Classes custom feature

Now SimplyBook.me allows new option for classes and events scheduling whatever kind of business you have. Brand new feature allows you to have all your classes/events in separate section so that you will never mix them up with simple services. Or you can use classes/events interface only. Moreover, this custom feature allows to have almost all settings necessary for class/event scheduling on one page, which makes the setup process easy and fast.
Video tutorial available
Useful to check Should I use Classes or Services
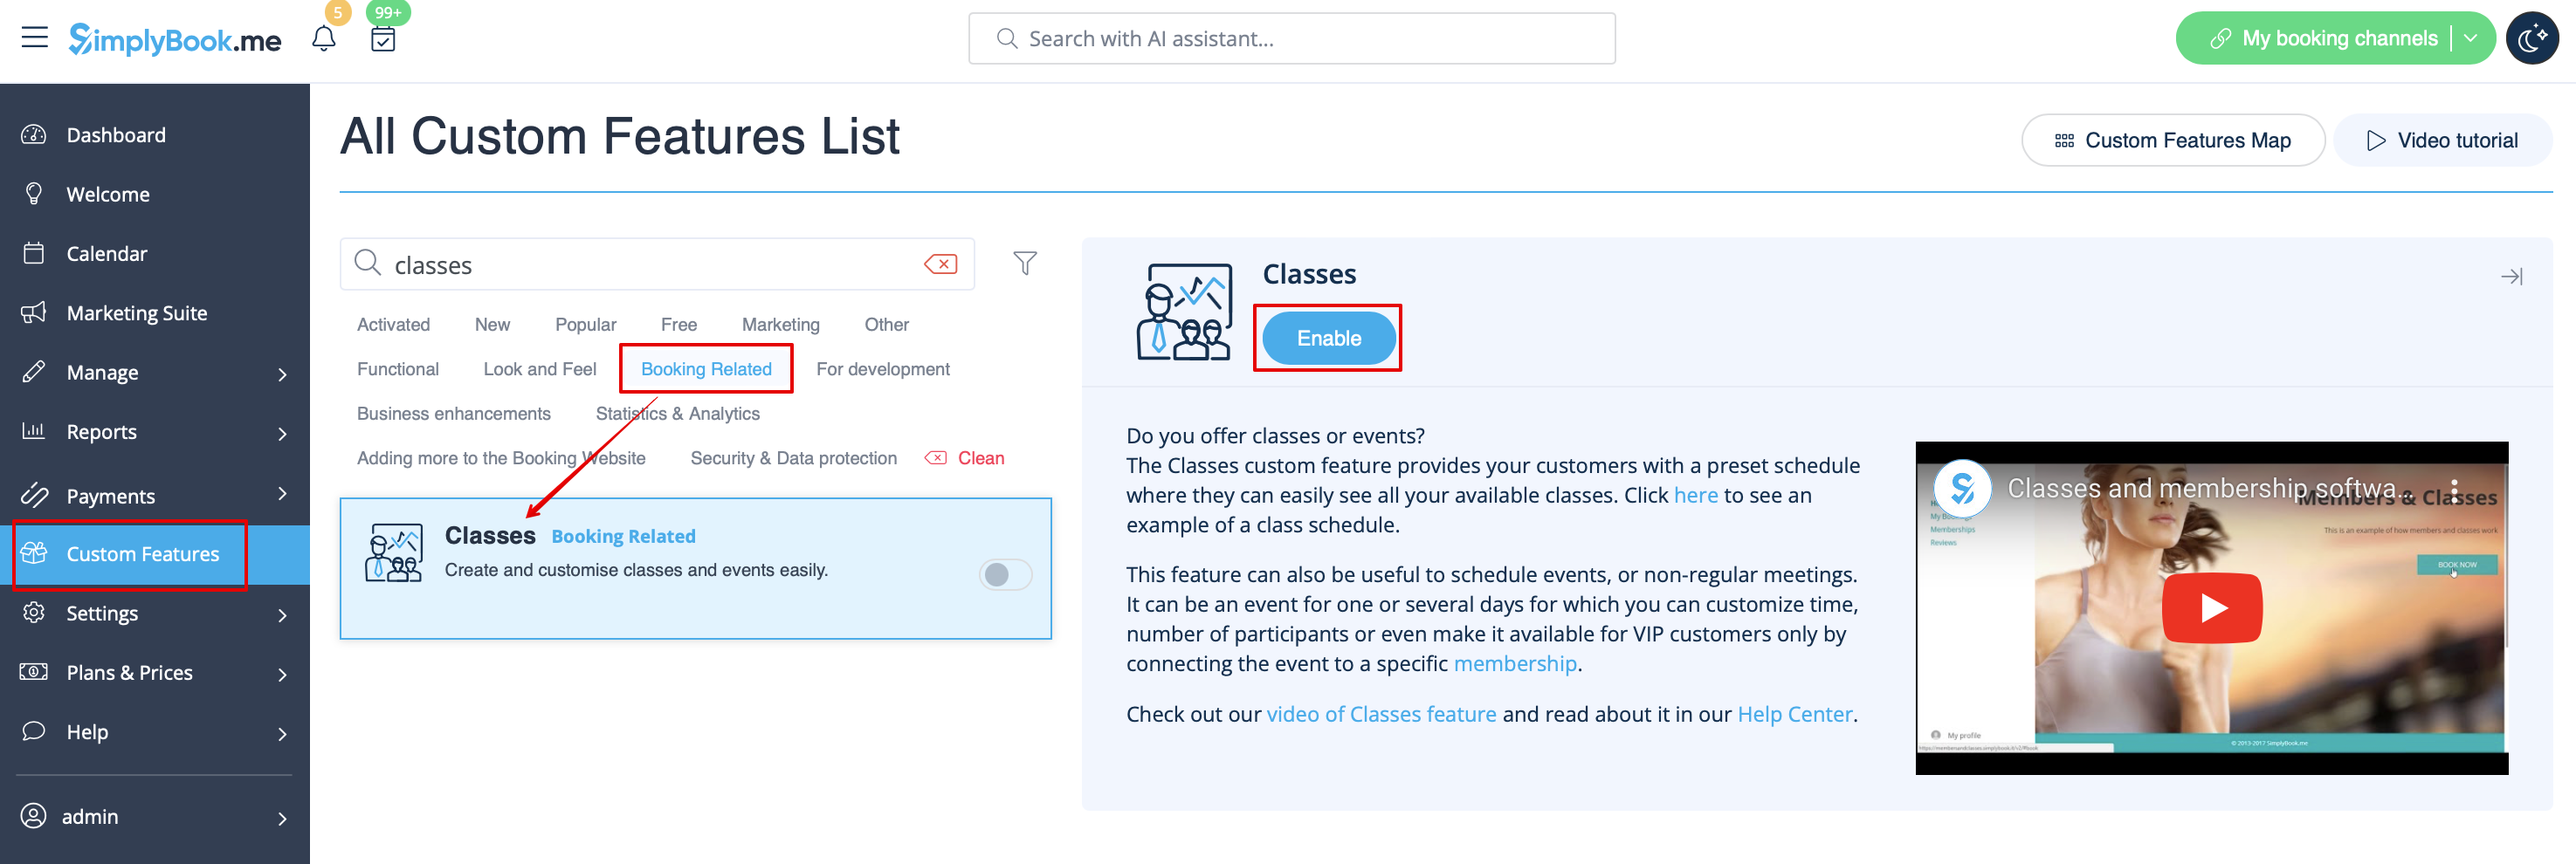
To enable Classes option please go to Custom features page, select “Booking Related” section and click on “Enable” near “Classes” feature.
How to create class?
Please go to Manage//Classes page using your admin page left-side menu and click on “+” icon at the top. New menu will appear on the right side of the page, that will allow you to add class/event name, add its description, attach a nice image and set price if you plan to receive payments for your classes/events online.
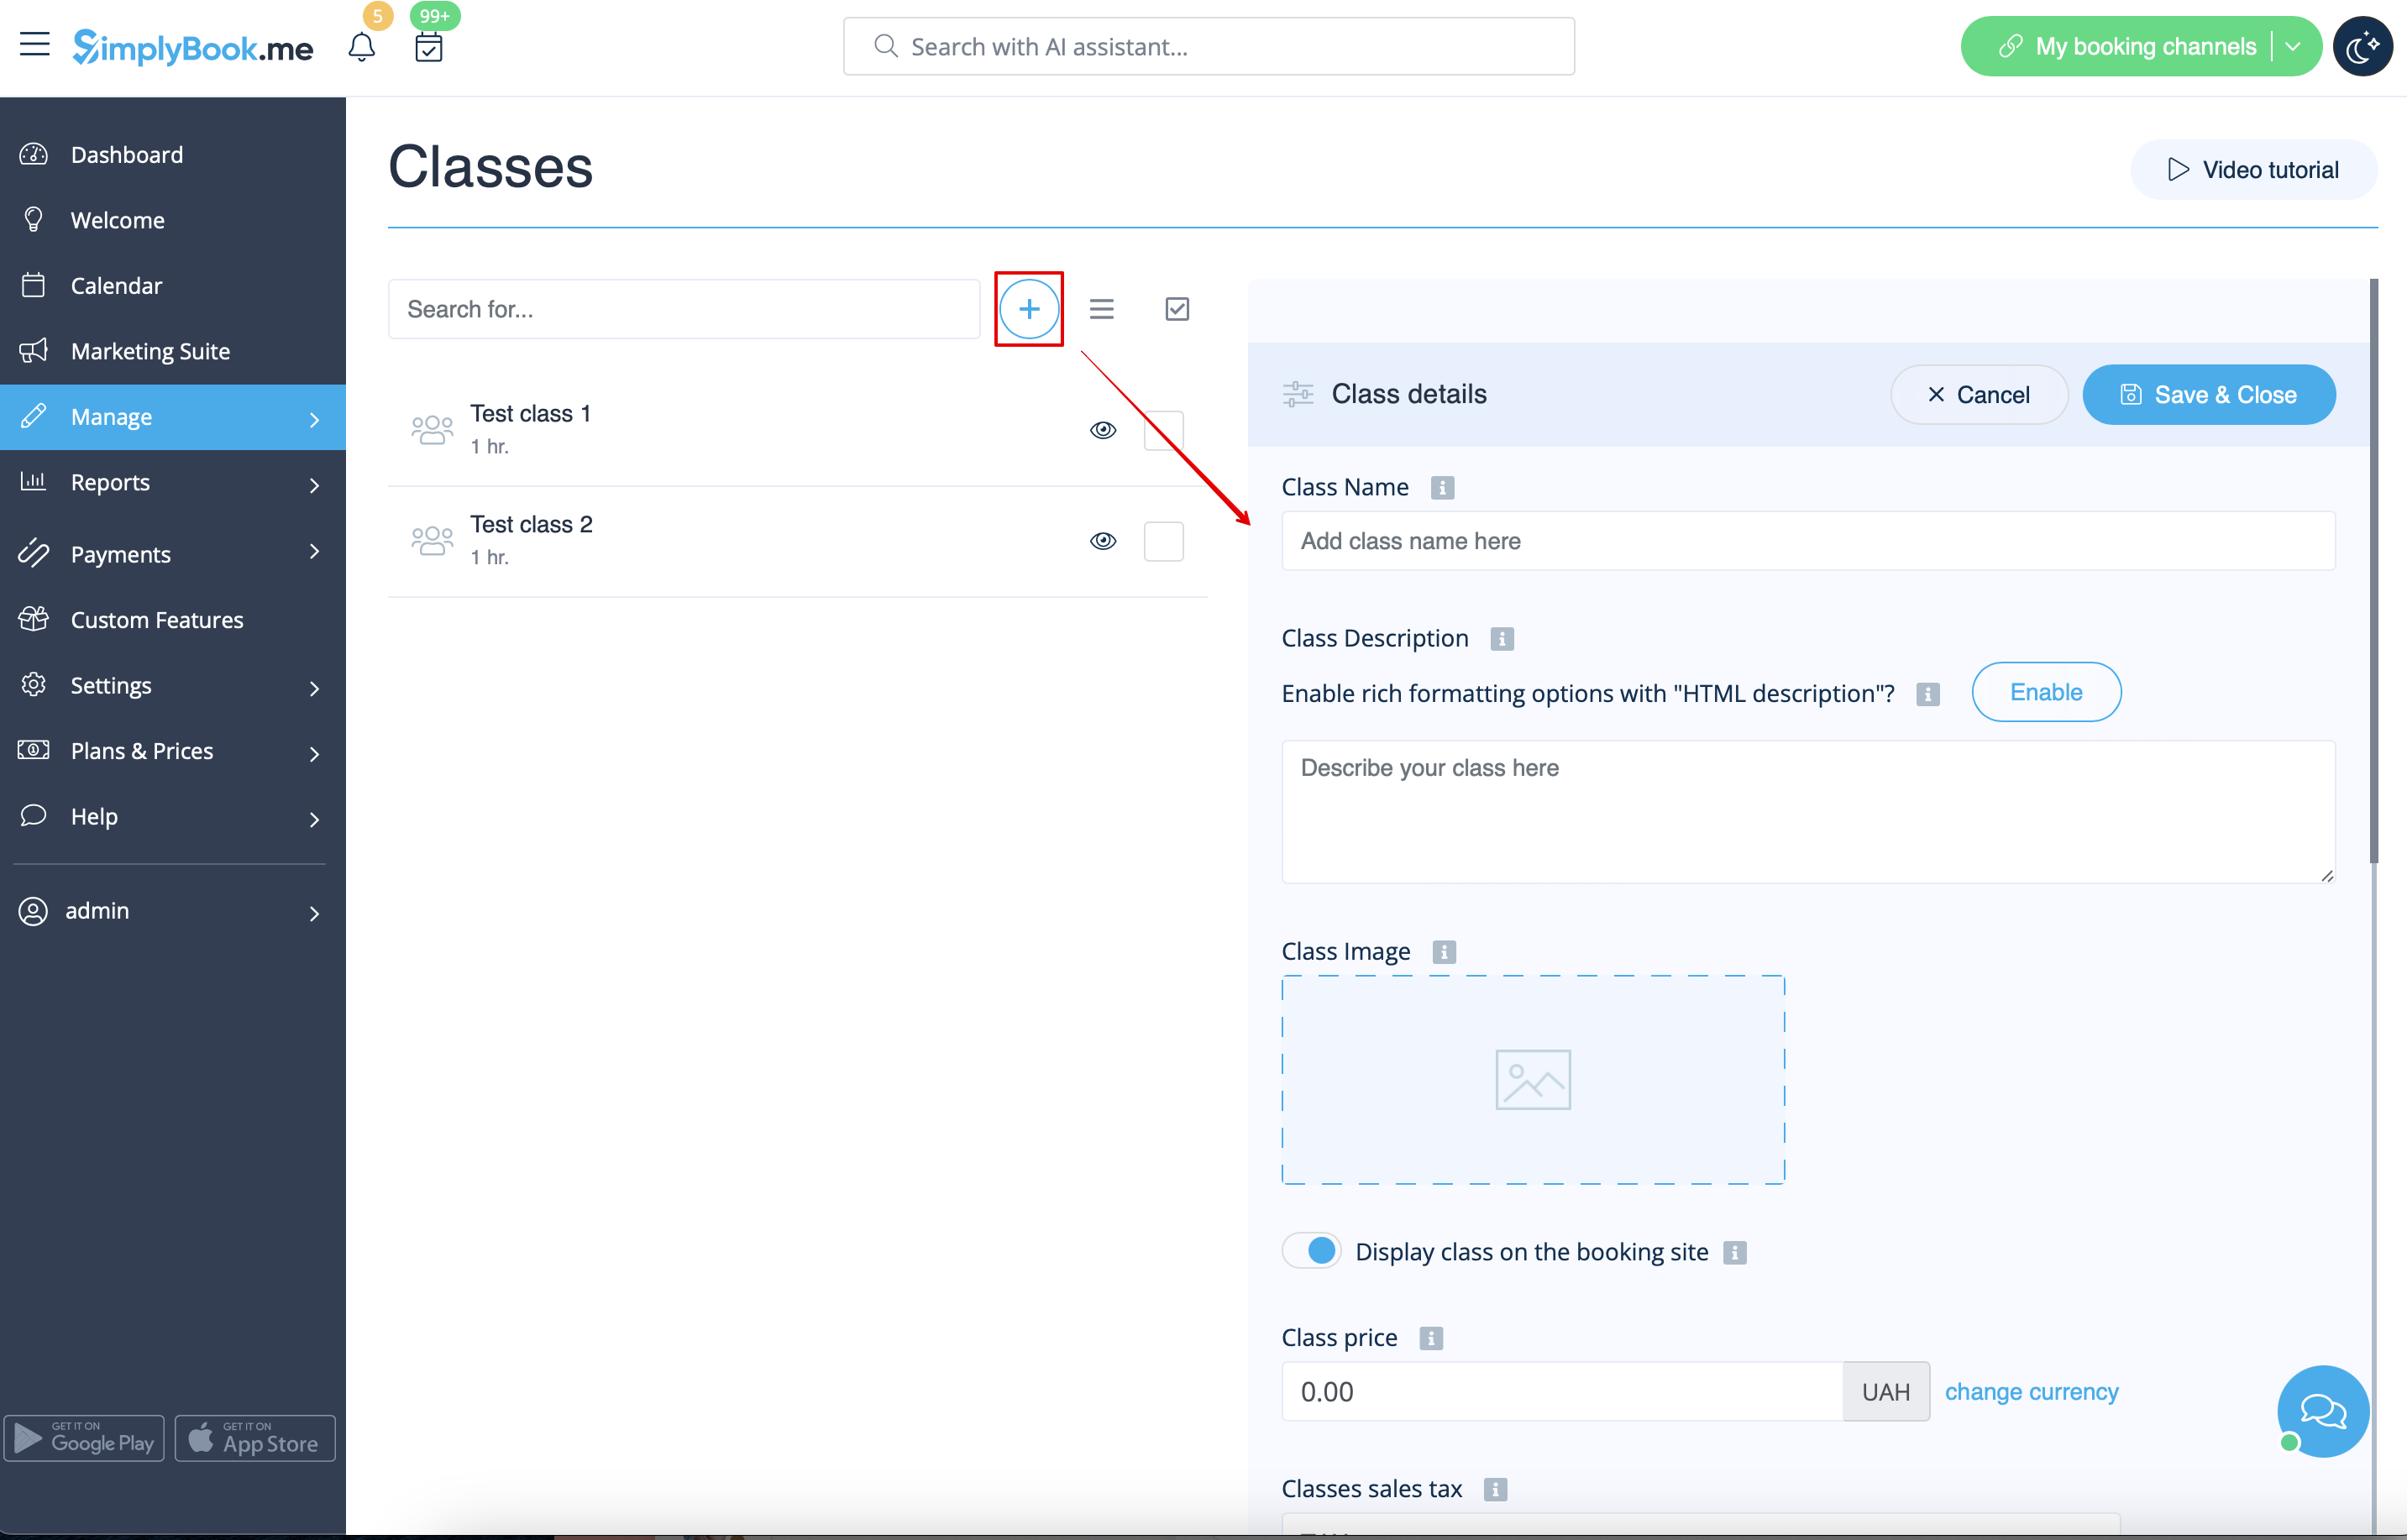
To set duration please select “Time details” tab there and set the desired time.
You may also need:
- how to create services and providers;
- how to change system interval;
- buffer time;
- HTML formatting for class description.
How to set number of participants per class?
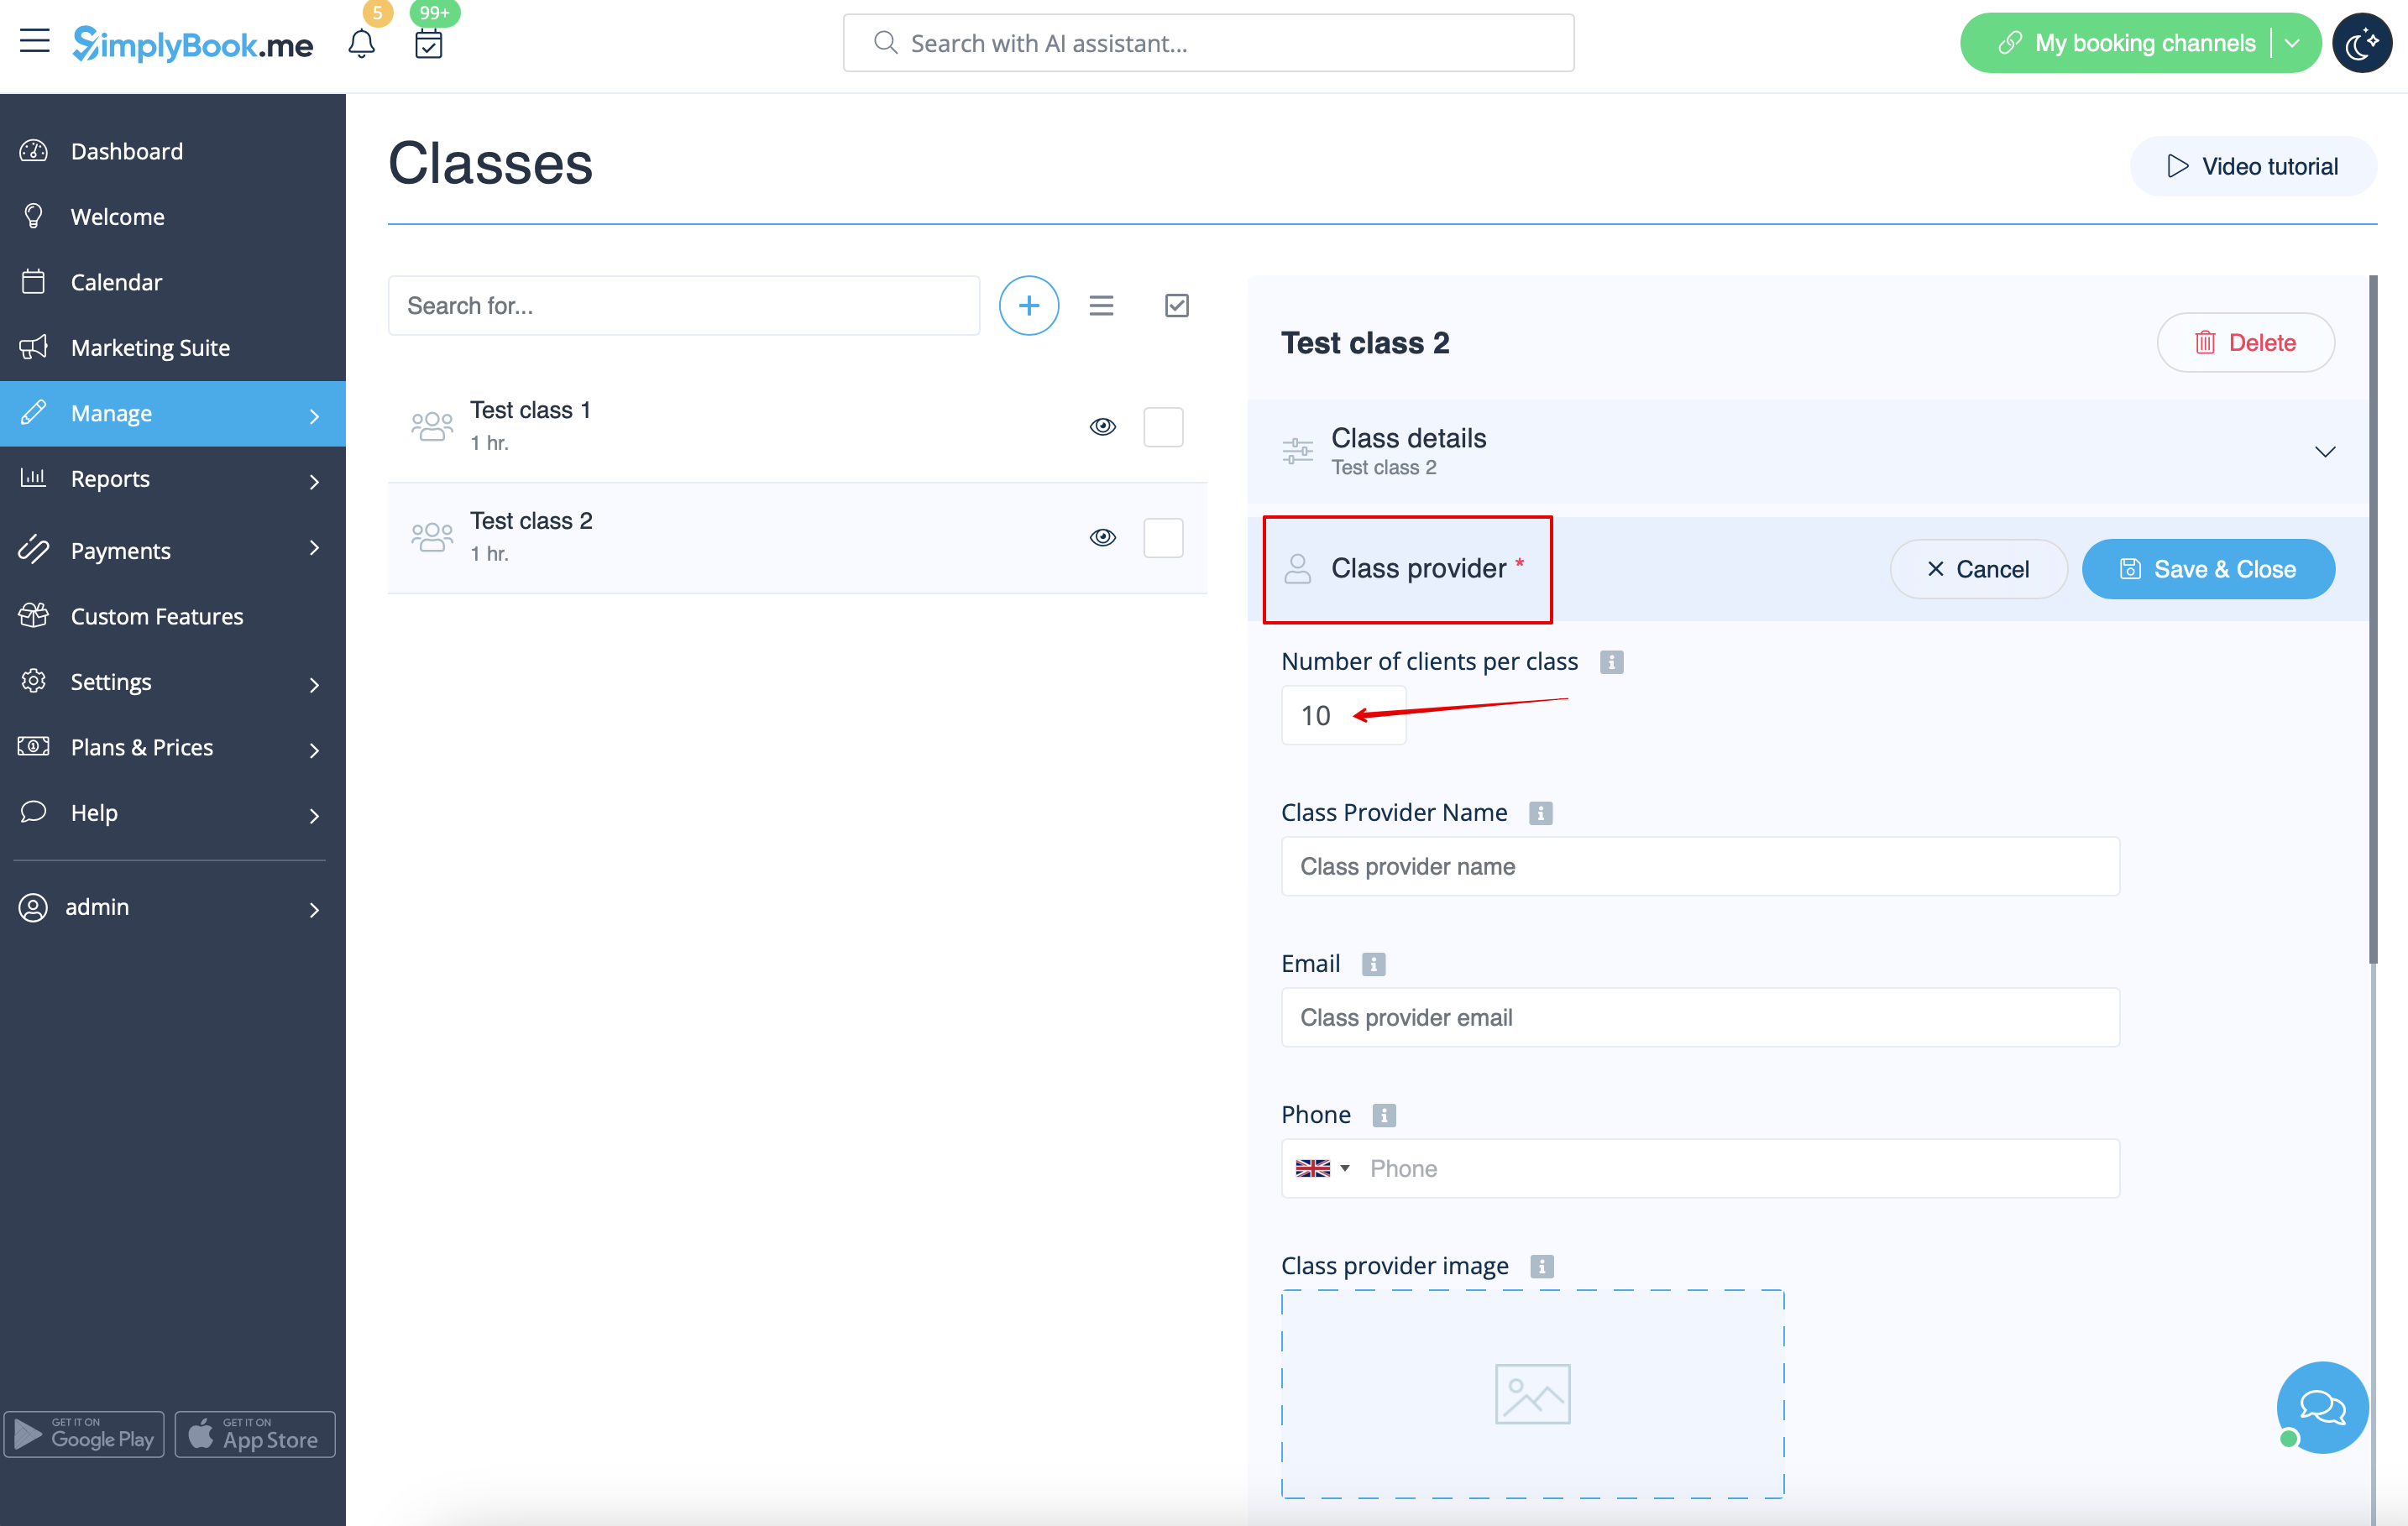
By default the number of people who can attend the class is set to 1, but you can adjust this amount to your needs at any time by selecting “Class provider” tab and indicating desired number there. Do not forget to save your settings. ;)
- If you need to change this setting to smaller value but the system does not allow, please check these solutions.
Here you can also adjust provider name that will be displayed on the booking page as it is the same as class name by default.

Need the class to be recurring?
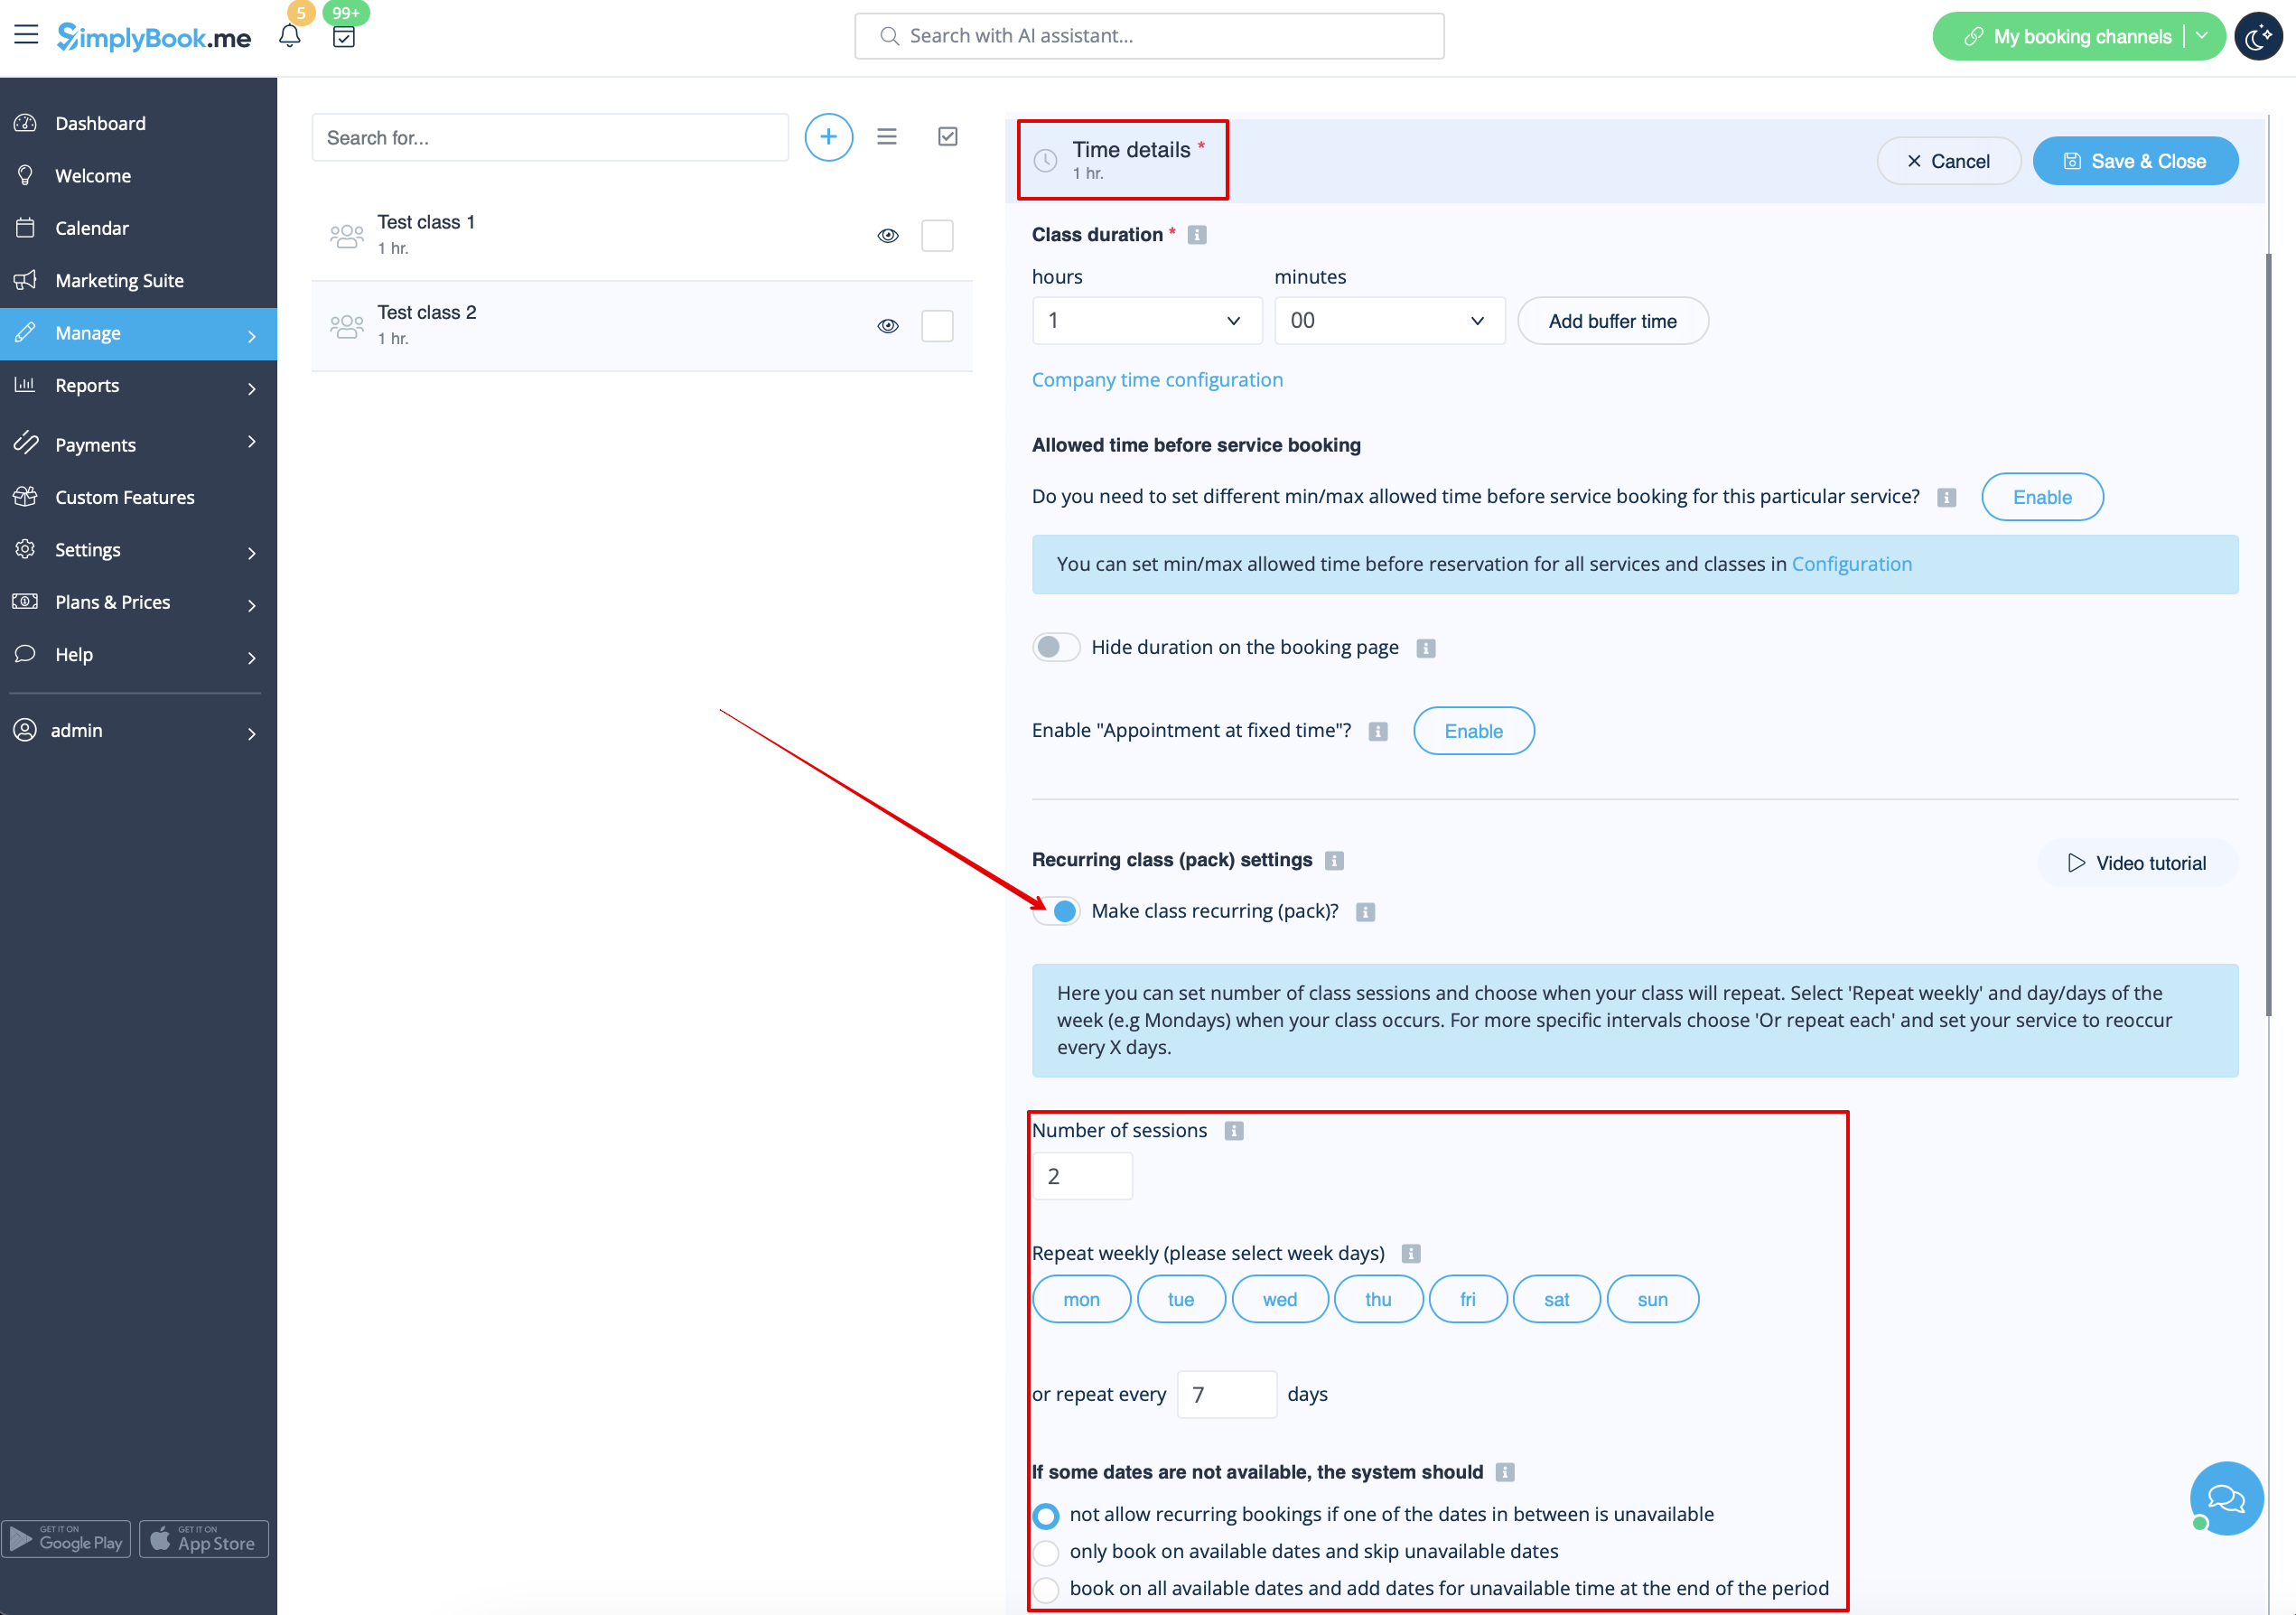
Please enable “Make class recurring/pack”, set number of sessions, repeat period and the mode how they should repeat. It is just a few steps. ;)
Available modes:
- Not allow - not allow recurring bookings if one of dates in between unavailable (Using the example below, if 15th is busy, the system will not allow to book 1st and 8th, only days after busy day).
- Book only on available date - only book on available dates and skip unavailable dates (Using the example below, if 15th is busy, the system will allow you to book 1st and 8th and 22nd (only 3 out of 4).
- Add appointments - book on all available dates and add dates behind for unavailable in between dates (Using the example below, if 15th is busy, the system will book 1 and 8th and 22nd + 1 day instead of busy 15th, which is August 29th).

Please note! If you make the recurring class paid, the amount that you set as the class price is the total for all the sessions.
It is currently not possible to set single session price for the recurring class packs.
That is why if you have single class and decide to make a recurring booking for it from the admin side/POS interface, its price will not be multiplied by the number of selected sessions.
You may also need:
How to sell classes memberships?
Need to offer your client an ability to buy membership and book sessions later when they wish to?
Membership custom feature is the solution! Please go to “Is part of membership” tab and enable the option.
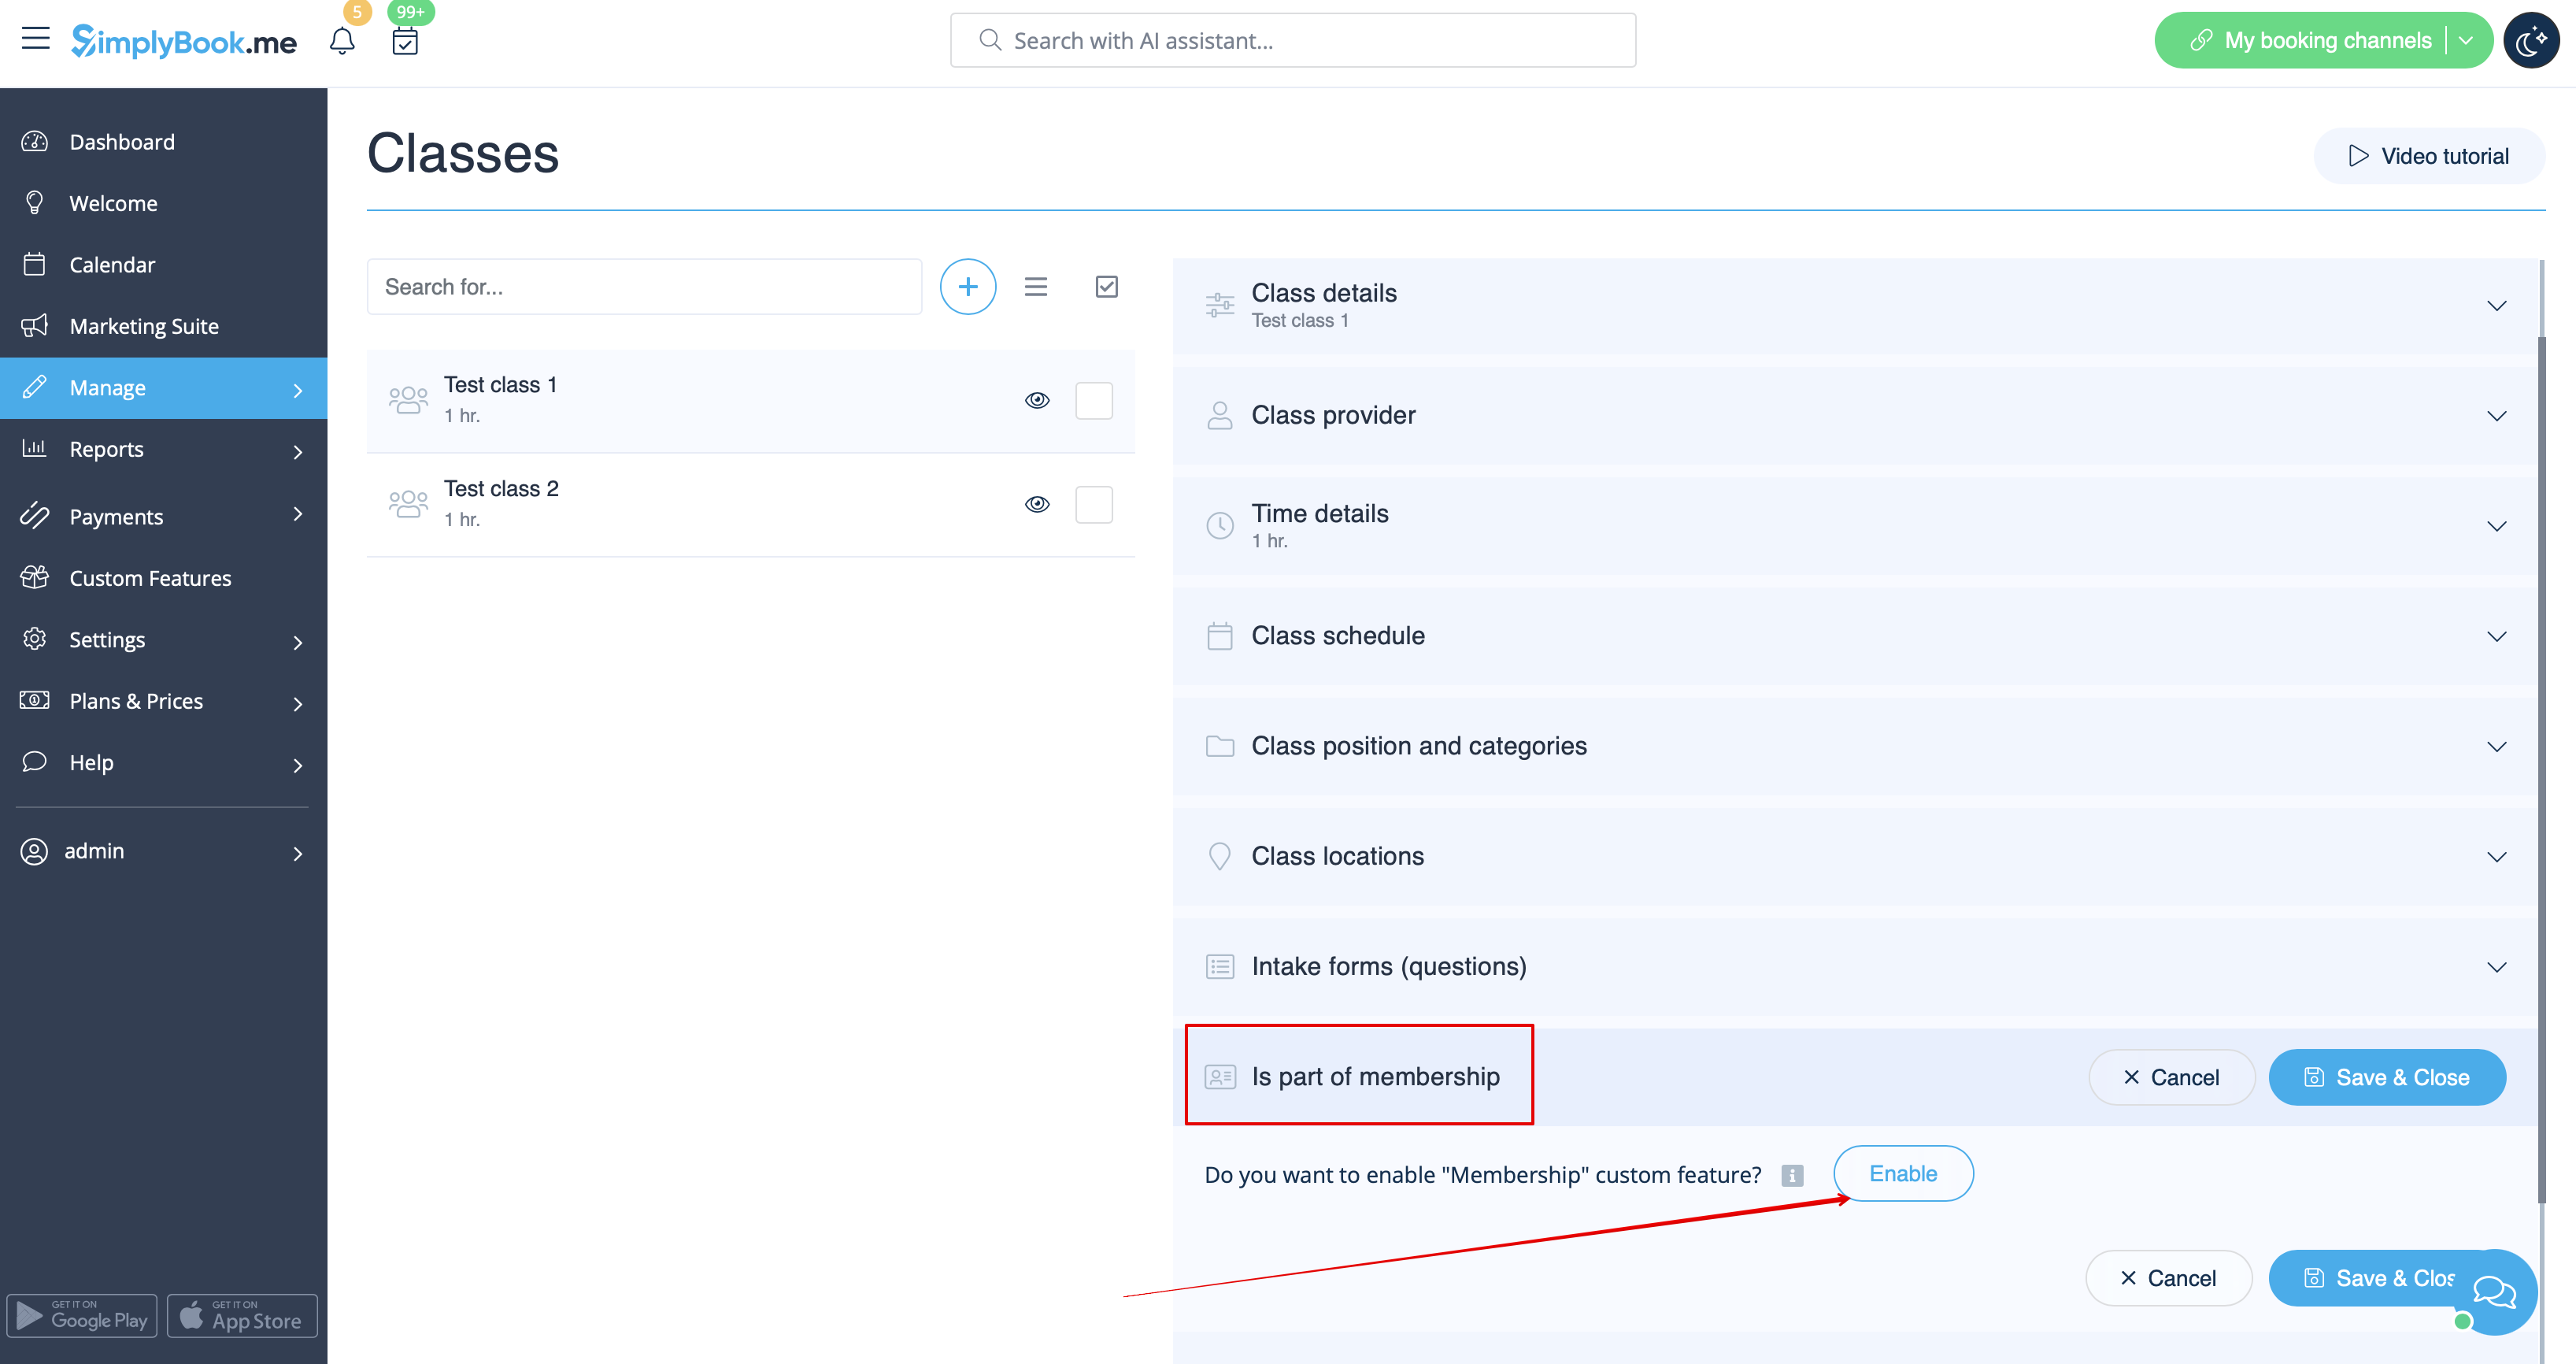
- Please note that Accept payments and Client login custom features will be enabled as well.
Create Memberships by clicking on “+” button and attach them to desired classes by checking corresponding boxes.
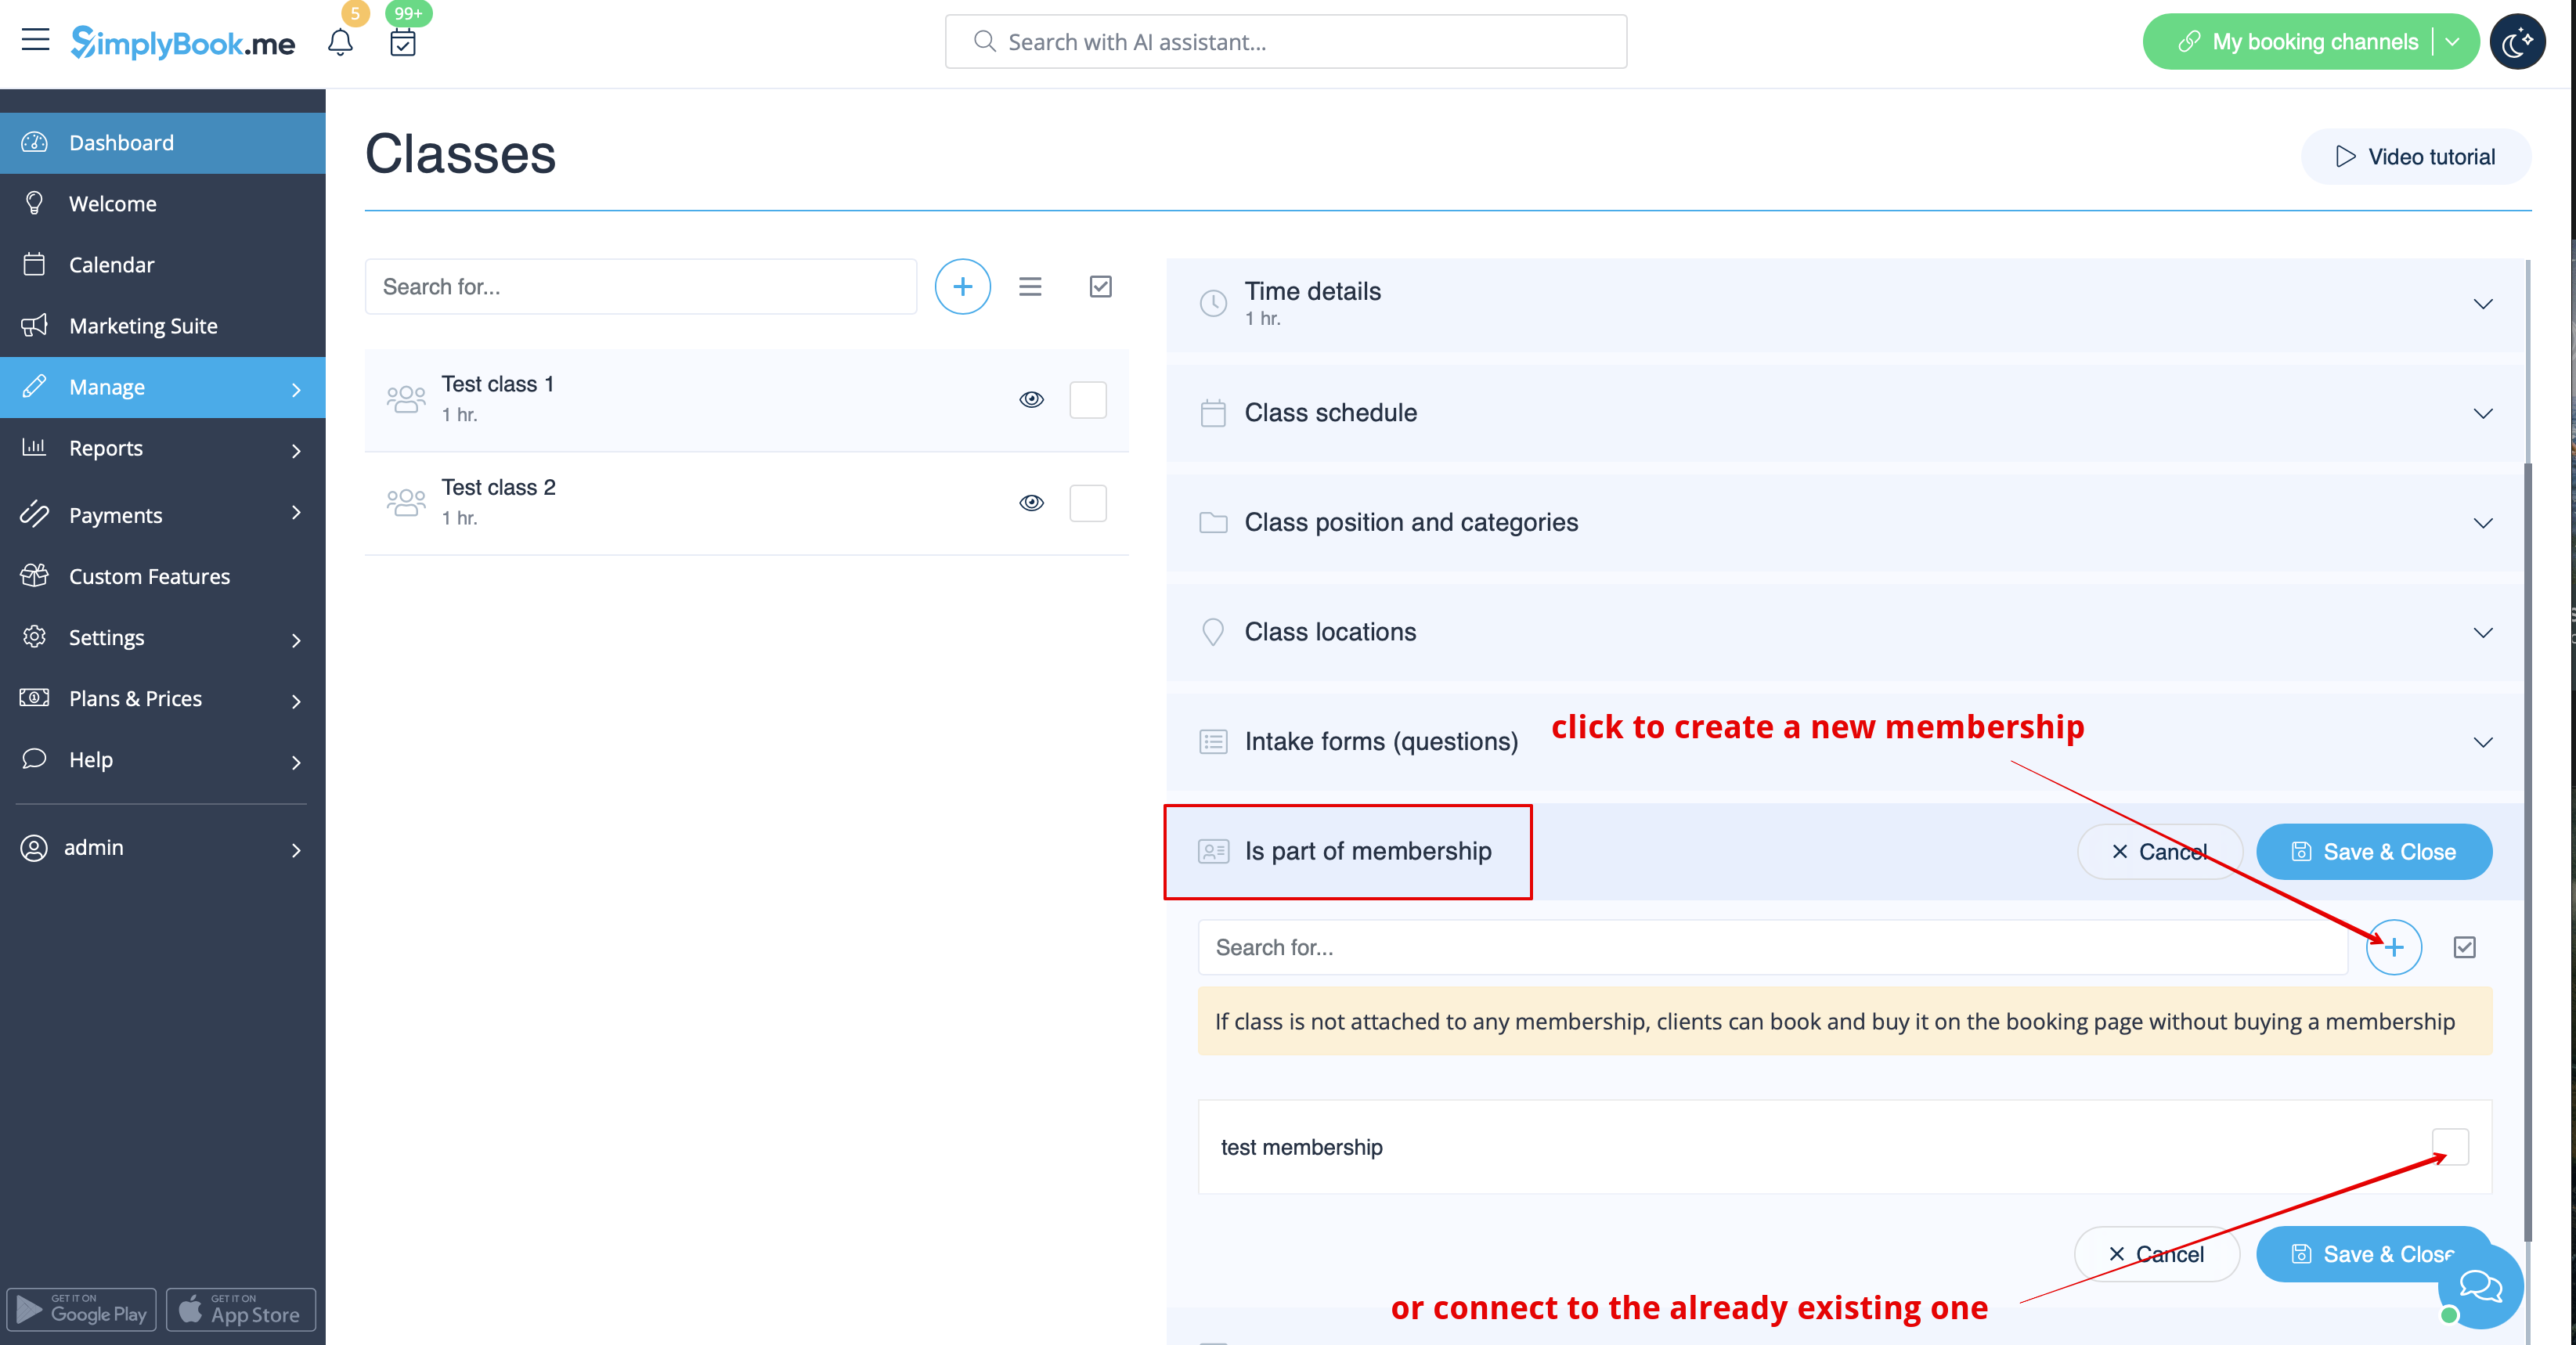
Here you can check video tutorial how to create classes and relate them to memberships.
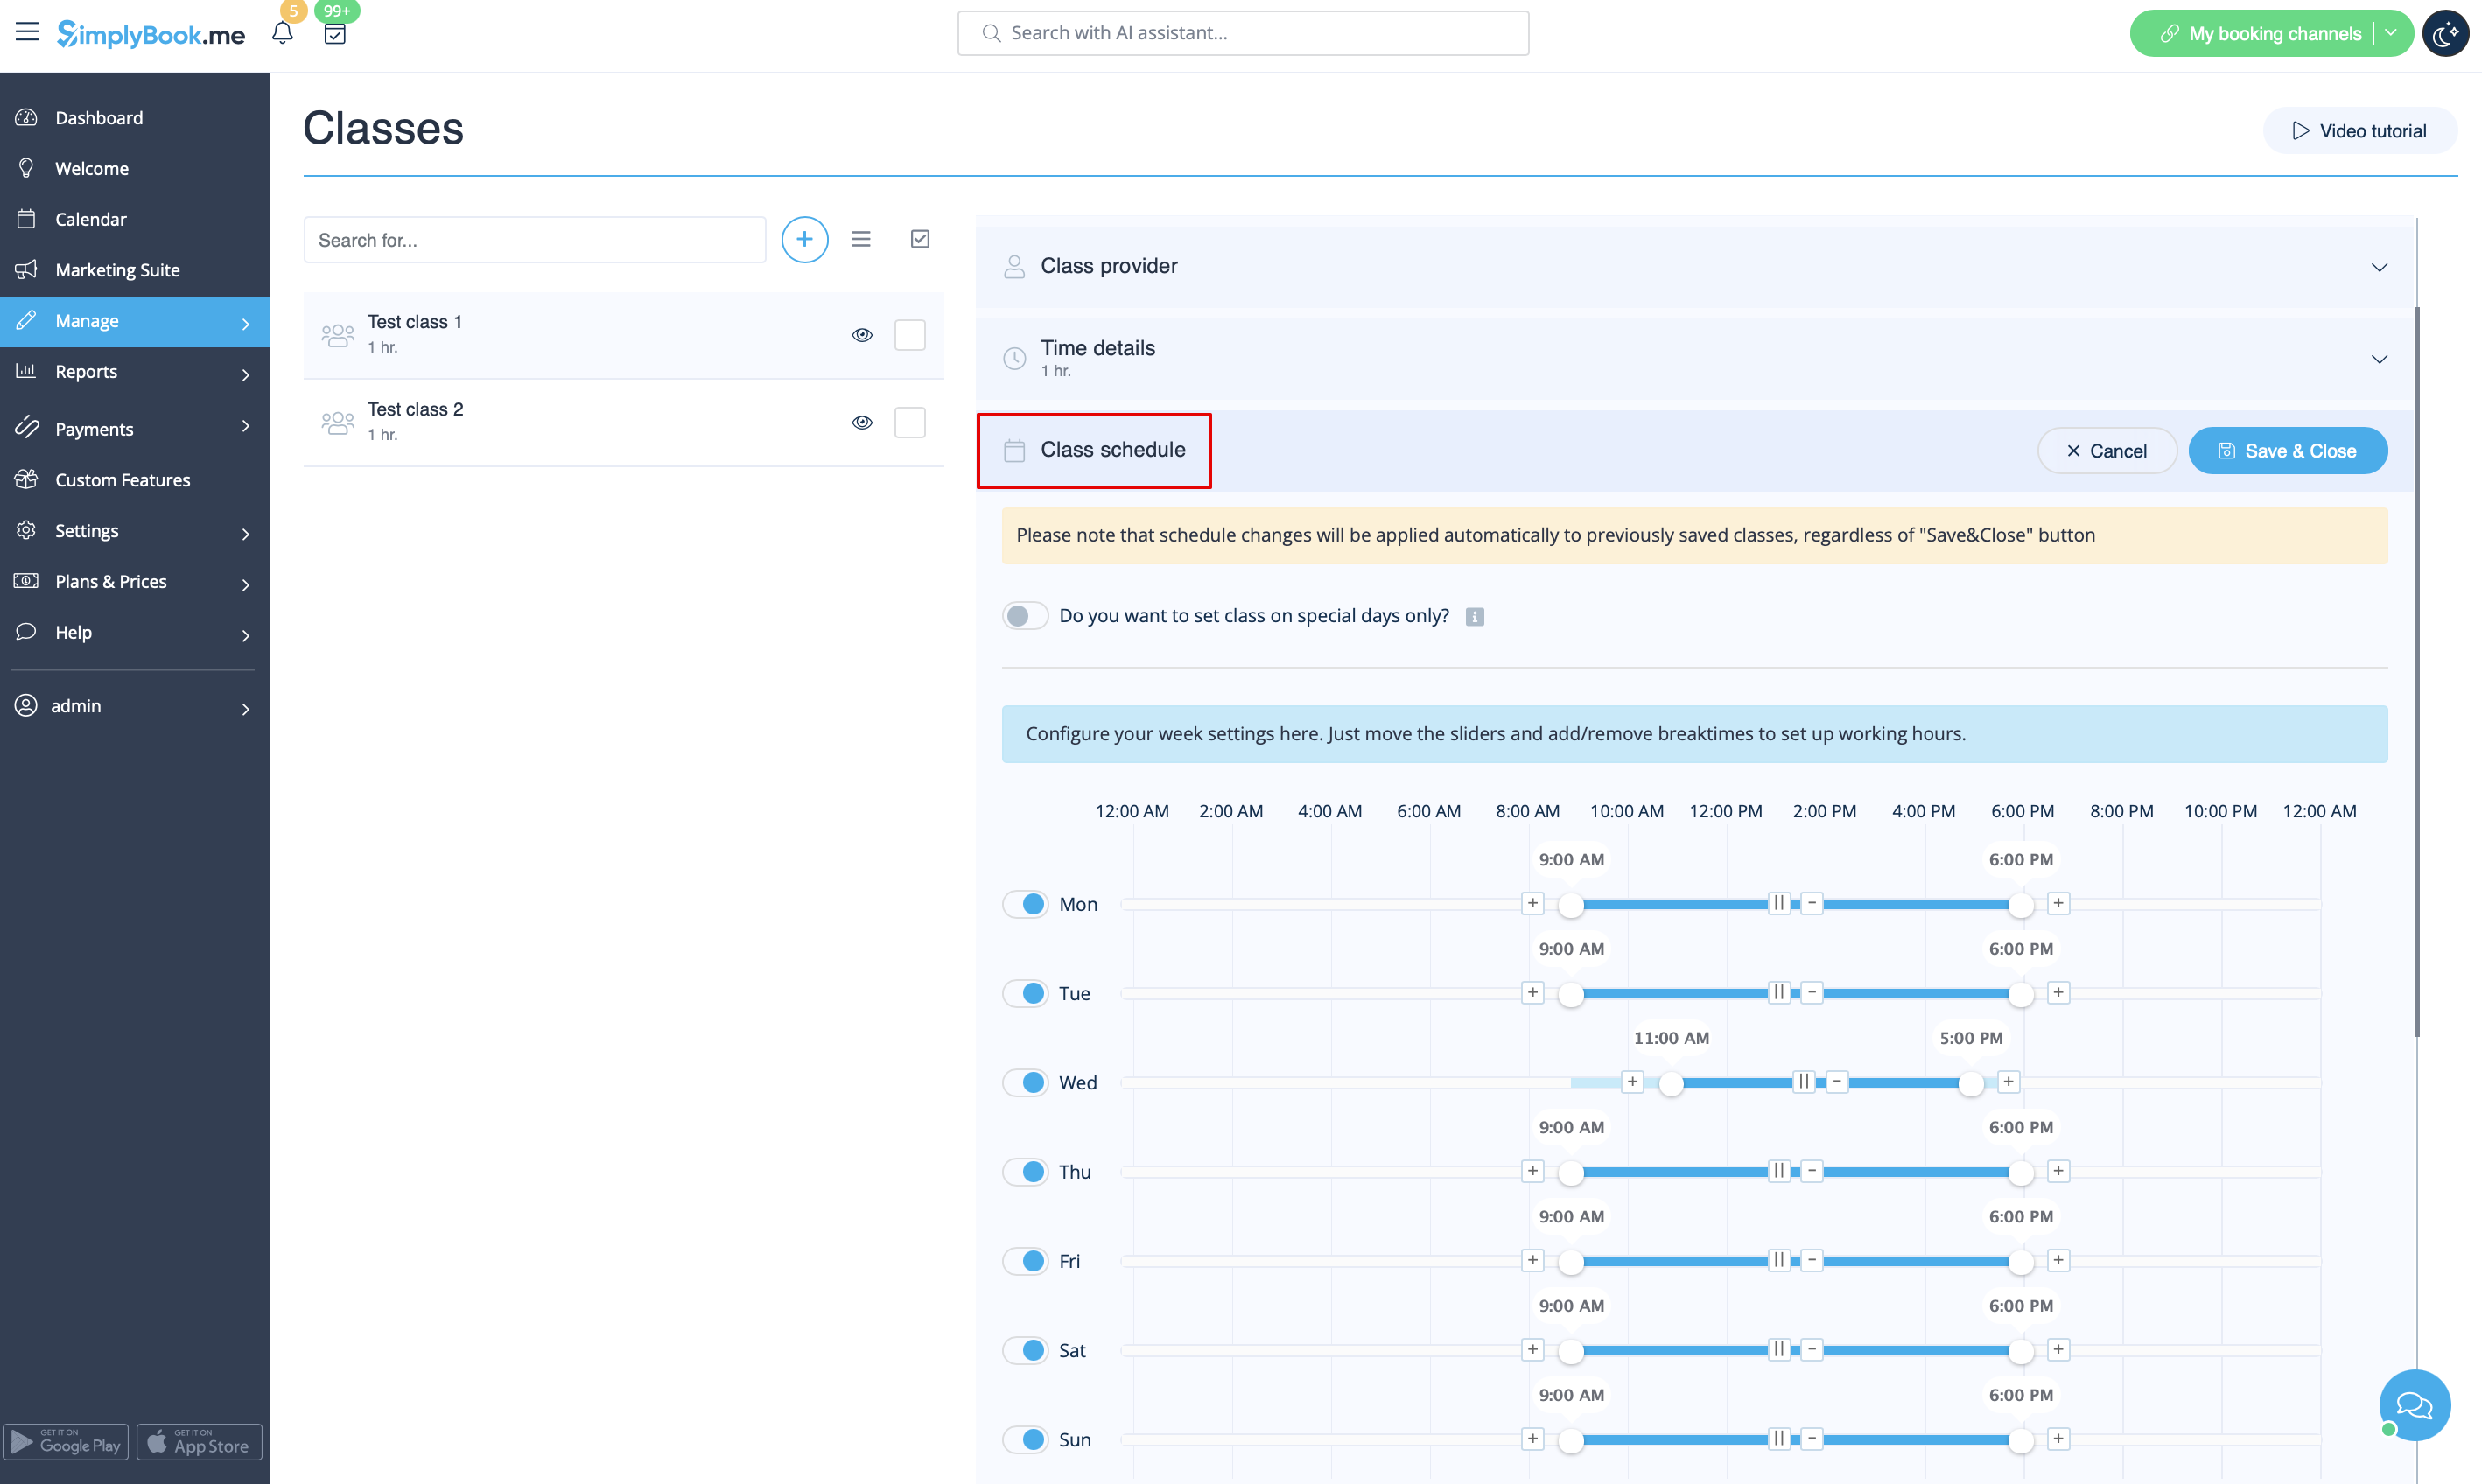
Need different schedules for each class/event?
It is also easy. ;) Just select “Class schedule” tab and set the desired times.
Please move the sliders to adjust the available times and use ![]() and
and ![]() icons to add/remove breaktimes.
icons to add/remove breaktimes.
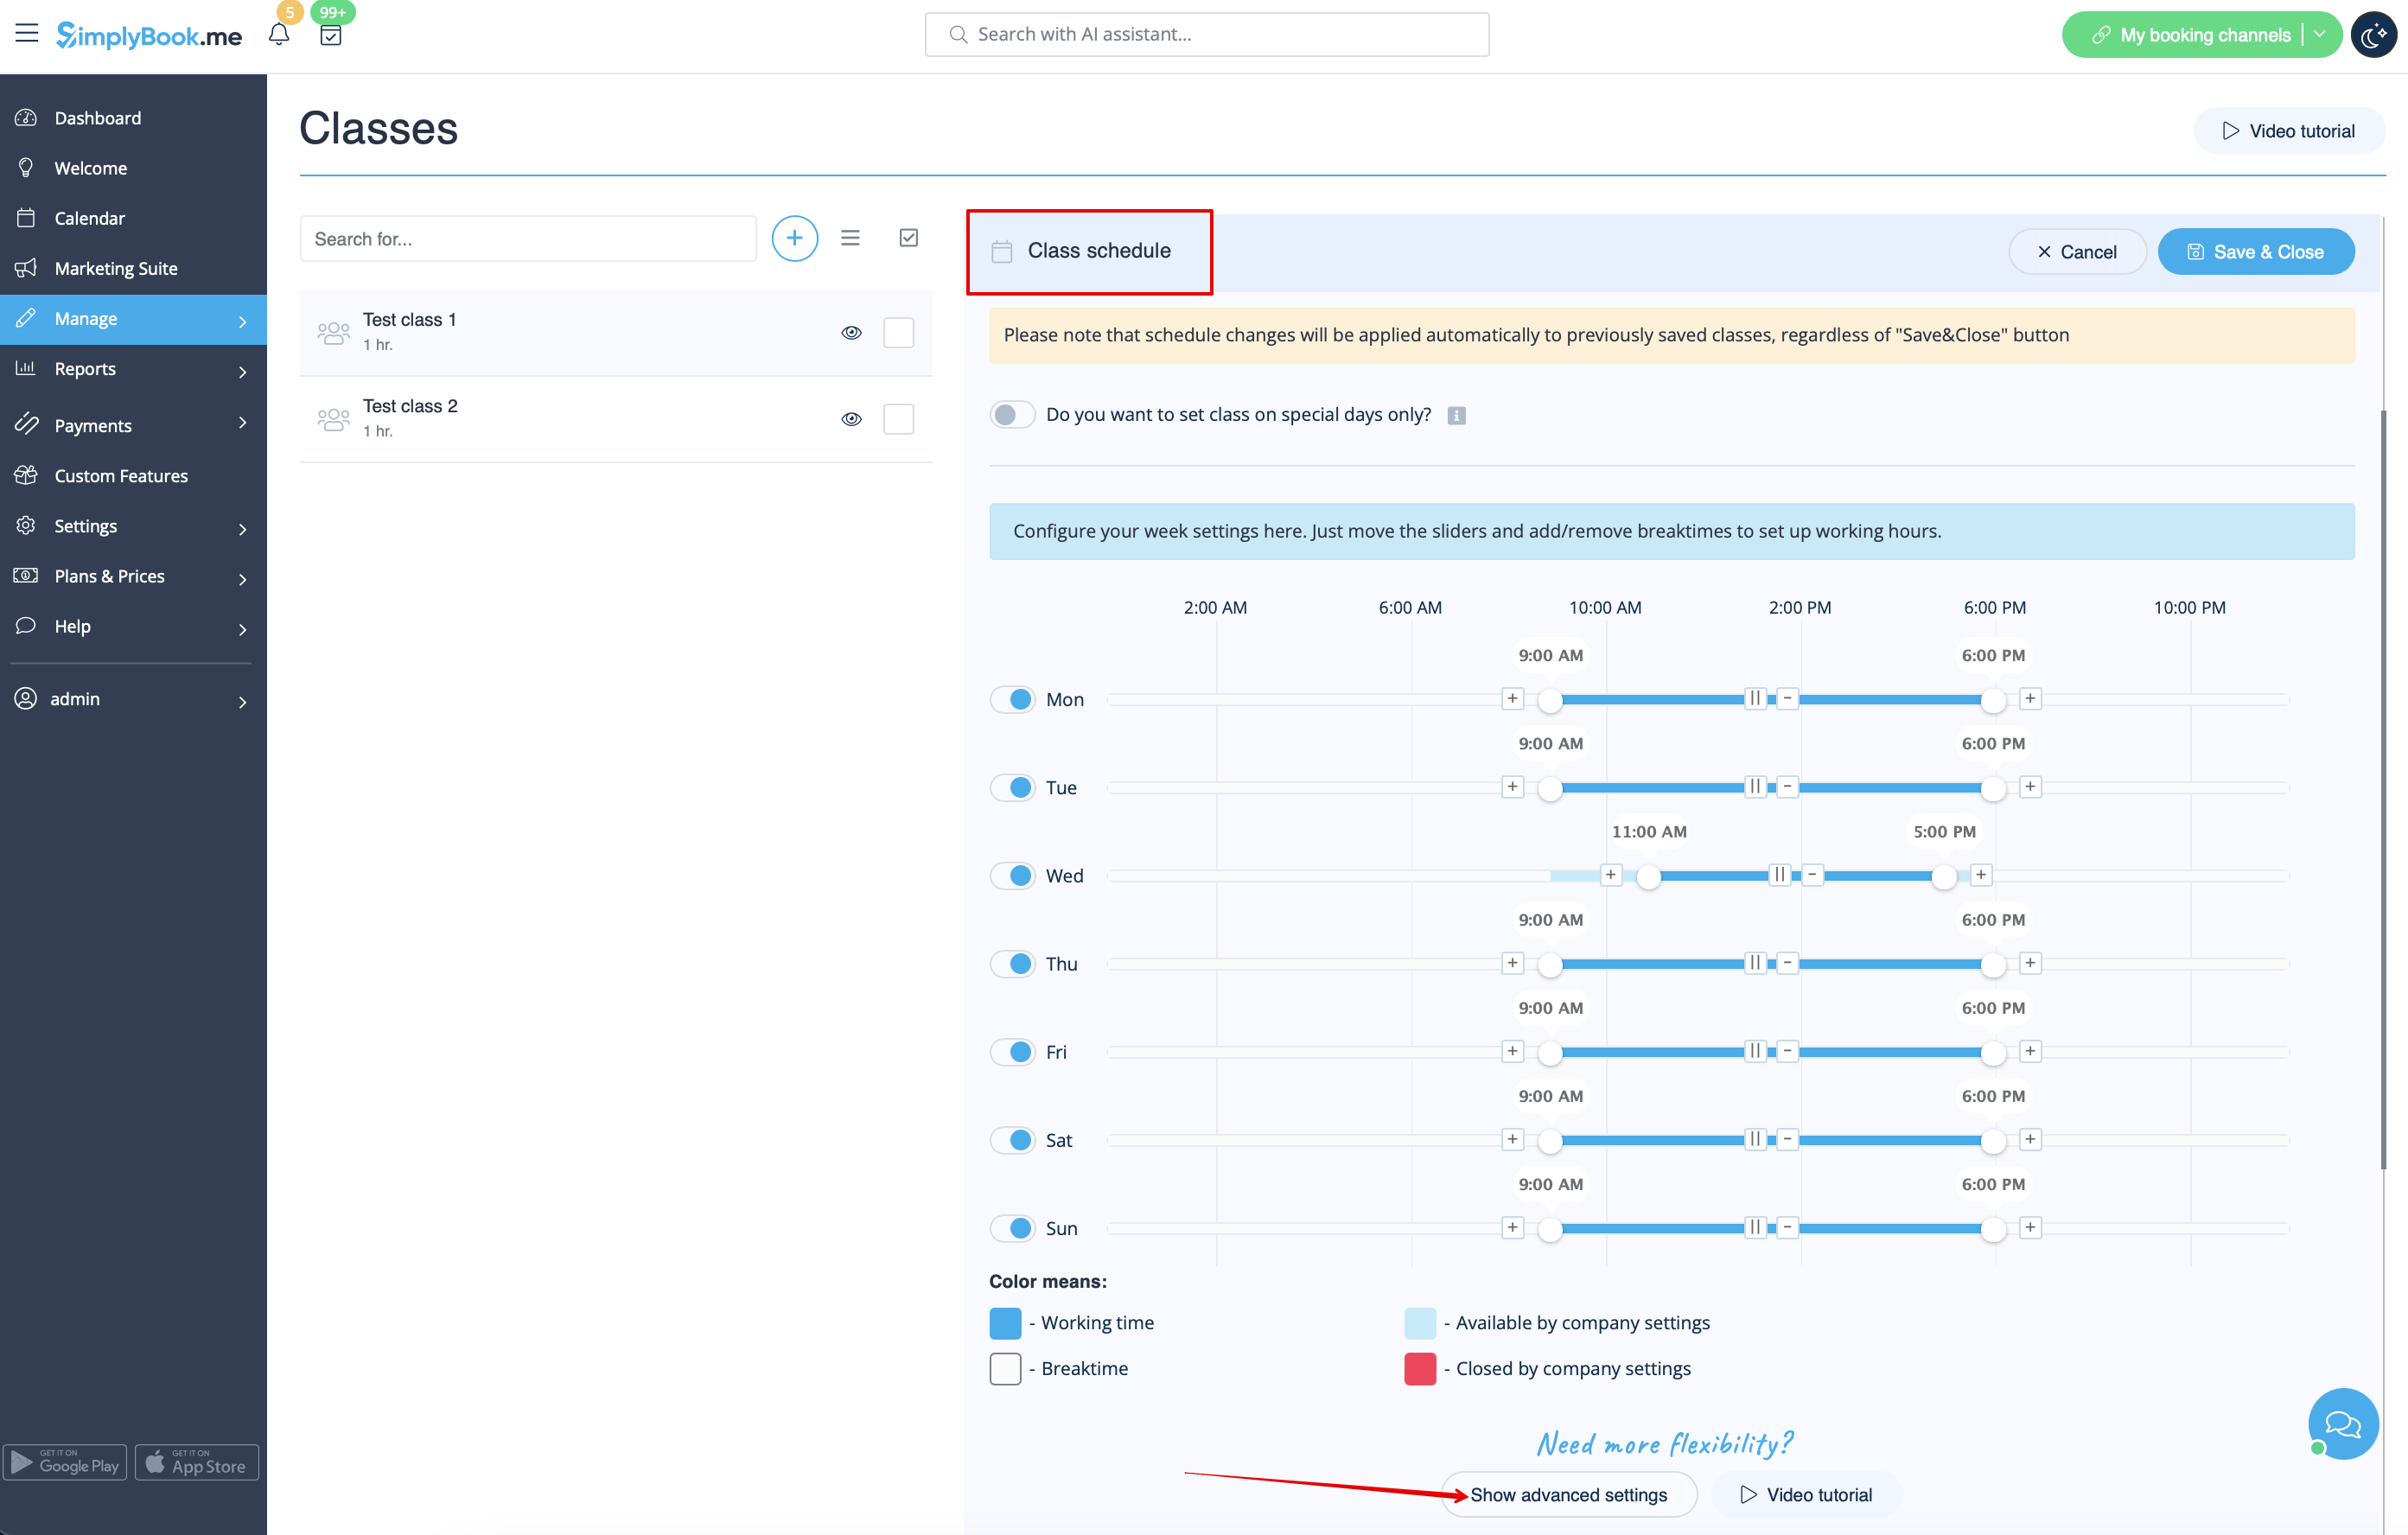
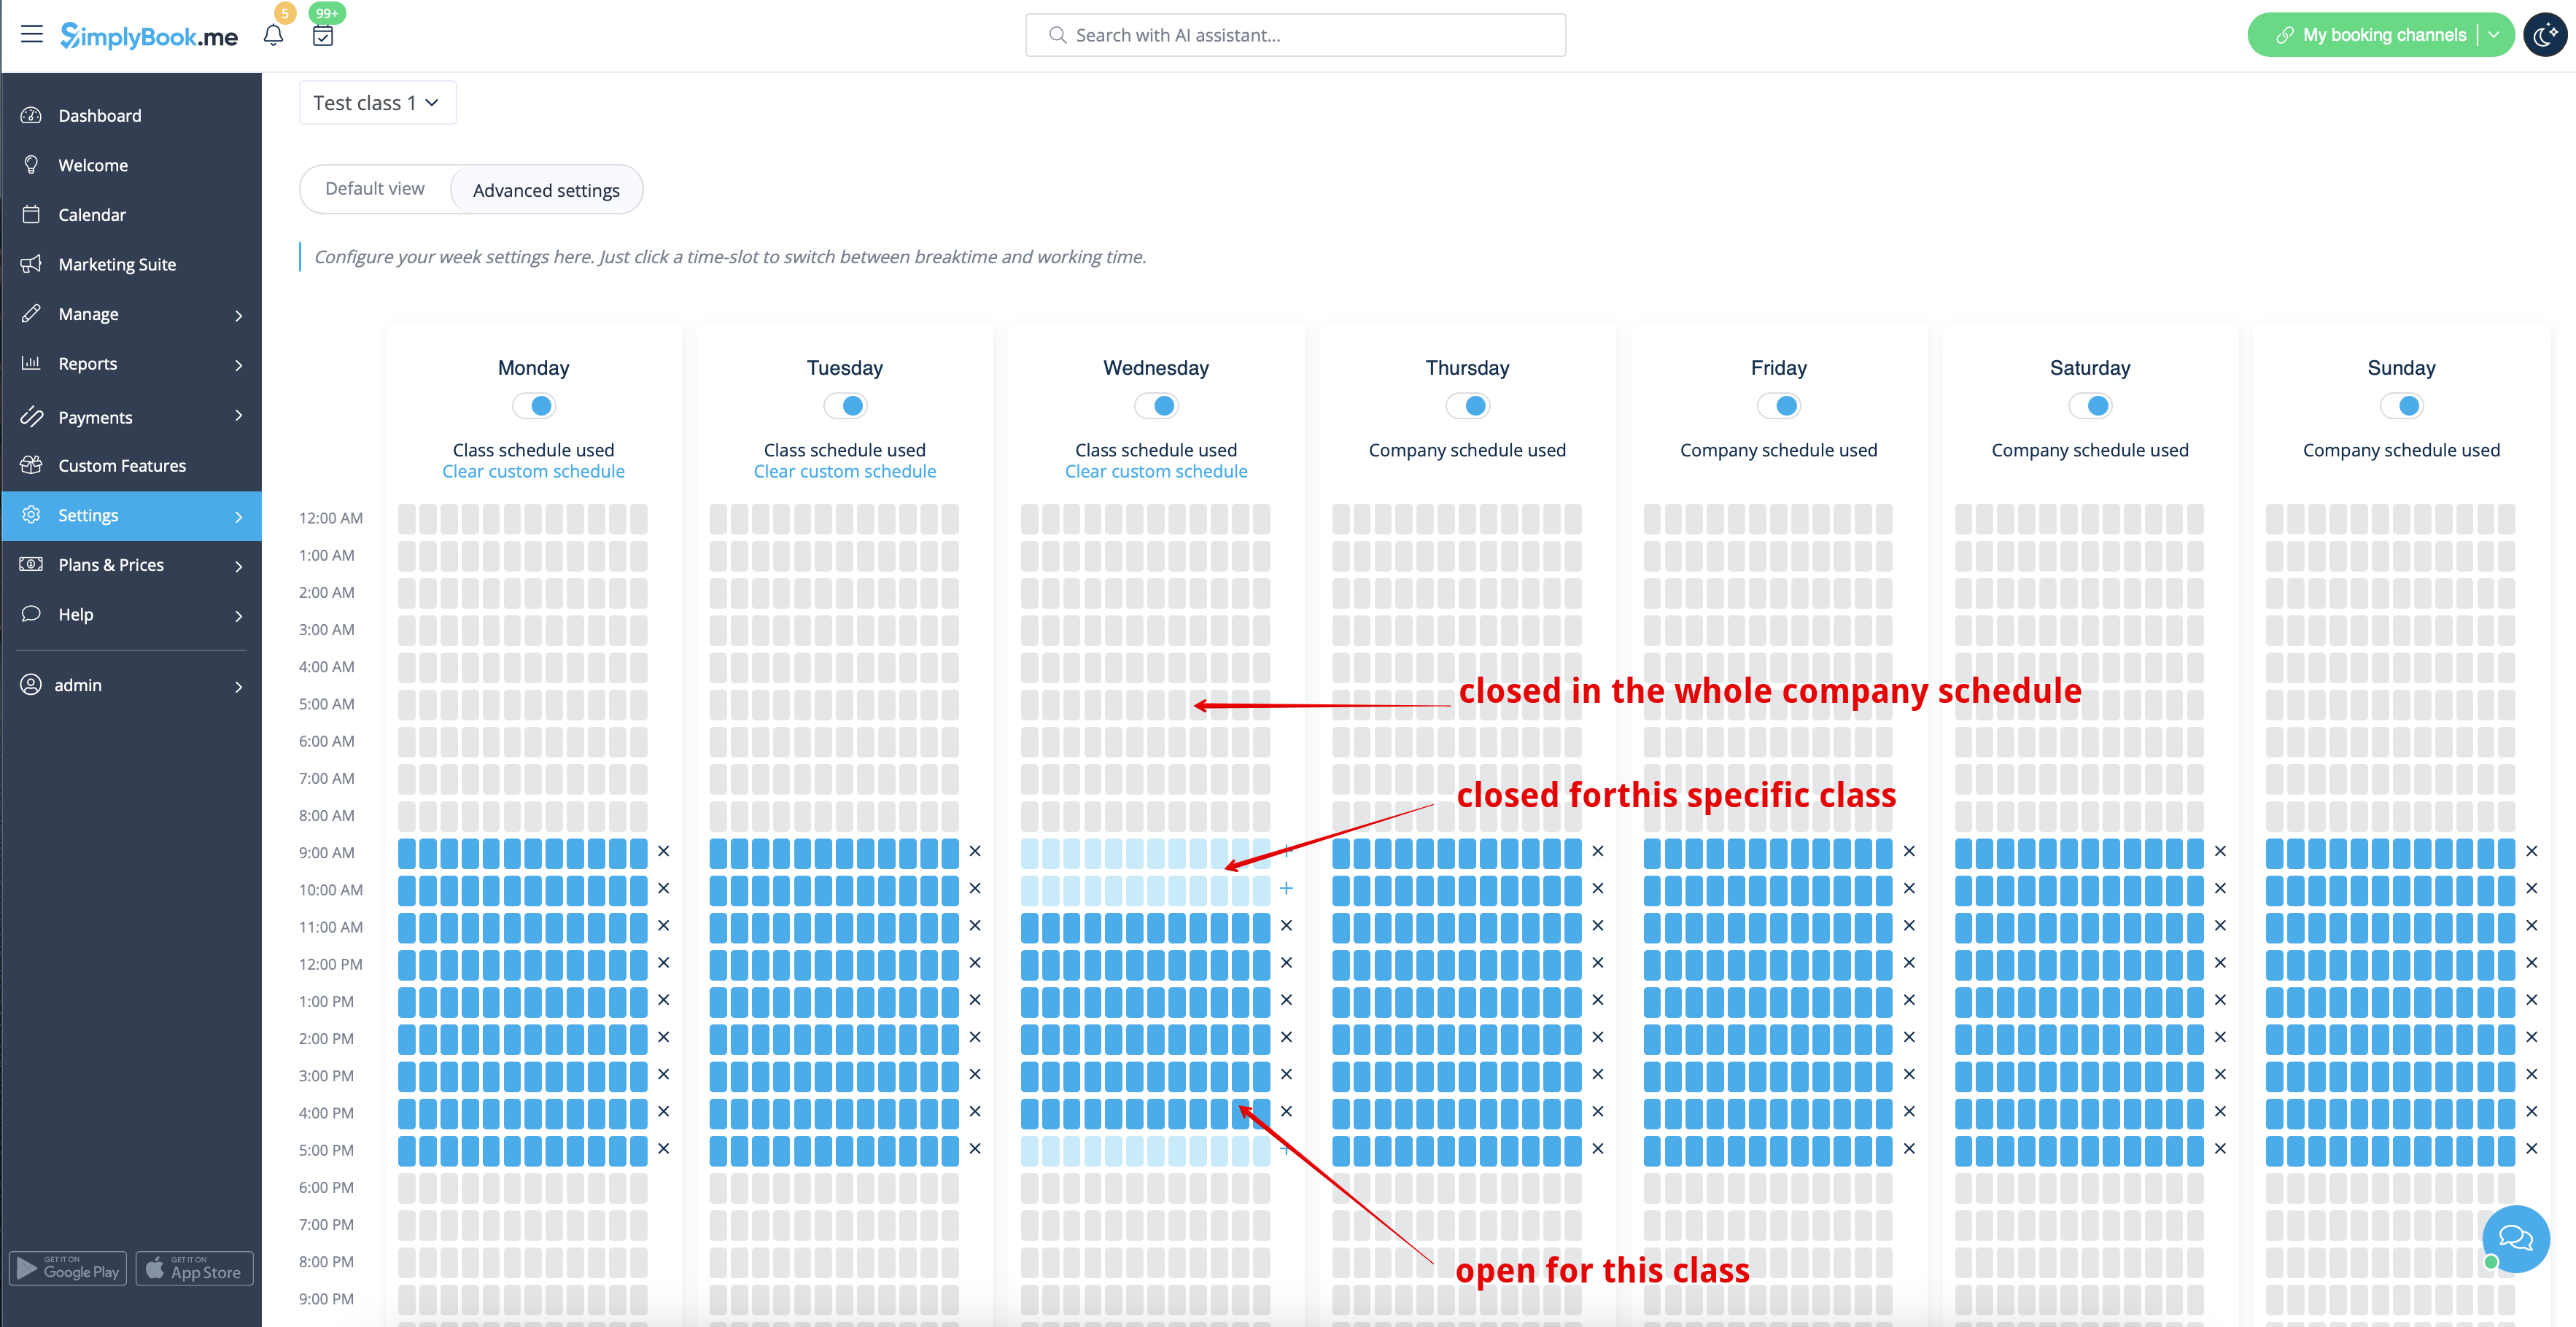
If you need to use small intervals in class schedule please click on “Show advanced settings” button there and click on slots to open or close them
(bright blue color means the time is open, light blue means it is closed)
If you have some exceptions in this class schedule on specific dates please use “Special days” tab to set them.
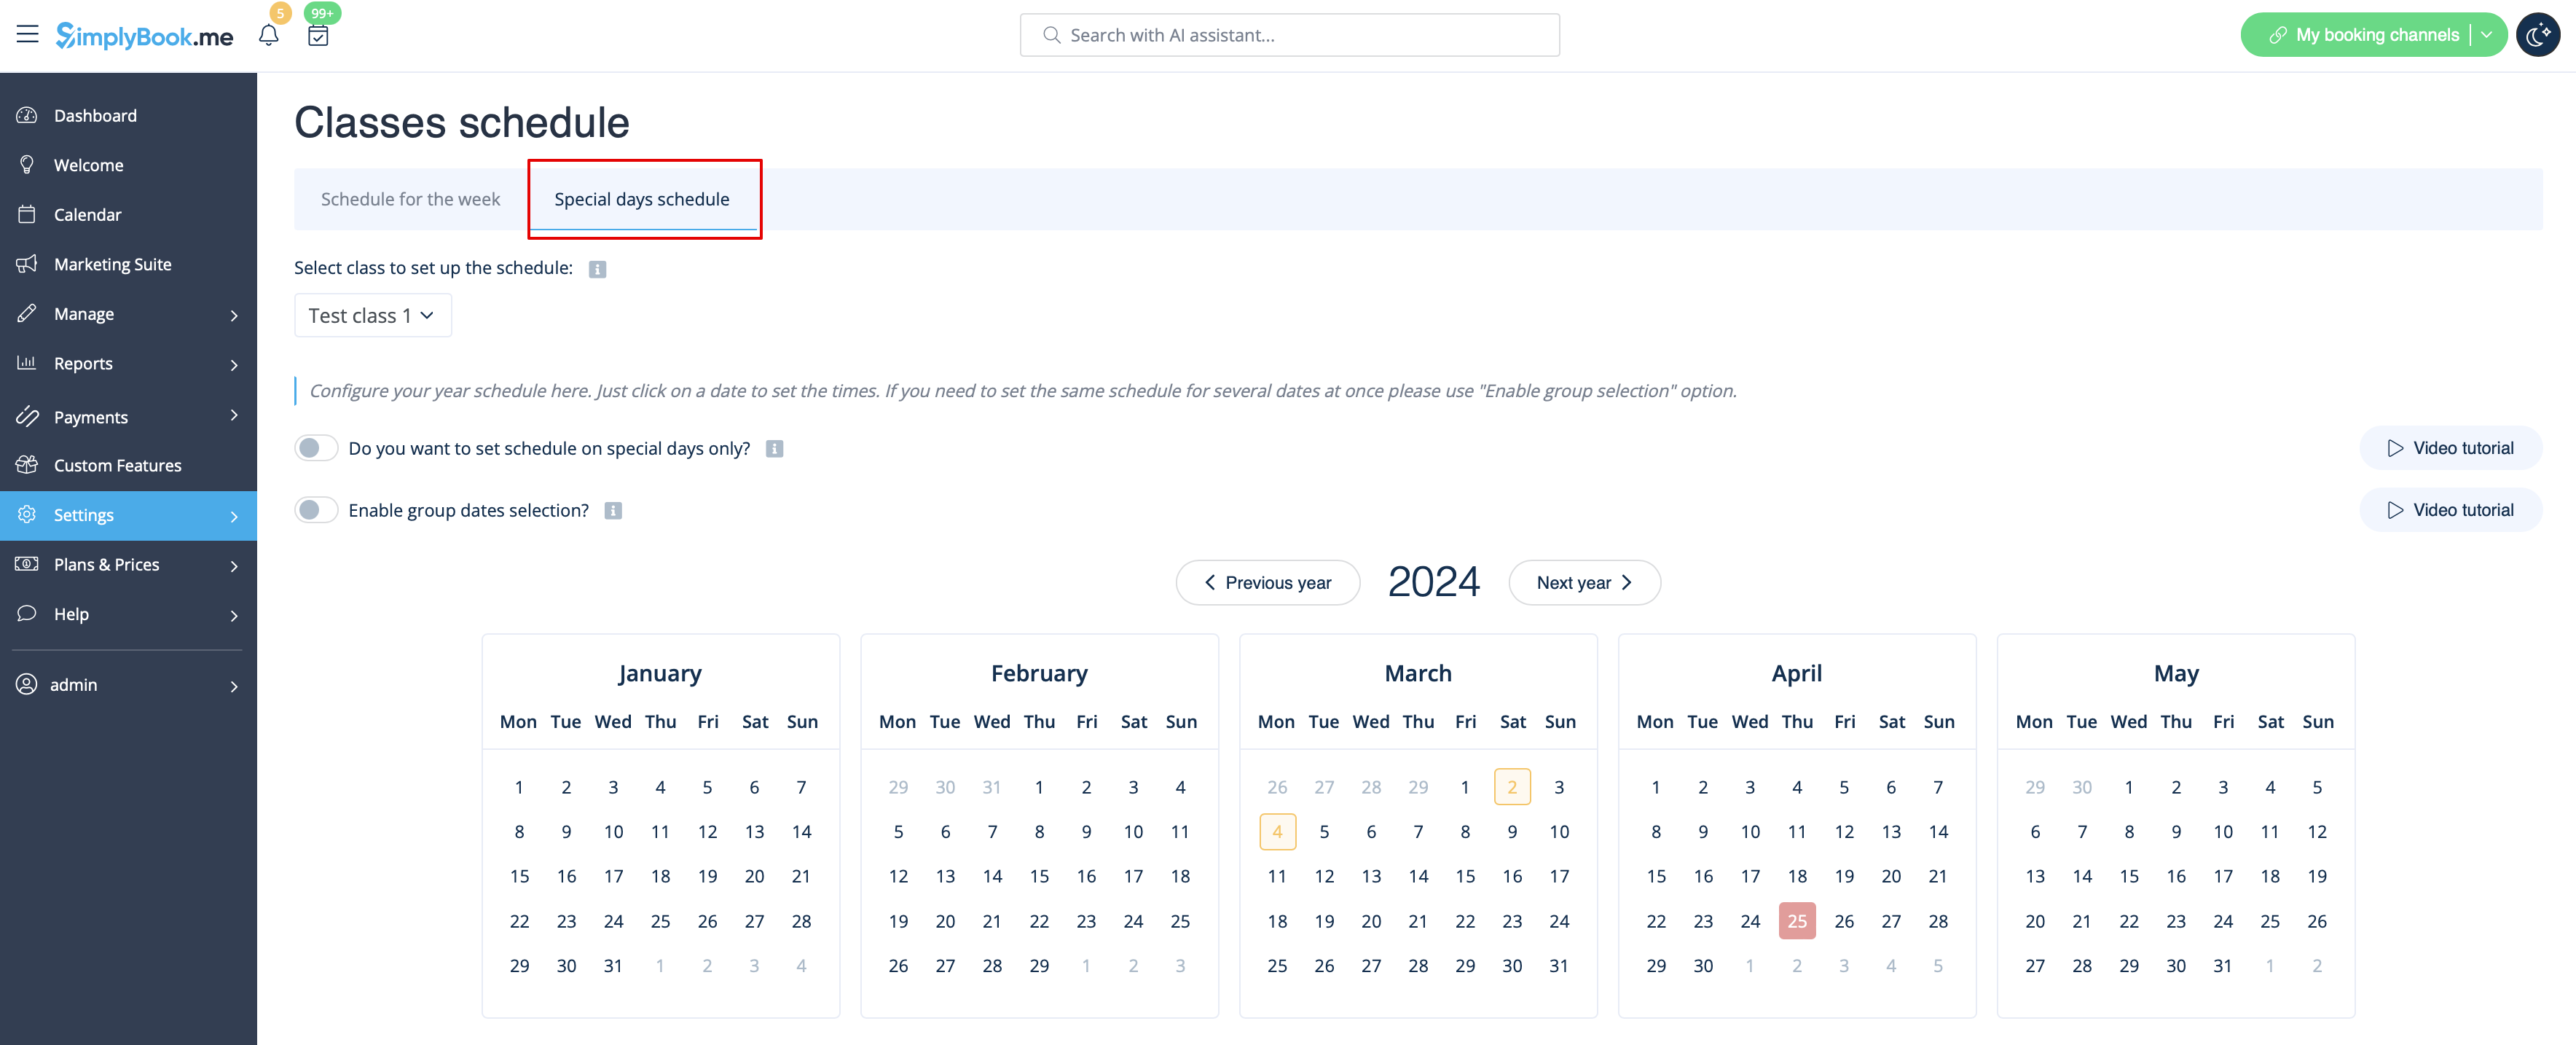
Need you class to be available on some specific dates only or plan an event?
Please switch on “Do you want to set class on special days only” option and set the times date by date by using the calendar and clicking on the dates.
Or choose “Show advanced settings” to see full year calendar.

Need to set the same times for several dates at once?
Just turn on “Enable group dates selection”,
click on necessary dates and choose “Setup schedule” option to manage the times.
Clear your selection after setting up the times.
- Important note! Please make sure that you have saved all your class settings before switching to available times editing.
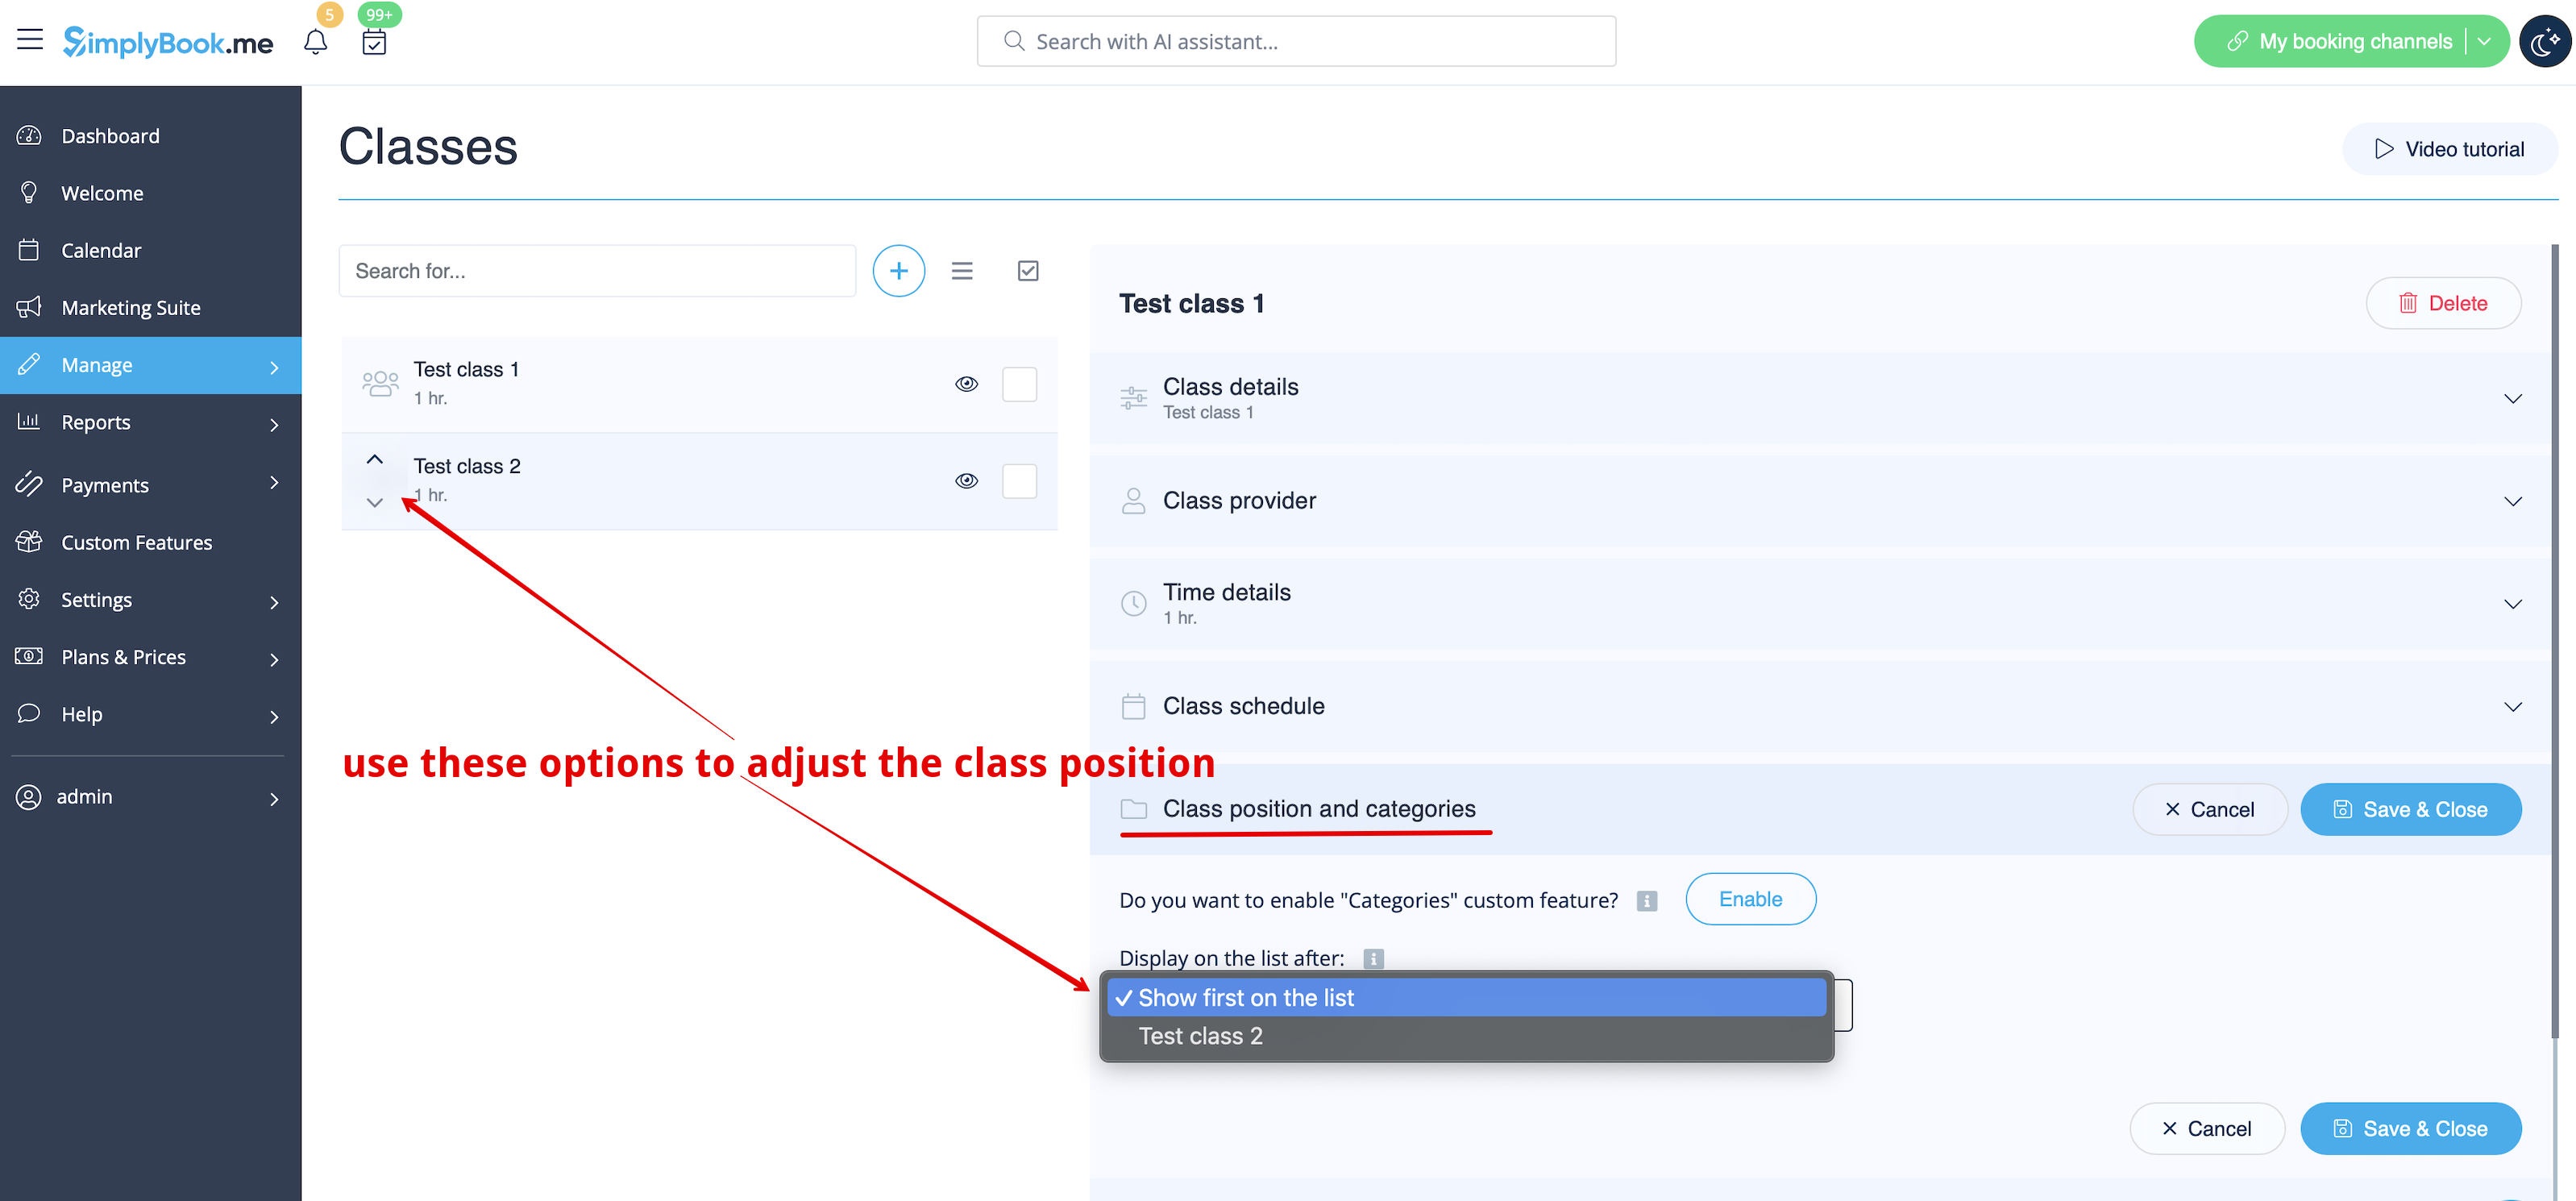
How to re-order already created classes?
Please select “Class positions and categories” tab and choose the desired position from the drop-down.
Or use arrows near classes names to quickly re-order them.
How to group classes into categories or attach them to locations?
Service Categories and Multiple Locations features will help you with setting these options up.
Please select “Class categories and position” tab, click on “do you wish to enable categories” option to switch on the feature and click on “+” icon to create new category.

If you need to attach classes to locations just select “Locations” tab, enable corresponding option and and create locations one by one with the help of “+” icon.

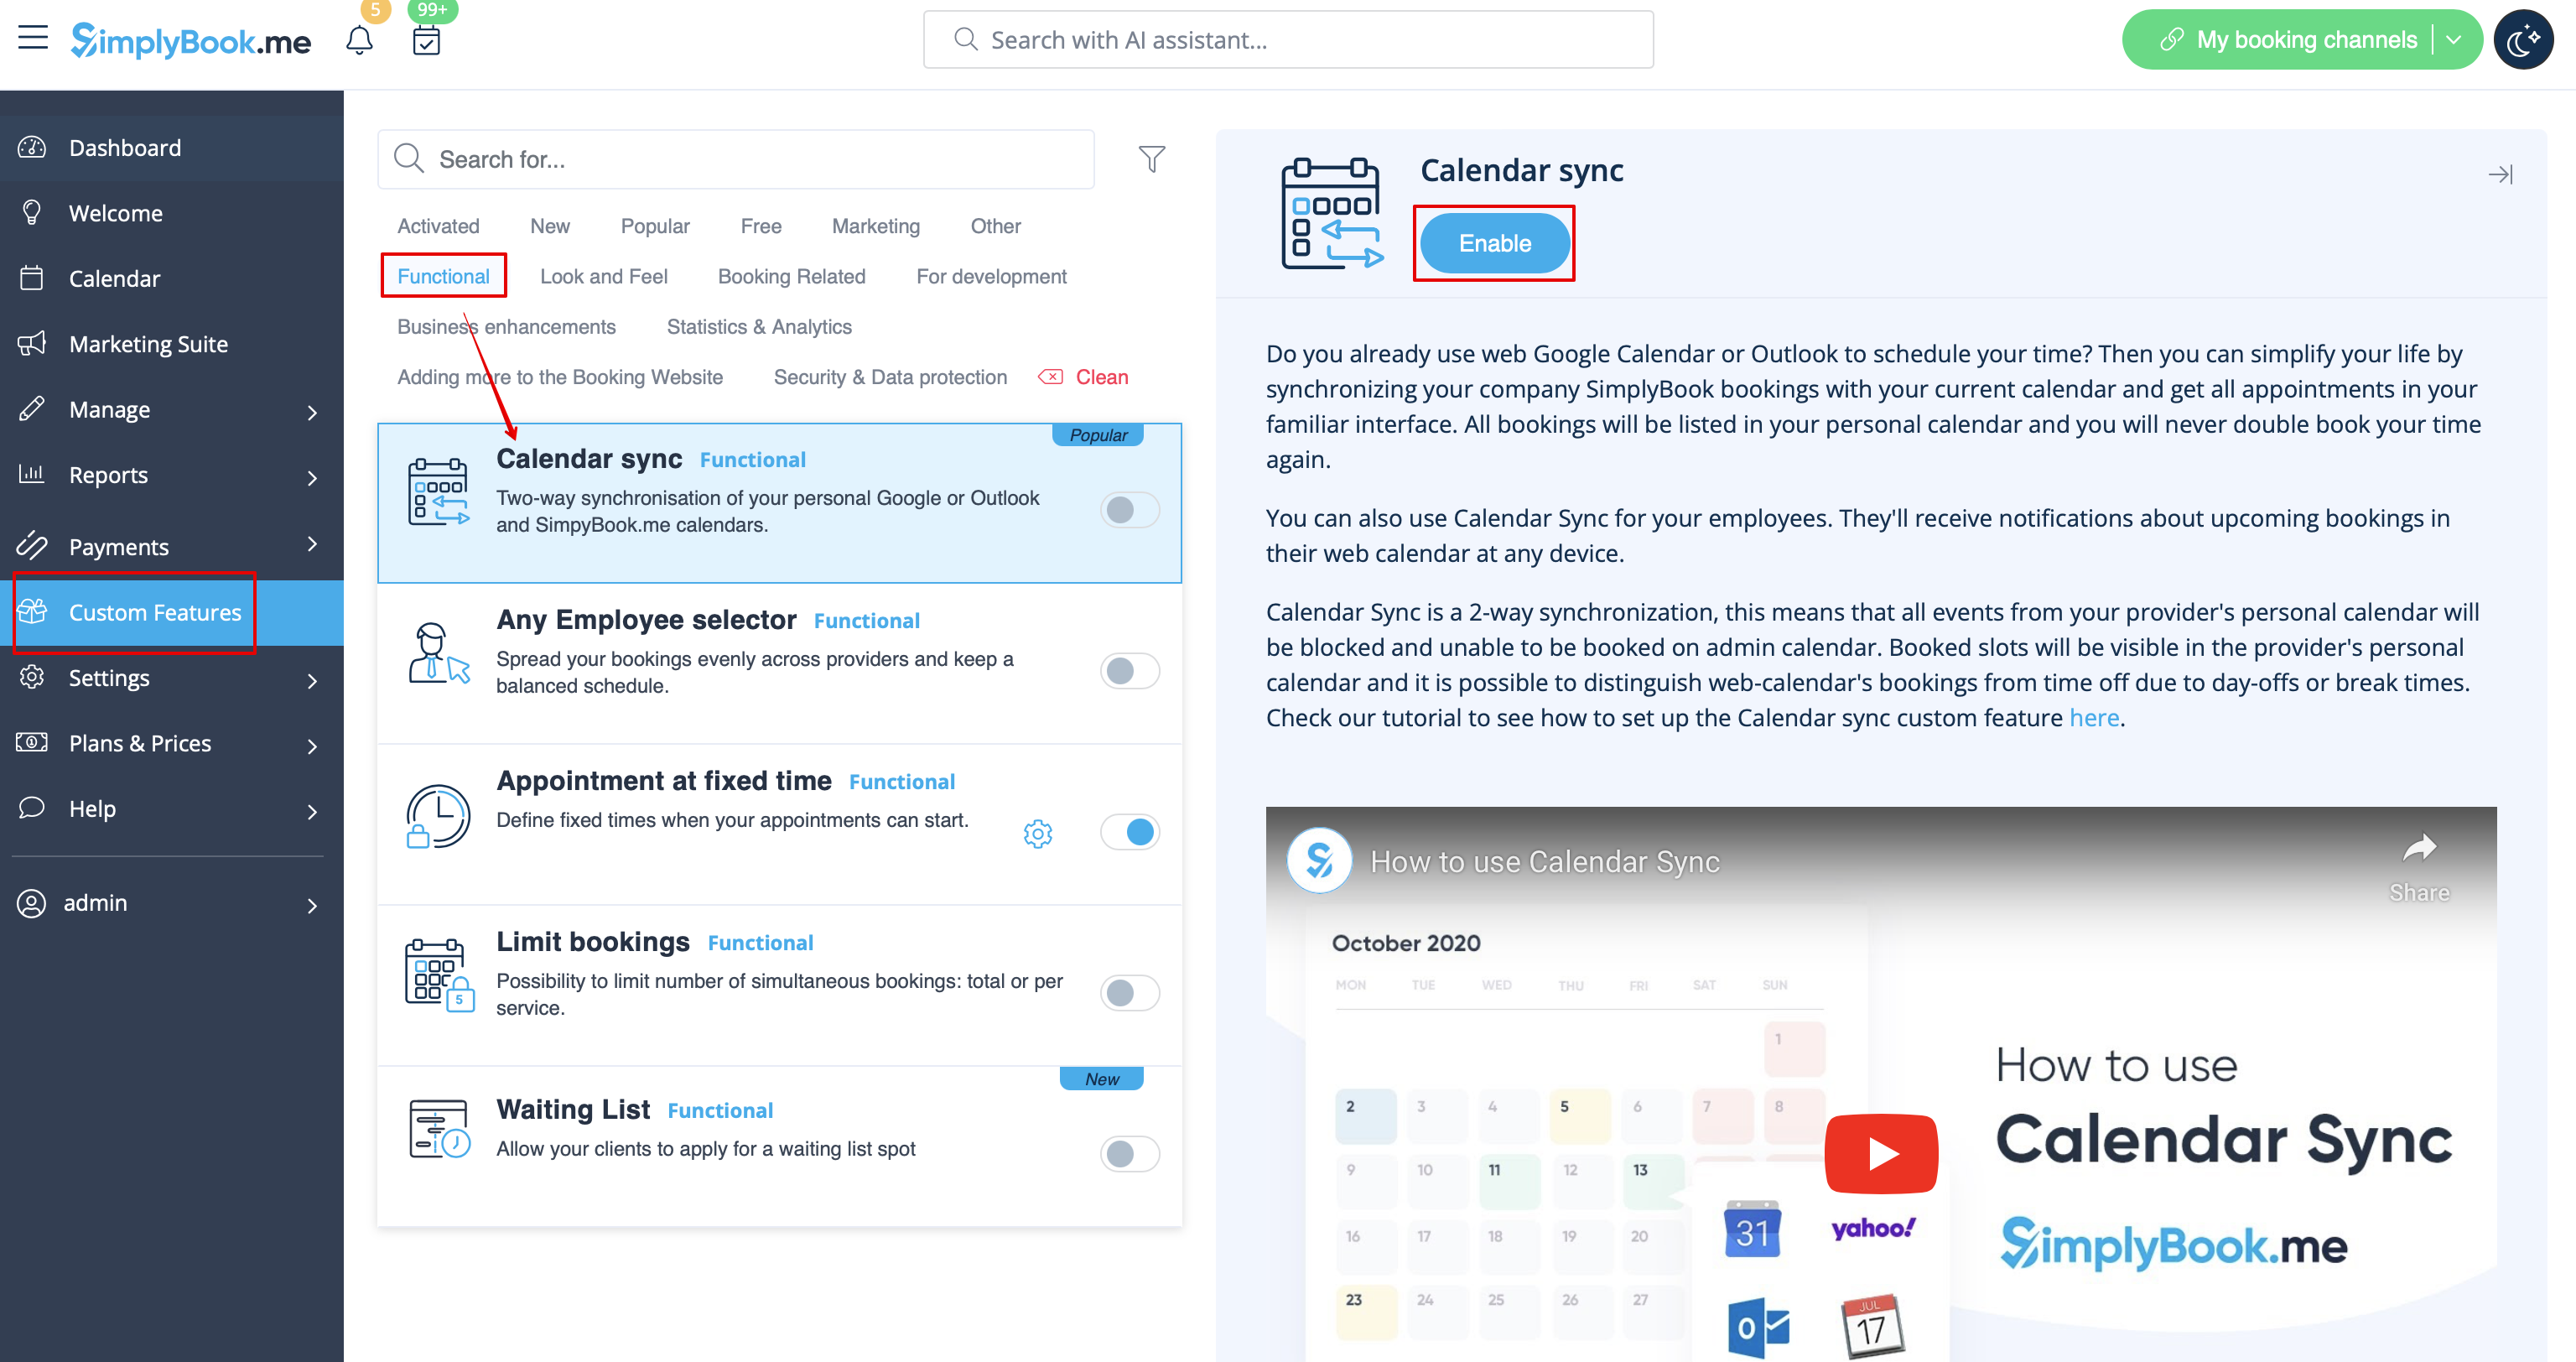
Can I sync classes bookings with my Google or Outlook calendar?
Sure! We have Calendar sync feature to make it possible. Please go to Custom features//Calendar sync to enable it and click on “Settings” to attach calendars.
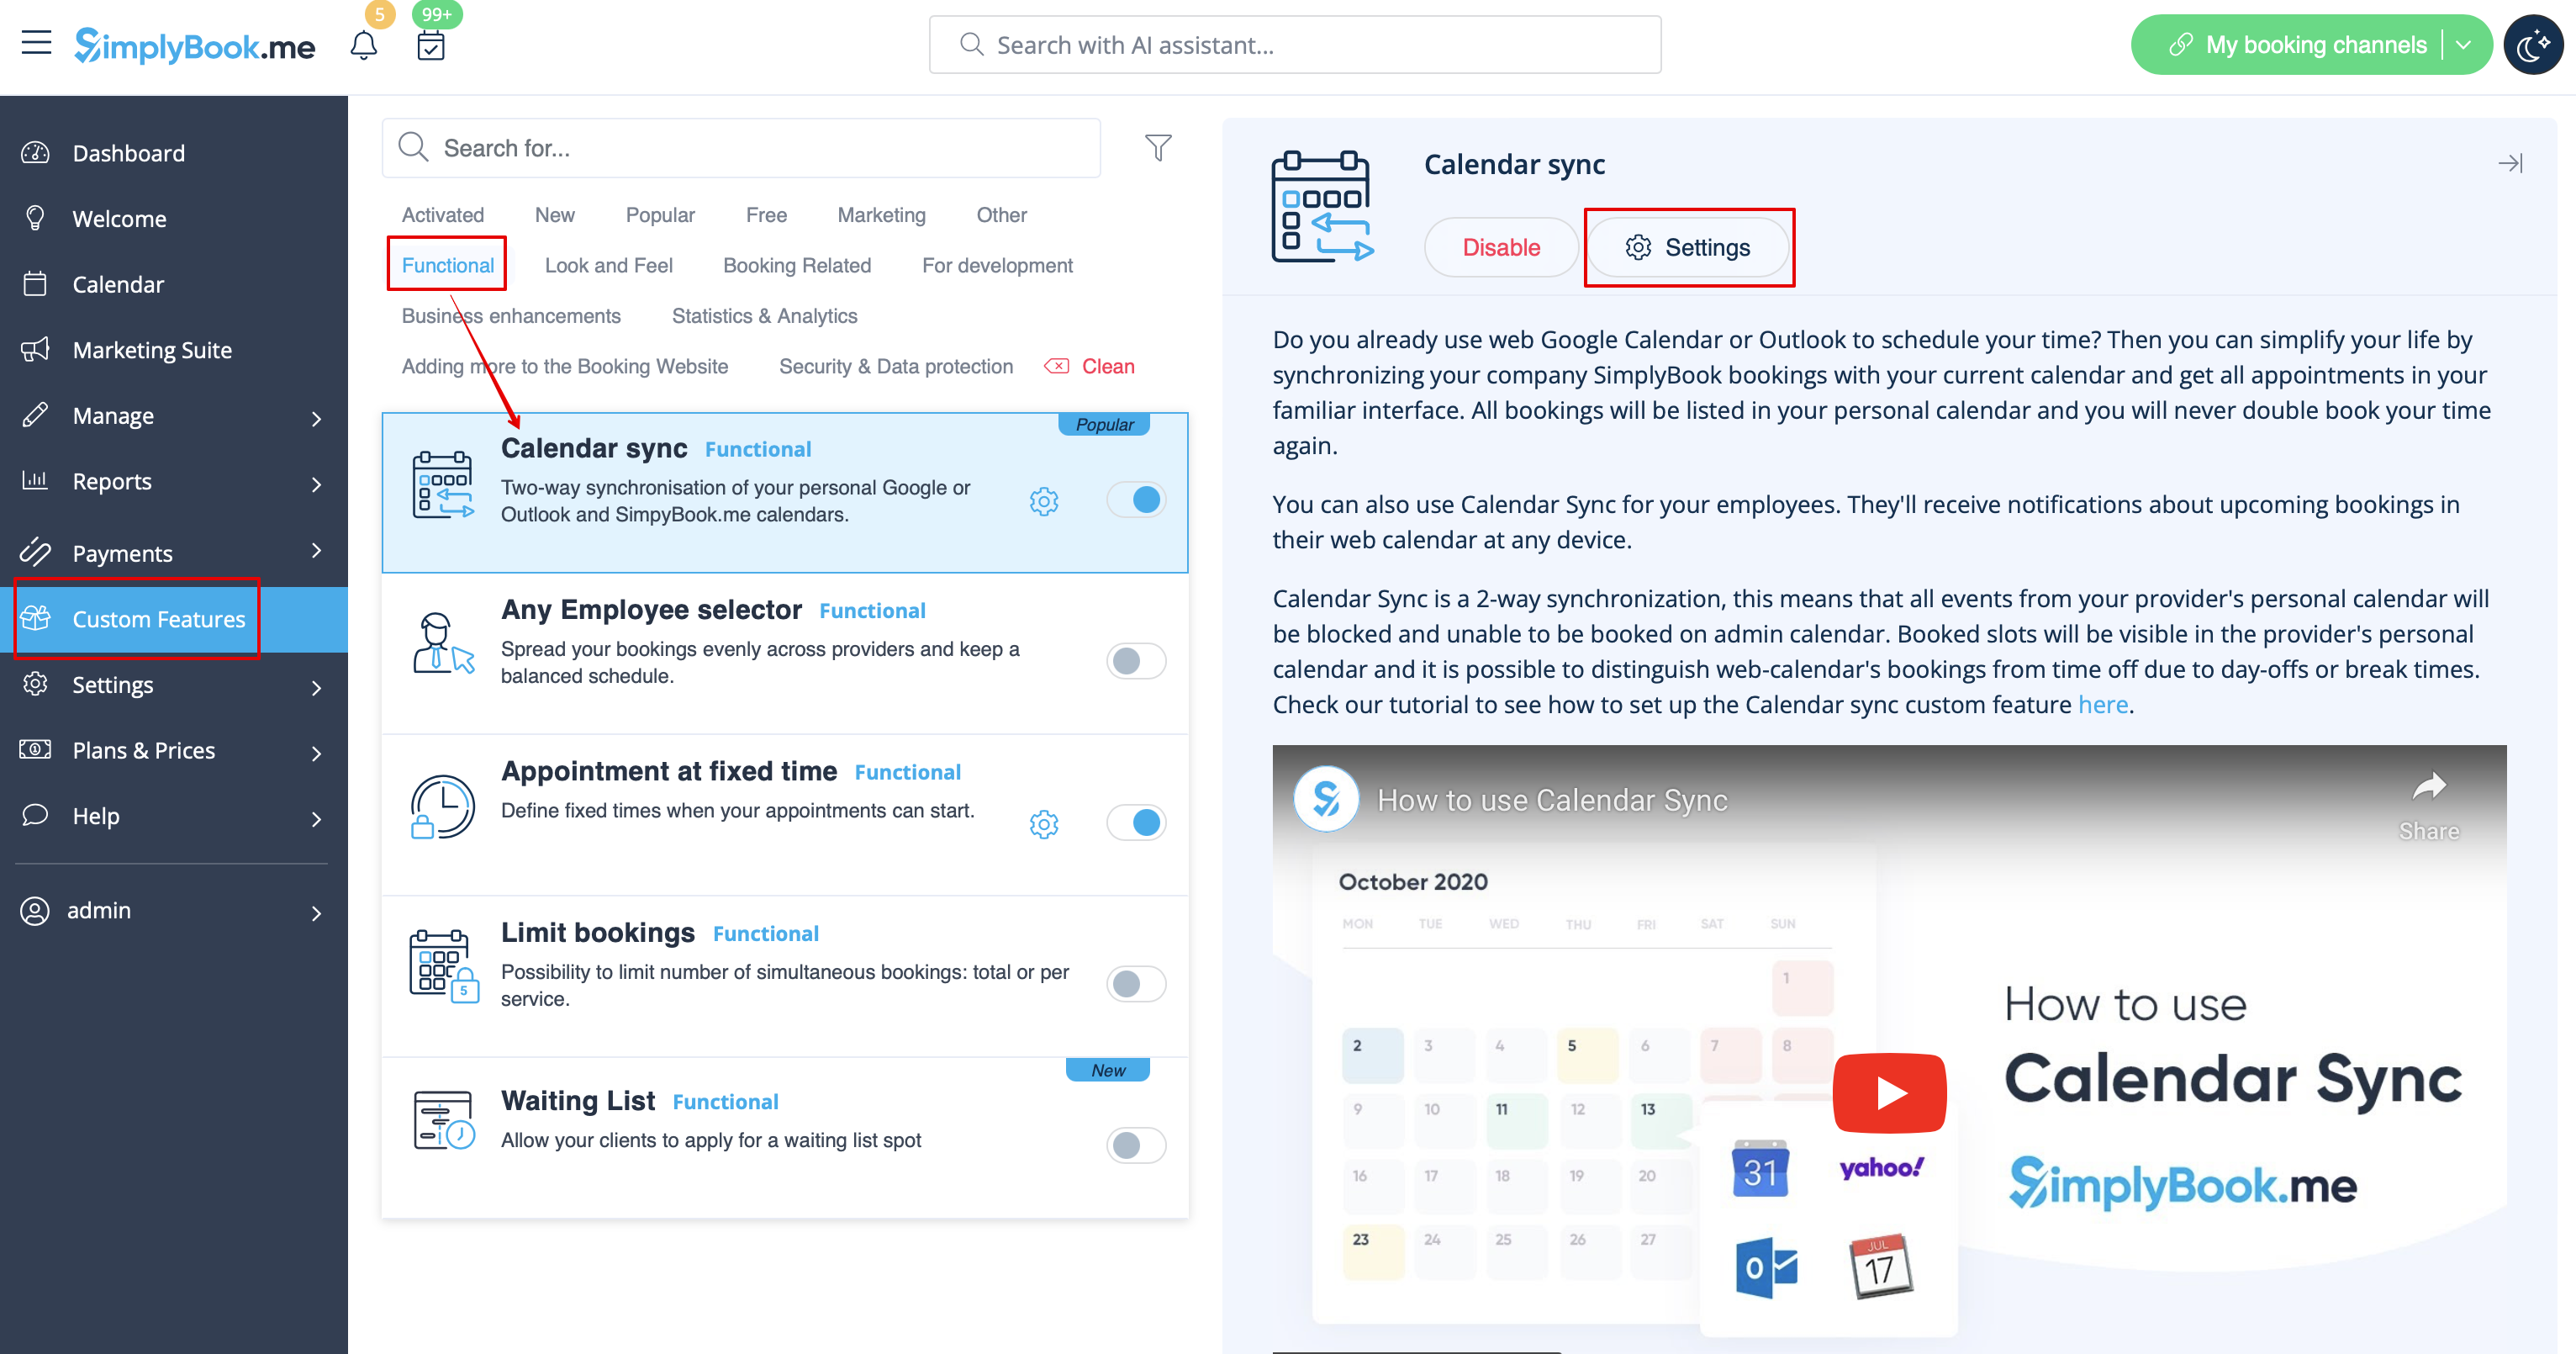
- Important note! Please do not use “sync busy time” option for classes sync if you have more than 1 participant as it will block all the spaces.
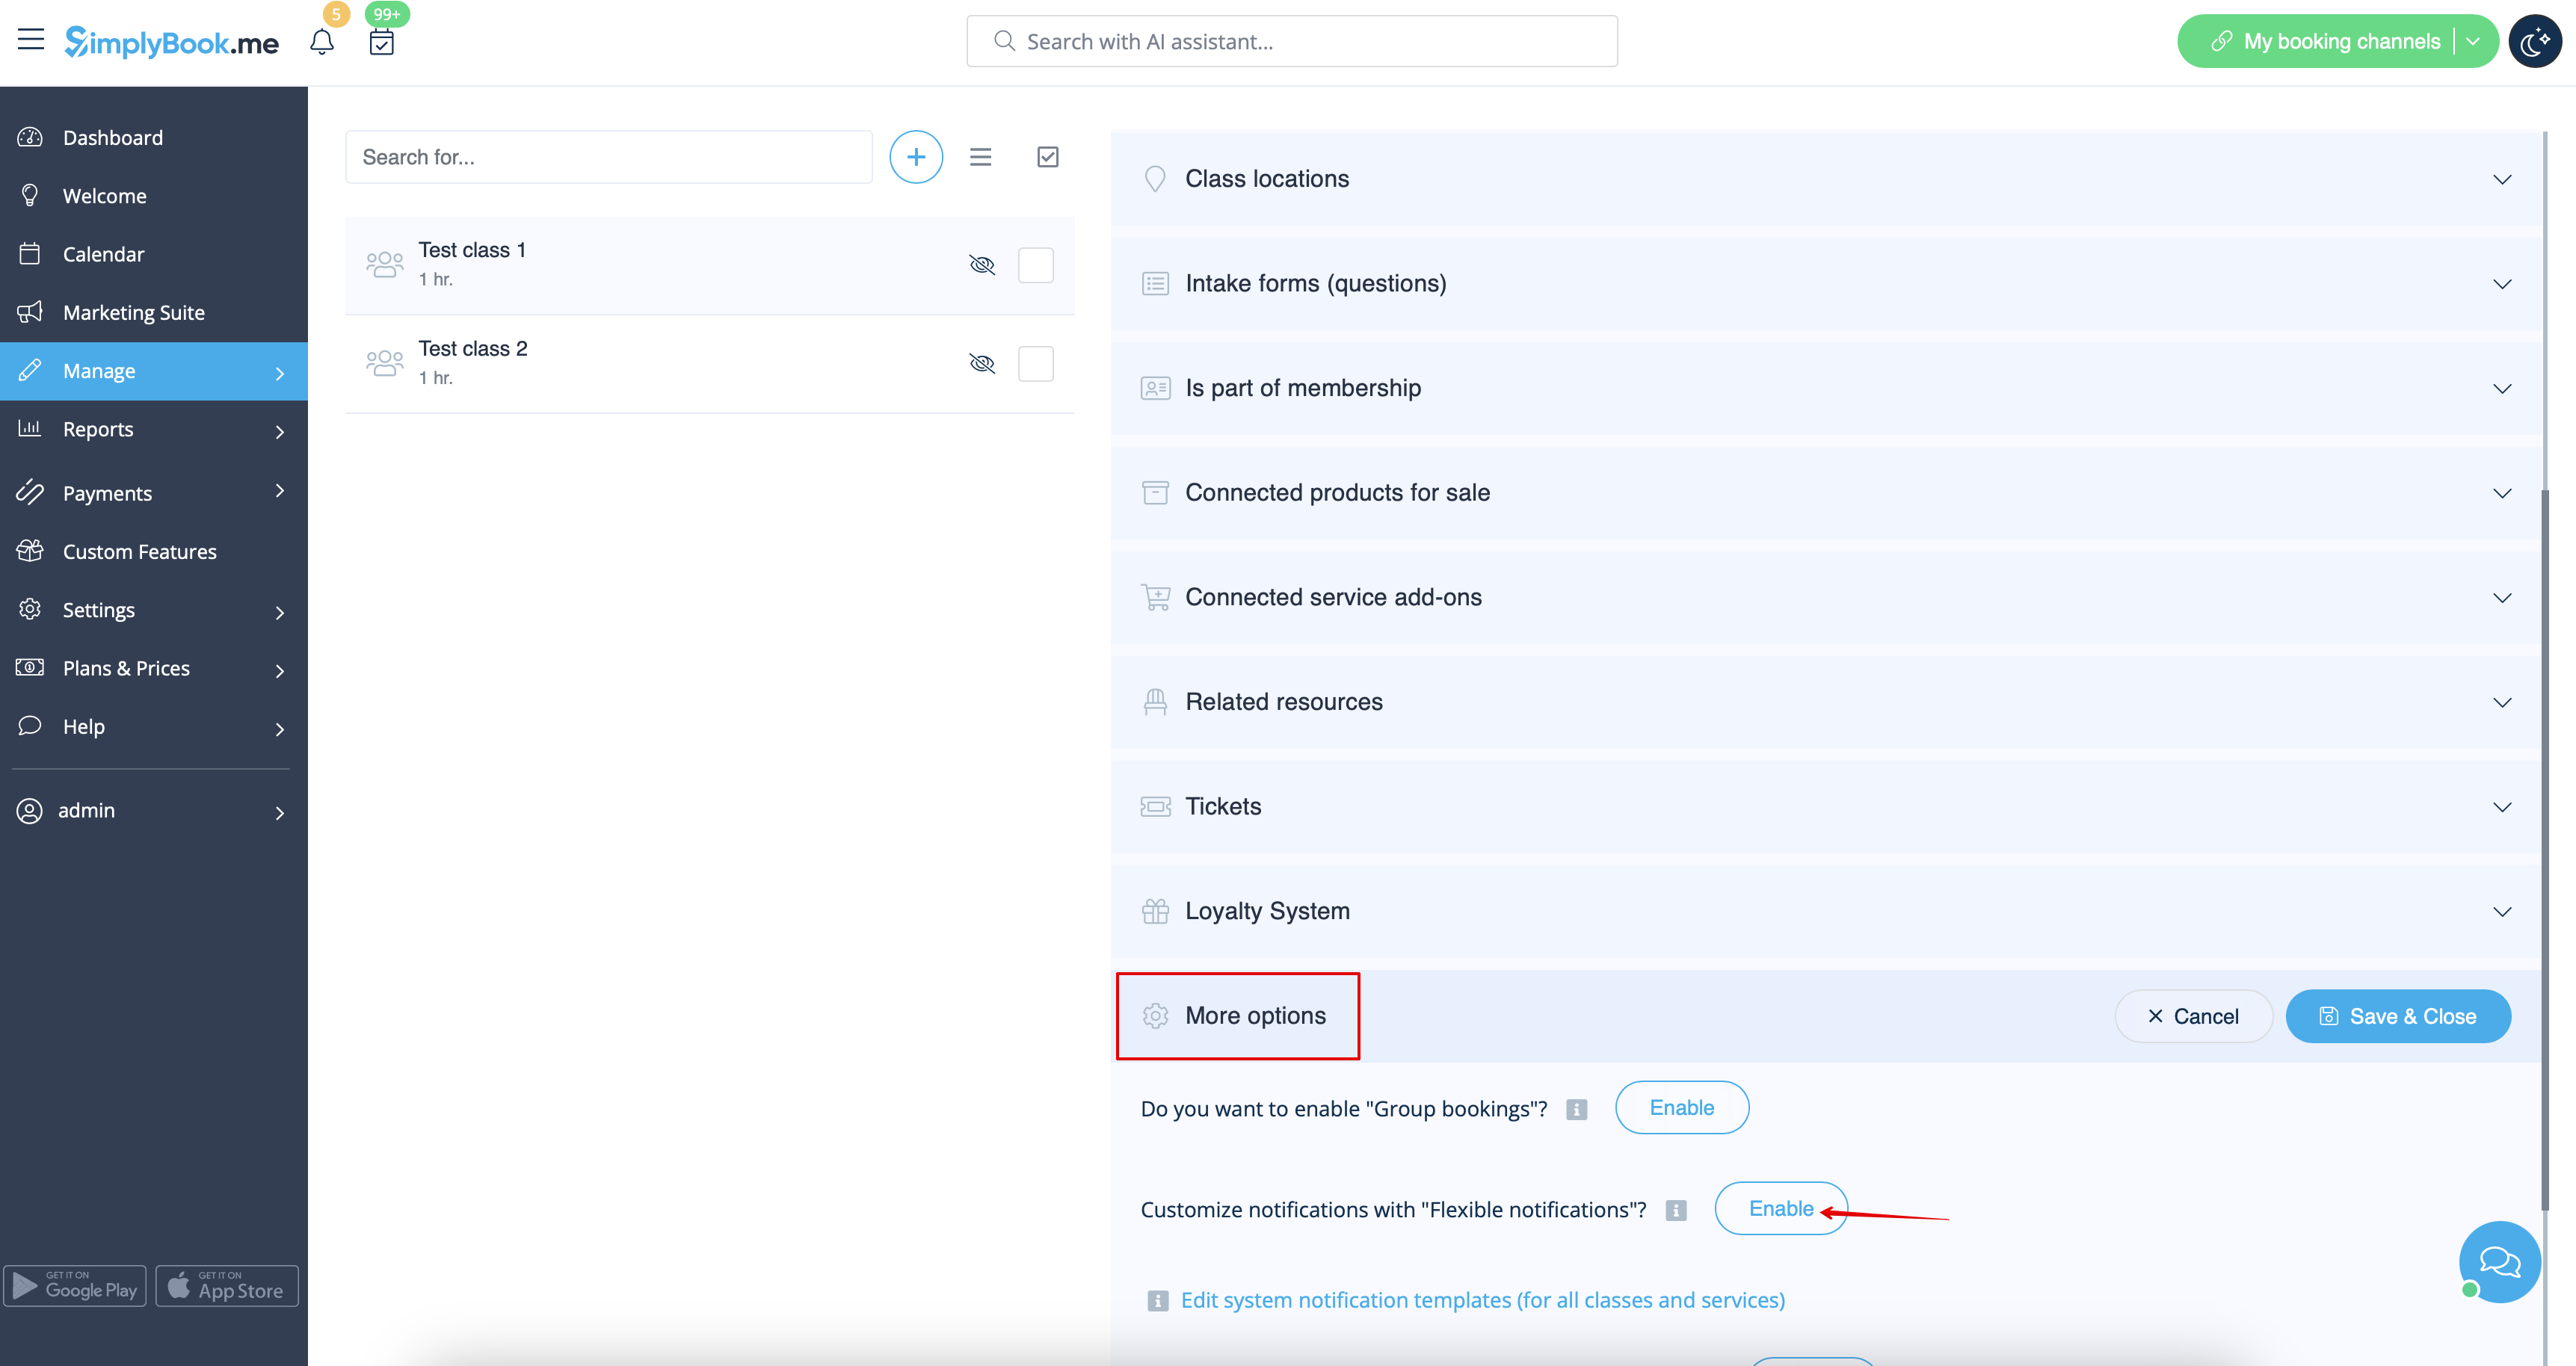
How to set specific emails for classes/events?
It may happen that you need to have absolutely different templates for each class for confirmations or reminders, or other notifications. Flexible notifications feature will help you to solve the question. Please select “More options” tab, click on “Customize notifications with “Flexible notificatiions”” to enable it and create new template to your needs.
In addition to all these possibilities you can attach some Products for sale or Service Add-ons to your classes to earn more and remind existing clients to book again.

Important information for cases when you disable Classes custom feature
Generally the class consists of pair Service + Provider that are setup on one page.
That is why when you disable this feature the classes you have created before will be split to services and providers that will be displayed in corresponding sections.
- 1. If you delete service/provider related to class and enable Classes feature back, such class will no longer exist and remaining part(service or provider) will be displayed on corresponding page only.
- 2. If you unattach the pair service and provider, after re-enabling the Classes feature and re-saving class the connection between them will be re-established.
- 3. If you attach class service to another provider(s), after re-enabling Classes feature and re-saving class they will be disconnected and class service will be connected only to corresponding class provider.
- 4. If you attach class provider to another service(s), after re-enabling Classes feature and re-saving class connections with other classes services will be removed. If non-class services were attached, these connections are to be removed manually.