HIPAA custom feature

Available with Standard and Premium(former Gold and Platinum) subscriptions.
The personal information custom feature is designed to help SimplyBook.me users to protect their client's and patient's data. It does not replace user's own security procedures but enhances SimplyBook.me data security by using double authentication during login process for all users who access the system (users need to register their mobile phone number to receive authentication code SMS(you need SMS credits for this) or connect Google Authenticator using corresponding custom feature). This custom feature includes a “Timeout” setting which automatically logs user out to reduce the risk of unauthorized users accessing the system.
The system blocks all access for SimplyBook support personnel further reducing access by unrelated people to the system. It is possible to further reduce exposure of personal information to unauthorized people by using the Clean History custom feature. This way old data gets deleted and is therefore not accessible.
Please note!
- This custom feature does NOT replace the SimplyBook.me user's own security controls which also need to be in place for client and patient data protection. Please refer to relevant documentation in your country and get assistance from qualified advisors in the field of client/patient data protection.
- [service] and [client] variables in notification templates do not work when this Custom Feature is enabled due to security reasons.
- It is not possible to connect the account to Zapier if you are using HIPAA feature.
- It is not possible to use HIPAA with API custom feature.
- This custom feature cannot be enabled without Google Authenticator custom feature.
- How to use
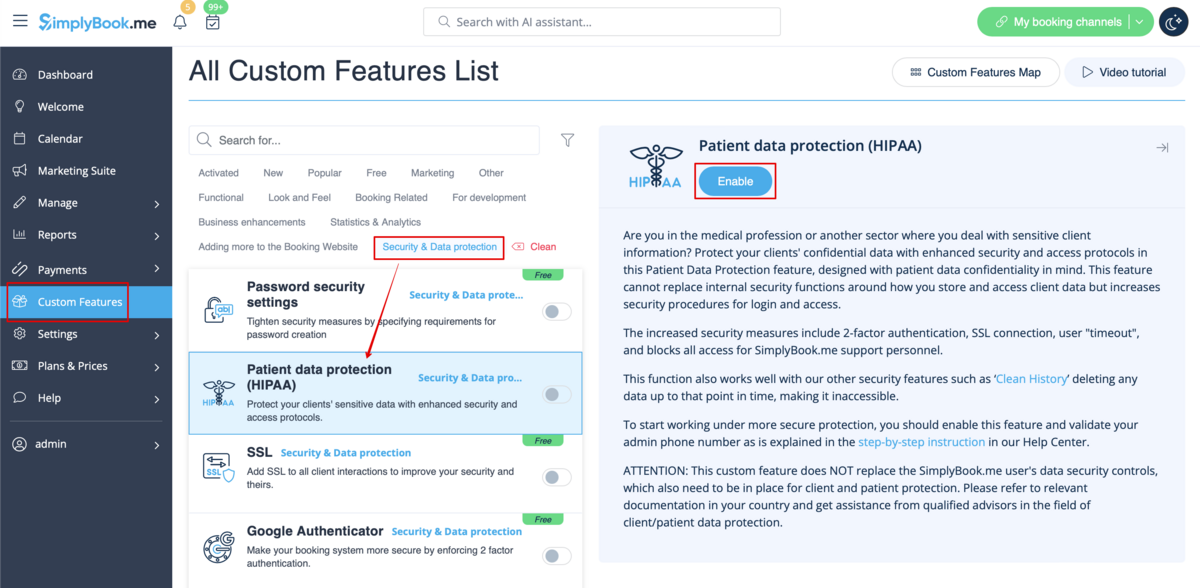
- 1. Enable HIPAA features on your Custom Features page.
- When you enable this feature SSL custom feature and Google Authenticator will be enabled as well to add security to client side.
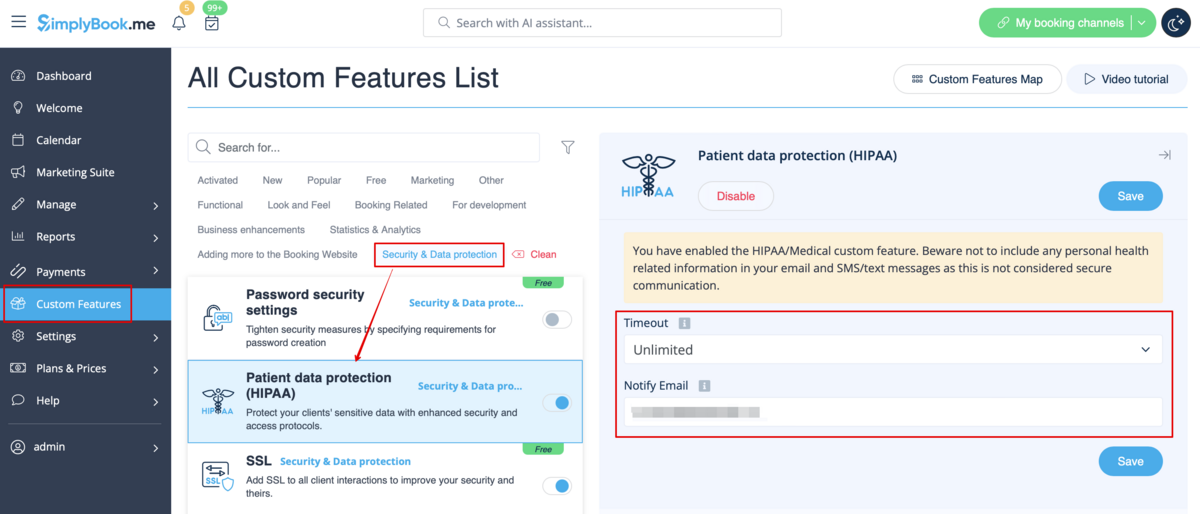
- 2. Go to its settings on the right to set timeout period and email address to be notified about new log ins.
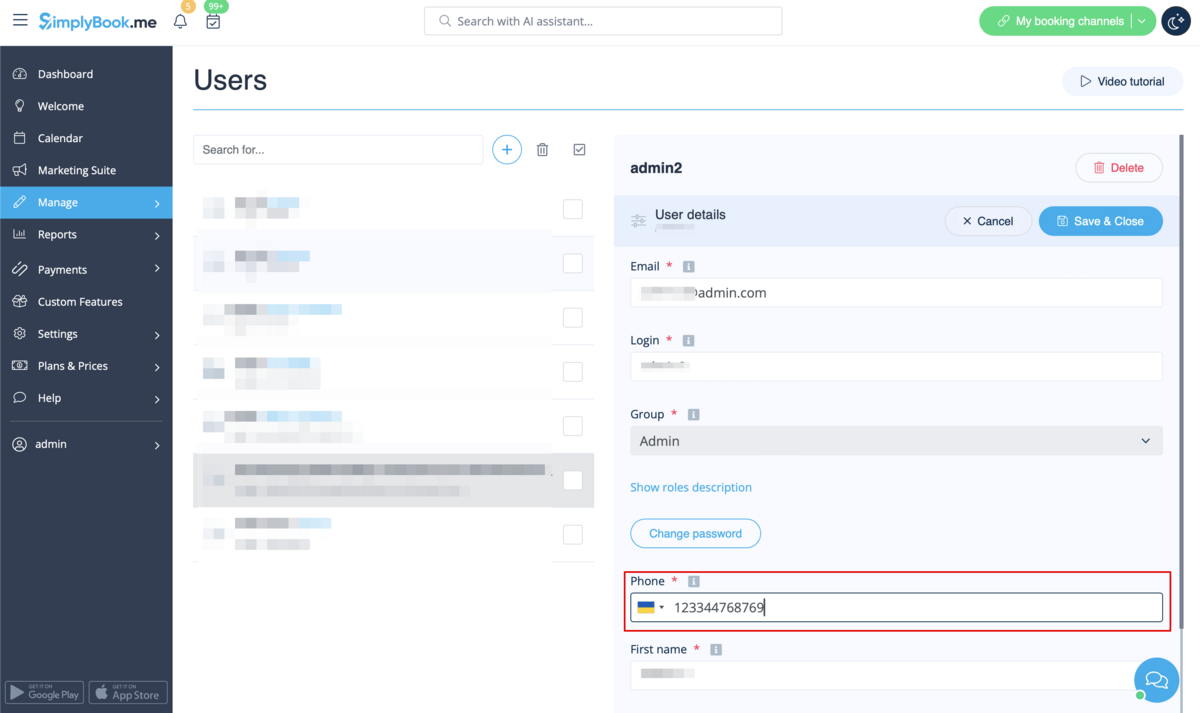
- 3. Add phone numbers for your users in Manage//Users//select the user//User details.
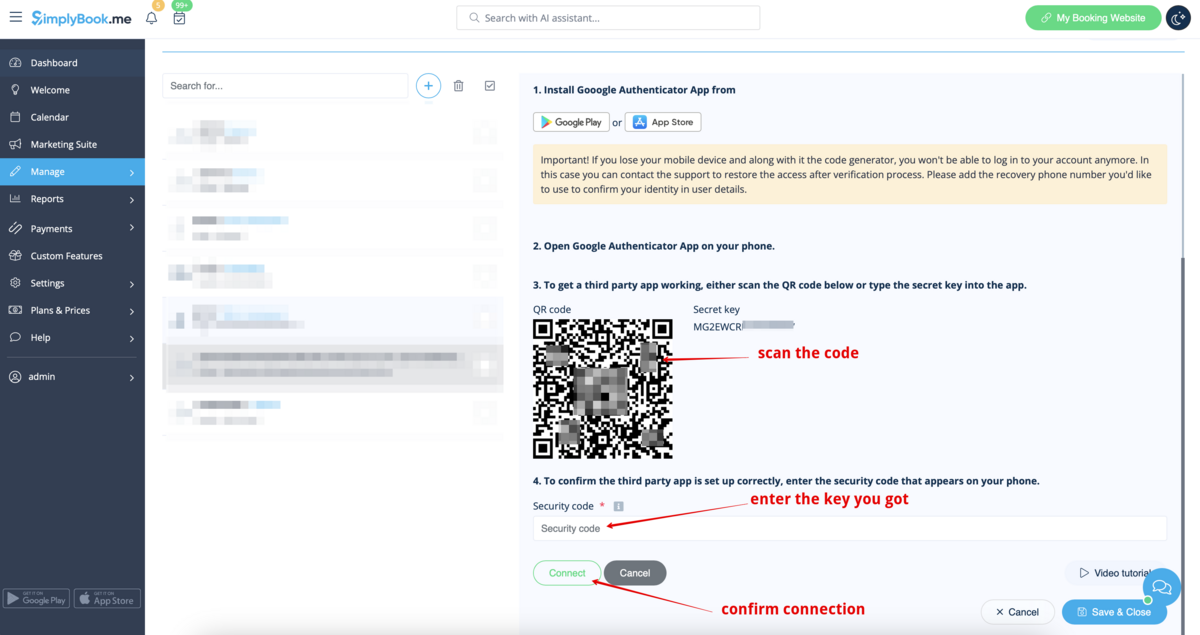
- 4. Set up and validate main admin Google Authenticator in Manage//Users//select the user//Google Authenticator.
- (download the app to your phone from Google Play or App Store if you do not have it yet,
- scan QR-code with Google Authenticator application on your smartphone, enter the code you see in the app and click on "Connect" button.)
- 5. Validate main admin phone number to have a backup tw-step authentication method.
- How to validate phone number
- 1. Please navigate to Manage//Users//main admin user//User details.
- Click on "Generate a check-code to validate phone" button under the phone number field.
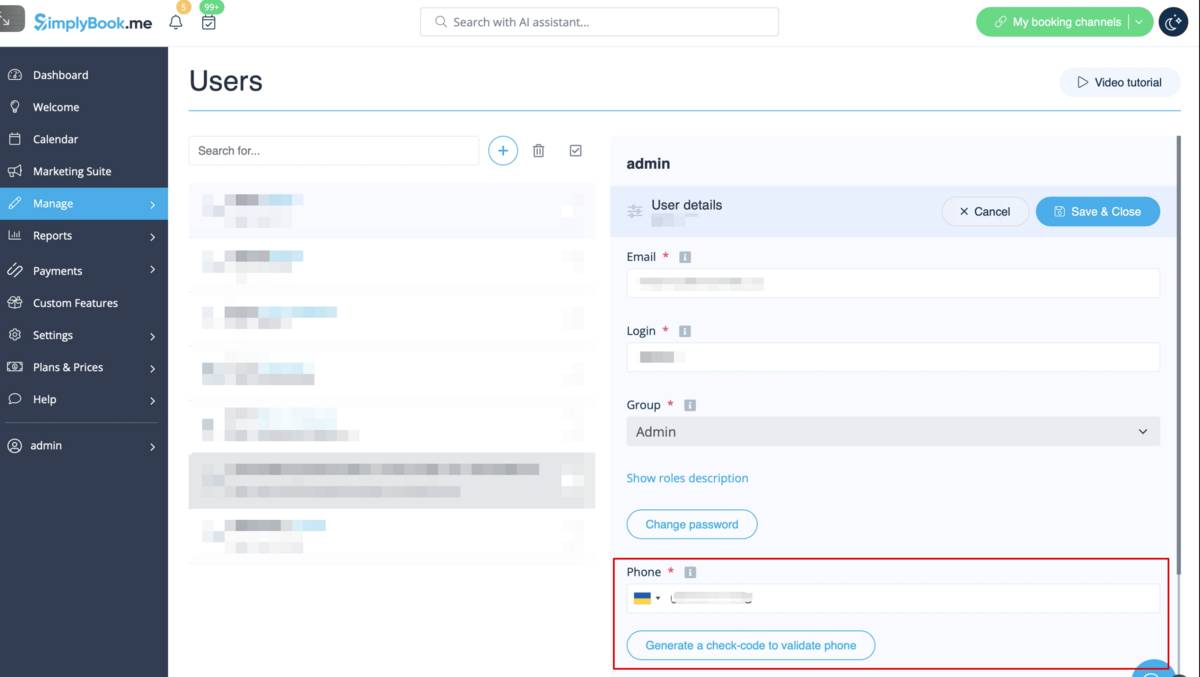
- 2. You will receive sms with the code, enter the code into the "Validation code" field and press "Confirm the check-code".
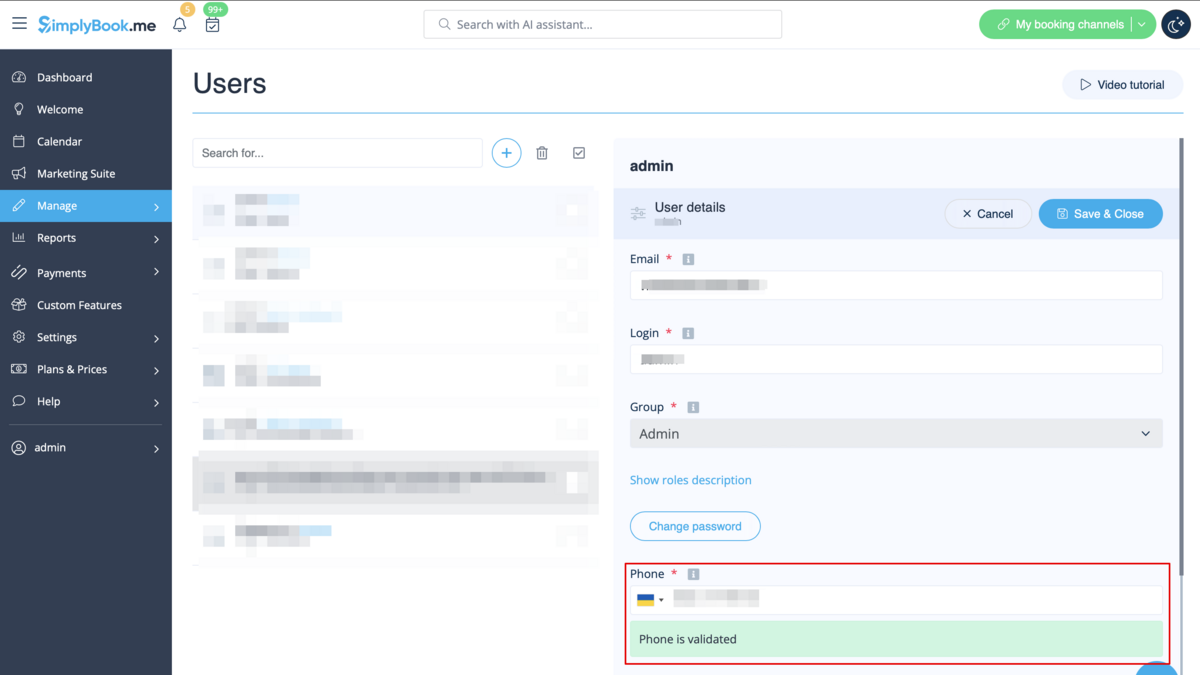
- 3. Get a success message that the code is confirmed.
- As a one more backup method you can download the file with one-time codes for two-step authentication in "Google Authenticator" tab on Manage//Users page.
