Point of Sale custom feature
Point of Sale Custom Feature allows system users to create and track sales of bookings, and to sell memberships, products and gift certificates to existing or new clients. You can check client's history of purchases, approve pending transactions and print invoices. All in the neat mobile friendly interface! It is a valuable tool for managing booking payments within the system. However, it's important to mention that it is not an actual payment terminal and cannot process payments. Instead, it offers an intuitive interface for recording payment information. There is no possibility for now to link Simplybook with payment terminals.
Please note! Accept Payments Custom Feature will be enabled as well when you switch PoS feature on.
Why you should use The Point Of Sale System
Video tutorial
- How to use
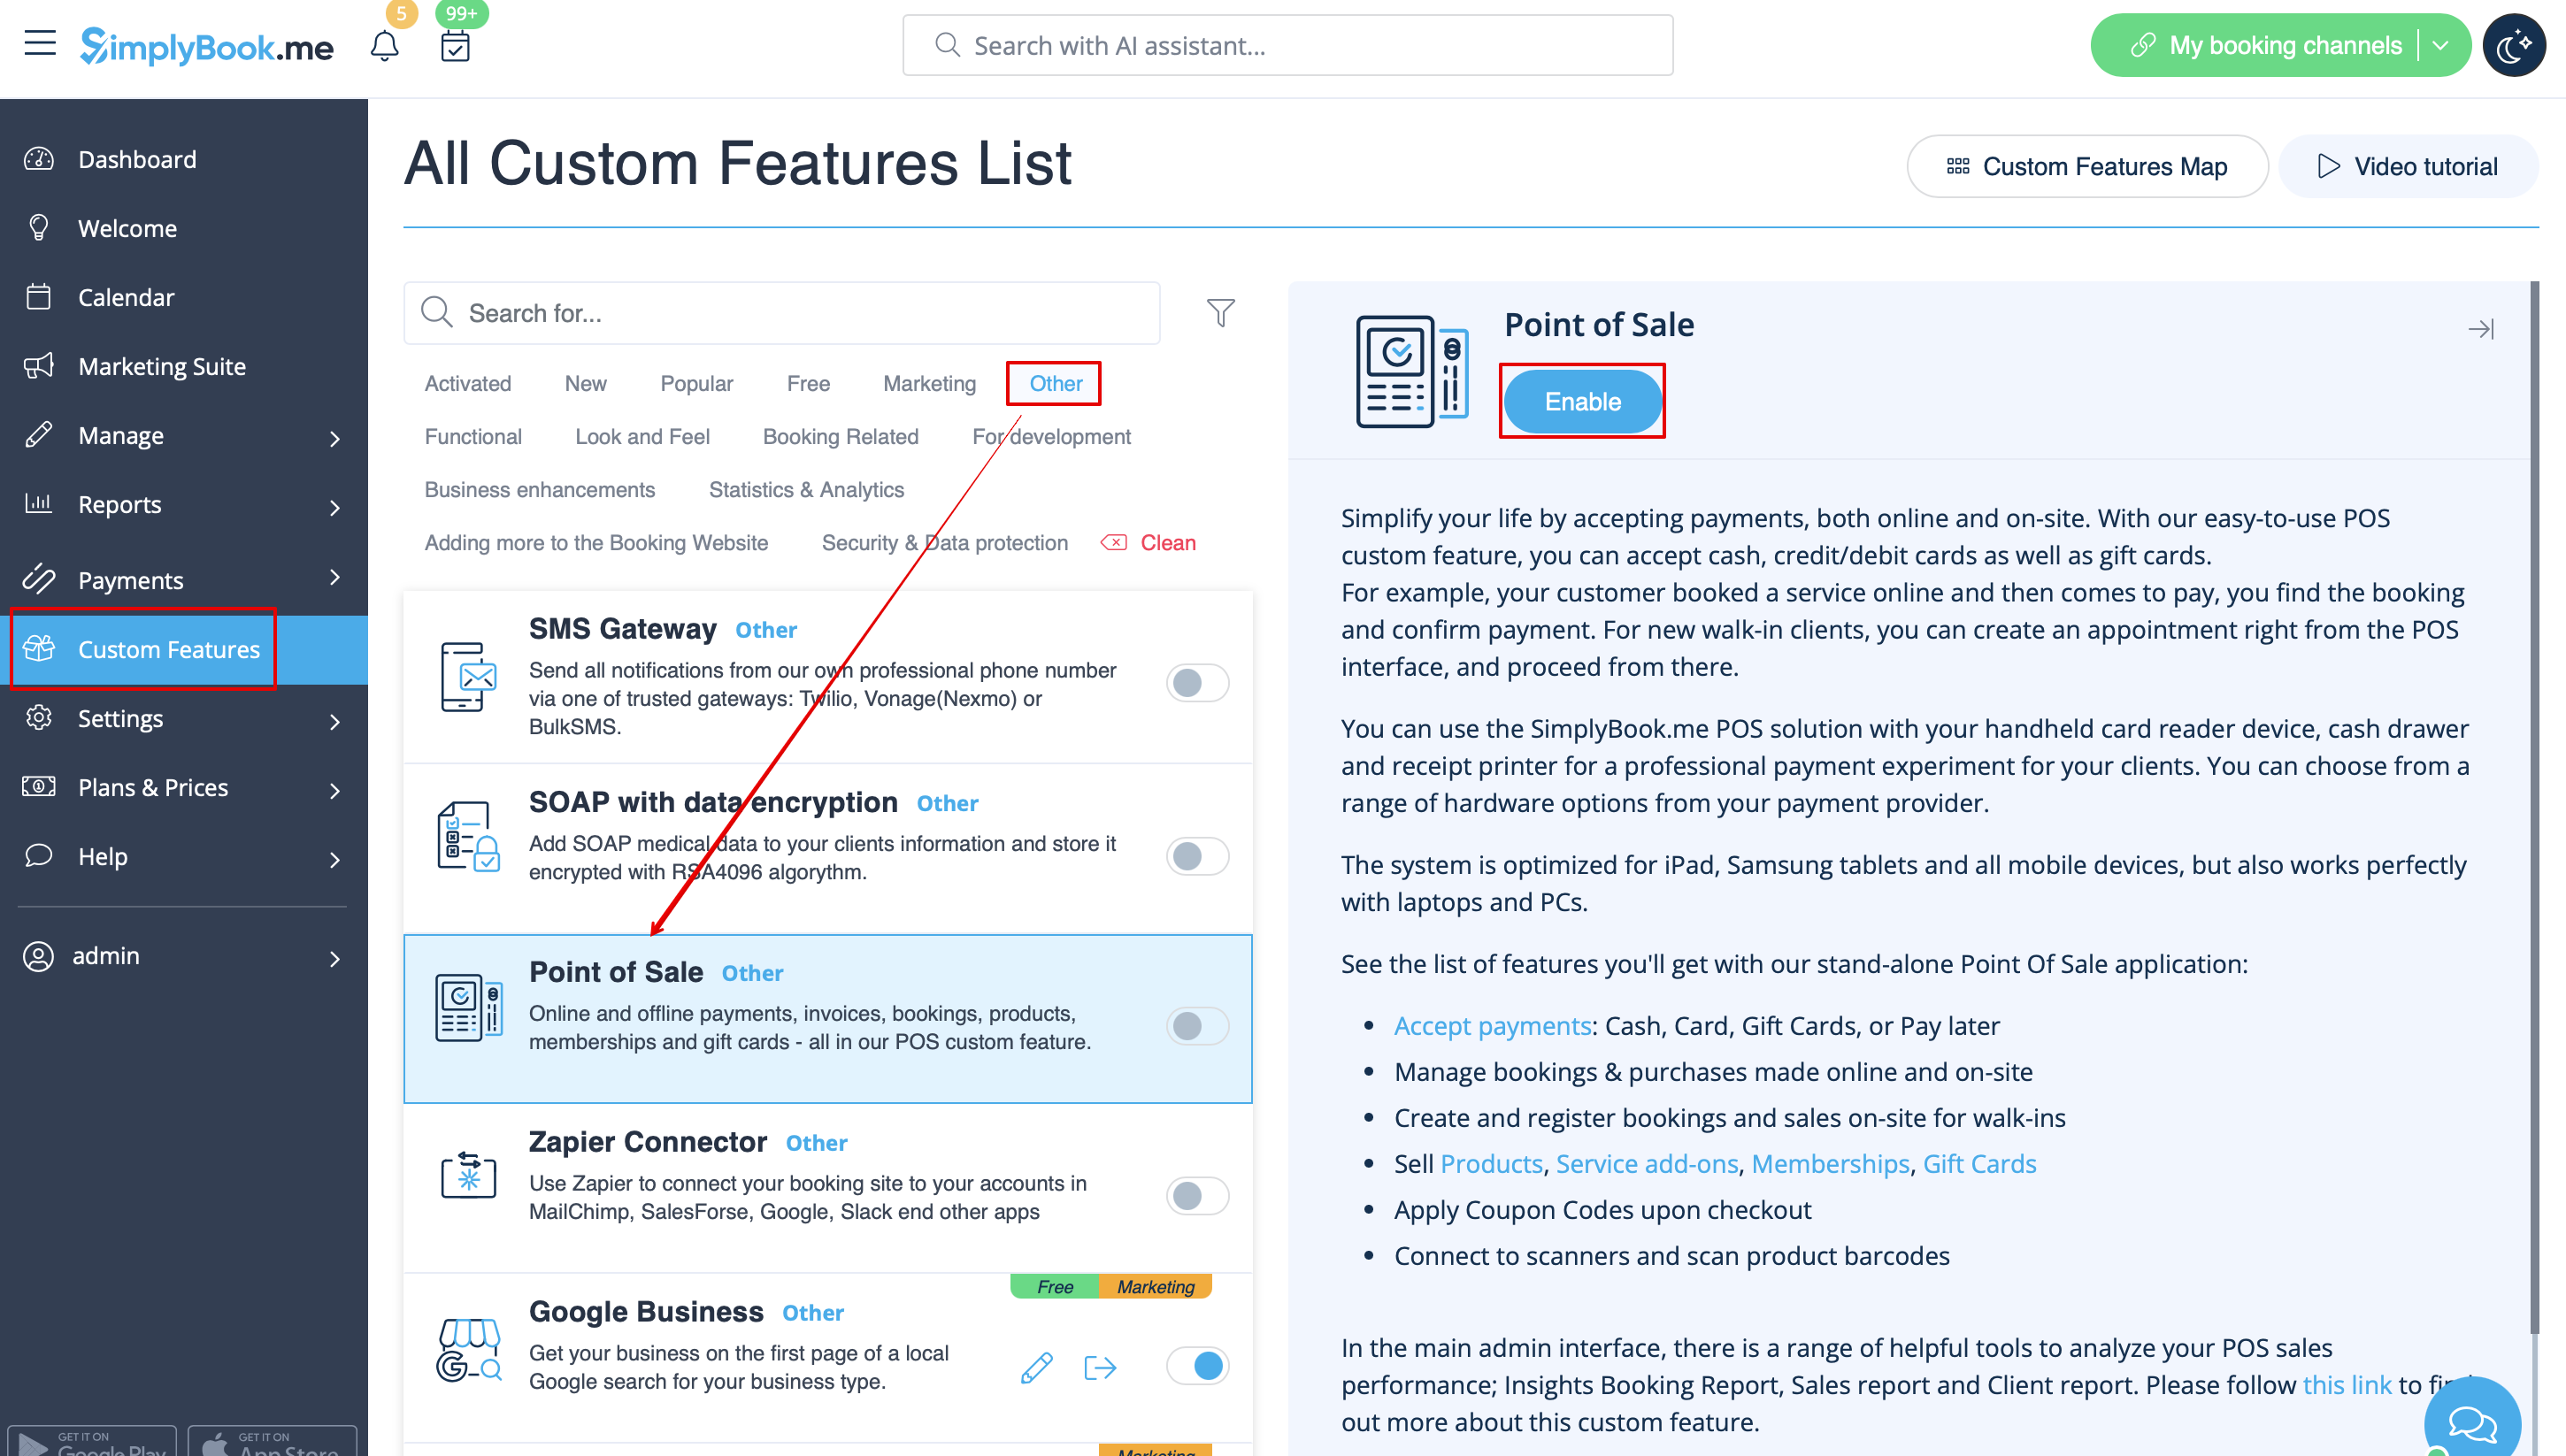
- 1. Enable Point of Sale Custom Feature on your Custom Features page, “Other” section.
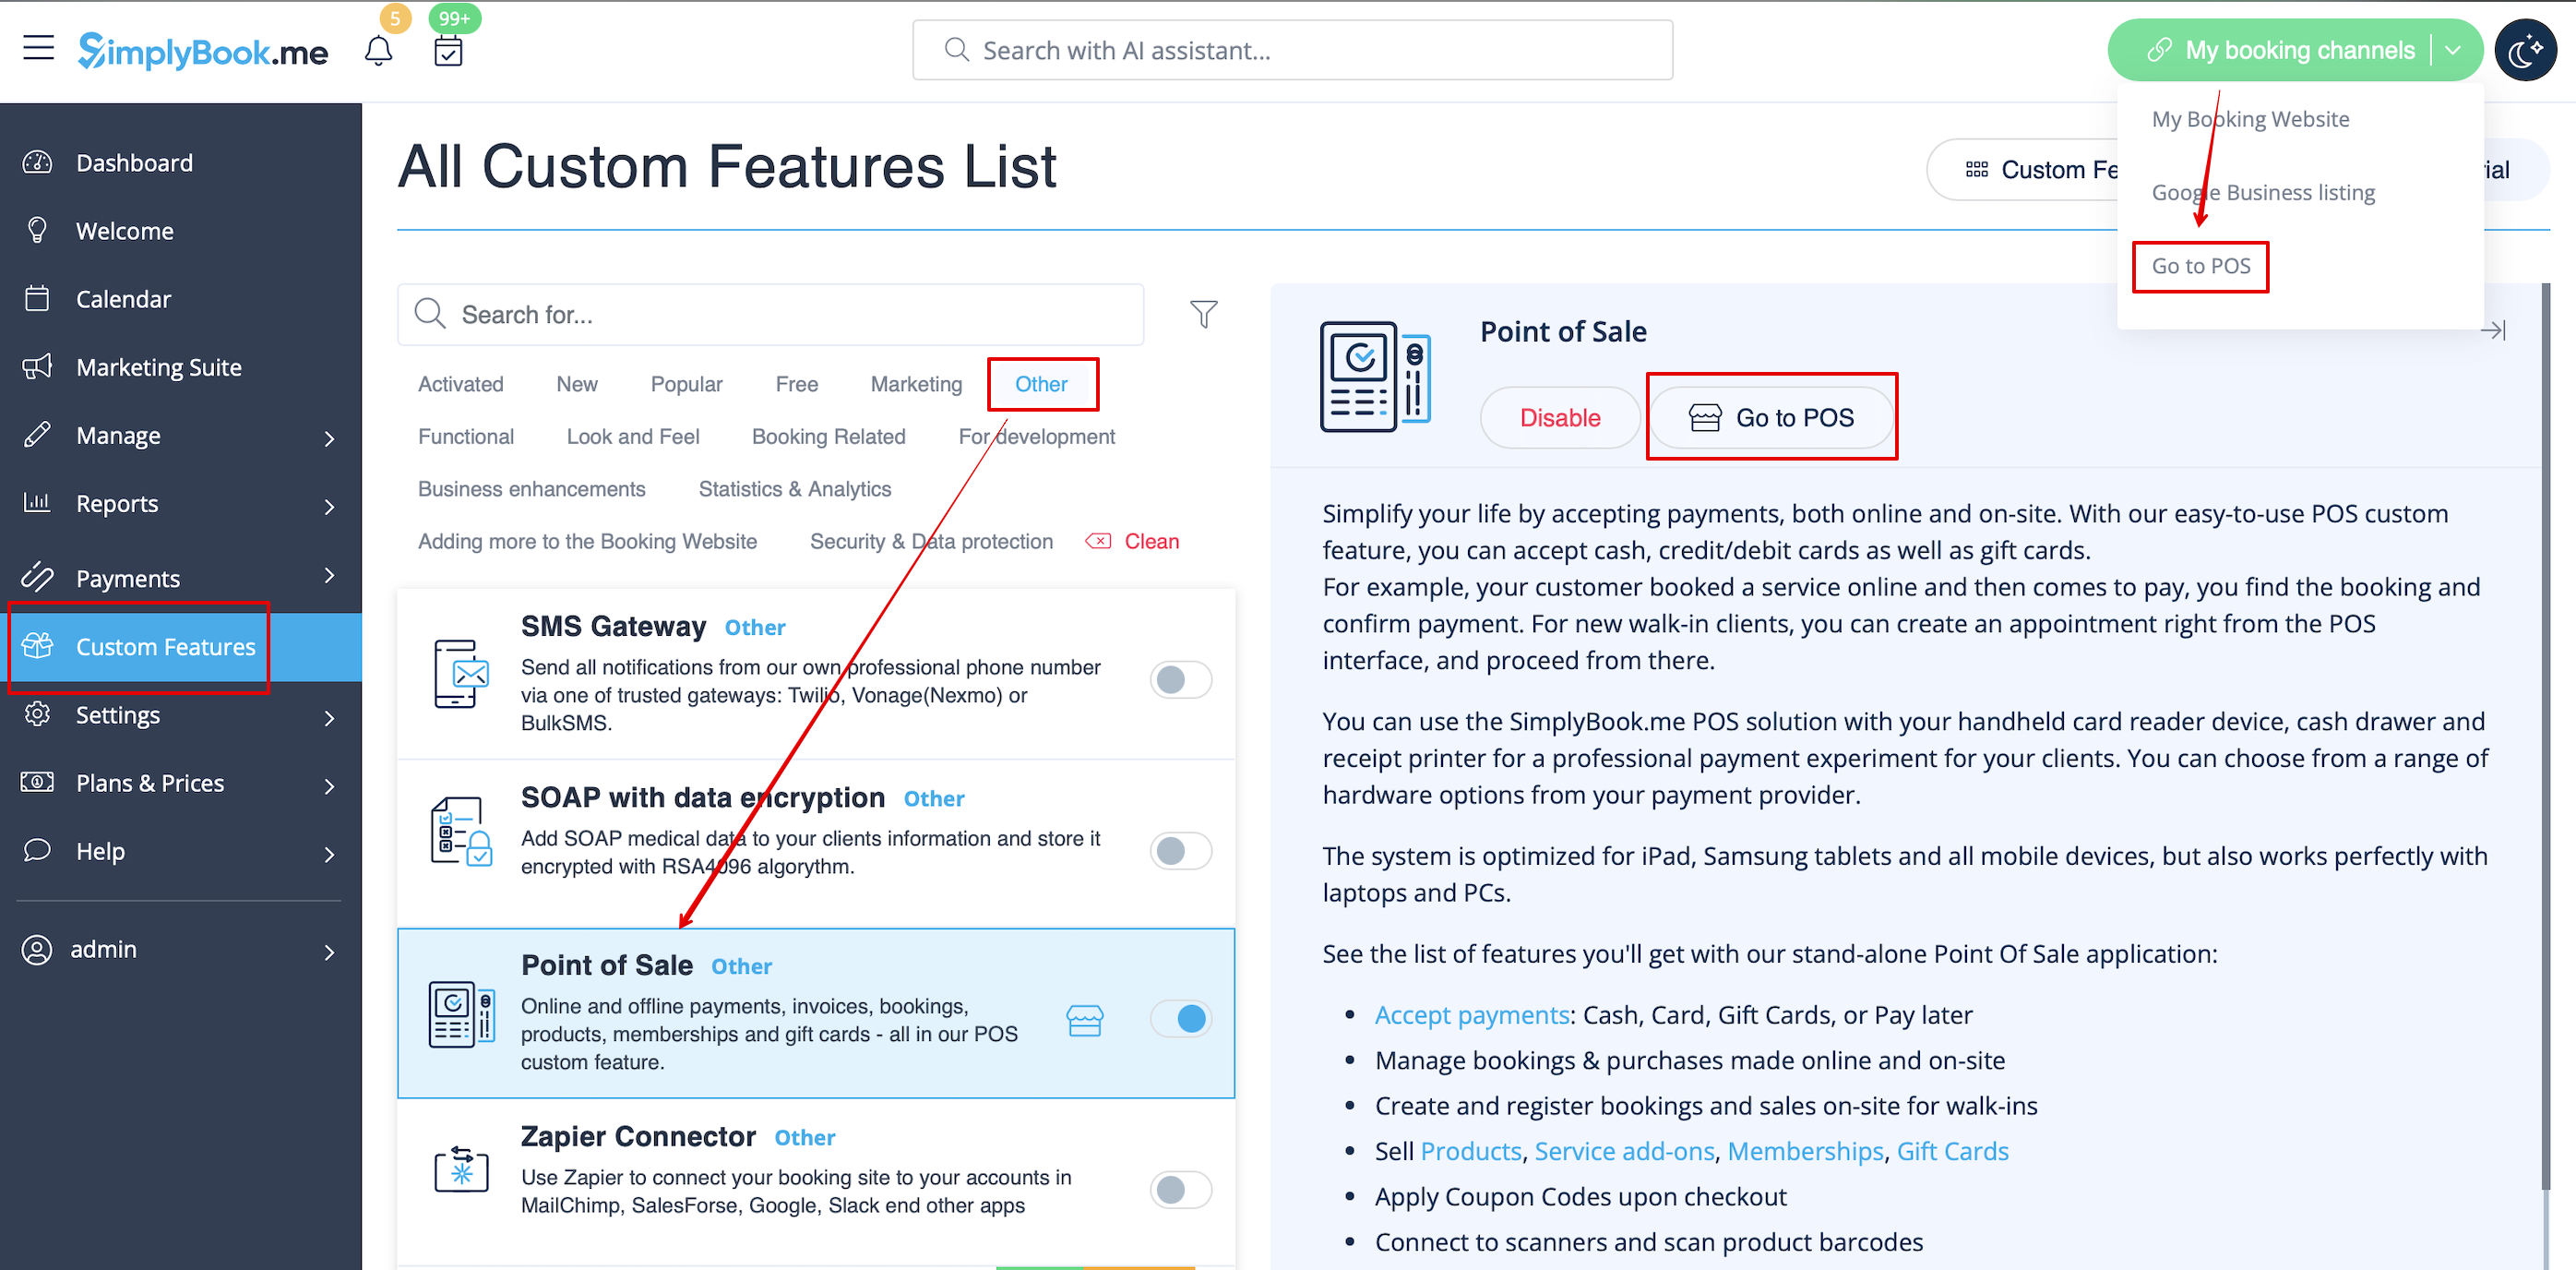
- 2. Click on “Go to POS” near this feature or in top right corner of your admin interface under "My booking channels".
- 3. You will see sale start page. (If you need to return here at some point please use “Home” icon in the top left corner.)

- 4. By default guest client is selected, but you can select a client from already existing ones in your system.

- 5. Or add new client directly from POS interface.

- 6. Select “New Sale” option to sell service/membership/package/product/add-on.


- 7. If you have selected service option new booking will be created. Please choose which service/class, provider, date and time do you wish to book. Add product(s), add-on(s) if necessary and click on “Save”.

- 8. On the next step you can add more options to the cart(left side of the page) or confirm all the selections by clicking on the “Checkout button”(right side of the page).

- 9. Select payment method to confirm the order.

- 10. If you have chosen “Credit card/Wire transfer/Cash” the order will be automatically confirmed meaning that you have received the money using the options mentioned.
- If you have selected “Pay later” the order will be displayed as “pending”. You will be able to click on “Checkout” once more and select another payment method to confirm the sale.


- 11. You can go to “Home” page and use filters to see today/upcoming/expired/non-booking/pending/paid, etc. orders. It is possible to click on the order to see the details/print the invoice.
