Translations:Custom Email custom feature/4/fr: Difference between revisions

From SimplyBook.me
Created page with "comment utiliser l' :1. Activez la fonctionnalité <span style="background-color:#d4f8e5; padding:5px; border-radius:5px;">E-mails personnalisés</span> sur votre page <span style="background-color:#d4f8e5; padding:5px; border-radius:5px;">Fonctionnalités personnalisées</span>, <span style="background-color:#d4f8e5; padding:5px; border-radius:5px;">dans la</span> section <span style="background-color:#d4f8e5; padding:5px; border-radius:5px;">Apparence</span>. File:Cu..."
 
(No difference)

Latest revision as of 14:45, 19 May 2025

Information about message (contribute)
This message has no documentation. If you know where or how this message is used, you can help other translators by adding documentation to this message.
Message definition (Custom Email custom feature)
;How to use
:1. Enable <span style="background-color:#d4f8e5; padding:5px; border-radius:5px;">Custom Email</span> feature on your <span style="background-color:#d4f8e5; padding:5px; border-radius:5px;">Custom features</span> page, <span style="background-color:#d4f8e5; padding:5px; border-radius:5px;">Look and Feel</span> section.
[[File:Custom email enable path redesigned.png|1200px|border|center|link=https://help.simplybook.me/images/4/40/Custom_email_enable_path_redesigned.png]]
<br><br>
:2. Click on <span style="background-color:#d4f8e5; padding:5px; border-radius:5px;">Create template</span> link to get to the editor and be able to setup your first template.
[[File:Custom domain settings path redesigned.png|1200px|border|center|link=https://help.simplybook.me/images/e/ef/Custom_domain_settings_path_redesigned.png]]
<br><br>
:3. Please select either <span style="background-color:#d4f8e5; padding:5px; border-radius:5px;">Create from templates</span> if you would like to select one of our beautiful premade options or <span style="background-color:#d4f8e5; padding:5px; border-radius:5px;">Create new empty</span> to start adding all the elements from scratch.<br>
:Add template name for the empty template type (pre-made templates can be renamed during editing) and hit <span style="background-color:#d4f8e5; padding:5px; border-radius:5px;">Create</span> button to get to the editing mode.
[[File:Create new custom email template path redesigned.png|1200px|border|center|link=https://help.simplybook.me/images/6/62/Create_new_custom_email_template_path_redesigned.png]]
<br><br>
:4. Add/Edit text blocks, add images, links, menus, columns, upload your company logo, use brand colors, and many more with the integrated editor.<br>
:Please use the tools on the right side of the page and visualization in the center, drag and drop, adjust the desired elements to get the necessary look.
[[File:Using editor custom email redesigned.png|1200px|border|center|link=https://help.simplybook.me/images/1/15/Using_editor_custom_email_redesigned.png]]
[[File:Using editor blocks custom email empty template redesigned.png|1200px|border|center|link=https://help.simplybook.me/images/9/92/Using_editor_blocks_custom_email_empty_template_redesigned.png]]
<br><br>
:5. You can also switch to <span style="background-color:#d4f8e5; padding:5px; border-radius:5px;">Mobile</span> mode to adjust email look for mobile phones.
[[File:Mobile view custom email redesigned.png|1200px|border|center|link=https://help.simplybook.me/images/8/84/Mobile_view_custom_email_redesigned.png]]
<br><br>
:6. It is important <span style="background-color:#d4f8e5; padding:5px; border-radius:5px;">to add <nowiki>{{content}}</nowiki> tag</span> to the desired place in the template as in real emails it will be replaced with the booking/purchase related information.<br>
:Without this tag the customization will not be applied to the notification and it will be sent as plain text.
:<span style="background-color:#ffe9e9; padding:5px; border-radius:5px;">'''Please note!''' All variables that are related to appointments or purchases data should only be used either in <span style="background-color:#d4f8e5; padding:5px; border-radius:5px;">Settings</span> -> <span style="background-color:#d4f8e5; padding:5px; border-radius:5px;">Email and SMS Settings</span> or in the corresponding <span style="background-color:#d4f8e5; padding:5px; border-radius:5px;">custom feature</span> options.</span>
[[File:Variables overview redesigned.png|1200px|border|center|link=https://help.simplybook.me/images/d/d3/Variables_overview_redesigned.png]]
<br><br>
:(optional) You can also use <span style="background-color:#d4f8e5; padding:5px; border-radius:5px;"><nowiki>{{name}}</nowiki></span> and <span style="background-color:#d4f8e5; padding:5px; border-radius:5px;"><nowiki>{{email}}</nowiki></span> tags here in case you need to reflect recipient's name and/or email separately from main notification content.
:<span style="background-color:#ffe9e9; padding:5px; border-radius:5px;">'''Please note!''' The templates are regularly automatically saved so you do not need to manually save them.</span>
[[File:Custom email tags path redesigned.png|1200px|border|center|link=https://help.simplybook.me/images/3/3b/Custom_email_tags_path_redesigned.png]]
<br><br>
:7. Use the <span style="background-color:#d4f8e5; padding:5px; border-radius:5px;">Preview</span> option at the bottom to check the look.
[[File:Preview option custom email redesigned.png|1200px|border|center|link=https://help.simplybook.me/images/f/ff/Preview_option_custom_email_redesigned.png]]
<br><br>
:8. (optional) In case you need similar designs with some small changes only or with different content please use <span style="background-color:#d4f8e5; padding:5px; border-radius:5px;">Clone</span> option to make a copy of the previously saved template.
[[File:Custom email clone template path redesigned.png|1200px|border|center|link=https://help.simplybook.me/images/e/e1/Custom_email_clone_template_path_redesigned.png]]
<br><br>
:9. Once all the necessary templates are ready please go back to <span style="background-color:#d4f8e5; padding:5px; border-radius:5px;">Custom features</span> -> <span style="background-color:#d4f8e5; padding:5px; border-radius:5px;">Look and Feel</span> -> <span style="background-color:#d4f8e5; padding:5px; border-radius:5px;">Custom email.</span>
<br><br>
:10. Please <span style="background-color:#d4f8e5; padding:5px; border-radius:5px;">select the template</span> for each <span style="background-color:#d4f8e5; padding:5px; border-radius:5px;">notification type.</span>
[[File:Select template per notification type custom email redesigned.png|1200px|border|center|link=https://help.simplybook.me/images/9/9a/Select_template_per_notification_type_custom_email_redesigned.png]]
<br><br>
:11. Send <span style="background-color:#d4f8e5; padding:5px; border-radius:5px;">test emails</span> to check the look with sample content.
[[File:Send test email option for custom email redesigned.png|1200px|border|center|link=https://help.simplybook.me/images/9/92/Send_test_email_option_for_custom_email_redesigned.png]]
<br><br>
:12. If you would like to set same template for all the notifications types within one block please use right-side <span style="background-color:#d4f8e5; padding:5px; border-radius:5px;">drop-down menu options.</span>
[[File:Set template for all notifications custom email redesigned.png|1200px|border|center|link=https://help.simplybook.me/images/5/56/Set_template_for_all_notifications_custom_email_redesigned.png]]
<br><br>
:13. In case you have various custom features with own notification types enabled you will be able to see the corresponding <span style="background-color:#d4f8e5; padding:5px; border-radius:5px;">blocks</span> in <span style="background-color:#d4f8e5; padding:5px; border-radius:5px;">Custom Email</span> settings.<br>
:Please open <span style="background-color:#d4f8e5; padding:5px; border-radius:5px;">each block</span> and set the templates for the notifications you wish to have the customized look. 
:Save settings once done.
[[File:Custom email cf templates list redesigned.png|1200px|border|center|link=https://help.simplybook.me/images/3/3a/Custom_email_cf_templates_list_redesigned.png]]
<br><br>
:14. It is also possible to use customized emails when you need to manually send some email from <span style="background-color:#d4f8e5; padding:5px; border-radius:5px;">Reports</span> -> <span style="background-color:#d4f8e5; padding:5px; border-radius:5px;">Bookings details</span> or <span style="background-color:#d4f8e5; padding:5px; border-radius:5px;">Reports</span> -> <span style="background-color:#d4f8e5; padding:5px; border-radius:5px;">Clients.</span><br>
:Just check the desired boxes there, click on <span style="background-color:#d4f8e5; padding:5px; border-radius:5px;">Send E-mail</span> button and <span style="background-color:#d4f8e5; padding:5px; border-radius:5px;">choose the template</span> to be applied in the first drop-down in the popup. Add subject and content. Send the message.
[[File:Apply custom email template from report redesigned.png|1200px|border|center|link=https://help.simplybook.me/images/2/22/Apply_custom_email_template_from_report_redesigned.png]]
<br><br><br><br>

comment utiliser l'

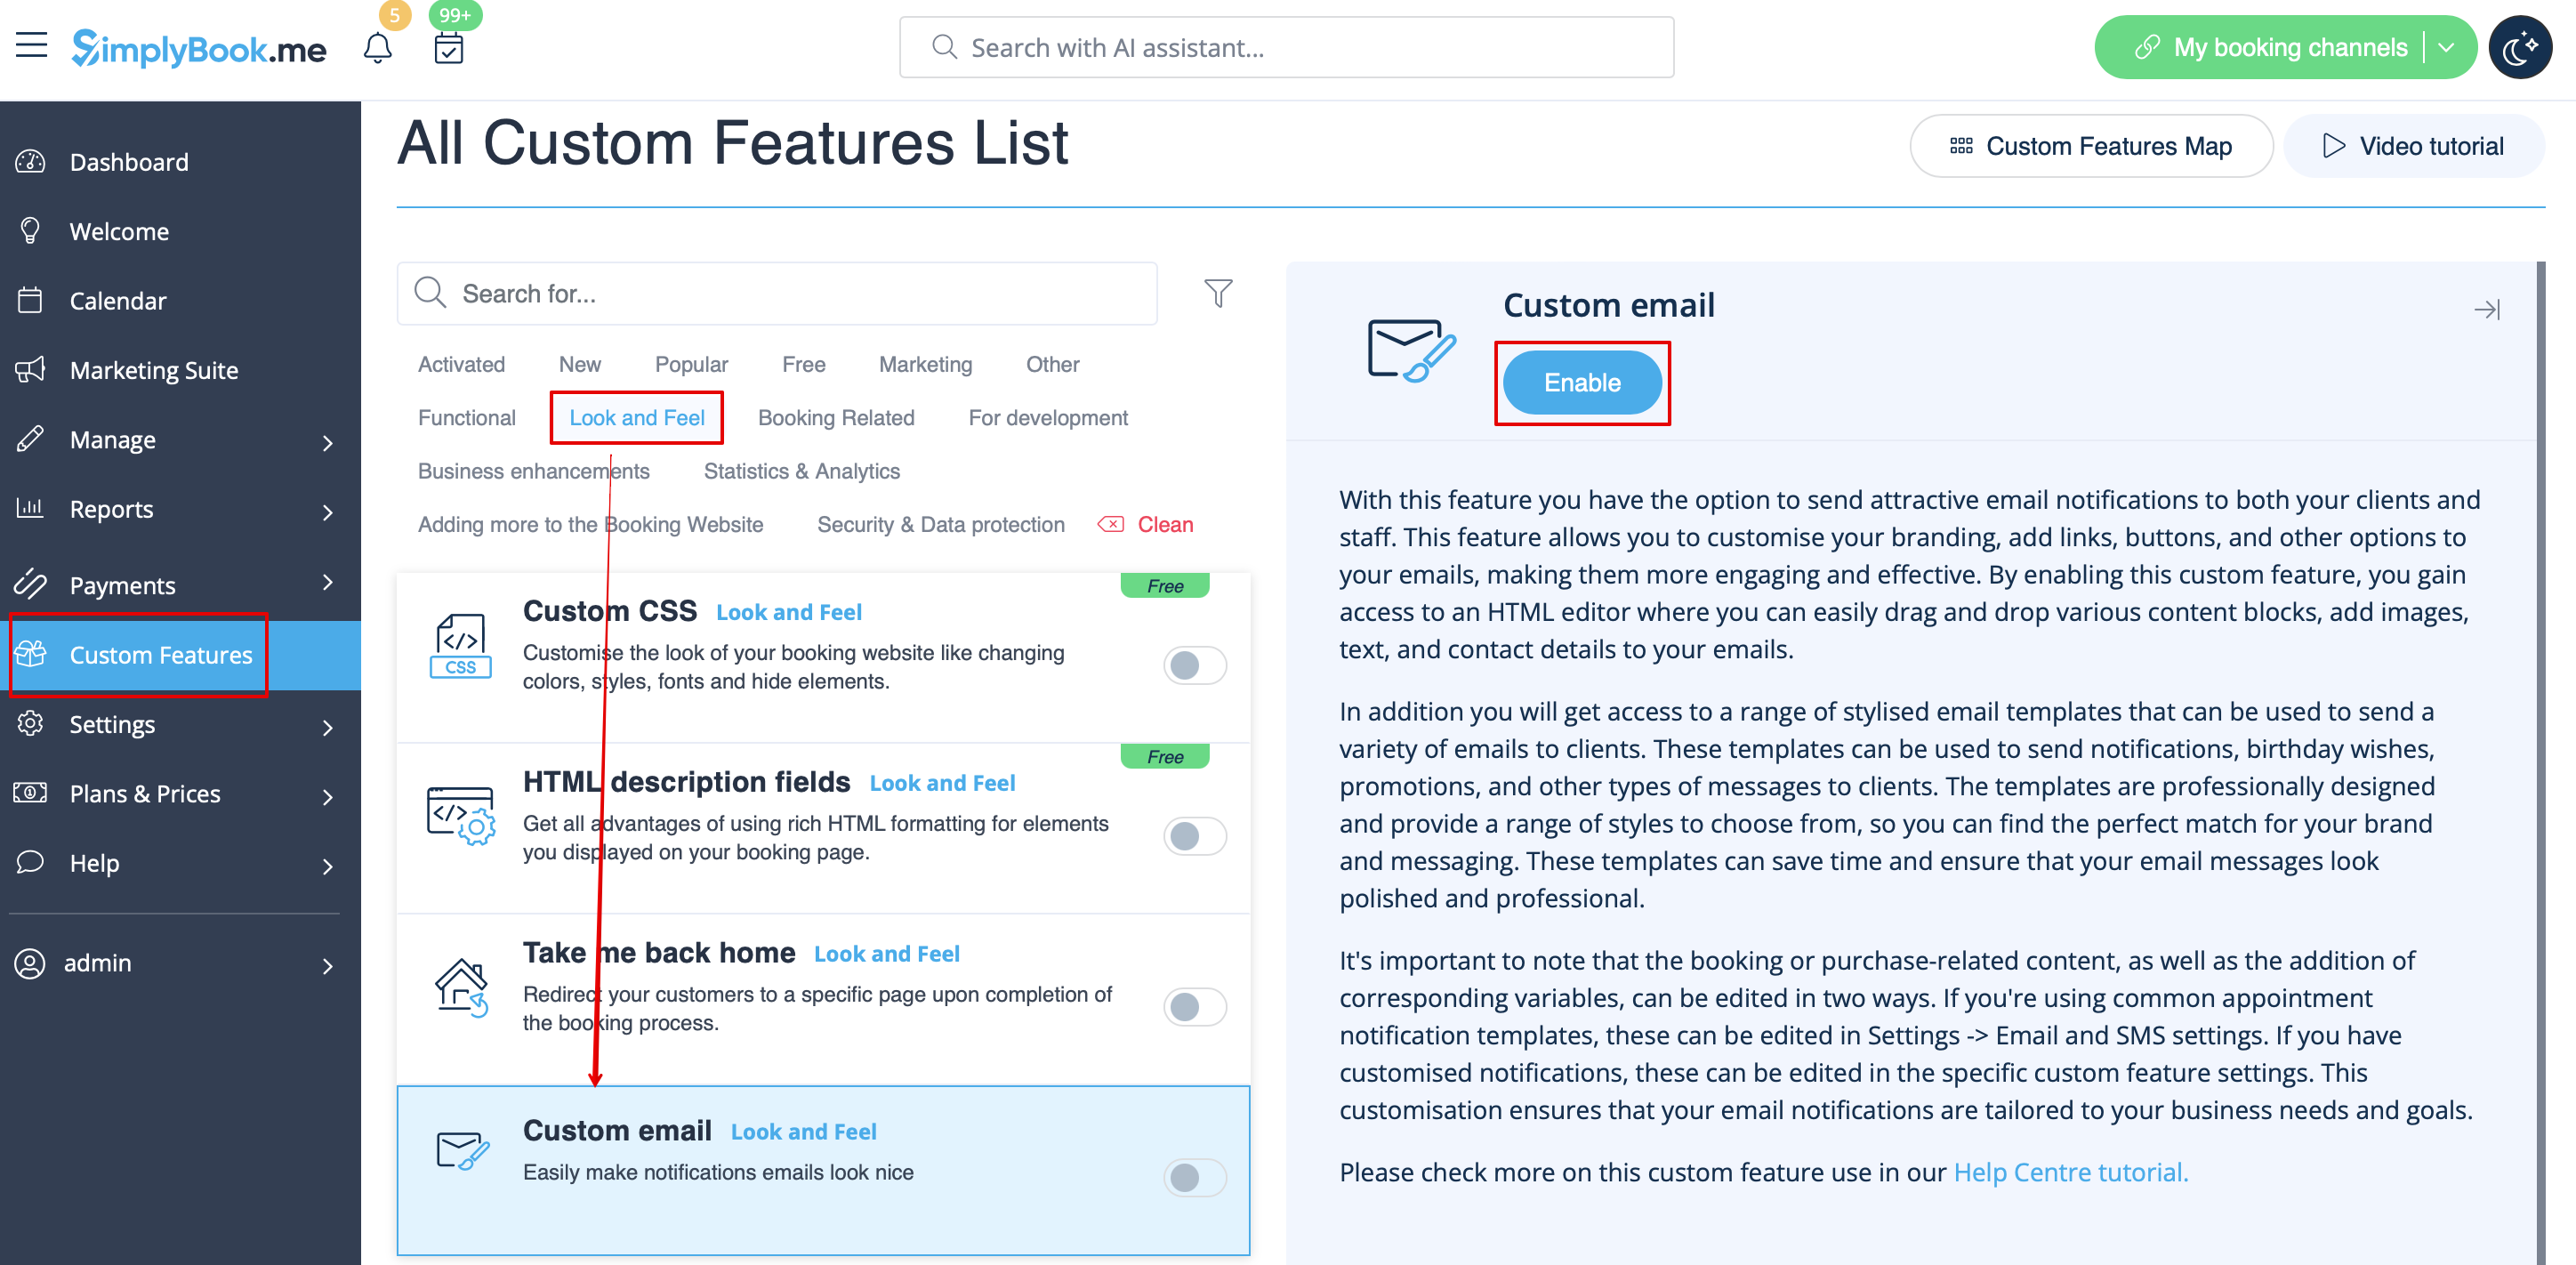
1. Activez la fonctionnalité E-mails personnalisés sur votre page Fonctionnalités personnalisées, dans la section Apparence.


2. Cliquez sur le lien Créer un modèle pour accéder à l'éditeur et pouvoir configurer votre premier modèle.


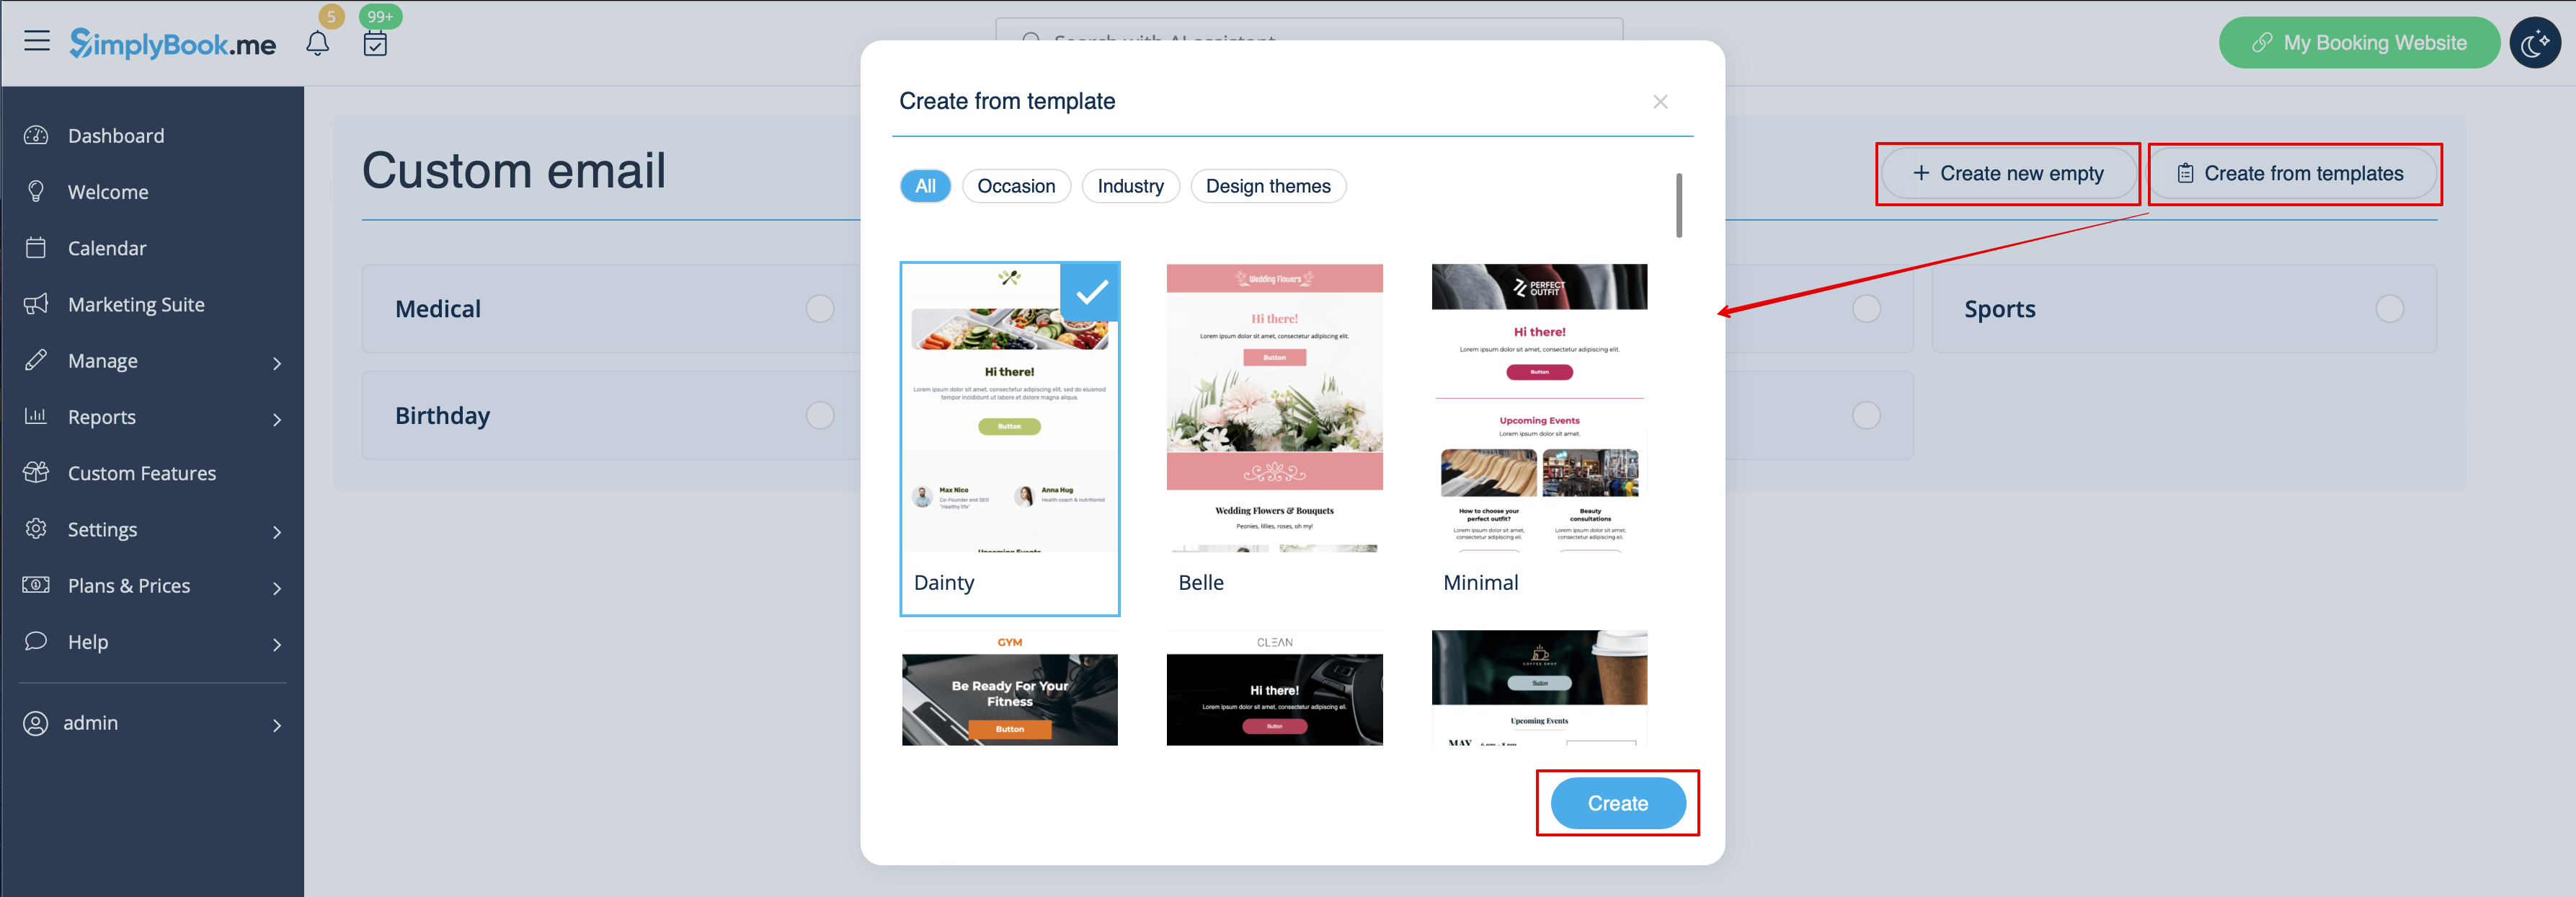
3. Veuillez sélectionner Créer à partir de modèles si vous souhaitez choisir l'une de nos superbes options prédéfinies ou Créer un nouveau modèle vide pour commencer à ajouter tous les éléments à partir de zéro.
Ajoutez un nom au modèle vide (les modèles prédéfinis peuvent être renommés lors de la modification) et cliquez sur le bouton Créer pour accéder au mode d'édition.


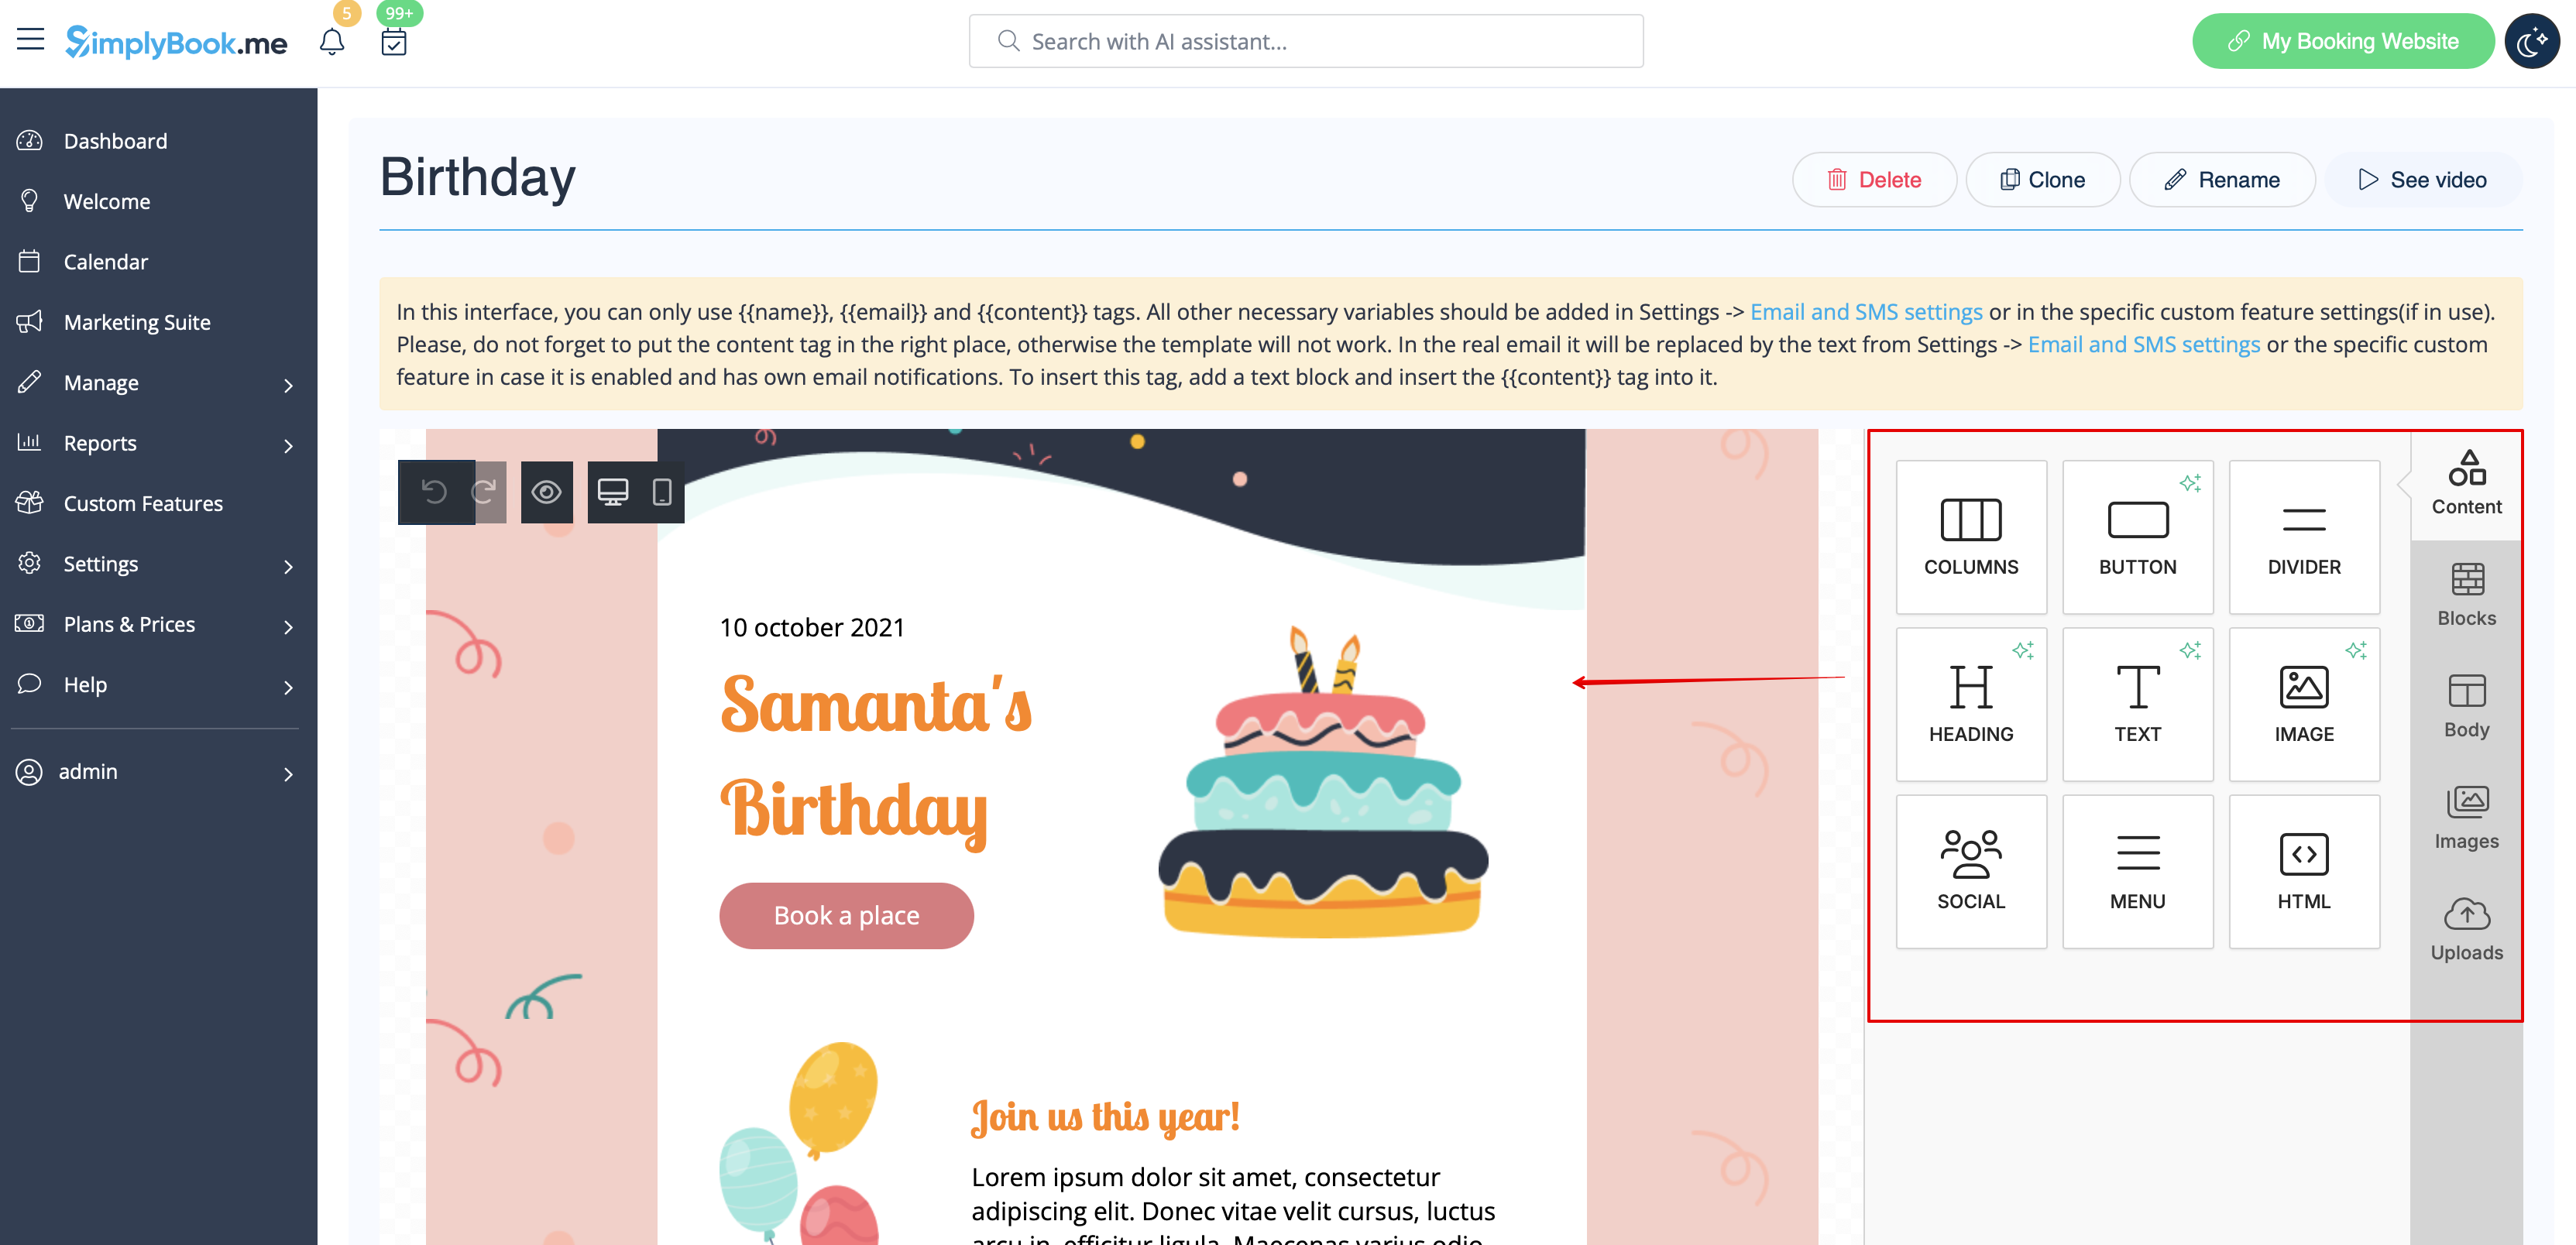
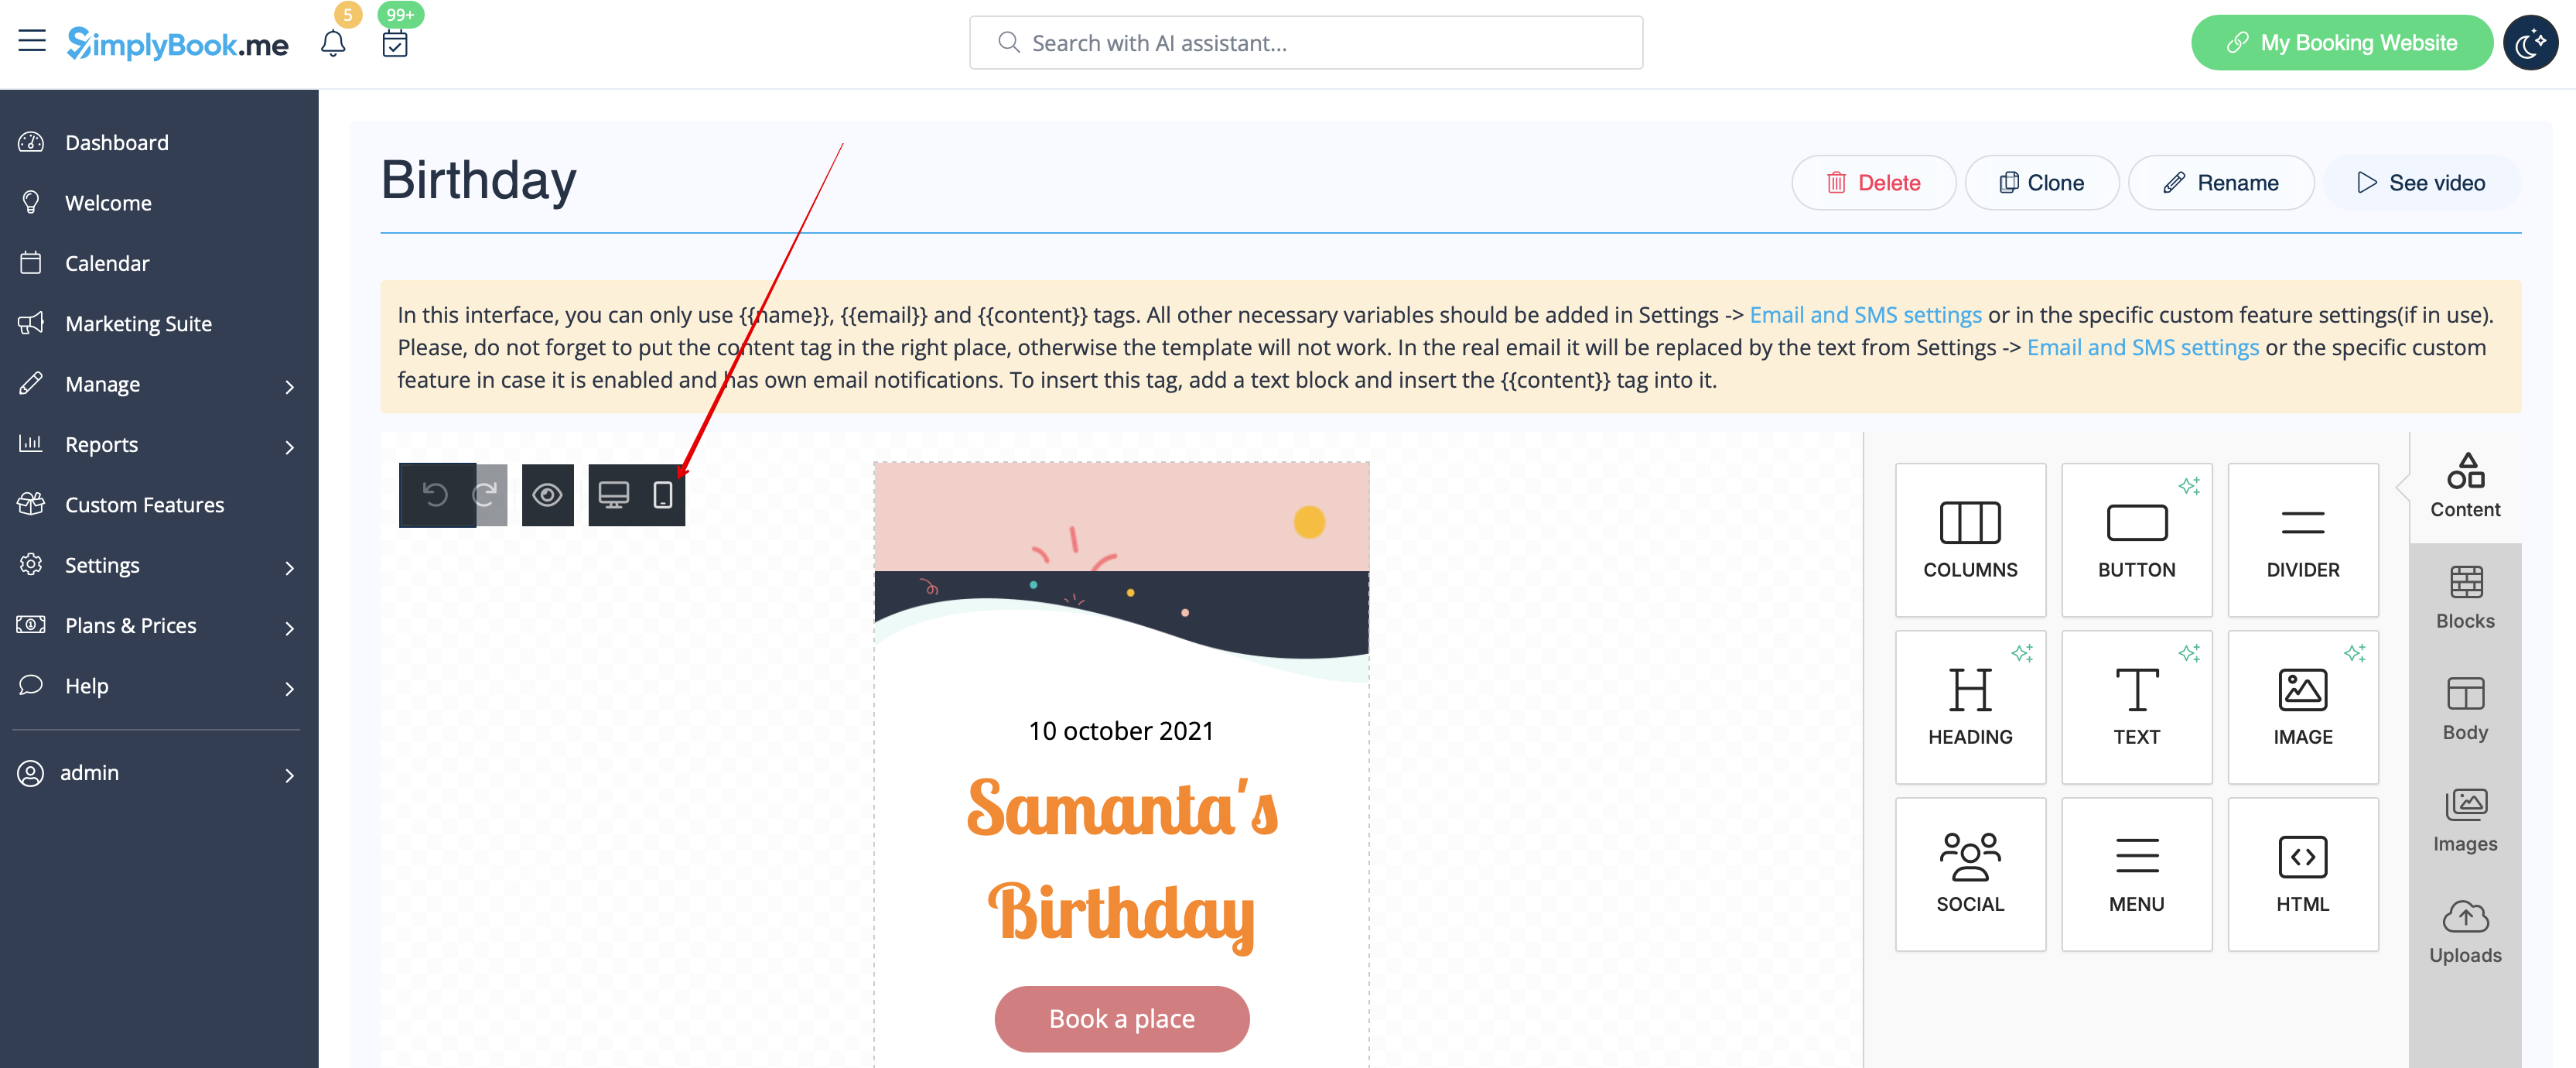
4. Ajoutez/modifiez des blocs de texte, ajoutez des images, des liens, des menus, des colonnes, téléchargez le logo de votre entreprise, utilisez les couleurs de votre marque et bien plus encore grâce à l'éditeur intégré.
Veuillez utiliser les outils situés à droite de la page et la visualisation au centre, glisser-déposer, ajuster les éléments souhaités pour obtenir l'apparence souhaitée.


5. Vous pouvez également passer en mode Mobile pour ajuster l'apparence des e-mails sur les téléphones mobiles.


6. Il est important d'ajouter la balise {{content}} à l'endroit souhaité dans le modèle, car dans les e-mails réels, elle sera remplacée par les informations relatives à la réservation/l'achat.
Sans cette balise, la personnalisation ne sera pas appliquée à la notification et celle-ci sera envoyée sous forme de texte brut.
Remarque importante ! Toutes les variables liées aux données de rendez-vous ou d'achat doivent être utilisées uniquement dans Paramètres -> Paramètres e-mail et SMS ou dans les options de fonctionnalités personnalisées correspondantes.


(facultatif) Vous pouvez également utiliser {{name}} et {{email}} ici si vous avez besoin d'indiquer le nom et/ou l'adresse e-mail du destinataire séparément du contenu principal de la notification.
Remarque : les modèles sont automatiquement enregistrés à intervalles réguliers, vous n'avez donc pas besoin de les enregistrer manuellement.


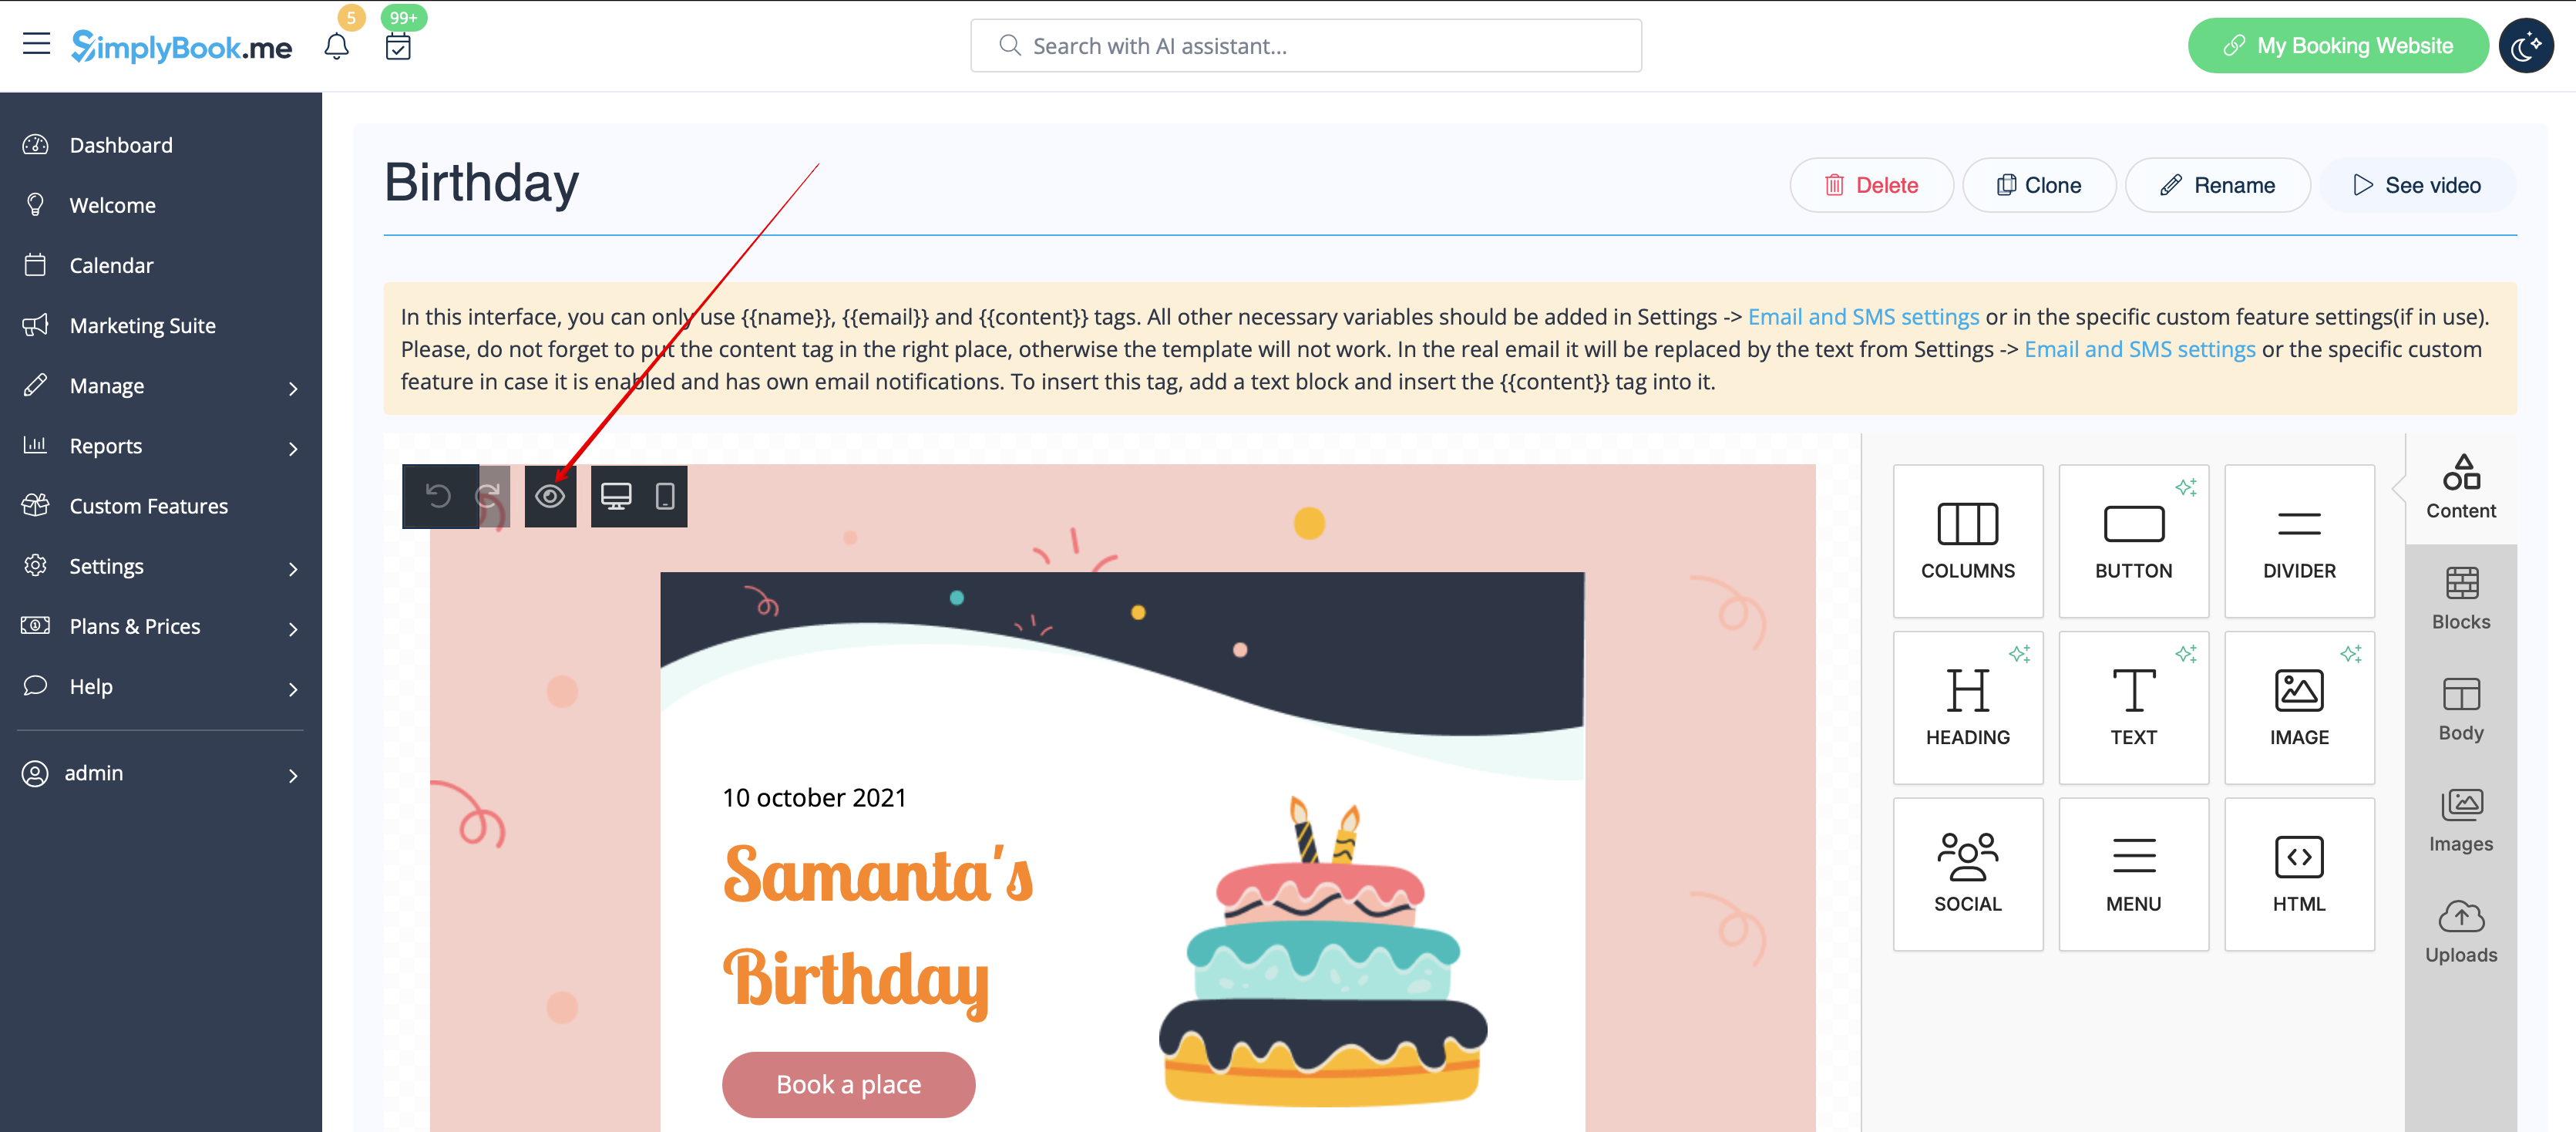
7. Utilisez l'option Aperçu en bas pour vérifier l'apparence.


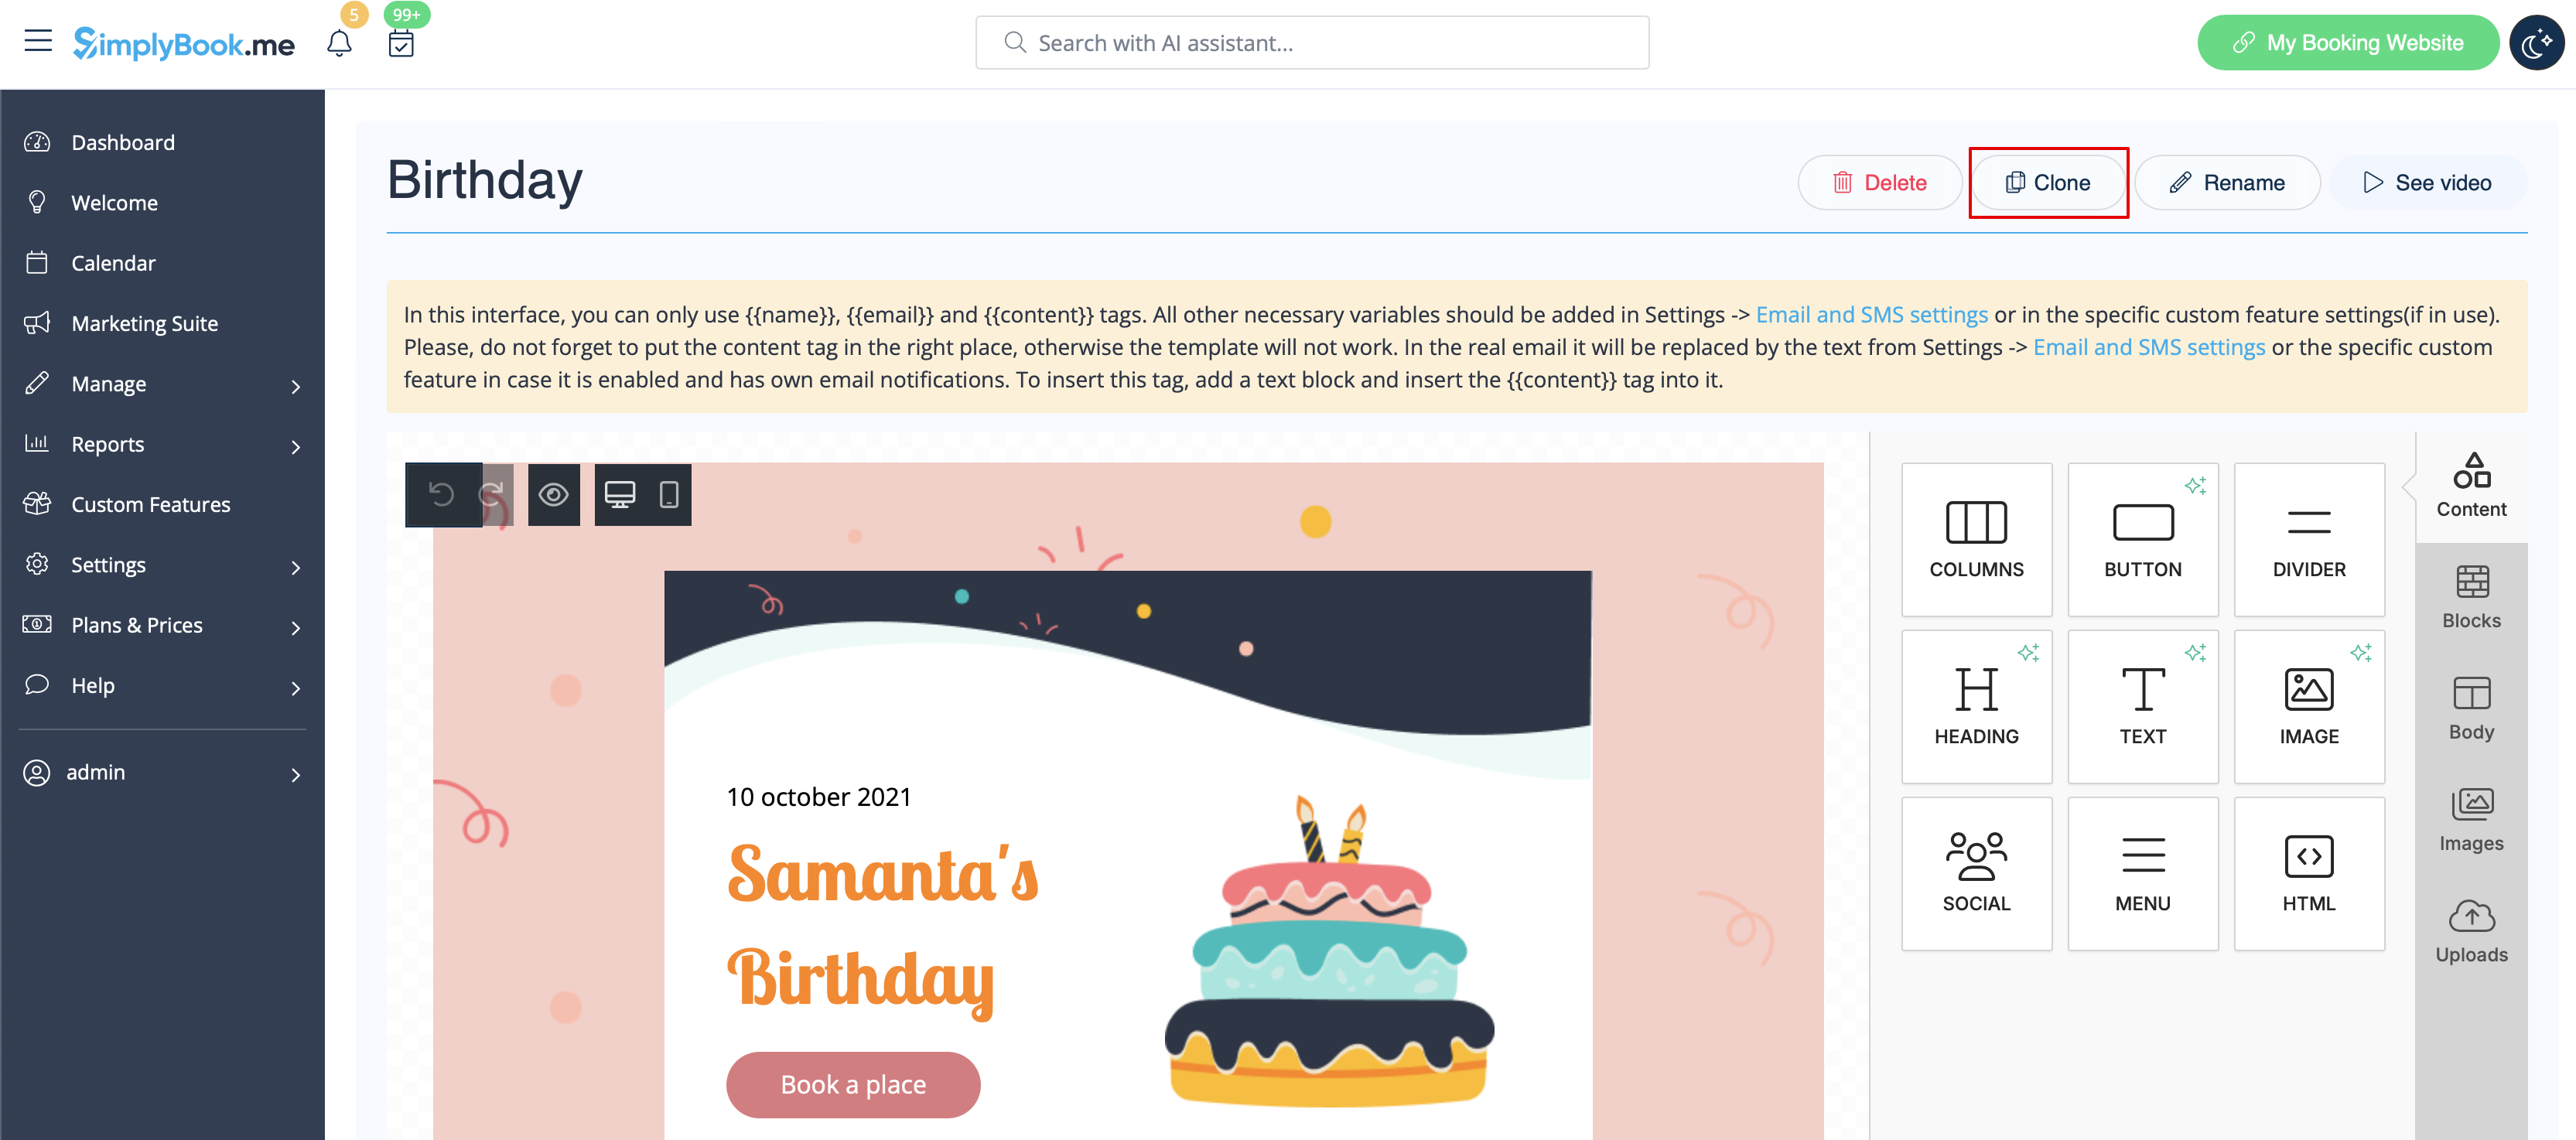
8. (facultatif) Si vous avez besoin de designs similaires avec seulement quelques petites modifications ou avec un contenu différent, veuillez utiliser l'option Cloner pour faire une copie du modèle précédemment enregistré.


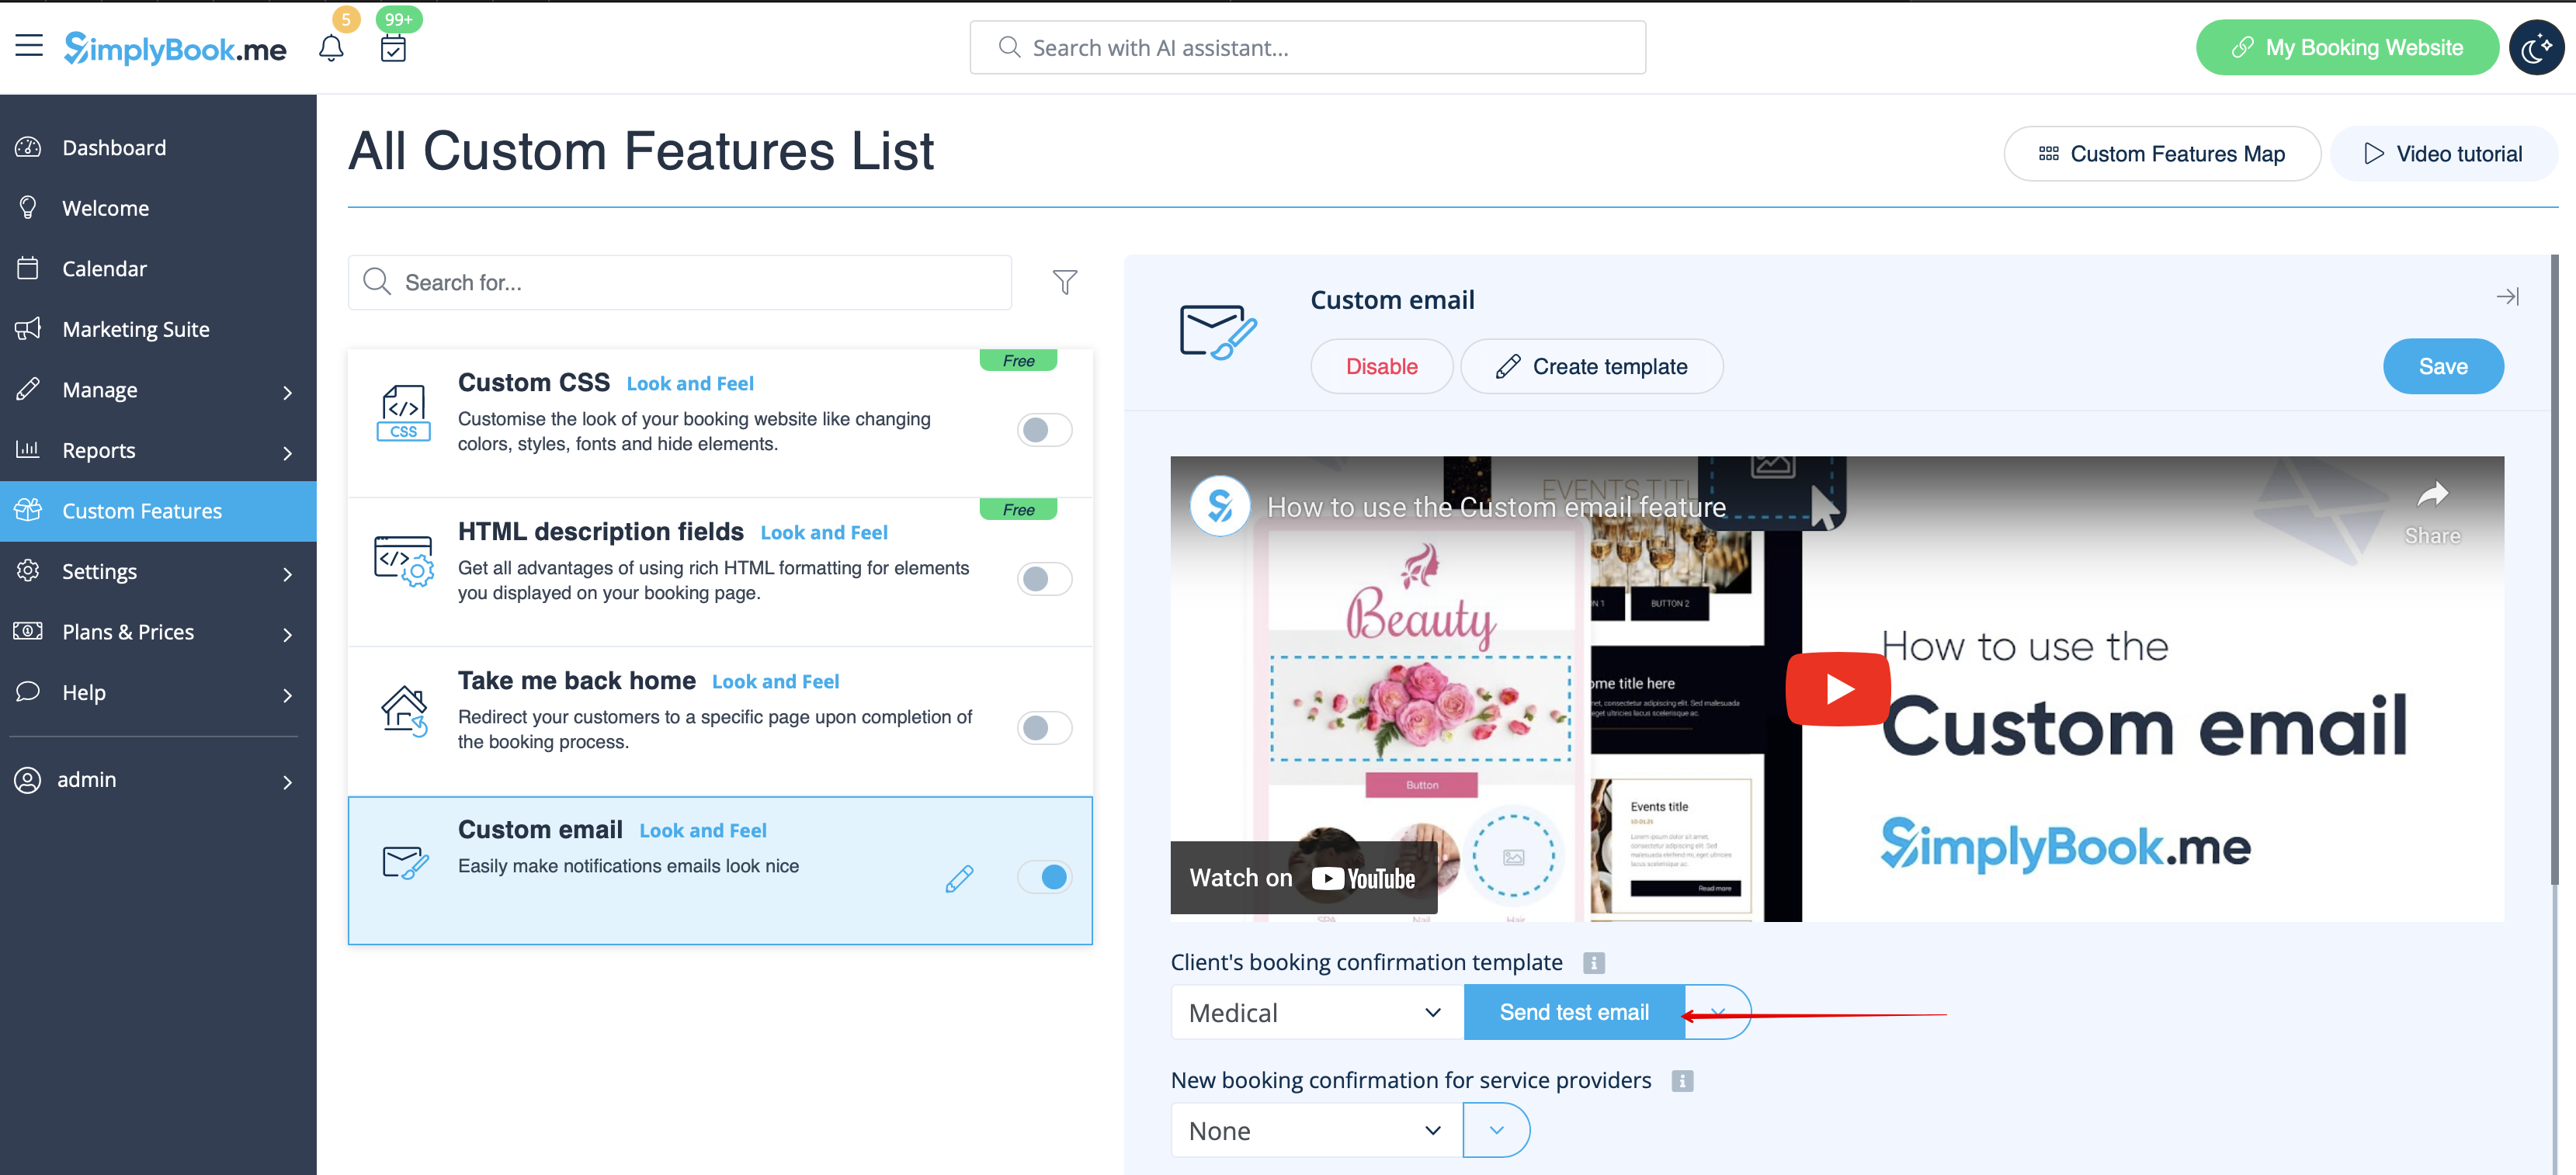
9. Une fois que tous les modèles nécessaires sont prêts, veuillez revenir à Fonctionnalités personnalisées -> Apparence - > E-mail personnalisé.


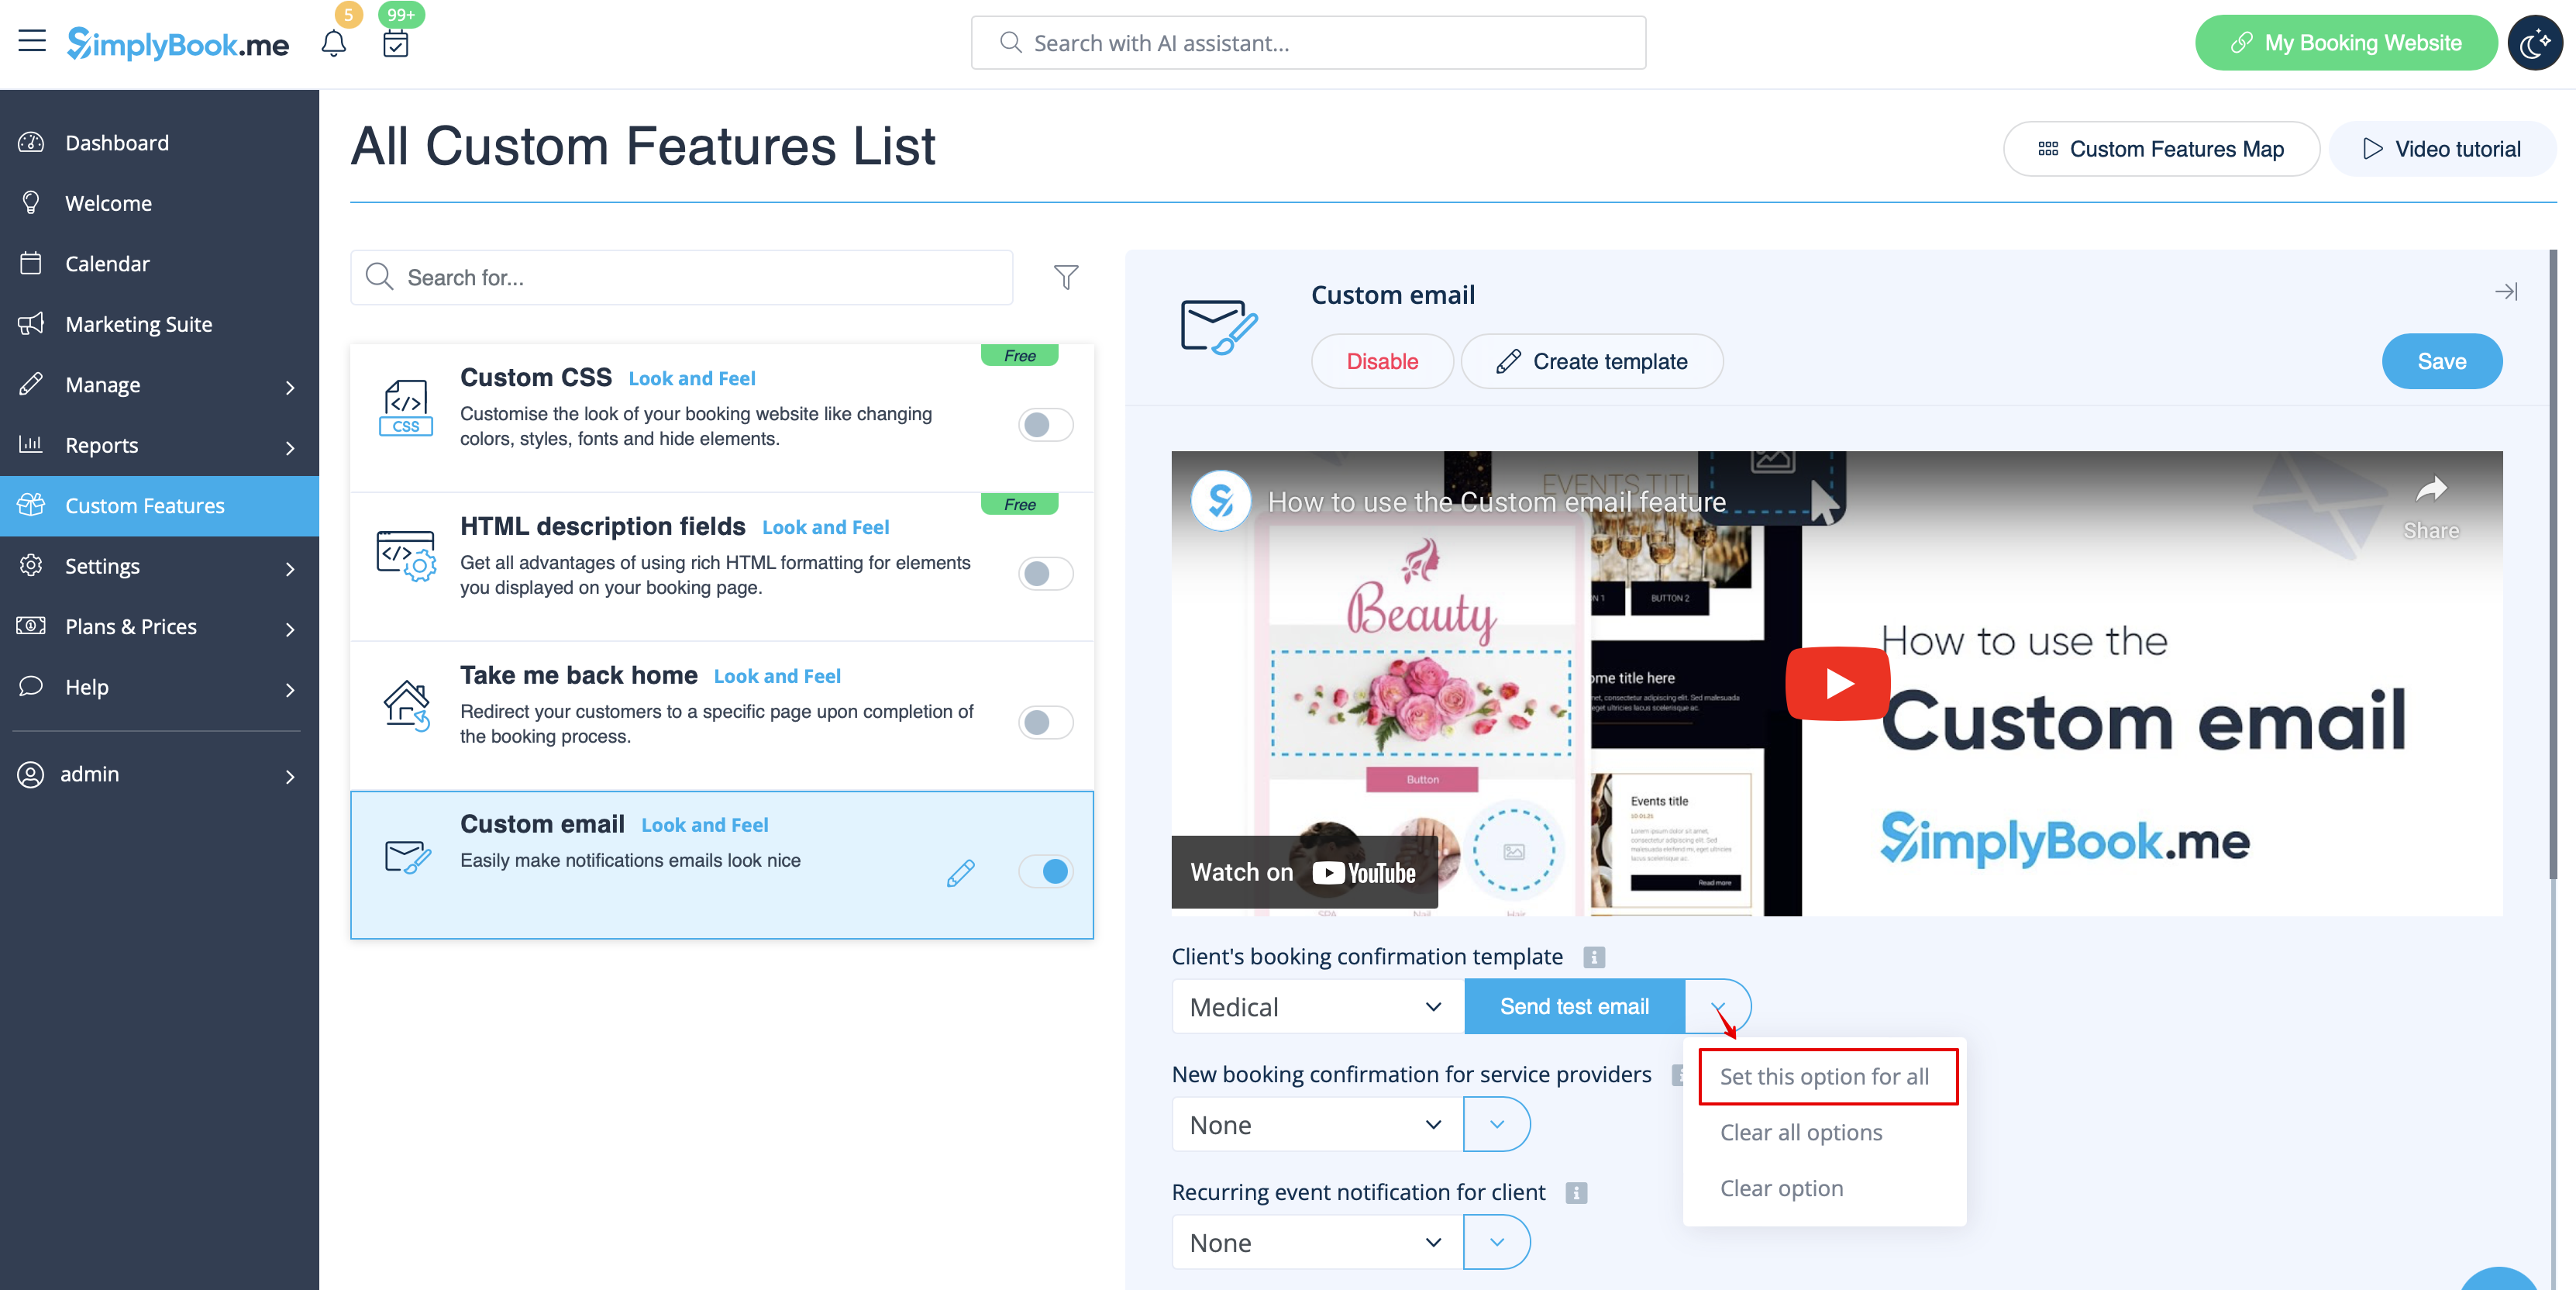
10. Veuillez sélectionner le modèle pour chaque type de notification.


11. Envoyez des e-mails de test pour vérifier l'apparence avec un exemple de contenu.


12. Si vous souhaitez définir le même modèle pour tous les types de notifications dans un bloc, veuillez utiliser les options du menu déroulant à droite .


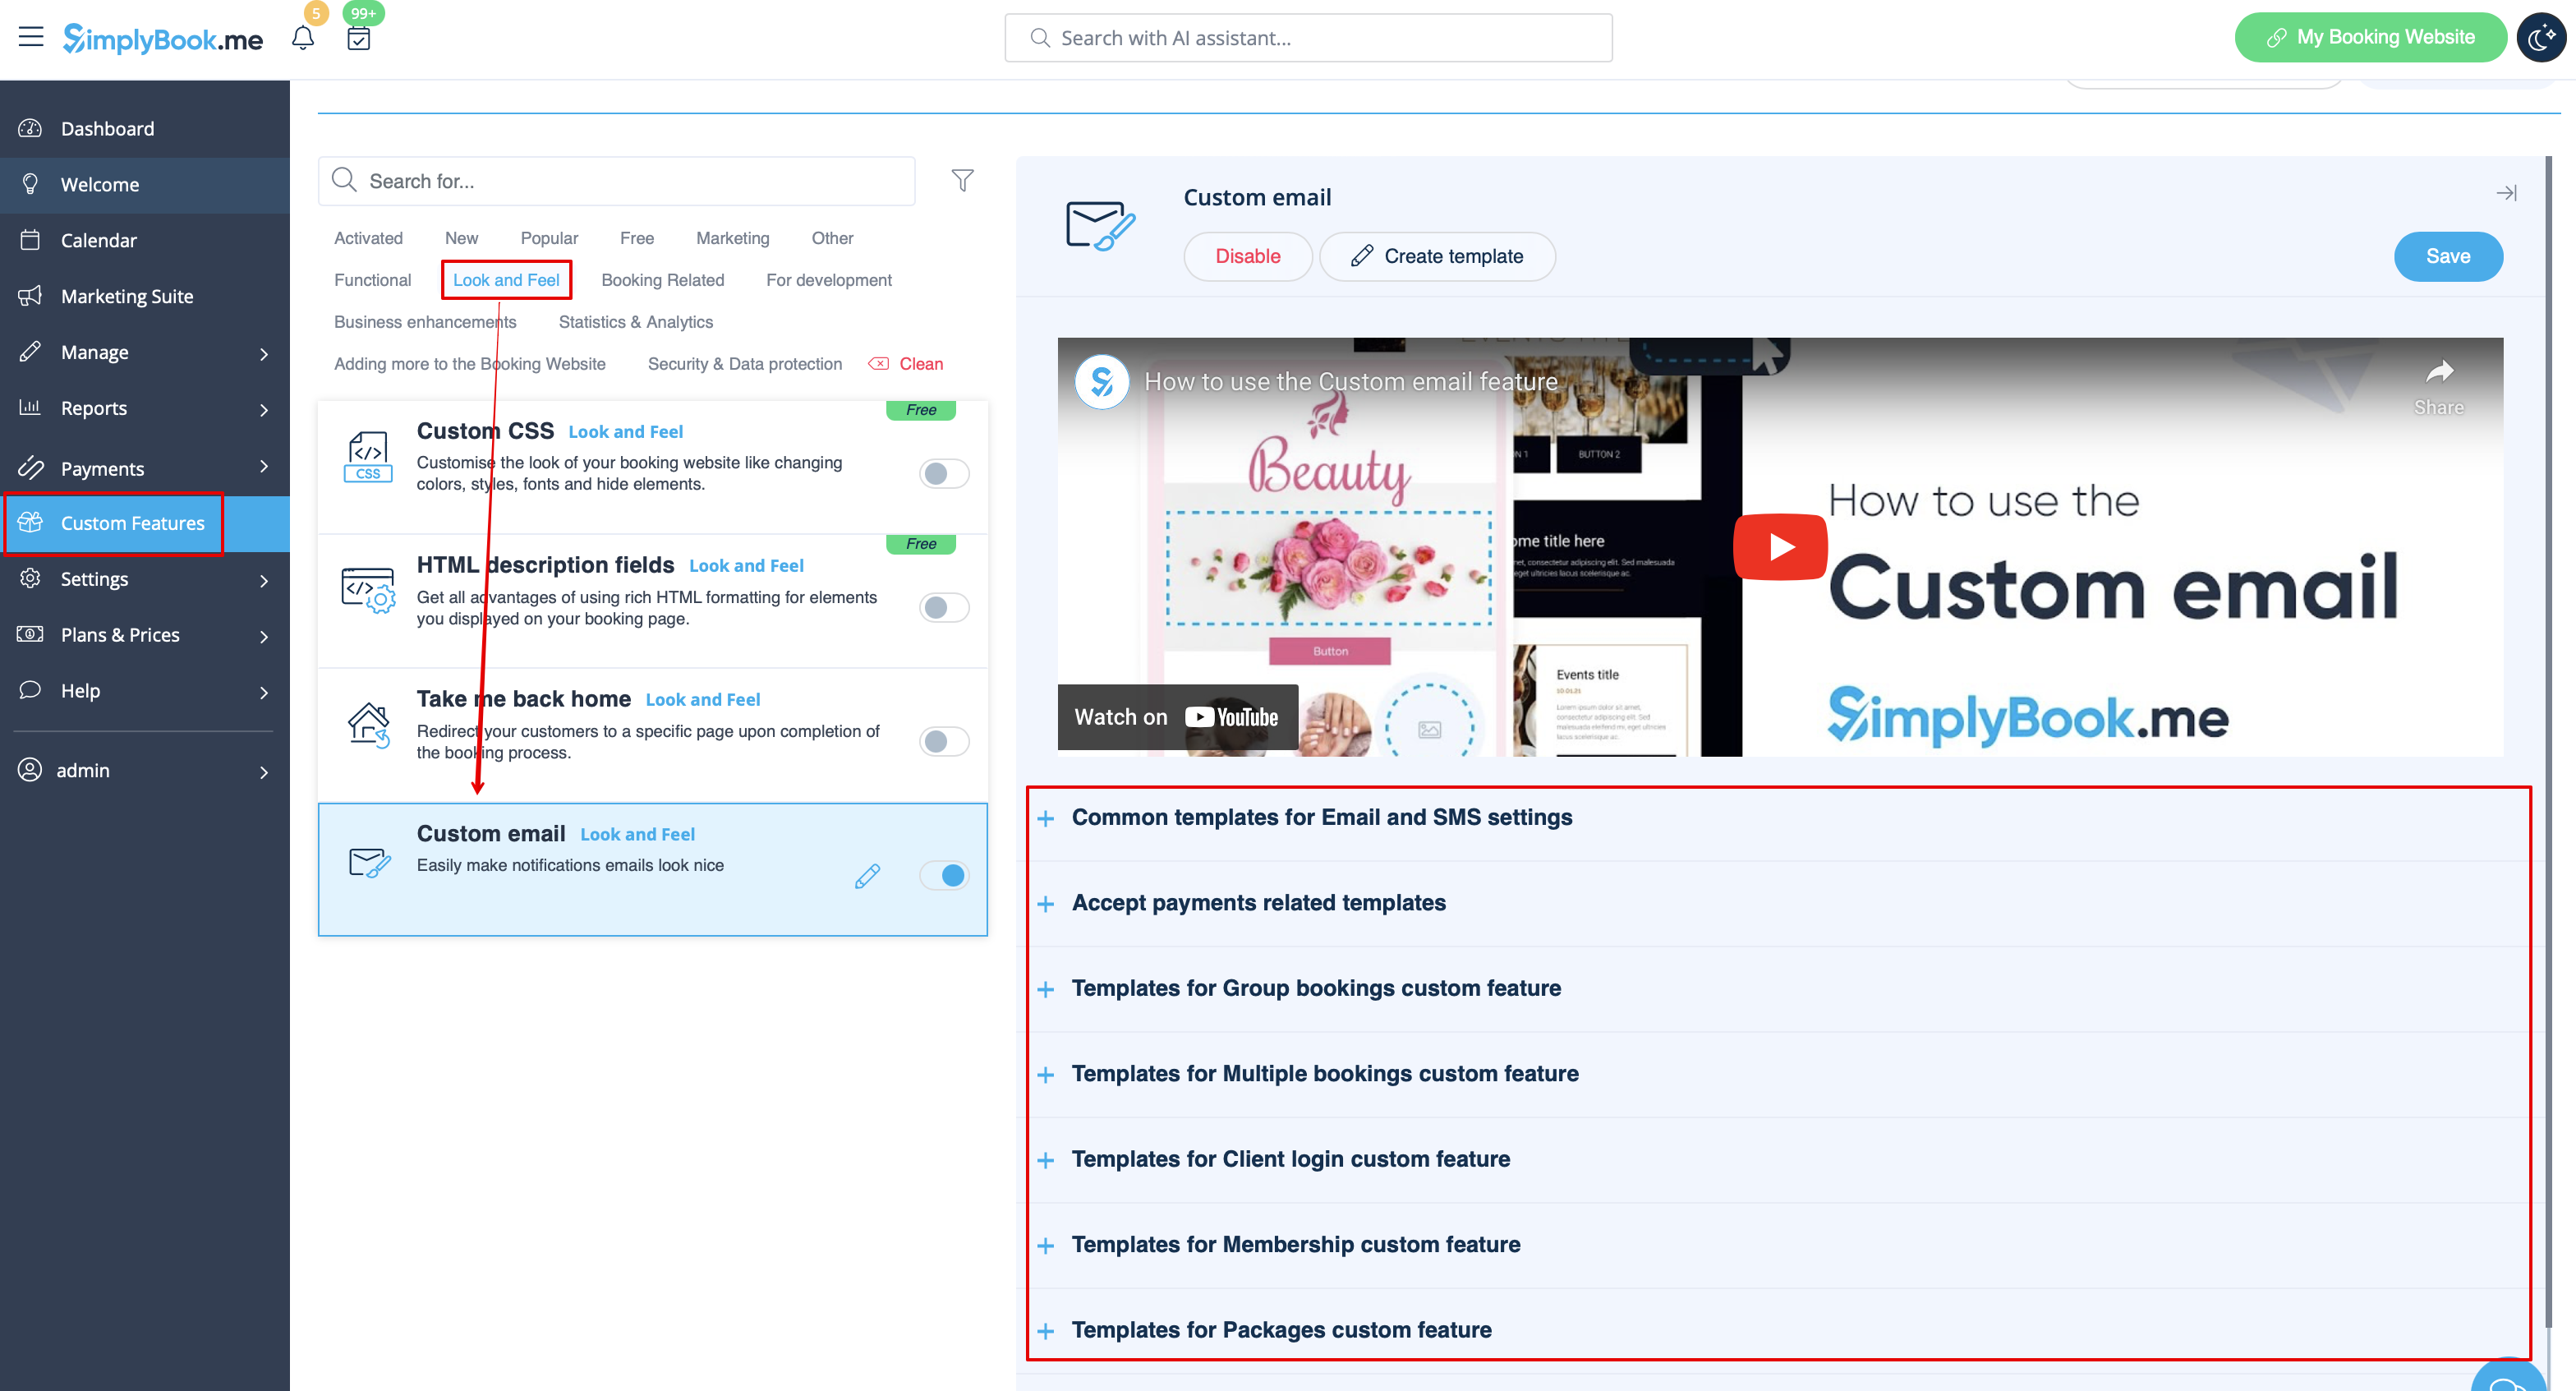
13. Si vous disposez de plusieurs fonctionnalités personnalisées avec vos propres types de notifications activés, vous pourrez voir les blocs correspondants dans les paramètres E-mail personnalisé.
Veuillez ouvrir chaque bloc et définir les modèles pour les notifications que vous souhaitez personnaliser.
Enregistrez les paramètres une fois que vous avez terminé.


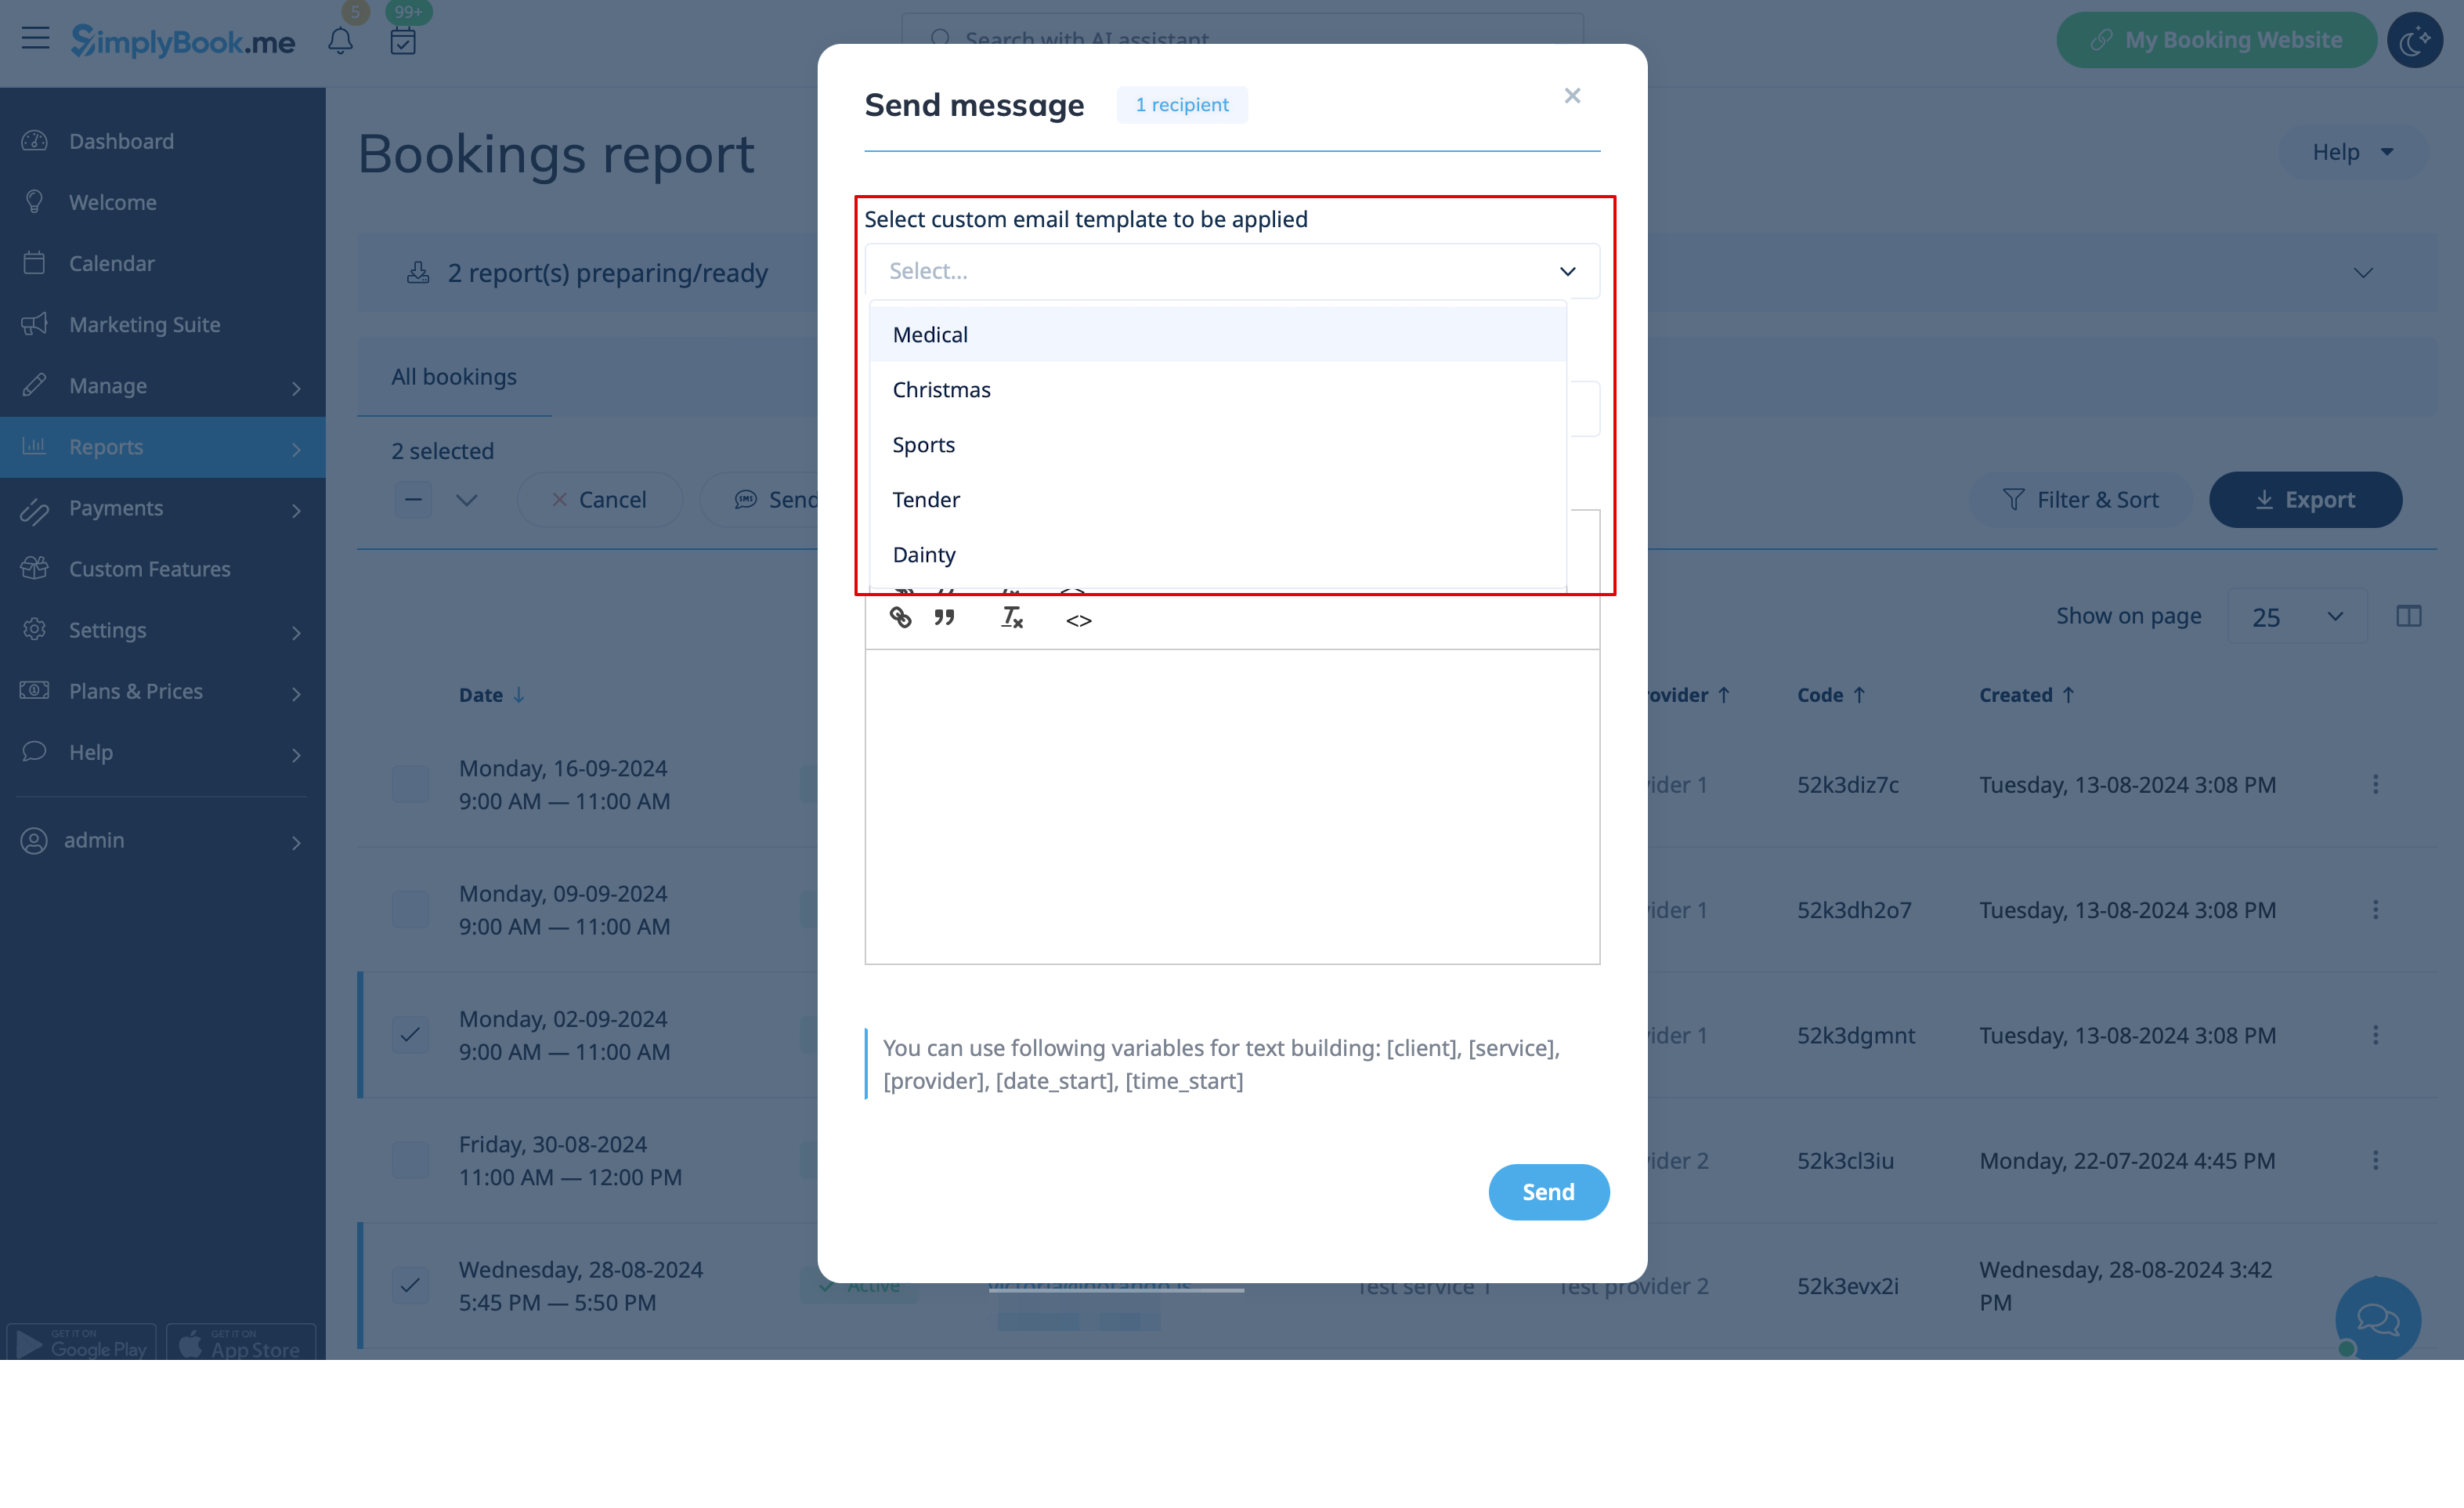
14. Il est également possible d'utiliser des e-mails personnalisés lorsque vous devez envoyer manuellement des e-mails à partir de Rapports -> Détails des réservations ou Rapports -> Clients.
Il suffit de cocher les cases souhaitées, de cliquer sur le bouton Envoyer un e-mail et de choisir le modèle à appliquer dans le premier menu déroulant de la fenêtre contextuelle. Ajoutez un objet et un contenu. Envoyez le message.