Translations:File Uploader - Google Drive custom feature/3/nl: Difference between revisions

From SimplyBook.me
Created page with "1. Schakel deze optie in op uw pagina <span style="background-color:#d4f8e5; padding:5px; border-radius:5px;">Aangepaste functies</span> -> <span style="background-color:#d4f8e5; padding:5px; border-radius:5px;">Meer toevoegen aan de</span> categorie <span style="background-color:#d4f8e5; padding:5px; border-radius:5px;">Boekingswebsite</span>. File:File upload enable path redesigned.png|1200px|center|link=https://help.simplybook.me/images/8/8c/File_upload_enable_pa..."
 
(No difference)

Latest revision as of 14:58, 19 May 2025

Information about message (contribute)
This message has no documentation. If you know where or how this message is used, you can help other translators by adding documentation to this message.
Message definition (File Uploader - Google Drive custom feature)
1. Enable this option on your <span style="background-color:#d4f8e5; padding:5px; border-radius:5px;">Custom features</span> page -> <span style="background-color:#d4f8e5; padding:5px; border-radius:5px;">Adding more to the Booking Website</span> category.
[[File:File upload enable path redesigned.png|1200px|center|link=https://help.simplybook.me/images/8/8c/File_upload_enable_path_redesigned.png]]
<br><br>
2. On the right side of the page you will see it settings. Click on <span style="background-color:#d4f8e5; padding:5px; border-radius:5px;">Authorize</span> to connect to your Google Drive and give the requested permissions.
[[File:File uploader auth path redesigned.png|1200px|center|link=https://help.simplybook.me/images/2/2b/File_uploader_auth_path_redesigned.png]]
<br><br>
3. After successful connection you will be able to see its status and use the link to the files folder on your Google Drive from the same Custom Features page.
[[File:File upload authorized redesigned.png|1200px|center|link=https://help.simplybook.me/images/1/11/File_upload_authorized_redesigned.png]]
<br><br>
4. Navigate to <span style="background-color:#d4f8e5; padding:5px; border-radius:5px;">Manage</span> -> <span style="background-color:#cdeffc; padding:5px; border-radius:5px;">[[Special:MyLanguage/Intake_Forms_custom_feature|Intake forms]]</span> or <span style="background-color:#d4f8e5; padding:5px; border-radius:5px;">Manage</span> -> <span style="background-color:#cdeffc; padding:5px; border-radius:5px;">[[Special:MyLanguage/Client_Fields_Custom_Feature|Client fields]]</span> (or enable one or both features if needed) and create <span style="background-color:#d4f8e5; padding:5px; border-radius:5px;">File Uploader - Google Drive</span> form.
Make it obligatory or not depending on your needs.
[[File:File type for intake form redesigned.png|1200px|center|link=https://help.simplybook.me/images/d/d3/File_type_for_intake_form_redesigned.png]]
<br><br>
5. After you have created the desired forms the clients will be able to upload their files during the booking process <span style="background-color:#cdeffc; padding:5px; border-radius:5px;">([[Special:MyLanguage/Intake_Forms_custom_feature|Intake forms]])</span>
[[File:Cloud storage client side booking form.png|1200px|center]]
<br><br>
or sign up <span style="background-color:#cdeffc; padding:5px; border-radius:5px;">([[Special:MyLanguage/Client_Fields_Custom_Feature|Client fields]])</span>
[[File:Cloud storage client side sign up.png|1200px|center]]
<br><br>
6. From admin side you will be able to see and download the files either <span style="background-color:#d4f8e5; padding:5px; border-radius:5px;">in the booking popup</span> on the Calendar page if it is an <span style="background-color:#cdeffc; padding:5px; border-radius:5px;">[[Special:MyLanguage/Intake_Forms_custom_feature|intake form]]</span>
[[File:View file in intake form in booking redesigned.png|1200px|center|link=https://help.simplybook.me/images/a/a9/View_file_in_intake_form_in_booking_redesigned.png]]
<br><br>
or from <span style="background-color:#d4f8e5; padding:5px; border-radius:5px;">Manage</span> -> <span style="background-color:#d4f8e5; padding:5px; border-radius:5px;">Clients</span> -> <span style="background-color:#d4f8e5; padding:5px; border-radius:5px;">edit the client record</span> if you have it as a <span style="background-color:#cdeffc; padding:5px; border-radius:5px;">[[Special:MyLanguage/Client_Fields_Custom_Feature|client field]].</span>
[[File:Client filed file in client profile redesigned.png|1200px|center|link=https://help.simplybook.me/images/5/50/Client_filed_file_in_client_profile_redesigned.png]]
<br><br>
And, for sure, you will be able to manually upload the files during the new booking or client record creation/editing from admin side if necessary.
<br><br>
7. If you are also using <span style="background-color:#cdeffc; padding:5px; border-radius:5px;">[[Special:MyLanguage/SOAP_with_Encryption_custom_feature| SOAP with Encryption]]</span> custom feature you can also enable attaching the file in the SOAP feature settings on your Custom Features page.
[[File:Attach files to soap enable redesigned.png|1200px|border|center|link=https://help.simplybook.me/images/0/06/Attach_files_to_soap_enable_redesigned.png]]
<br><br>
As the result you will have the corresponding form in <span style="background-color:#d4f8e5; padding:5px; border-radius:5px;">Manage</span>  -> <span style="background-color:#d4f8e5; padding:5px; border-radius:5px;">Clients</span>  -> <span style="background-color:#d4f8e5; padding:5px; border-radius:5px;">SOAP info</span>  -> <span style="background-color:#d4f8e5; padding:5px; border-radius:5px;">Attach a file.</span> 
[[File:File in soap in edit clirent form redesigned.png|1200px|border|center|link=https://help.simplybook.me/images/1/1d/File_in_soap_in_edit_clirent_form_redesigned.png]]
<br><br><br><br>

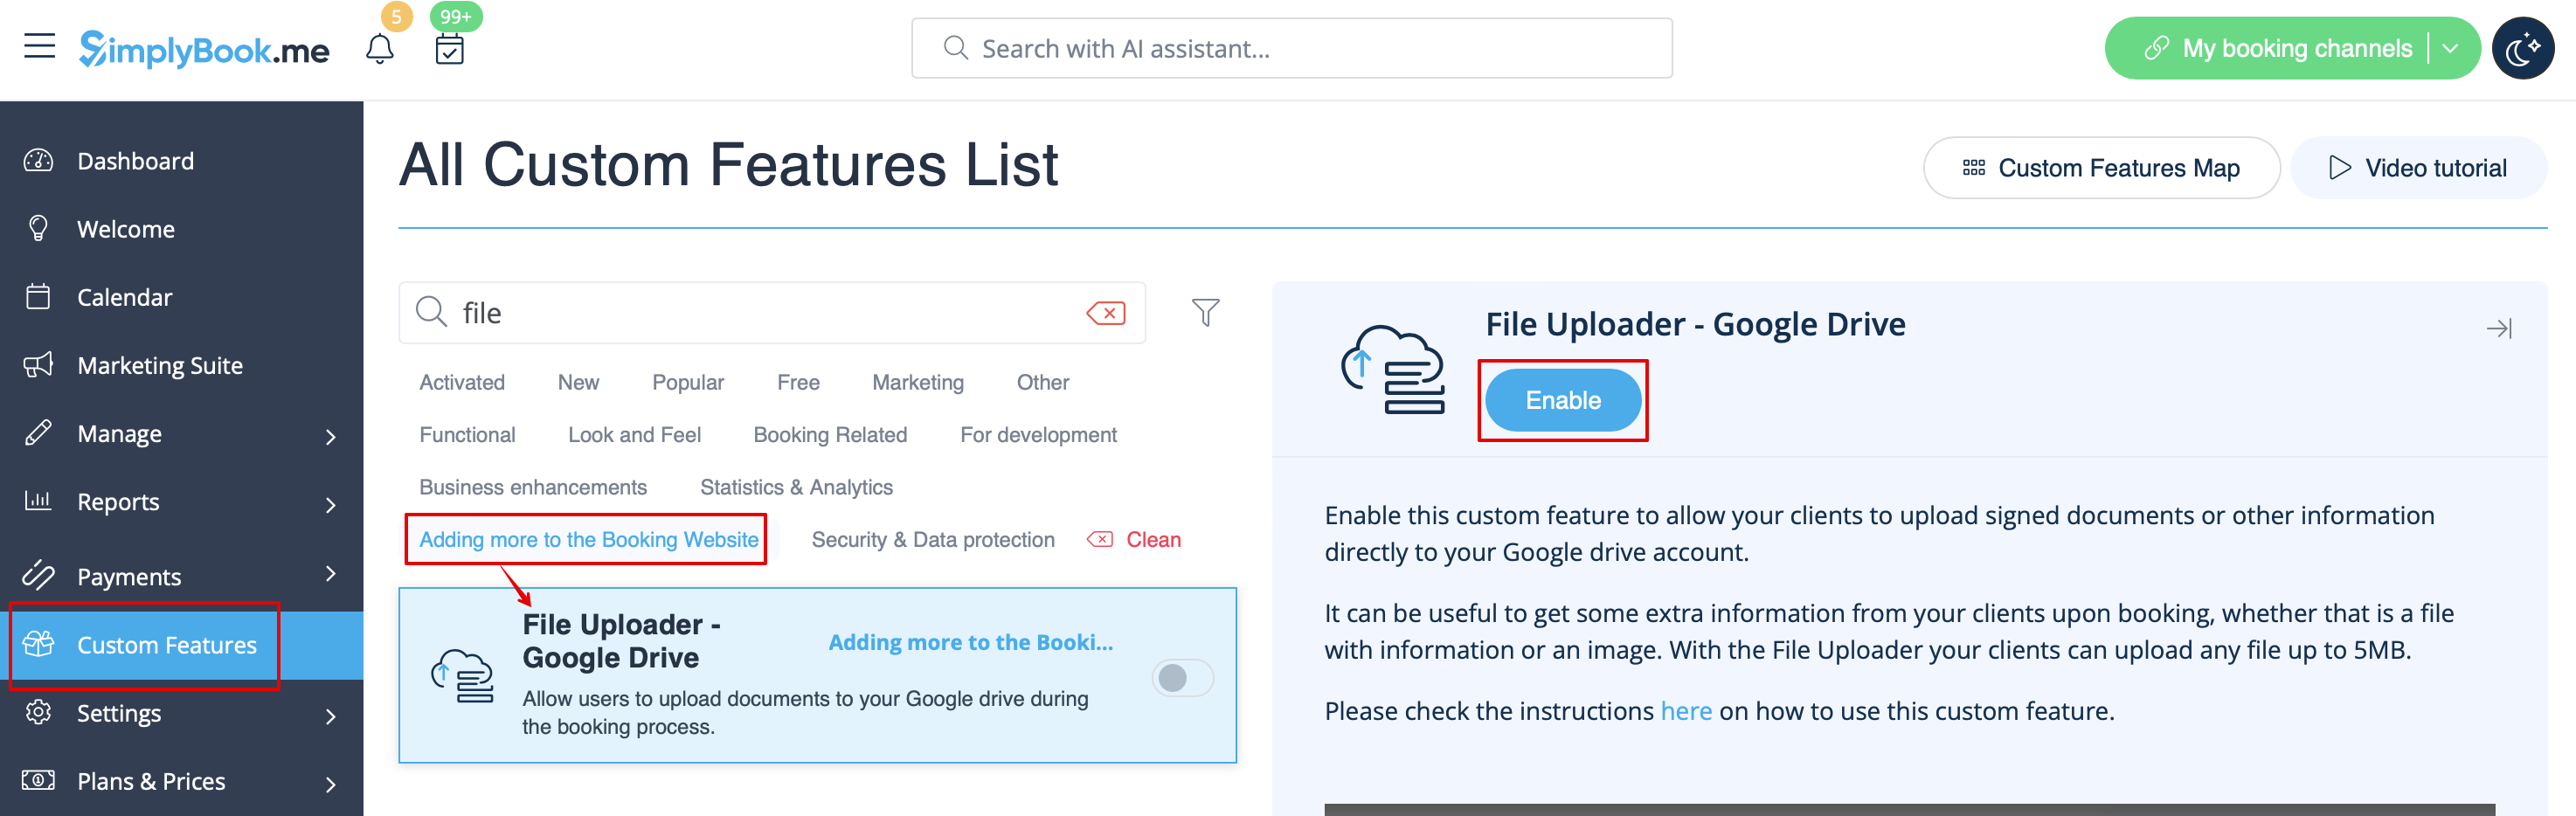
1. Schakel deze optie in op uw pagina Aangepaste functies -> Meer toevoegen aan de categorie Boekingswebsite.


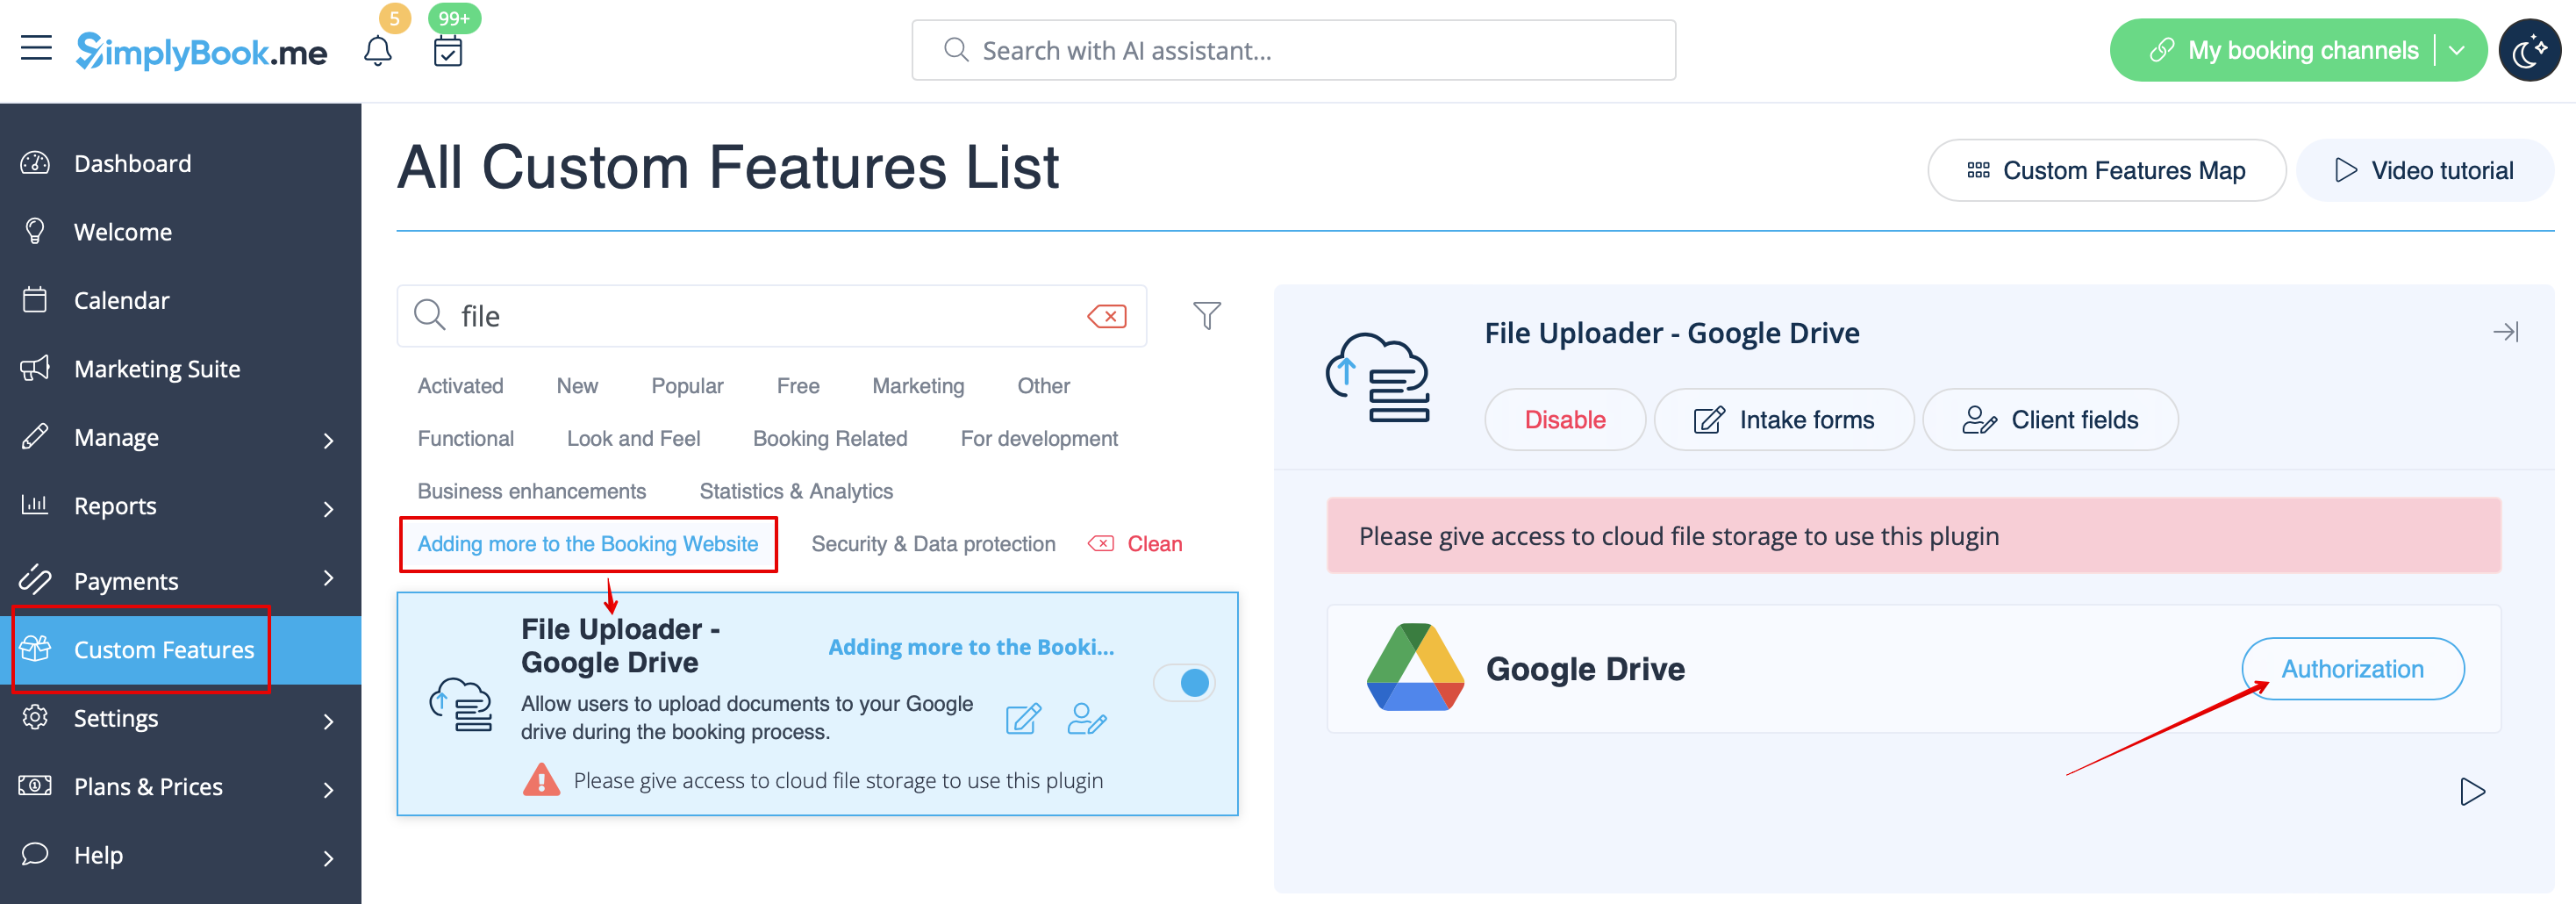
2. Aan de rechterkant van de pagina ziet u de instellingen. Klik op Autoriseren om verbinding te maken met uw Google Drive en geef de gevraagde machtigingen.


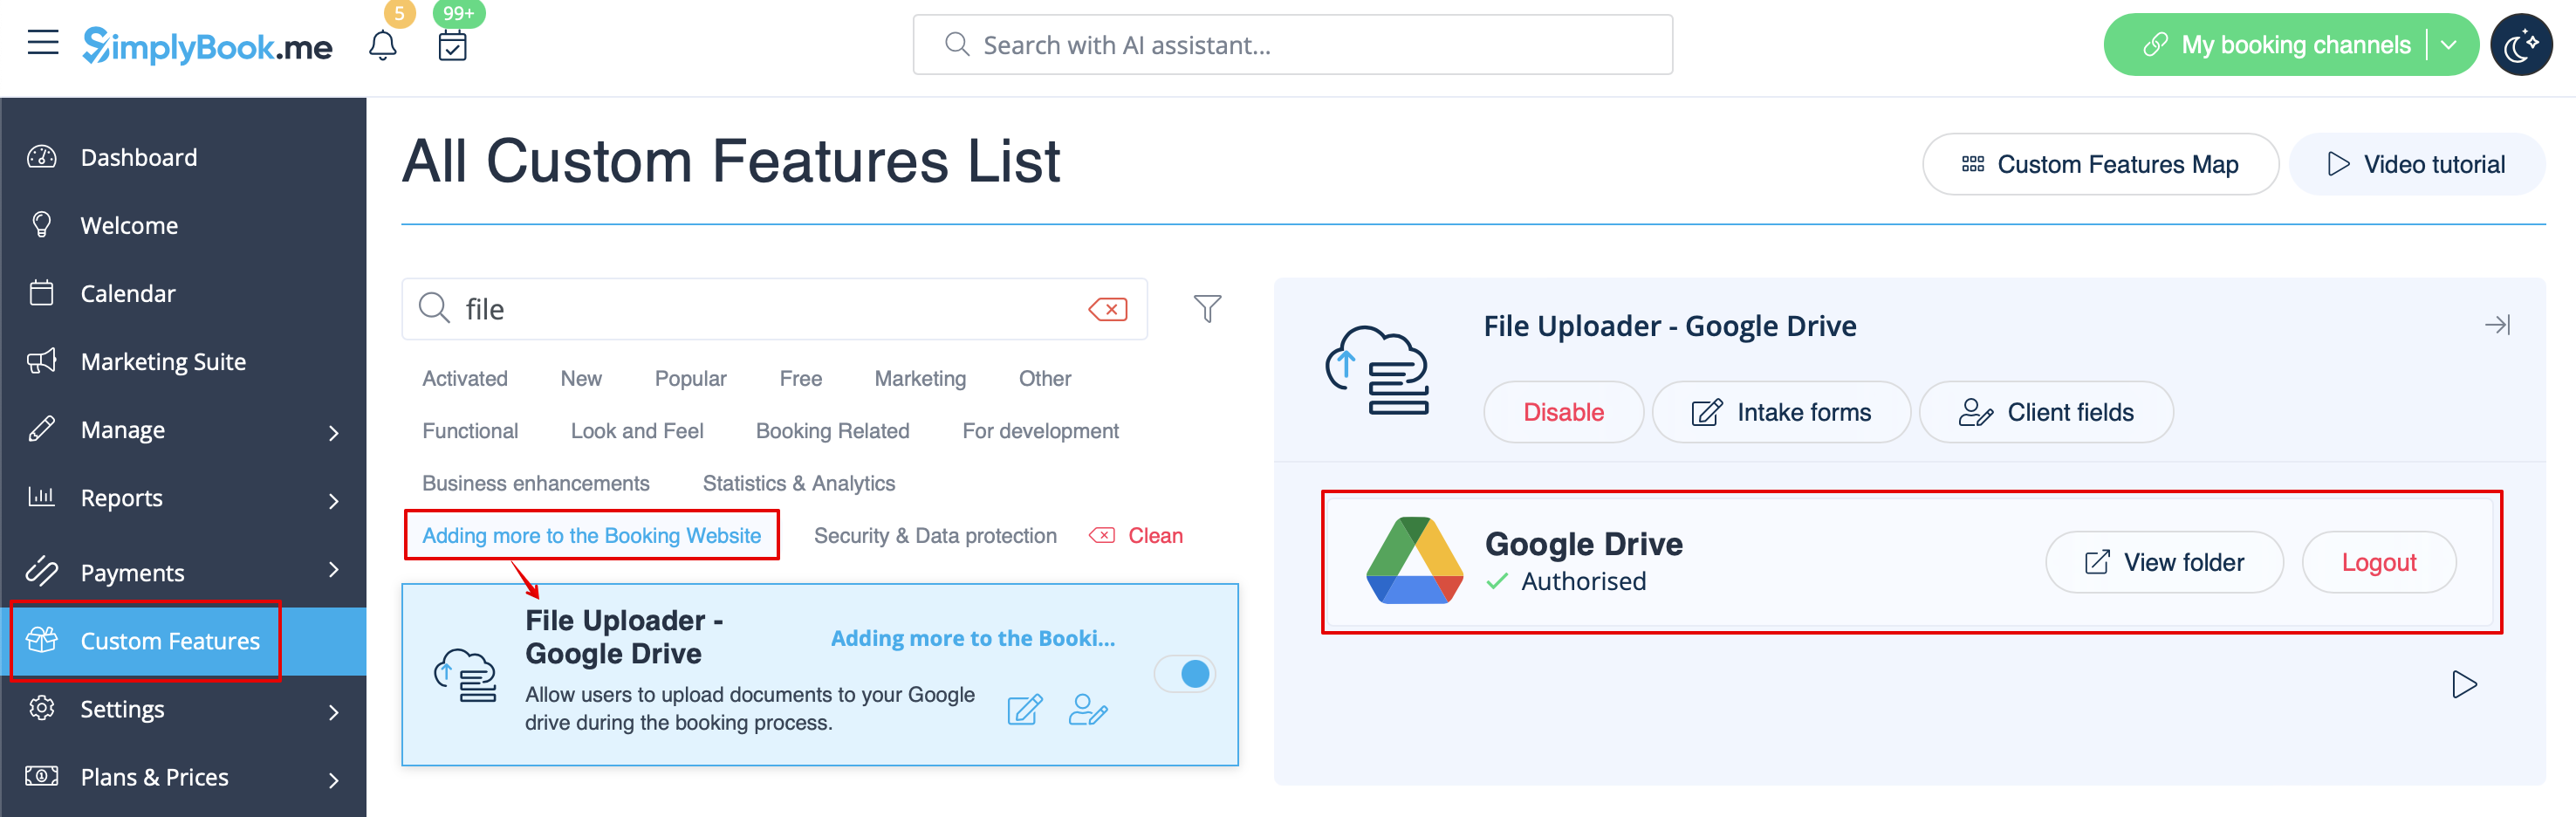
3. Nadat de verbinding tot stand is gebracht, kunt u de status zien en de link naar de bestandenmap op uw Google Drive gebruiken vanaf dezelfde pagina Aangepaste functies.


4. Ga naar Beheren -> Intakeformulieren of Beheren -> Klantvelden (of schakel een of beide functies in indien nodig) en maak een formulier Bestand uploaden - Google Drive. Maak dit al dan niet verplicht, afhankelijk van uw behoeften.


5. Nadat u de gewenste formulieren hebt aangemaakt, kunnen de klanten hun bestanden uploaden tijdens het boekingsproces (Intakeformulieren)


of zich aanmelden (Klantvelden)


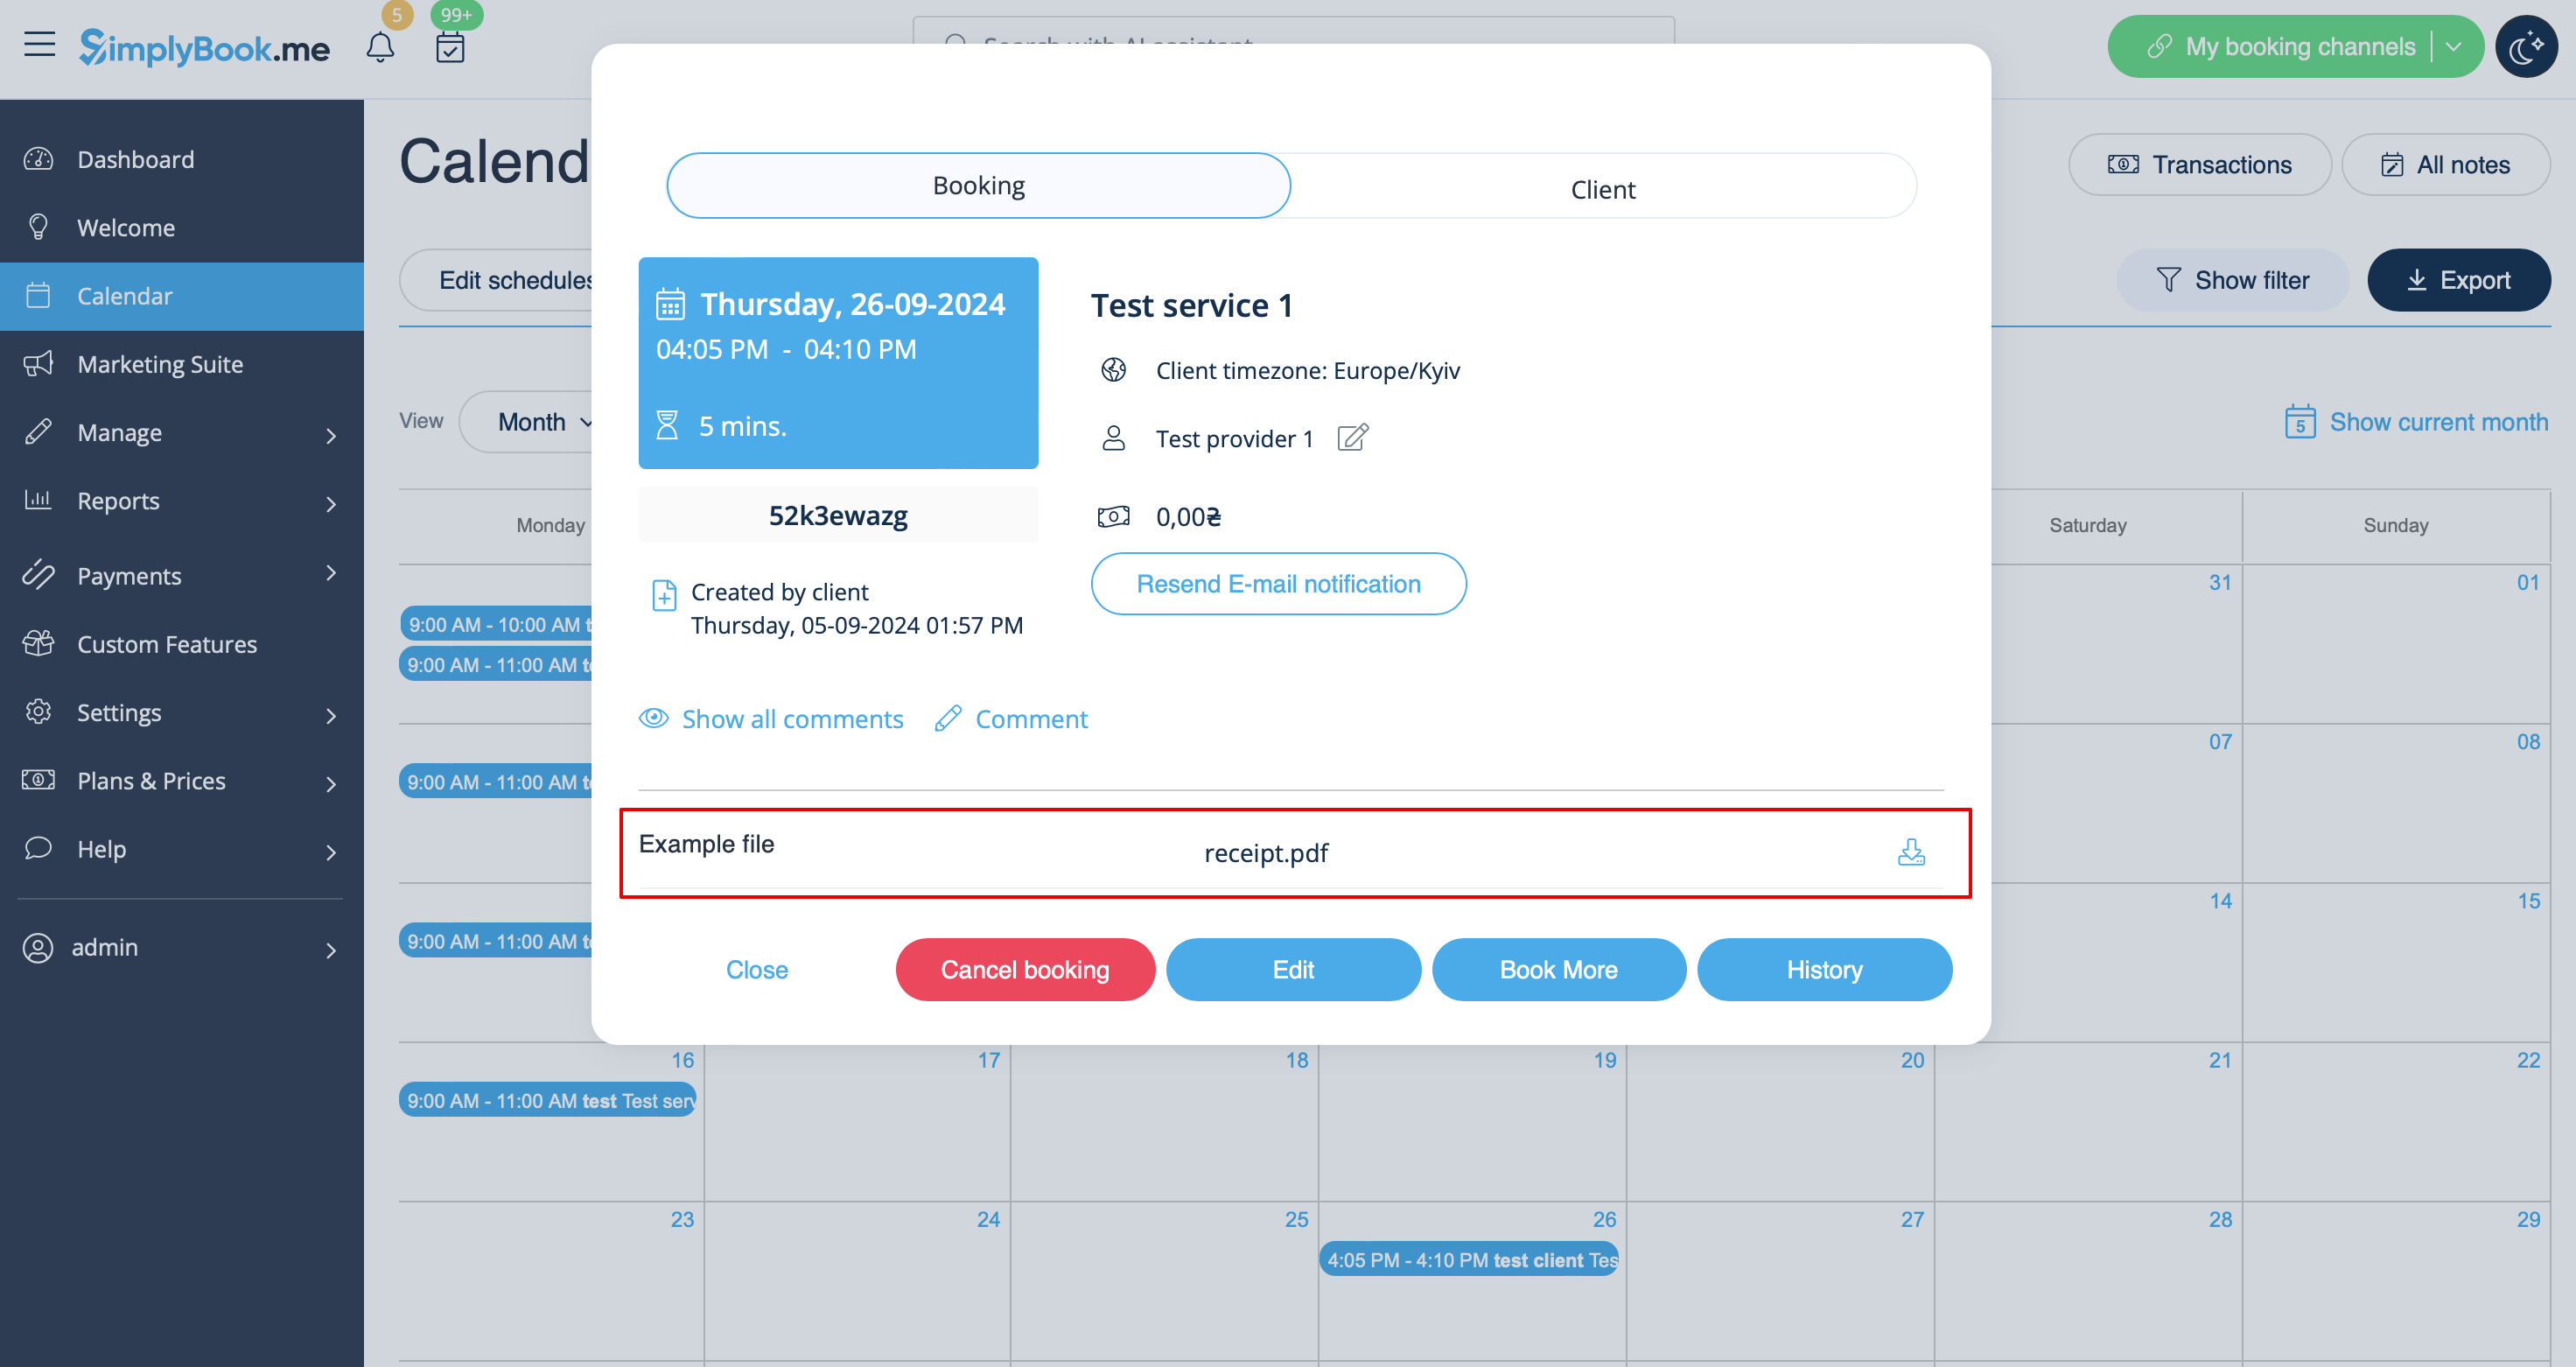
6. Vanuit de beheerdersinterface kunt u de bestanden bekijken en downloaden in de boekingspop-up op de pagina Kalender als het een intakeformulier betreft


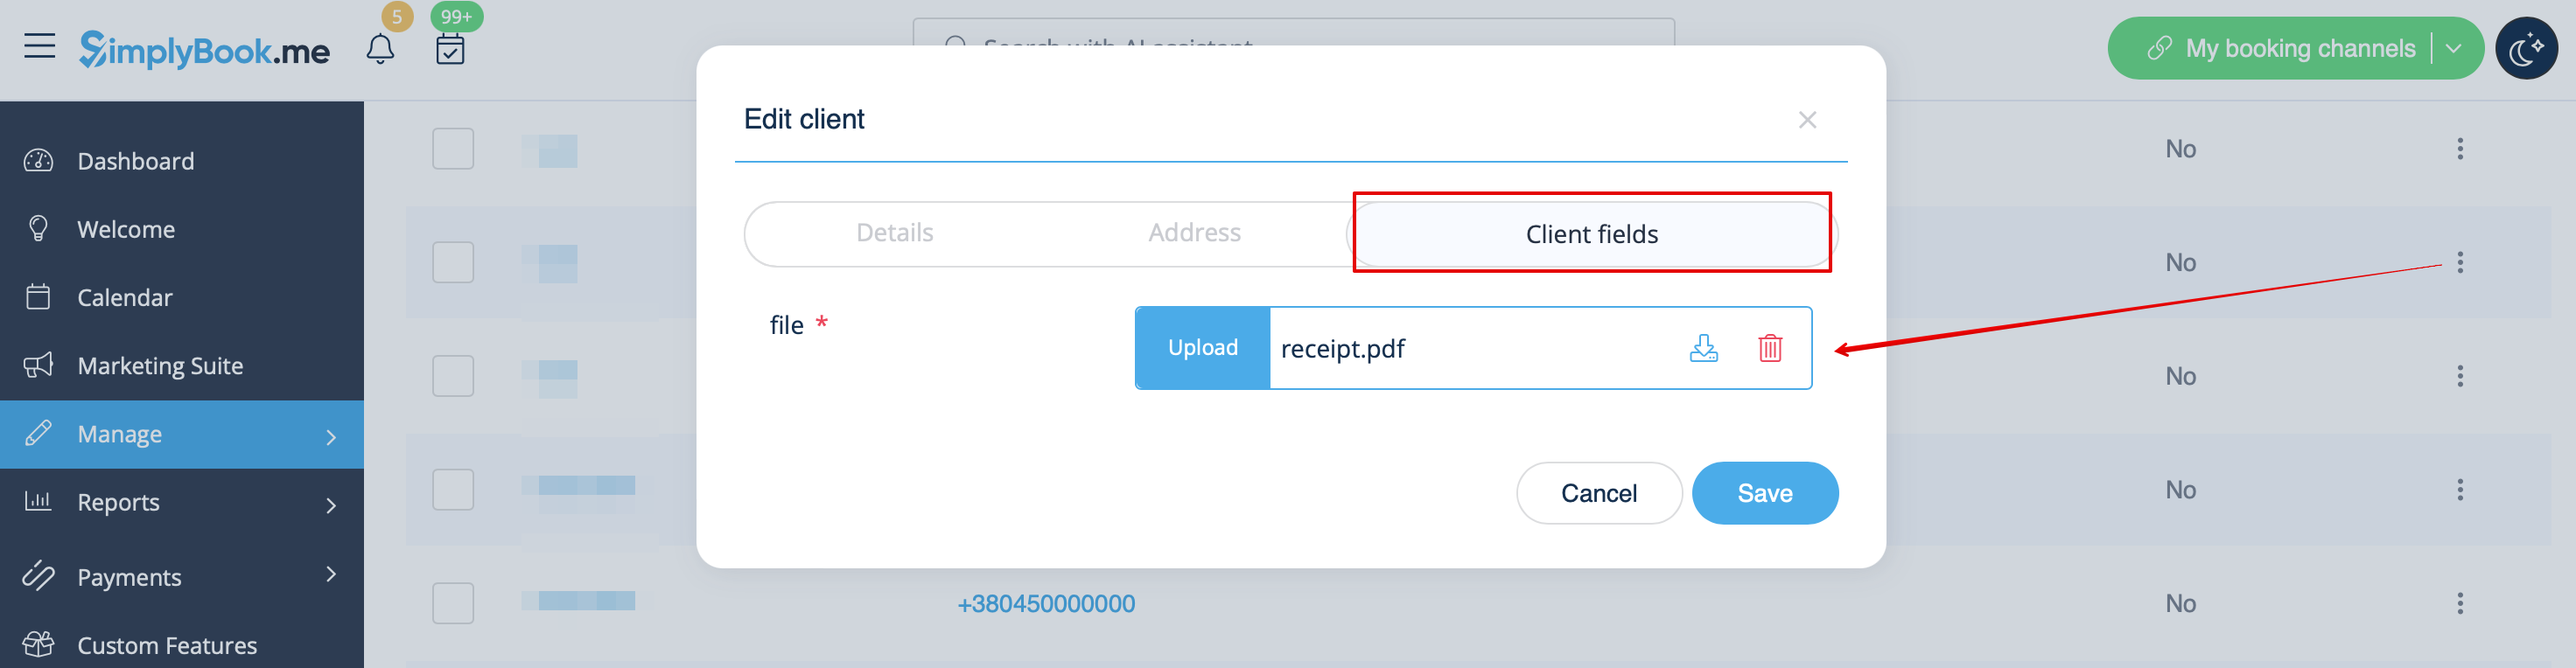
of via Beheer -> Klanten -> bewerk het klantendossier als u dit als klantveld hebt .


En natuurlijk kunt u de bestanden indien nodig handmatig uploaden tijdens het maken of bewerken van een nieuwe boeking of klantendossier vanuit de beheerderskant.

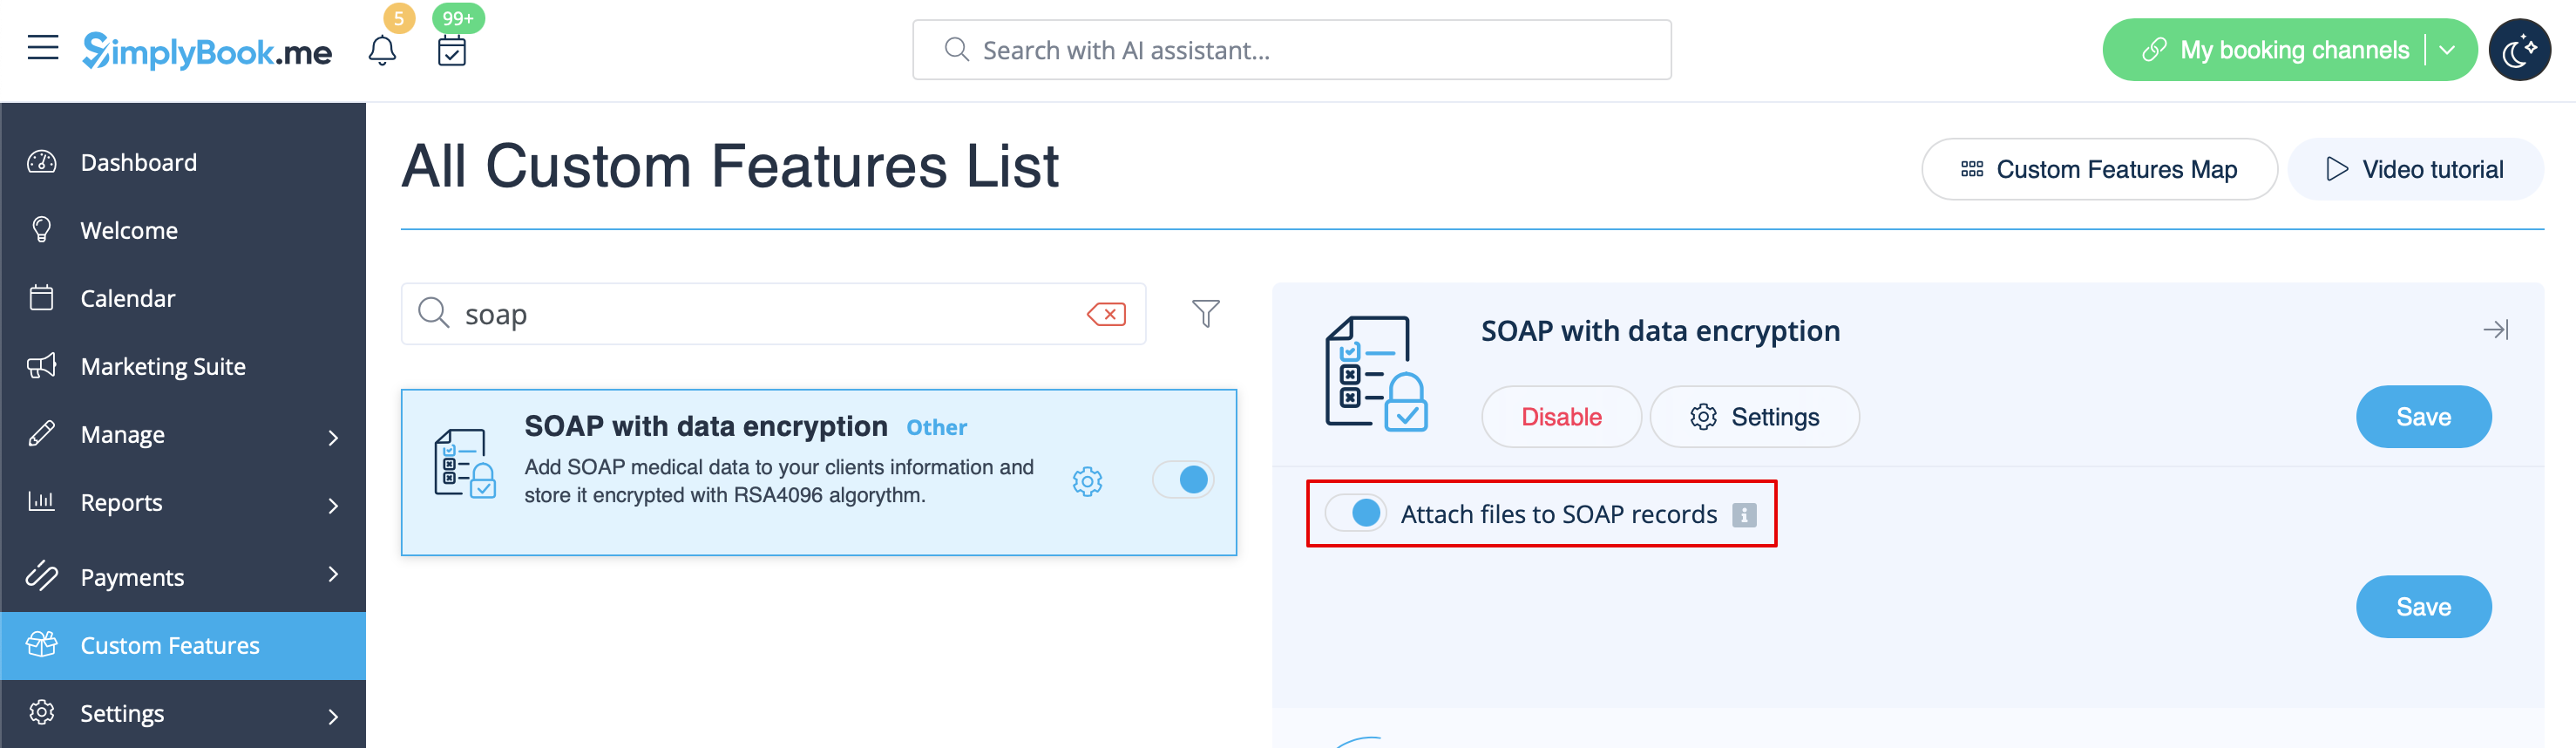
7. Als u ook de aangepaste functie SOAP met versleuteling gebruikt, kunt u het toevoegen van bestanden ook inschakelen in de instellingen voor de SOAP-functie op uw pagina Aangepaste functies.


Als resultaat krijgt u het bijbehorende formulier in Beheer -> Klanten -> SOAP-info -> Een bestand toevoegen.