From SimplyBook.me
Created page with ";Як використовувати гнучкі повідомлення :1. Перейдіть до розділу «Налаштування»//«Пов'язані з бронюванням», знайдіть «Гнучкі повідомлення» та натисніть «Увімкнути». 1200px | center|link=https://help.simplybook.me/images/6/63/Flexible_notofocations_enable_path.png <br><br> :2. Натис..." |
(No difference)
|
Latest revision as of 14:58, 19 May 2025
- Як використовувати гнучкі повідомлення
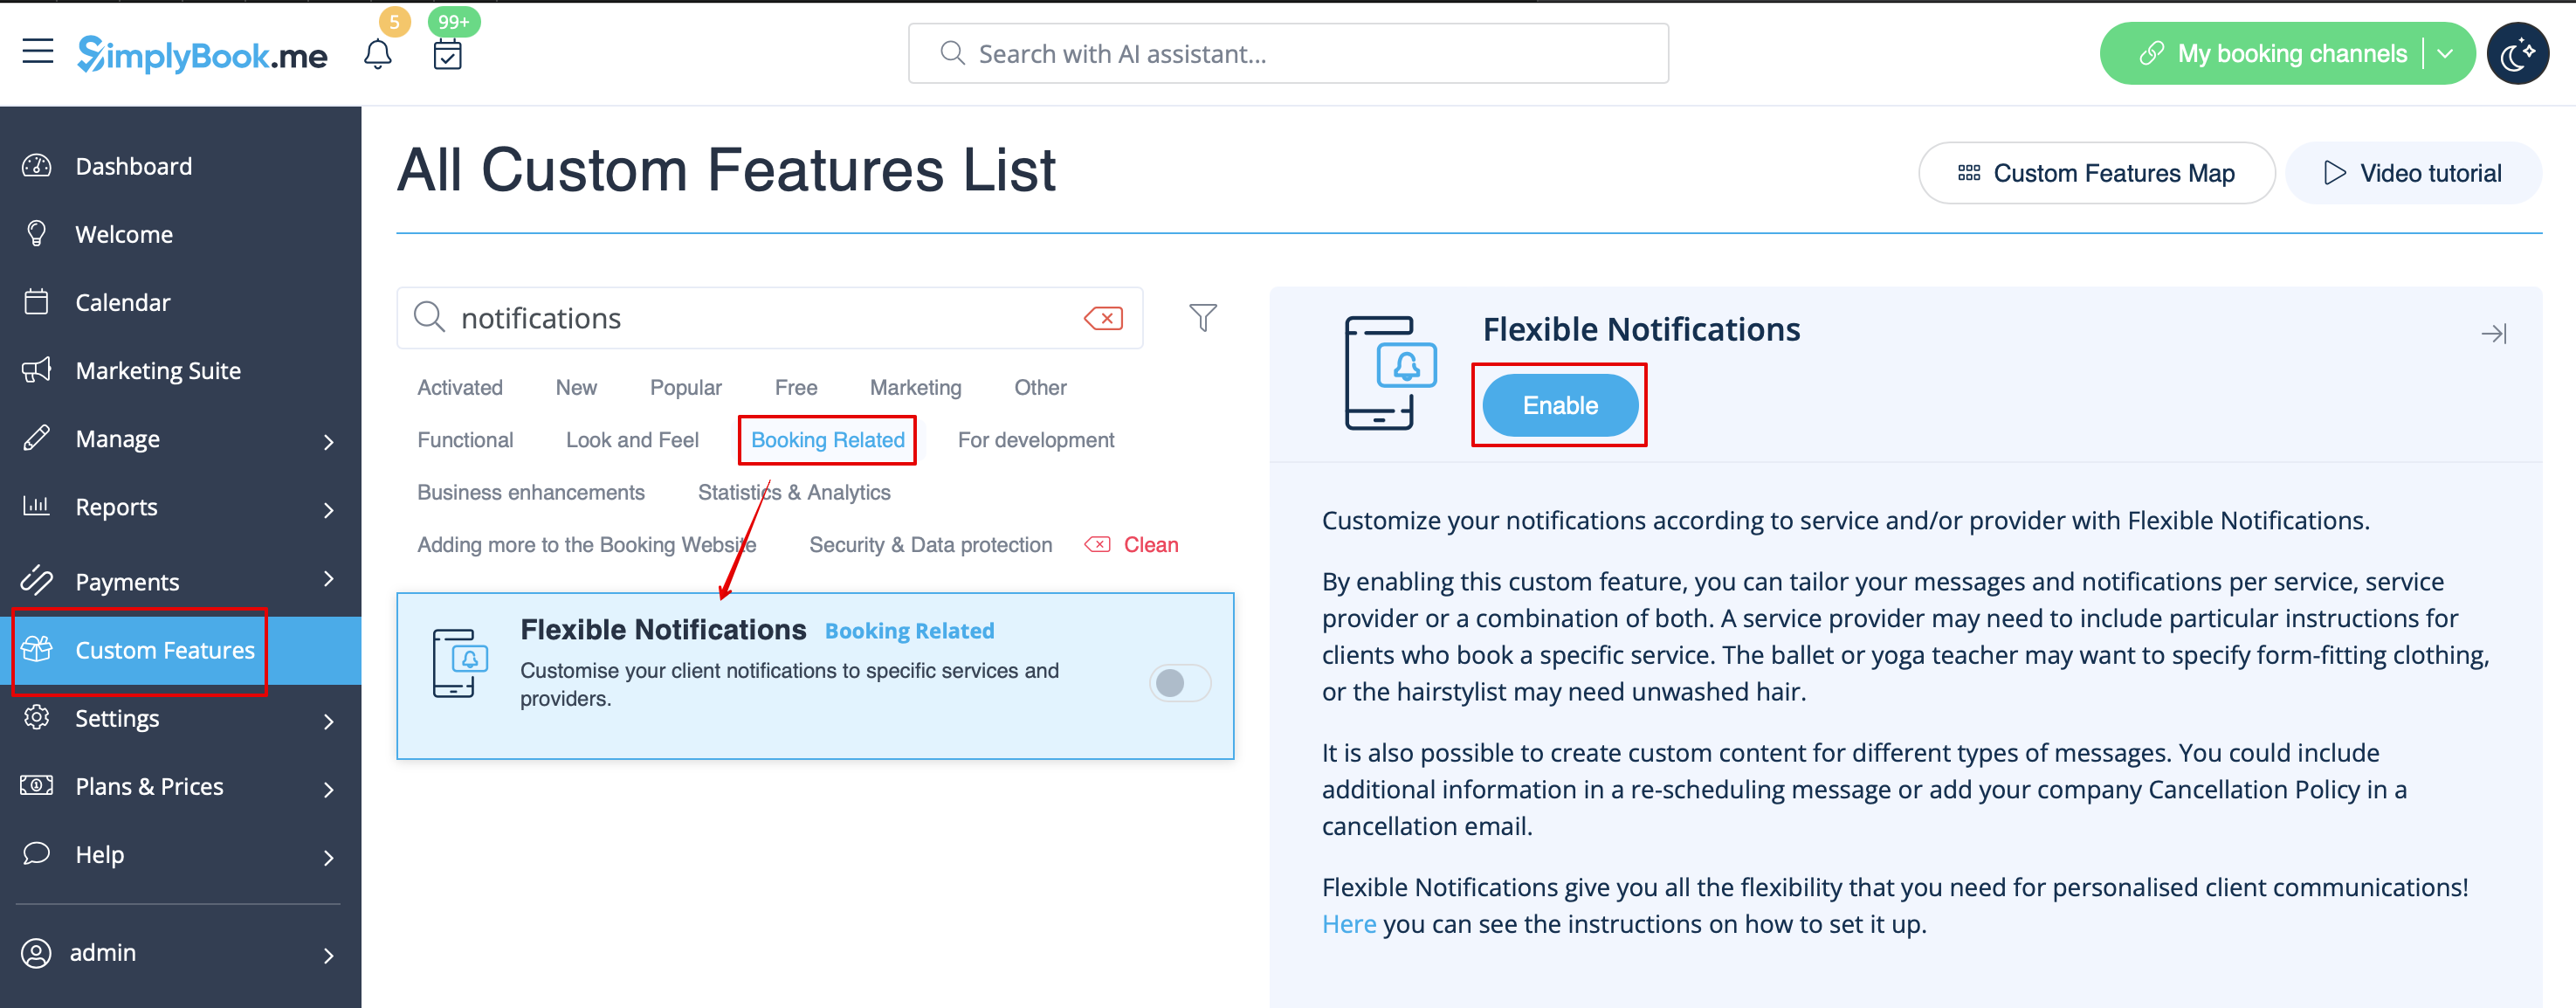
- 1. Перейдіть до розділу «Налаштування»//«Пов'язані з бронюванням», знайдіть «Гнучкі повідомлення» та натисніть «Увімкнути».
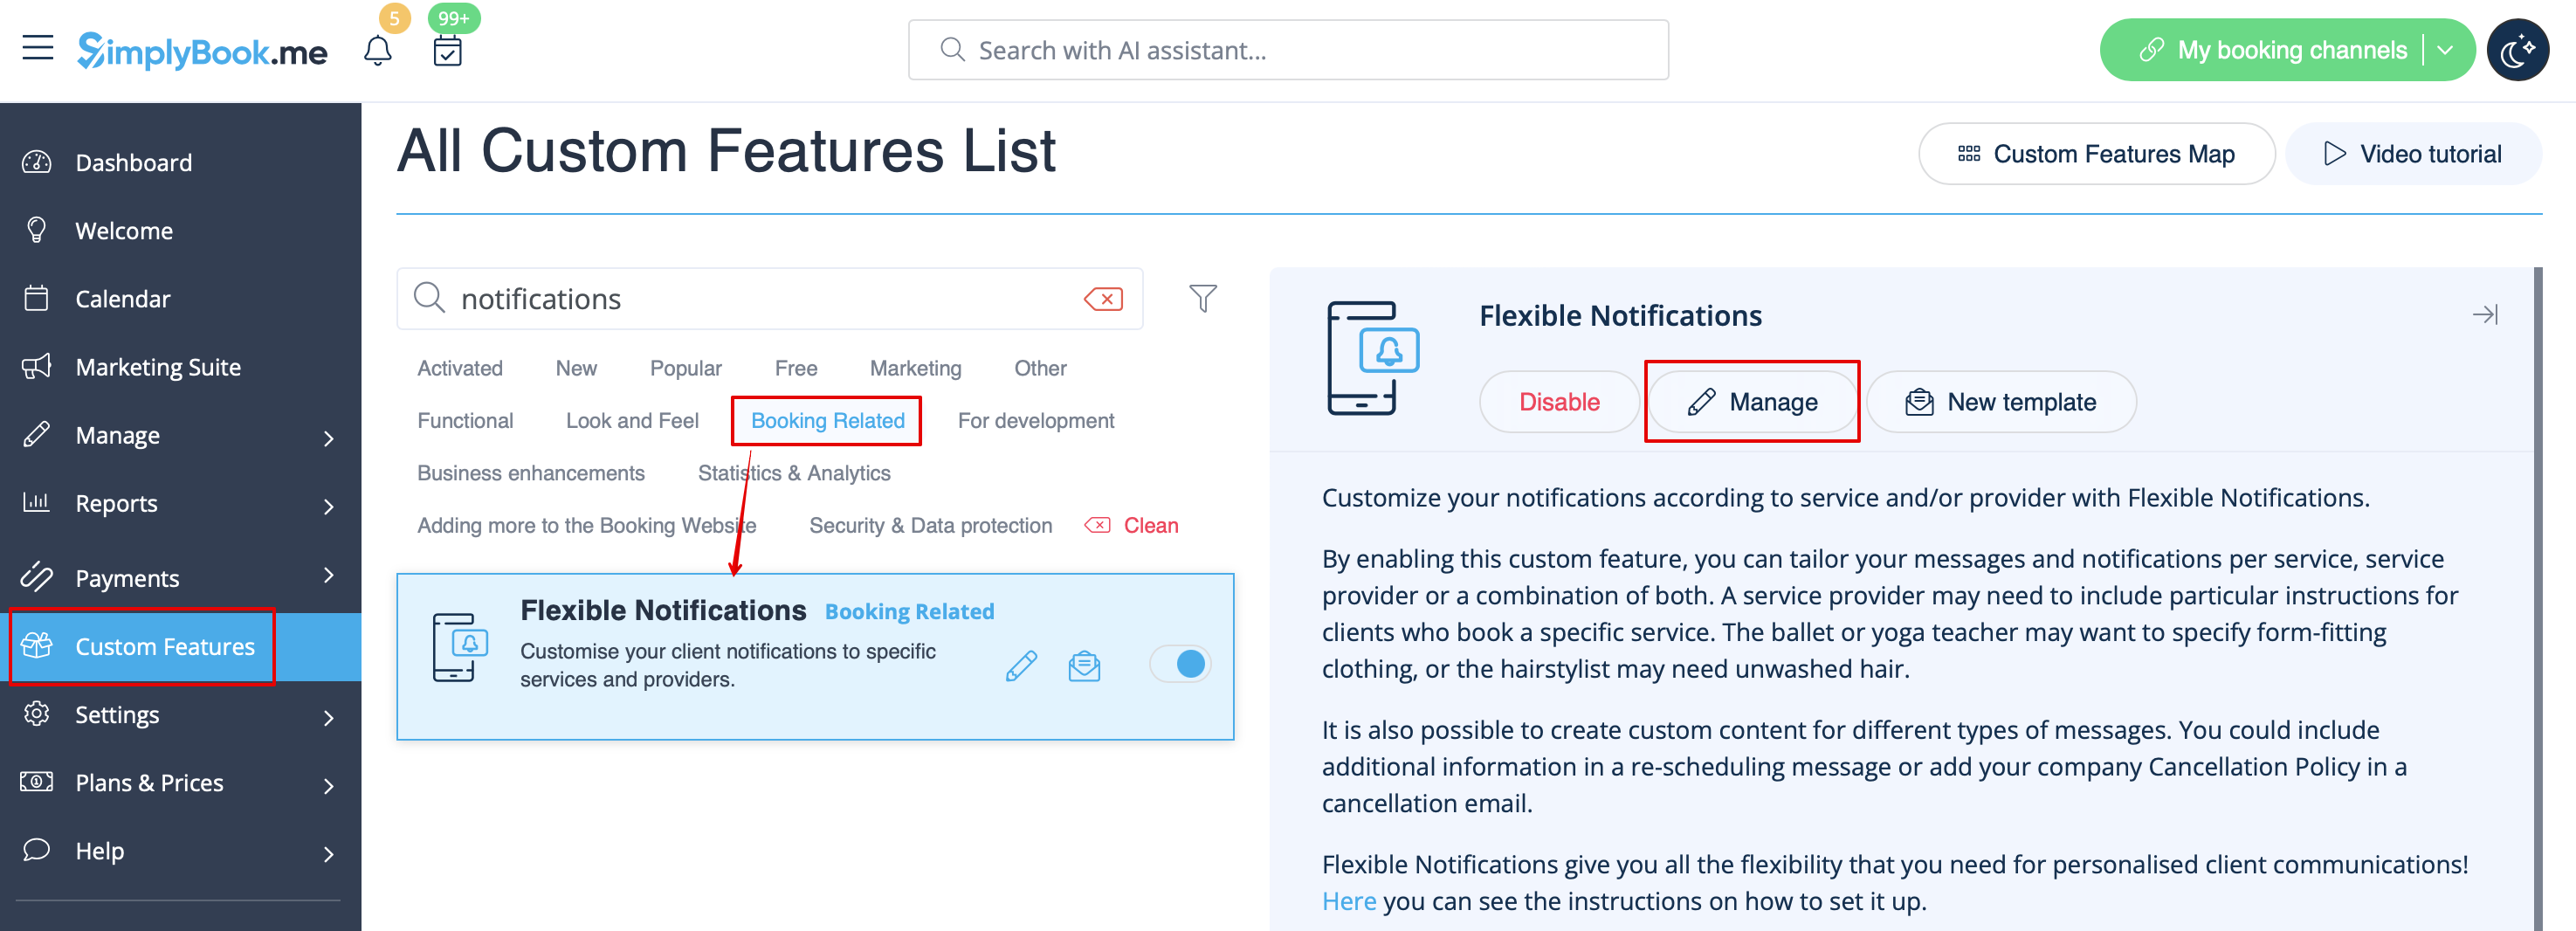
- 2. Натисніть «Керувати» біля цієї функції.
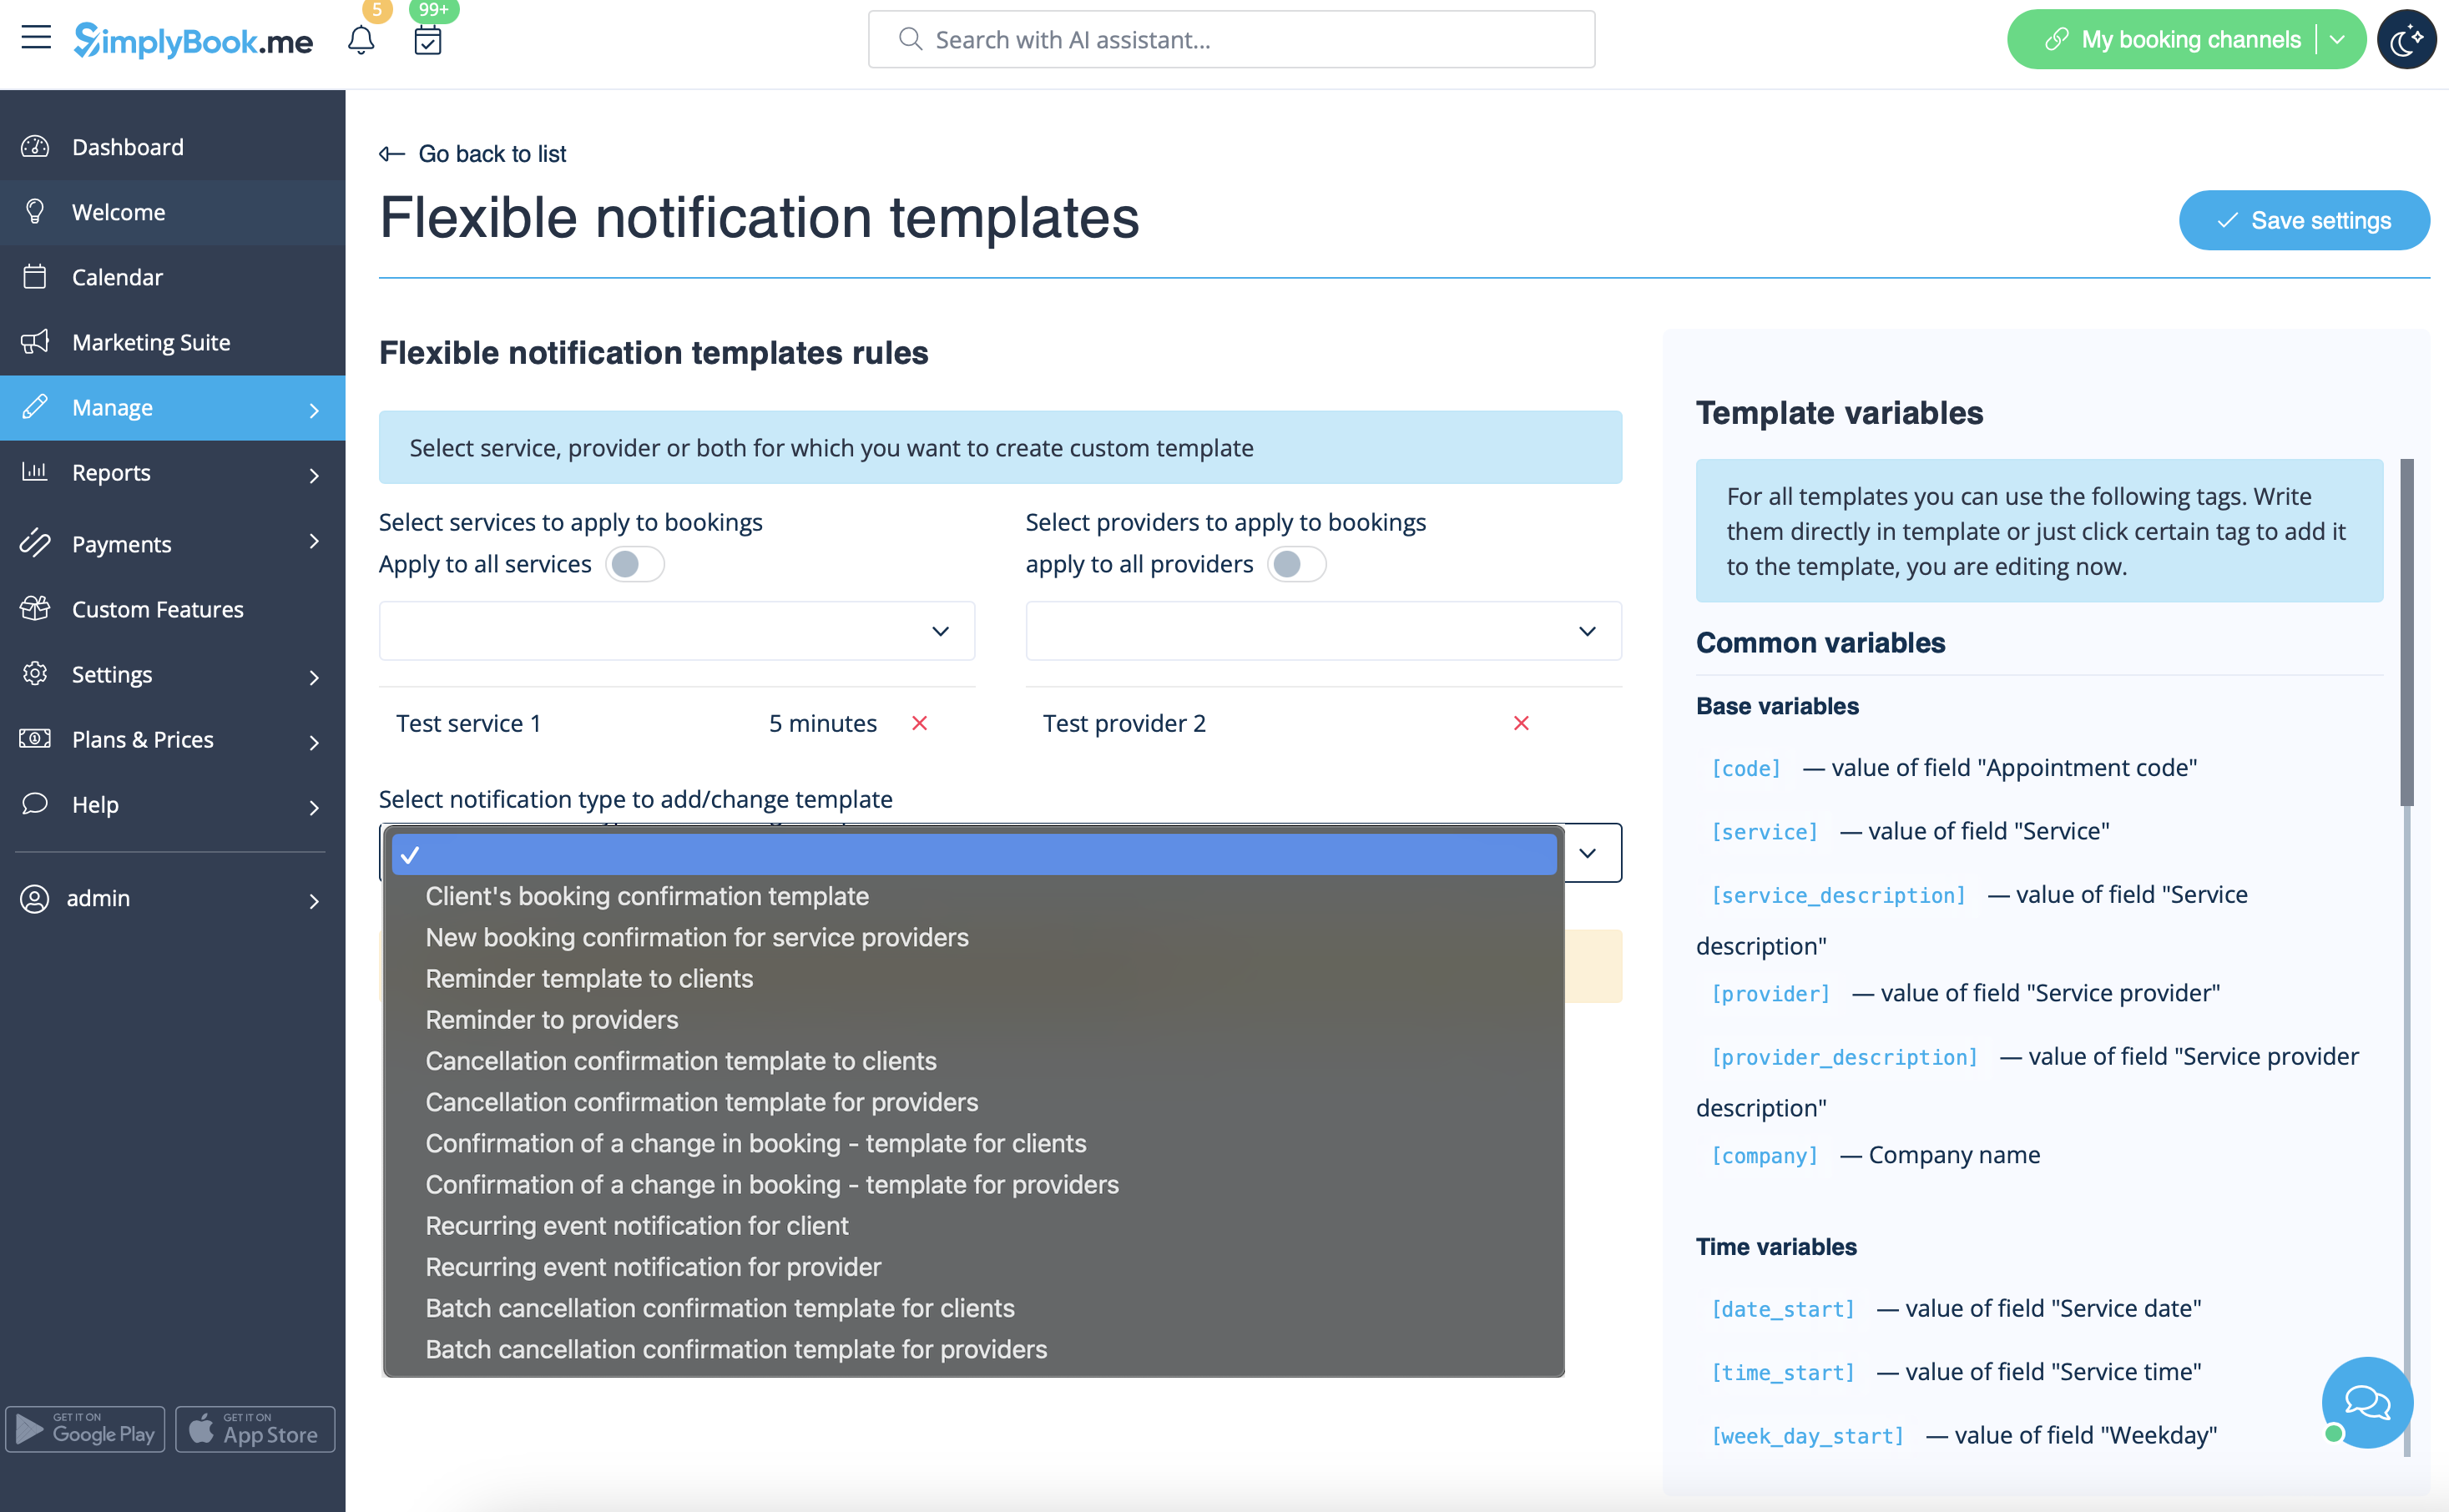
- 3. На сторінці, що з'явиться, натисніть «Нові налаштування гнучкого шаблону».

- 4. У новому шаблоні виберіть служби та/або постачальників, до яких будуть застосовуватися налаштовані шаблони. Потім виберіть тип повідомлення, щоб додати/змінити шаблон і відредагувати текст. За необхідності використовуйте змінні праворуч, щоб включити їх у свої шаблони.