From SimplyBook.me
Created page with "як користуватися :1. Увімкніть спеціальну функцію «Форми прийому» в розділі «Спеціальні функції//Додавання додаткових елементів на сторінку бронювання». 1200px | center|link=https://help.simplybook.me/images/d/d7/Intake_forms_enable_path_redesigned.png <br><br> :2. Перейдіть до йог..." |
(No difference)
|
Latest revision as of 15:27, 19 May 2025
як користуватися
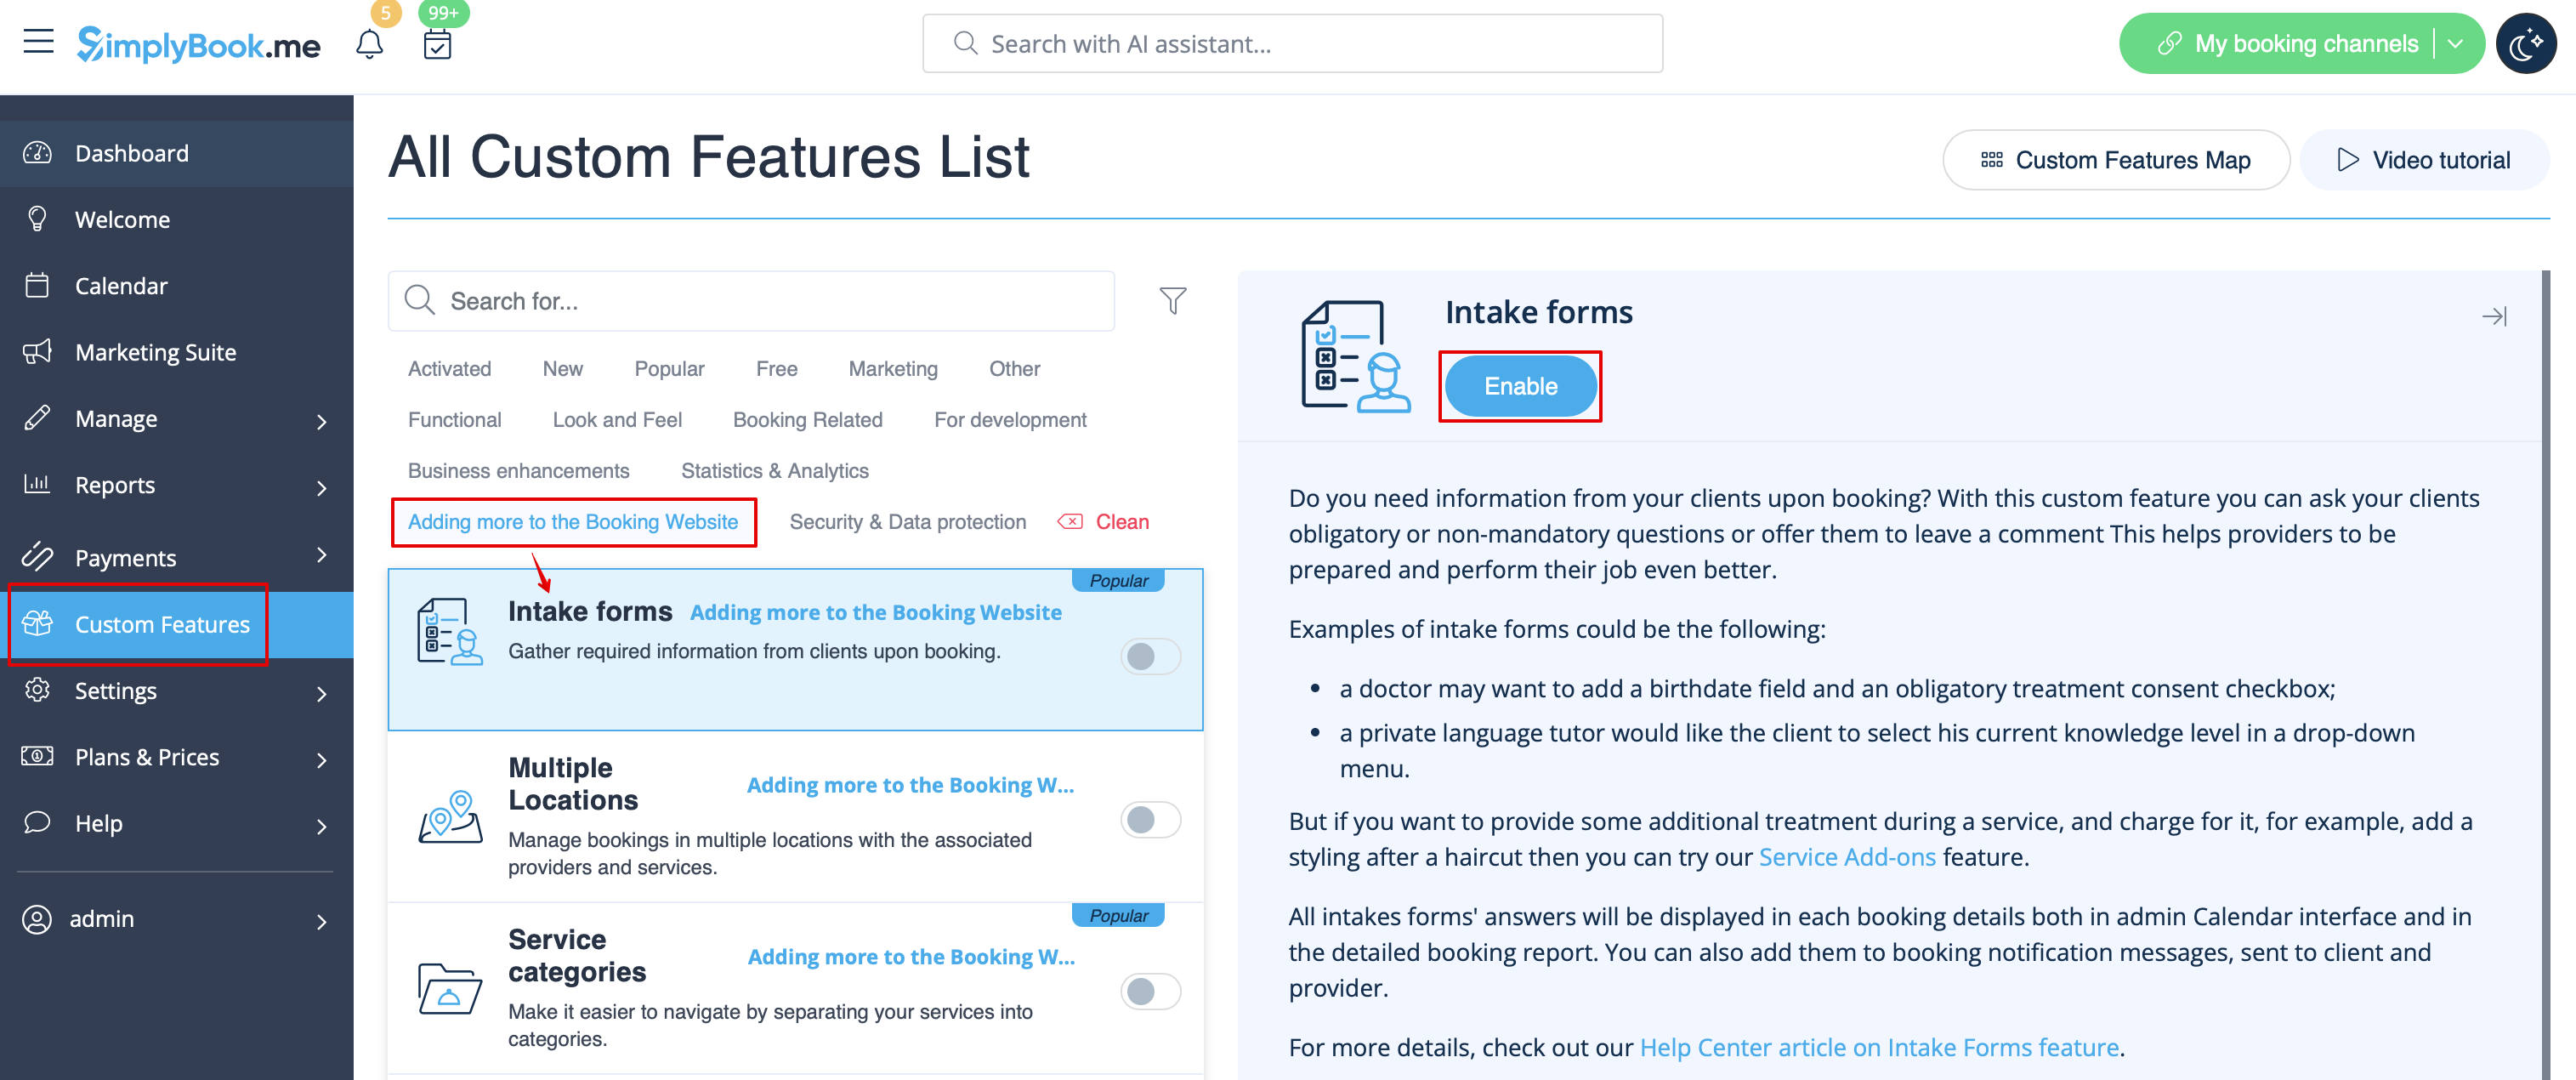
- 1. Увімкніть спеціальну функцію «Форми прийому» в розділі «Спеціальні функції//Додавання додаткових елементів на сторінку бронювання».
- 2. Перейдіть до його управління або на сторінку «Управління//Форми для прийому».

- 3. Натисніть кнопку «+» в налаштуваннях «Налаштовані функції», щоб створити нову форму.
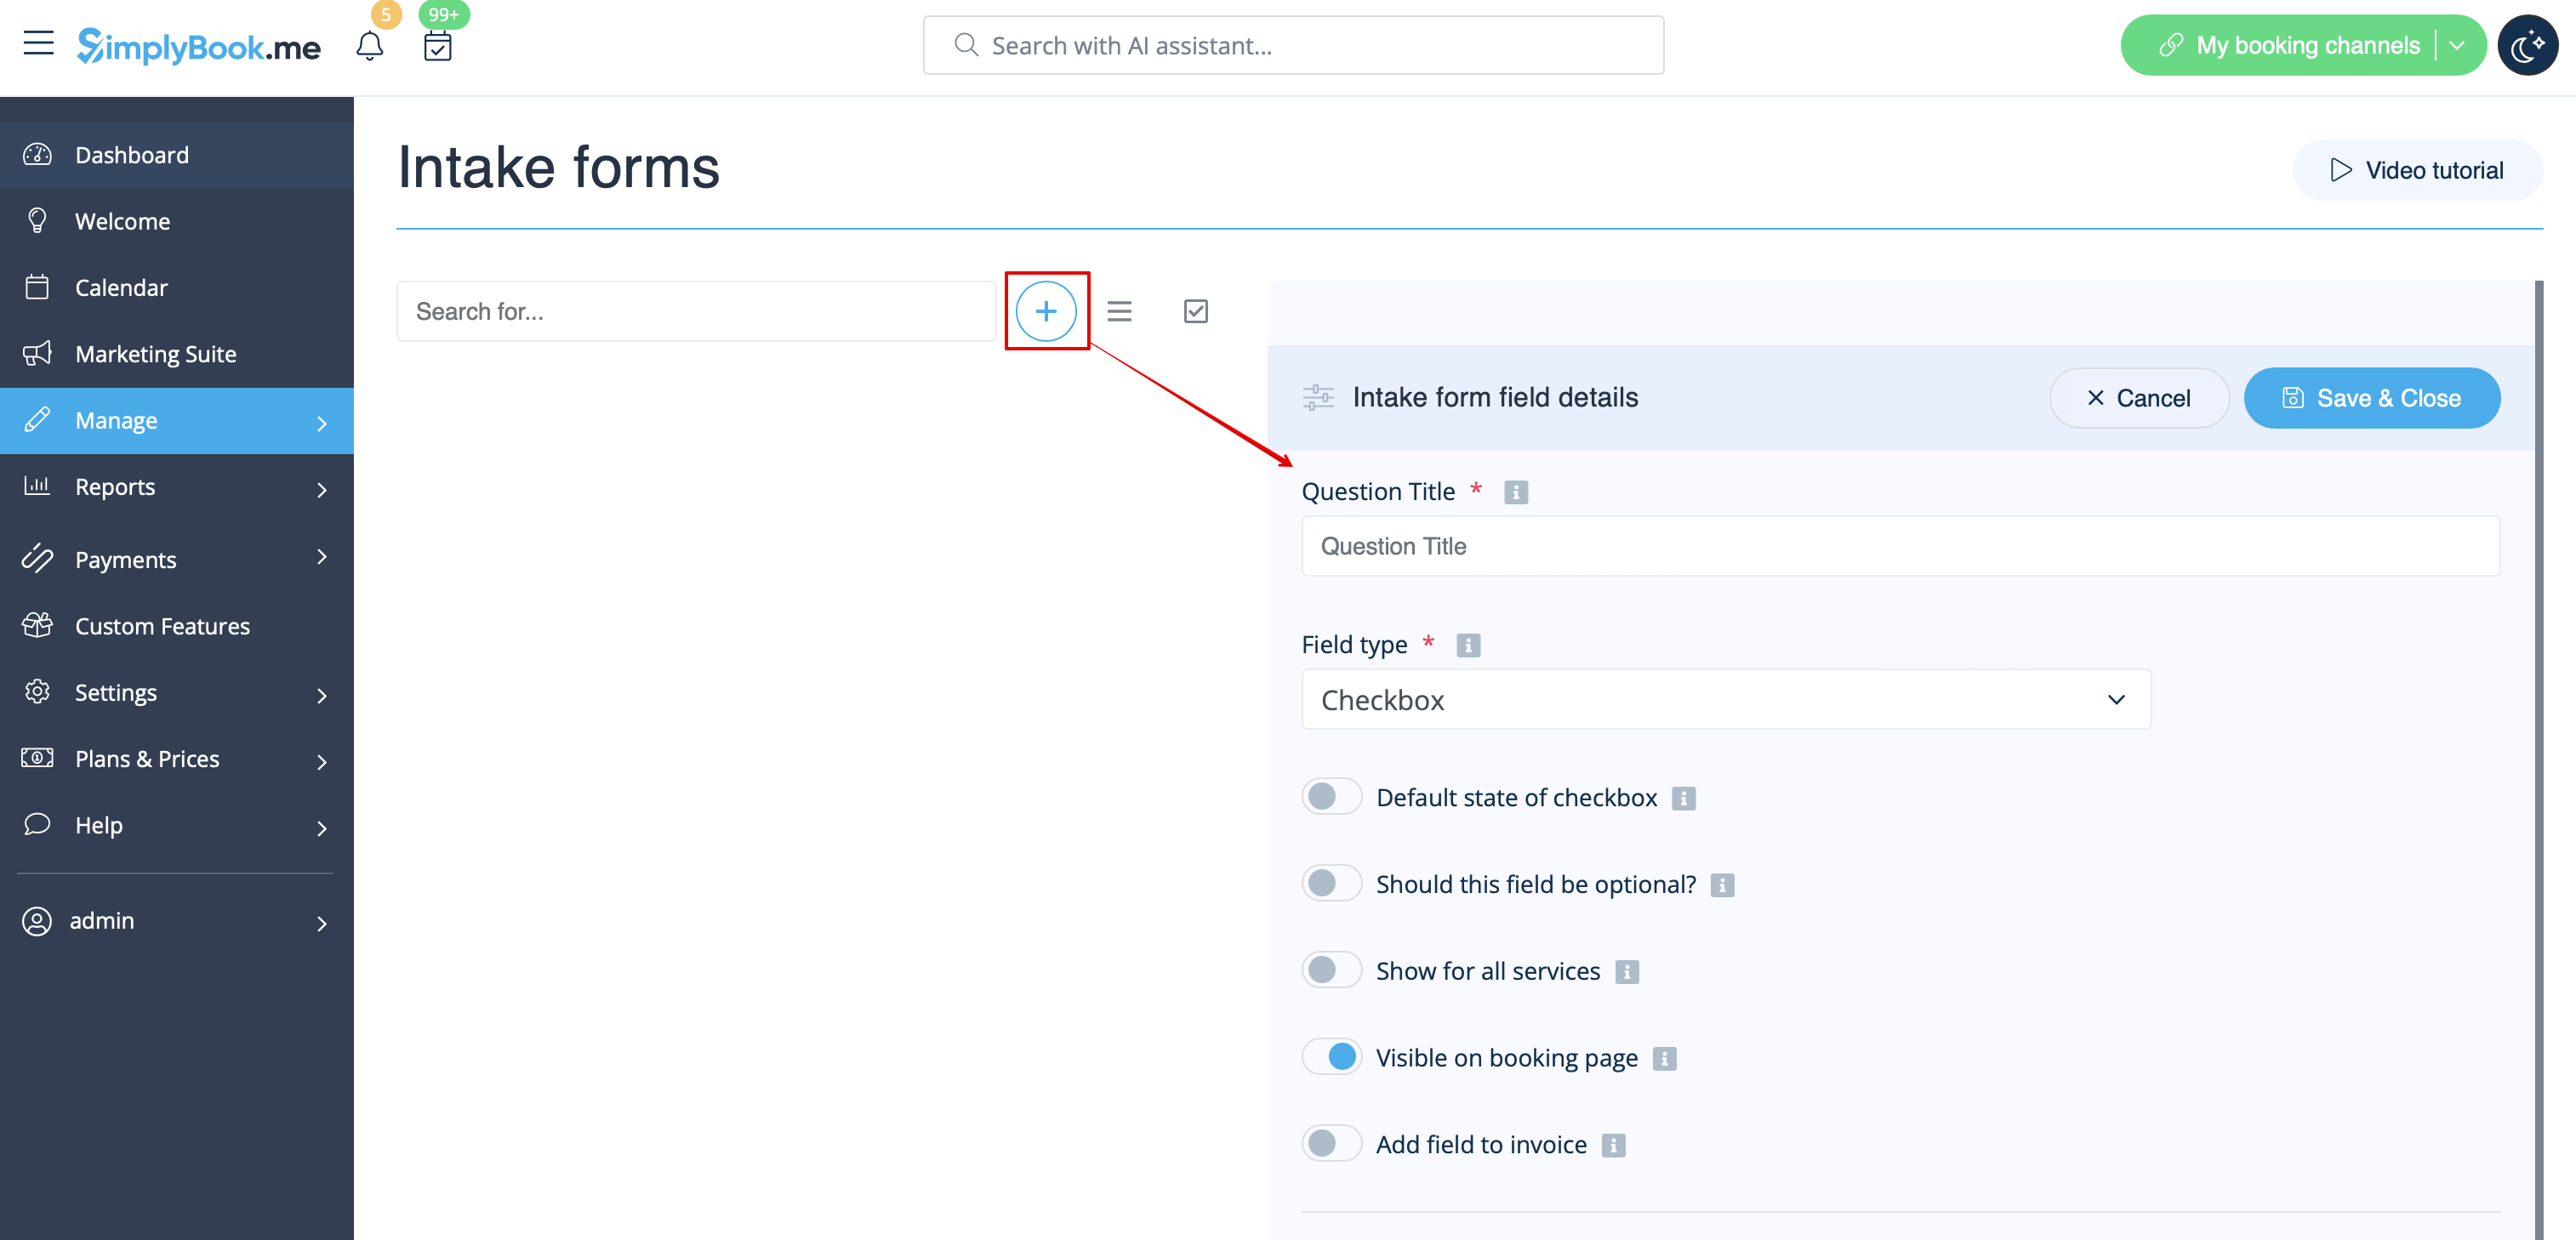
- 4. У полі «Заголовок питання» введіть питання, на яке ви хочете отримати відповідь від клієнтів. Наприклад: Вік, уподобання, Чи є у вас проблеми зі здоров'ям? тощо.
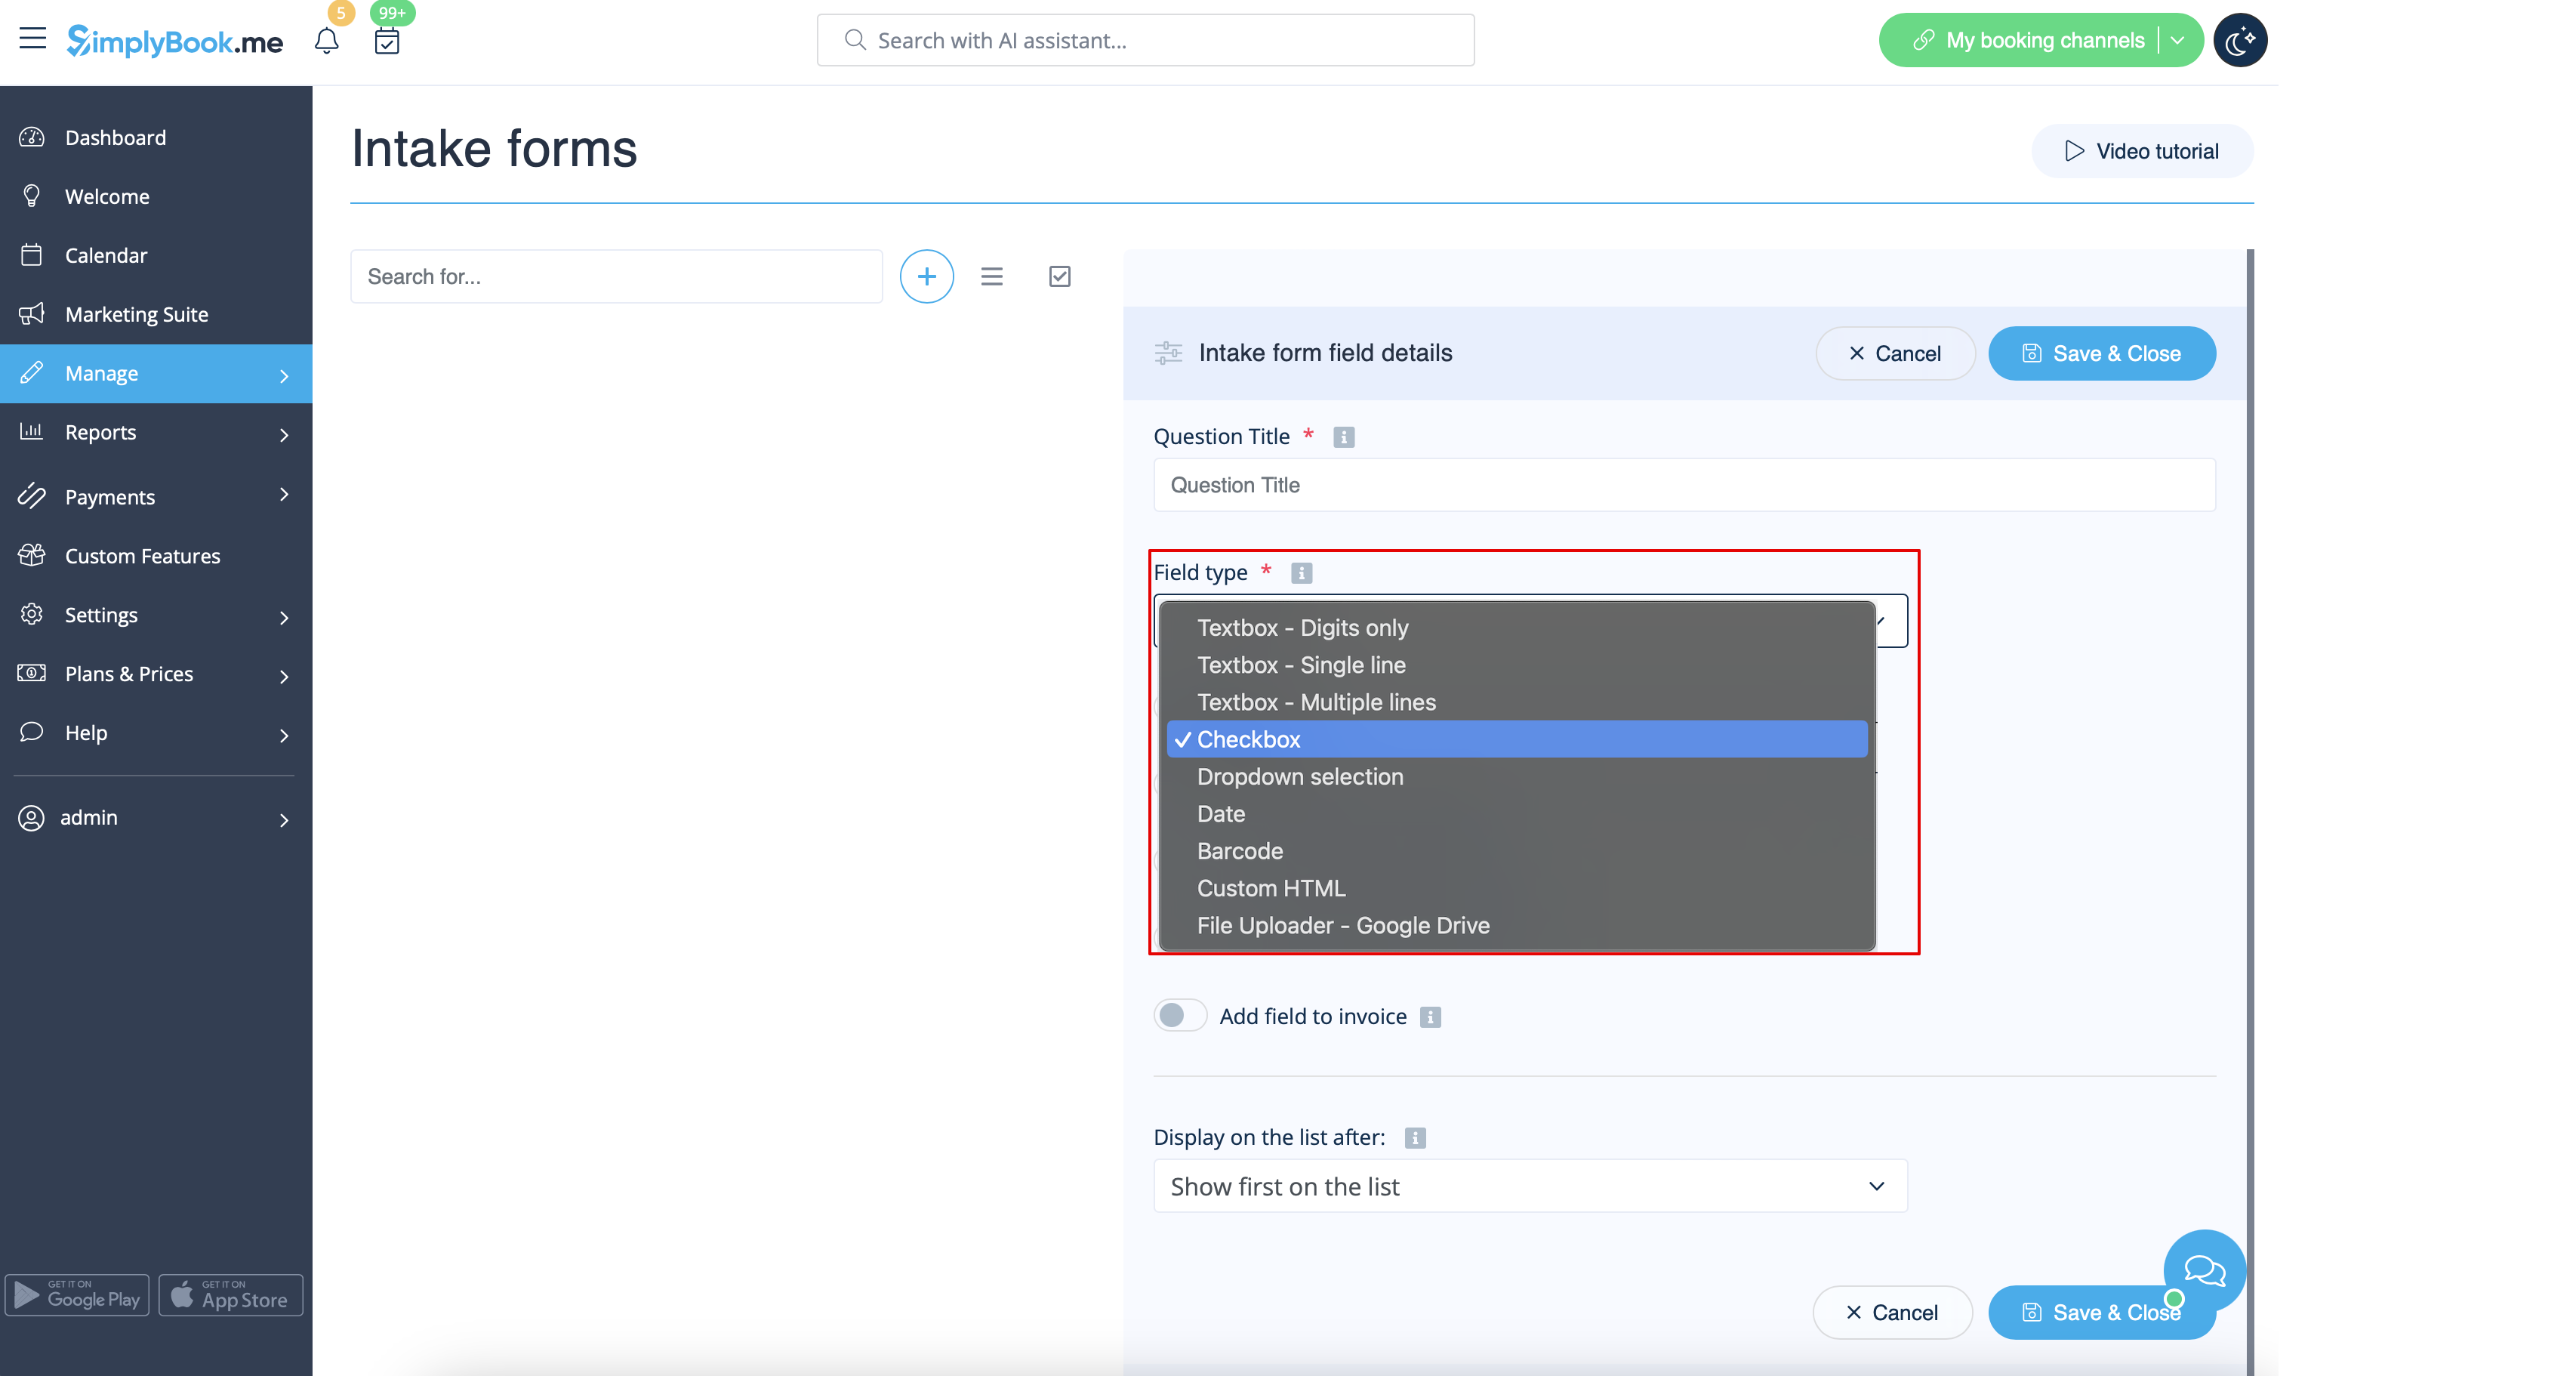
- 5. Виберіть тип поля:
- digits only - дозволяє вводити тільки цифри. Корисно, коли вам потрібно знати вік, зріст або будь-яку іншу інформацію, яка вимагає тільки цифр.
- single line - зазвичай використовується для коротких відповідей
- multiple lines - використовуйте цей тип поля, якщо ви очікуєте від своїх клієнтів довгих пояснень
- checkbox - створює поле, яке клієнти повинні або позначити, або залишити непозначеним. Корисно для питань, що вимагають бінарної відповіді, наприклад «Мені потрібні додаткові послуги».
- dropdown selection - створює список, що розкривається, з можливістю вибрати тільки 1 варіант. Щоб створити це поле, вам потрібно створити список значень у розділі «Параметри списку, що розкривається, і варіант за замовчуванням». Також ви можете вибрати значення за замовчуванням, яке буде присвоєно, якщо нічого не буде вибрано зі списку.
- date - створює опцію вибору дати з календарем.
- barcode - дозволяє сканувати штрих-коди за допомогою мобільного додатку адміністратора та отримувати значення зі сканування. Також дозволяє вводити простий текст, як у однорядкових формах для прийому.
- custom HTML - дозволяє додавати візуальні роздільники або додатковий текст біля форми для прийому. Не можна використовувати для введення даних клієнтом.
- file uploader - Google Drive - доступно, якщо увімкнено спеціальну функцію File Uploader - Google Drive. Дозволяє завантажувати файли, які ви зможете побачити в спеціальній папці на вашому Google Drive.
- 6. Зробіть це обов'язковим або необов'язковим за допомогою перемикача «опціонально».
- Додайте поле (будуть включені як заголовок, так і відповідь) до рахунків-фактур клієнтів, якщо це необхідно і якщо ви використовуєте спеціальну функцію «Приймати платежі ».
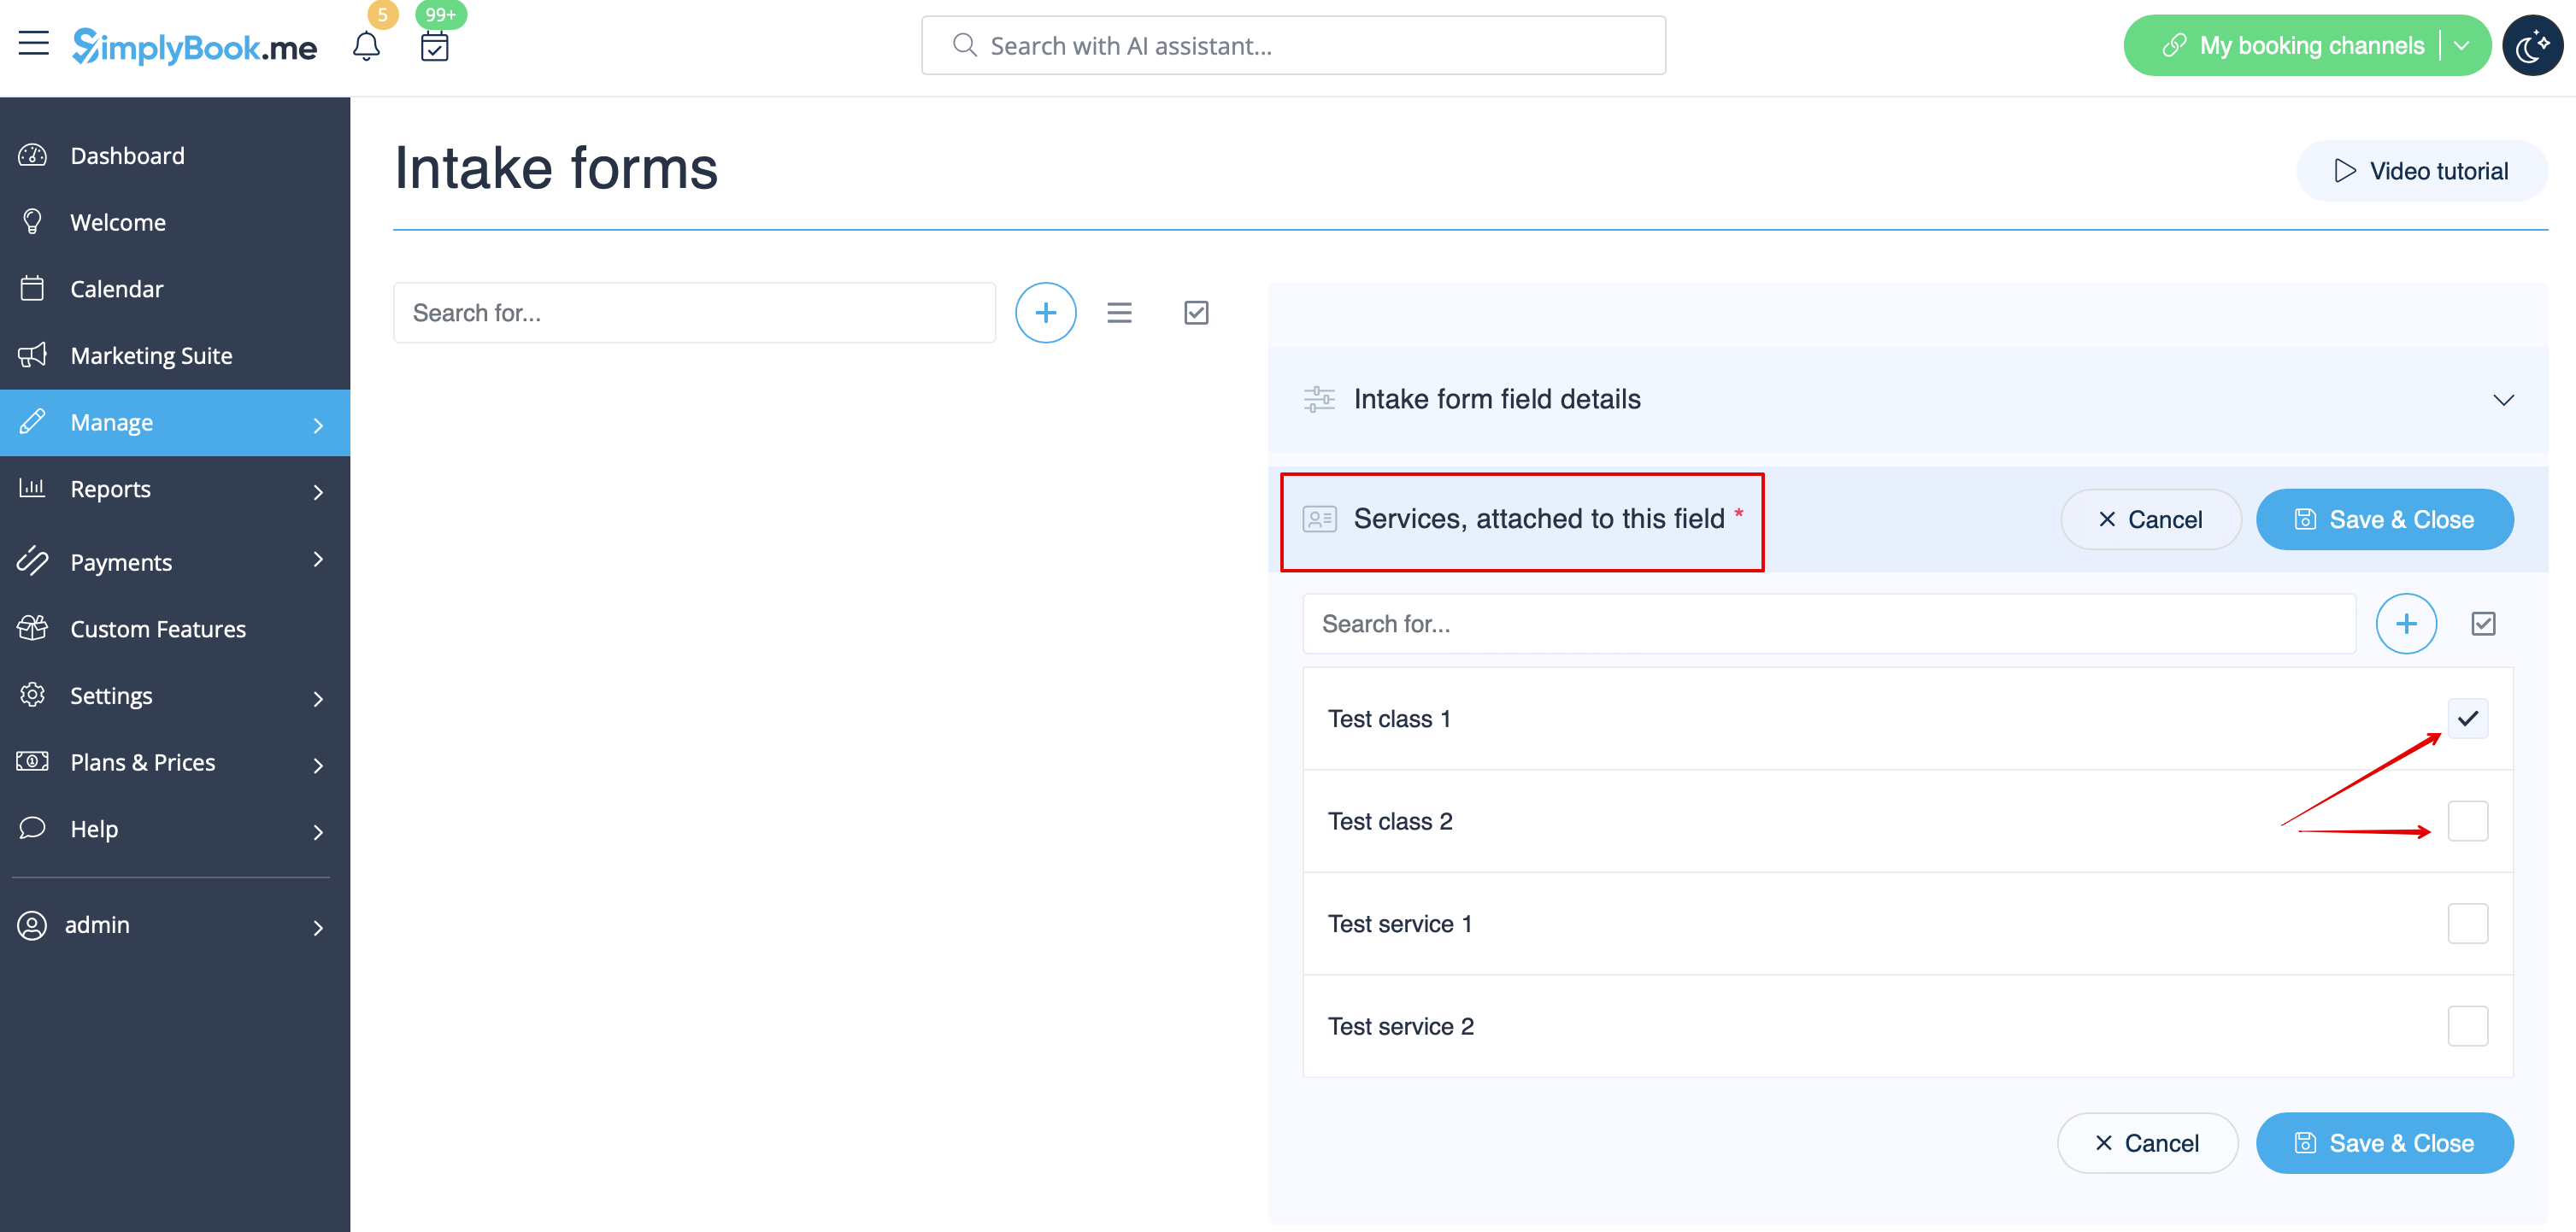
- 7. Якщо ви хочете пов'язати форму з певними послугами, виберіть вкладку «Послуги, пов'язані з цим полем» і встановіть прапорці біля відповідних послуг.
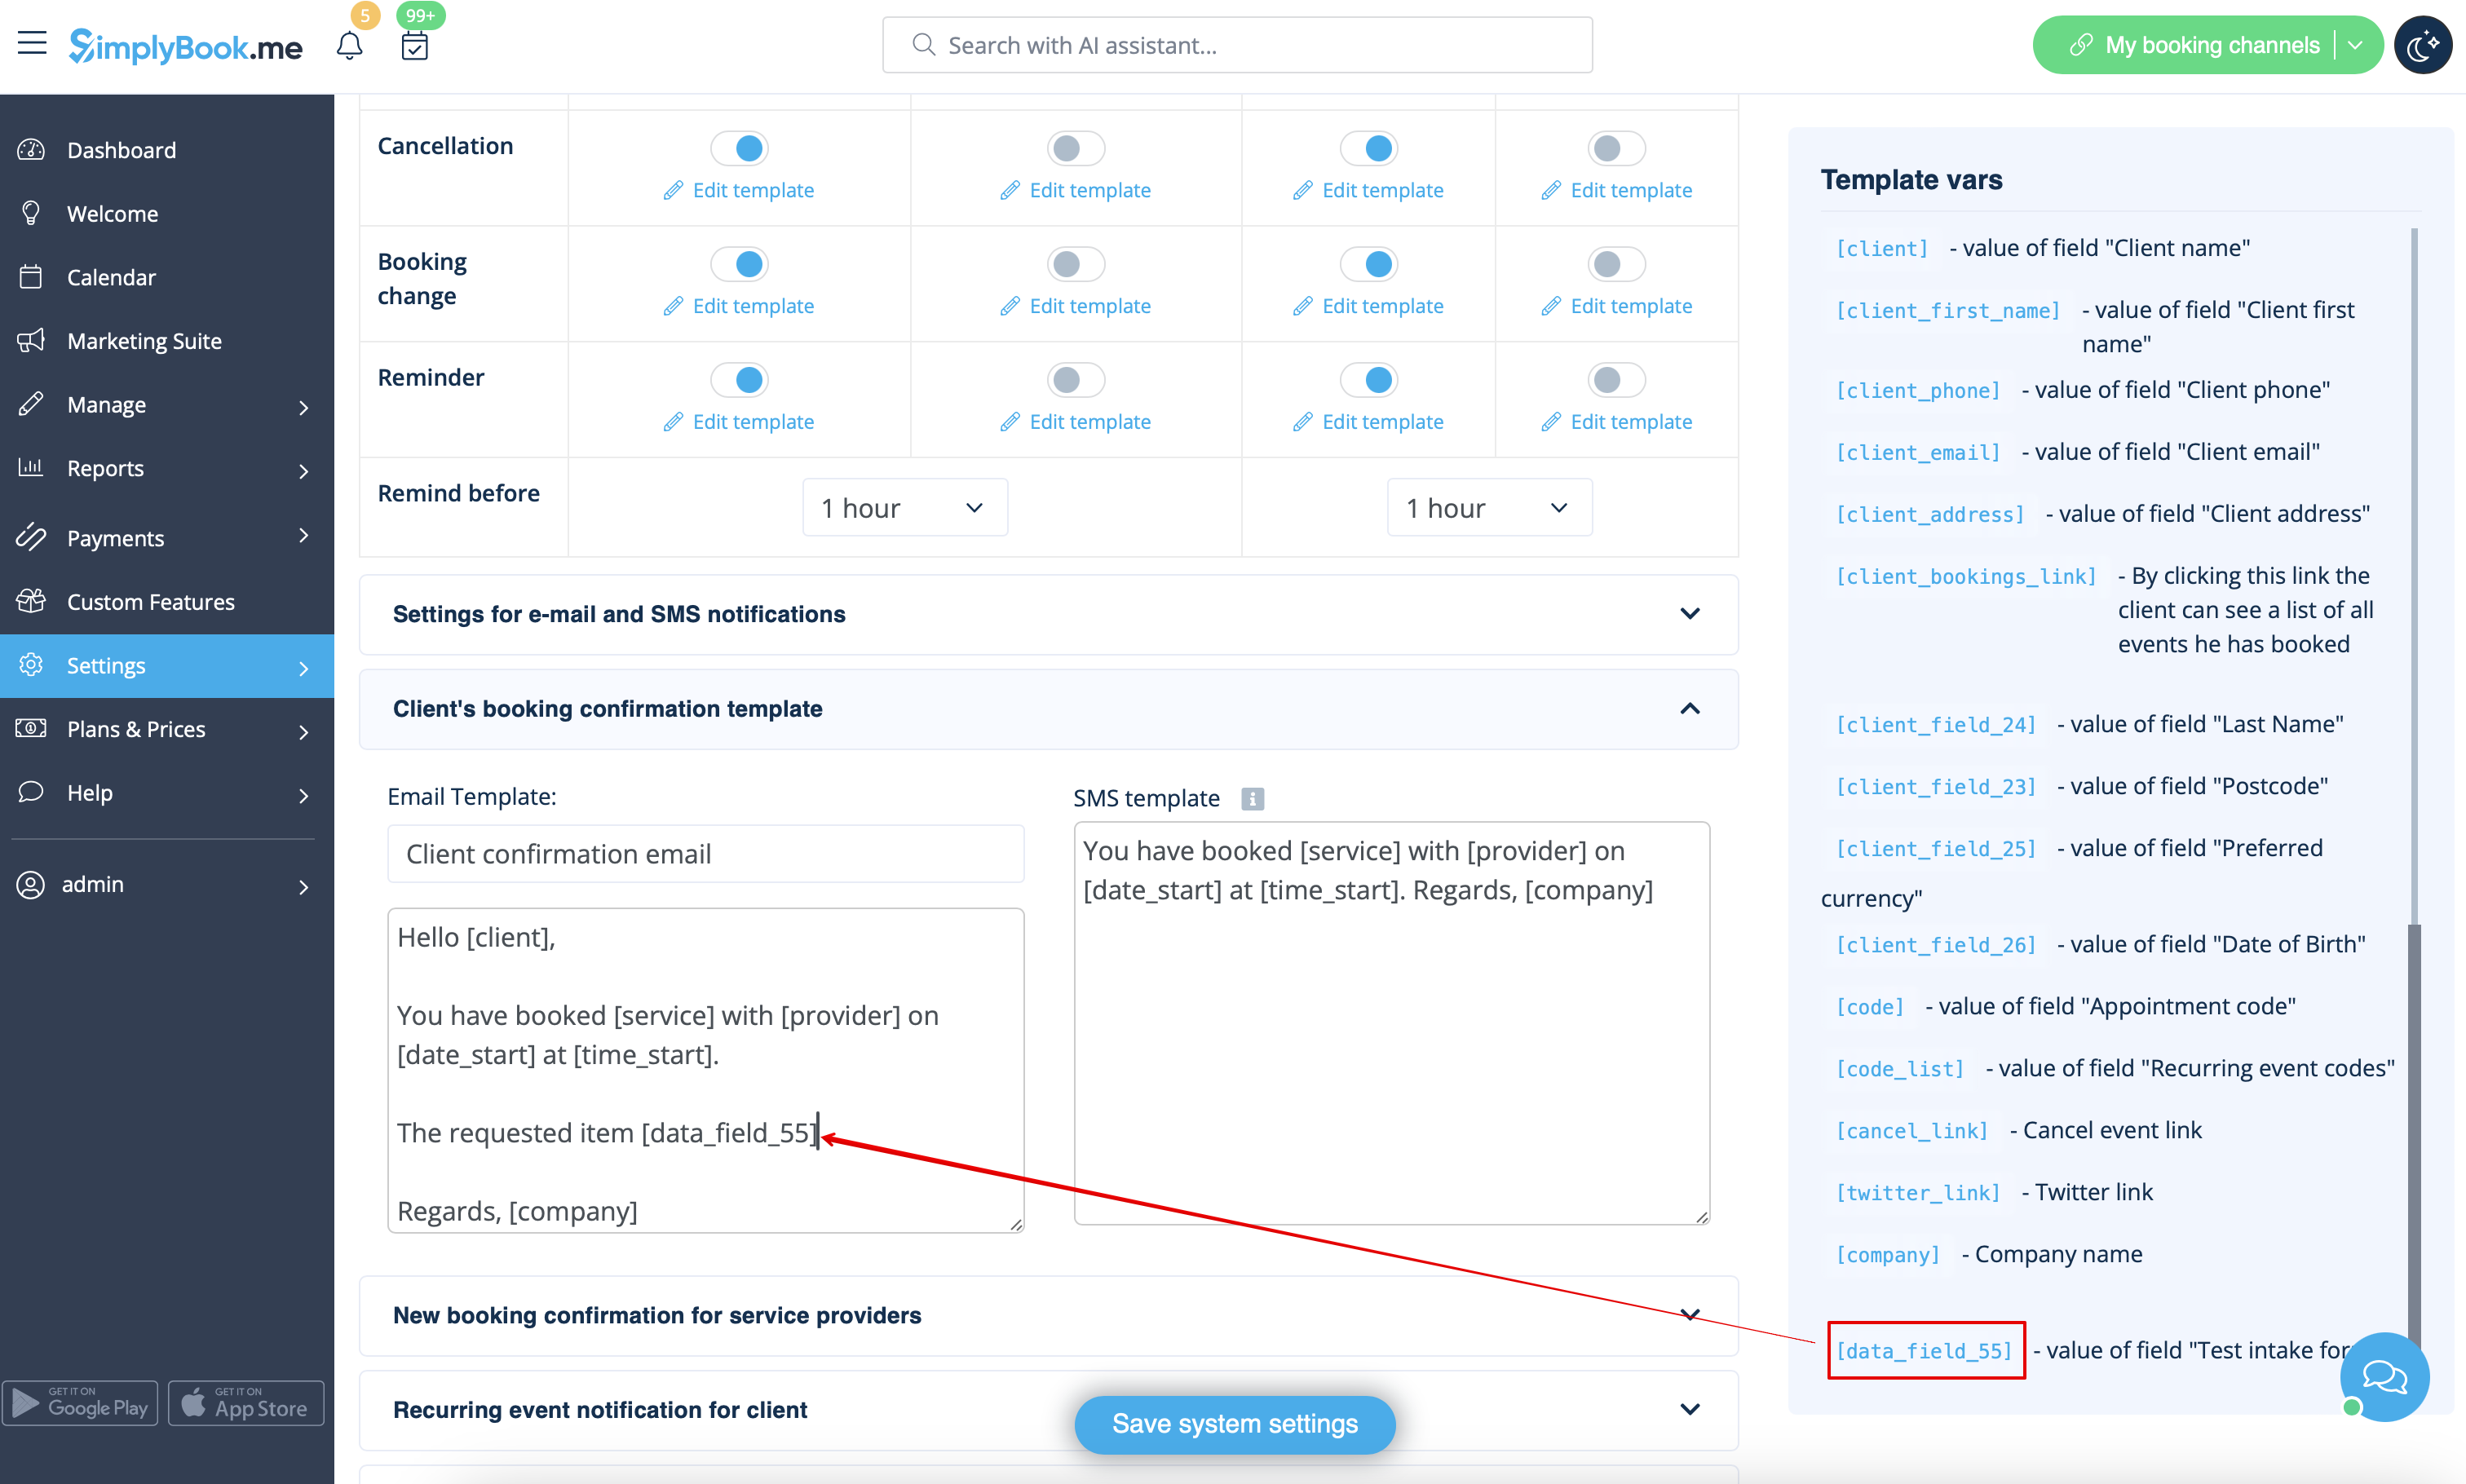
- 8. Якщо ви хочете включити інформацію з форми прийому в шаблони електронних листів, знайдіть змінні форми прийому та додайте їх до шаблонів у налаштуваннях «Налаштування електронної пошти та SMS».