Translations:Tips Custom Feature/6/da: Difference between revisions

From SimplyBook.me
Created page with ";Sådan bruges 1. For at aktivere denne funktion skal du gå til afsnittet <span style="background-color:#d4f8e5; padding:5px; border-radius:5px;">Brugerdefinerede funktioner</span> i menuen til venstre i din admin-grænseflade, finde <span style="background-color:#d4f8e5; padding:5px; border-radius:5px;">Tips</span> og klikke på knappen <span style="background-color:#d4f8e5; padding:5px; border-radius:5px;">Aktivér</span> eller bruge kontakten. File:Tips enable path..."
 
(No difference)

Latest revision as of 15:49, 19 May 2025

Information about message (contribute)
This message has no documentation. If you know where or how this message is used, you can help other translators by adding documentation to this message.
Message definition (Tips Custom Feature)
;How to use
1. To enable this feature, go to the <span style="background-color:#d4f8e5; padding:5px; border-radius:5px;">Custom Features</span> section using the left-side menu of your admin interface, find <span style="background-color:#d4f8e5; padding:5px; border-radius:5px;">Tips</span>, and click on <span style="background-color:#d4f8e5; padding:5px; border-radius:5px;">Enable</span> button or use the switcher.
[[File:Tips enable path redesigned.png|1200px|border|center|link=https://help.simplybook.me/images/6/6e/Tips_enable_path_redesigned.png]]
<br><br>
2. Once enabled, you can select if some tax should be added to tips or not. Use the drop-down menu to choose from the previously created sales taxes or leave it with “No tax” if taxes should not be applied. 
[[File:Taxes on tips redesigned.png|1200px|border|center|link=https://help.simplybook.me/images/9/99/Taxes_on_tips_redesigned.png]]
<br><br>
3. There are 2 tipping options for your clients:<br>
:''Option A'': Tipping when making payment upon booking. 
When clients make a booking, they will see 4 tipping options at the Payment step. The amount of the tip depends on the price of your service and is equal to 5%, 10%, and 15% of the service price. The 4th option is “Custom” - the clients can choose to enter the custom amount of their tip.
[[File:Tips client side.png|1200px|border|center|link=https://help.simplybook.me/images/6/64/Tips_client_side.png]]
<br><br>
<span style="background-color:#ffe9e9; padding:5px; border-radius:5px;">'''Please note!''': If the service price is set to 0 (service is provided for free), the option of adding a tip will not be available.</span><br>
:''Option B'': Tipping after the appointment is finished. (Pay Later chosen upon booking)
If you are using the <span style="background-color:#d4f8e5; padding:5px; border-radius:5px;">Pay Later</span> payment option you can send the payment links from the admin side to your customers. <br>
It can be done in <span style="background-color:#d4f8e5; padding:5px; border-radius:5px;">Reports</span> -> <span style="background-color:#d4f8e5; padding:5px; border-radius:5px;">Payment Transactions</span> -> <span style="background-color:#d4f8e5; padding:5px; border-radius:5px;">3 dots menu</span> per necessary row -> <span style="background-color:#d4f8e5; padding:5px; border-radius:5px;">Receive payment</span>  -> <span style="background-color:#d4f8e5; padding:5px; border-radius:5px;">Send Email/SMS.</span><br>
<span style="background-color:#ffe9e9; padding:5px; border-radius:5px;">'''Please note!''' Sending payment links is available only with <span style="background-color:#cdeffc; padding:5px; border-radius:5px;">[https://sbpay.me SBPay.me PRO]</span> integration.</span>
[[File:Send payment links for tips.jpg|1200px|border|center|link=https://help.simplybook.me/images/d/d4/Send_payment_links_for_tips.jpg]]
<br><br>       
Your clients can also scan the <span style="background-color:#d4f8e5; padding:5px; border-radius:5px;">QR code</span> and will be redirected to the payment step where they can leave tip. 
[[File:Show qr for tips.png|1200px|border|center|link=https://help.simplybook.me/images/1/19/Show_qr_for_tips.png]]
<br><br><br><br>
;How to use Tips Custom Feature with Accept Deposits Custom Feature
<br>
Sådan bruges

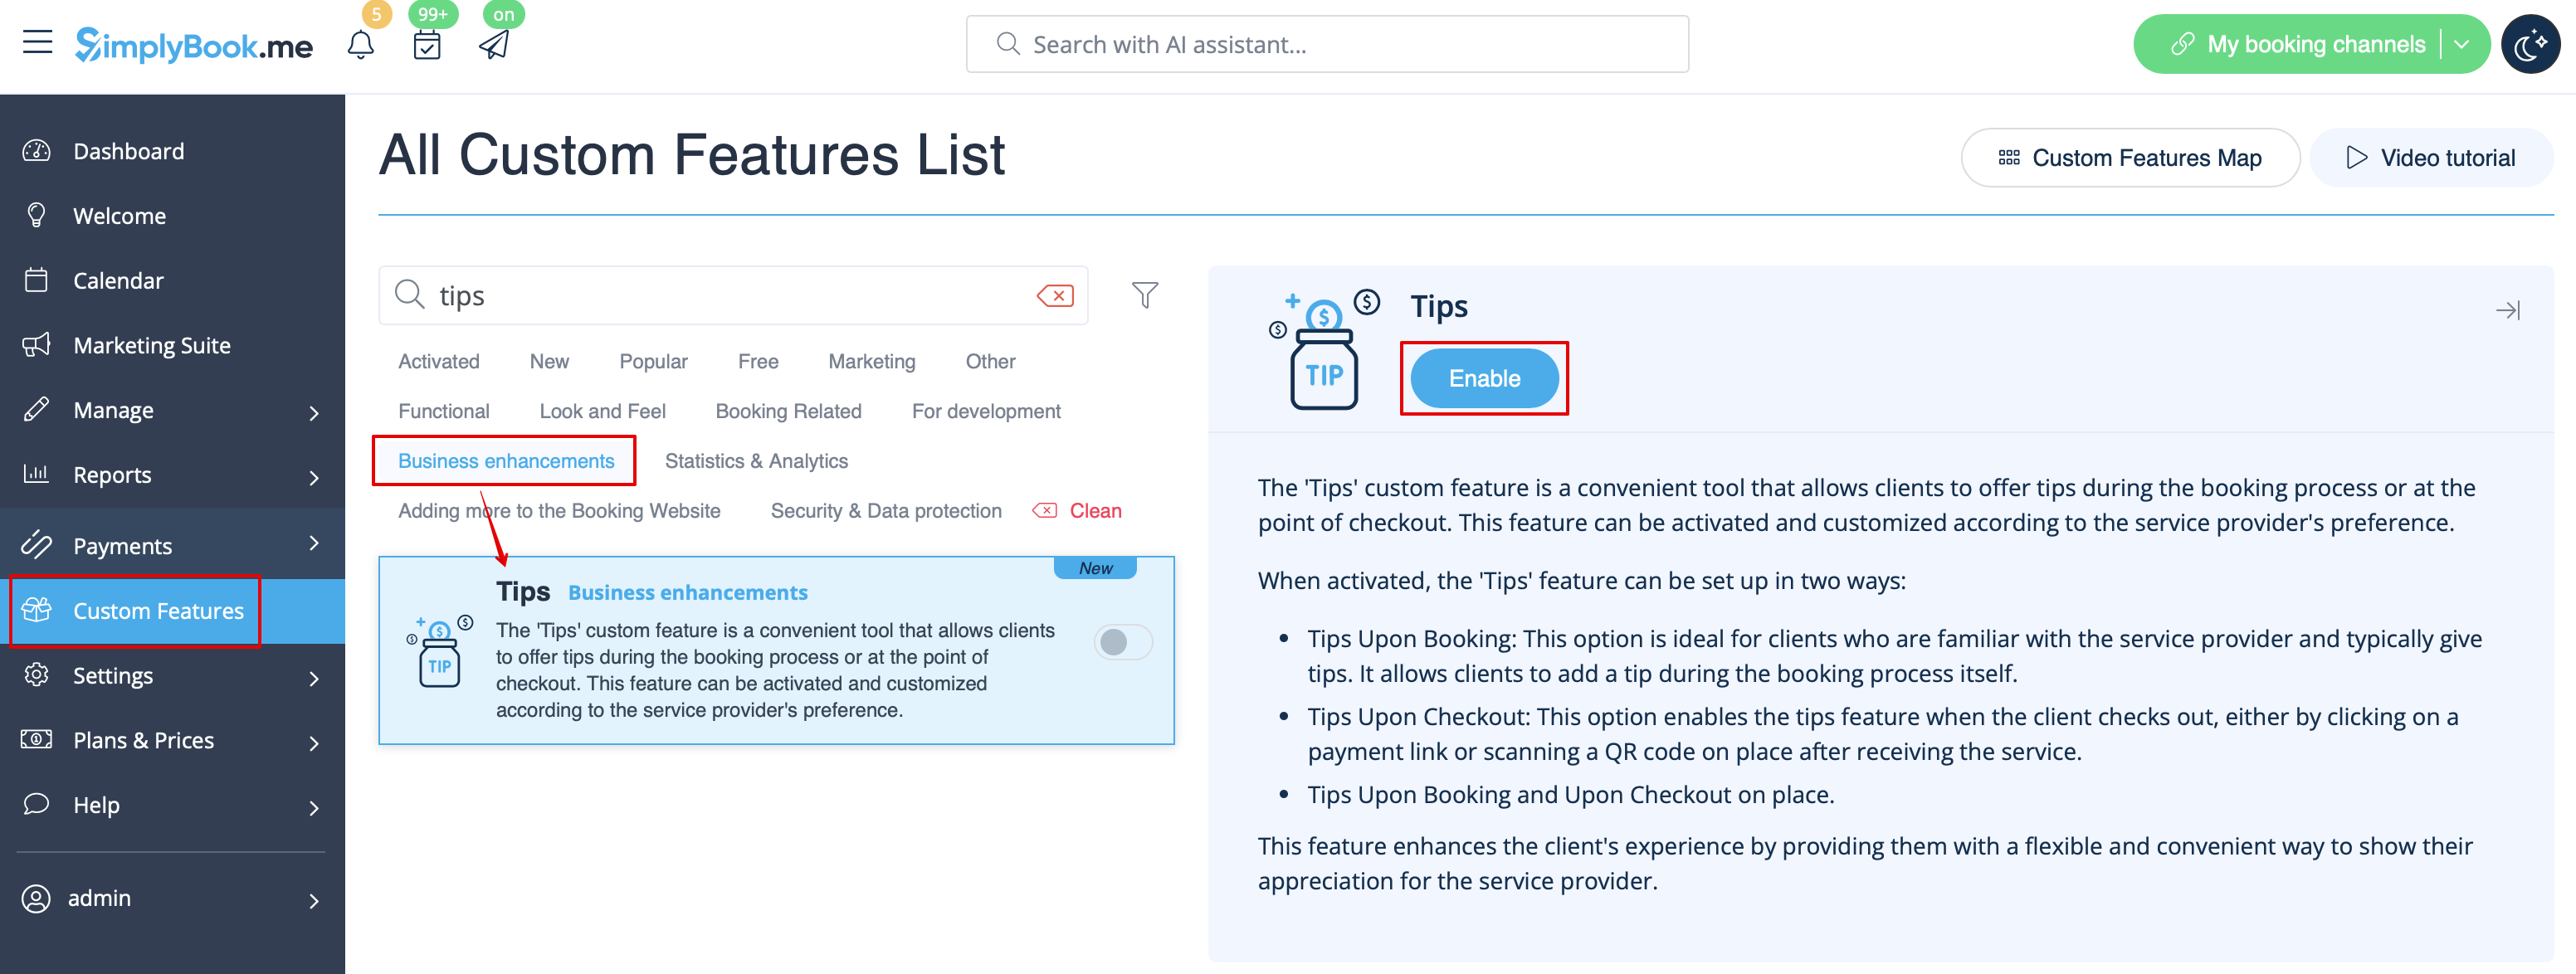
1. For at aktivere denne funktion skal du gå til afsnittet Brugerdefinerede funktioner i menuen til venstre i din admin-grænseflade, finde Tips og klikke på knappen Aktivér eller bruge kontakten.


2. Når funktionen er aktiveret, kan du vælge, om der skal tilføjes moms til tips eller ej. Brug rullemenuen til at vælge mellem de tidligere oprettede momstyper, eller lad feltet stå på "Ingen moms", hvis der ikke skal pålægges moms.


3. Der er to muligheder for drikkepenge til dine kunder:

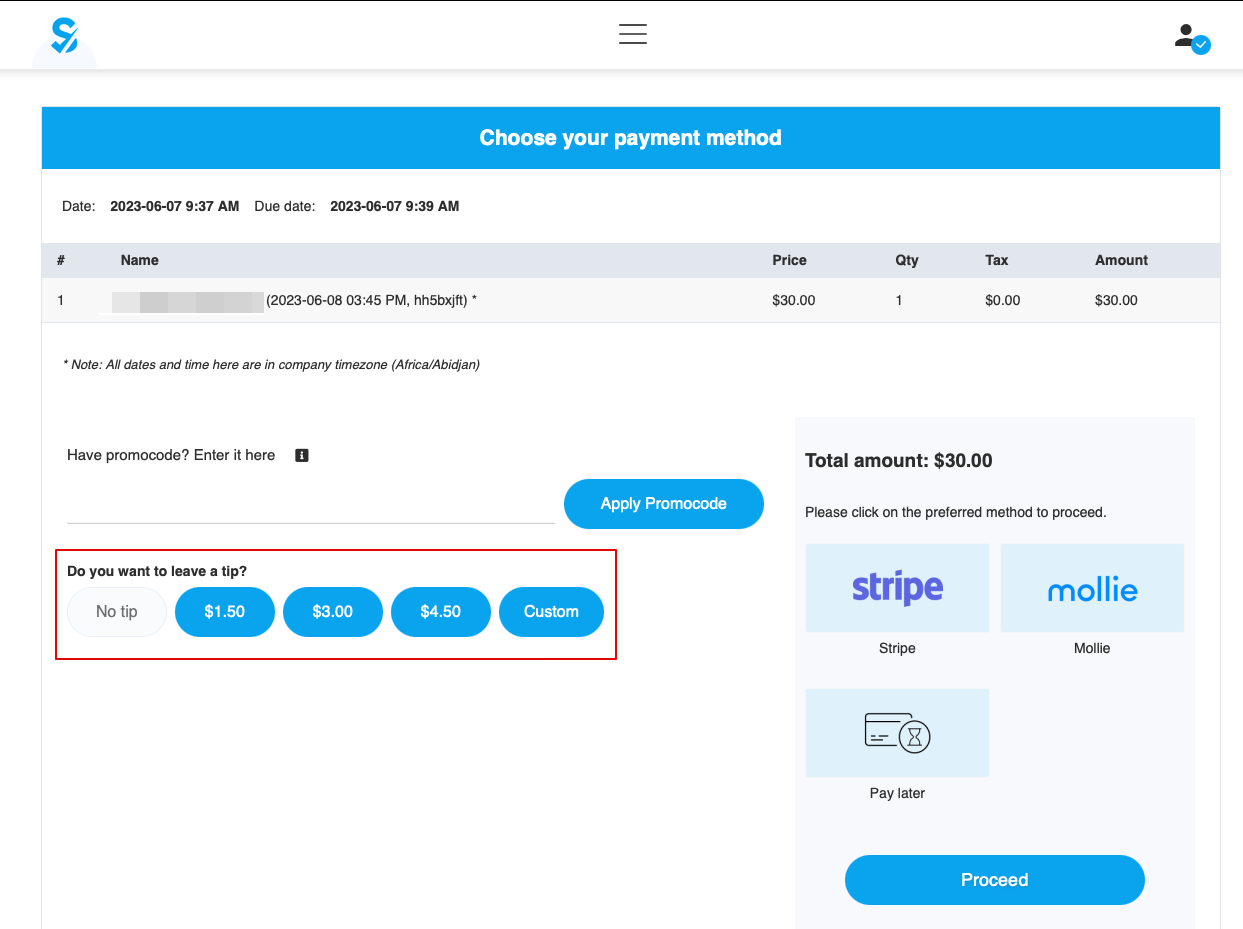
Mulighed A: Drikkepenge ved betaling ved booking.

Når kunder foretager en booking, vil de se fire muligheder for drikkepenge i betalingstrinnet. Drikkepengene afhænger af prisen på din service og svarer til 5 %, 10 % eller 15 % af serviceprisen. Den fjerde mulighed er "Brugerdefineret" – kunderne kan vælge at indtaste et brugerdefineret beløb for deres drikkepenge.


Bemærk: Hvis serviceprisen er sat til 0 (servicen leveres gratis), er muligheden for at tilføje drikkepenge ikke tilgængelig.

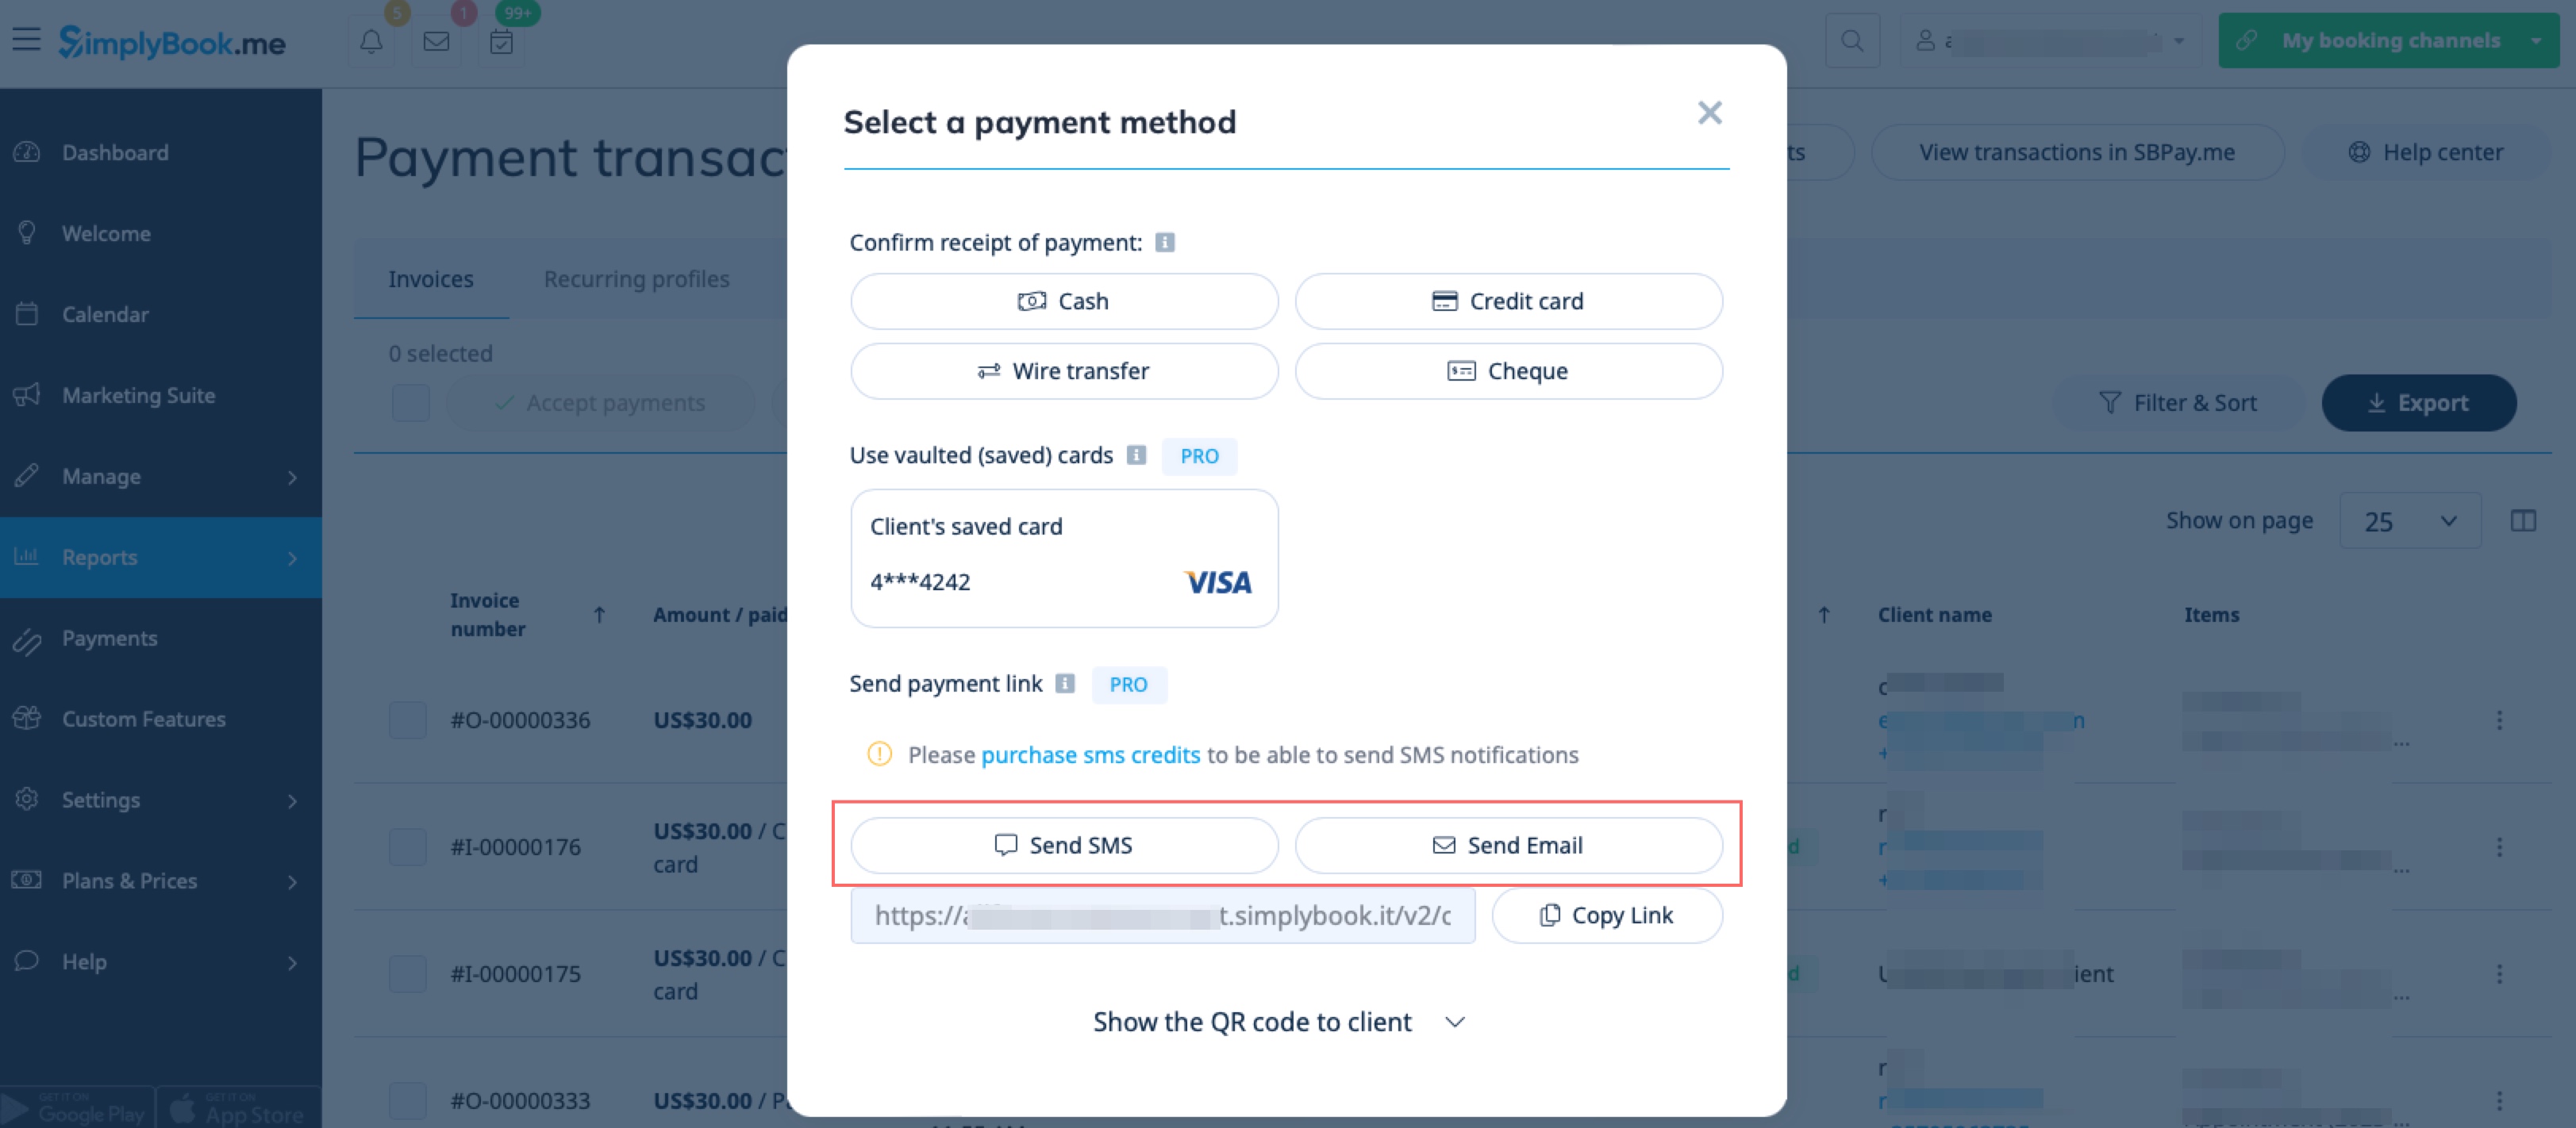
Mulighed B: Drikkepenge efter aftalens afslutning. (Betal senere valgt ved booking)

Hvis du bruger betalingsmuligheden Betal senere, kan du sende betalingslinkene fra administrationssiden til dine kunder.
Det kan gøres i Rapporter -> Betalingstransaktioner -> 3 prikker-menuen for den nødvendige række -> Modtag betaling -> Send e-mail/SMS.
Bemærk! Afsendelse af betalingslinks er kun tilgængelig med SBPay.me PRO-integration.


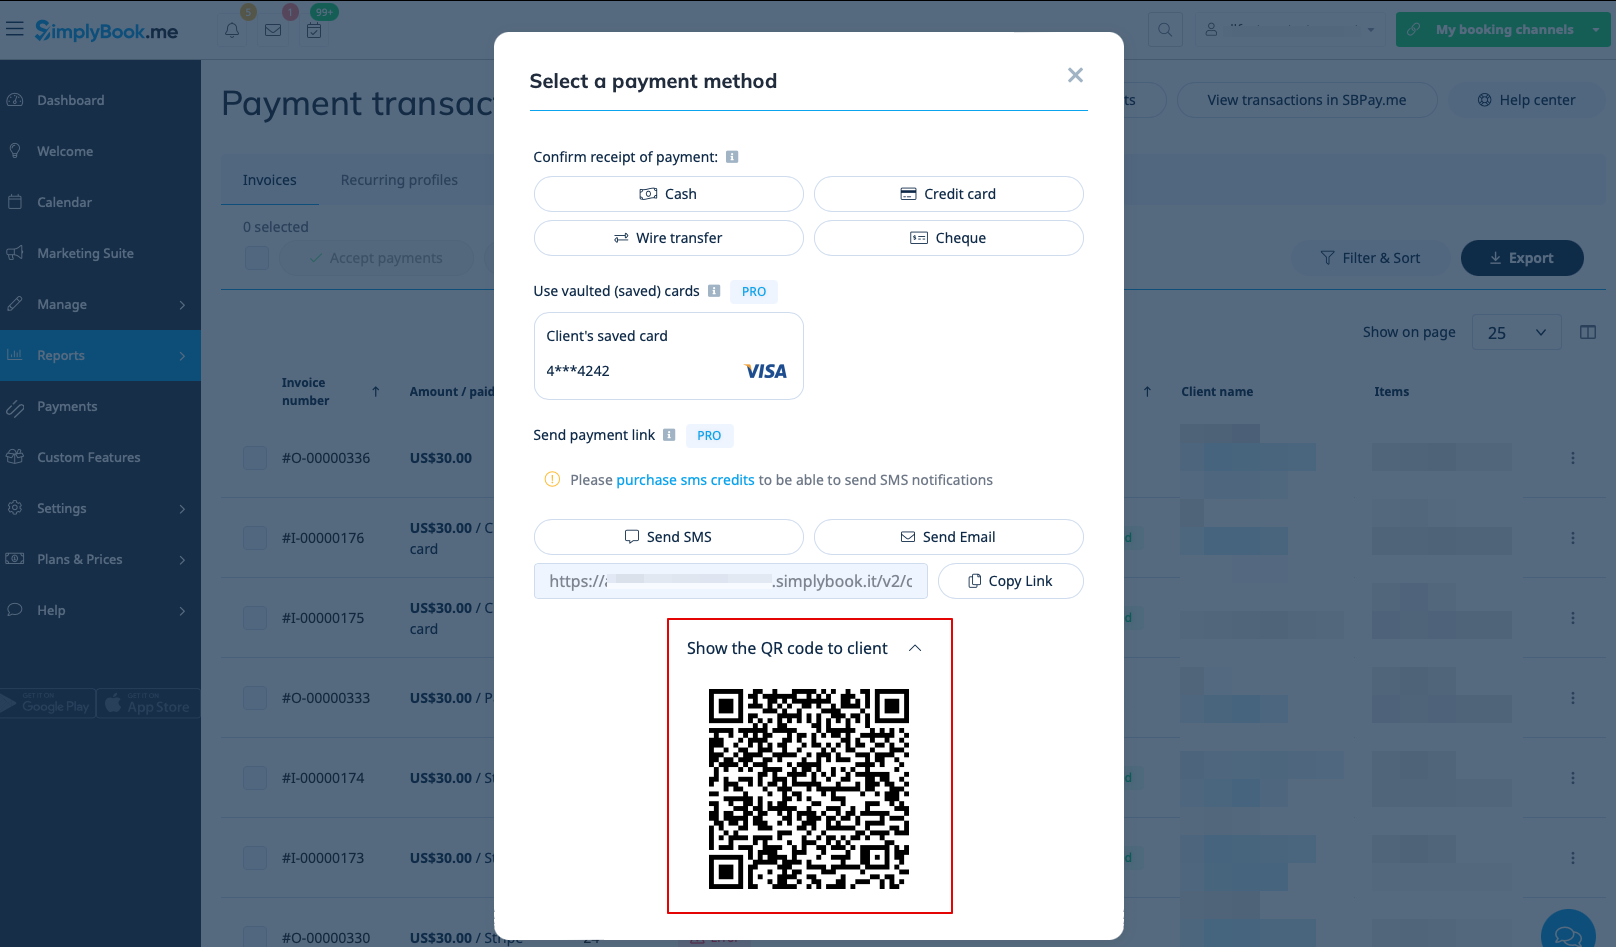
Dine kunder kan også scanne QR-koden og vil blive omdirigeret til betalingstrinnet, hvor de kan give drikkepenge.


Sådan bruges den tilpassede funktion til drikkepenge med den tilpassede funktion til at acceptere depositum