Translations:Tips Custom Feature/6/nl: Difference between revisions

From SimplyBook.me
Created page with ";Hoe gebruik je 1. Om deze functie in te schakelen, ga je naar het gedeelte <span style="background-color:#d4f8e5; padding:5px; border-radius:5px;">Aangepaste functies</span> in het menu aan de linkerkant van je beheerdersinterface, zoek <span style="background-color:#d4f8e5; padding:5px; border-radius:5px;">je Tips</span> en klik je op de knop <span style="background-color:#d4f8e5; padding:5px; border-radius:5px;">Inschakelen</span> of gebruik je de schakelaar. File:T..."
 
(No difference)

Latest revision as of 15:56, 19 May 2025

Information about message (contribute)
This message has no documentation. If you know where or how this message is used, you can help other translators by adding documentation to this message.
Message definition (Tips Custom Feature)
;How to use
1. To enable this feature, go to the <span style="background-color:#d4f8e5; padding:5px; border-radius:5px;">Custom Features</span> section using the left-side menu of your admin interface, find <span style="background-color:#d4f8e5; padding:5px; border-radius:5px;">Tips</span>, and click on <span style="background-color:#d4f8e5; padding:5px; border-radius:5px;">Enable</span> button or use the switcher.
[[File:Tips enable path redesigned.png|1200px|border|center|link=https://help.simplybook.me/images/6/6e/Tips_enable_path_redesigned.png]]
<br><br>
2. Once enabled, you can select if some tax should be added to tips or not. Use the drop-down menu to choose from the previously created sales taxes or leave it with “No tax” if taxes should not be applied. 
[[File:Taxes on tips redesigned.png|1200px|border|center|link=https://help.simplybook.me/images/9/99/Taxes_on_tips_redesigned.png]]
<br><br>
3. There are 2 tipping options for your clients:<br>
:''Option A'': Tipping when making payment upon booking. 
When clients make a booking, they will see 4 tipping options at the Payment step. The amount of the tip depends on the price of your service and is equal to 5%, 10%, and 15% of the service price. The 4th option is “Custom” - the clients can choose to enter the custom amount of their tip.
[[File:Tips client side.png|1200px|border|center|link=https://help.simplybook.me/images/6/64/Tips_client_side.png]]
<br><br>
<span style="background-color:#ffe9e9; padding:5px; border-radius:5px;">'''Please note!''': If the service price is set to 0 (service is provided for free), the option of adding a tip will not be available.</span><br>
:''Option B'': Tipping after the appointment is finished. (Pay Later chosen upon booking)
If you are using the <span style="background-color:#d4f8e5; padding:5px; border-radius:5px;">Pay Later</span> payment option you can send the payment links from the admin side to your customers. <br>
It can be done in <span style="background-color:#d4f8e5; padding:5px; border-radius:5px;">Reports</span> -> <span style="background-color:#d4f8e5; padding:5px; border-radius:5px;">Payment Transactions</span> -> <span style="background-color:#d4f8e5; padding:5px; border-radius:5px;">3 dots menu</span> per necessary row -> <span style="background-color:#d4f8e5; padding:5px; border-radius:5px;">Receive payment</span>  -> <span style="background-color:#d4f8e5; padding:5px; border-radius:5px;">Send Email/SMS.</span><br>
<span style="background-color:#ffe9e9; padding:5px; border-radius:5px;">'''Please note!''' Sending payment links is available only with <span style="background-color:#cdeffc; padding:5px; border-radius:5px;">[https://sbpay.me SBPay.me PRO]</span> integration.</span>
[[File:Send payment links for tips.jpg|1200px|border|center|link=https://help.simplybook.me/images/d/d4/Send_payment_links_for_tips.jpg]]
<br><br>       
Your clients can also scan the <span style="background-color:#d4f8e5; padding:5px; border-radius:5px;">QR code</span> and will be redirected to the payment step where they can leave tip. 
[[File:Show qr for tips.png|1200px|border|center|link=https://help.simplybook.me/images/1/19/Show_qr_for_tips.png]]
<br><br><br><br>
;How to use Tips Custom Feature with Accept Deposits Custom Feature
<br>
Hoe gebruik je

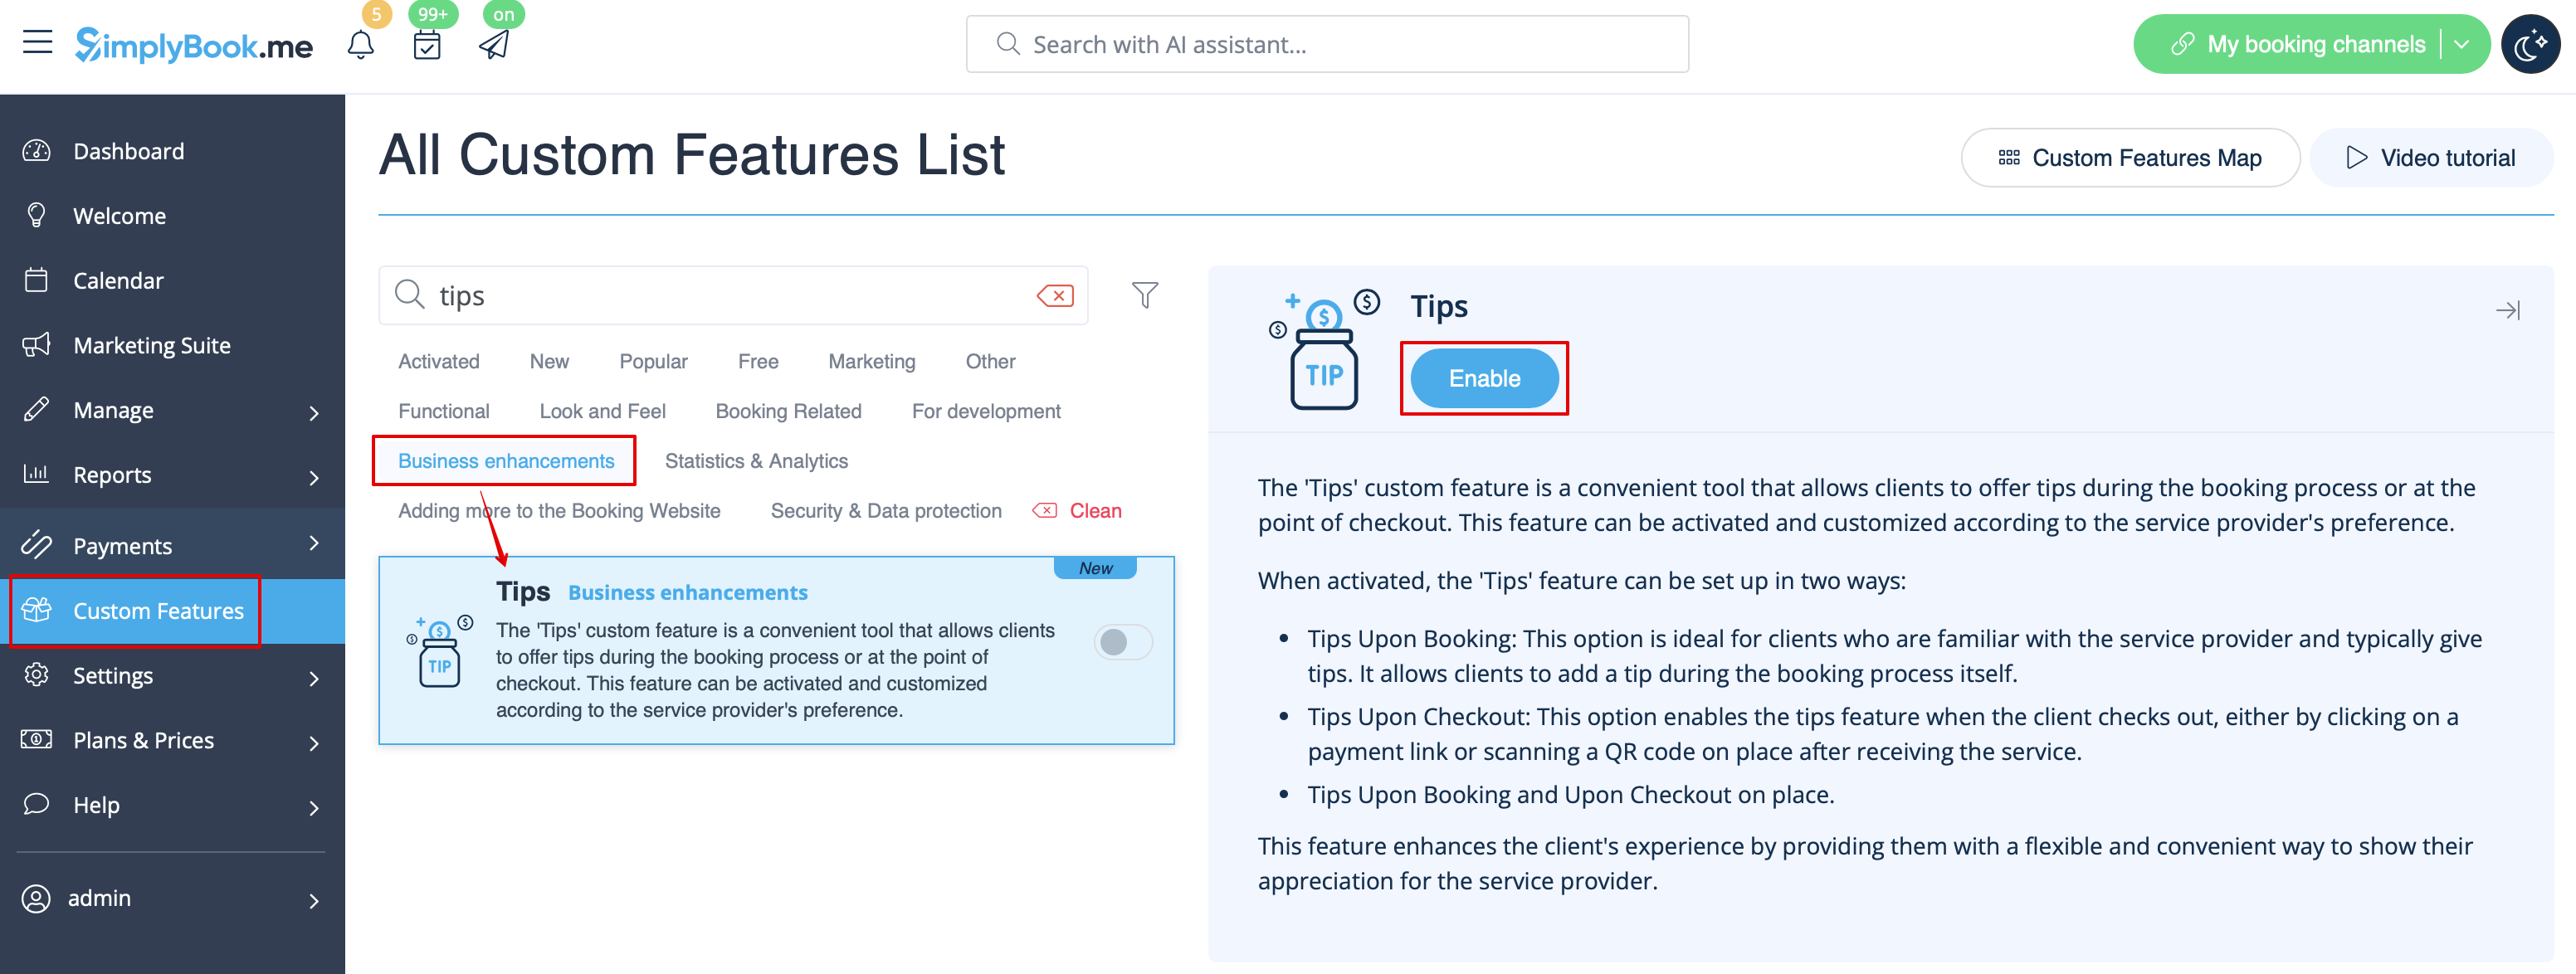
1. Om deze functie in te schakelen, ga je naar het gedeelte Aangepaste functies in het menu aan de linkerkant van je beheerdersinterface, zoek je Tips en klik je op de knop Inschakelen of gebruik je de schakelaar.


2. Zodra deze functie is ingeschakeld, kun je selecteren of er belasting moet worden toegevoegd aan fooien. Gebruik het vervolgkeuzemenu om te kiezen uit de eerder aangemaakte omzetbelastingen of laat het op "Geen belasting" staan als er geen belasting moet worden toegepast.


3. Er zijn 2 fooienopties voor uw klanten:

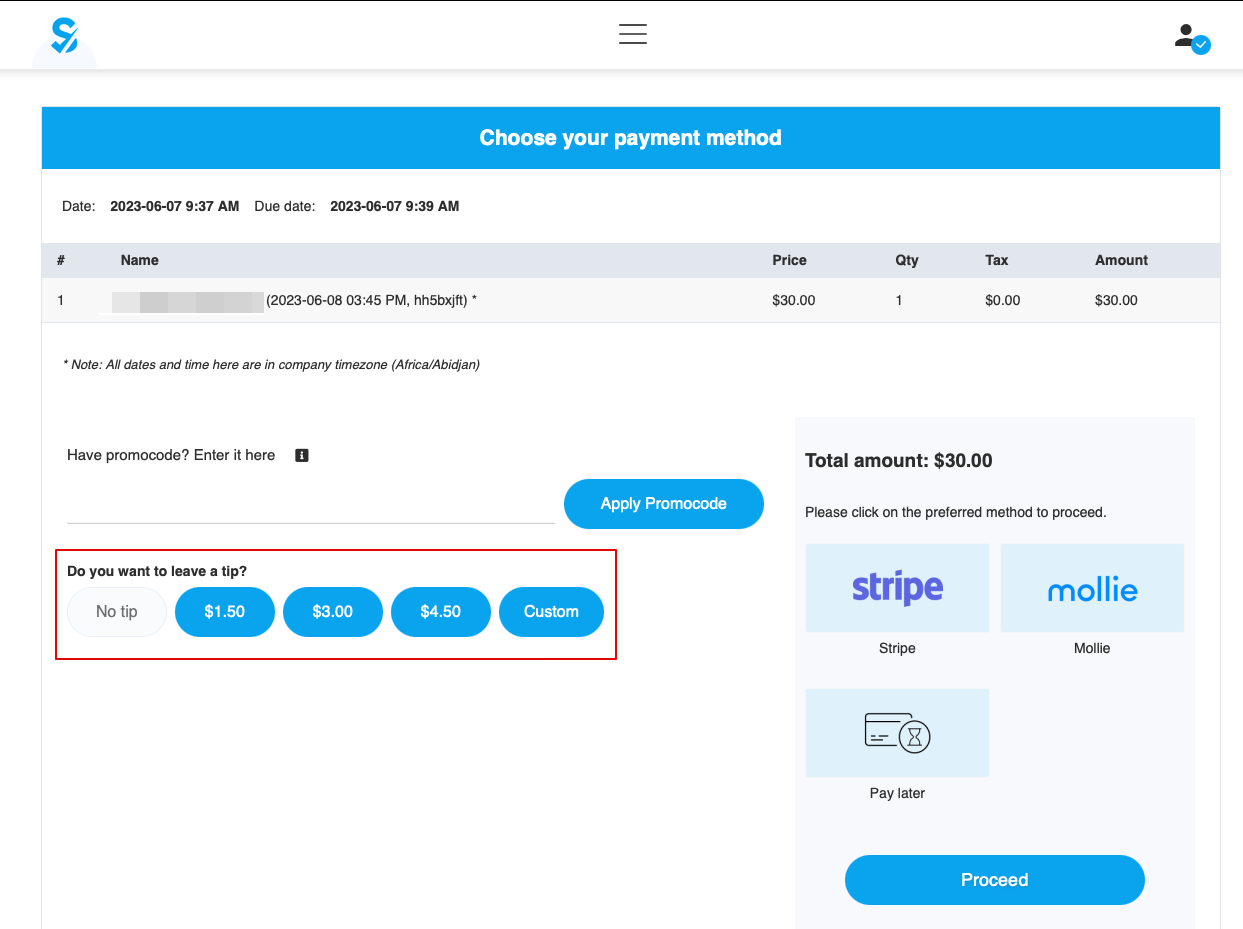
Optie A: Fooien geven bij het betalen van de boeking.

Wanneer klanten een boeking maken, zien ze bij de stap 'Betaling' vier opties voor fooien. Het bedrag van de fooi is afhankelijk van de prijs van uw dienst en is gelijk aan 5%, 10% of 15% van de prijs van de dienst. De vierde optie is 'Aangepast': klanten kunnen zelf een bedrag voor de fooi invoeren.


Let op: als de prijs van de dienst is ingesteld op 0 (dienst wordt gratis aangeboden), is de optie om een fooi toe te voegen niet beschikbaar.

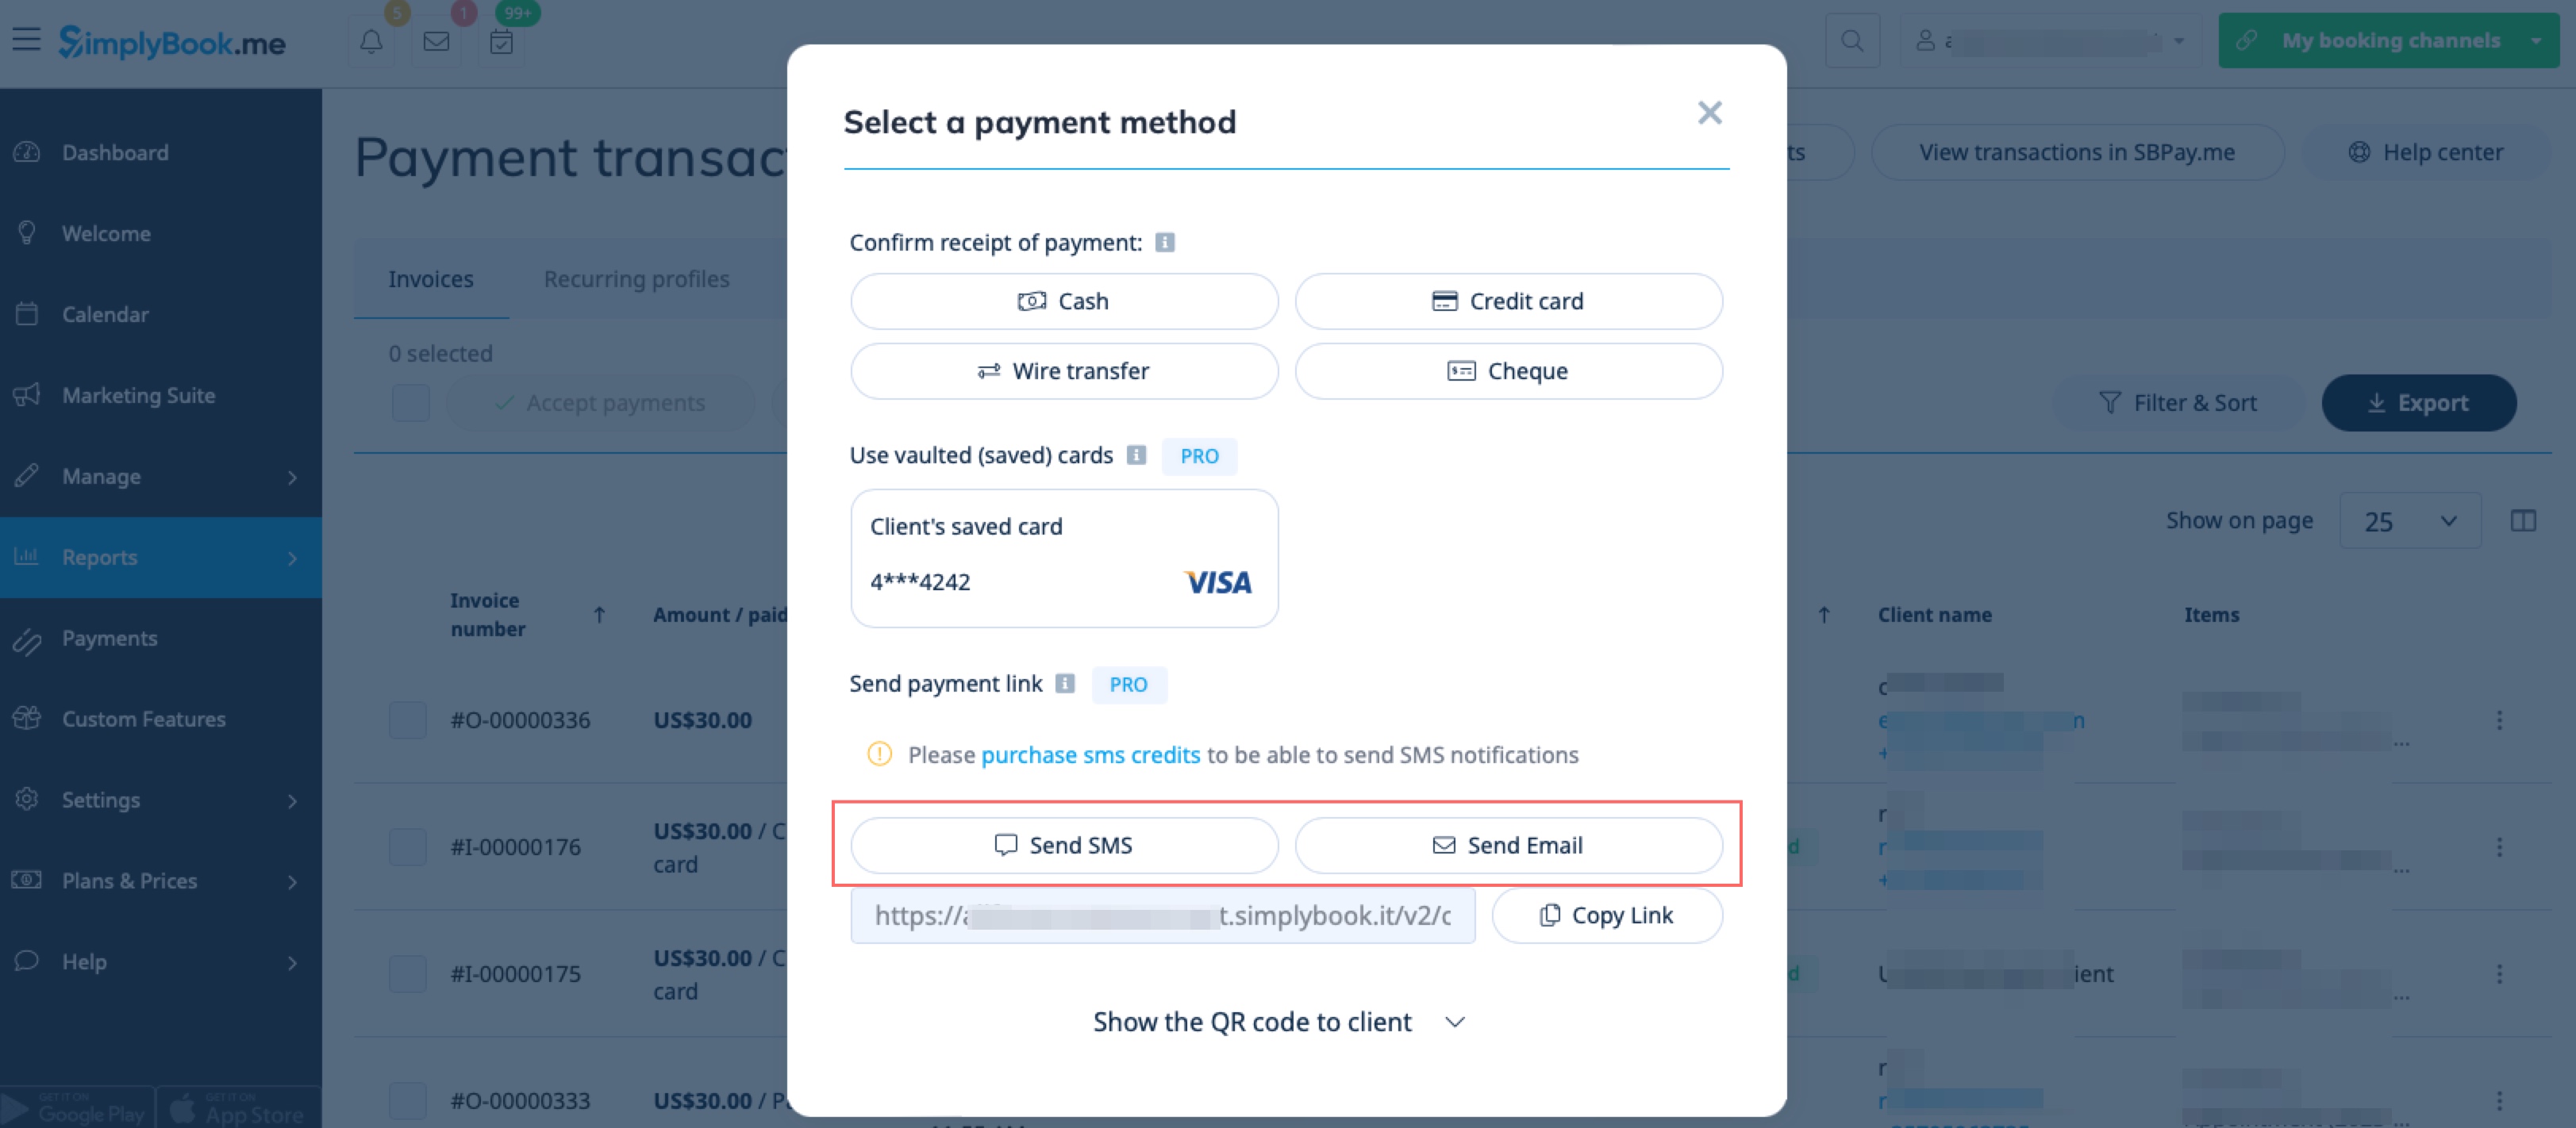
Optie B: Fooien geven nadat de afspraak is voltooid. (Later betalen gekozen bij het boeken)

Als u de betalingsoptie Later betalen gebruikt, kunt u de betalingslinks vanuit de beheerderskant naar uw klanten sturen.
Dit kan worden gedaan in Rapporten -> Betalingstransacties -> 3 puntjes menu per benodigde rij -> Betaling ontvangen -> E-mail/sms verzenden.
Let op! Het verzenden van betalingslinks is alleen mogelijk met SBPay.me PRO-integratie.


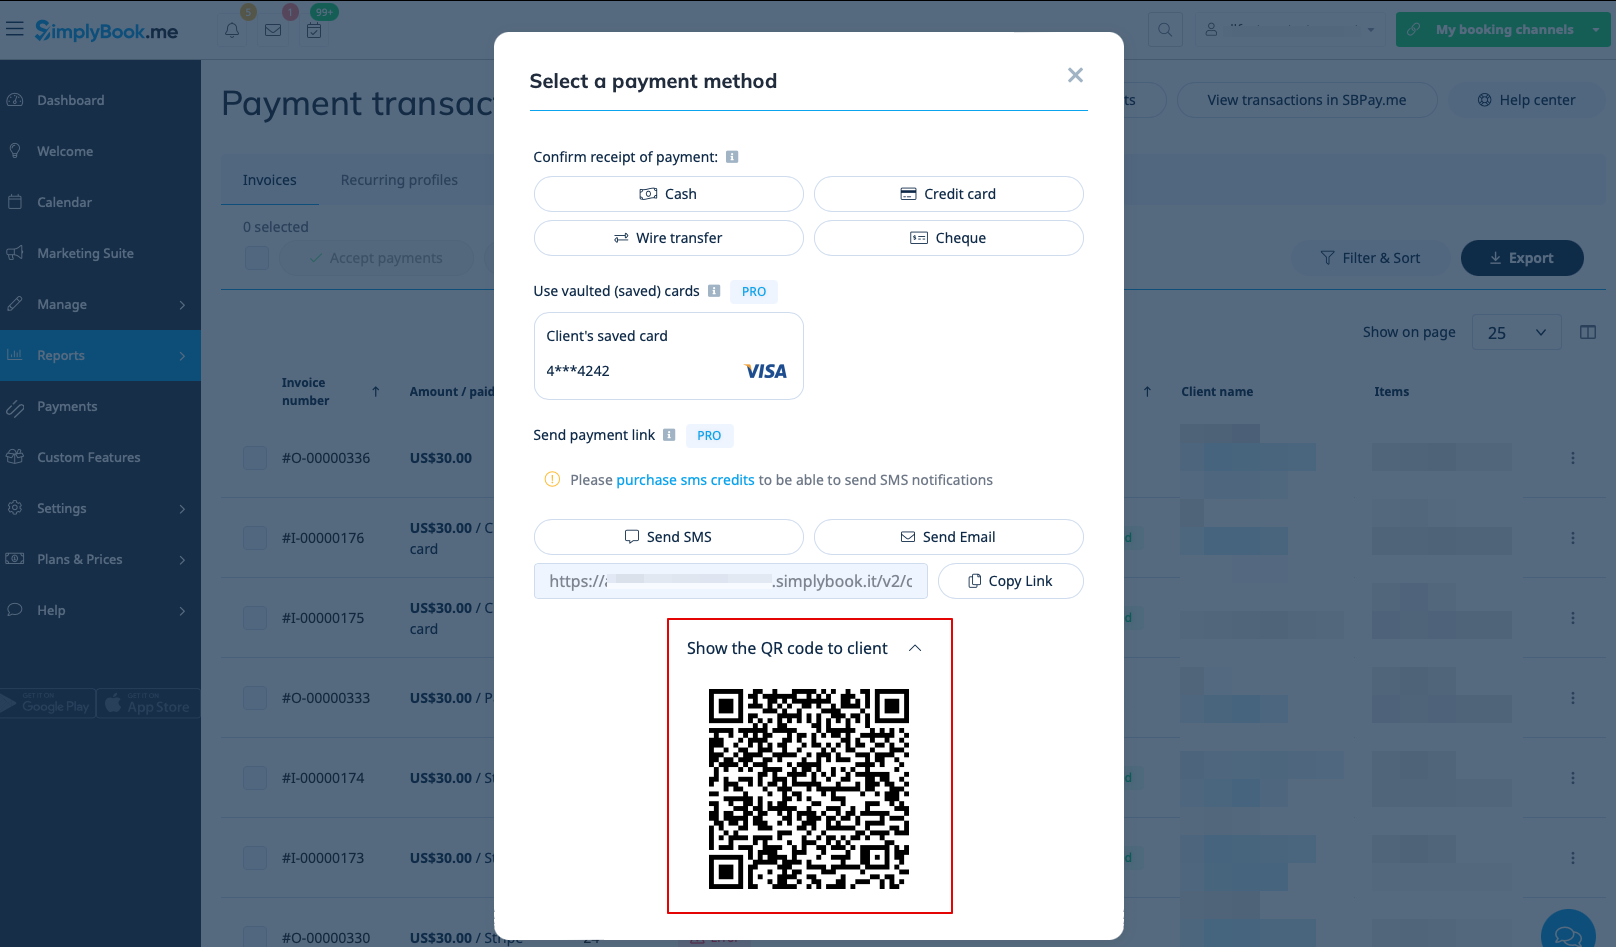
Uw klanten kunnen ook de QR-code scannen en worden doorgestuurd naar de betaalstap waar ze een fooi kunnen achterlaten.


Hoe de aangepaste functie voor fooien te gebruiken met de aangepaste functie voor het accepteren van aanbetalingen