Translations:Tickets custom feature/8/fr: Difference between revisions

From SimplyBook.me
Created page with ":1. Activez cette fonctionnalité sur votre page <span style="background-color:#d4f8e5; padding:5px; border-radius:5px;">Fonctionnalités personnalisées</span>. 1200px|border|center|link=https://help.simplybook.me/images/c/cf/Tickets_enable_path_redesigned.png <br><br> :2. Accédez à <span style="background-color:#d4f8e5; padding:5px; border-radius:5px;">Gérer</span> à l'aide du lien situé à côté de la fonctionnalité a..."
 
(No difference)

Latest revision as of 15:59, 19 May 2025

Information about message (contribute)
This message has no documentation. If you know where or how this message is used, you can help other translators by adding documentation to this message.
Message definition (Tickets custom feature)
:1. Enable this feature on your <span style="background-color:#d4f8e5; padding:5px; border-radius:5px;">Custom Features</span> page.
[[File:Tickets enable path redesigned.png|1200px|border|center|link=https://help.simplybook.me/images/c/cf/Tickets_enable_path_redesigned.png]]
<br><br>
:2. Navigate to <span style="background-color:#d4f8e5; padding:5px; border-radius:5px;">Manage</span> using the link near the enabled feature or go to <span style="background-color:#d4f8e5; padding:5px; border-radius:5px;">Manage</span> -> <span style="background-color:#d4f8e5; padding:5px; border-radius:5px;">Services</span> section.
[[File:Tickets manage path redesigned.png|1200px |border|center|link=https://help.simplybook.me/images/8/8c/Tickets_manage_path_redesigned.png]]
<br><br>
:3. Select the service you would like to sell the tickets for with a click and go to <span style="background-color:#d4f8e5; padding:5px; border-radius:5px;">Tickets</span> tab.
<br><br>
:4. <span style="background-color:#d4f8e5; padding:5px; border-radius:5px;">Enable</span> tickets issuing and connect the template by clicking on it. Save settings.
:(There is one default template, but with Premium plan you can create your own one).
[[File:Attach ticket to service redesigned.png|1200px|border|center|link=https://help.simplybook.me/images/1/1b/Attach_ticket_to_service_redesigned.png]]
<br><br>
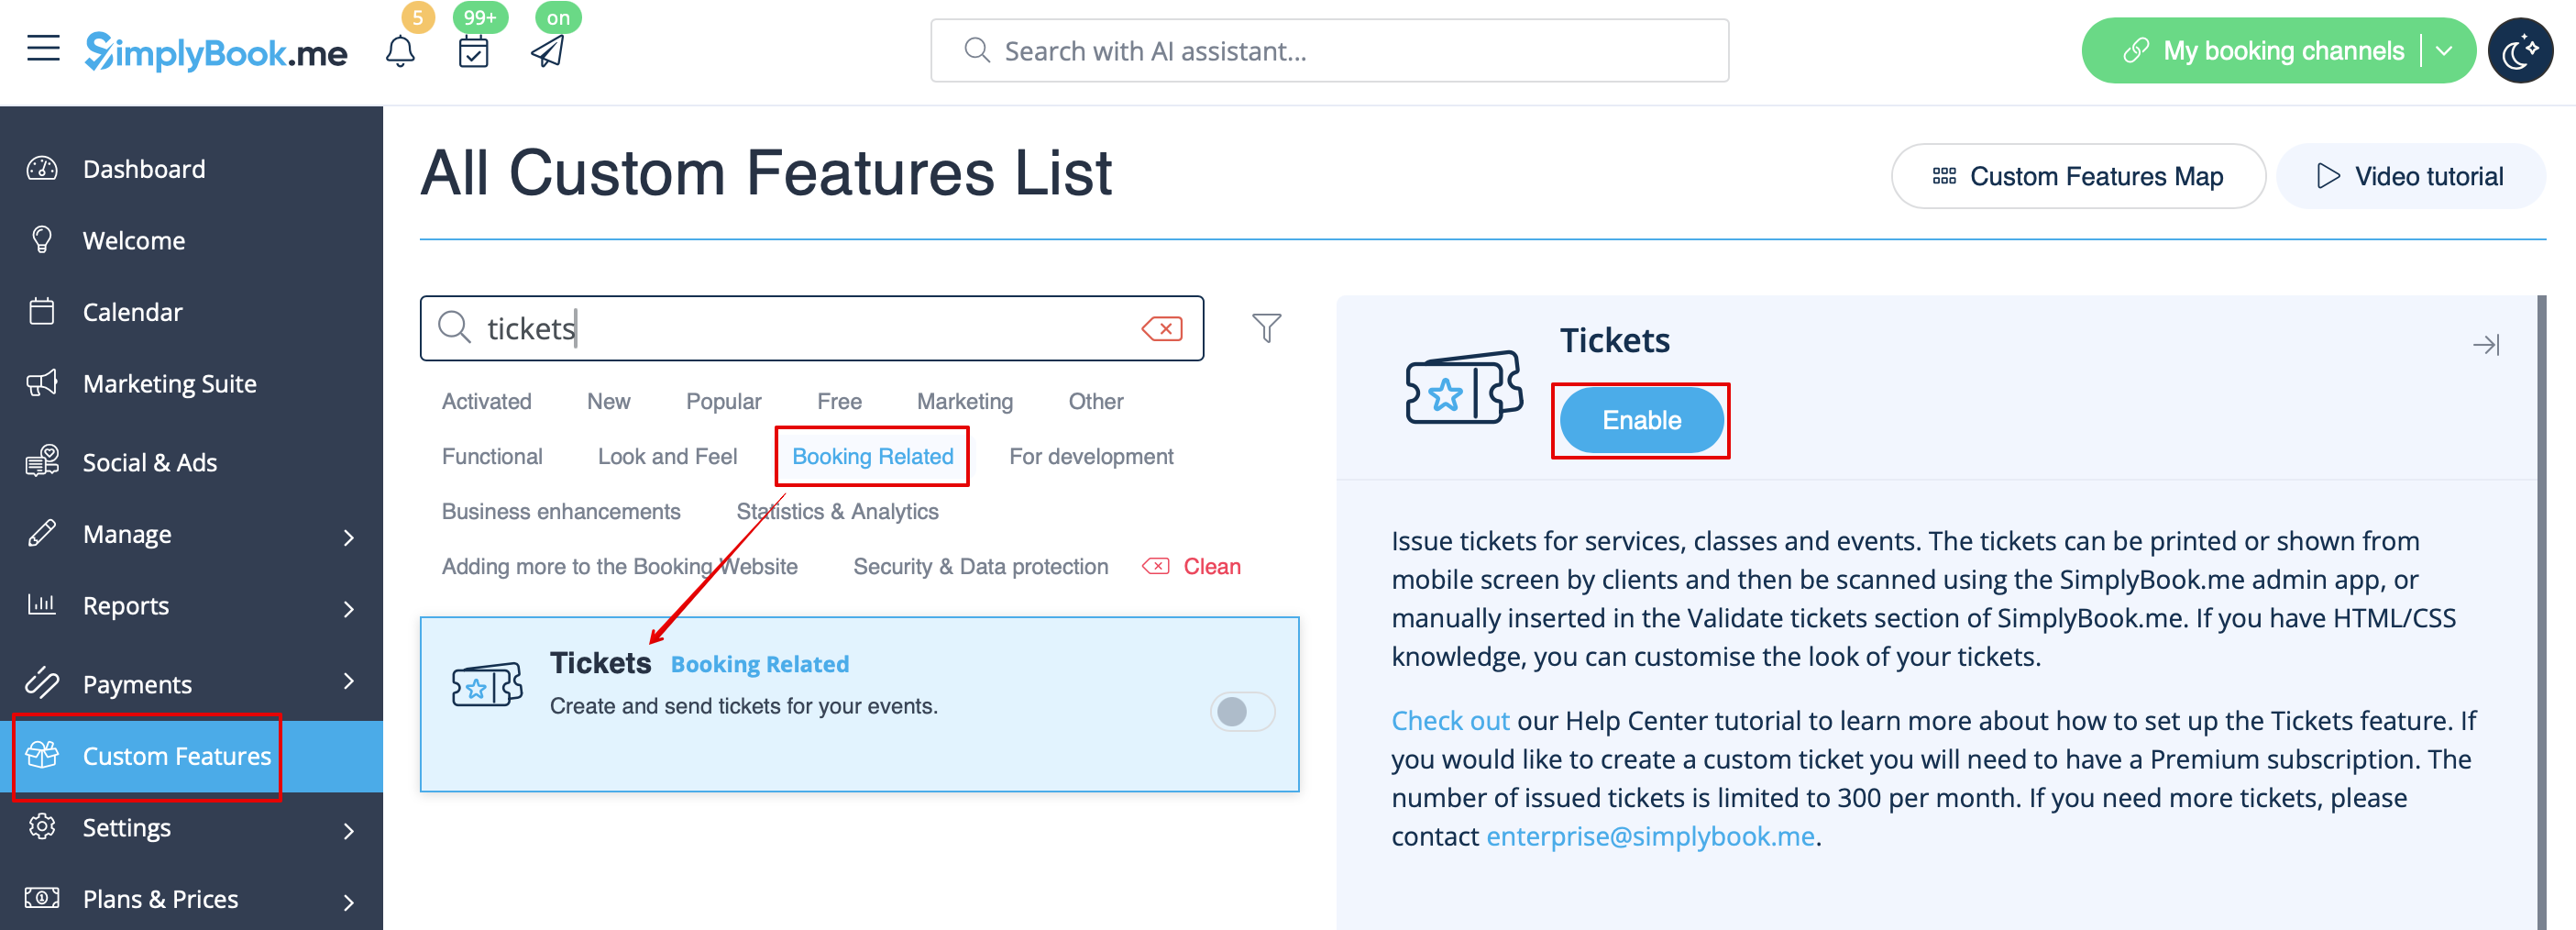
1. Activez cette fonctionnalité sur votre page Fonctionnalités personnalisées.


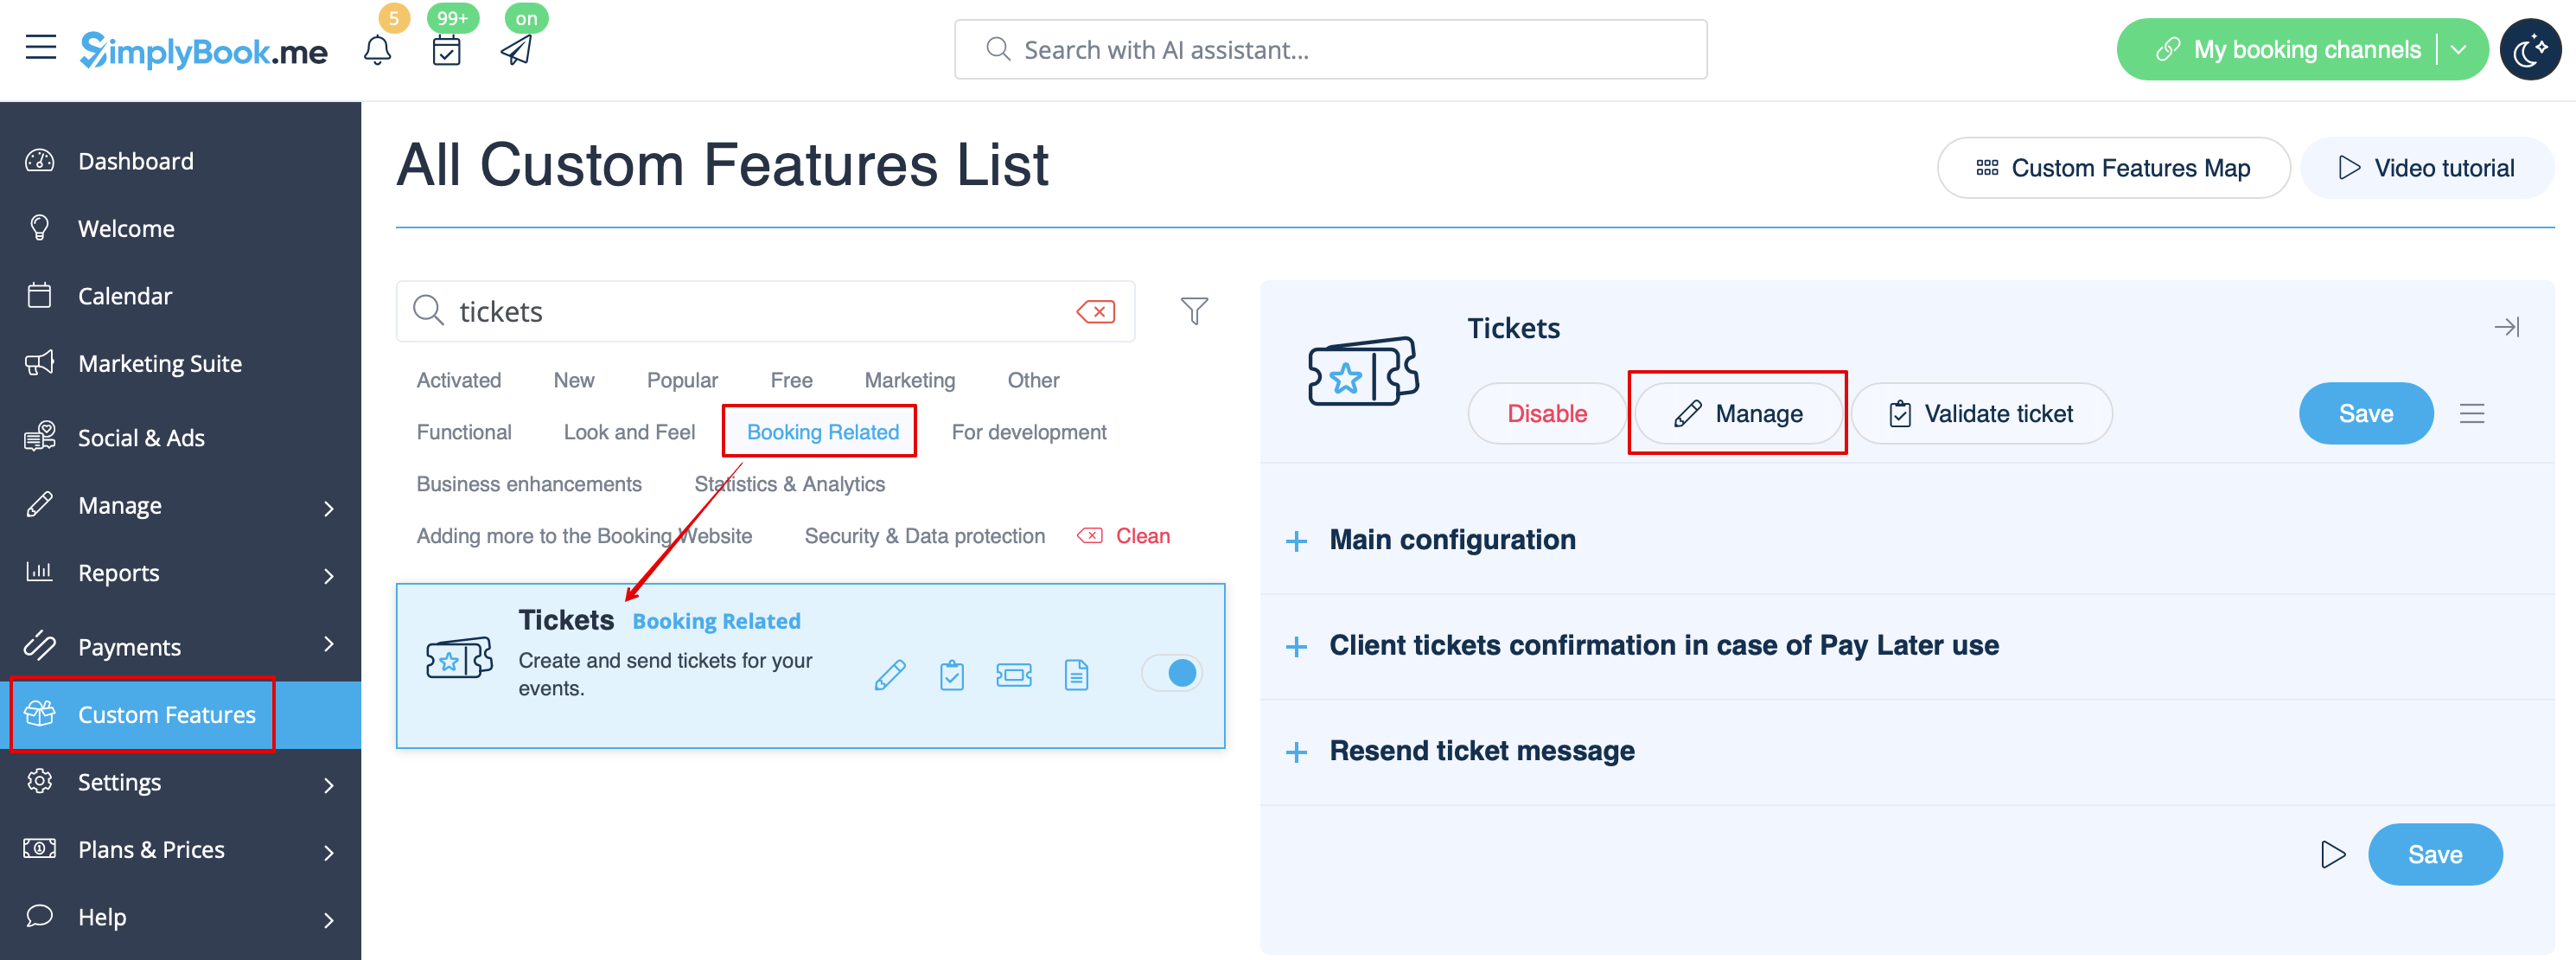
2. Accédez à Gérer à l'aide du lien situé à côté de la fonctionnalité activée ou allez dans Gérer -> section Services.


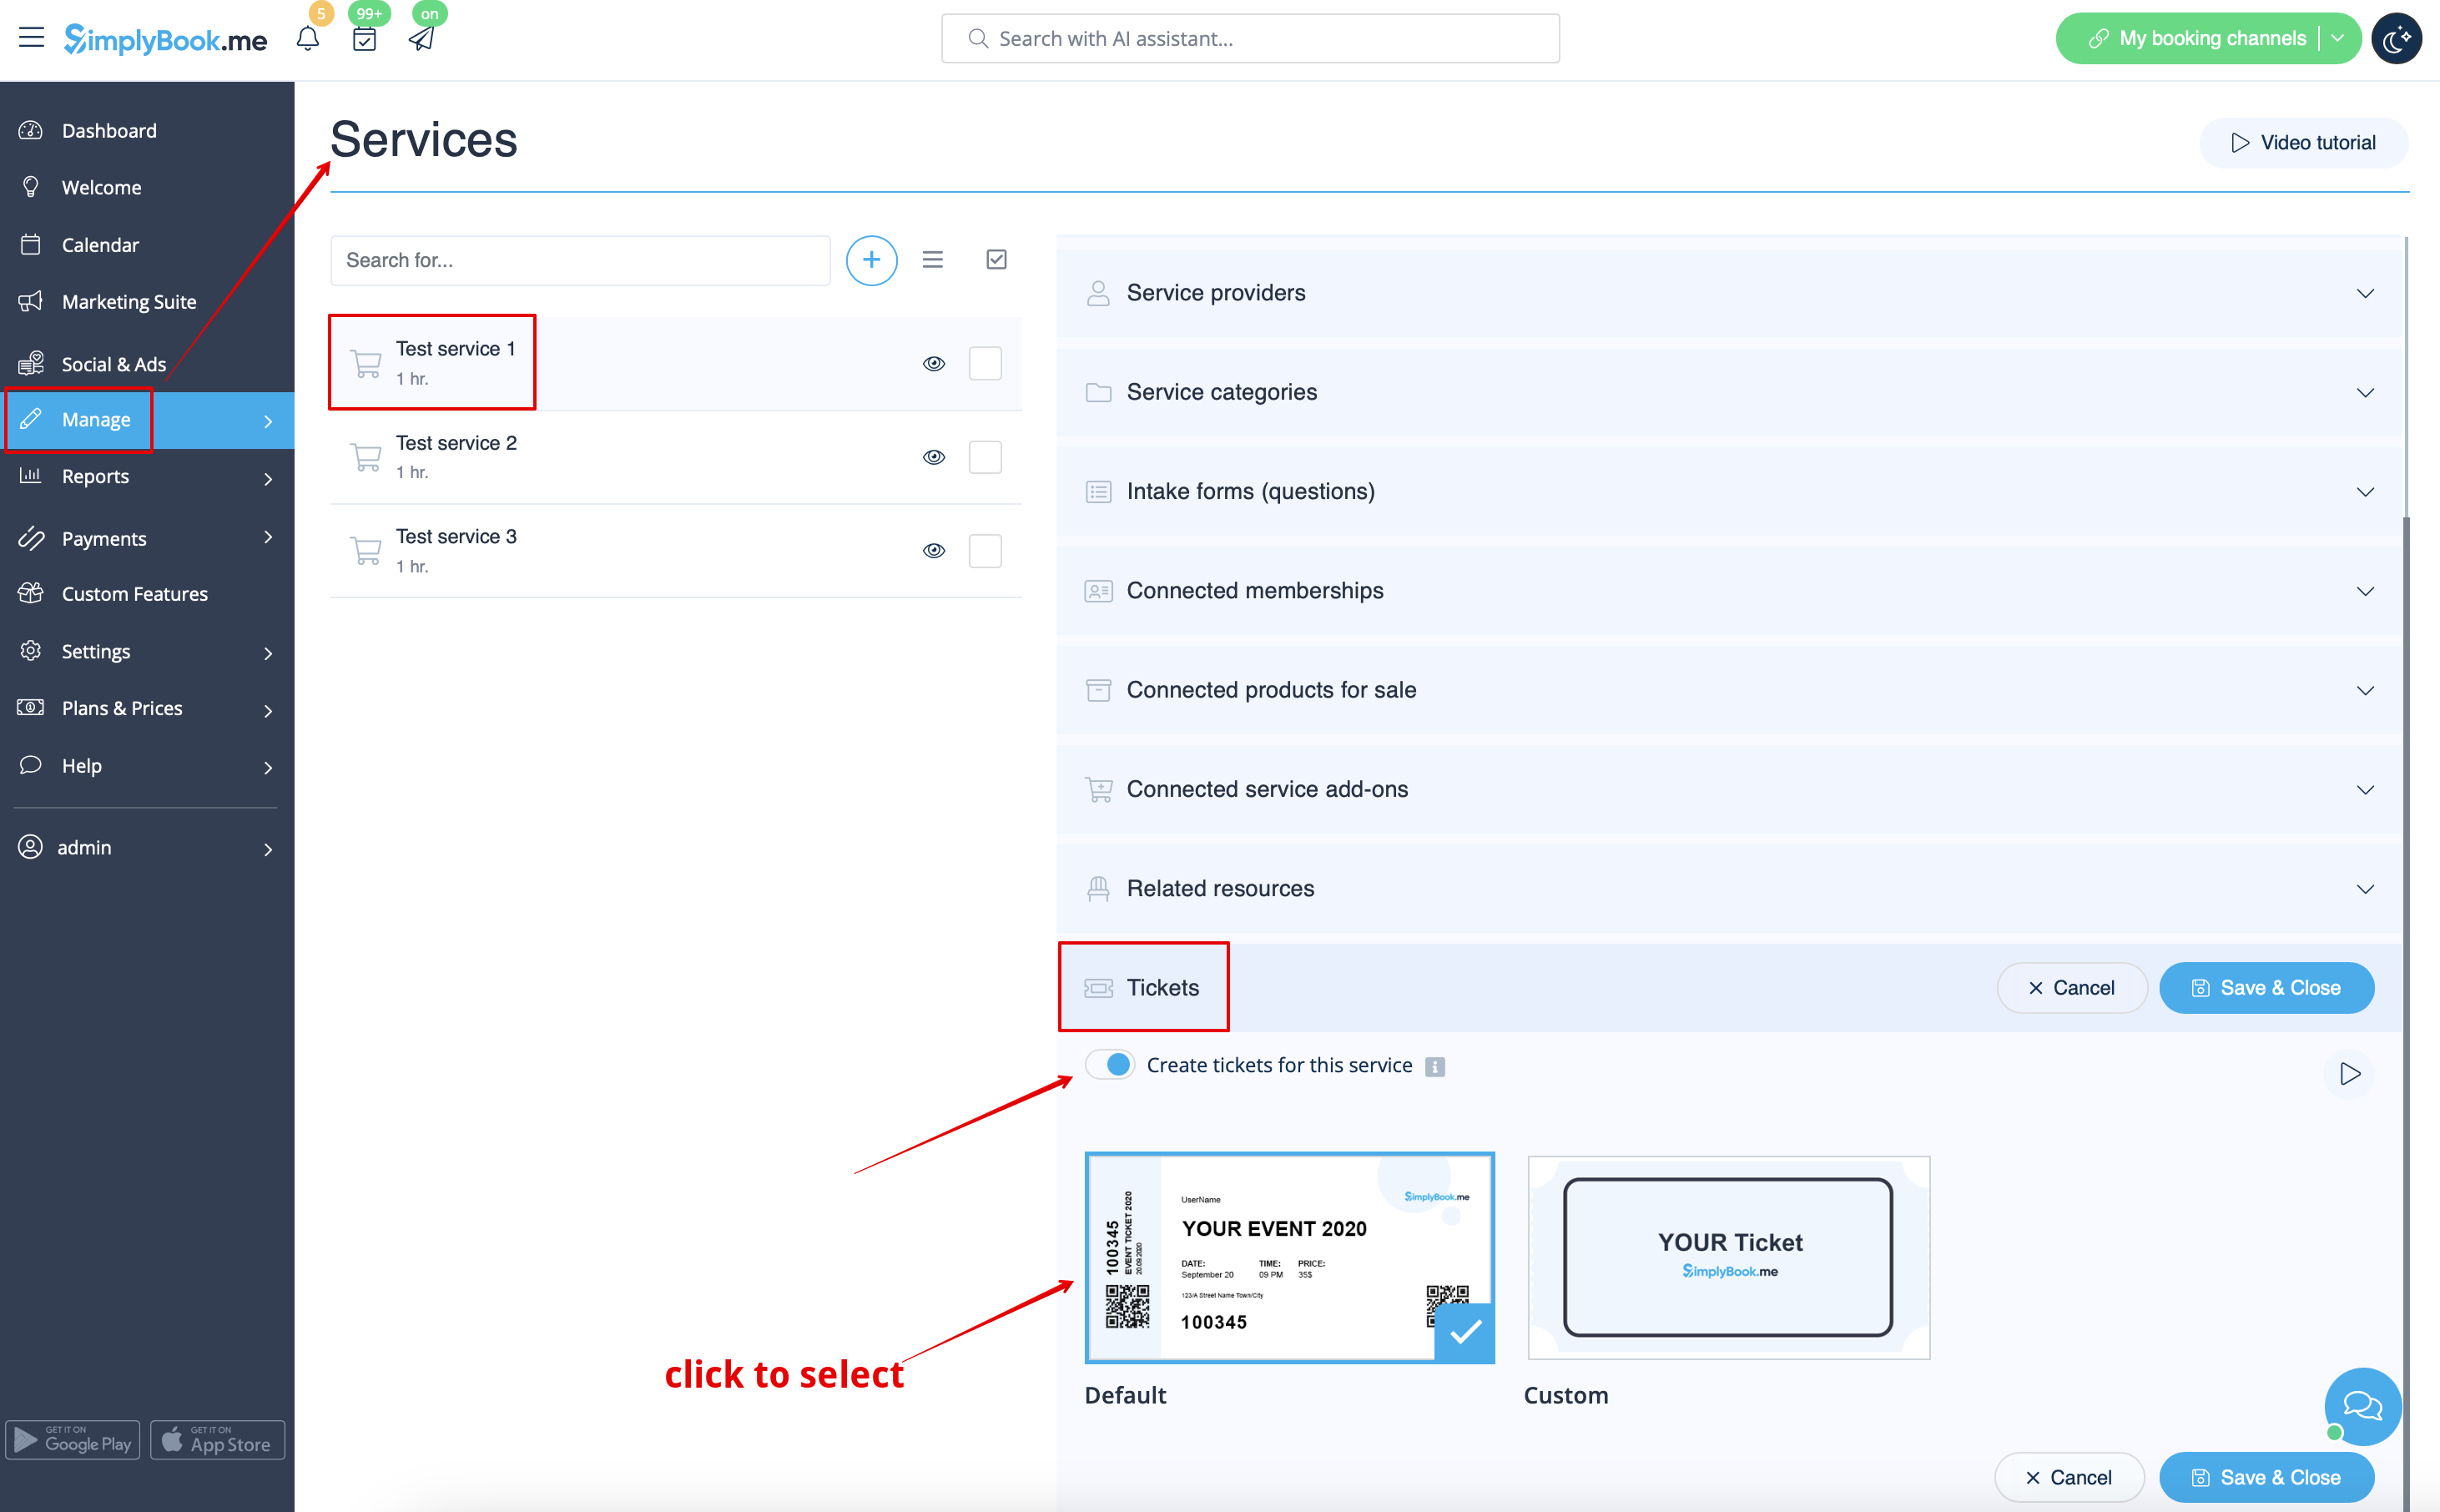
3. Sélectionnez le service pour lequel vous souhaitez vendre des billets en cliquant dessus, puis accédez à l'onglet Billets.


4. Activez l'émission de billets et connectez le modèle en cliquant dessus. Enregistrez les paramètres.
(Il existe un modèle par défaut, mais avec le plan Premium, vous pouvez créer le vôtre).