Translations:SSO-SAML Custom Feature/8/da: Difference between revisions

From SimplyBook.me
Created page with "1200px|border|center|link=https://help.simplybook.me/images/e/e6/Base64_certificate_paste_new.png <br><br> :13. Rul <span style="background-color:#d4f8e5; padding:5px; border-radius:5px;">MS Azure-siden</span> til blokken <span style="background-color:#d4f8e5; padding:5px; border-radius:5px;">Opsætning</span>, og find indstillingerne <span style="background-color:#d4f8e5; padding:5px; border-radius:5px;">Login-URL,</span> <span..."
 
(No difference)

Latest revision as of 16:13, 19 May 2025

Information about message (contribute)
This message has no documentation. If you know where or how this message is used, you can help other translators by adding documentation to this message.
Message definition (SSO-SAML Custom Feature)
[[File:Base64 certificate paste new.png|1200px|border|center|link=https://help.simplybook.me/images/e/e6/Base64_certificate_paste_new.png]]
<br><br>
:13. Scroll <span style="background-color:#d4f8e5; padding:5px; border-radius:5px;">MS Azure side</span> page to <span style="background-color:#d4f8e5; padding:5px; border-radius:5px;">Set up</span> block and find <span style="background-color:#d4f8e5; padding:5px; border-radius:5px;">Login URL,</span> <span style="background-color:#d4f8e5; padding:5px; border-radius:5px;">Azure AD/Microsoft Entra Identifier</span> and <span style="background-color:#d4f8e5; padding:5px; border-radius:5px;">Logout URL</span> options, Copy each of them and paste to the corresponding boxes on SimplyBook.me side.
[[File:Login logout and azure id new.png|1200px|border|center|link=https://help.simplybook.me/images/4/4c/Login_logout_and_azure_id_new.png]]
<br><br>
:14. Go to <span style="background-color:#d4f8e5; padding:5px; border-radius:5px;">User attributes and claims</span> block on MS Azure side and click on <span style="background-color:#d4f8e5; padding:5px; border-radius:5px;">Pen</span> icon to edit it.
[[File:Ms azure user attributes and claims.png|border|center]]
<br><br>
:15. For <span style="background-color:#d4f8e5; padding:5px; border-radius:5px;">Unique User Identifier</span>(click on it to edit) please set <span style="background-color:#d4f8e5; padding:5px; border-radius:5px;">user.mail</span> variable as <span style="background-color:#d4f8e5; padding:5px; border-radius:5px;">Source Attribute.</span> It is the parameter that will allow us to differentiate between different user logins.
[[File:Ms azure user attributes and claims identifier.png|border|center]]
<br><br>
[[File:Ms azure user attributes and claims identifier mail.png|border|center]]
<br><br>
:16. For additional claims please add <span style="background-color:#d4f8e5; padding:5px; border-radius:5px;">Groups</span> option using <span style="background-color:#d4f8e5; padding:5px; border-radius:5px;">Add group claim</span> and <span style="background-color:#d4f8e5; padding:5px; border-radius:5px;">Email</span> and <span style="background-color:#d4f8e5; padding:5px; border-radius:5px;">Name</span> with <span style="background-color:#d4f8e5; padding:5px; border-radius:5px;">Add new claim</span> buttons correspondingly.<br>
:You can also add phone and last name if you need. See claims setup example below.
[[File:Setup claims new.png|1200px|border|center|link=https://help.simplybook.me/images/8/81/Setup_claims_new.png]]
<br><br>


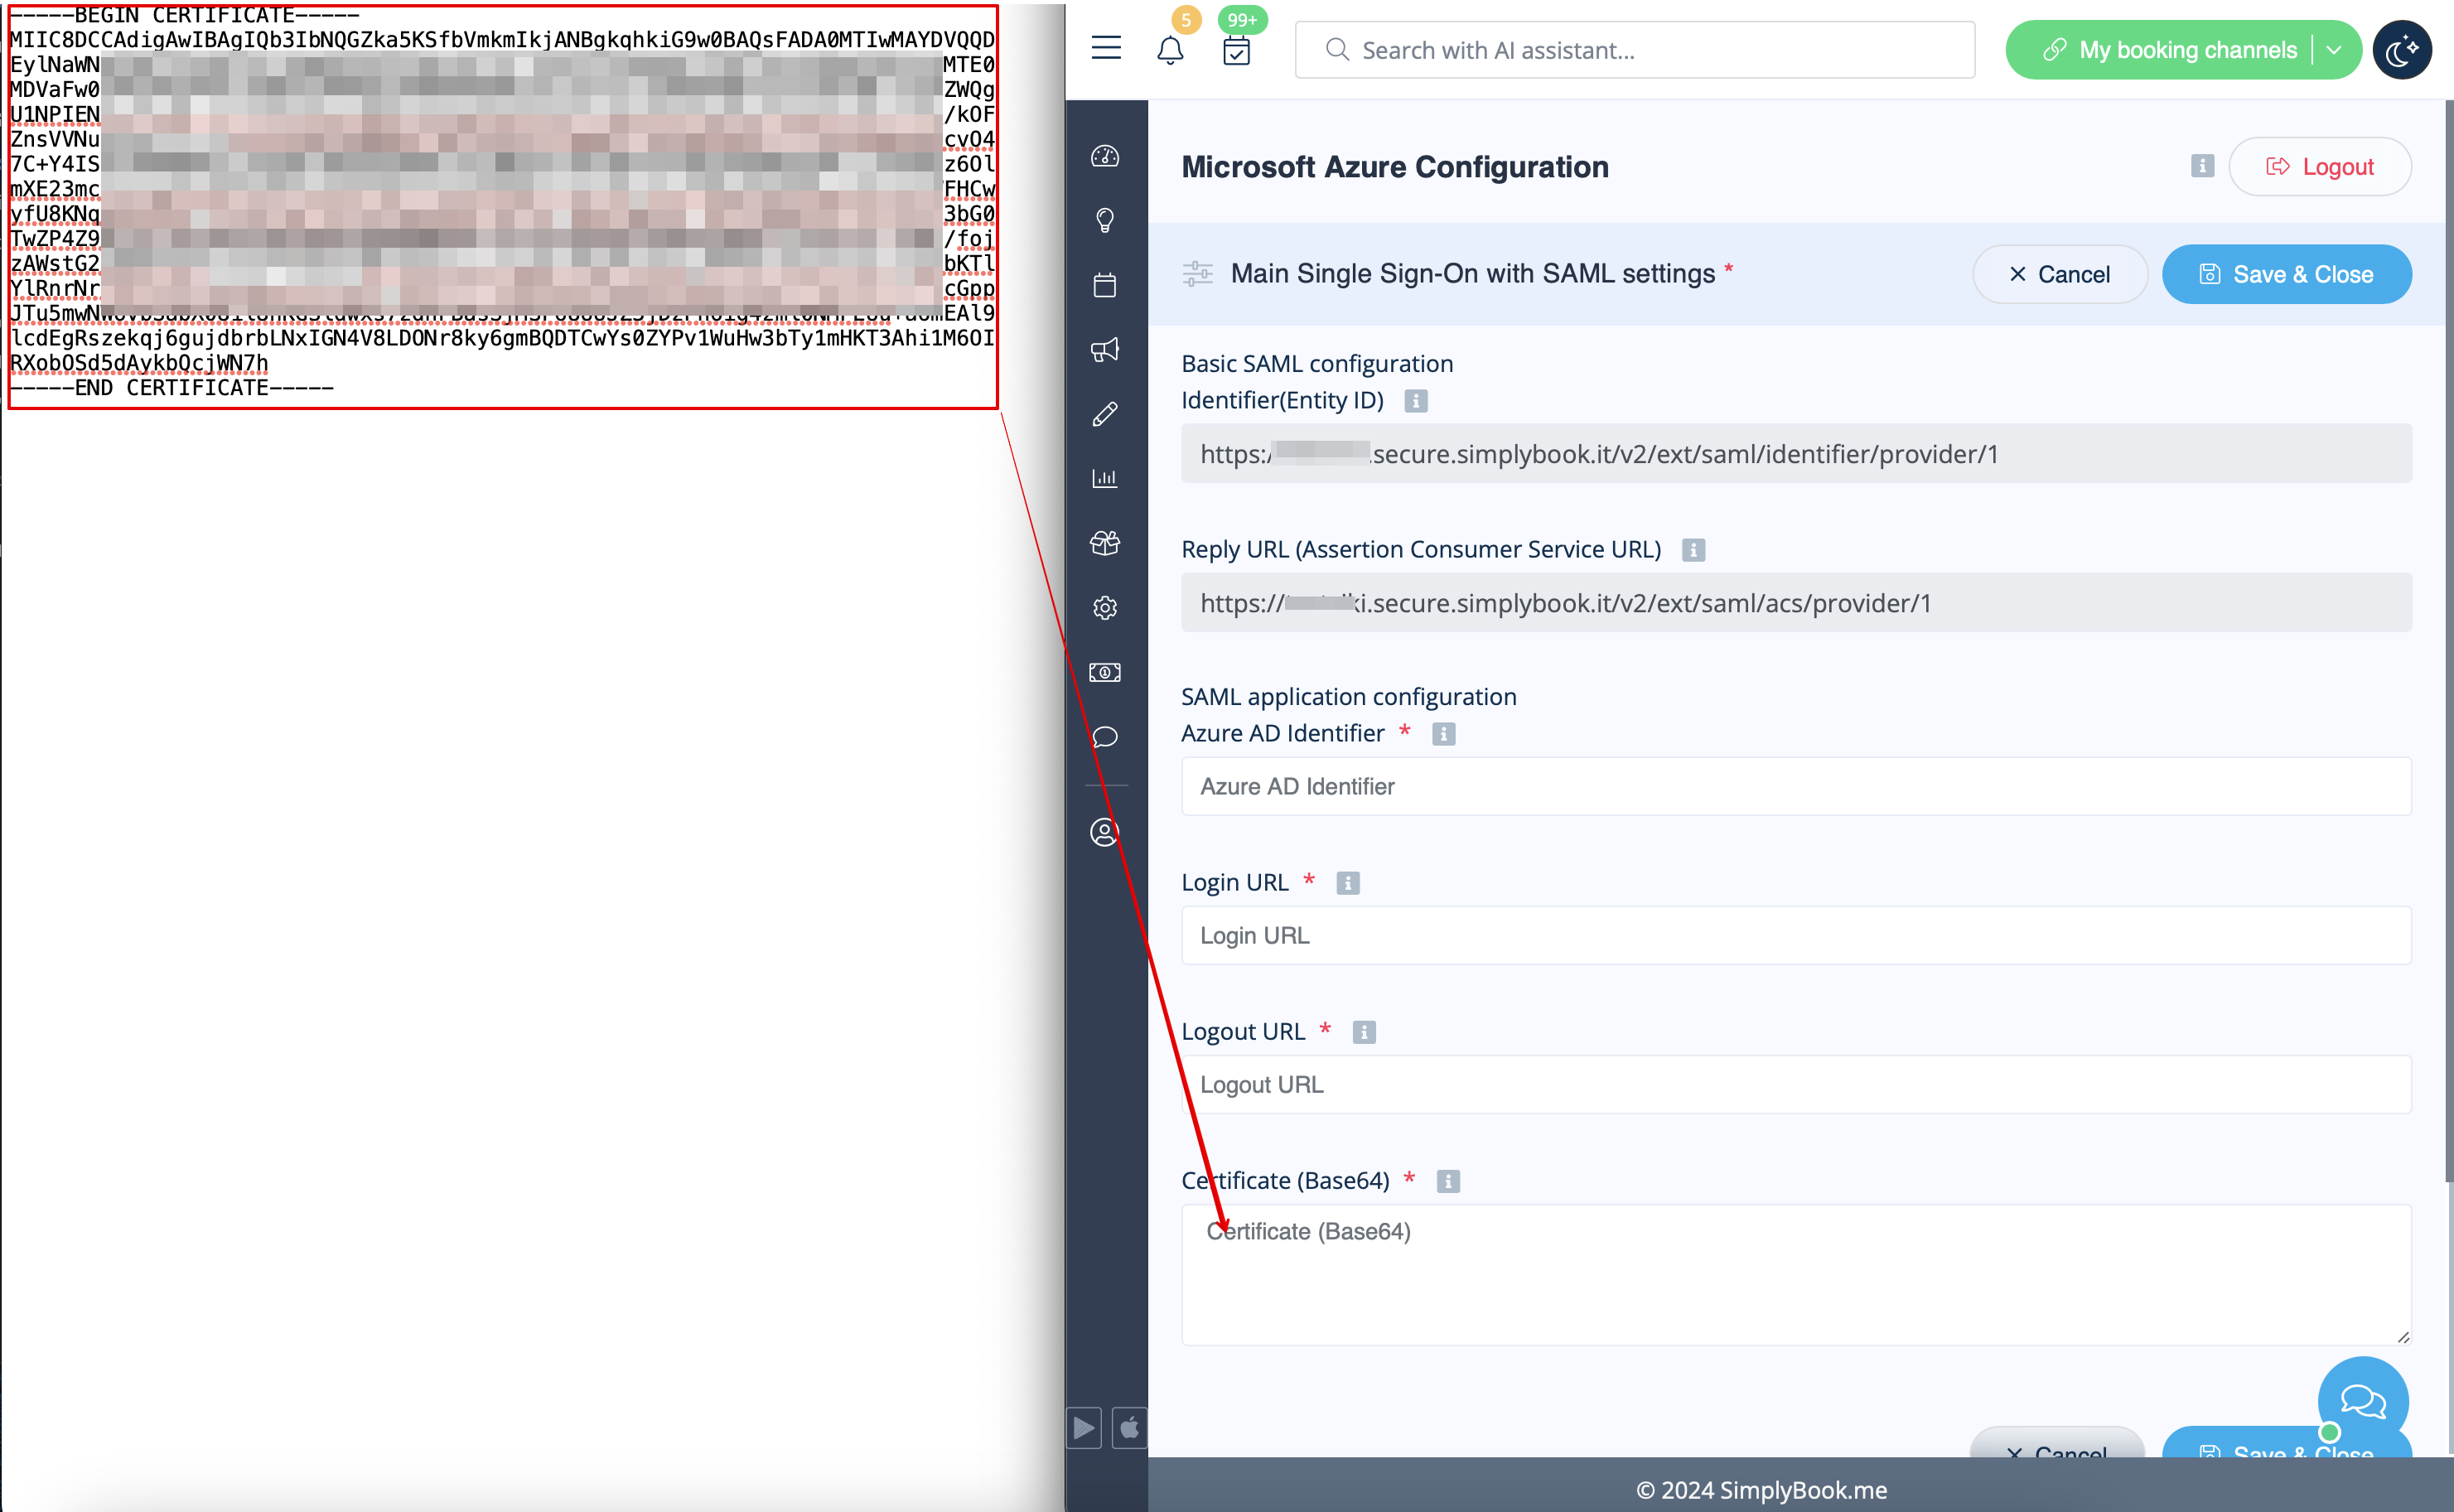
13. Rul MS Azure-siden til blokken Opsætning, og find indstillingerne Login-URL, Azure AD/Microsoft Entra-identifikator og Logout-URL. Kopier dem alle, og indsæt dem i de tilsvarende felter på SimplyBook.me-siden.


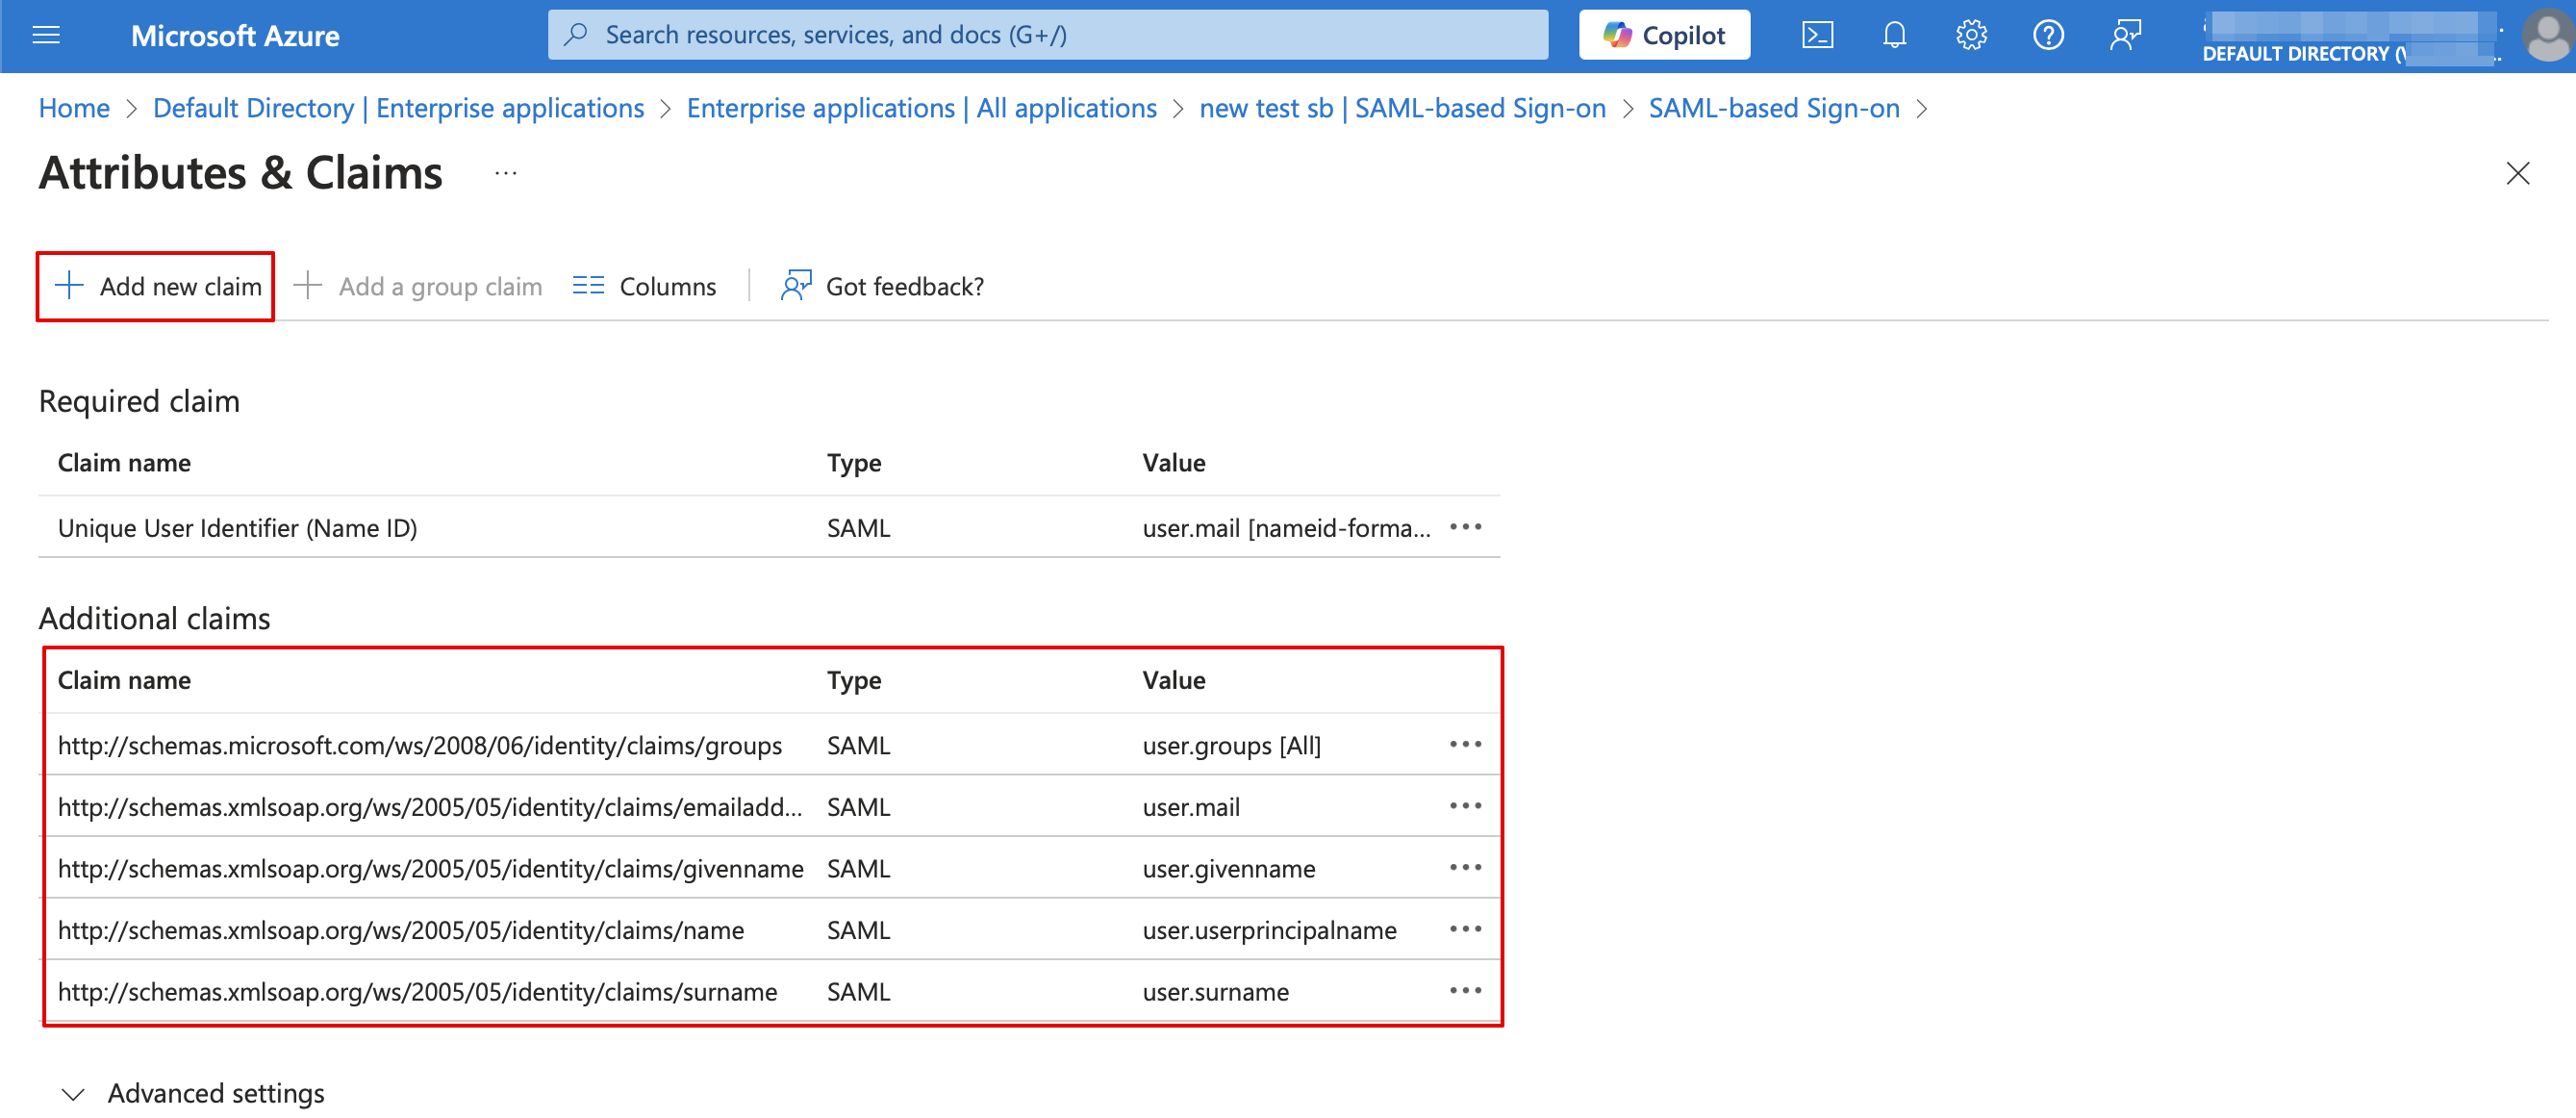
14. Gå til blokken User attributes and claims (Brugerattributter og krav) på MS Azure-siden, og klik på pen-ikonet for at redigere den.


15. For Unique User Identifier(unik brugeridentifikator) (klik på den for at redigere) skal du indstille variabel user.mail som Source Attribute (kildeattribut). Det er den parameter, der giver os mulighed for at skelne mellem forskellige brugerlogin.


16. For yderligere krav skal du tilføje Gruppen-indstillingen ved hjælp af knapperne Tilføj gruppekrav og E-mail og Navn med Tilføj nyt krav.
Du kan også tilføje telefonnummer og efternavn, hvis det er nødvendigt. Se eksemplet på kravopsætning nedenfor.