Translations:SSO-SAML Custom Feature/10/da: Difference between revisions

From SimplyBook.me
Created page with "== Sådan opsættes og bruges Okta == :1. Opret en konto hos [https://www.okta.com Okta]. <br><br> :2. Gå til '''Applications''' i Okta-administrationspanelet og klik for at oprette en ny app. 1200px|center|link=https://help.simplybook.me/images/c/c7/Okta_create_app_integration_path.png <br><br> :3. Tilføj det ønskede navn og upload et logo. File:Okta app add name & logo.png|1200px|center|link=https://help.simplybook.me/..."
 
(No difference)

Latest revision as of 16:13, 19 May 2025

Information about message (contribute)
This message has no documentation. If you know where or how this message is used, you can help other translators by adding documentation to this message.
Message definition (SSO-SAML Custom Feature)
==How to set & use Okta==
:1. Create account at [https://www.okta.com Okta].
<br><br>
:2. Navigate to '''Applications''' in Okta admin panel and click to create a new app there.
[[File:Okta create app integration path.png|1200px|center|link=https://help.simplybook.me/images/c/c7/Okta_create_app_integration_path.png]]
<br><br>
:3. Add the desirable name and upload a logo.
[[File:Okta app add name & logo.png|1200px|center|link=https://help.simplybook.me/images/0/0a/Okta_app_add_name_%26_logo.png]]
<br><br>
:4. Select '''SAML''' method.
[[File:Okta app saml select.png|1200px|center|link=https://help.simplybook.me/images/4/4b/Okta_app_saml_select.png]]
<br><br>
:5. On the SAML settings step please copy the '''Audience URI''' and '''Okta Single Sign-On URL''' from SimplyBook.me SSO-SAML custom feature -> Manage -> Okta SAML Single Sign-On and paste to the corresponding fields on the Okta side.
[[File:Create saml integration step 1.png|1200px|center|link=https://help.simplybook.me/images/3/37/Create_saml_integration_step_1.png]]
<br><br>
:6. Set '''Name ID''' and '''Application username''' as in the image below.
[[File:Create saml integrattion 2.png|1200px|center|link=https://help.simplybook.me/images/3/32/Create_saml_integrattion_2.png]]
<br><br>
:7. Scroll the page to '''Attribute settings''' and add the attributes for name, email, id and firstname as in the example.<br>
:And separately '''group''' attribute in the corresponding block.<br>
[[File:Saml add attribite statements.png|1200px|center|link=https://help.simplybook.me/images/8/8c/Saml_add_attribite_statements.png]]
<br><br>
:On the SimplyBook.me side please make sure the same attributes are indicated in the '''User attributes and claims''' tab.
<br><br>
:8. Proceed to the next step.
[[File:Saml proceed to the next.png|1200px|center|link=https://help.simplybook.me/images/0/03/Saml_proceed_to_the_next.png]]
<br><br>
:9. The app is now saved. Please open '''Sign on''' tab and click on ''' on '''More details''' there.
[[File:Saml sign on more details.png|1200px|center|link=https://help.simplybook.me/images/4/4c/Saml_sign_on_more_details.png]]
<br><br>
:10. Copy '''Sign on URL''', '''Sign out URL''', '''Issuer''' and '''Signing certificate''' in Okta and paste them to the corresponding fields in SimplyBook.me SSO-SAML custom feature -> Manage -> Okta SAML Single Sign-On  
[[File:Saml copy urls from okta.png|1200px|center|link=https://help.simplybook.me/images/3/38/Saml_copy_urls_from_okta.png]]
<br><br>
:11. Now in Okta interface make sure all necessary employees are added to the system in '''People''' tab.
[[File:Add people okta.png|1200px|center|link=https://help.simplybook.me/images/b/b7/Add_people_okta.png]]
<br><br>
:12. In '''Groups''' tab - create the groups matching the SimplyBook.me access levels. Assign the employees to these groups.
[[File:Create groups okta.png|1200px|center|link=https://help.simplybook.me/images/c/c0/Create_groups_okta.png]]
[[File:Assign people to groups okta.png|1200px|center|link=https://help.simplybook.me/images/0/07/Assign_people_to_groups_okta.png]]
<br><br>
:13. Assign the groups and people to the application that you've created.
[[File:Assign applications to groups.png|1200px|center|link=https://help.simplybook.me/images/7/78/Assign_applications_to_groups.png]]
<br><br>
:14. In the SimplyBook.me side please indicate the groups names in the '''User groups matching settings''' tab. Save settings.
<br><br>
:15. Everything is ready now. Your employees an now log in to your company account at SimplyBook.me with one single click on the Okta panel (the user in SimplyBook.me will be automatically create on the first login with the corresponding rights)
[[File:Login screen okta.png|1200px|center|link=https://help.simplybook.me/images/0/06/Login_screen_okta.png]]
<br><br>
<br><br>

Sådan opsættes og bruges Okta

1. Opret en konto hos Okta.


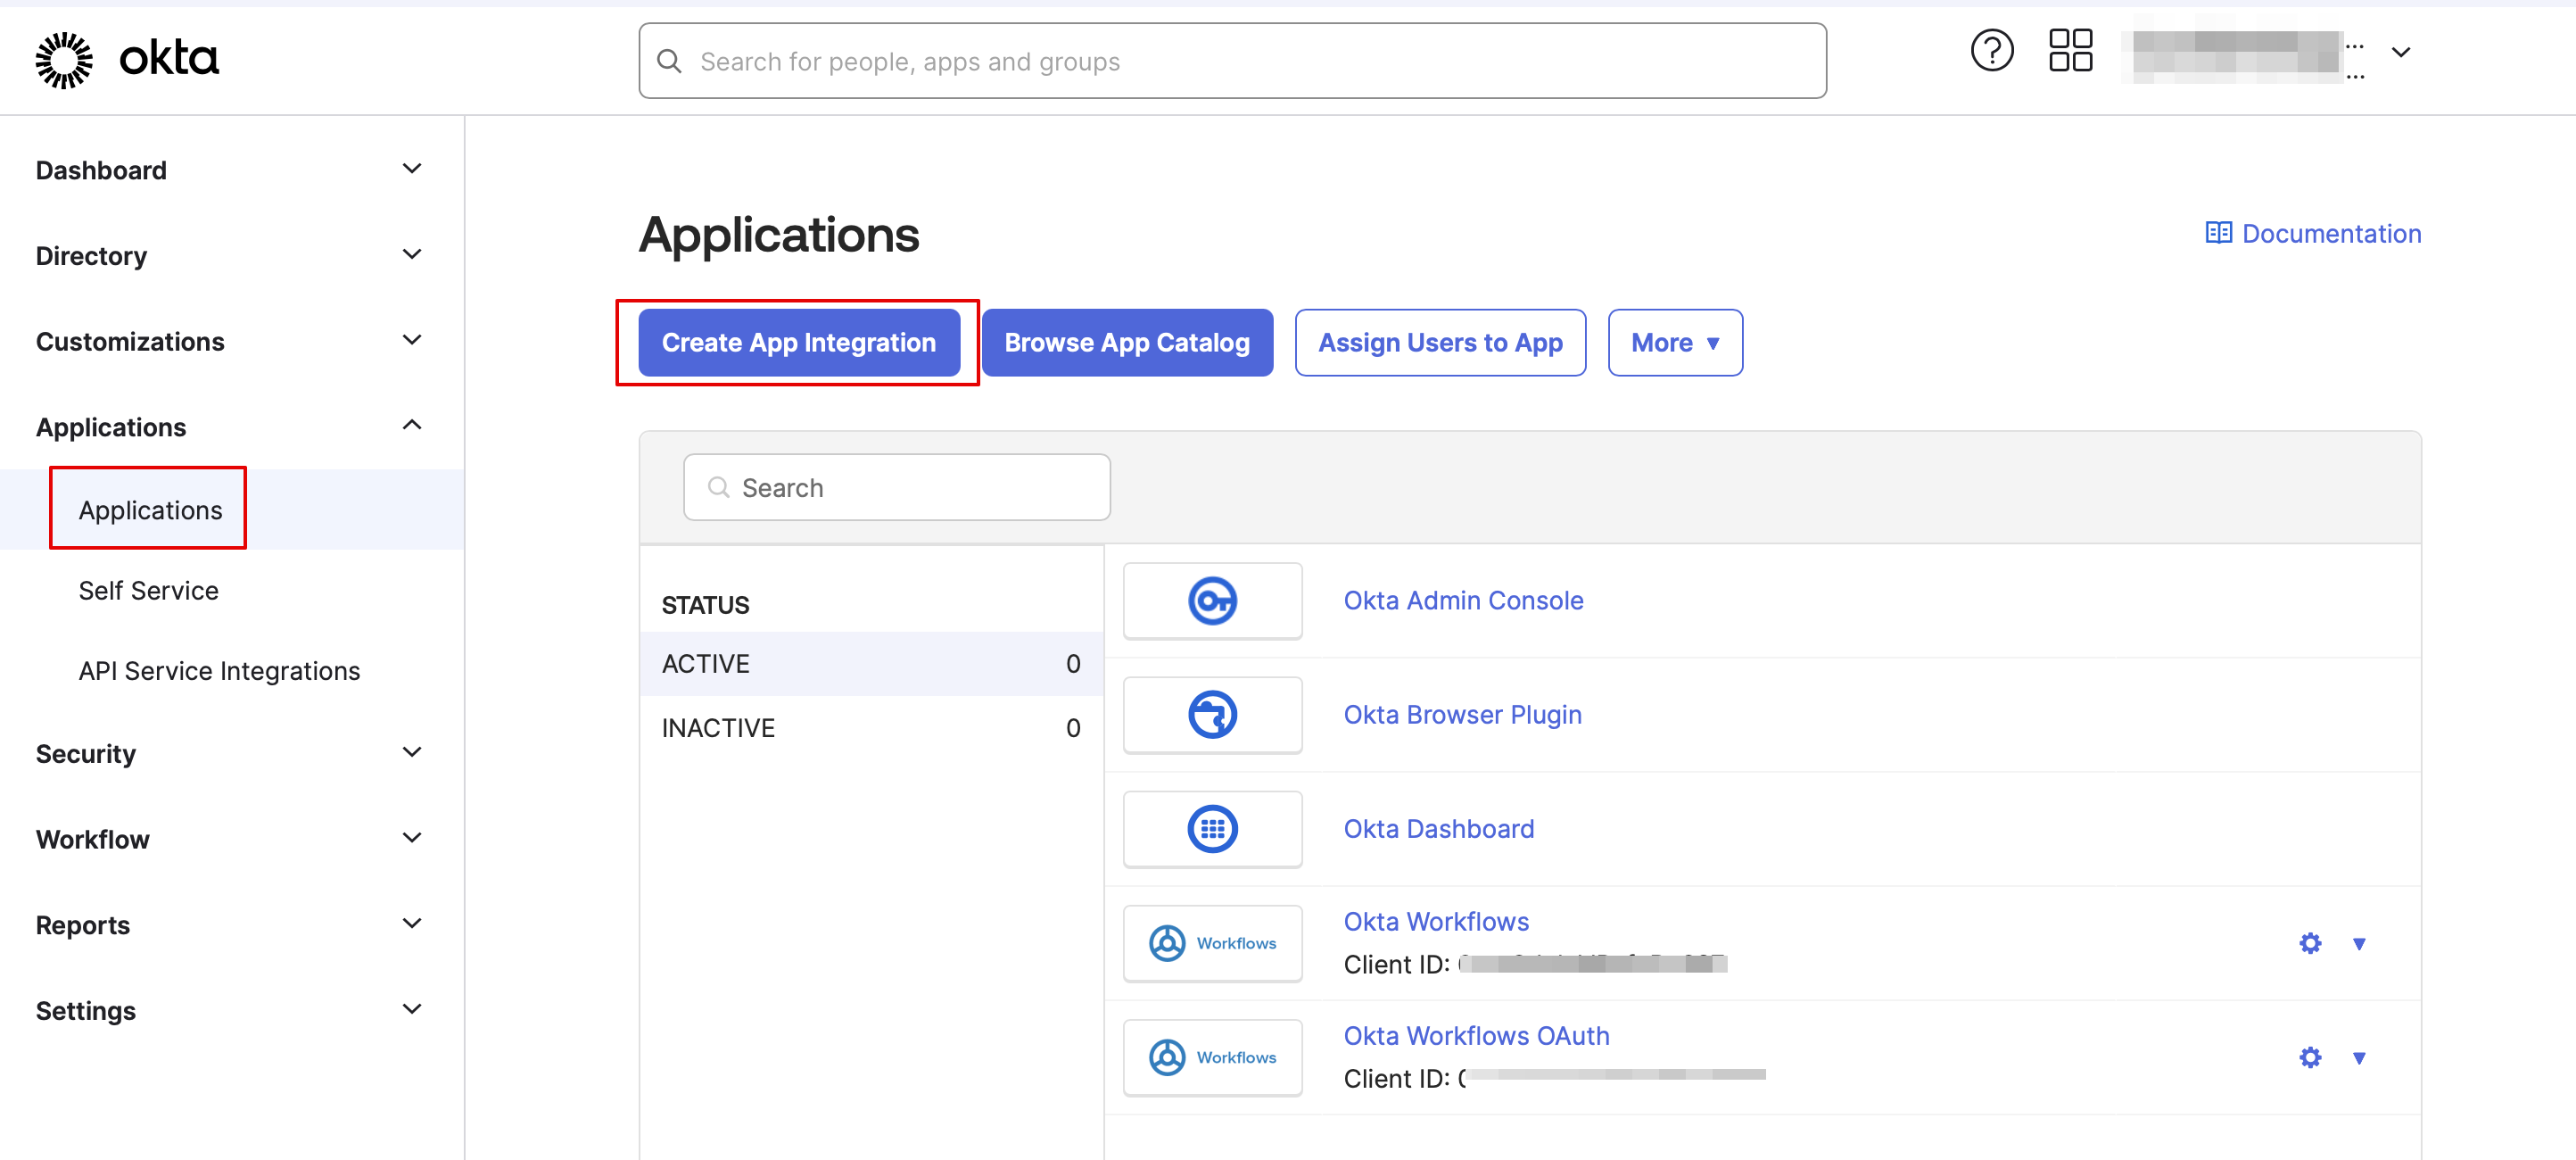
2. Gå til Applications i Okta-administrationspanelet og klik for at oprette en ny app.


3. Tilføj det ønskede navn og upload et logo.


4. Vælg SAML-metoden.


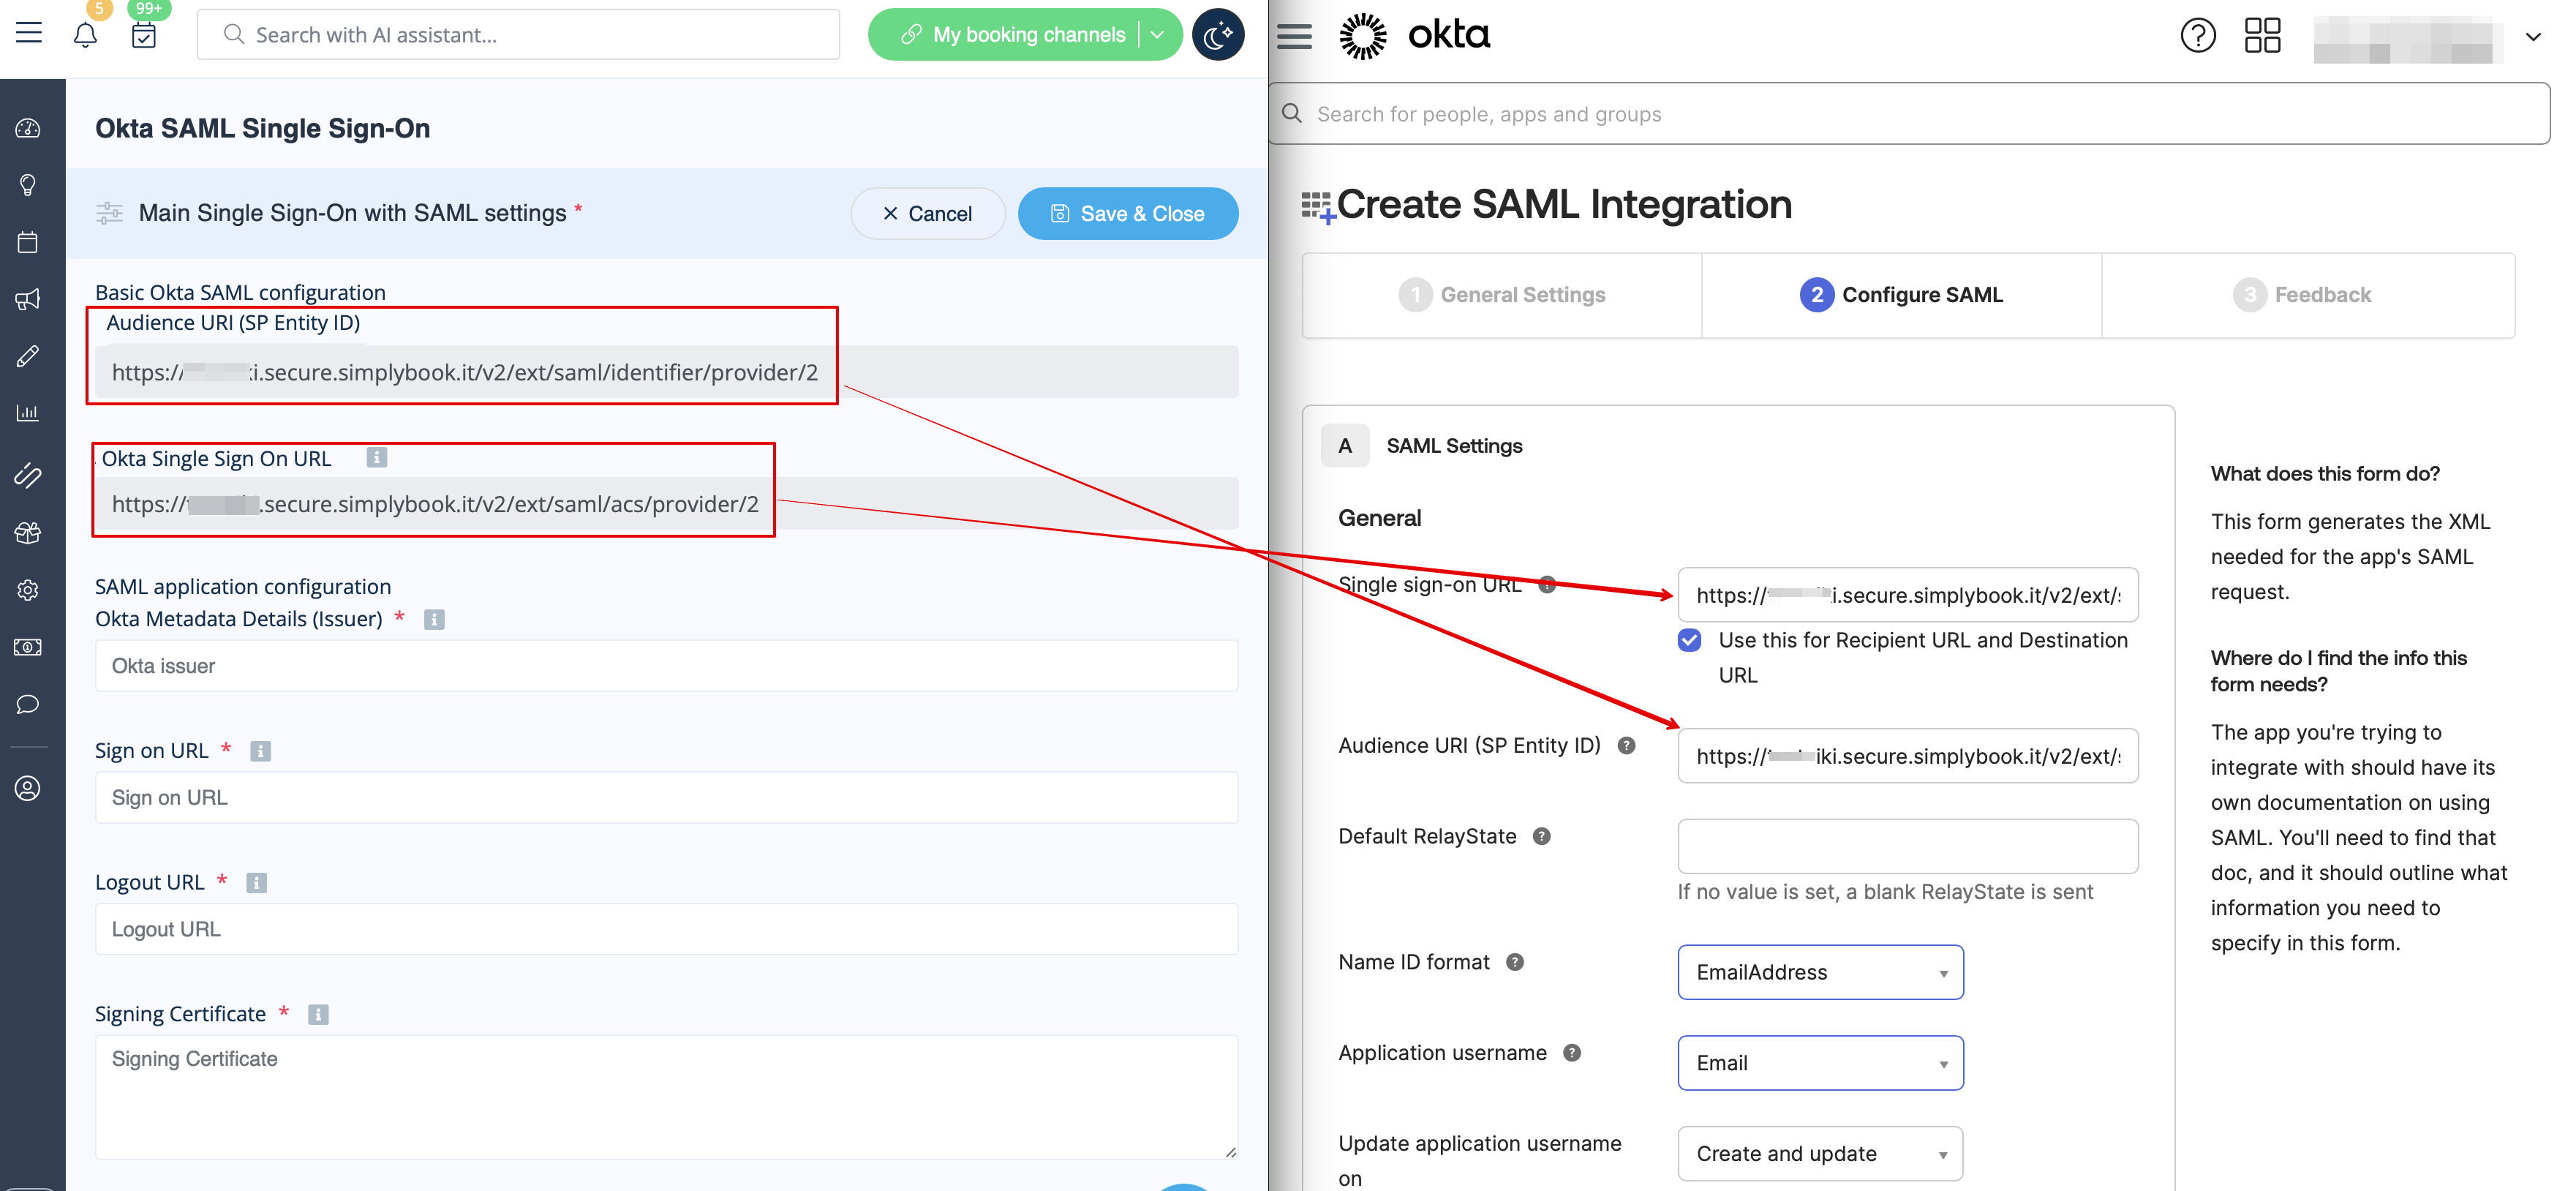
5. I trinnet SAML-indstillinger skal du kopiere Audience URI og Okta Single Sign-On URL fra SimplyBook.me SSO-SAML brugerdefineret funktion -> Administrer -> Okta SAML Single Sign-On og indsætte dem i de tilsvarende felter på Okta-siden.


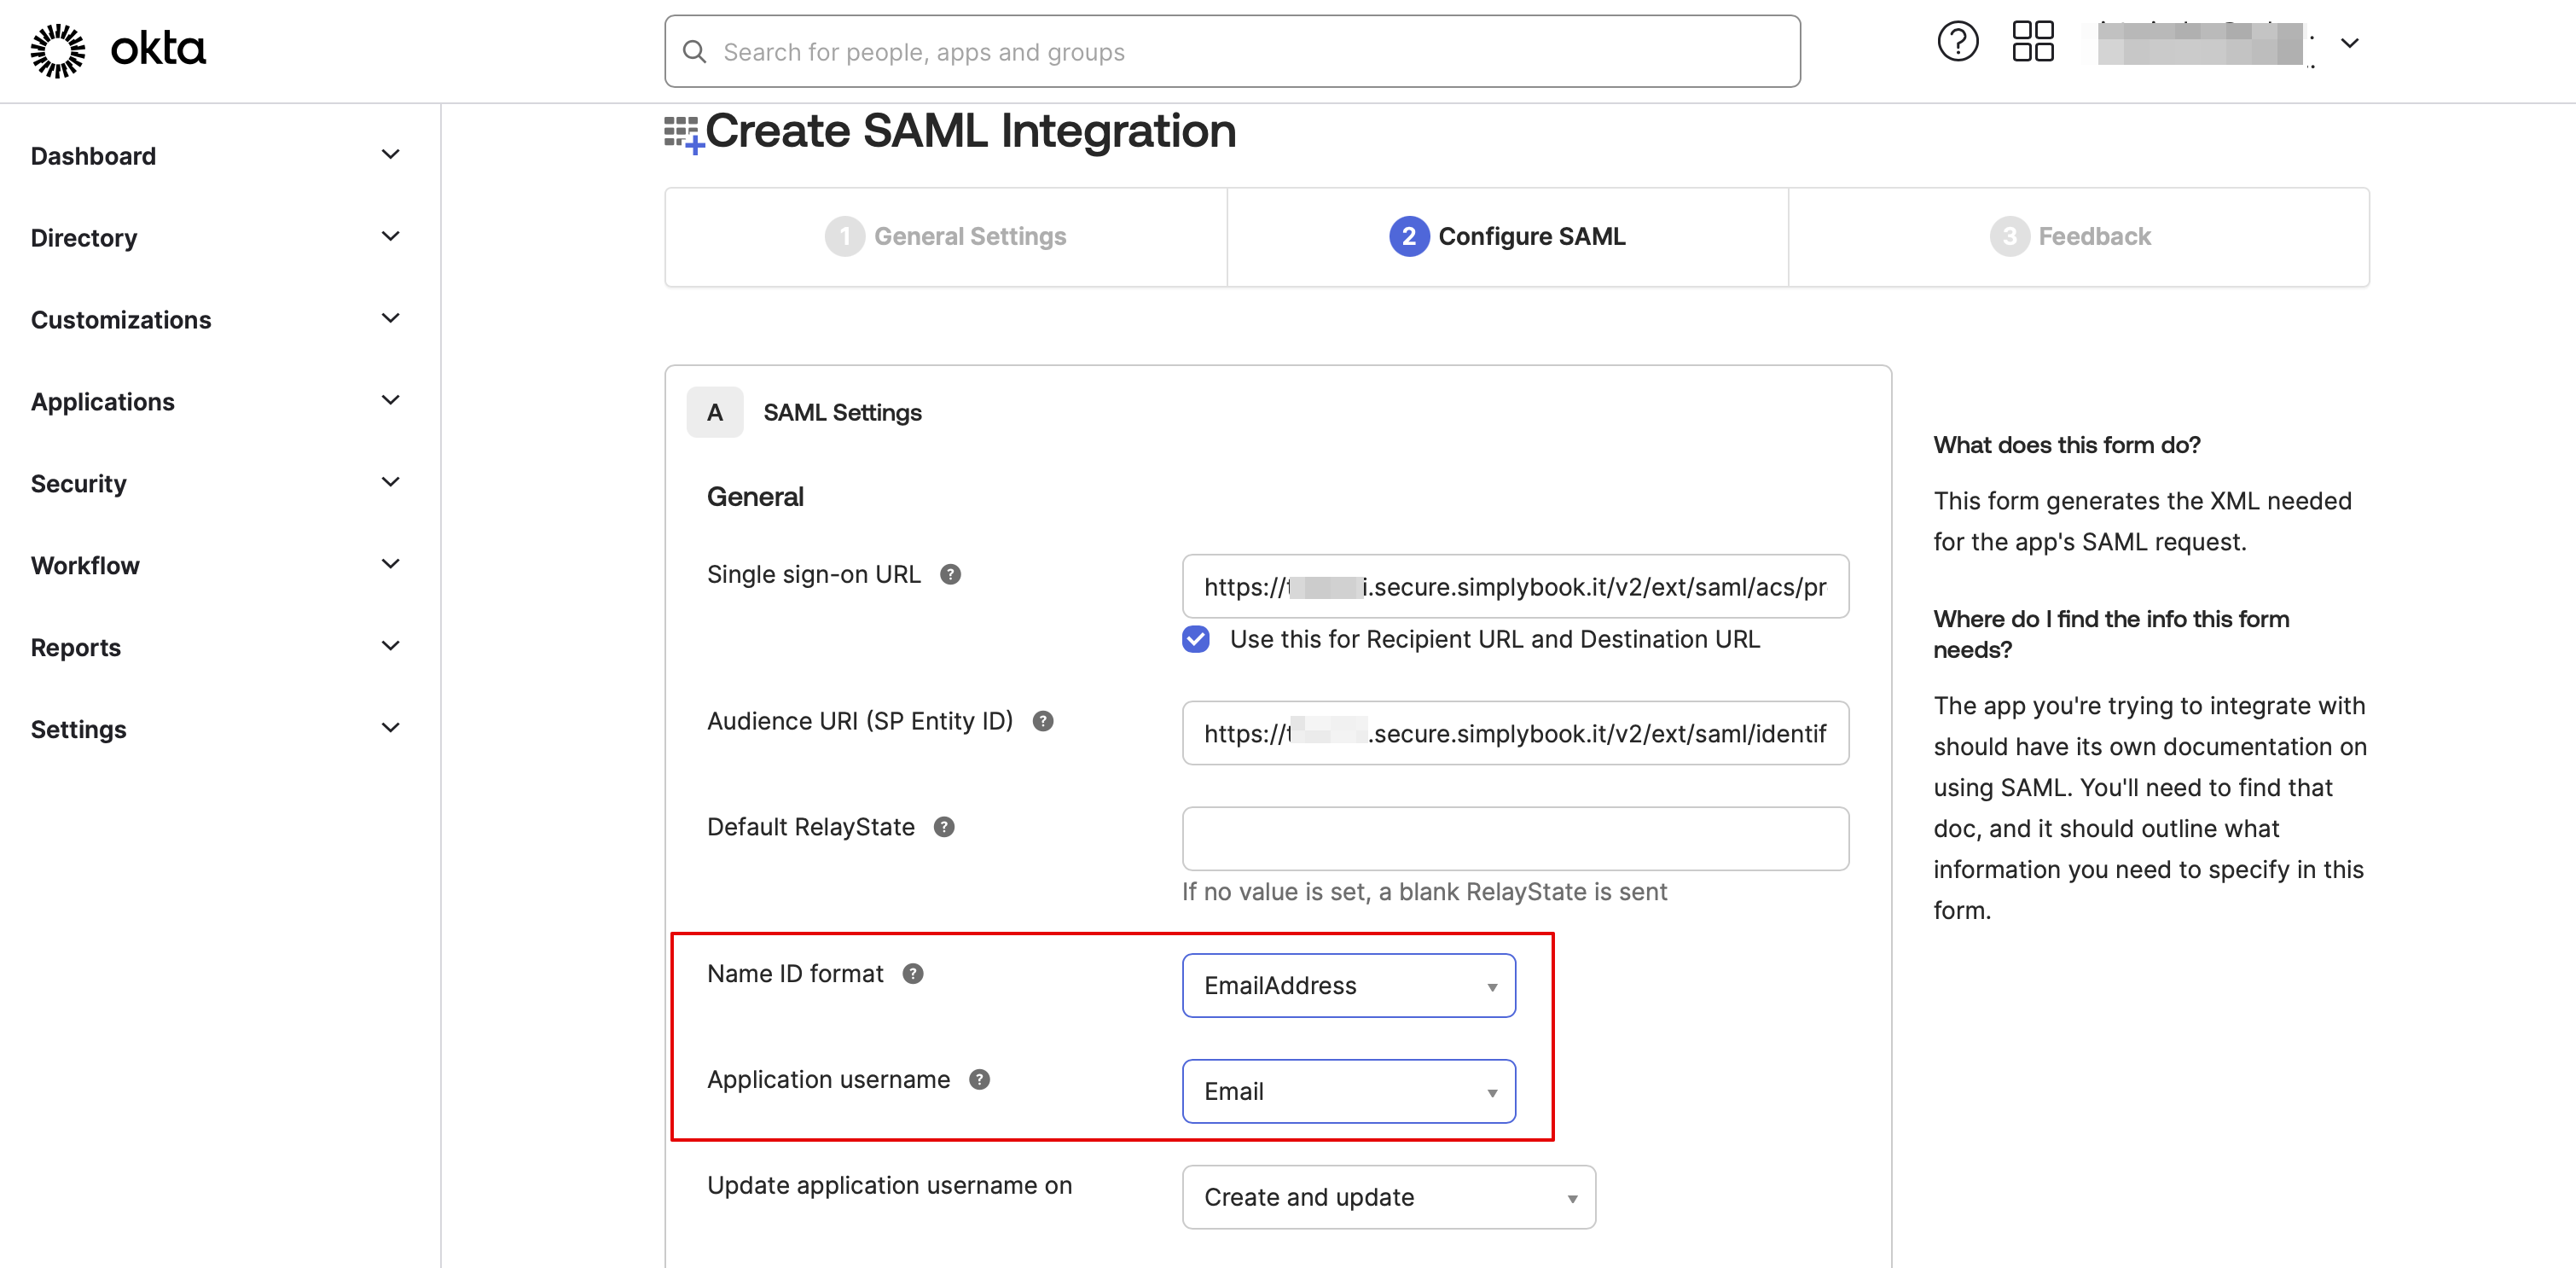
6. Indstil Navn-ID og Applikationsbrugernavn som vist på billedet nedenfor.


7. Rul siden ned til Attributindstillinger og tilføj attributterne for navn, e-mail, id og fornavn som i eksemplet.
Og gruppér attributterne separat i det tilsvarende blok.


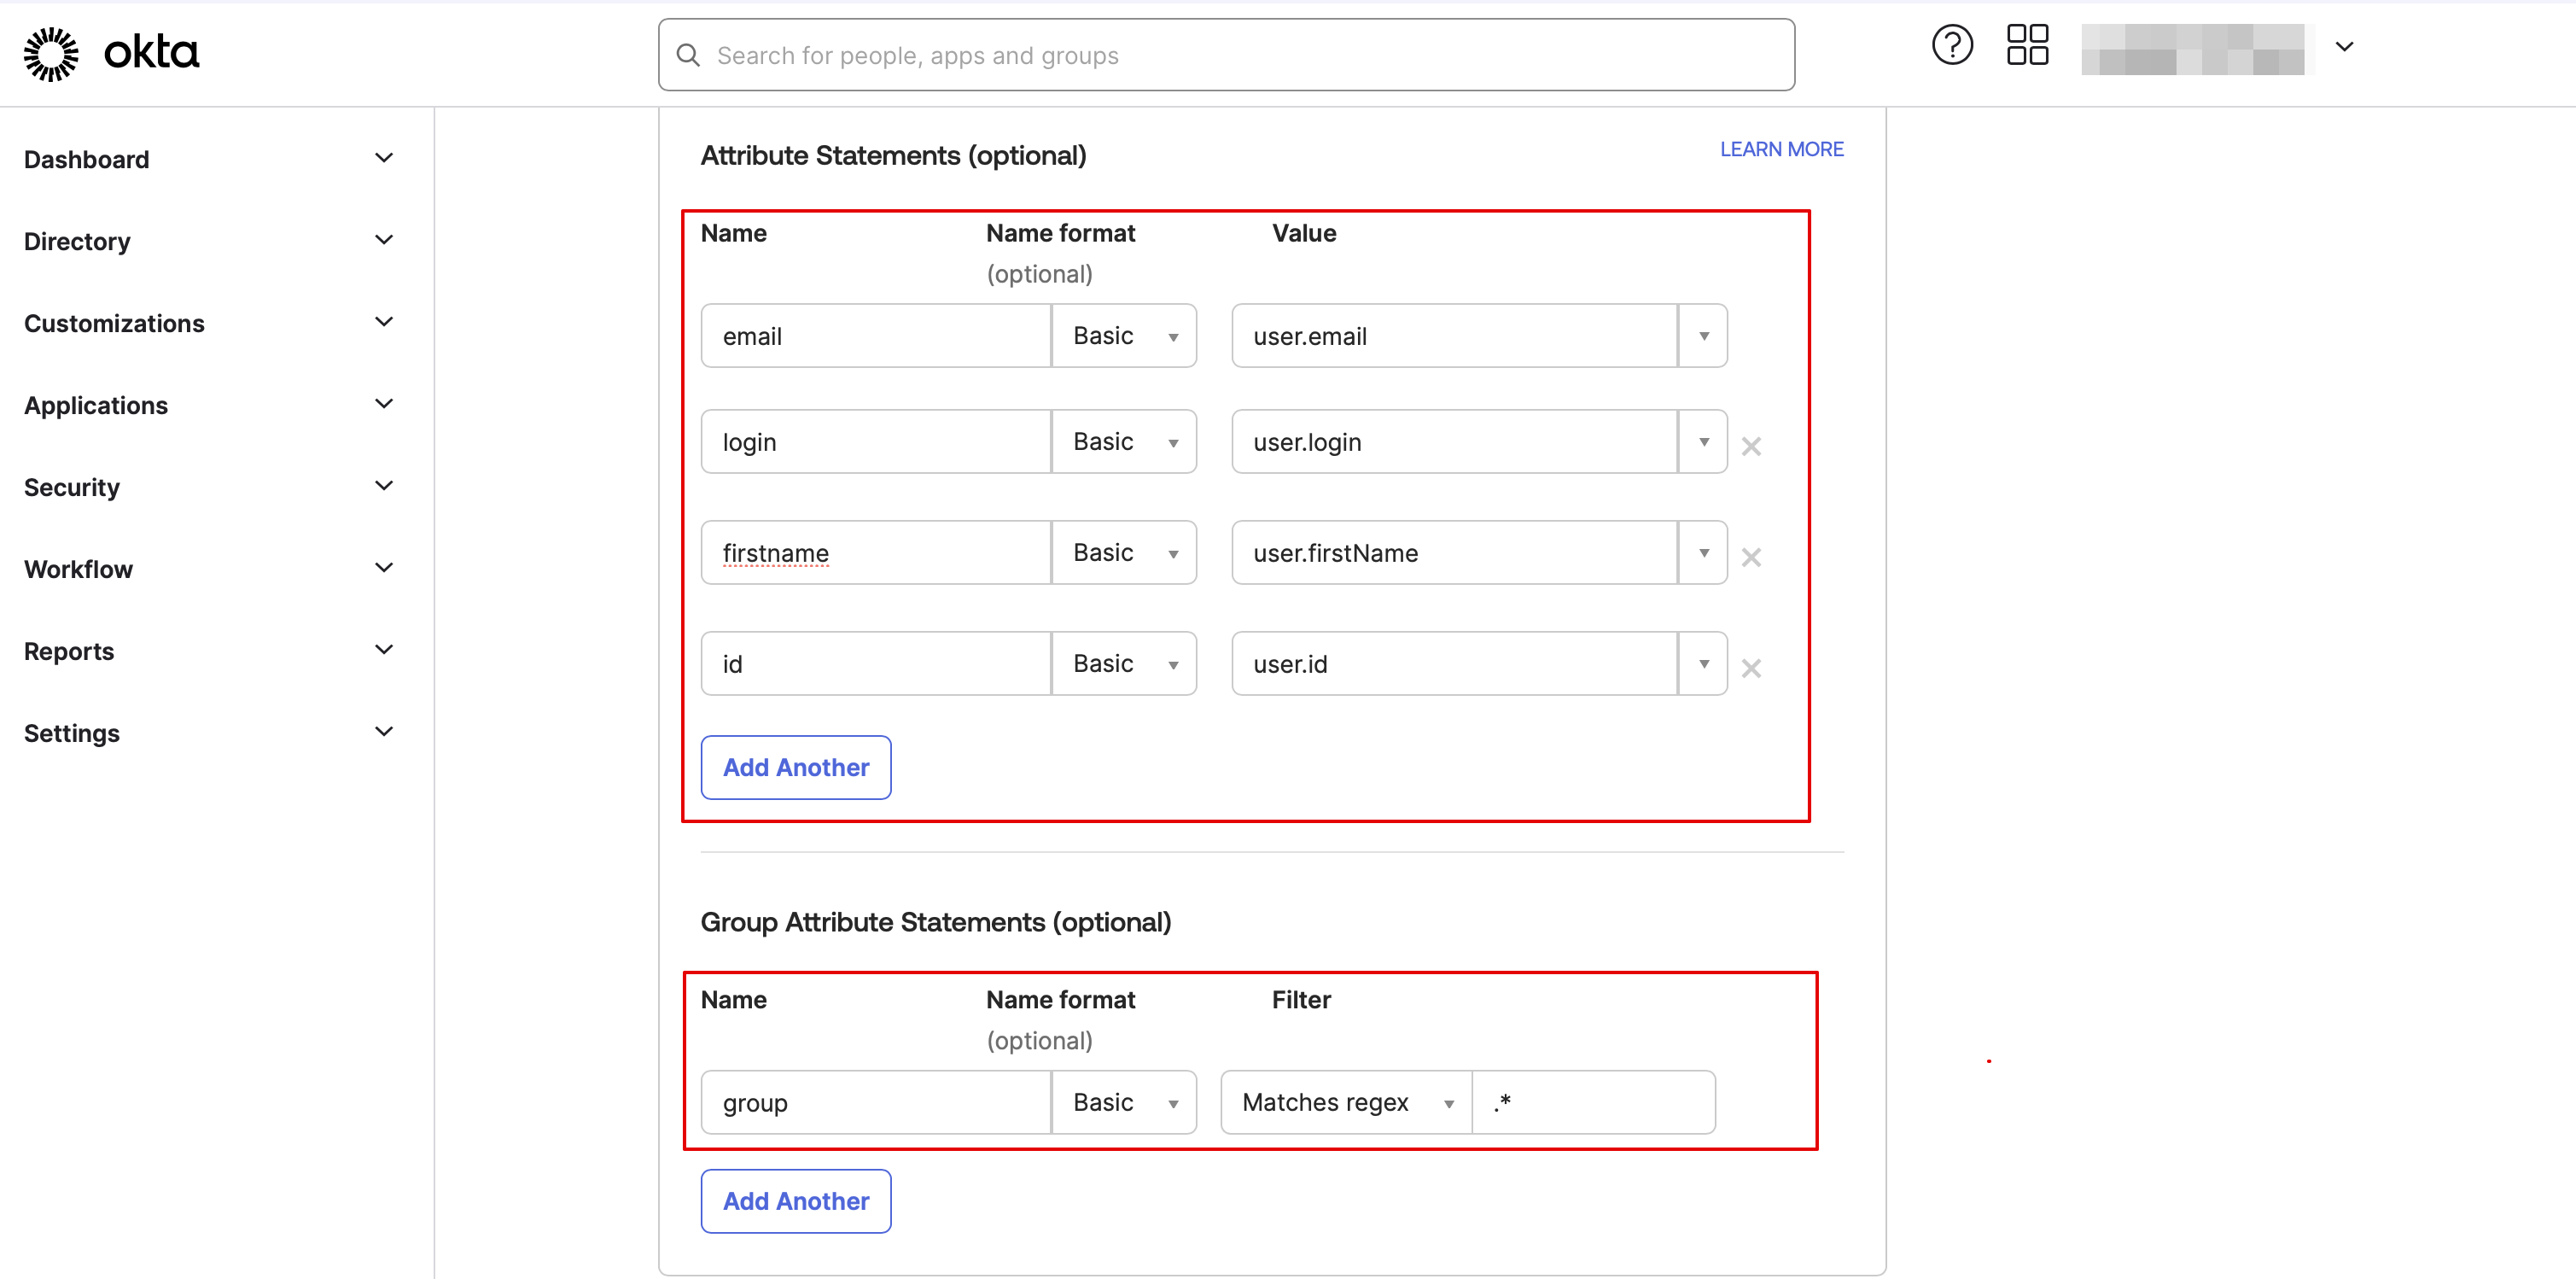
På SimplyBook.me-siden skal du sikre dig, at de samme attributter er angivet i fanen Brugerattributter og krav.


8. Fortsæt til næste trin.


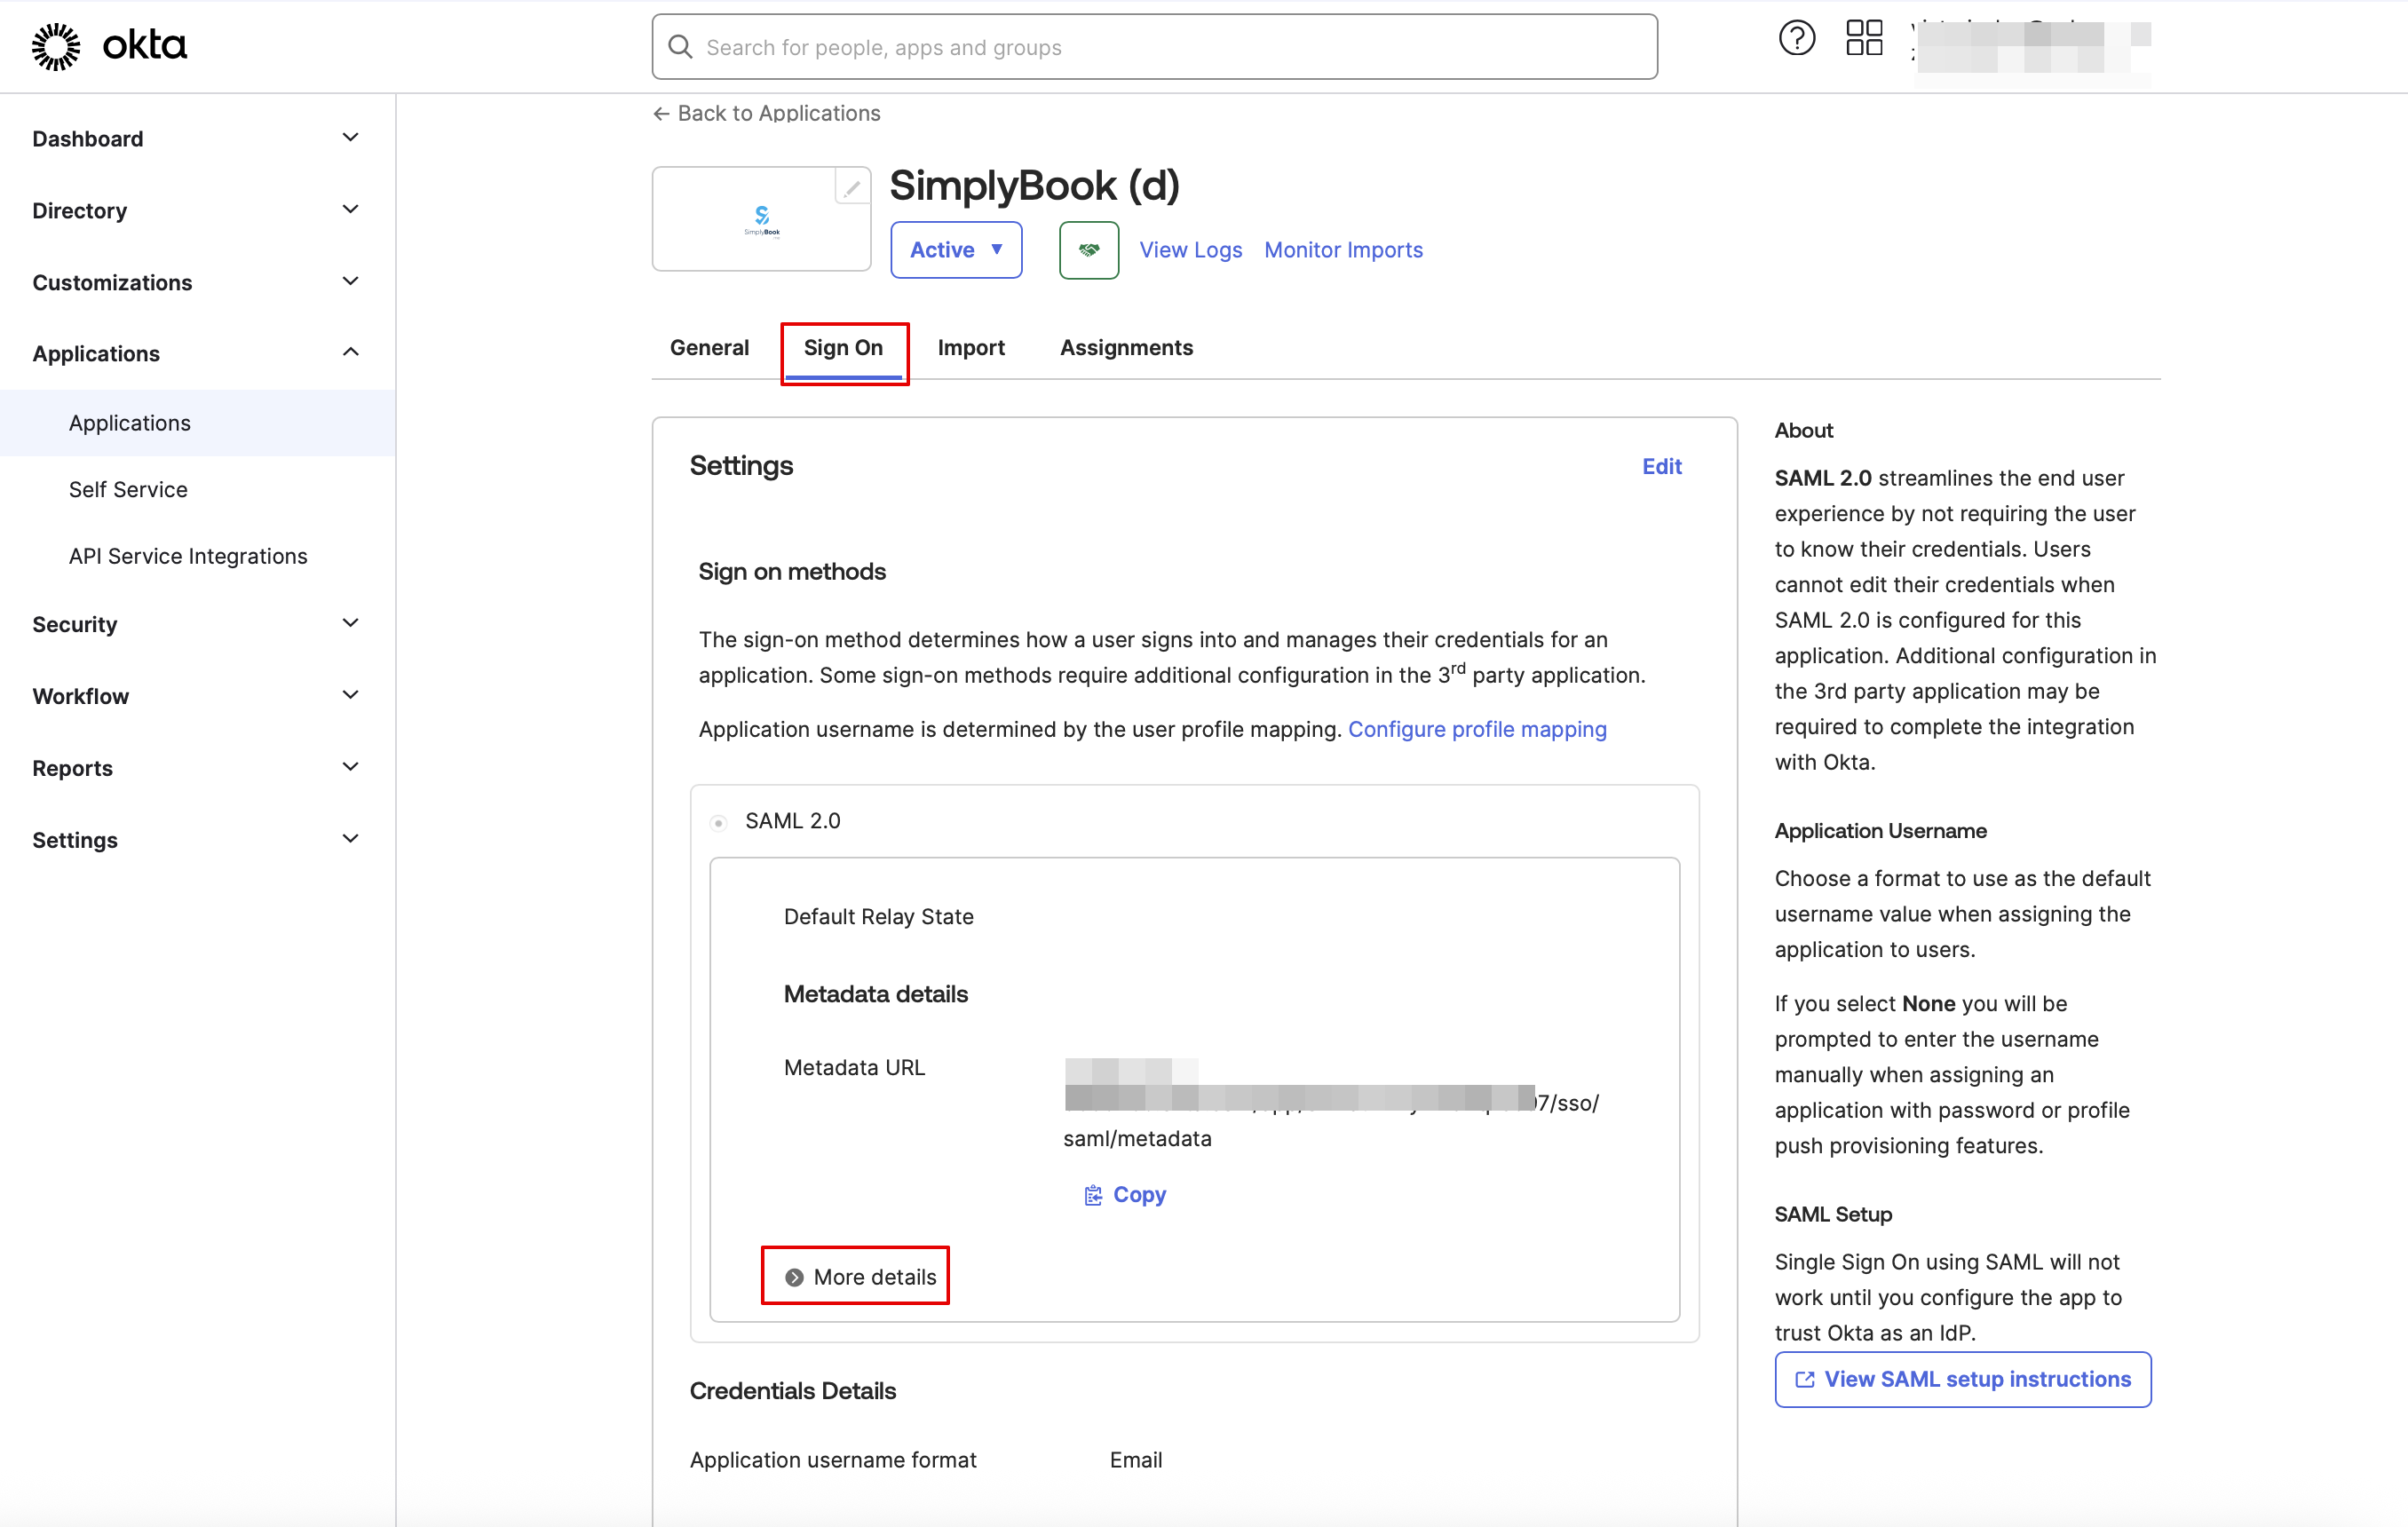
9. Appen er nu gemt. Åbn fanen Log på, og klik på på Flere detaljer der.


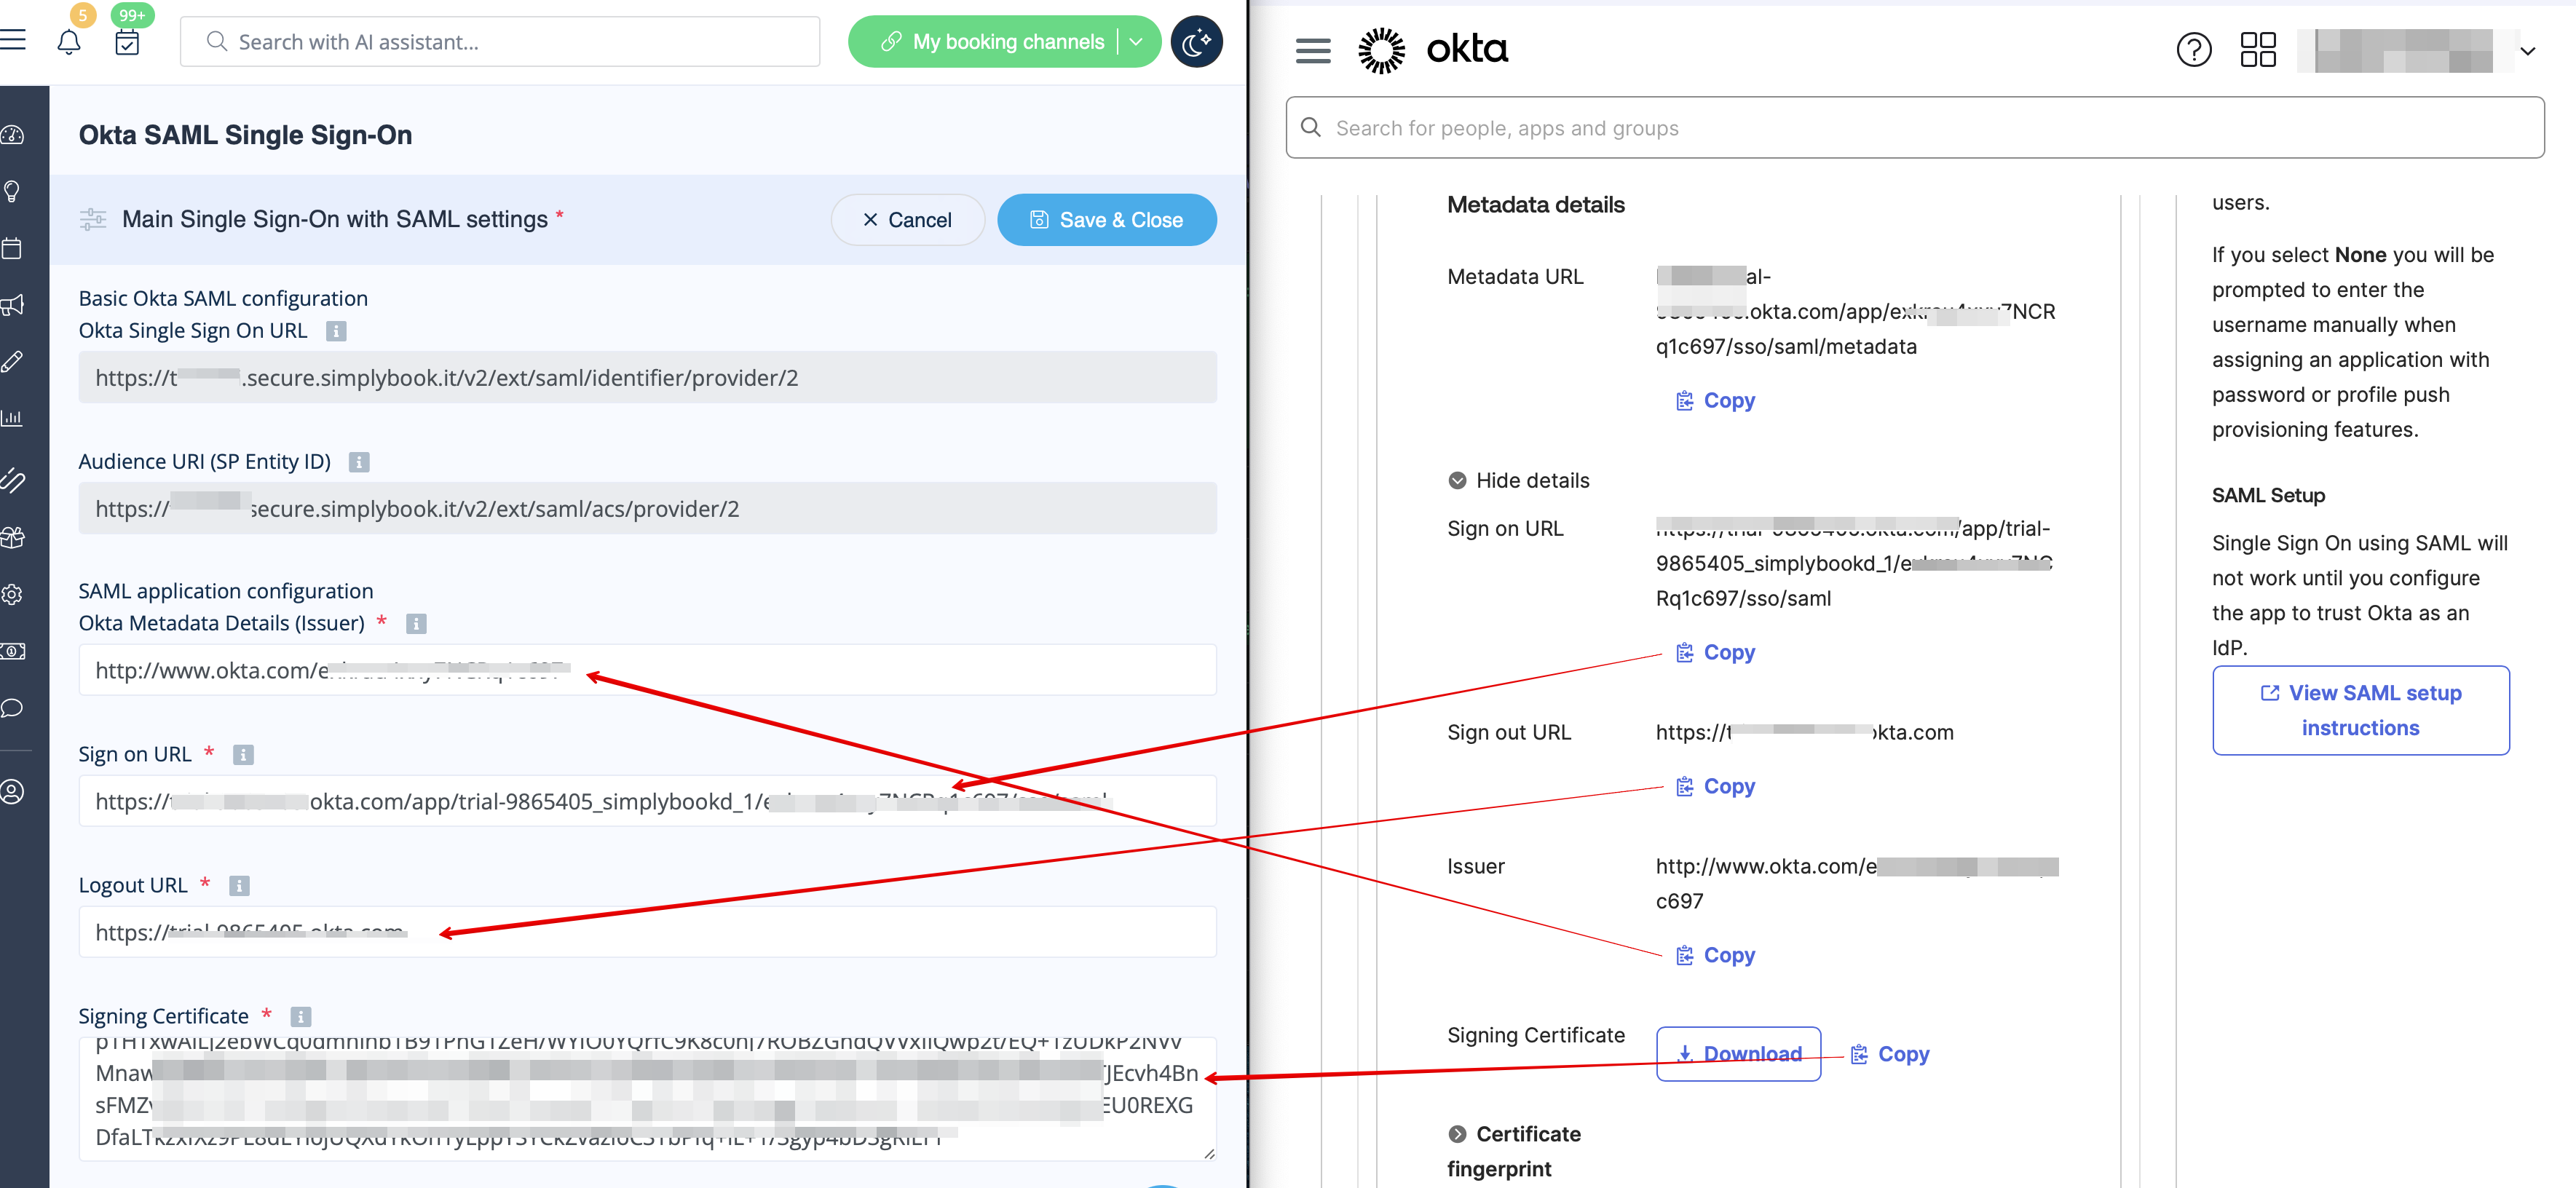
10. Kopier URL til login, URL til logout, udsteder og signeringscertifikat i Okta, og indsæt dem i de tilsvarende felter i SimplyBook.me SSO-SAML-tilføjelsesfunktion -> Administrer -> Okta SAML Single Sign-On


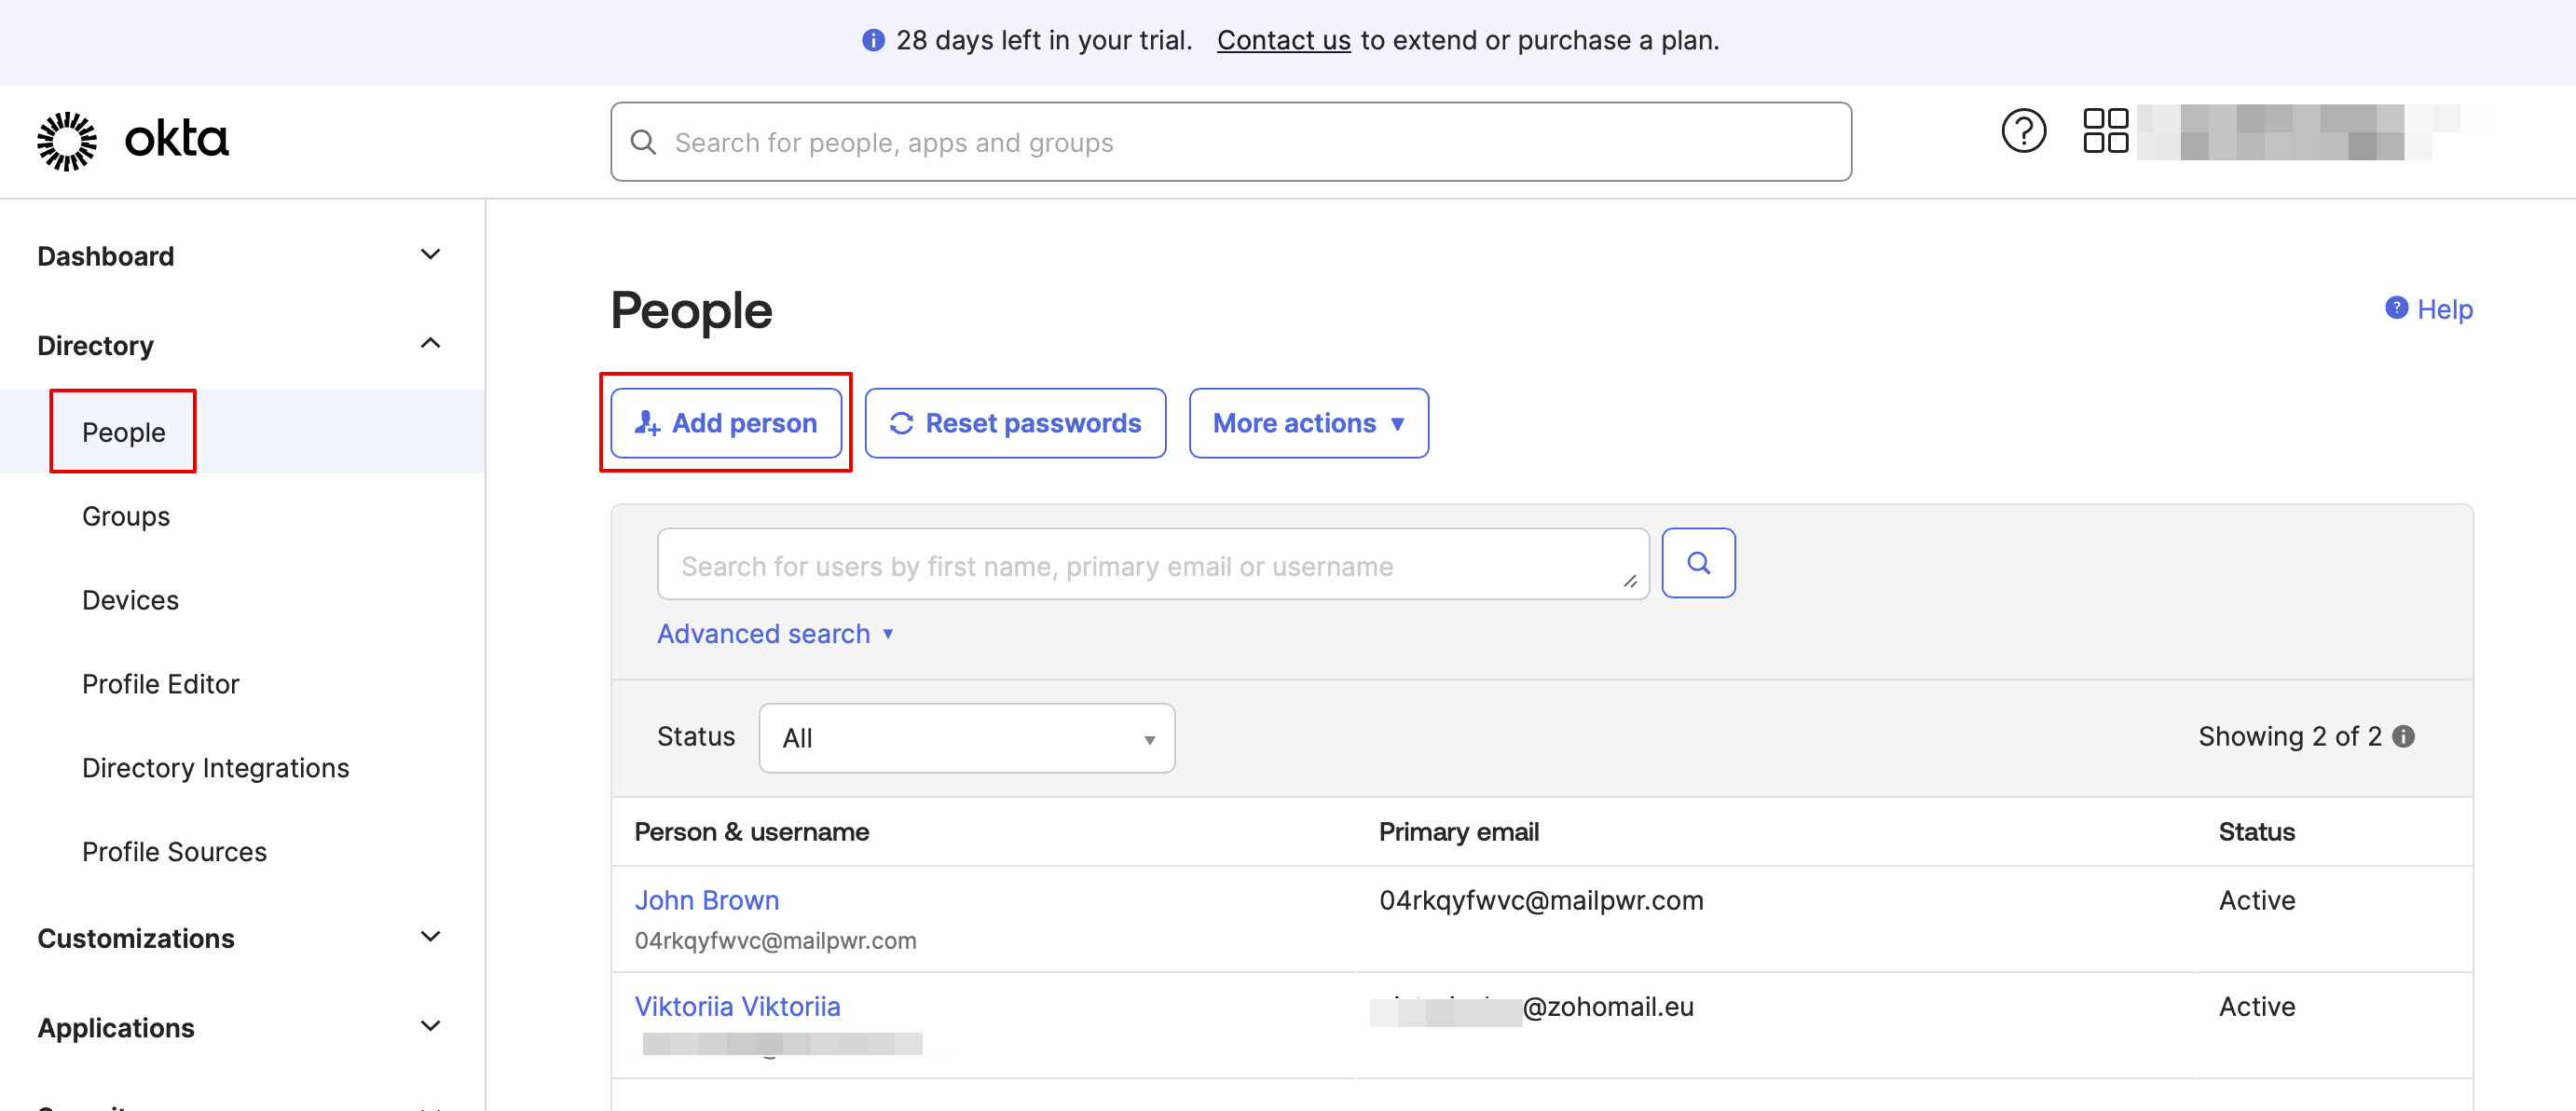
11. Sørg nu for, at alle nødvendige medarbejdere er tilføjet til systemet i fanen Personer i Okta-grænsefladen.


12. I fanen Grupper skal du oprette de grupper, der matcher SimplyBook.me-adgangsniveauerne. Tildel medarbejderne til disse grupper.


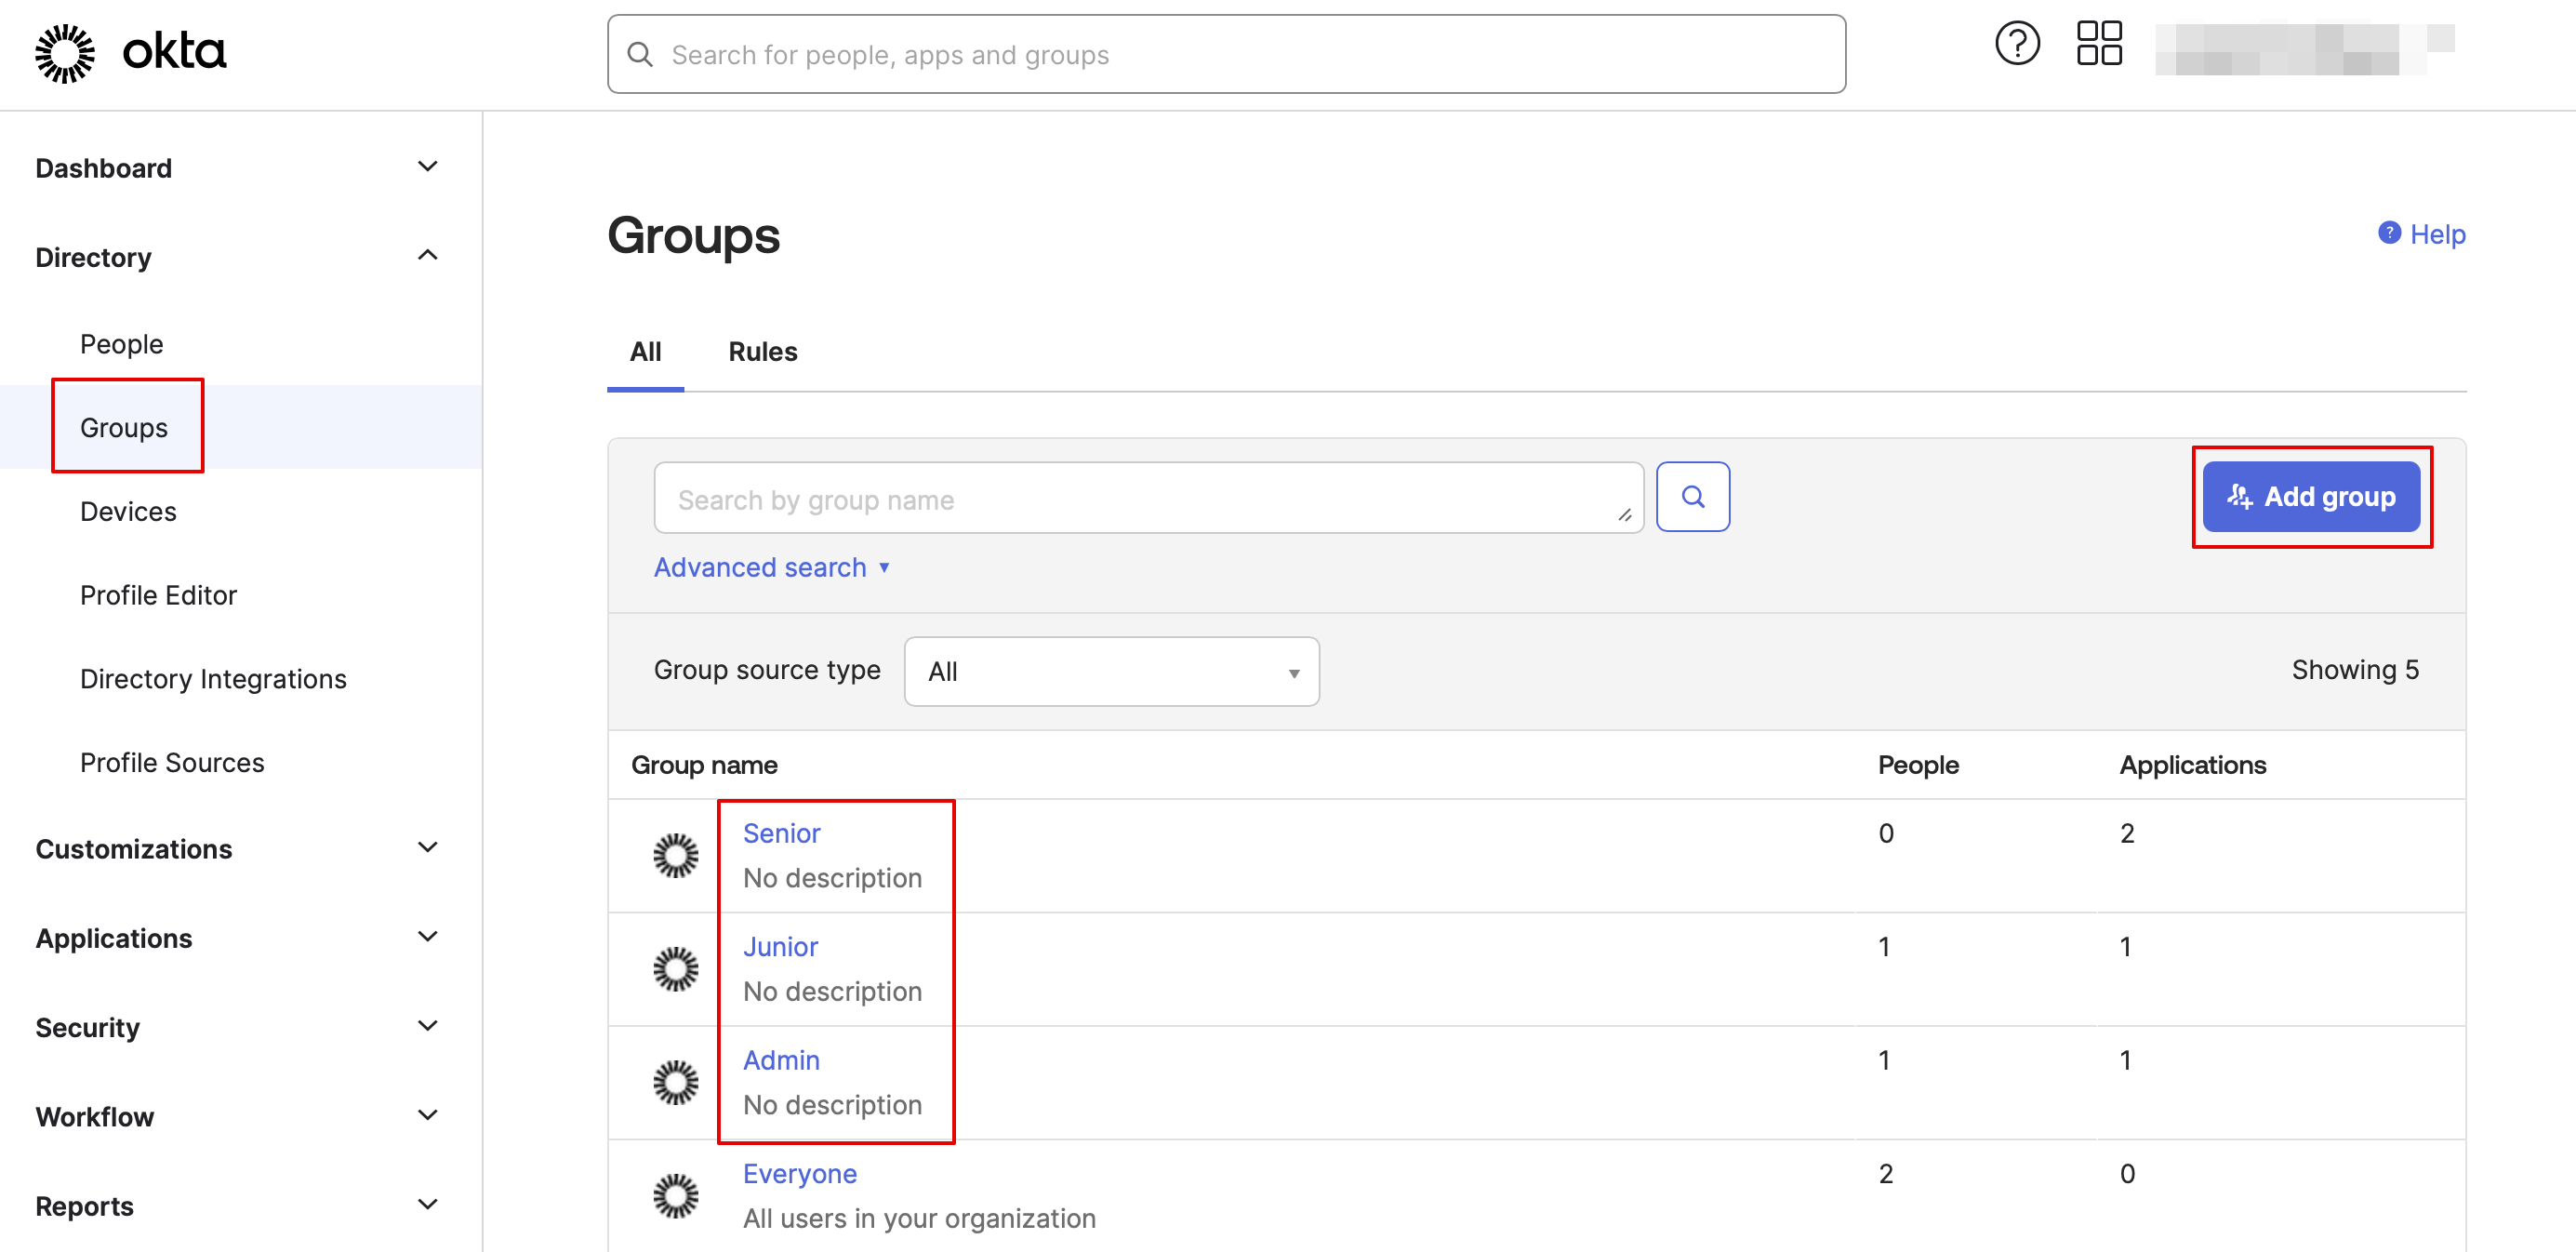
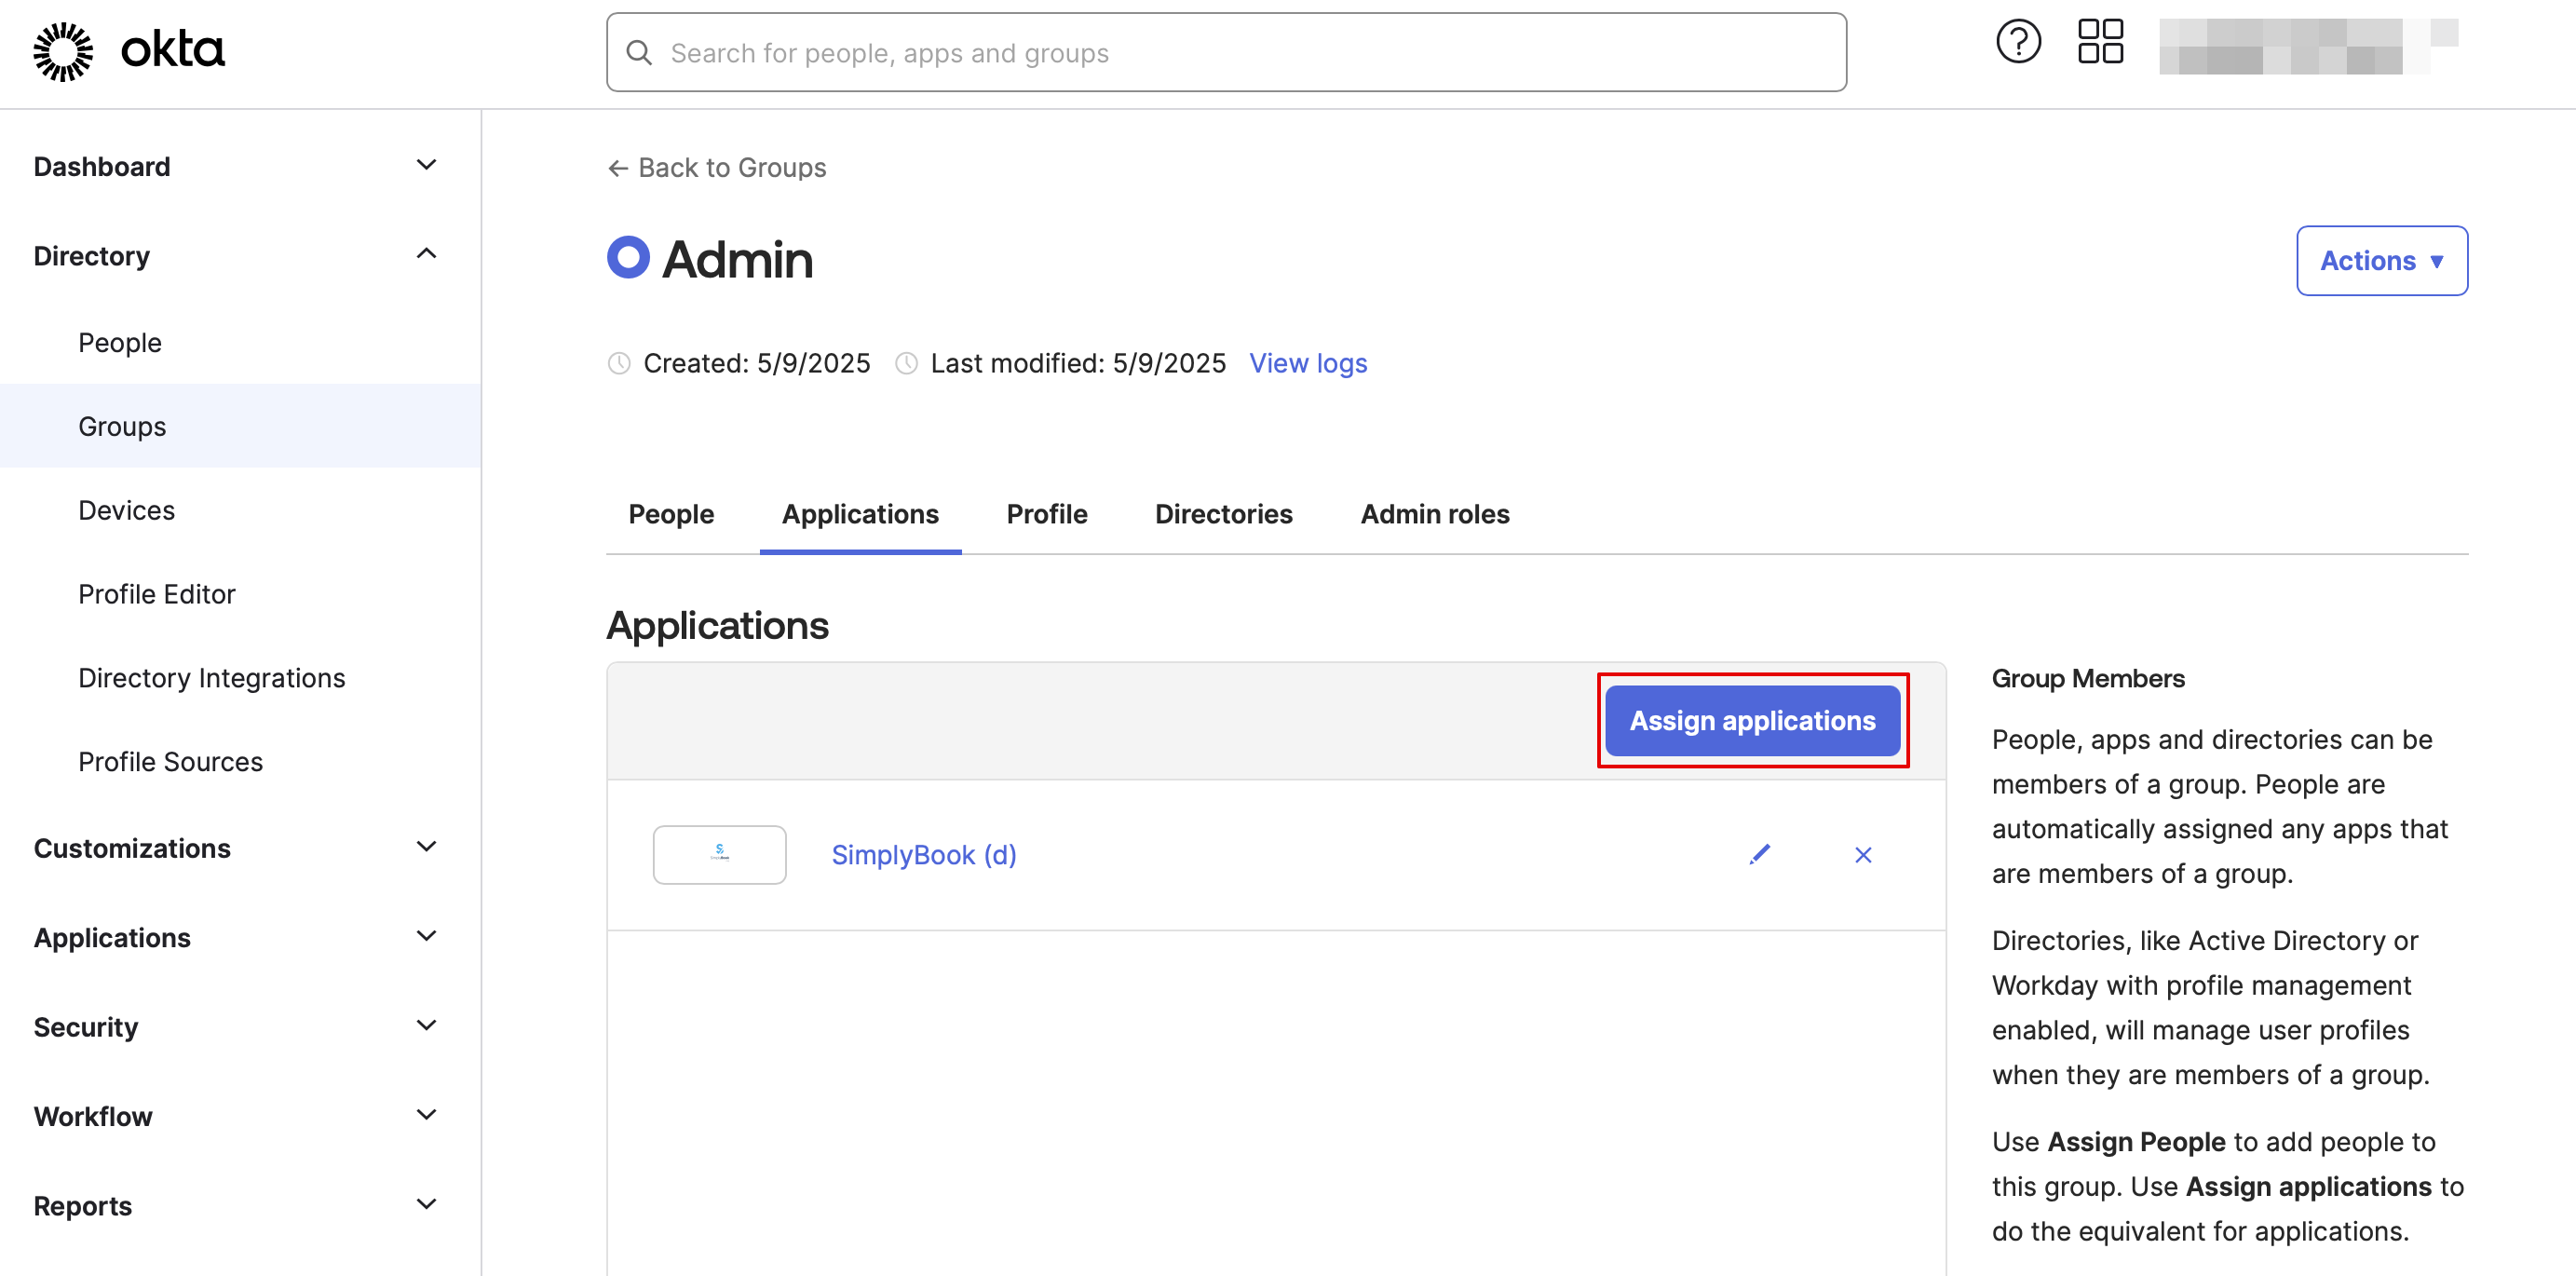
13. Tildel grupperne og personerne til den applikation, du har oprettet.


14. I SimplyBook.me skal du angive gruppernes navne i fanen Indstillinger for brugergrupper. Gem indstillingerne.


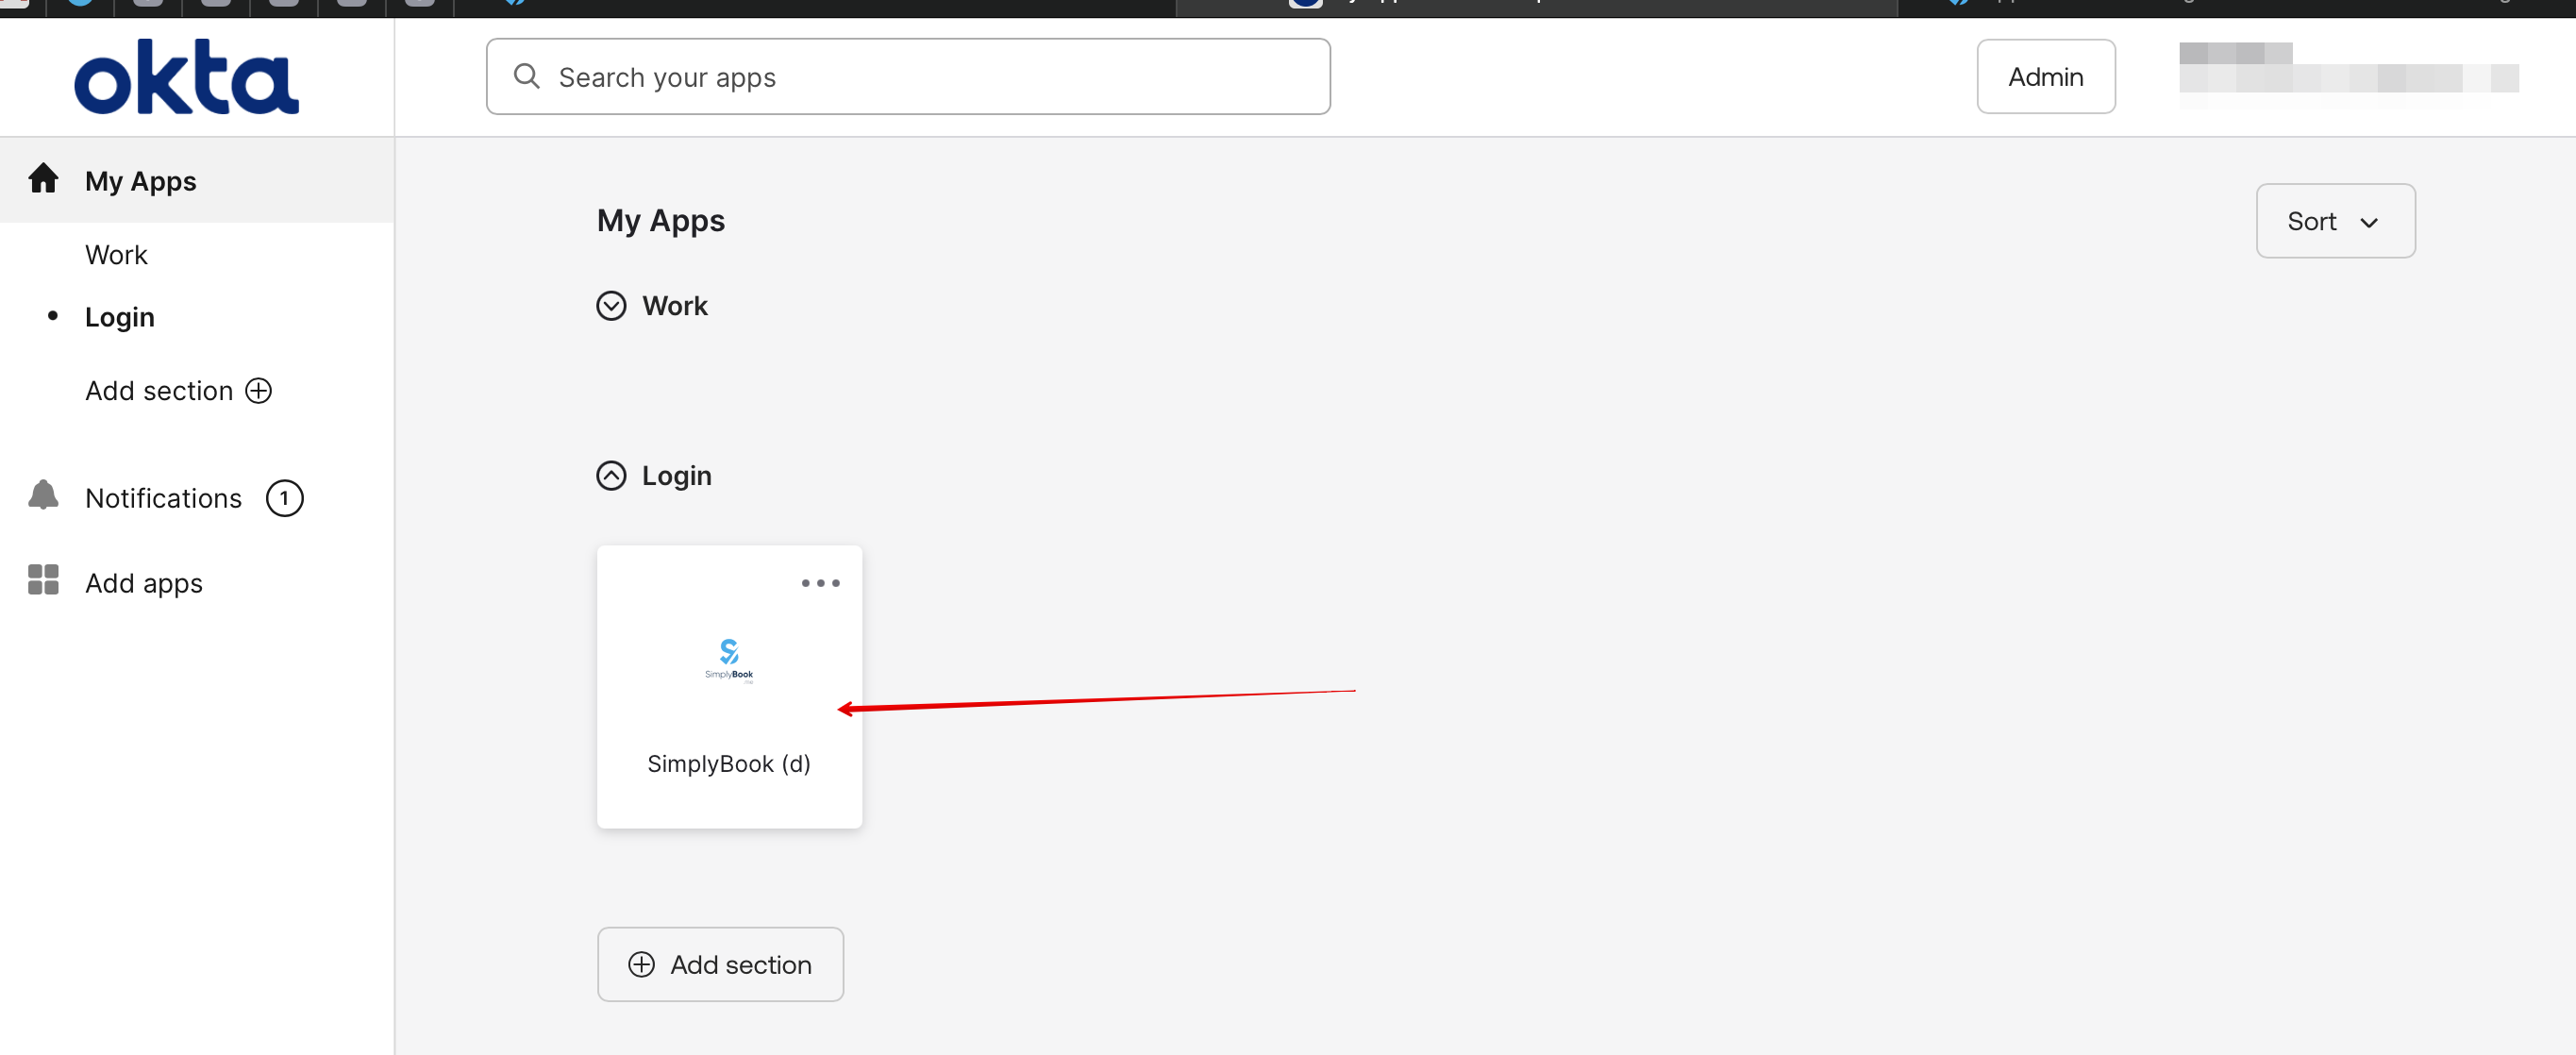
15. Nu er alt klar. Dine medarbejdere kan nu logge ind på din virksomhedskonto på SimplyBook.me med et enkelt klik på Okta-panelet (brugeren i SimplyBook.me oprettes automatisk ved første login med de relevante rettigheder).