Translations:SSO-SAML Custom Feature/10/nl: Difference between revisions

From SimplyBook.me
Created page with "== Okta instellen en gebruiken == :1. Maak een account aan bij [https://www.okta.com Okta]. <br><br> :2. Ga naar '''Applications''' in het Okta-beheerderspaneel en klik daar om een nieuwe app aan te maken. 1200px|center|link=https://help.simplybook.me/images/c/c7/Okta_create_app_integration_path.png <br><br> :3. Voeg de gewenste naam toe en upload een logo. File:Okta app add name & logo.png|1200px|center|link=https://help.s..."
 
(No difference)

Latest revision as of 16:14, 19 May 2025

Information about message (contribute)
This message has no documentation. If you know where or how this message is used, you can help other translators by adding documentation to this message.
Message definition (SSO-SAML Custom Feature)
==How to set & use Okta==
:1. Create account at [https://www.okta.com Okta].
<br><br>
:2. Navigate to '''Applications''' in Okta admin panel and click to create a new app there.
[[File:Okta create app integration path.png|1200px|center|link=https://help.simplybook.me/images/c/c7/Okta_create_app_integration_path.png]]
<br><br>
:3. Add the desirable name and upload a logo.
[[File:Okta app add name & logo.png|1200px|center|link=https://help.simplybook.me/images/0/0a/Okta_app_add_name_%26_logo.png]]
<br><br>
:4. Select '''SAML''' method.
[[File:Okta app saml select.png|1200px|center|link=https://help.simplybook.me/images/4/4b/Okta_app_saml_select.png]]
<br><br>
:5. On the SAML settings step please copy the '''Audience URI''' and '''Okta Single Sign-On URL''' from SimplyBook.me SSO-SAML custom feature -> Manage -> Okta SAML Single Sign-On and paste to the corresponding fields on the Okta side.
[[File:Create saml integration step 1.png|1200px|center|link=https://help.simplybook.me/images/3/37/Create_saml_integration_step_1.png]]
<br><br>
:6. Set '''Name ID''' and '''Application username''' as in the image below.
[[File:Create saml integrattion 2.png|1200px|center|link=https://help.simplybook.me/images/3/32/Create_saml_integrattion_2.png]]
<br><br>
:7. Scroll the page to '''Attribute settings''' and add the attributes for name, email, id and firstname as in the example.<br>
:And separately '''group''' attribute in the corresponding block.<br>
[[File:Saml add attribite statements.png|1200px|center|link=https://help.simplybook.me/images/8/8c/Saml_add_attribite_statements.png]]
<br><br>
:On the SimplyBook.me side please make sure the same attributes are indicated in the '''User attributes and claims''' tab.
<br><br>
:8. Proceed to the next step.
[[File:Saml proceed to the next.png|1200px|center|link=https://help.simplybook.me/images/0/03/Saml_proceed_to_the_next.png]]
<br><br>
:9. The app is now saved. Please open '''Sign on''' tab and click on ''' on '''More details''' there.
[[File:Saml sign on more details.png|1200px|center|link=https://help.simplybook.me/images/4/4c/Saml_sign_on_more_details.png]]
<br><br>
:10. Copy '''Sign on URL''', '''Sign out URL''', '''Issuer''' and '''Signing certificate''' in Okta and paste them to the corresponding fields in SimplyBook.me SSO-SAML custom feature -> Manage -> Okta SAML Single Sign-On  
[[File:Saml copy urls from okta.png|1200px|center|link=https://help.simplybook.me/images/3/38/Saml_copy_urls_from_okta.png]]
<br><br>
:11. Now in Okta interface make sure all necessary employees are added to the system in '''People''' tab.
[[File:Add people okta.png|1200px|center|link=https://help.simplybook.me/images/b/b7/Add_people_okta.png]]
<br><br>
:12. In '''Groups''' tab - create the groups matching the SimplyBook.me access levels. Assign the employees to these groups.
[[File:Create groups okta.png|1200px|center|link=https://help.simplybook.me/images/c/c0/Create_groups_okta.png]]
[[File:Assign people to groups okta.png|1200px|center|link=https://help.simplybook.me/images/0/07/Assign_people_to_groups_okta.png]]
<br><br>
:13. Assign the groups and people to the application that you've created.
[[File:Assign applications to groups.png|1200px|center|link=https://help.simplybook.me/images/7/78/Assign_applications_to_groups.png]]
<br><br>
:14. In the SimplyBook.me side please indicate the groups names in the '''User groups matching settings''' tab. Save settings.
<br><br>
:15. Everything is ready now. Your employees an now log in to your company account at SimplyBook.me with one single click on the Okta panel (the user in SimplyBook.me will be automatically create on the first login with the corresponding rights)
[[File:Login screen okta.png|1200px|center|link=https://help.simplybook.me/images/0/06/Login_screen_okta.png]]
<br><br>
<br><br>

Okta instellen en gebruiken

1. Maak een account aan bij Okta.


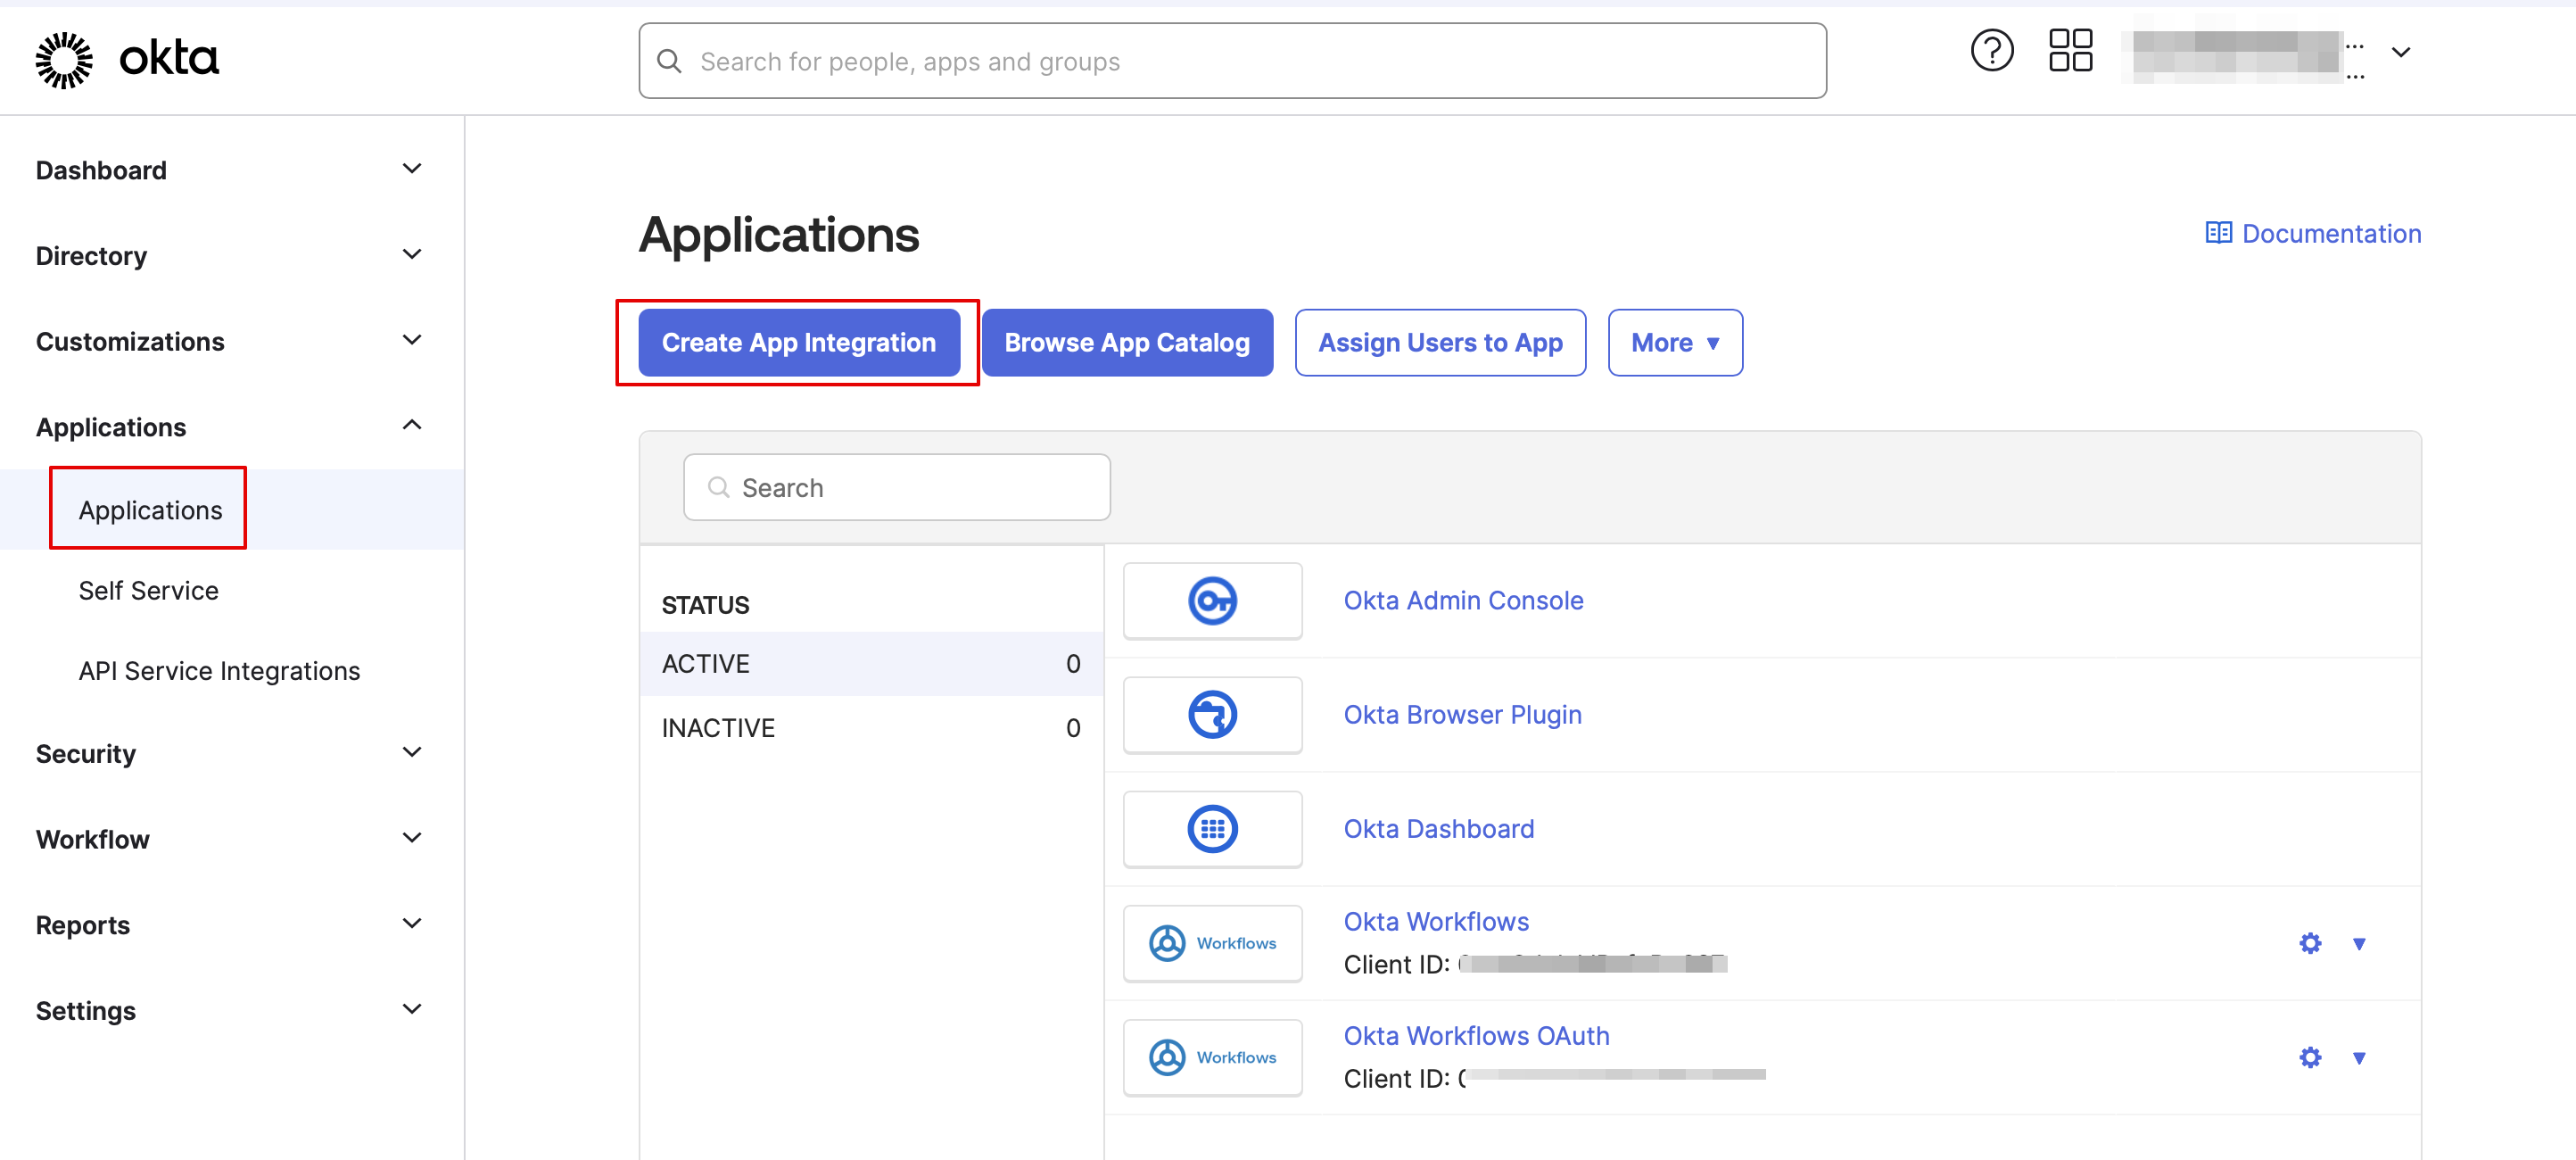
2. Ga naar Applications in het Okta-beheerderspaneel en klik daar om een nieuwe app aan te maken.


3. Voeg de gewenste naam toe en upload een logo.


4. Selecteer de SAML-methode.


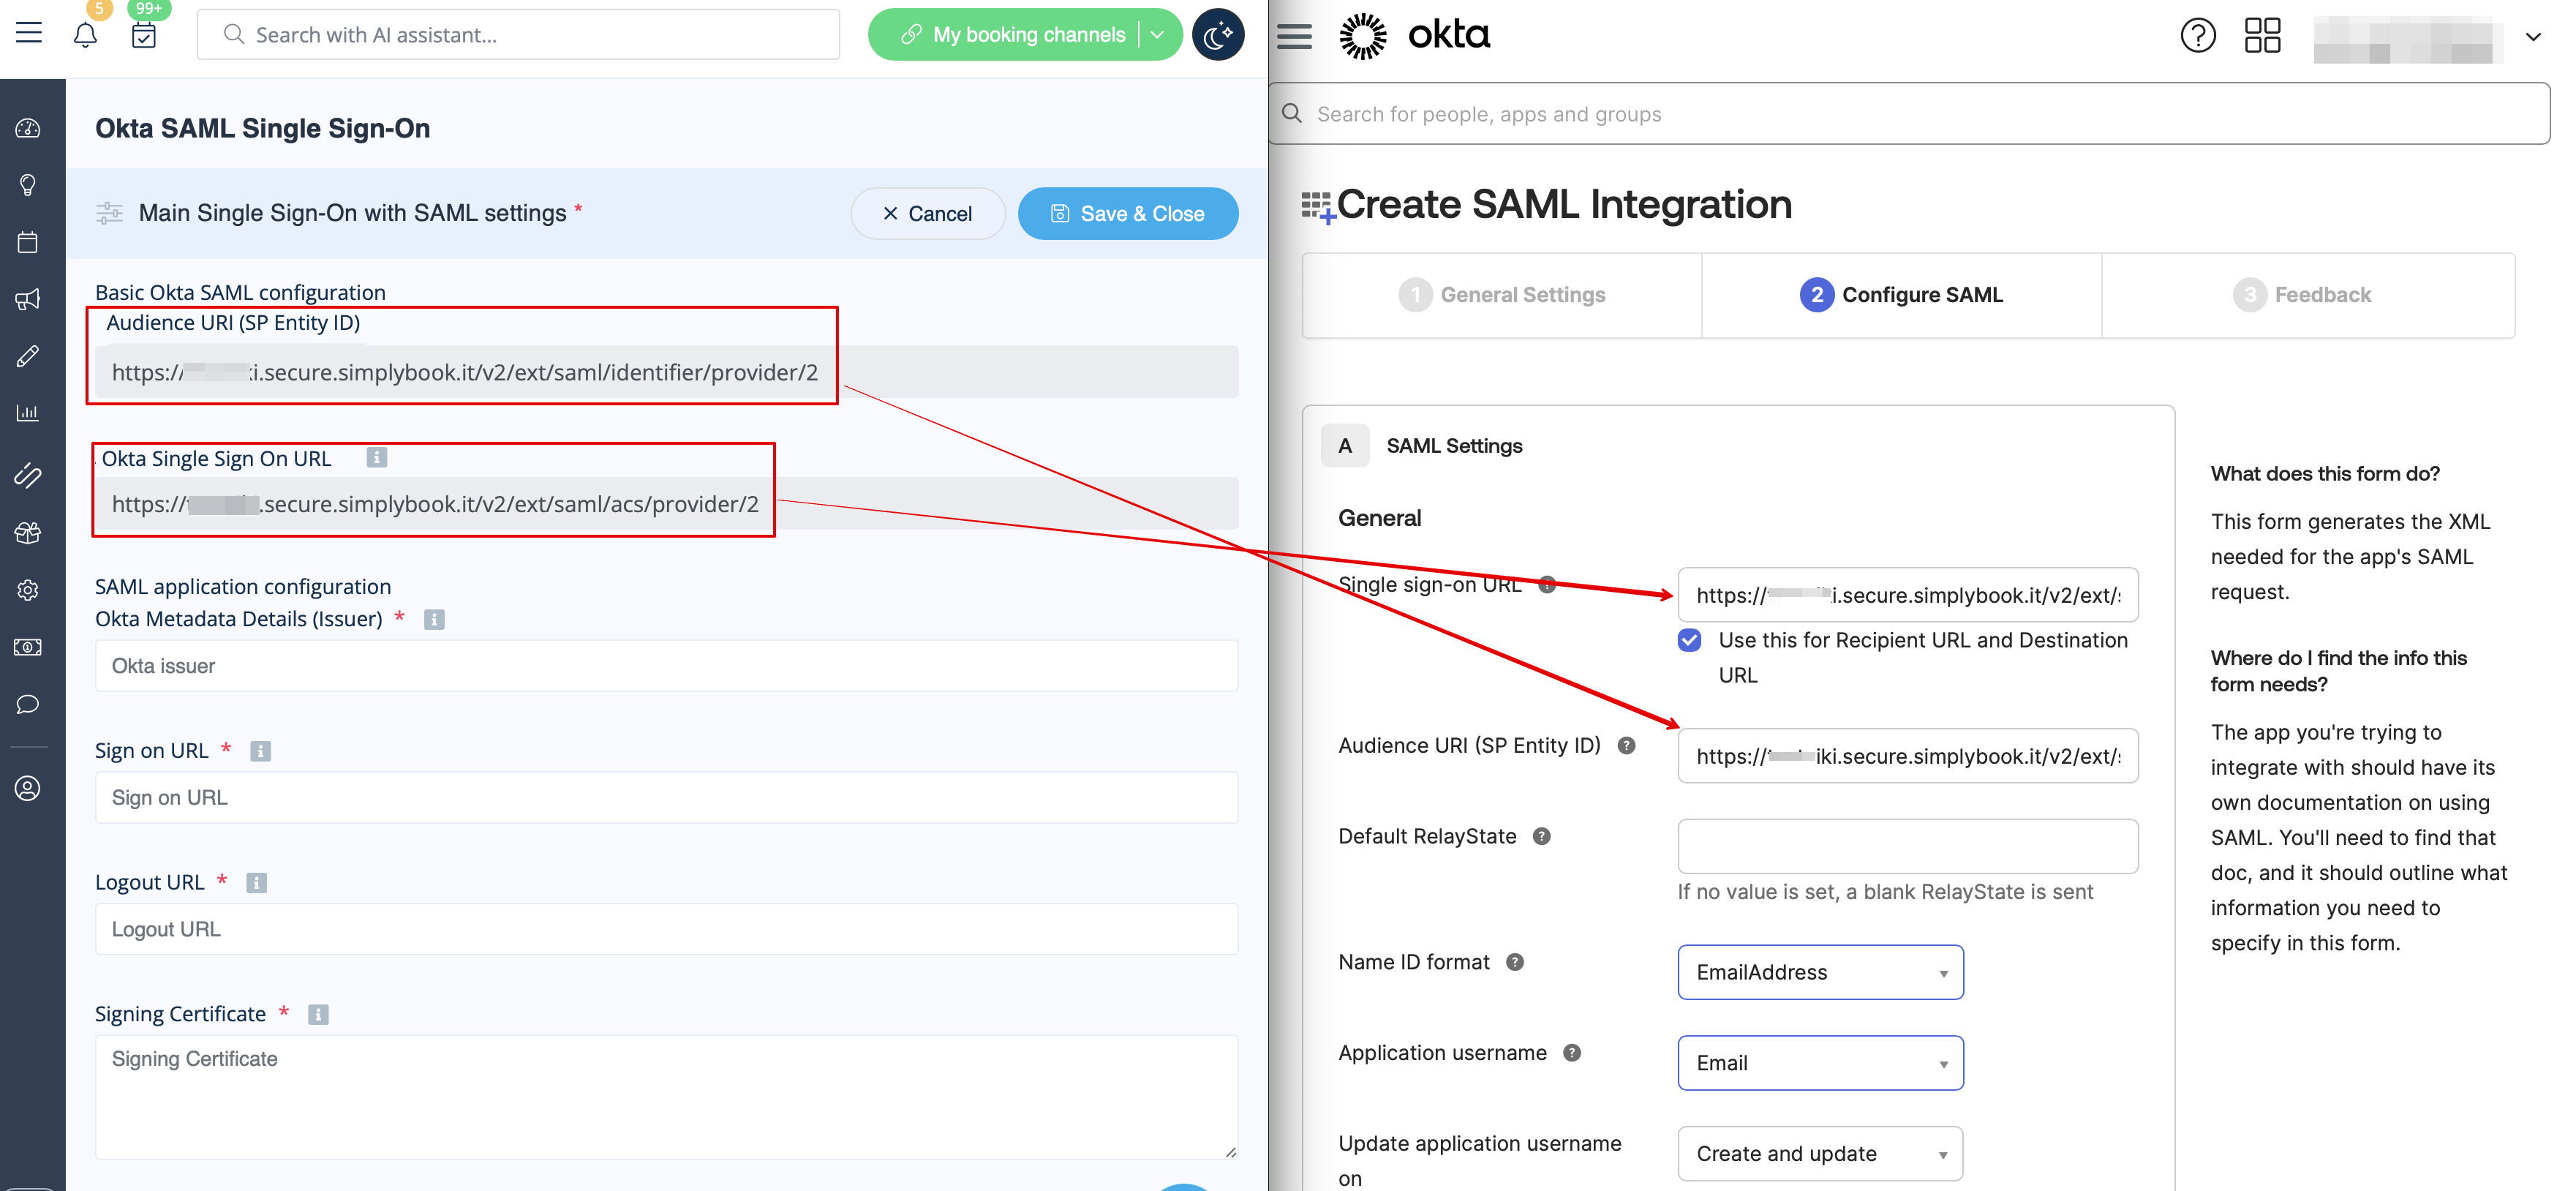
5. Kopieer in de stap SAML-instellingen de Audience URI en Okta Single Sign-On URL uit SimplyBook.me SSO-SAML aangepaste functie -> Beheren -> Okta SAML Single Sign-On en plak deze in de overeenkomstige velden aan de Okta-kant.


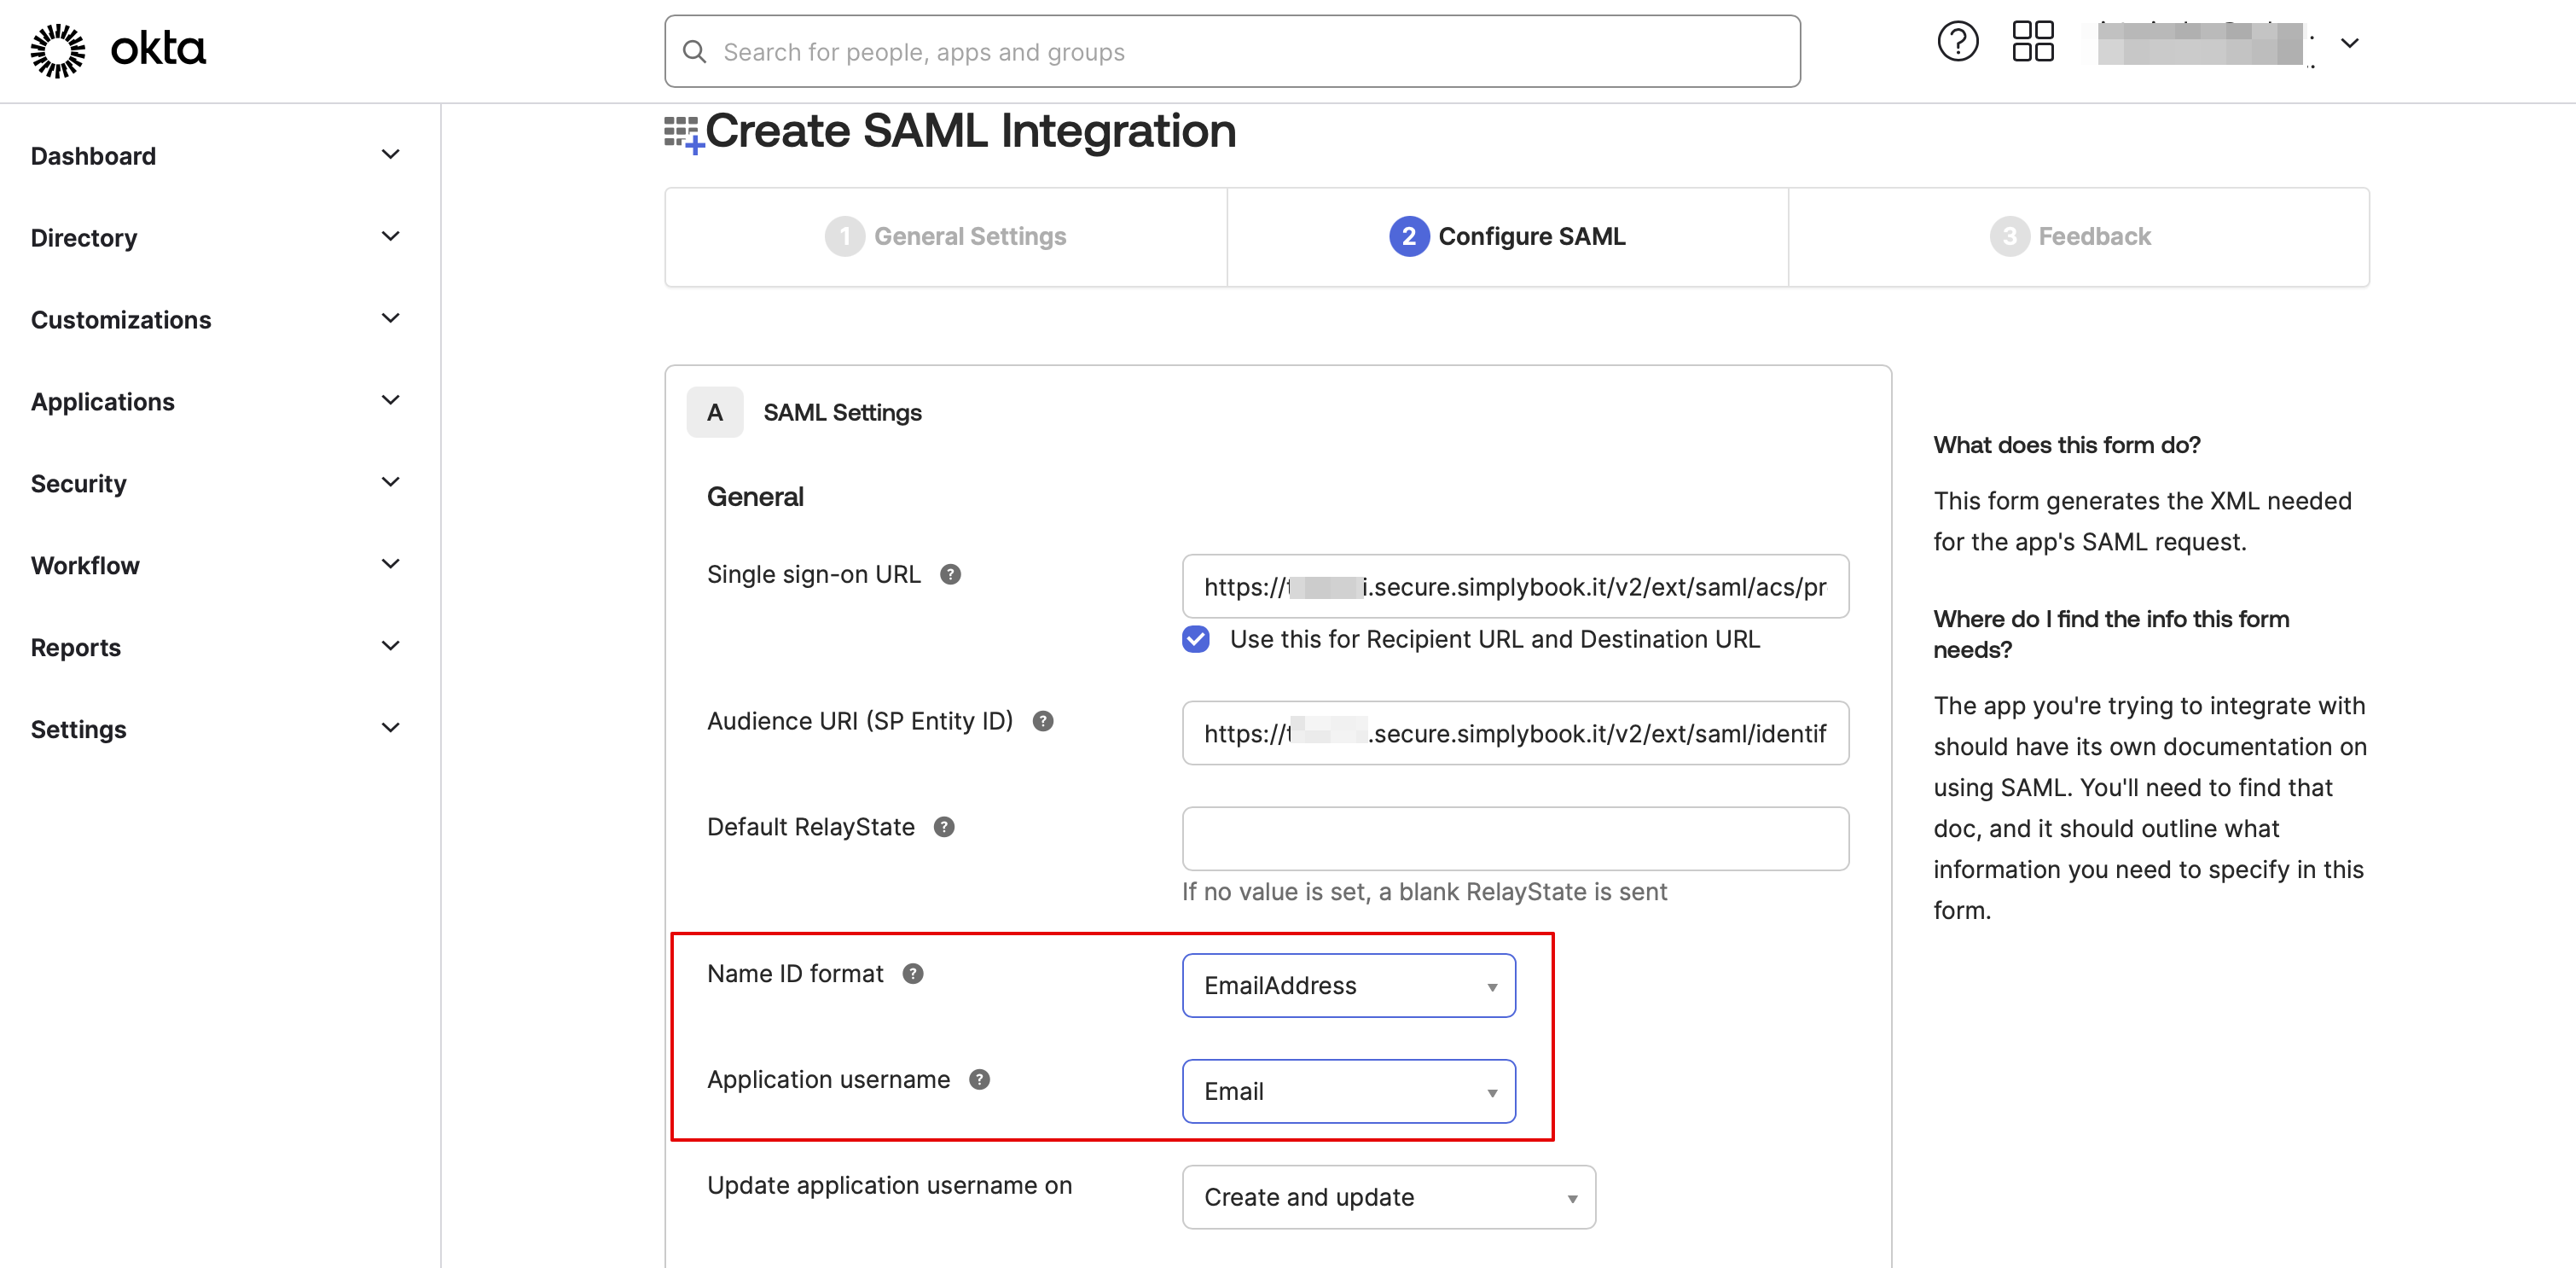
6. Stel Name ID en Application username in zoals in de onderstaande afbeelding.


7. Scroll naar Attribute settings en voeg de attributen voor name, email, id en firstname toe zoals in het voorbeeld.
Groepeer de attributen afzonderlijk in het overeenkomstige blok.


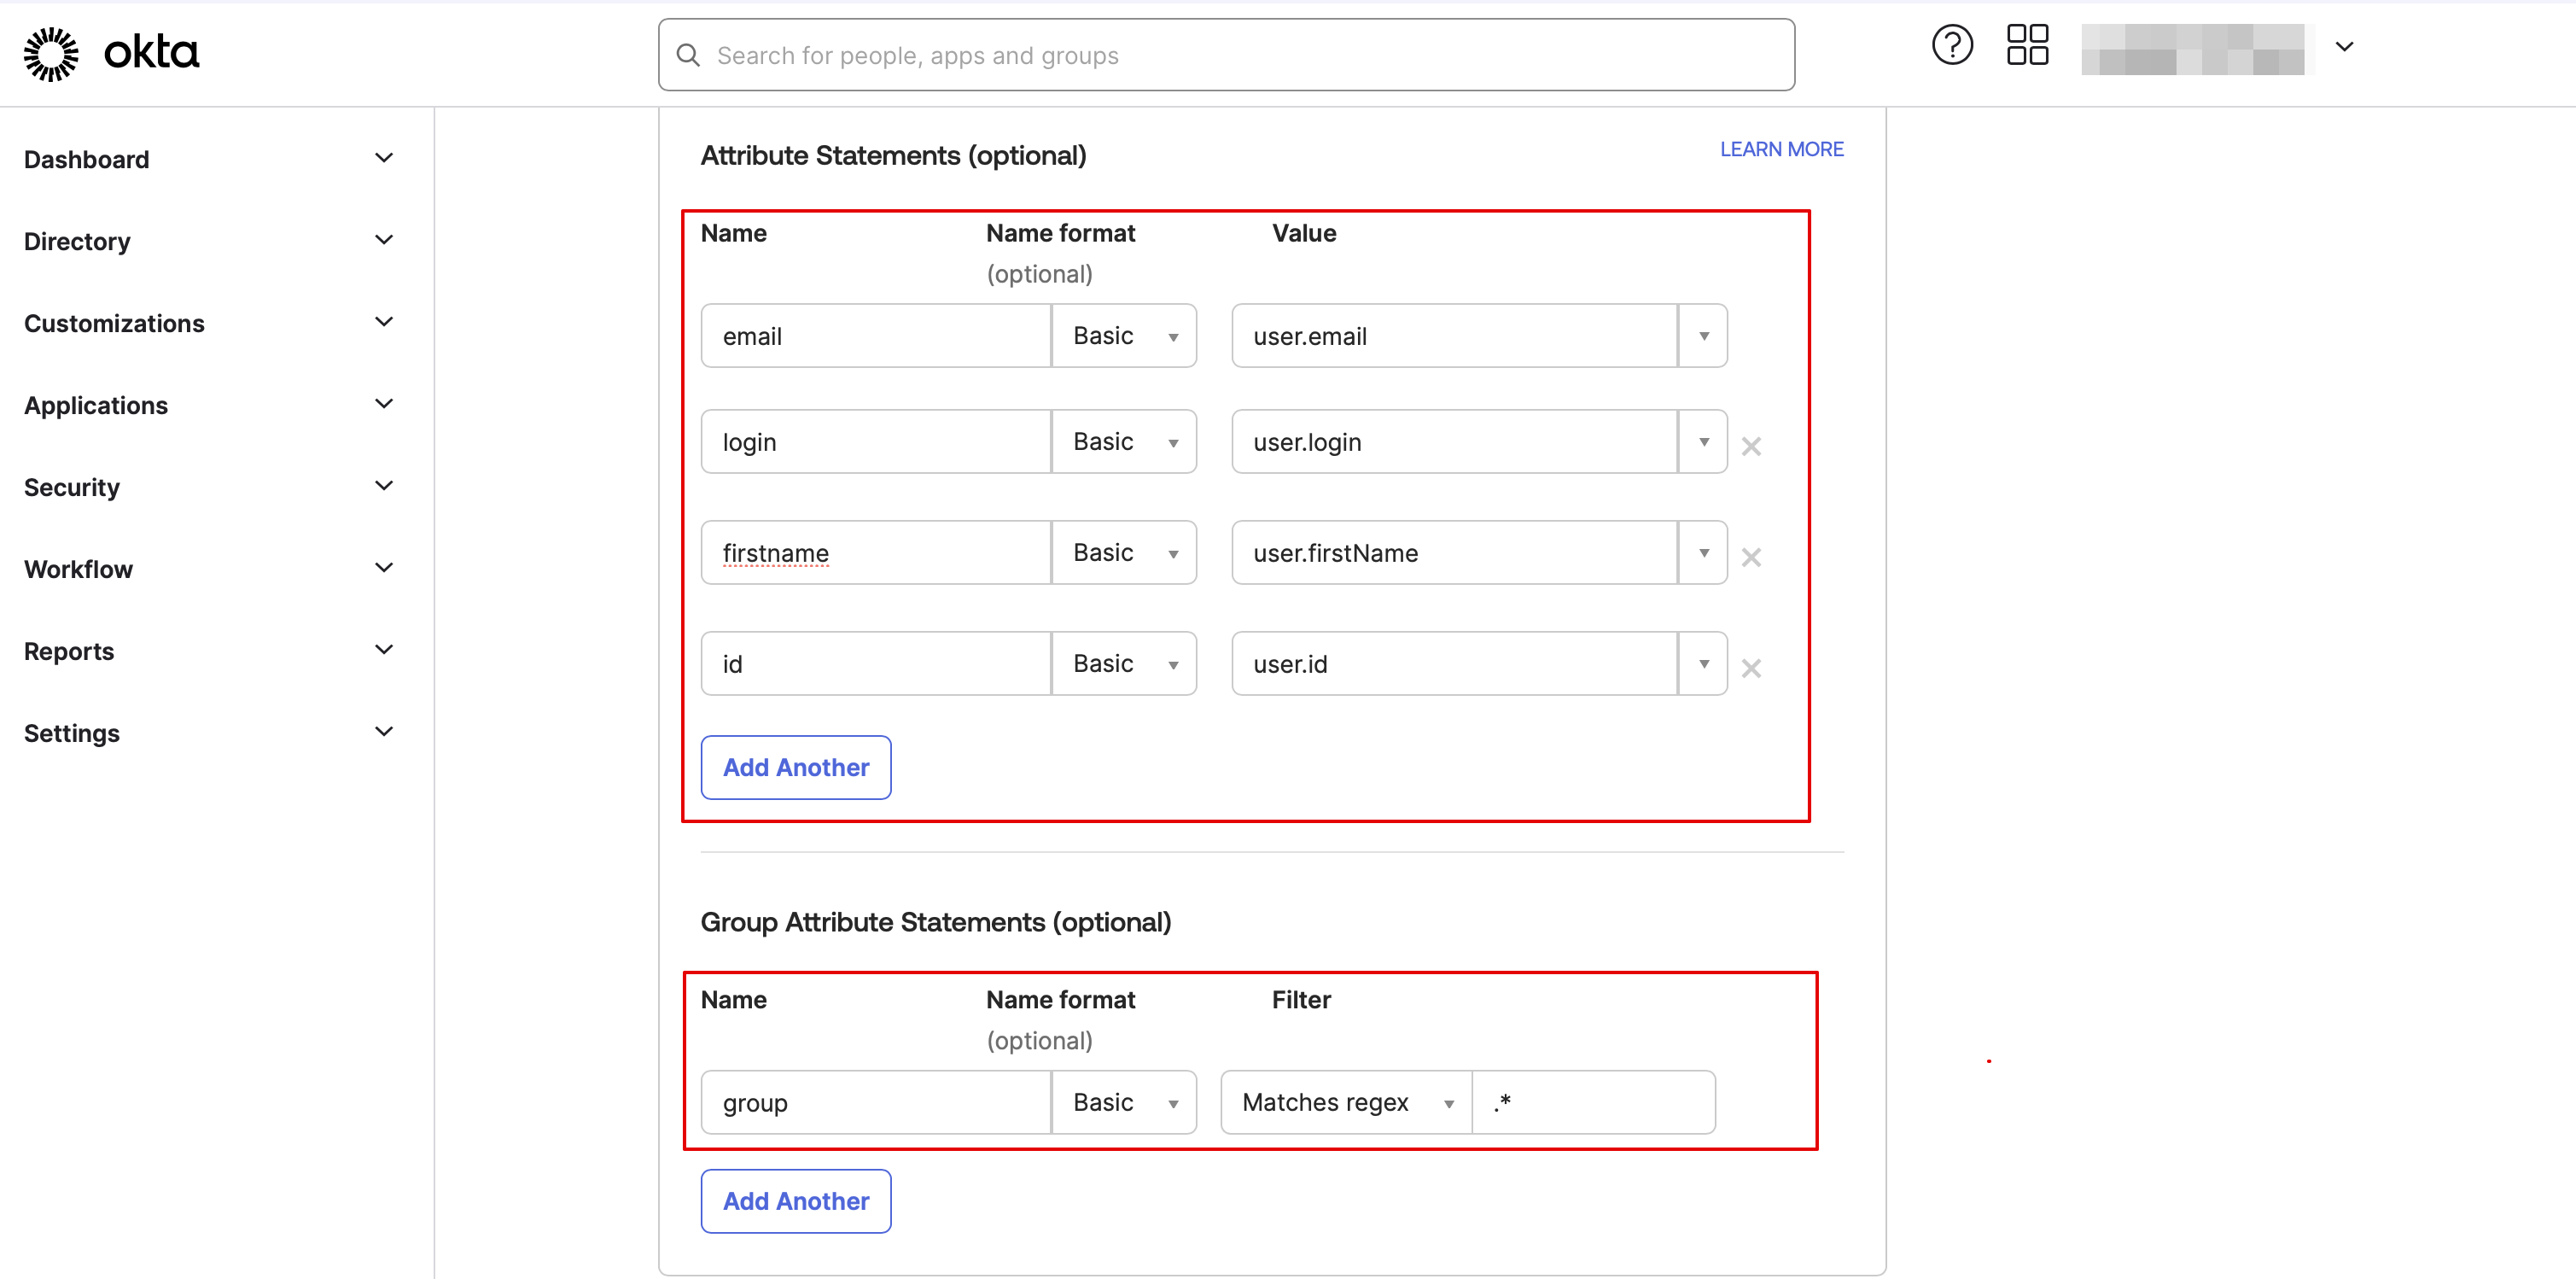
Zorg ervoor dat aan de kant van SimplyBook.me dezelfde attributen zijn aangegeven in het tabblad Gebruikersattributen en claims.


8. Ga verder met de volgende stap.


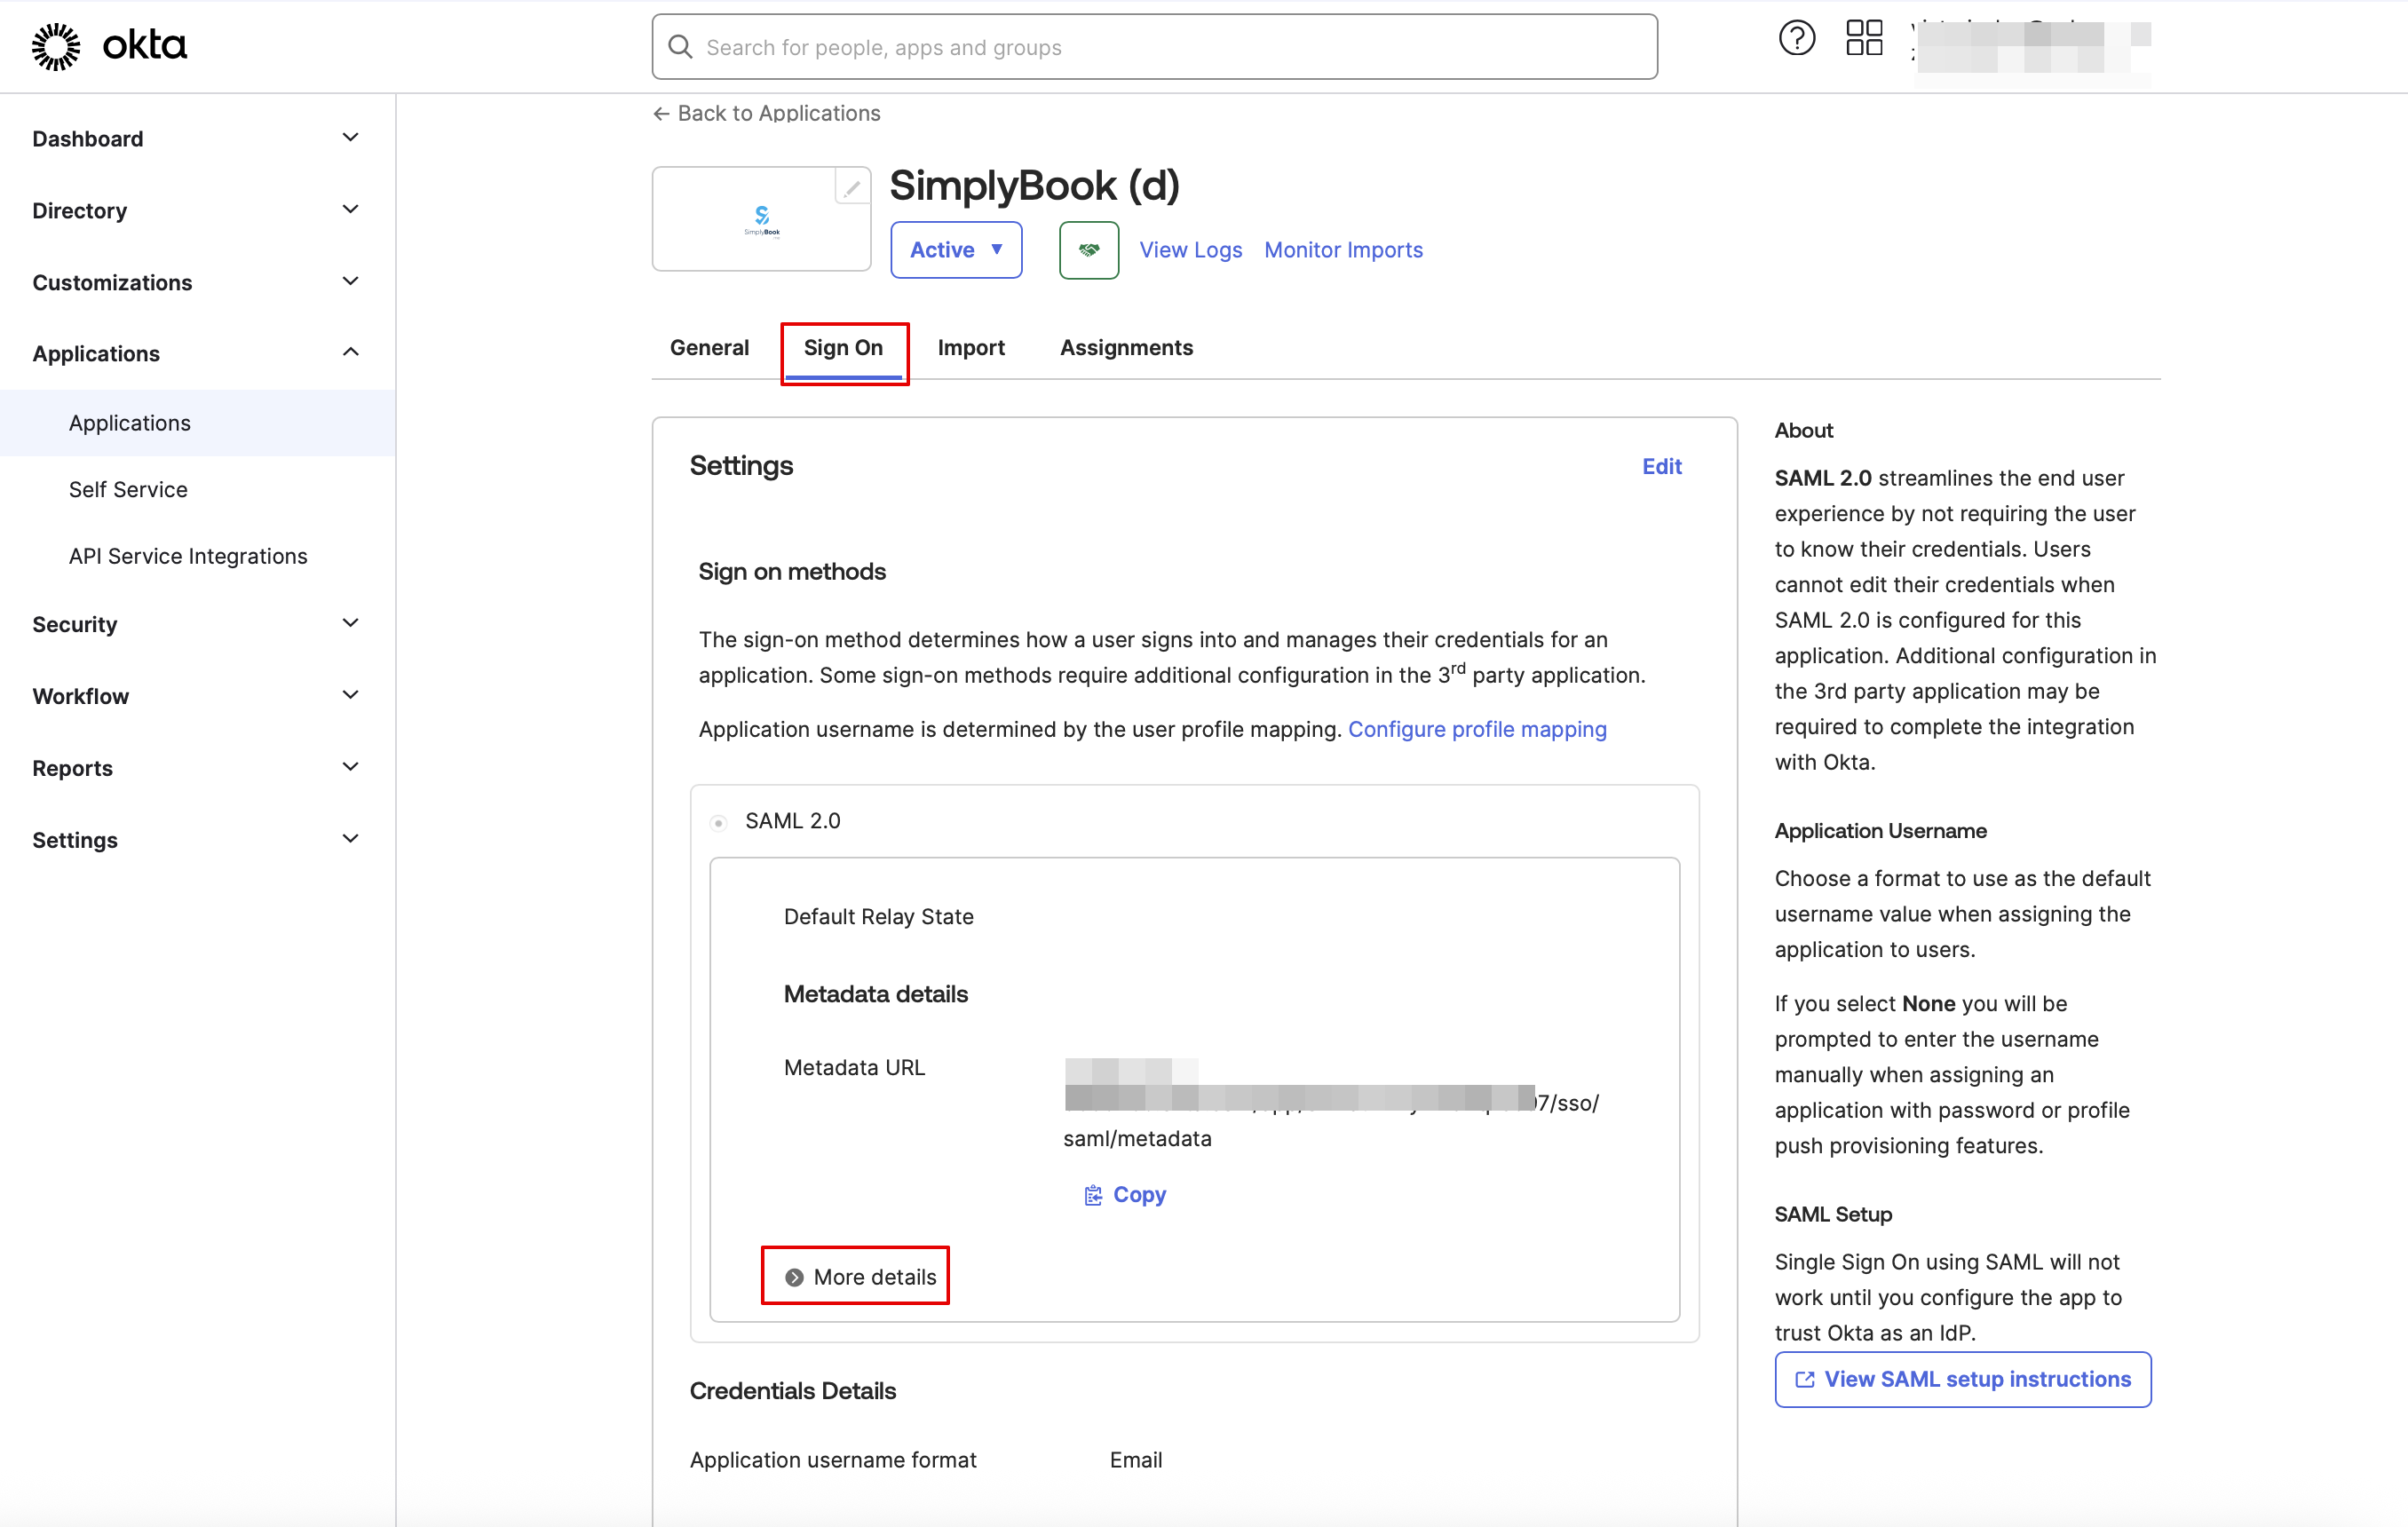
9. De app is nu opgeslagen. Open het tabblad Aanmelden en klik daar op op Meer details.


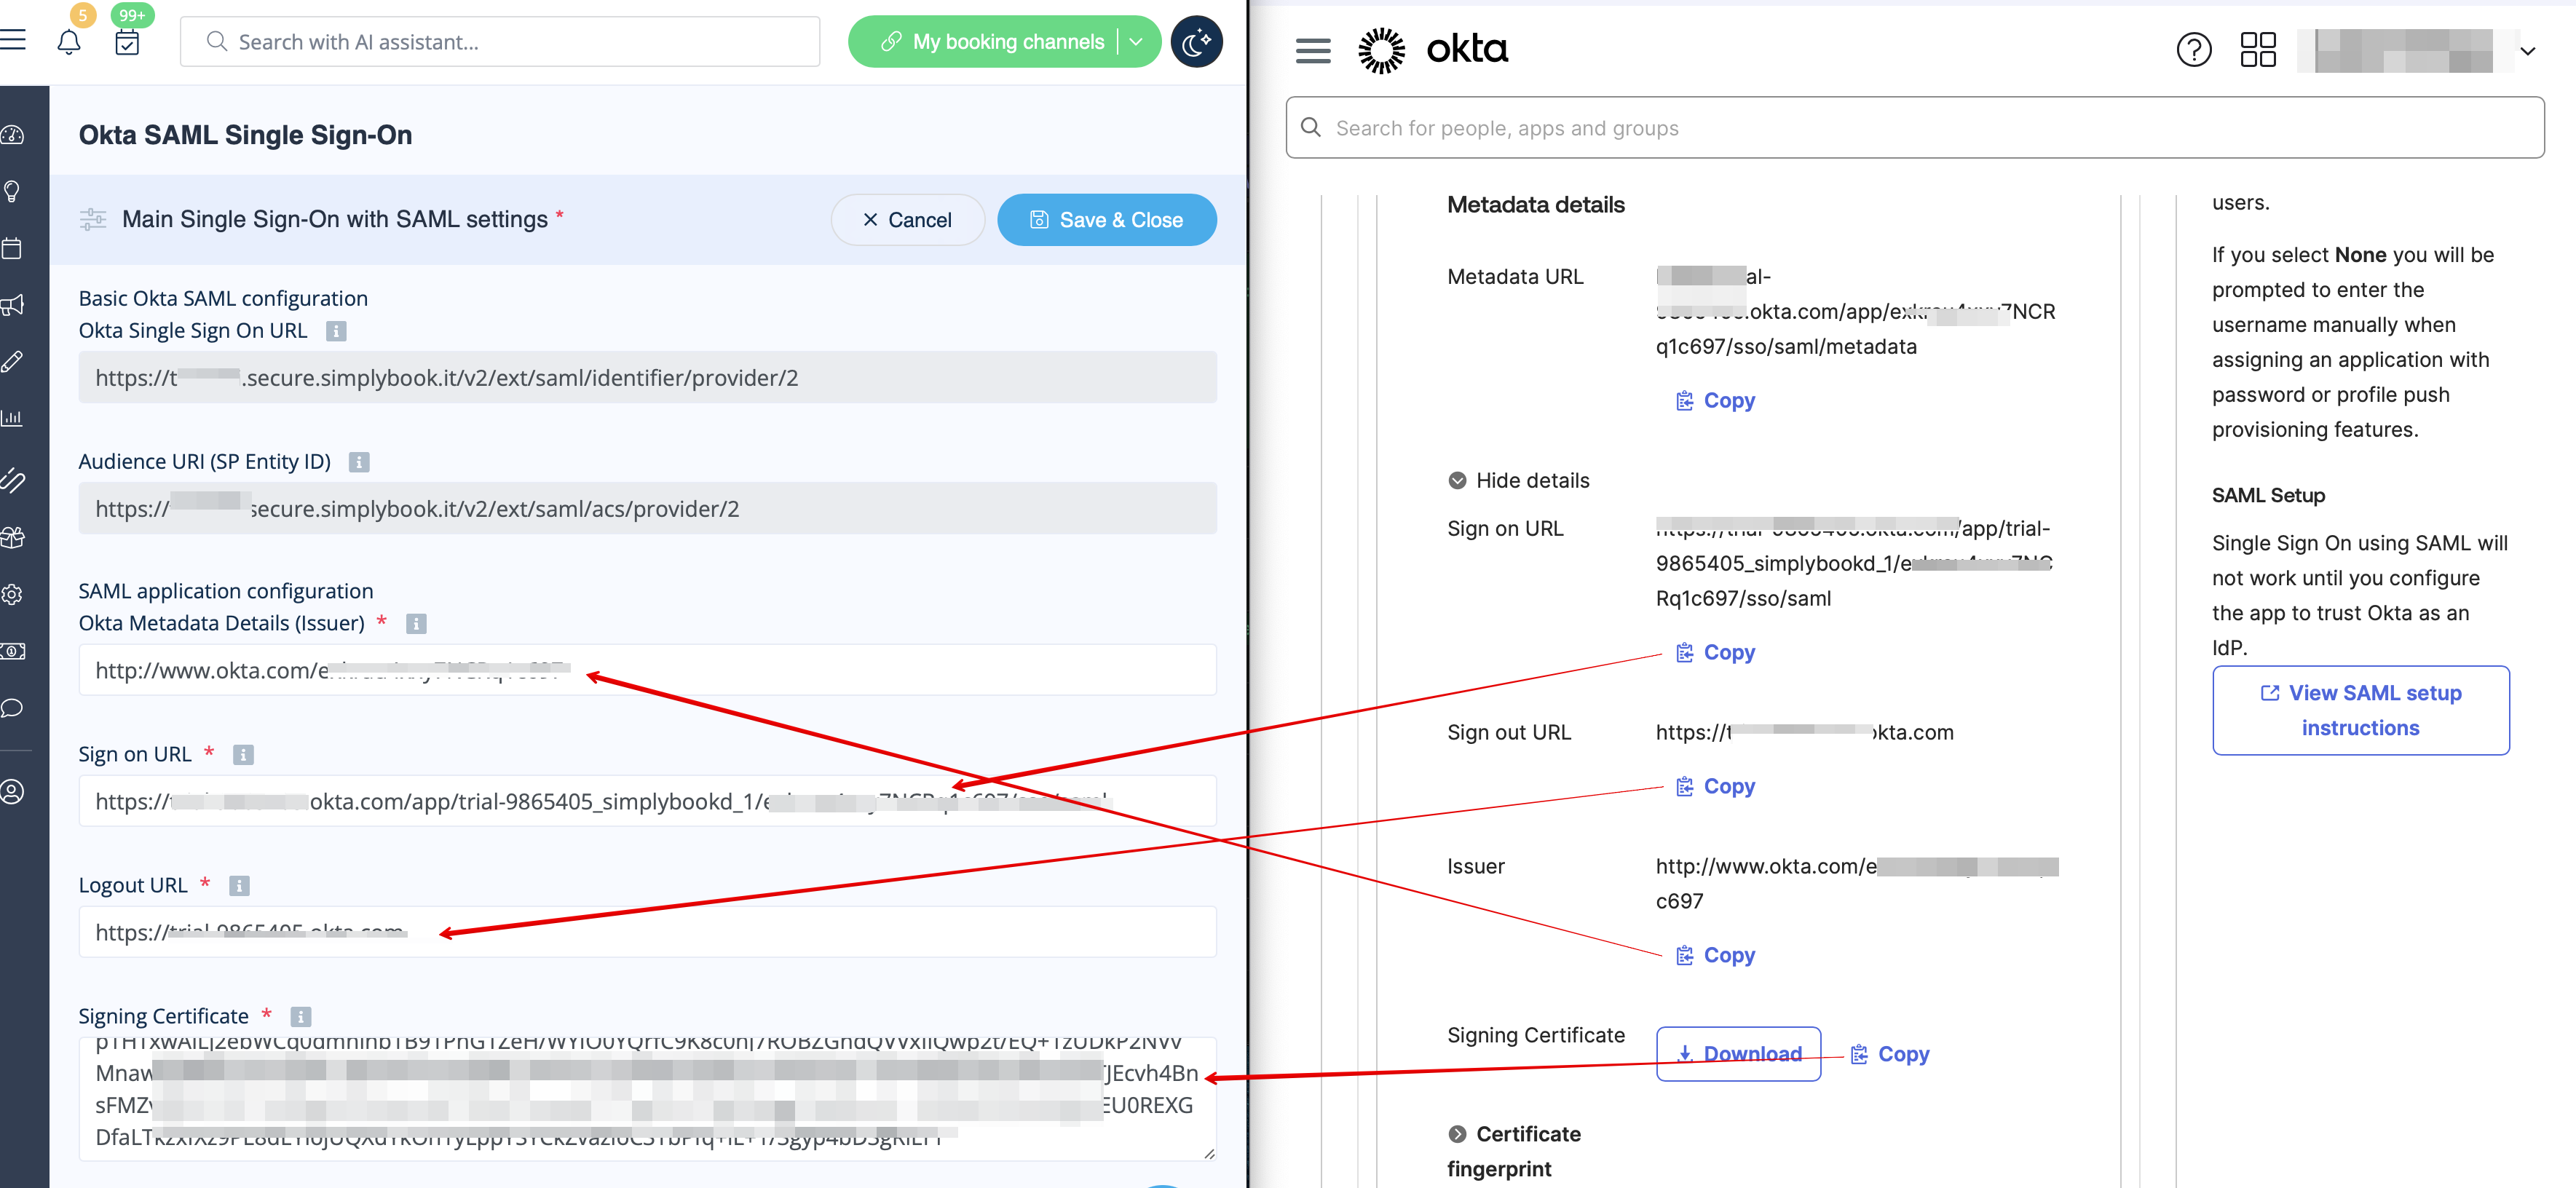
10. Kopieer de aanmeld-URL, afmeld-URL, uitgever en ondertekeningscertificaat in Okta en plak deze in de overeenkomstige velden in SimplyBook.me SSO-SAML aangepaste functie -> Beheren -> Okta SAML Single Sign-On


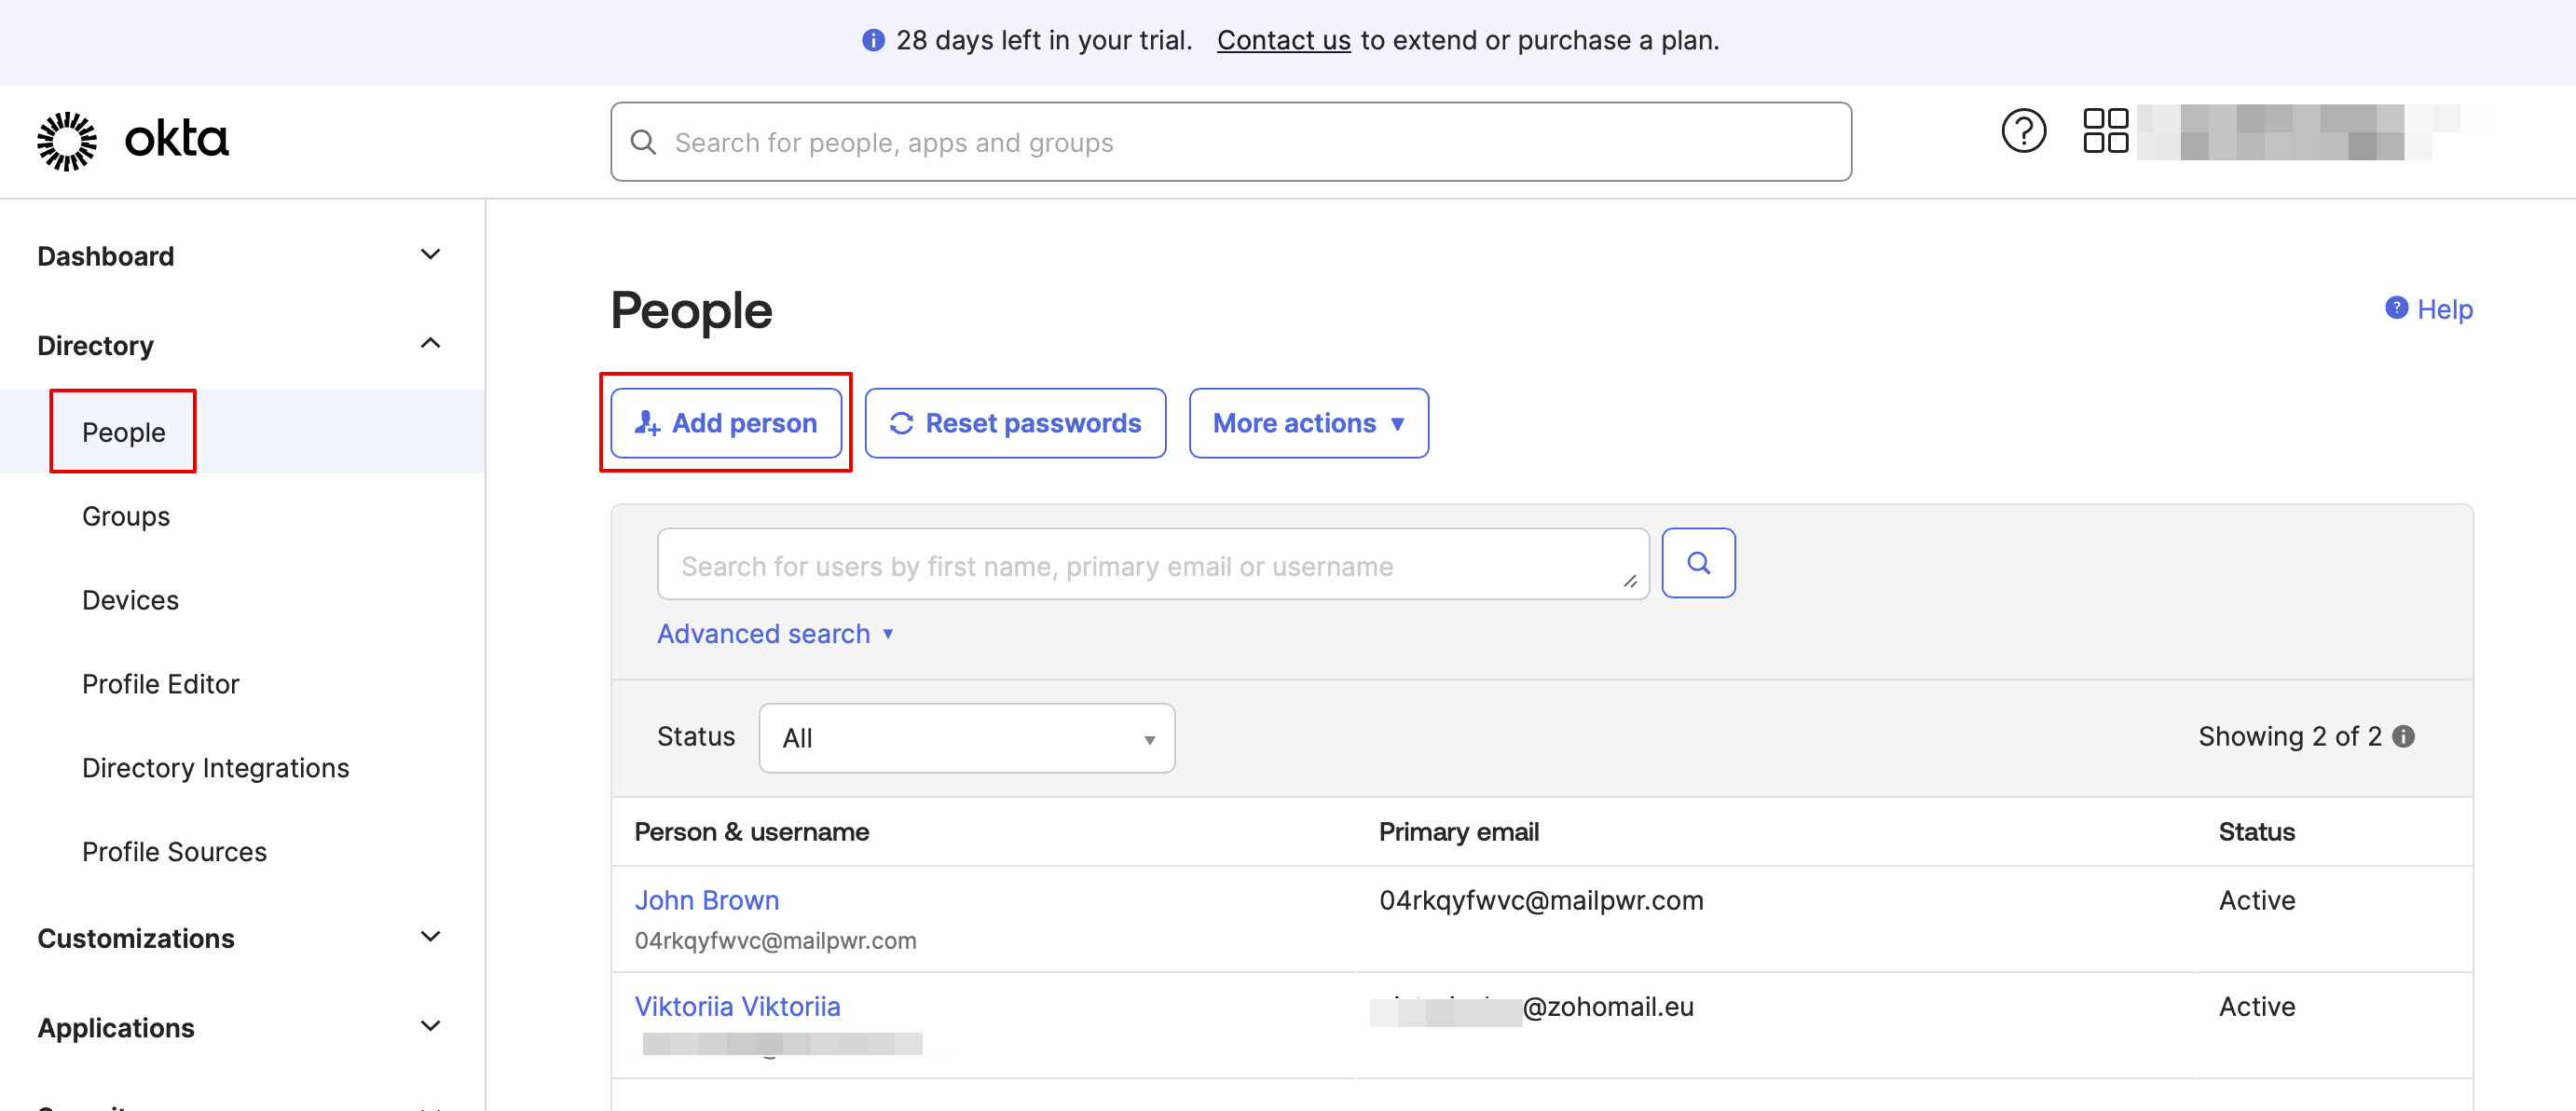
11. Zorg er nu in de Okta-interface voor dat alle benodigde medewerkers zijn toegevoegd aan het systeem in het tabblad Mensen.


12. Maak in het tabblad Groups (Groepen) de groepen aan die overeenkomen met de toegangsniveaus van SimplyBook.me. Wijs de medewerkers aan deze groepen toe.


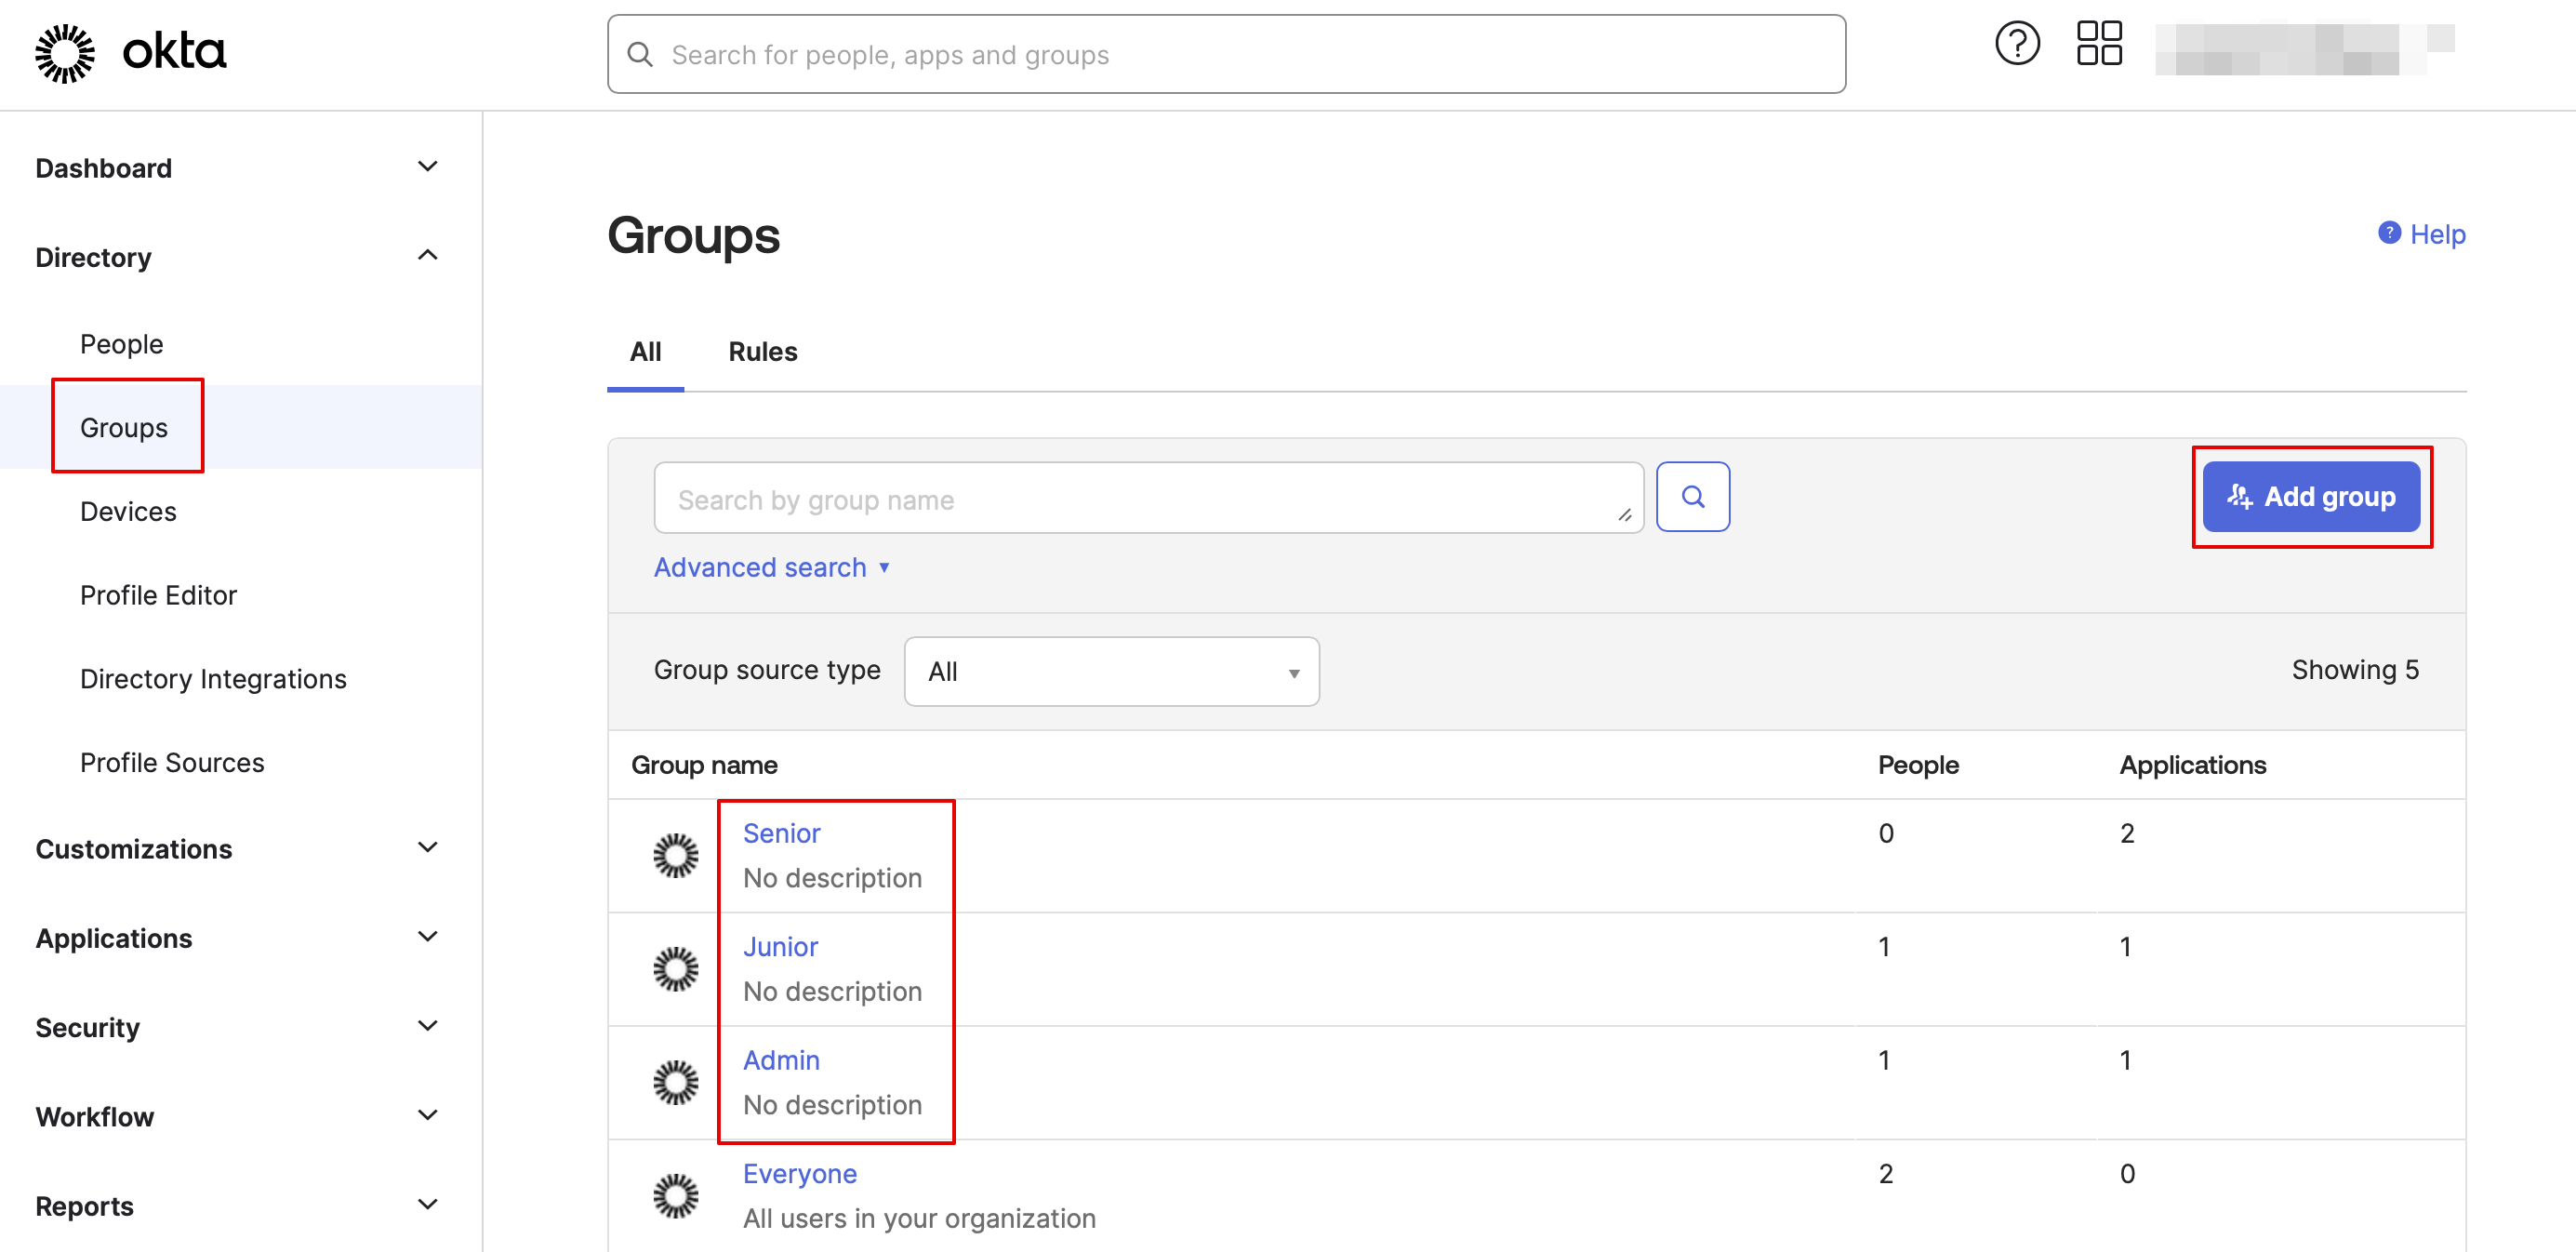
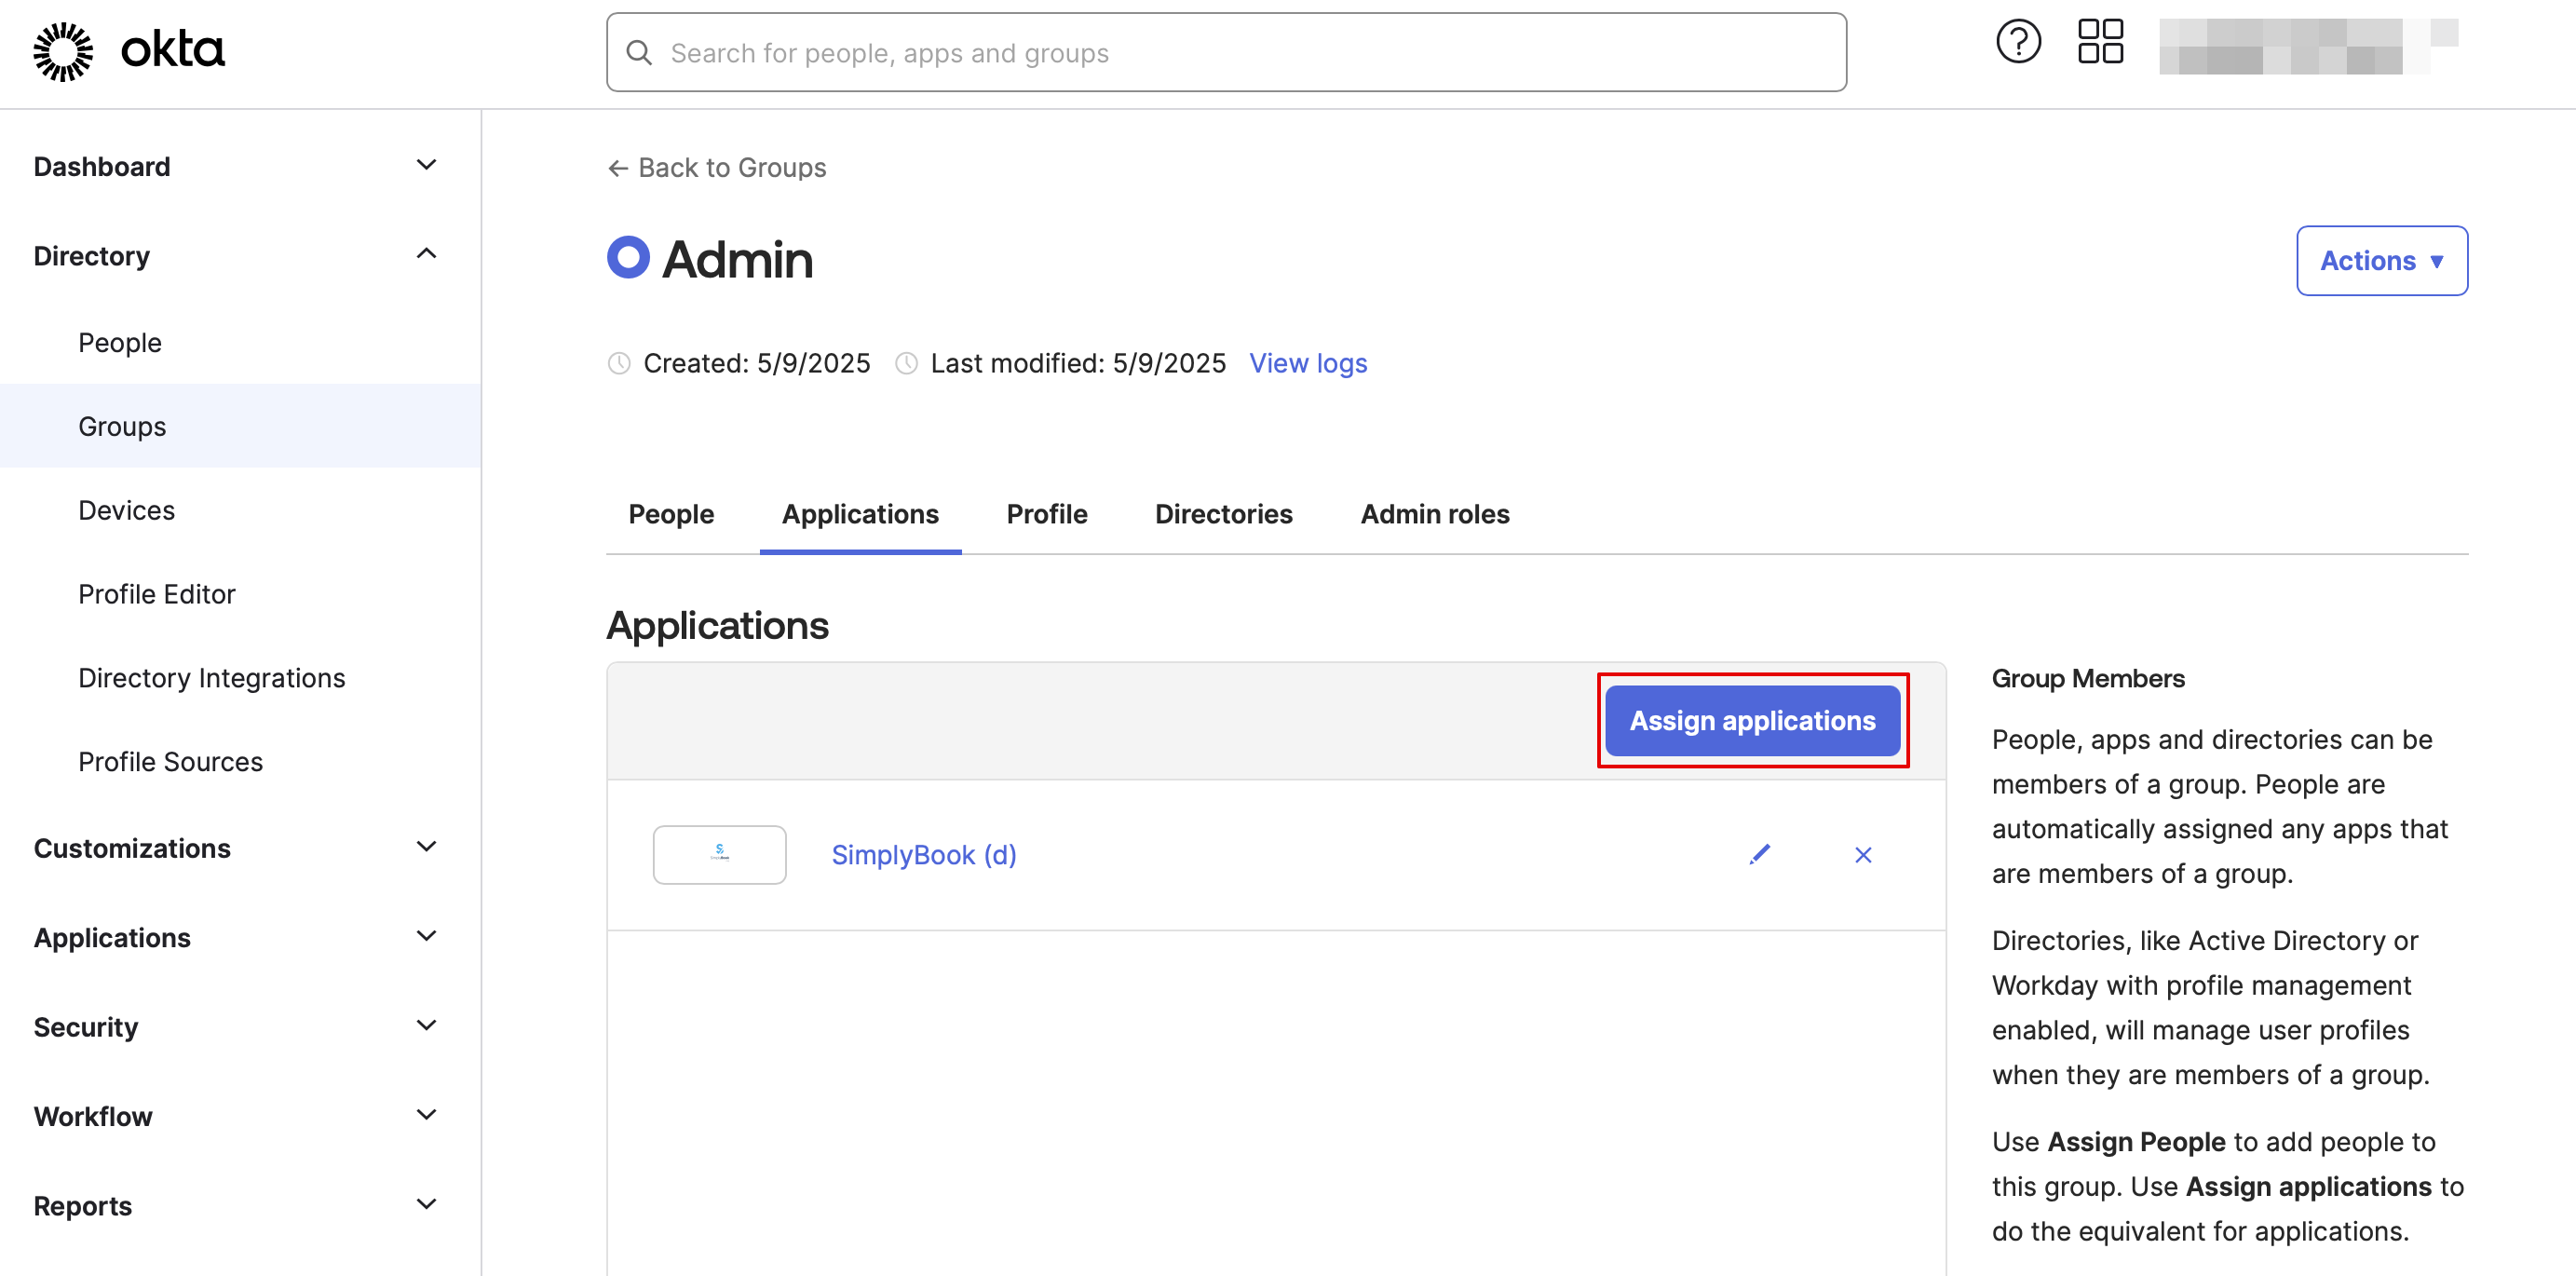
13. Wijs de groepen en personen toe aan de applicatie die u hebt aangemaakt.


14. Geef in SimplyBook.me de namen van de groepen op in het tabblad User groups matching settings (Instellingen voor gebruikersgroepen). Sla de instellingen op.


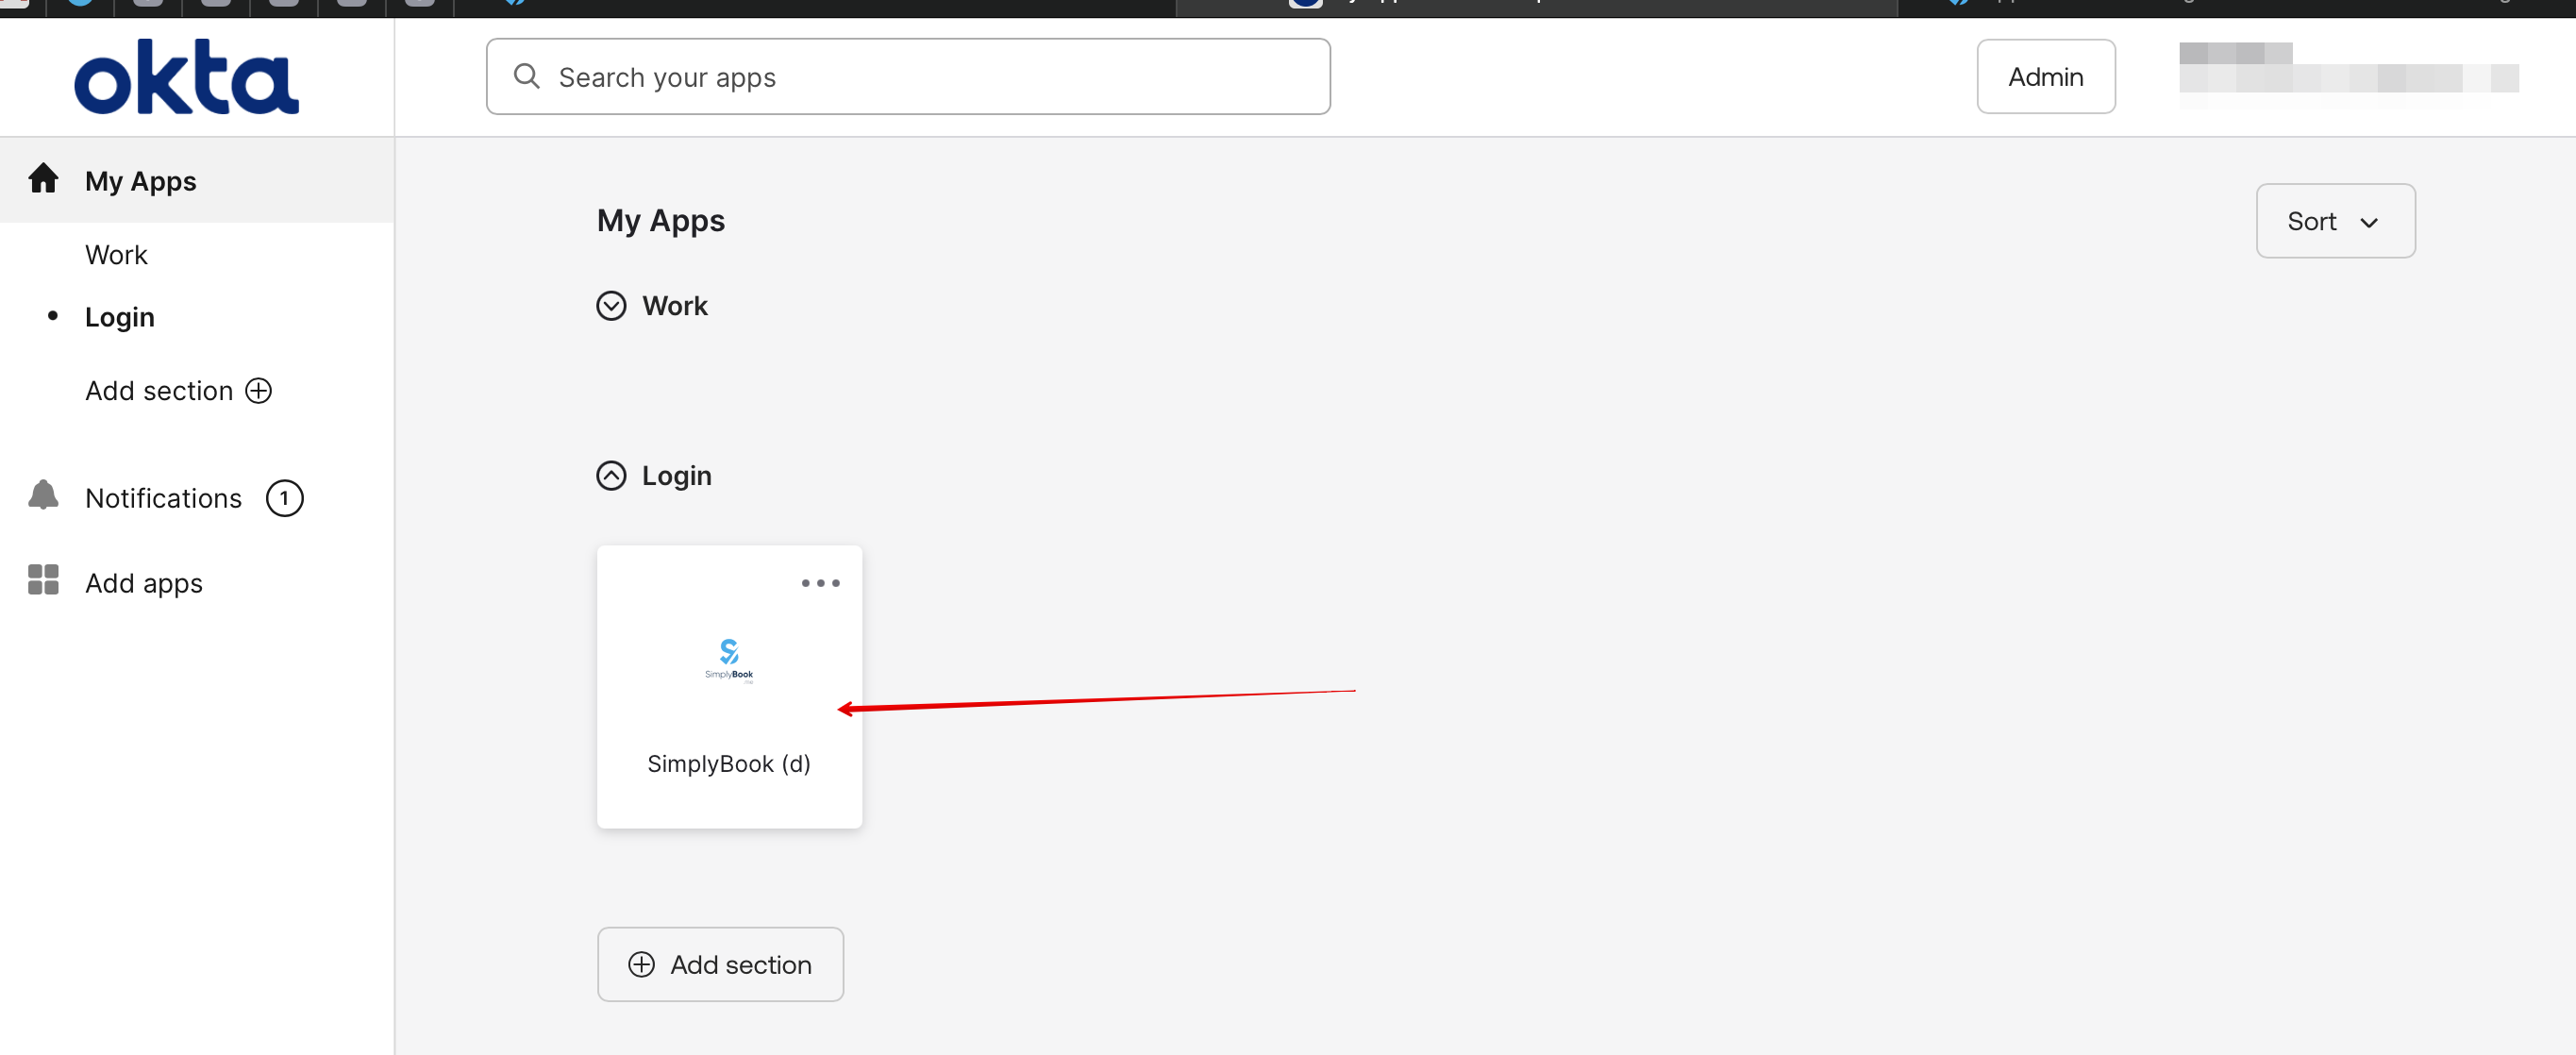
15. Alles is nu klaar. Uw medewerkers kunnen nu met één klik op het Okta-paneel inloggen op uw bedrijfsaccount bij SimplyBook.me (de gebruiker in SimplyBook.me wordt bij de eerste keer inloggen automatisch aangemaakt met de bijbehorende rechten)