SimplyBook.me
Not logged in
English
Log in
Search
Navigation
Help Center
Getting started
Booking website
Time settings
Prices and purchases
Custom Features
Calendar and bookings
Tips for specific businesses
Integration
For developers
Video tutorials
Tools
What links here
Related changes
Special pages
Printable version
Permanent link
Page information
In other languages
Page history
Refresh page
Translations:Shopify/5/fr: Difference between revisions
Help
Namespaces
Translation unit
Discussion
Views
Read
View source
From SimplyBook.me
Visual
Wikitext
Latest revision as of 08:09, 1 July 2025
view source
Admin
(
talk
|
contribs
)
Bureaucrats
,
Interface administrators
,
Administrators
35,073
edits
Created page with ":4. Cliquez sur <span style="background-color:#d4f8e5; padding:5px; border-radius:5px;">Ajouter du contenu</span> et sélectionnez <span style="background-color:#d4f8e5; padding:5px; border-radius:5px;">HTML personnalisé</span>
border|center
<br><br> :5. Accédez à votre <span style="background-color:#d4f8e5; padding:5px; border-radius:5px;">compte SimplyBook.me</span> -> <span style="background-color:#d4f8e5; padding:5px; border-radius:5px;..."
(No difference)
Latest revision as of 08:09, 1 July 2025
Information about message (
contribute
)
This message has no documentation. If you know where or how this message is used, you can help other translators by adding documentation to this message.
Message definition (
Shopify
)
:4. Click on <span style="background-color:#d4f8e5; padding:5px; border-radius:5px;">Add content</span> and select <span style="background-color:#d4f8e5; padding:5px; border-radius:5px;">Custom HTML</span>
[[File:Select html.png|border|center]]
<br><br>
:5. Navigate to your <span style="background-color:#d4f8e5; padding:5px; border-radius:5px;">SimplyBook.me account</span> -> <span style="background-color:#d4f8e5; padding:5px; border-radius:5px;">Settings</span> -> <span style="background-color:#d4f8e5; padding:5px; border-radius:5px;">Booking widgets settings</span> -> <span style="background-color:#d4f8e5; padding:5px; border-radius:5px;">iFrame widget</span>
[[File:Booking widget path redesigned.png|1200px|border|center|link=https://help.simplybook.me/images/6/68/Booking_widget_path_redesigned.png]]
<br><br>
:6. Adjust the design to your taste and needs, <span style="background-color:#d4f8e5; padding:5px; border-radius:5px;">get widget code.</span>
[[File:Copy widget code redesigned.png|1200px|border|center|link=https://help.simplybook.me/images/b/b4/Copy_widget_code_redesigned.png]]
<br><br>
4. Cliquez sur
Ajouter du contenu
et sélectionnez
HTML personnalisé
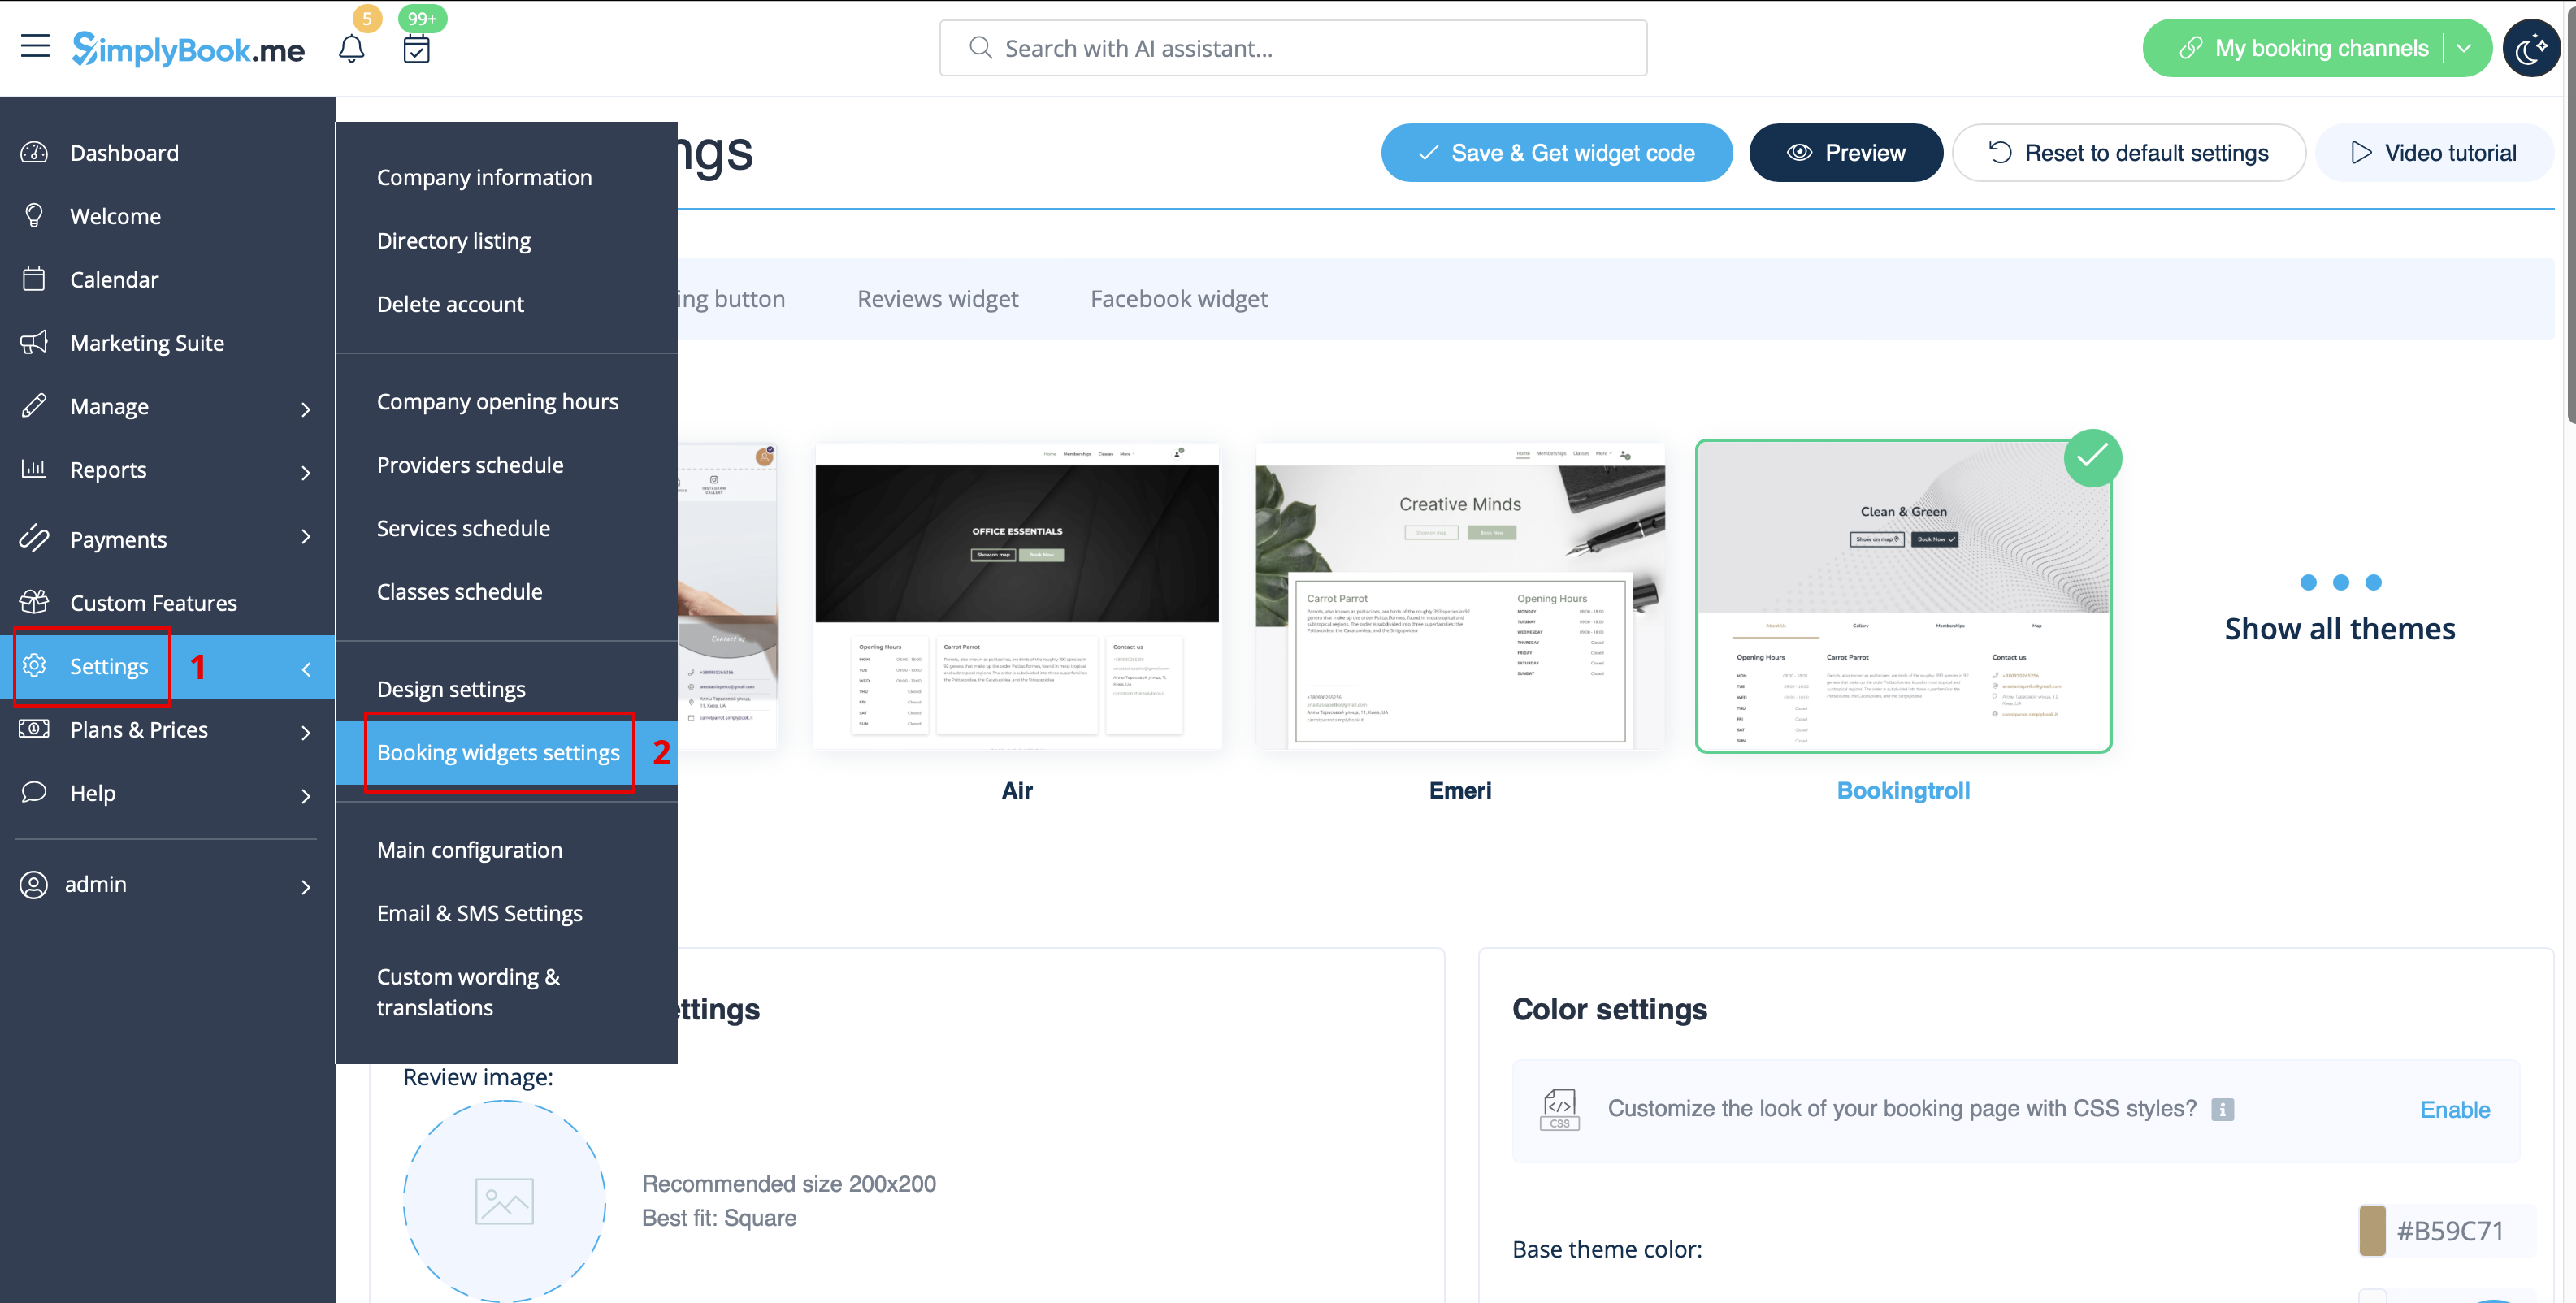
5. Accédez à votre
compte SimplyBook.me
->
Paramètres
->
Paramètres des widgets de réservation
->
Widget iFrame
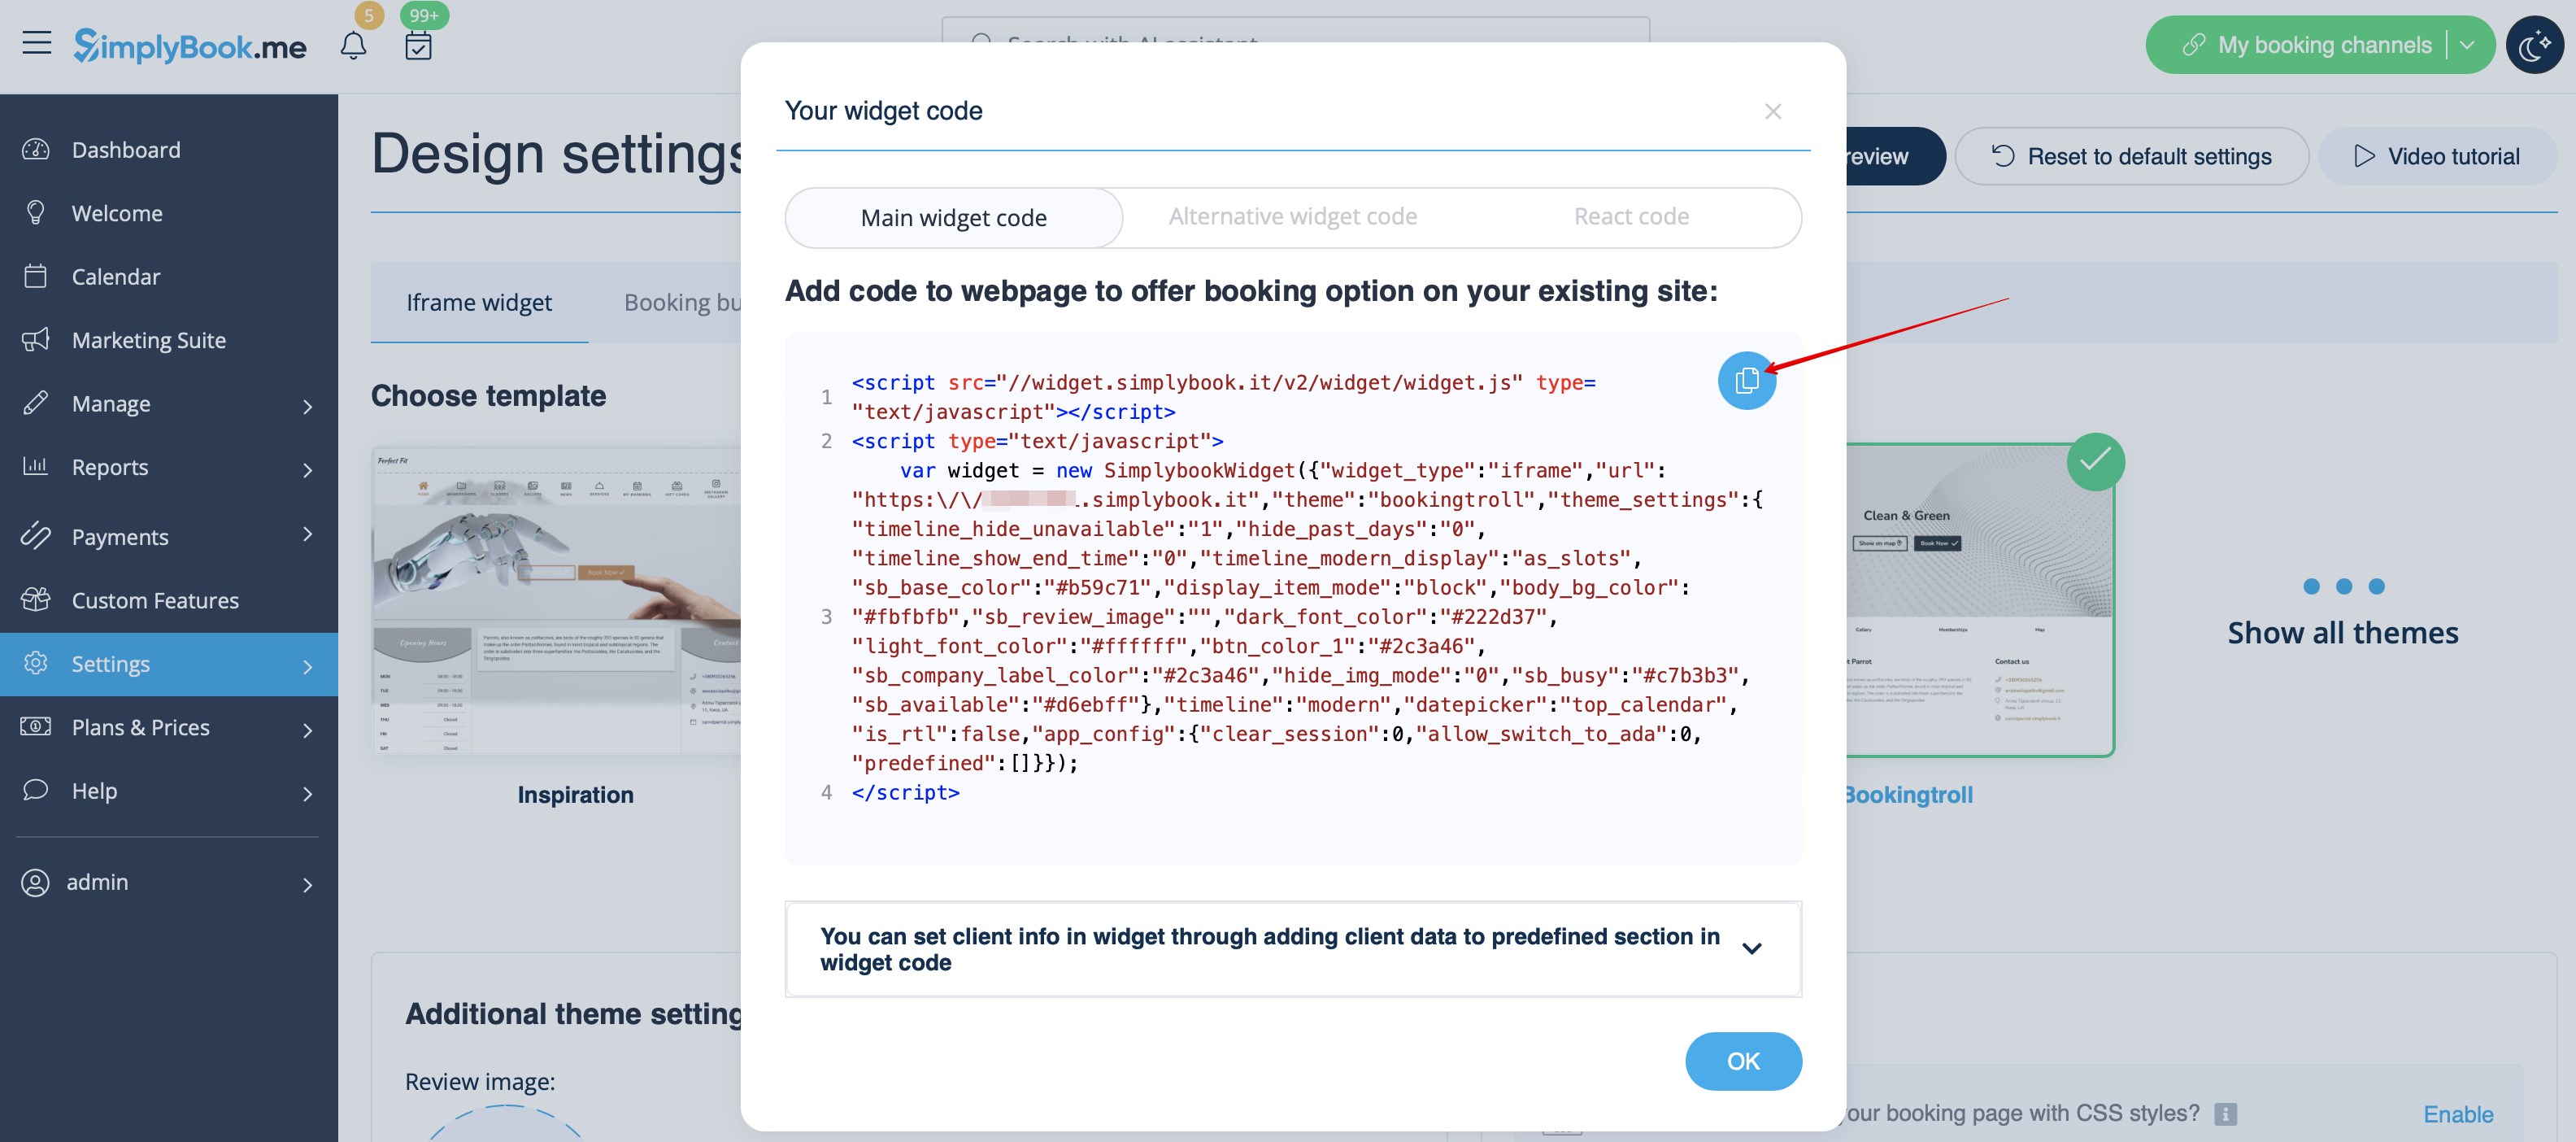
6. Ajustez le design à votre goût et à vos besoins, puis
obtenez le code du widget.