SimplyBook.me
Not logged in
English
Log in
Search
Navigation
Help Center
Getting started
Booking website
Time settings
Prices and purchases
Custom Features
Calendar and bookings
Tips for specific businesses
Integration
For developers
Video tutorials
Tools
What links here
Related changes
Special pages
Printable version
Permanent link
Page information
In other languages
Page history
Refresh page
Translations:Zapier Connector custom feature/7/fr: Difference between revisions
Help
Namespaces
Translation unit
Discussion
Views
Read
View source
From SimplyBook.me
Visual
Wikitext
Latest revision as of 11:16, 5 August 2025
view source
Admin
(
talk
|
contribs
)
Bureaucrats
,
Interface administrators
,
Administrators
35,073
edits
Created page with "<br><br> ;Comment l'utiliser : :1. Activez la fonctionnalité personnalisée <span style="background-color:#d4f8e5; padding:5px; border-radius:5px;">Connecteur Zapier</span> sur la page <span style="background-color:#d4f8e5; padding:5px; border-radius:5px;">Fonctionnalités personnalisées</span> de SimplyBook.me.
1200px|border | center|link=https://help.simplybook.me/images/b/b9/Zapier_enable_path_redesigned.png
<br><br> :2..."
(No difference)
Latest revision as of 11:16, 5 August 2025
Information about message (
contribute
)
This message has no documentation. If you know where or how this message is used, you can help other translators by adding documentation to this message.
Message definition (
Zapier Connector custom feature
)
<br><br>
;How to use:
:1. Enable <span style="background-color:#d4f8e5; padding:5px; border-radius:5px;">Zapier connector</span> custom feature on your <span style="background-color:#d4f8e5; padding:5px; border-radius:5px;">Custom features</span> page on SimplyBook.me side.
[[File:Zapier enable path redesigned.png|1200px|border | center|link=https://help.simplybook.me/images/b/b9/Zapier_enable_path_redesigned.png]]
<br><br>
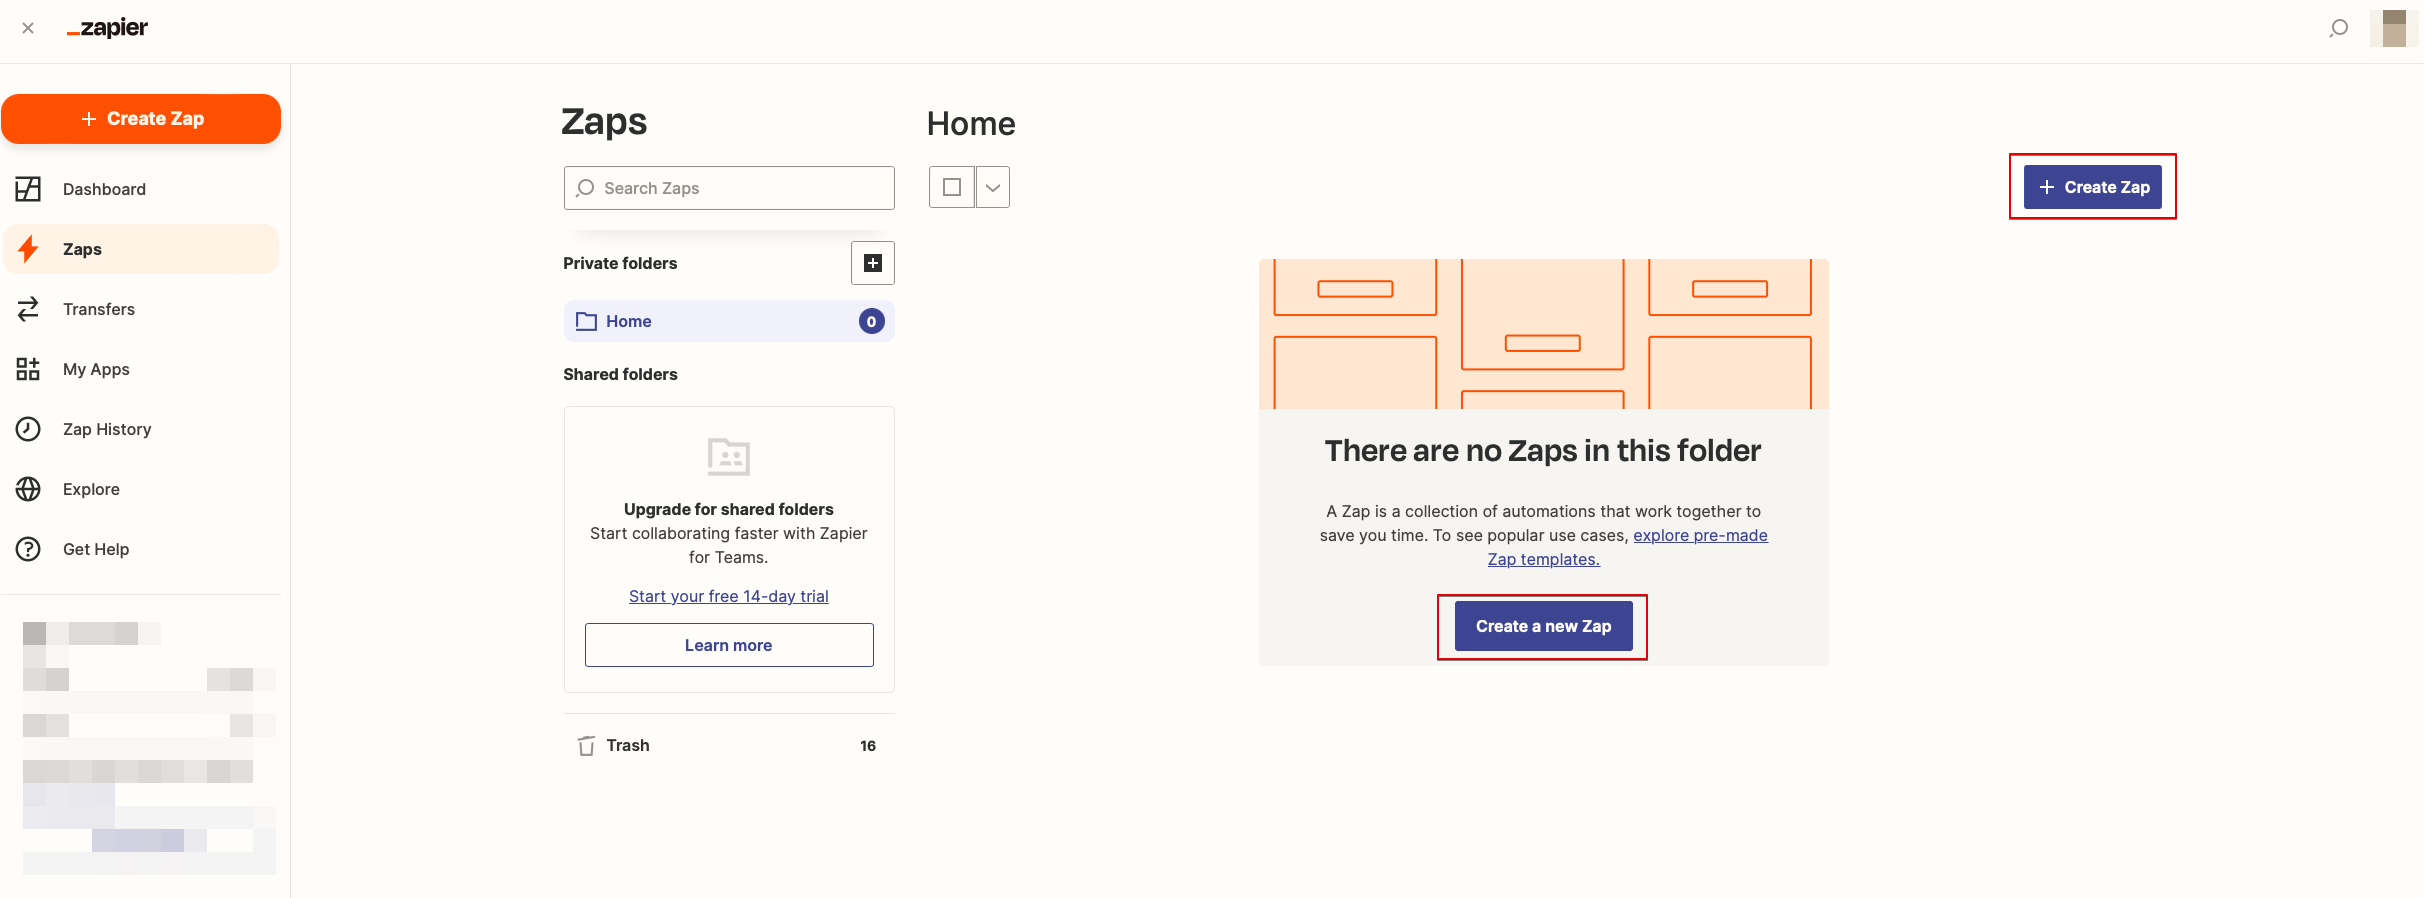
:2. Create new Zap by clicking on <span style="background-color:#d4f8e5; padding:5px; border-radius:5px;">Make a Zap</span> button in Zapier interface.
[[File:Zapier redesigned create new zap from dashboard.png|1200px|border| center|link=https://help.simplybook.me/images/6/68/Zapier_redesigned_create_new_zap_from_dashboard.png]]
<br><br>
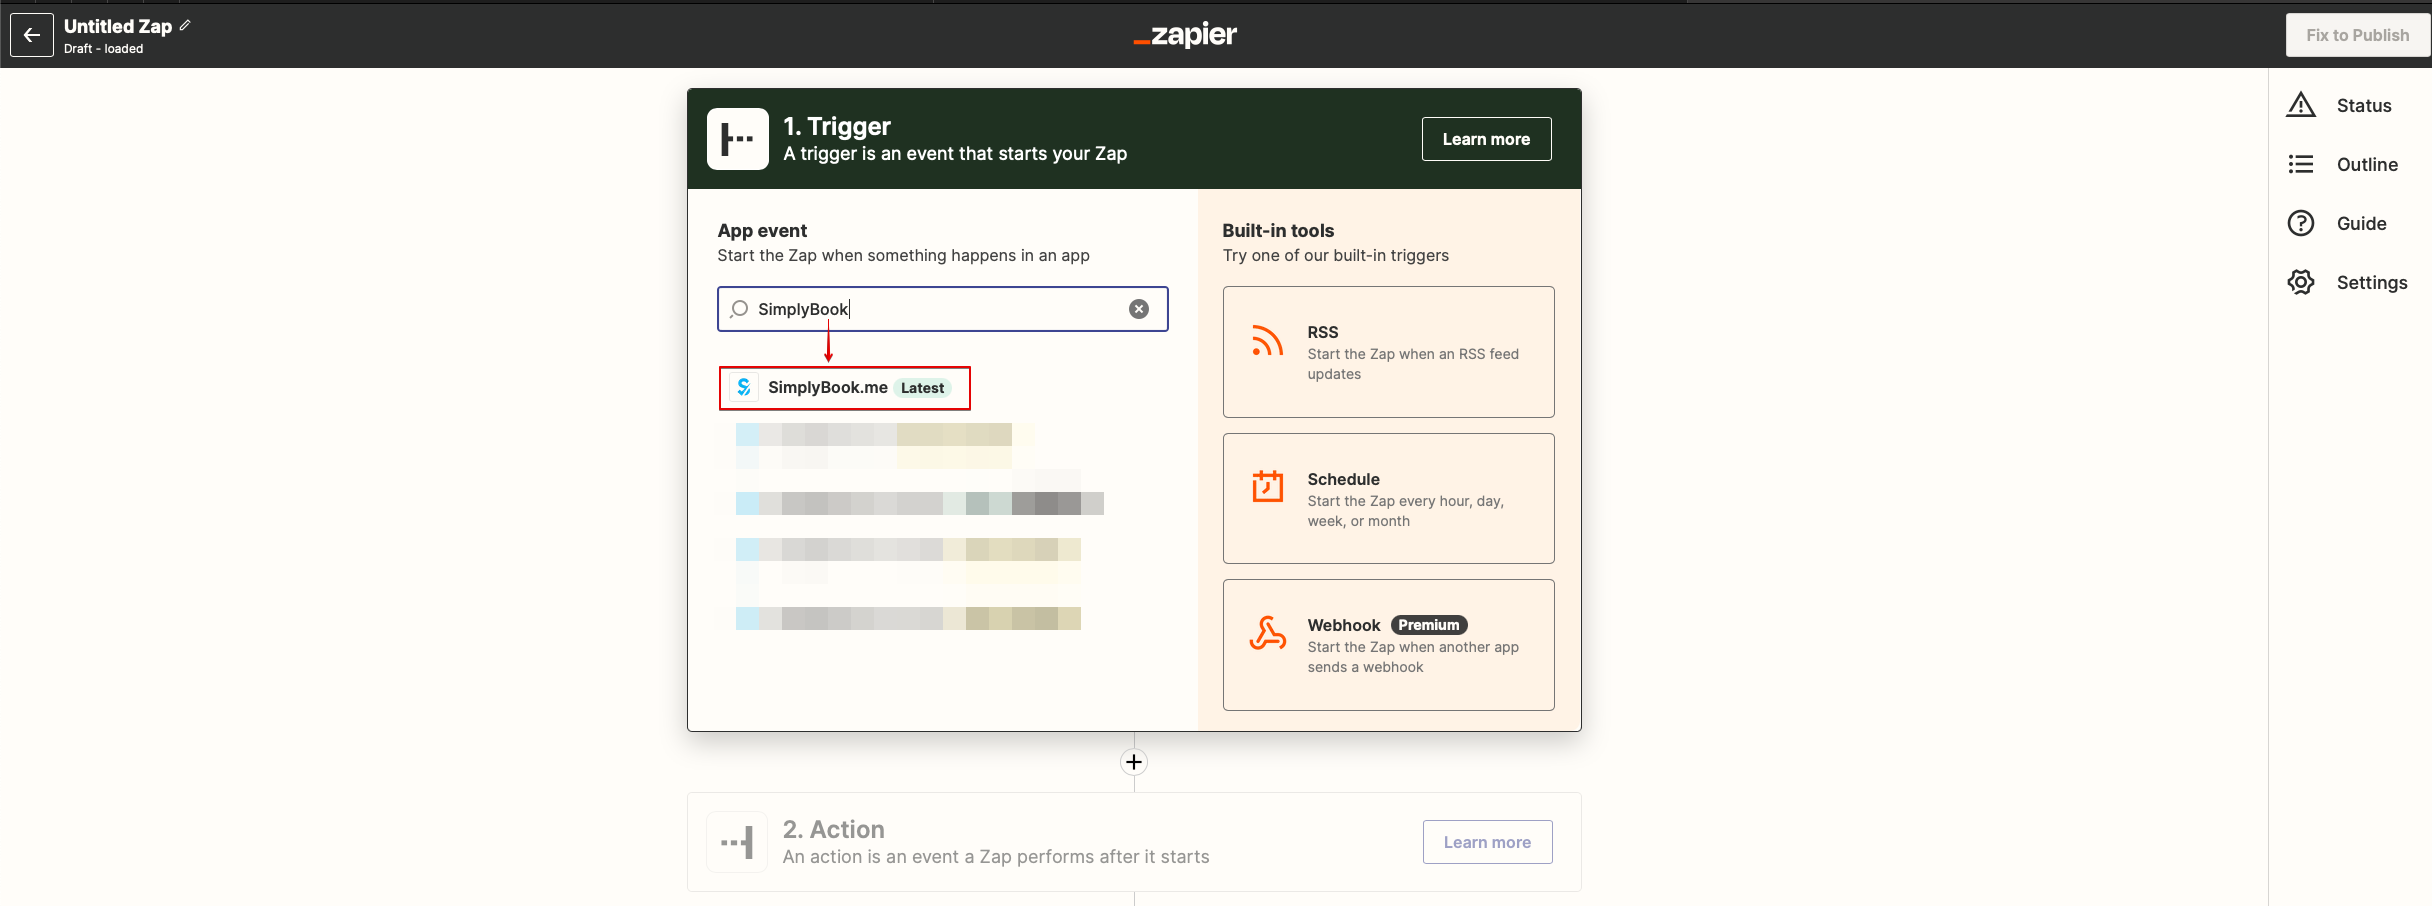
:3. Look for Simplybook in <span style="background-color:#d4f8e5; padding:5px; border-radius:5px;">Trigger step.</span>
[[File:Zapier redesigned select trigger app.png|1200px|border | center|link=https://help.simplybook.me/images/c/c1/Zapier_redesigned_select_trigger_app.png]]
<br><br>
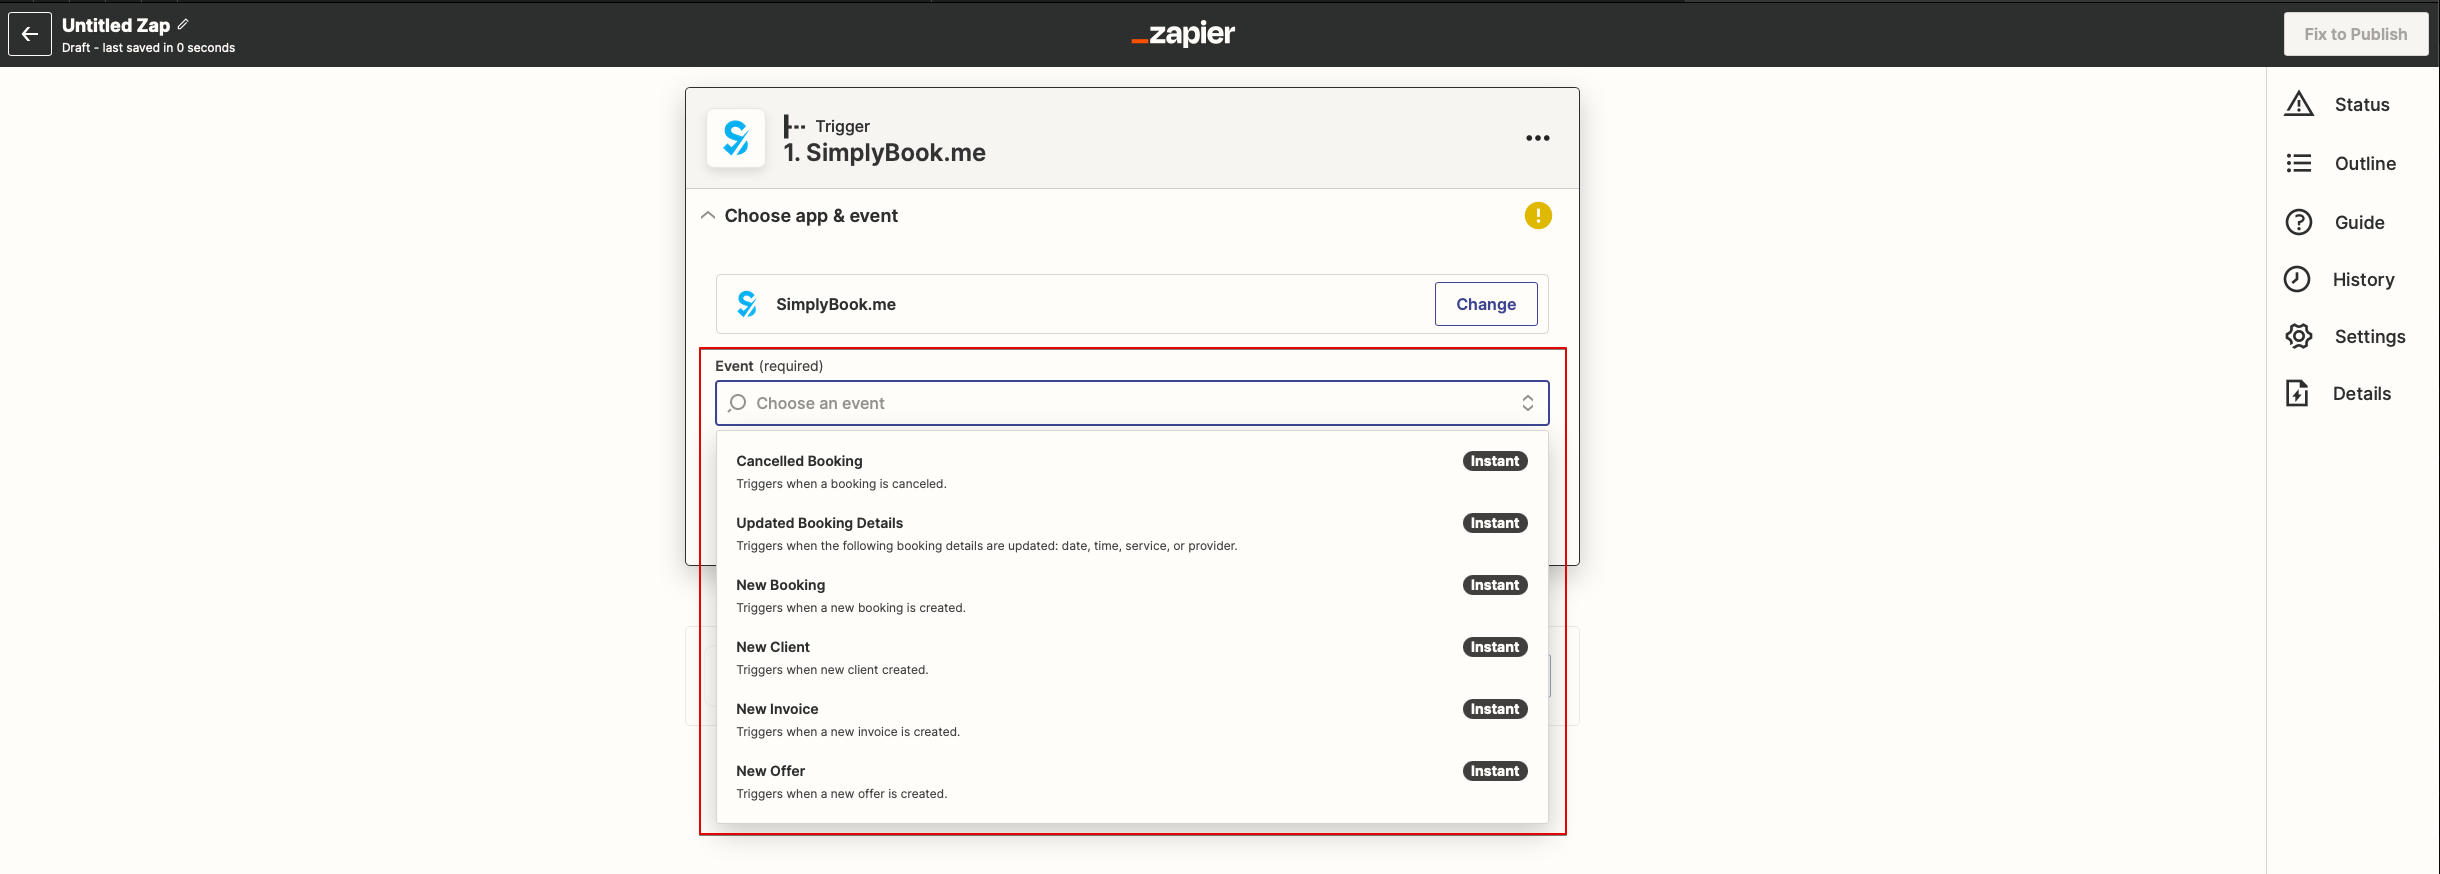
:4. Select the desirable trigger.
[[File:Zapier redesigned choose trigger event.png|1200px|border | center|link=https://help.simplybook.me/images/9/94/Zapier_redesigned_choose_trigger_event.png]]
<br><br>
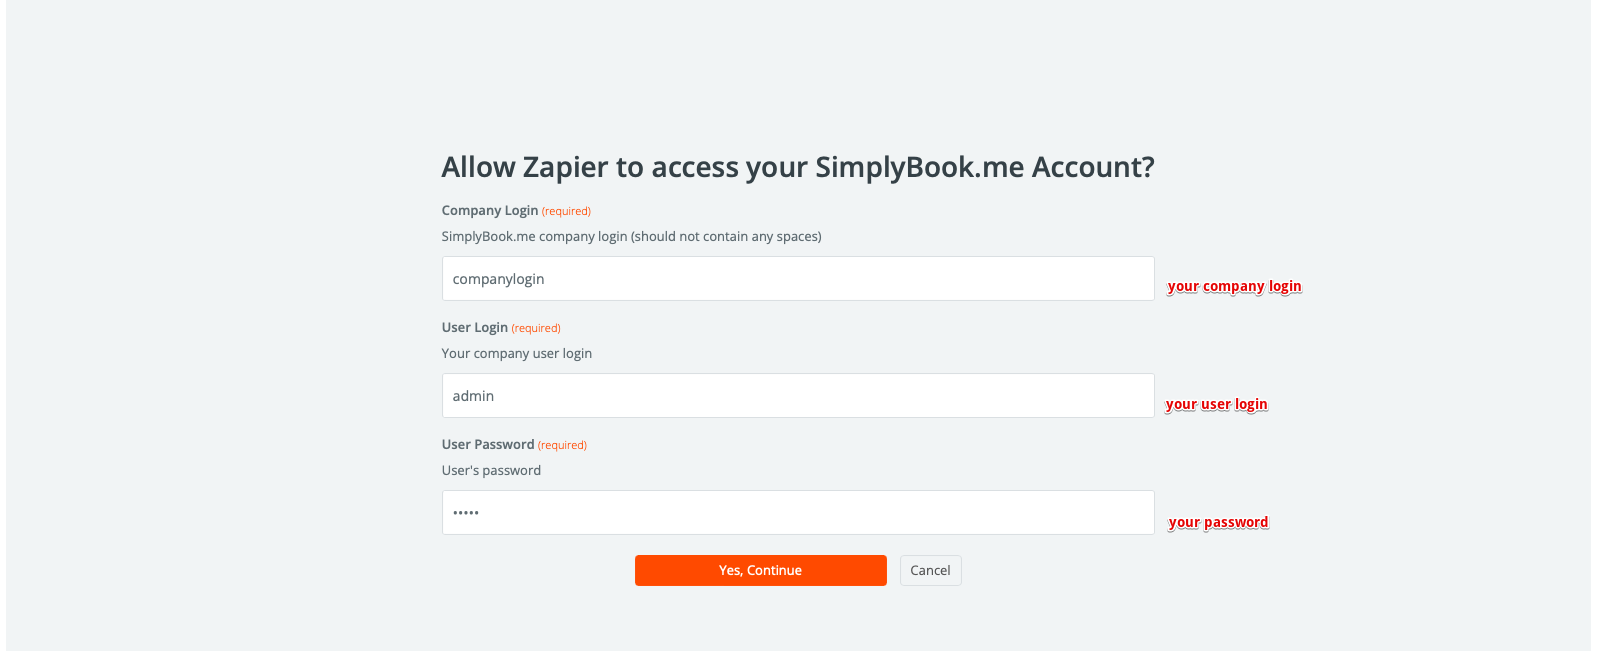
:5. Connect SimplyBook.me account.
[[File:Zapier redesigned connect simplybook account.png|1200px|border | center|link=https://help.simplybook.me/images/2/24/Zapier_redesigned_connect_simplybook_account.png]]
<br><br>
:6. Click <span style="background-color:#d4f8e5; padding:5px; border-radius:5px;">Continue</span> to test this step.
[[File:Zapier redesigned continue to test trigger step.png|1200px|border | center|link=https://help.simplybook.me/images/b/be/Zapier_redesigned_continue_to_test_trigger_step.png]]
<br><br>
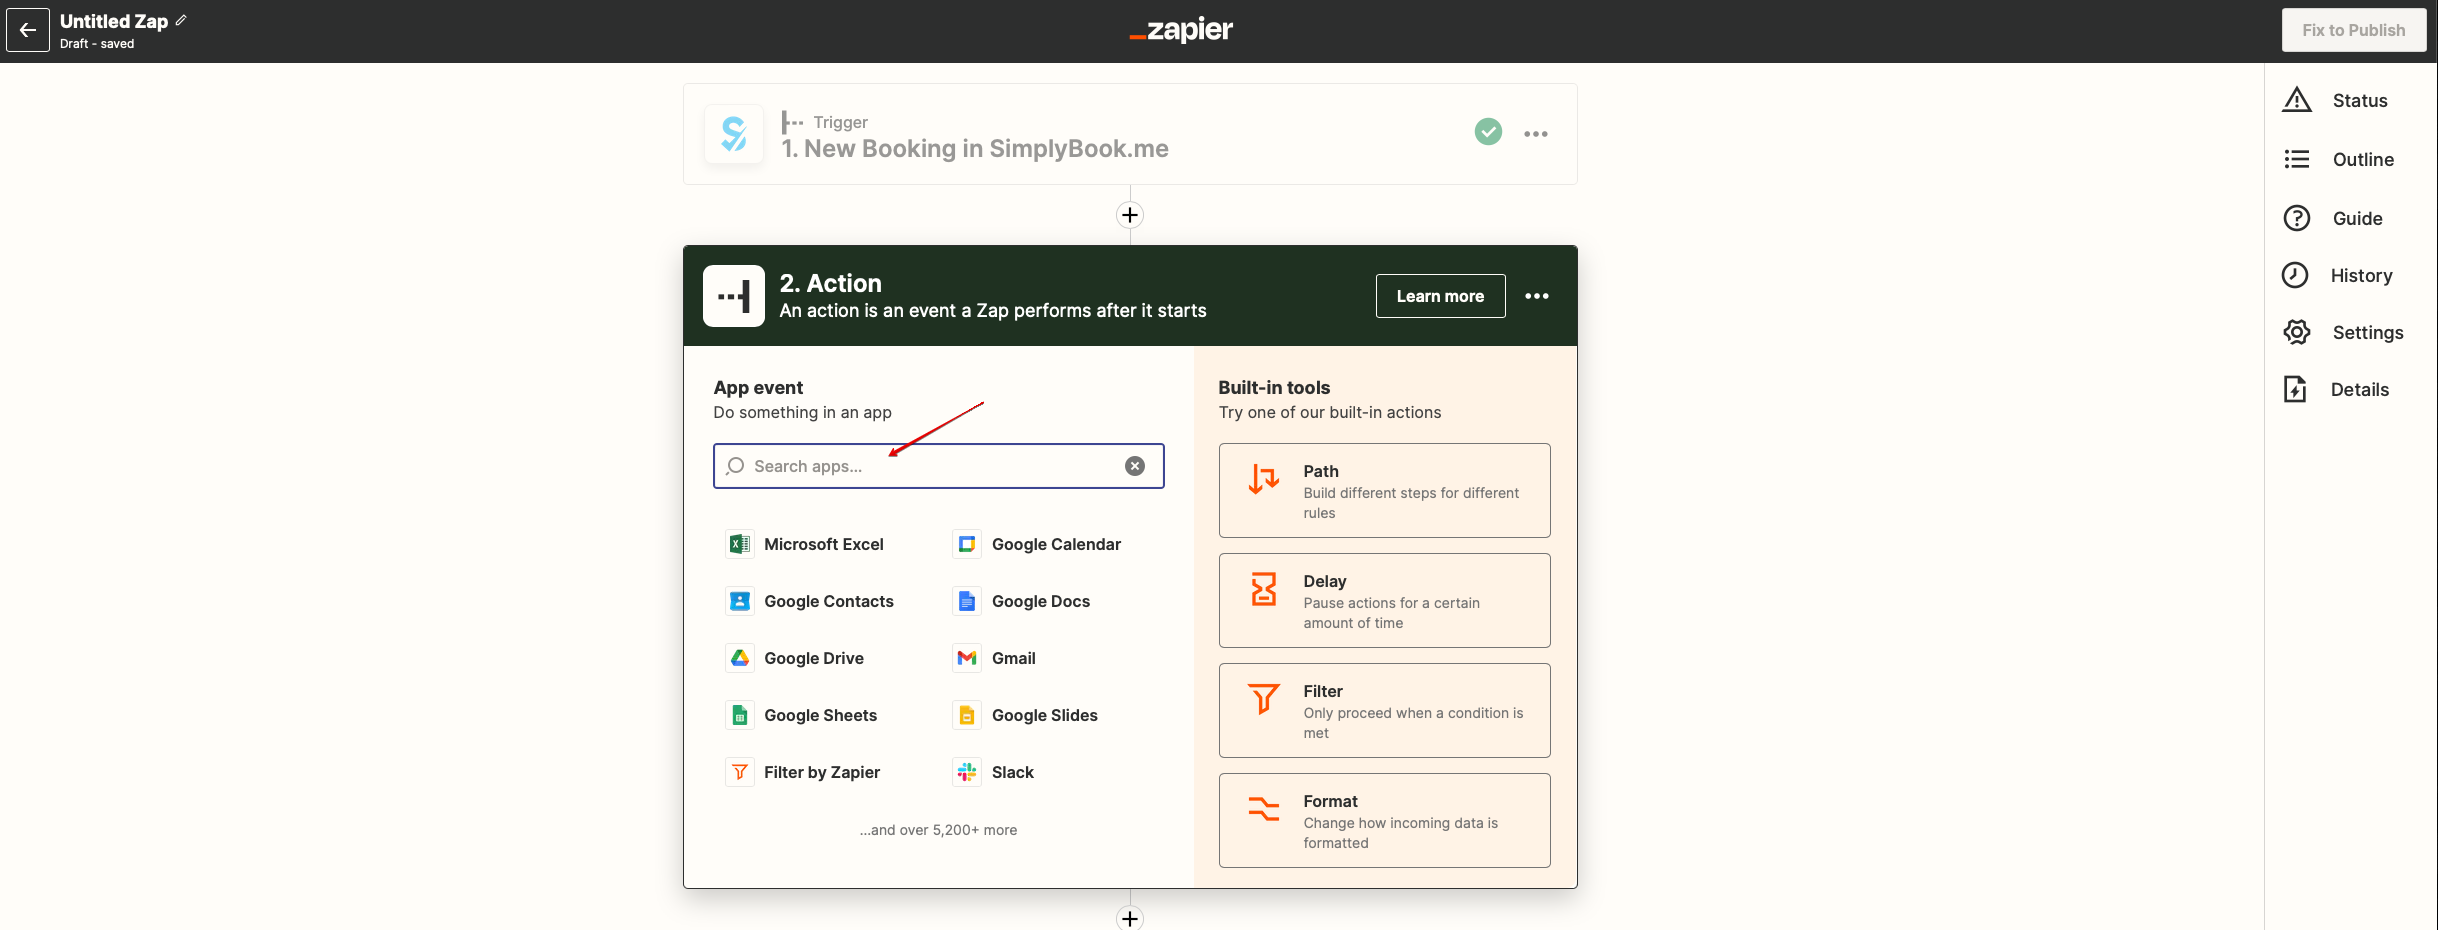
:7. Proceed to adding the Action step and search for the app you wish to connect SimplyBook.me to.
[[File:Zapier redesigned search for the action app.png|1200px|border | center|link=https://help.simplybook.me/images/9/95/Zapier_redesigned_search_for_the_action_app.png]]
<br><br>
:8. Connect this application account and setup the template using the available data mentioned above.
<br><br>
:9. You can test this step operation as well if necessary or skip it.
<br><br>
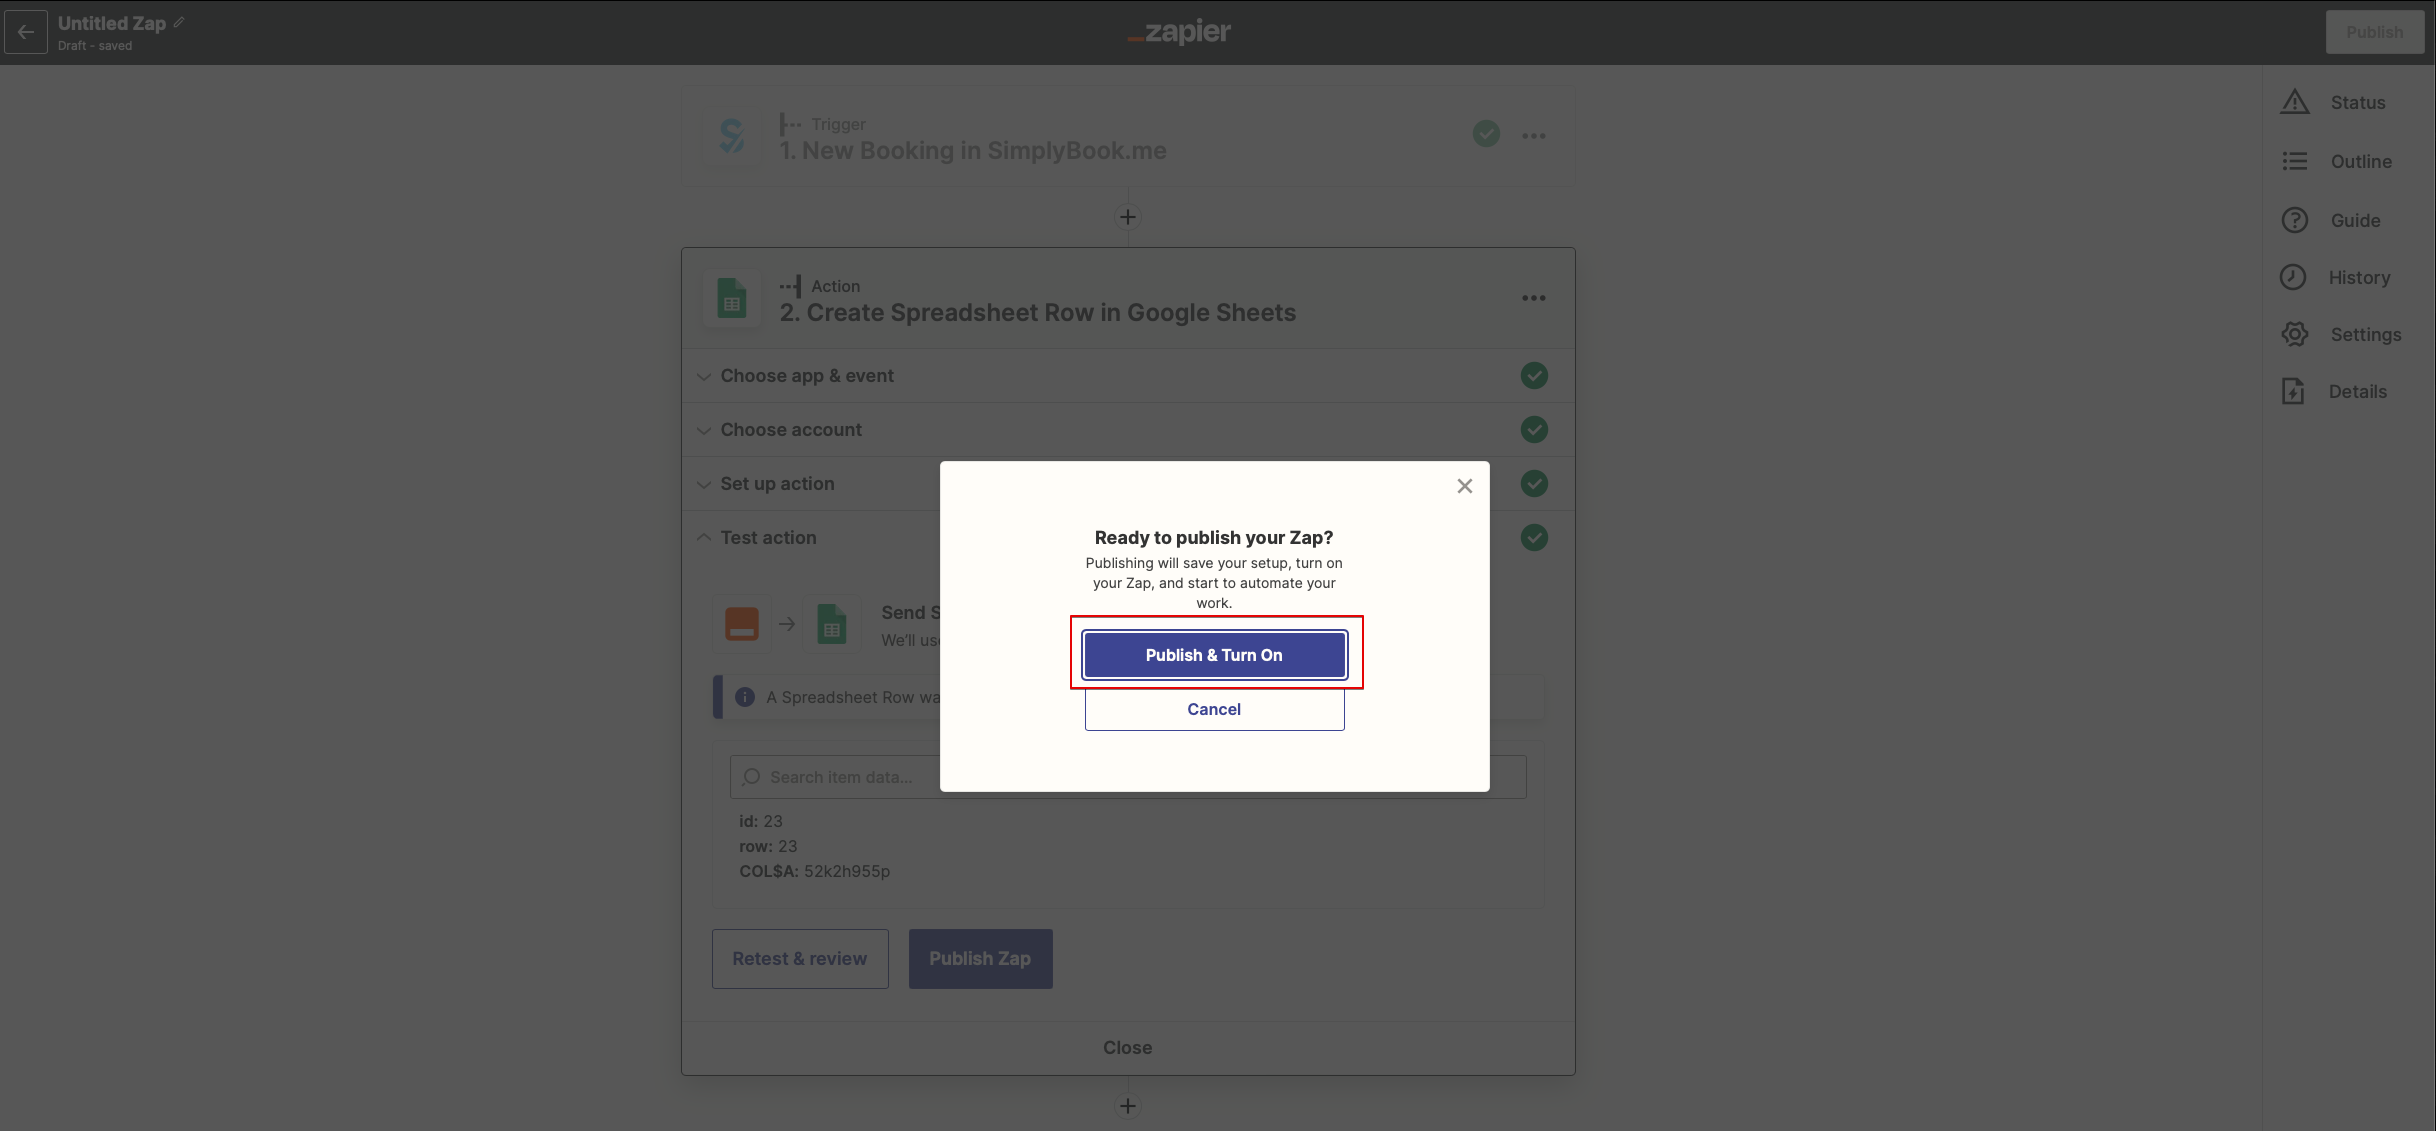
:10. Finish the setup, add Zap name and turn it on.
[[File:Zapier redesigned enable zap.png|1200px|border | center|link=https://help.simplybook.me/images/9/9b/Zapier_redesigned_enable_zap.png]]
<br><br>
Comment l'utiliser
1. Activez la fonctionnalité personnalisée
Connecteur Zapier
sur la page
Fonctionnalités personnalisées
de SimplyBook.me.
2. Créez un nouveau Zap en cliquant sur le bouton
Make a Zap
dans Zapier.
3. Recherchez SimplyBook dans l’étape
Trigger
.
4. Sélectionnez le déclencheur souhaité.
5. Connectez votre compte SimplyBook.me.
6. Cliquez sur
Continuer
pour tester cette étape.
7. Ajoutez l’étape d’action et recherchez l’application à connecter.
8. Connectez le compte de cette application et configurez le modèle à l’aide des données disponibles mentionnées ci-dessus.
9. Testez cette étape si nécessaire ou passez-la.
10. Finalisez la configuration, nommez votre Zap et activez-le.