Importing a new version from external source |
Importing a new version from external source |
||
| Line 7: | Line 7: | ||
<br><br> | <br><br> | ||
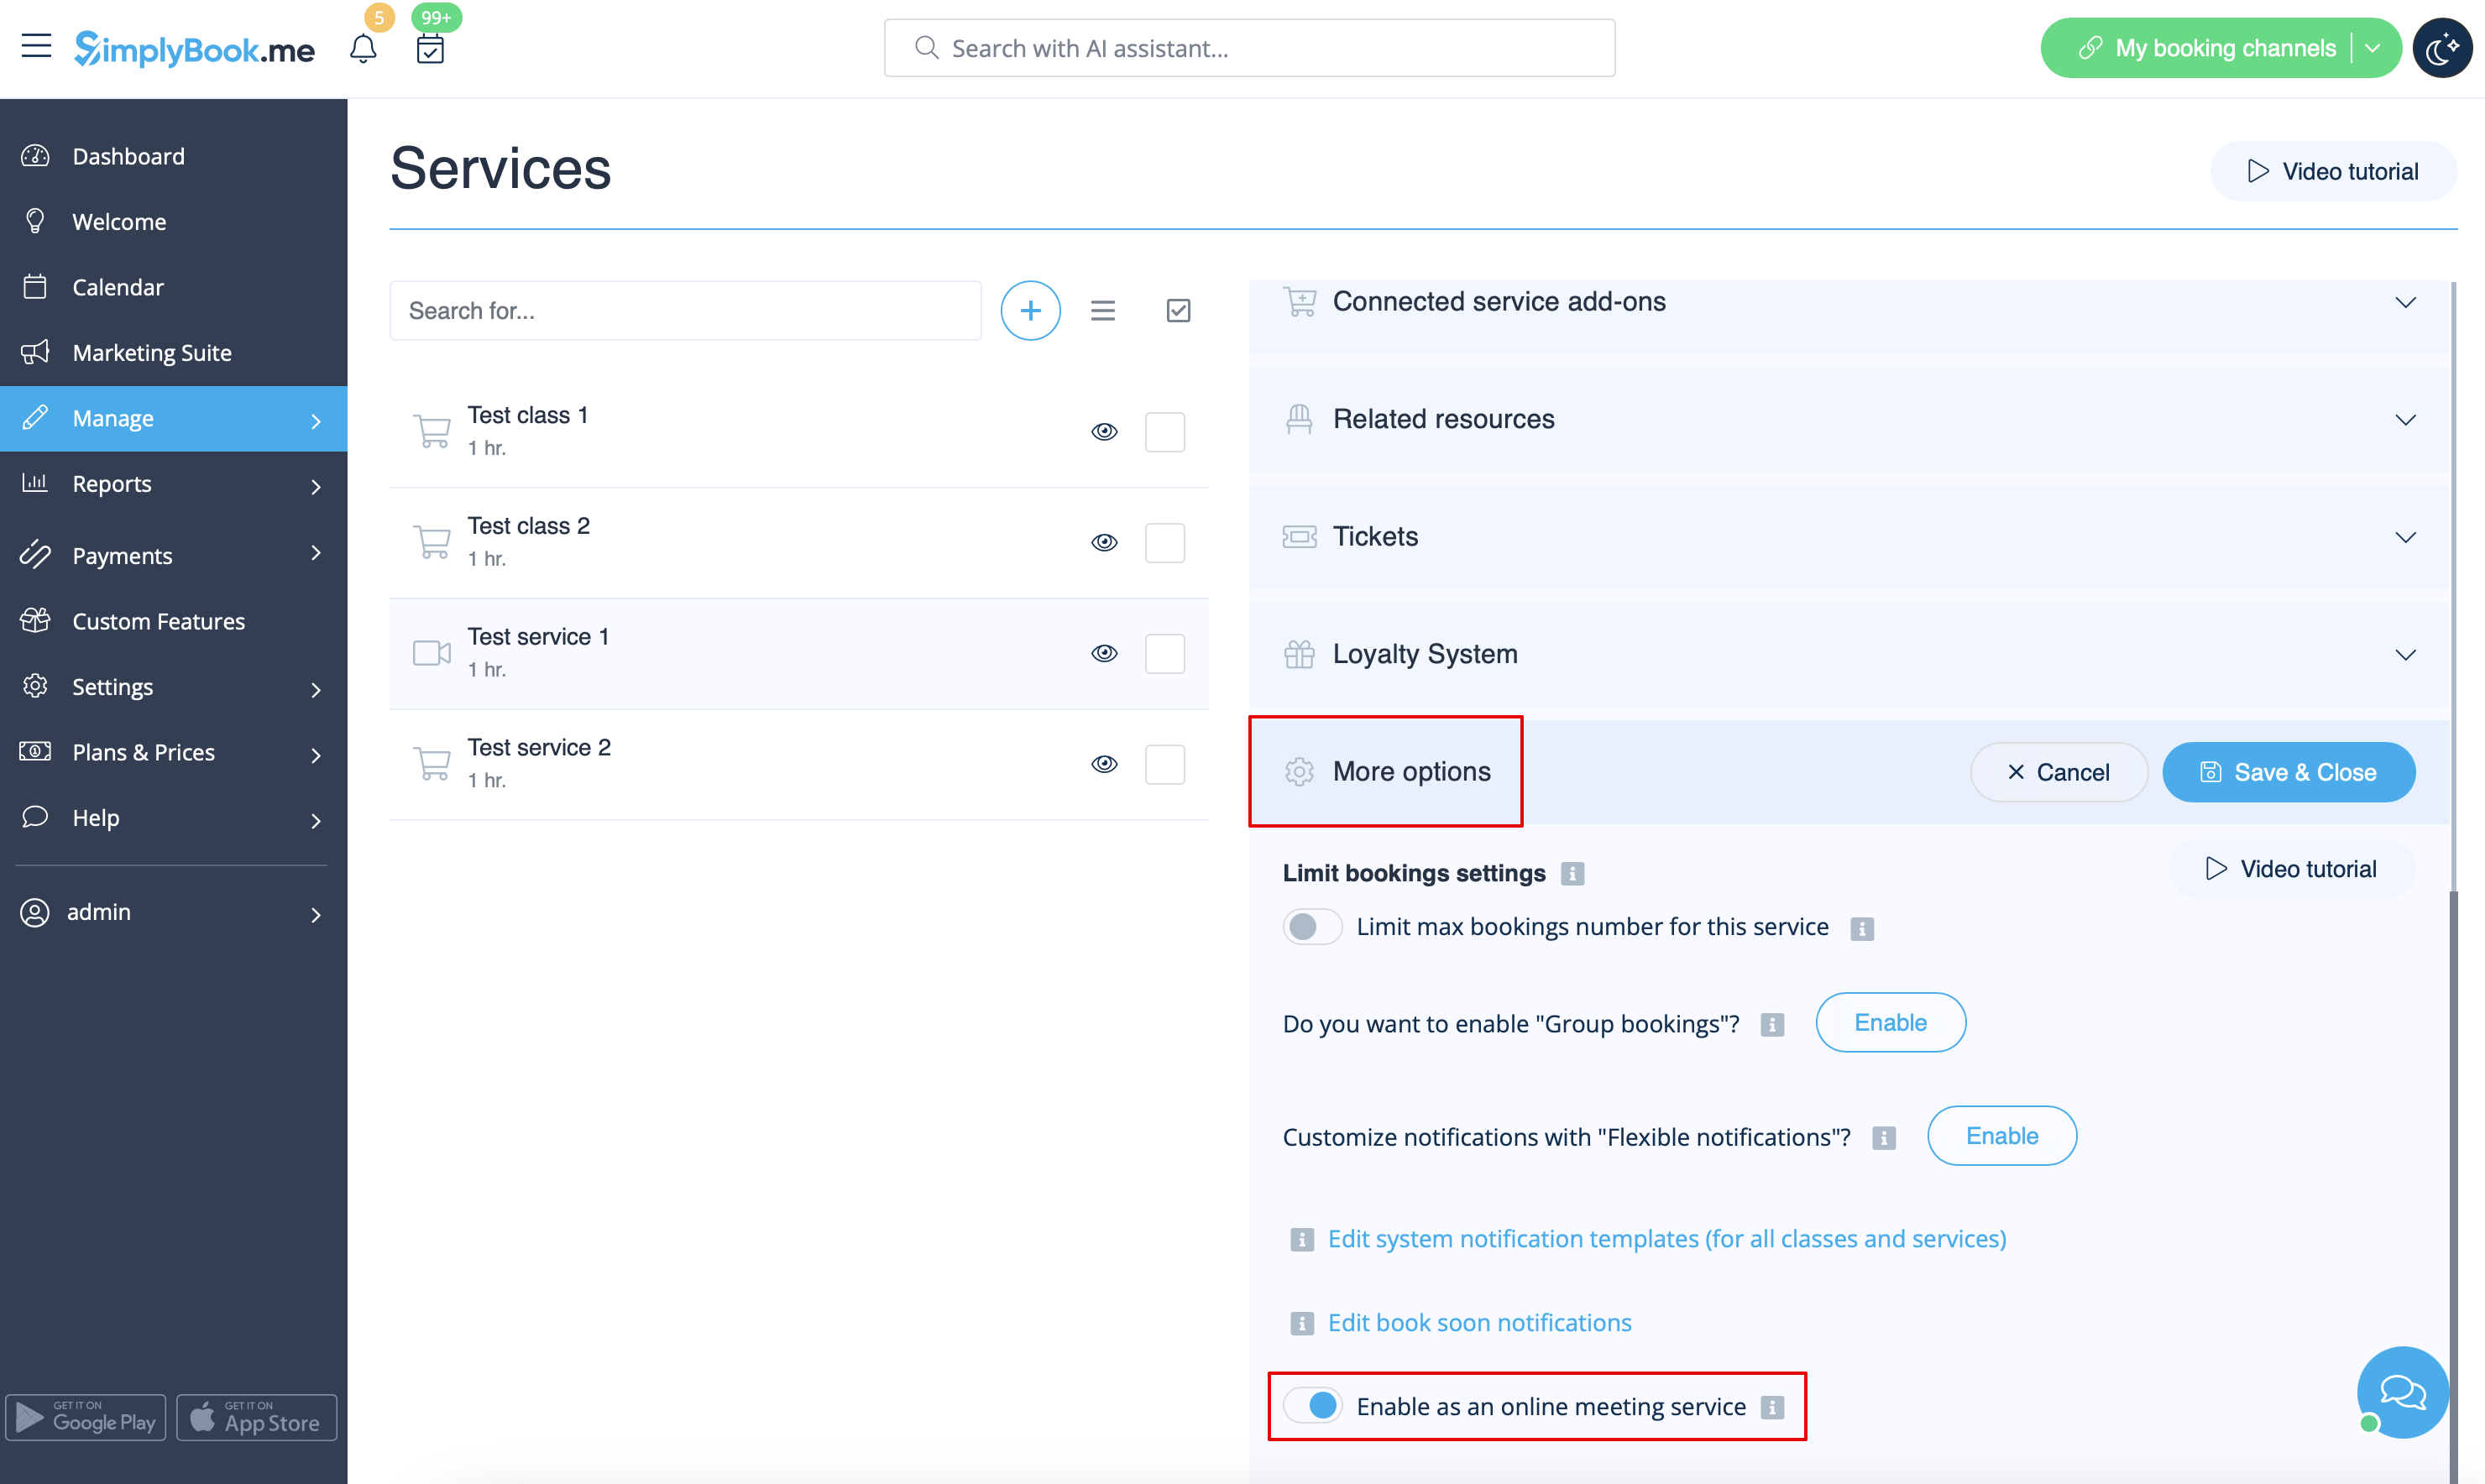
5. After your Zoom connection is set, the last thing you need to do is enable online meeting option for your services. To do that please navigate to <span style="background-color:#d4f8e5; padding:5px; border-radius:5px;">Manage</span> -> <span style="background-color:#d4f8e5; padding:5px; border-radius:5px;">Services</span> -> click on needed Service name -> scroll down to <span style="background-color:#d4f8e5; padding:5px; border-radius:5px;">More options.</span> | 5. After your Zoom connection is set, the last thing you need to do is enable online meeting option for your services. To do that please navigate to <span style="background-color:#d4f8e5; padding:5px; border-radius:5px;">Manage</span> -> <span style="background-color:#d4f8e5; padding:5px; border-radius:5px;">Services</span> -> click on needed Service name -> scroll down to <span style="background-color:#d4f8e5; padding:5px; border-radius:5px;">More options.</span> | ||
(in <span style="background-color:#d4f8e5; padding:5px; border-radius:5px;">Manage</span> -> <span style="background-color:#d4f8e5; padding:5px; border-radius:5px;">[[Classes custom feature|Classes]]</span> -> click on Class name -> <span style="background-color:#d4f8e5; padding:5px; border-radius:5px;">More options</span> if you are using [[Classes custom feature|Classes]] feature) and switch on the option Enable as online meeting service/[[Classes custom feature|class]]. | (in <span style="background-color:#d4f8e5; padding:5px; border-radius:5px;">Manage</span> -> <span style="background-color:#d4f8e5; padding:5px; border-radius:5px;">[[Special:MyLanguage/Classes custom feature|Classes]]</span> -> click on Class name -> <span style="background-color:#d4f8e5; padding:5px; border-radius:5px;">More options</span> if you are using [[Special:MyLanguage/Classes custom feature|Classes]] feature) and switch on the option Enable as online meeting service/[[Special:MyLanguage/Classes custom feature|class]]. | ||
[[File:Enable service as online meeting redesigned.png|1200px|center|link=https://help.simplybook.me/images/e/ec/Enable_service_as_online_meeting_redesigned.png]] | [[File:Enable service as online meeting redesigned.png|1200px|center|link=https://help.simplybook.me/images/e/ec/Enable_service_as_online_meeting_redesigned.png]] | ||
<br><br> | <br><br> | ||
Latest revision as of 07:41, 24 September 2025
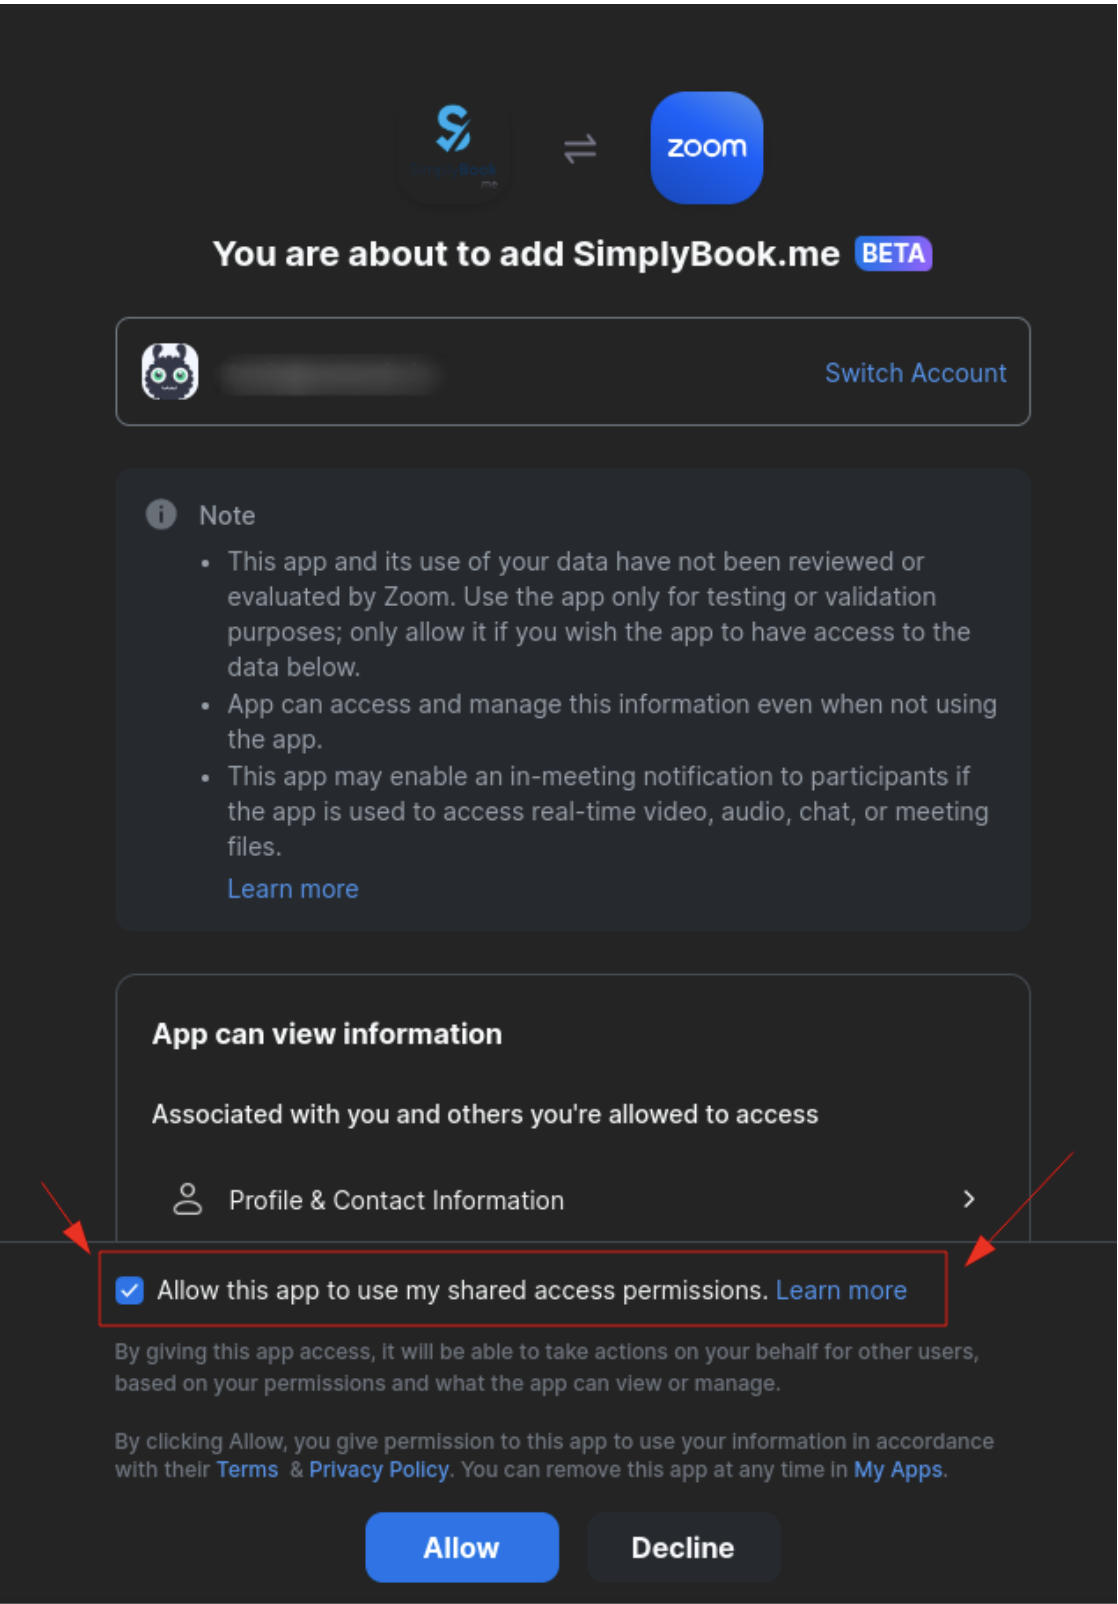
3. Enter your credentials to log into Zoom, or click SSO, Google, or Facebook to log in through those services.
You can connect one zoom account per company OR connect all zoom users added to your account by checking the checkbox Allow this app to use my shared access permissions
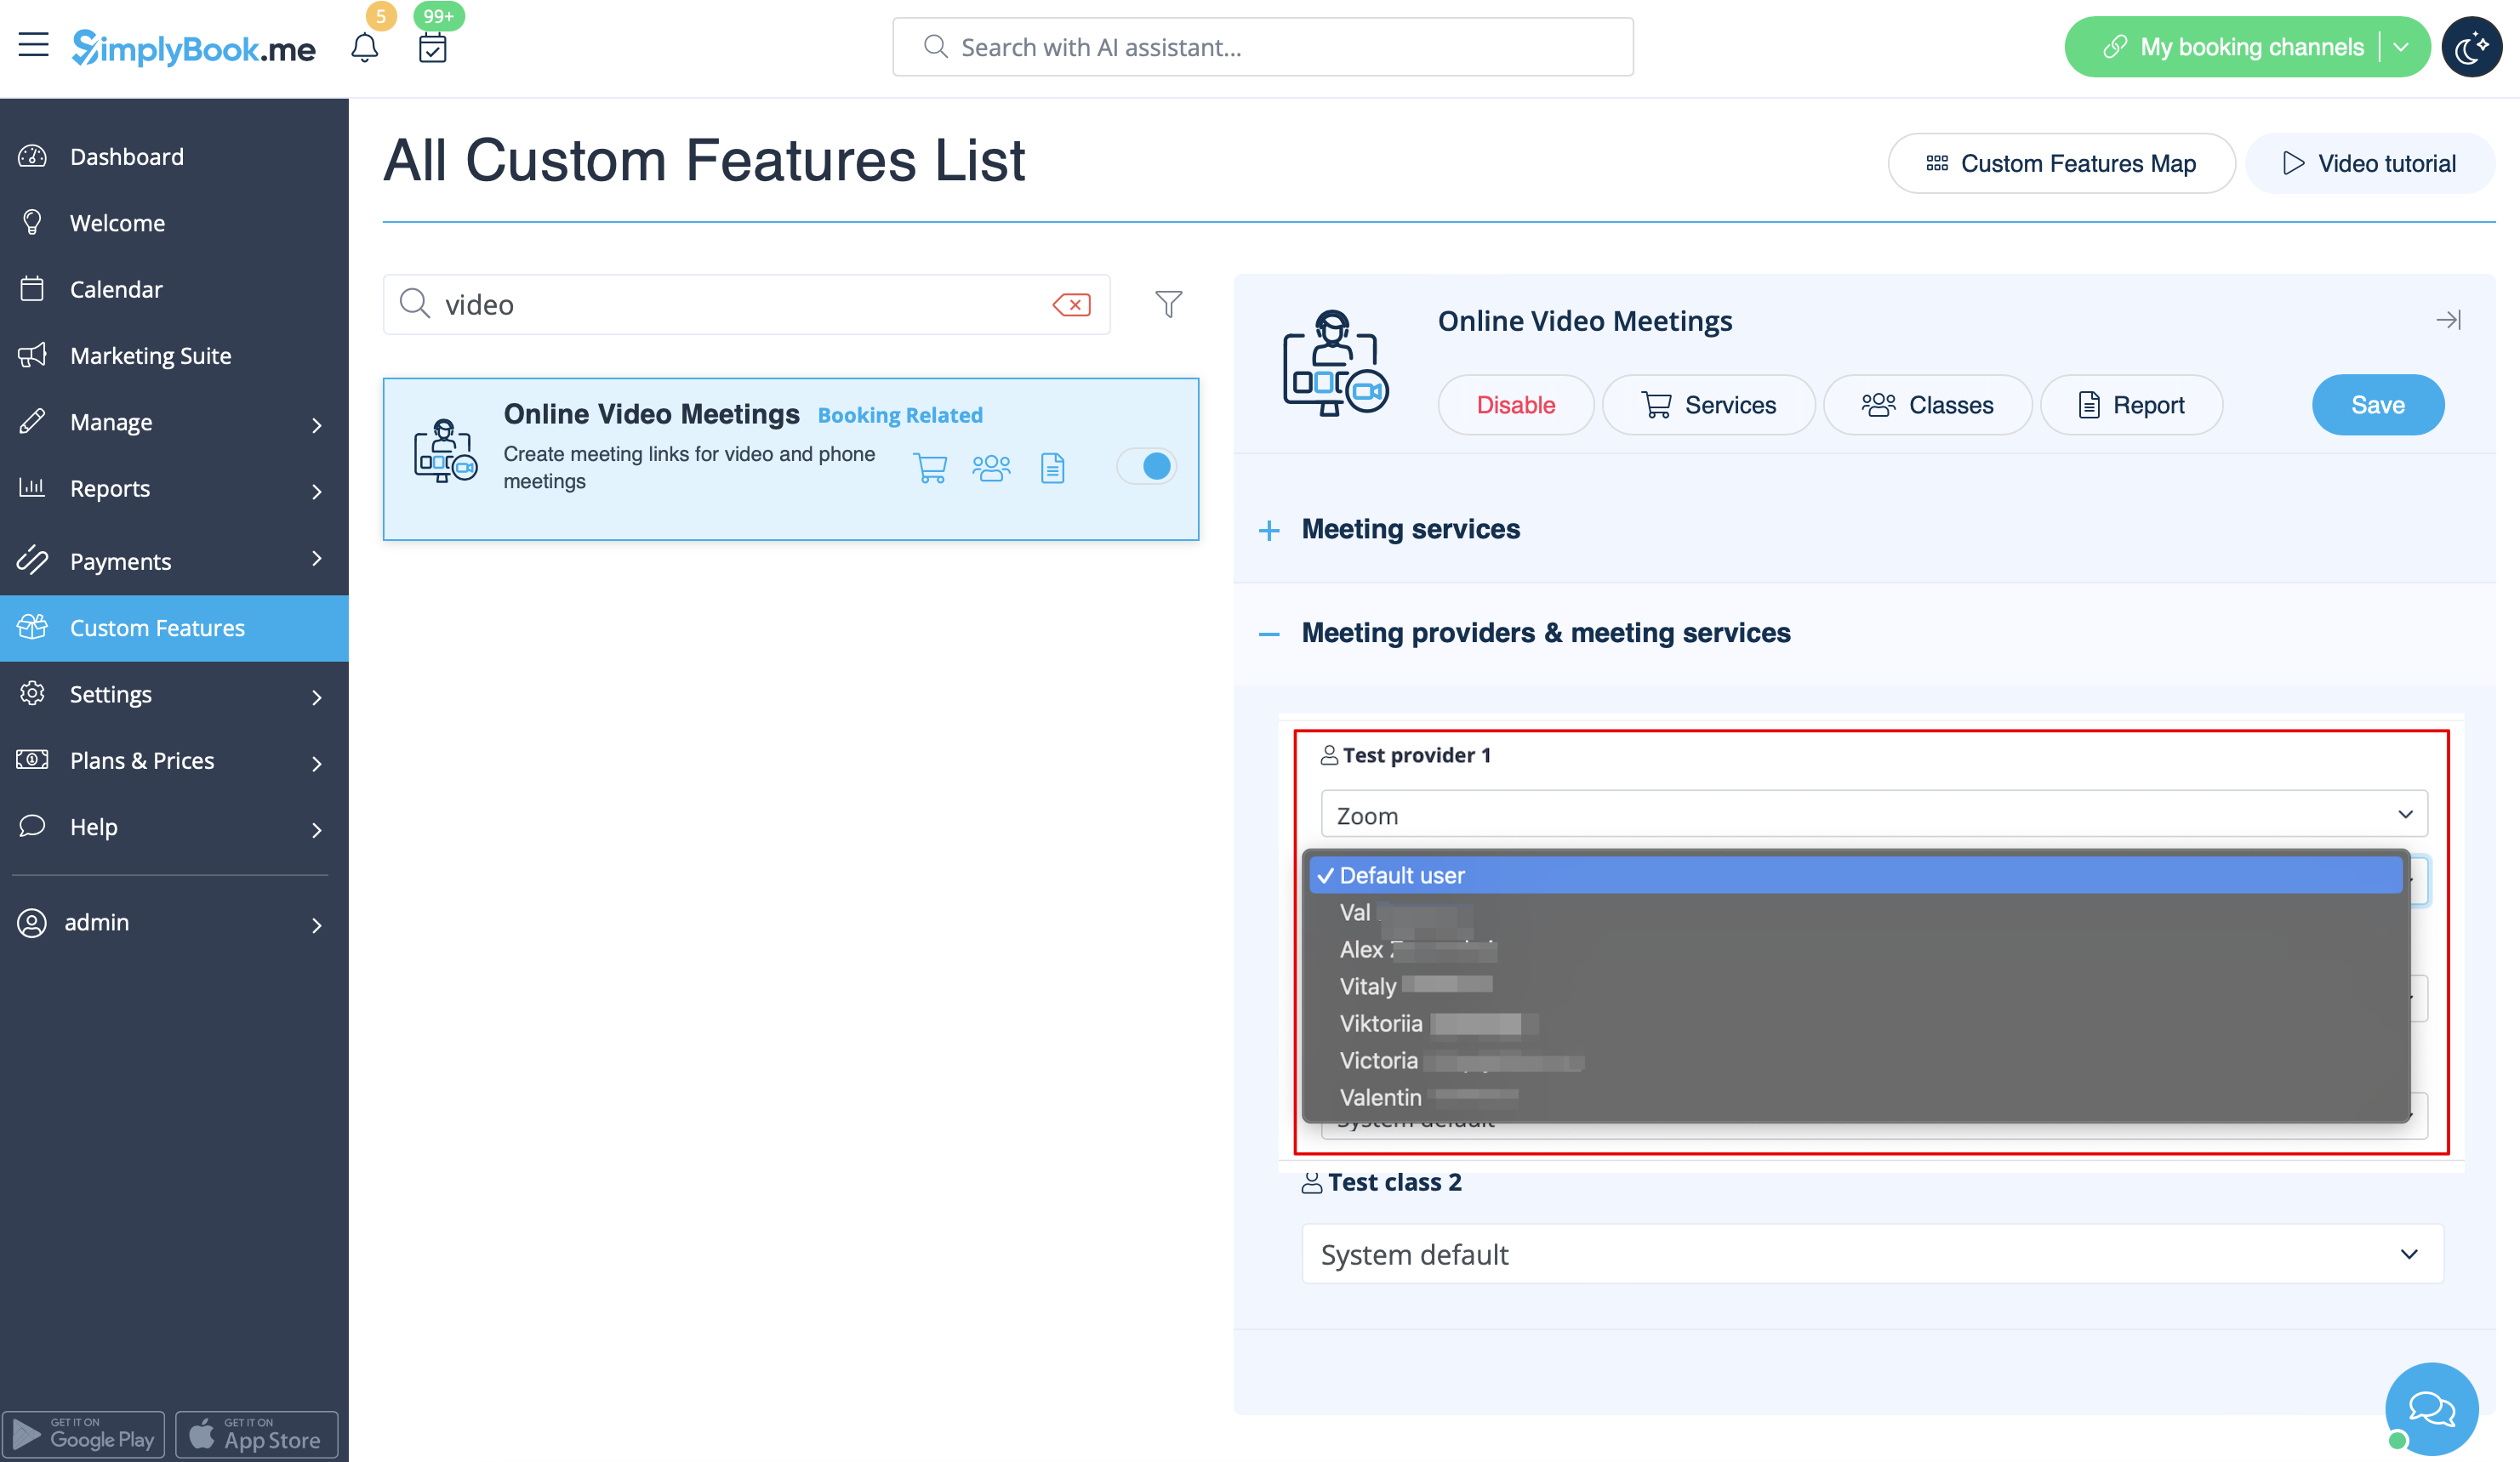
4. After Zoom is authorized, click on Meeting Providers and Meeting Services and choose providers that should be connected to Zoom by selecting Zoom option from the respective drop down. In the next drop-down please select Zoom user (if you have several users under your Zoom account) that should be connected to that provider.
5. After your Zoom connection is set, the last thing you need to do is enable online meeting option for your services. To do that please navigate to Manage -> Services -> click on needed Service name -> scroll down to More options.
(in Manage -> Classes -> click on Class name -> More options if you are using Classes feature) and switch on the option Enable as online meeting service/class.