[[File:Add services to package redesigned.png|1200px | center|link=https://help.simplybook.me/images/1/1c/Add_services_to_package_redesigned.png]]
[[File:Add services to package redesigned.png|1200px | center|link=https://help.simplybook.me/images/1/1c/Add_services_to_package_redesigned.png]]
<br><br>
<br><br>
:8. Om du använder funktionerna [[Special:MyLanguage/Custom_Features#Products_for_Sale |Produkter till salu]] och/eller [[Special:MyLanguage/Custom_Features#Service_Add-ons |Tilläggstjänster]] väljer du bara motsvarande flikar och lägger till element på samma sätt.
:8. Om du använder funktionerna [[Special:MyLanguage/Products for Sale custom feature |Produkter till salu]] och/eller [[Special:MyLanguage/Service Add-Ons custom feature |Tilläggstjänster]] väljer du bara motsvarande flikar och lägger till element på samma sätt.
[[File:Add products to package redesigned.png|1200px | center|link=https://help.simplybook.me/images/0/0f/Add_products_to_package_redesigned.png]]
[[File:Add products to package redesigned.png|1200px | center|link=https://help.simplybook.me/images/0/0f/Add_products_to_package_redesigned.png]]
<br><br>
<br><br>
Latest revision as of 11:18, 24 September 2025
Videohandledning tillgänglig
Hur
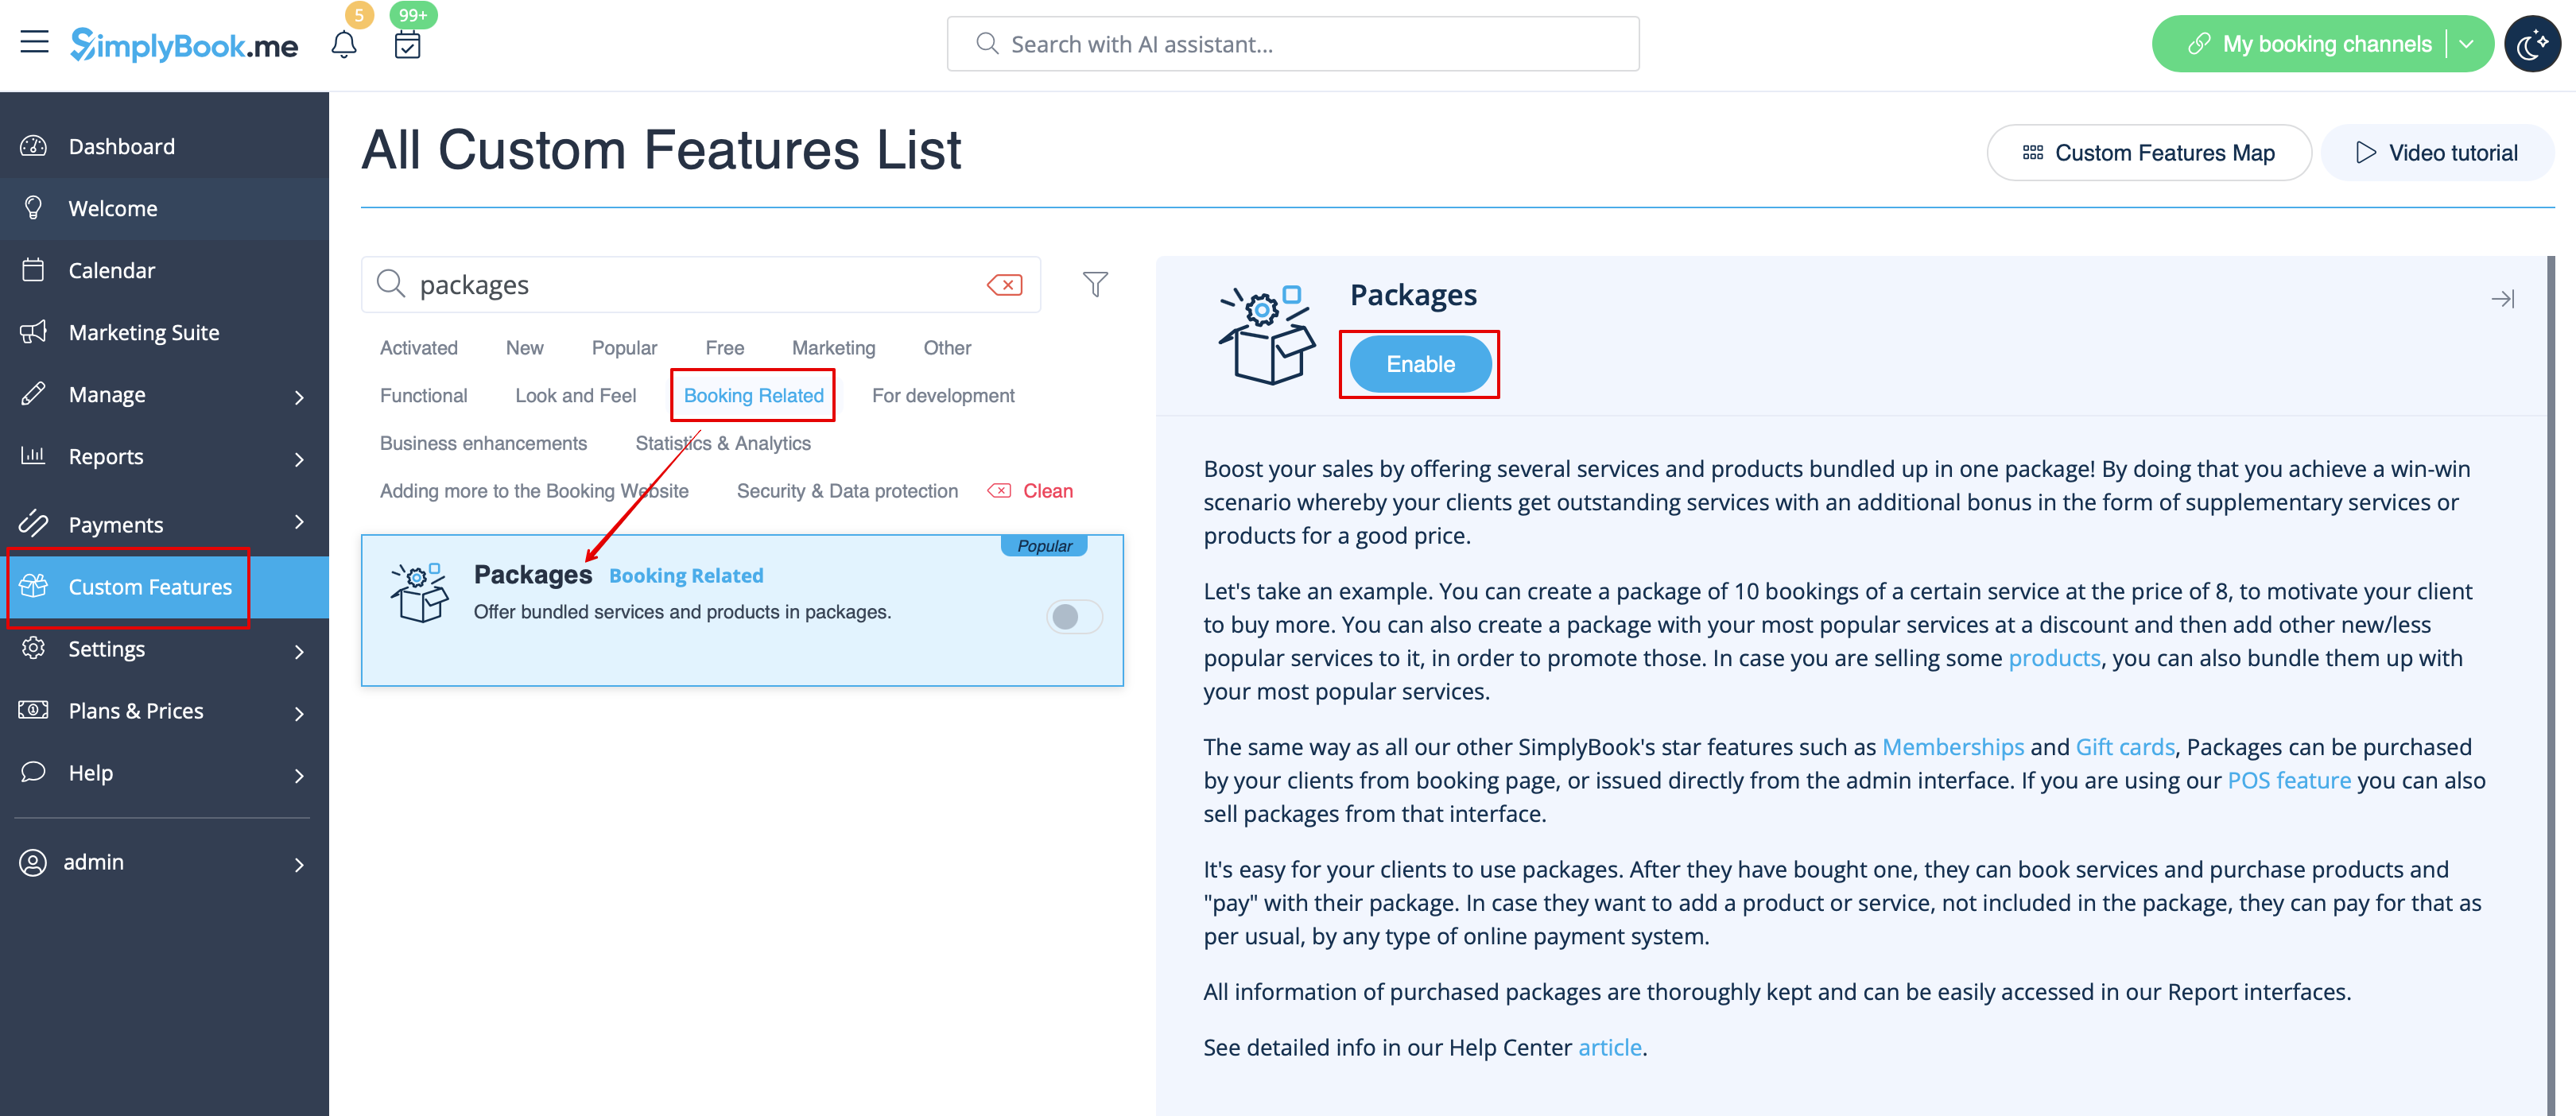
1. För att aktivera den här anpassade funktionen, gå till sidan Anpassade funktioner, gå till avsnittet "Bokningsrelaterat" och klicka på "Aktivera".
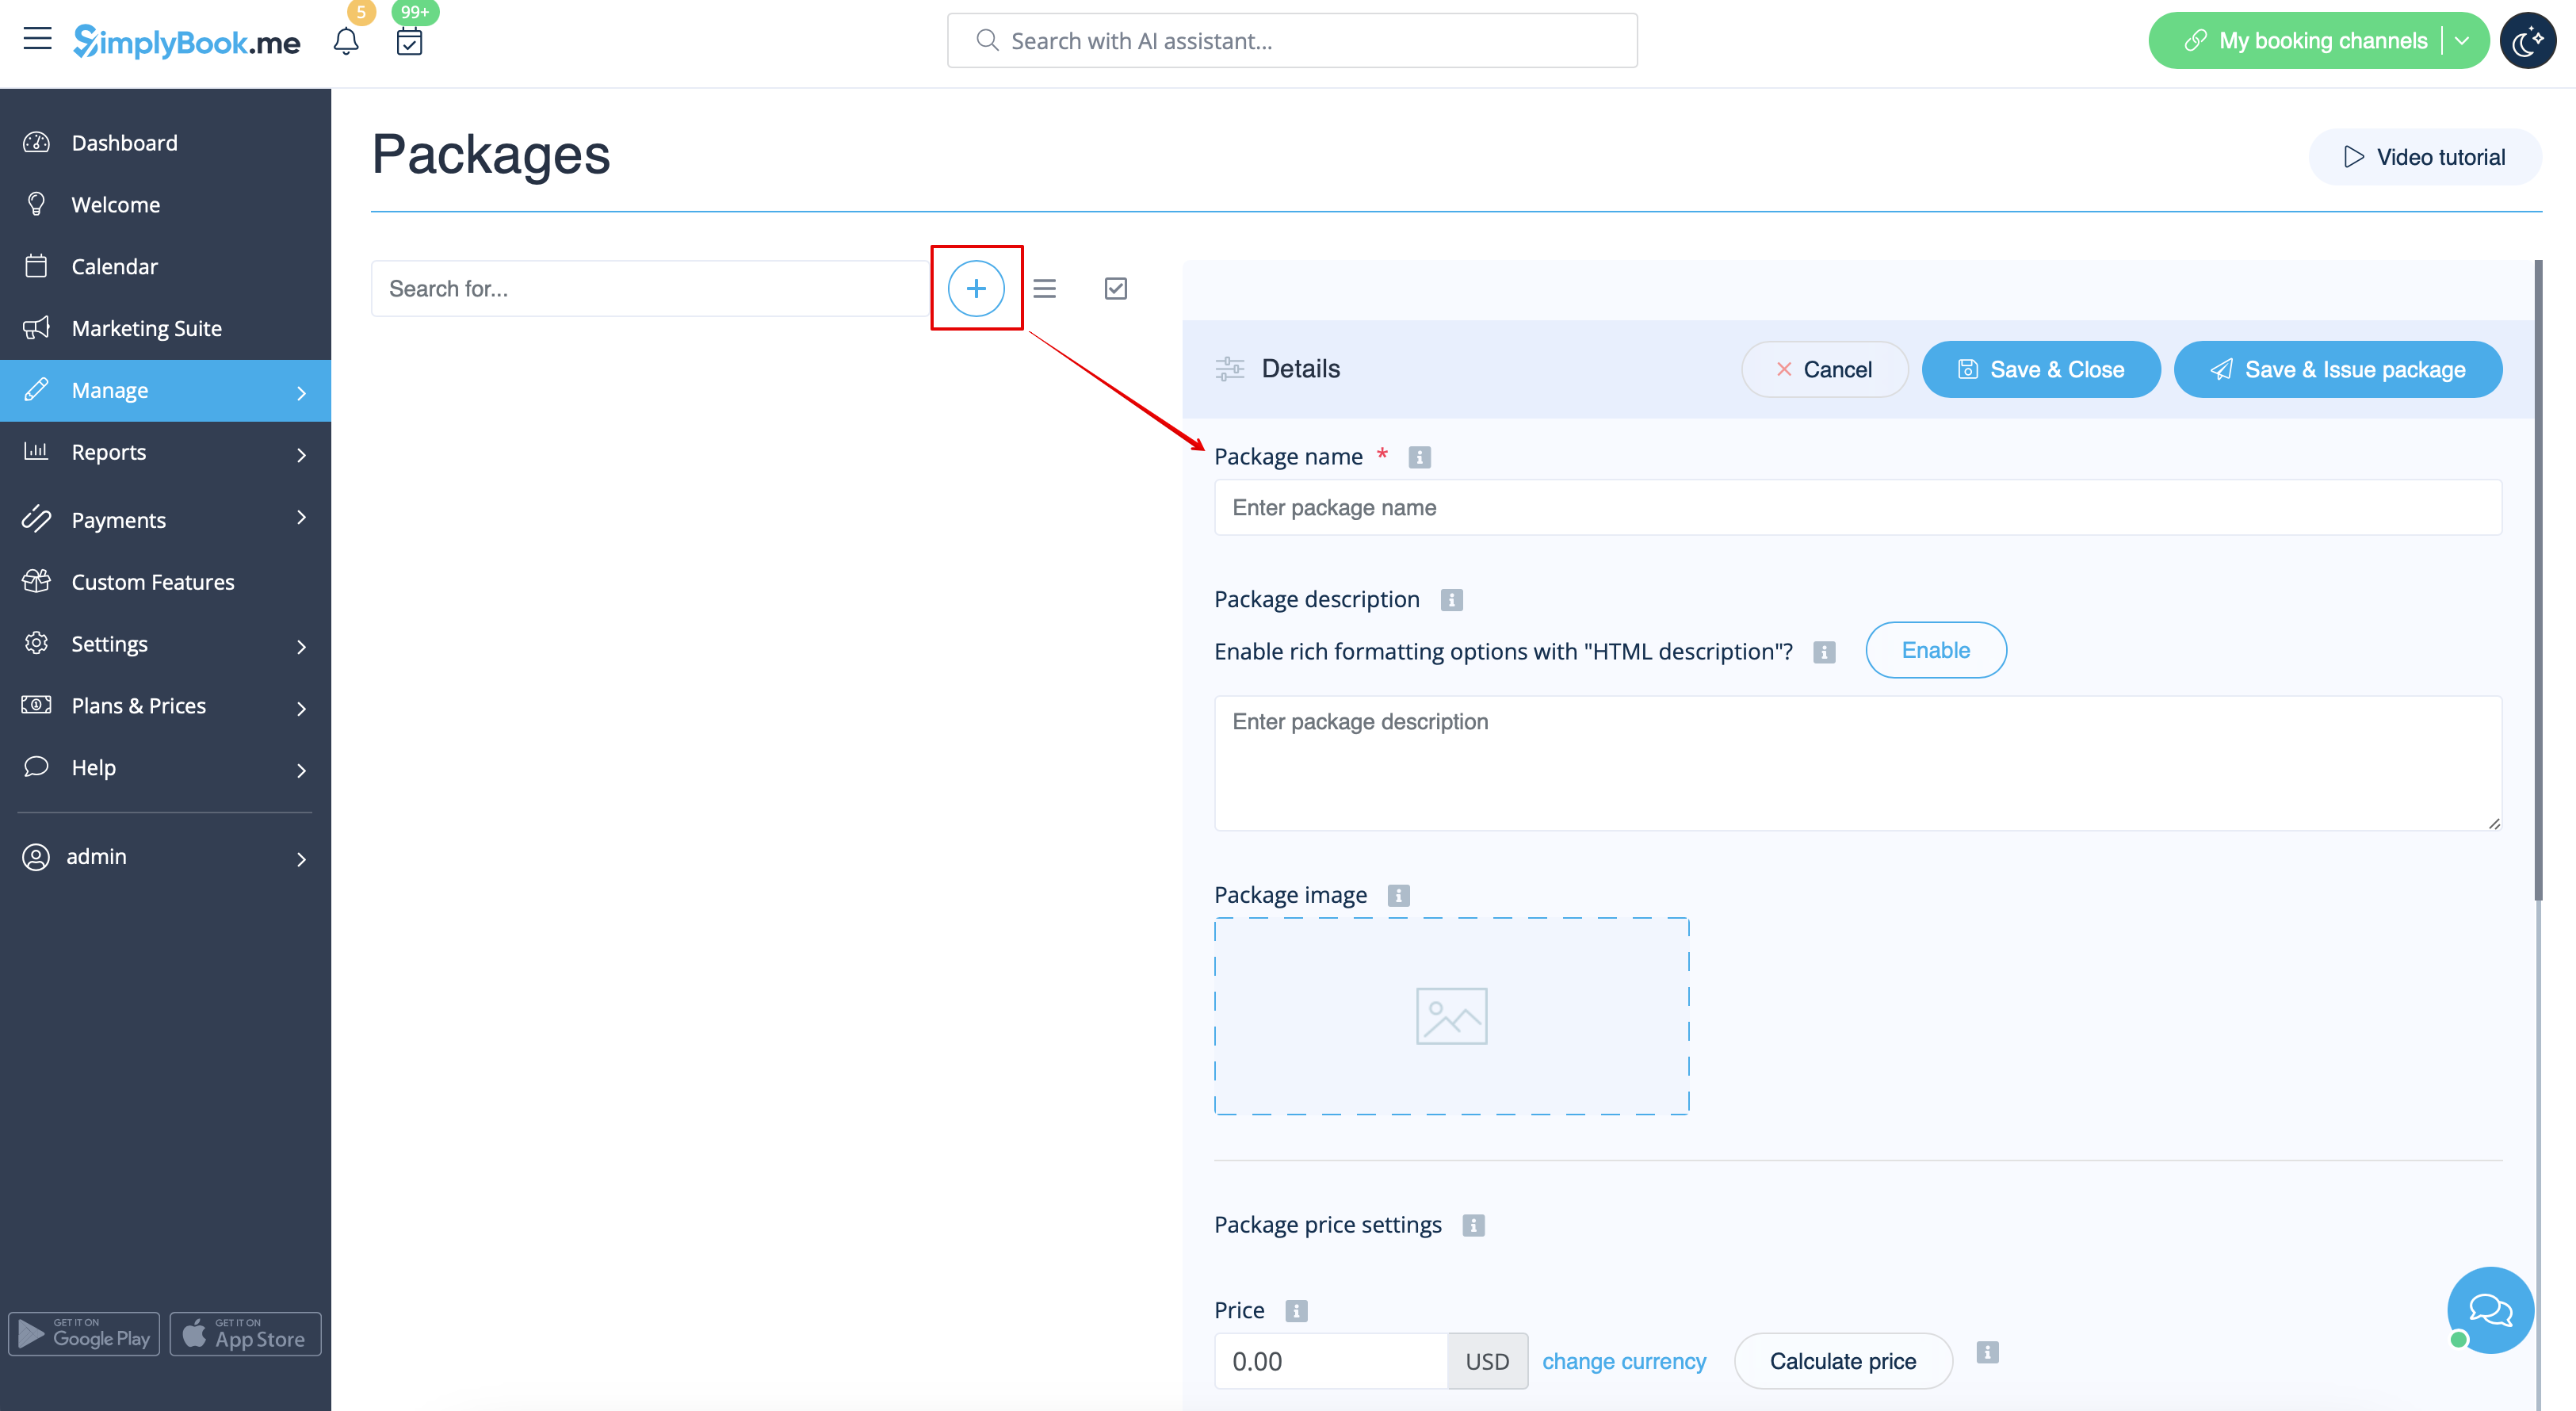
2. Välj sedan alternativet "Hantera" antingen bredvid den anpassade funktionen eller gå till Paket i avsnittet Hantera i menyn till vänster.
3. Klicka bara på knappen "+" för att skapa ett nytt paket. Formuläret visas på höger sida av sidan.
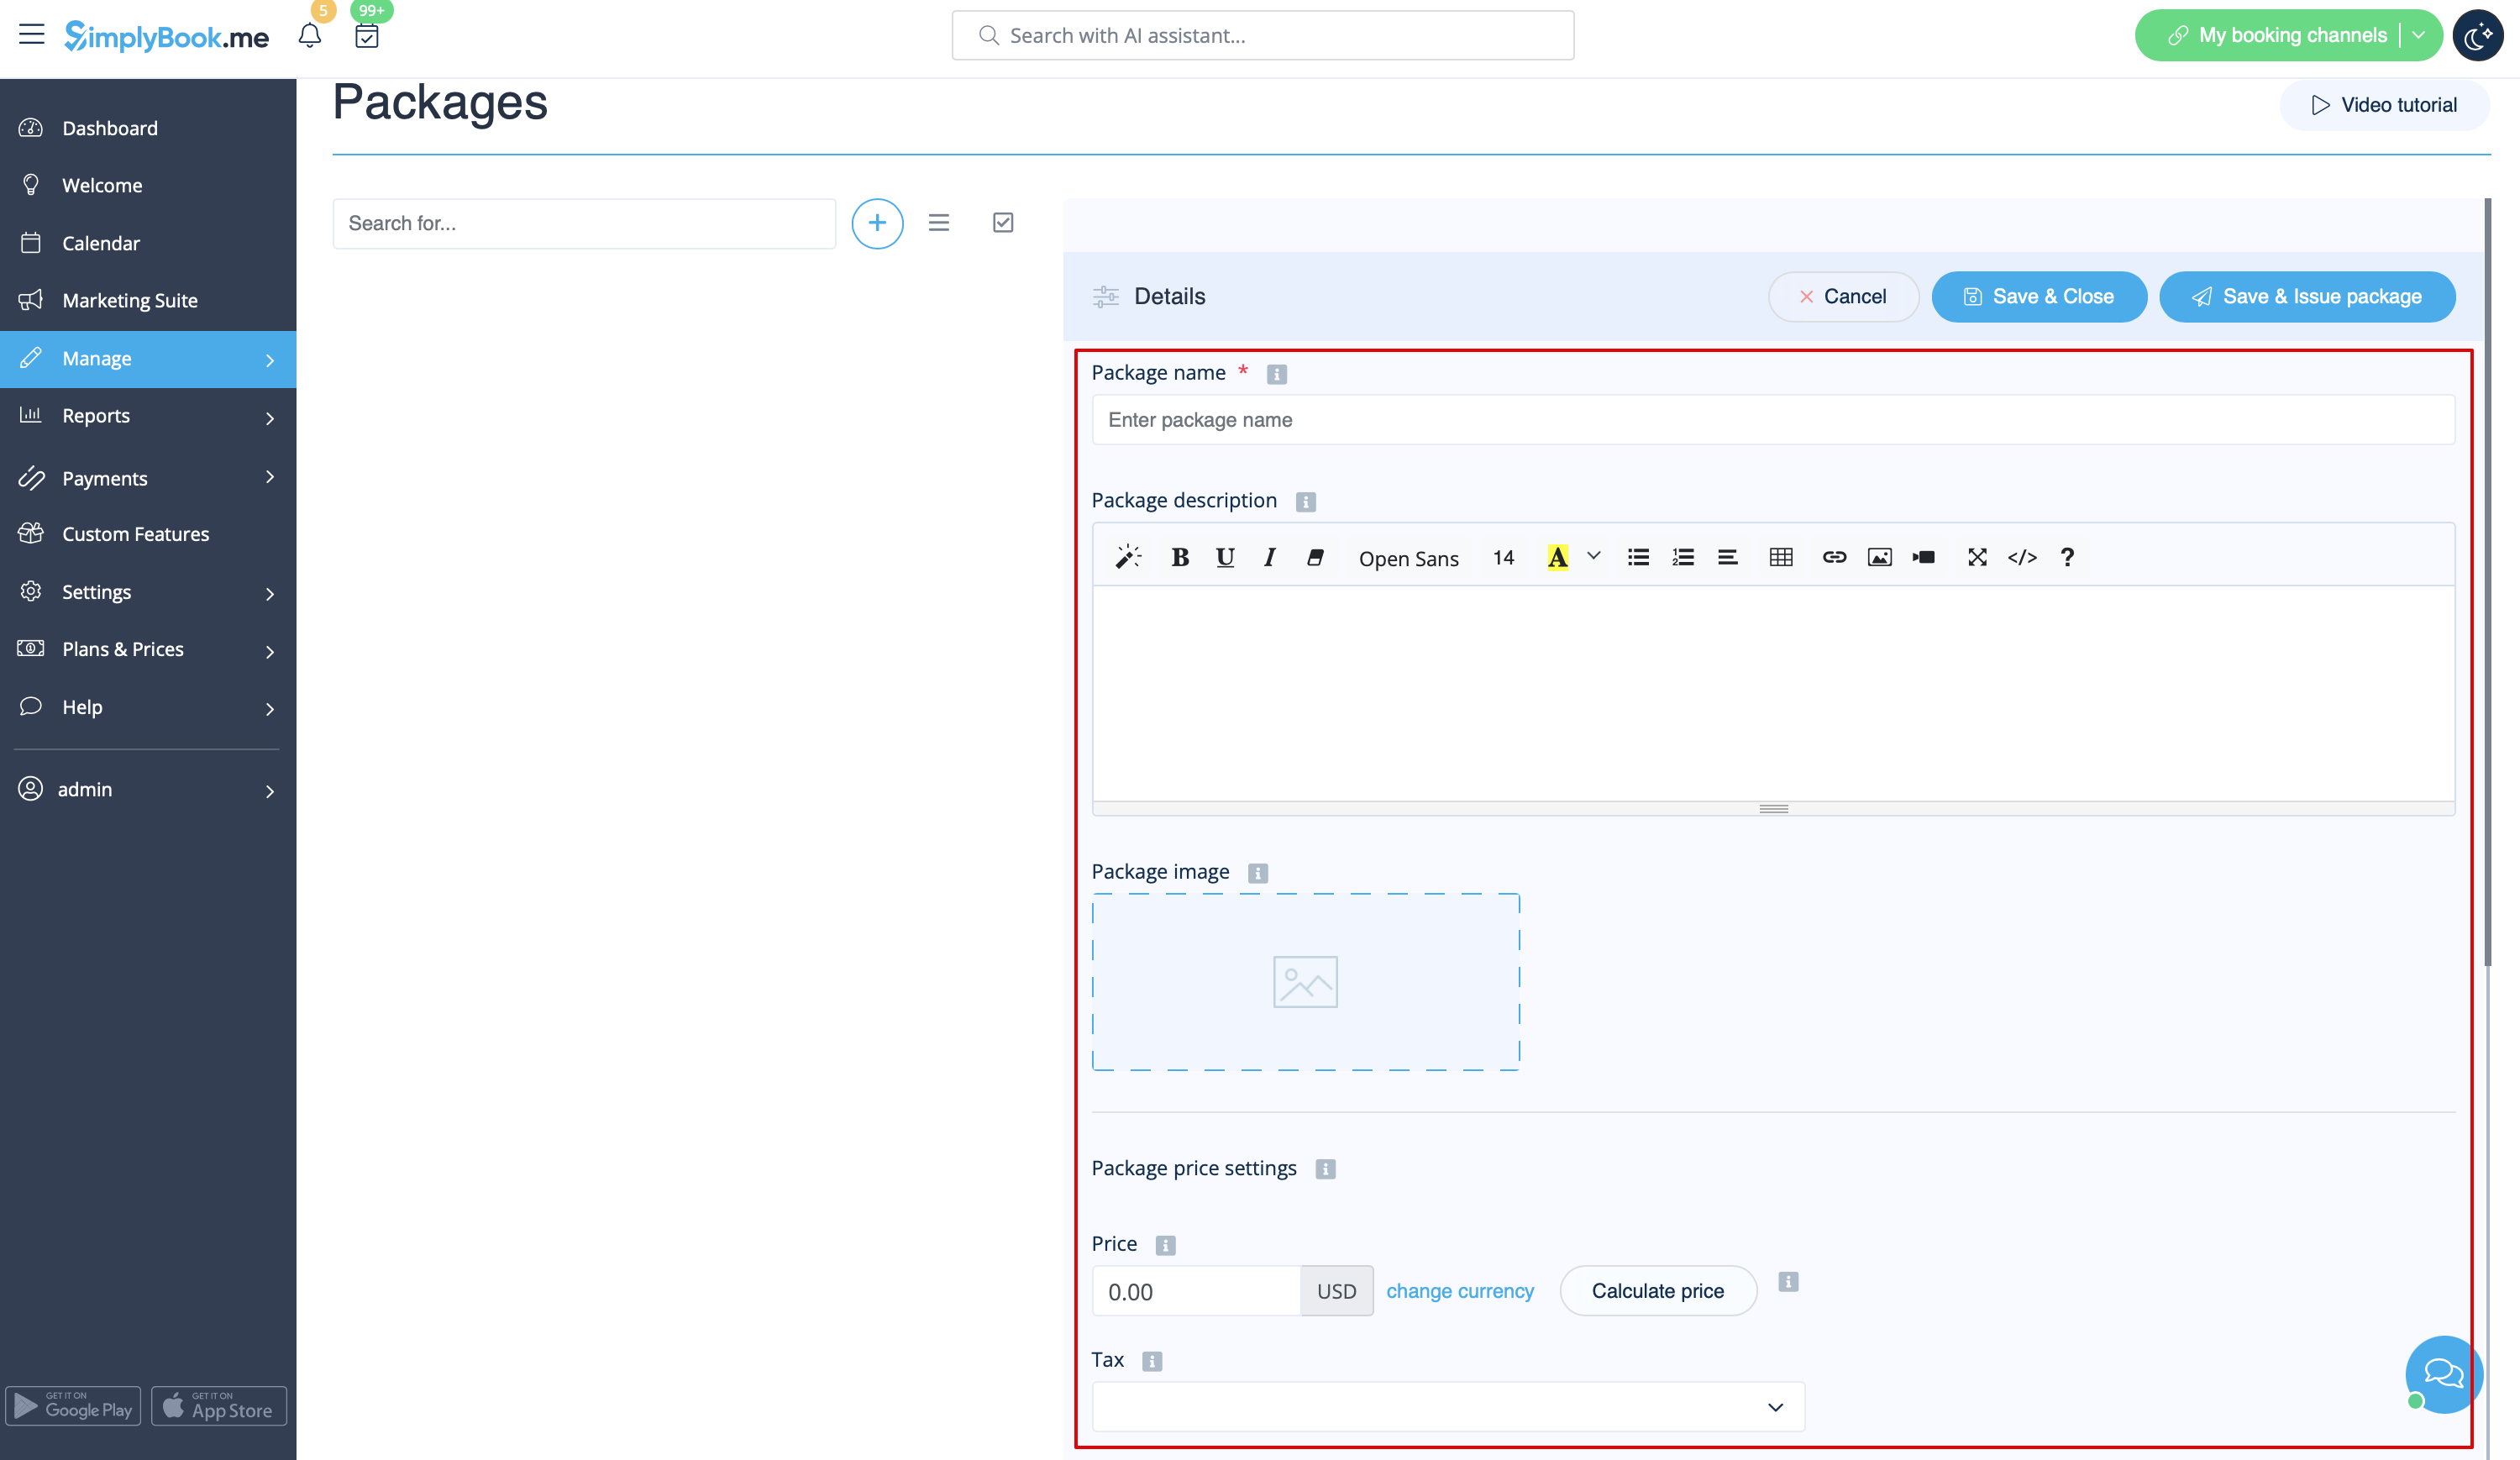
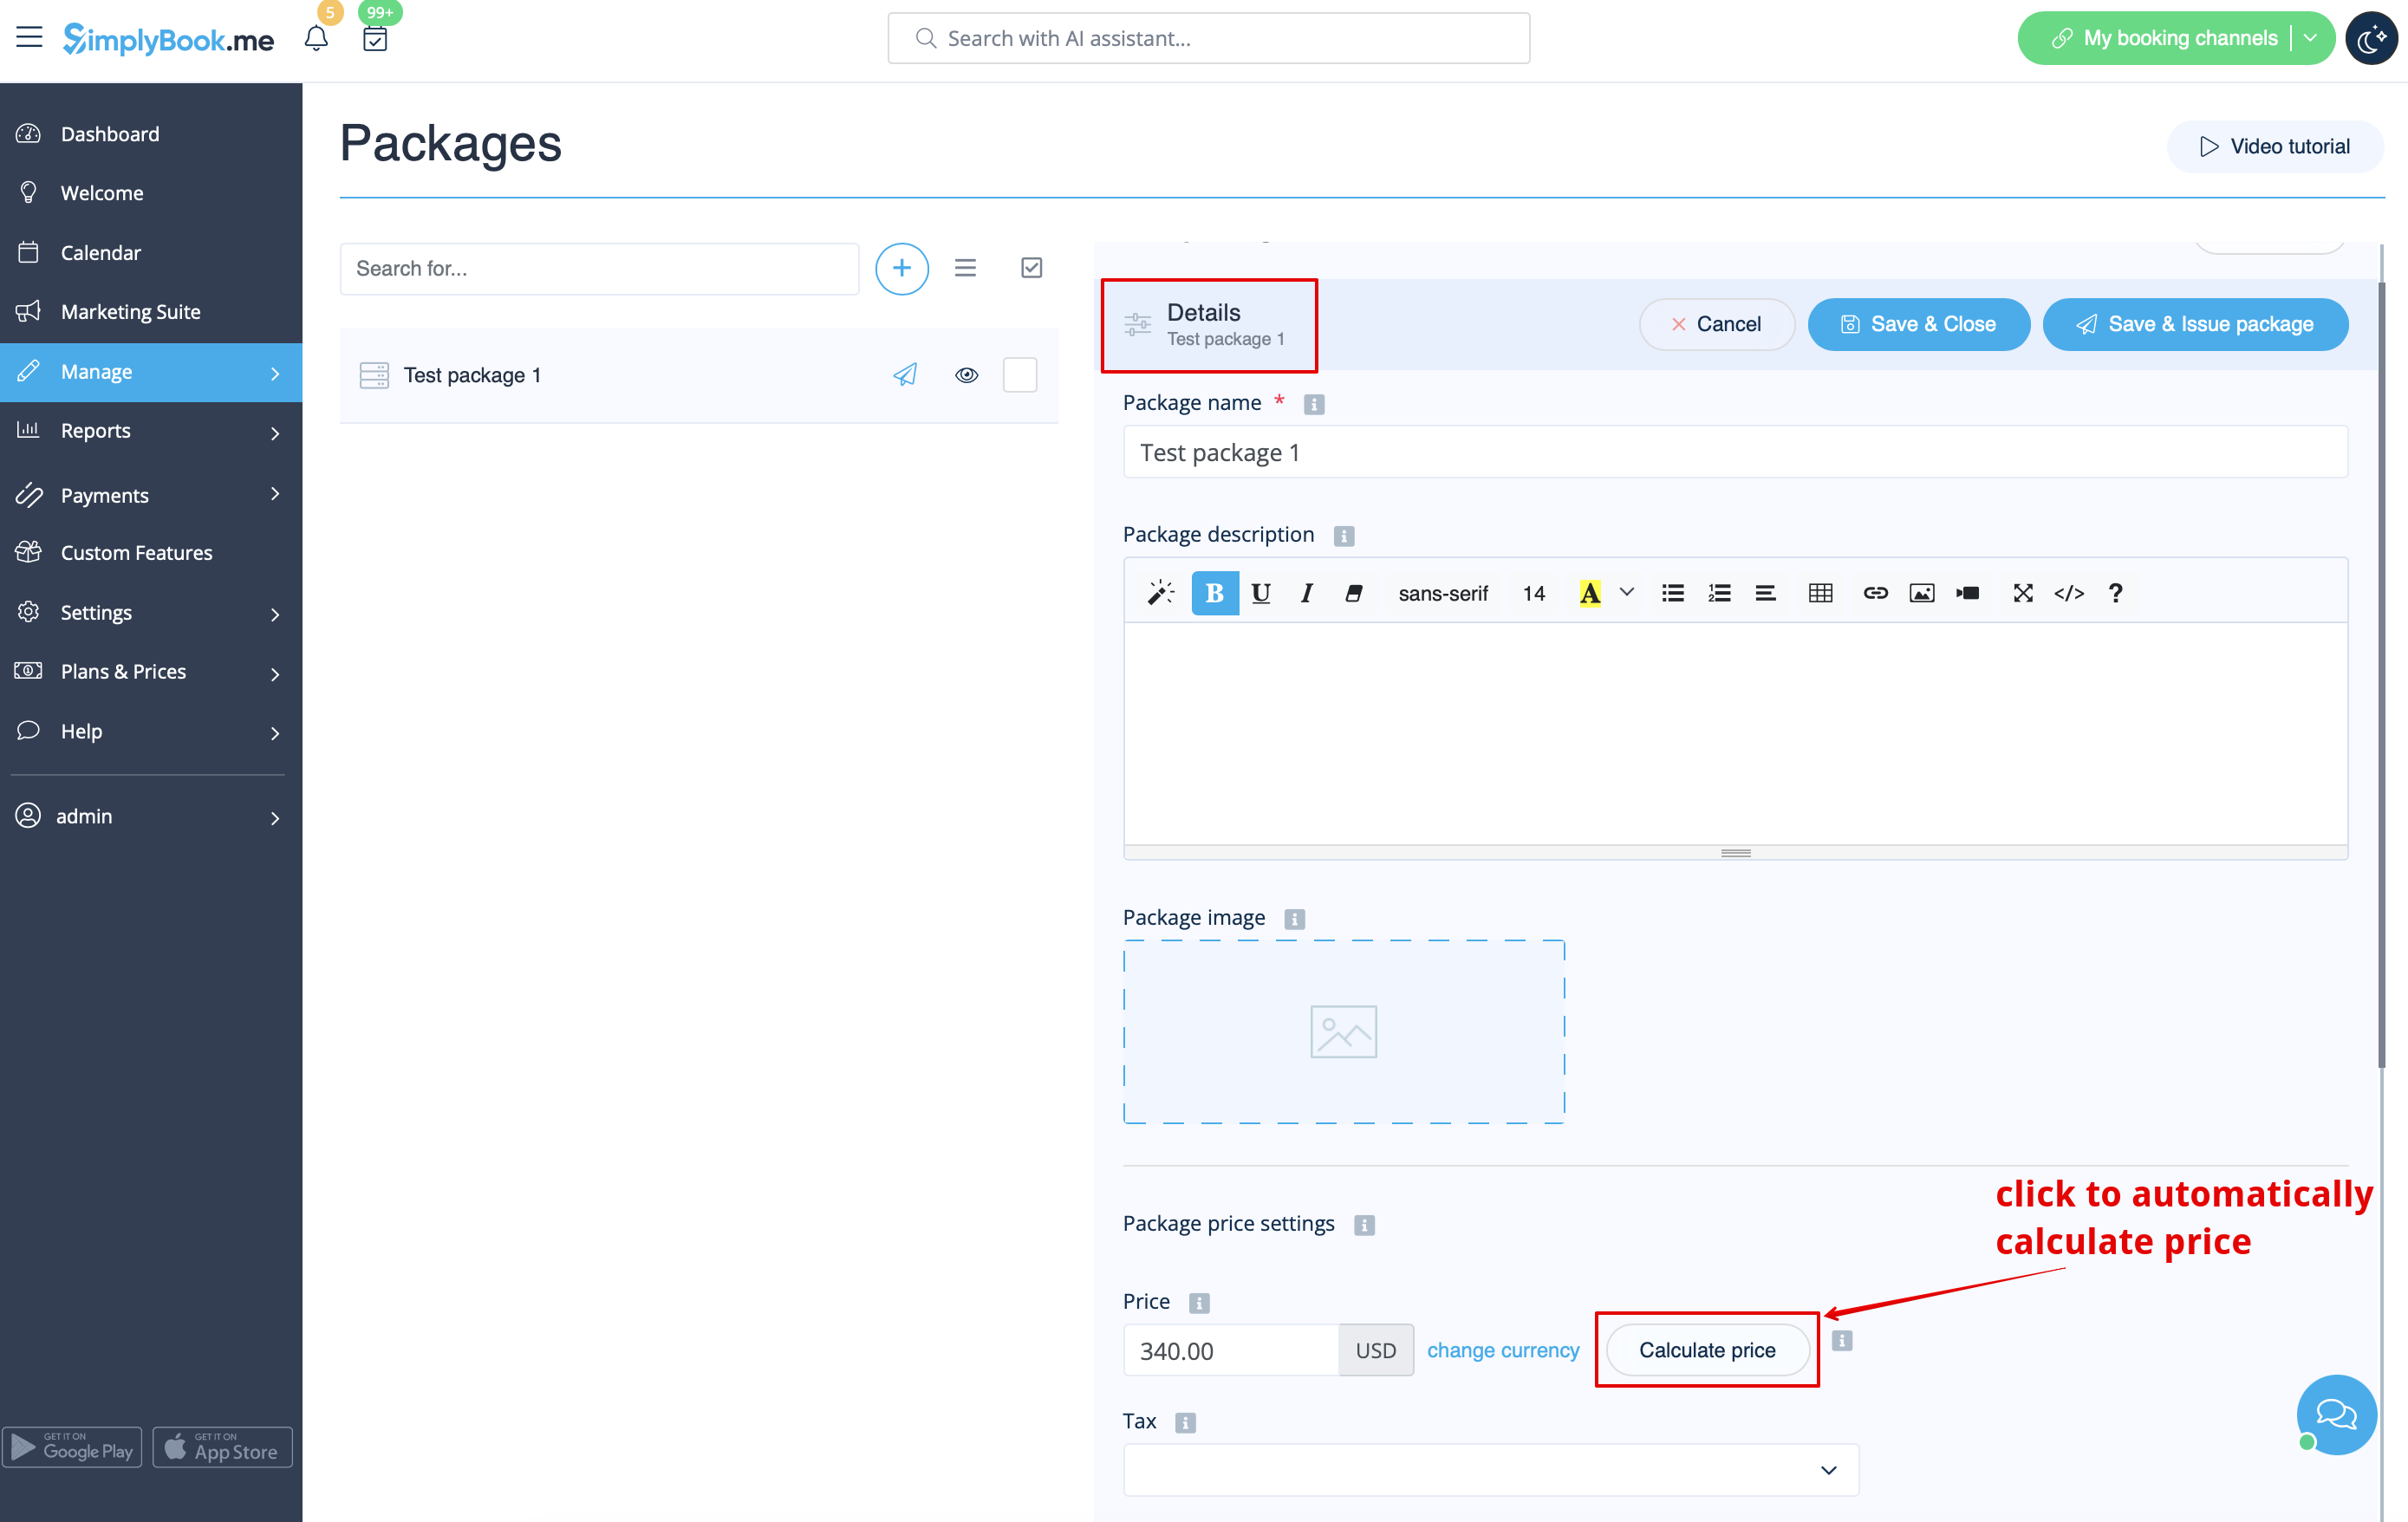
4. Ange paketets namn, lägg till en beskrivning (du kan även använda HTML-formatering för ett snyggare utseende) och en bild.
Nu kan du även ange paketets pris: du kan ange det definierade paketpriset (om du till exempel vill ge rabatt) eller
hoppa över prisrutan för att senare beräkna det totala beloppet för alla element som ingår i paketet.
Observera att det inte går att skapa ett paket utan pris.
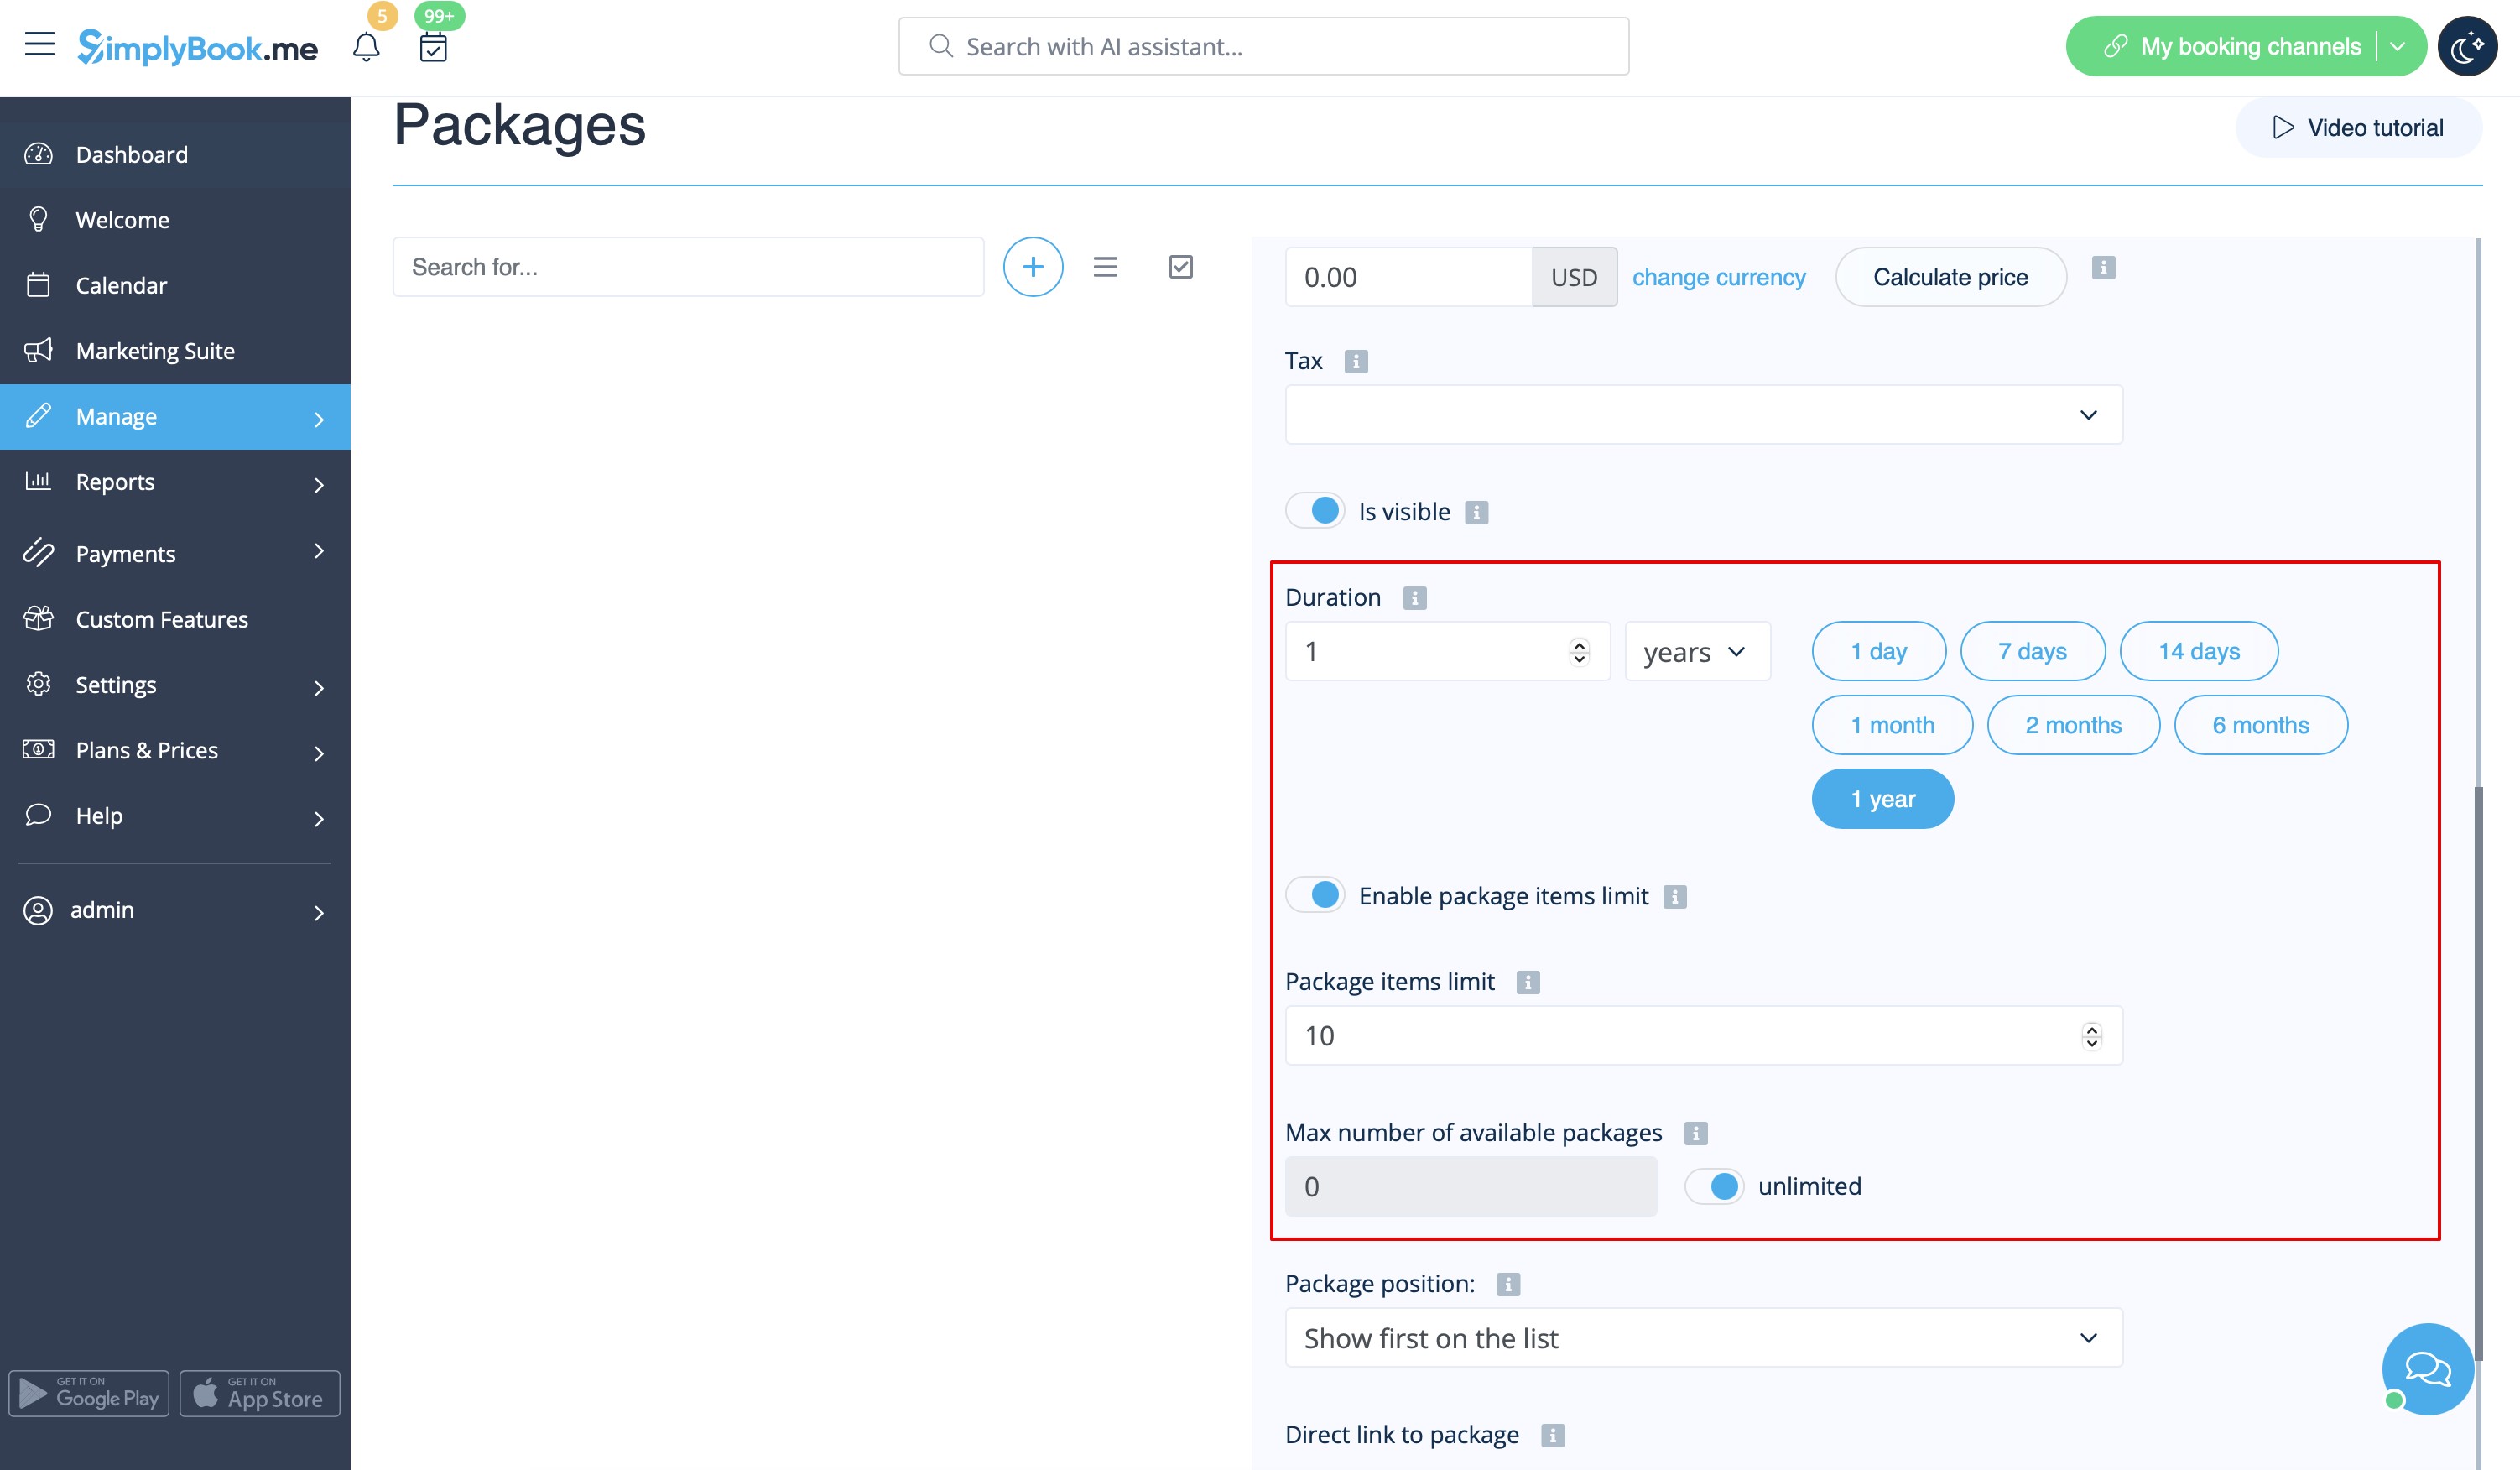
5. Ange paketets giltighetstid,
aktivera och ange den allmänna begränsningen för de inkluderade artiklarna (valfritt, kommer att tillämpas på tjänster, tillägg och produkter som är kopplade till paketet)
och ange antalet set som är tillgängliga för försäljning (obegränsat som standard).
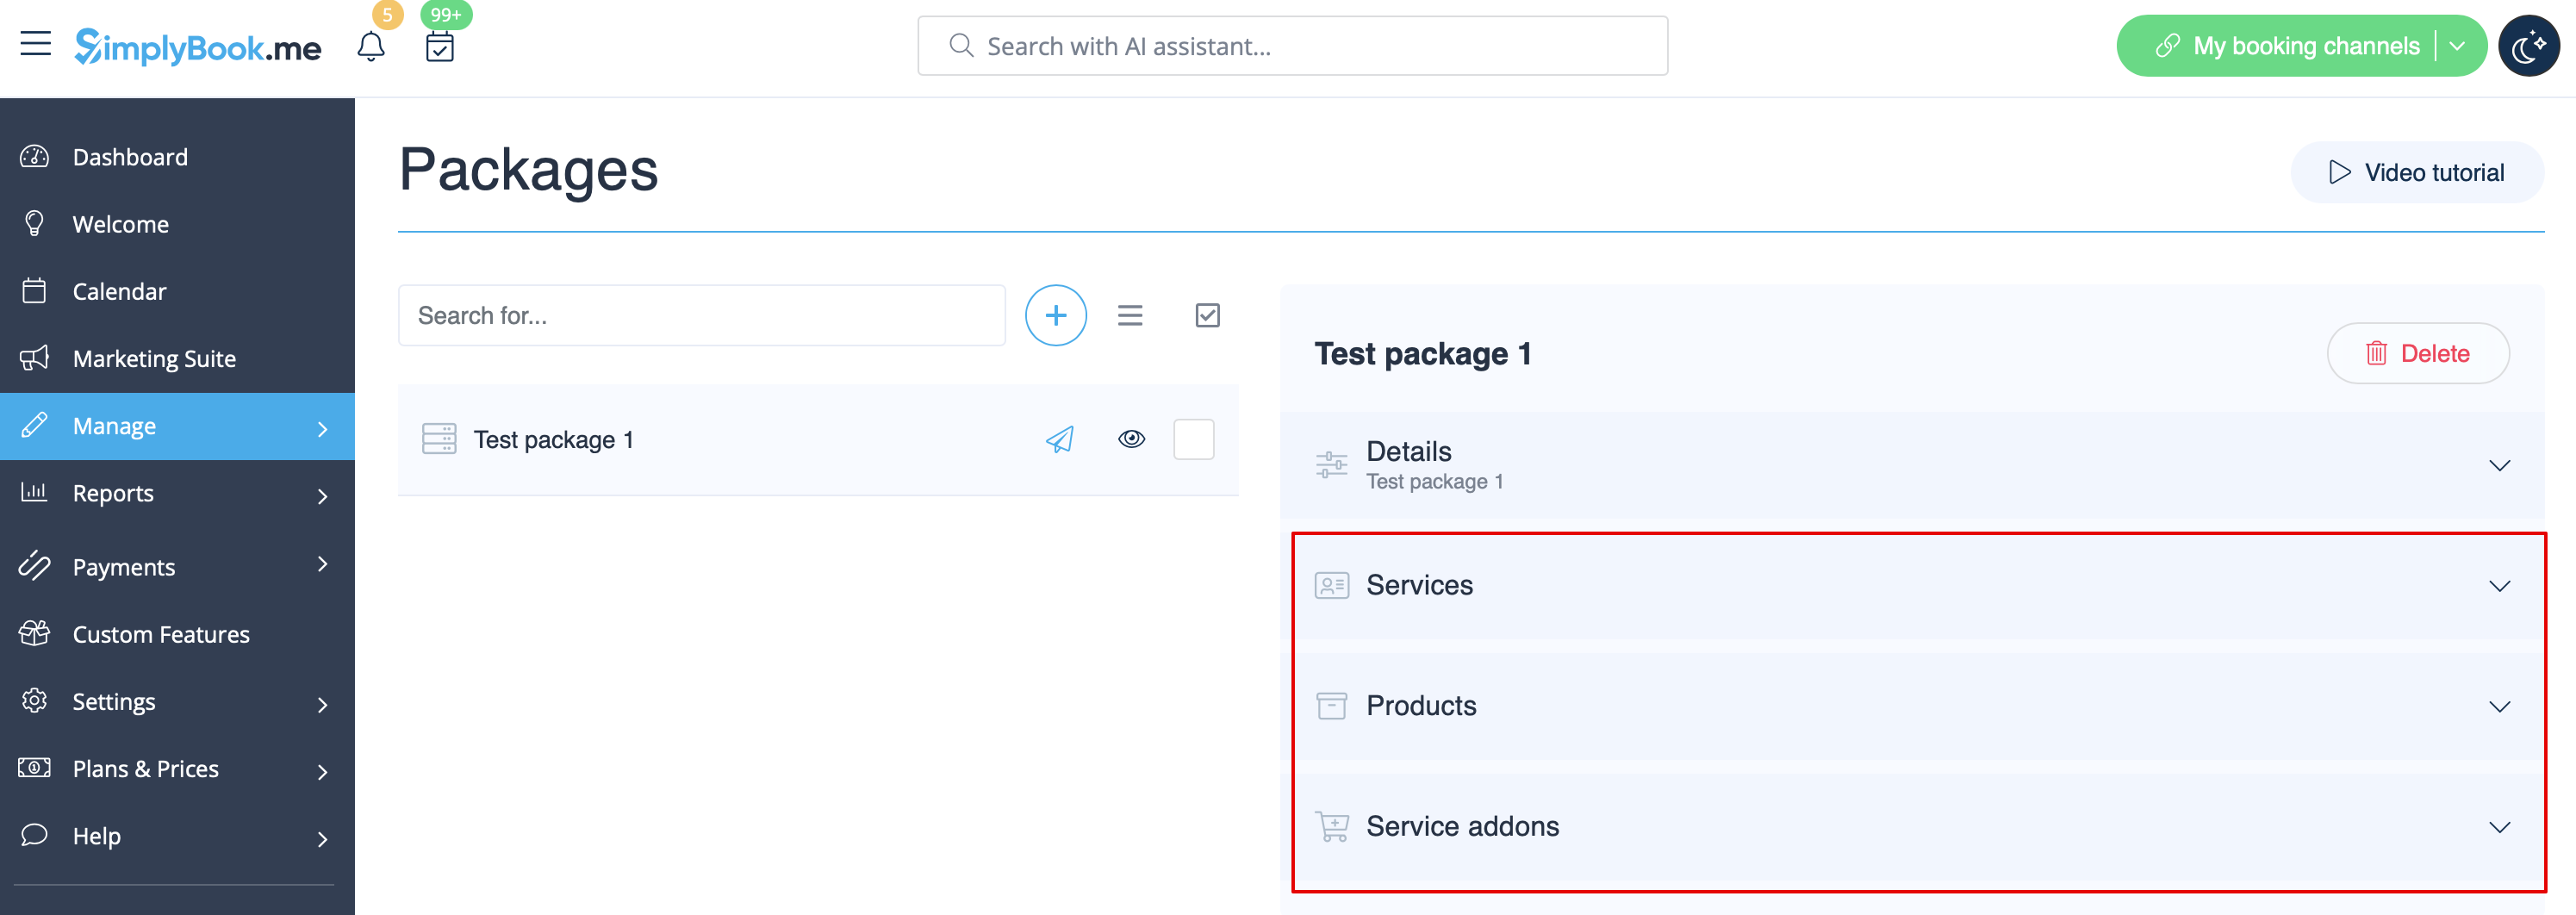
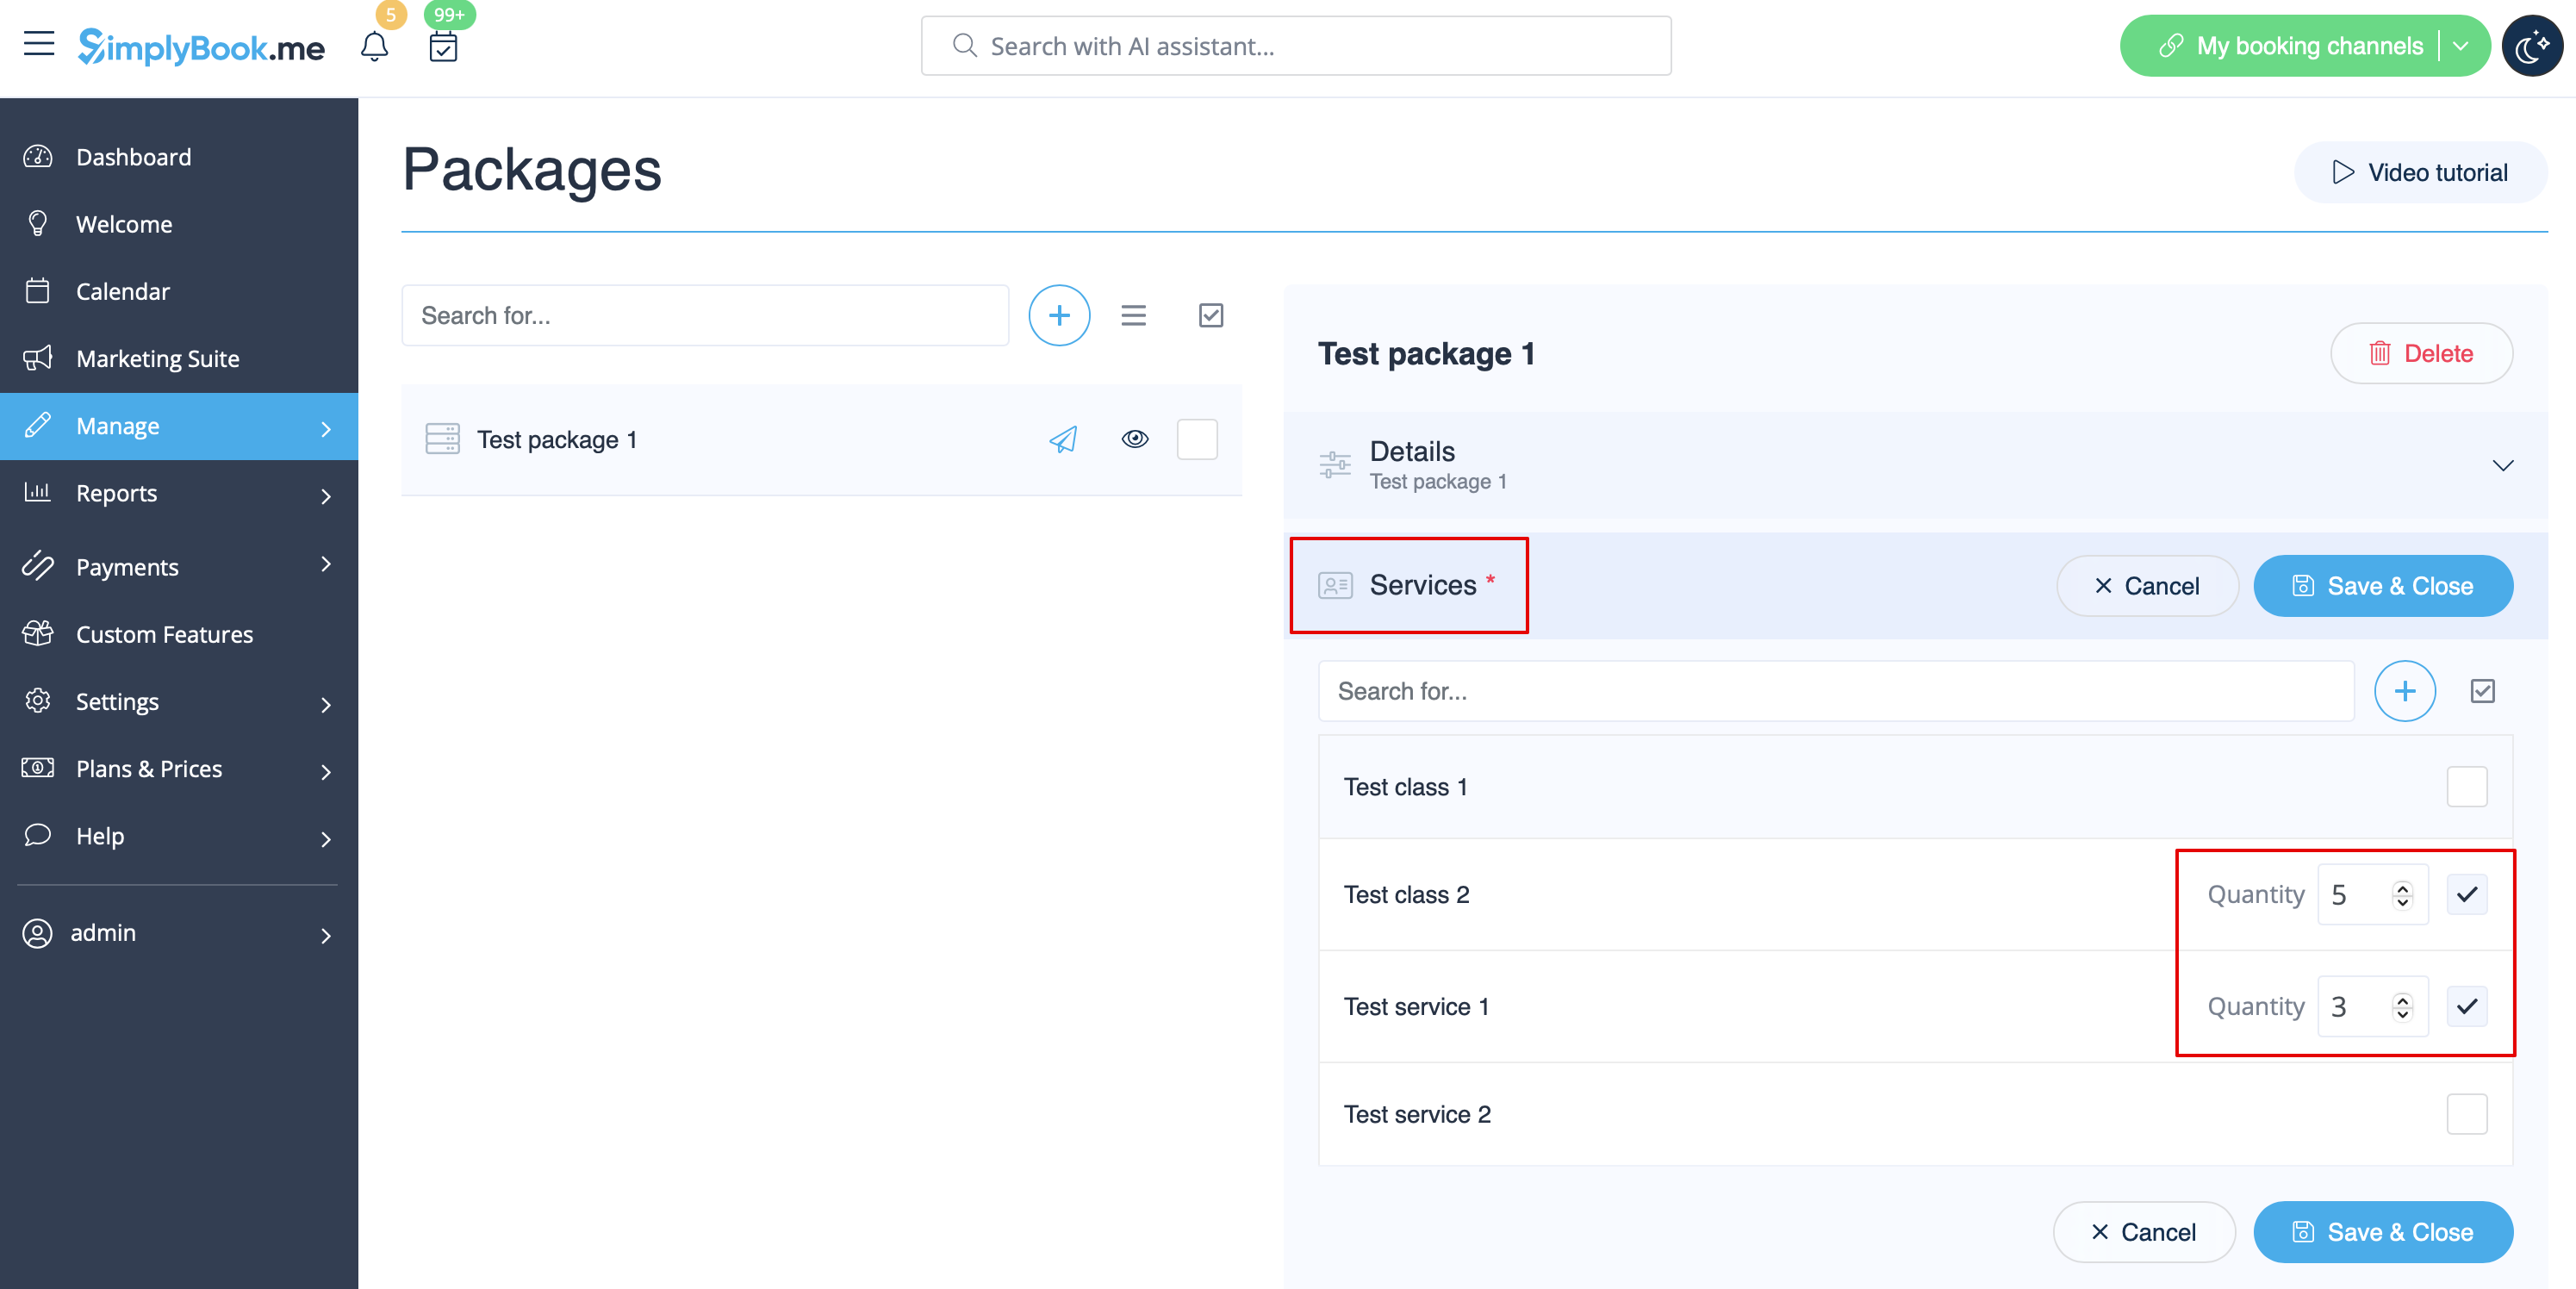
6. Fortsätt med att lägga till tjänster, produkter och tillägg till paketet
(du måste fortfarande ställa in dem utöver den allmänna begränsningen om du använder den för att inkludera önskade artiklar i paketet, annars kommer det inte att vara möjligt att använda paketet under bokningsprocessen för tjänsten/klassen).
Du kommer att se tre motsvarande avsnitt nedan.
7. Välj avsnittet "Tjänster", markera rutorna med nödvändiga artiklar och ange den kvantitet som kommer att vara tillgänglig för bokning inom paketet.
8. Om du använder funktionerna Produkter till salu och/eller Tilläggstjänster väljer du bara motsvarande flikar och lägger till element på samma sätt.
9. När du har lagt till alla alternativ och om du ännu inte har angett ett paketpris går du tillbaka till fliken "Detaljer" och använder knappen "Beräkna pris" så att systemet automatiskt summerar alla elementpriser åt dig.
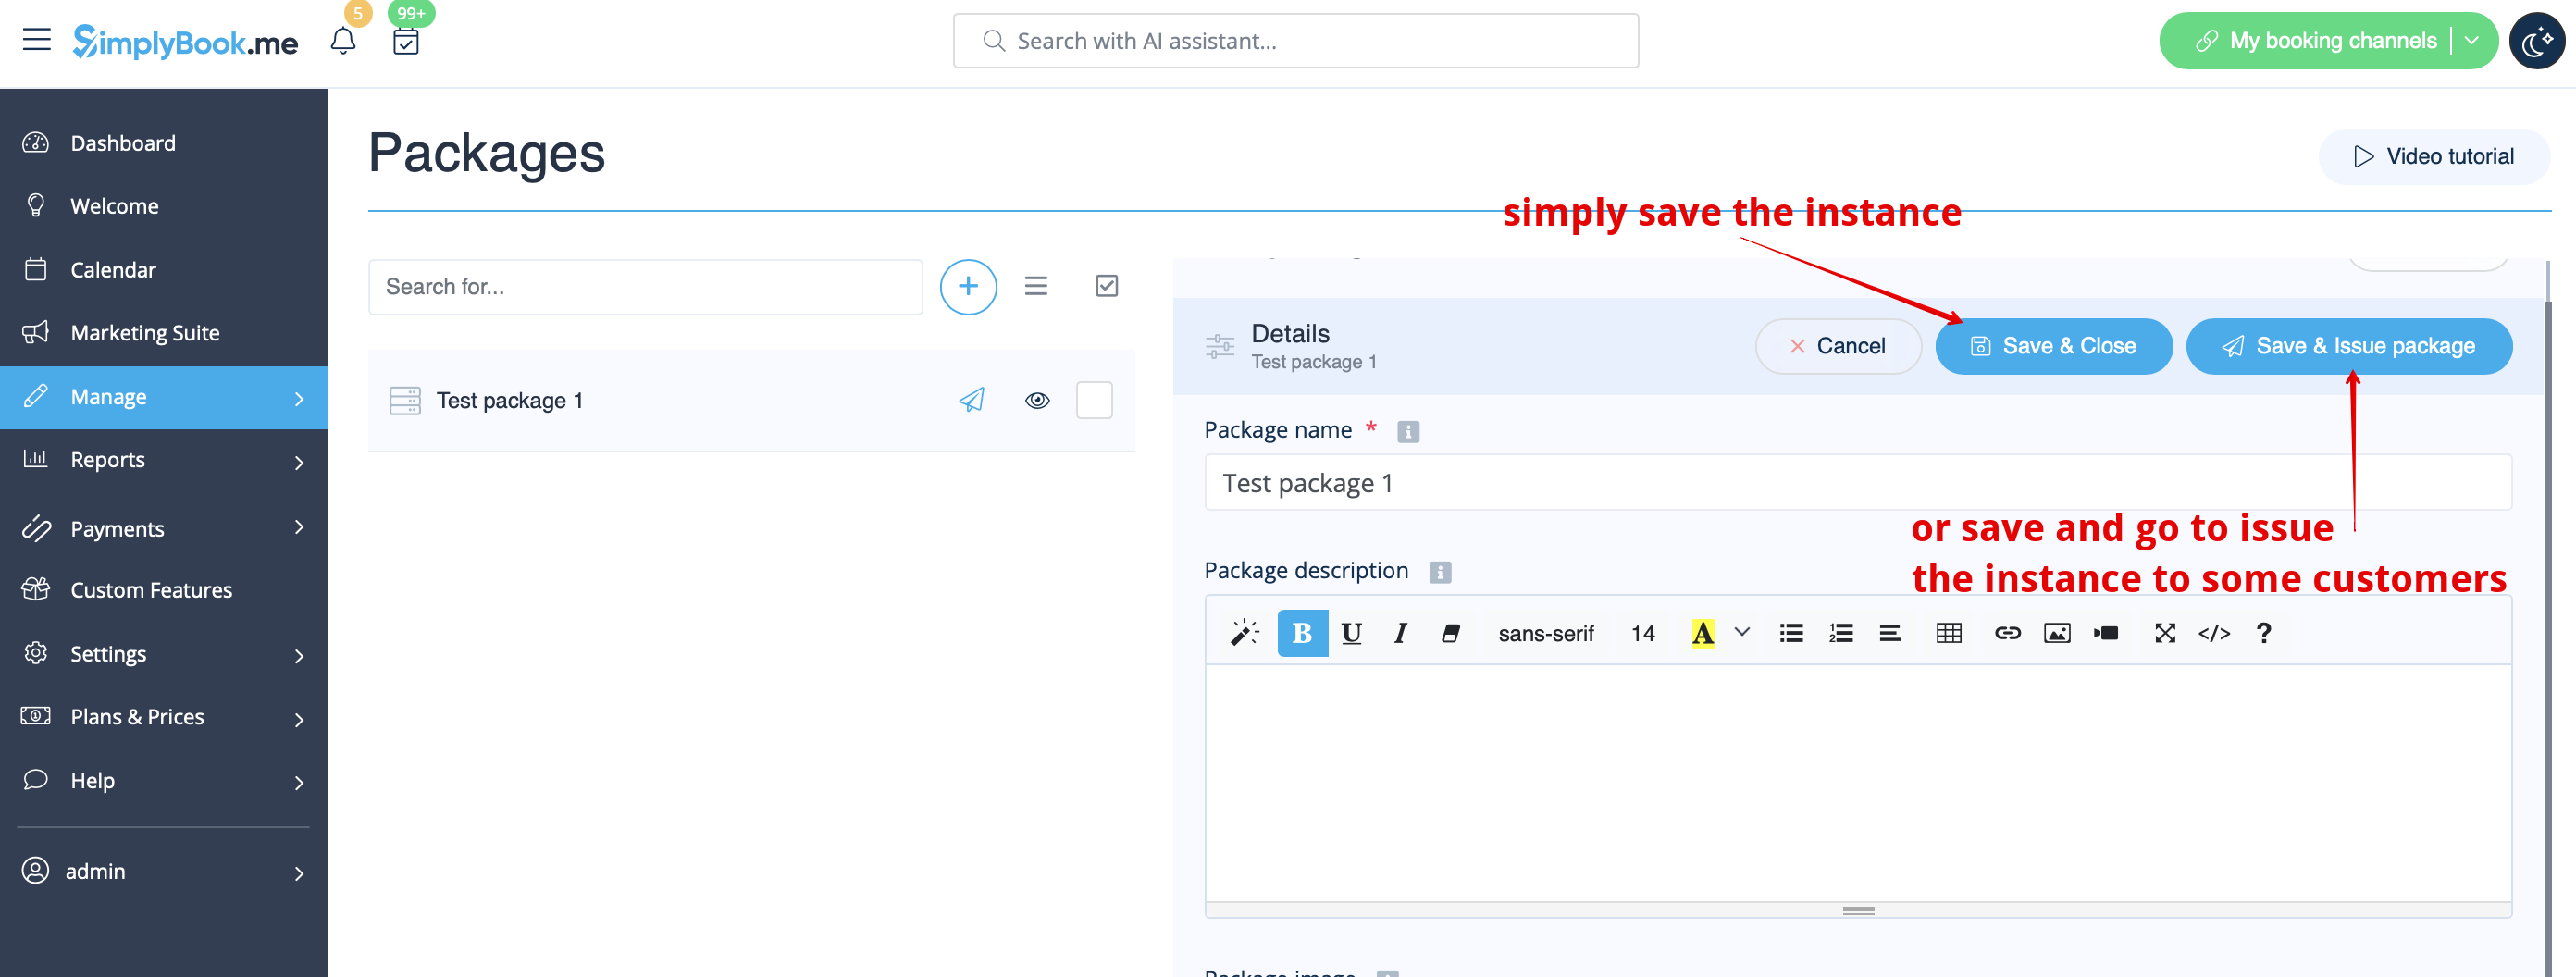
10. Nu kan du klicka på "Spara och utfärda paket" för att utfärda det till vissa kunder eller helt enkelt spara allt och låta dina kunder köpa detta paket på din bokningssida.
Om du tilldelar ett paket från administratörssidan eller om kunden köper ett paket på bokningssidan kommer han/hon att få ett meddelande om att paketet har aktiverats.
Fakturan skickas endast om köpet och betalningen har gjorts från kundens sida.
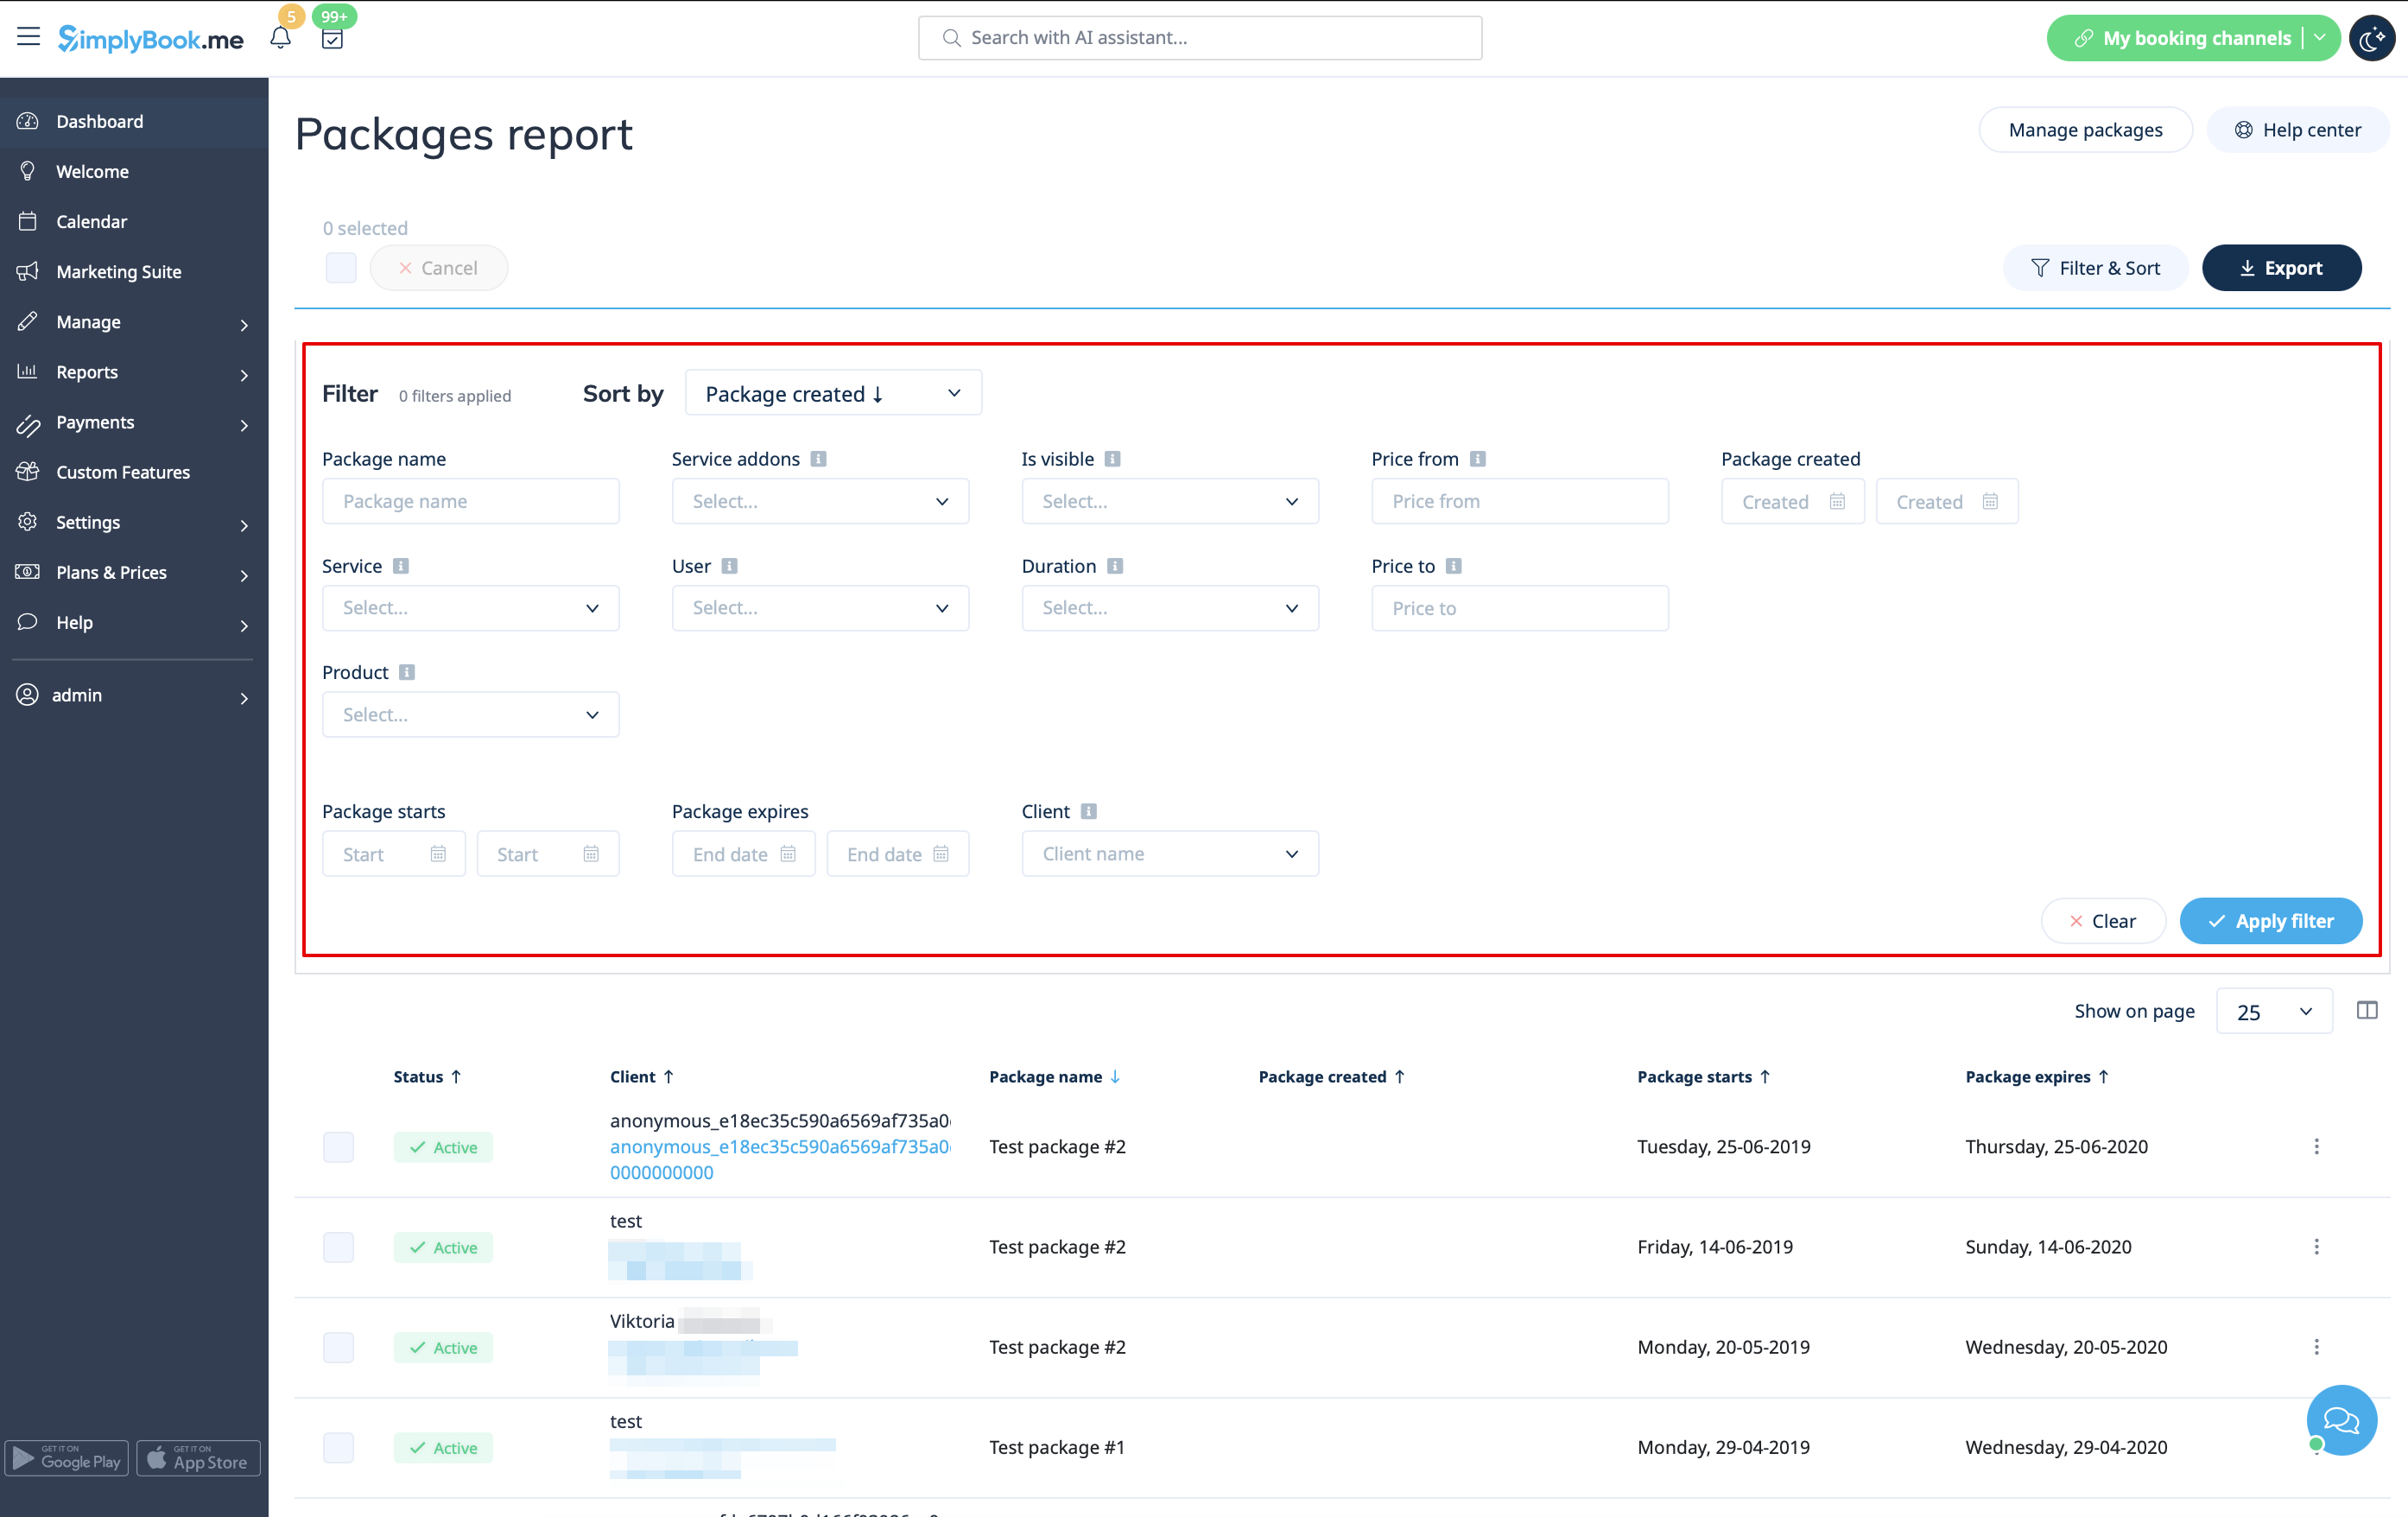
11. Gå till Rapporter//Utfärdade paket för att kontrollera paketens orderhistorik, kunddata samt antalet återstående artiklar.
Använd filter för mer omfattande analys.
Här kan du också avbryta paketet för en specifik kund om det behövs.