From SimplyBook.me
Importing a new version from external source |
Importing a new version from external source Tags: Mobile edit Mobile web edit |
||
| Line 1: | Line 1: | ||
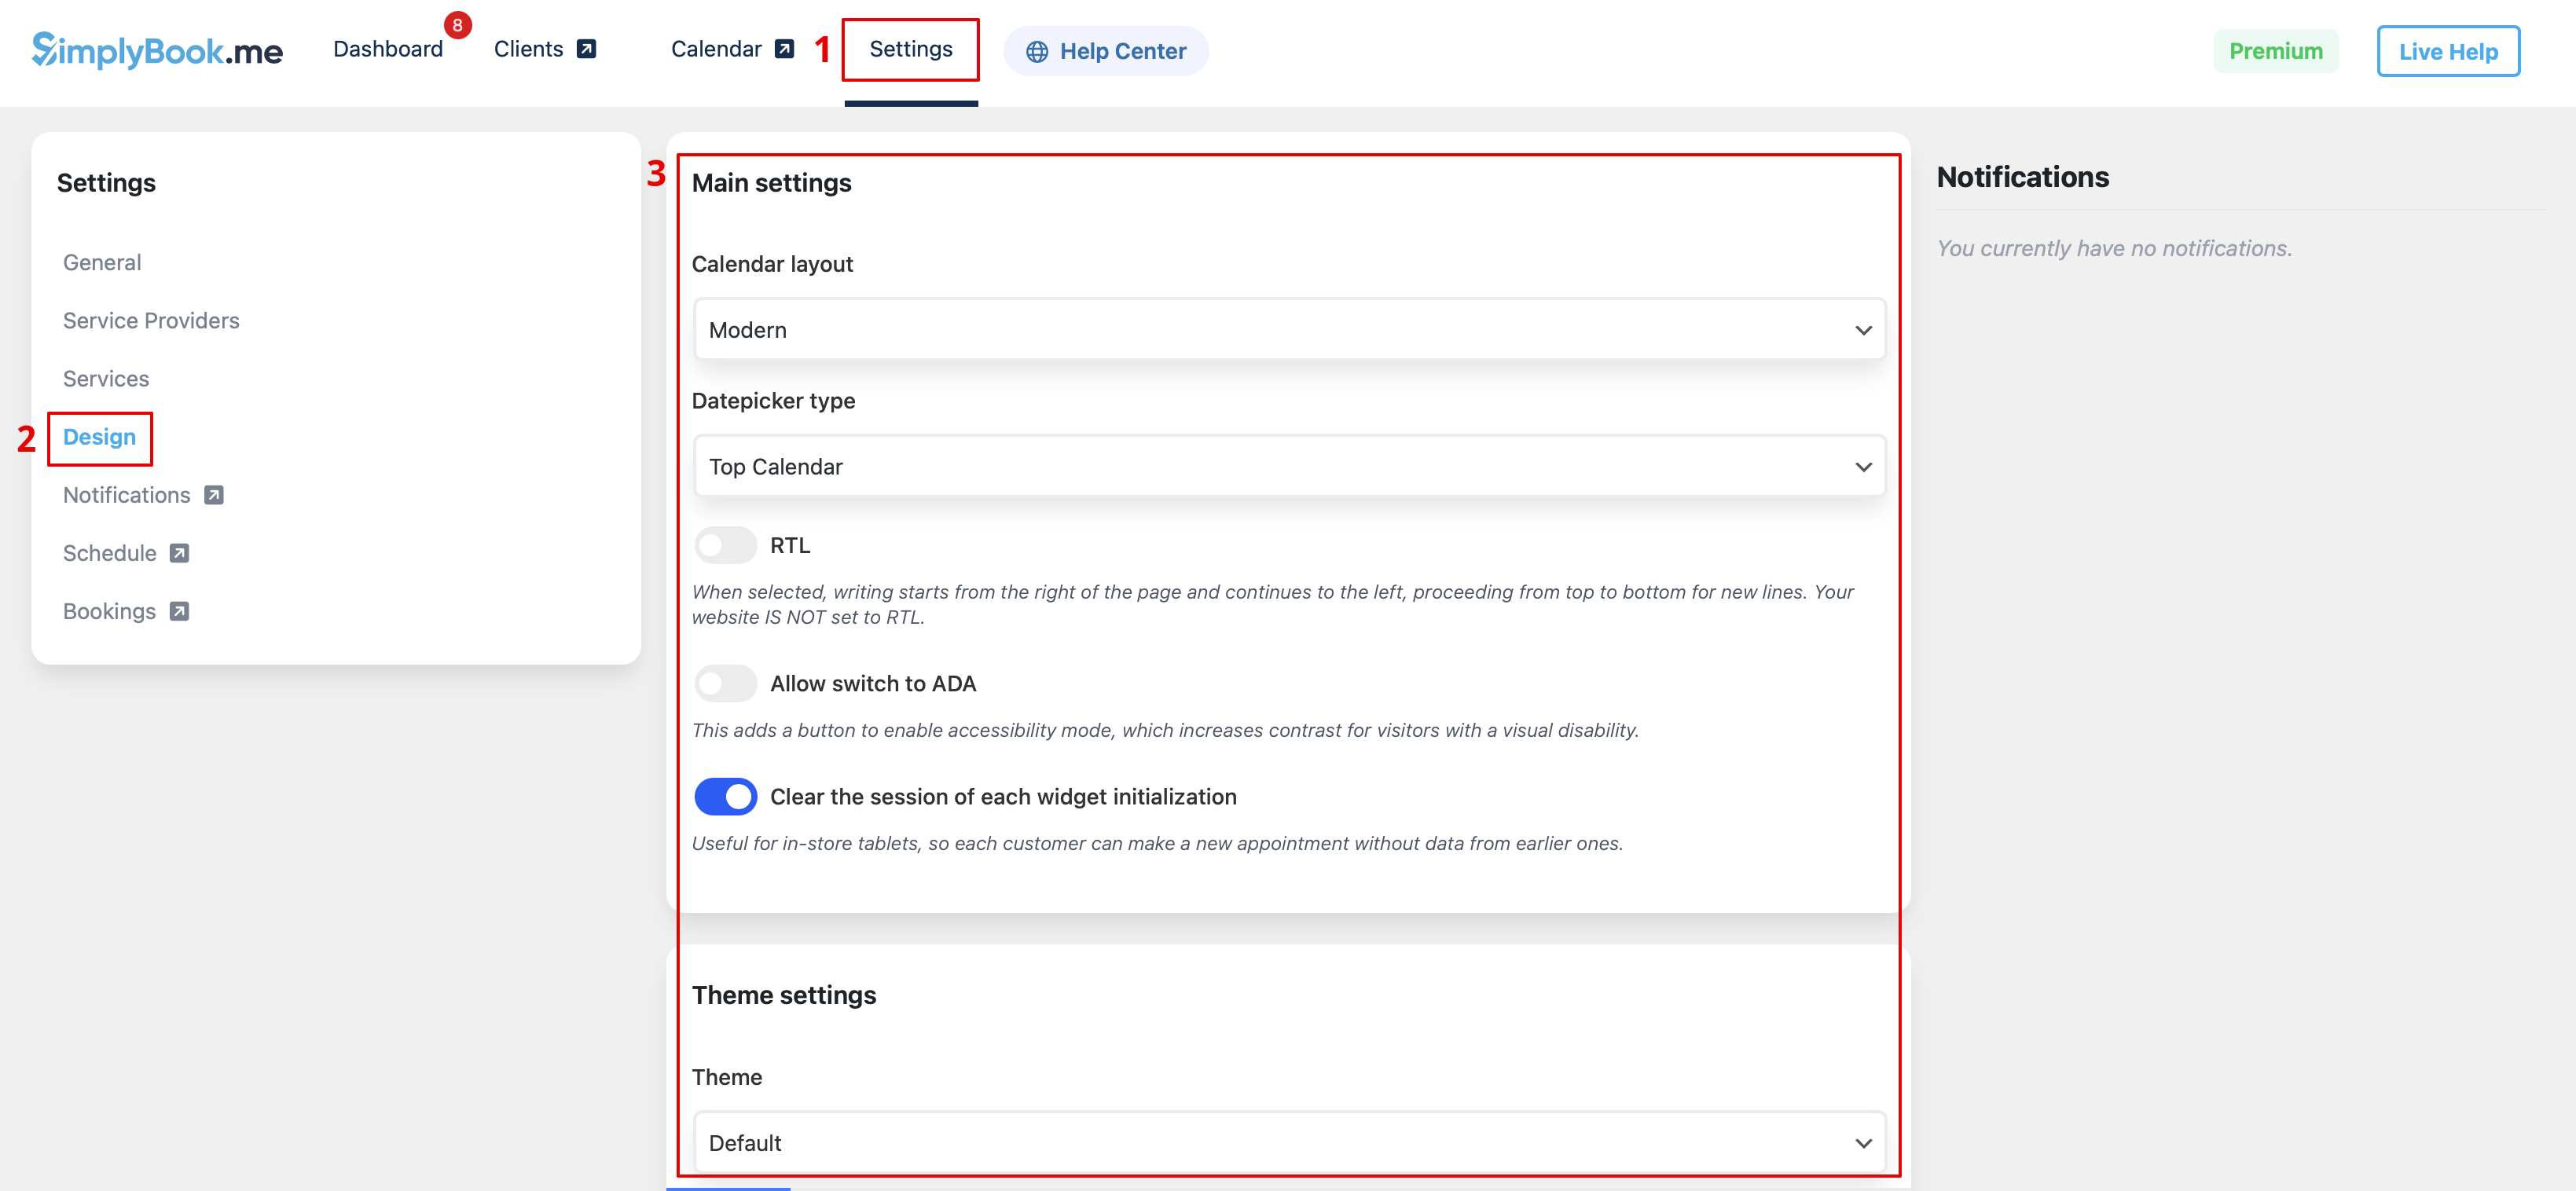
:6. Switch to | :6. Switch to <span style="background-color:#d4f8e5; padding:5px; border-radius:5px;">Design</span> tab.<br> | ||
:Adjust the look for your widget.<br> | |||
:You can select the | :You can select the preferable calendar layout, adjust the colors and much more. | ||
[[File:Wp new design settings path.png|1200px|center|link=https://help.simplybook.me/images/b/ba/Wp_new_design_settings_path.png]] | |||
[[File: | |||
<br><br> | <br><br> | ||
:7. Save your settings and navigate to <span style="background-color:#d4f8e5; padding:5px; border-radius:5px;"> | :7. Save your settings and navigate to <span style="background-color:#d4f8e5; padding:5px; border-radius:5px;">Pages</span> tab of the WordPress interface.<br> | ||
[[File: | :Open the page you would like to add the booking functionality to or add a new one. | ||
:Click on "+" button there and look for '''Simplybook''' option. Click on it to add to the page. Save the page. | |||
:After the website is published the clients will be able to book your services. | |||
[[File:Wp new add plugin to page.png|1200px|center|link=https://help.simplybook.me/images/7/7e/Wp_new_add_plugin_to_page.png]] | |||
<br><br> | <br><br> | ||
Latest revision as of 12:54, 17 October 2025
- 6. Switch to Design tab.
- Adjust the look for your widget.
- You can select the preferable calendar layout, adjust the colors and much more.
- 7. Save your settings and navigate to Pages tab of the WordPress interface.
- Open the page you would like to add the booking functionality to or add a new one.
- Click on "+" button there and look for Simplybook option. Click on it to add to the page. Save the page.
- After the website is published the clients will be able to book your services.
