From SimplyBook.me
Importing a new version from external source |
Importing a new version from external source |
||
| Line 5: | Line 5: | ||
[[File:Select trigger sbm.png |border|center]] | [[File:Select trigger sbm.png |border|center]] | ||
<br><br> | <br><br> | ||
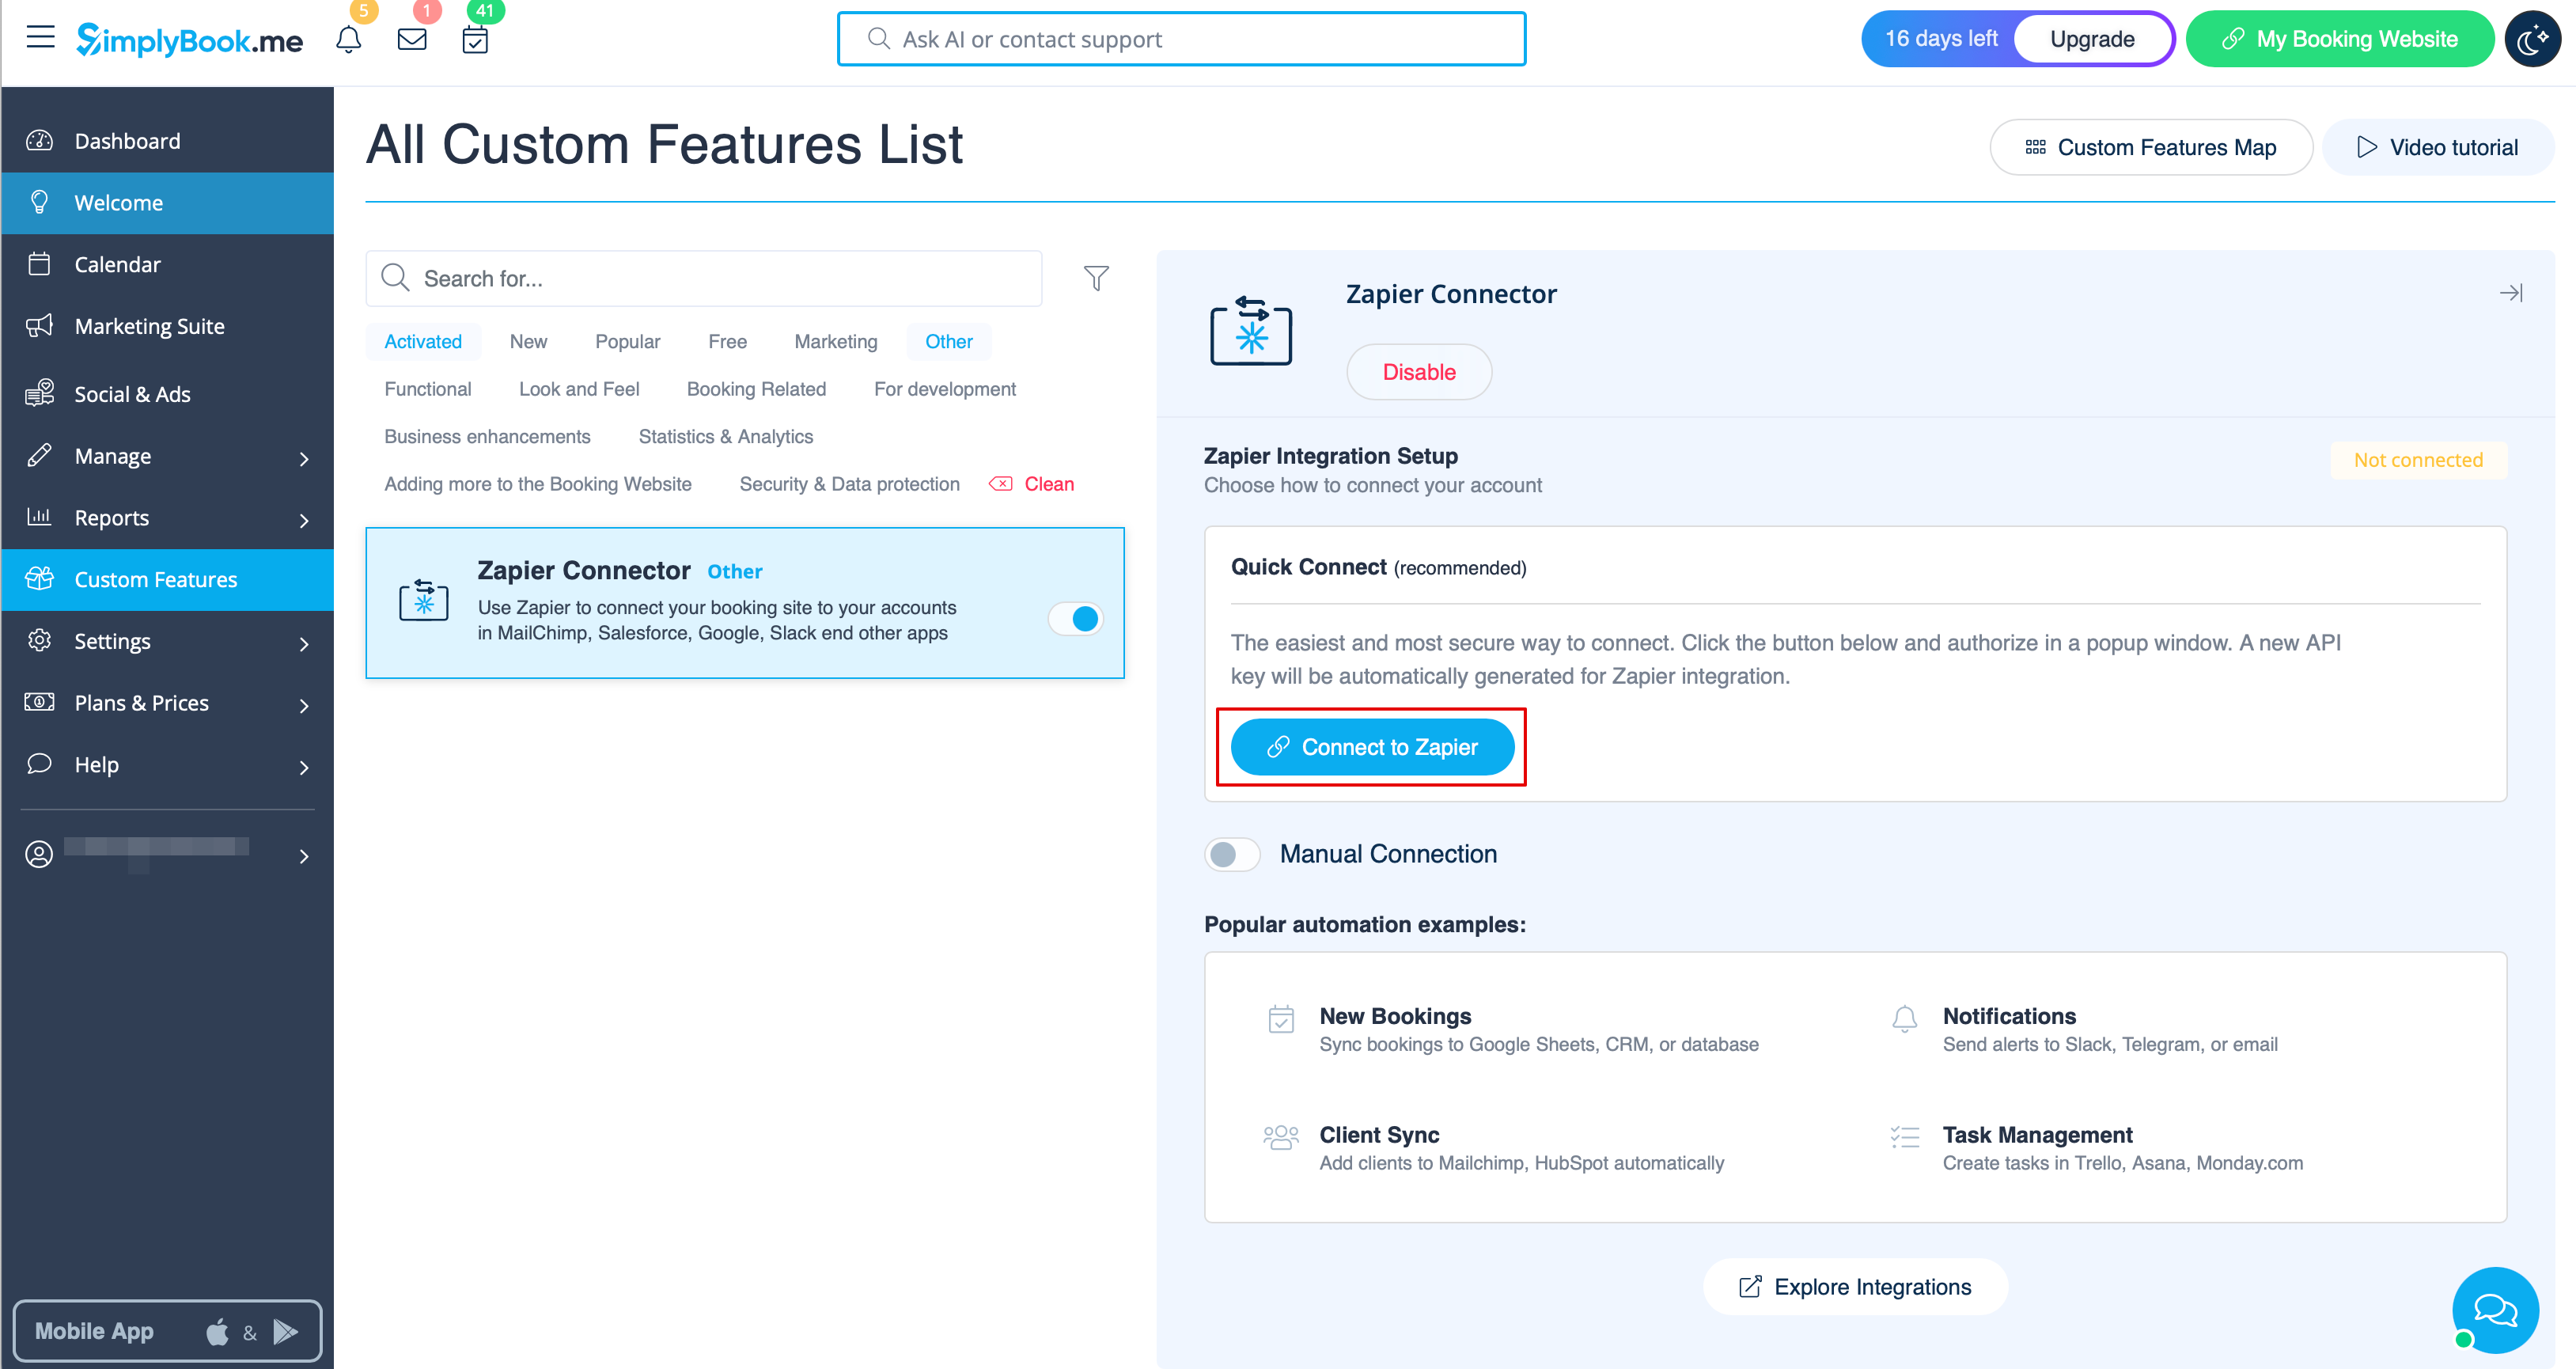
:6. | :6. Enable '''Zapier Connector''' custom feature on your custom features page.<br> | ||
[[File: | Connect to your Zapier account using the ‘’’Quick connect’’’ option there. | ||
[[File:Quick connect zapier.png|1200px|border | center|link=https://help.simplybook.me/images/8/84/Quick_connect_zapier.png]] | |||
<br><br> | <br><br> | ||
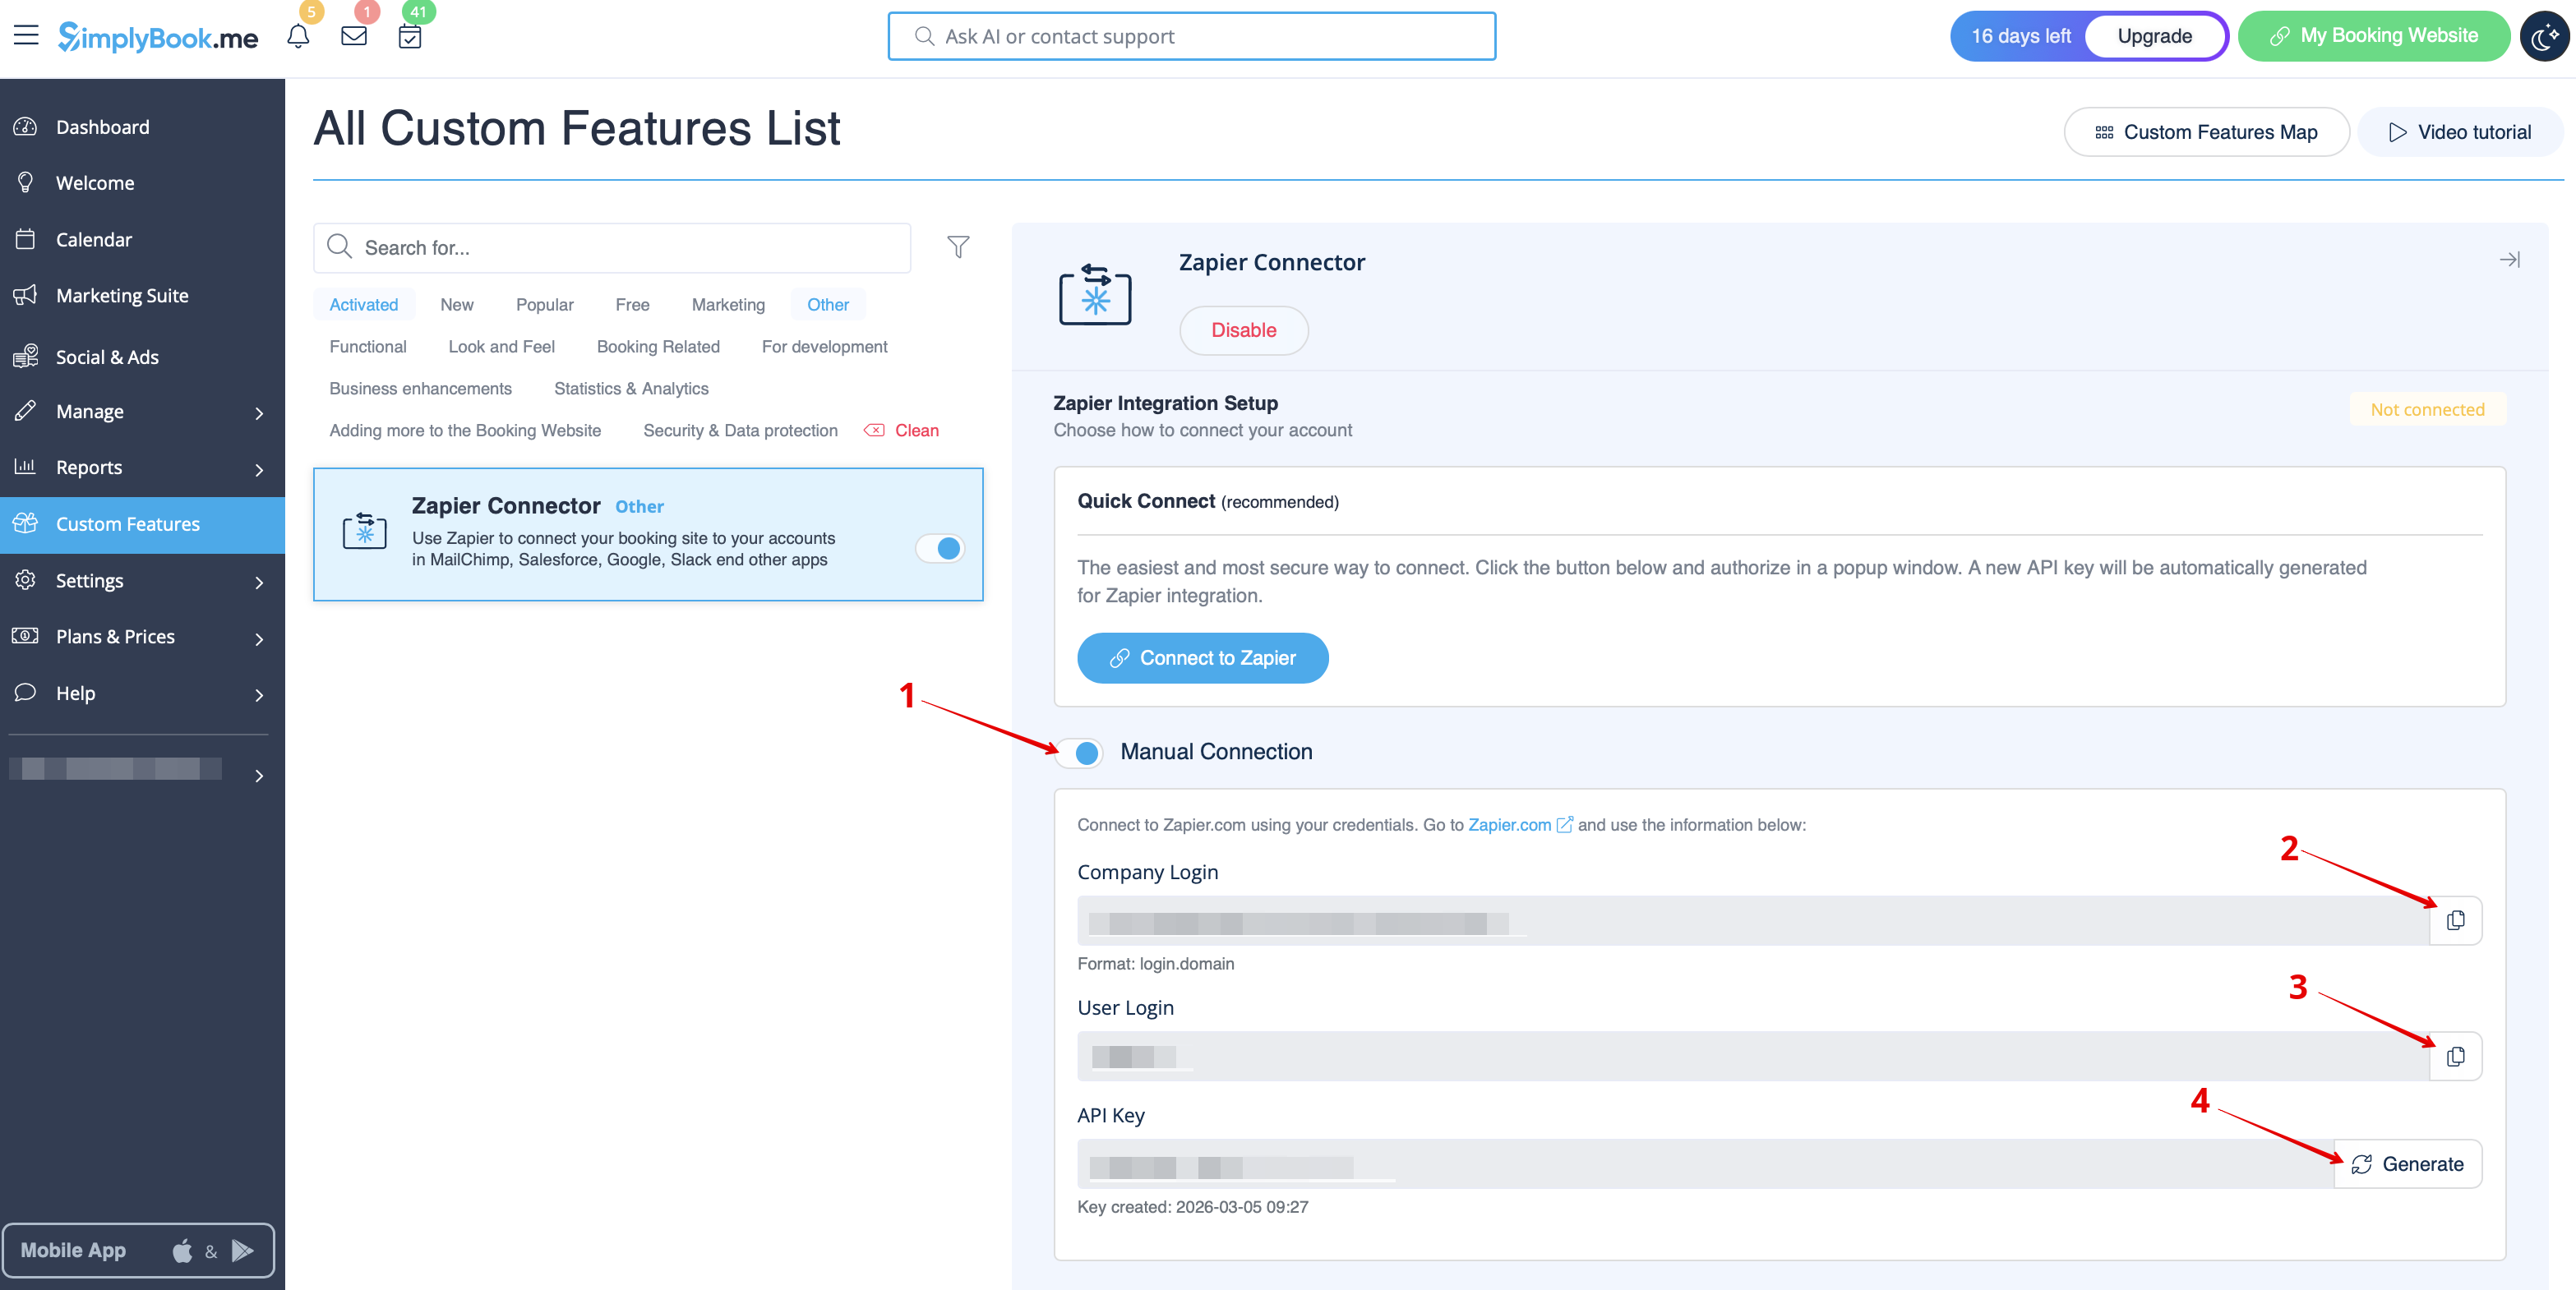
:7. | :7. Or you can choose a manual connection by credentials. | ||
[[File: | - Go to Zapier.com -> App connections page and click on “Add connection” button<br> | ||
[[File:Add connection zapeir side.png|1200px|border | center|link=https://help.simplybook.me/images/c/c2/Add_connection_zapeir_side.png]] | |||
<br><br> | |||
- Select SimplyBook.me<br> | |||
- Copy company login, user login, generate and copy API key from your SimpyBook.me account<br> | |||
[[File:Zapier manual connection new.png|1200px|border | center|link=https://help.simplybook.me/images/c/c3/Zapier_manual_connection_new.png]] | |||
<br><br> | |||
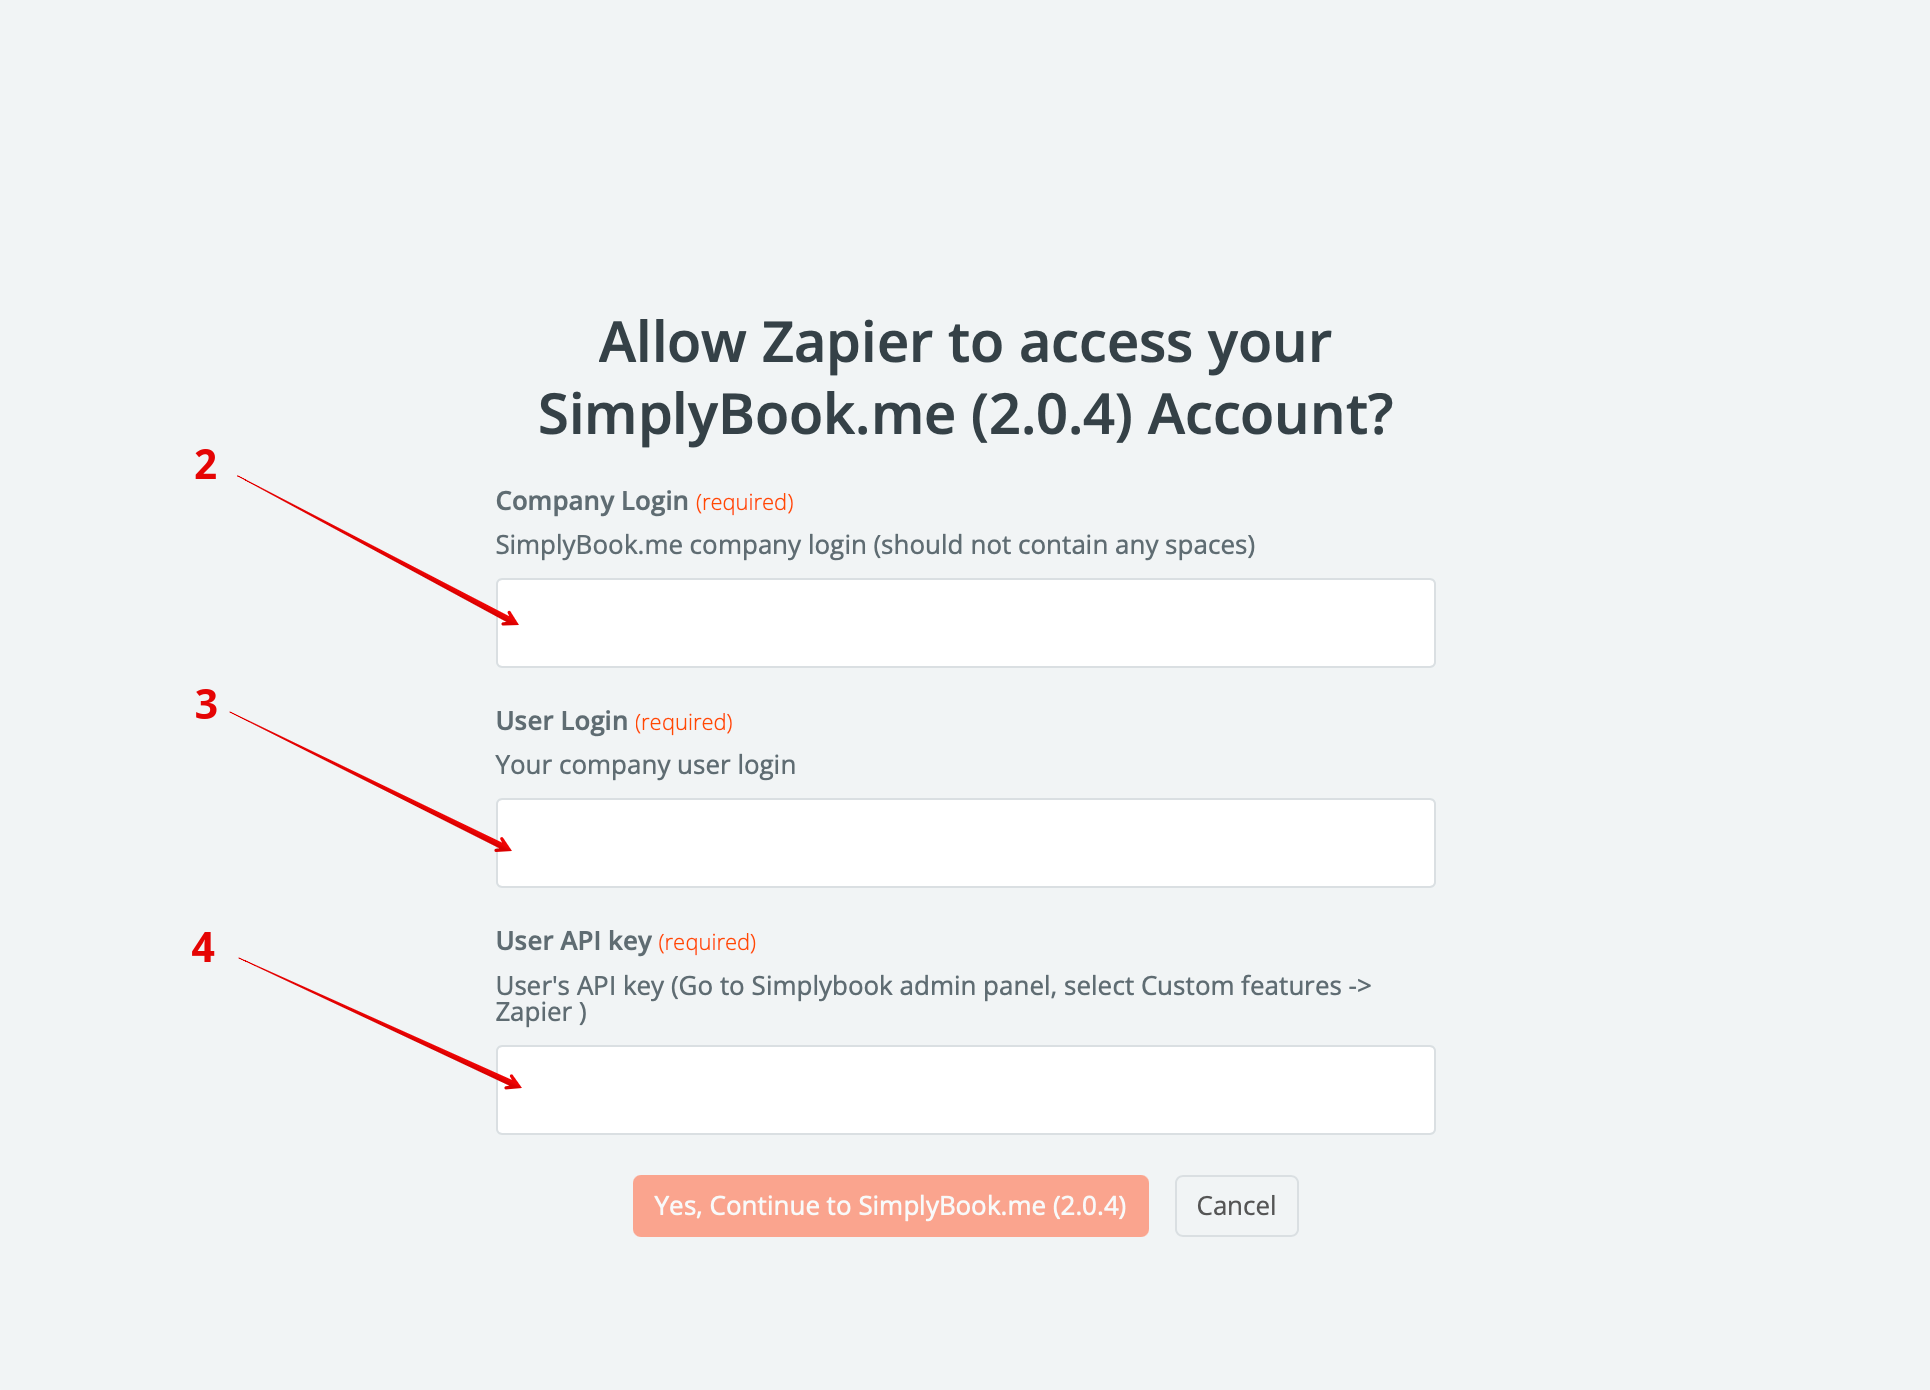
- Paste them to the corresponding fields on Zapier.com side and click on “Continue” option there. The account gets connected. | |||
[[File:Credentials on zapier side new.png|1200px|border | center|link=https://help.simplybook.me/images/e/e9/Credentials_on_zapier_side_new.png]] | |||
<br><br> | <br><br> | ||
:8. Now <span style="background-color:#d4f8e5; padding:5px; border-radius:5px;">select MailChimp as an action app</span> and select the action that will take place when the trigger works. | :8. Now <span style="background-color:#d4f8e5; padding:5px; border-radius:5px;">select MailChimp as an action app</span> and select the action that will take place when the trigger works. | ||
Latest revision as of 10:35, 16 March 2026
- 5. Next choose a trigger app - put SimplyBook in the searchbox to find and select it.


- 6. Enable Zapier Connector custom feature on your custom features page.
Connect to your Zapier account using the ‘’’Quick connect’’’ option there.
- 7. Or you can choose a manual connection by credentials.
- Go to Zapier.com -> App connections page and click on “Add connection” button

- Select SimplyBook.me
- Copy company login, user login, generate and copy API key from your SimpyBook.me account
- Paste them to the corresponding fields on Zapier.com side and click on “Continue” option there. The account gets connected.
- 8. Now select MailChimp as an action app and select the action that will take place when the trigger works.


- 9. Connect your MailChimp account.

- 10. Set the required fields depending on the action you have selected.

- 11. Confirm your choices and turn the Zap on.