From SimplyBook.me
Created page with ":5. <span style="background-color:#d4f8e5; padding:5px; border-radius:5px;">Choisissez</span> ensuite <span style="background-color:#d4f8e5; padding:5px; border-radius:5px;">une application déclencheuse</span>: saisissez « SimplyBook » dans la barre de recherche pour la trouver et sélectionnez-la. <br><br> border|center <br><br> border|center » <br><br> :6. Vous devez maintenant <span style="ba..." |
No edit summary |
||
| (One intermediate revision by the same user not shown) | |||
| Line 1: | Line 1: | ||
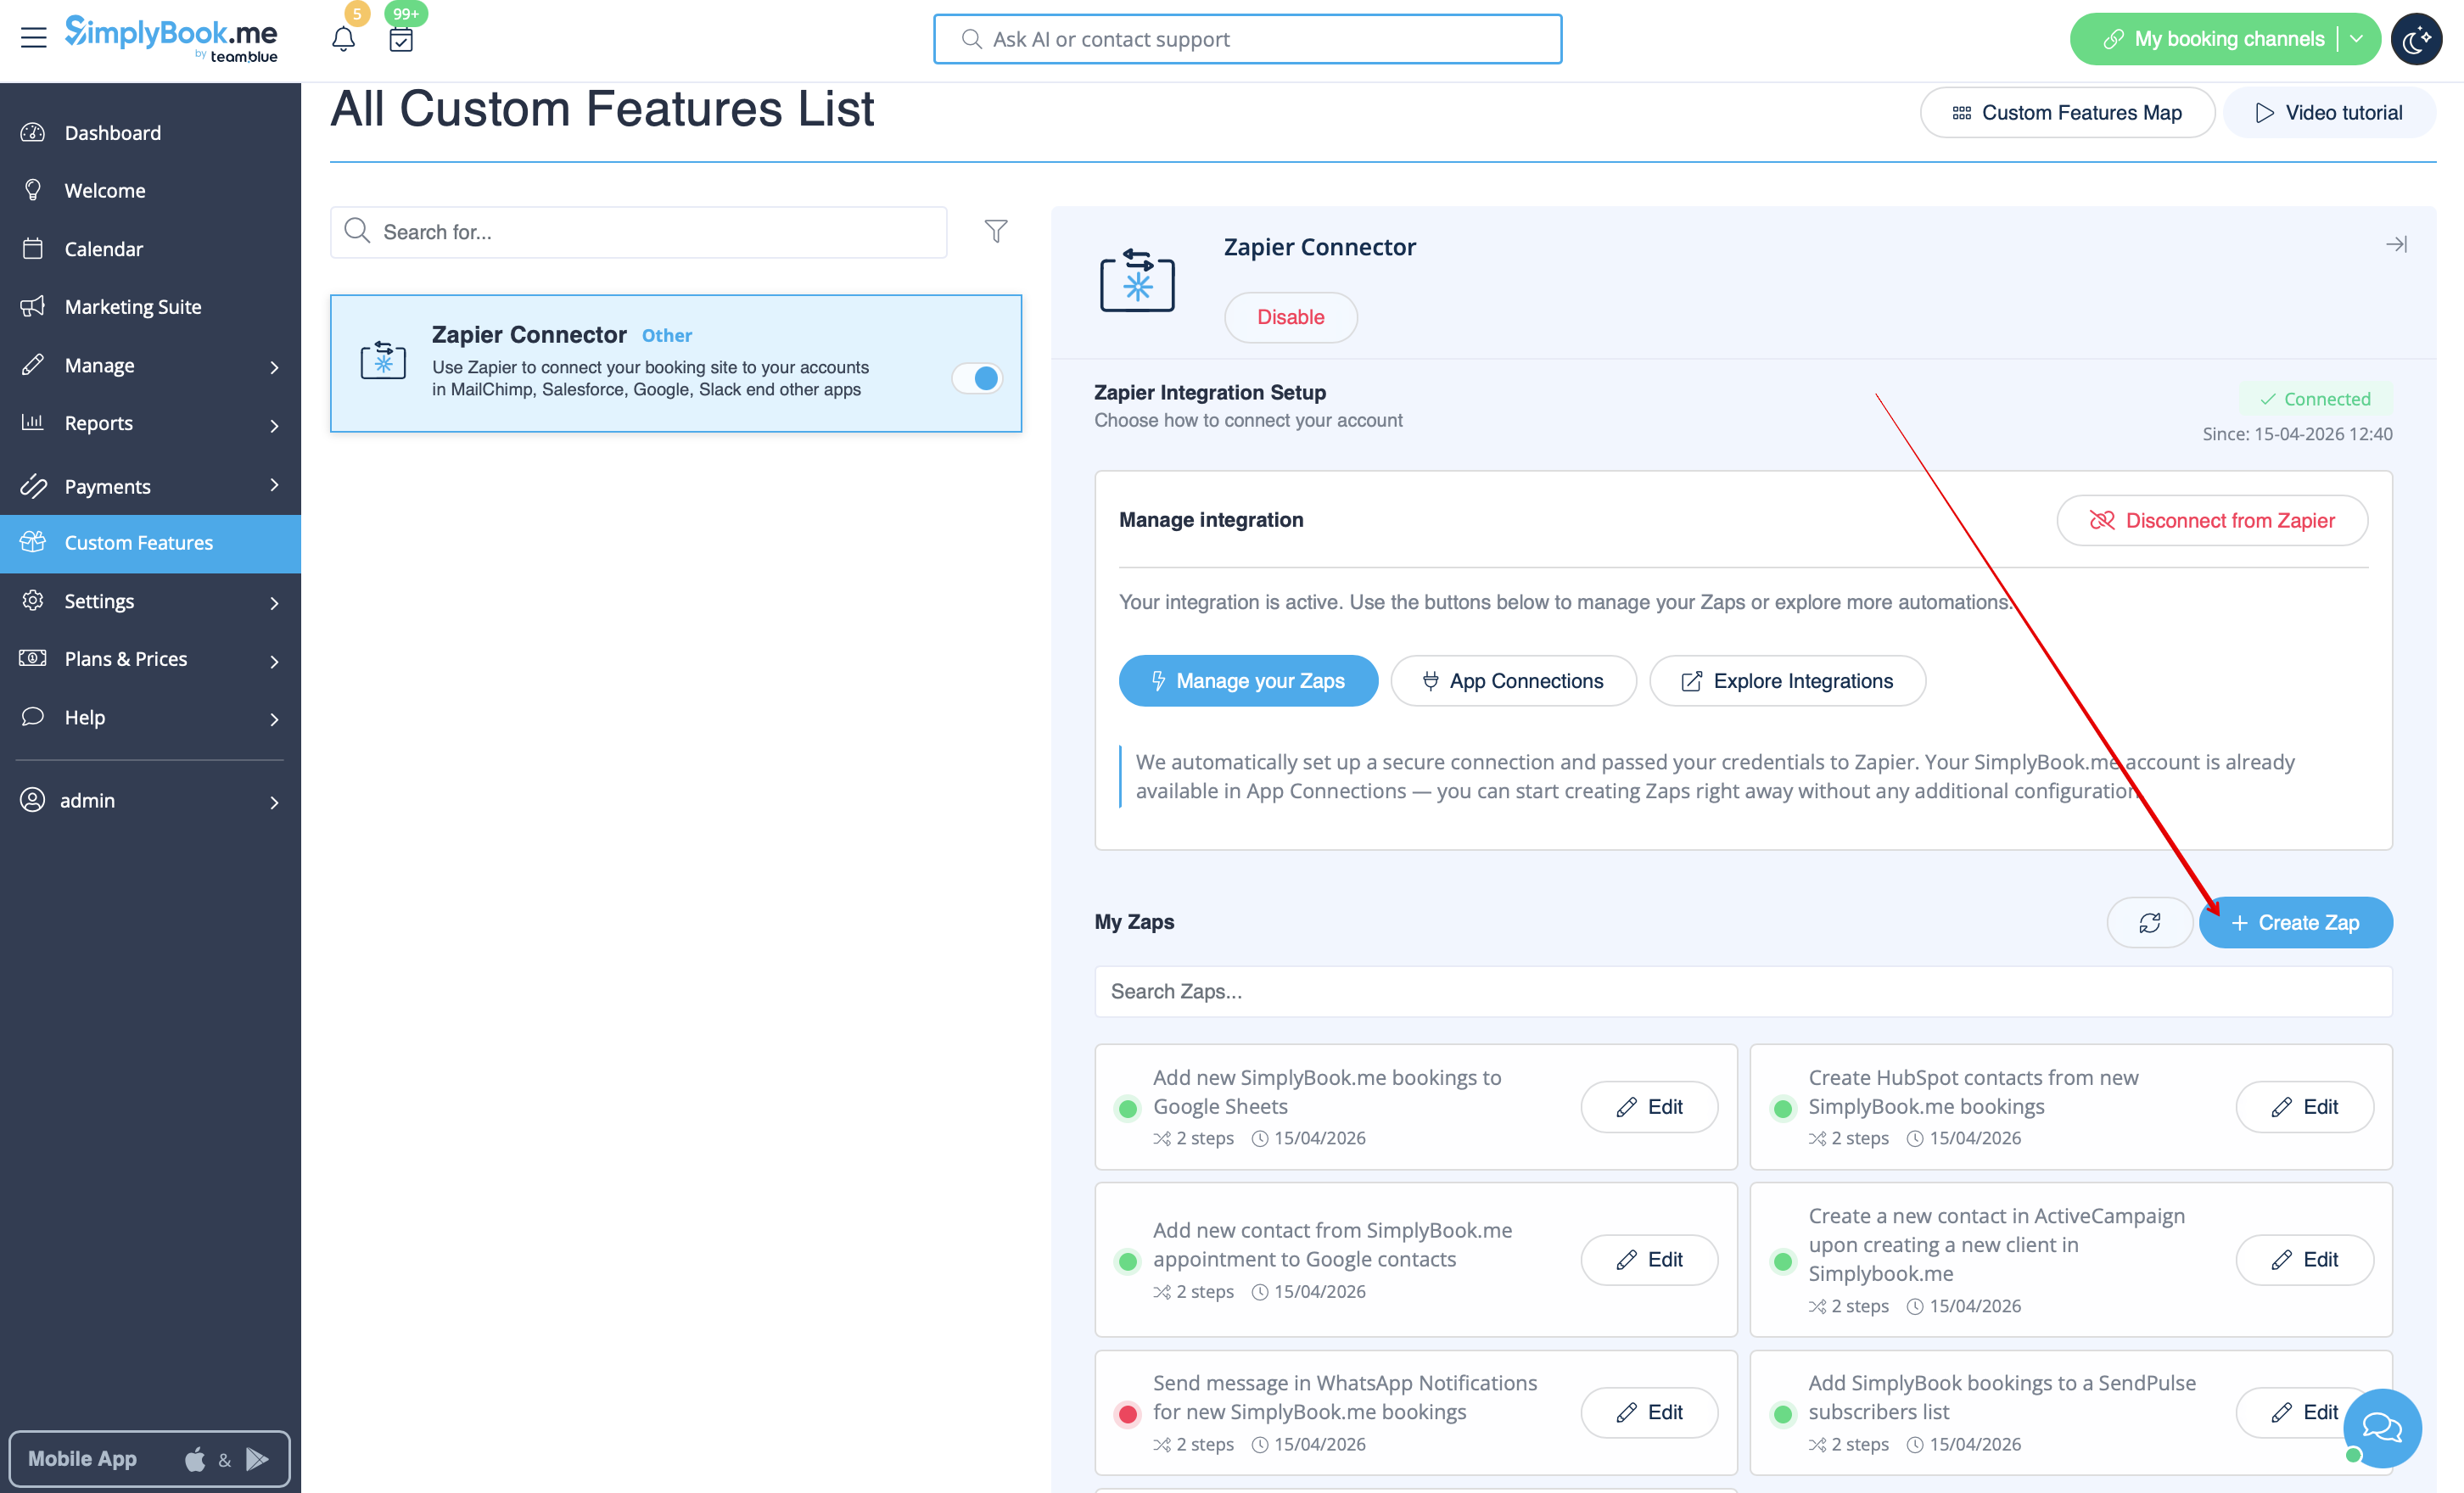
:5. | :5. Cliquez sur le bouton '''+ Créer un Zap'''. | ||
[[File:Create zap path.png|1200px|border | center|link=https://help.simplybook.me/images/2/24/Create_zap_path.png]] | |||
<br><br> | <br><br> | ||
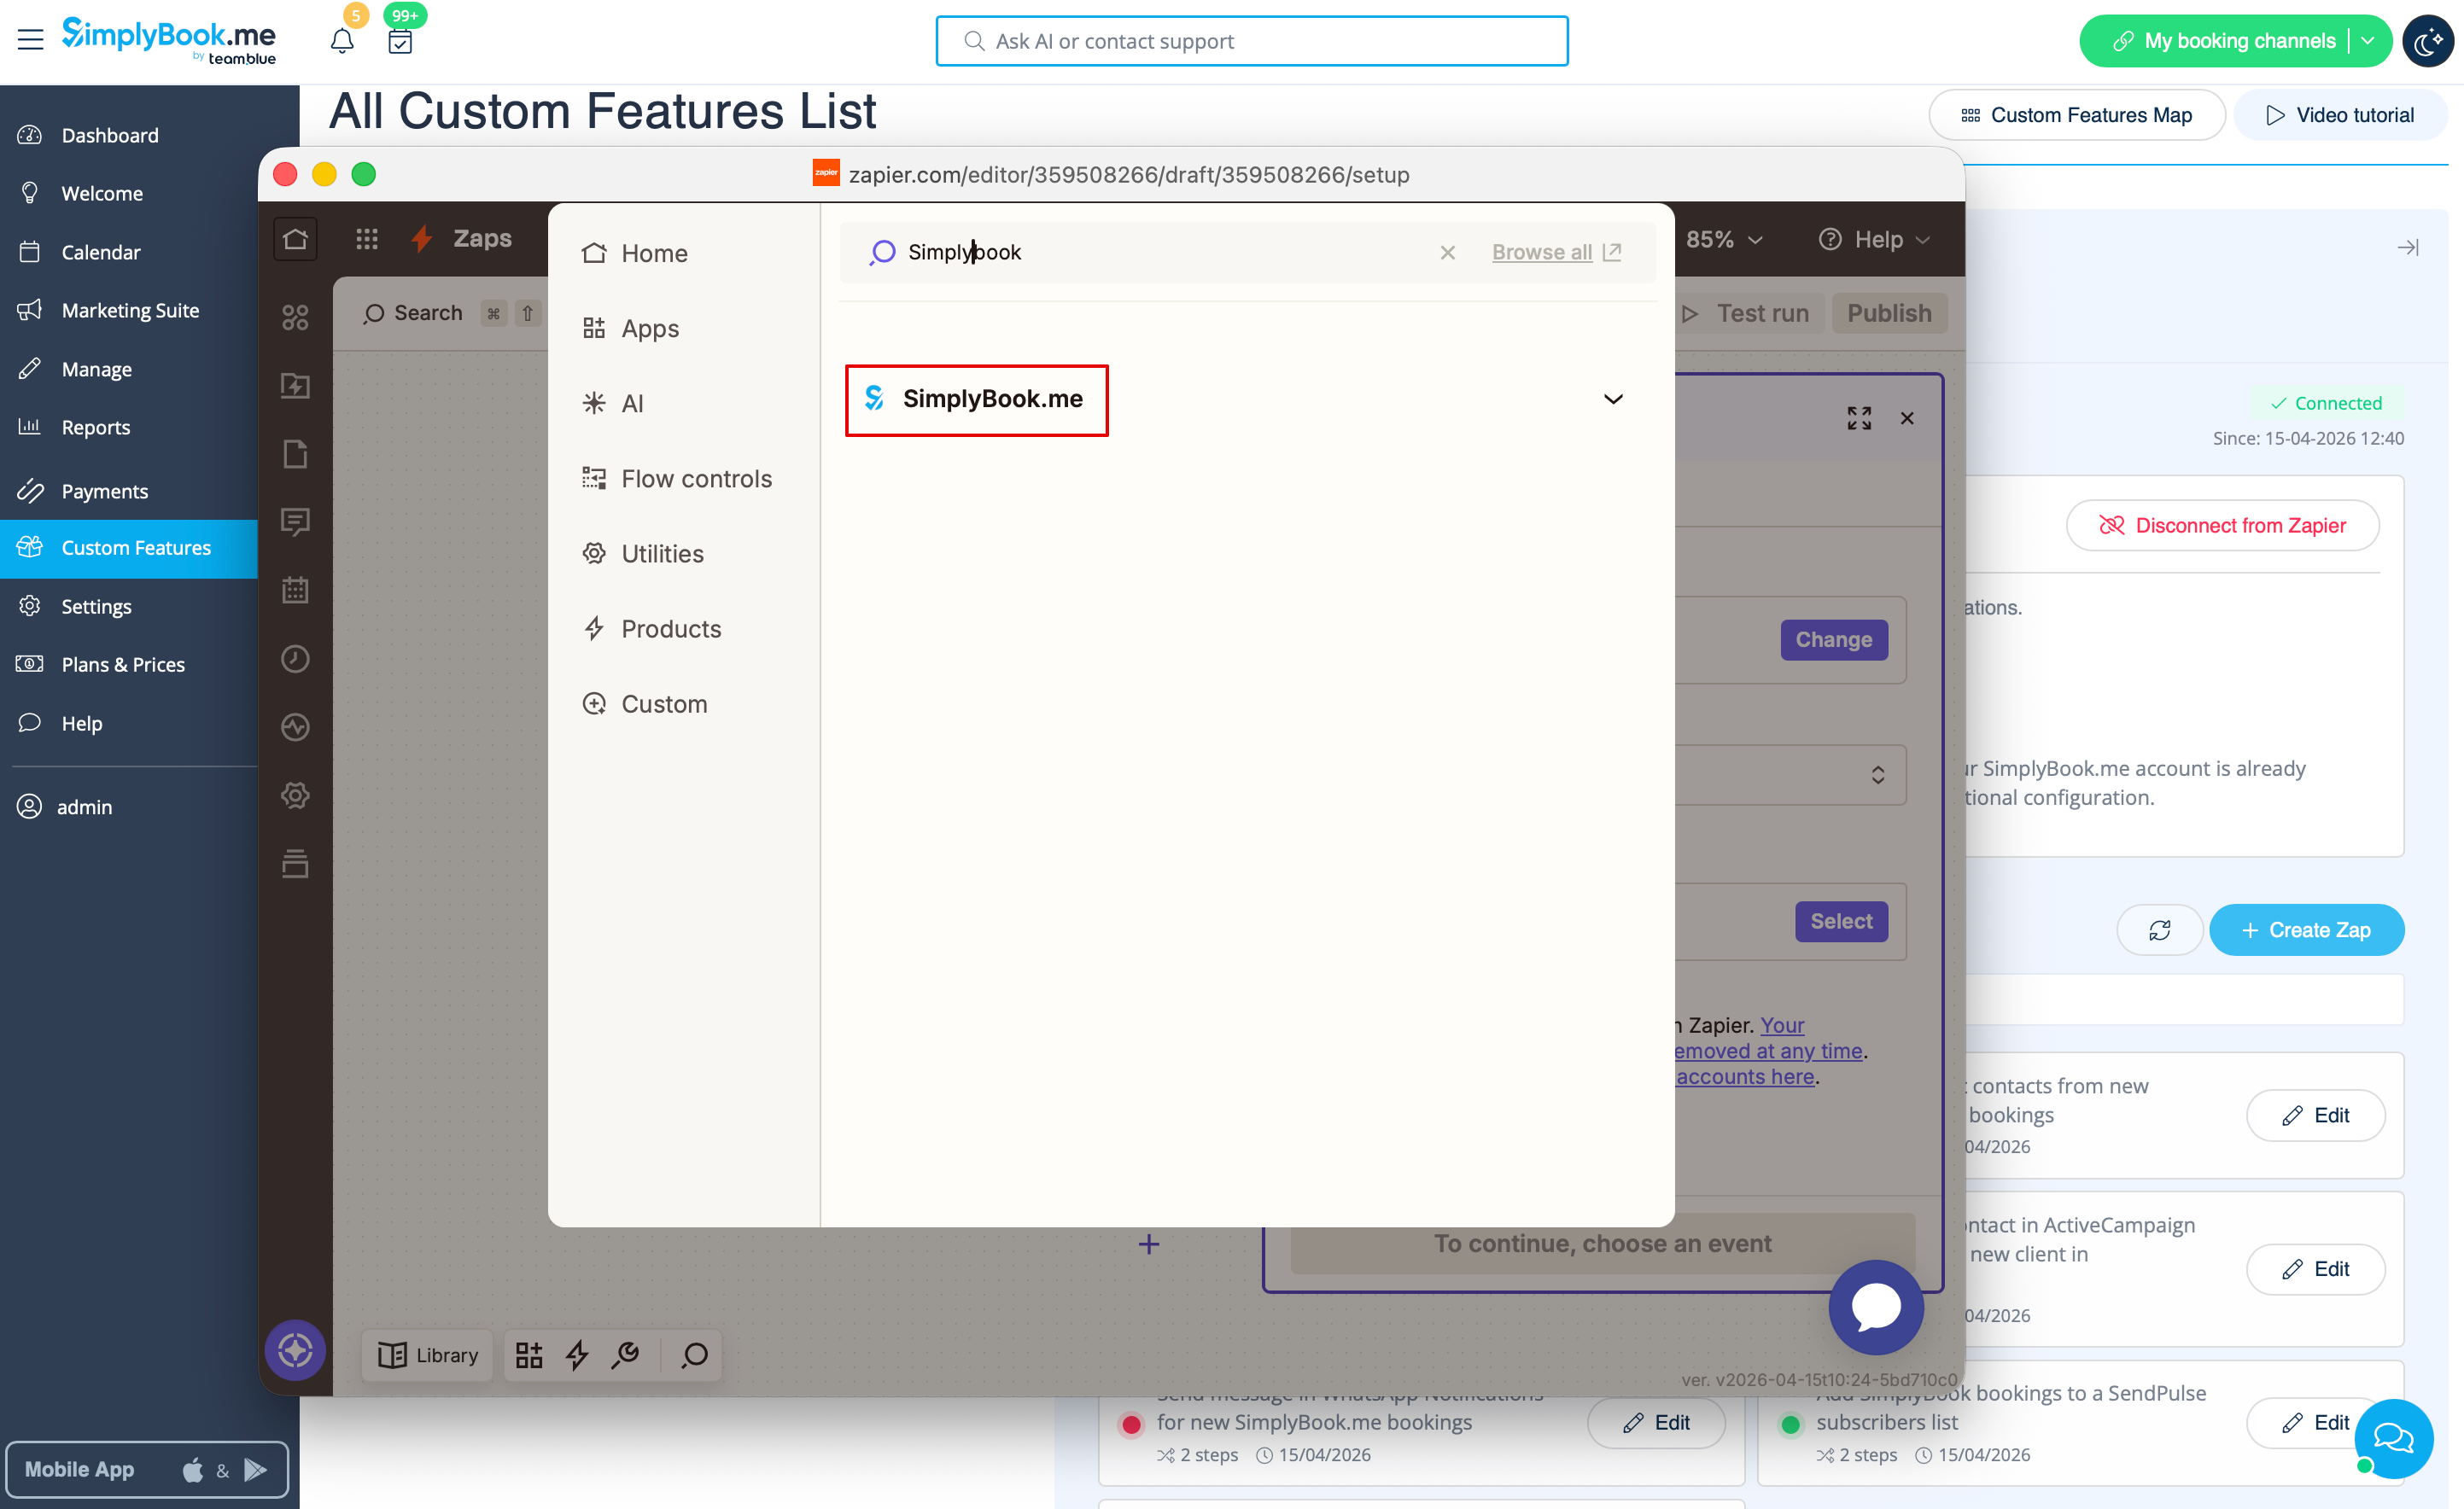
[[File: | :6. Dans la fenêtre contextuelle qui apparaît, recherchez SimplyBook.me dans la liste des applications auxquelles vous pouvez vous connecter. | ||
[[File:Zapier new sb as trigger.png|1200px|border | center|link=https://help.simplybook.me/images/1/13/Zapier_new_sb_as_trigger.png]] | |||
<br><br> | <br><br> | ||
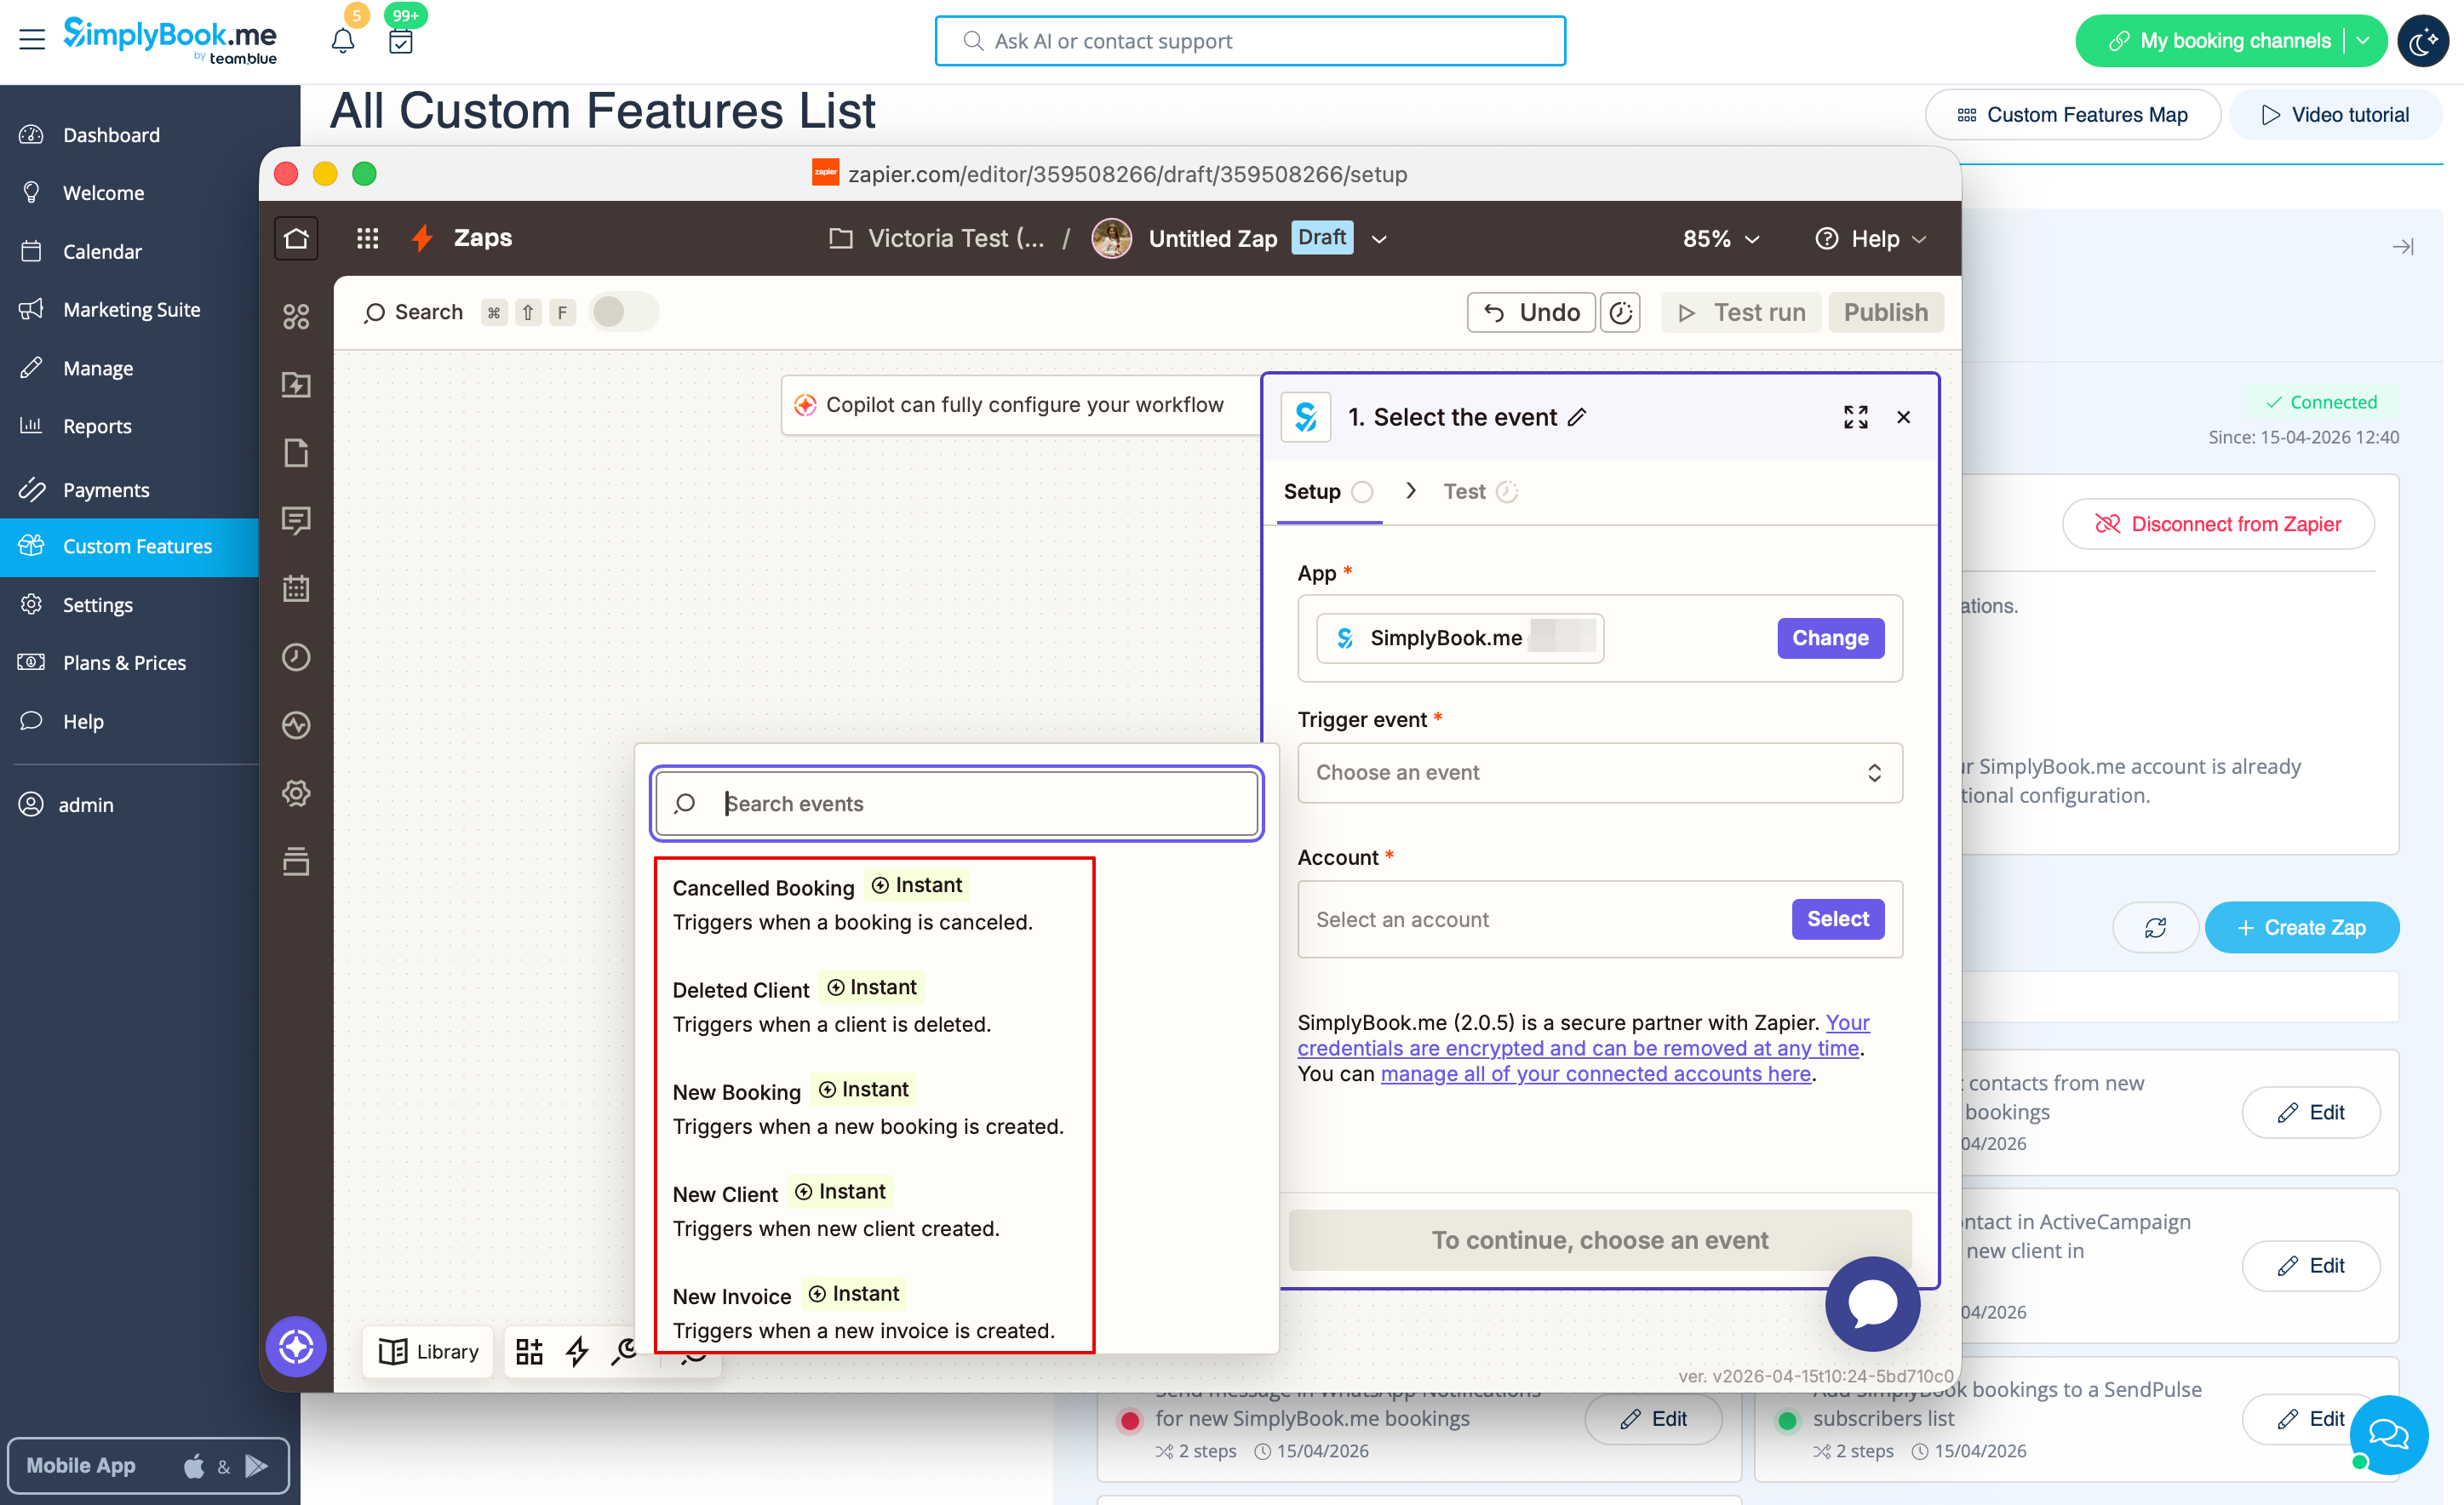
[[File: | :7. Choisissez le déclencheur souhaité et le compte que vous avez précédemment connecté. Cliquez sur "Continuer". | ||
[[File:Zapier new choose trigger event.png|1200px|border | center|link=https://help.simplybook.me/images/4/45/Zapier_new_choose_trigger_event.png]] | |||
<br><br> | <br><br> | ||
: | :8. Testez votre déclencheur, sélectionnez l'enregistrement exemple et passez à l'étape d'action. | ||
<br><br> | <br><br> | ||
: | :9. Maintenant <span style="background-color:#d4f8e5; padding:5px; border-radius:5px;">sélectionnez MailChimp comme application d'action</span> et sélectionnez l'action qui aura lieu lorsque le déclencheur s'activera. | ||
[[File:Select mailchimp.png|border|center]] | [[File:Select mailchimp.png|border|center]] | ||
<br><br> | <br><br> | ||
[[File:Select action on mailchimp side.png|border|center]] | [[File:Select action on mailchimp side.png|border|center]] | ||
<br><br> | <br><br> | ||
: | :10. Connectez <span style="background-color:#d4f8e5; padding:5px; border-radius:5px;">votre compte MailChimp.</span> | ||
[[File:Log in to mailchimp.png|border|center]] | [[File:Log in to mailchimp.png|border|center]] | ||
<br><br> | <br><br> | ||
: | :11. <span style="background-color:#d4f8e5; padding:5px; border-radius:5px;">Définissez les champs obligatoires</span> en fonction de l'action que vous avez sélectionnée. | ||
[[File:Mailchimp template.png|border|center]] | [[File:Mailchimp template.png|border|center]] | ||
<br><br> | <br><br> | ||
: | :12. Confirmez vos choix et <span style="background-color:#d4f8e5; padding:5px; border-radius:5px;">activez le Zap.</span> | ||
<br><br><br><br> | <br><br><br><br> | ||
Latest revision as of 15:14, 17 April 2026
- 5. Cliquez sur le bouton + Créer un Zap.
- 6. Dans la fenêtre contextuelle qui apparaît, recherchez SimplyBook.me dans la liste des applications auxquelles vous pouvez vous connecter.
- 7. Choisissez le déclencheur souhaité et le compte que vous avez précédemment connecté. Cliquez sur "Continuer".
- 8. Testez votre déclencheur, sélectionnez l'enregistrement exemple et passez à l'étape d'action.
- 9. Maintenant sélectionnez MailChimp comme application d'action et sélectionnez l'action qui aura lieu lorsque le déclencheur s'activera.


- 10. Connectez votre compte MailChimp.

- 11. Définissez les champs obligatoires en fonction de l'action que vous avez sélectionnée.

- 12. Confirmez vos choix et activez le Zap.