From SimplyBook.me
Created page with "'''iFrame widget:''' :1. In your [https://simplybook.me/ Simplybook] admin page get the code in Settings//Bookings on Webpage or Facebook//Booking widget for your own website/..." |
No edit summary |
||
| (10 intermediate revisions by the same user not shown) | |||
| Line 1: | Line 1: | ||
<languages/> | |||
:1 | <translate> | ||
<!--T:1--> | |||
: | {{#seo: | ||
|title=Squarespace - SimplyBook.me | |||
|description=Integrate booking widget with Squarespace websites. Embed booking functionality on Squarespace pages with widget code. Streamline appointment management. | |||
|titlemode=append | |||
|keywords=faq, frequently asked questions, booking software, appointment system questions, appointments online, calendar software, booking system, booking calendar, scheduling software, online appointment scheduling, online scheduling, plugins, custom features, custom booking page link, domain name, custom domain name, custom url | |||
}} | |||
</translate><translate> | |||
<!--T:2--> | |||
__FORCETOC__ | |||
<!--T:3--> | |||
:1. | =iFrame widget= | ||
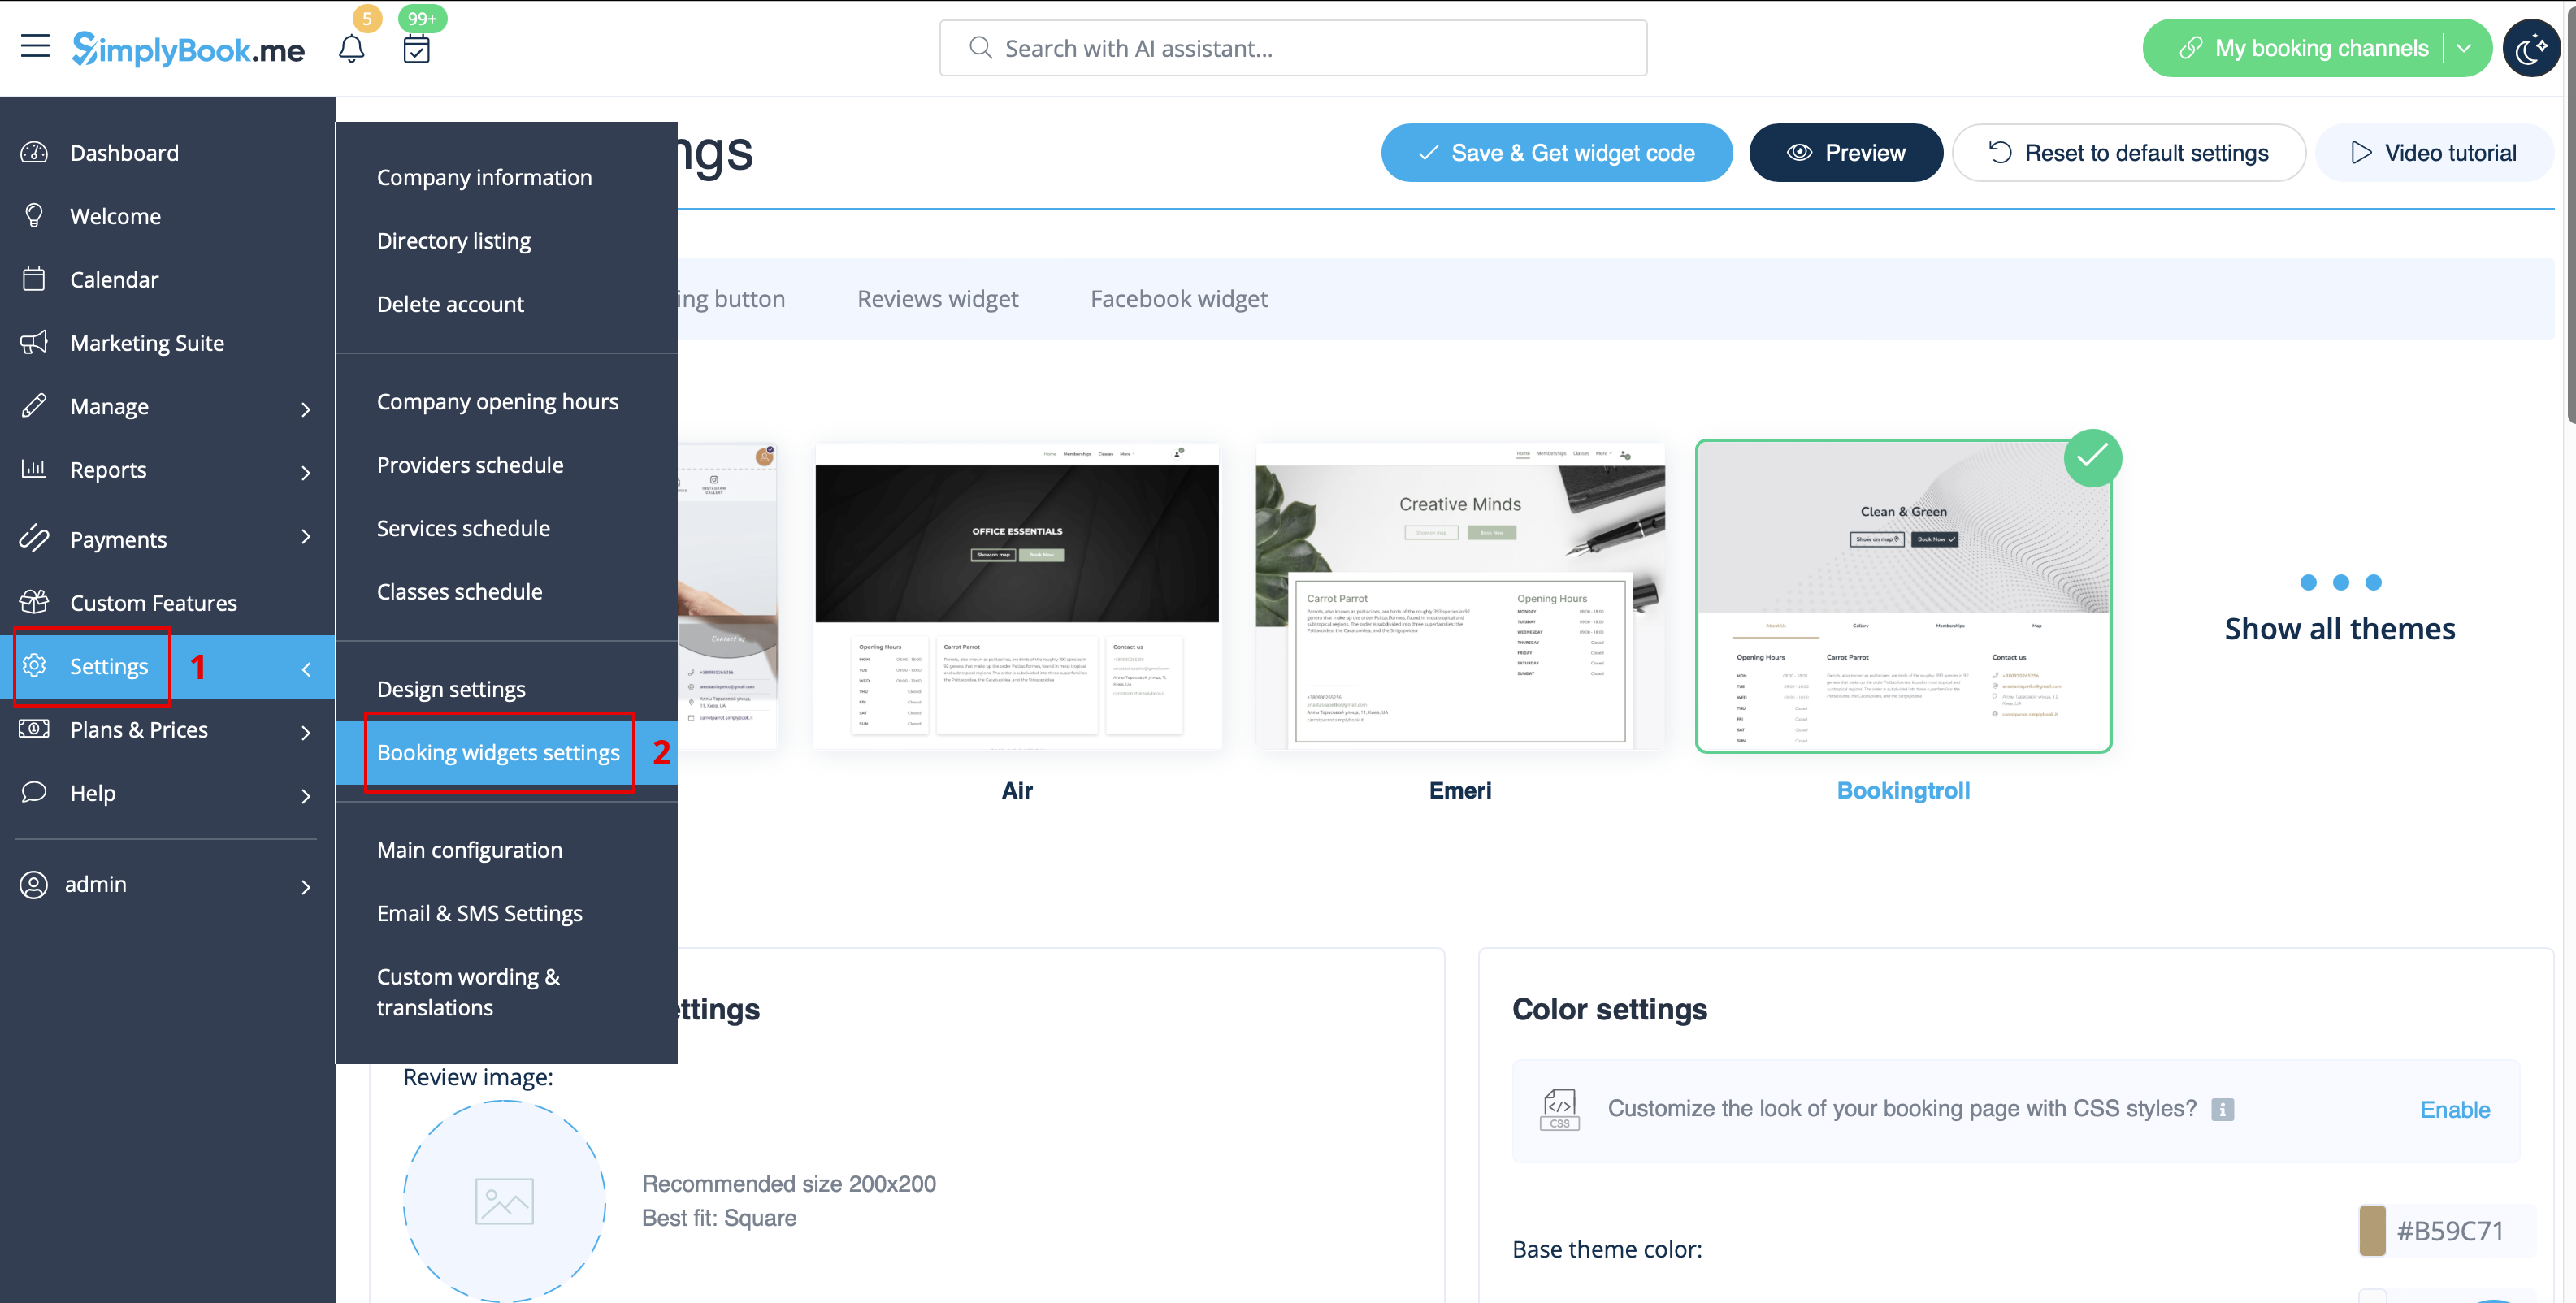
:2. | :1. In your [https://simplybook.me/ Simplybook] admin page get the code in <span style="background-color:#d4f8e5; padding:5px; border-radius:5px;">Settings</span> -> <span style="background-color:#d4f8e5; padding:5px; border-radius:5px;">Booking widgets settings</span> -> <span style="background-color:#d4f8e5; padding:5px; border-radius:5px;">iFrame widget</span> | ||
:3. Insert the code received in [https://simplybook.me/ Simplybook] admin page, to your Squarespace | [[File:Booking widget path redesigned.png|1200px | center|link=https://help.simplybook.me/images/6/68/Booking_widget_path_redesigned.png]] | ||
<br><br> | |||
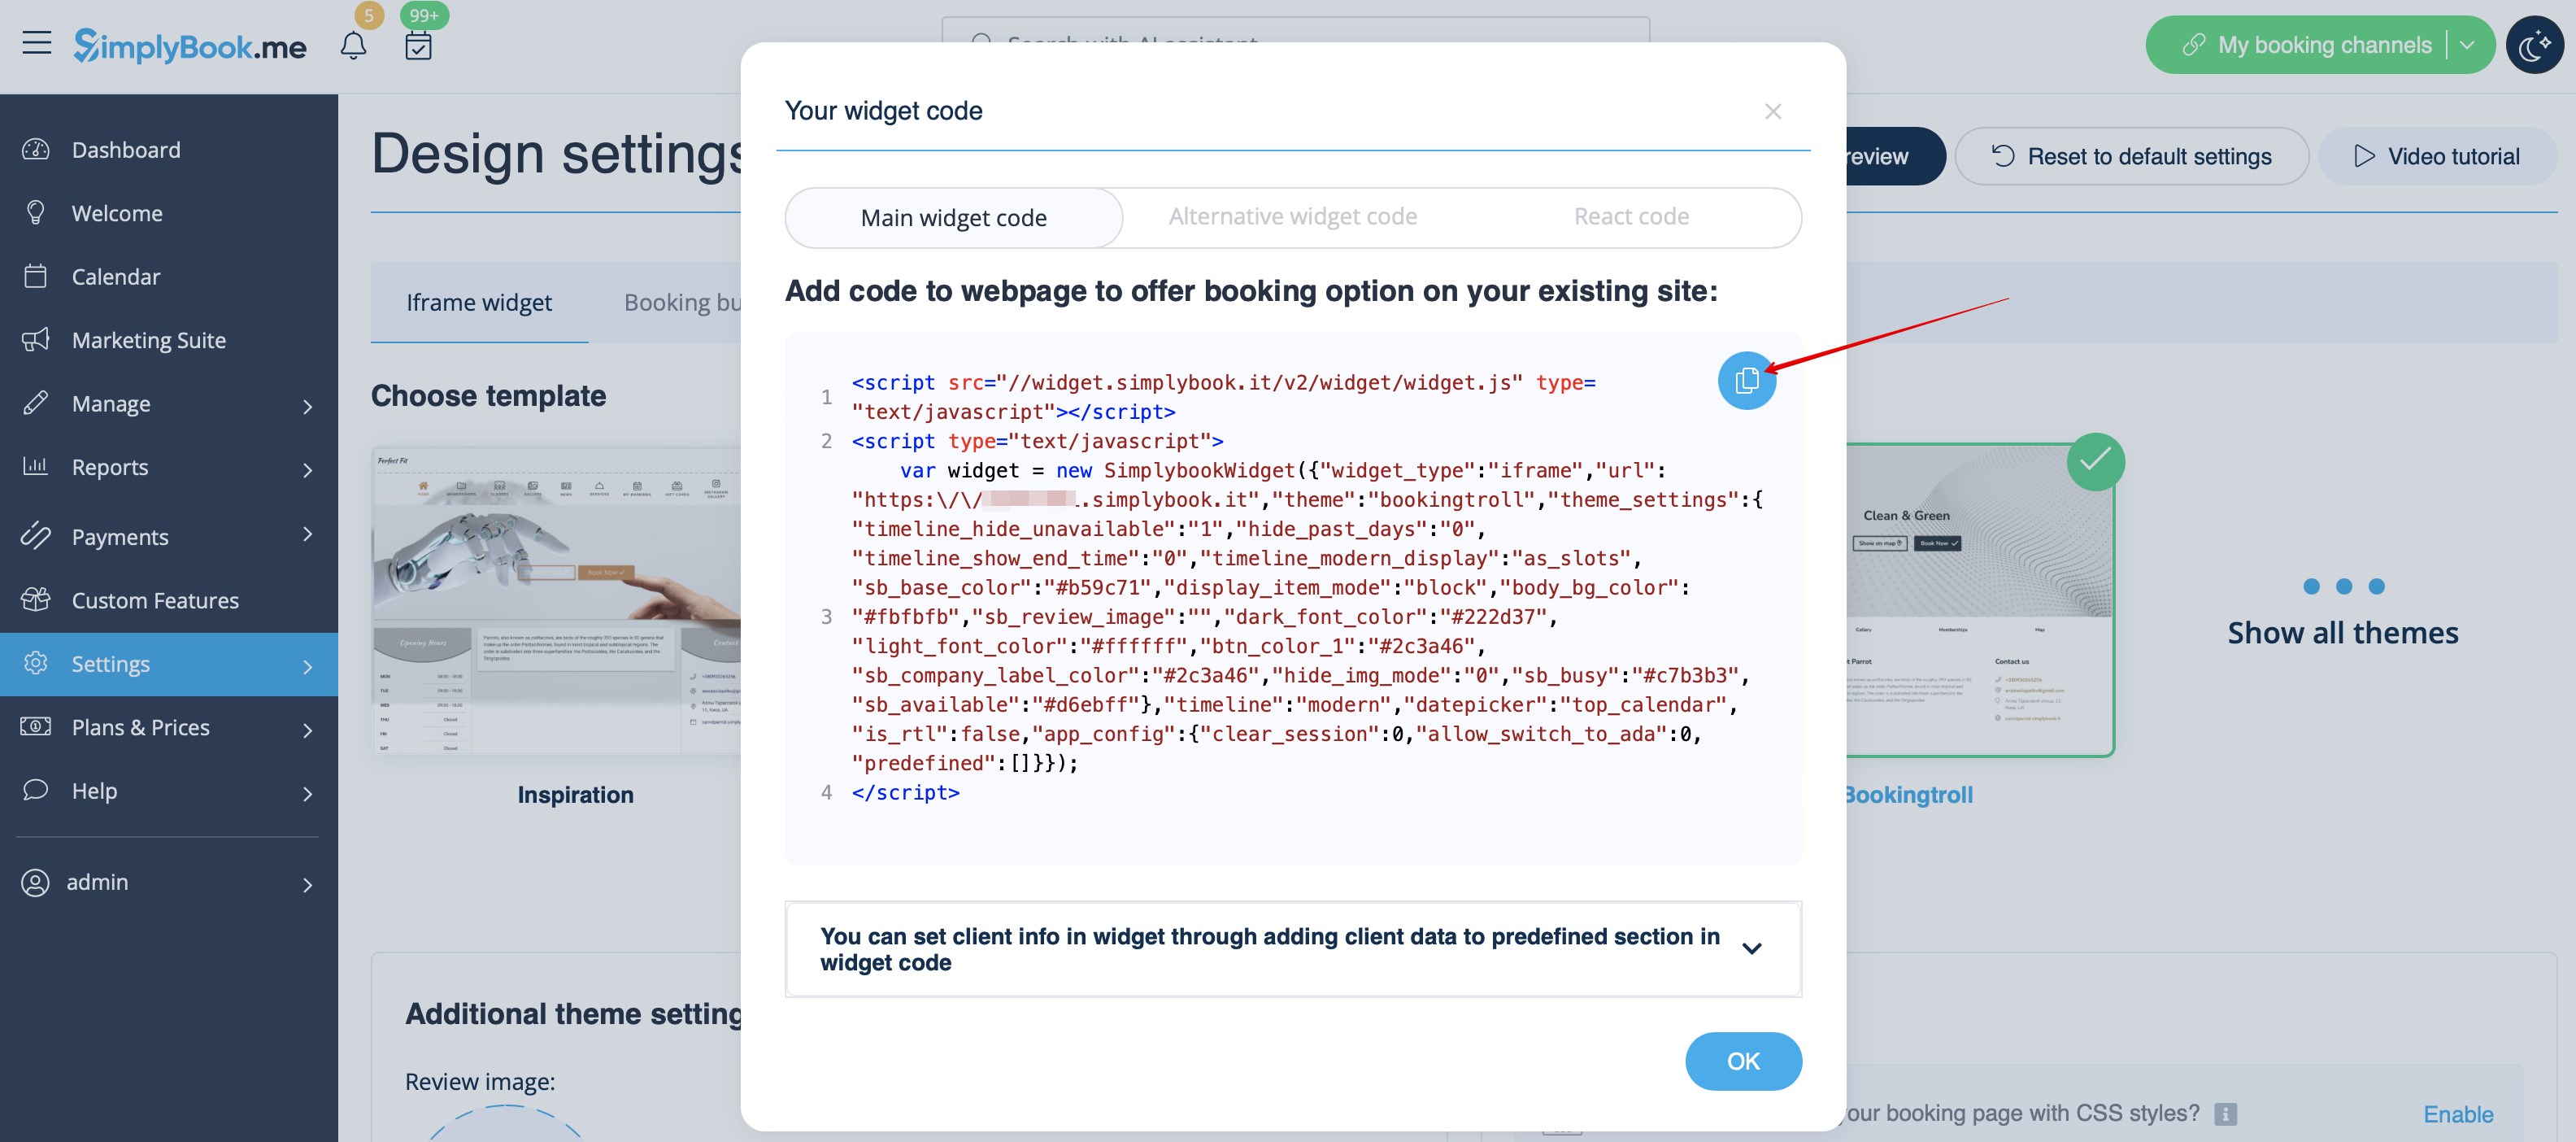
[[File:Copy widget code redesigned.png|1200px | center|link=https://help.simplybook.me/images/b/b4/Copy_widget_code_redesigned.png]] | |||
<br><br> | |||
:2. On your Squarespace account, choose the page where are planning to insert your booking calendar. We recommend using a new page in Main Navigation designed specifically for online booking. | |||
:You can name it "Book Now", "Online Booking" or "Calendar." | |||
[[File:Squarespace add new page.png | center]] | |||
<br><br> | |||
:3. Open the page editor. Remove the default booking block. | |||
<br><br> | |||
:4. Click on "+" in the top right corner and select ''Code'' from the Block Menu. | |||
[[File:Squarespace add new block.png | center]] | |||
<br><br> | |||
[[File:Squarespace select code block.png | center]] | |||
<br><br> | |||
:5. Insert the code received in [https://simplybook.me/ Simplybook] admin page, to the HTML code box and click "Apply". | |||
[[File:Squarespace add code.png | center]] | |||
<br><br> | |||
:6. You may get a message that embedded scripts are disabled - it is done on Squarespace side due to security reasons but you can click on "Preview" to see if the widget is working. | |||
[[File:Squarespace preview.png | center]] | |||
<br><br> | |||
:7. Or you can publish the website and access it as a client to check the look. | |||
[[File:Squarespace website look.png | center]] | |||
<br><br></translate><translate> | |||
<!--T:4--> | |||
=Booking button widget= | |||
:1. In your [https://simplybook.me/ Simplybook] admin page get the code in <span style="background-color:#d4f8e5; padding:5px; border-radius:5px;">Settings</span> -> <span style="background-color:#d4f8e5; padding:5px; border-radius:5px;">Booking widgets settings</span> -> <span style="background-color:#d4f8e5; padding:5px; border-radius:5px;">Booking button</span> | |||
[[File:Booking widget path redesigned.png|1200px | center|link=https://help.simplybook.me/images/6/68/Booking_widget_path_redesigned.png]] | |||
<br><br> | |||
:2. In your Squarespace account go to the page you wish to add the code to, switch to editing mode and select to add "Code" block. | |||
[[File:Squarespace add new block.png | center]] | |||
<br><br> | |||
[[File:Squarespace select code block.png | center]] | |||
<br><br> | |||
:3. Insert the code received in [https://simplybook.me/ Simplybook] admin page, to your Squarespace page. | |||
[[File:Squarespace add code.png | center]] | |||
<br><br> | |||
:4. Save the page and check the look. | |||
[[File:Squarespace booking button widget new.png | center]] | |||
<br><br></translate> | |||
Latest revision as of 16:15, 5 February 2026
iFrame widget
- 1. In your Simplybook admin page get the code in Settings -> Booking widgets settings -> iFrame widget
- 2. On your Squarespace account, choose the page where are planning to insert your booking calendar. We recommend using a new page in Main Navigation designed specifically for online booking.
- You can name it "Book Now", "Online Booking" or "Calendar."

- 3. Open the page editor. Remove the default booking block.
- 4. Click on "+" in the top right corner and select Code from the Block Menu.


- 5. Insert the code received in Simplybook admin page, to the HTML code box and click "Apply".

- 6. You may get a message that embedded scripts are disabled - it is done on Squarespace side due to security reasons but you can click on "Preview" to see if the widget is working.

- 7. Or you can publish the website and access it as a client to check the look.

Booking button widget
- 1. In your Simplybook admin page get the code in Settings -> Booking widgets settings -> Booking button
- 2. In your Squarespace account go to the page you wish to add the code to, switch to editing mode and select to add "Code" block.
- 3. Insert the code received in Simplybook admin page, to your Squarespace page.
- 4. Save the page and check the look.
