Created page with "Il peut être nécessaire d'afficher ou de masquer certaines données ou de modifier l'apparence des factures que le système envoie aux clients après qu'ils ont effectué un achat sur votre site web de réservation.<br> Vous pouvez modifier les éléments suivants : <br><br>" |
No edit summary |
||
| (9 intermediate revisions by 2 users not shown) | |||
| Line 1: | Line 1: | ||
<languages/> | <languages/> | ||
{{#seo: |title=Modification des factures clients - SimplyBook.me |description= | {{#seo: |title=Modification des factures clients - SimplyBook.me |description=Personnalisez l’apparence et le contenu des factures. Ajoutez le logo de l’entreprise, ajustez la mise en page et incluez les données des formulaires d’admission. Configurez la numérotation des factures, les conditions et les informations de pied de page.|titlemode=ajouter |keywords=faq, foire aux questions, logiciel de réservation, questions sur le système de rendez-vous, rendez-vous en ligne, logiciel de calendrier, système de réservation, calendrier de réservation, logiciel de planification, planification de rendez-vous en ligne, planification en ligne, configuration, aide à la configuration, assistance, contenu d'aide }} | ||
Il peut être nécessaire d'afficher ou de masquer certaines données ou de modifier l'apparence des factures que le système envoie aux clients après qu'ils ont effectué un achat sur votre site web de réservation.<br> | Il peut être nécessaire d'afficher ou de masquer certaines données ou de modifier l'apparence des factures que le système envoie aux clients après qu'ils ont effectué un achat sur votre site web de réservation.<br> | ||
| Line 15: | Line 15: | ||
<br><br> | <br><br> | ||
2. '''Numéro de TVA de l'entreprise.'''<br> | |||
2. ''' | Si elle est ajoutée dans <span style="background-color:#d4f8e5; padding:5px; border-radius:5px;">Paiements (SBPay.me)</span> -> <span style="background-color:#d4f8e5; padding:5px; border-radius:5px;">Systèmes de paiement - </span> > <span style="background-color:#d4f8e5; padding:5px; border-radius:5px;">Paramètres</span> -> <span style="background-color:#d4f8e5; padding:5px; border-radius:5px;">Profil de l'entreprise</span> -> <span style="background-color:#d4f8e5; padding:5px; border-radius:5px;">Informations fiscales</span>, elle sera incluse dans l'en-tête de la facture. | ||
[[File:Sbpay company settings page - tax info.png|1200px|border|center|link=https://help.simplybook.me/images/8/8e/Sbpay_company_settings_page_-_tax_info.png]] | [[File:Sbpay company settings page - tax info.png|1200px|border|center|link=https://help.simplybook.me/images/8/8e/Sbpay_company_settings_page_-_tax_info.png]] | ||
<br><br> | <br><br> | ||
[[File:Sbpay printed invoice example with comoany vat number.png|1200px|border|center|link=https://help.simplybook.me/images/d/d0/Sbpay_printed_invoice_example_with_comoany_vat_number.png]] | [[File:Sbpay printed invoice example with comoany vat number.png|1200px|border|center|link=https://help.simplybook.me/images/d/d0/Sbpay_printed_invoice_example_with_comoany_vat_number.png]] | ||
<br><br> | <br><br> | ||
3. '''Adresse du client.'''<br> | |||
3. ''' | Pour que l'adresse du client s'affiche, veuillez activer la fonctionnalité personnalisée [[Special:MyLanguage/Client_Login_custom_feature|Connexion client]], puis cocher les cases <span style="background-color:#d4f8e5; padding:5px; border-radius:5px;">Afficher l'adresse sur la page de réservation</span> et <span style="background-color:#d4f8e5; padding:5px; border-radius:5px;">Rendre l'adresse obligatoire</span> dans <span style="background-color:#d4f8e5; padding:5px; border-radius:5px;">la section</span> <span style="background-color:#d4f8e5; padding:5px; border-radius:5px;">Accessibilité</span>. Enregistrez les paramètres. | ||
[[File:Make address mandatory redesigned.png|1200px|border|center|link=https://help.simplybook.me/images/6/68/Make_address_mandatory_redesigned.png]] | [[File:Make address mandatory redesigned.png|1200px|border|center|link=https://help.simplybook.me/images/6/68/Make_address_mandatory_redesigned.png]] | ||
<br><br> | <br><br> | ||
[[File:Sbpay printed invoice example with client address.png|1200px|border|center|link=https://help.simplybook.me/images/4/4d/Sbpay_printed_invoice_example_with_client_address.png]] | [[File:Sbpay printed invoice example with client address.png|1200px|border|center|link=https://help.simplybook.me/images/4/4d/Sbpay_printed_invoice_example_with_client_address.png]] | ||
<br><br> | <br><br> | ||
4. '''<span style="background-color:#cdeffc; padding:5px; border-radius:5px;">[[Intake_Forms_custom_feature|Formulaires d'admission]]</span> et <span style="background-color:#cdeffc; padding:5px; border-radius:5px;">[[Client_Fields_Custom_Feature|champs client]]</span>'''<br> | |||
4. '''<span style="background-color:#cdeffc; padding:5px; border-radius:5px;">[[Intake_Forms_custom_feature| | Vous pouvez ajouter certains formulaires à afficher dans le bloc d'informations client.<br> | ||
S'il s'agit d'un formulaire d'admission, allez dans <span style="background-color:#d4f8e5; padding:5px; border-radius:5px;">Gérer</span> -> <span style="background-color:#d4f8e5; padding:5px; border-radius:5px;">Formulaires d'admission</span> -> cliquez sur le formulaire souhaité pour le sélectionner -> activez <span style="background-color:#d4f8e5; padding:5px; border-radius:5px;">Ajouter un champ à la facture,</span> puis enregistrez les paramètres.<br> | |||
[[File:Add intake form to invoice redesigned.png|1200px|border|center|link=https://help.simplybook.me/images/1/16/Add_intake_form_to_invoice_redesigned.png]] | [[File:Add intake form to invoice redesigned.png|1200px|border|center|link=https://help.simplybook.me/images/1/16/Add_intake_form_to_invoice_redesigned.png]] | ||
<br><br> | <br><br> | ||
Si vous souhaitez ajouter un formulaire client, accédez à <span style="background-color:#d4f8e5; padding:5px; border-radius:5px;">Gérer</span> -> <span style="background-color:#d4f8e5; padding:5px; border-radius:5px;">Champs client</span> -> cliquez sur le champ souhaité pour le modifier -> activez <span style="background-color:#d4f8e5; padding:5px; border-radius:5px;">Ajouter un champ à la facture,</span> puis enregistrez.<br> | |||
[[File:Add client form to invoice redesigned.png|1200px|border|center|link=https://help.simplybook.me/images/2/2f/Add_client_form_to_invoice_redesigned.png]] | [[File:Add client form to invoice redesigned.png|1200px|border|center|link=https://help.simplybook.me/images/2/2f/Add_client_form_to_invoice_redesigned.png]] | ||
<br><br> | <br><br> | ||
Le titre du formulaire et la réponse du client apparaîtront ainsi tous deux sur la facture. | |||
[[File:Sbpay printed invoice example with client fields and intake forms.png|1200px|border|center|link=https://help.simplybook.me/images/8/88/Sbpay_printed_invoice_example_with_client_fields_and_intake_forms.png]] | [[File:Sbpay printed invoice example with client fields and intake forms.png|1200px|border|center|link=https://help.simplybook.me/images/8/88/Sbpay_printed_invoice_example_with_client_fields_and_intake_forms.png]] | ||
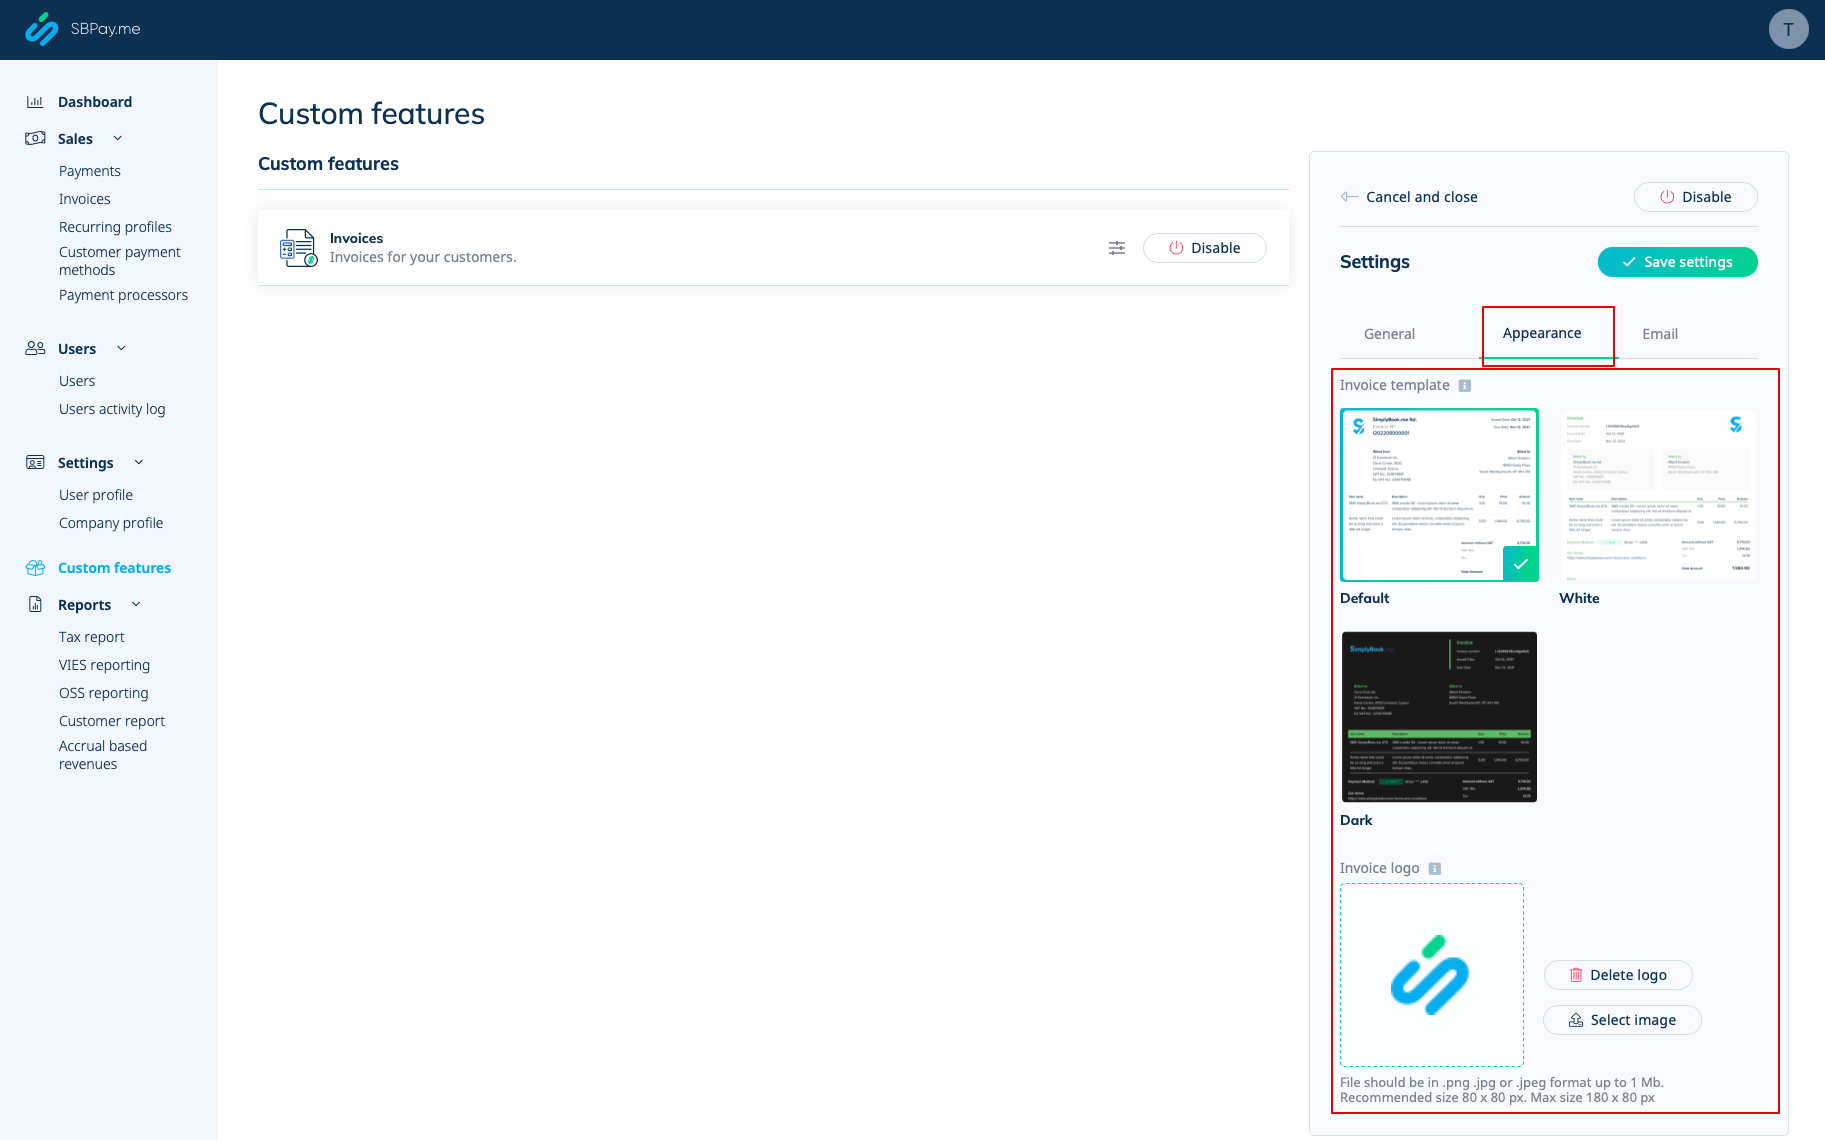
5. '''Conception des factures.'''<br> | |||
5. ''' | Vous avez le choix entre trois modèles dans <span style="background-color:#d4f8e5; padding:5px; border-radius:5px;">Paiements (SBPay.me)</span> -> <span style="background-color:#d4f8e5; padding:5px; border-radius:5px;">Systèmes de paiement - </span> > <span style="background-color:#d4f8e5; padding:5px; border-radius:5px;">Fonctionnalités personnalisées</span> -> <span style="background-color:#d4f8e5; padding:5px; border-radius:5px;">Factures</span> -> <span style="background-color:#d4f8e5; padding:5px; border-radius:5px;">Paramètres</span> -> <span style="background-color:#d4f8e5; padding:5px; border-radius:5px;">Apparence.</span> | ||
Veuillez sélectionner celui qui vous convient le mieux, ajouter le logo de votre entreprise et enregistrer les paramètres. | |||
[[File:Sbpay invoice appearance settings.png|1200px|border|center|link=https://help.simplybook.me/images/f/f3/Sbpay_invoice_appearance_settings.png]] | [[File:Sbpay invoice appearance settings.png|1200px|border|center|link=https://help.simplybook.me/images/f/f3/Sbpay_invoice_appearance_settings.png]] | ||
<br><br> | <br><br> | ||
<span style="background-color:#ffe9e9; padding:5px; border-radius:5px;">'''Remarque importante !''' L'importation directe de factures depuis des plateformes externes vers le système n'est pas prise en charge. Cependant, SimplyBook.me propose des options d'intégration avec divers logiciels de comptabilité, notamment [[Special:MyLanguage/Xero_integration| Xero]], [[Special:MyLanguage/QuickBooks_integration| QuickBooks]] et [[Special:MyLanguage/FreshBooks_integration| FreshBooks]]. Vous pouvez ainsi gérer efficacement vos factures dans votre système comptable préféré.</span> | |||
<span style="background-color:#ffe9e9; padding:5px; border-radius:5px;">''' | |||
<br><br> | <br><br> | ||
Latest revision as of 19:50, 2 February 2026
Il peut être nécessaire d'afficher ou de masquer certaines données ou de modifier l'apparence des factures que le système envoie aux clients après qu'ils ont effectué un achat sur votre site web de réservation.
Vous pouvez modifier les éléments suivants :
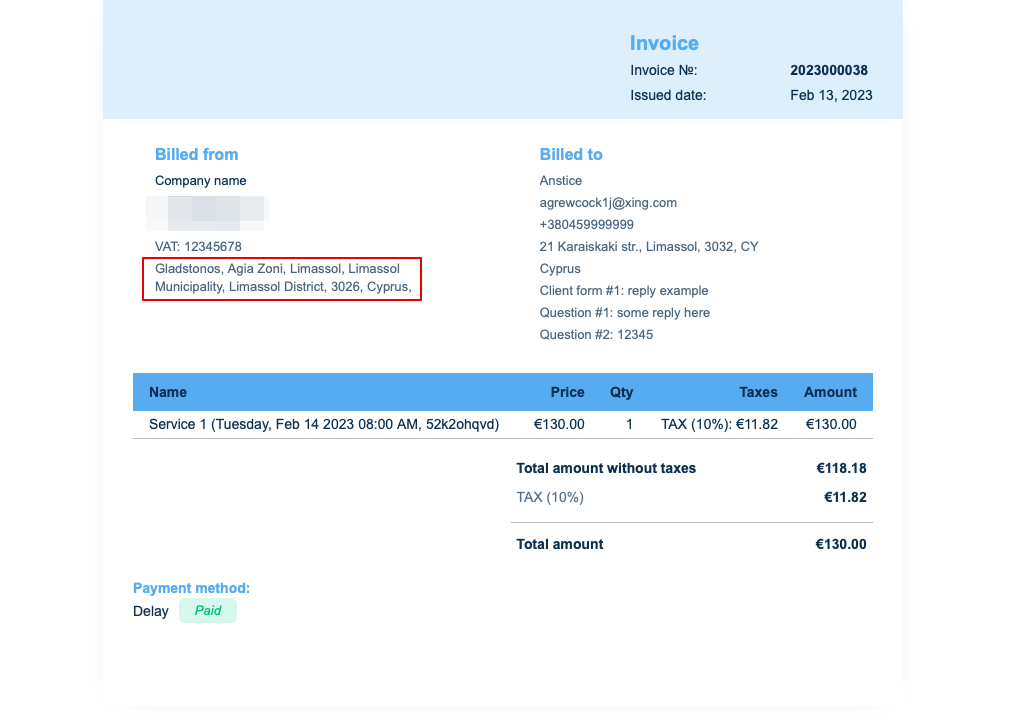
1. Adresse de l'entreprise.
L'adresse de l'entreprise ajoutée dans Paiements (SBPay.me) -> Systèmes de paiement - > Paramètres -> Profil de l'entreprise -> Adresse sera indiquée sur les factures.
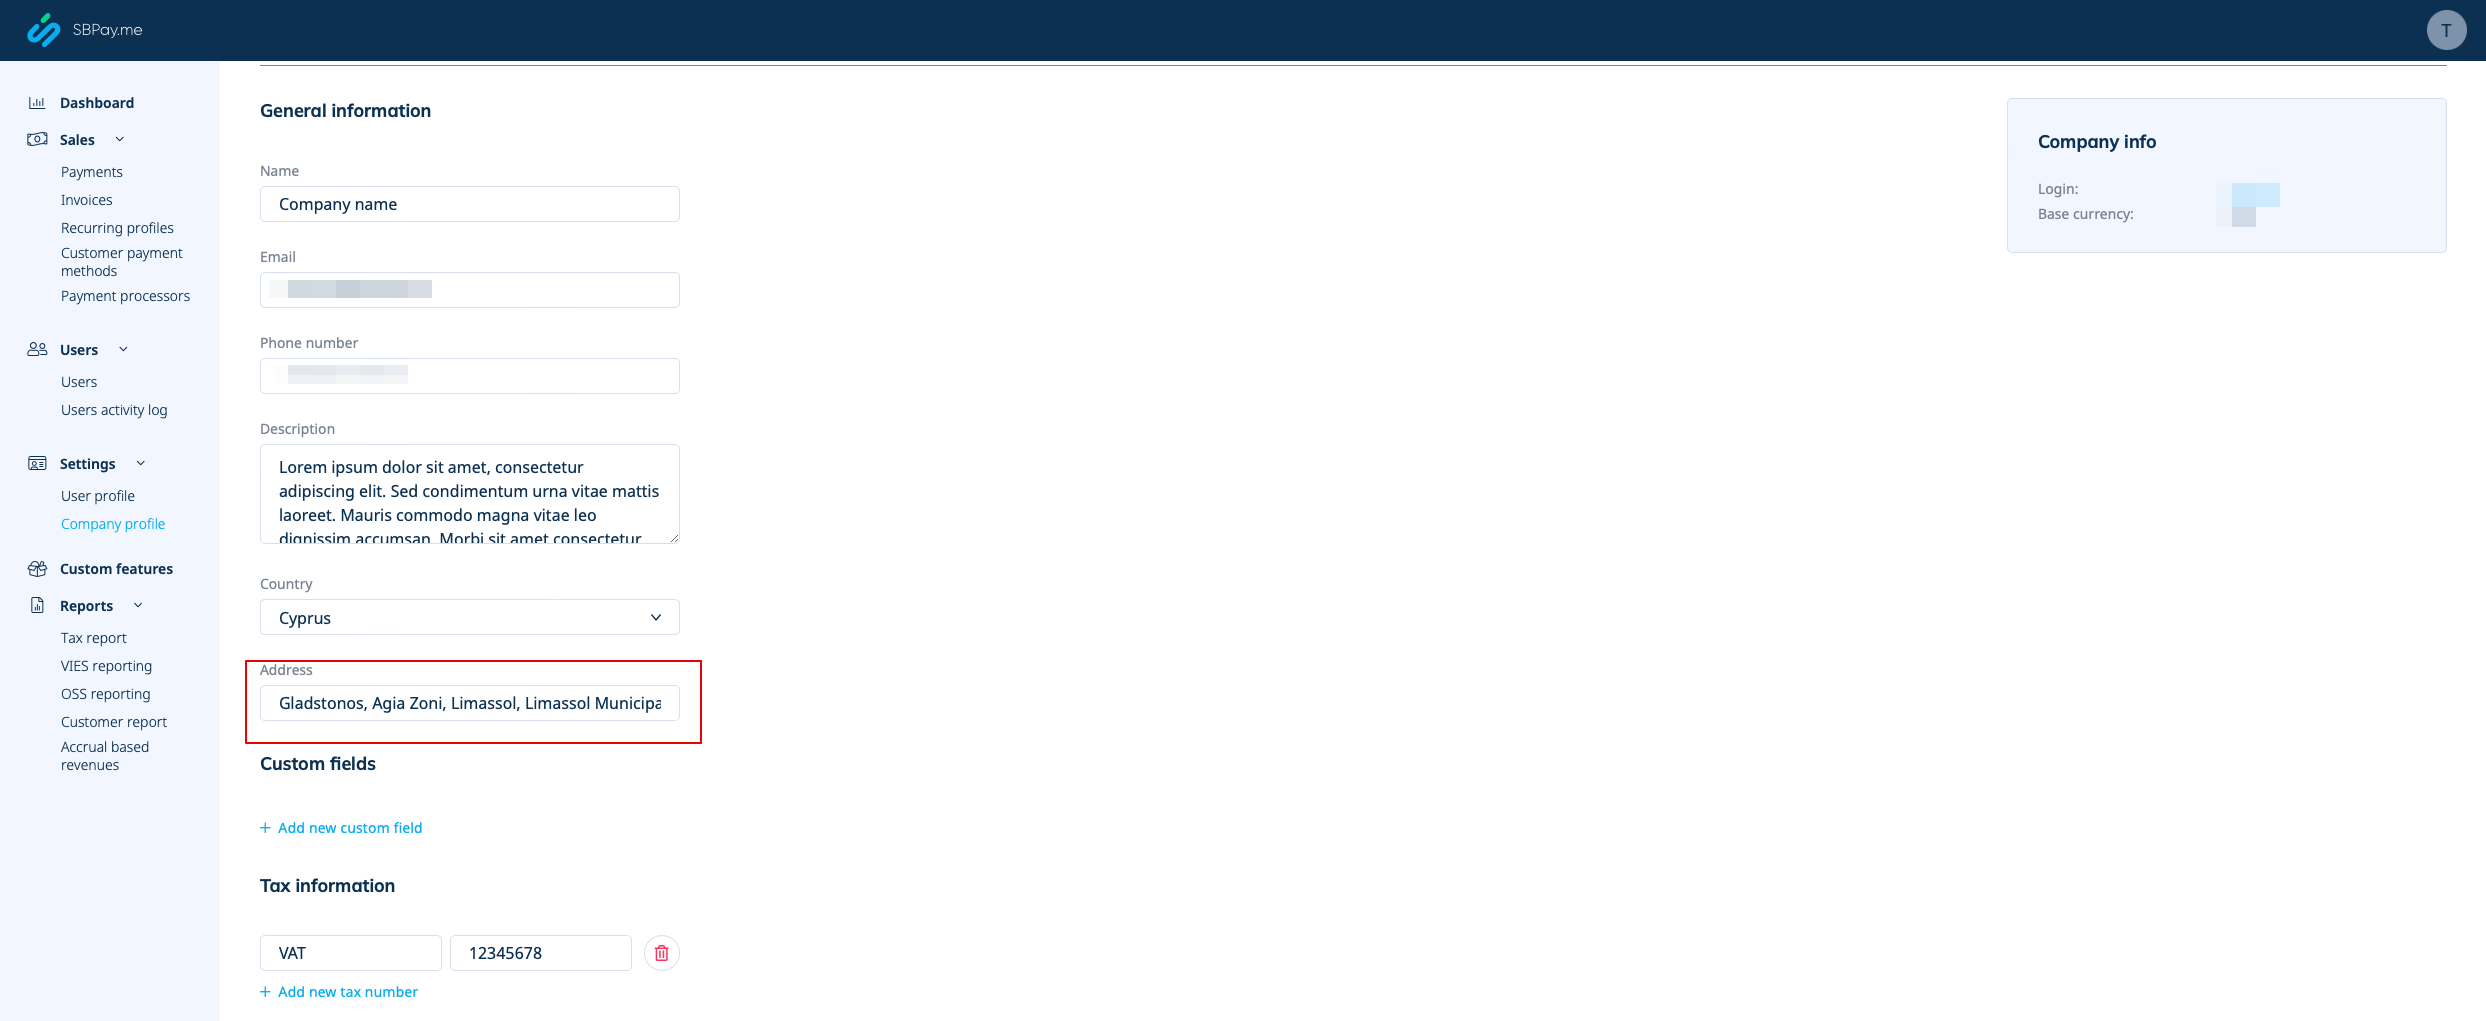
Si vous souhaitez le masquer, supprimez simplement l'adresse de ce champ et enregistrez les paramètres.
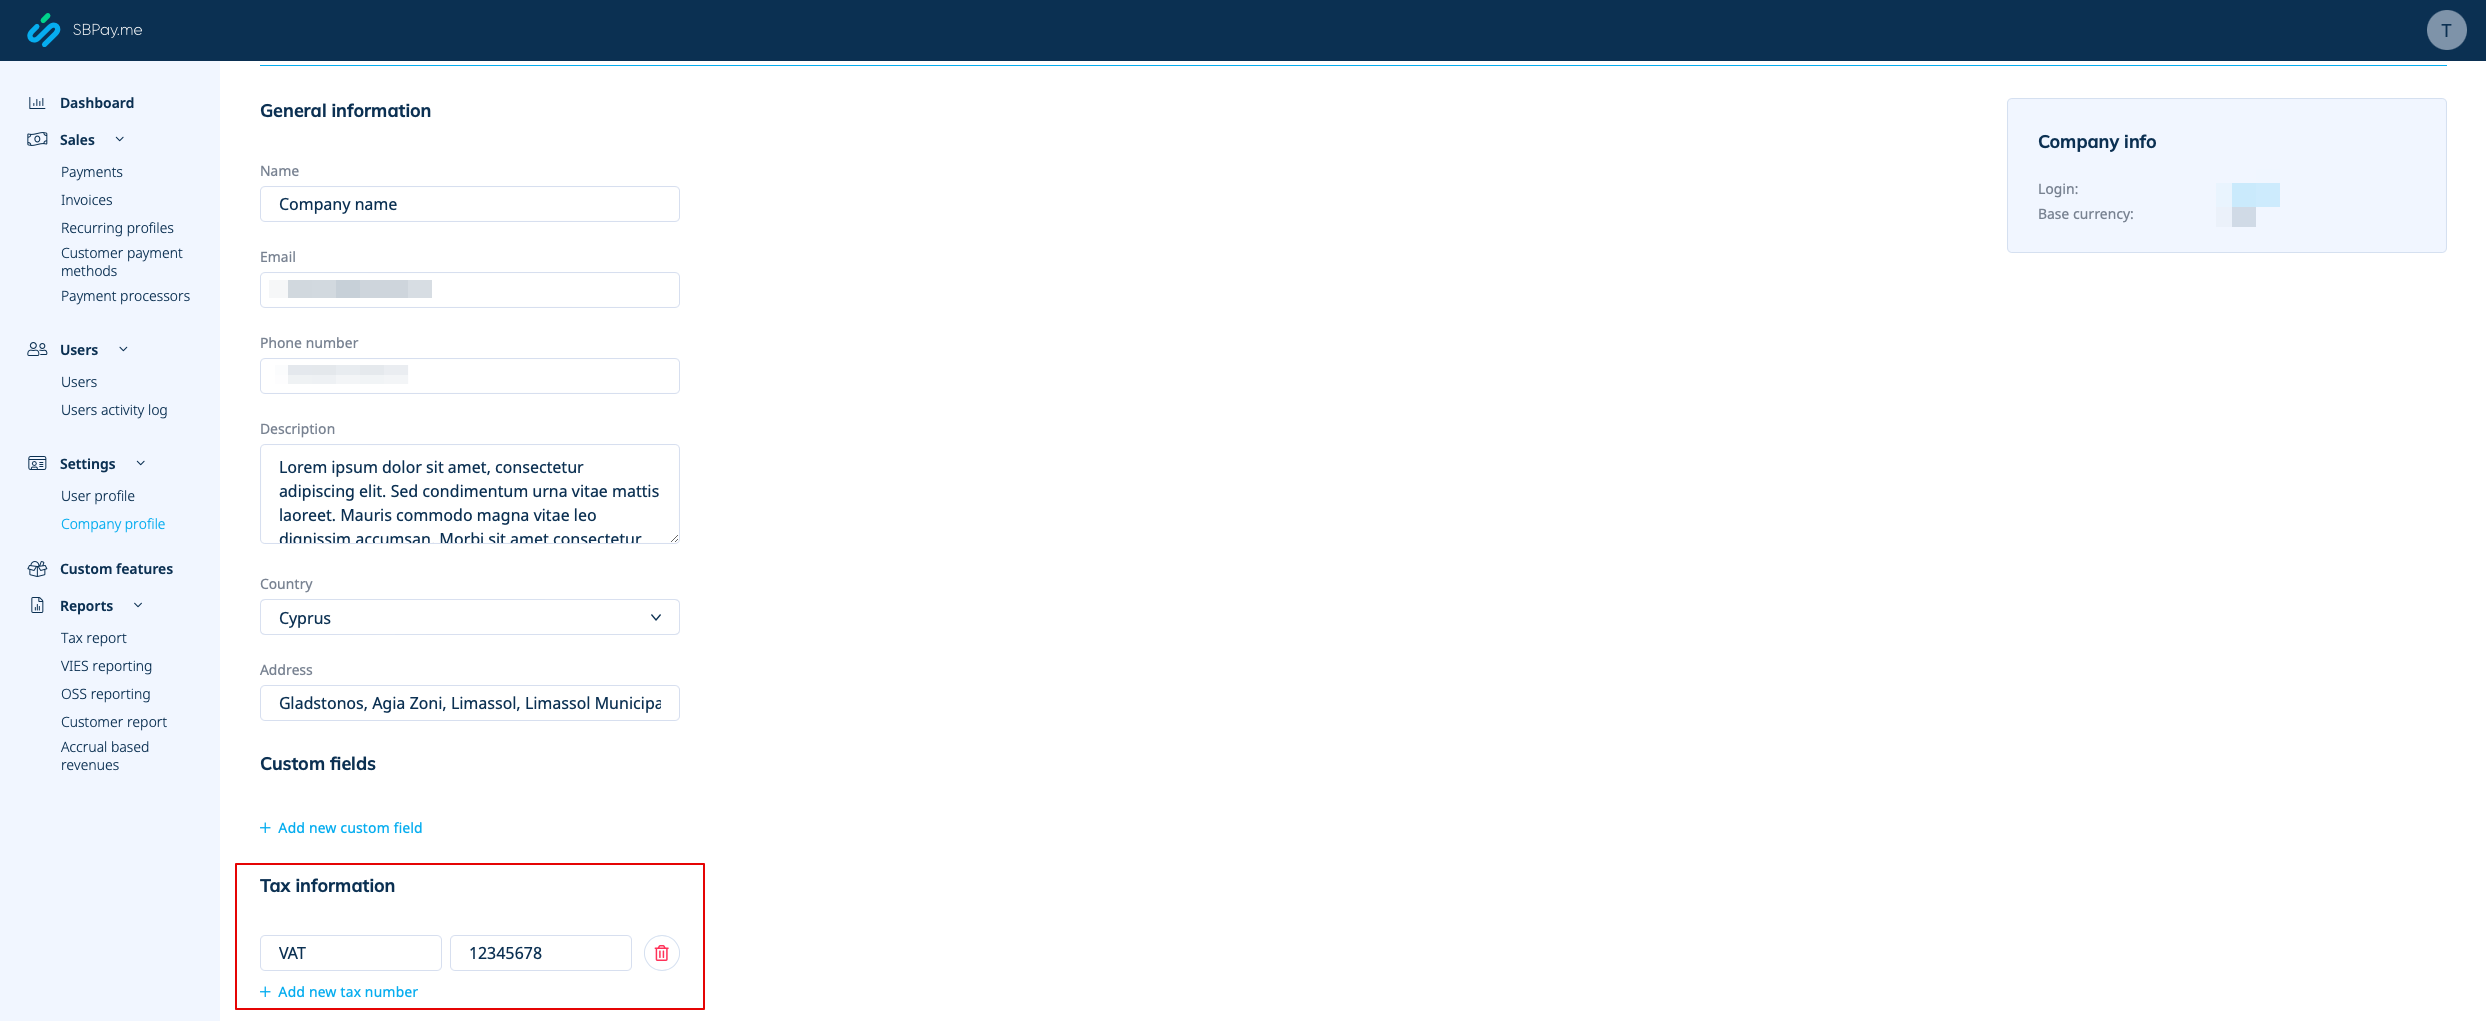
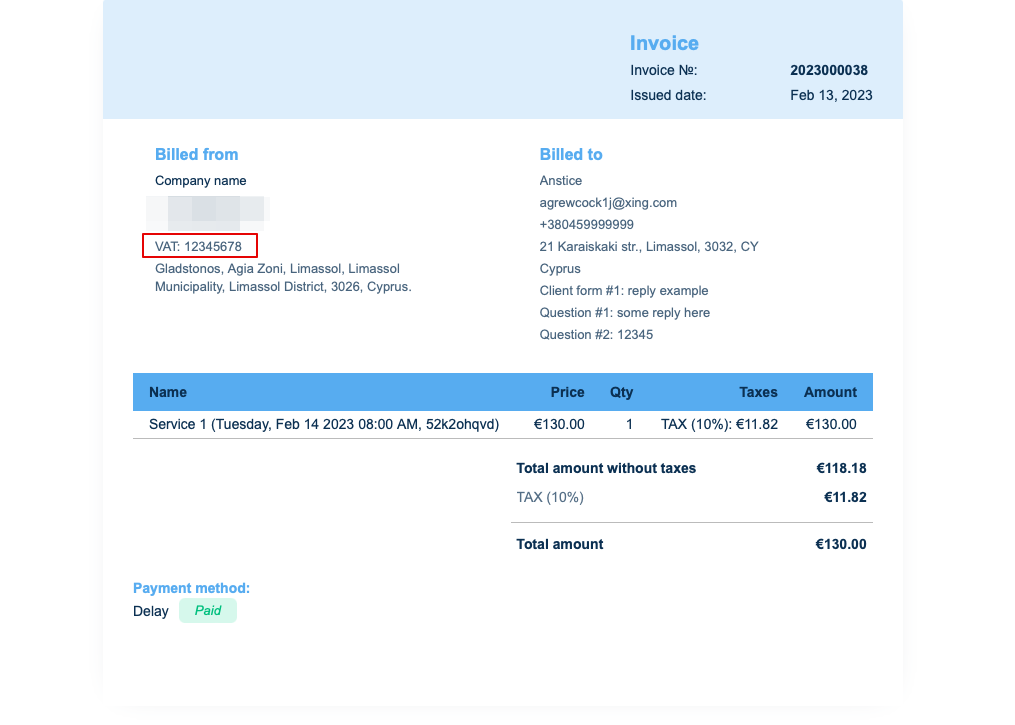
2. Numéro de TVA de l'entreprise.
Si elle est ajoutée dans Paiements (SBPay.me) -> Systèmes de paiement - > Paramètres -> Profil de l'entreprise -> Informations fiscales, elle sera incluse dans l'en-tête de la facture.
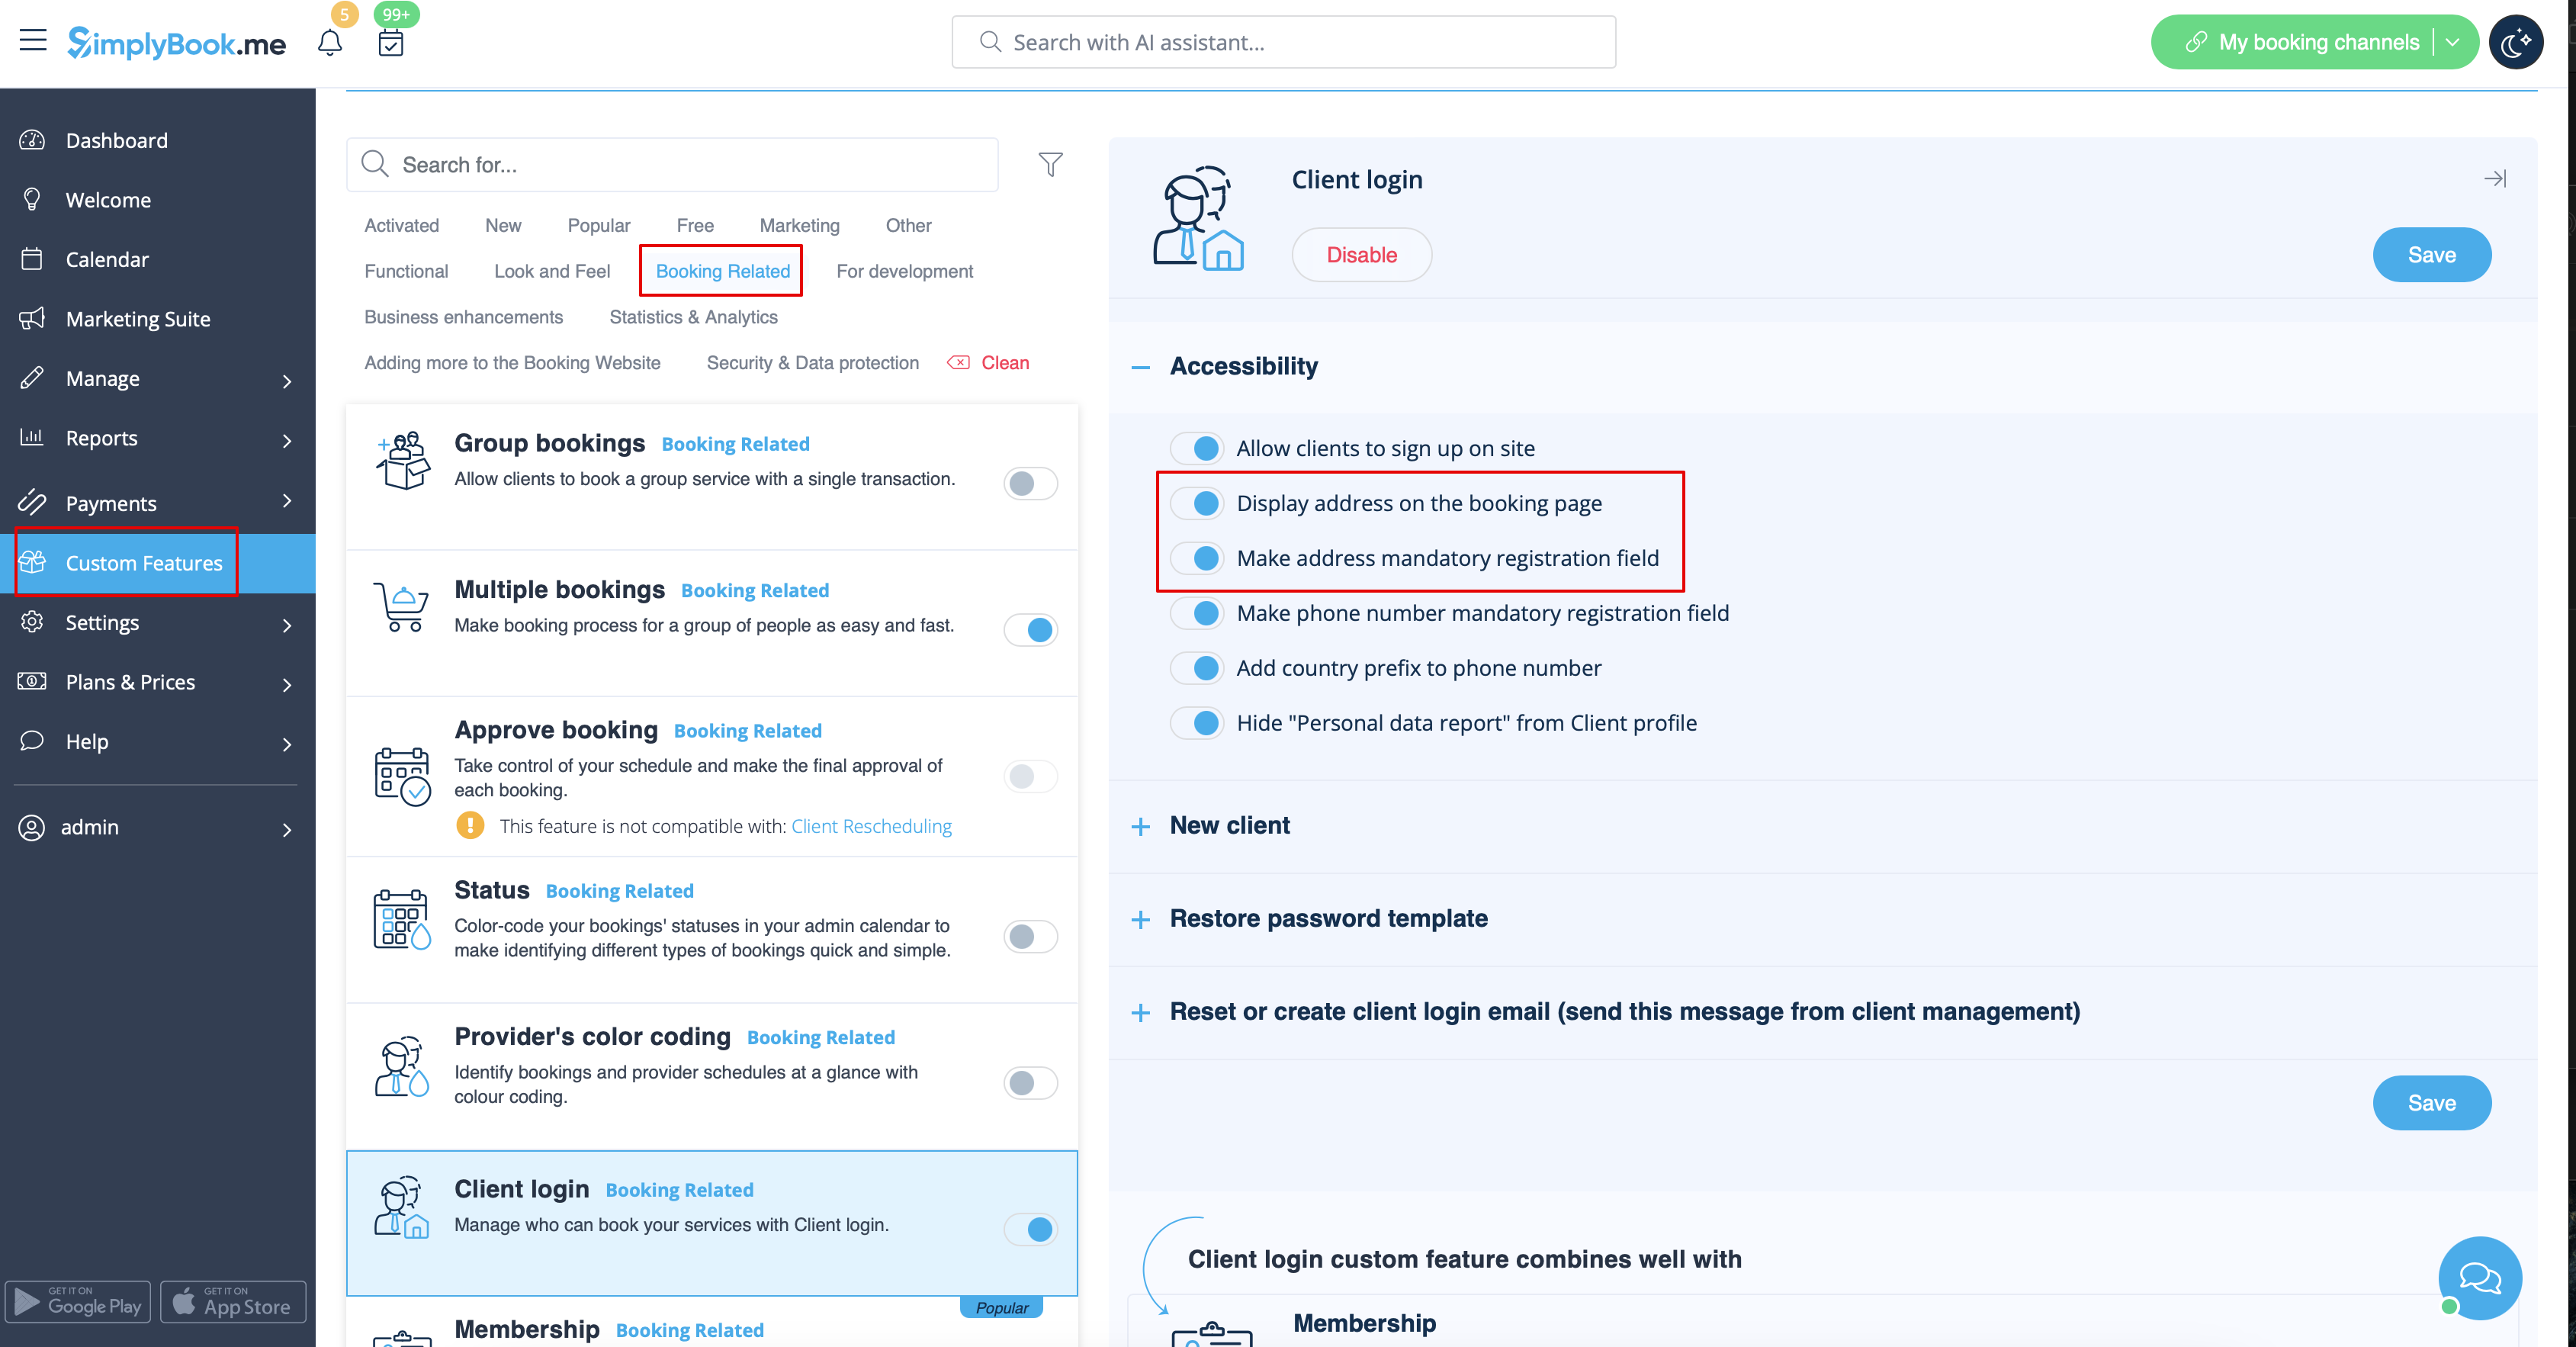
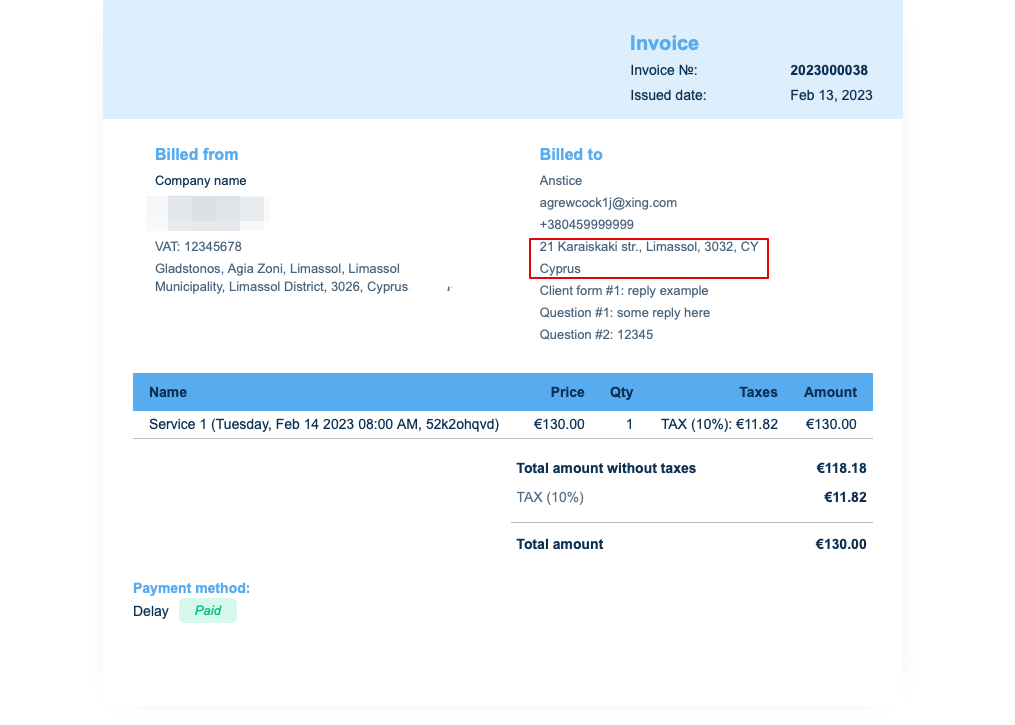
3. Adresse du client.
Pour que l'adresse du client s'affiche, veuillez activer la fonctionnalité personnalisée Connexion client, puis cocher les cases Afficher l'adresse sur la page de réservation et Rendre l'adresse obligatoire dans la section Accessibilité. Enregistrez les paramètres.
4. Formulaires d'admission et champs client
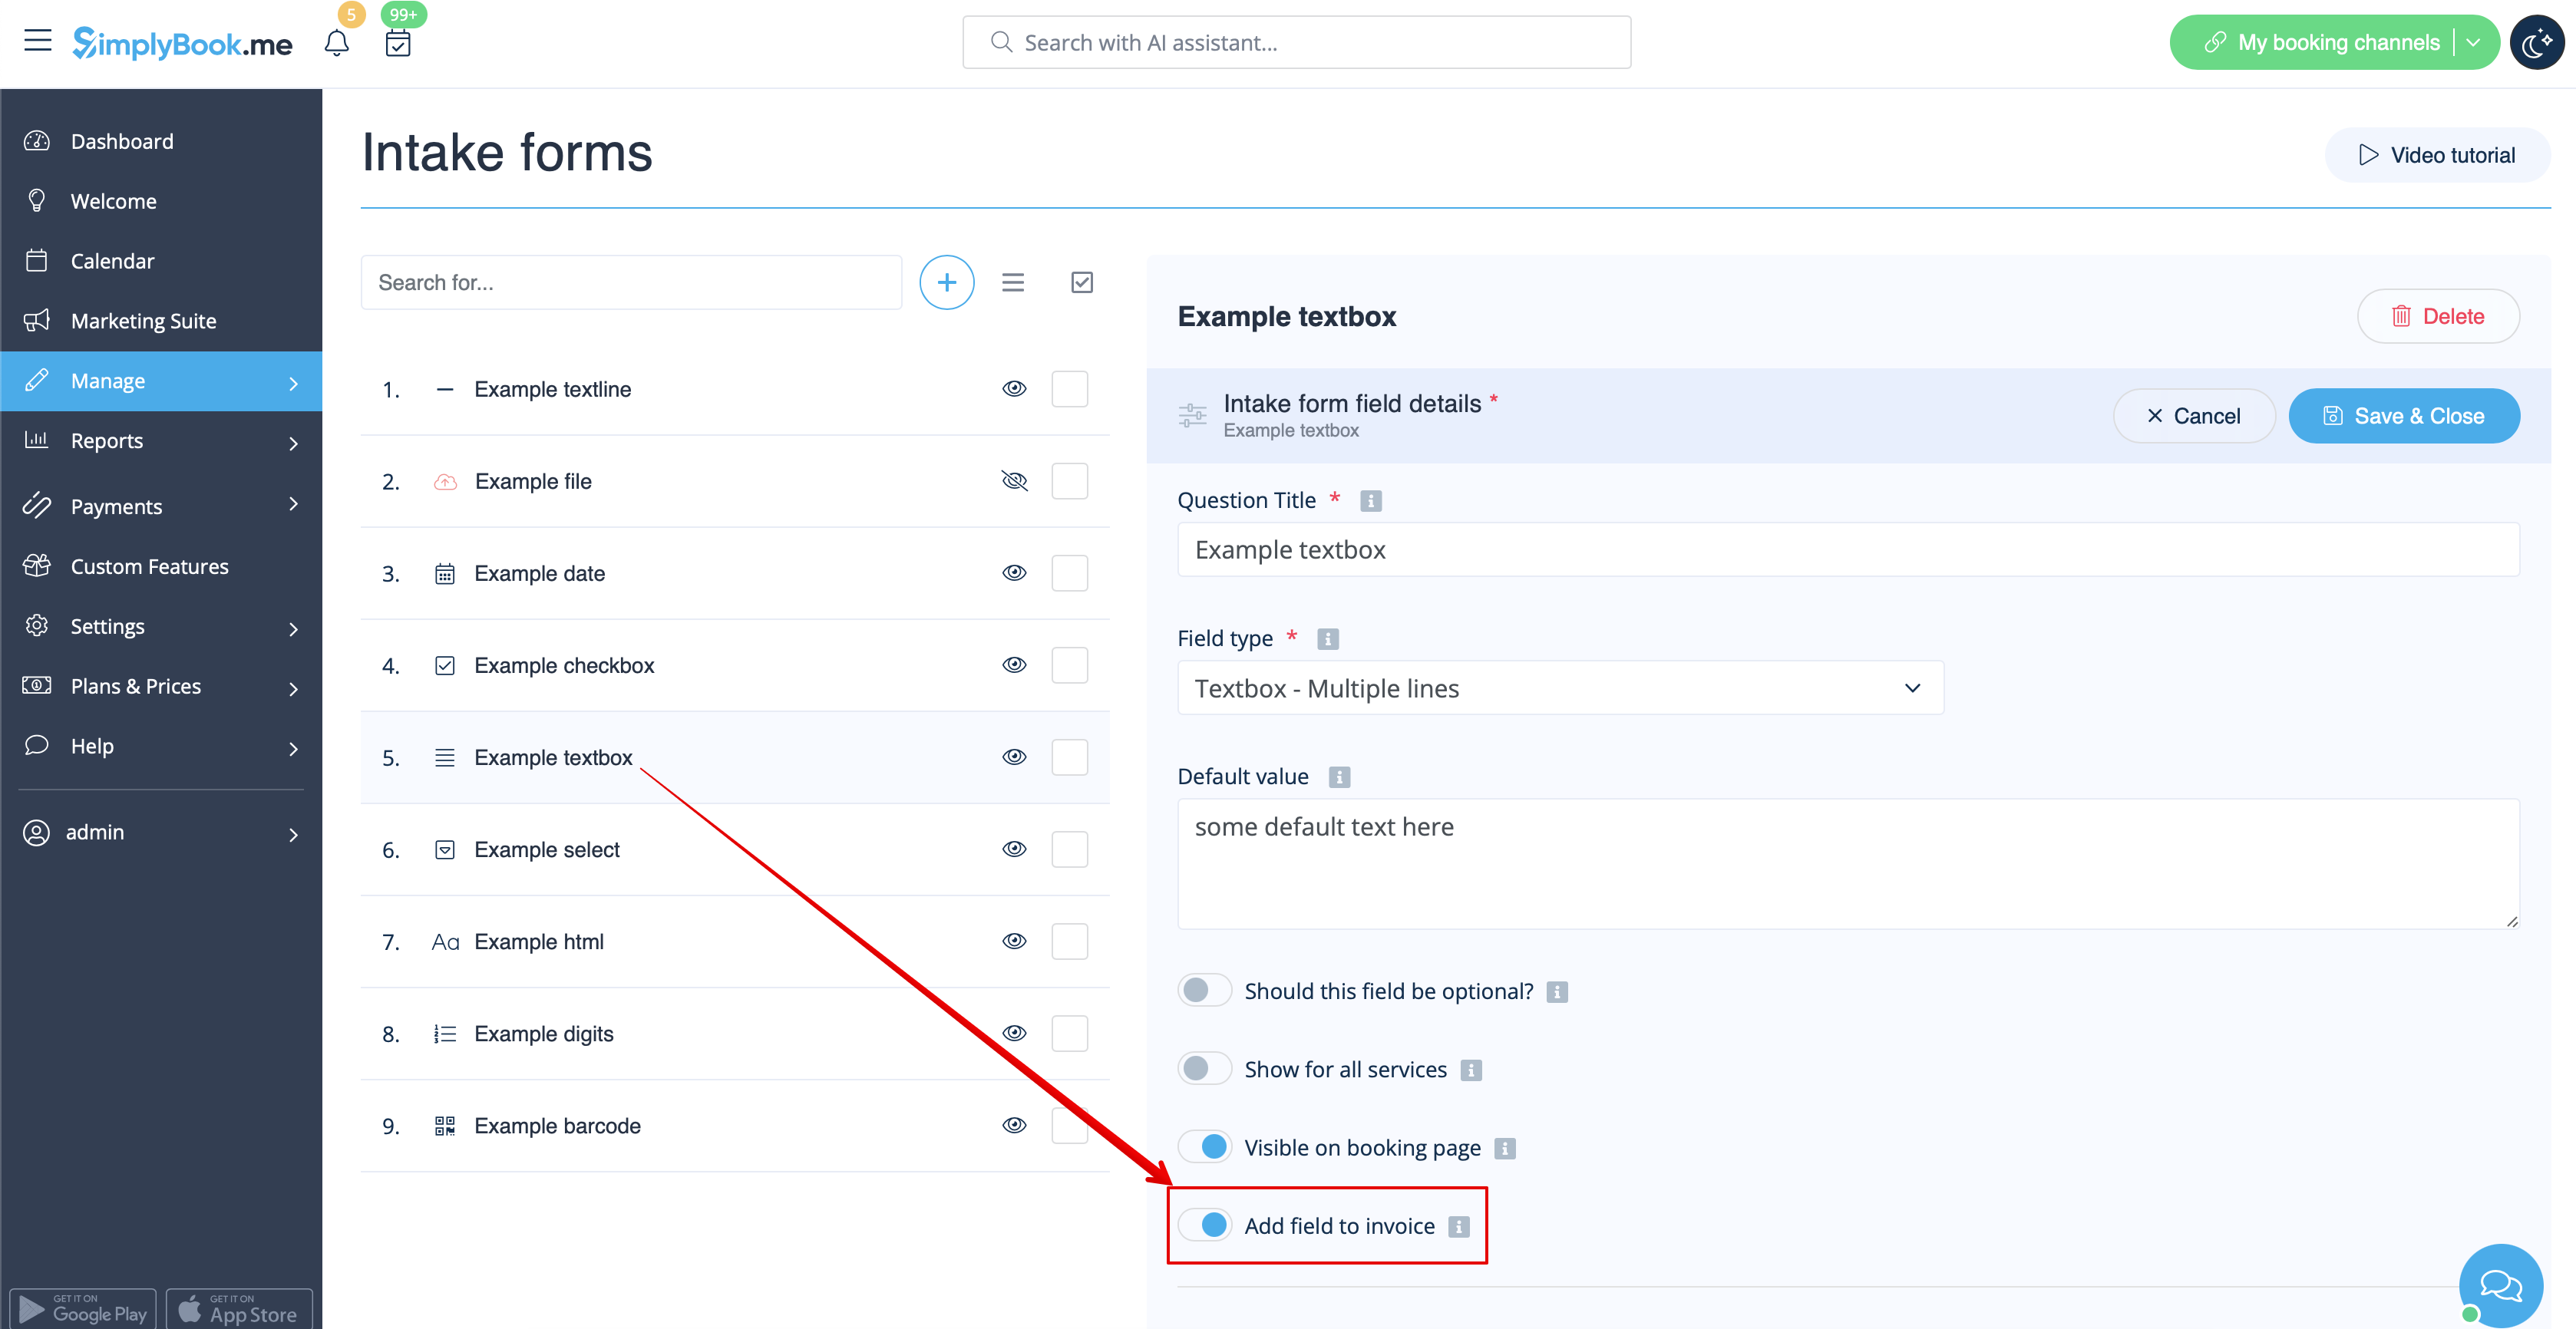
Vous pouvez ajouter certains formulaires à afficher dans le bloc d'informations client.
S'il s'agit d'un formulaire d'admission, allez dans Gérer -> Formulaires d'admission -> cliquez sur le formulaire souhaité pour le sélectionner -> activez Ajouter un champ à la facture, puis enregistrez les paramètres.
Si vous souhaitez ajouter un formulaire client, accédez à Gérer -> Champs client -> cliquez sur le champ souhaité pour le modifier -> activez Ajouter un champ à la facture, puis enregistrez.
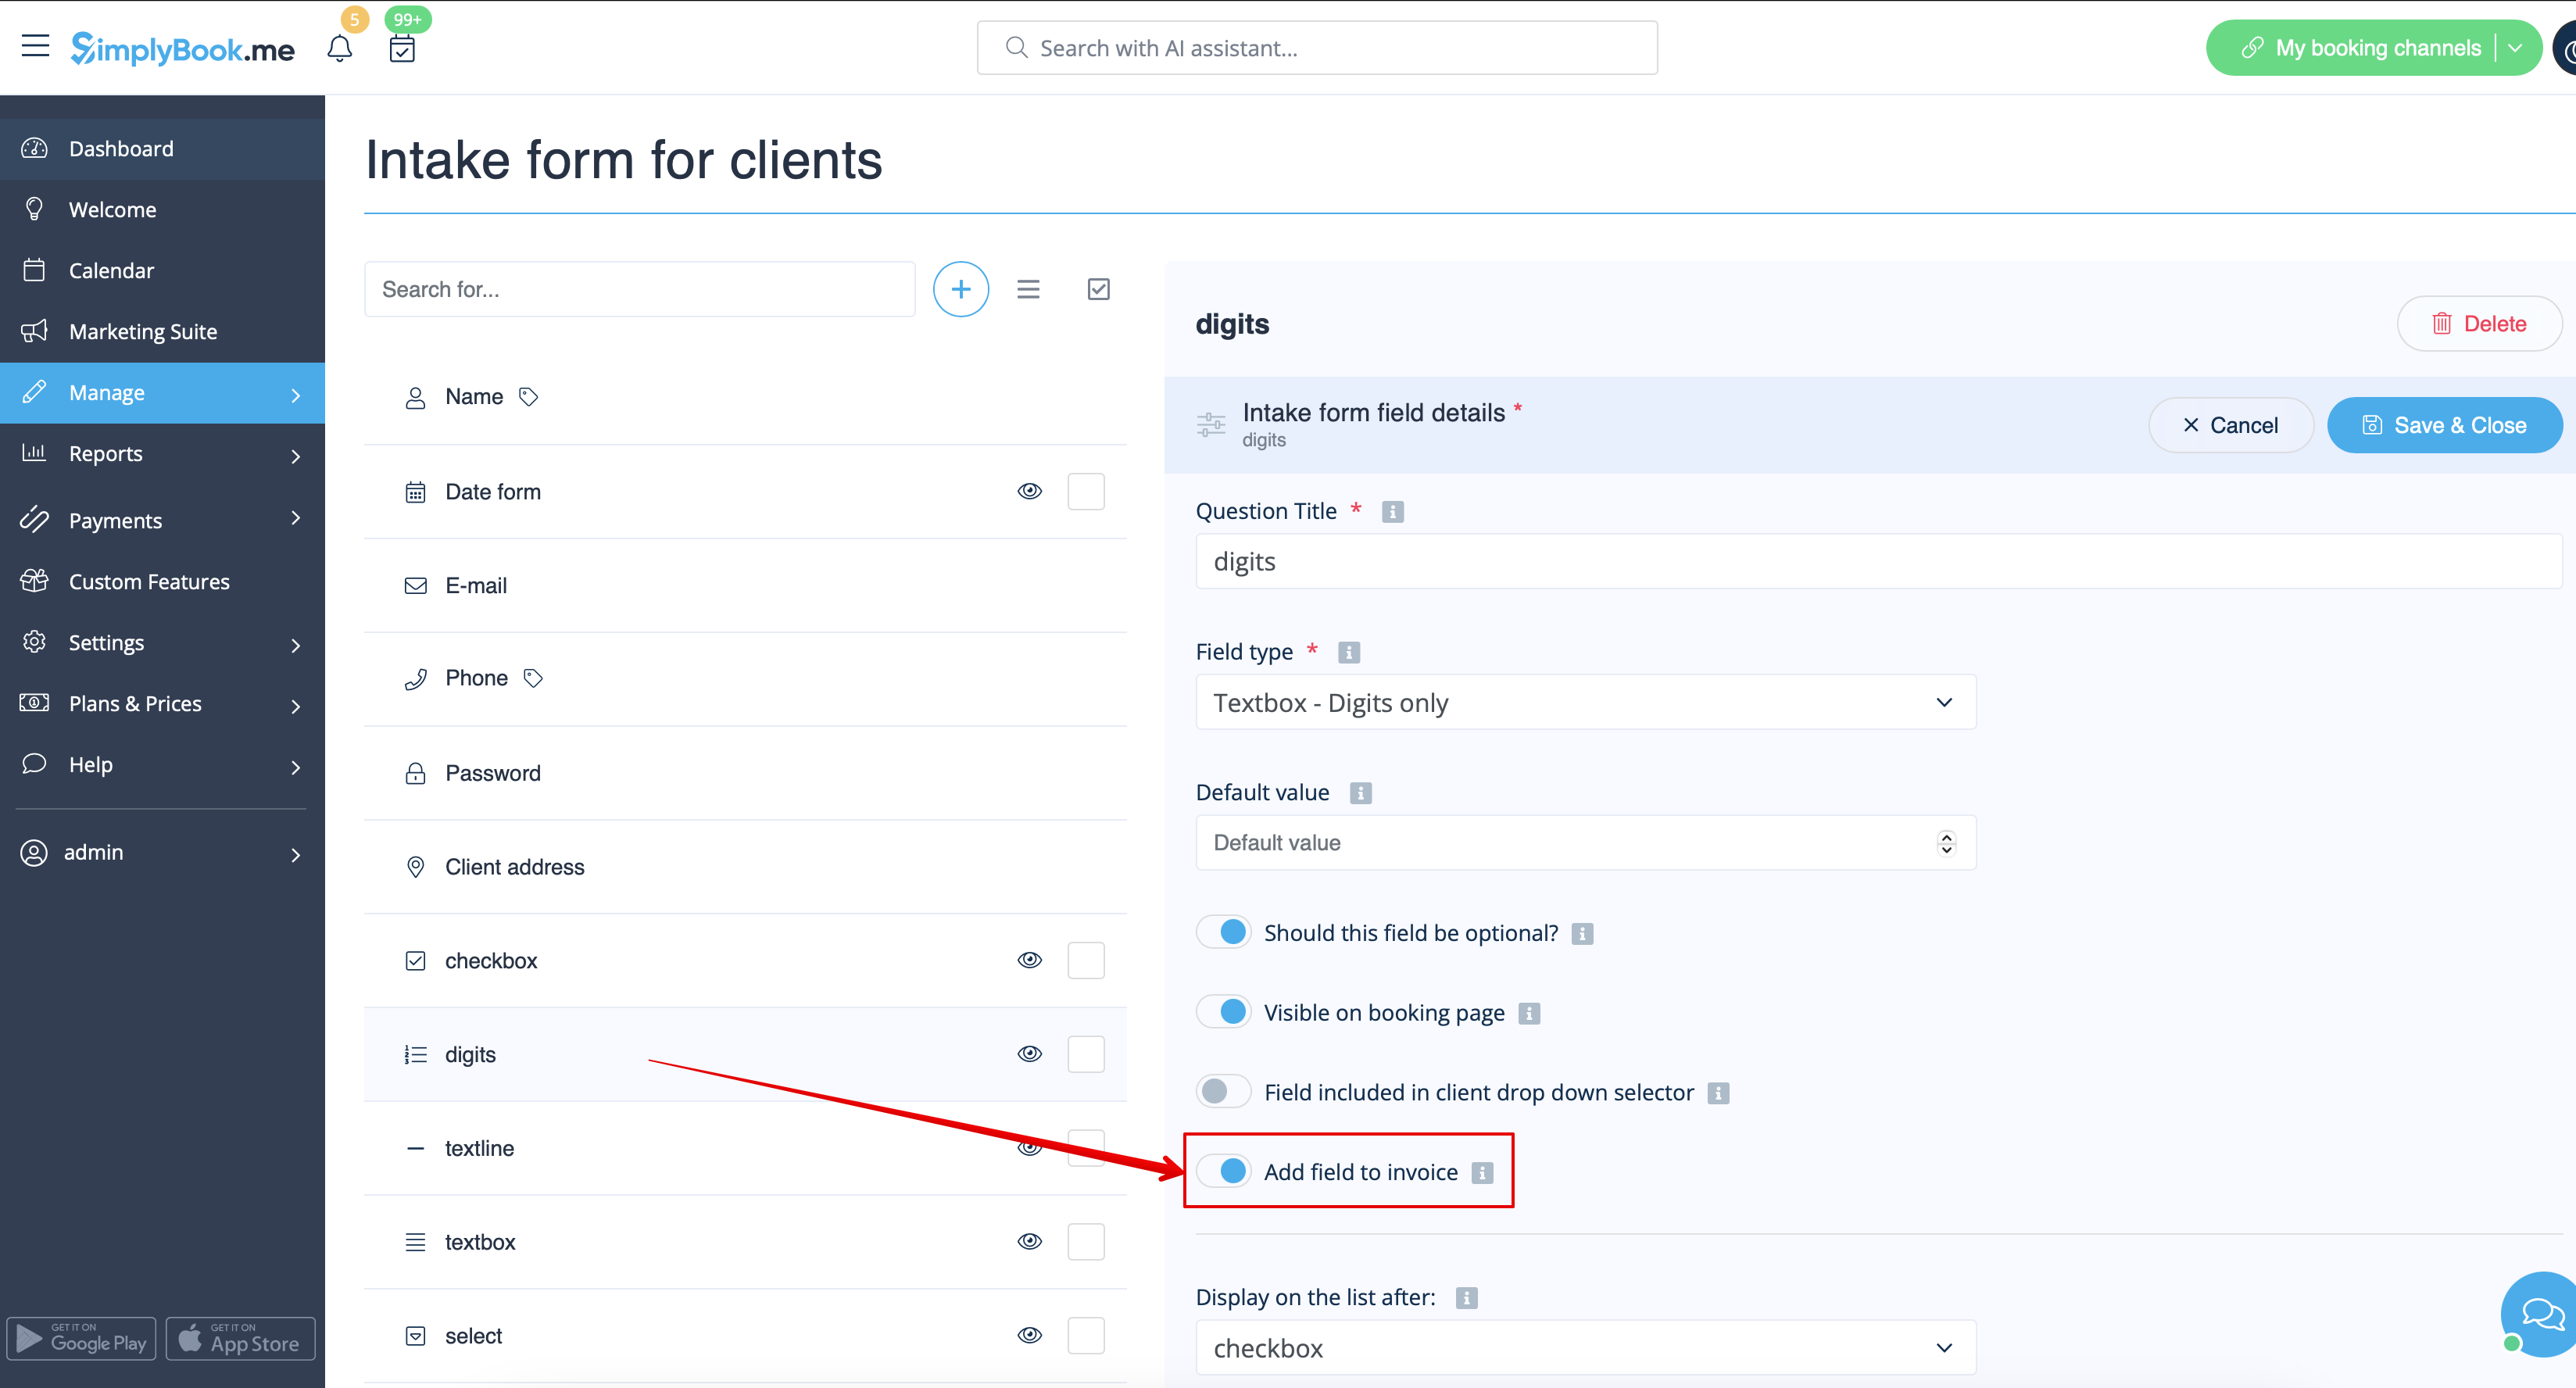
Le titre du formulaire et la réponse du client apparaîtront ainsi tous deux sur la facture.

5. Conception des factures.
Vous avez le choix entre trois modèles dans Paiements (SBPay.me) -> Systèmes de paiement - > Fonctionnalités personnalisées -> Factures -> Paramètres -> Apparence.
Veuillez sélectionner celui qui vous convient le mieux, ajouter le logo de votre entreprise et enregistrer les paramètres.
Remarque importante ! L'importation directe de factures depuis des plateformes externes vers le système n'est pas prise en charge. Cependant, SimplyBook.me propose des options d'intégration avec divers logiciels de comptabilité, notamment Xero, QuickBooks et FreshBooks. Vous pouvez ainsi gérer efficacement vos factures dans votre système comptable préféré.