From SimplyBook.me
Created page with " left :1. In your [https://simplybook.me/ Simplybook] admin page get the code in Settings//Bookings on Webpage or Facebook//Booking button widget fo..." |
No edit summary |
||
| (7 intermediate revisions by the same user not shown) | |||
| Line 1: | Line 1: | ||
[[File:Godaddy-logo.png | left]] | <languages/> | ||
:1. In your [https://simplybook.me/ Simplybook] admin page get the code in Settings// | <translate> | ||
:2. In | <!--T:1--> | ||
:3. Click | {{#seo: | ||
:4. | |title=Go Daddy guide for SimplyBook.me | ||
: | |description=GoDaddy integration guide. Embed SimplyBook.me widget on GoDaddy websites. Instructions for adding booking functionality to GoDaddy-hosted sites. | ||
: | |titlemode=append | ||
: | |keywords=faq, frequently asked questions, booking software, appointment system questions, appointments online, calendar software, booking system, booking calendar, scheduling software, online appointment scheduling, online scheduling, setup, setup help, support, help content | ||
: | }} | ||
</translate><translate> | |||
<!--T:2--> | |||
[[File:Godaddy-logo (2).png| left]]<br><br> | |||
<!--T:3--> | |||
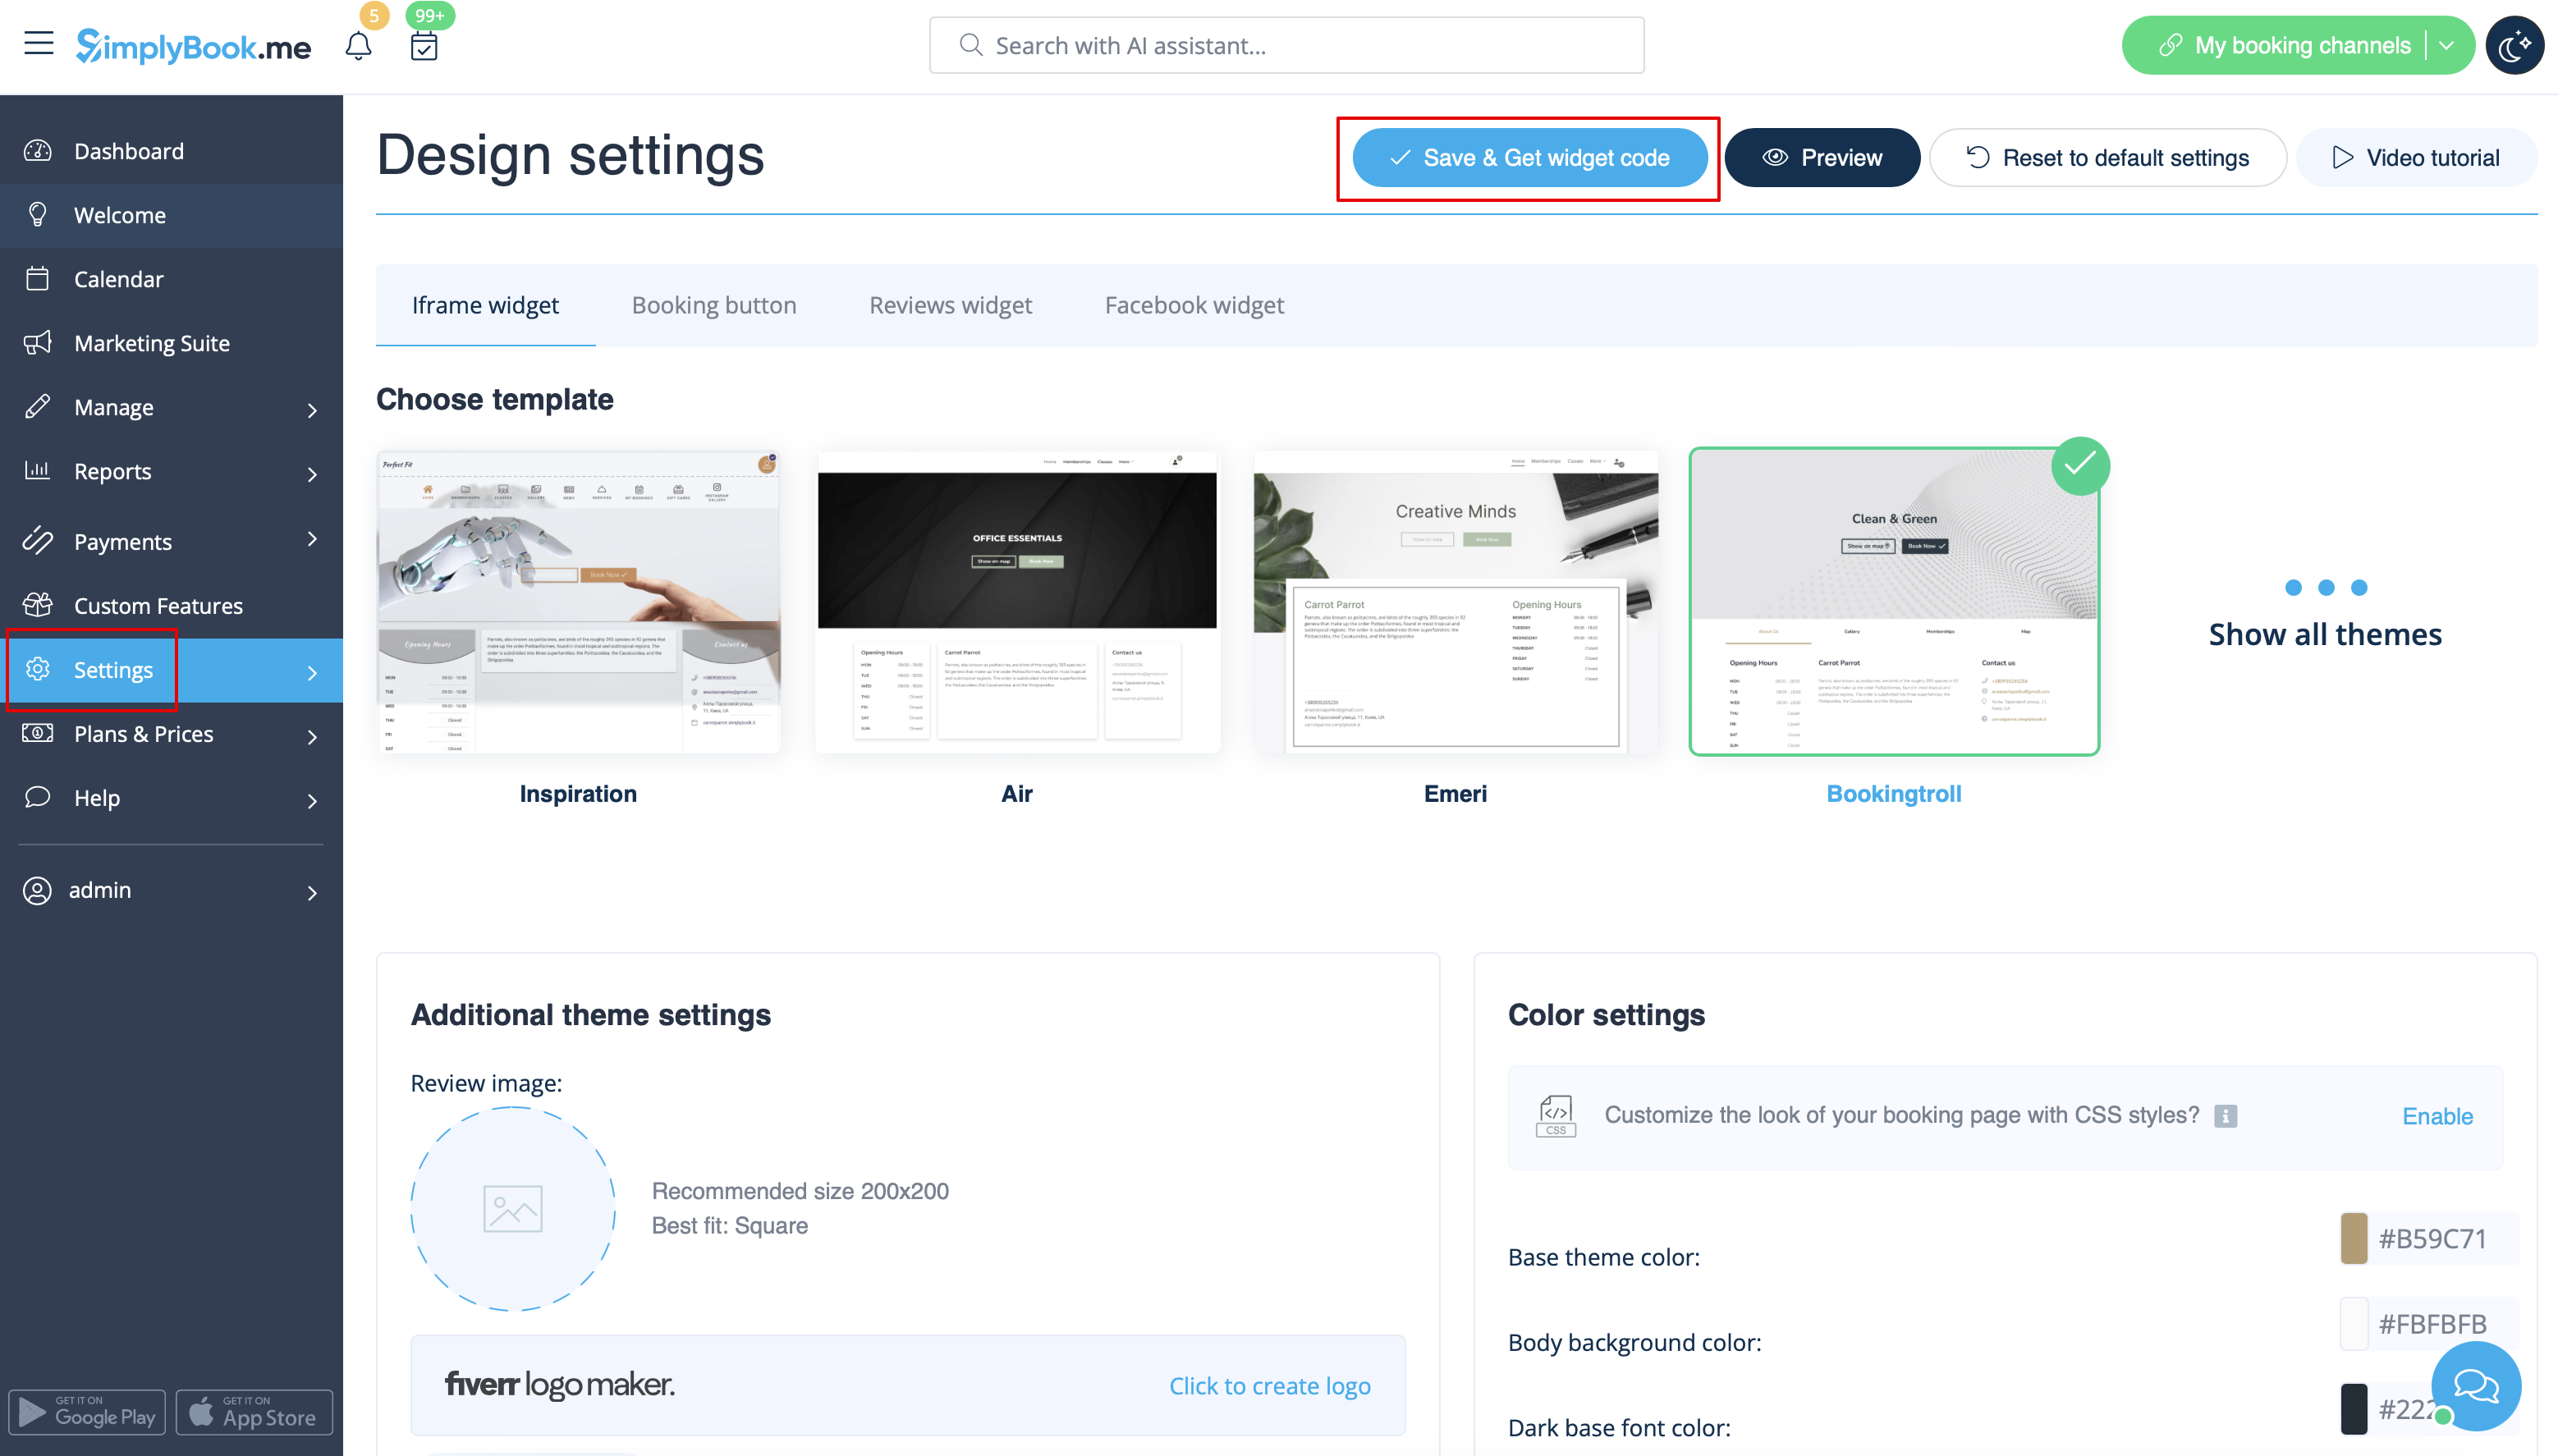
:1. In your [https://simplybook.me/ Simplybook] admin page get the code in <span style="background-color:#d4f8e5; padding:5px; border-radius:5px;">Settings</span> -> <span style="background-color:#d4f8e5; padding:5px; border-radius:5px;">Booking widgets settings</span> -> <span style="background-color:#d4f8e5; padding:5px; border-radius:5px;">iFrame widget</span> -> <span style="background-color:#d4f8e5; padding:5px; border-radius:5px;">Get widget code.</span> | |||
[[File:Get iframe widget code redesigned.png|1200px|border|center|link=https://help.simplybook.me/images/d/de/Get_iframe_widget_code_redesigned.png]] | |||
<br><br> | |||
:2. In <span style="background-color:#d4f8e5; padding:5px; border-radius:5px;">GoDaddy</span> system, Log in to your account and go to website editing. | |||
:3. Click on <span style="background-color:#d4f8e5; padding:5px; border-radius:5px;">Pages&Sections.</span> | |||
[[File:Go daddy pages new.png|border|center]] | |||
<br><br> | |||
:4. Select <span style="background-color:#d4f8e5; padding:5px; border-radius:5px;">Manage Pages</span> option. | |||
[[File:Go daddy manage pages.png|border|center]] | |||
<br><br> | |||
:5. From the pages menu, select the page you want to modify or add a new one. | |||
[[File:Go daddy add page new.png |border|center]] | |||
<br><br> | |||
:6. On page details add page title, set appearance options to your taste and create the page. | |||
[[File:Go daddy page details.png|border|center]] | |||
<br><br> | |||
:7. Proceed to <span style="background-color:#d4f8e5; padding:5px; border-radius:5px;">adding a section.</span> | |||
[[File:Go daddy add section.png|border|center]] | |||
<br><br> | |||
:8. Select to add <span style="background-color:#d4f8e5; padding:5px; border-radius:5px;">HTML</span> block from the side menu. | |||
[[File:Go daddy add html.png|border|center]] | |||
<br><br> | |||
:9. Paste the code that you have previously copied from SimplyBook.me interface to the corresponding box. | |||
[[File:Go daddy paste code.png|border|center]] | |||
<br><br> | |||
:10. Check the preview and publish the changes. | |||
[[File:Go daddy preview.png|border|center]] | |||
<br><br><br><br> | |||
</translate> | |||
Latest revision as of 16:28, 12 February 2026
- 1. In your Simplybook admin page get the code in Settings -> Booking widgets settings -> iFrame widget -> Get widget code.
- 2. In GoDaddy system, Log in to your account and go to website editing.
- 3. Click on Pages&Sections.

- 4. Select Manage Pages option.

- 5. From the pages menu, select the page you want to modify or add a new one.

- 6. On page details add page title, set appearance options to your taste and create the page.

- 7. Proceed to adding a section.

- 8. Select to add HTML block from the side menu.

- 9. Paste the code that you have previously copied from SimplyBook.me interface to the corresponding box.

- 10. Check the preview and publish the changes.
