From SimplyBook.me
No edit summary |
No edit summary |
||
| (One intermediate revision by the same user not shown) | |||
| Line 4: | Line 4: | ||
{{#seo: | {{#seo: | ||
|title=Giving access to the system to other people - SimplyBook.me | |title=Giving access to the system to other people - SimplyBook.me | ||
|description= | |description=Grant system access to staff. Create user accounts, assign roles. Manage permissions for providers, managers, receptionists with appropriate access levels. | ||
|titlemode=append | |titlemode=append | ||
|keywords=faq, frequently asked questions, booking software, appointment system questions, appointments online, calendar software, booking system, booking calendar, scheduling software, online appointment scheduling, online scheduling, plugins, custom features, custom booking page link, domain name, custom domain name, custom url | |keywords=faq, frequently asked questions, booking software, appointment system questions, appointments online, calendar software, booking system, booking calendar, scheduling software, online appointment scheduling, online scheduling, plugins, custom features, custom booking page link, domain name, custom domain name, custom url | ||
| Line 10: | Line 10: | ||
<translate> | <translate> | ||
<!--T:2--> | |||
<br><br> | <br><br> | ||
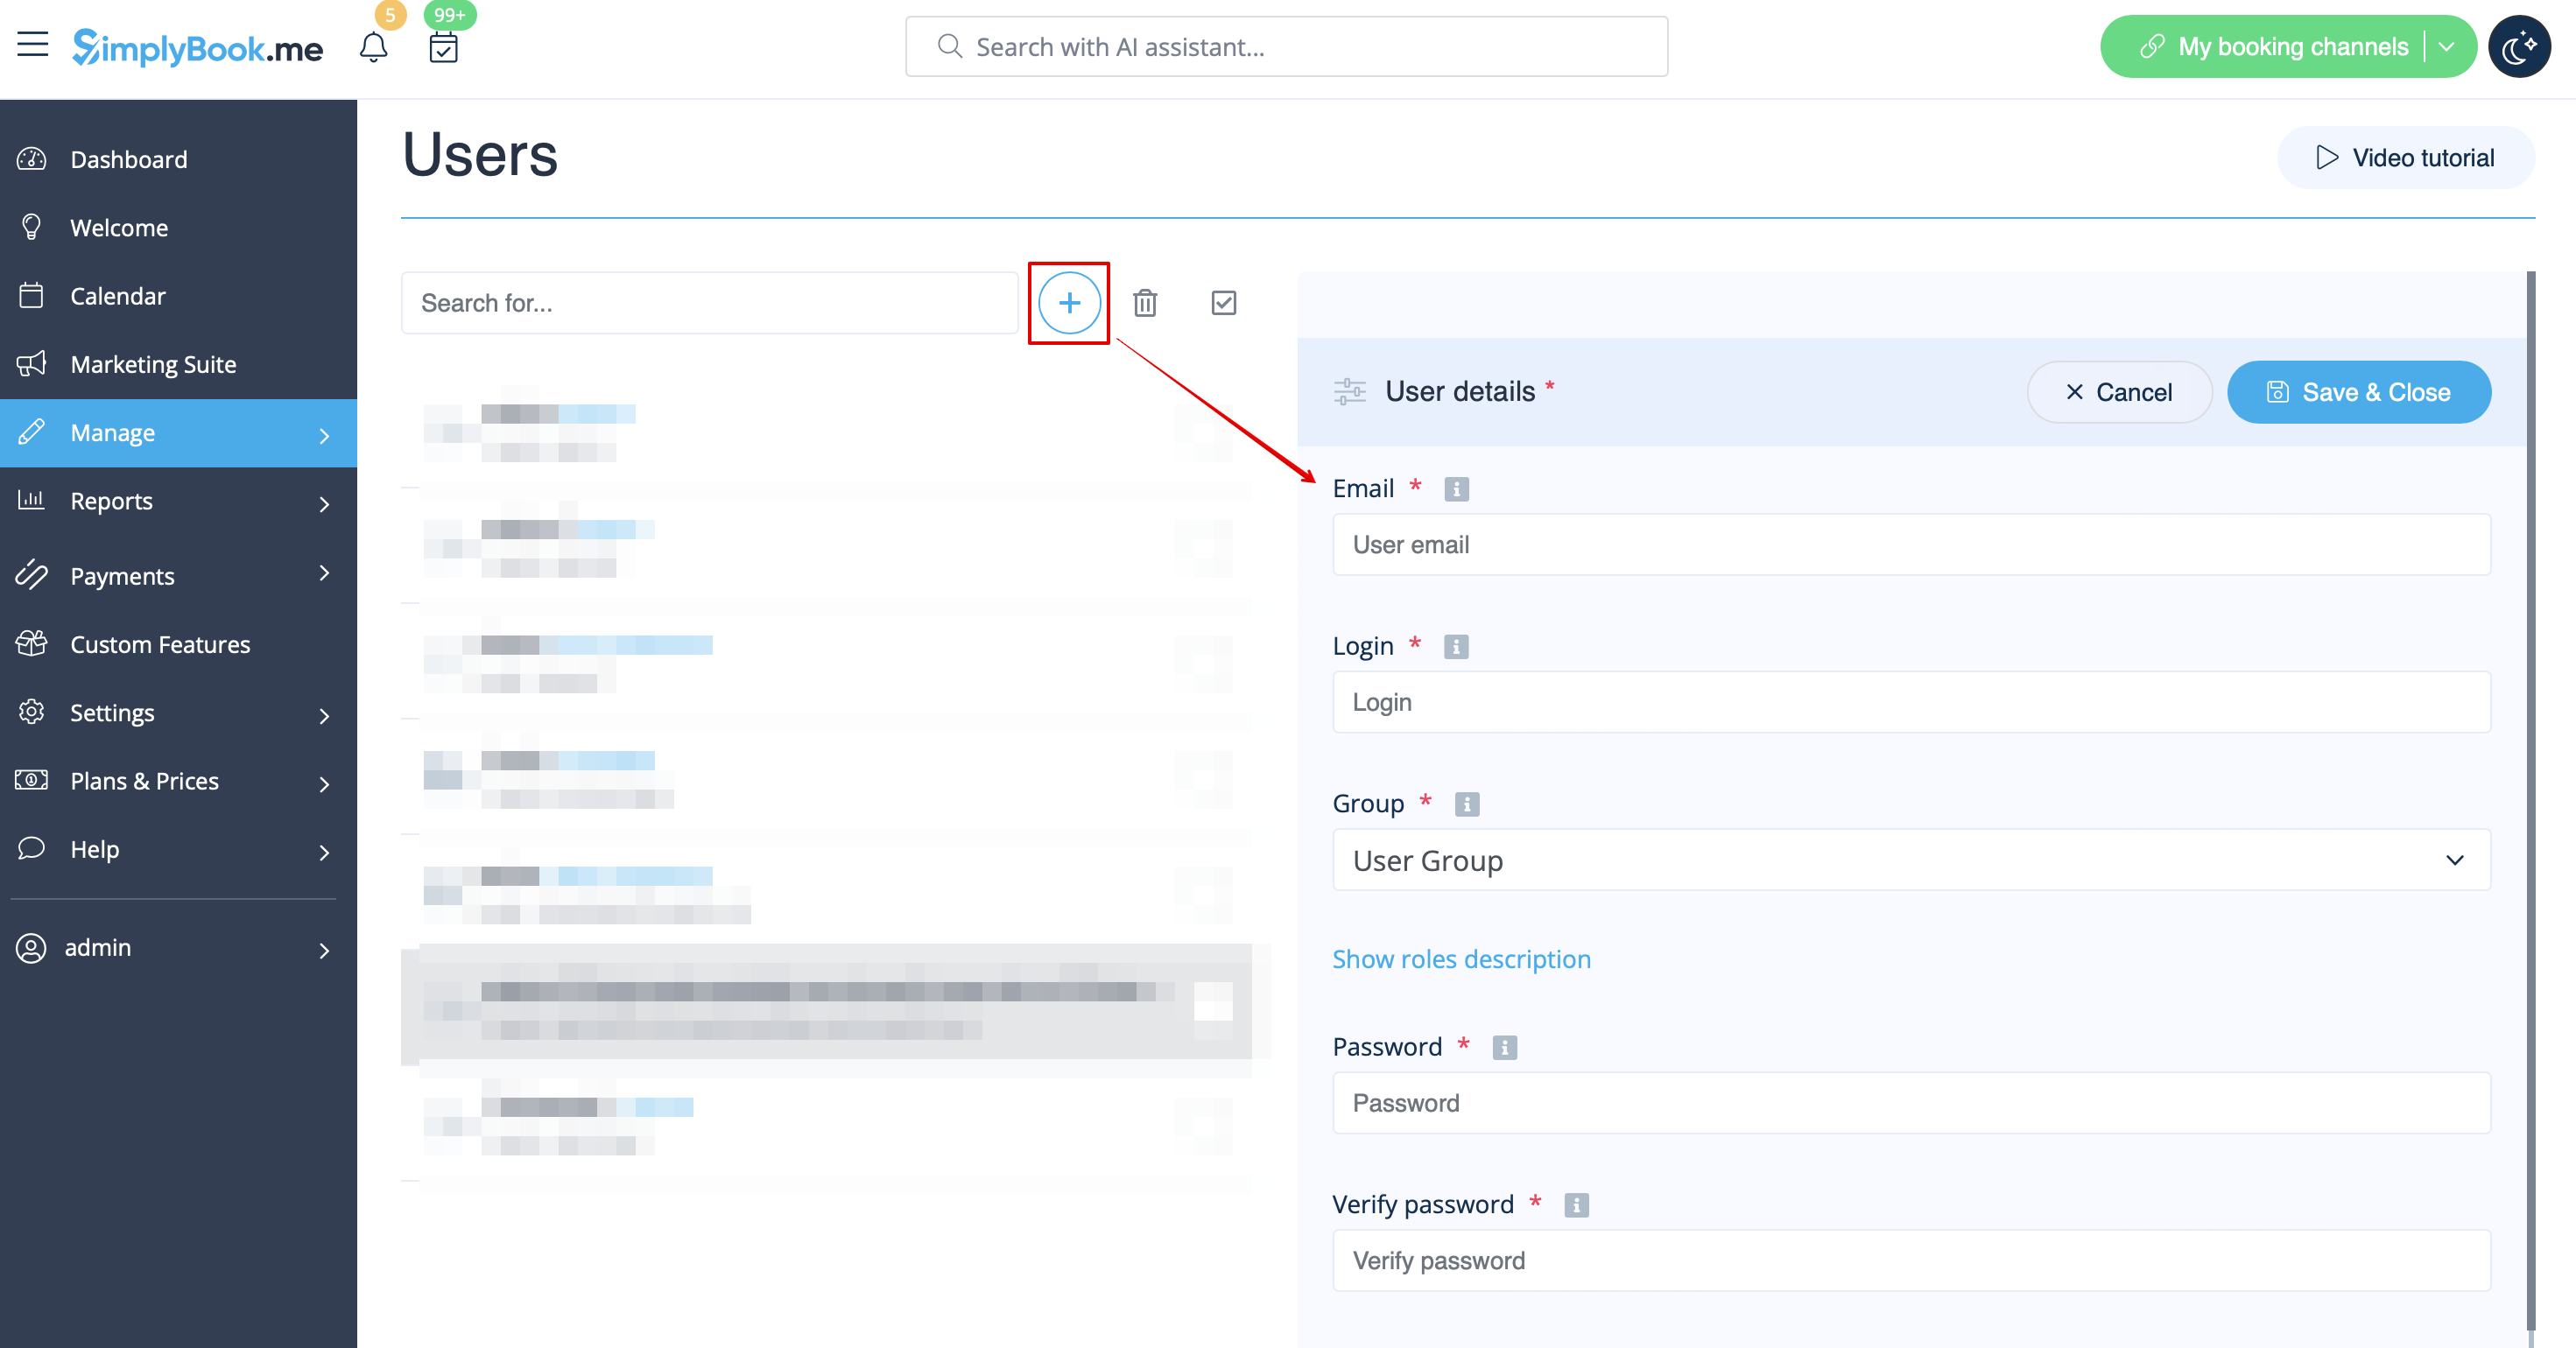
You can create a separate user for the person who needs to access your admin page in <span style="background-color:#d4f8e5; padding:5px; border-radius:5px;">Manage</span> -> <span style="background-color:#d4f8e5; padding:5px; border-radius:5px;">Users</span> and assign the corresponding rights to him/her. <br>See the list of available user roles <span style="background-color:#cdeffc; padding:5px; border-radius:5px;">[[Adding_other_users_to_the_system#User_Roles| here]].</span> | You can create a separate user for the person who needs to access your admin page in <span style="background-color:#d4f8e5; padding:5px; border-radius:5px;">Manage</span> -> <span style="background-color:#d4f8e5; padding:5px; border-radius:5px;">Users</span> and assign the corresponding rights to him/her. <br>See the list of available user roles <span style="background-color:#cdeffc; padding:5px; border-radius:5px;">[[Adding_other_users_to_the_system#User_Roles| here]].</span> | ||
<!--T:3--> | |||
[[File:Create new user path redesigned.png|1200px | center|link=https://help.simplybook.me/images/f/f0/Create_new_user_path_redesigned.png]] | [[File:Create new user path redesigned.png|1200px | center|link=https://help.simplybook.me/images/f/f0/Create_new_user_path_redesigned.png]] | ||
| Line 18: | Line 20: | ||
<translate> | <translate> | ||
<!--T:4--> | |||
[[File:Relate user with provider redesined.png|1200px | center|link=https://help.simplybook.me/images/4/4b/Relate_user_with_provider_redesined.png]] | [[File:Relate user with provider redesined.png|1200px | center|link=https://help.simplybook.me/images/4/4b/Relate_user_with_provider_redesined.png]] | ||
<!--T:5--> | |||
<br><br> | <br><br> | ||
When adding new user details just enable the switch <span style="background-color:#d4f8e5; padding:5px; border-radius:5px;">Send login information to user</span> and save the user record.<br> | When adding new user details just enable the switch <span style="background-color:#d4f8e5; padding:5px; border-radius:5px;">Send login information to user</span> and save the user record.<br> | ||
Latest revision as of 16:30, 12 February 2026
You can create a separate user for the person who needs to access your admin page in Manage -> Users and assign the corresponding rights to him/her.
See the list of available user roles here.
When adding new user details just enable the switch Send login information to user and save the user record.
The system will automatically send the email with the login credentials according to the template you have set in Settings -> Email and SMS Settings -> New user login notification.
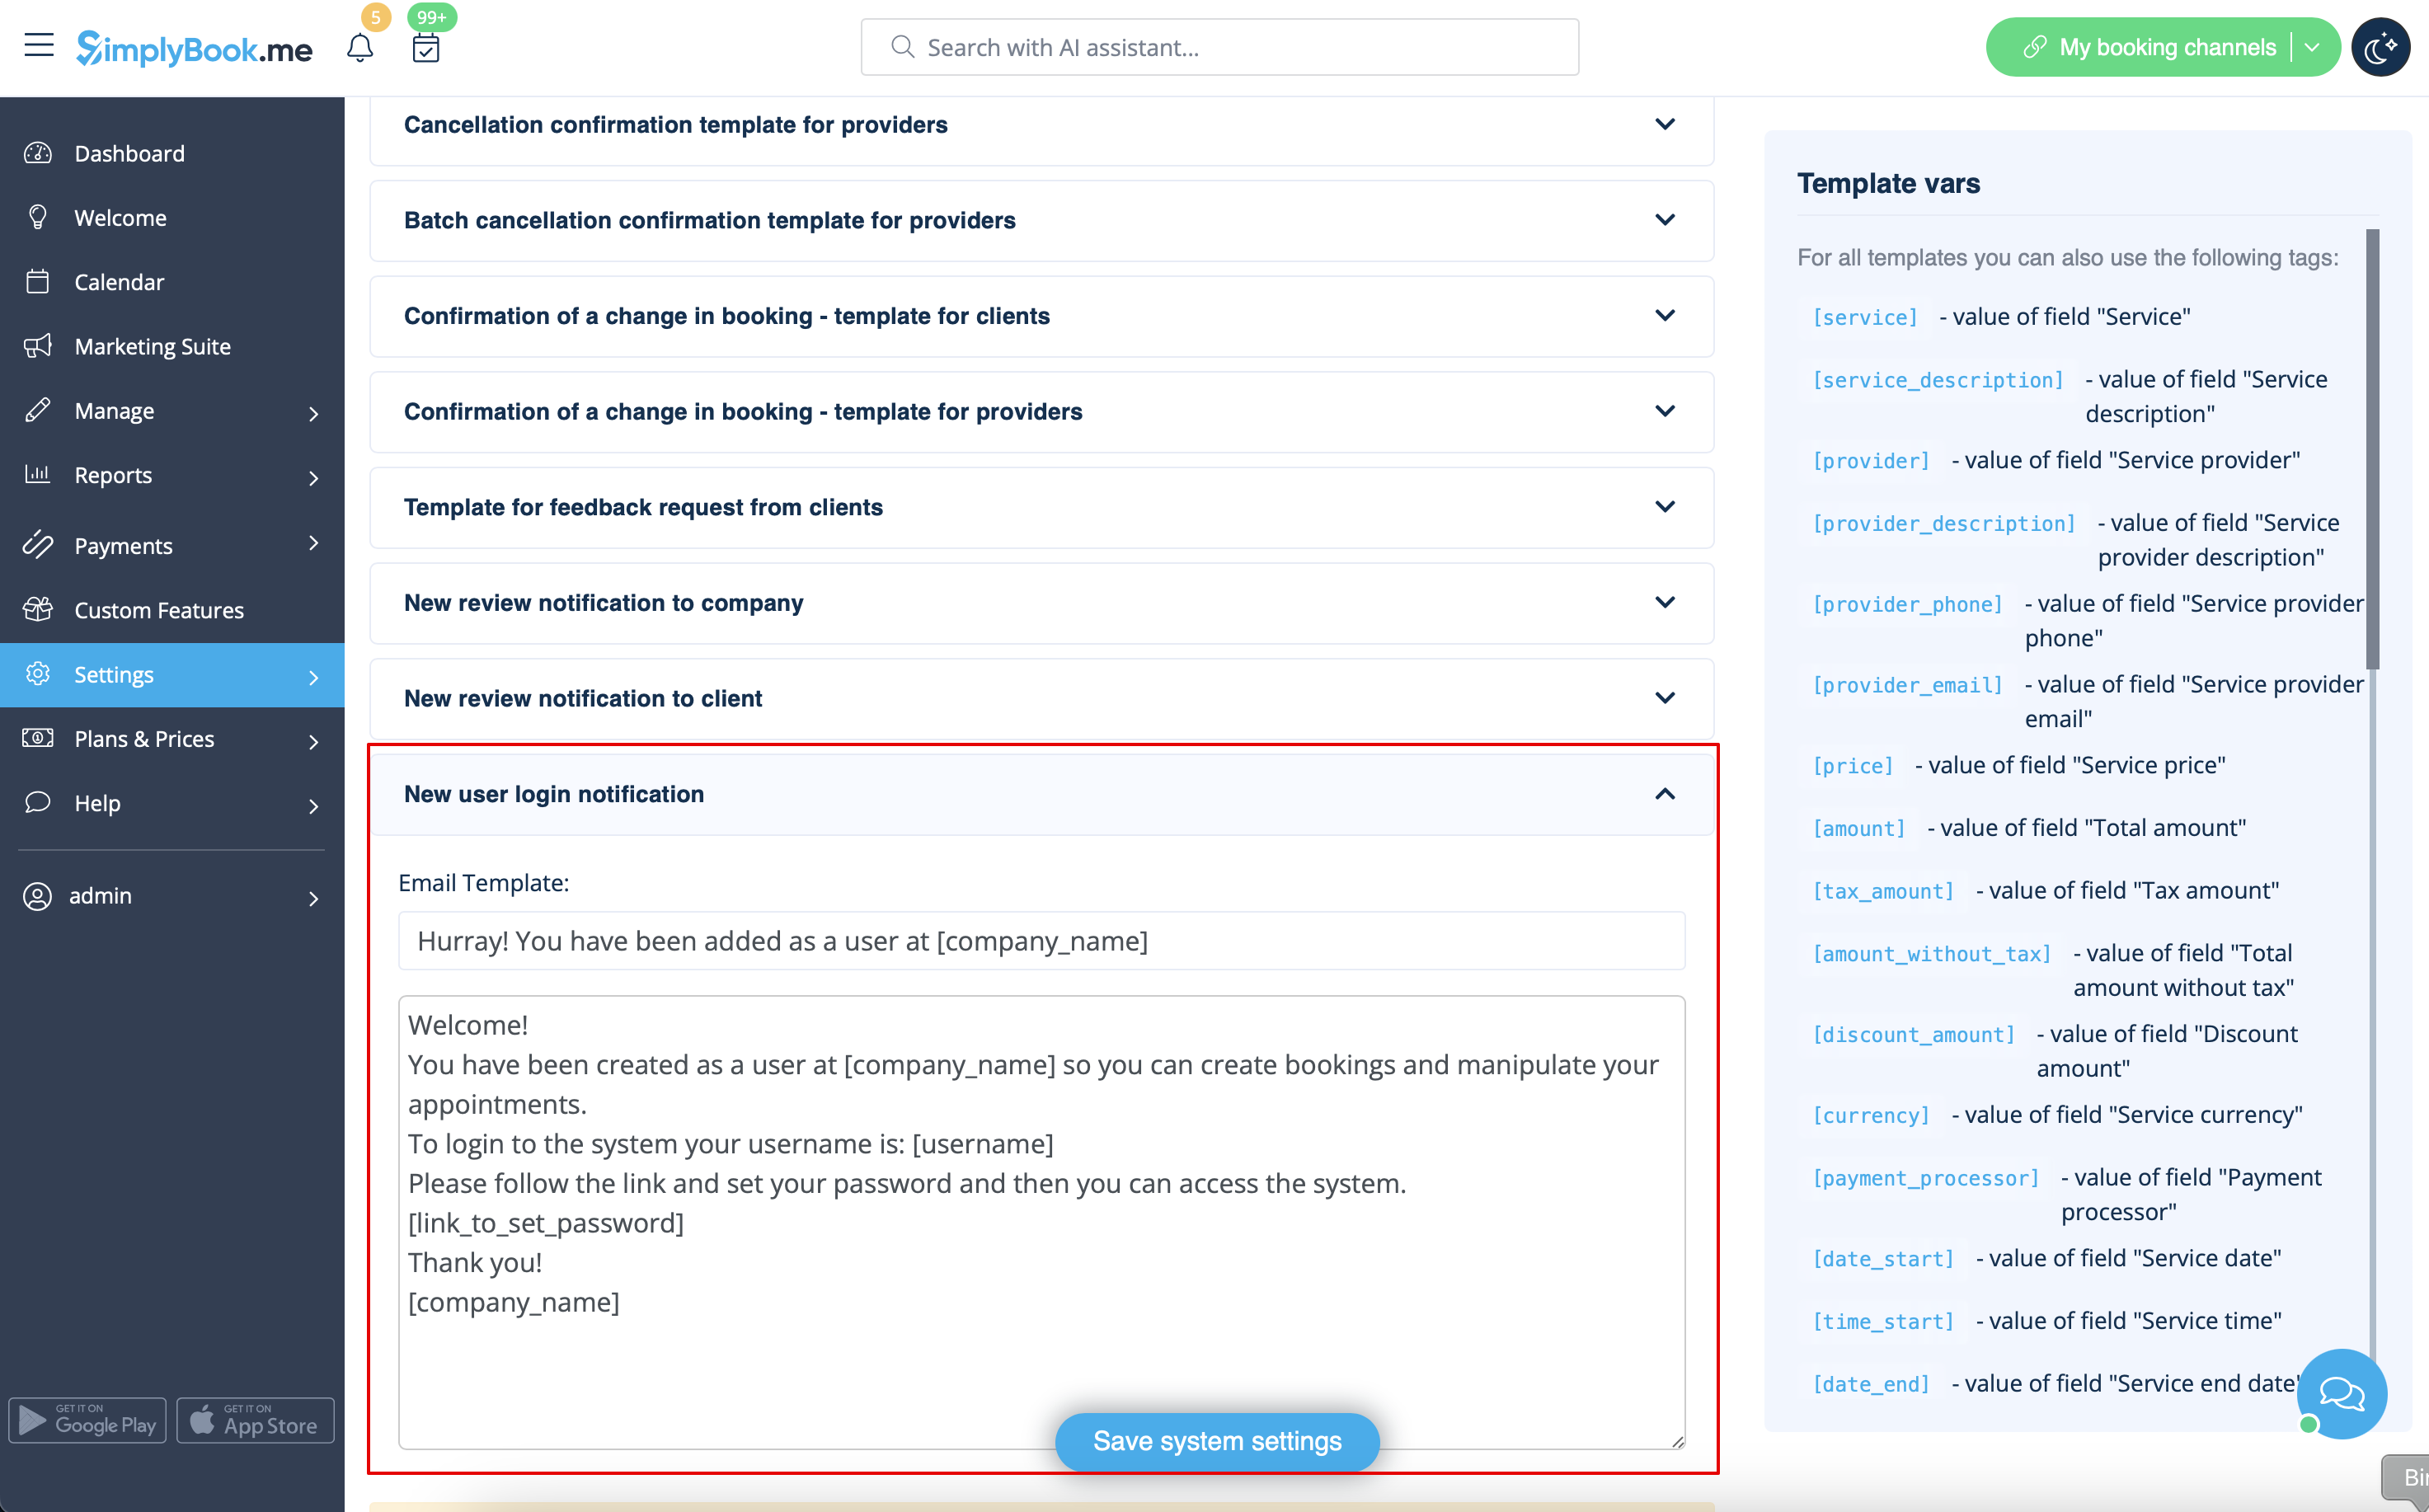
Or you can manually send login and password to your users along with the link to your admin page after saving the user.