No edit summary |
No edit summary |
||
| (One intermediate revision by the same user not shown) | |||
| Line 1: | Line 1: | ||
Tilføj en AI-drevet bookingoplevelse til dit website og dine beskedkanaler. Assistenten indsamler bookingoplysninger, kontrollerer tilgængelighed af tider og opretter reservationer automatisk. | Tilføj en AI-drevet bookingoplevelse til dit website og dine beskedkanaler. Assistenten indsamler bookingoplysninger, kontrollerer tilgængelighed af tider og opretter reservationer automatisk. | ||
Alt-i-én AI-bookingmodul, der forbinder din assistent med dit website og dine beskedkanaler for at modtage bookinger og sende bekræftelser og påmindelser. Konfigurer integrationer (Facebook Messenger, WhatsApp, web-widget) og grundlæggende indstillinger, og begynd derefter automatisk at modtage reservationer. | Alt-i-én AI-bookingmodul, der forbinder din assistent med dit website og dine beskedkanaler for at modtage bookinger og sende bekræftelser og påmindelser. Konfigurer integrationer (Facebook Messenger, WhatsApp, web-widget) og grundlæggende indstillinger, og begynd derefter automatisk at modtage reservationer. | ||
<br><br> | |||
<span style="background-color:#ffe9e9; padding:5px; border-radius:5px;">'''Bemærk!''' I øjeblikket er det muligt at booke skjulte tjenester fra kundesiden.</span> | |||
<br><br> | <br><br> | ||
;Sådan bruges det: | ;Sådan bruges det: | ||
| Line 26: | Line 28: | ||
<br><br><br><br> | <br><br><br><br> | ||
==WhatsApp AI-booking== | ==WhatsApp AI-booking== | ||
1. Åbn https://developers.facebook.com/apps/ og klik på “Create App”: | 1. Åbn [https://developers.facebook.com/apps/ Facebook-udviklere] og klik på “Create App”: | ||
[[File:Create sb app step 1.png|1200px|center|link=https://help.simplybook.me/images/9/9c/Create_sb_app_step_1.png]] | [[File:Create sb app step 1.png|1200px|center|link=https://help.simplybook.me/images/9/9c/Create_sb_app_step_1.png]] | ||
<br><br> | <br><br> | ||
| Line 96: | Line 98: | ||
[[File:Paste token to sbm.png|1200px|center|link=https://help.simplybook.me/images/e/e7/Paste_token_to_sbm.png]] | [[File:Paste token to sbm.png|1200px|center|link=https://help.simplybook.me/images/e/e7/Paste_token_to_sbm.png]] | ||
<br><br> | <br><br> | ||
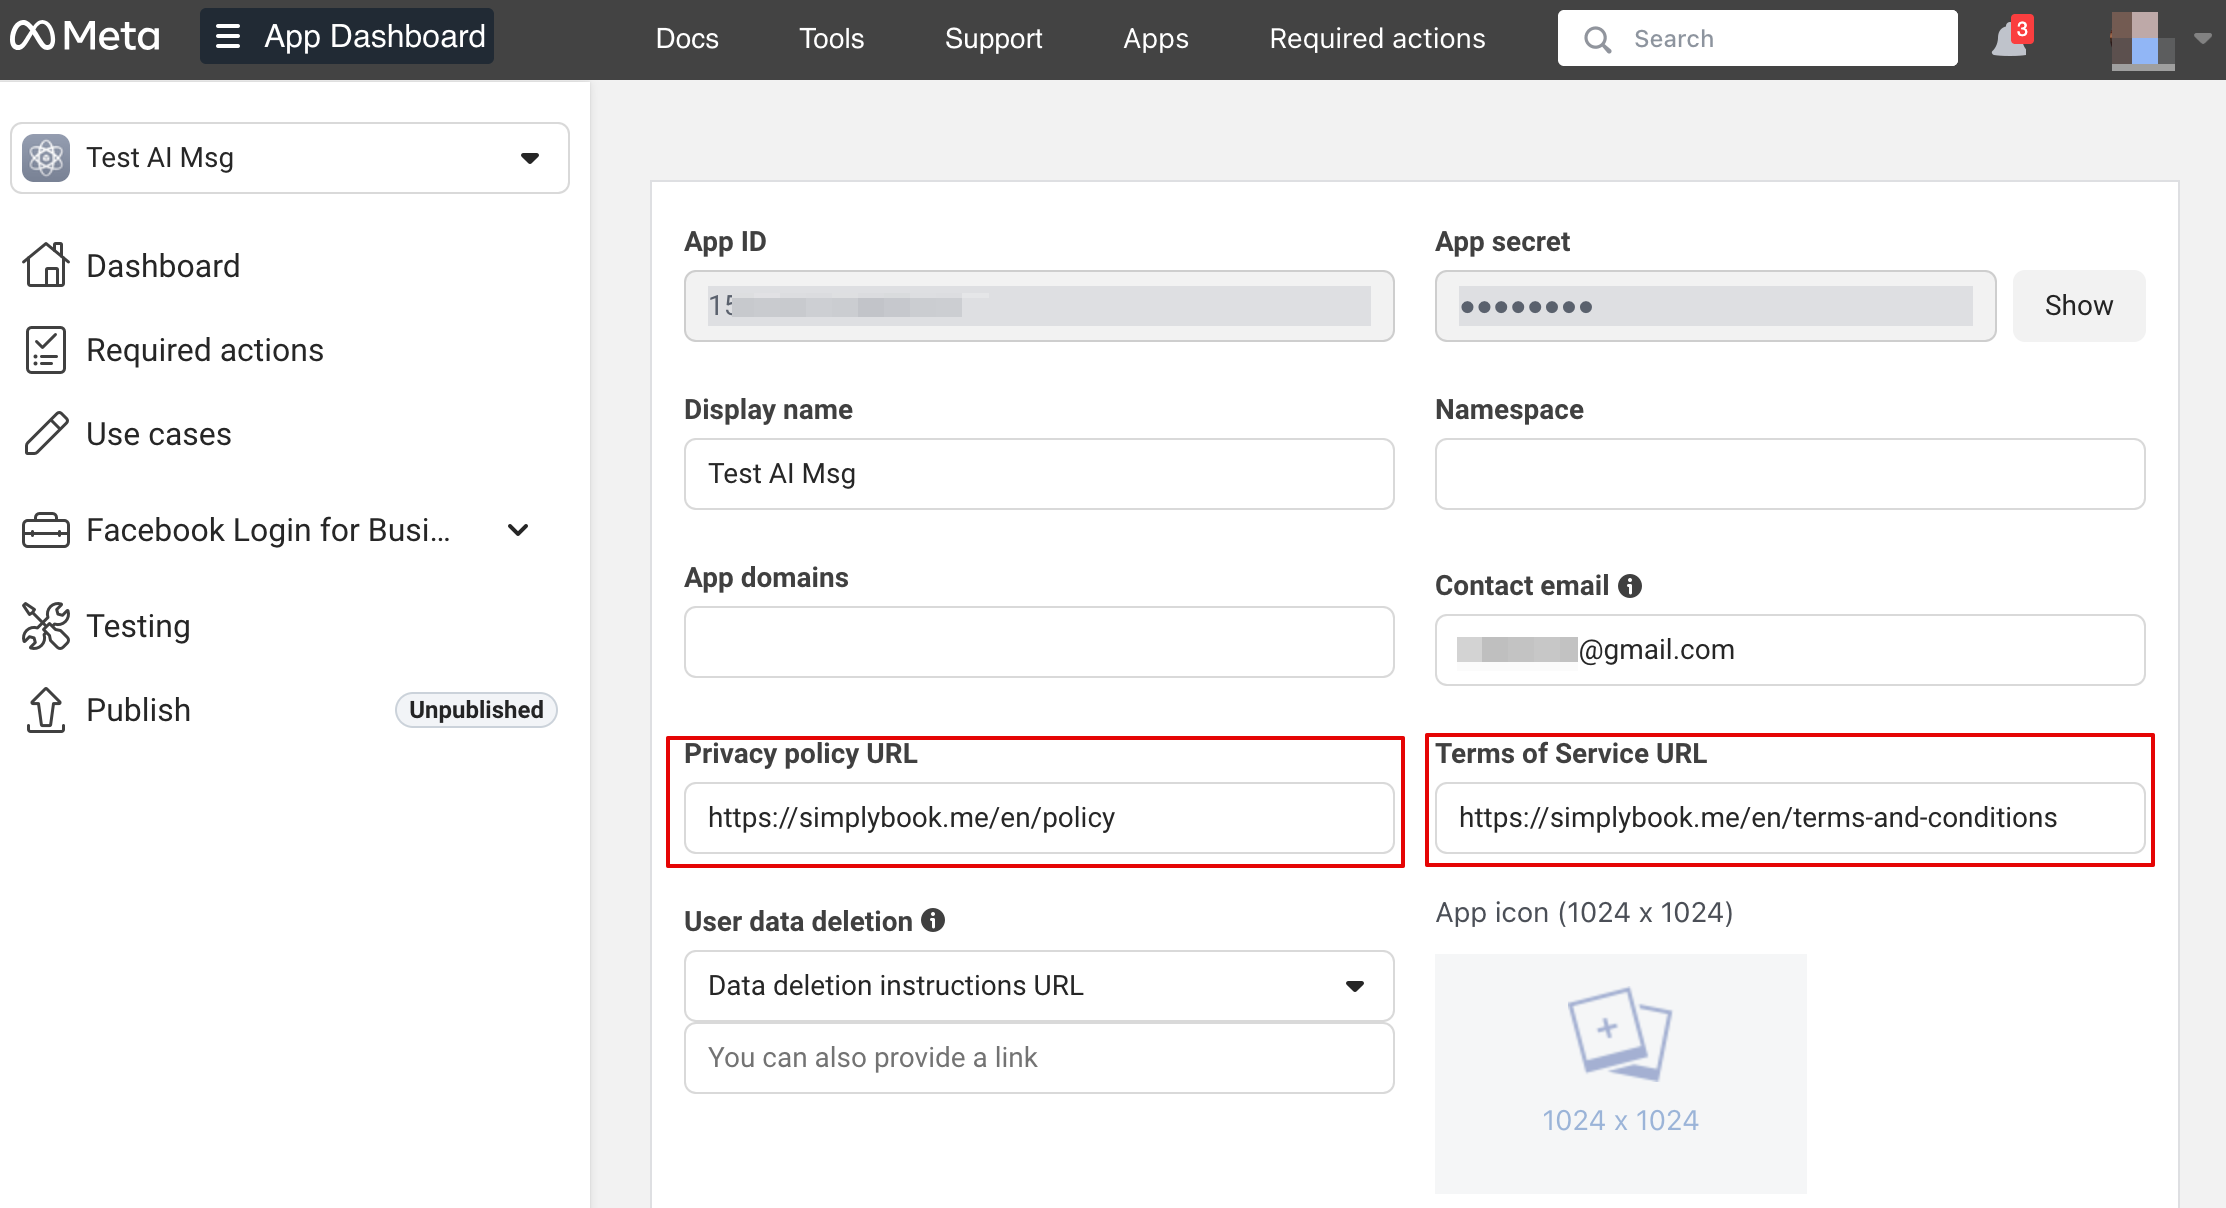
24. Gå nu tilbage til https://developers.facebook.com/apps/, vælg din app, klik på Indstillinger -> Grundlæggende. Indsæt URL’er til privatlivspolitik og servicevilkår | 24. Gå nu tilbage til [https://developers.facebook.com/apps/ Facebook-udviklere], vælg din app, klik på Indstillinger -> Grundlæggende. Indsæt URL’er til privatlivspolitik og servicevilkår | ||
[[File:App settings basic path.png|1200px|center|link=https://help.simplybook.me/images/7/70/App_settings_basic_path.png]] | [[File:App settings basic path.png|1200px|center|link=https://help.simplybook.me/images/7/70/App_settings_basic_path.png]] | ||
[[File:Insert your terms and privacy policy links upd.png|1200px|center|link=https://help.simplybook.me/images/9/92/Insert_your_terms_and_privacy_policy_links_upd.png]] | [[File:Insert your terms and privacy policy links upd.png|1200px|center|link=https://help.simplybook.me/images/9/92/Insert_your_terms_and_privacy_policy_links_upd.png]] | ||
| Line 107: | Line 109: | ||
<br><br><br><br> | <br><br><br><br> | ||
==Opsæt Facebook Messenger== | ==Opsæt Facebook Messenger== | ||
1. Åbn https://developers.facebook.com/apps/ og klik på “Create App”: | 1. Åbn [https://developers.facebook.com/apps/ Facebook-udviklere] og klik på “Create App”: | ||
[[File:Create sb app step 1.png|1200px|center|link=https://help.simplybook.me/images/9/9c/Create_sb_app_step_1.png]] | [[File:Create sb app step 1.png|1200px|center|link=https://help.simplybook.me/images/9/9c/Create_sb_app_step_1.png]] | ||
<br><br> | <br><br> | ||
Latest revision as of 14:59, 5 April 2026
Tilføj en AI-drevet bookingoplevelse til dit website og dine beskedkanaler. Assistenten indsamler bookingoplysninger, kontrollerer tilgængelighed af tider og opretter reservationer automatisk.
Alt-i-én AI-bookingmodul, der forbinder din assistent med dit website og dine beskedkanaler for at modtage bookinger og sende bekræftelser og påmindelser. Konfigurer integrationer (Facebook Messenger, WhatsApp, web-widget) og grundlæggende indstillinger, og begynd derefter automatisk at modtage reservationer.
Bemærk! I øjeblikket er det muligt at booke skjulte tjenester fra kundesiden.
- Sådan bruges det
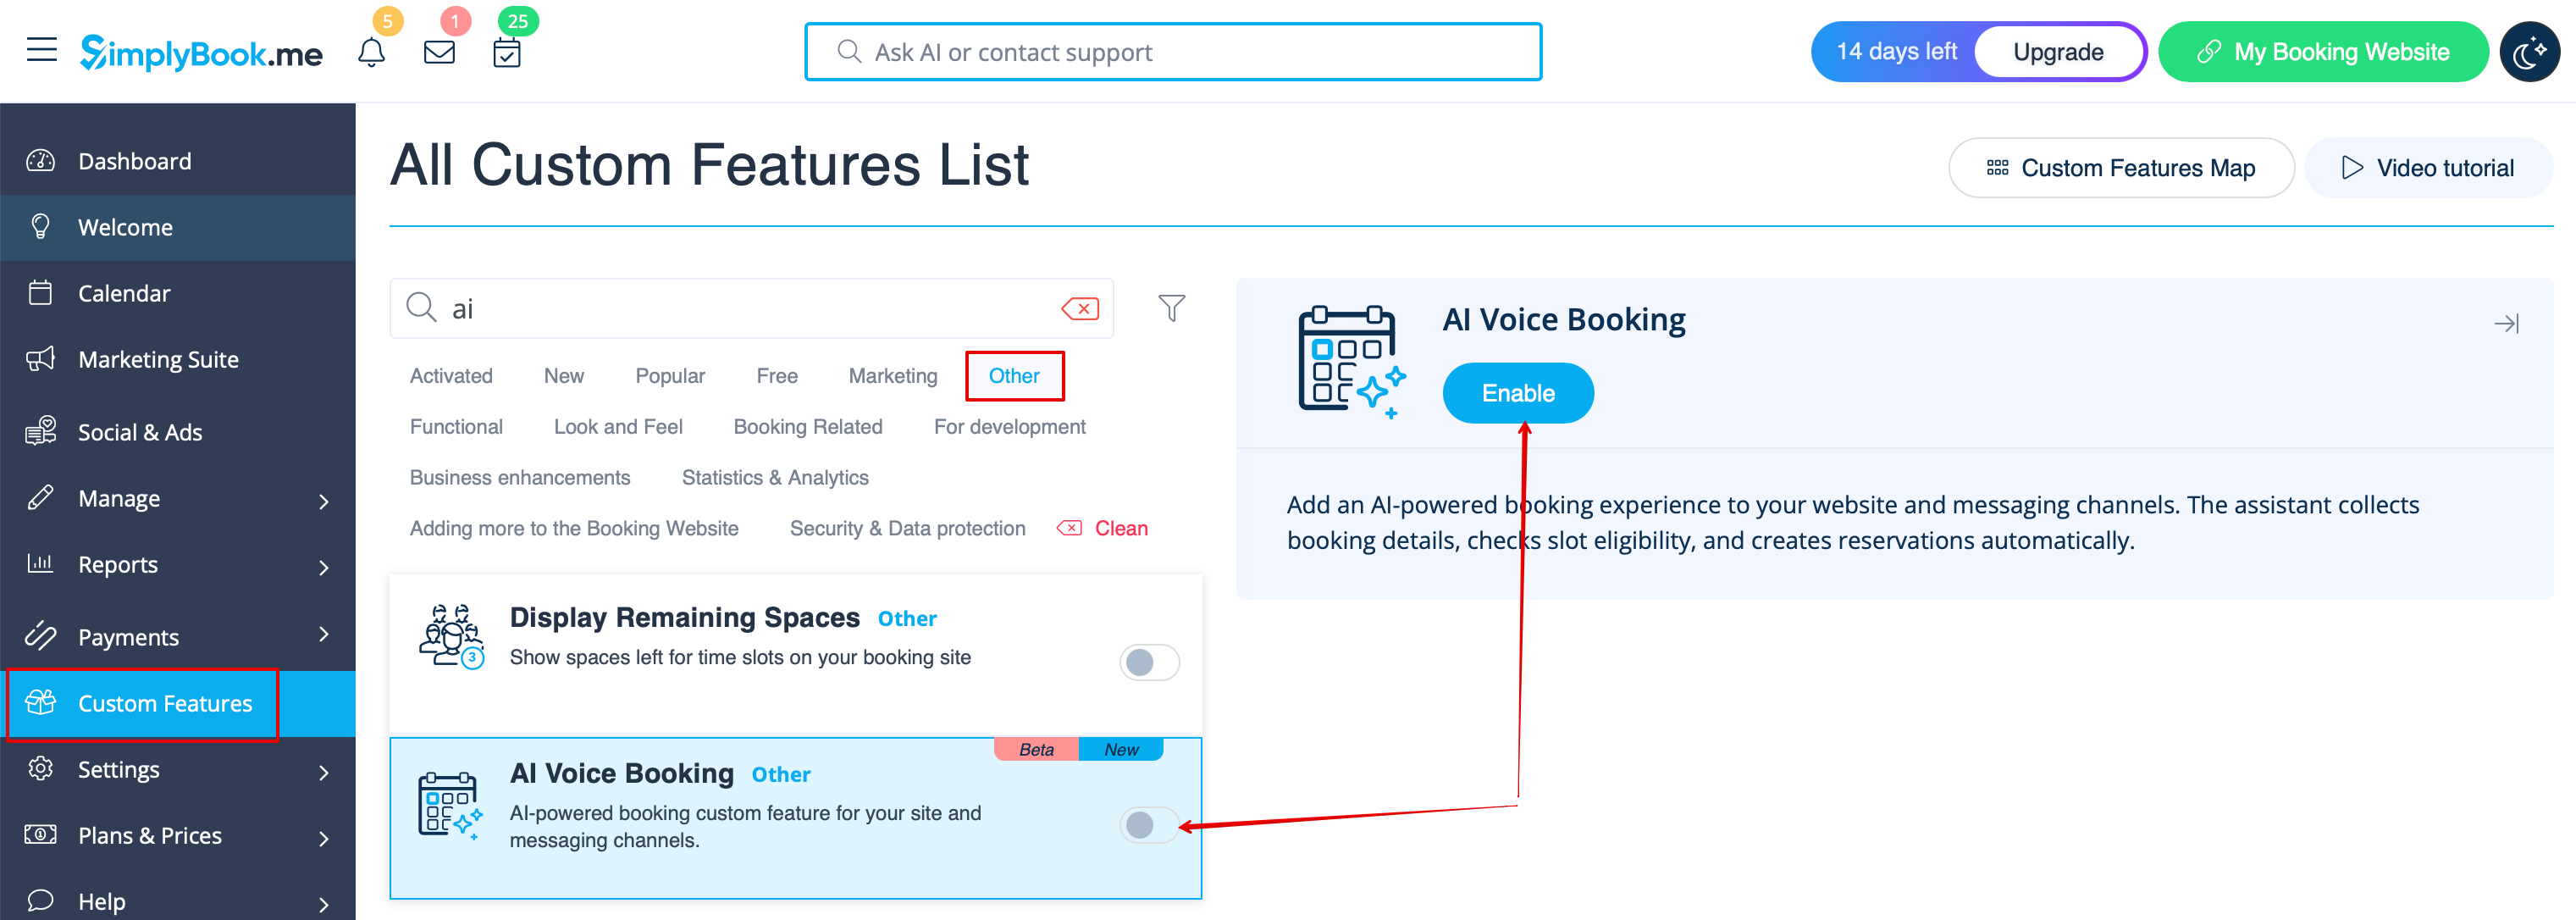
1. Aktivér funktionen på siden Brugerdefinerede funktioner -> Andet -> AI Voice booking.
2. Få gratis prøvecredits der, eller køb flere AI-bookingcredits på siden Abonnementer & Priser -> Ekstra elementer
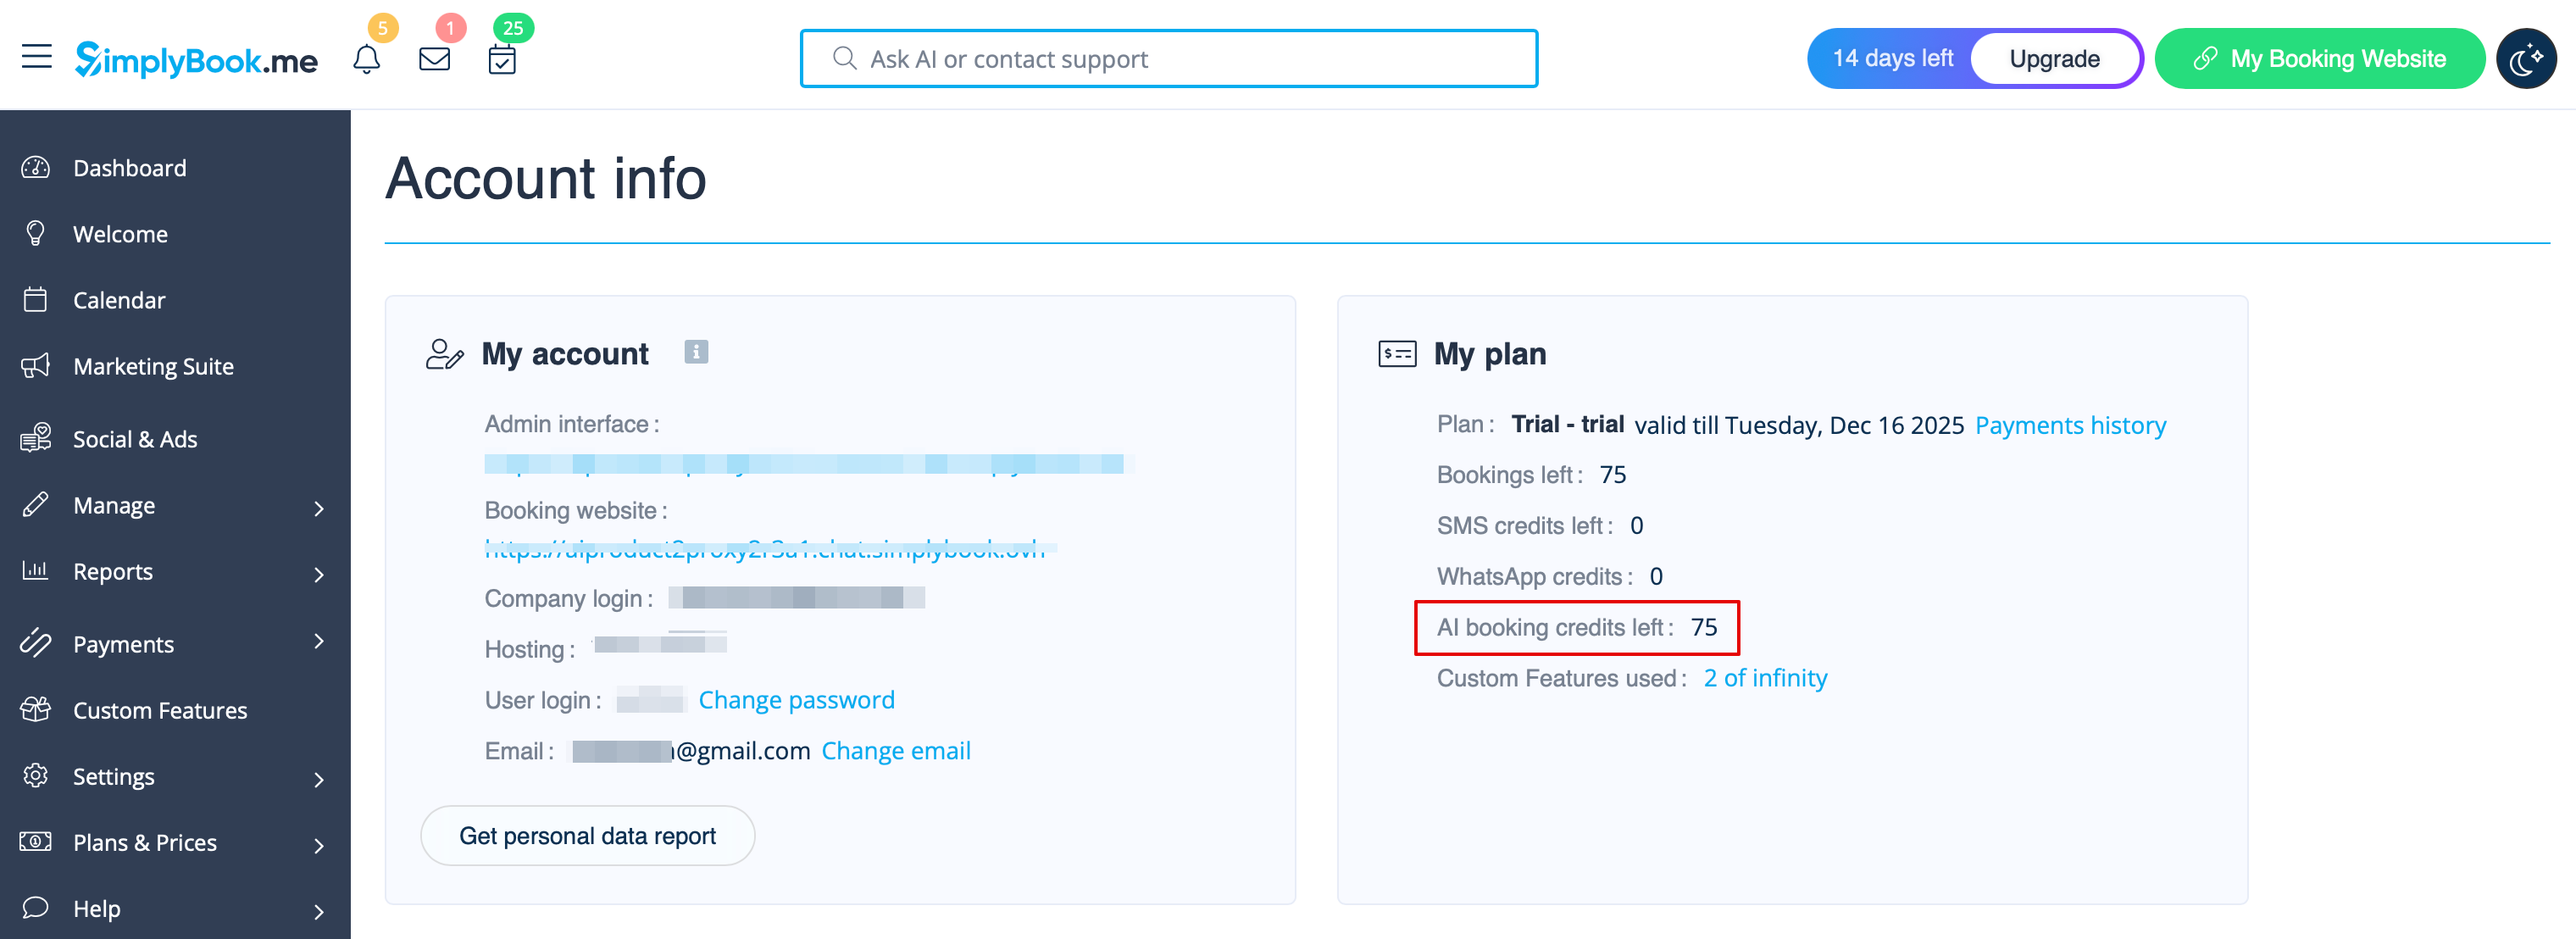
3. Du kan se antallet af resterende credits på Dashboard-siden eller i Kontooplysninger.
4. Gå tilbage til Brugerdefinerede funktioner -> Andet -> AI Voice booking for at justere præferencer for AI-stemme, model og tekst til e-mailbekræftelse.
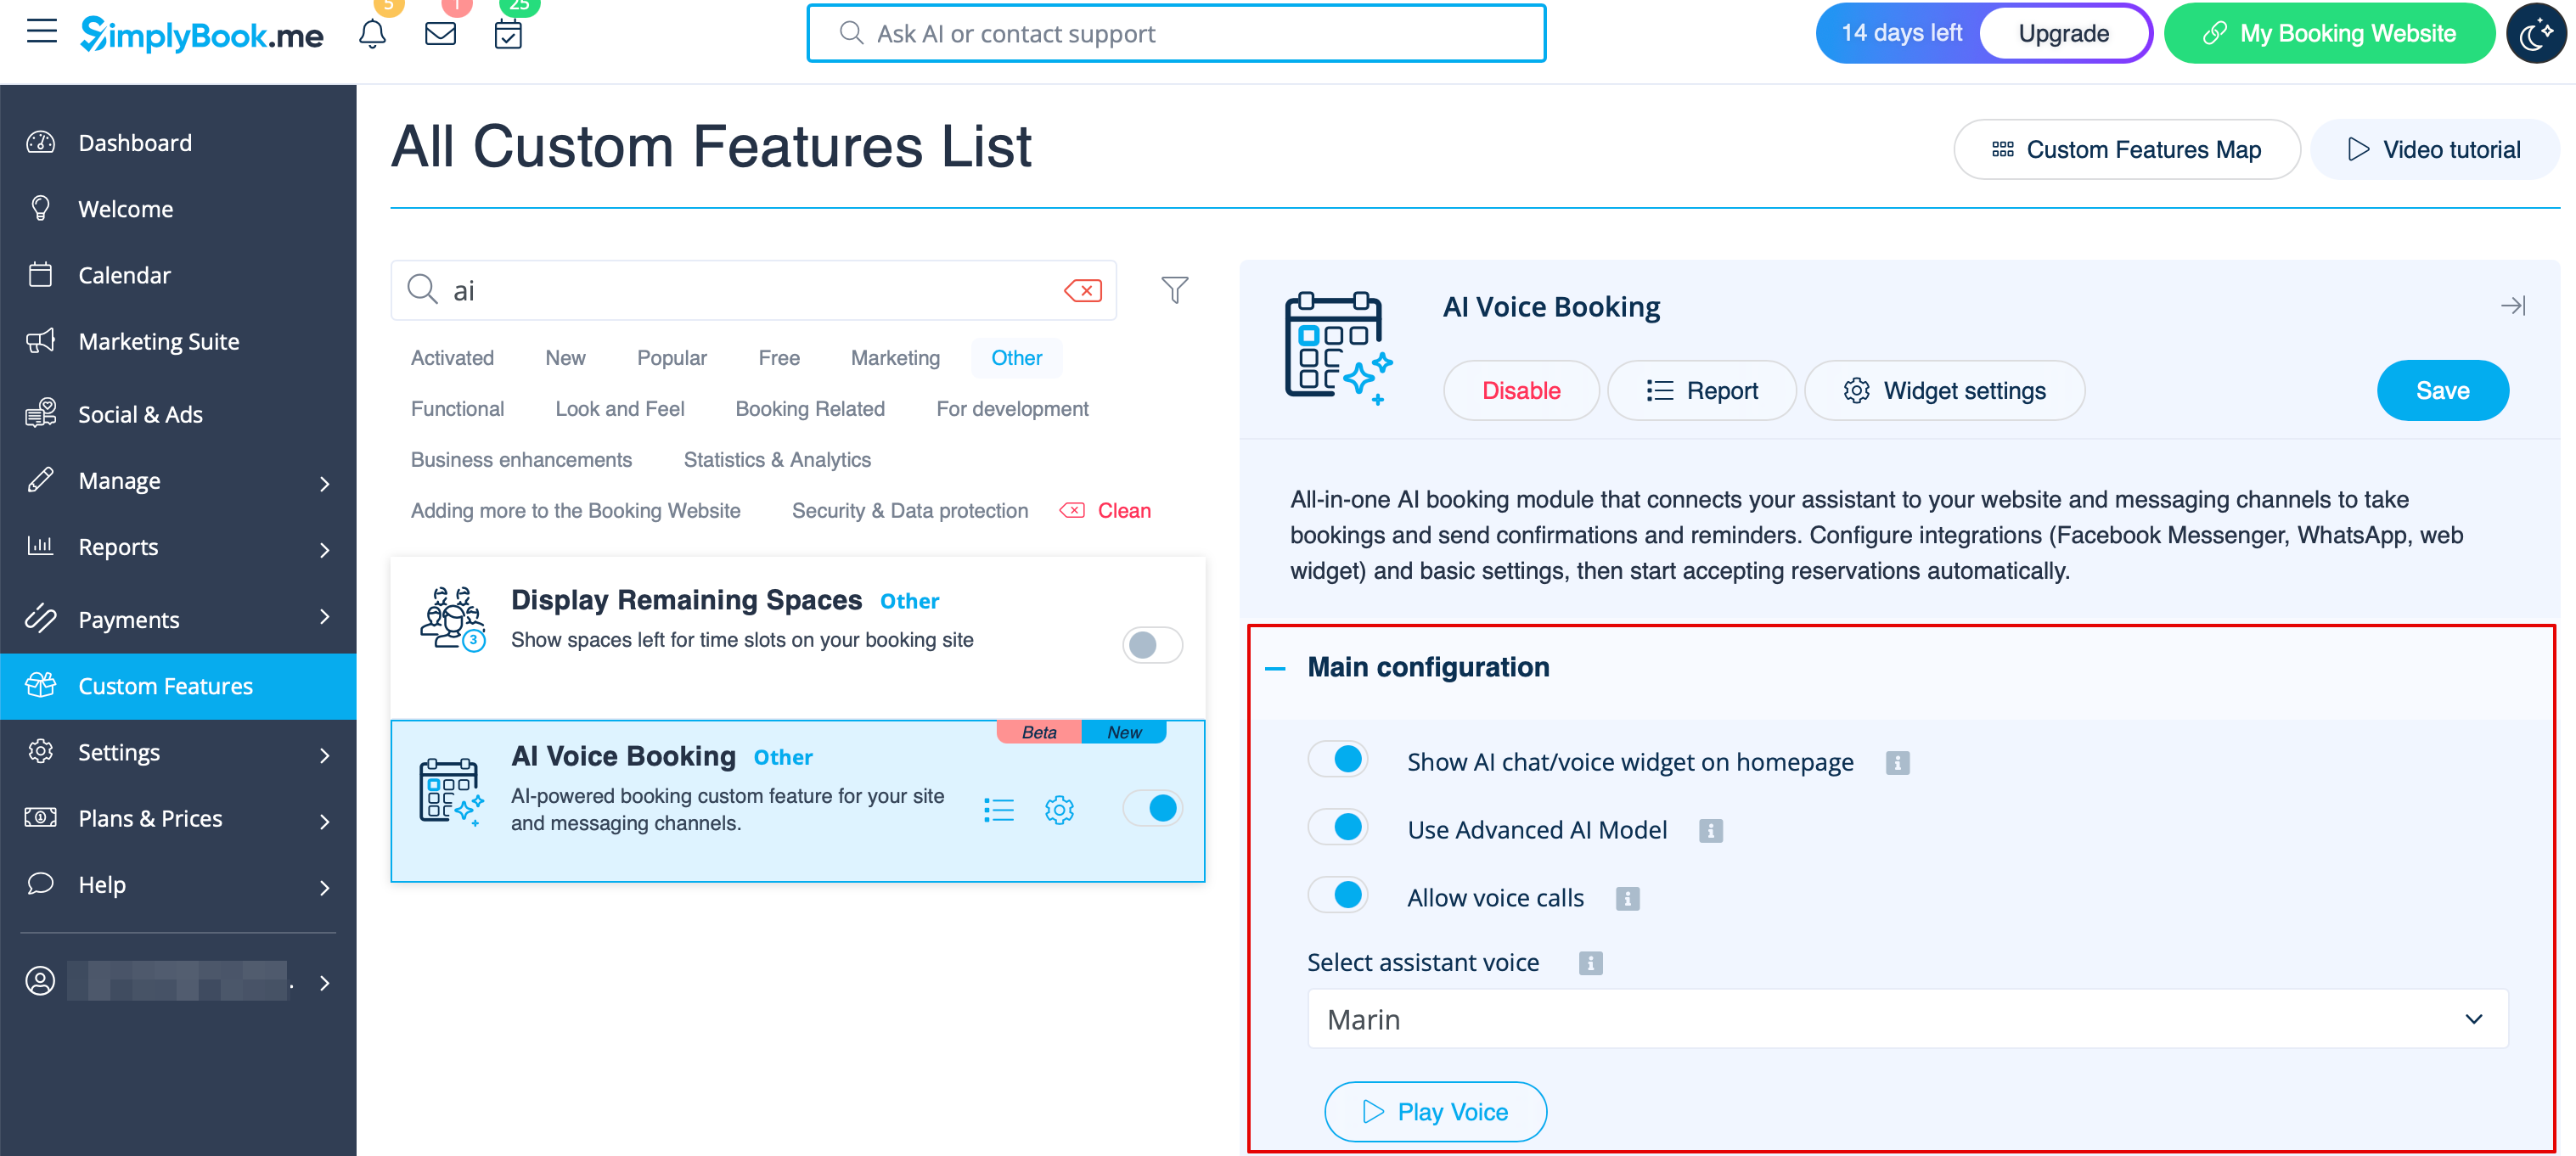
5. Vælg nu den mulighed, hvor AI-booking skal være tilgængelig for dine kunder.
Widget/Bookingside
1. Når credits er købt, tilføjes AI-chatwidgetten som standard til din bookingside. Kunderne kan sende tekst- eller talebeskeder for at gennemføre bookingprocessen med hjælp fra AI.
2. Hvis du har dit eget website, kan du tilføje AI-bookingwidgetten der. Gå blot til ‘’’Widgetindstillinger’’’, vælg de ønskede farver, klik på “Gem & hent widgetfarve” for at generere widgetkoden.
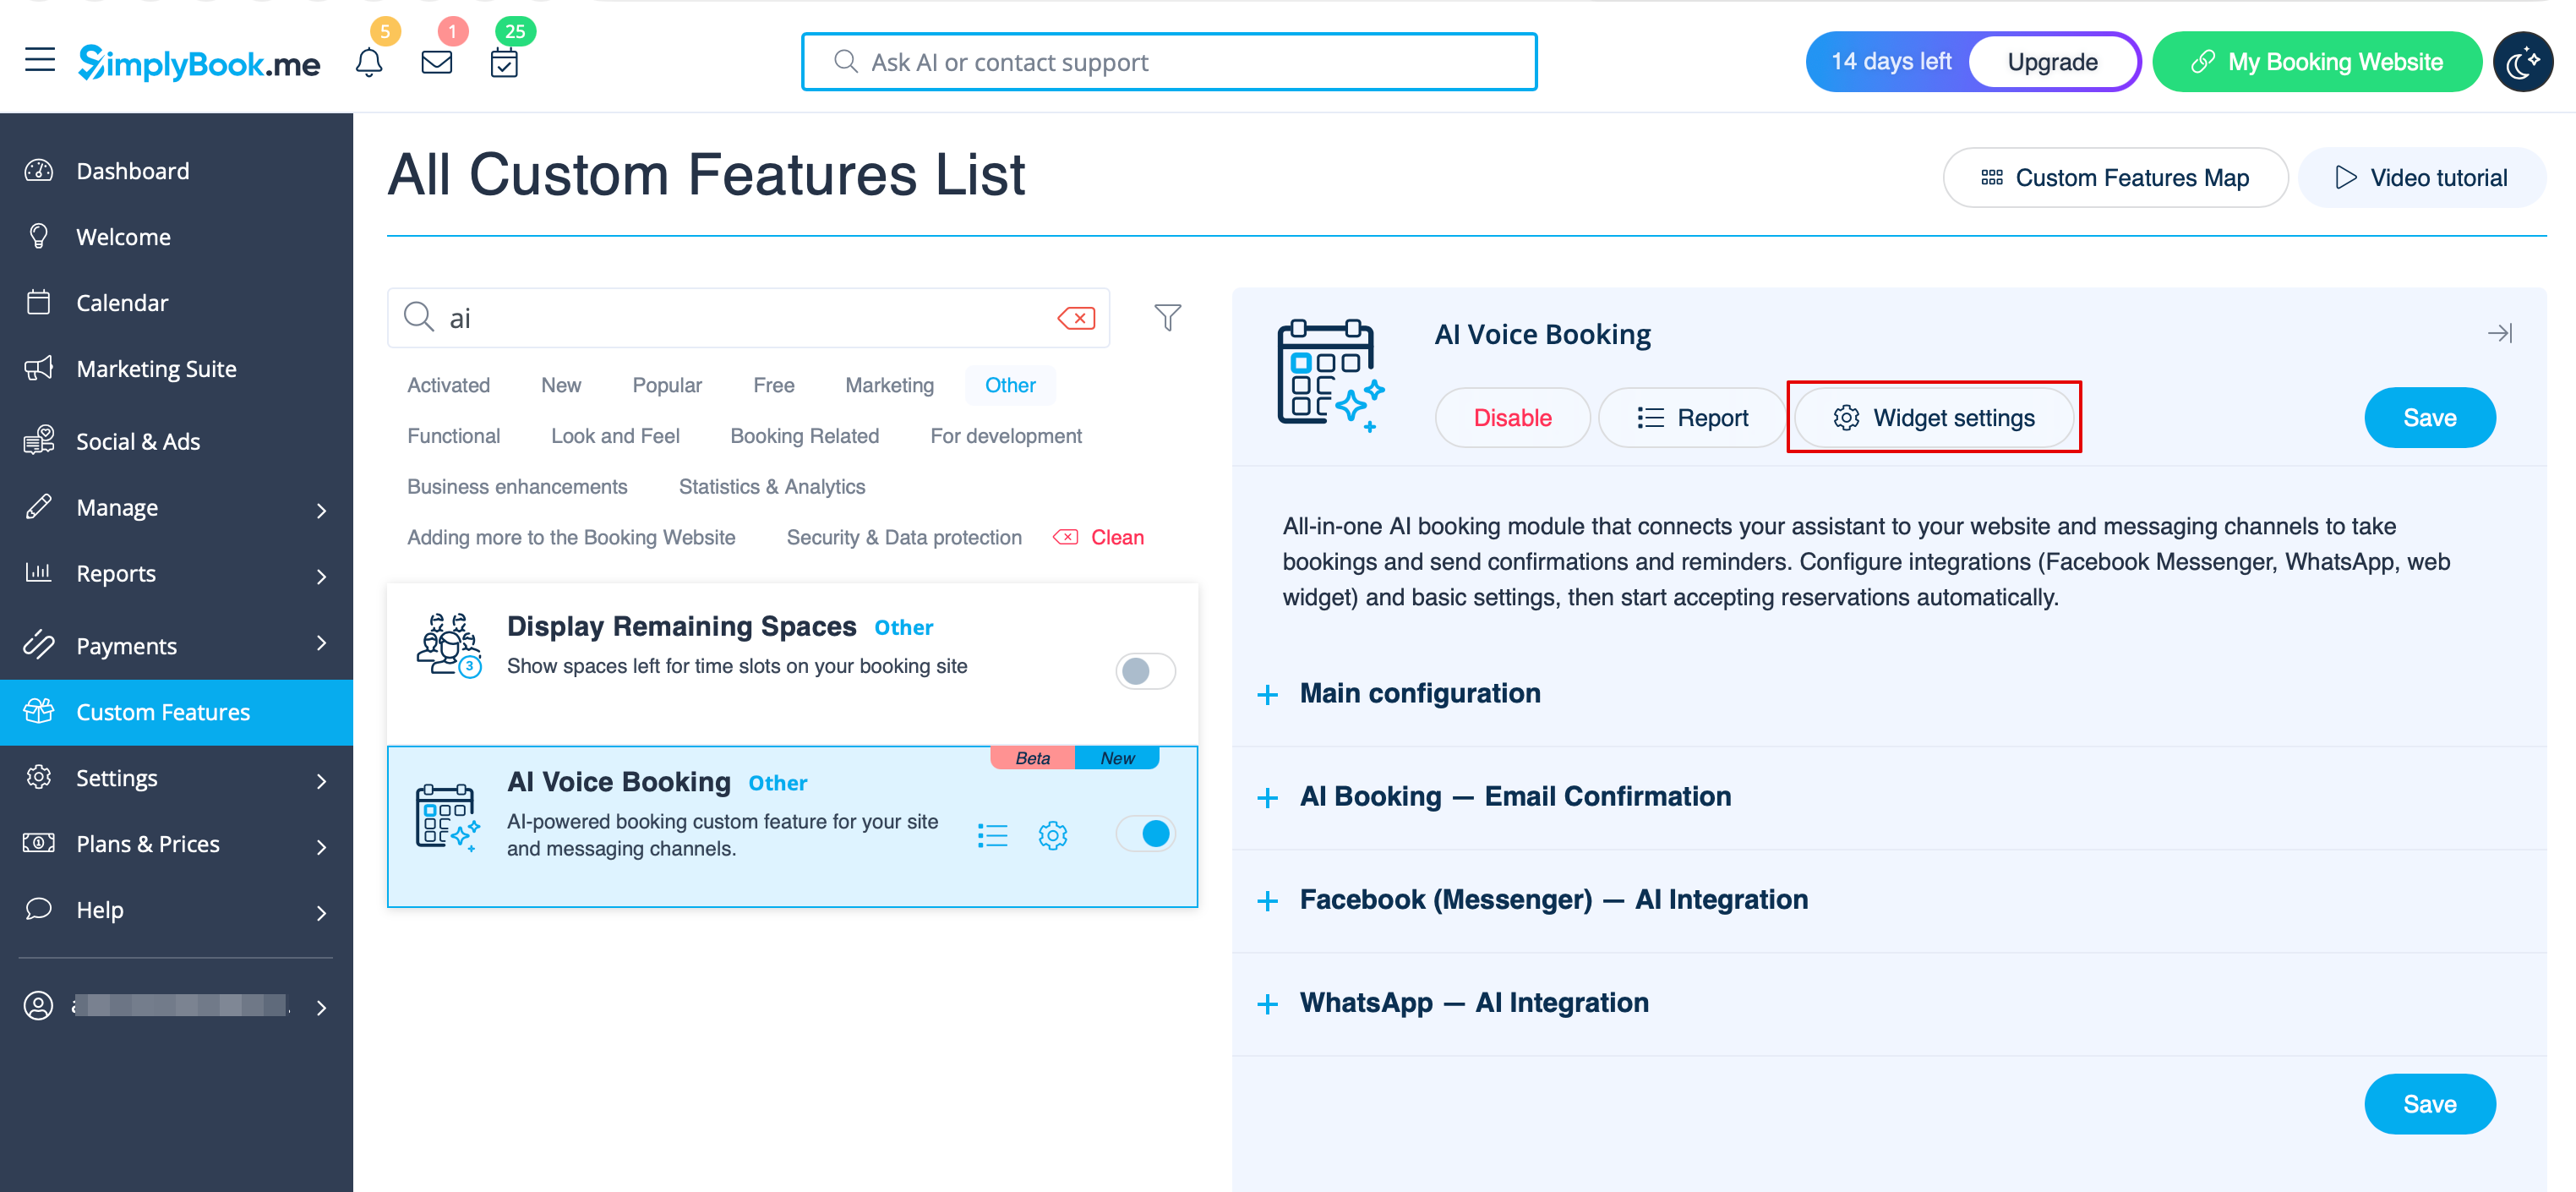
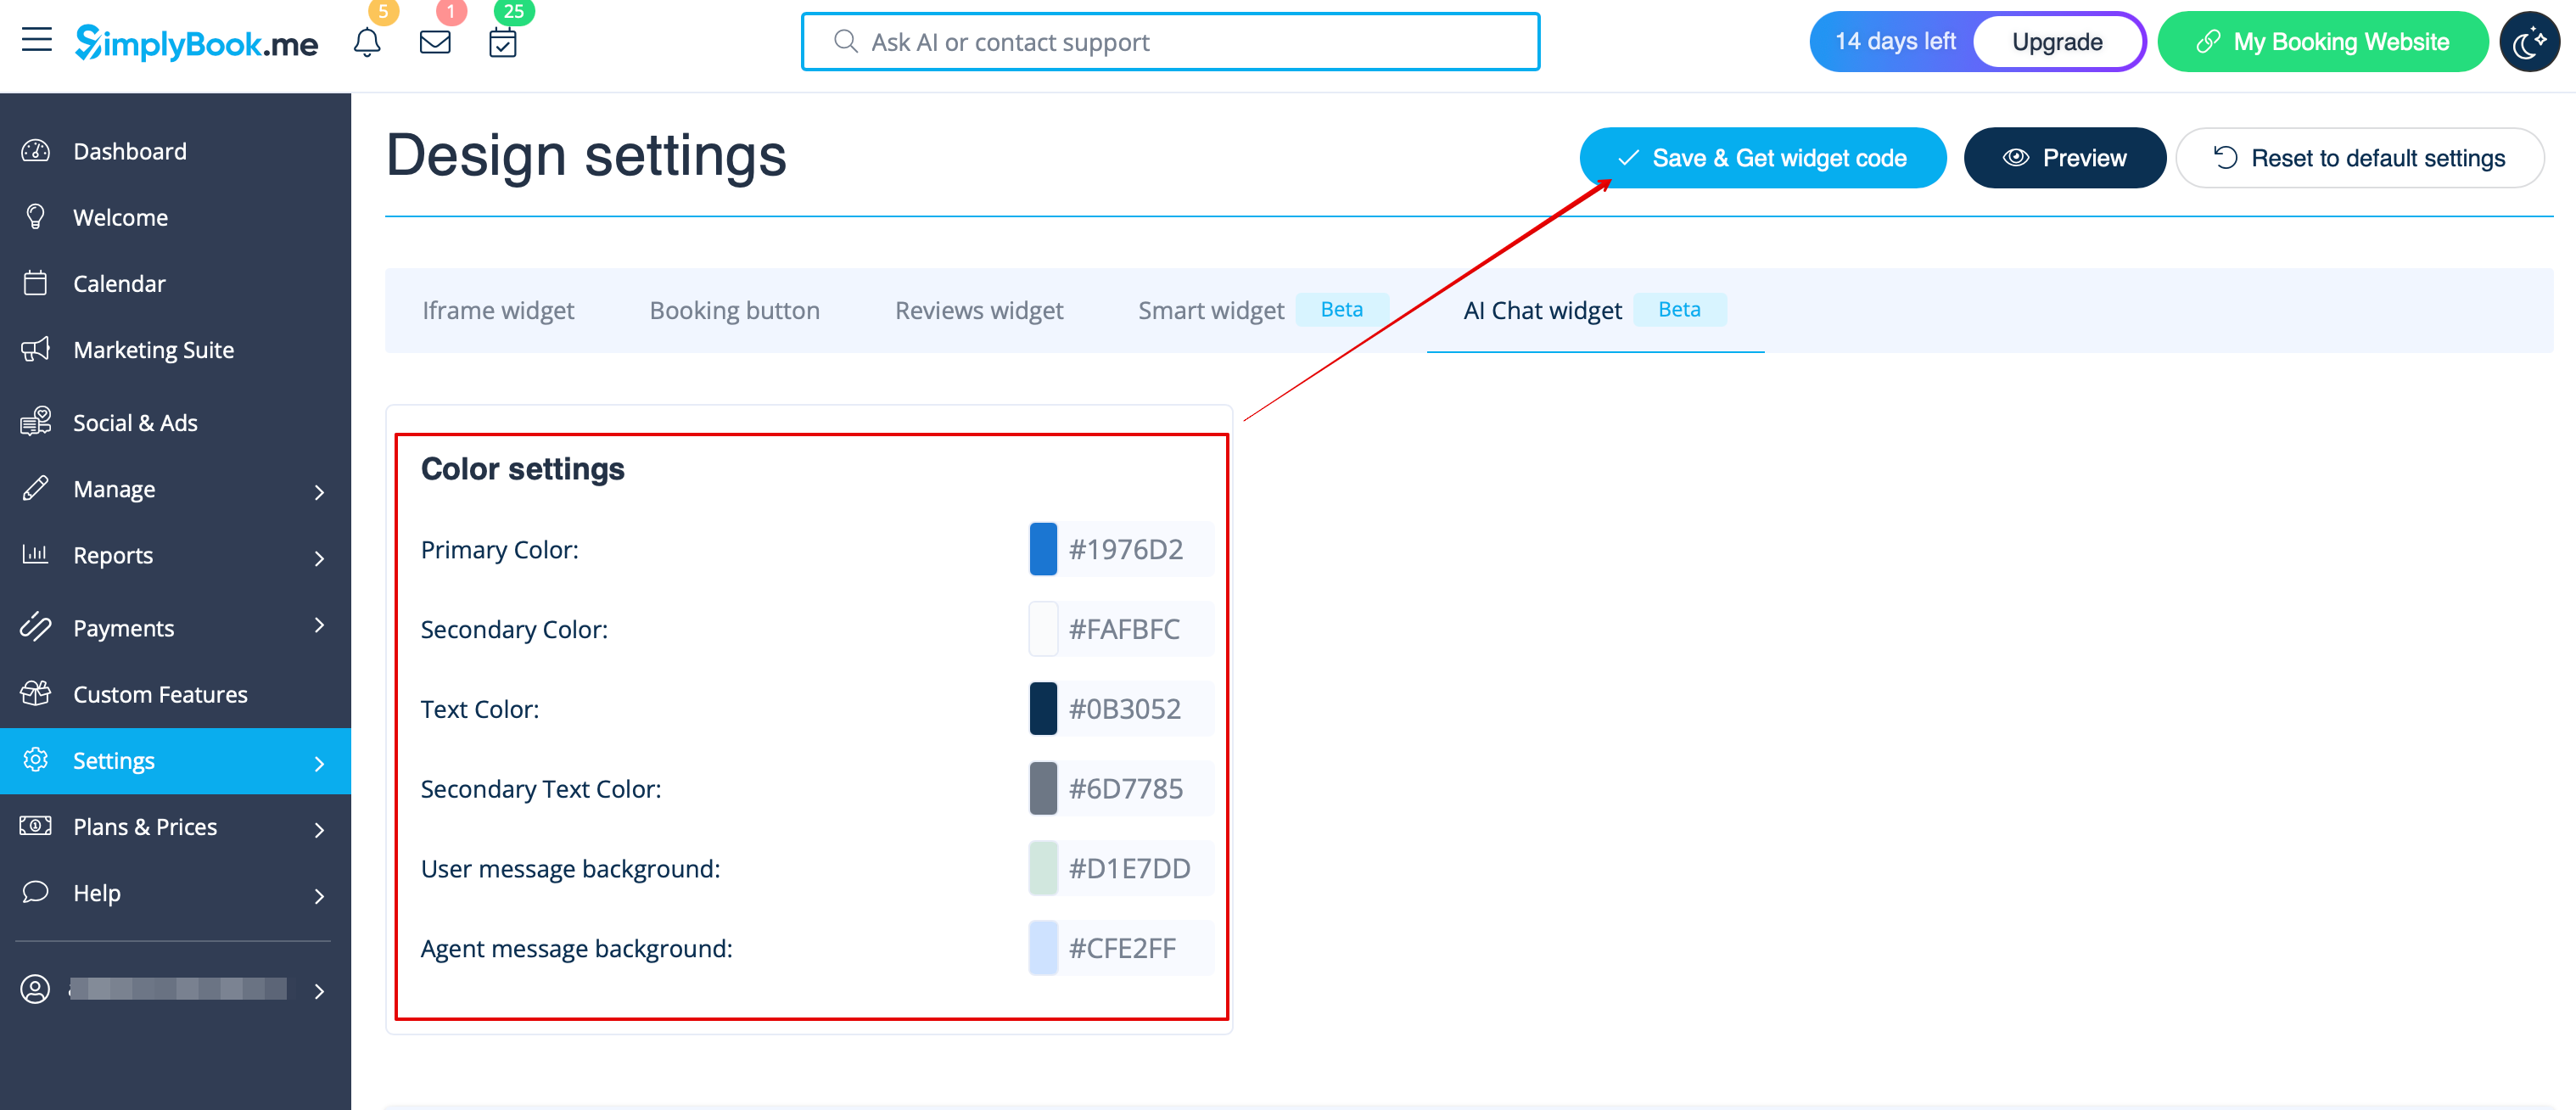
3. Gå til din website-editor og indsæt koden på den side, hvor du ønsker, at AI-bookingwidgetten skal være tilgængelig. Det er det.
WhatsApp AI-booking
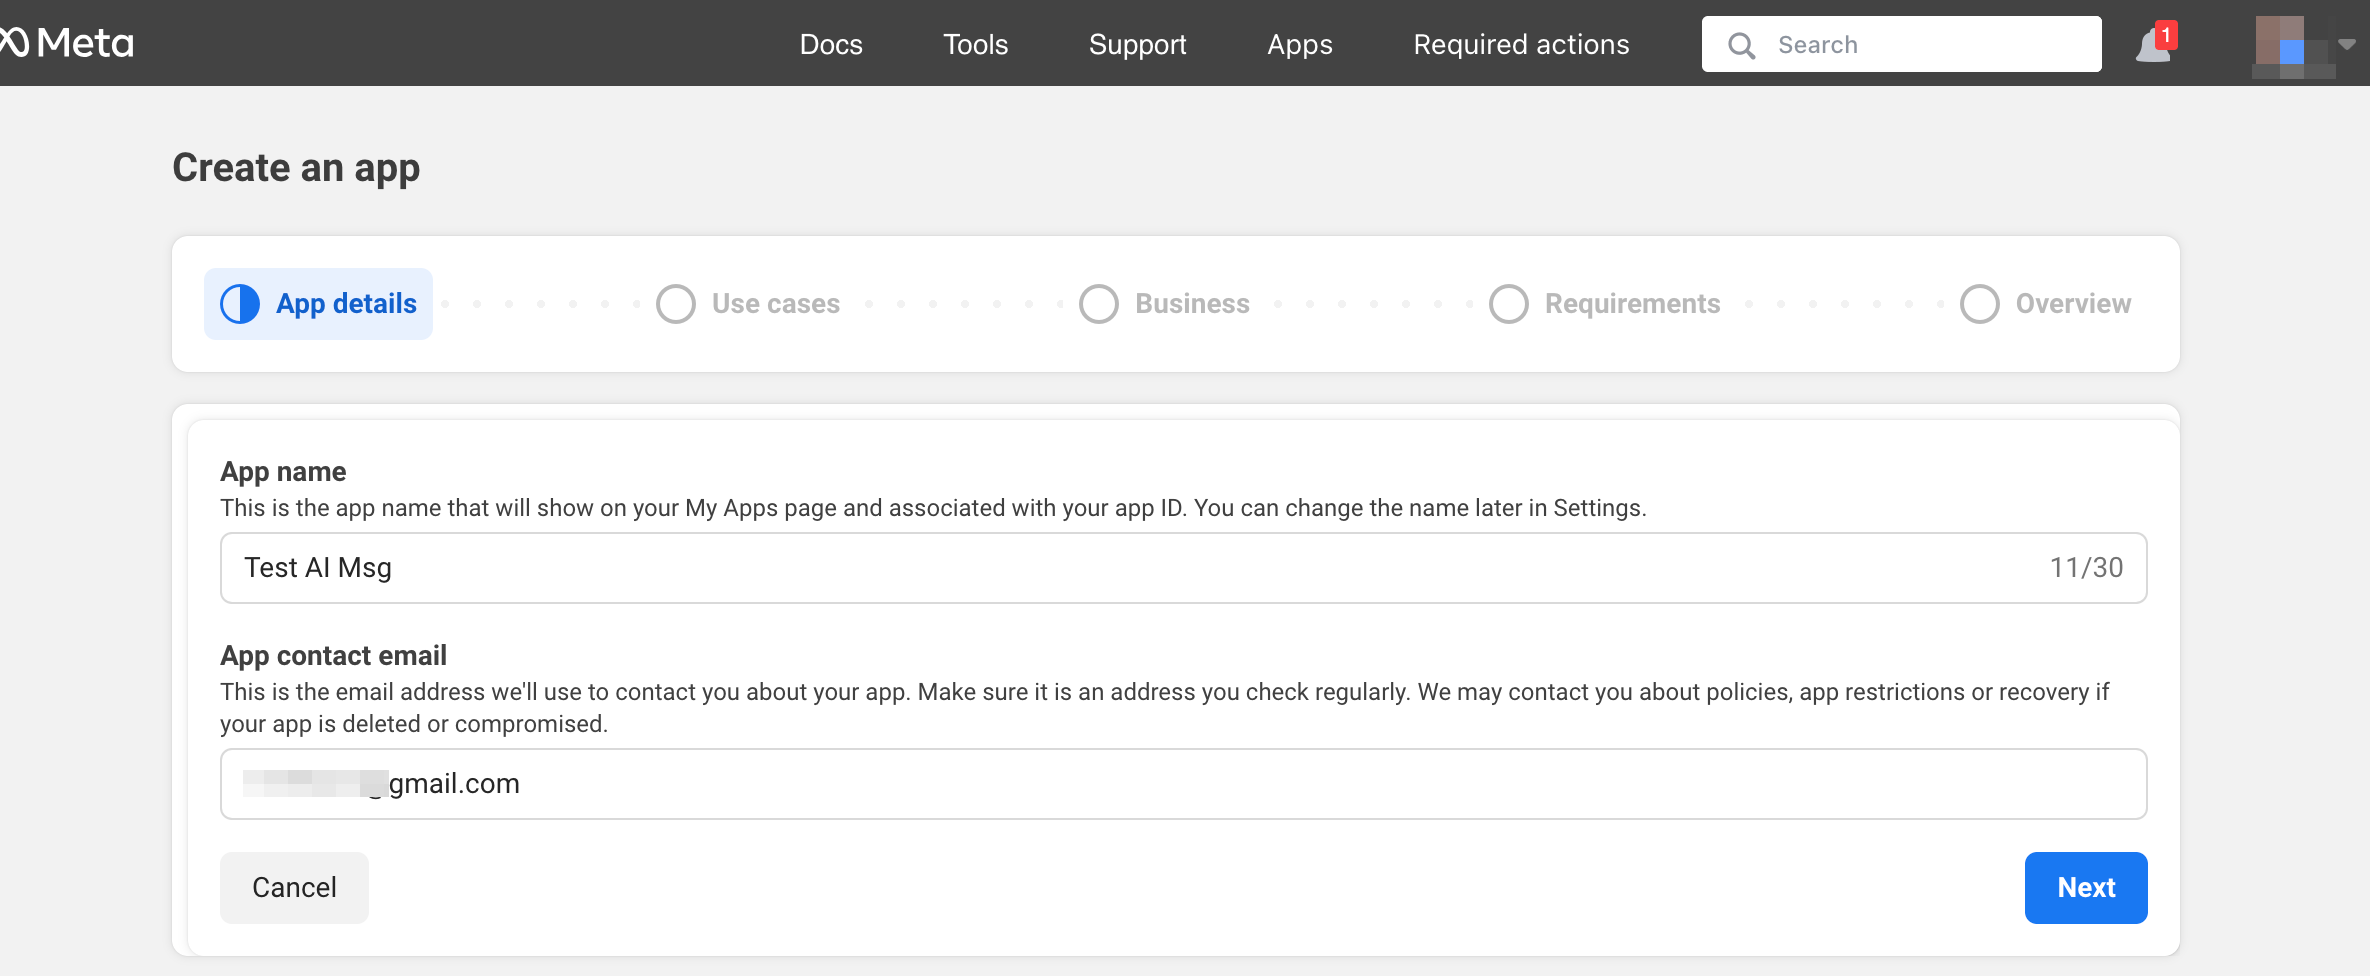
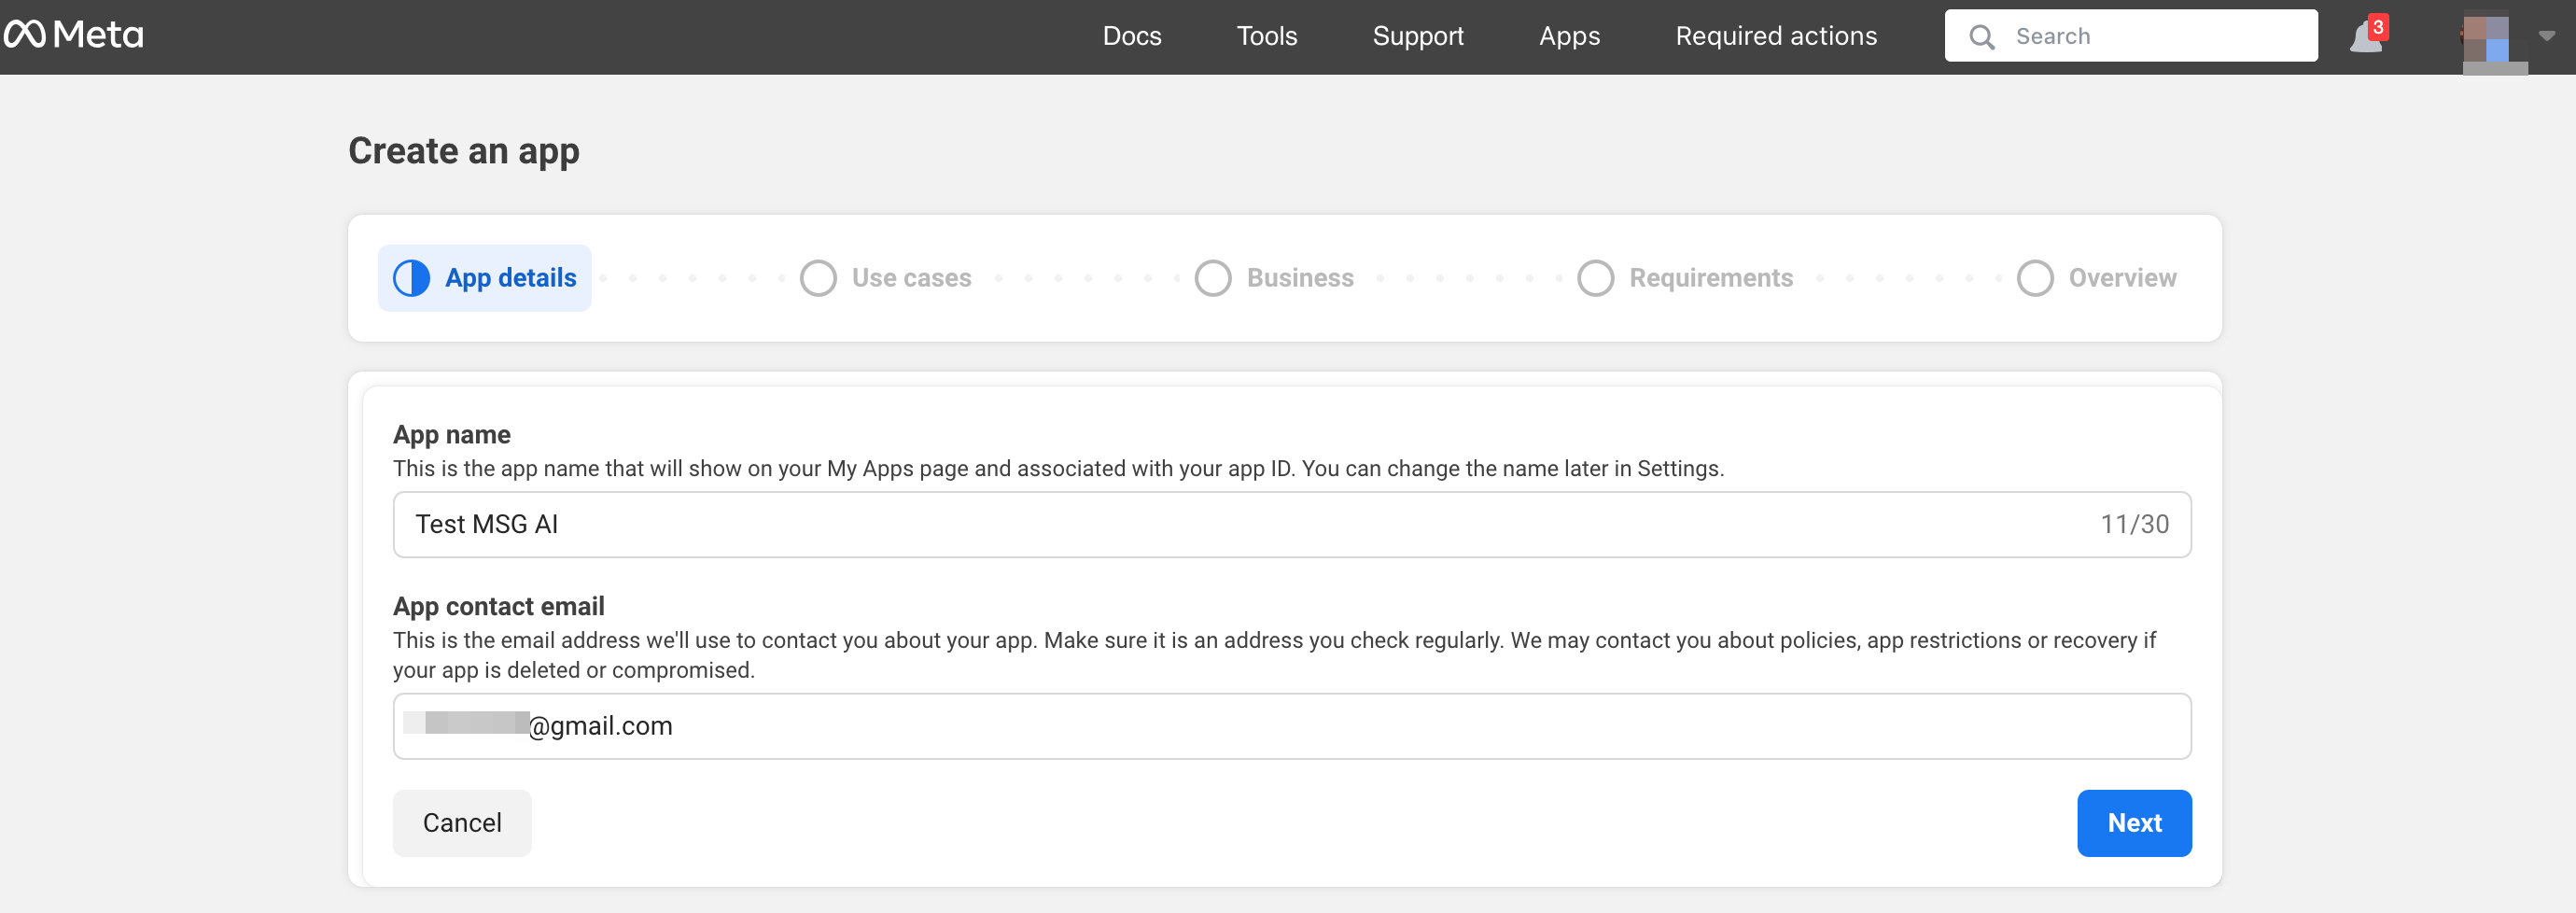
1. Åbn Facebook-udviklere og klik på “Create App”:

2. Indtast dine foretrukne appoplysninger:
3. Vælg WhatsApp-brugsscenarie:
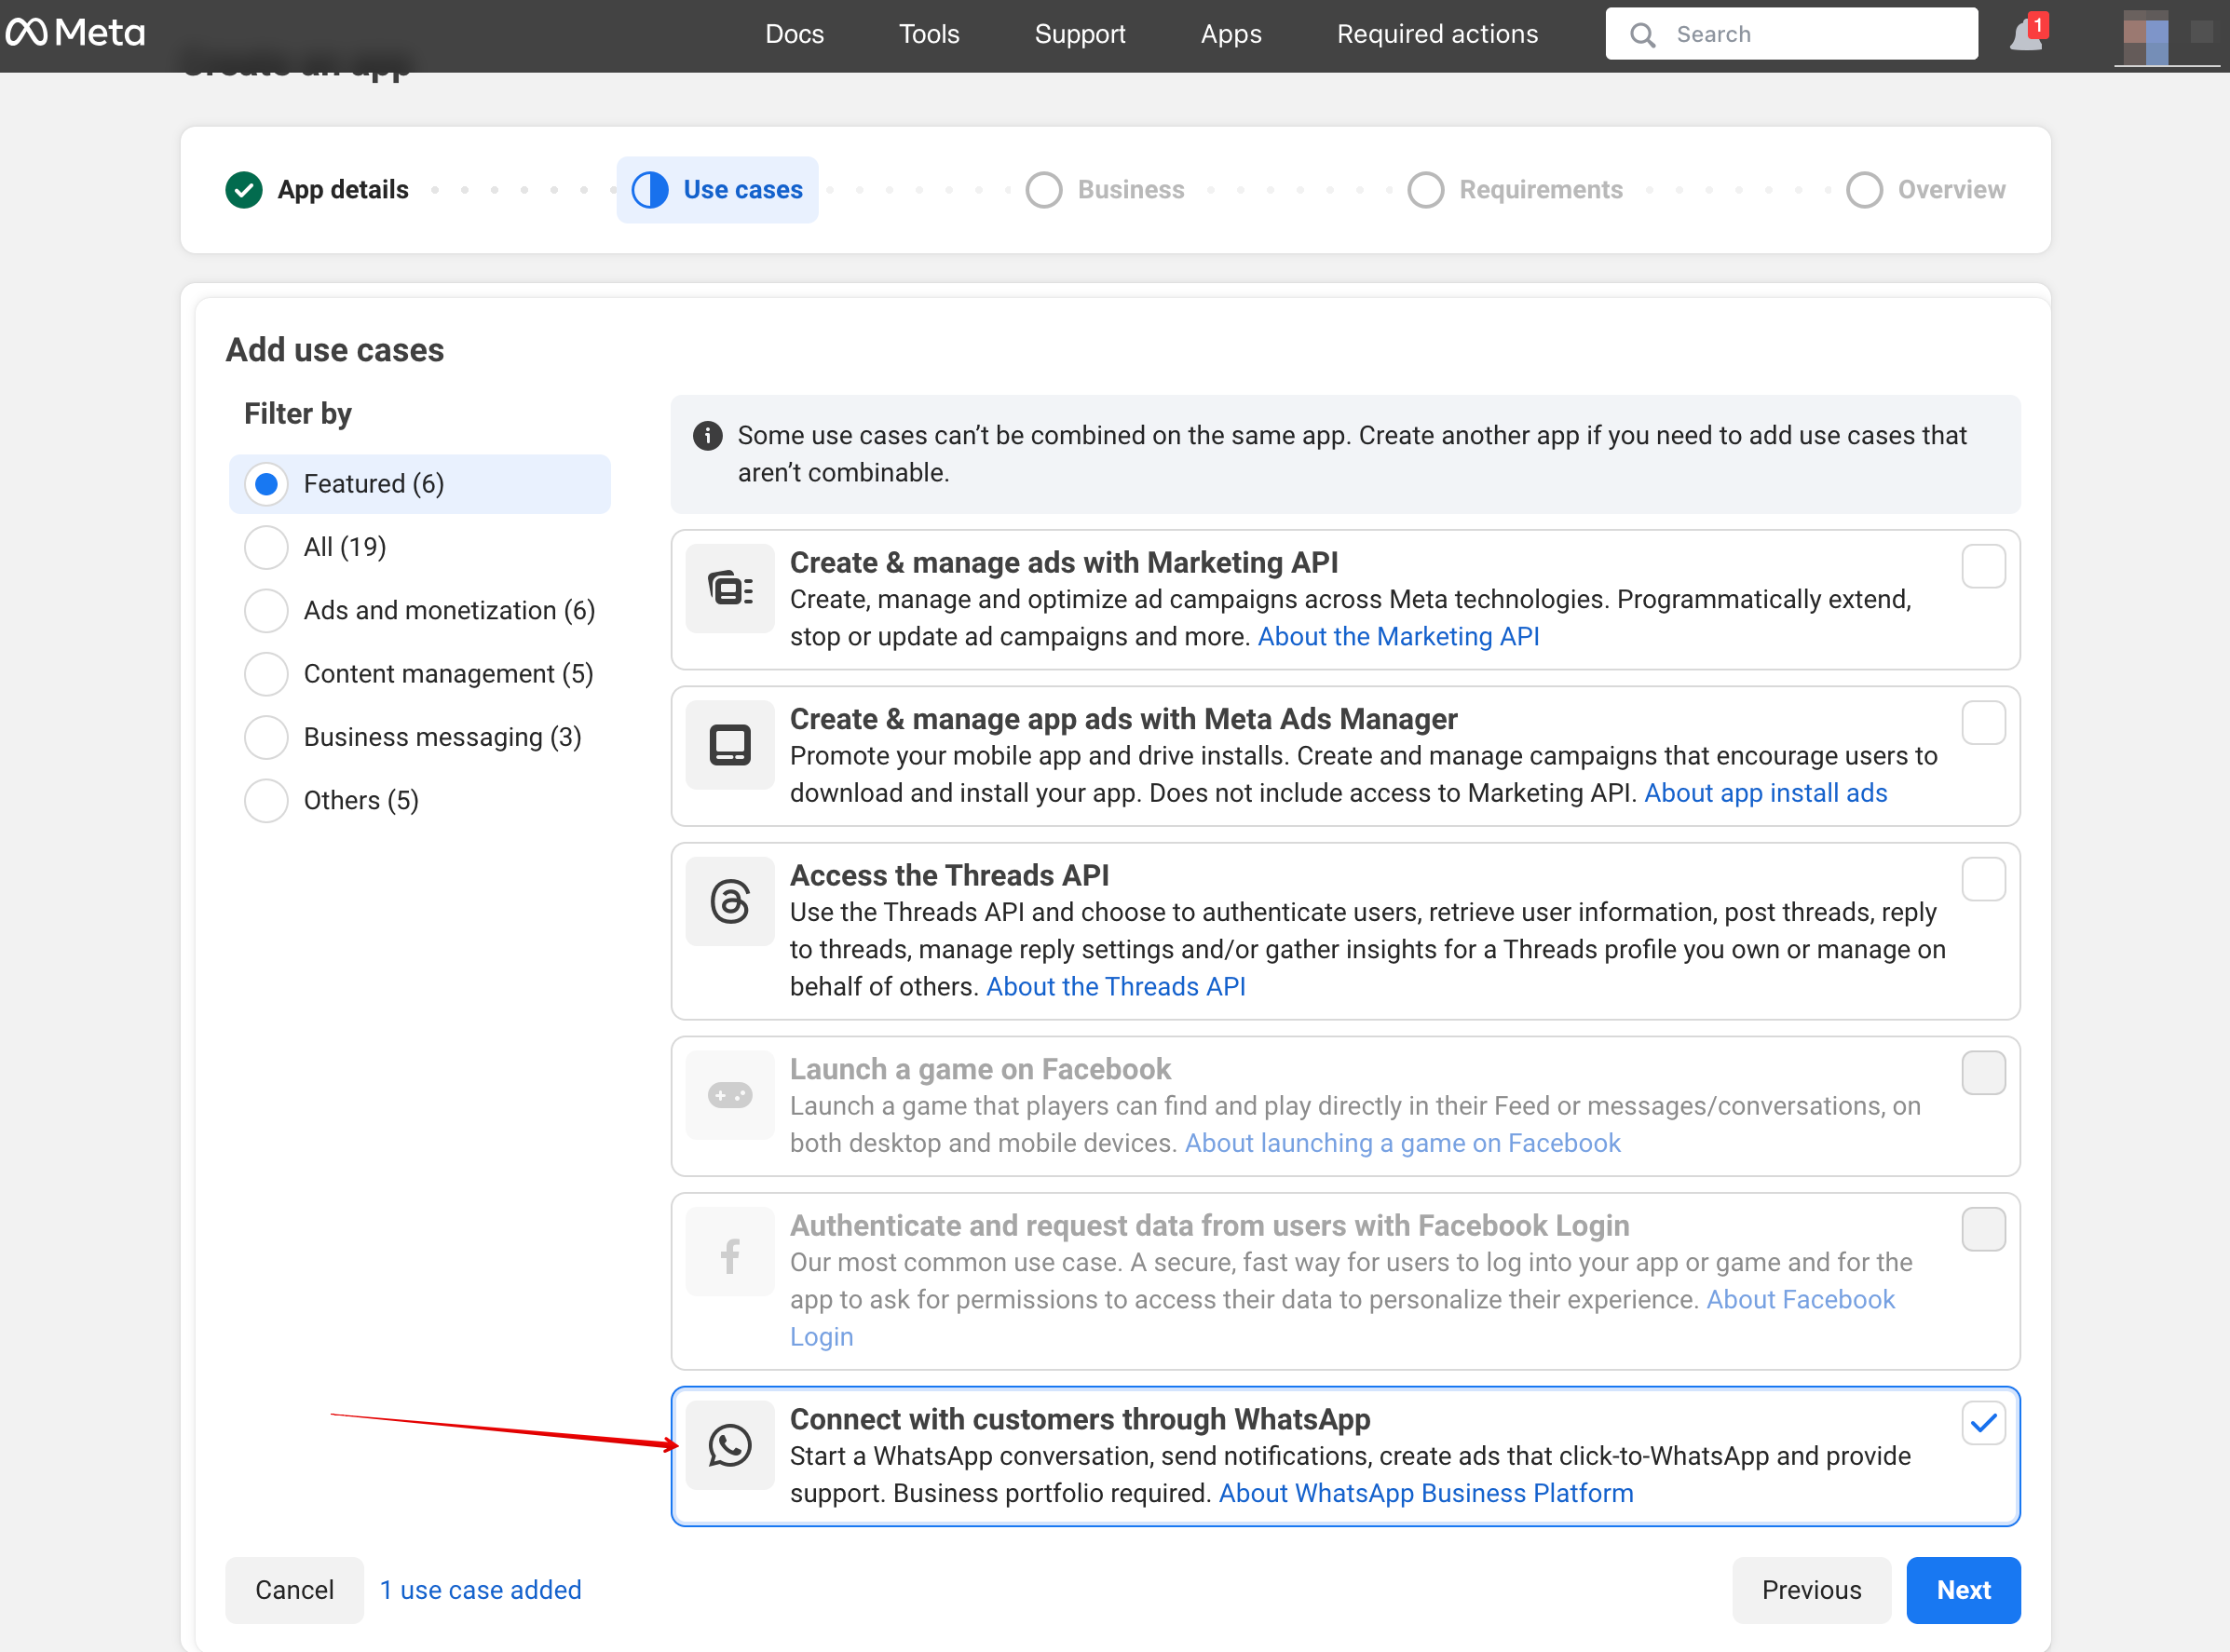
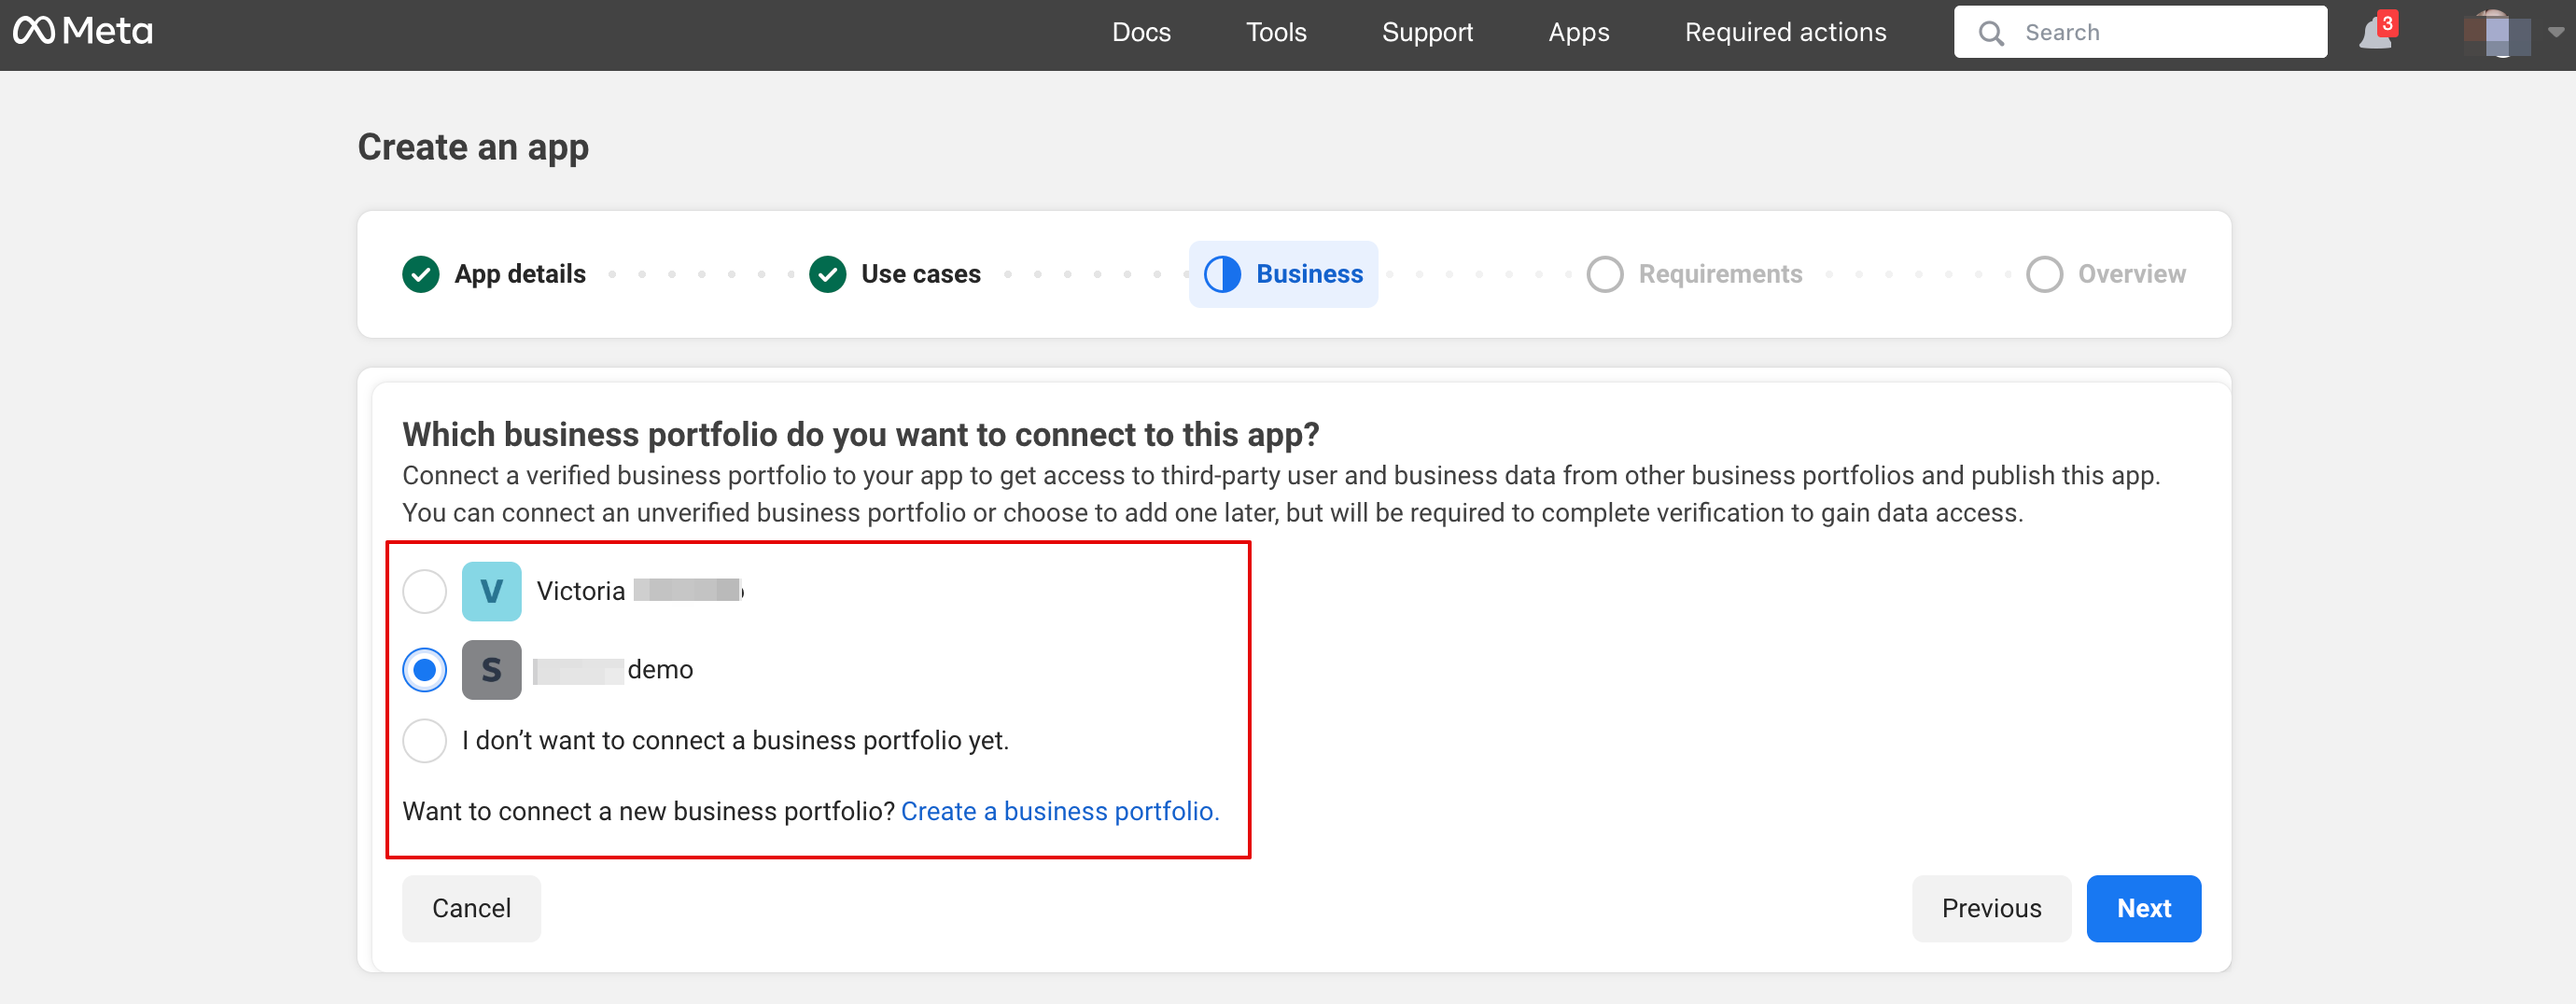
4. Vælg virksomhedsprofilen eller opret en ny.
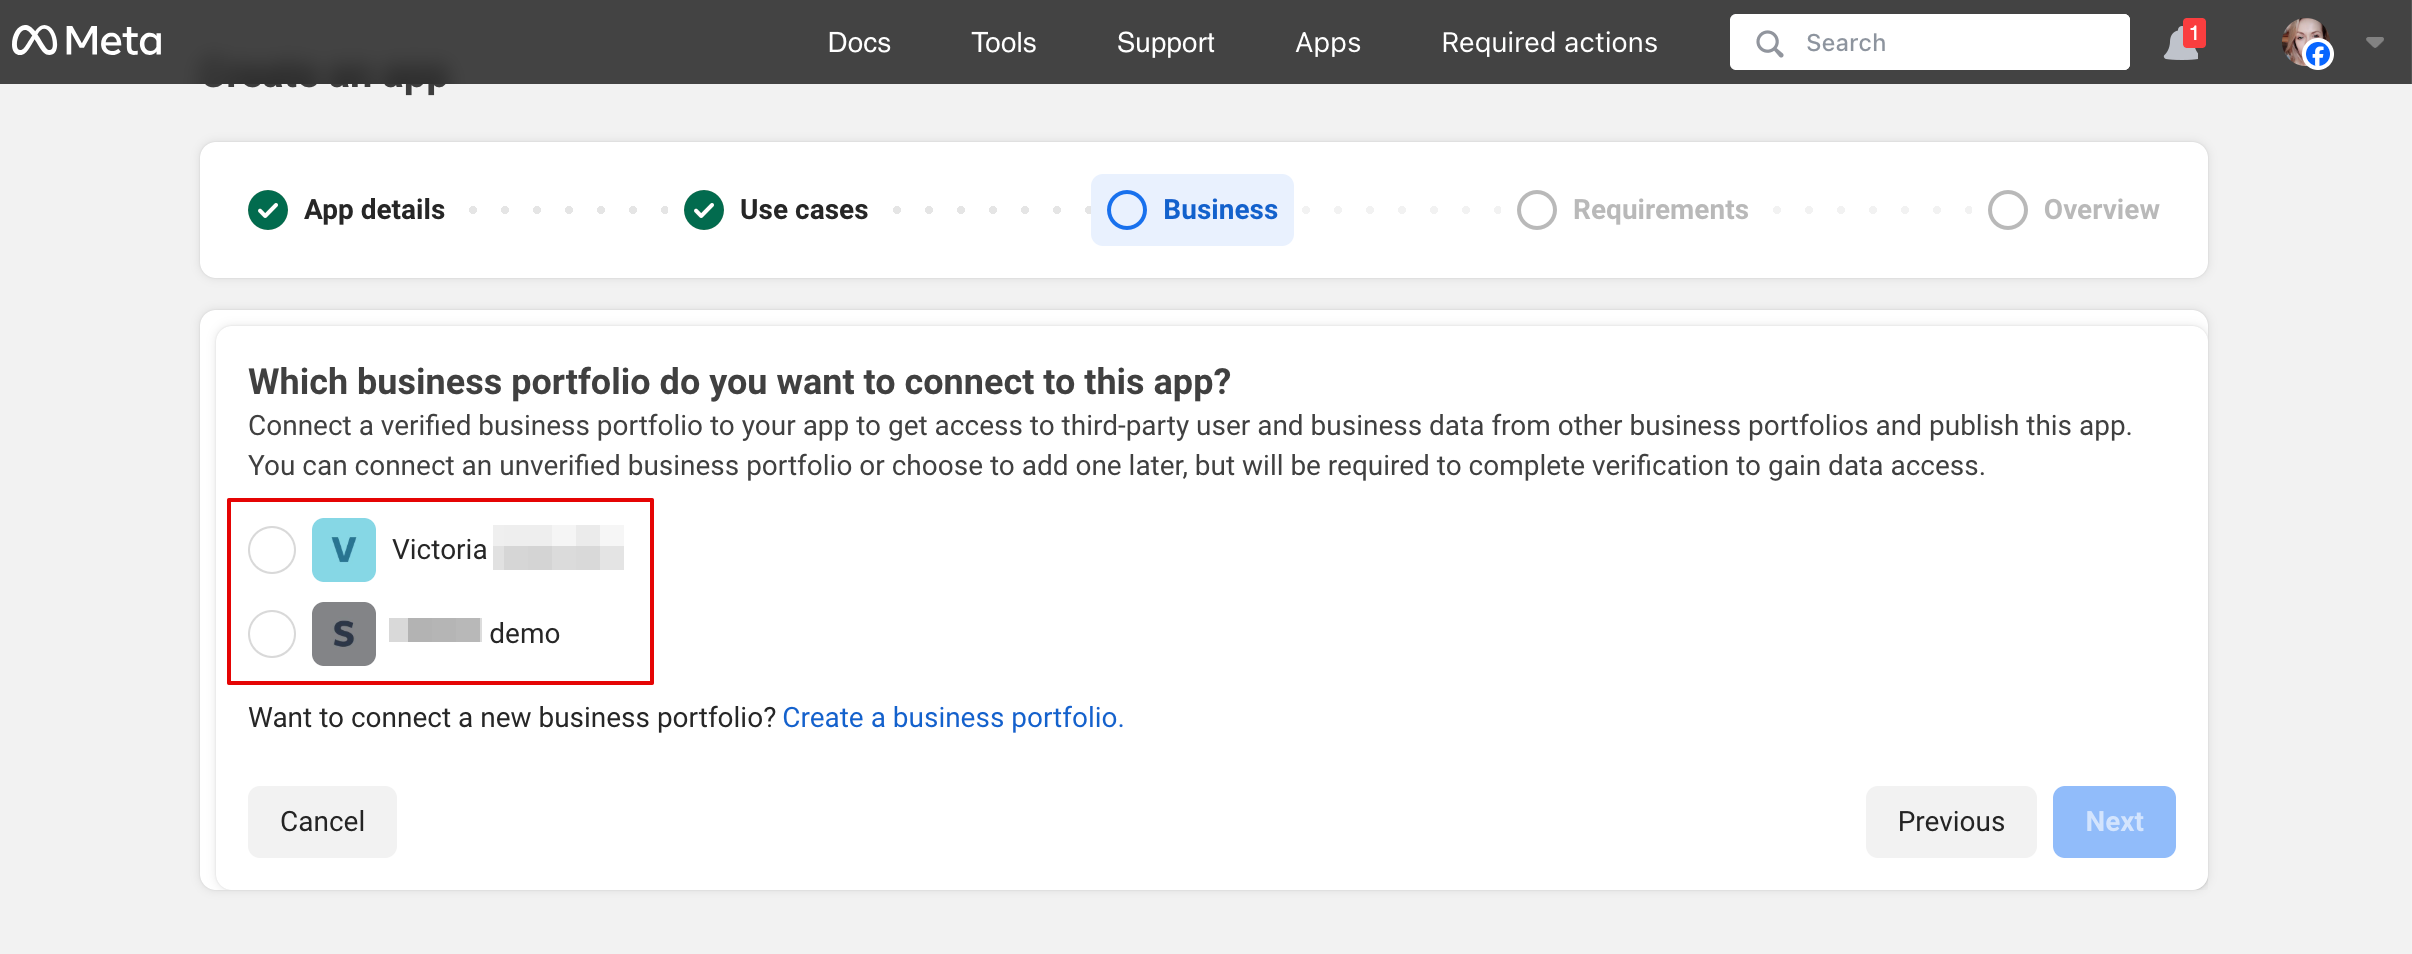
5. Klik på “Next” for at fortsætte:
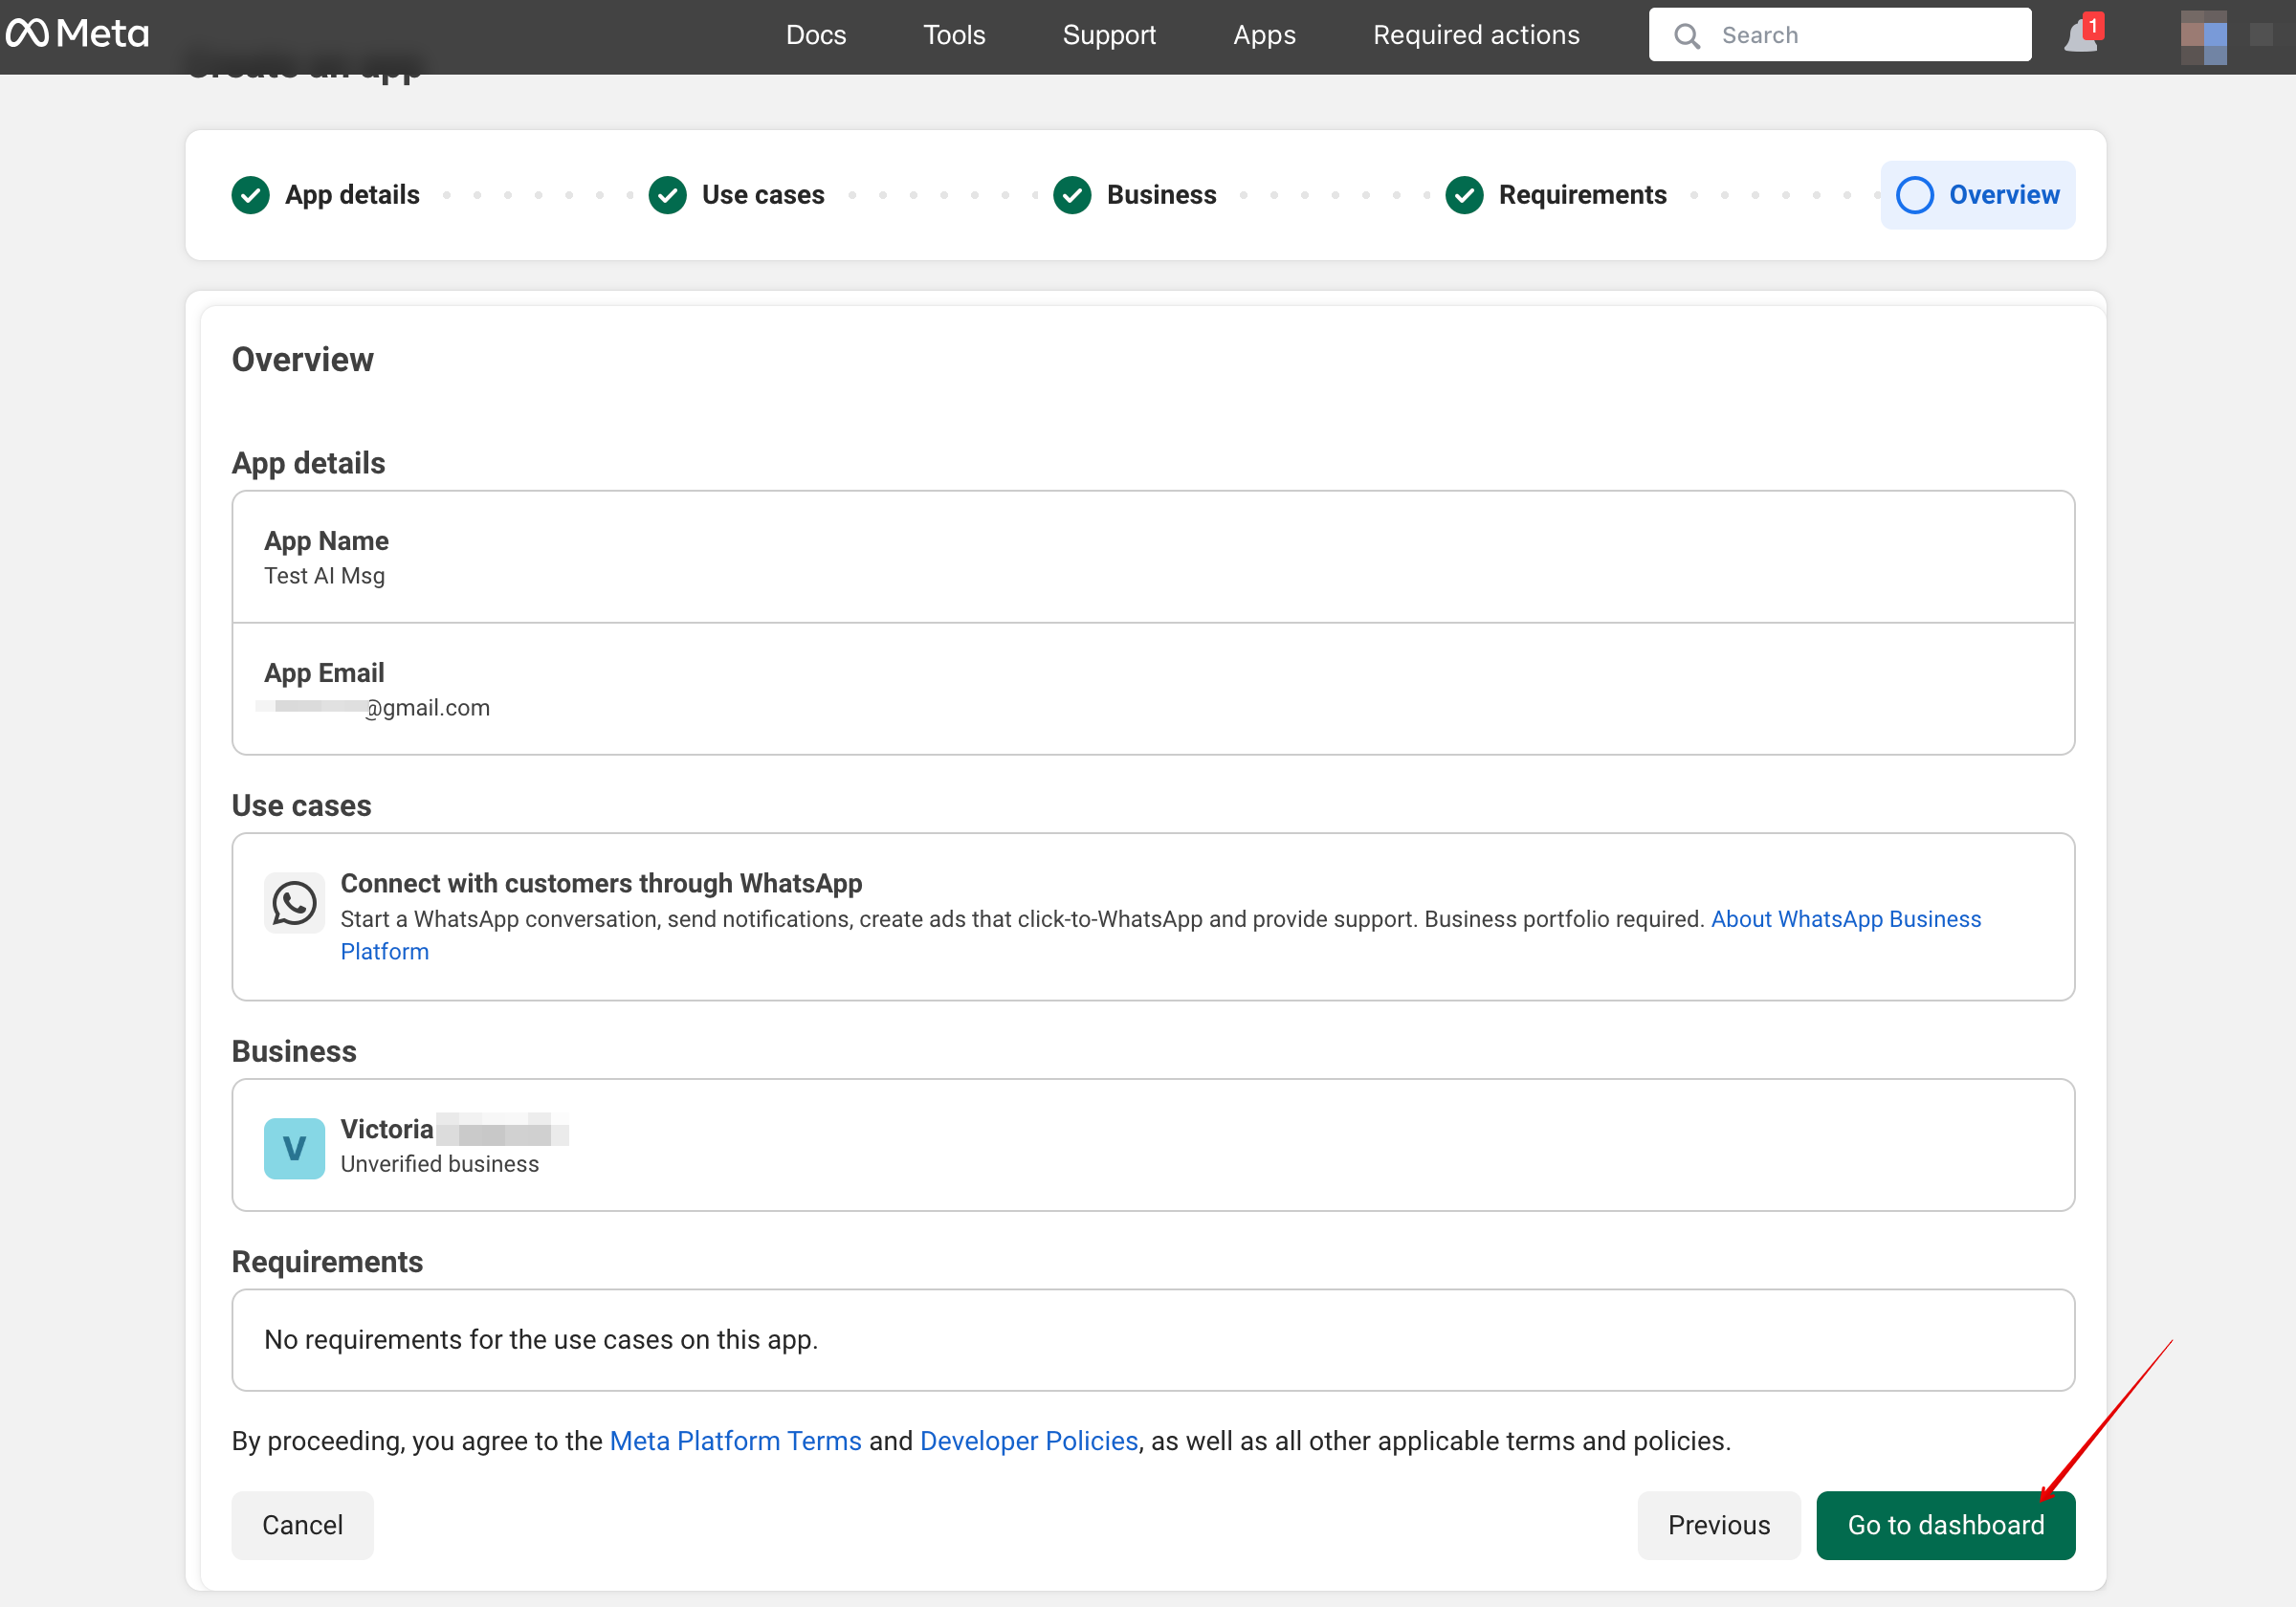
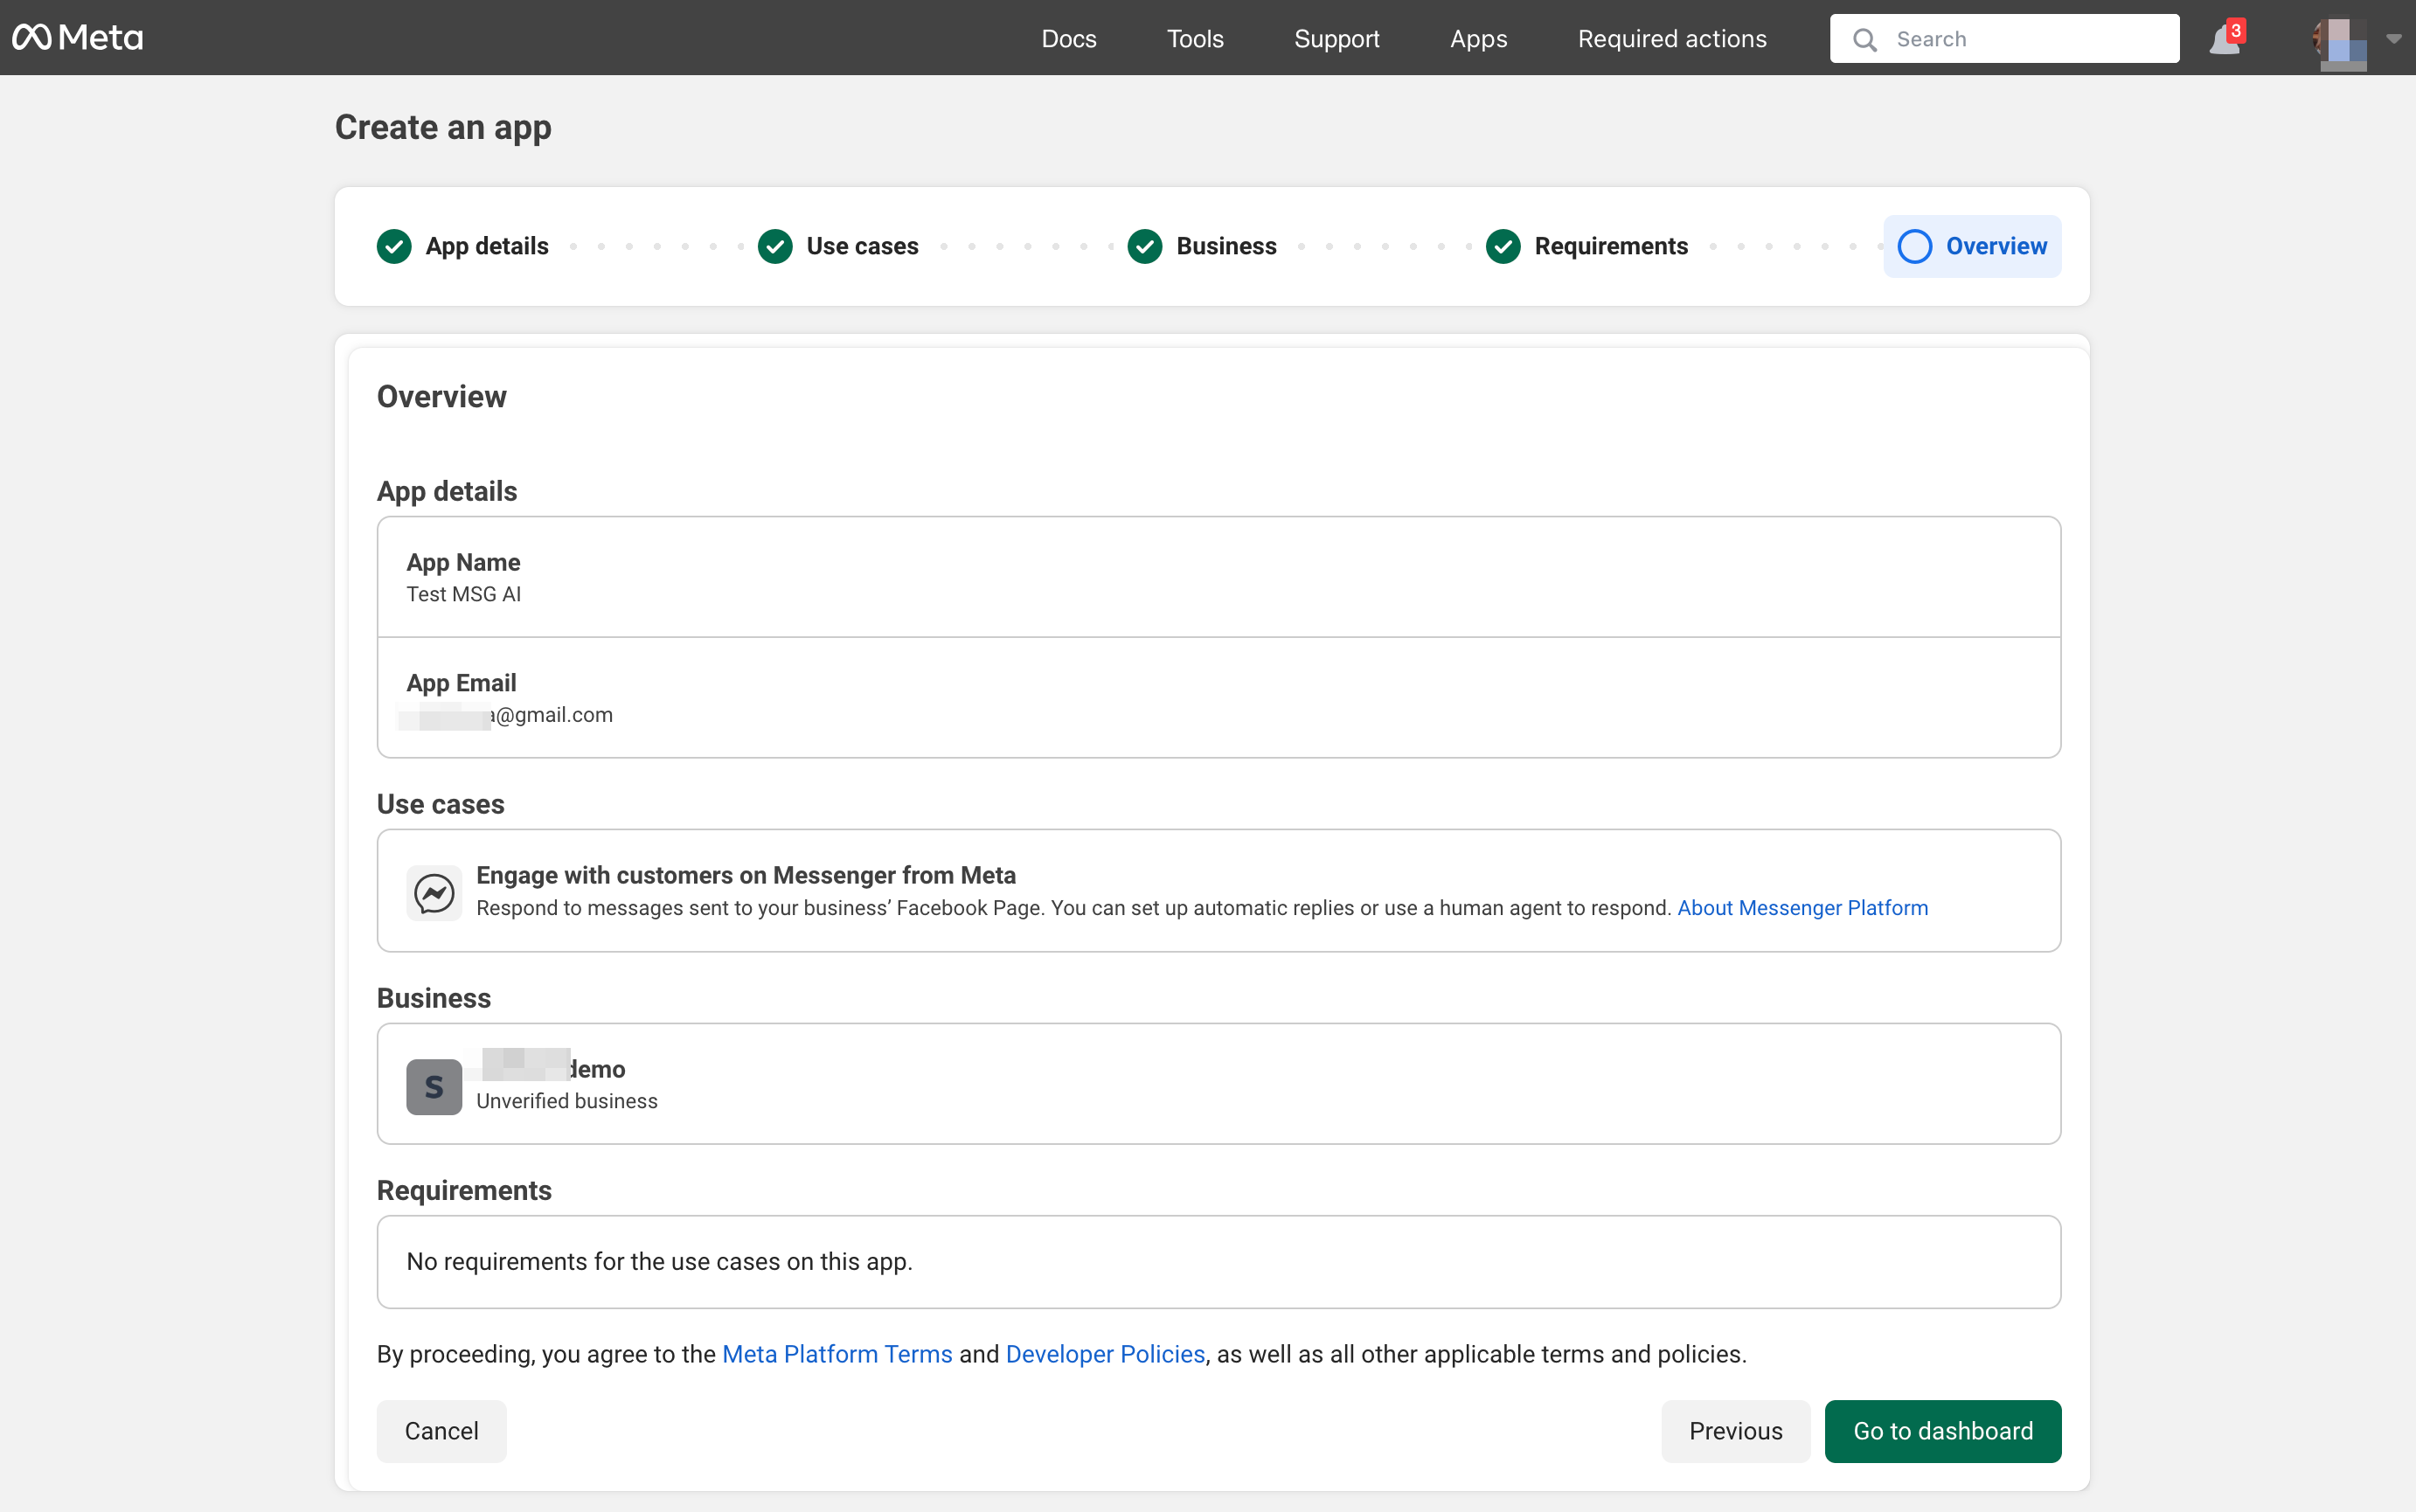
6. Gennemse detaljerne og klik på “Go to dashboard”:
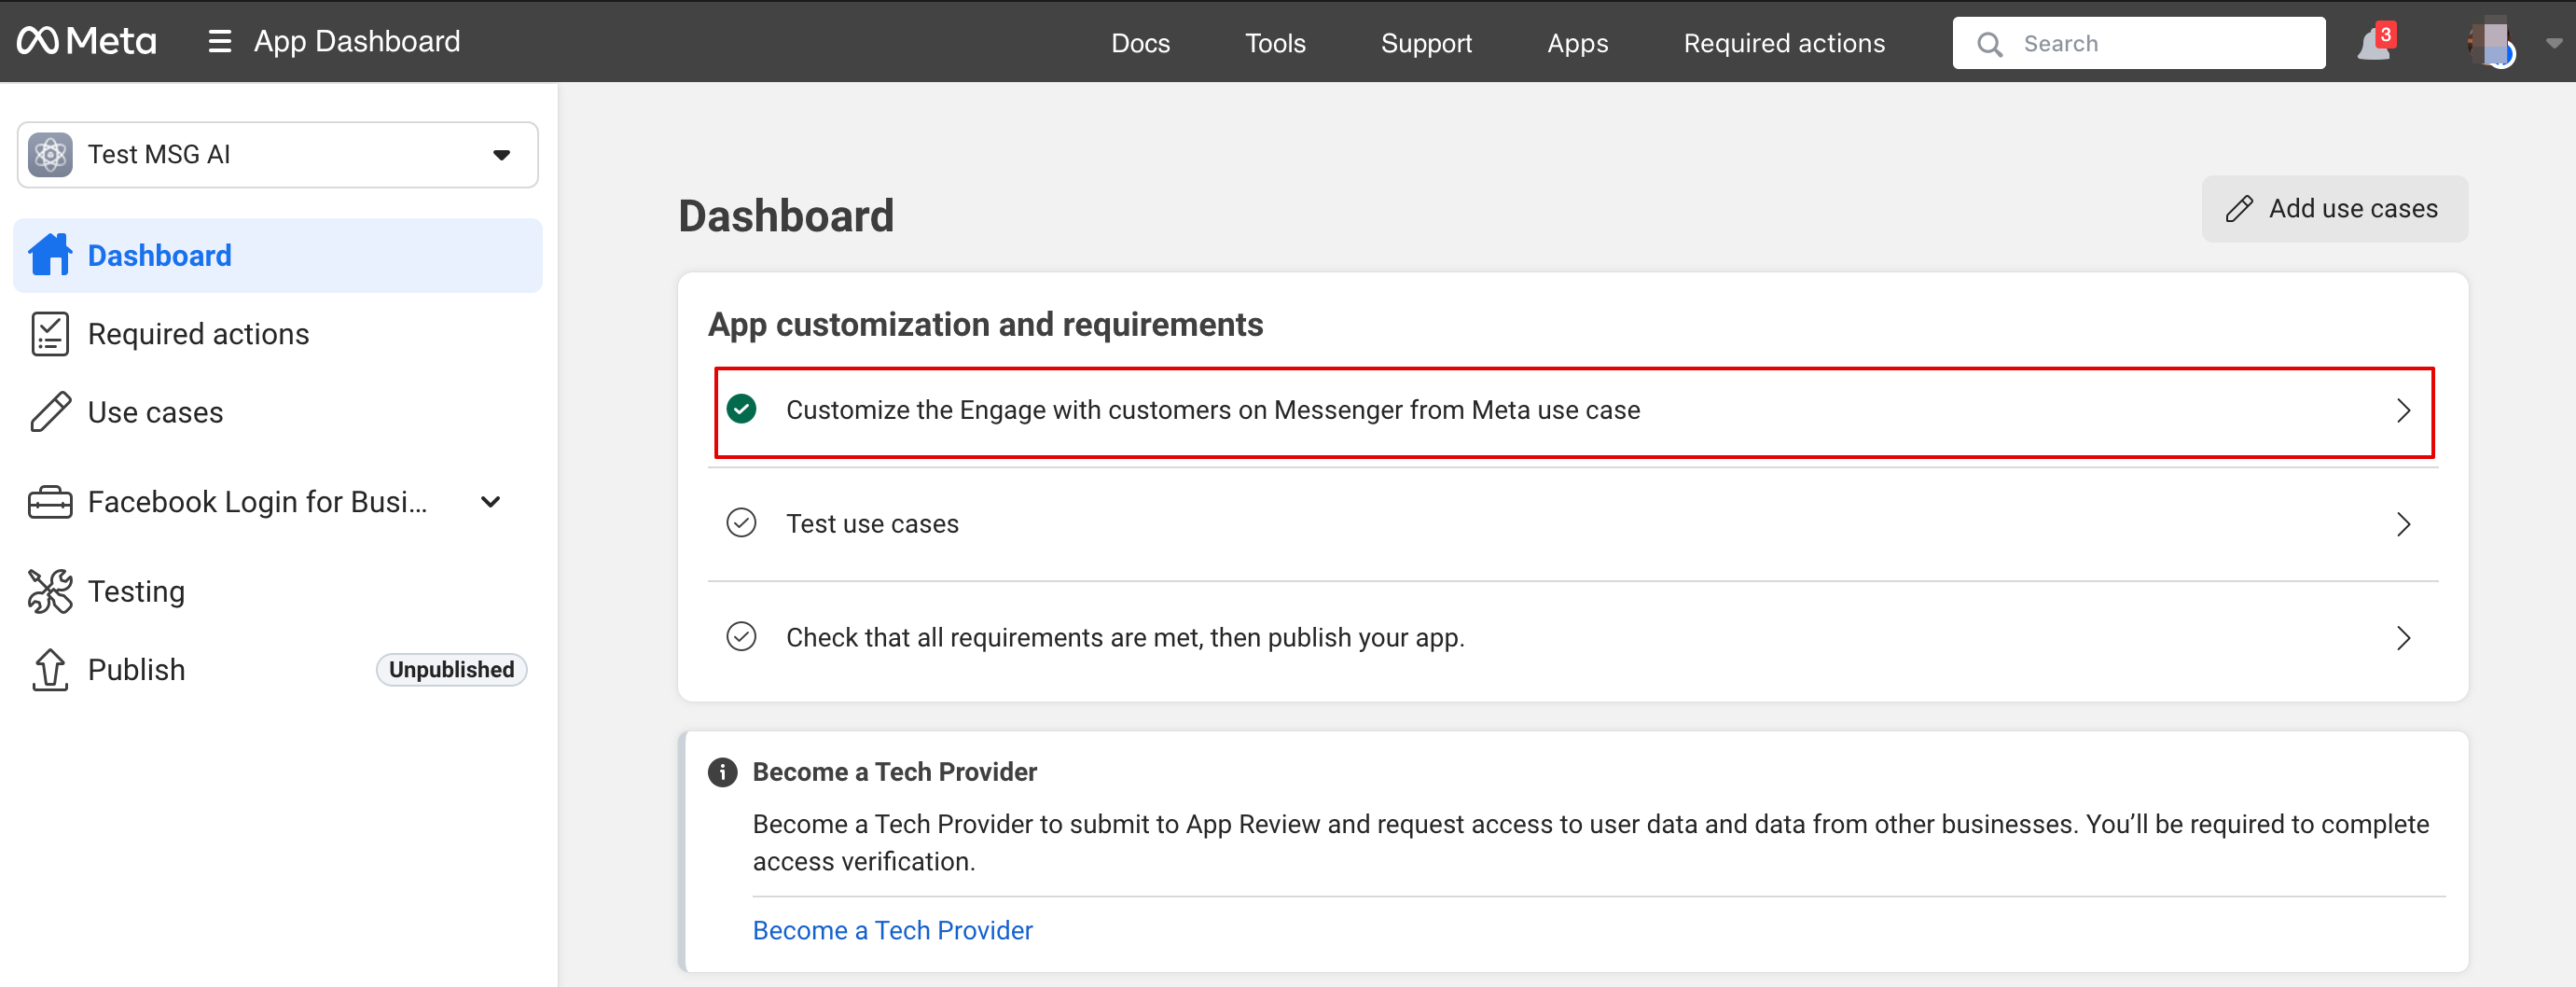
7. Vælg fanen “Use cases” og klik på knappen “Customize”:

8. Accepter servicevilkårene og bekræft virksomhedsprofilen:
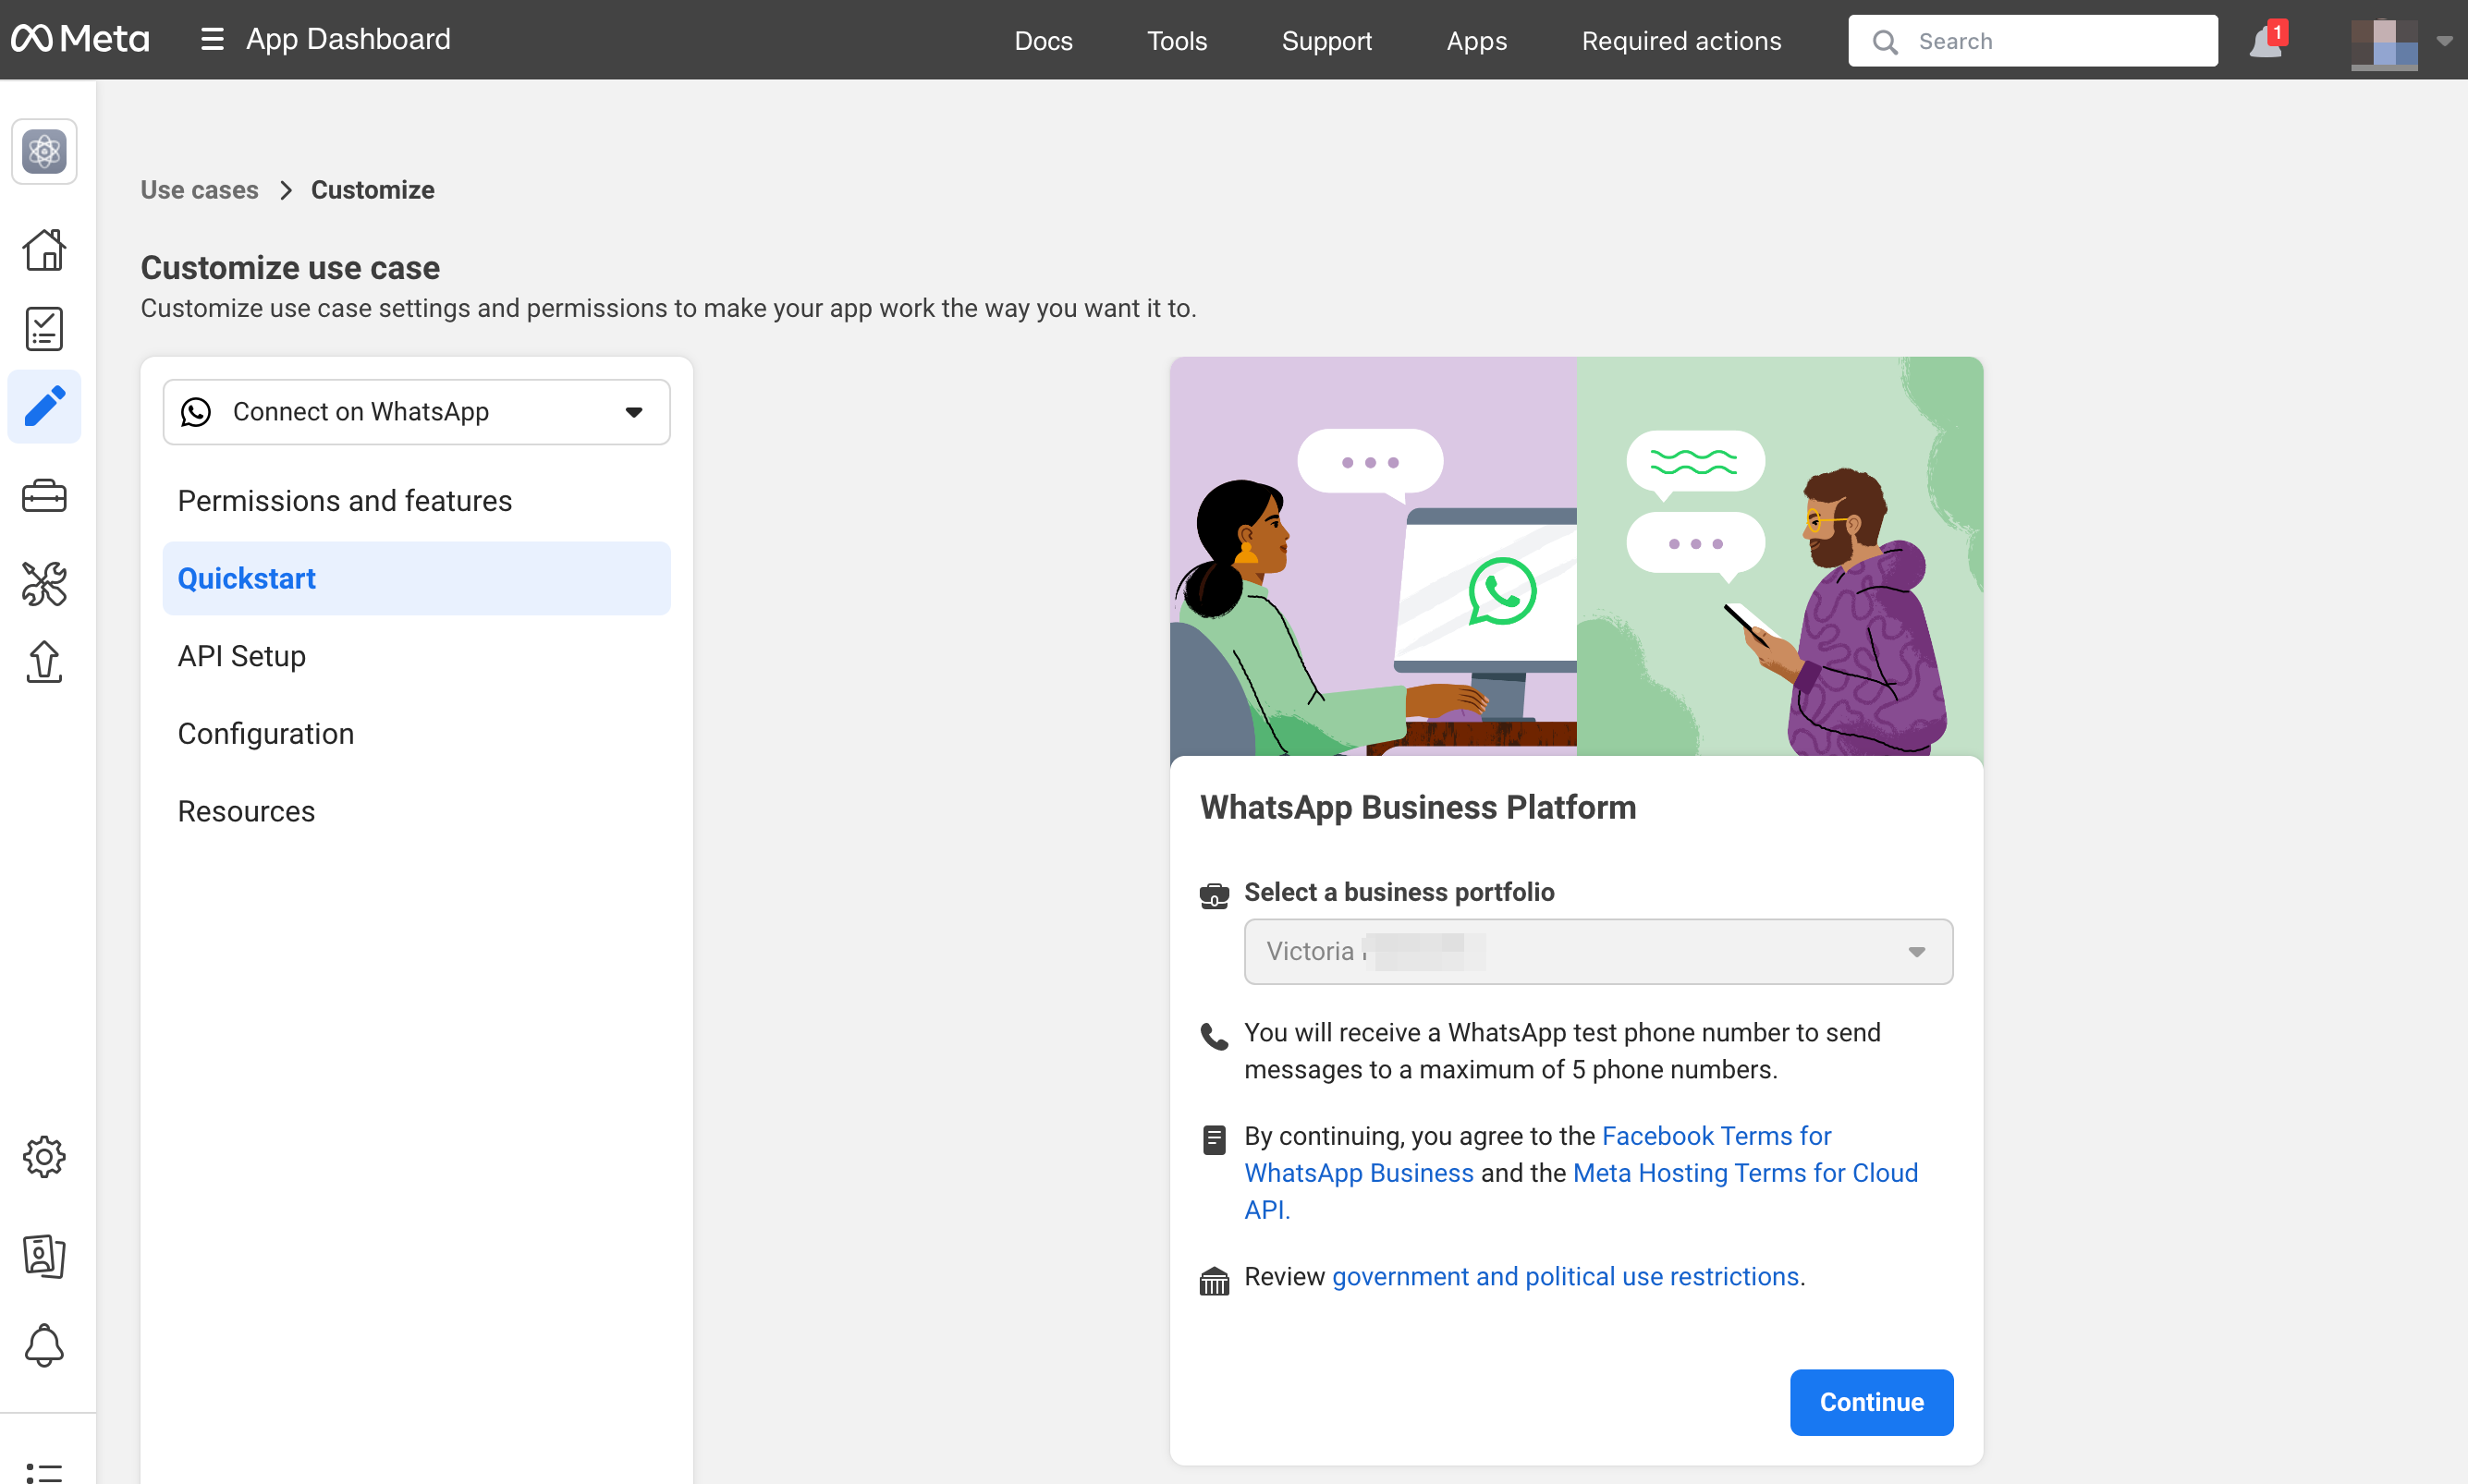
9. Vælg “Start using the API”:
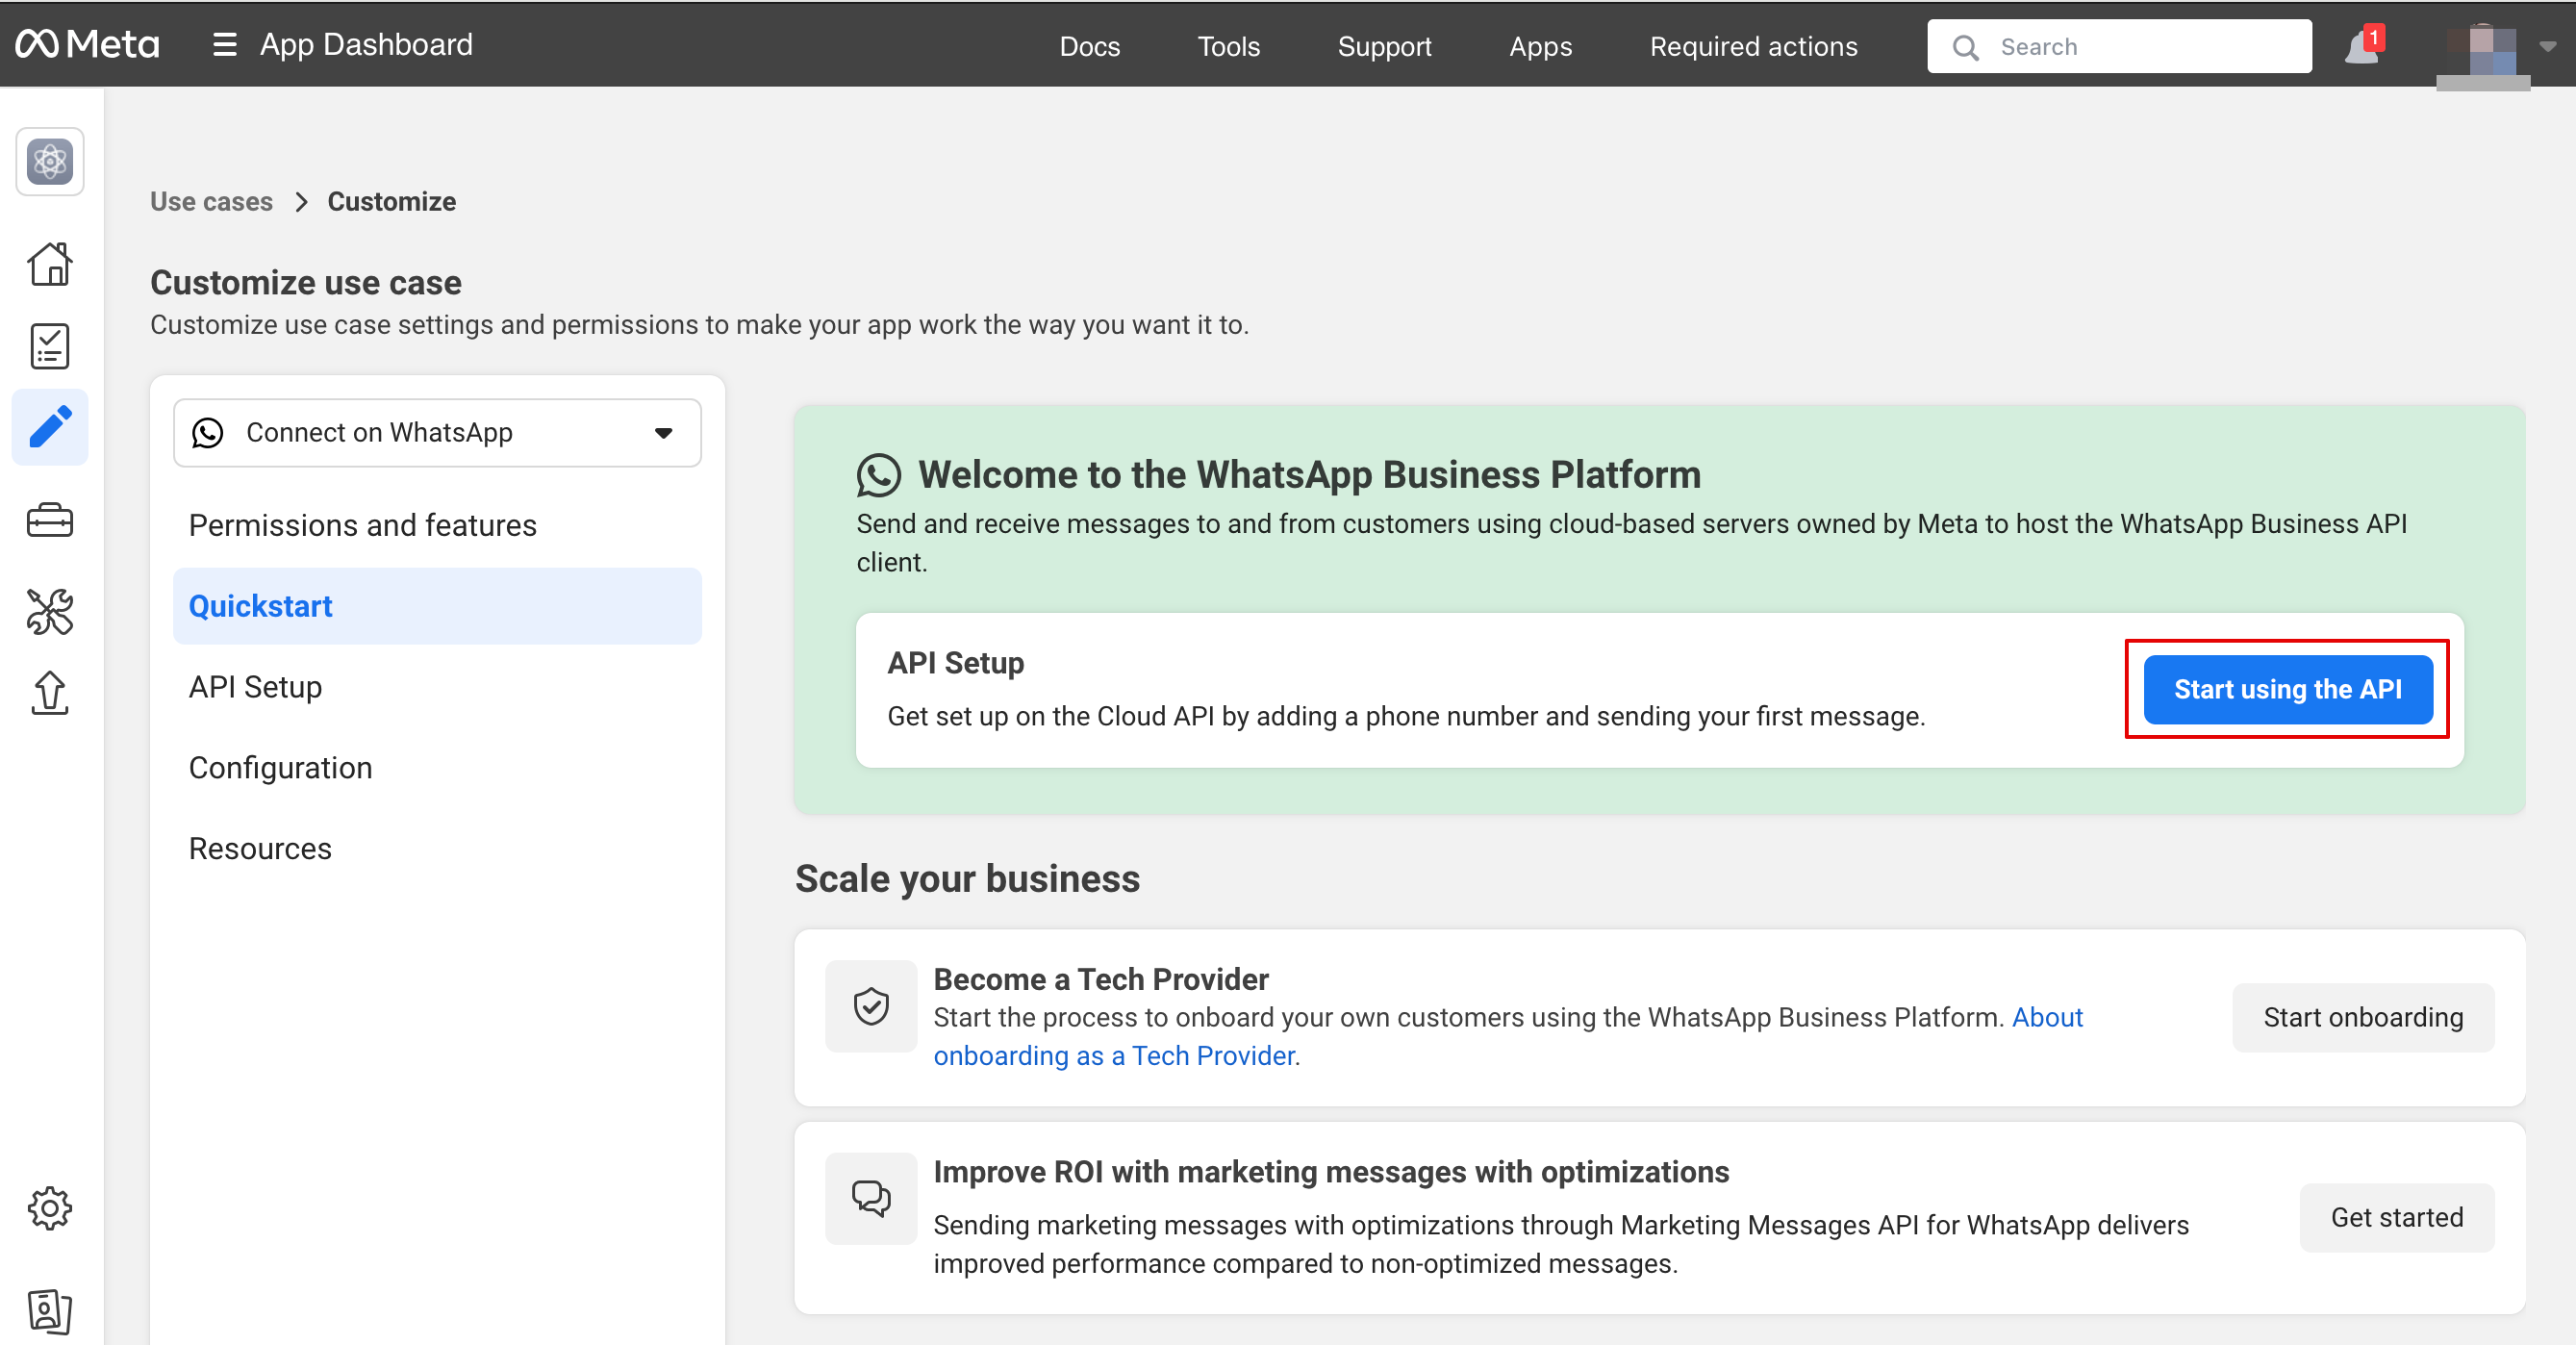
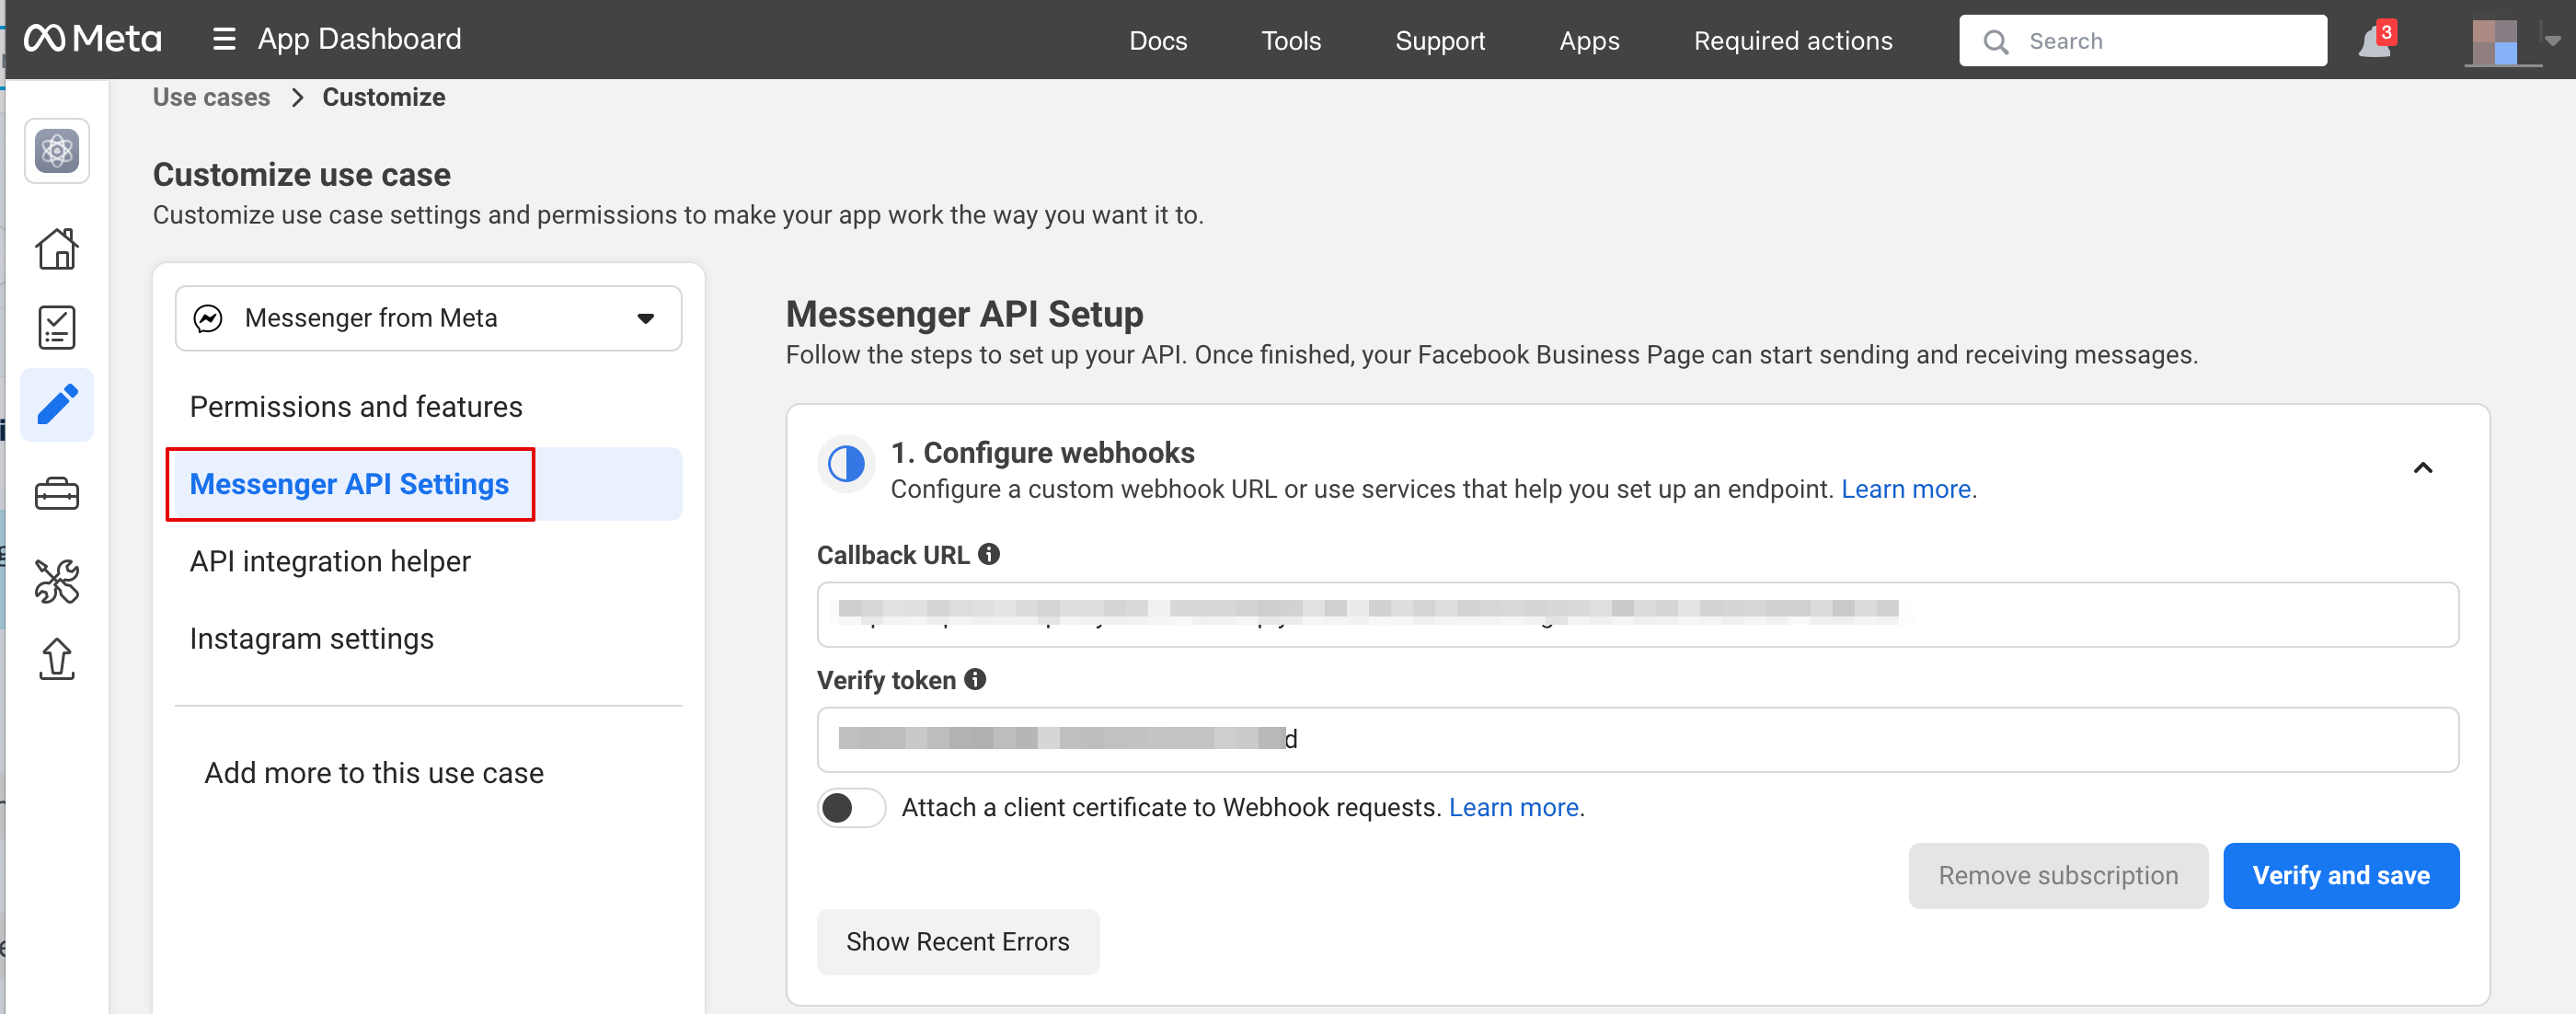
10. Gå derefter til “Configure webhooks”:
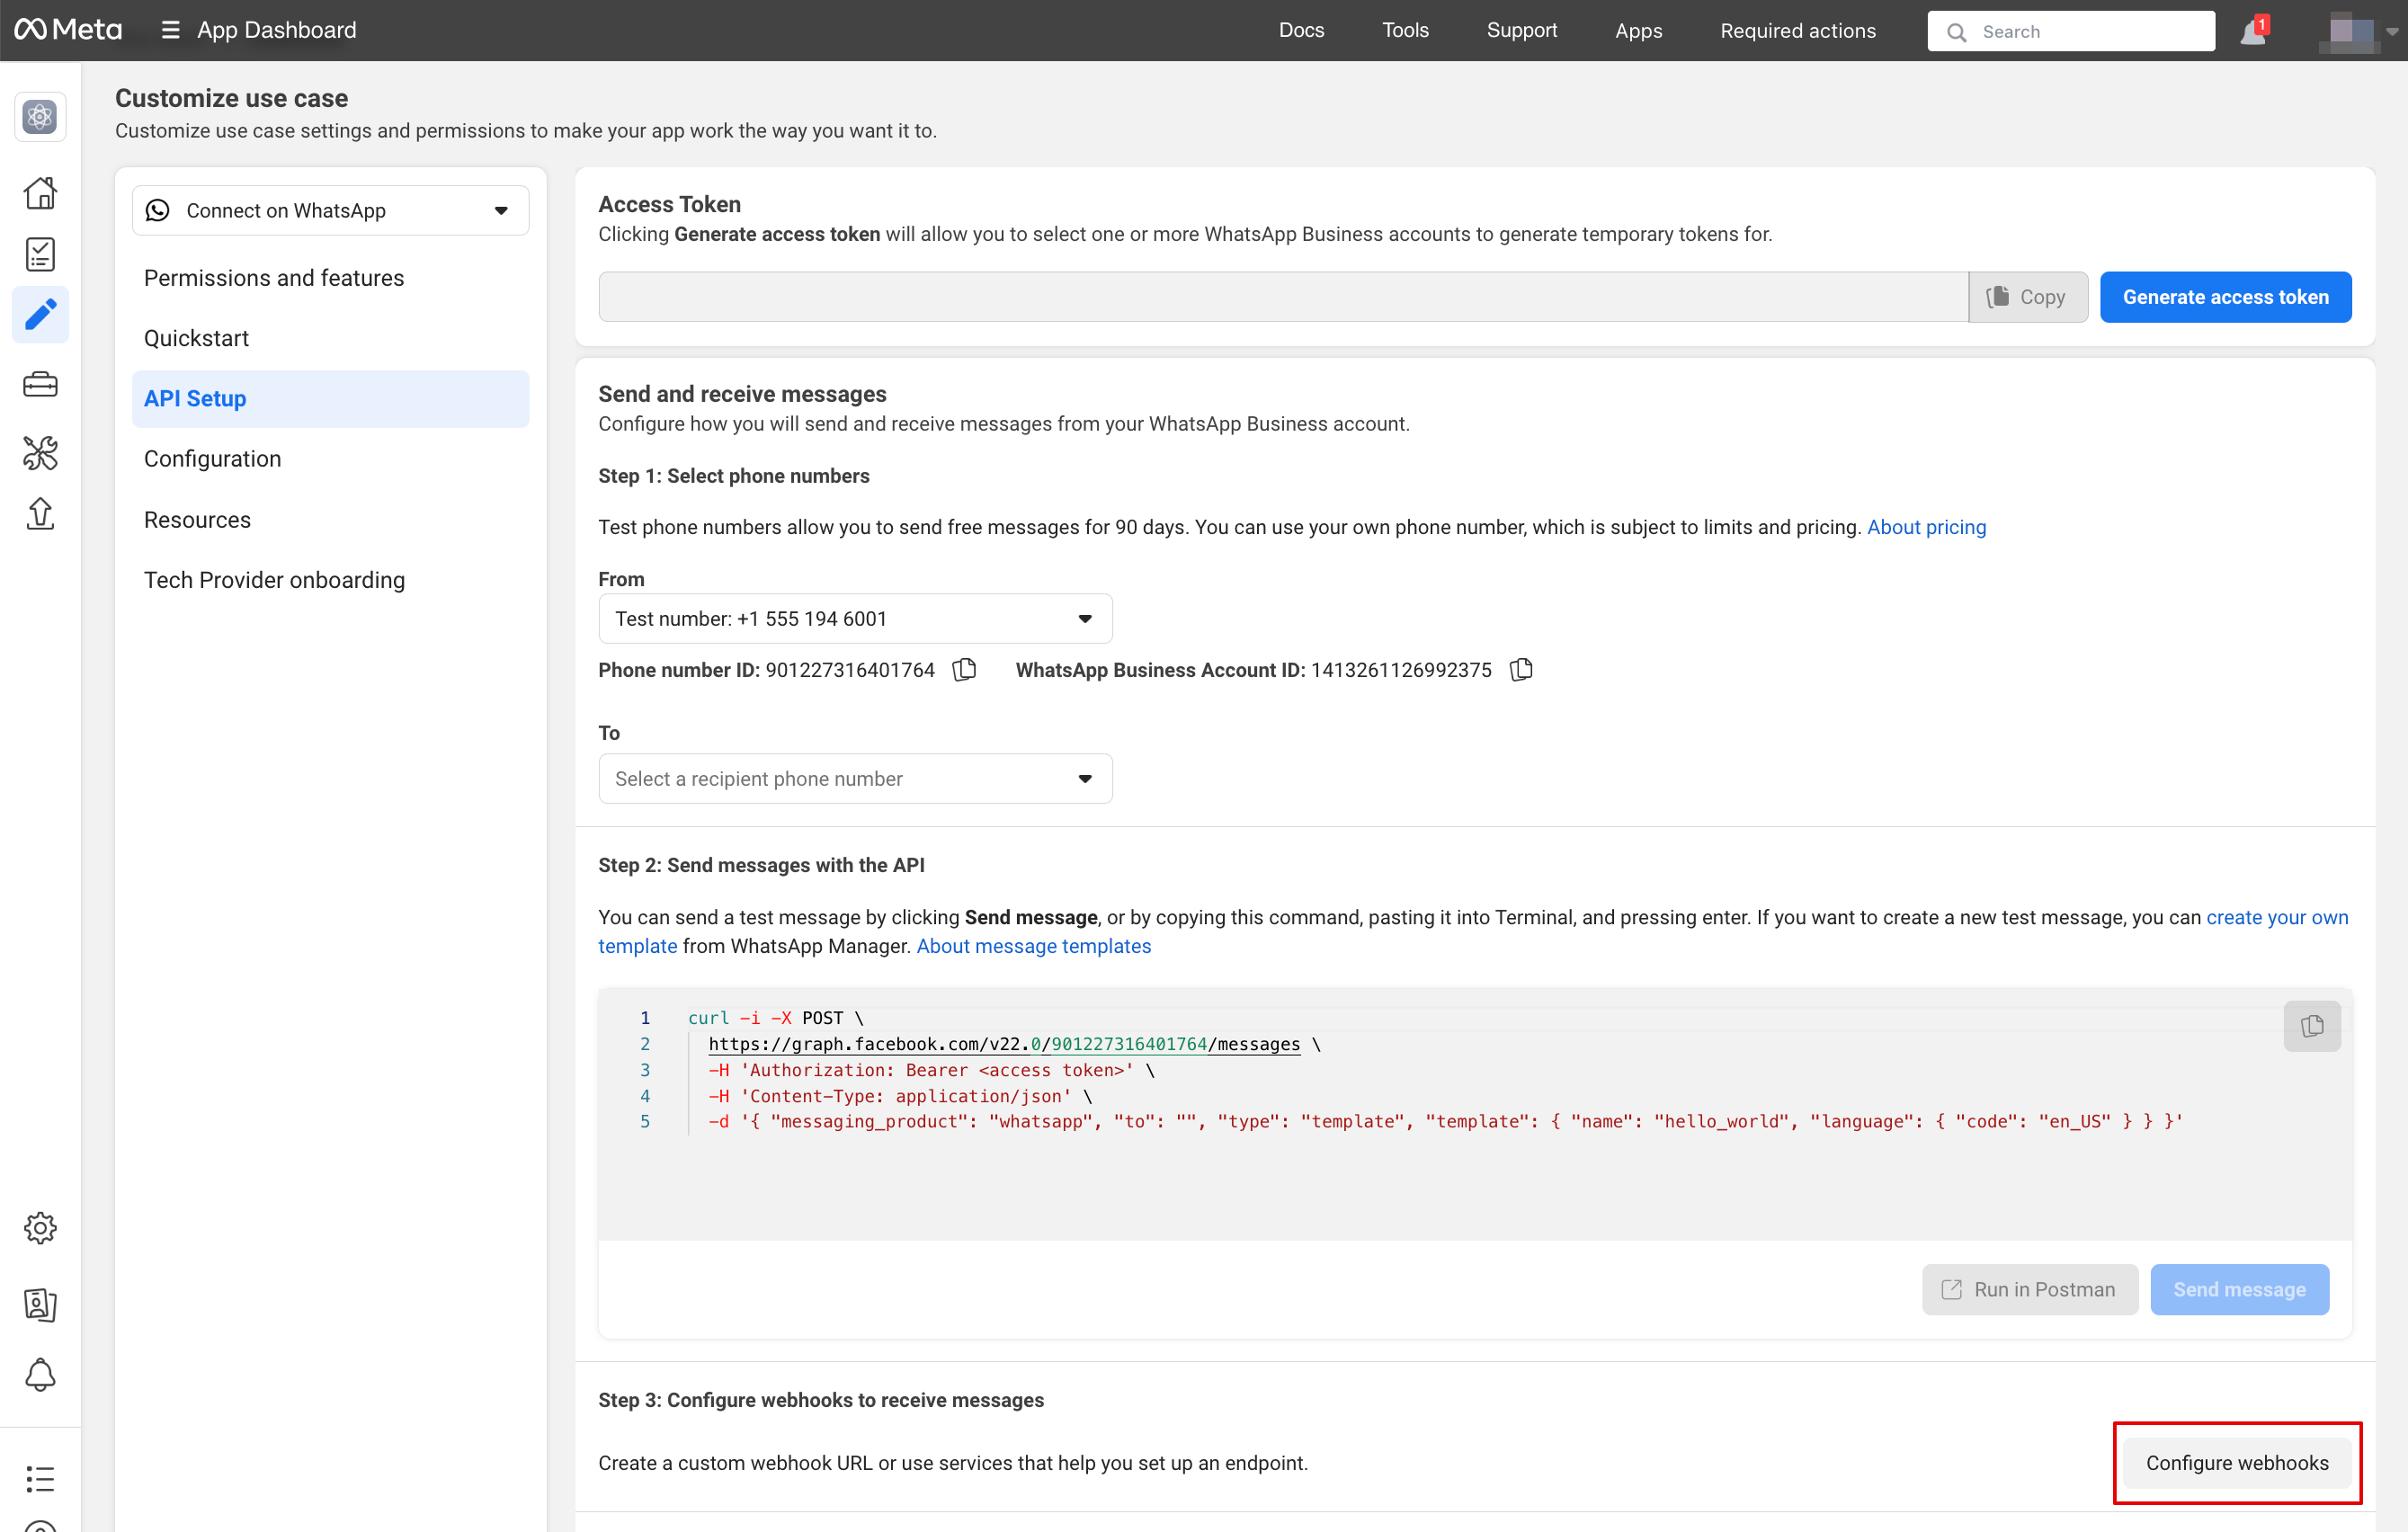
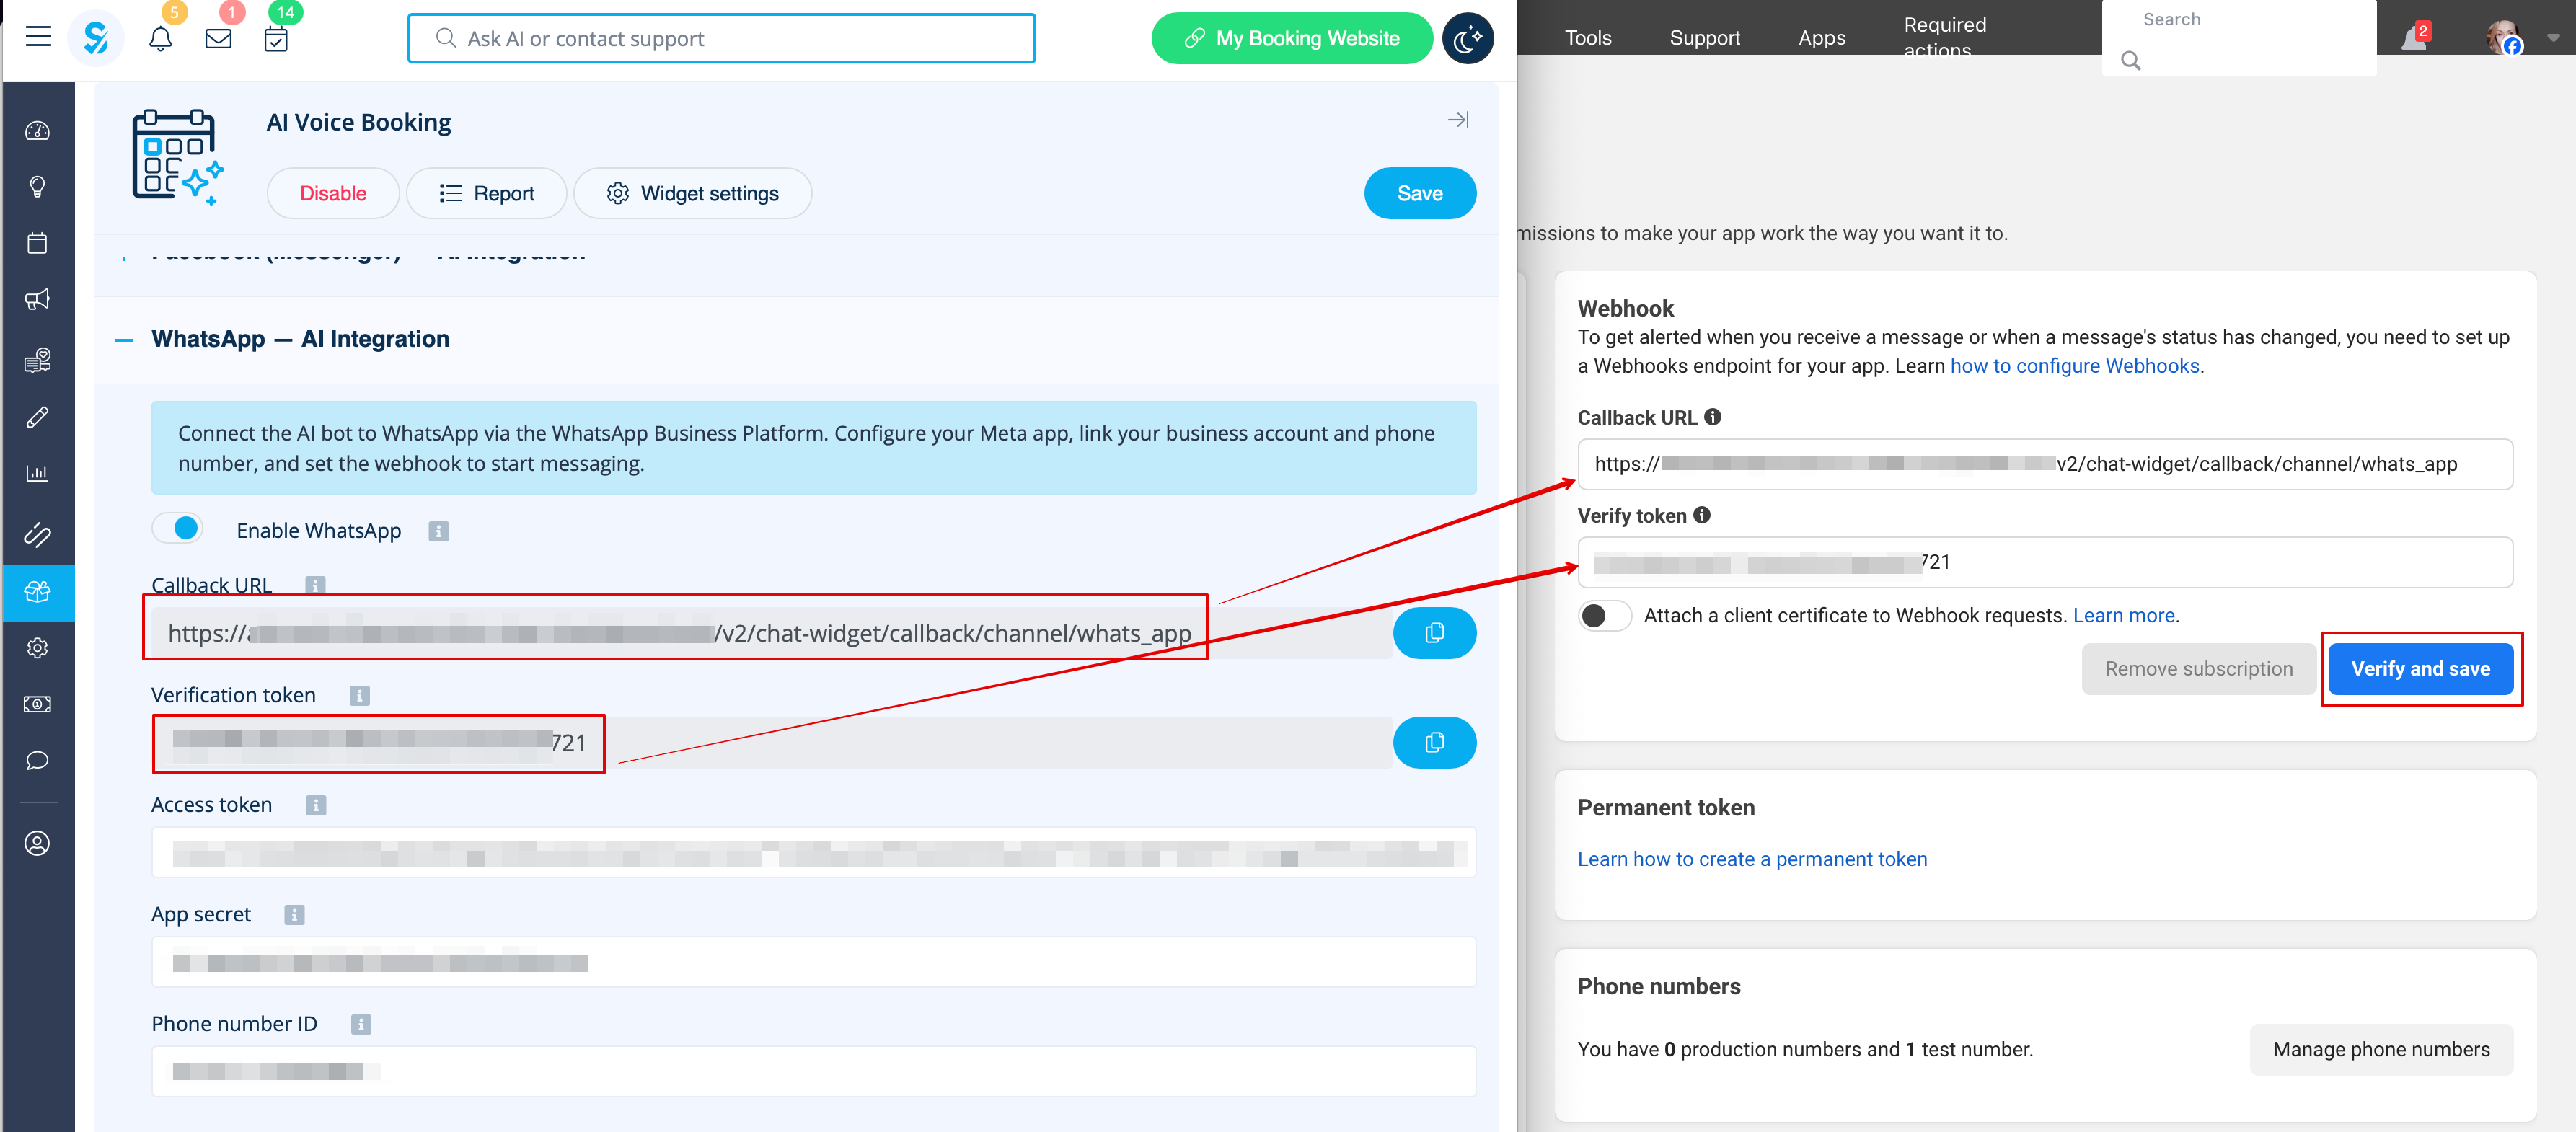
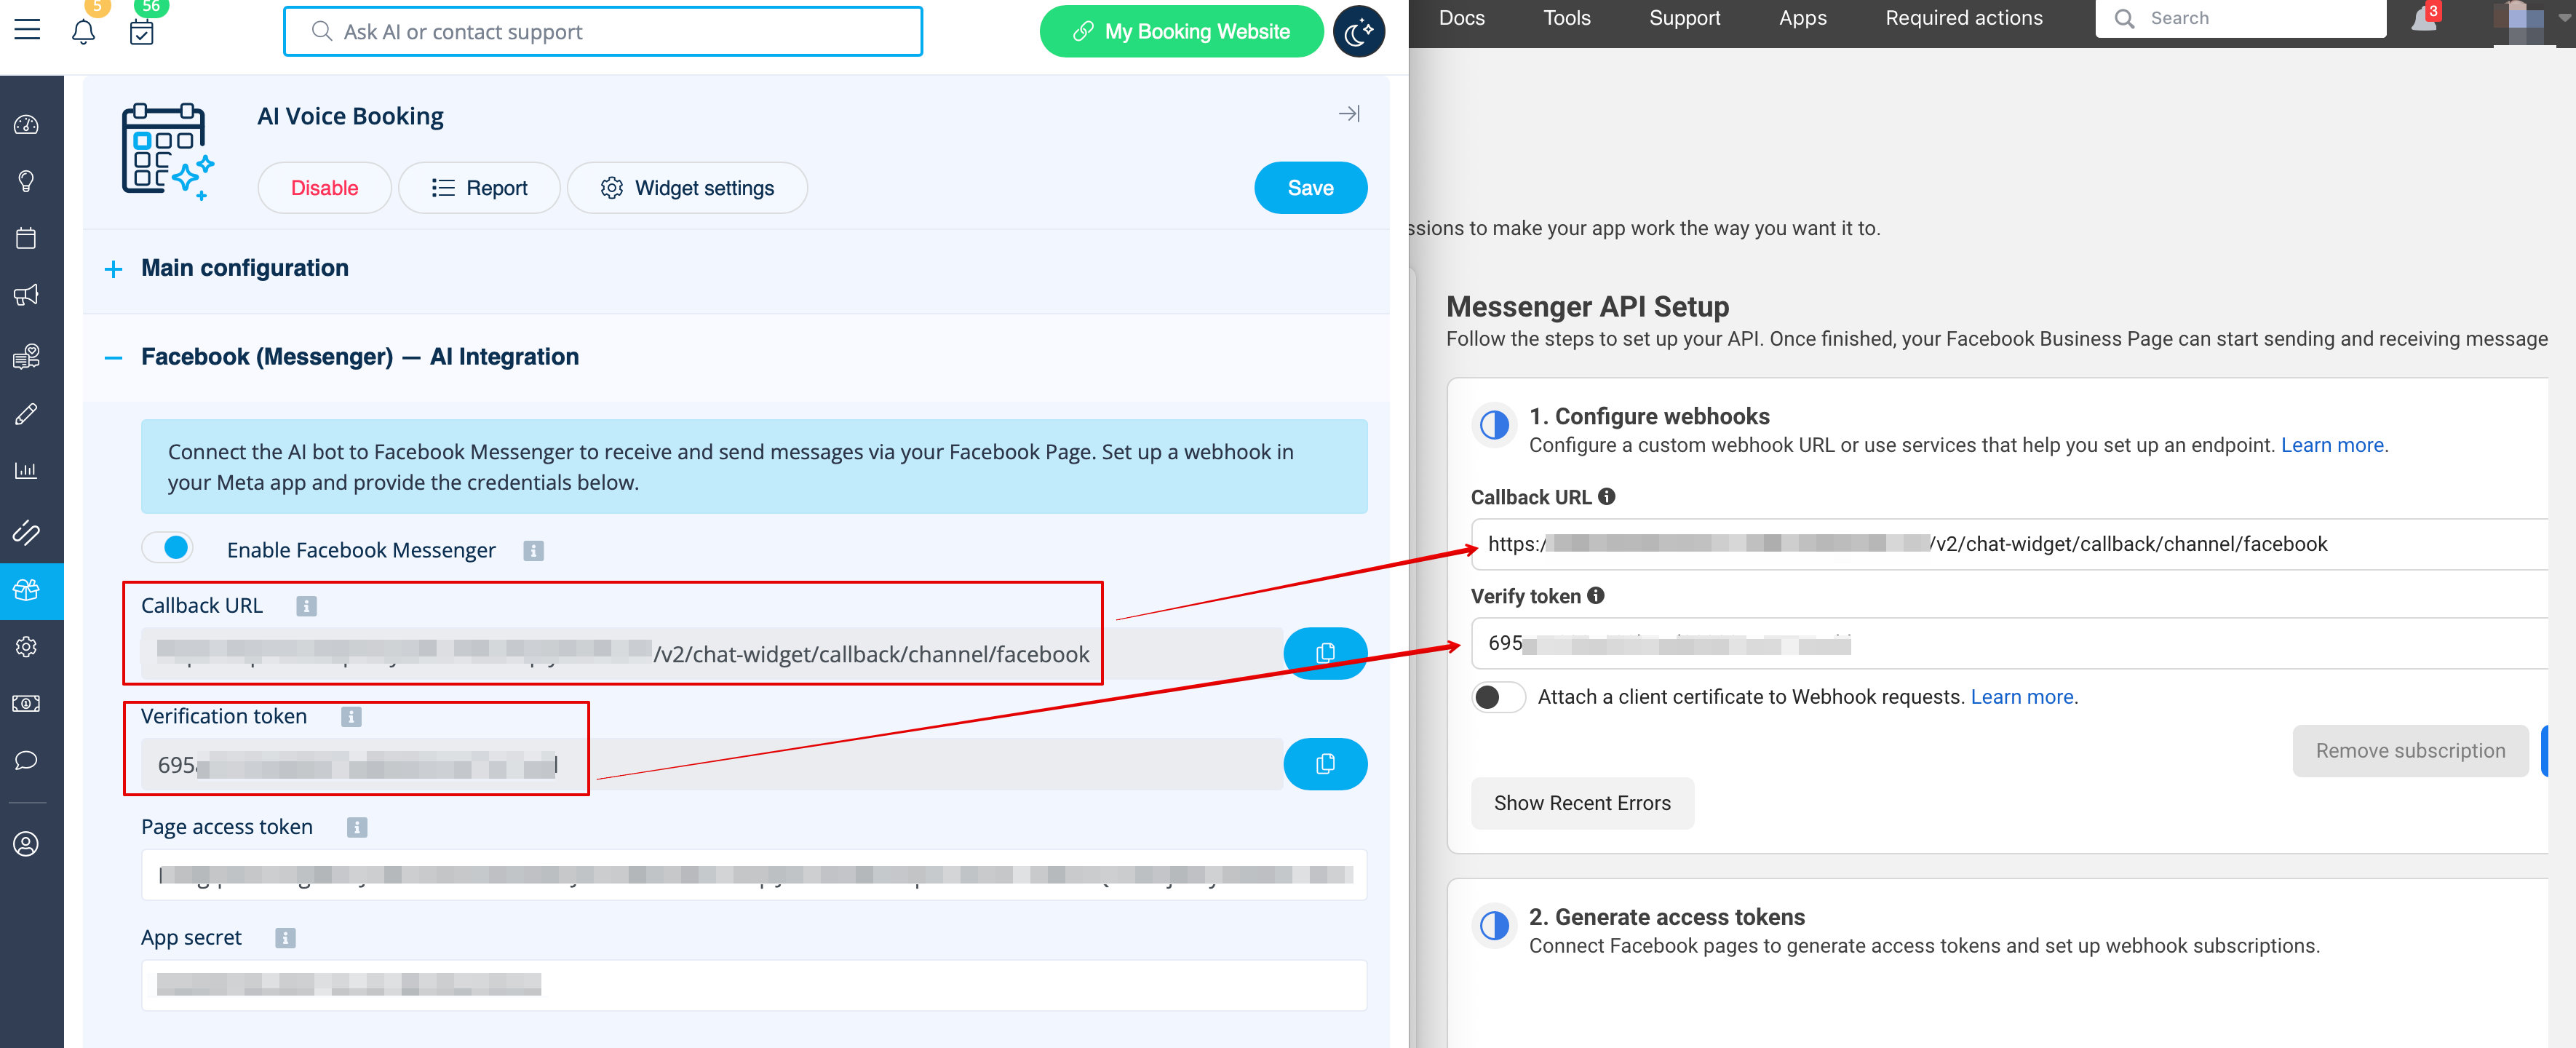
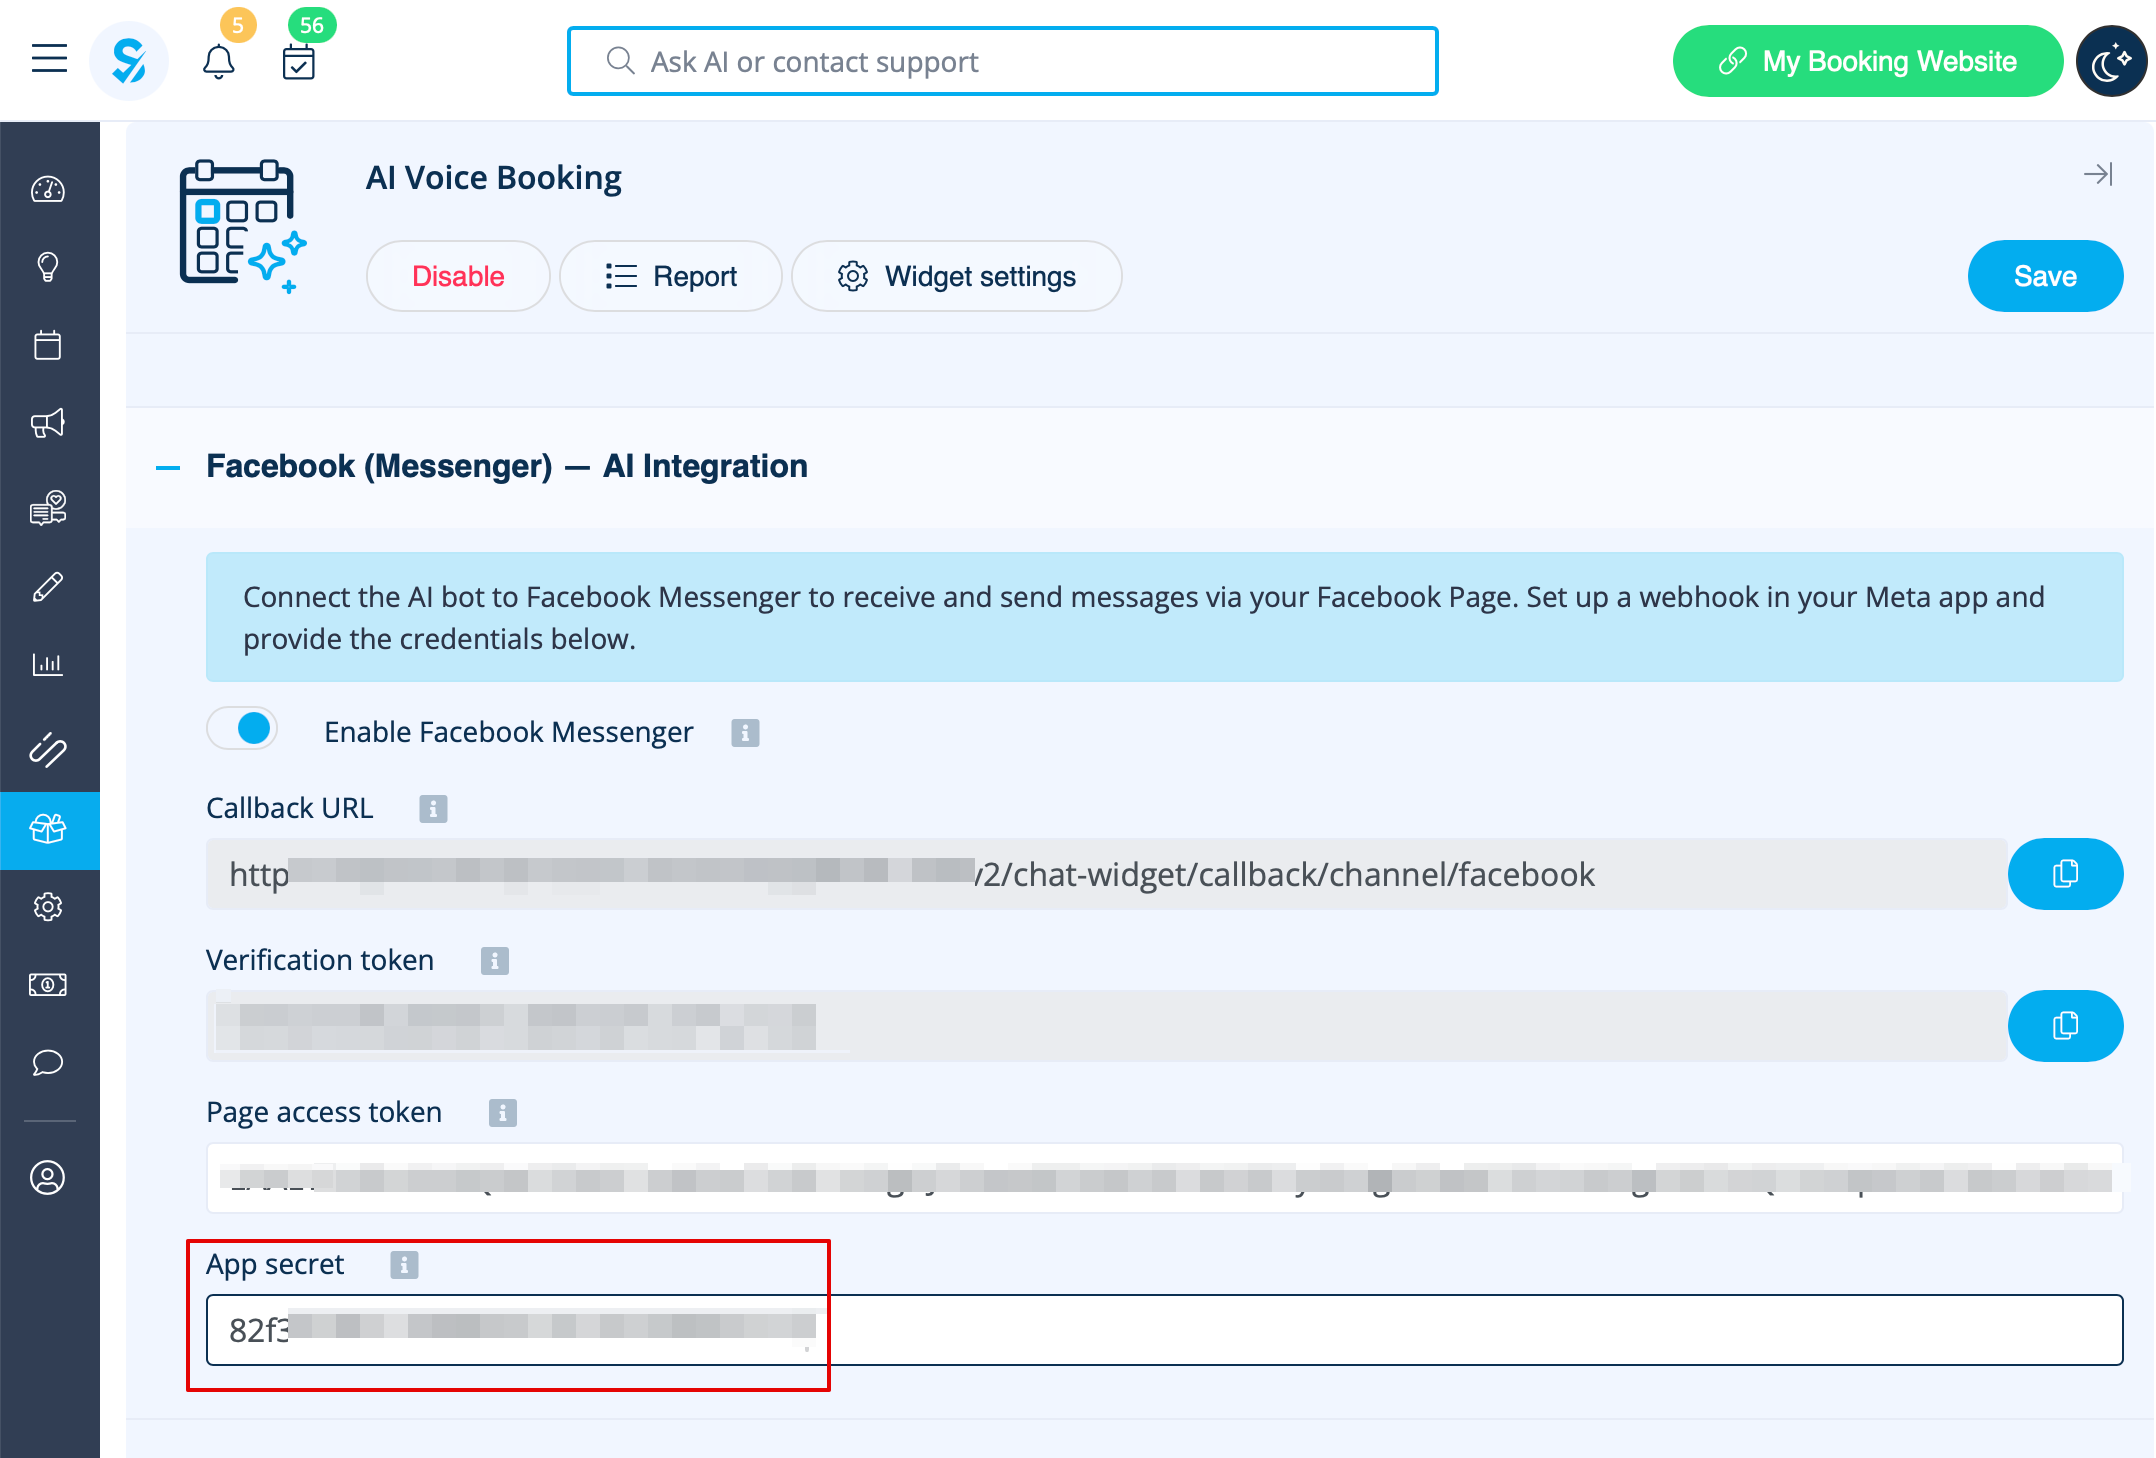
11. Kopiér “Callback URL” og “Verification token” fra din SimplyBook.me-konto -> Brugerdefinerede funktioner -> AI Voice booking, og indsæt dem i de tilsvarende felter i appen. Bekræft og gem:
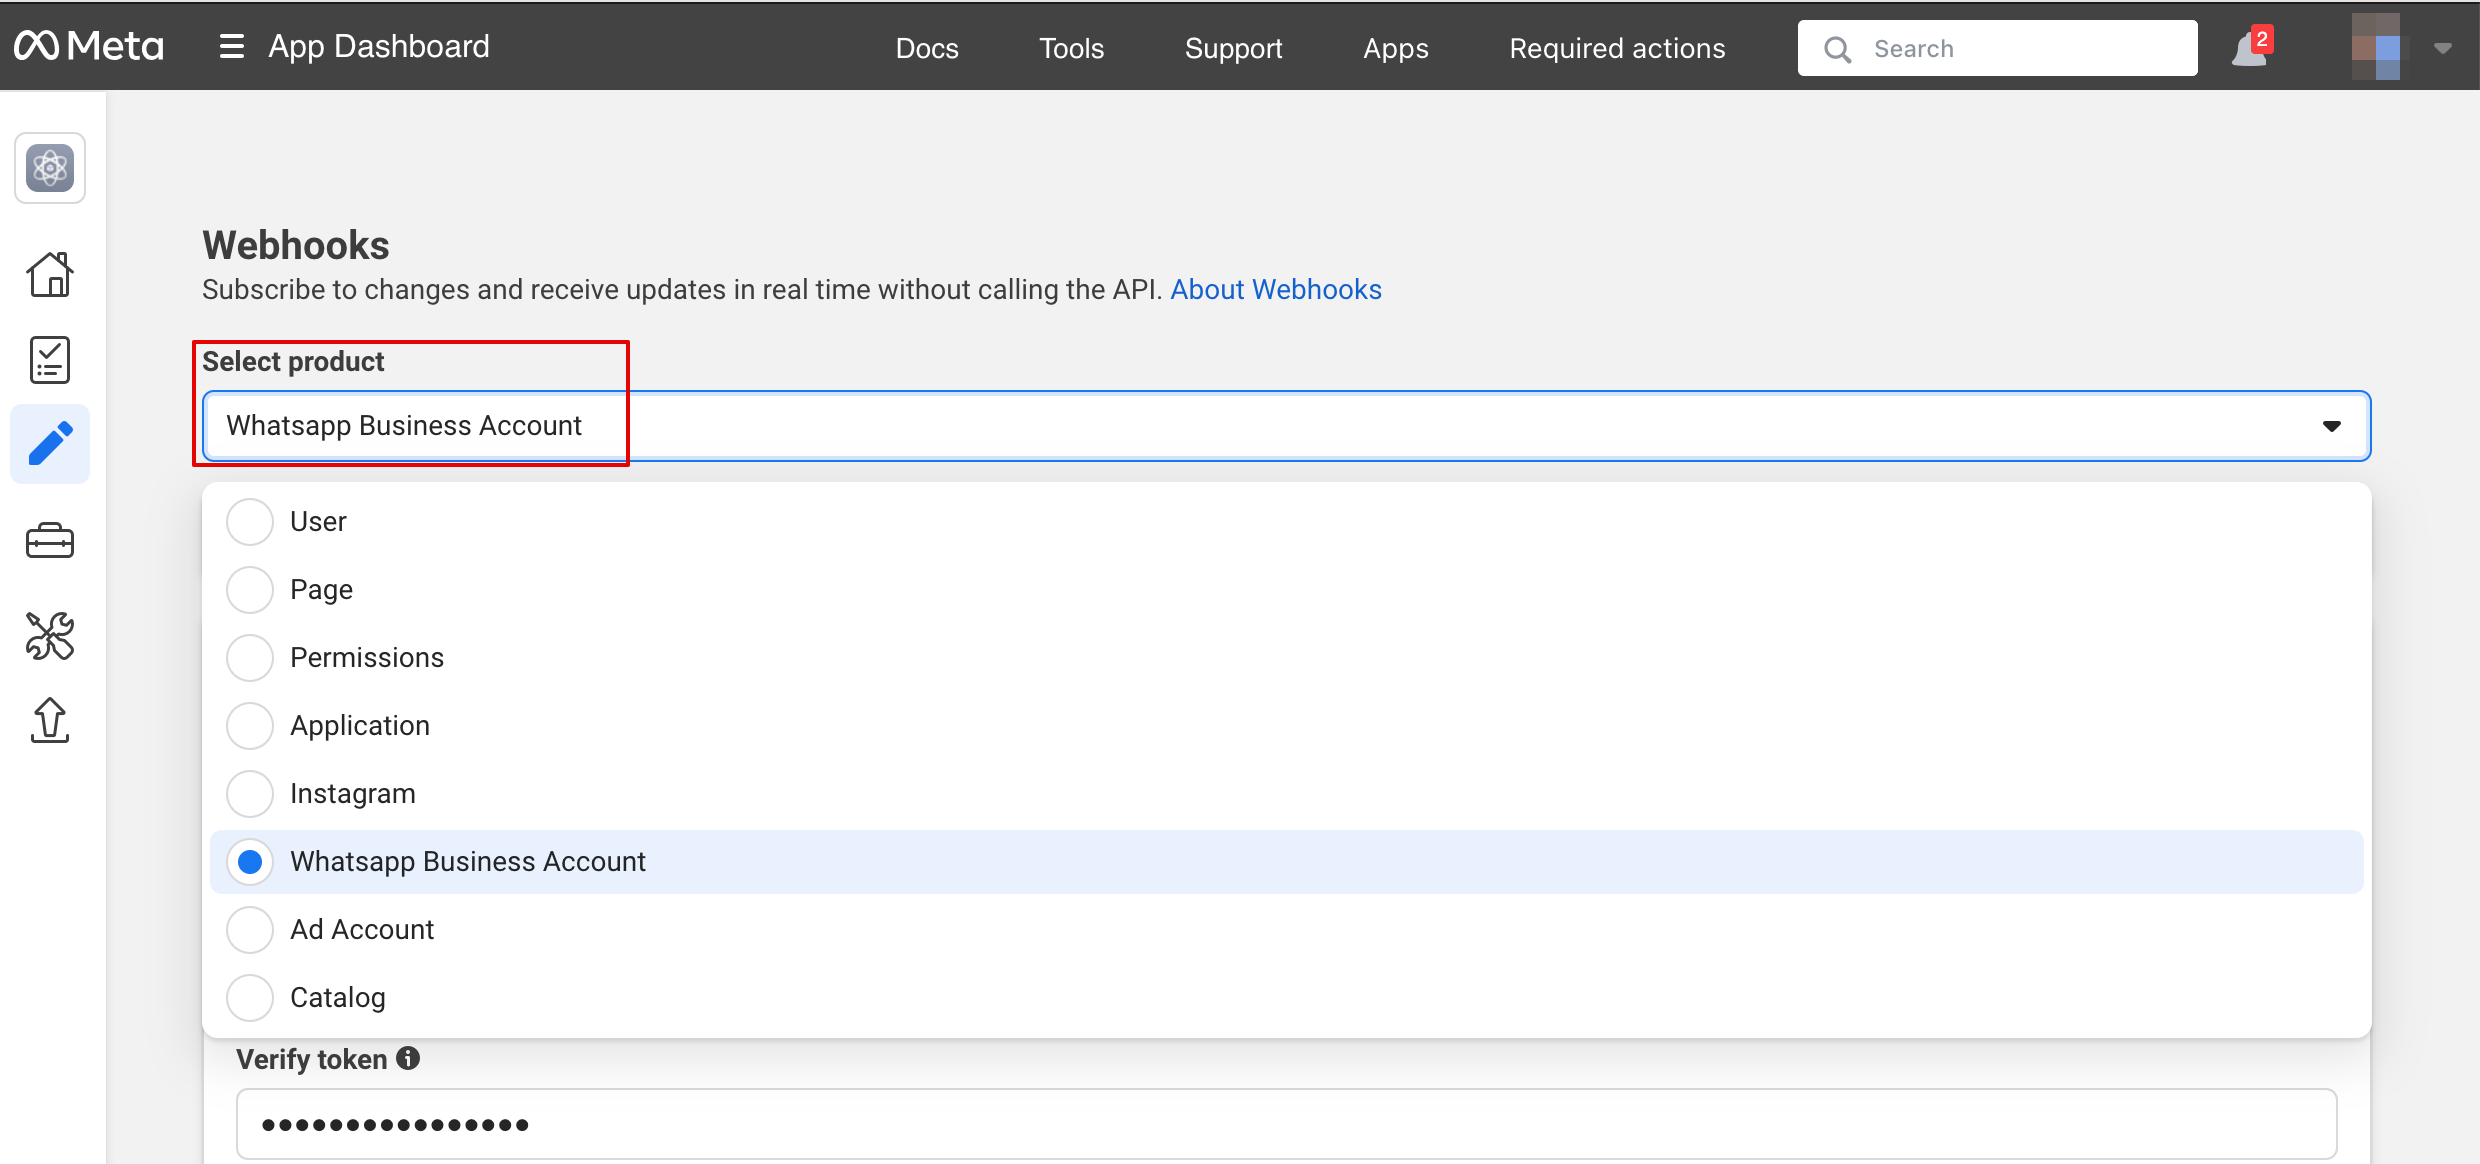
12. På næste trin i “Select product” skal du vælge “WhatsApp Business Account”:
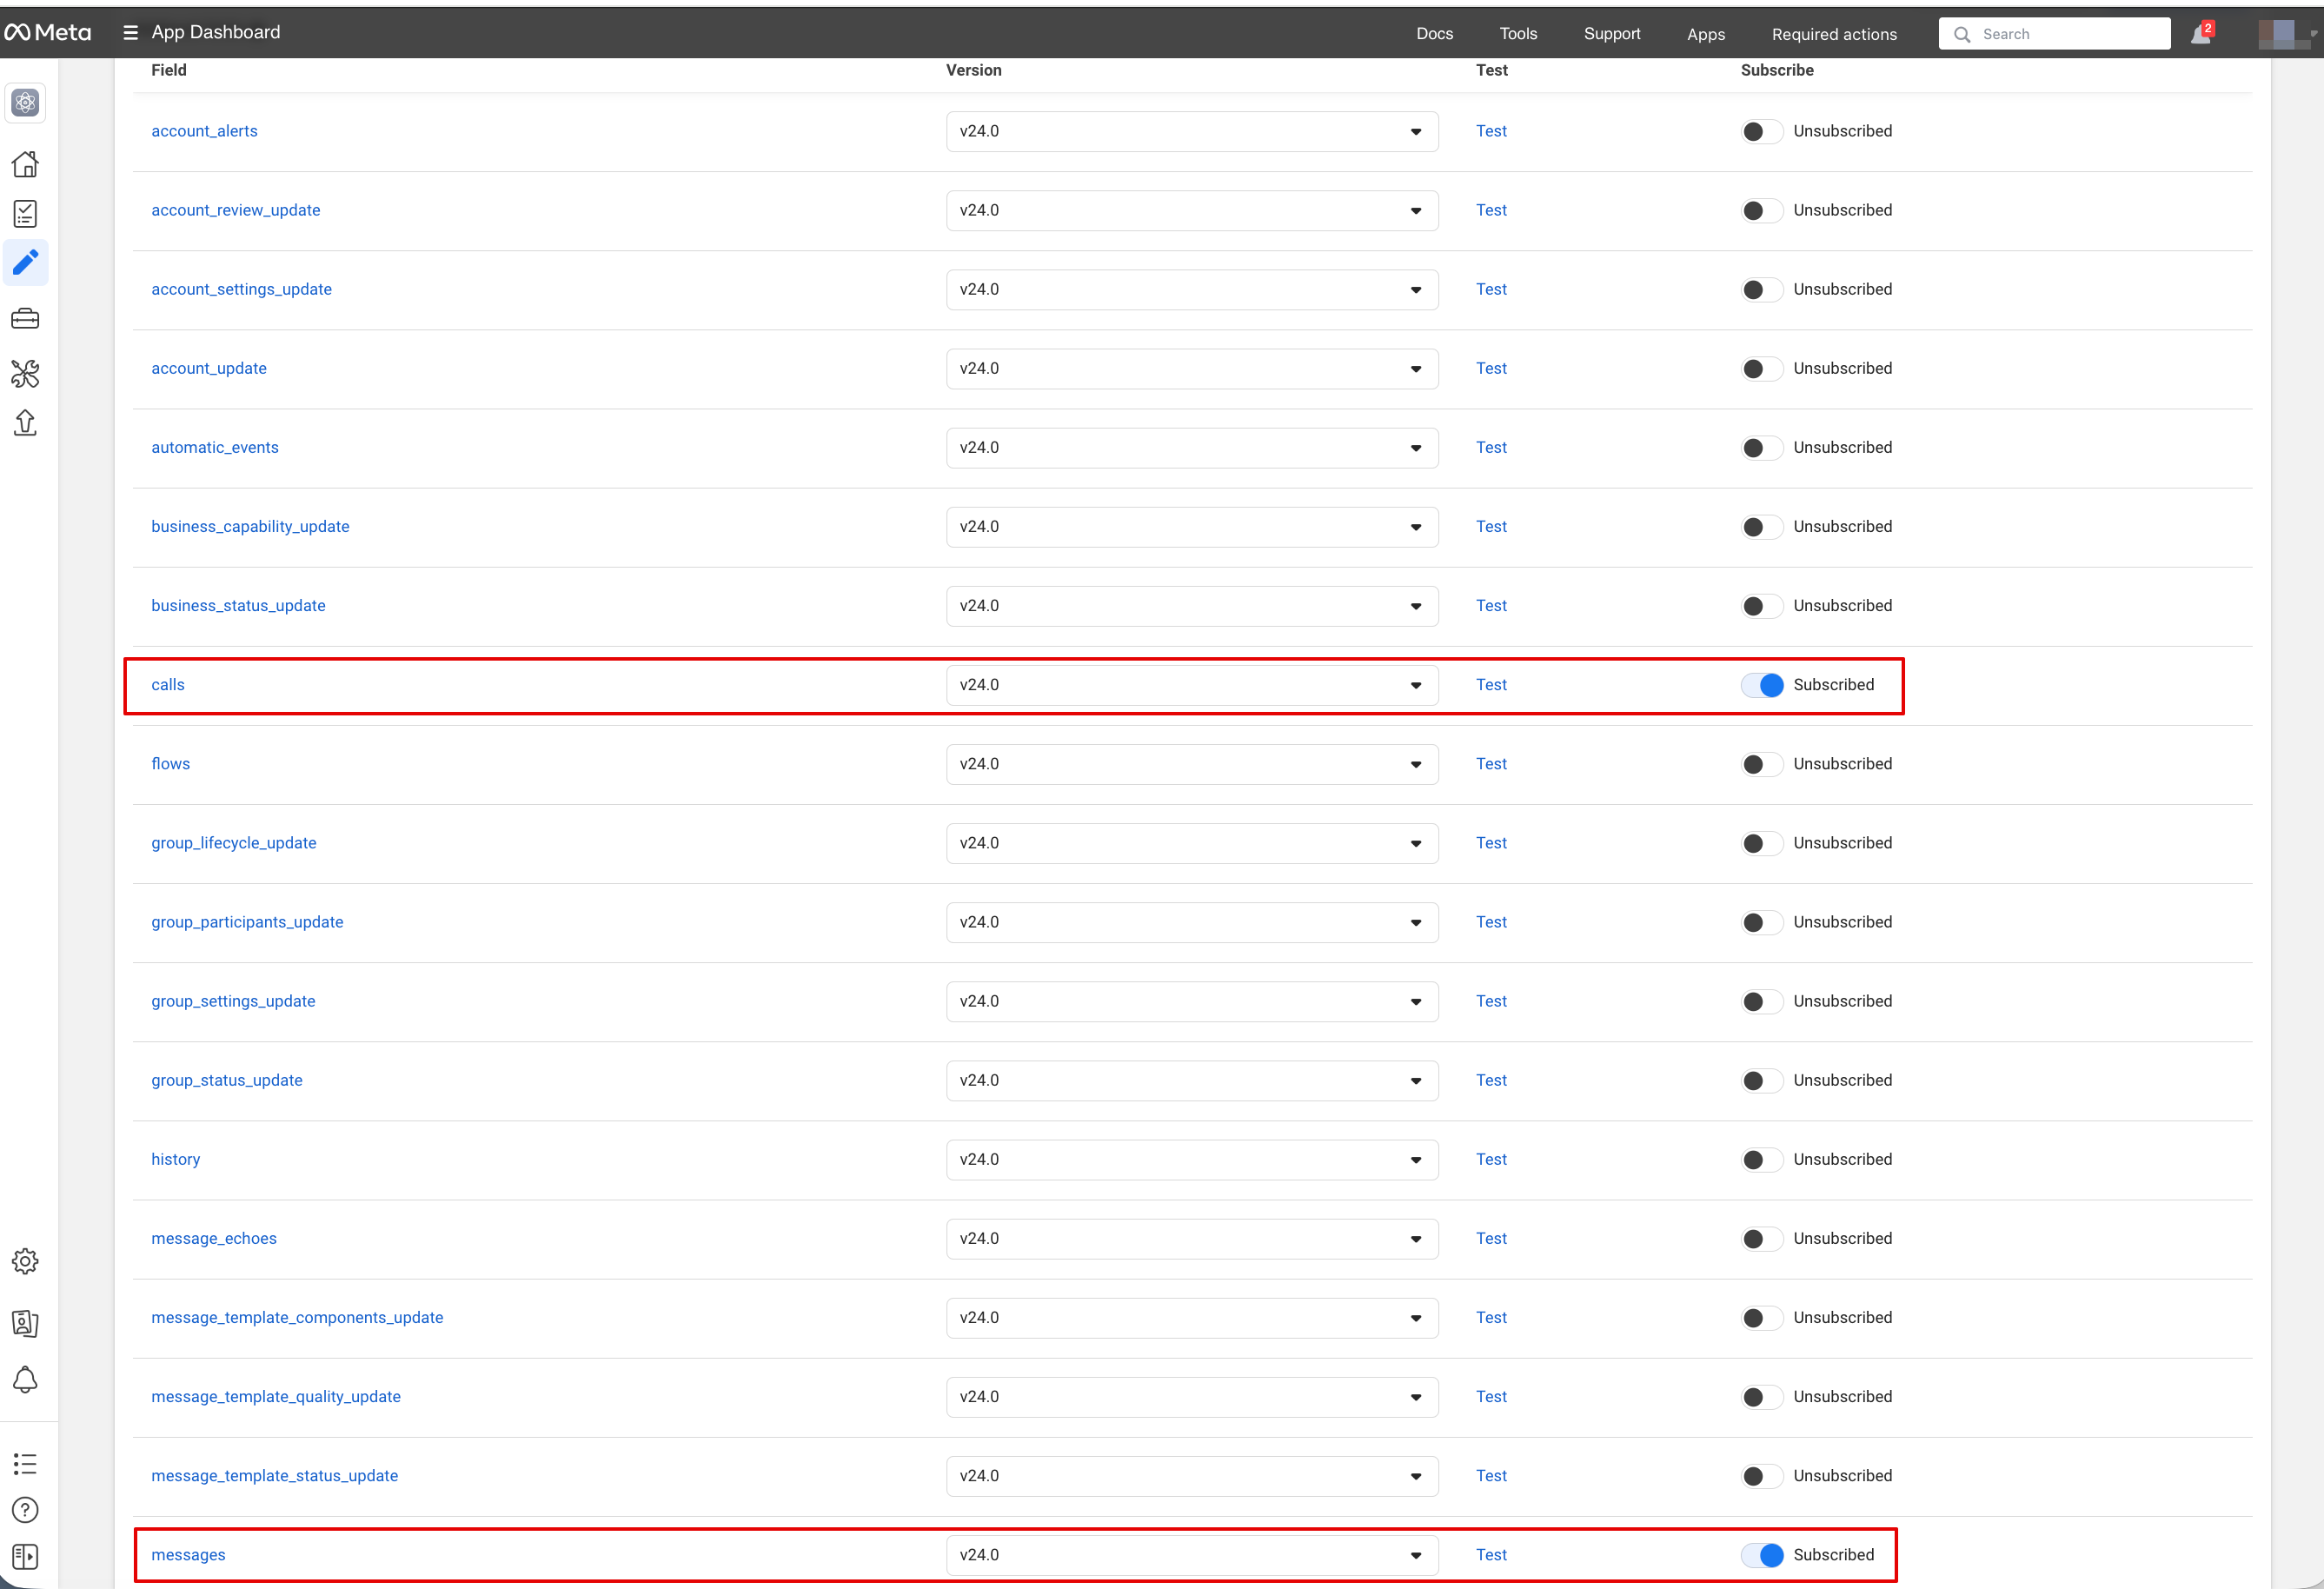
13. Aktivér derefter de nødvendige webhooks: beskeder og opkald (hvis du vil modtage opkald):
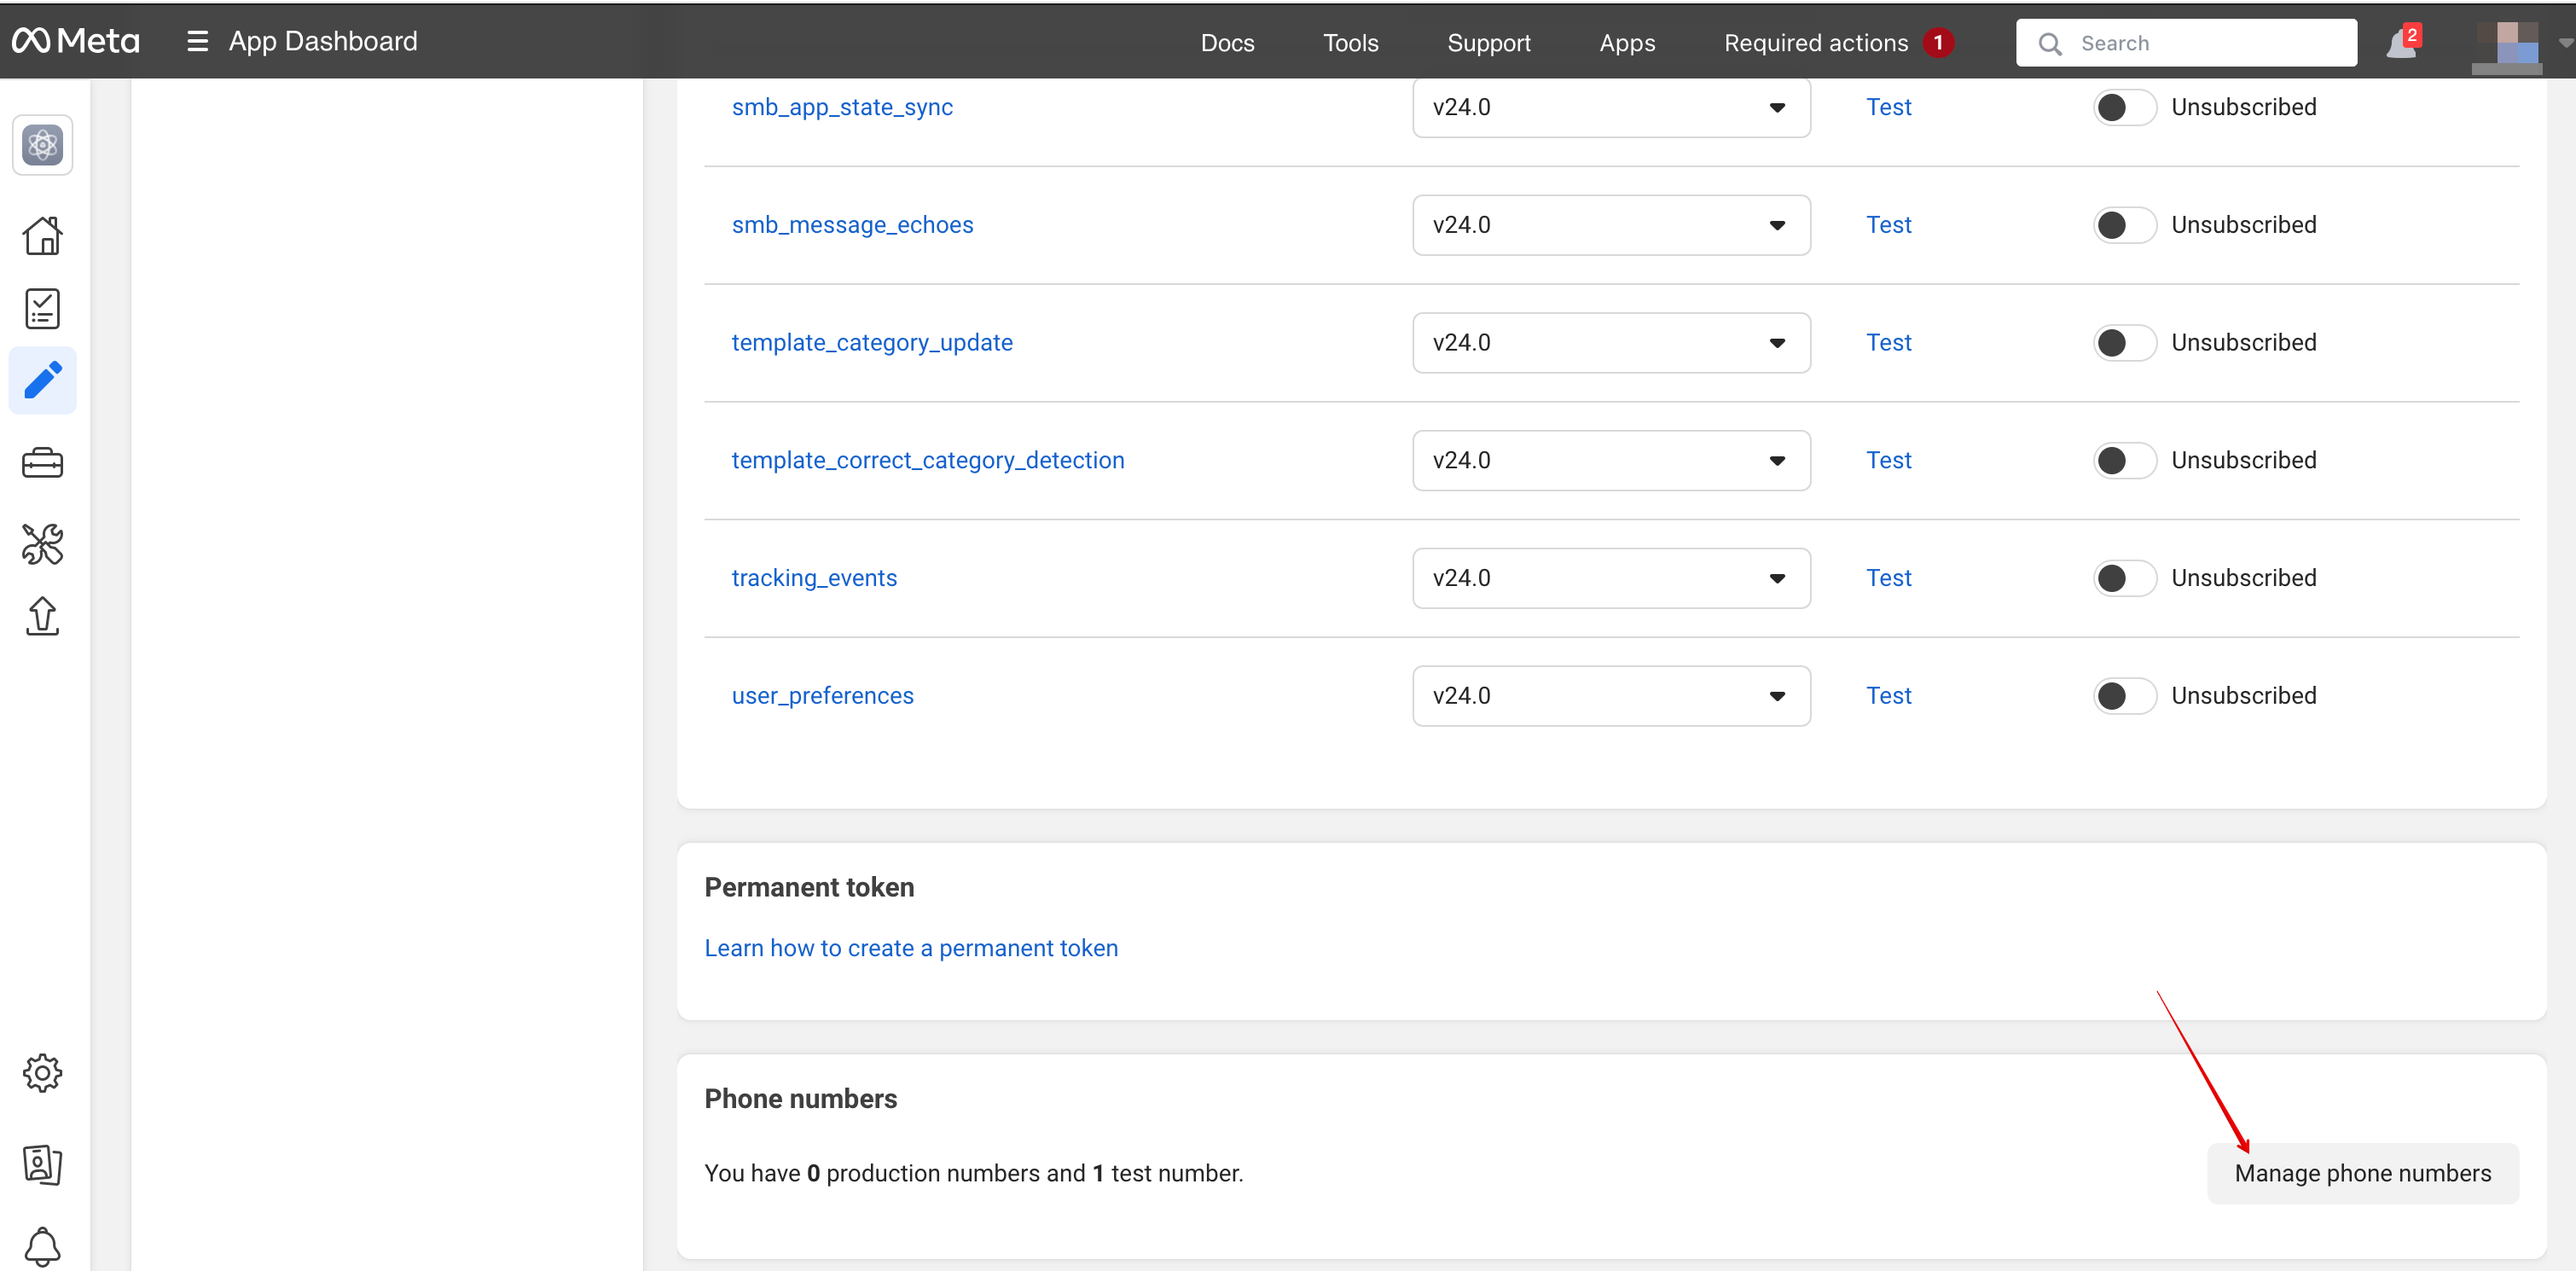
14. Nu kan du tilføje telefonnumre og betalingsmetode (da Facebook opkræver betaling for beskeder).
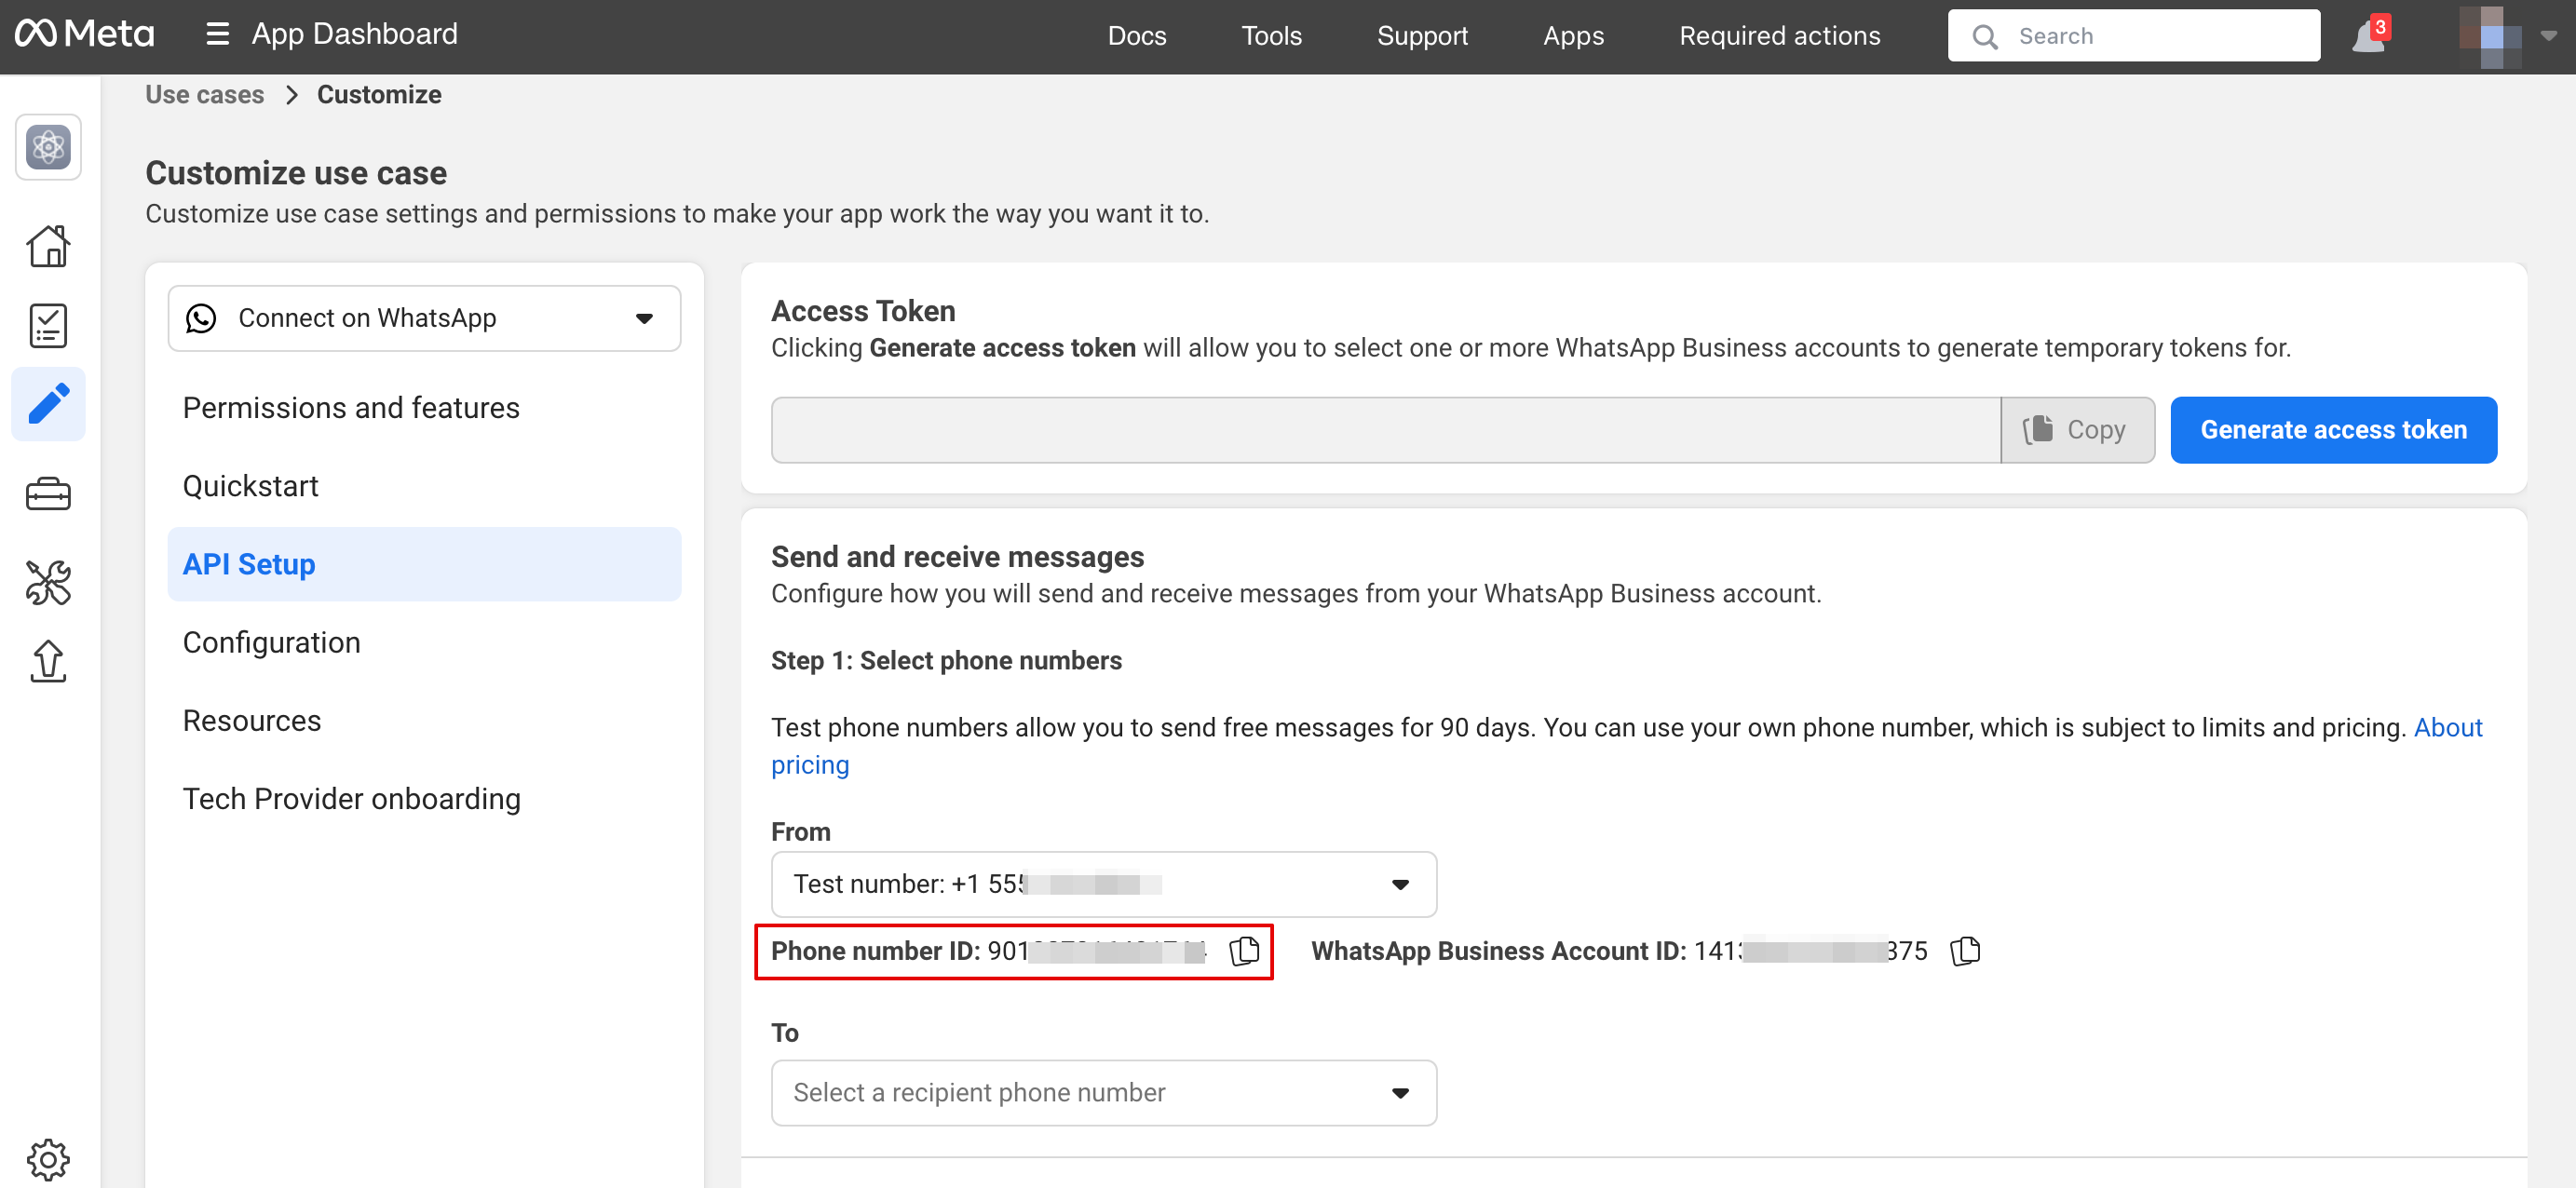
Kopiér telefonnummer-ID’et fra Facebook, og indsæt det i den tilsvarende formular i din SimplyBook.me-konto.
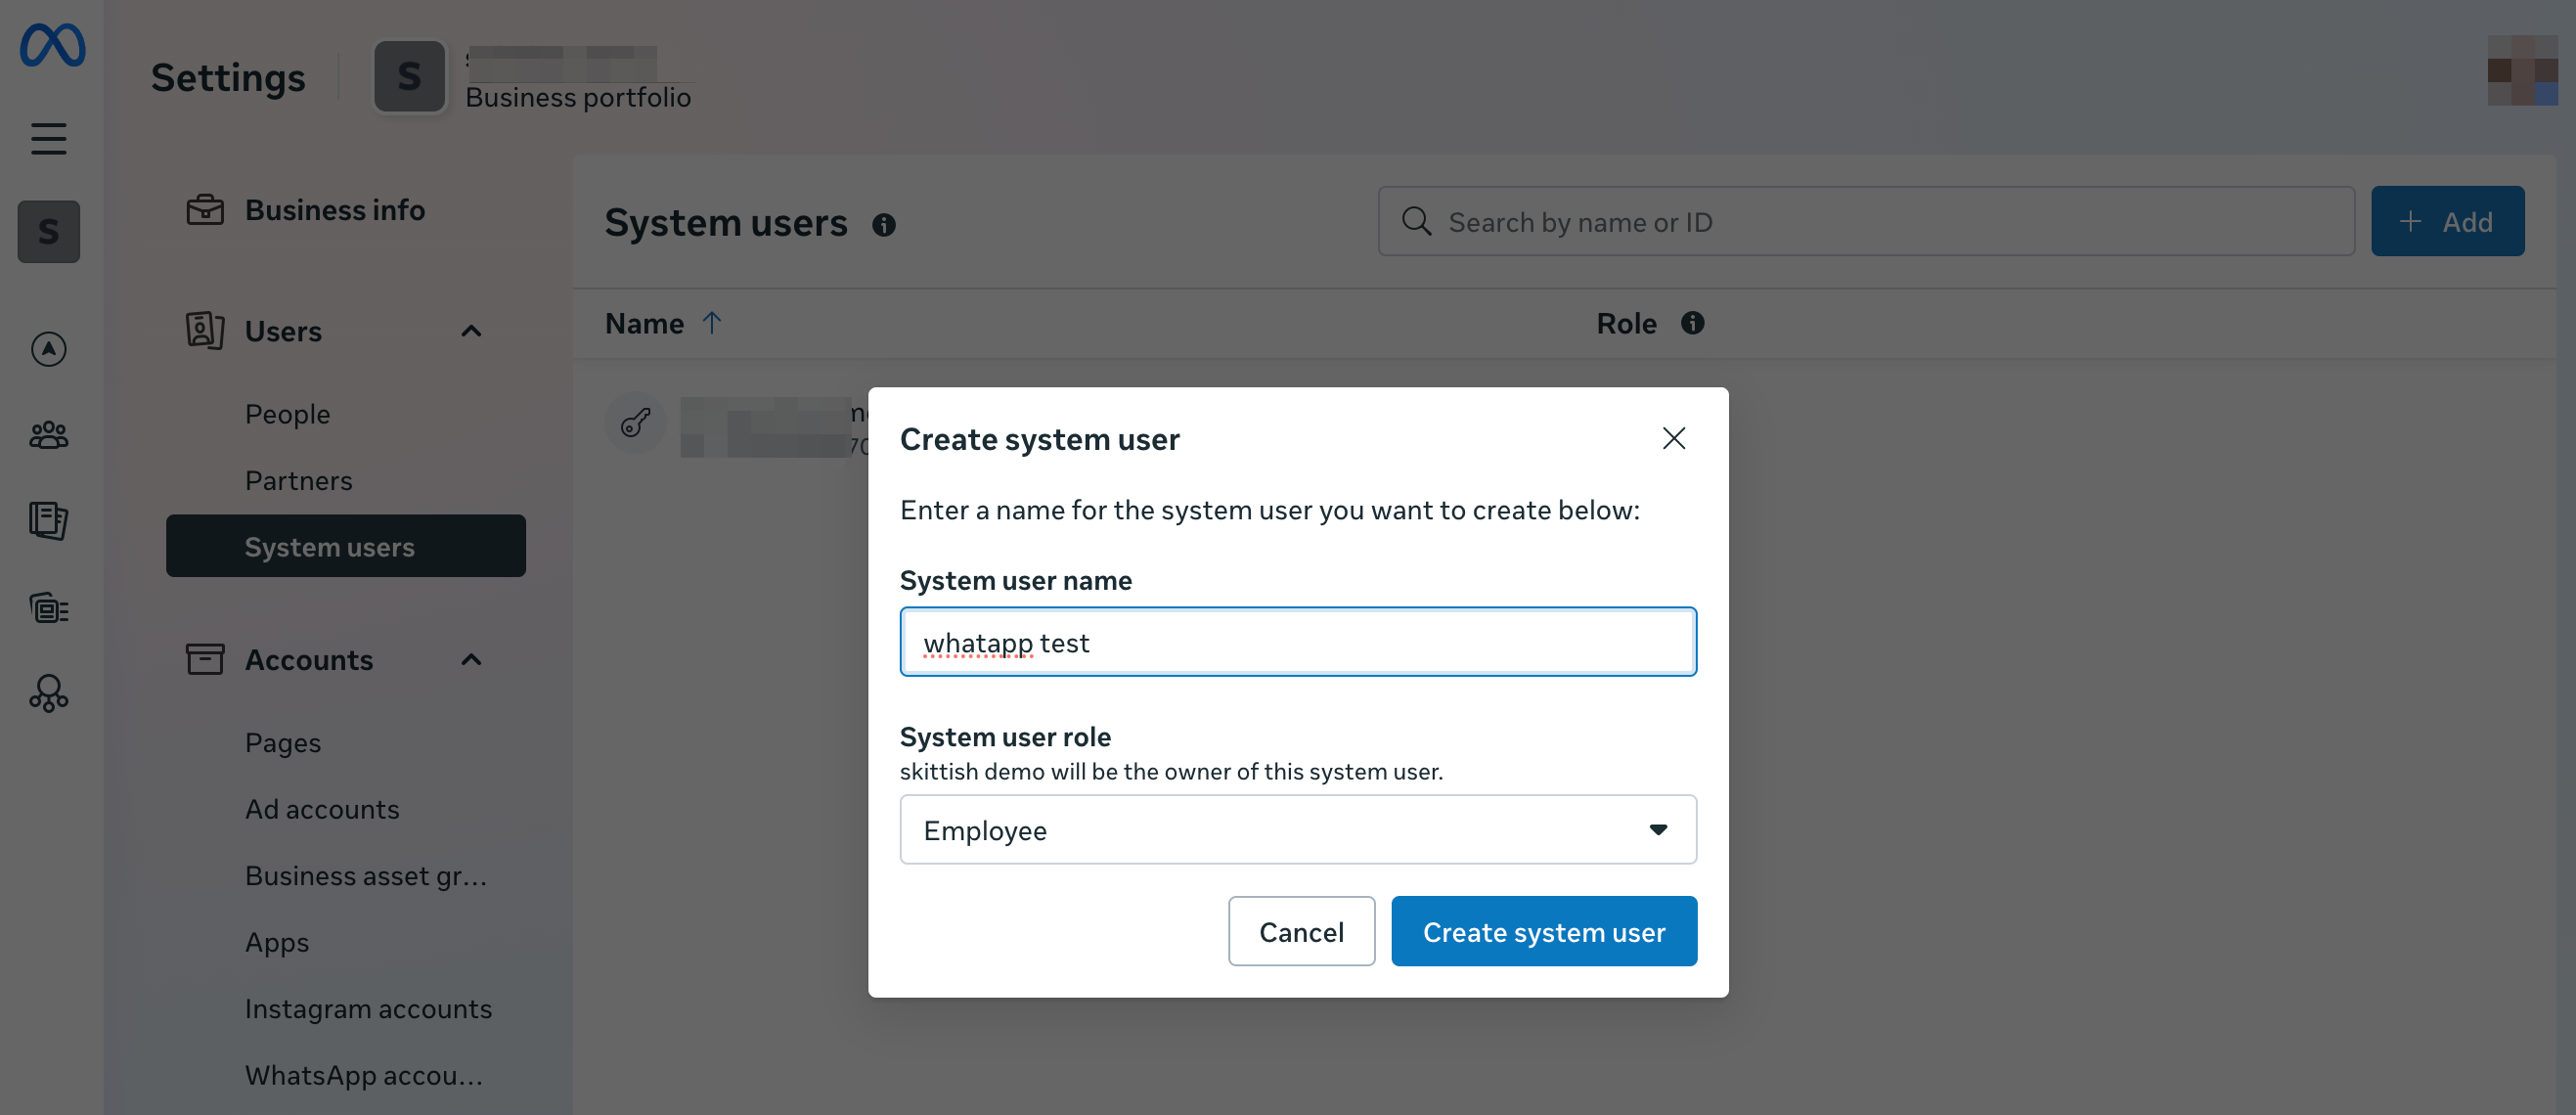
15. Nu skal du oprette en systembruger. Gå til Facebook Business-profilen og åbn fanen Systembrugere:

16. Klik på Tilføj ny bruger, og udfyld brugeroplysningerne:
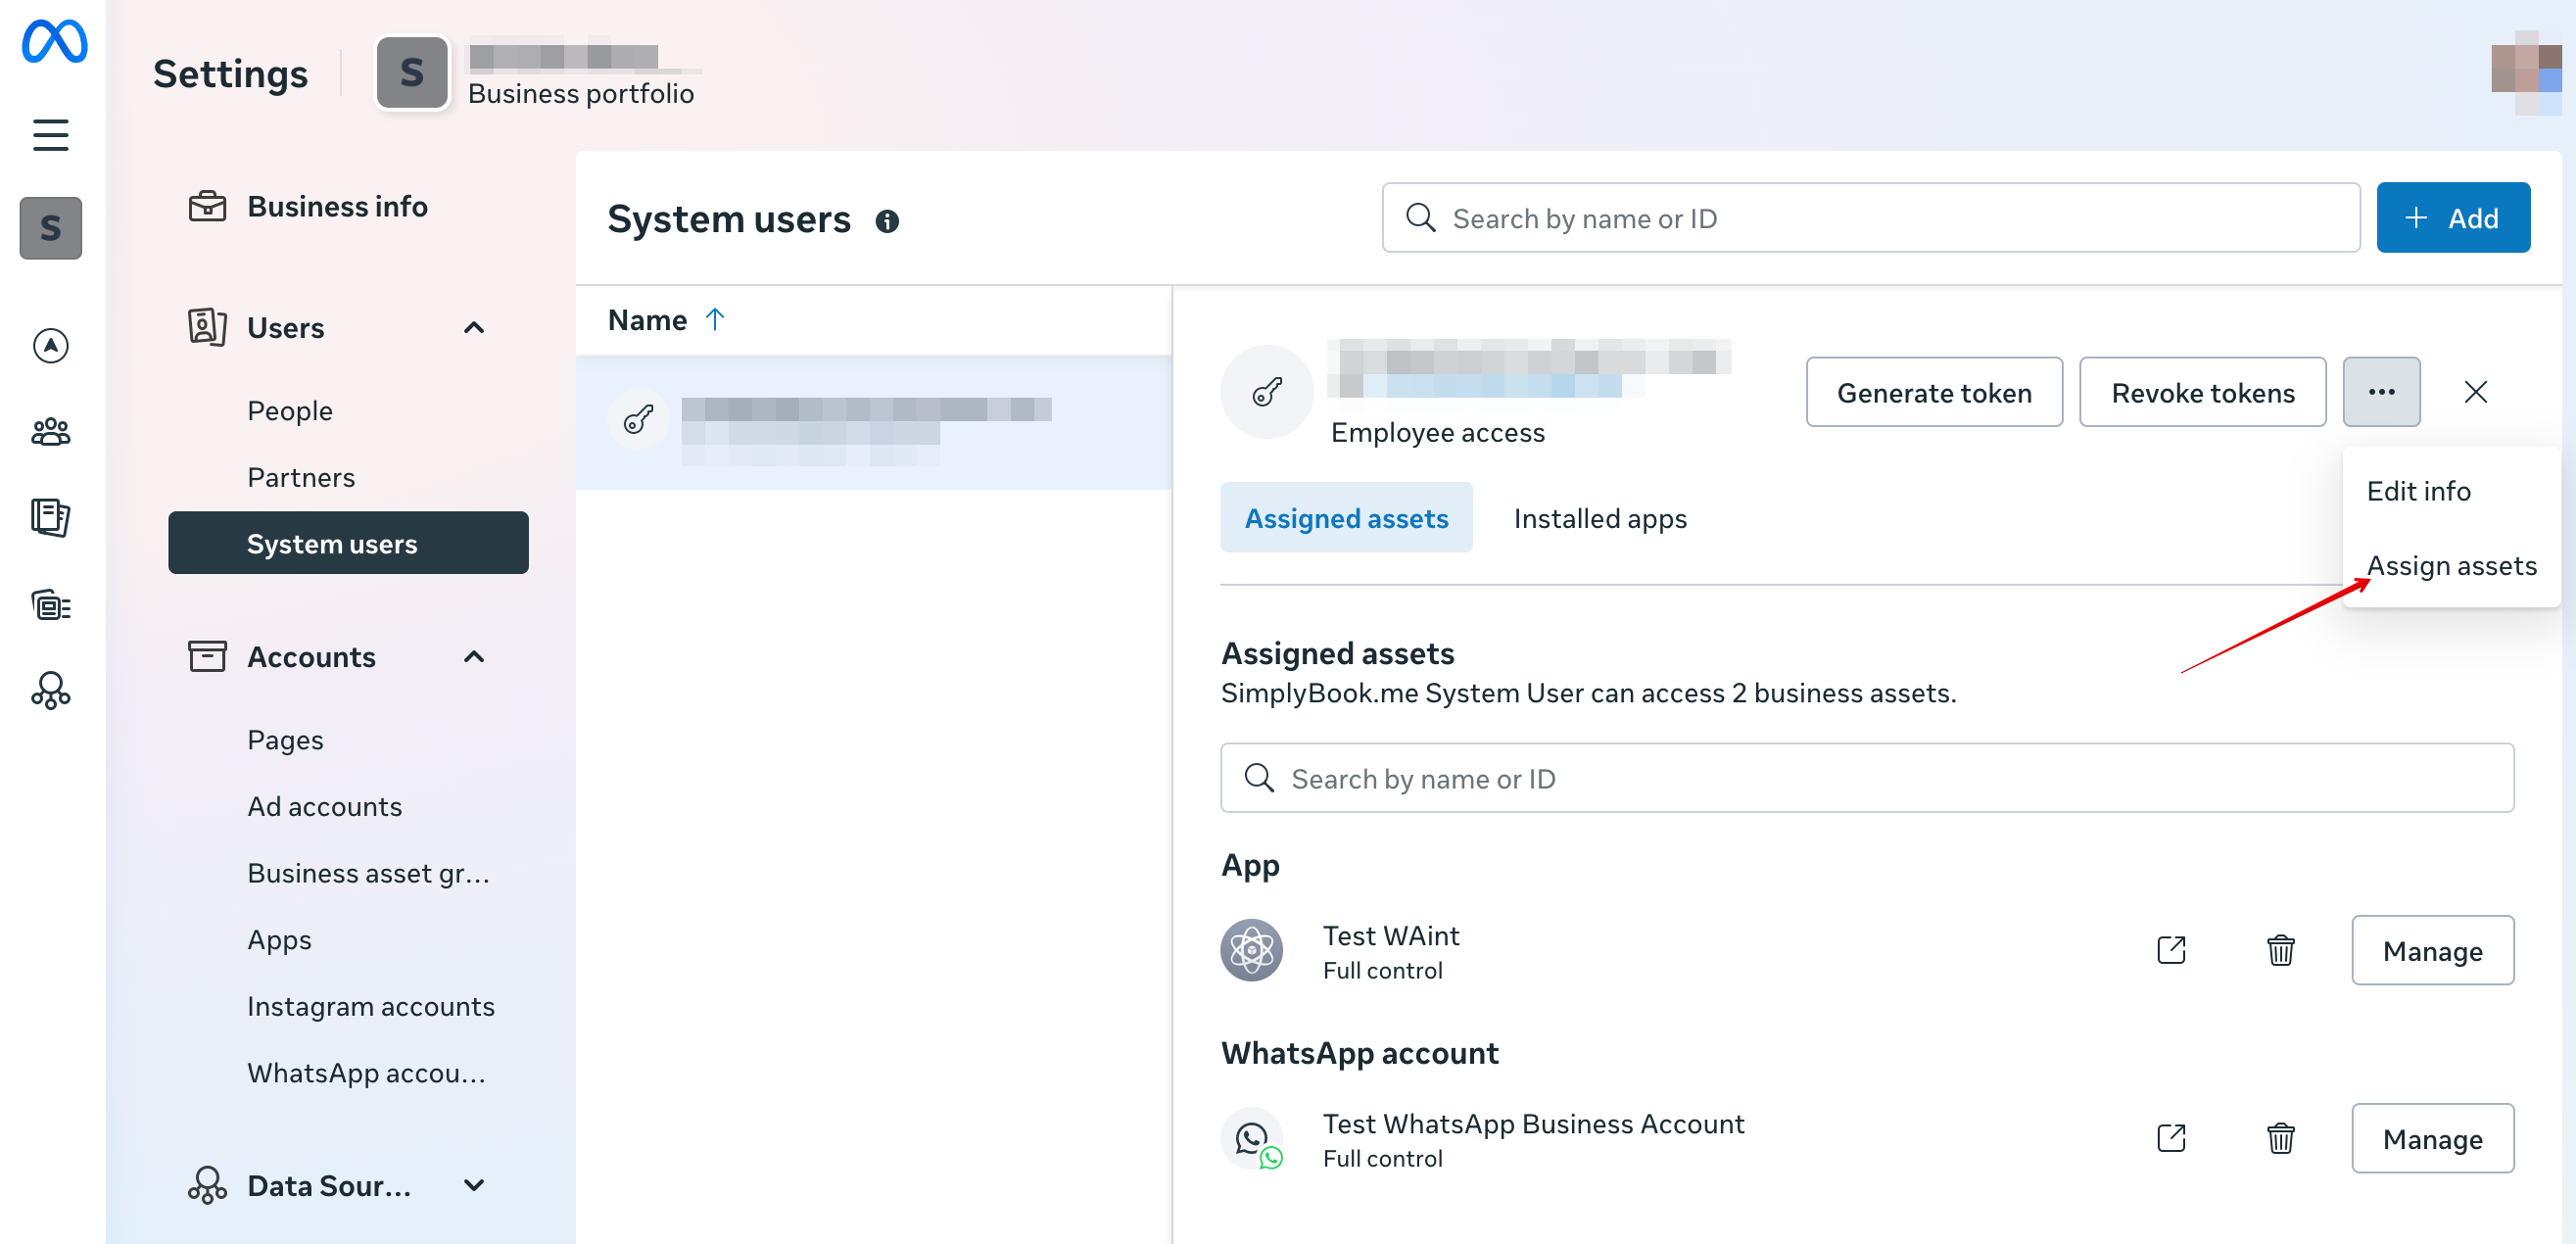
17. Gå derefter til Tildel aktiver:
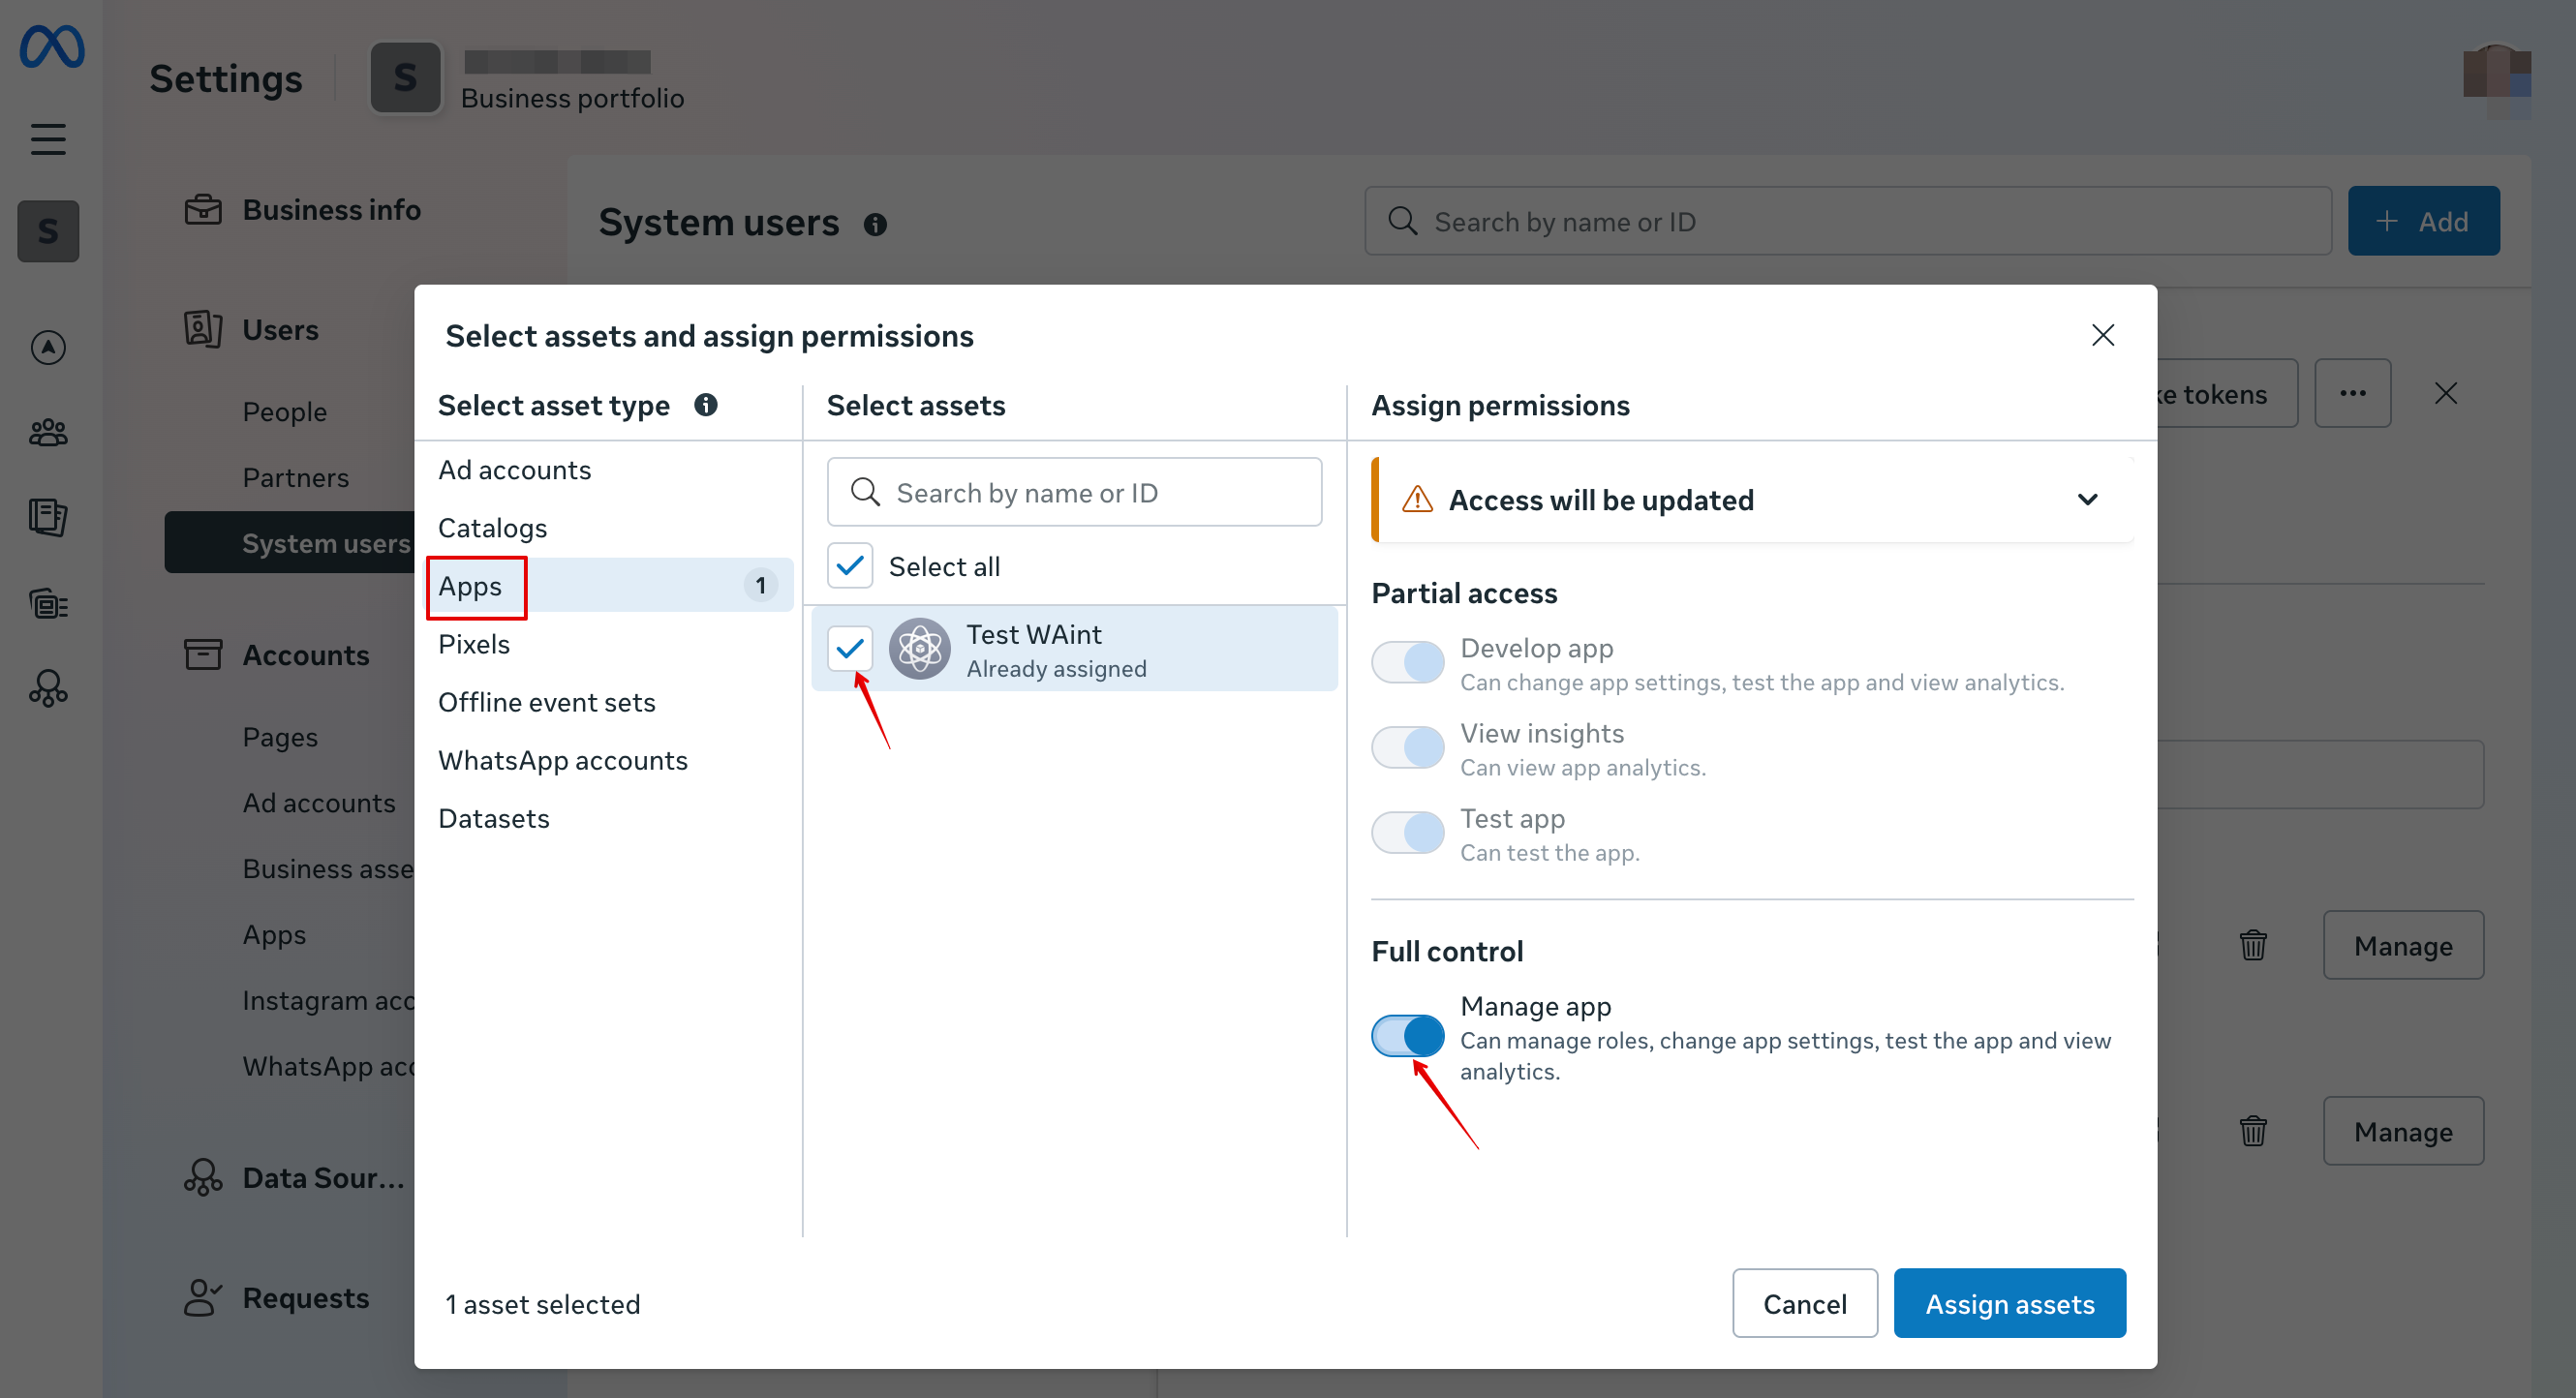
18. Vælg din app under fanen Apps, og aktivér tilladelsen “Manage app”:
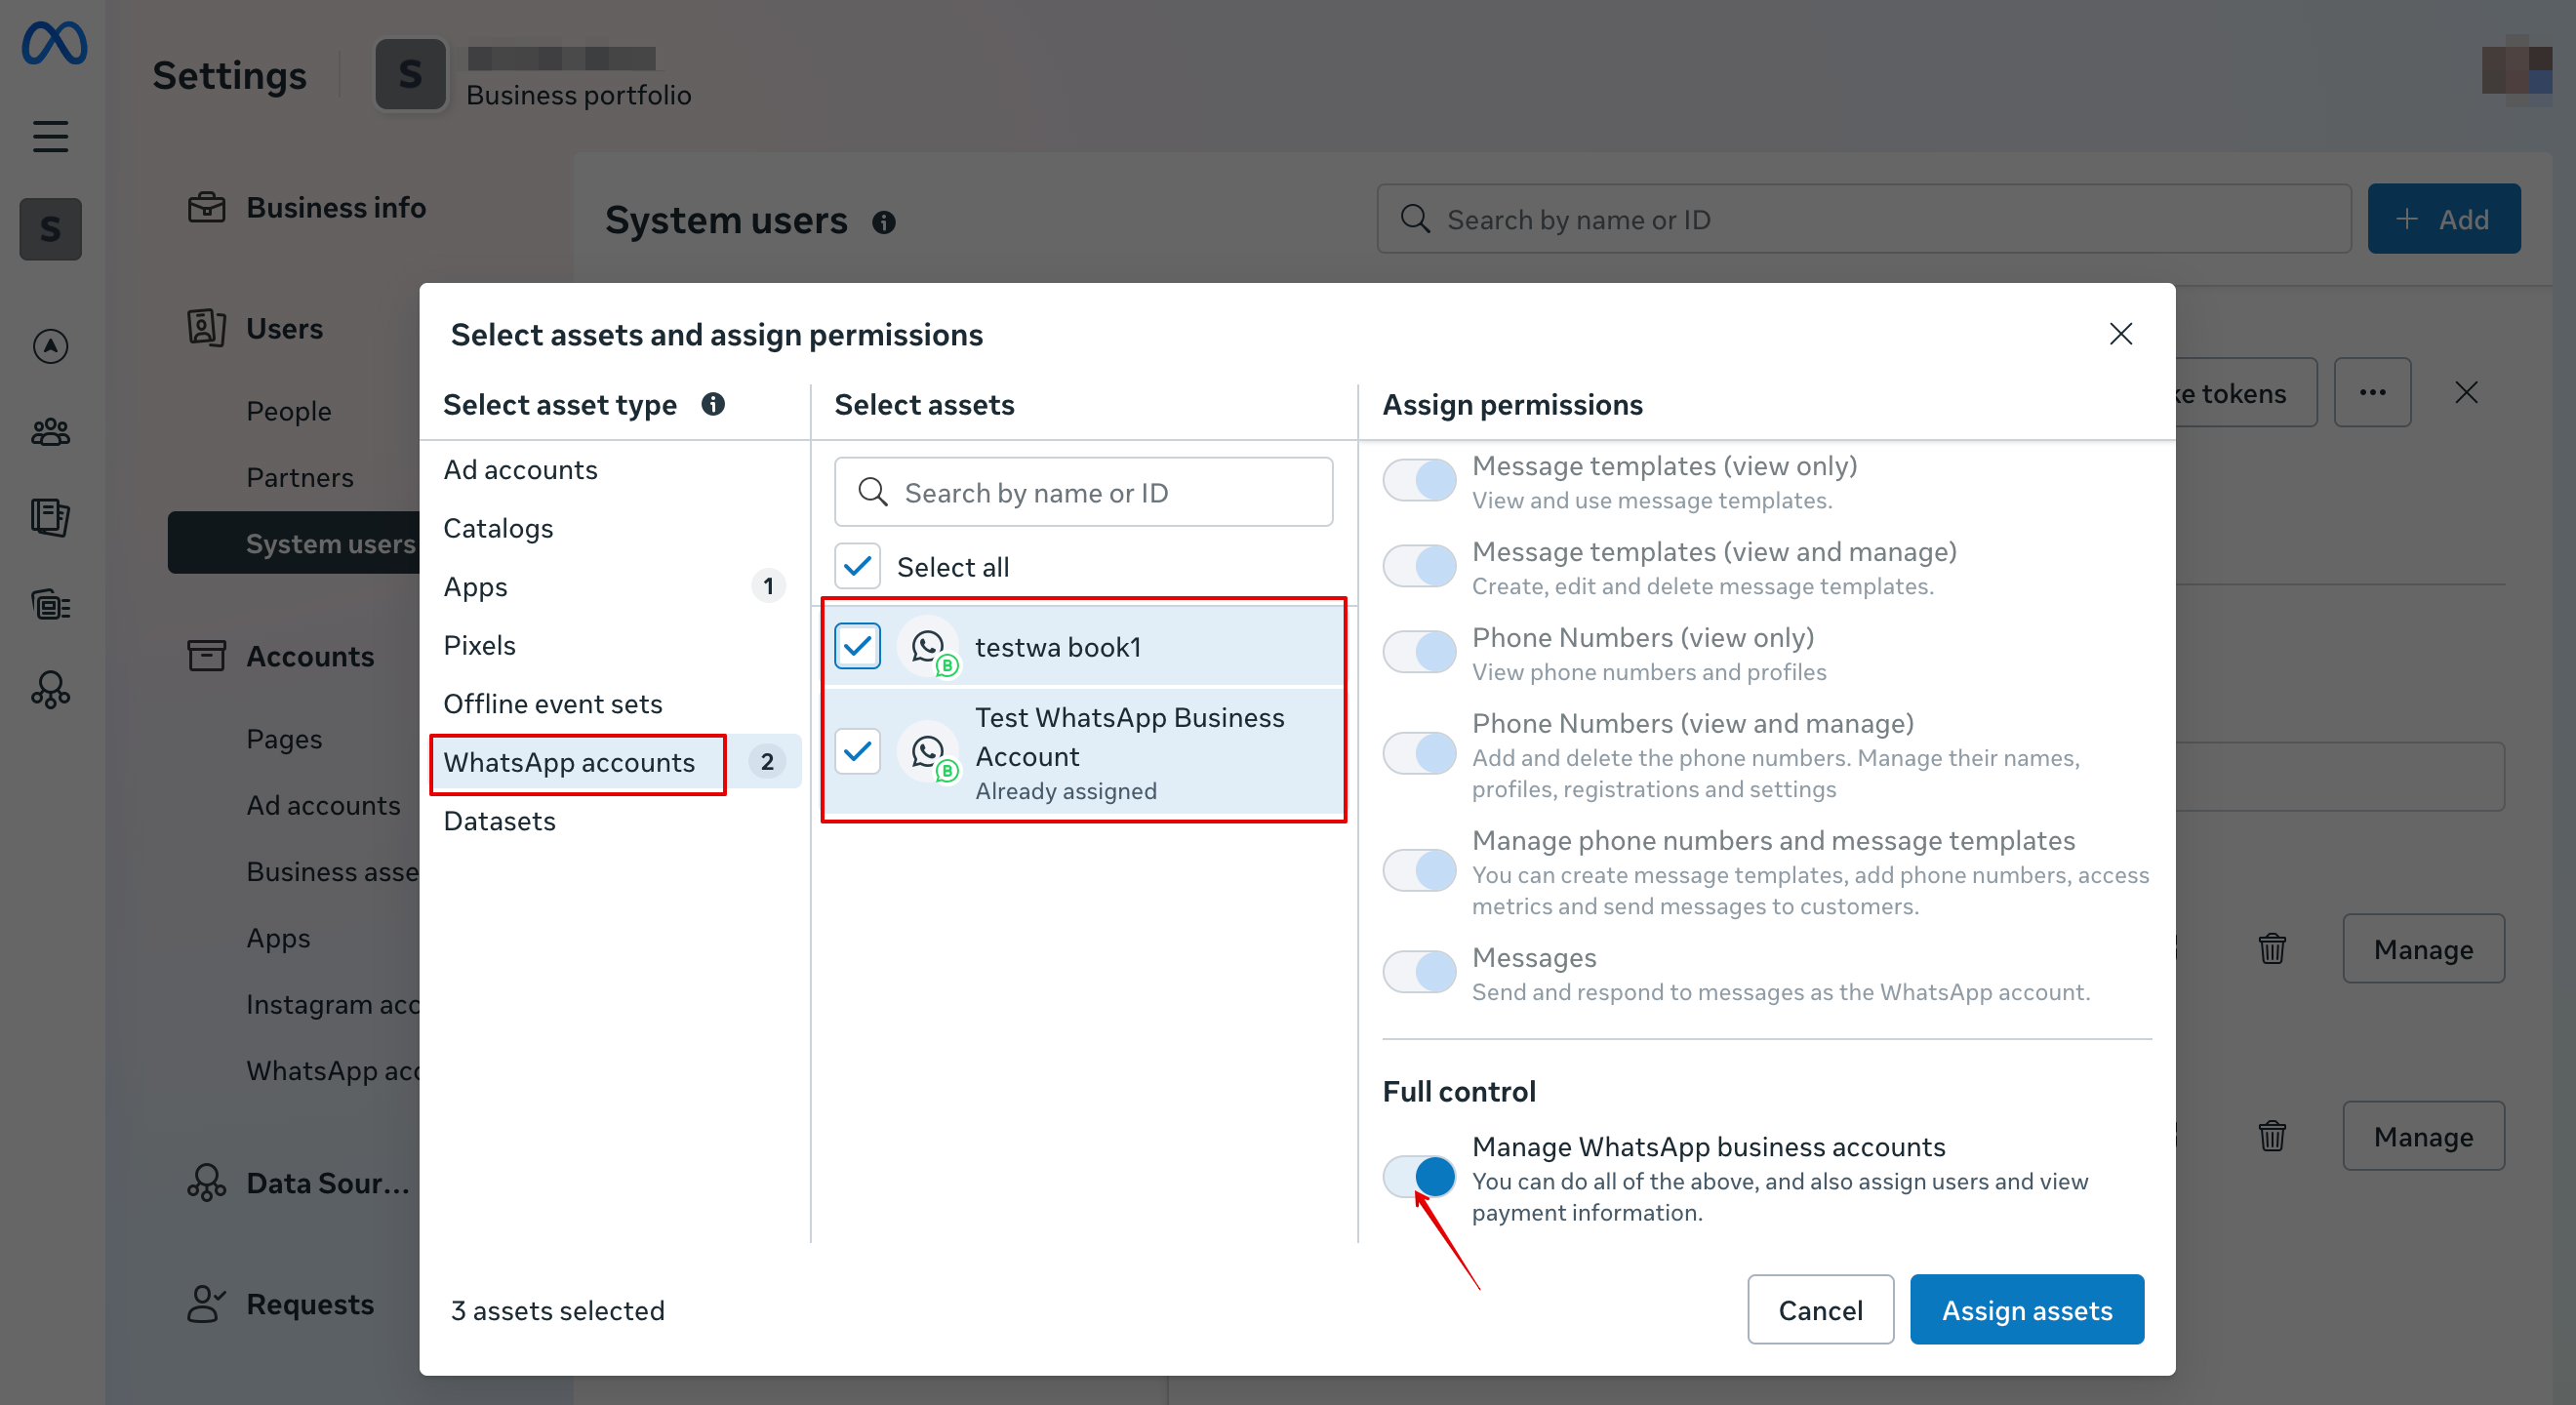
19. Vælg dine WhatsApp-konti under fanen WhatsApp-konti, og aktivér tilladelsen Manage WhatsApp business accounts:
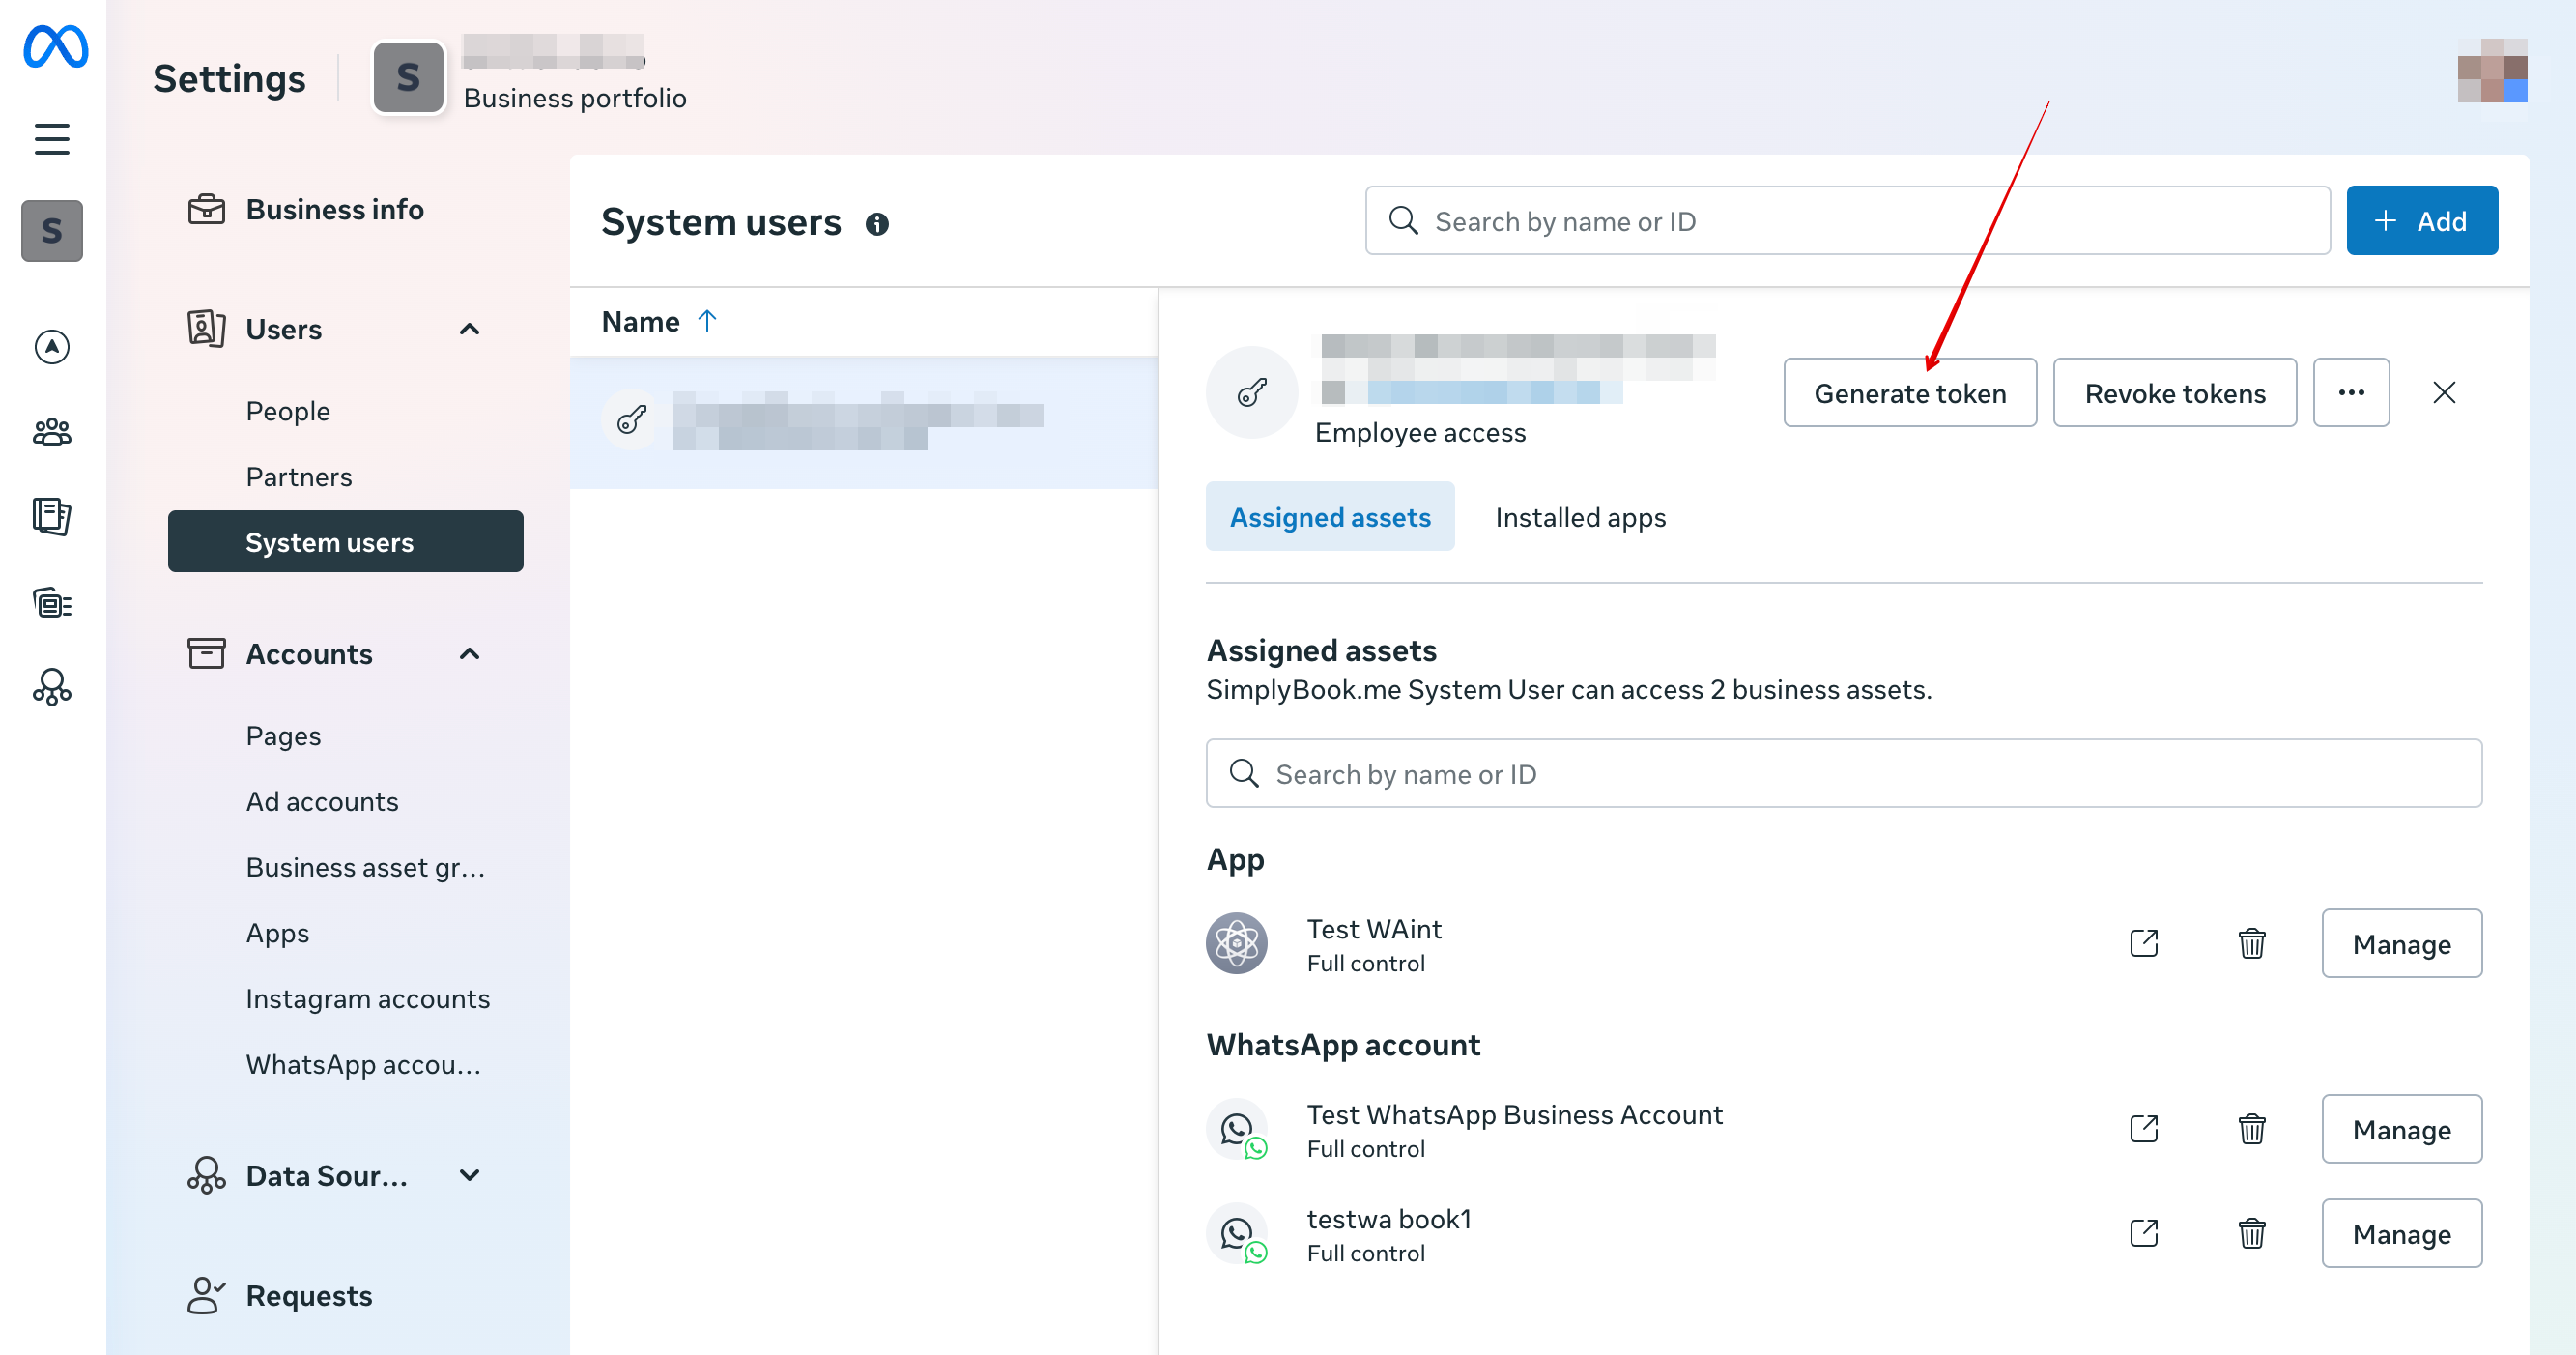
20. Når aktiverne er tildelt, klik på Generate Token:
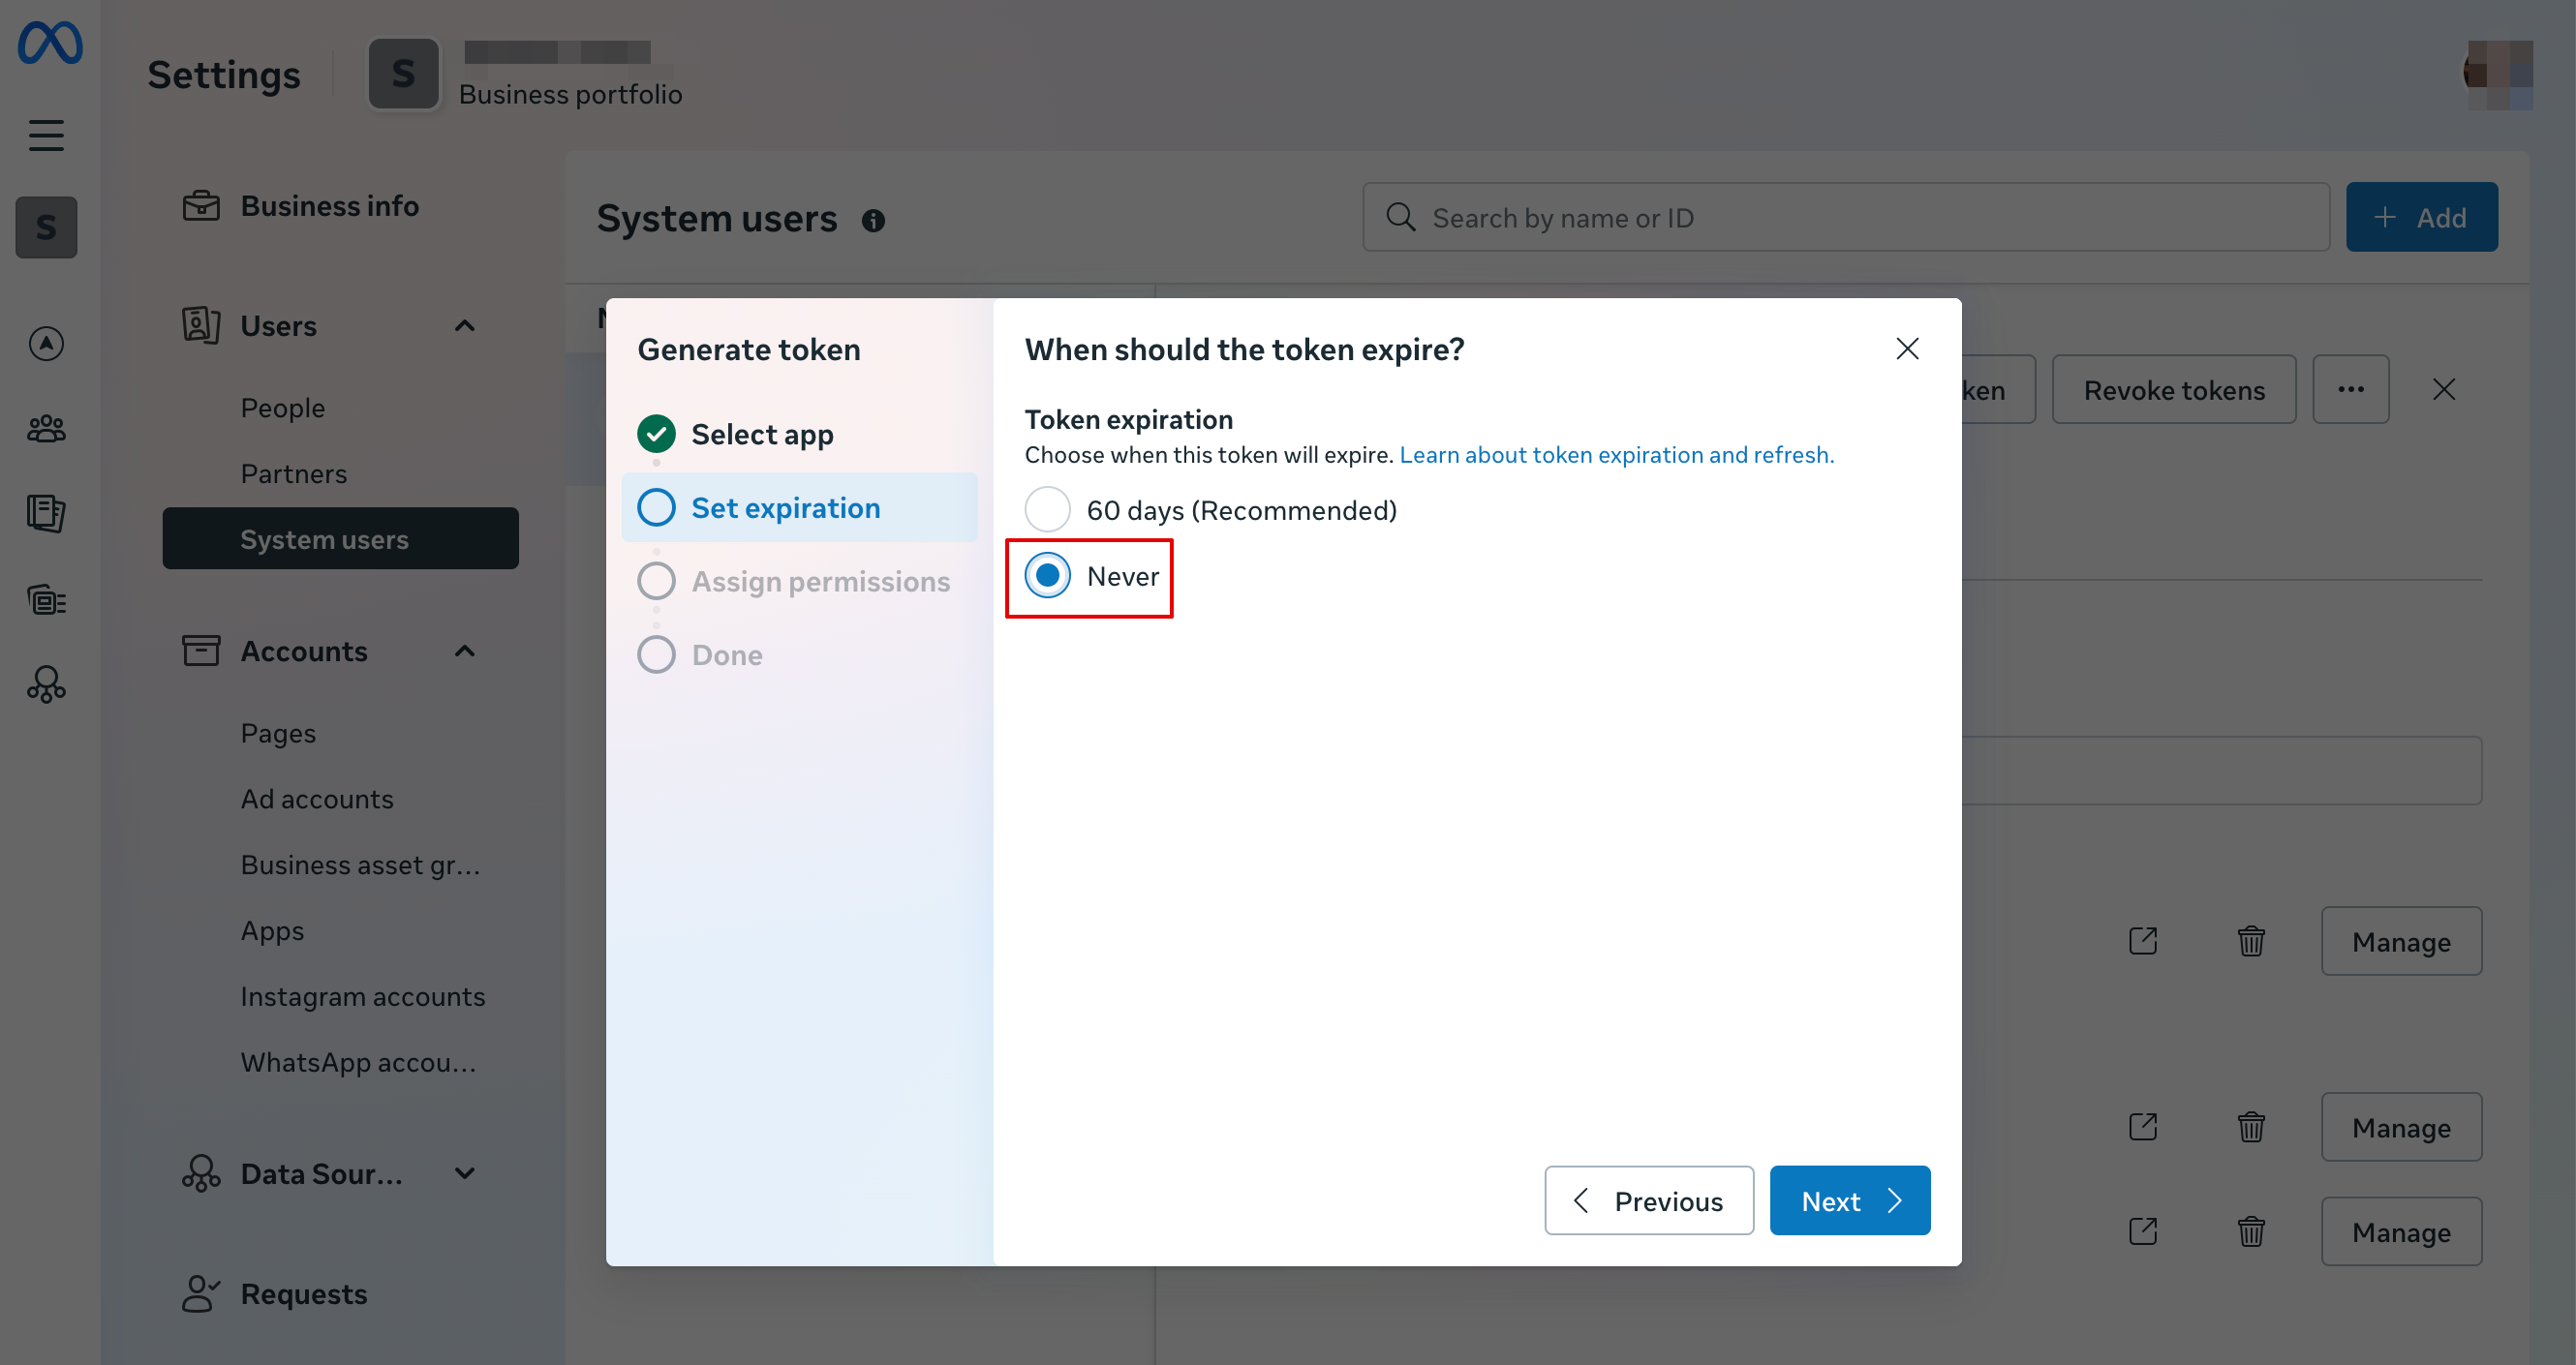
21. Vælg din app i rullemenuen, og sæt tokenudløb til “never”:
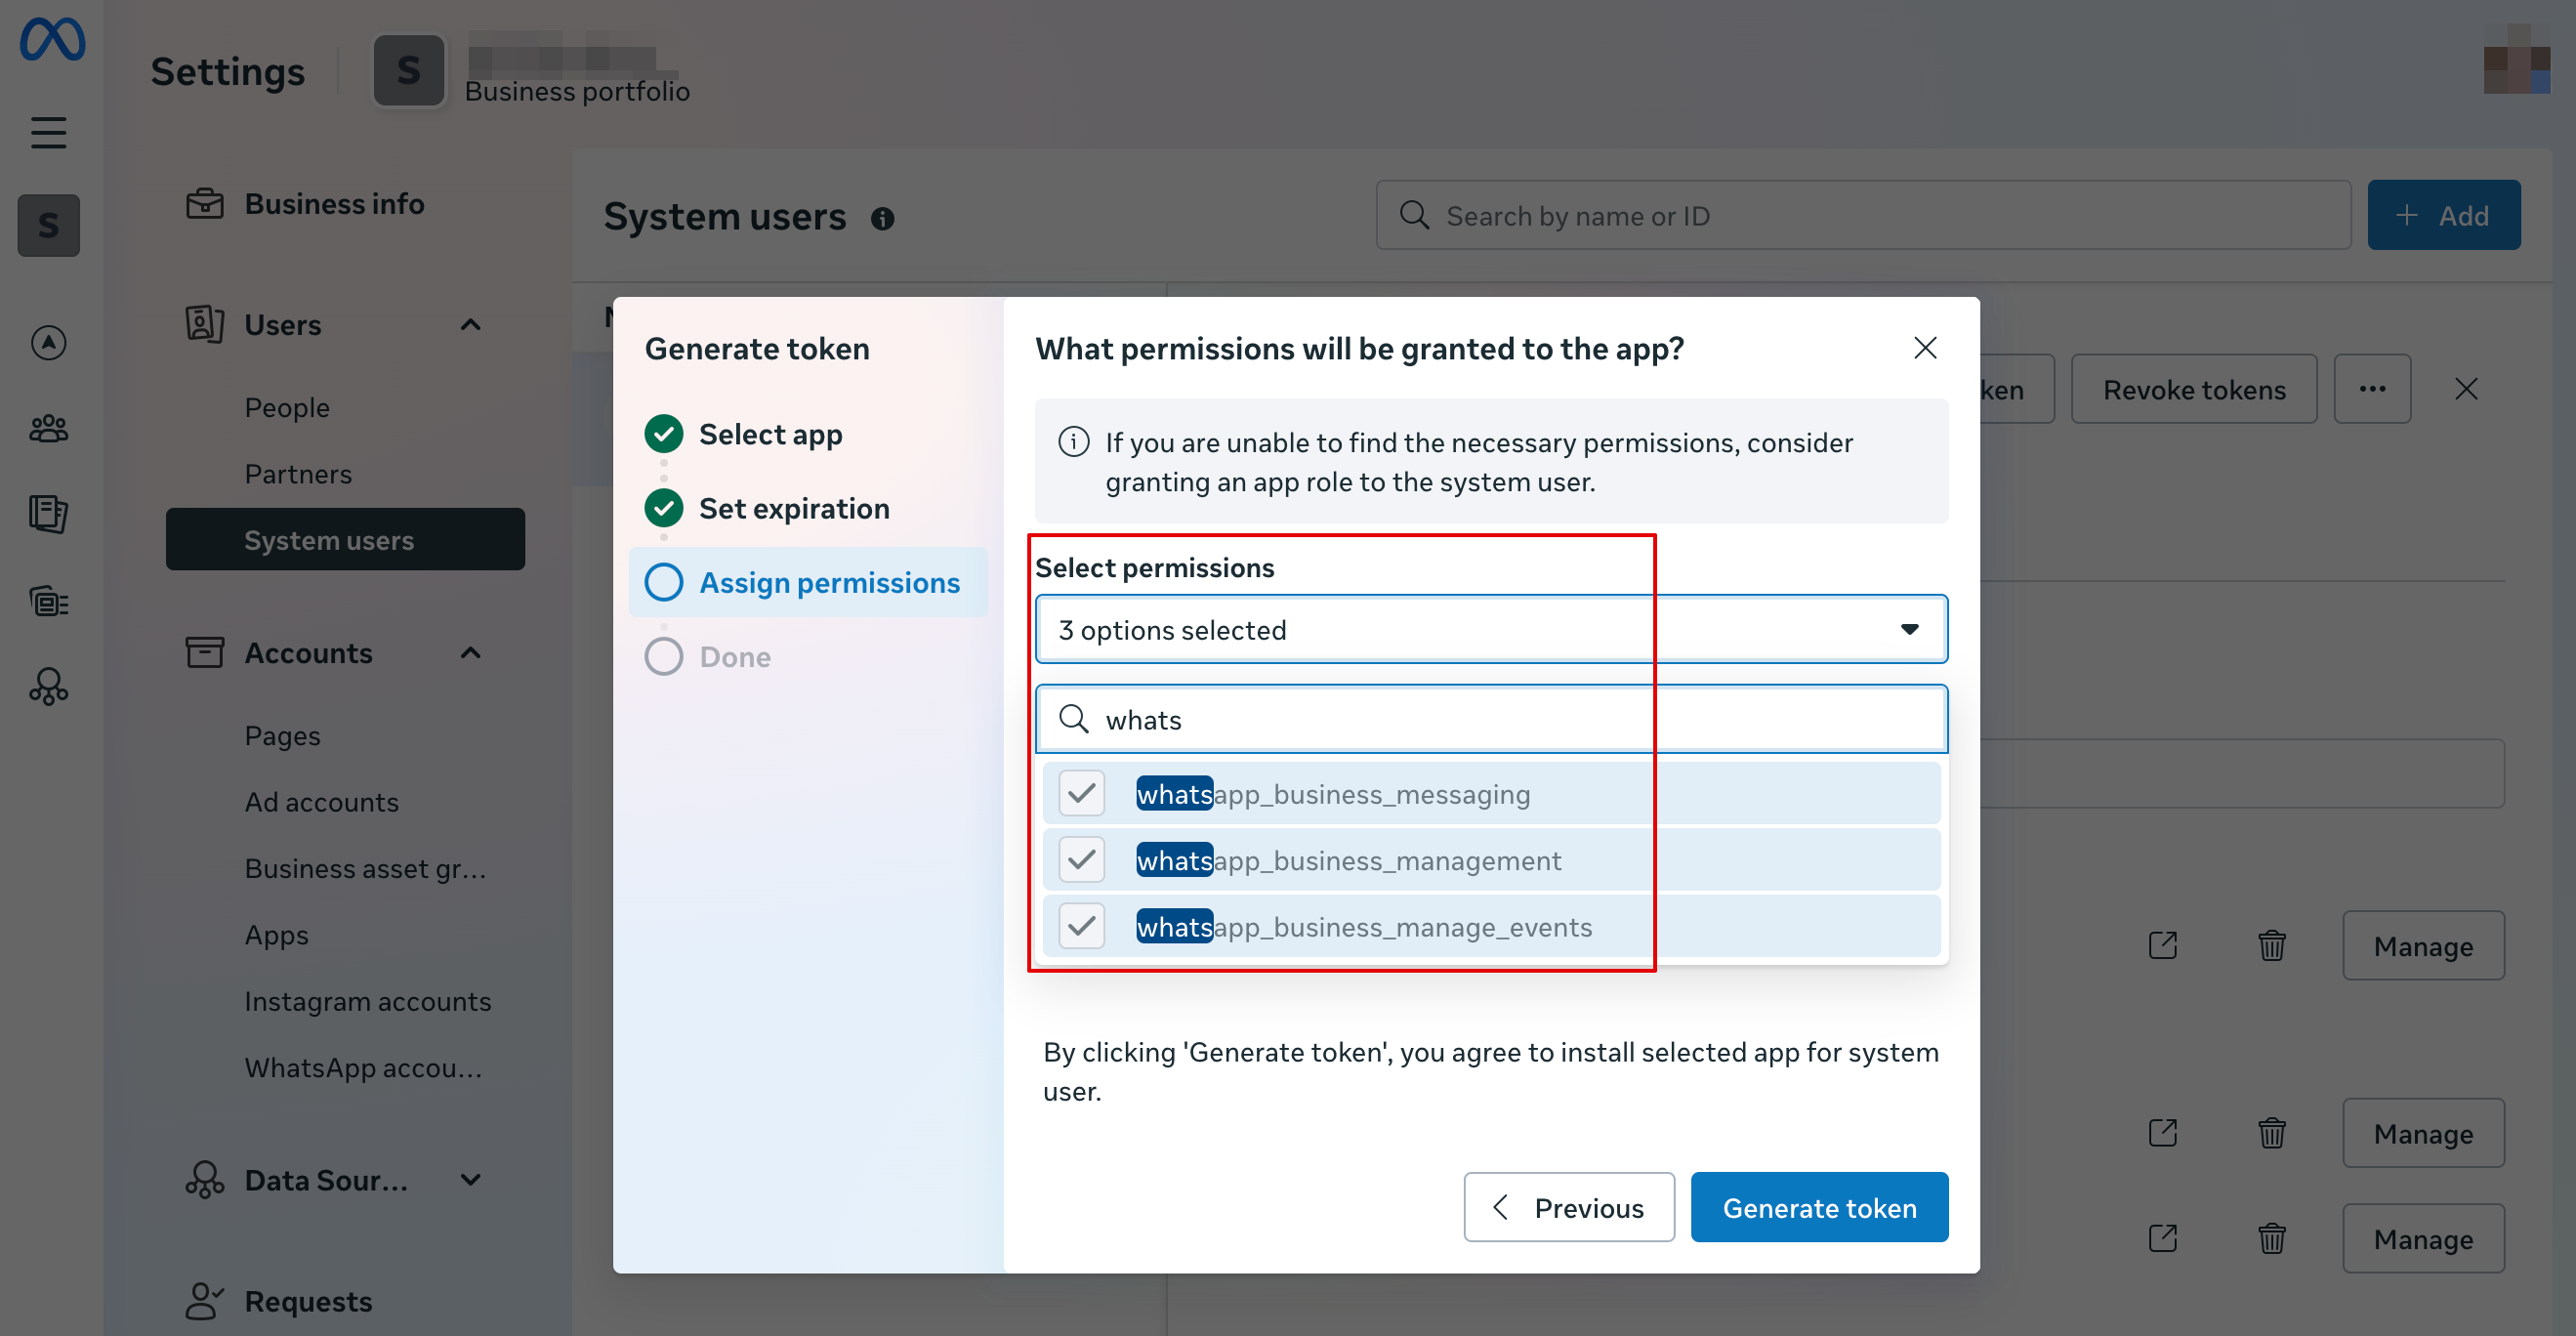
22. Vælg følgende tilladelser:
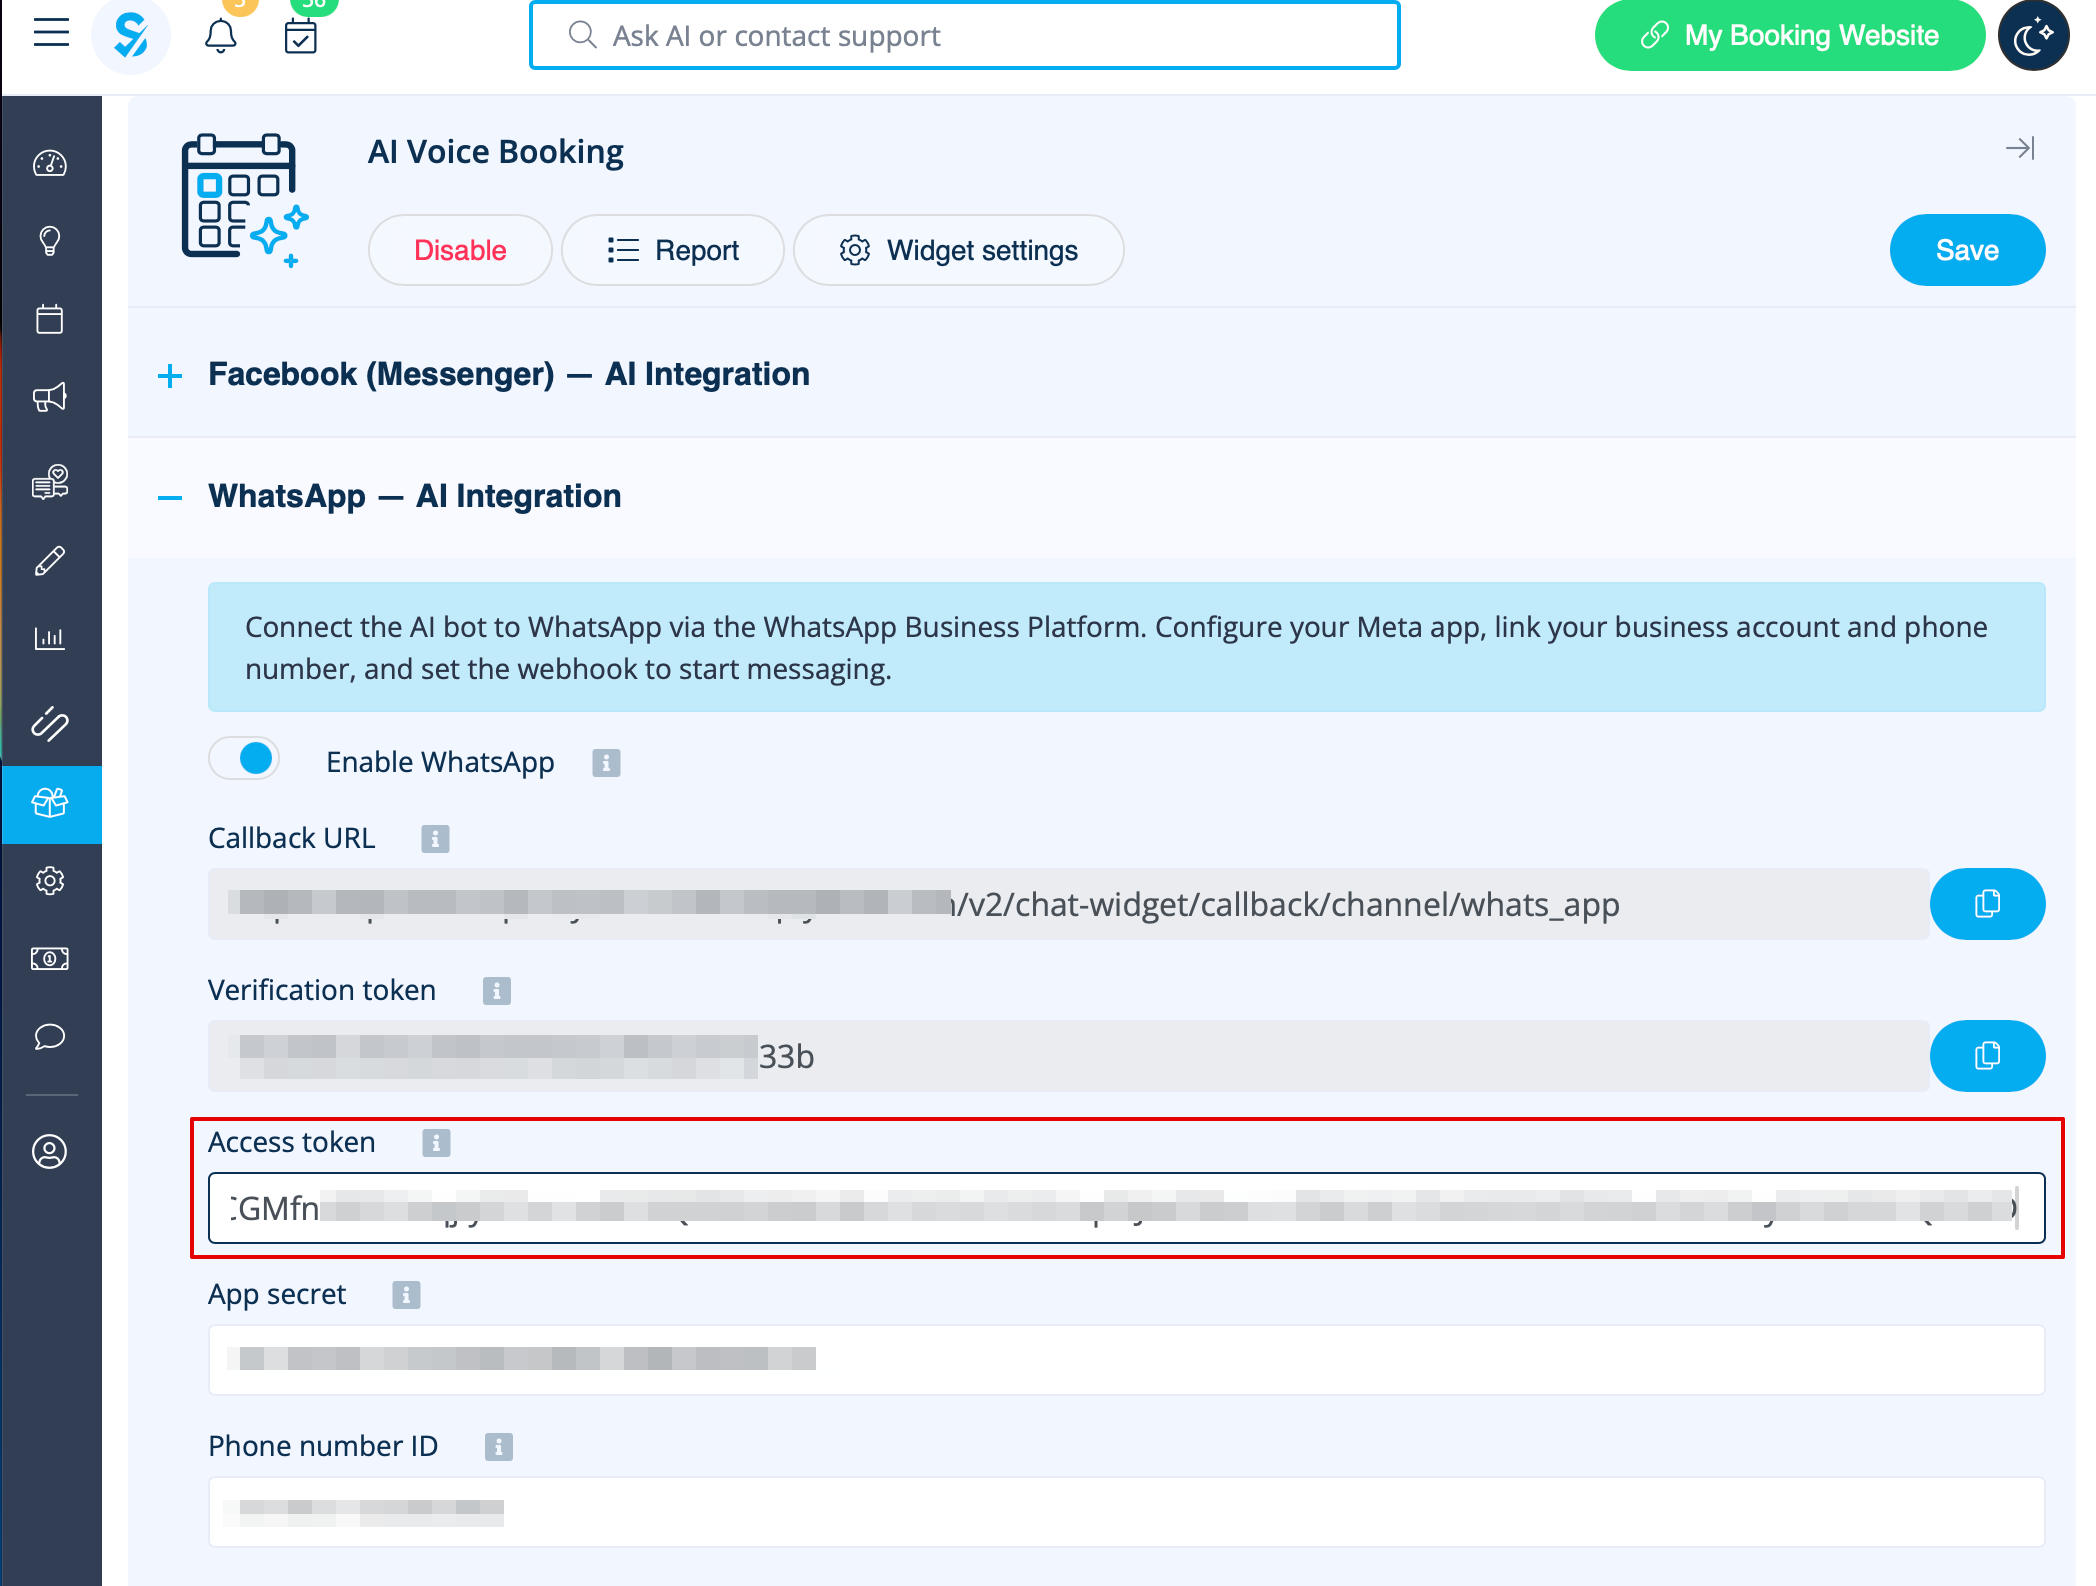
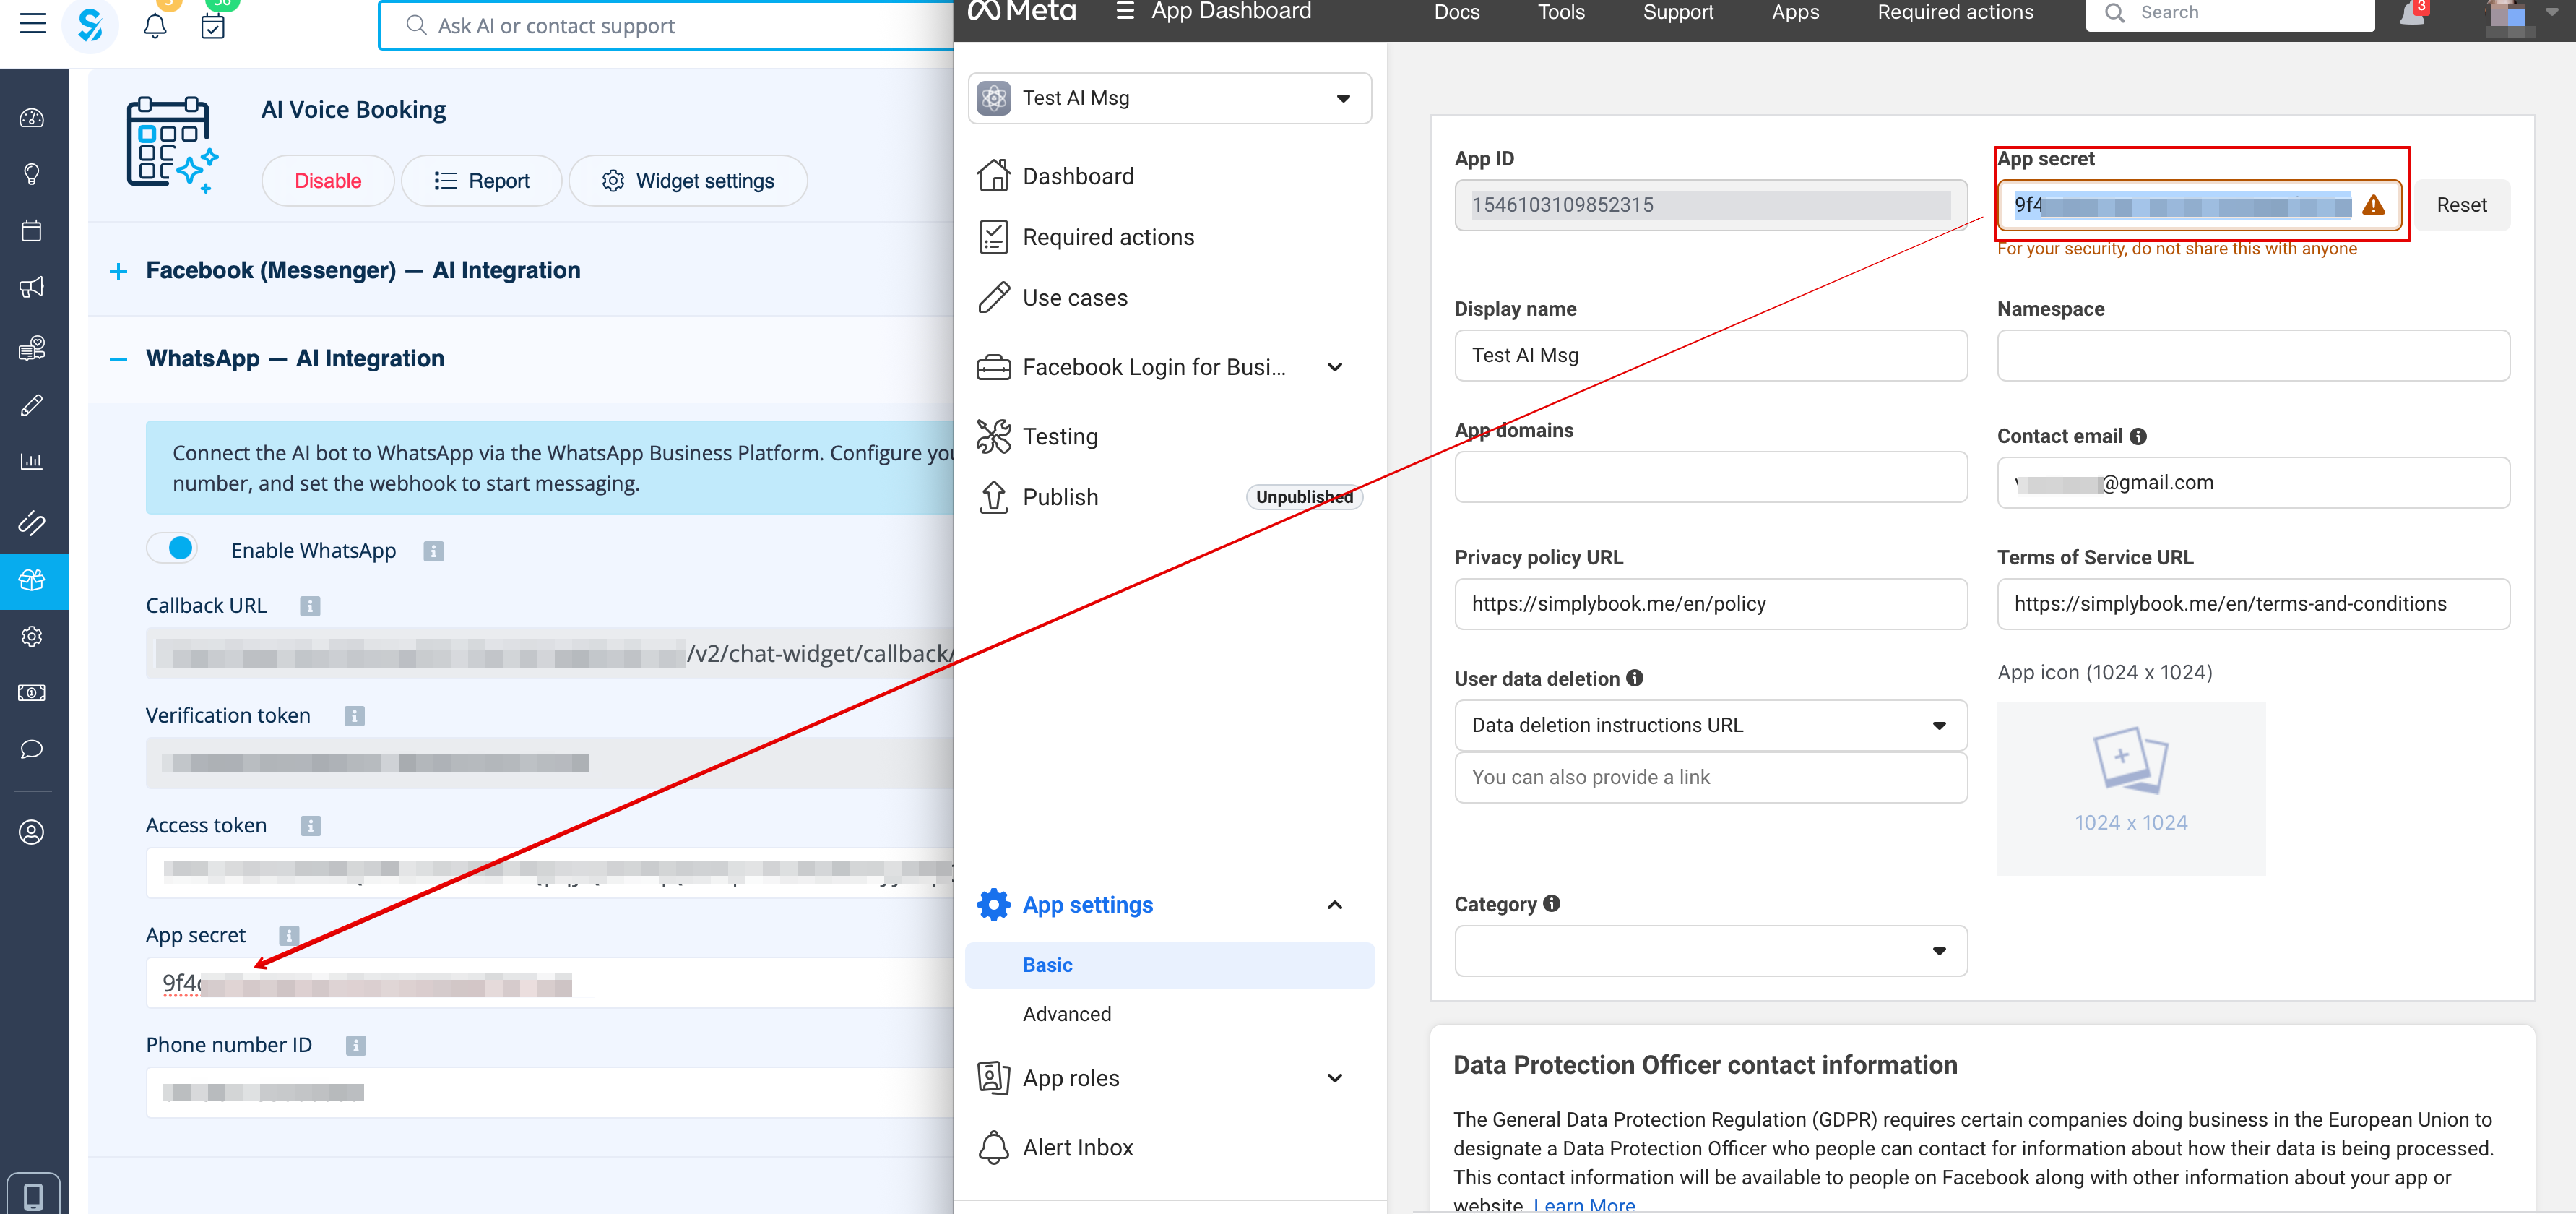
23. Kopiér tokenet, indsæt det i SB, og gem indstillingerne.
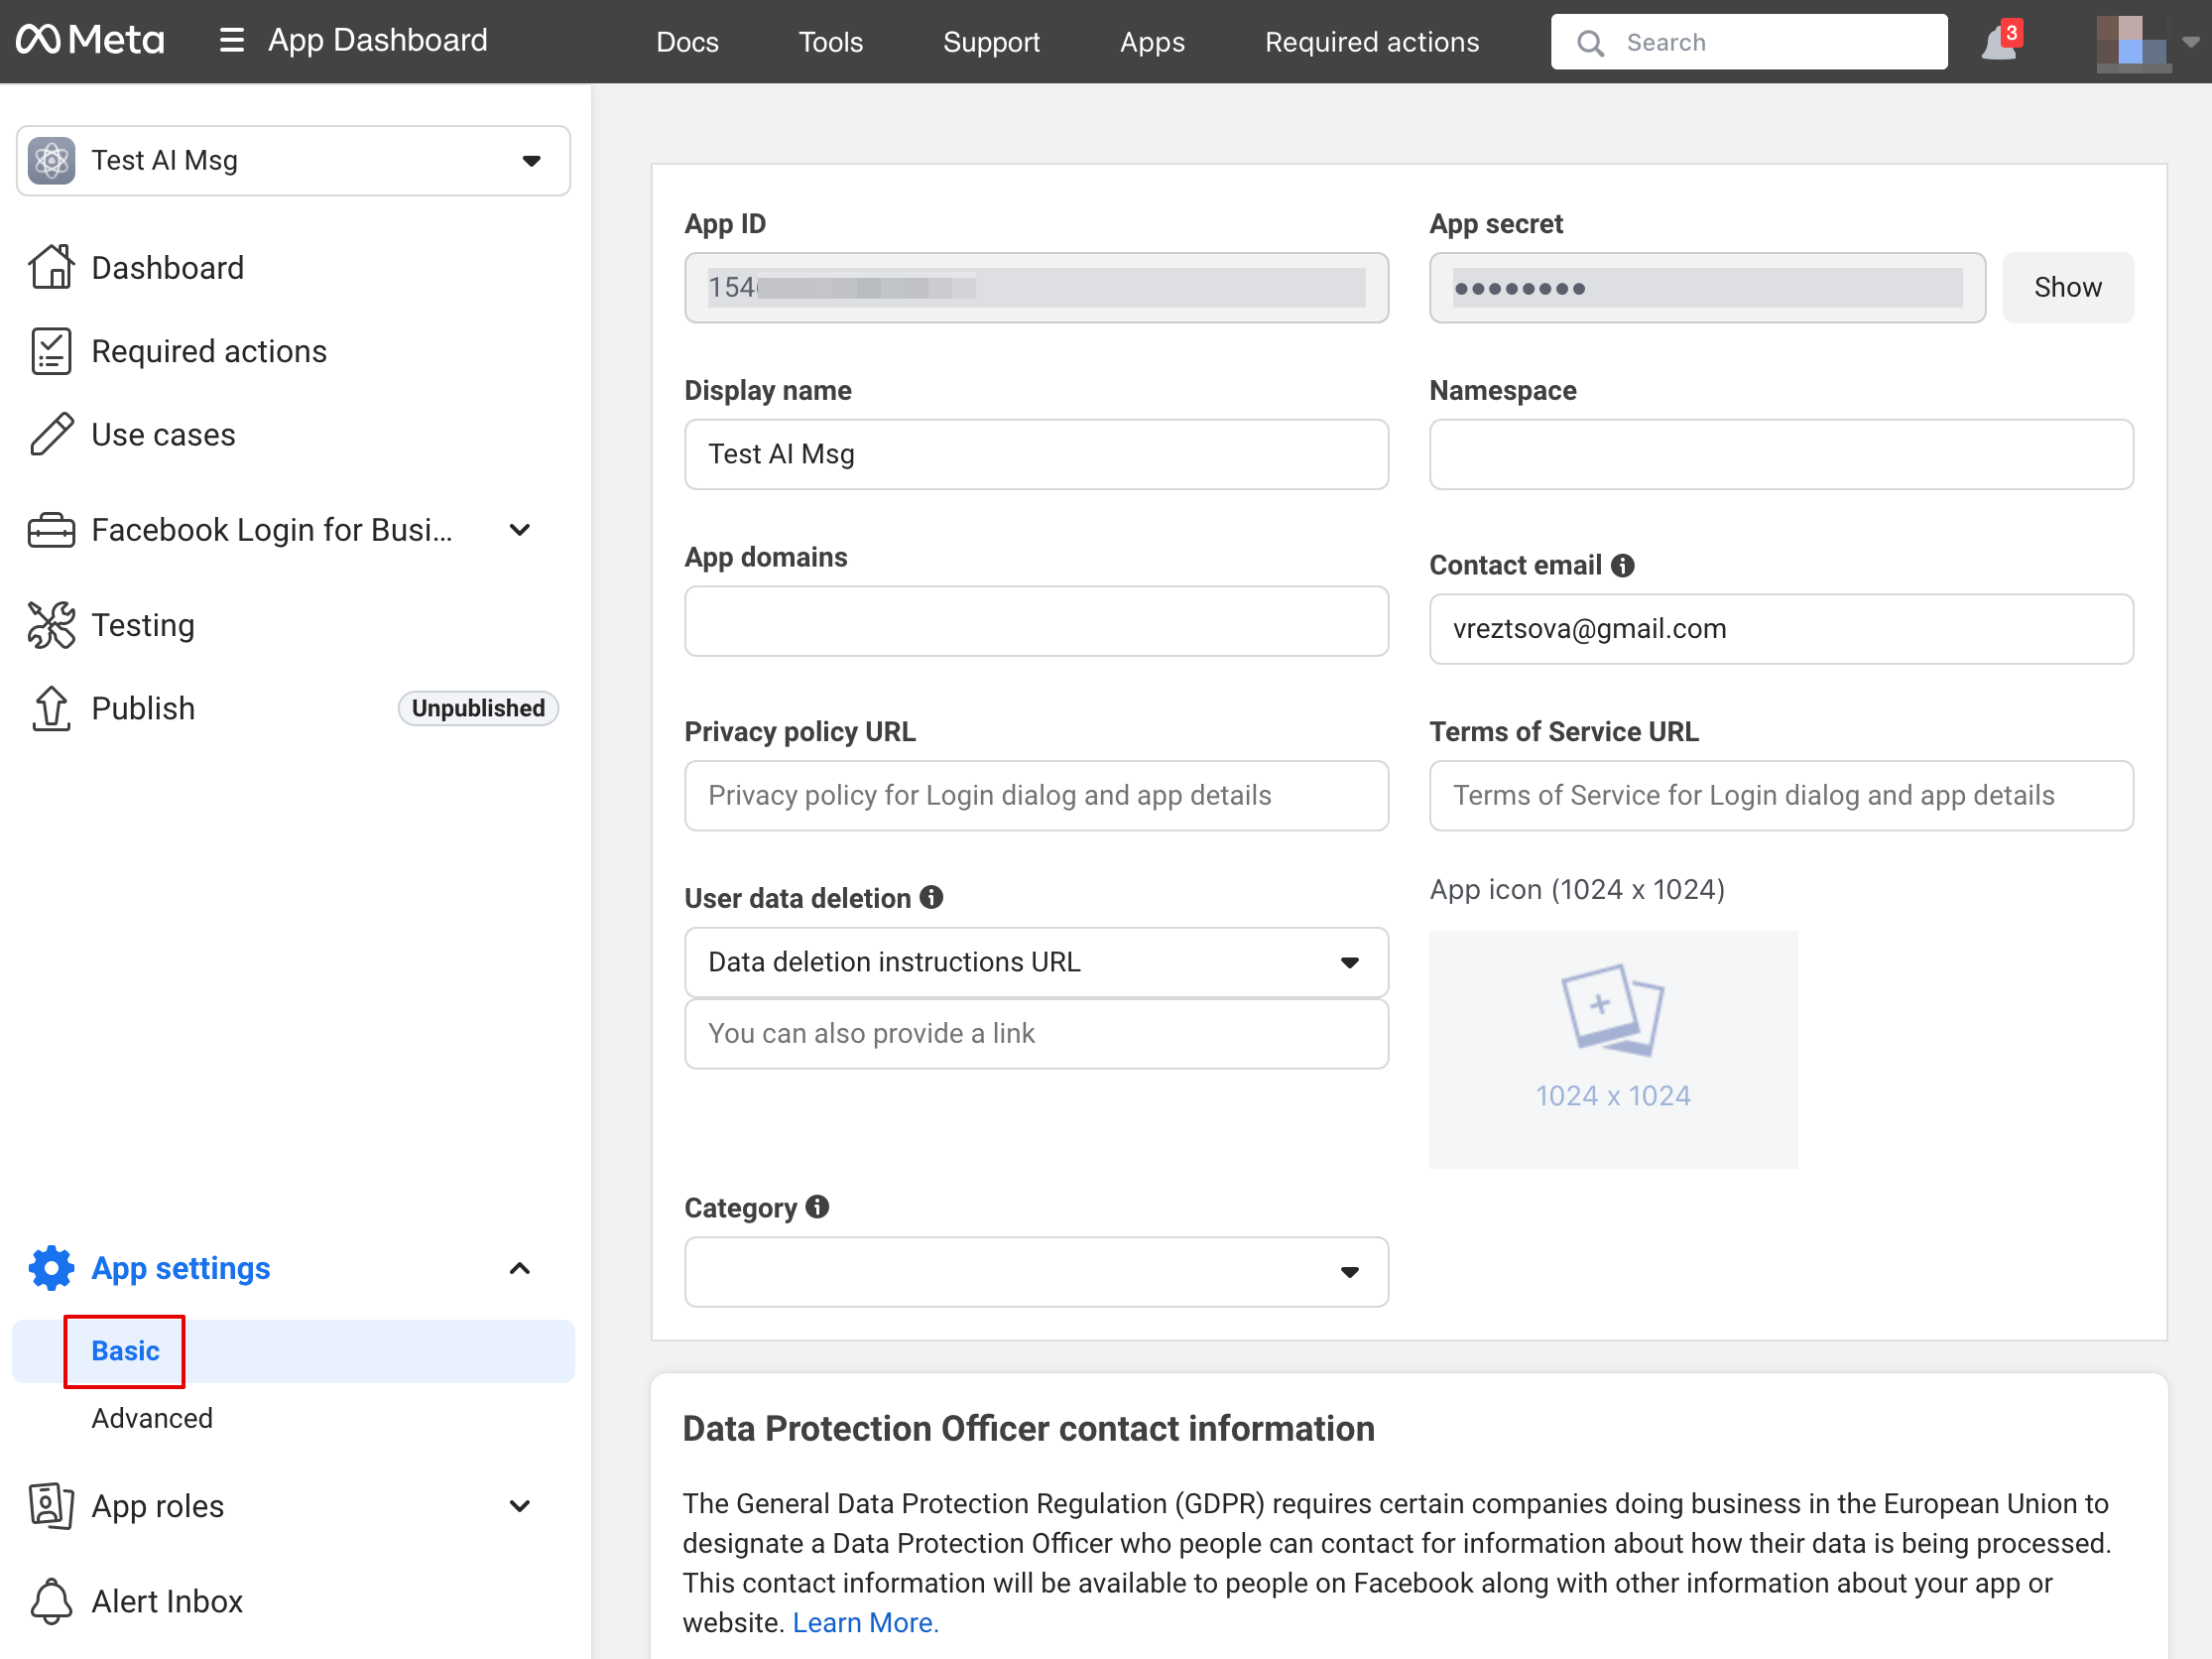
24. Gå nu tilbage til Facebook-udviklere, vælg din app, klik på Indstillinger -> Grundlæggende. Indsæt URL’er til privatlivspolitik og servicevilkår
25. Kopiér App Secret, og indsæt den i SB.
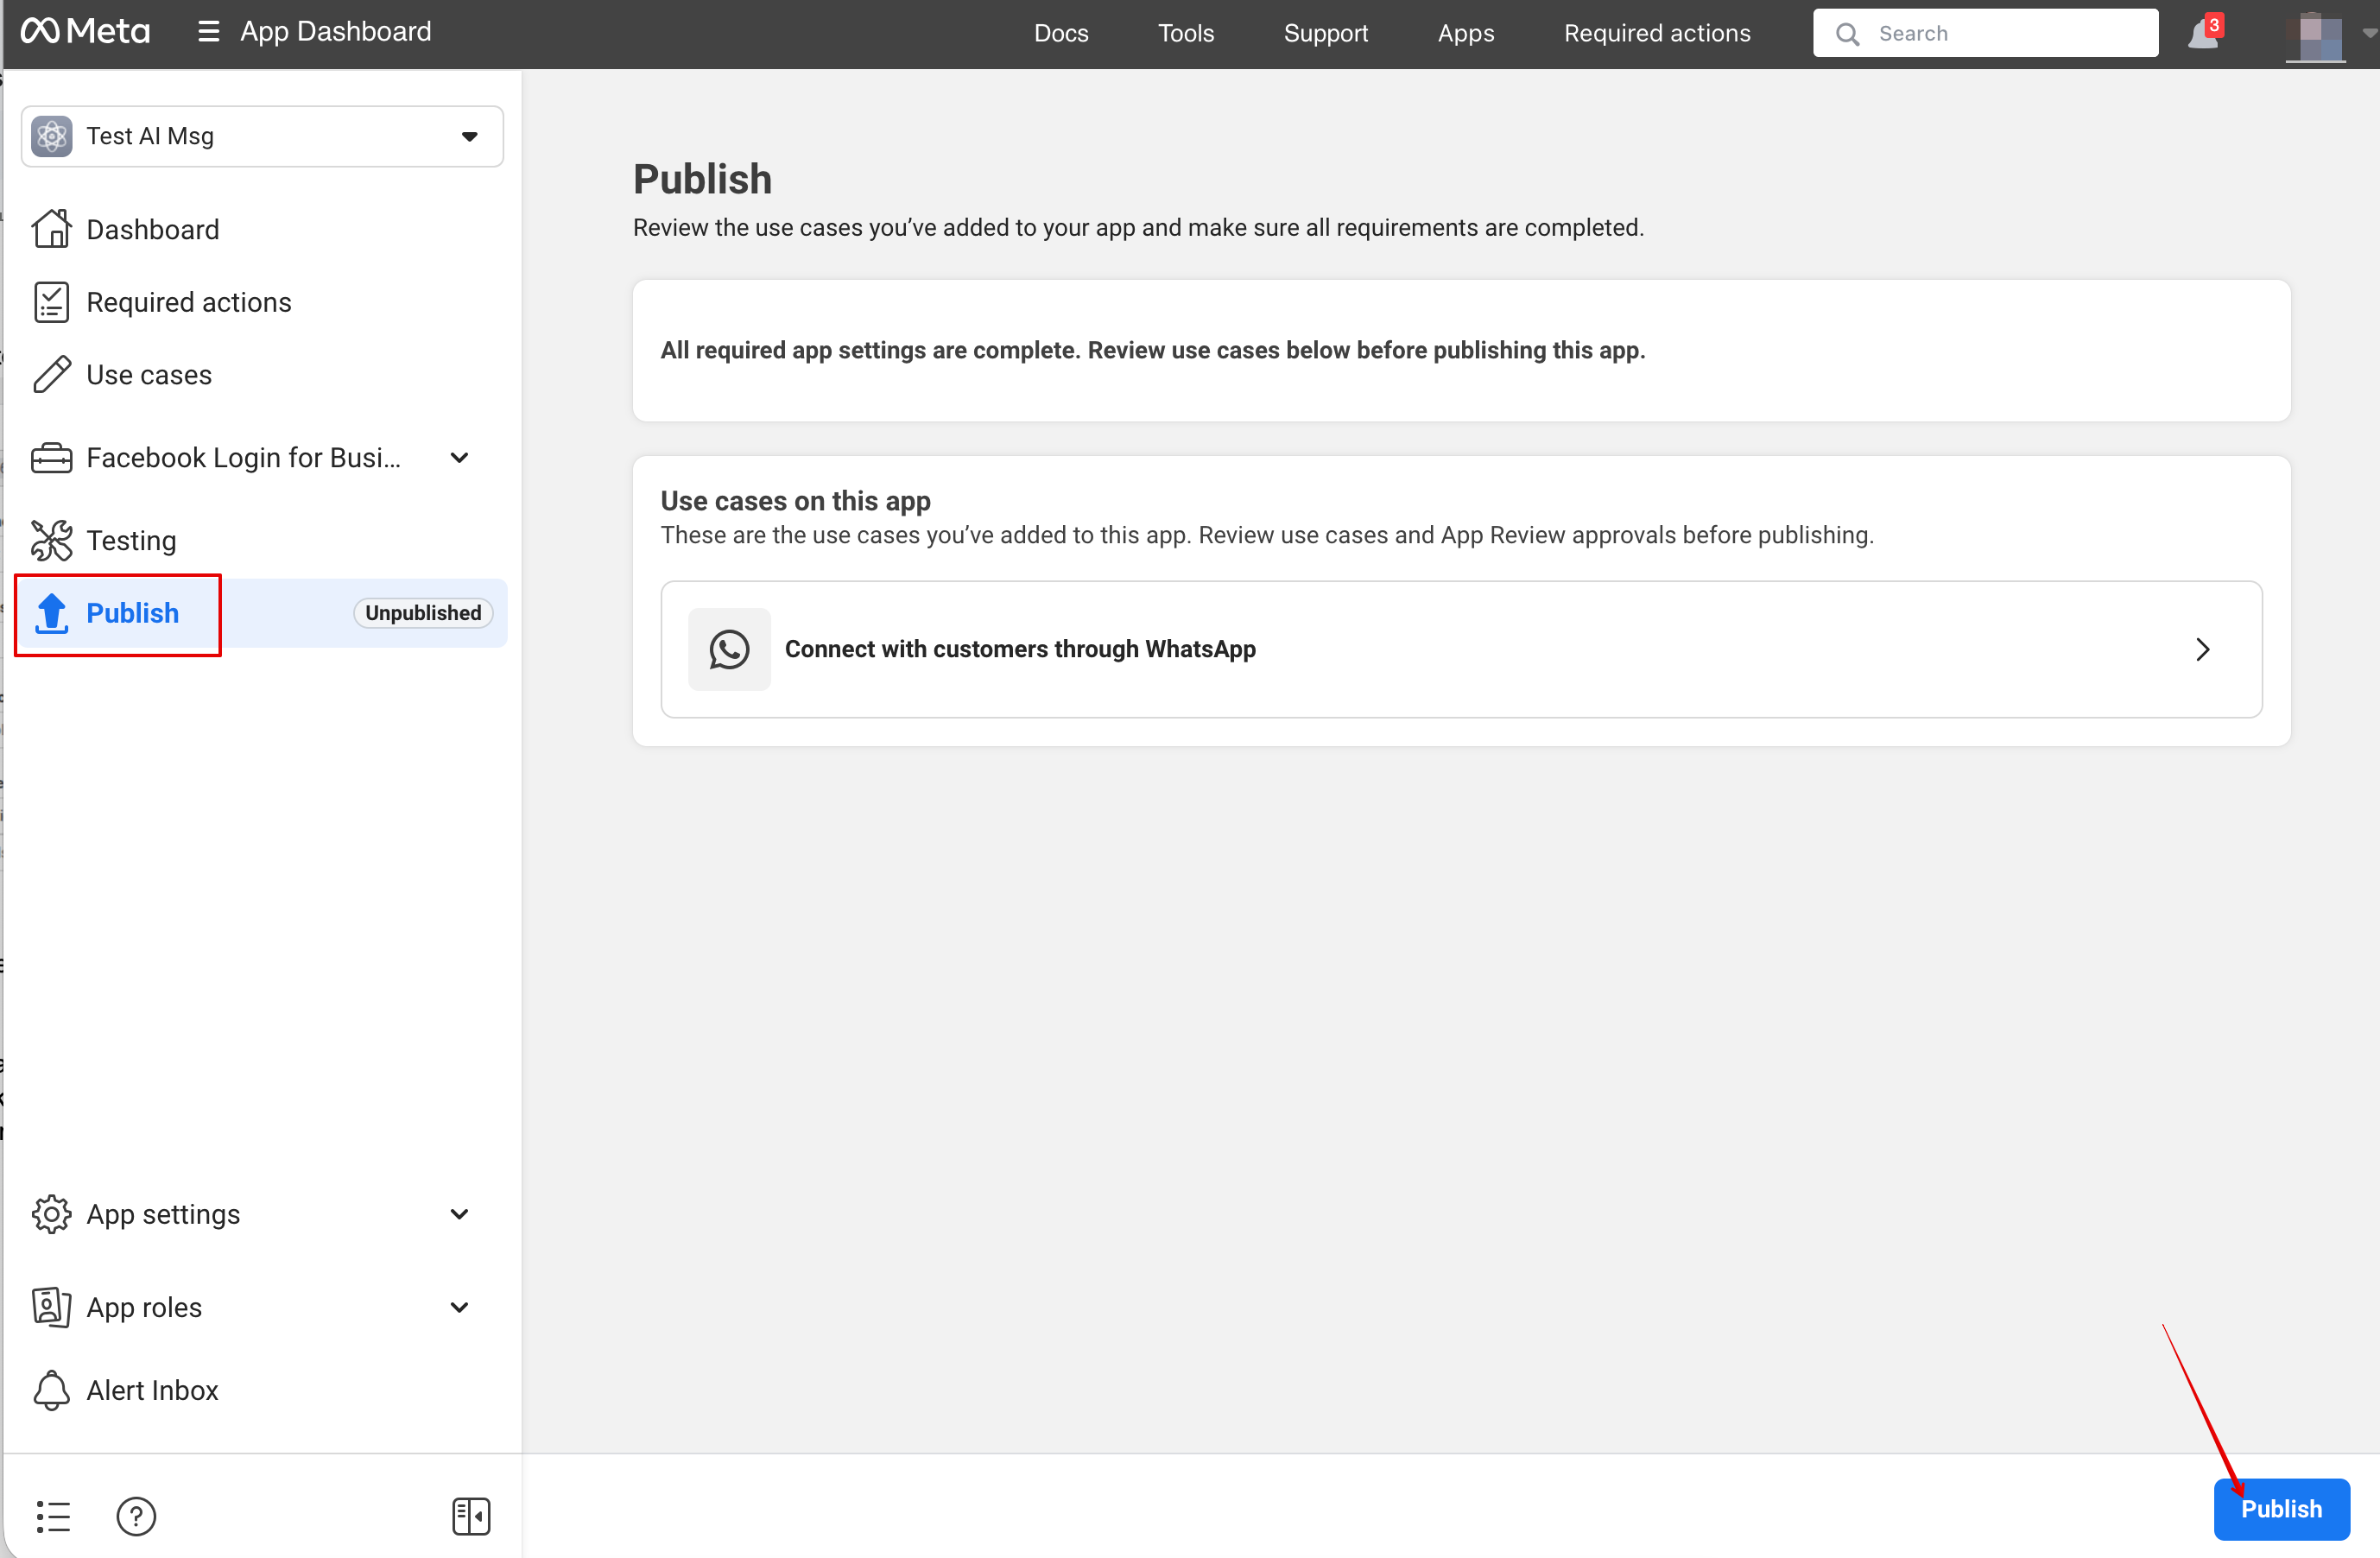
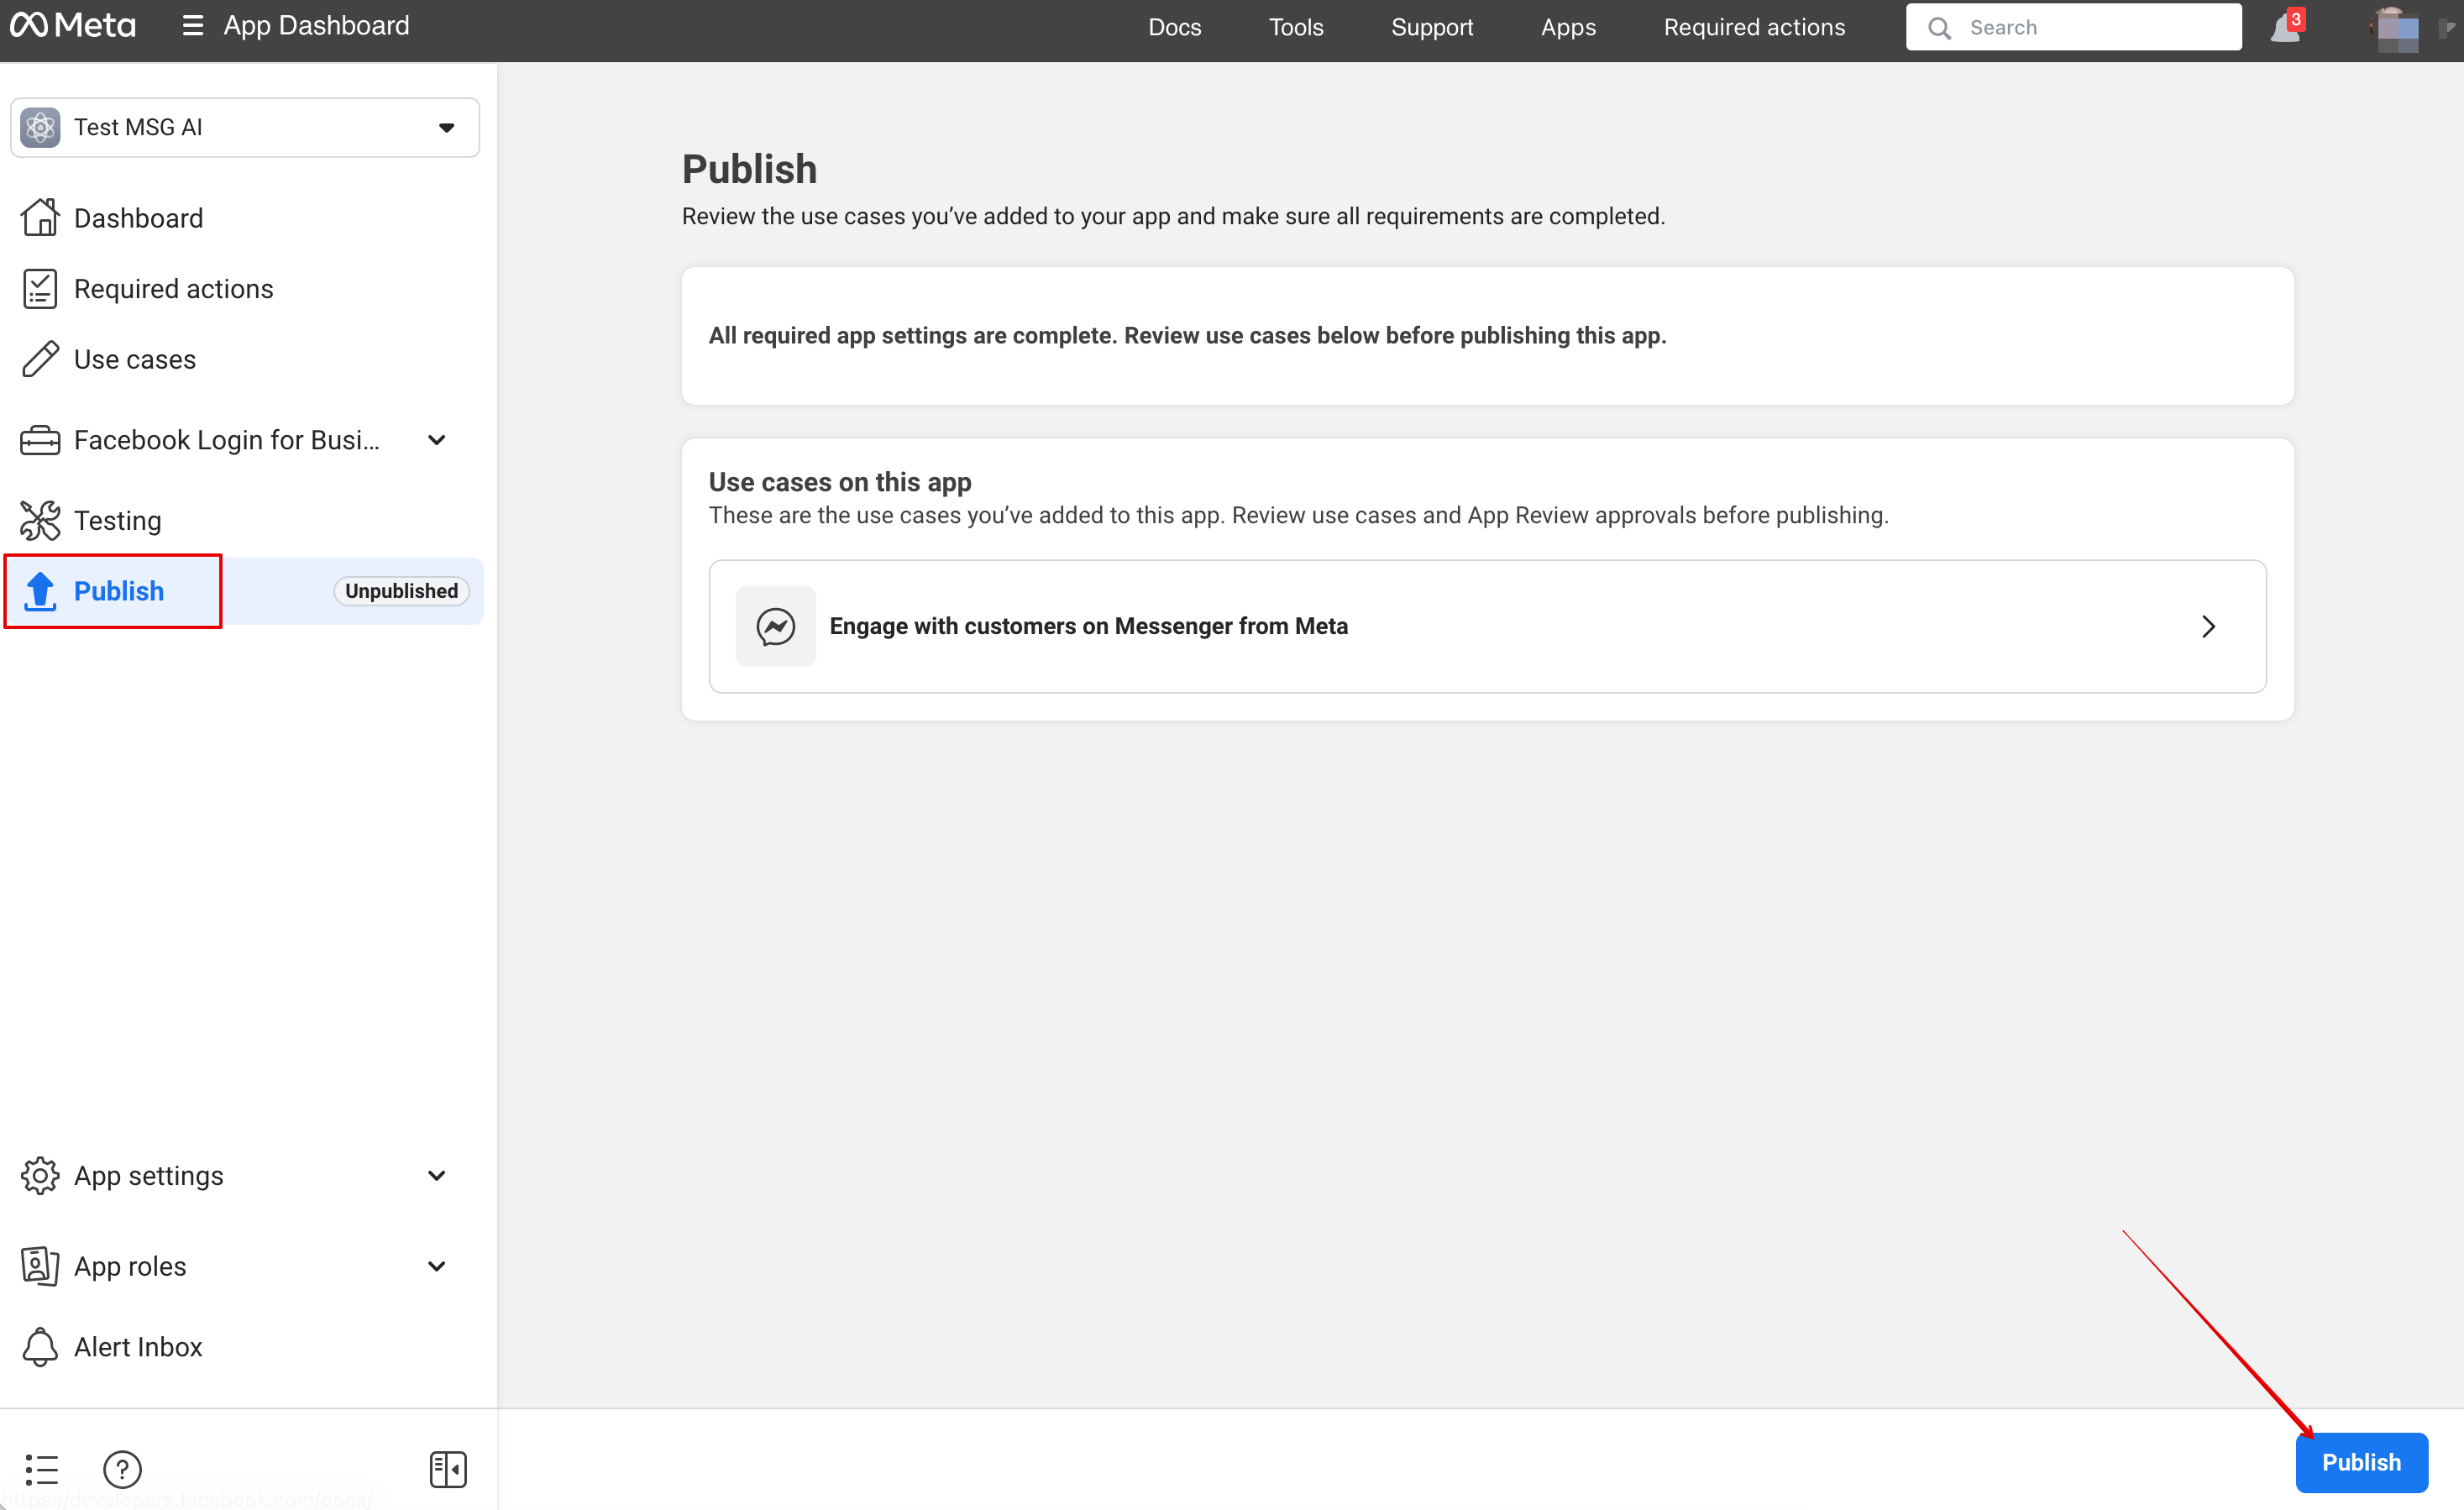
26. Nu kan du udgive appen, give dine kunder dit WhatsApp Business-nummer og lade dem booke tjenester ved hjælp af AI.
Opsæt Facebook Messenger
1. Åbn Facebook-udviklere og klik på “Create App”:
2. Indtast dine foretrukne appoplysninger:
3. Vælg Messenger-brugsscenarie fra listen:

4. Vælg virksomhedsprofilen eller opret en ny.
5. Gå videre til appens Dashboard efter gennemgang af detaljerne
6. Klik på tilpas brugsscenarie:
7. Indsæt webhook-URL og bekræftelsestoken fra SB i Messenger API-indstillingerne, og klik på Bekræft og gem:
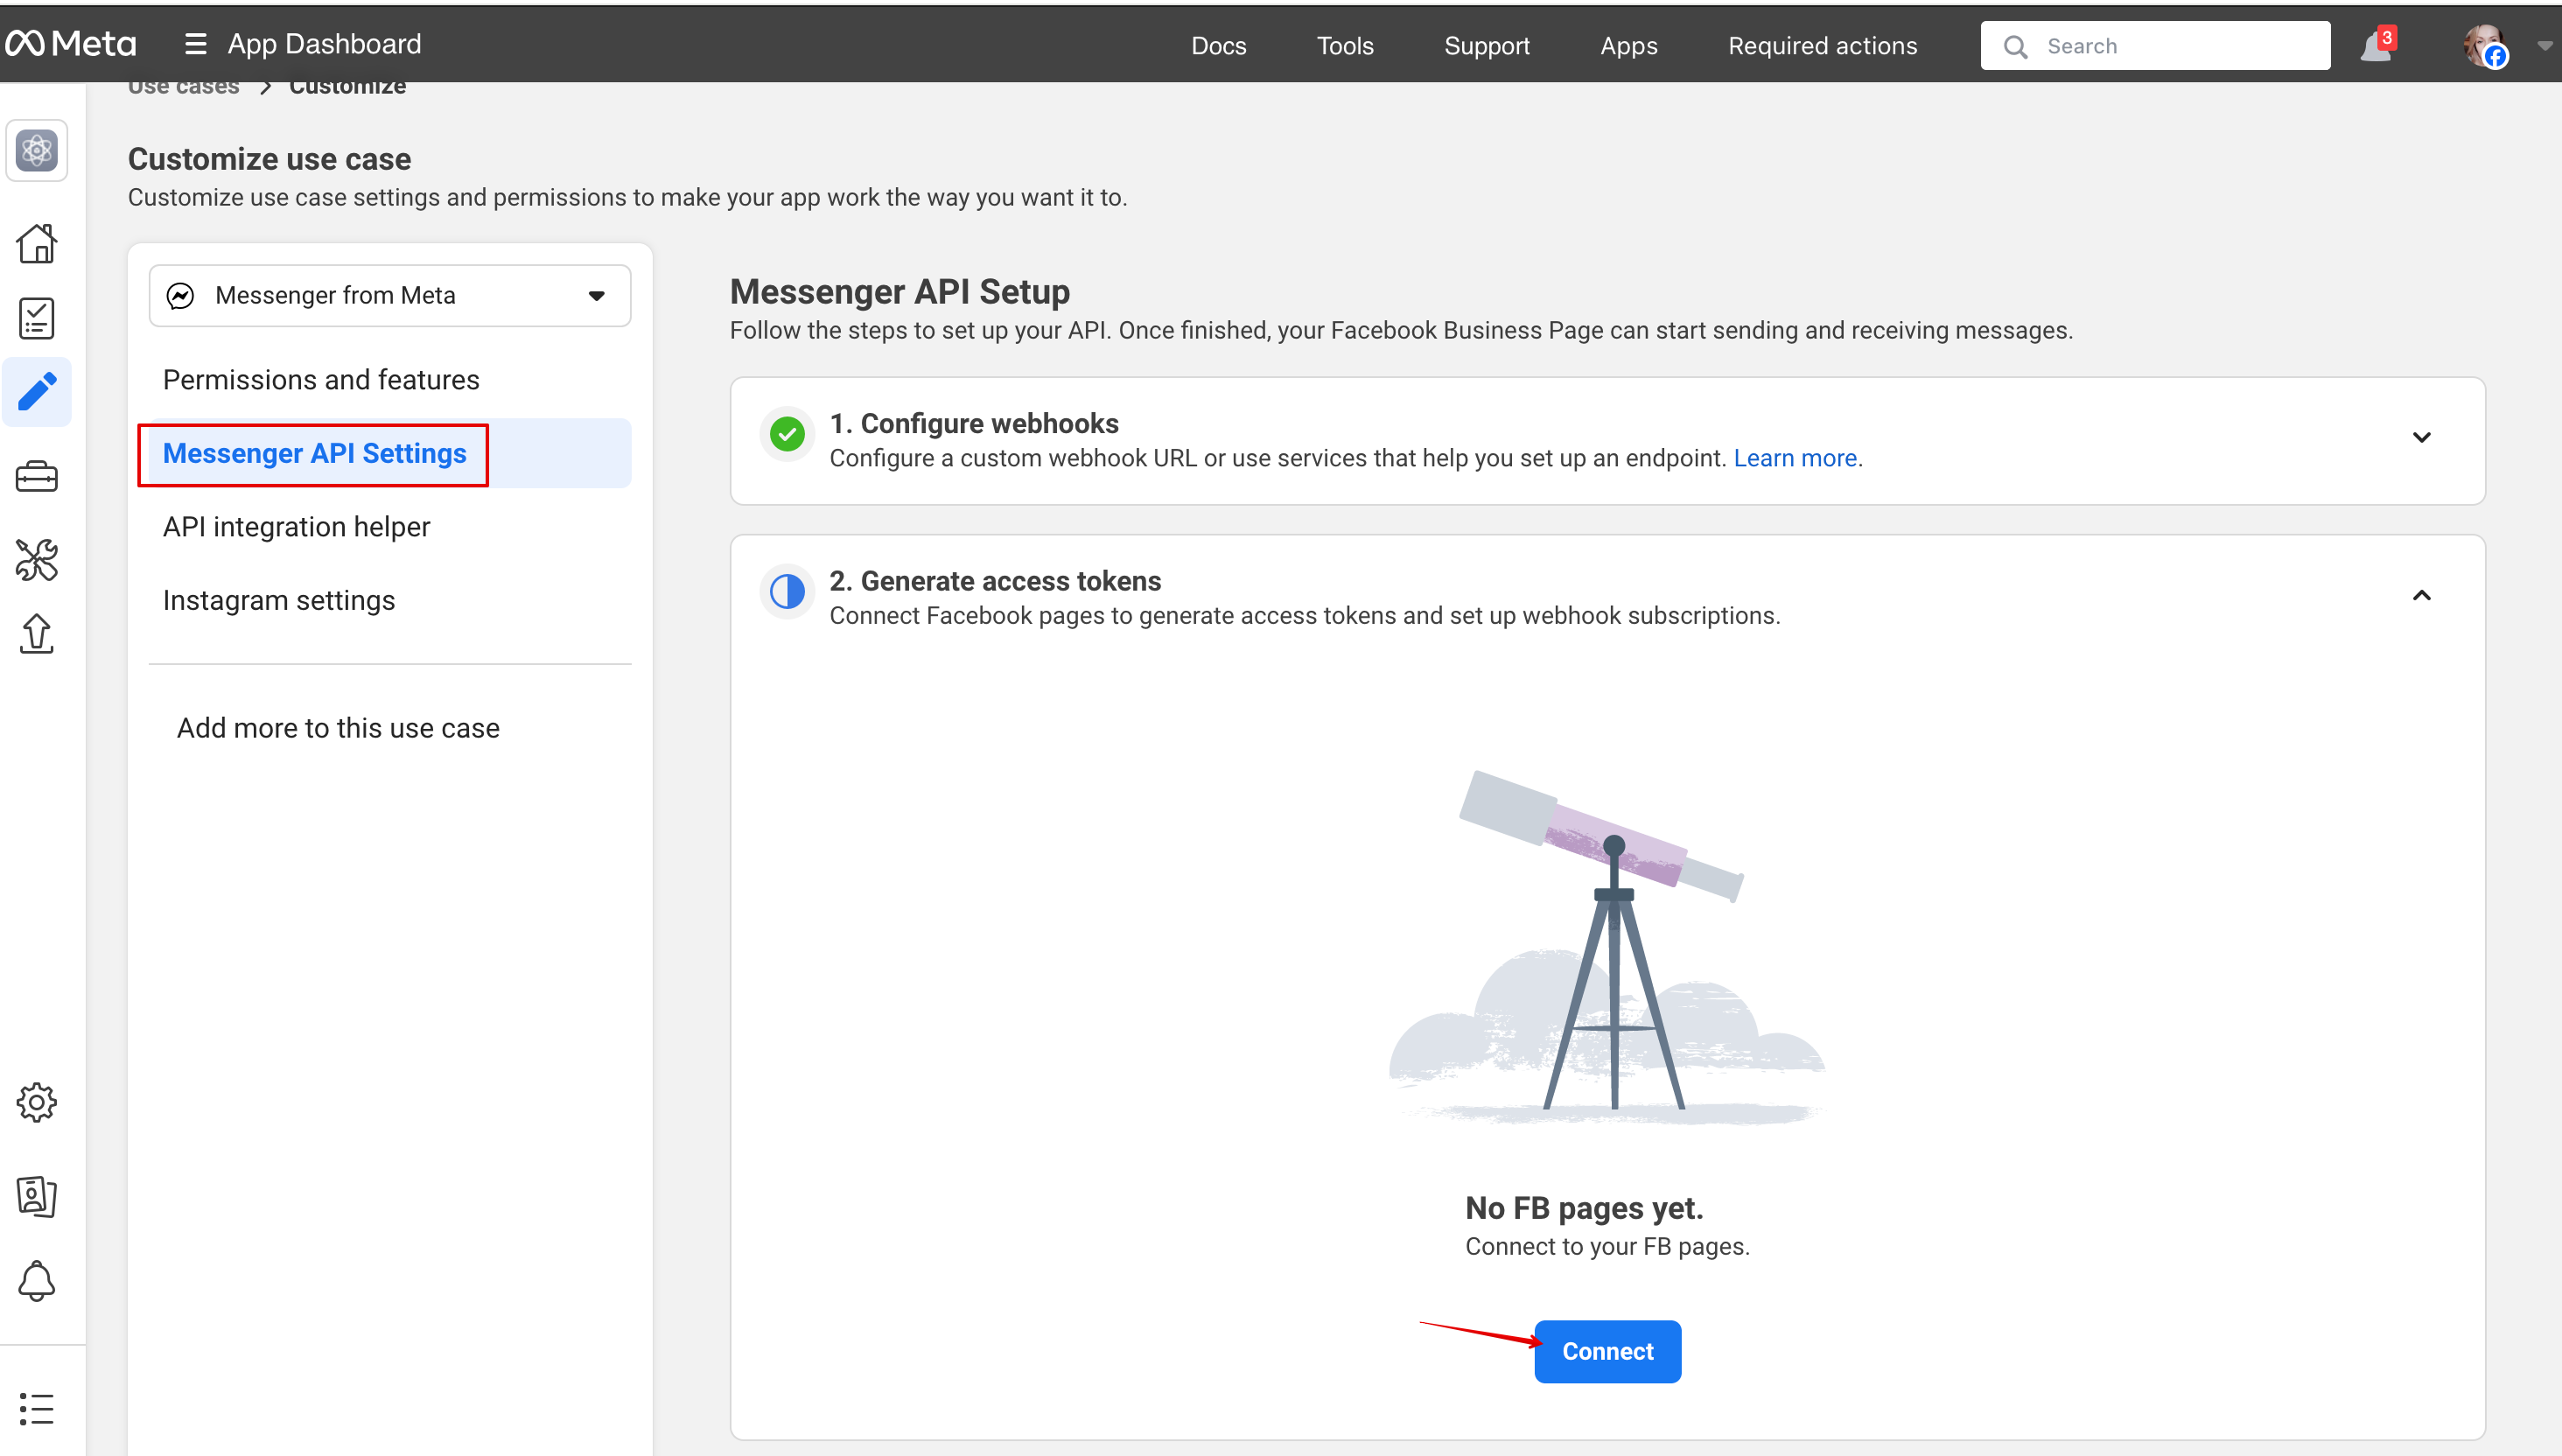
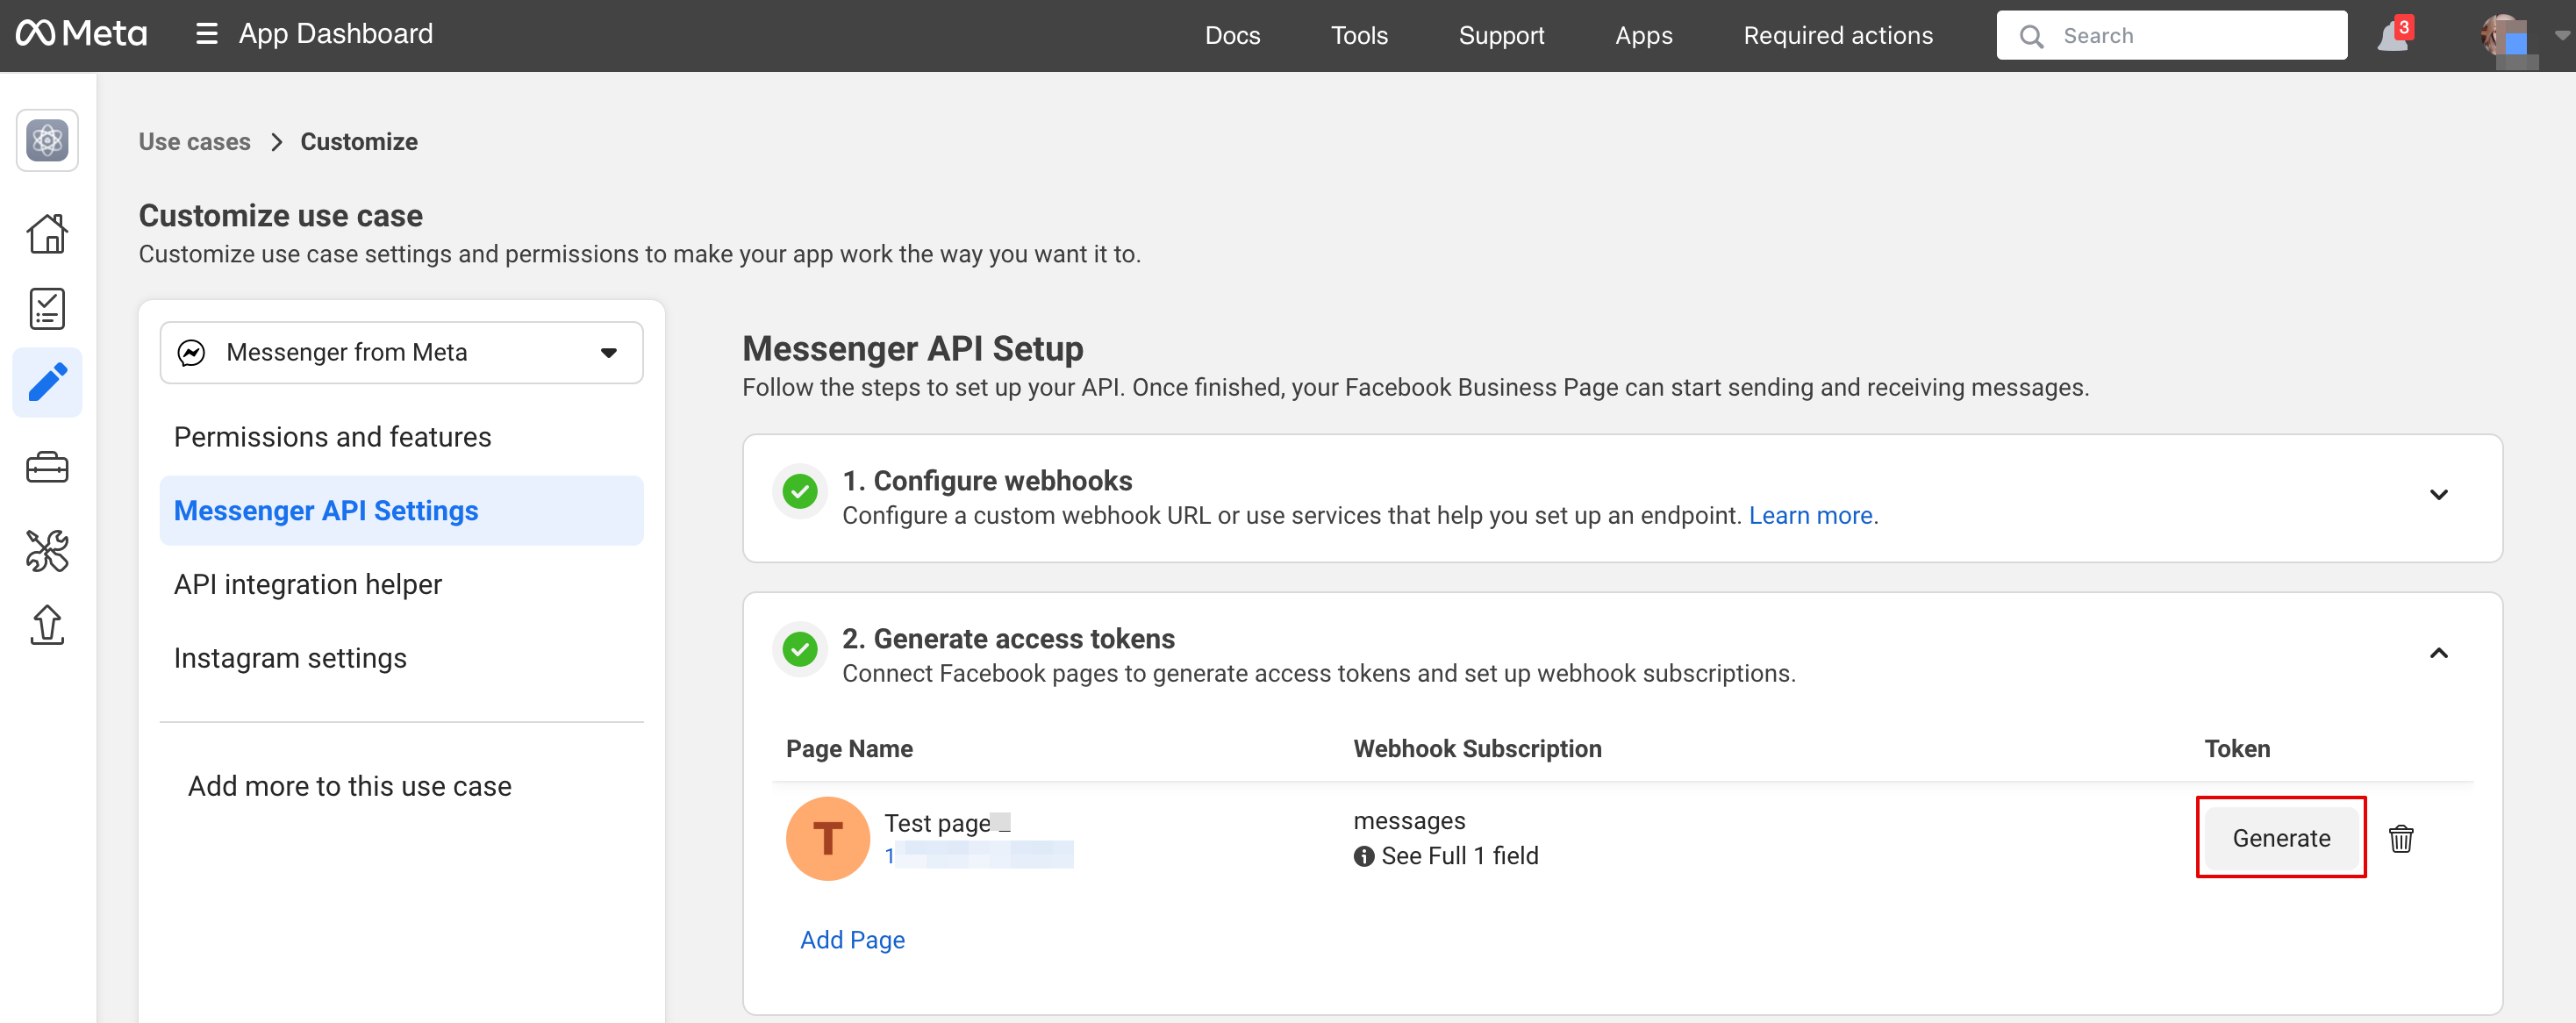
8. Gå tilbage til Messenger API-indstillingerne for at forbinde Facebook-siden, hvor AI-muligheden skal tilføjes, og generér et token. Klik på Forbind, og vælg siden:
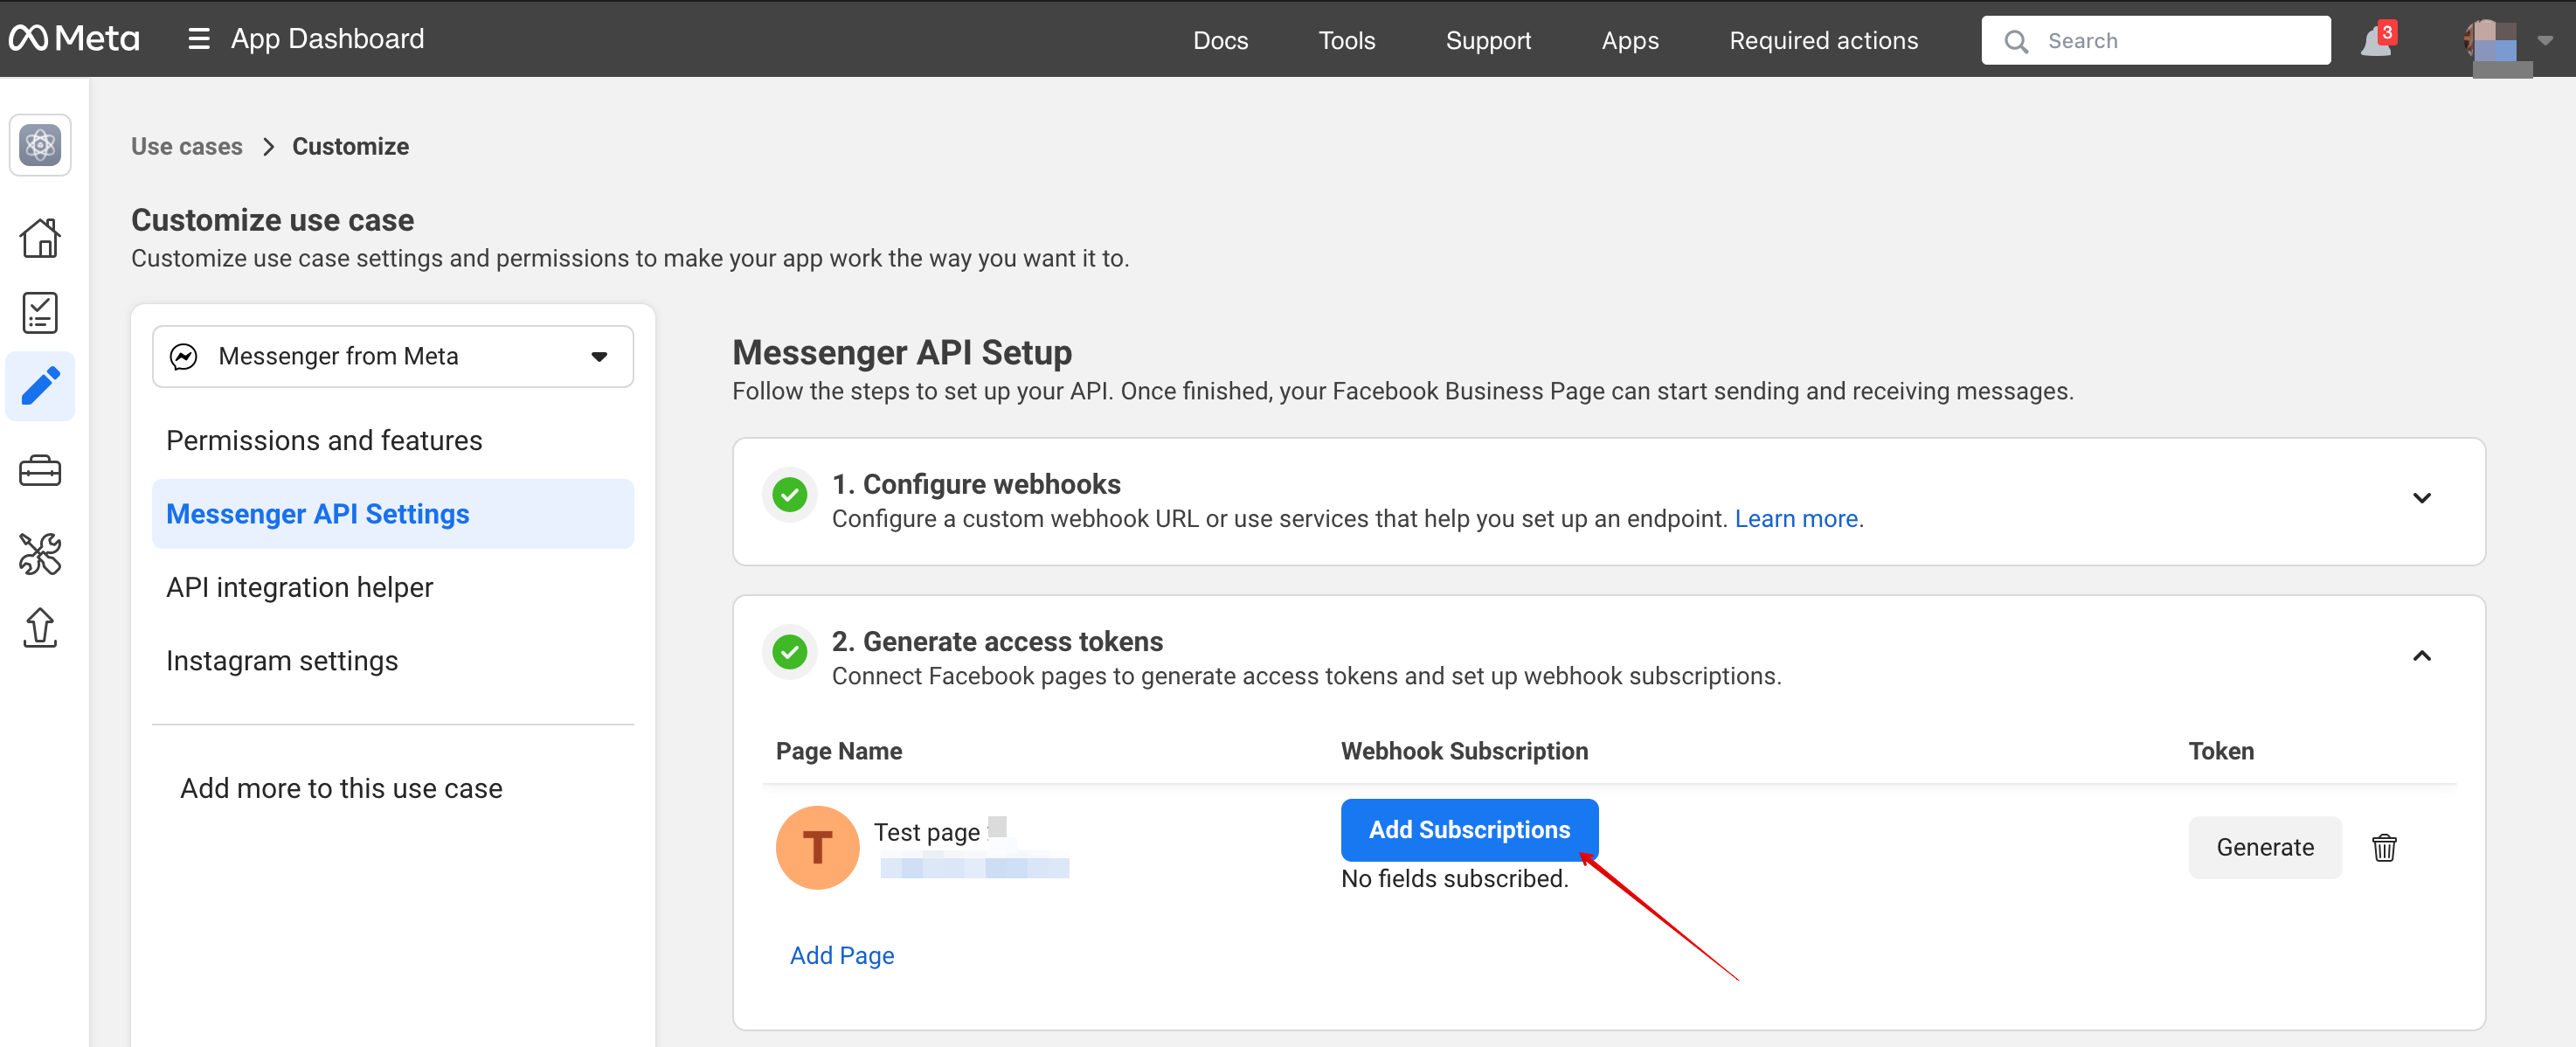
9. Klik på Tilføj abonnement:
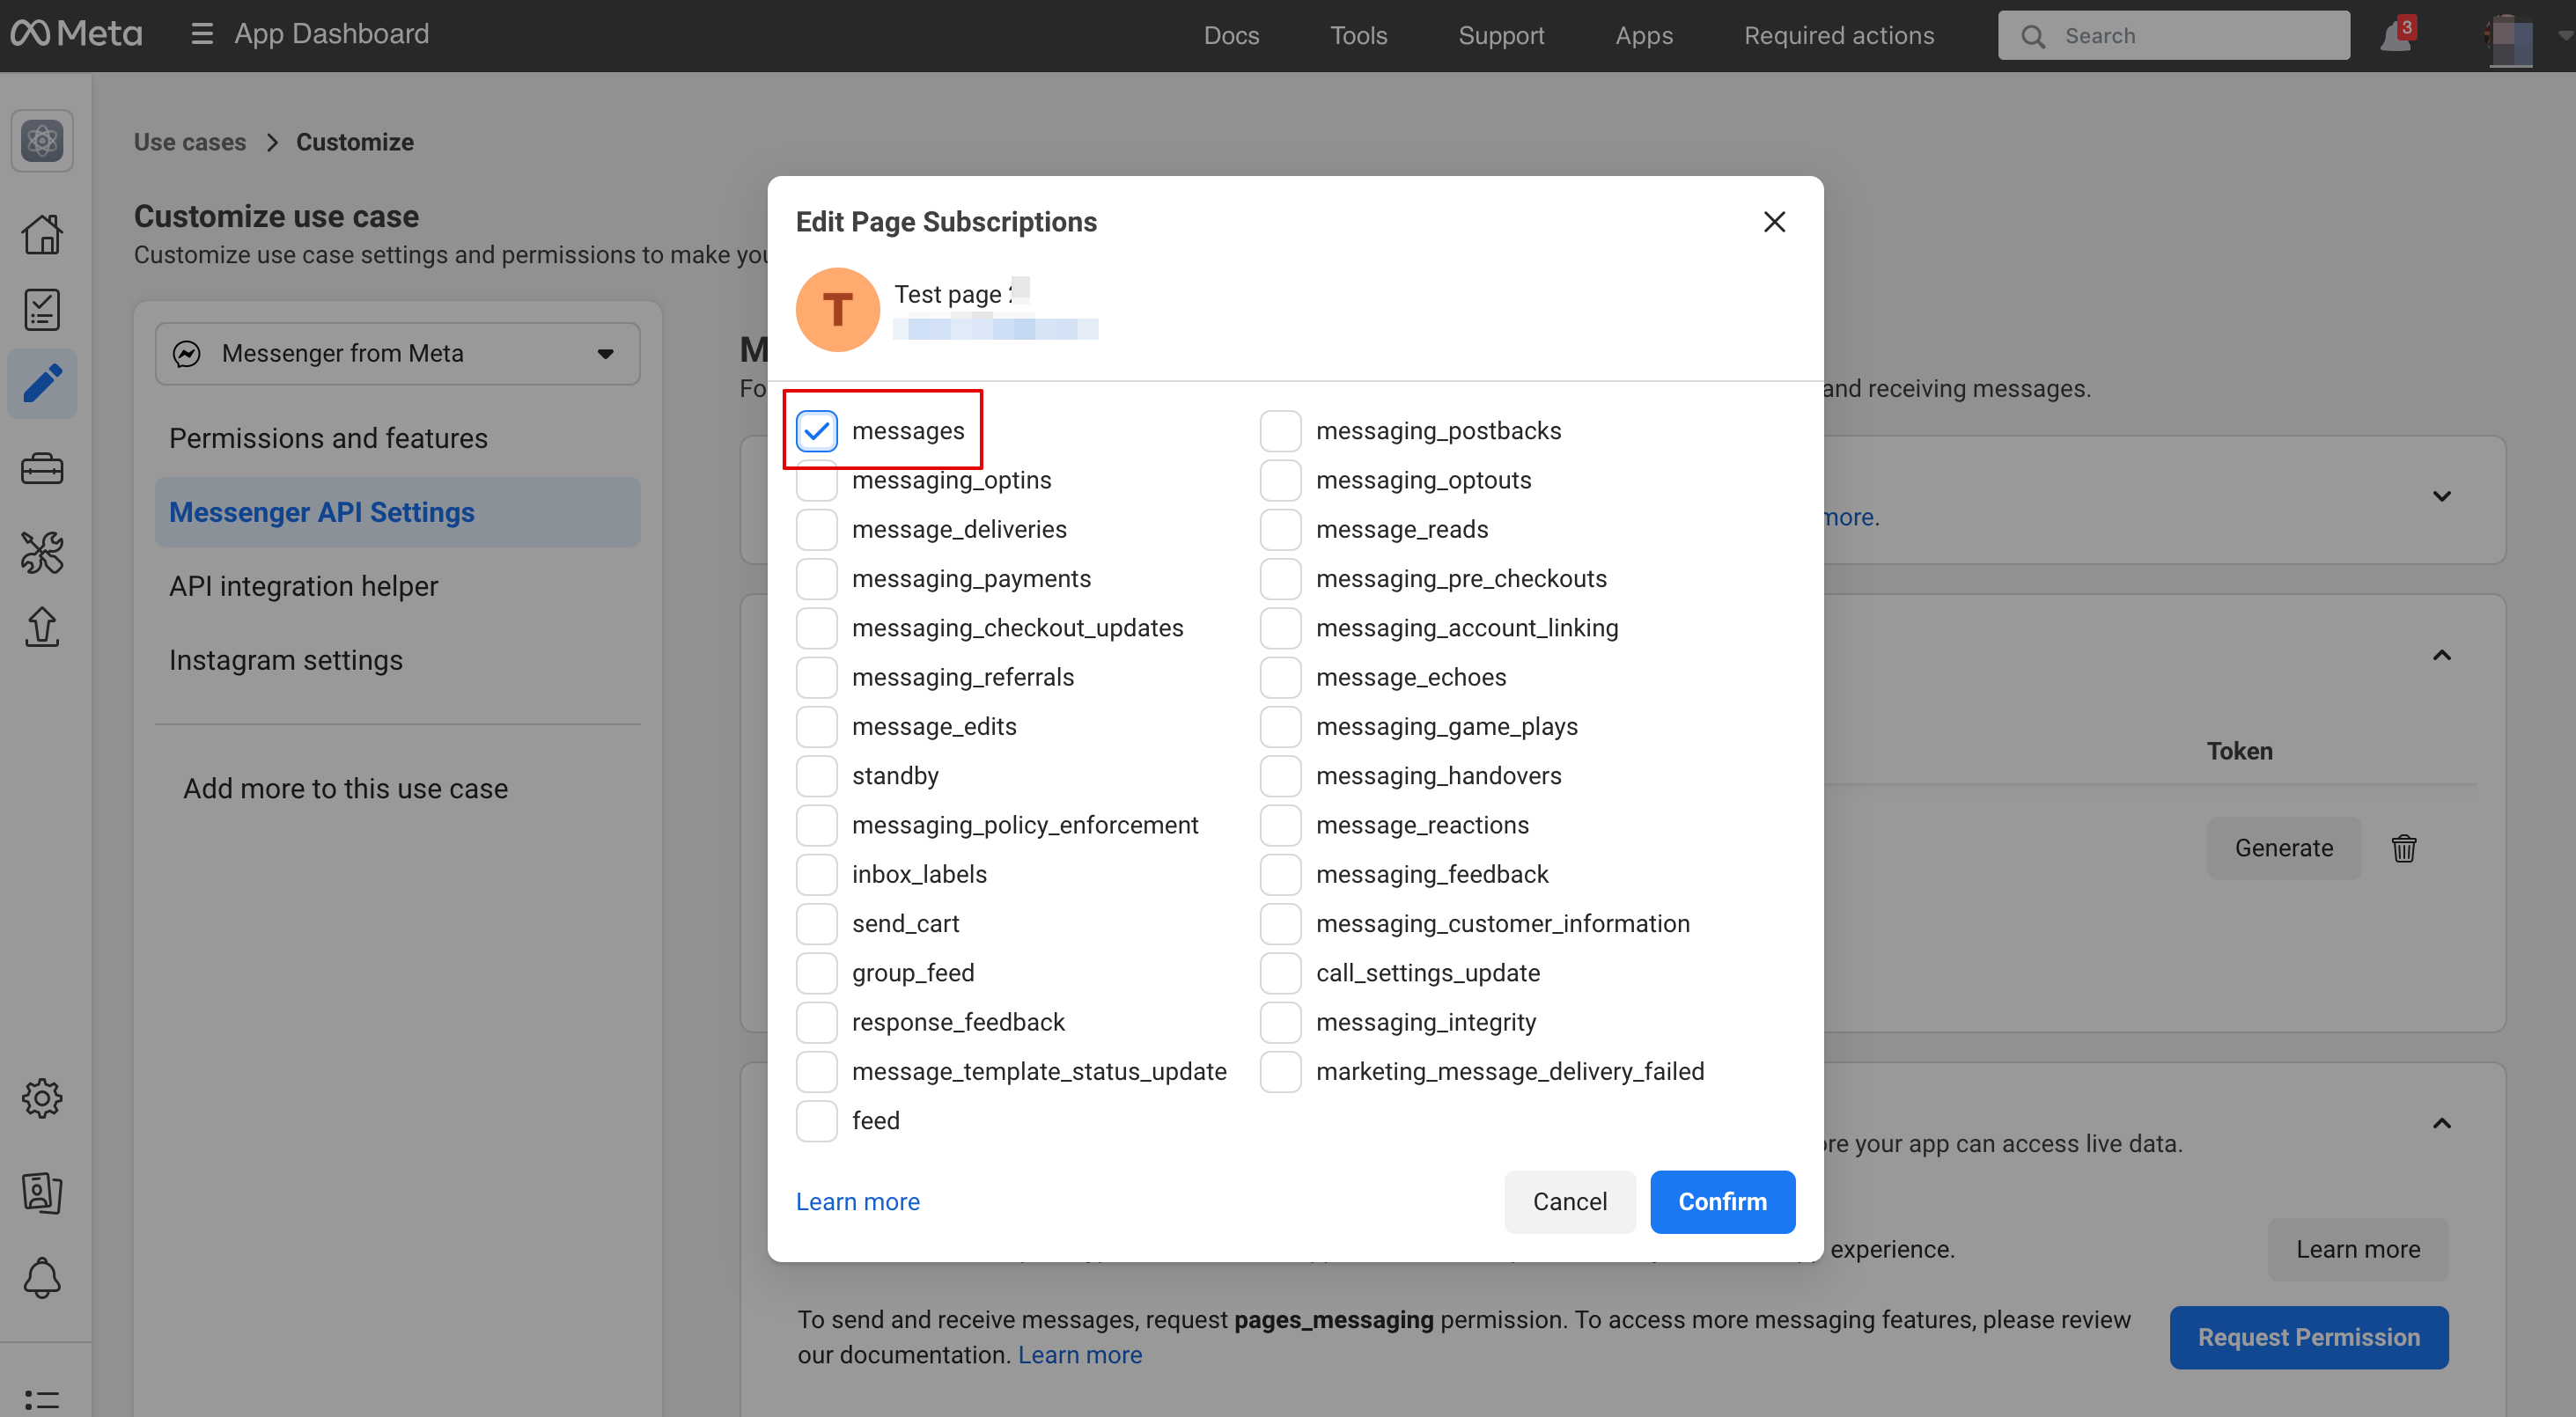
10. Vælg beskeder:
11. Klik på Generate Token, kopiér tokenet, og indsæt det i SB:
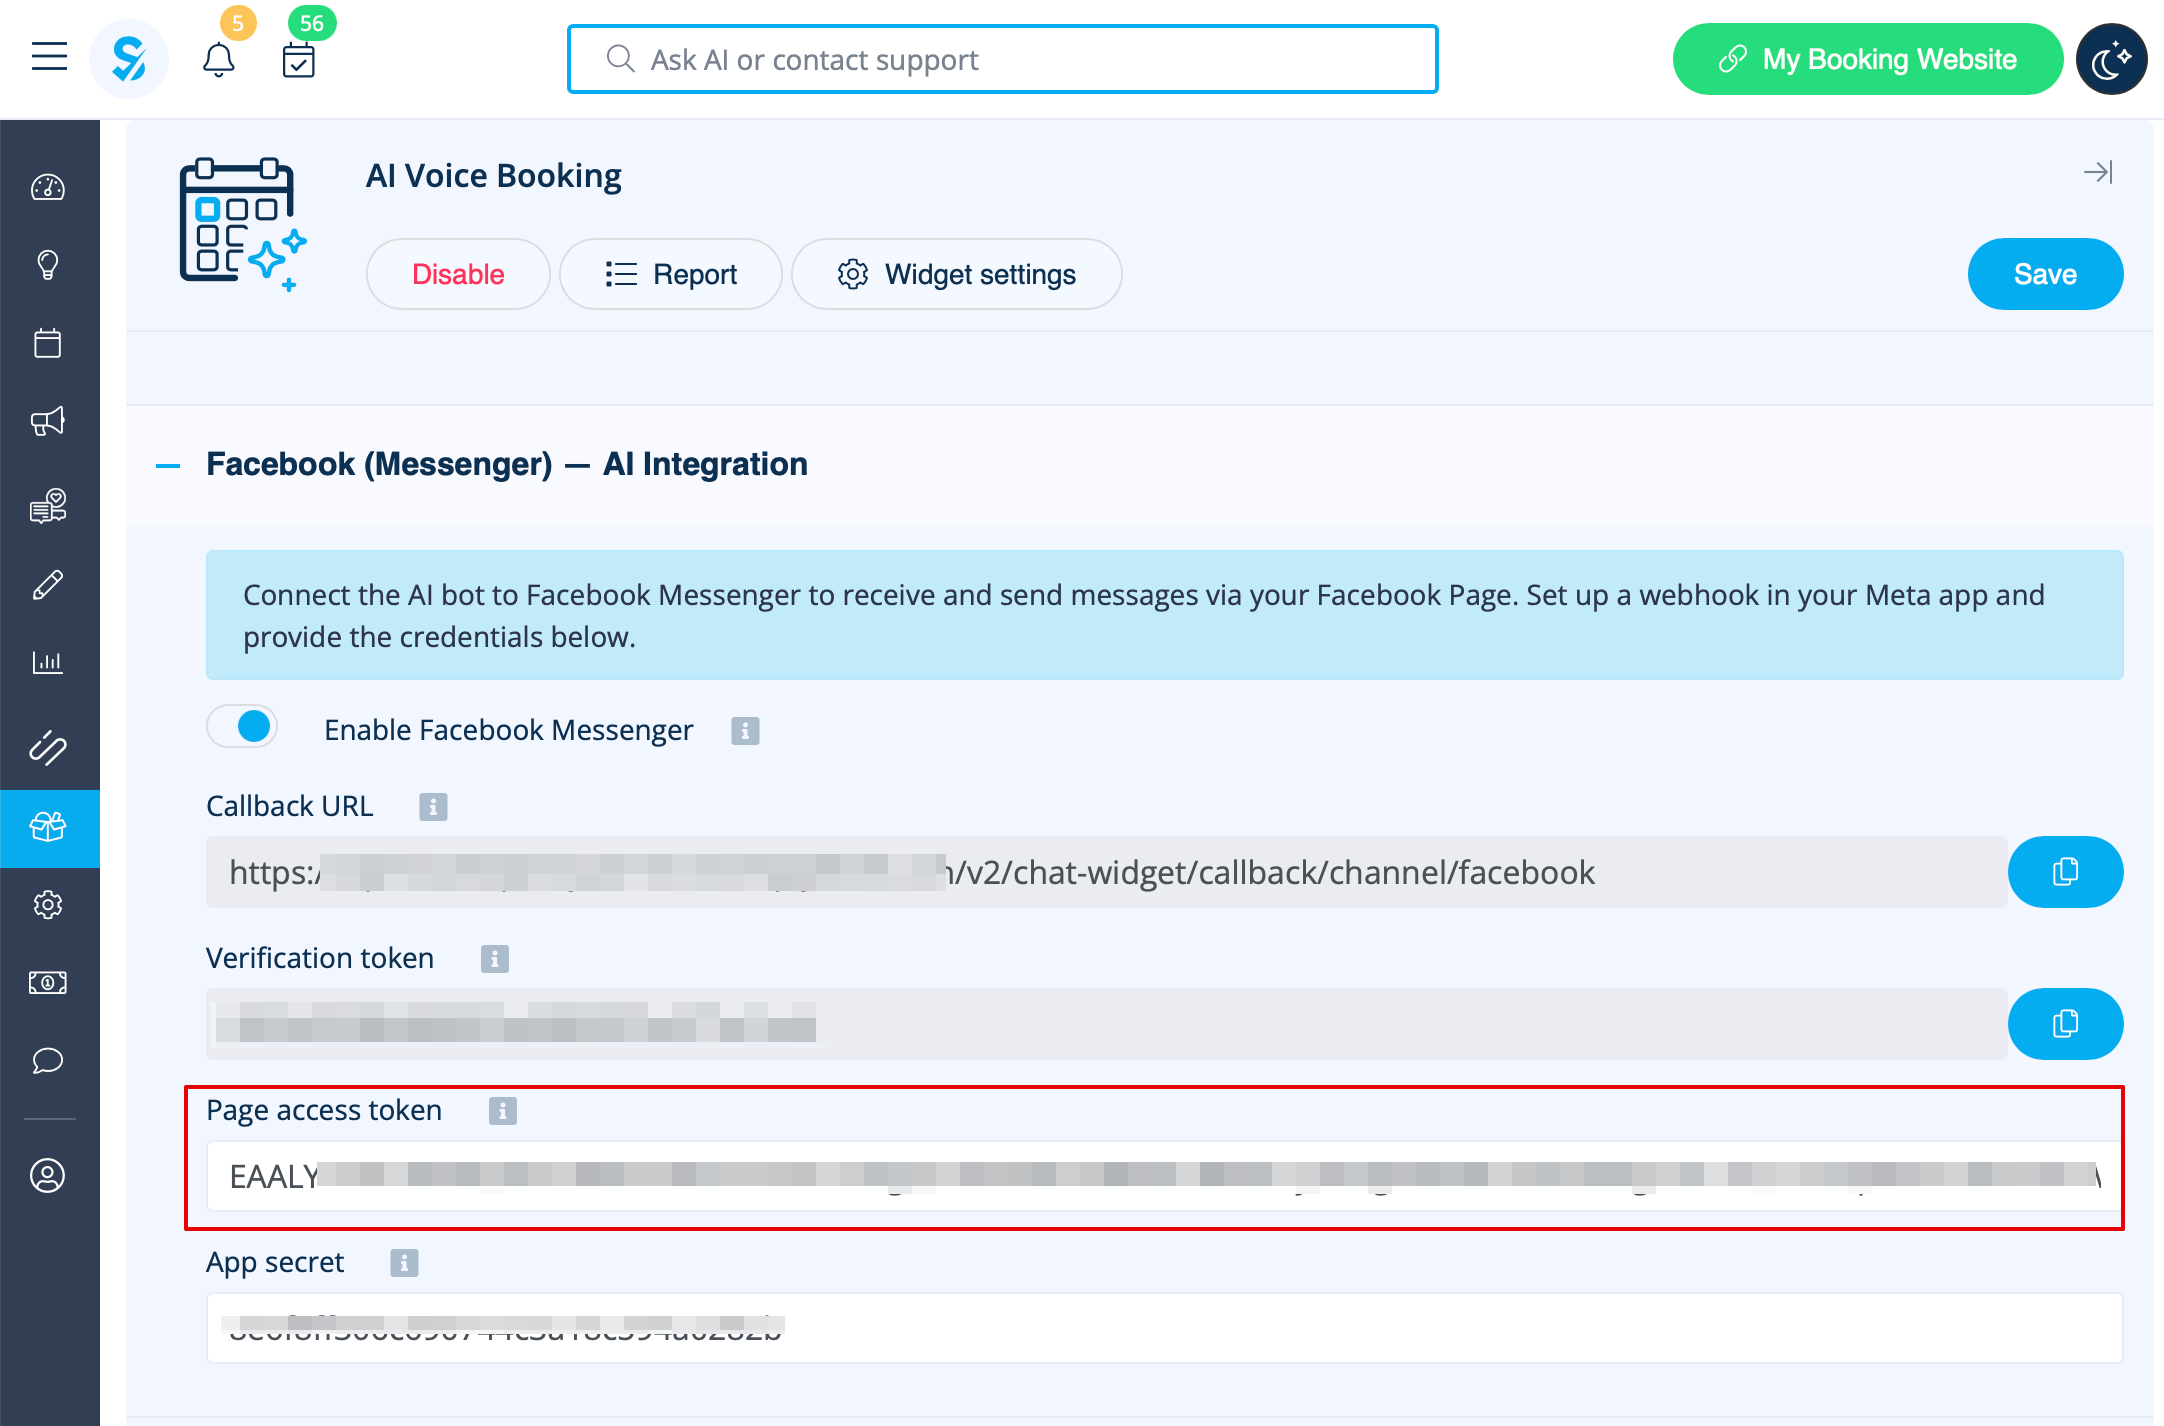
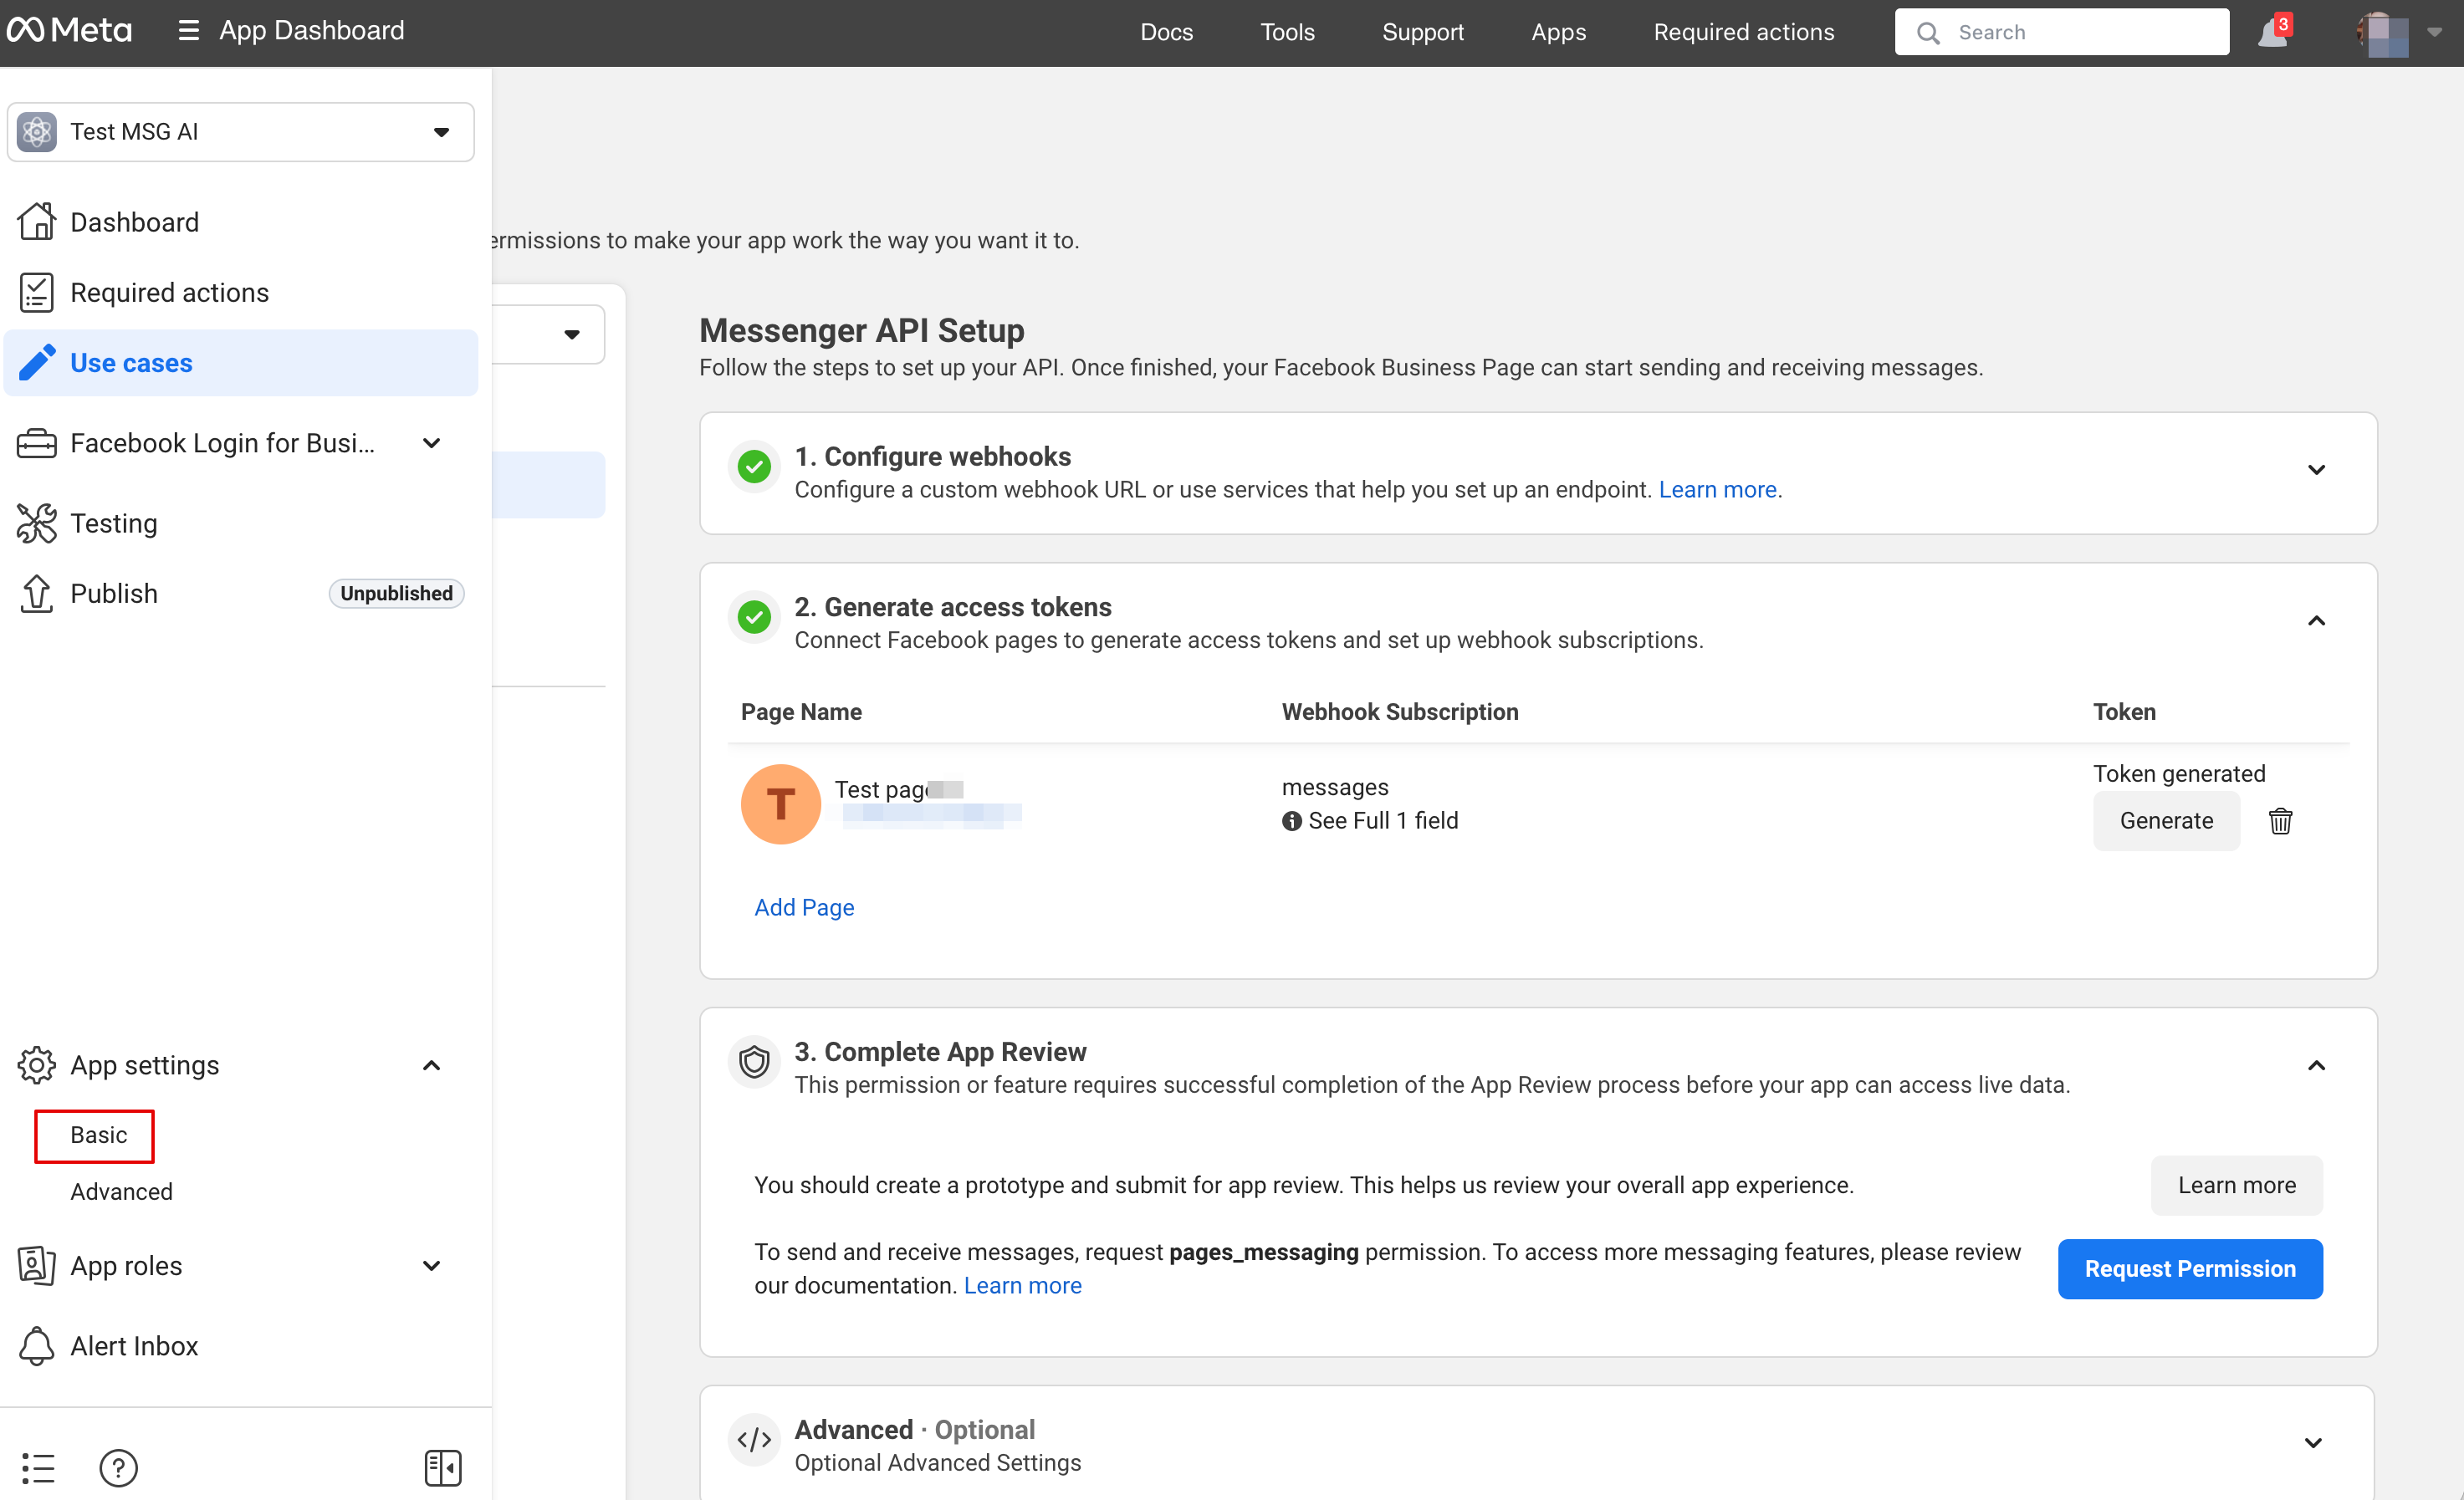
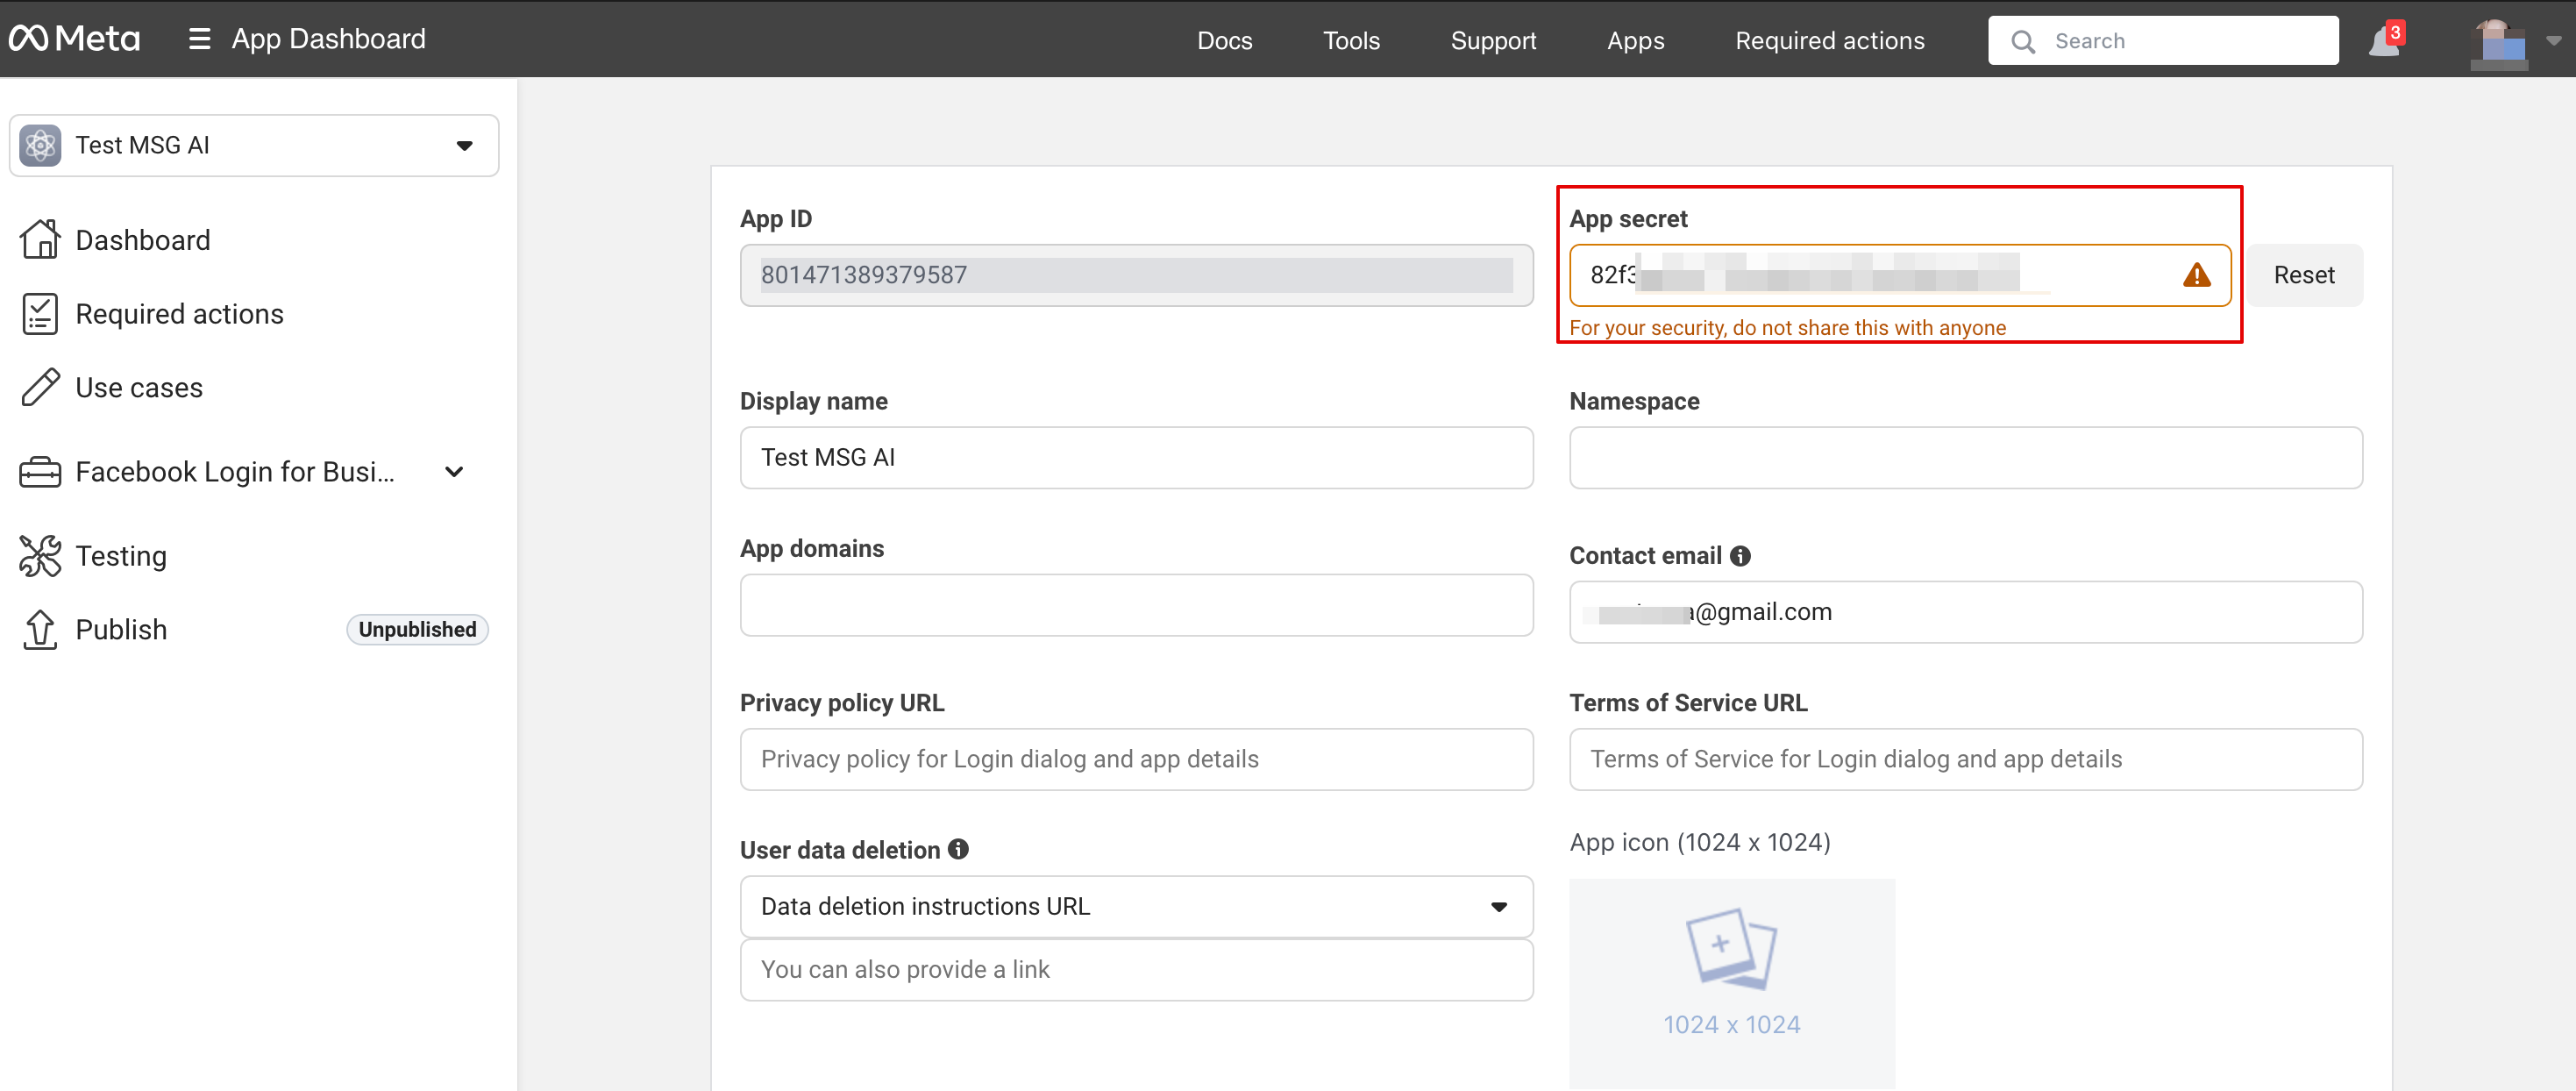
12. Kopiér App Secret i de grundlæggende appindstillinger, og indsæt den i SB:
13. Nu er du klar til at udgive applikationen, og dine besøgende kan chatte med botten på din side.
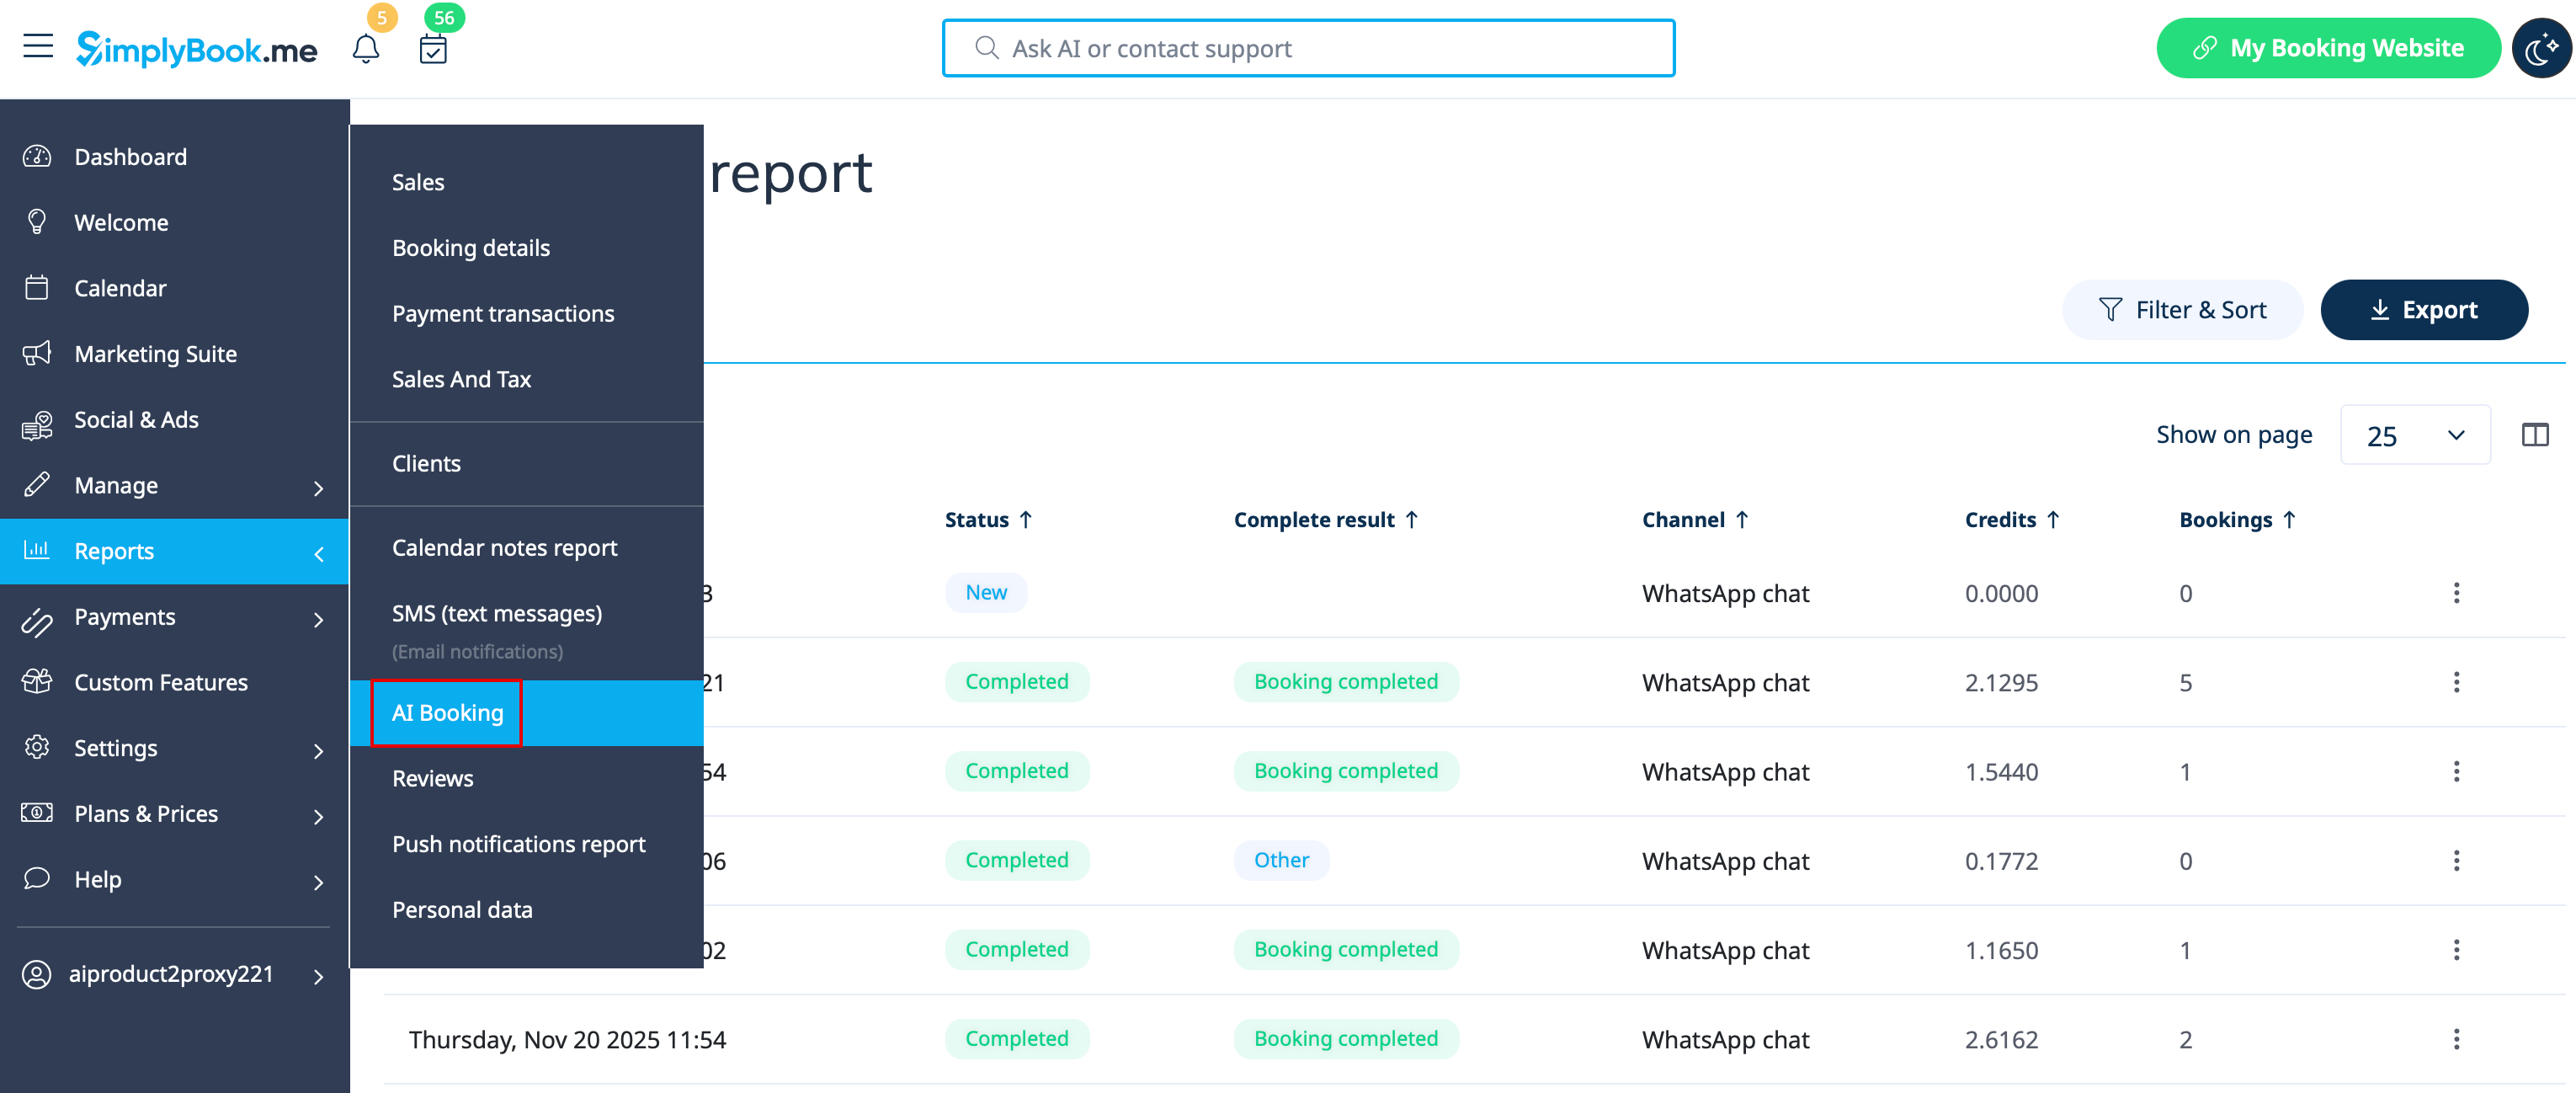
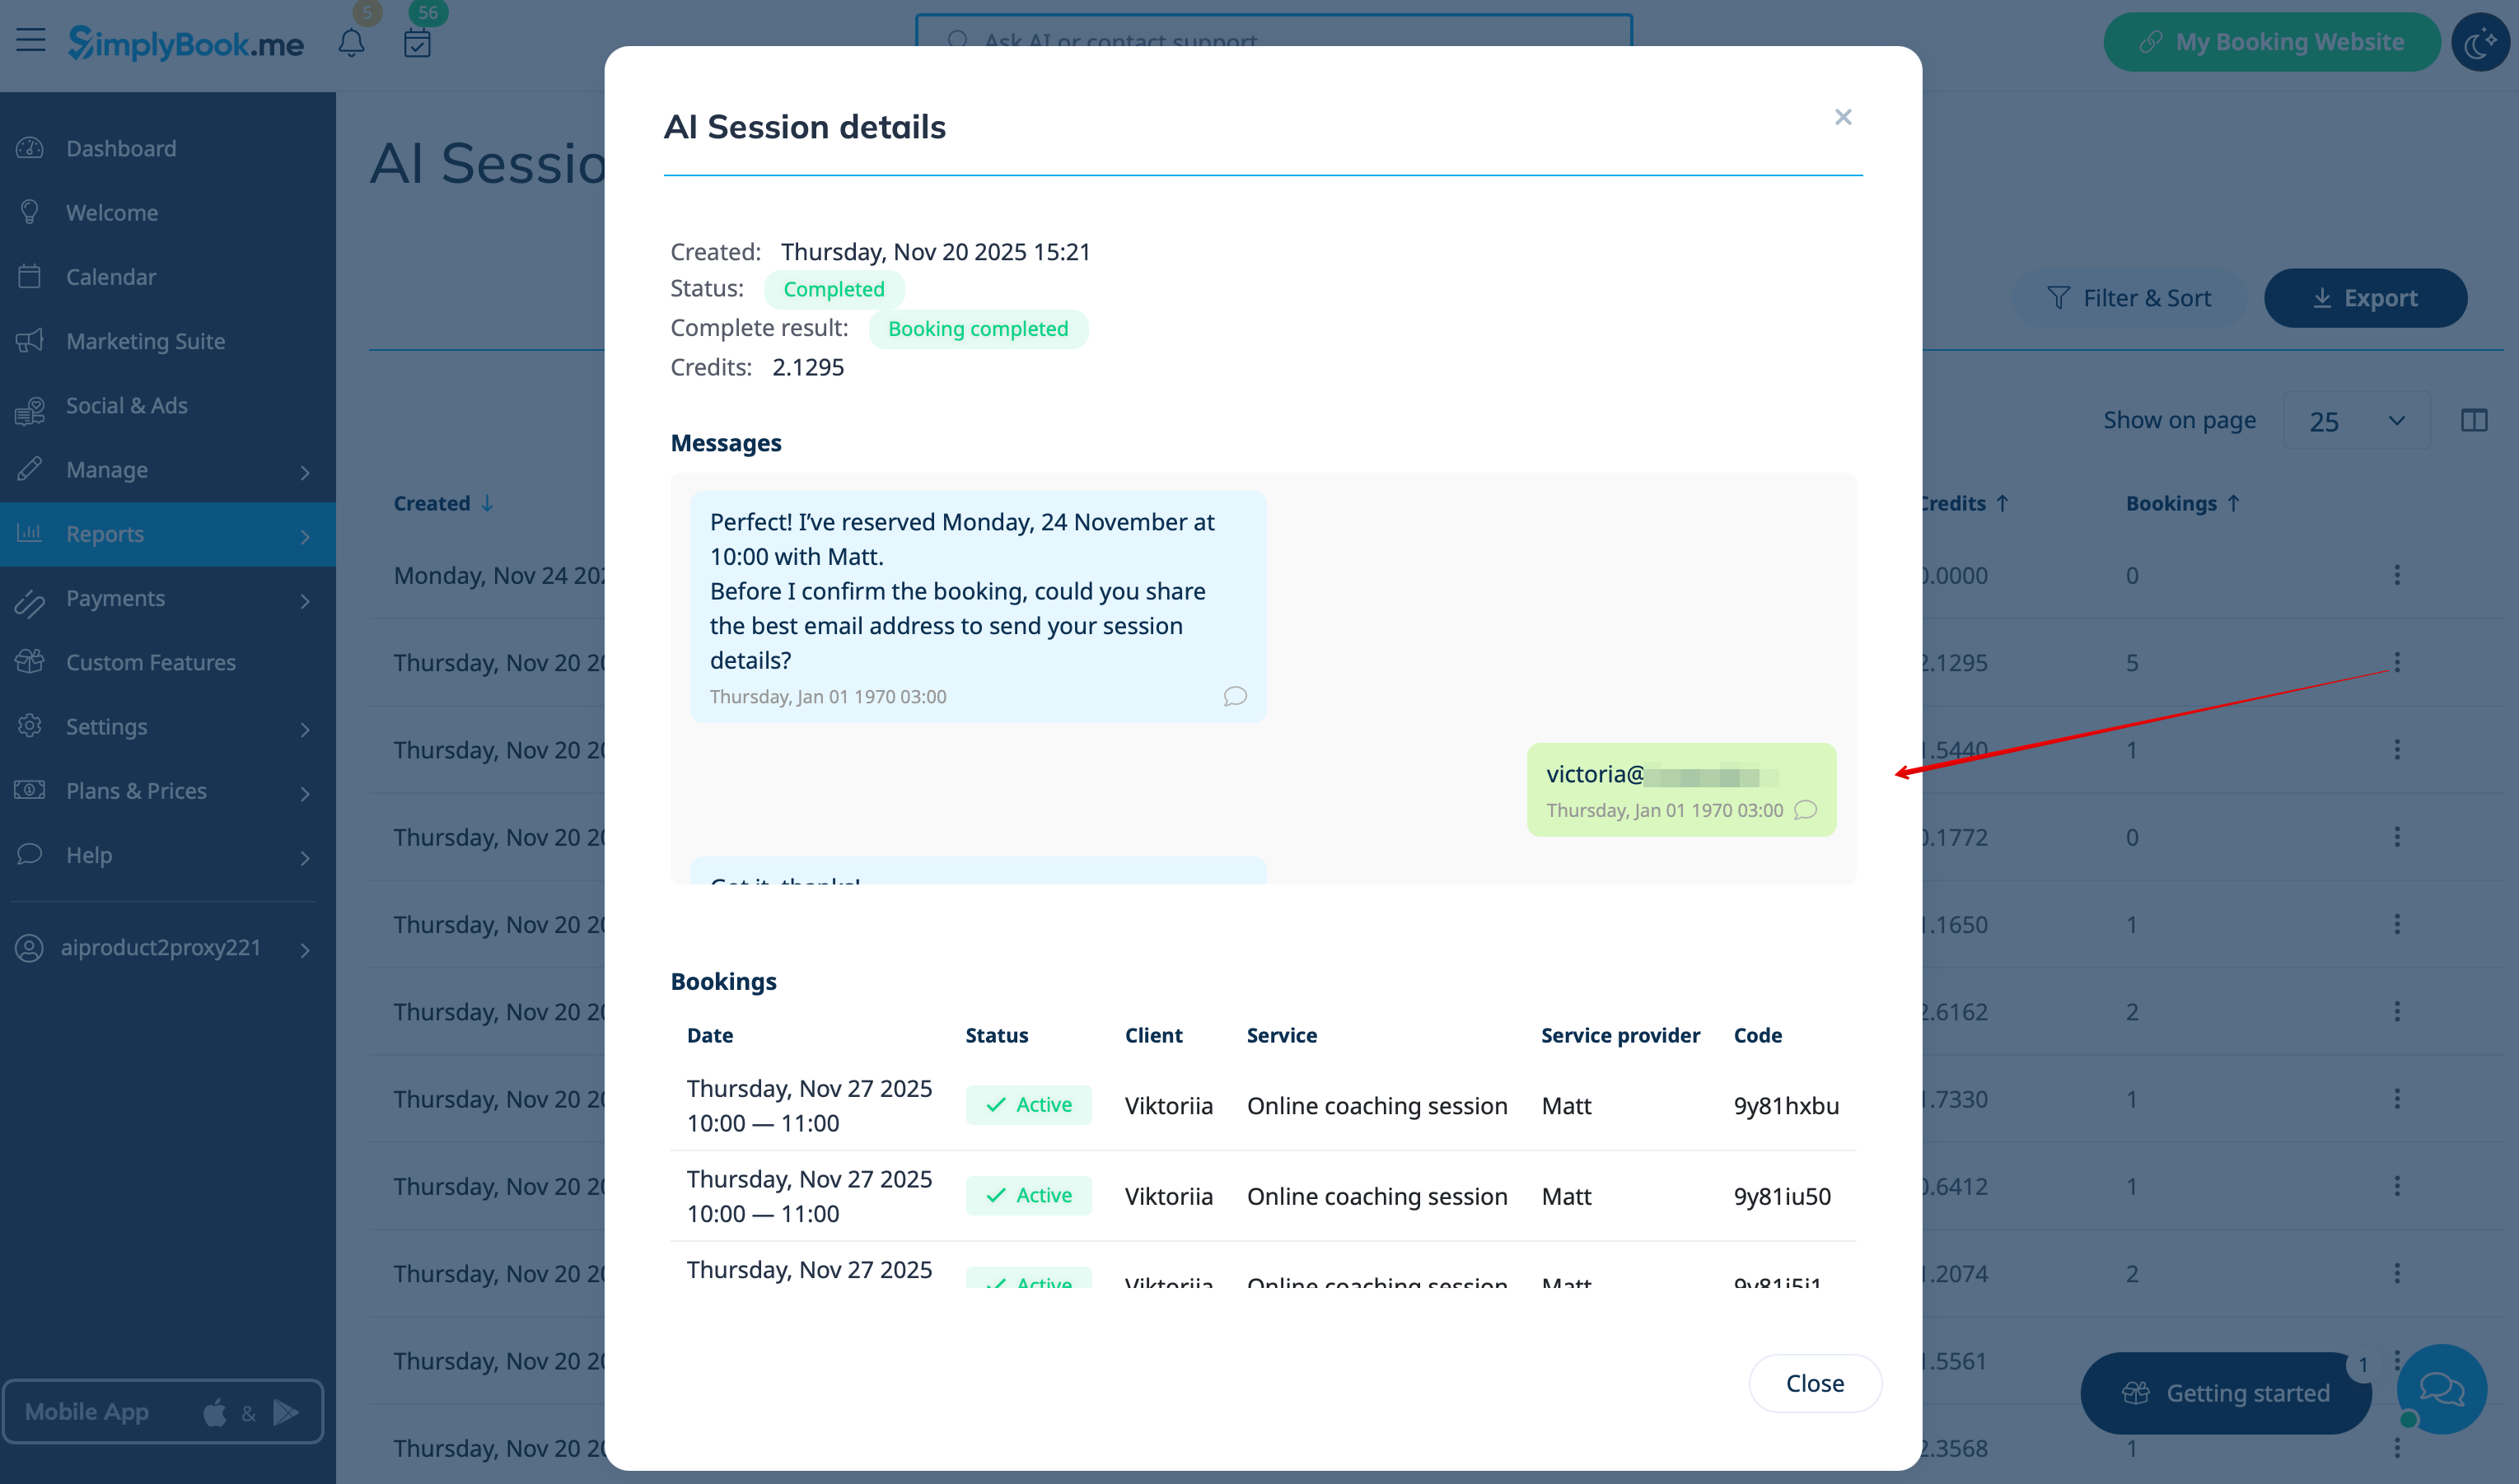
Rapport
Du kan se chattene, antallet af brugte credits samt se sessionsdetaljer med relaterede bookingoplysninger, hvis bookingprocessen blev gennemført, i Rapporter -> AI Booking