From SimplyBook.me
No edit summary |
No edit summary |
||
| Line 18: | Line 18: | ||
:2. Create an account at <span style="background-color:#cdeffc; padding:5px; border-radius:5px;">[https://zapier.com/ Zapier.com],</span> it only takes 1 minute. | :2. Create an account at <span style="background-color:#cdeffc; padding:5px; border-radius:5px;">[https://zapier.com/ Zapier.com],</span> it only takes 1 minute. | ||
<br><br> | <br><br> | ||
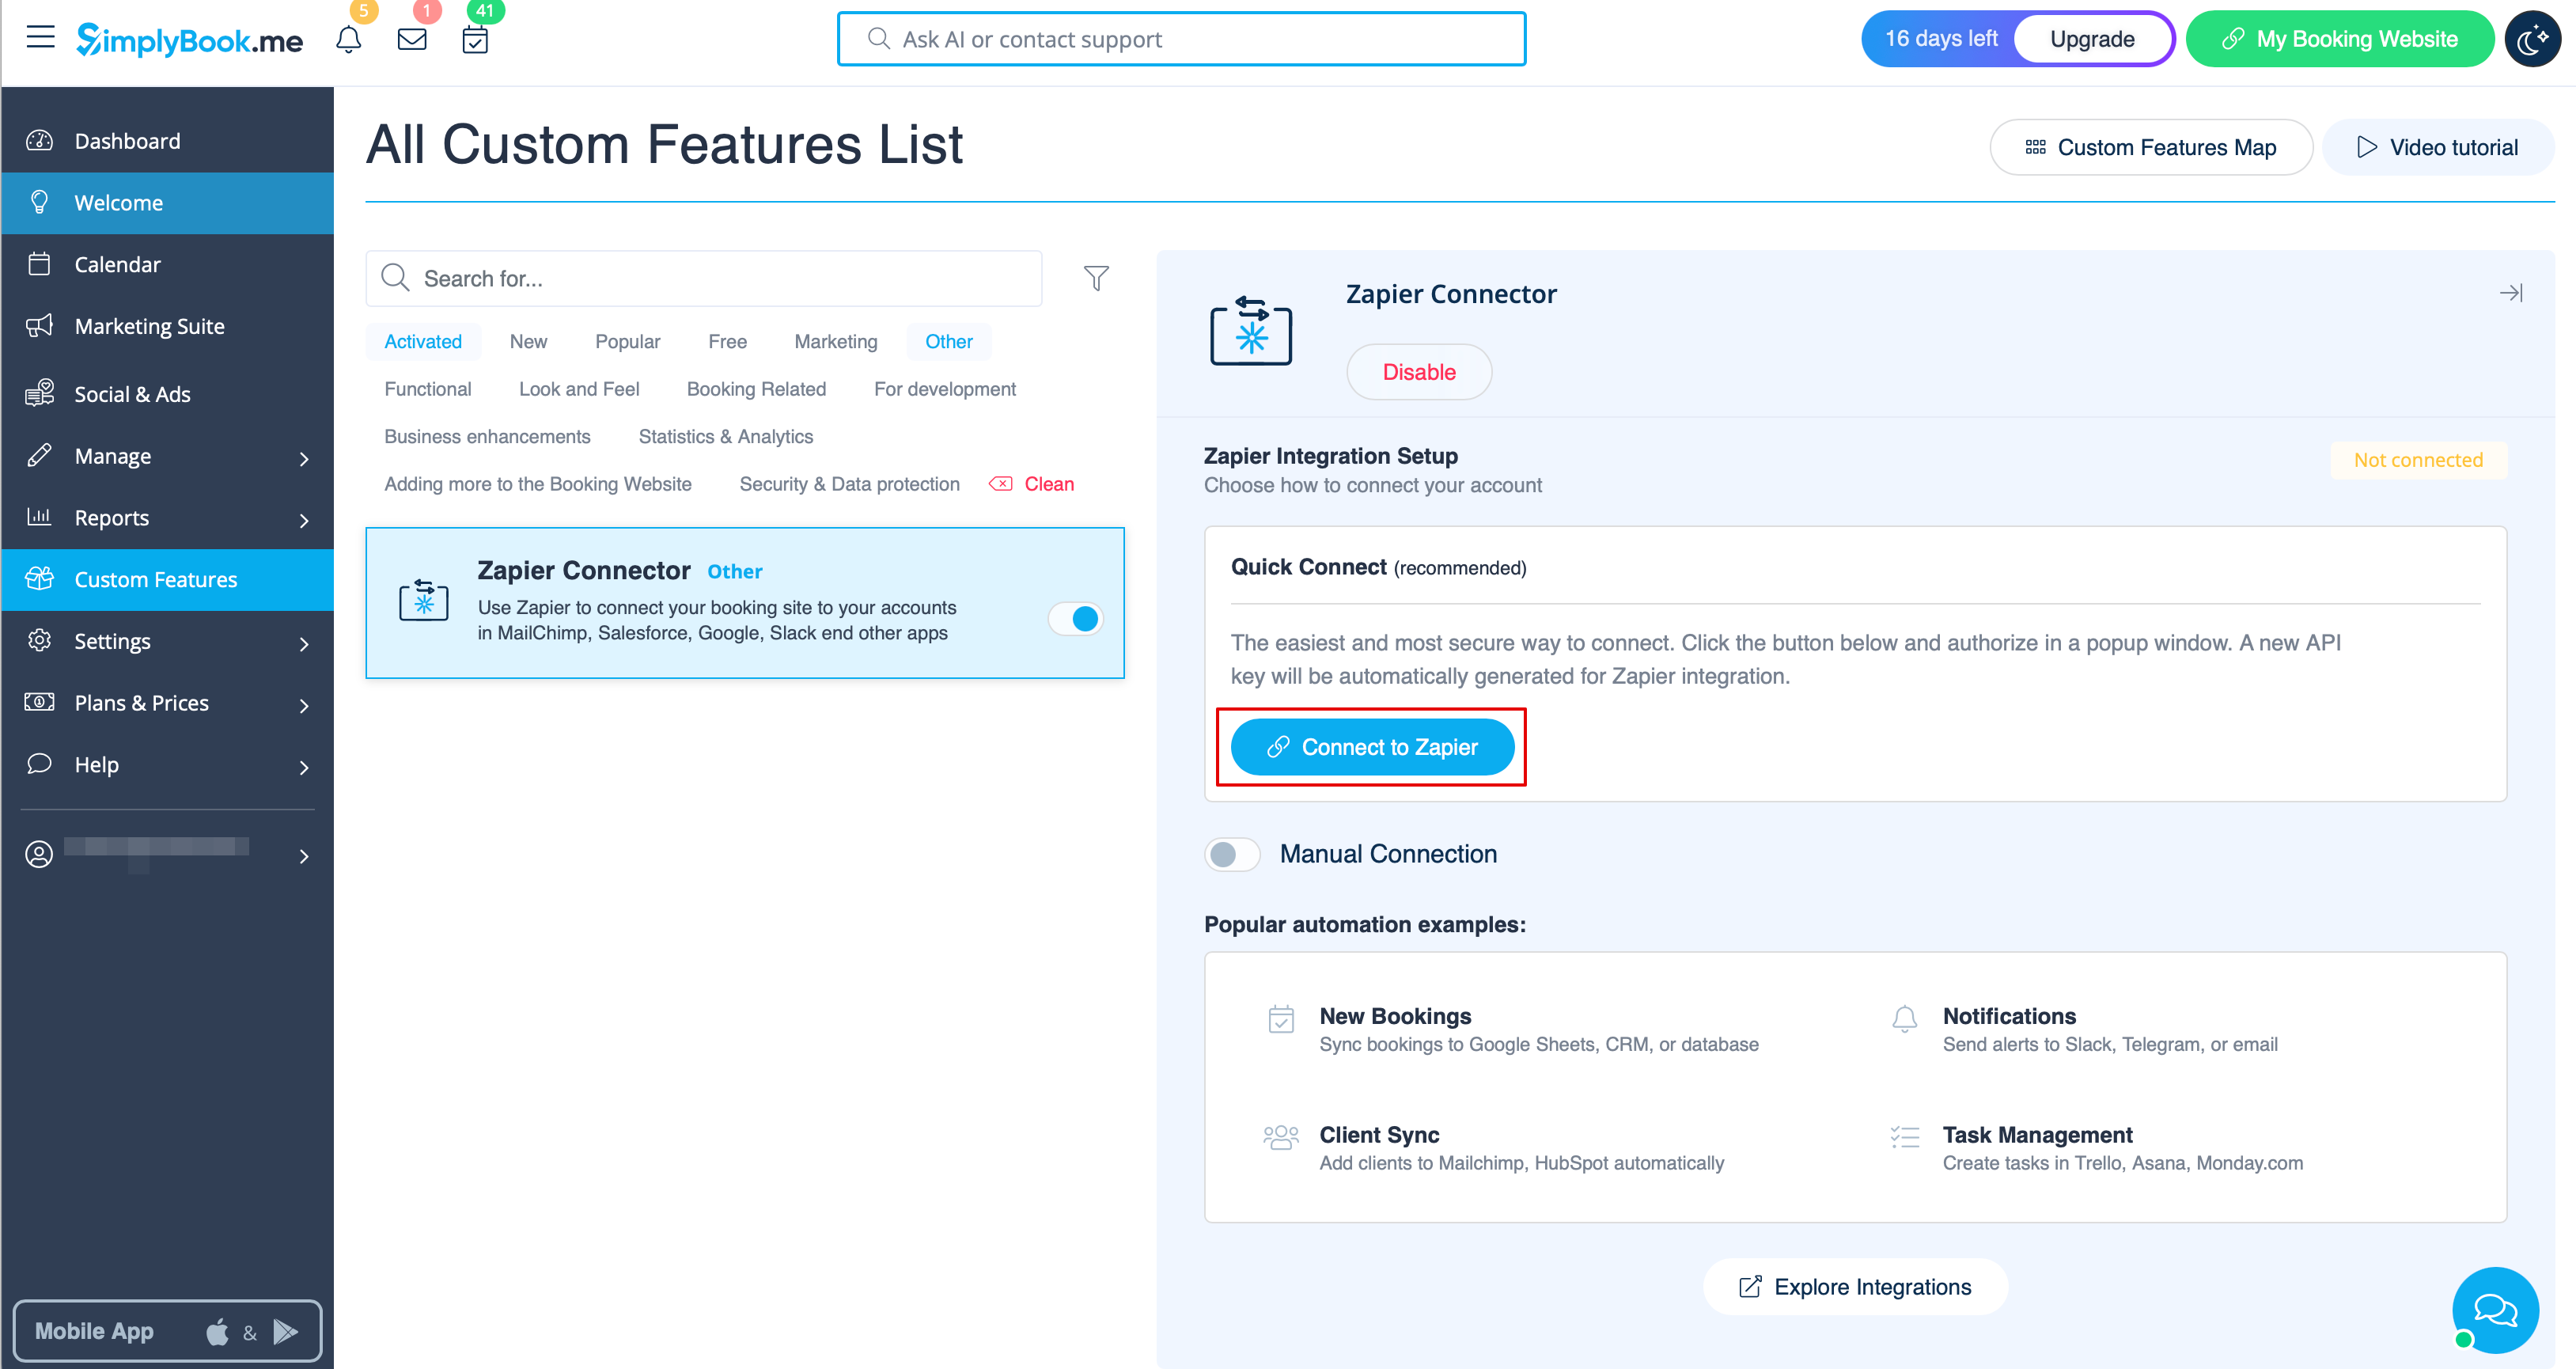
:3. | :3. Enable <span style="background-color:#d4f8e5; padding:5px; border-radius:5px;">Zapier connector</span> custom feature on your <span style="background-color:#d4f8e5; padding:5px; border-radius:5px;">Custom features</span> page on SimplyBook.me side. | ||
[[File:Zapier enable path redesigned.png|1200px|border | center|link=https://help.simplybook.me/images/b/b9/Zapier_enable_path_redesigned.png]] | |||
<br><br> | <br><br> | ||
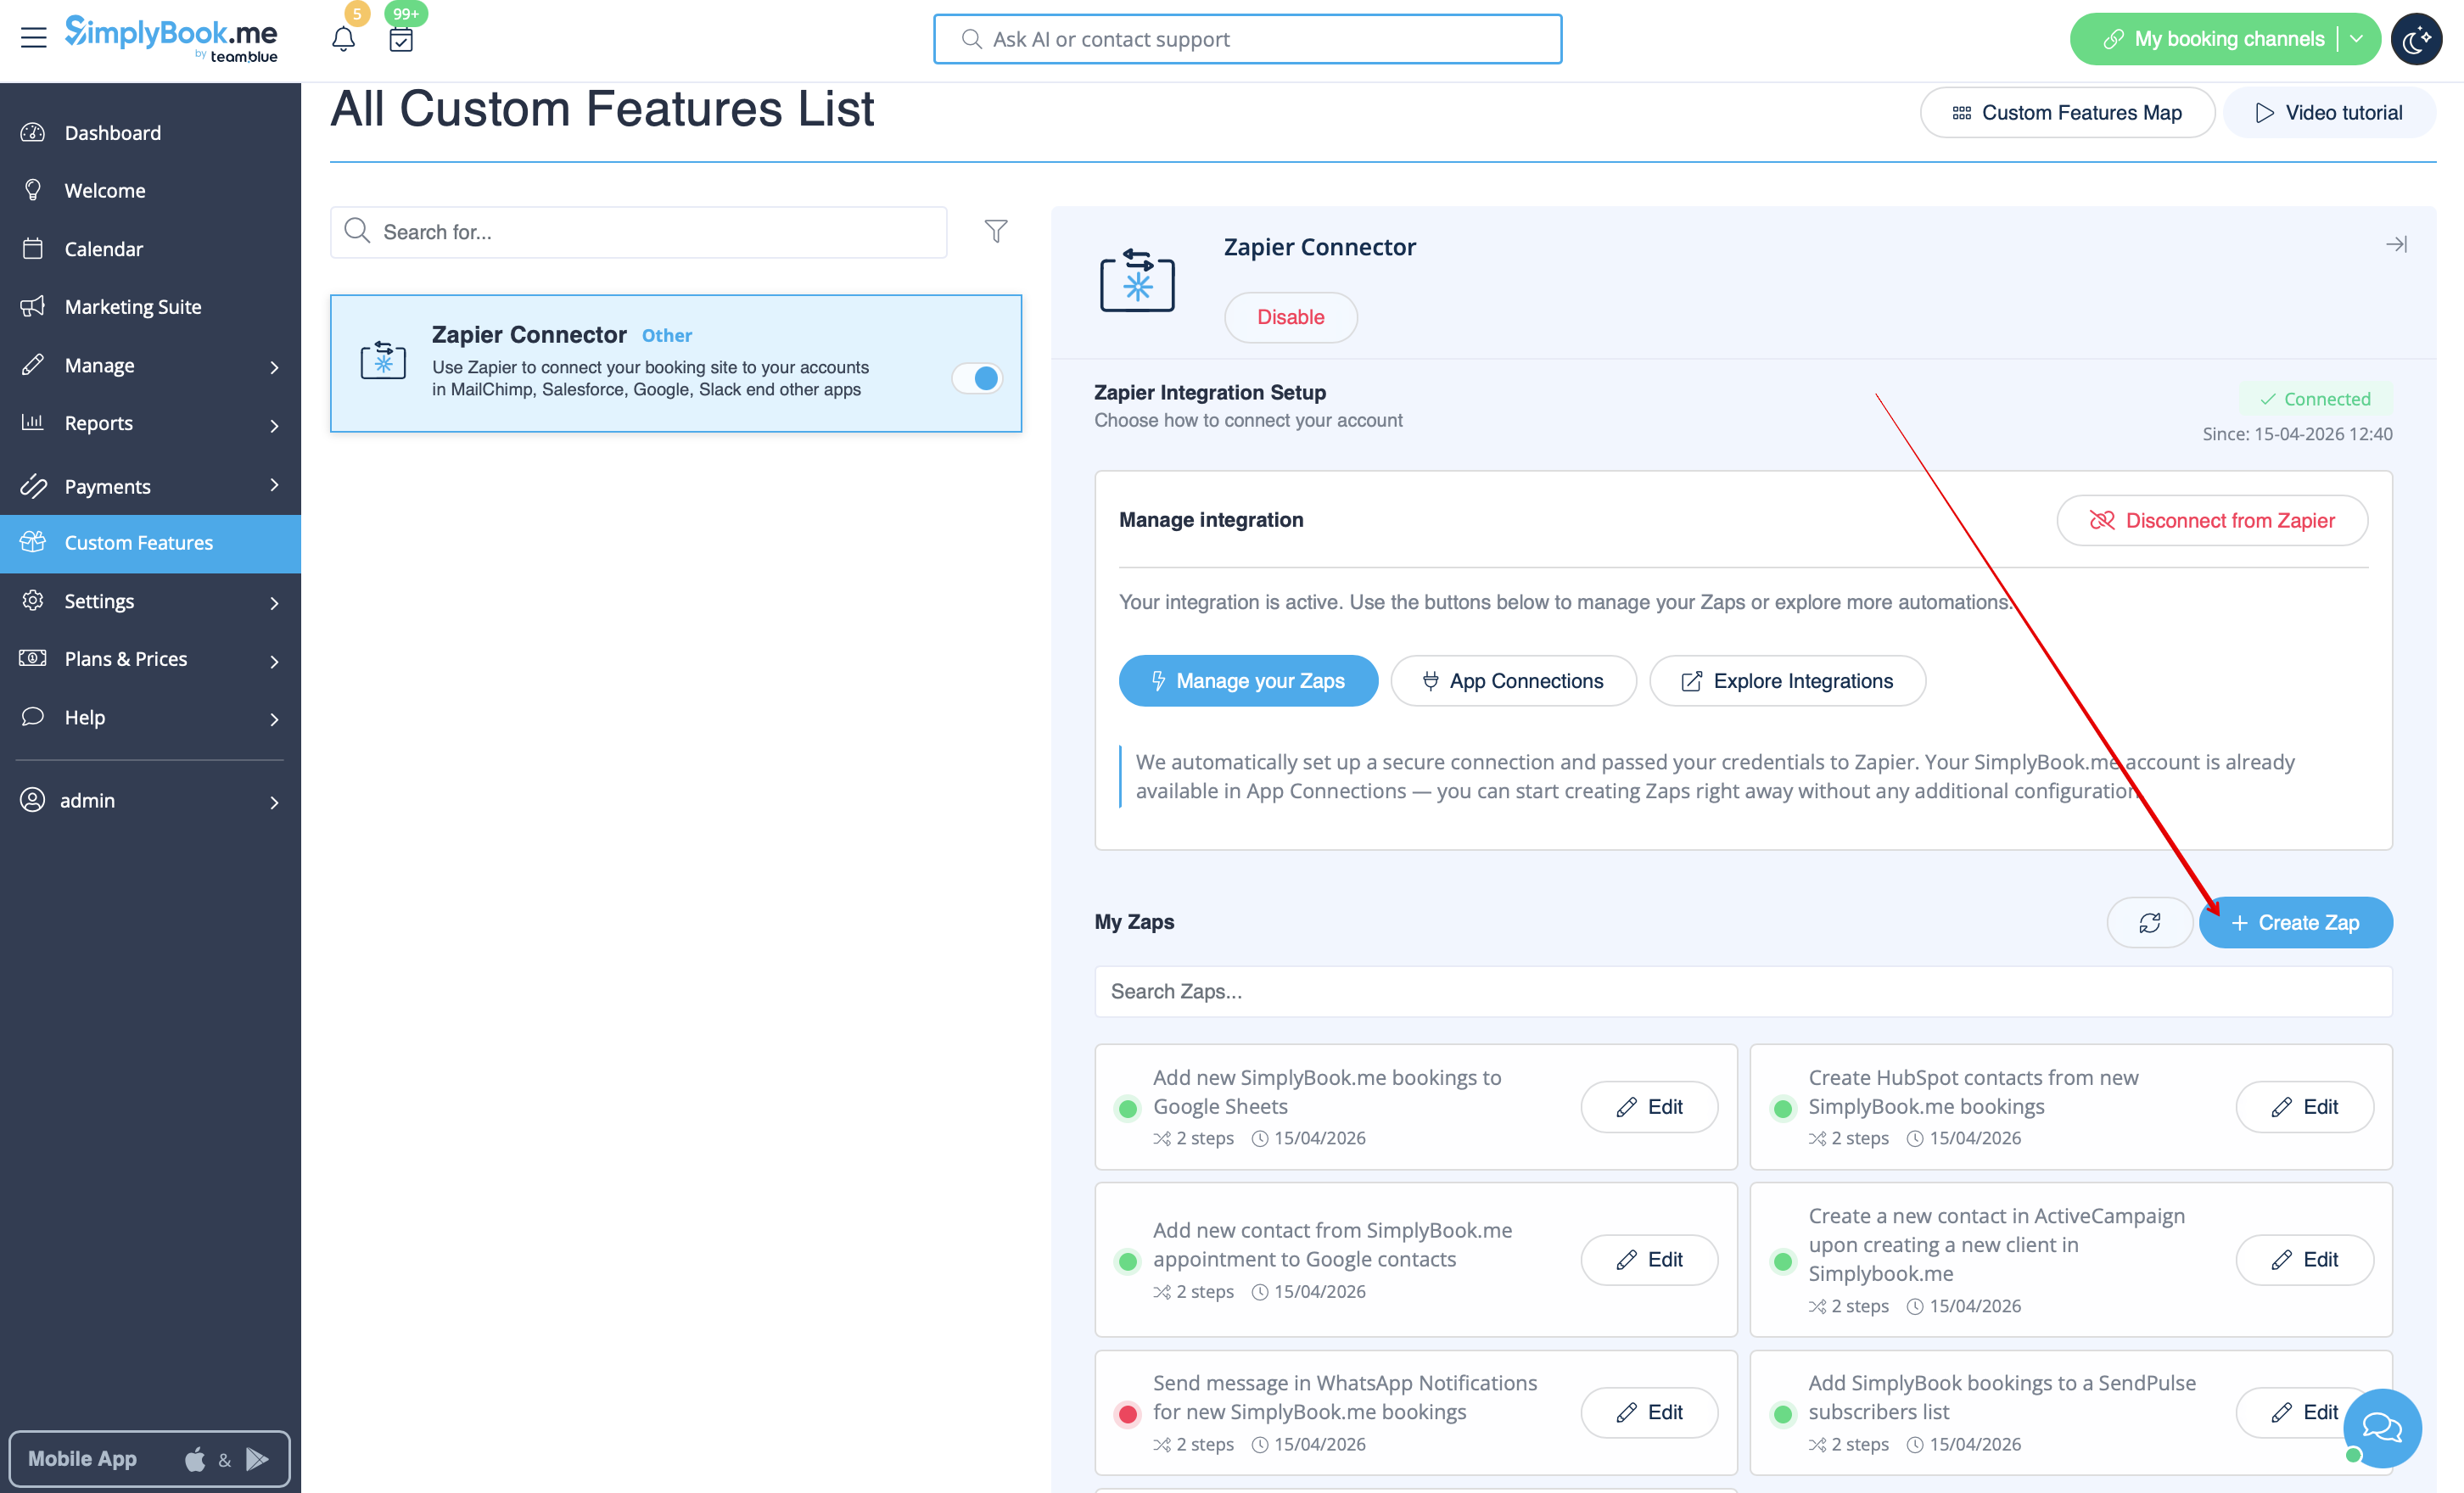
:4. | :4. Connect to your Zapier account using the ‘’’Quick connect’’’ option | ||
[[File: | [[File:Quick connect zapier.png|1200px|border | center|link=https://help.simplybook.me/images/8/84/Quick_connect_zapier.png]] | ||
<br><br></translate> | <br><br></translate> | ||
<translate> | <translate> | ||
<!--T:3--> | <!--T:3--> | ||
:5. | :5. Click on '''+ Create Zap''' button. | ||
[[File:Create zap path.png|1200px|border | center|link=https://help.simplybook.me/images/2/24/Create_zap_path.png]] | |||
[[File: | |||
<br><br> | <br><br> | ||
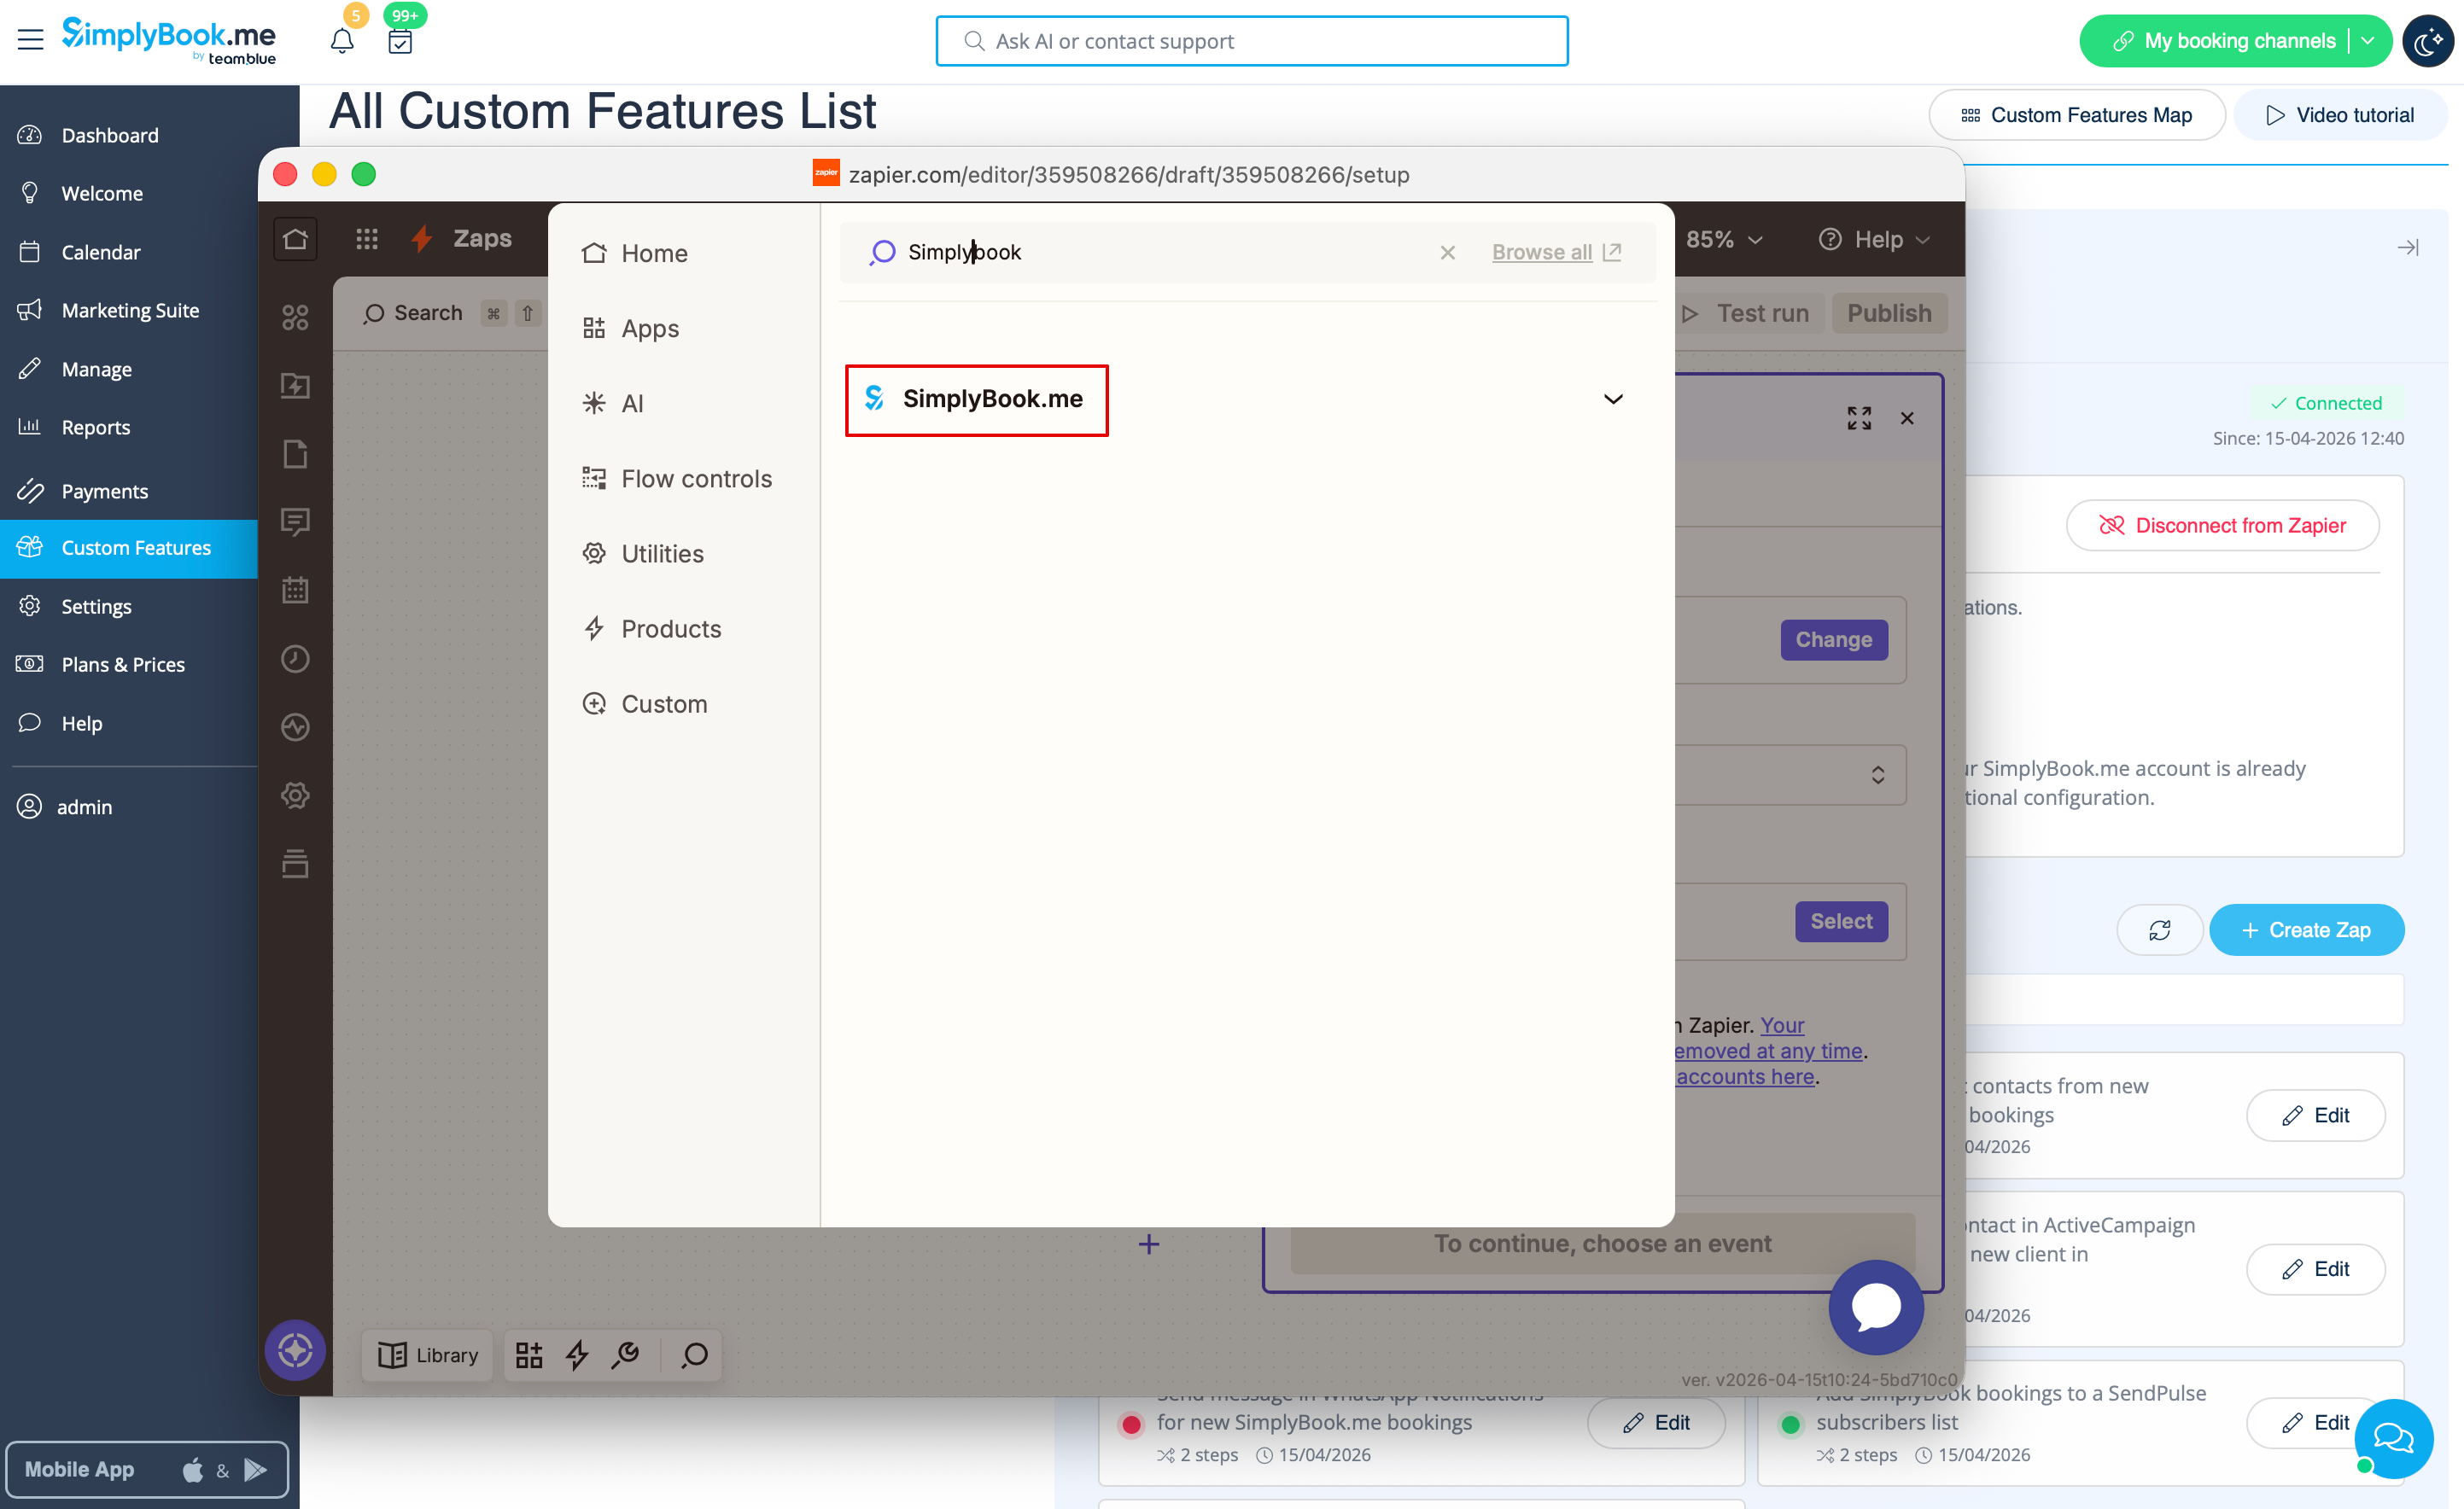
: | :6. In the popup that appears find SimplyBook.me in the list of apps to connect to. | ||
[[File:Zapier new sb as trigger.png|1200px|border | center|link=https://help.simplybook.me/images/1/13/Zapier_new_sb_as_trigger.png]] | |||
[[File: | |||
<br><br> | <br><br> | ||
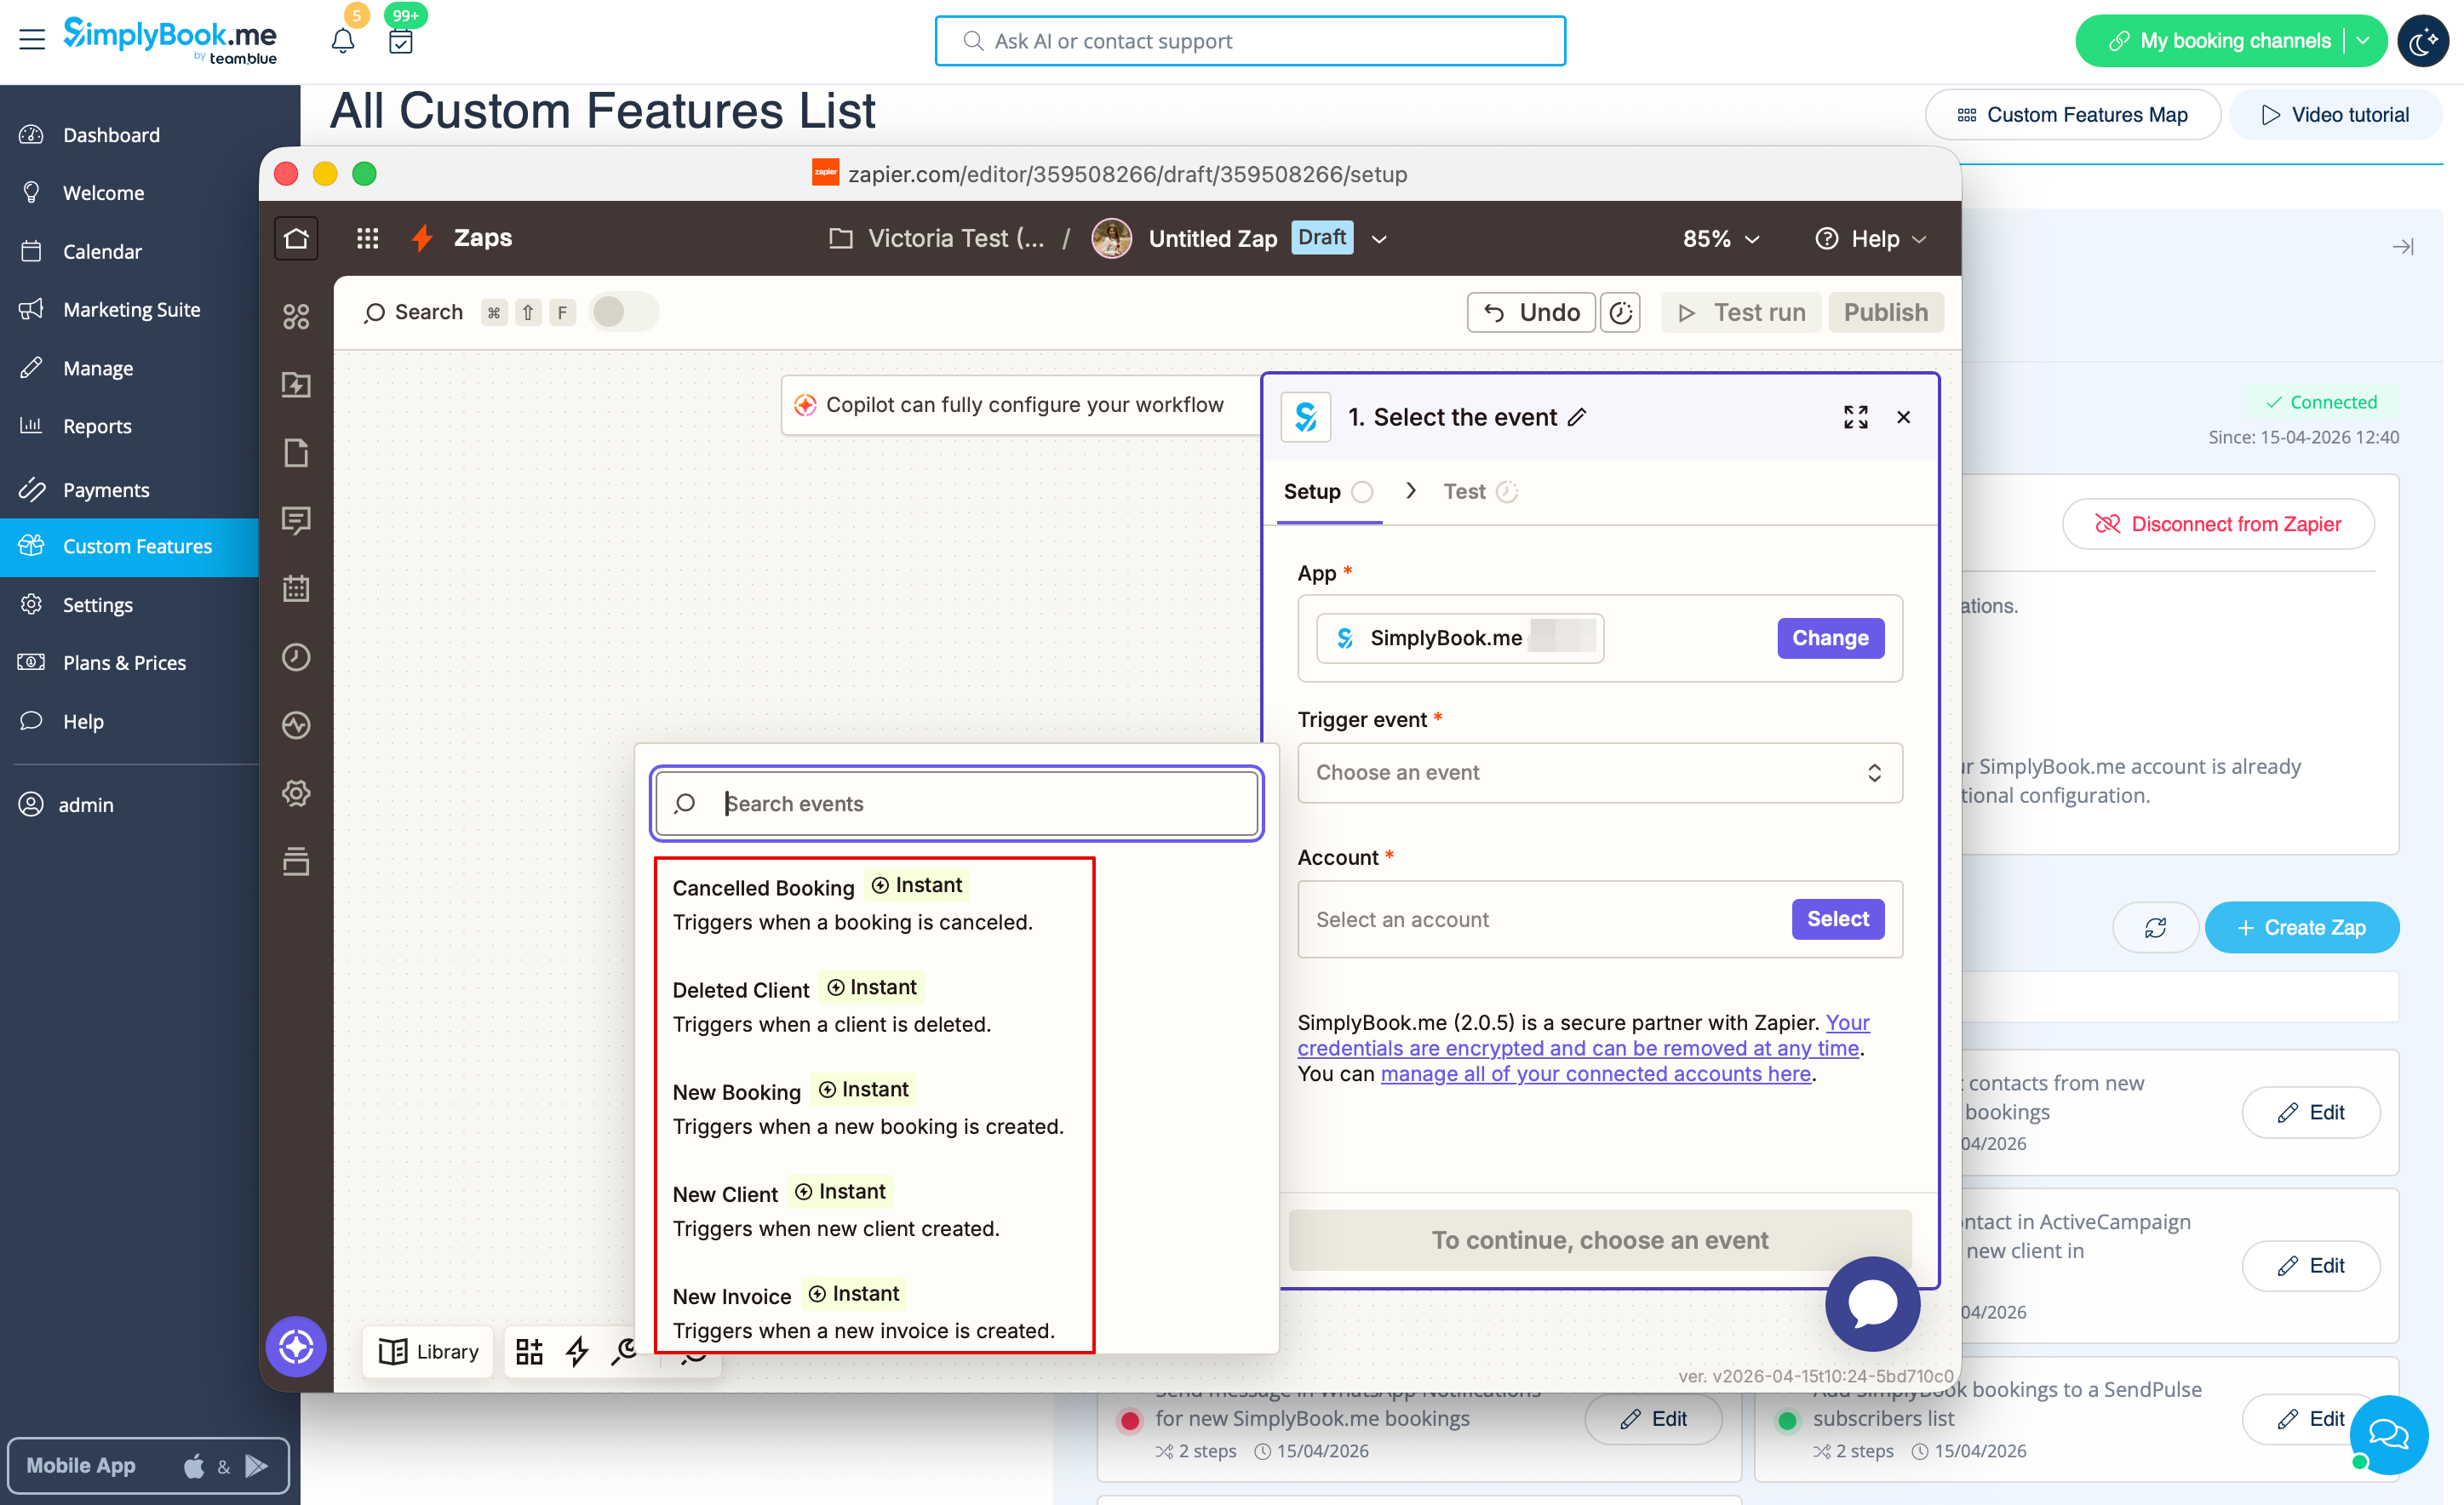
:7. Choose the desired trigger and the account that you have previously connected. Click "Continue". | |||
[[File:Zapier new choose trigger event.png|1200px|border | center|link=https://help.simplybook.me/images/4/45/Zapier_new_choose_trigger_event.png]] | |||
[[File:Zapier | |||
<br><br> | <br><br> | ||
:8. Test your trigger, select the sample record and proceed to the action step. | |||
<br><br> | <br><br> | ||
: | :9. Now <span style="background-color:#d4f8e5; padding:5px; border-radius:5px;">select MailChimp as an action app</span> and select the action that will take place when the trigger works. | ||
[[File:Select mailchimp.png|border|center]] | [[File:Select mailchimp.png|border|center]] | ||
<br><br> | <br><br> | ||
[[File:Select action on mailchimp side.png|border|center]] | [[File:Select action on mailchimp side.png|border|center]] | ||
<br><br> | <br><br> | ||
: | :10. Connect <span style="background-color:#d4f8e5; padding:5px; border-radius:5px;">your MailChimp account.</span> | ||
[[File:Log in to mailchimp.png|border|center]] | [[File:Log in to mailchimp.png|border|center]] | ||
<br><br> | <br><br> | ||
: | :11. <span style="background-color:#d4f8e5; padding:5px; border-radius:5px;">Set the required fields</span> depending on the action you have selected. | ||
[[File:Mailchimp template.png|border|center]] | [[File:Mailchimp template.png|border|center]] | ||
<br><br> | <br><br> | ||
: | :12. Confirm your choices and <span style="background-color:#d4f8e5; padding:5px; border-radius:5px;">turn the Zap on.</span> | ||
<br><br><br><br> | <br><br><br><br> | ||
</translate> | </translate> | ||
Latest revision as of 14:46, 17 April 2026
You can now add various functionality to the bookings that you receive in SimplyBook.me through the use of Zapier.com.
Here follows the detailed instruction on how to create a new zap that connects SimplyBook.me bookings to your email list at MailChimp.com.
- 1. First of all, make sure you have an account at MailChimp.com.
- 2. Create an account at Zapier.com, it only takes 1 minute.
- 3. Enable Zapier connector custom feature on your Custom features page on SimplyBook.me side.

- 4. Connect to your Zapier account using the ‘’’Quick connect’’’ option
- 5. Click on + Create Zap button.
- 6. In the popup that appears find SimplyBook.me in the list of apps to connect to.
- 7. Choose the desired trigger and the account that you have previously connected. Click "Continue".
- 8. Test your trigger, select the sample record and proceed to the action step.
- 9. Now select MailChimp as an action app and select the action that will take place when the trigger works.


- 10. Connect your MailChimp account.

- 11. Set the required fields depending on the action you have selected.

- 12. Confirm your choices and turn the Zap on.