From SimplyBook.me
No edit summary |
No edit summary |
||
| (7 intermediate revisions by the same user not shown) | |||
| Line 1: | Line 1: | ||
<languages/> | |||
<translate> | |||
<!--T:1--> | |||
{{#seo: | {{#seo: | ||
|title=API Custom Feature - SimplyBook.me | |title=API Custom Feature - SimplyBook.me | ||
|description=Enable API access for custom integrations. Build your own booking interface, connect external systems. JSON-RPC 2.0 protocol for developers to create custom ... | |||
|titlemode=append | |titlemode=append | ||
|keywords=faq, frequently asked questions, booking software, appointment system questions, appointments online, calendar software, booking system, booking calendar, scheduling software, online appointment scheduling, online scheduling, setup, setup help, support, help content, API, for developers, | |keywords=faq, frequently asked questions, booking software, appointment system questions, appointments online, calendar software, booking system, booking calendar, scheduling software, online appointment scheduling, online scheduling, setup, setup help, support, help content, API, for developers, | ||
}} | }}</translate> | ||
<translate> | |||
<!--T:2--> | |||
<br> | <br> | ||
[[File:Api new icon.png |left]] | [[File:Api new icon.png |left]] | ||
With the help of this custom feature you can design your own solutions varying from simple widgets to multi-functional applications. <br> | With the help of this custom feature you can design your own solutions varying from simple widgets to multi-functional applications. <br> | ||
Use it to authorize in [https://simplybook.me/ Simplybook] API with API key. | Use it to authorize in [https://simplybook.me/ Simplybook] API with API key. | ||
<br> | <br></translate> | ||
<translate> | |||
<!--T:3--> | |||
*[[API| API documentation]] | *[[API| API documentation]] | ||
<!--T:4--> | |||
*[https://simplybook.me/api/explorer API explorer] | *[https://simplybook.me/api/explorer API explorer] | ||
<br><br> | <br><br> | ||
| Line 25: | Line 32: | ||
:1. Navigate to <span style="background-color:#d4f8e5; padding:5px; border-radius:5px;">Custom features</span> section using the left-side menu of your admin interface,<br> | :1. Navigate to <span style="background-color:#d4f8e5; padding:5px; border-radius:5px;">Custom features</span> section using the left-side menu of your admin interface,<br> | ||
:find the corresponding feature and enable it. | :find the corresponding feature and enable it. | ||
[[File:Api enable path redesigned.png|1200px | center|link=https://help.simplybook.me/images/c/ce/Api_enable_path_redesigned.png]] | |||
<br><br> | <br><br> | ||
: | :2. Go to <span style="background-color:#d4f8e5; padding:5px; border-radius:5px;">Settings</span> on the right to access the <span style="background-color:#d4f8e5; padding:5px; border-radius:5px;">API keys.</span> | ||
< | [[File:Api settings path redesigned.png|1200px | center|link=https://help.simplybook.me/images/d/d6/Api_settings_path_redesigned.png]] | ||
<br><br> | <br><br> | ||
:3. (optional) Use <span style="background-color:#d4f8e5; padding:5px; border-radius:5px;">Callback URL</span> and other available options for your own development. | |||
<br><br></translate> | |||
Latest revision as of 13:32, 3 February 2026
With the help of this custom feature you can design your own solutions varying from simple widgets to multi-functional applications.
Use it to authorize in Simplybook API with API key.
- How to use
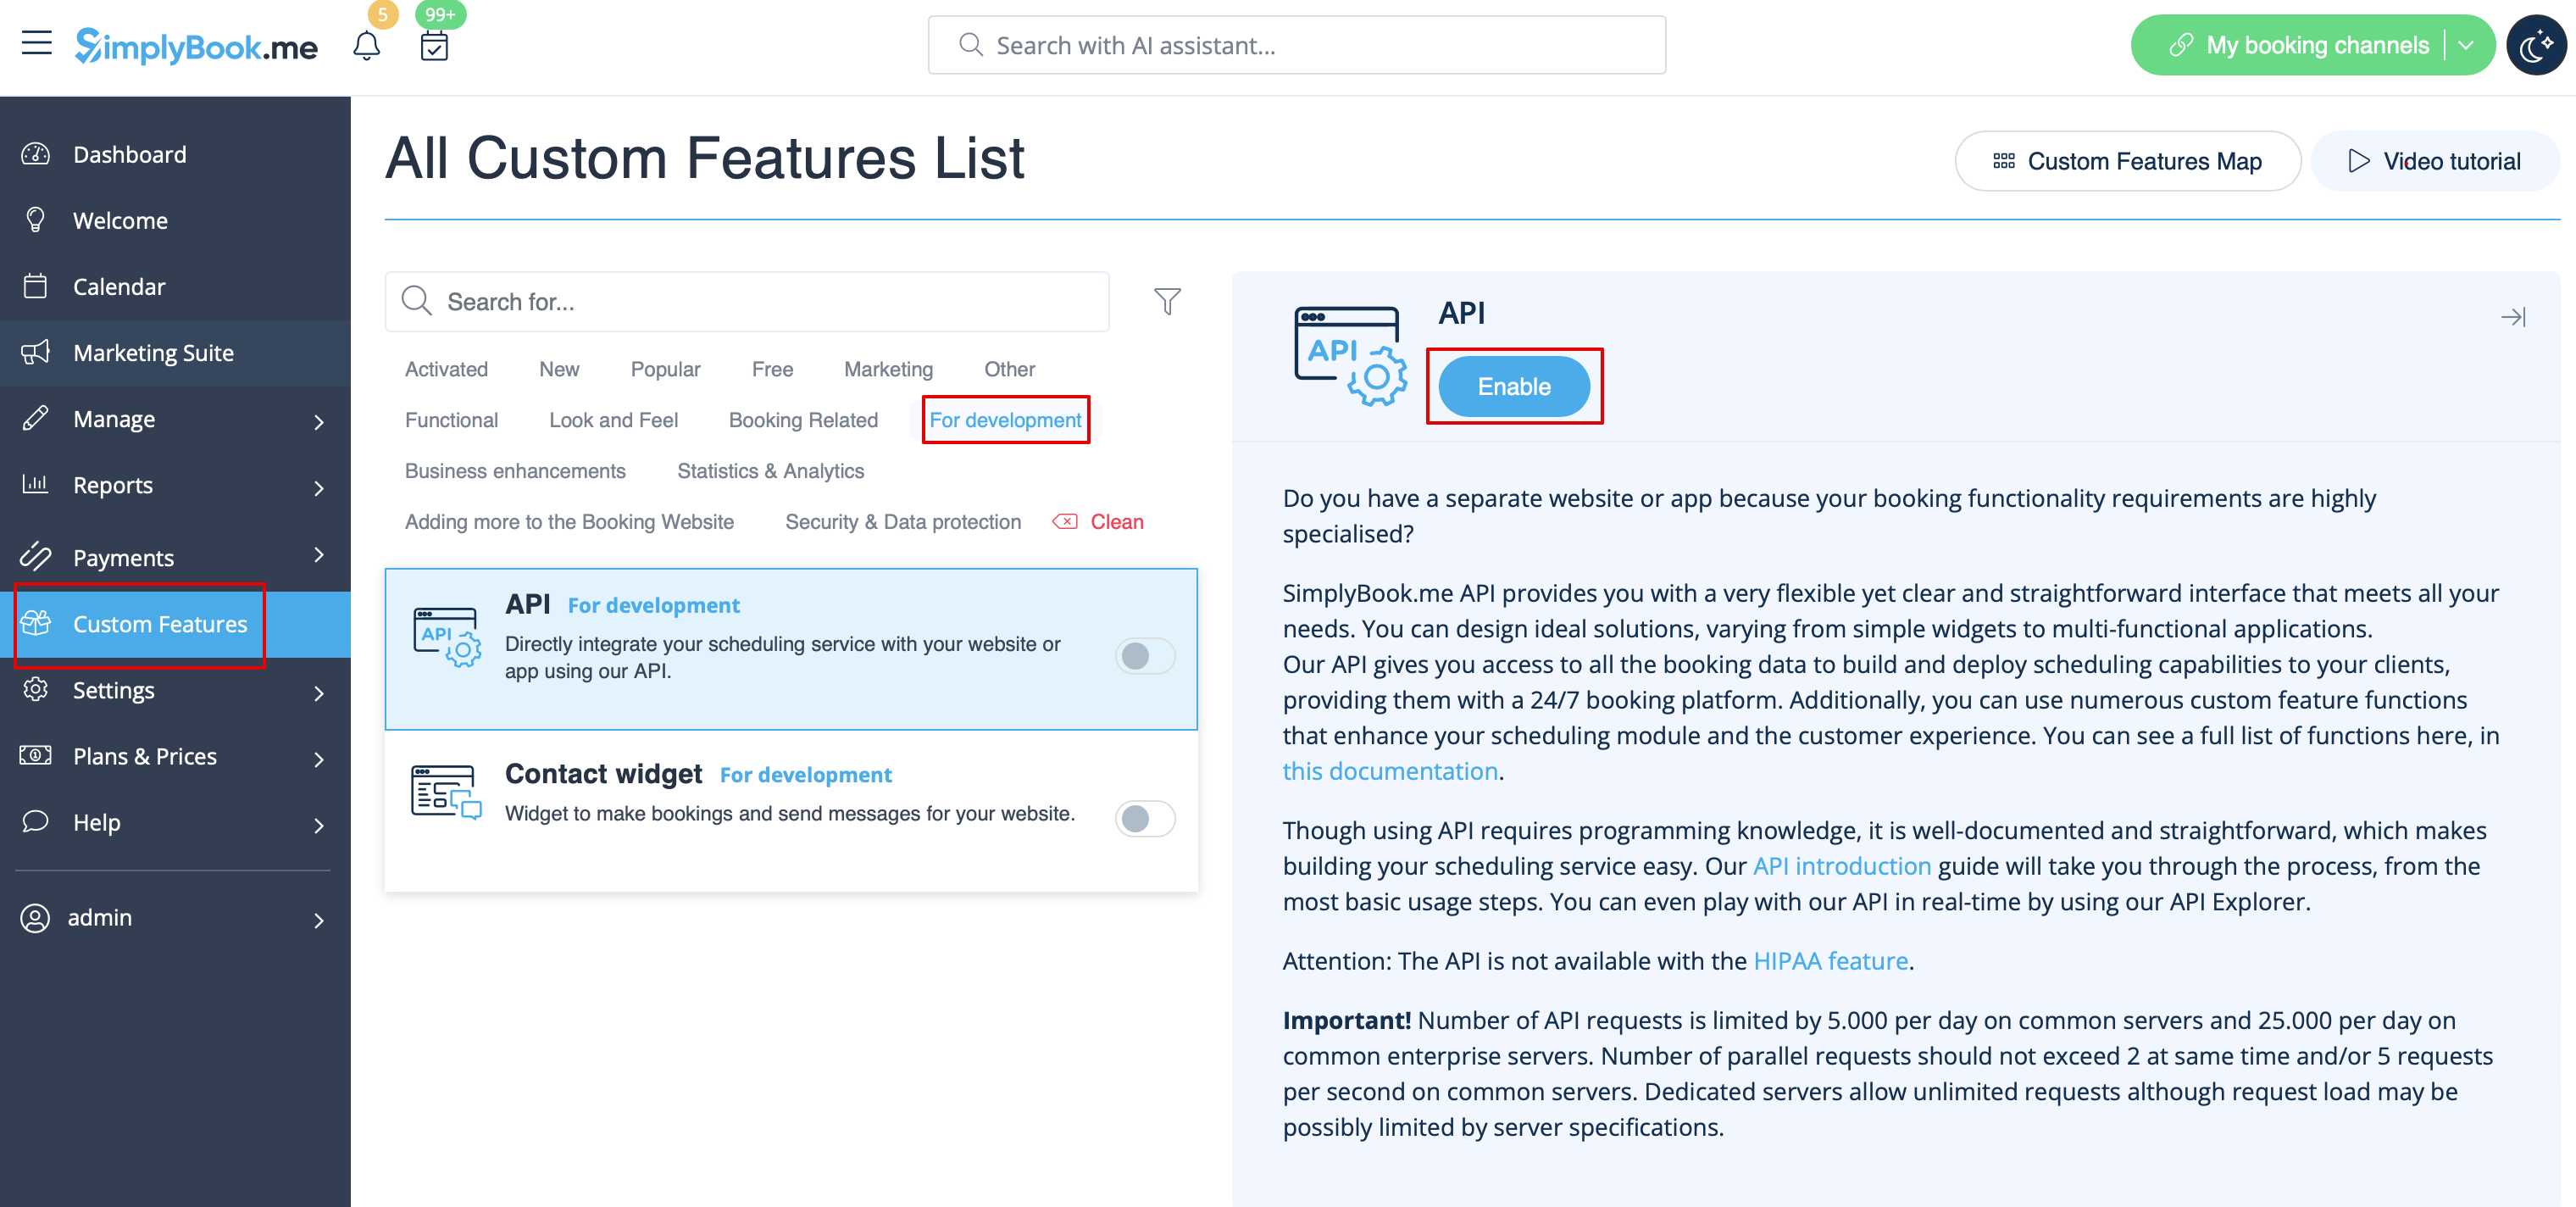
- 1. Navigate to Custom features section using the left-side menu of your admin interface,
- find the corresponding feature and enable it.
- 2. Go to Settings on the right to access the API keys.
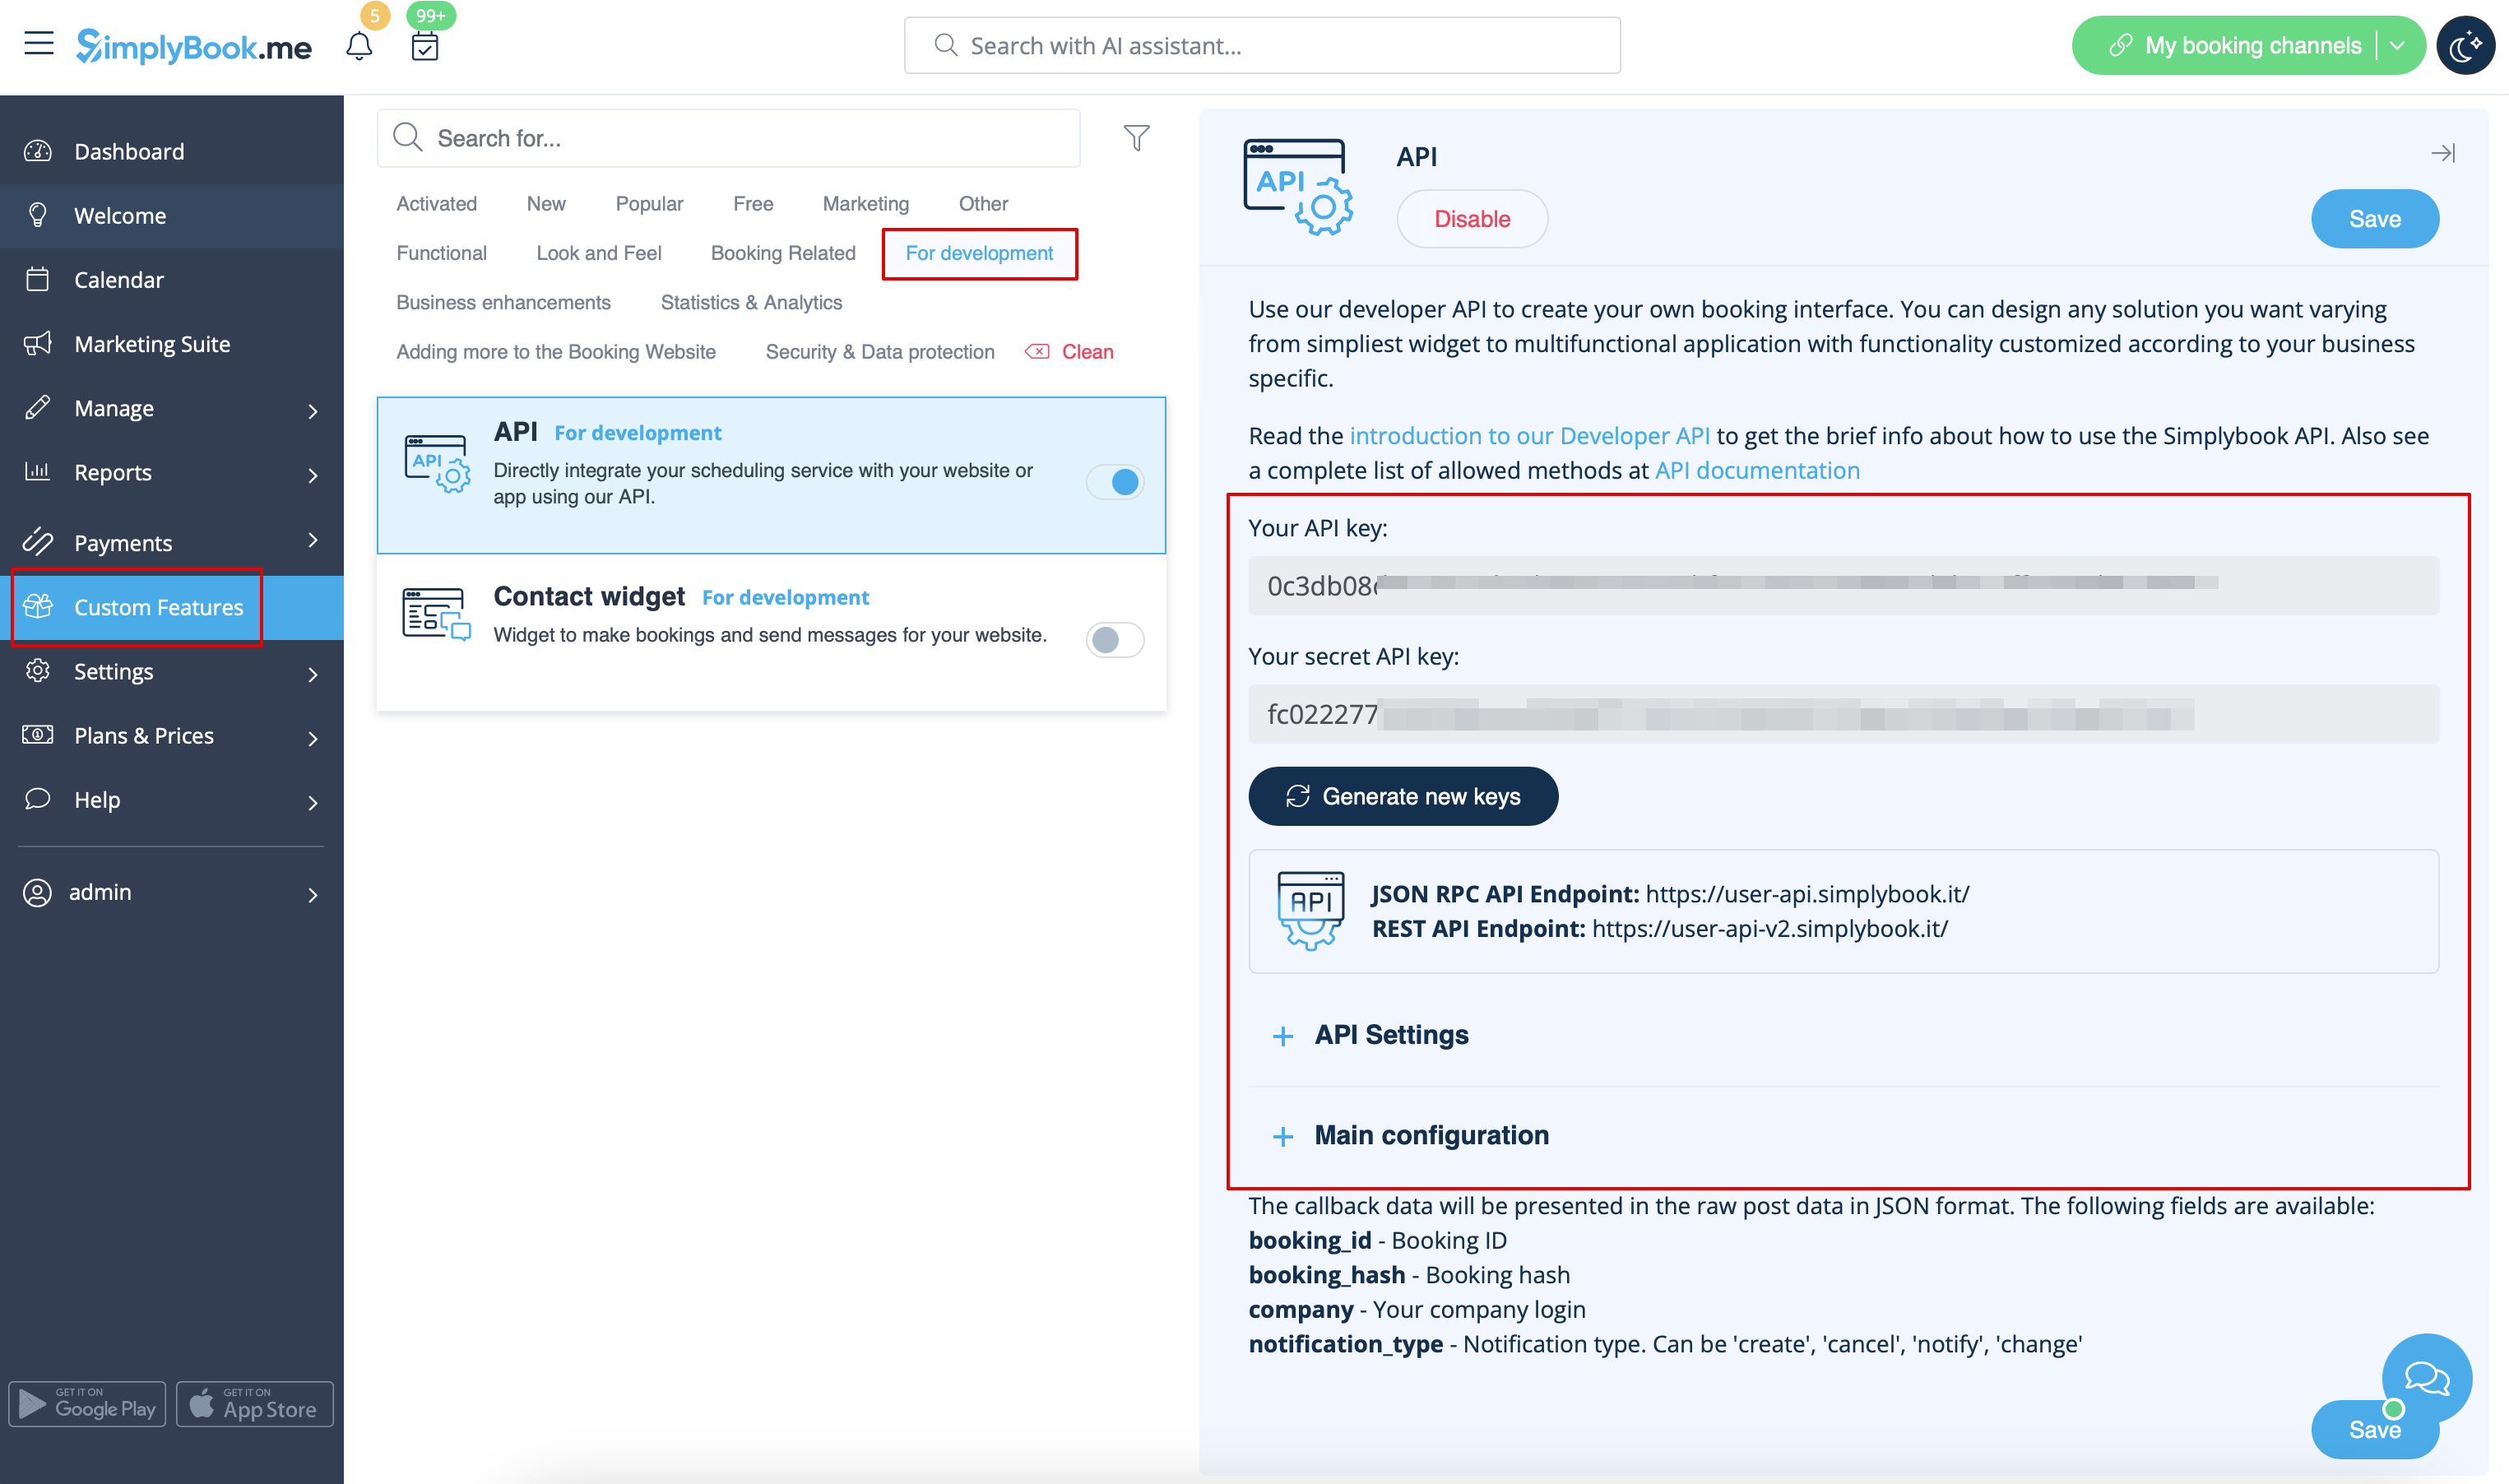
- 3. (optional) Use Callback URL and other available options for your own development.