From SimplyBook.me
No edit summary |
No edit summary |
||
| (5 intermediate revisions by the same user not shown) | |||
| Line 1: | Line 1: | ||
<languages/> | |||
<translate> | |||
<!--T:1--> | |||
<br><br> | <br><br> | ||
Sometimes you may need confirmation emails to be sent to more than one email address.<br> | Sometimes you may need confirmation emails to be sent to more than one email address.<br> | ||
| Line 4: | Line 7: | ||
<br><br> | <br><br> | ||
'''How to set it up'''<br><br> | '''How to set it up'''<br><br> | ||
: | :1. Enable <span style="background-color:#d4f8e5; padding:5px; border-radius:5px;">Zapier connector</span> custom feature on your <span style="background-color:#d4f8e5; padding:5px; border-radius:5px;">Custom features</span> page on SimplyBook.me side. | ||
[[File:Zapier redesigned | <!--T:2--> | ||
[[File:Zapier enable path redesigned.png|1200px|border | center|link=https://help.simplybook.me/images/b/b9/Zapier_enable_path_redesigned.png]] | |||
<br><br></translate> | |||
<translate> | |||
<!--T:3--> | |||
:2. Connect to your Zapier account using the ‘’’Quick connect’’’ option | |||
[[File:Quick connect zapier.png|1200px|border | center|link=https://help.simplybook.me/images/8/84/Quick_connect_zapier.png]] | |||
<br><br> | <br><br> | ||
:''' | <!--T:4--> | ||
[[File:Zapier | :3. Click on '''+ Create Zap''' button. | ||
[[File:Create zap path.png|1200px|border | center|link=https://help.simplybook.me/images/2/24/Create_zap_path.png]] | |||
<br><br> | |||
:4. In the popup that appears find SimplyBook.me in the list of apps to connect to. | |||
[[File:Zapier new sb as trigger.png|1200px|border | center|link=https://help.simplybook.me/images/1/13/Zapier_new_sb_as_trigger.png]] | |||
<br><br> | |||
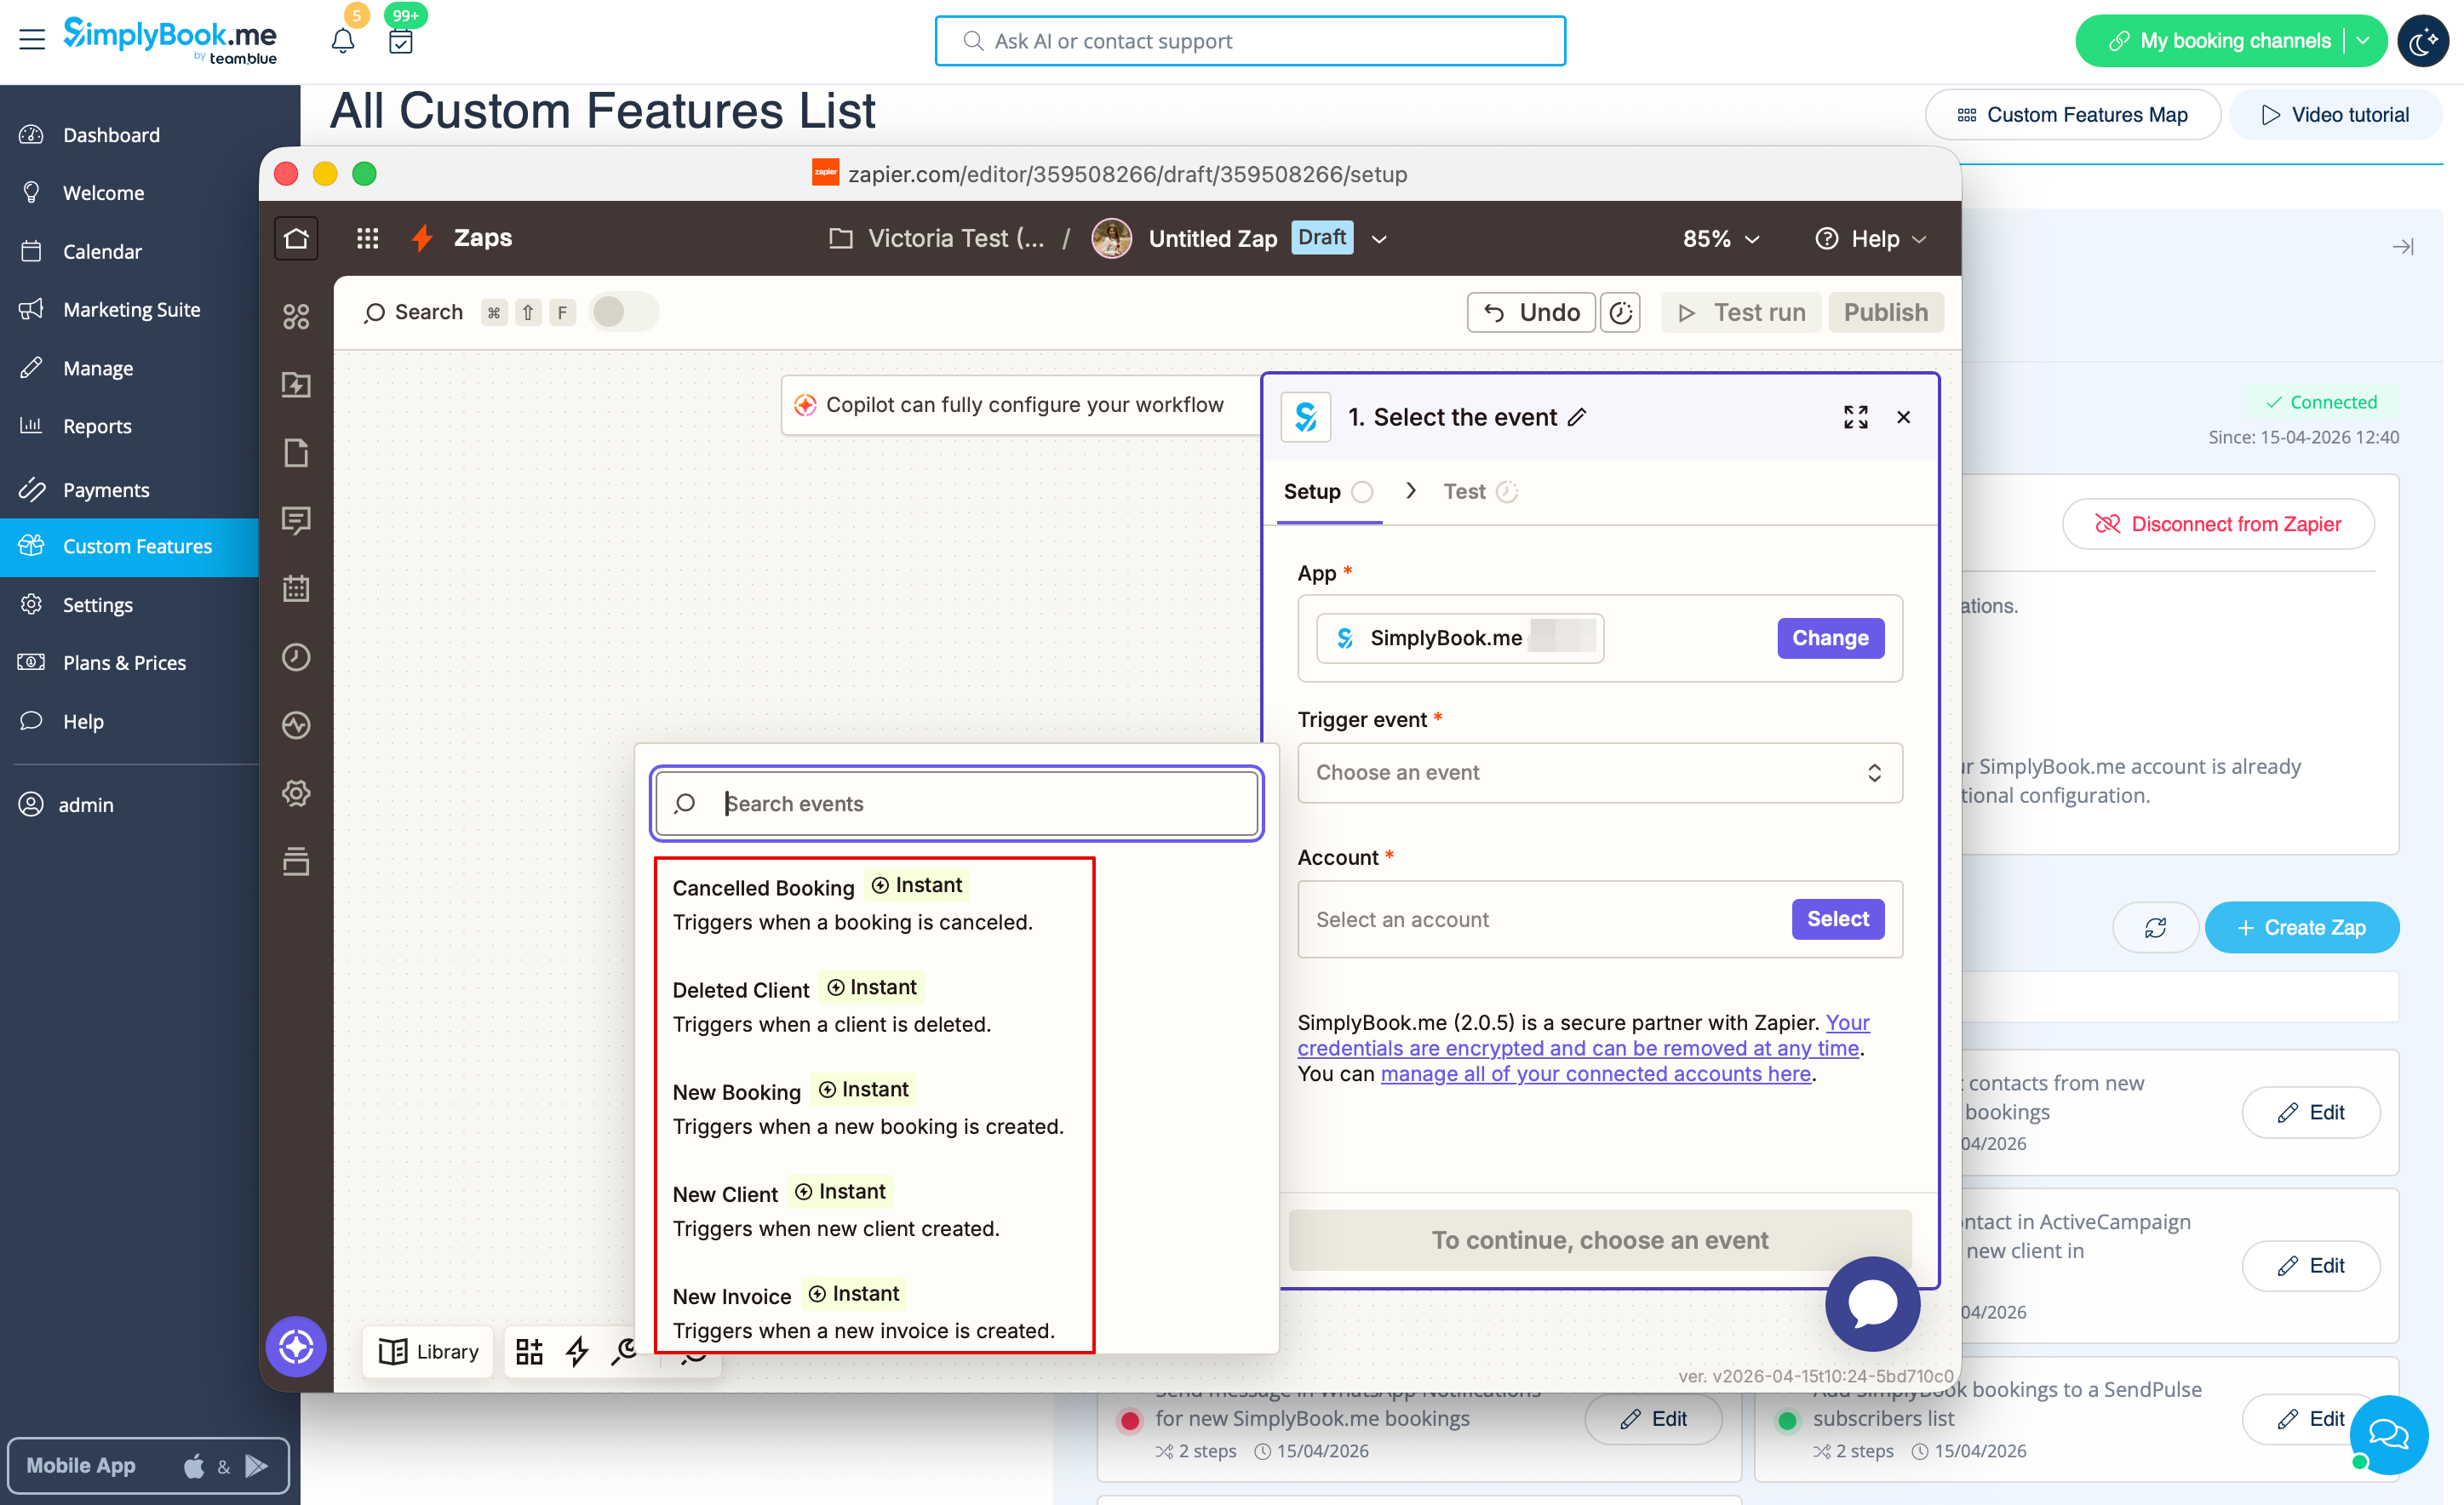
:5. Choose "New booking" trigger and the account that you have previously connected. Click "Continue". | |||
[[File:Zapier new choose trigger event.png|1200px|border | center|link=https://help.simplybook.me/images/4/45/Zapier_new_choose_trigger_event.png]] | |||
<br><br> | <br><br> | ||
:6. Test your trigger, select the sample record and proceed to the action step. | |||
: | |||
<br><br> | <br><br> | ||
''If Zapier shows an error "We could not find the booking" on test step don't worry, it may occur when your account is new or you have not got new bookings recently.<br> | ''If Zapier shows an error "We could not find the booking" on test step don't worry, it may occur when your account is new or you have not got new bookings recently.<br> | ||
You can skip test step and continue with setup.'' | You can skip test step and continue with setup.'' | ||
<br><br> | <br><br></translate> | ||
: | <translate> | ||
<!--T:6--> | |||
:7. Now you will be setting up actions step and as it is related to emails please find Gmail option using searchbox. | |||
[[File:Zapier redesigned gmail as action app.png|1200px|center|link=https://help.simplybook.me/images/0/01/Zapier_redesigned_gmail_as_action_app.png]] | [[File:Zapier redesigned gmail as action app.png|1200px|center|link=https://help.simplybook.me/images/0/01/Zapier_redesigned_gmail_as_action_app.png]] | ||
<br><br> | <br><br> | ||
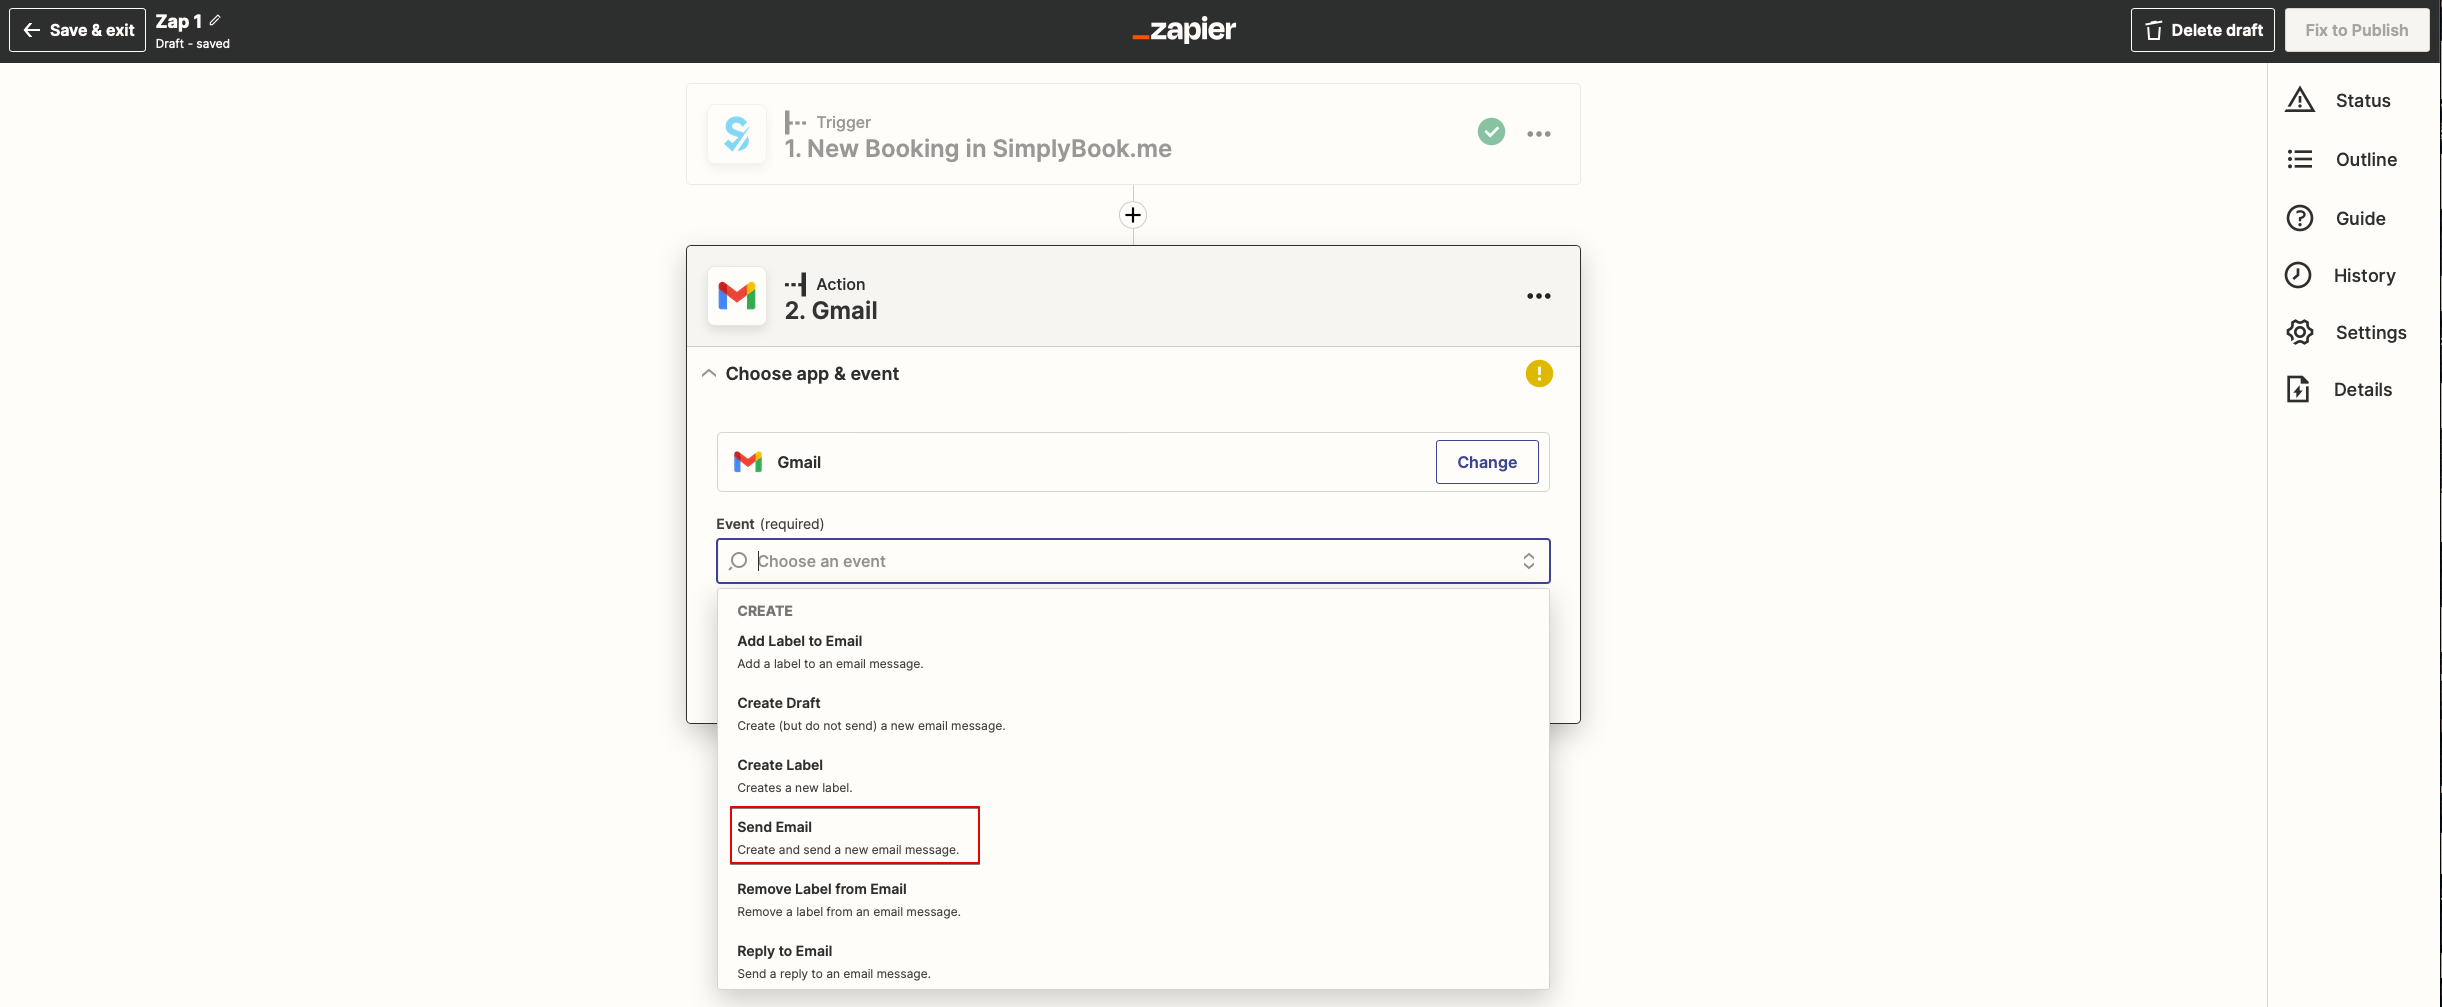
: | :8. From the list of available actions please choose "Send email" and connect Gmail account that will be used for sending notifications. | ||
[[File:Zapier redesigned send email action.png|1200px |center|link=https://help.simplybook.me/images/a/ac/Zapier_redesigned_send_email_action.png]] | [[File:Zapier redesigned send email action.png|1200px |center|link=https://help.simplybook.me/images/a/ac/Zapier_redesigned_send_email_action.png]] | ||
<br><br> | <br><br> | ||
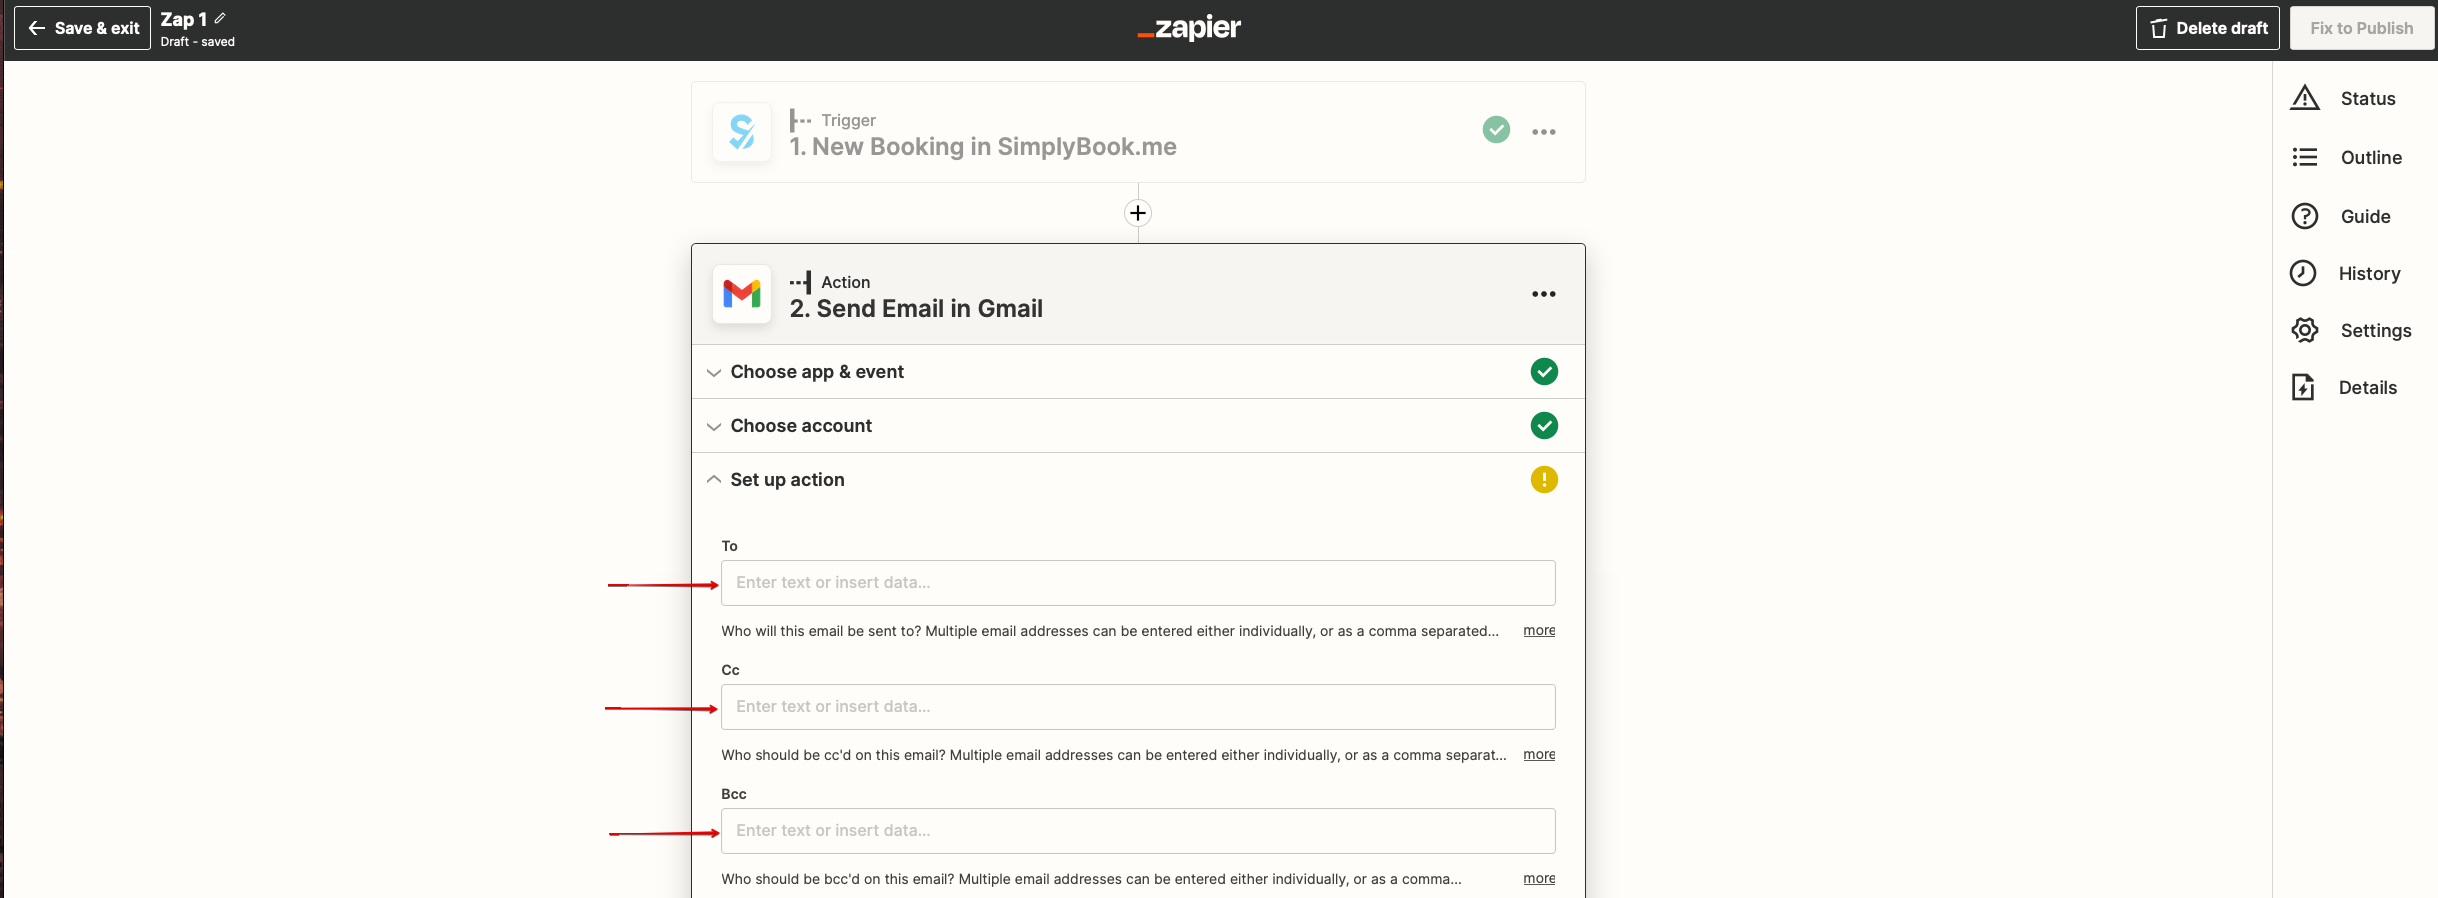
: | :9. On the next step please add email address(es) that you wish notification to be sent to. You may add only one address in "To(required)" email box or add some more addresses with the help of "Cc" and "Bcc" options or by clicking on "+" icon to add another email box. | ||
[[File:Zapier redesigned setup the email addresses.png|1200px |center|link=https://help.simplybook.me/images/5/5a/Zapier_redesigned_setup_the_email_addresses.png]] | [[File:Zapier redesigned setup the email addresses.png|1200px |center|link=https://help.simplybook.me/images/5/5a/Zapier_redesigned_setup_the_email_addresses.png]] | ||
<br><br> | <br><br></translate> | ||
: | <translate> | ||
<!--T:7--> | |||
:10. Now you come to template step. | |||
:Please use available variables by clicking on the textbox ands selecting the necessary ones from the list.<br> | :Please use available variables by clicking on the textbox ands selecting the necessary ones from the list.<br> | ||
:Here you can see the example how notification template can be set up. | :Here you can see the example how notification template can be set up. | ||
[[File:Zapier redesigned setup the email template.png|1200px | center|link=https://help.simplybook.me/images/5/5d/Zapier_redesigned_setup_the_email_template.png]] | [[File:Zapier redesigned setup the email template.png|1200px | center|link=https://help.simplybook.me/images/5/5d/Zapier_redesigned_setup_the_email_template.png]] | ||
<br><br> | <br><br></translate> | ||
<translate> | |||
: | <!--T:5--> | ||
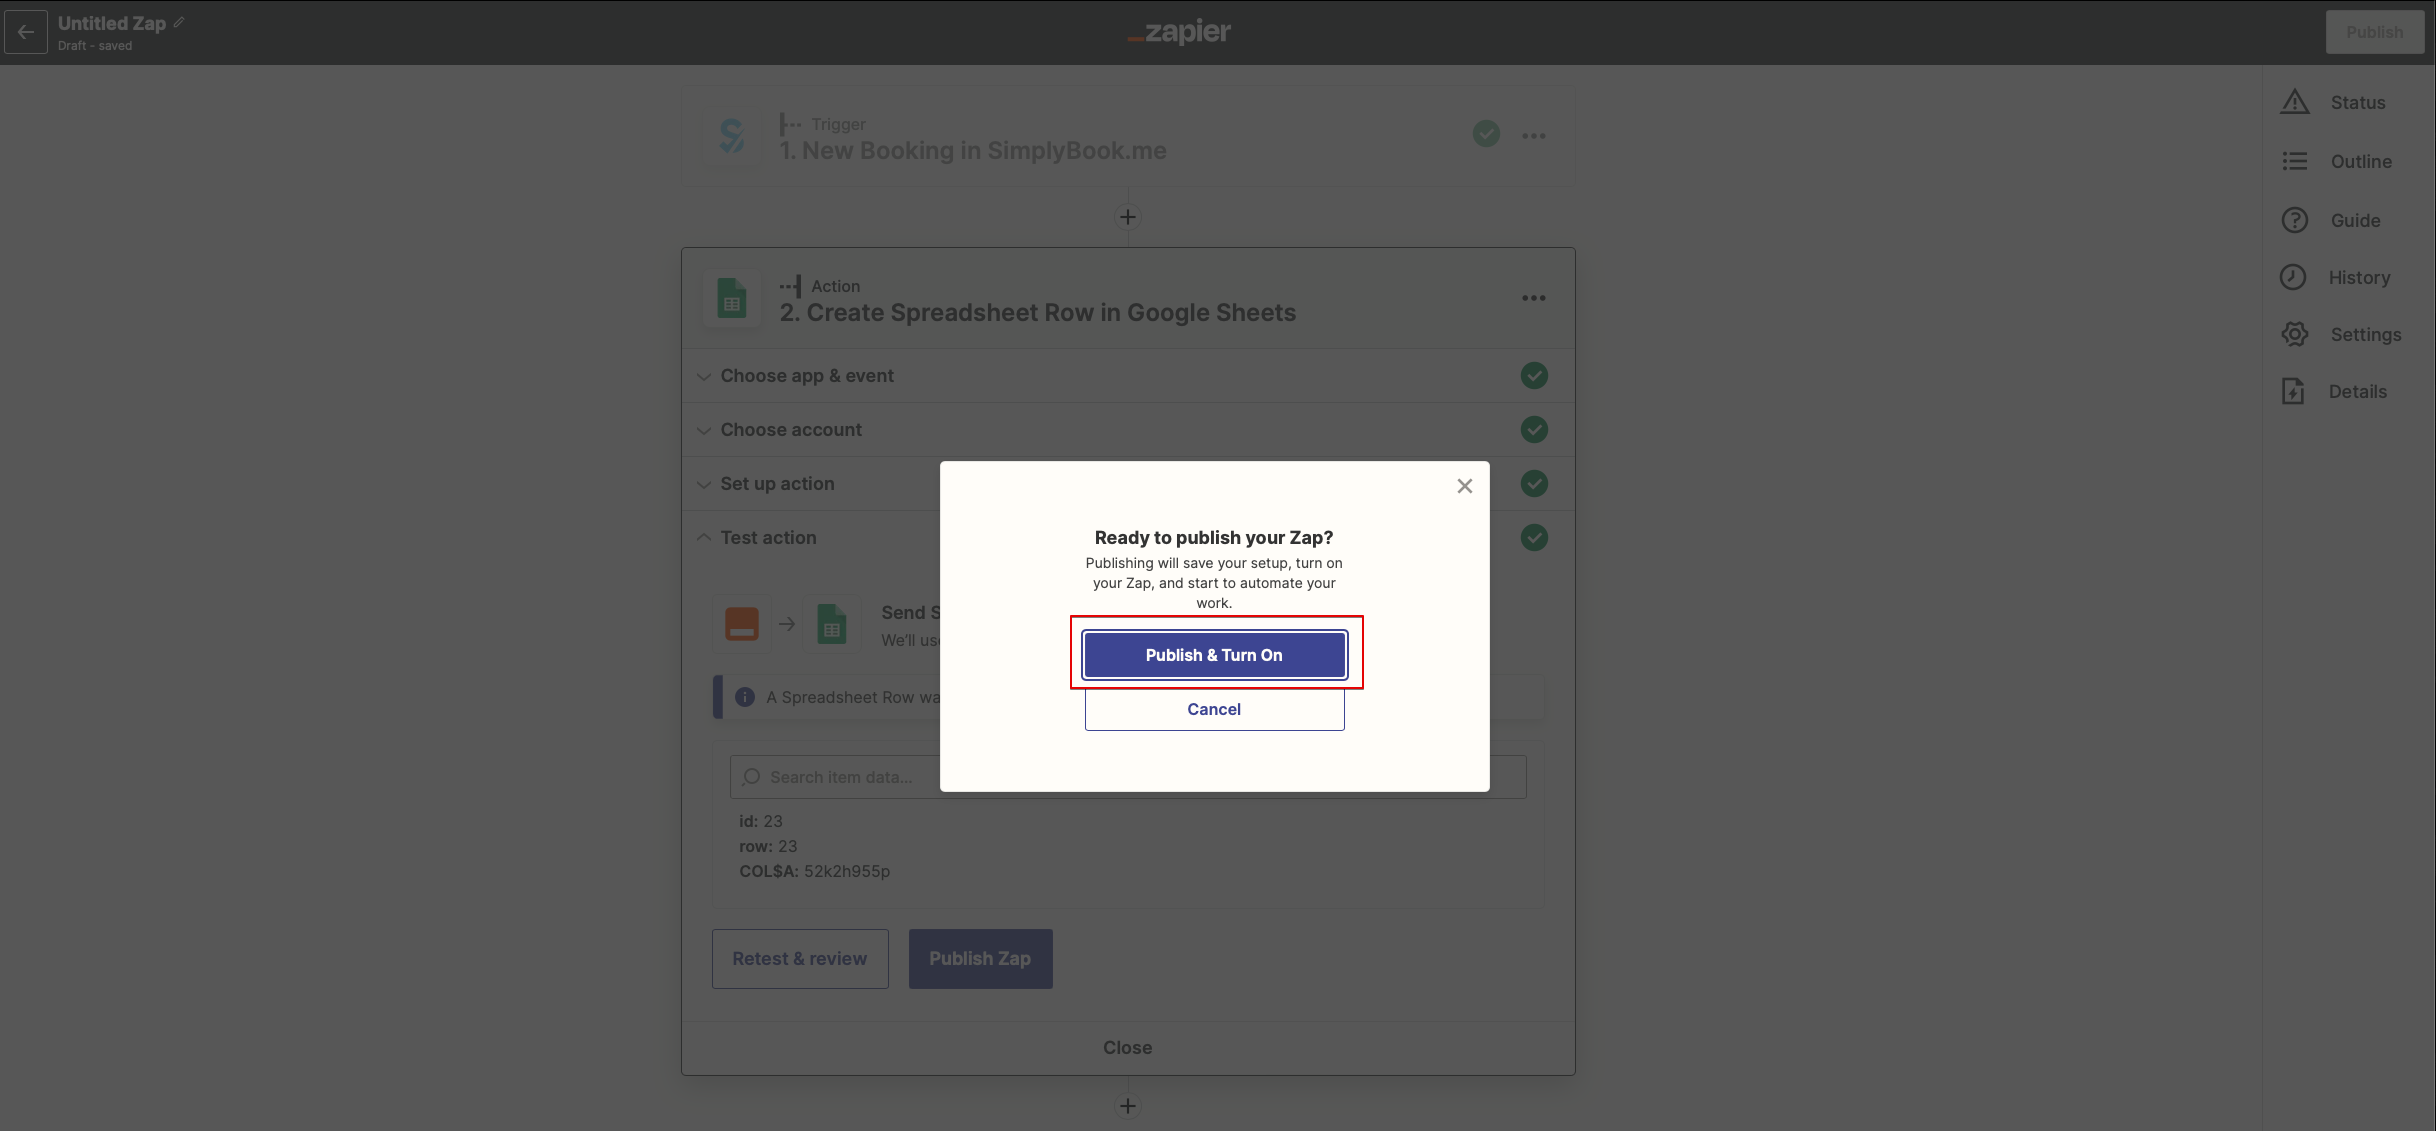
:11. Now you can turn your Zap on. It will send emails automatically to the indicated addresses when new booking is received by SimplyBook.me system. | |||
[[File:Zapier redesigned enable zap.png|1200px|center|link=https://help.simplybook.me/images/9/9b/Zapier_redesigned_enable_zap.png]] | [[File:Zapier redesigned enable zap.png|1200px|center|link=https://help.simplybook.me/images/9/9b/Zapier_redesigned_enable_zap.png]] | ||
<br><br> | <br><br> | ||
</translate> | |||
Latest revision as of 14:35, 17 April 2026
Sometimes you may need confirmation emails to be sent to more than one email address.
And you can use Zapier to achieve it.
How to set it up
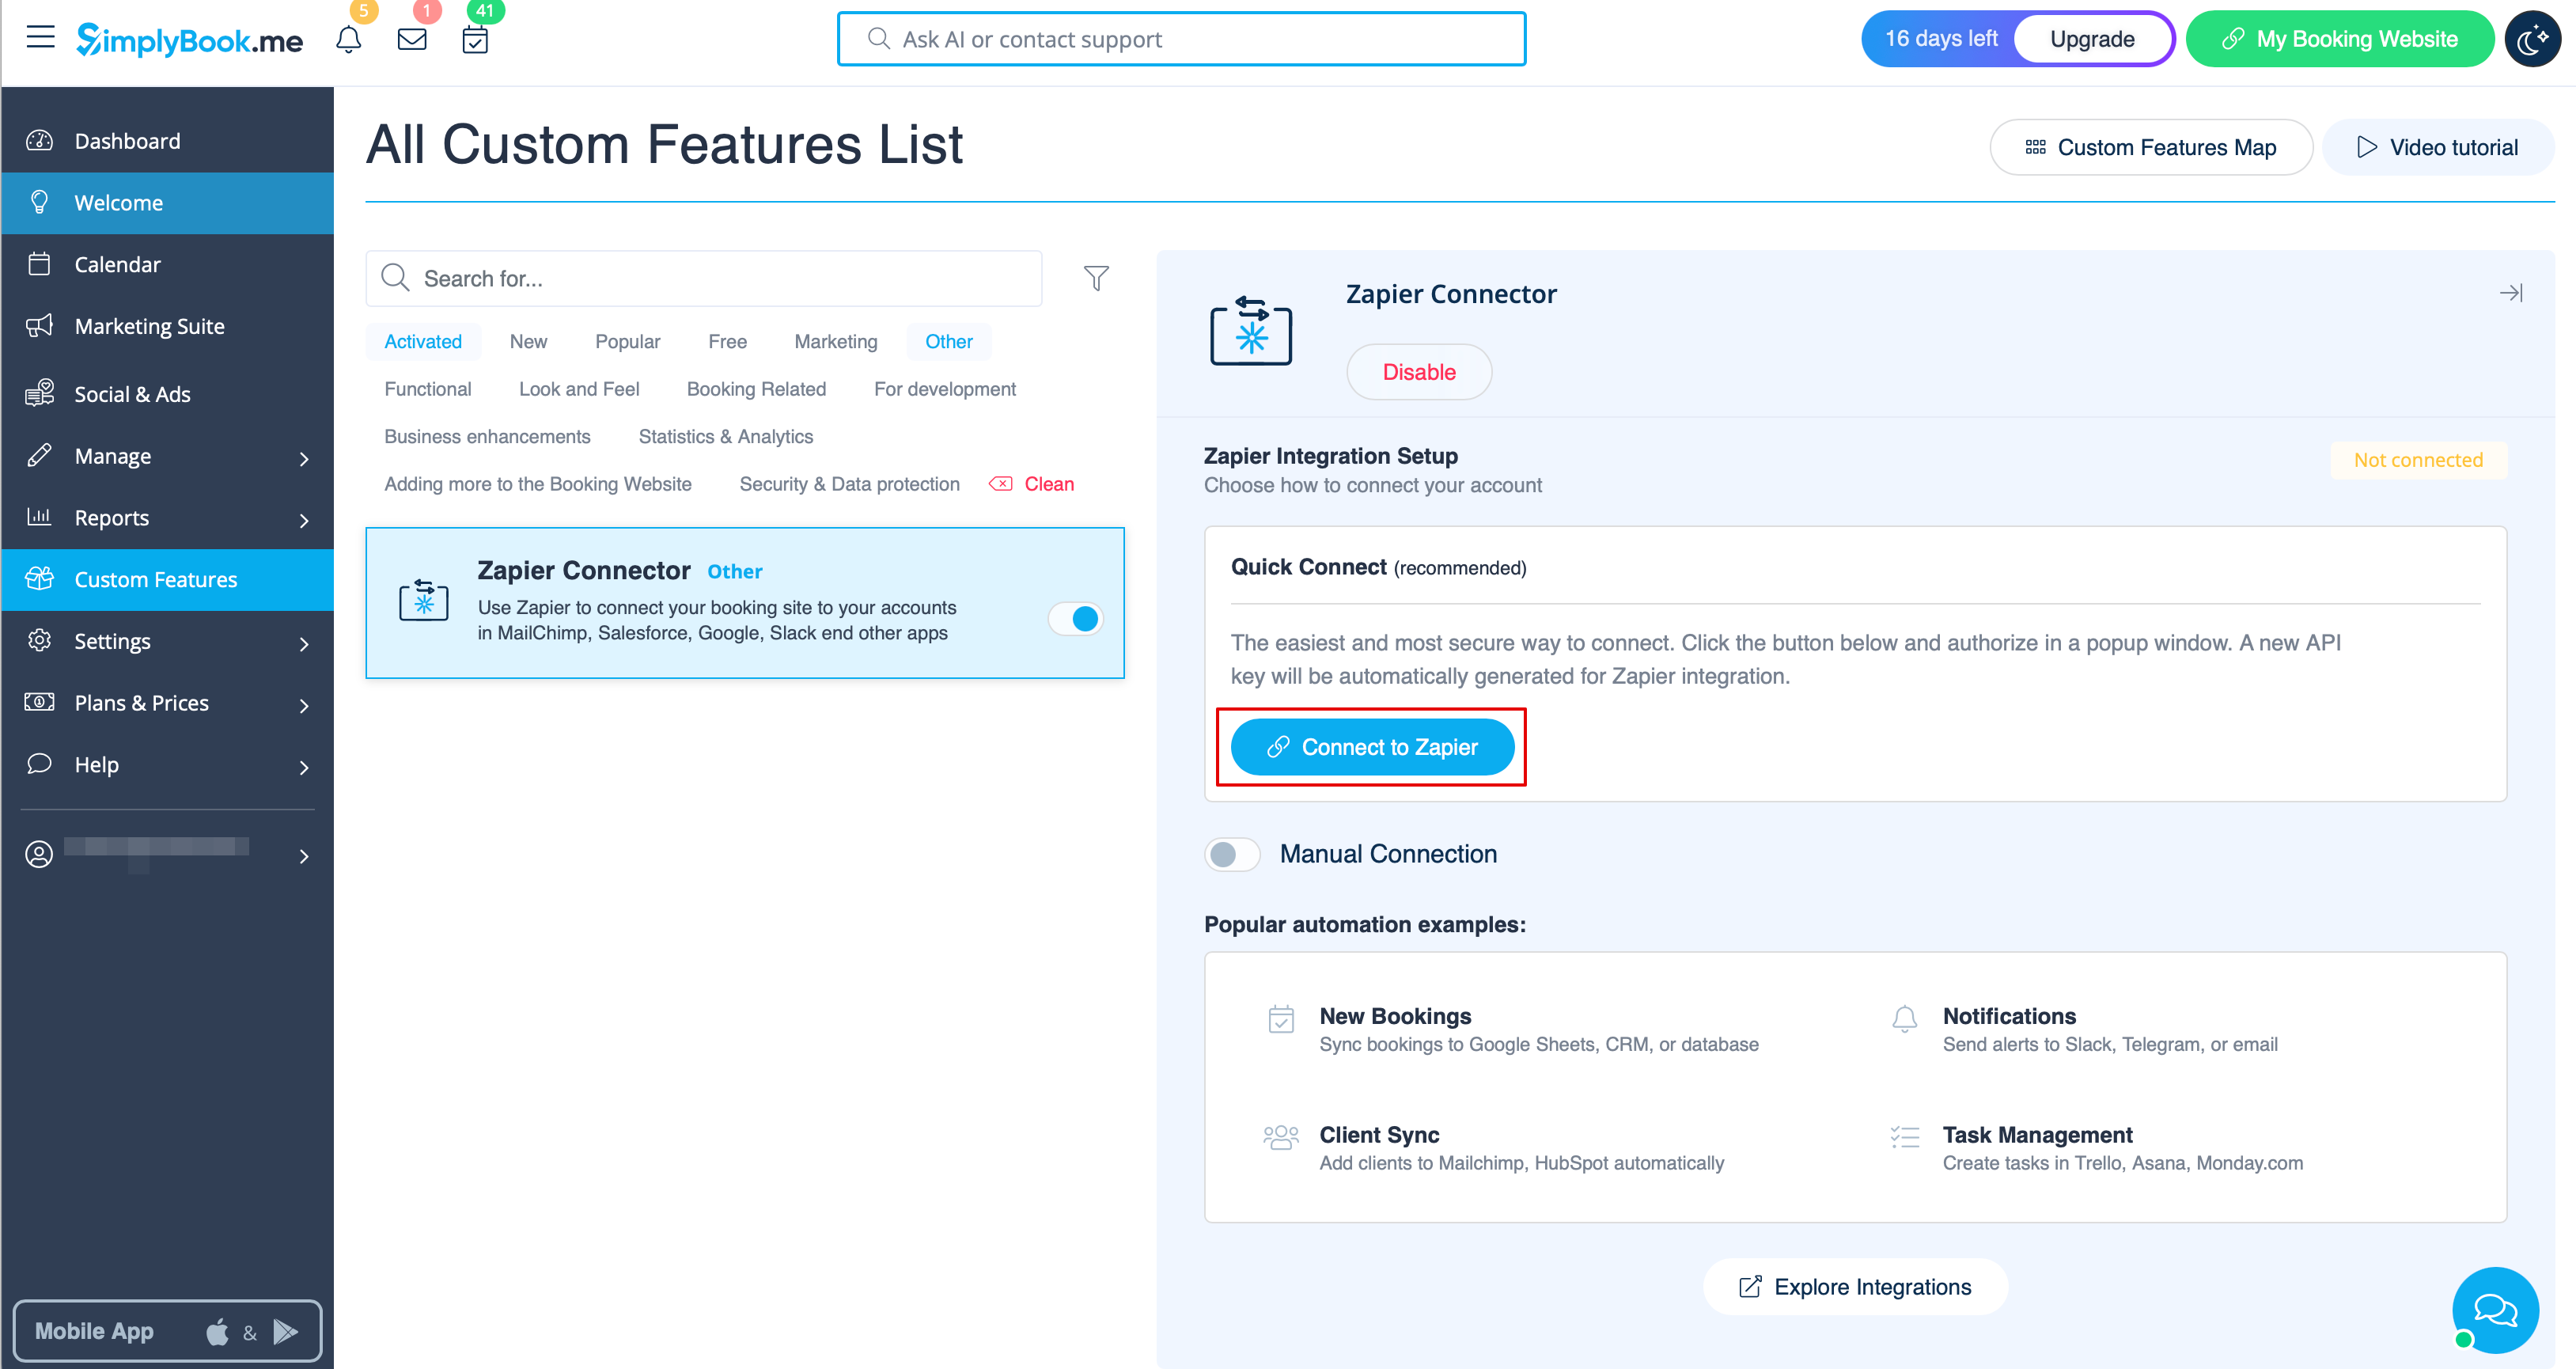
- 1. Enable Zapier connector custom feature on your Custom features page on SimplyBook.me side.

- 2. Connect to your Zapier account using the ‘’’Quick connect’’’ option
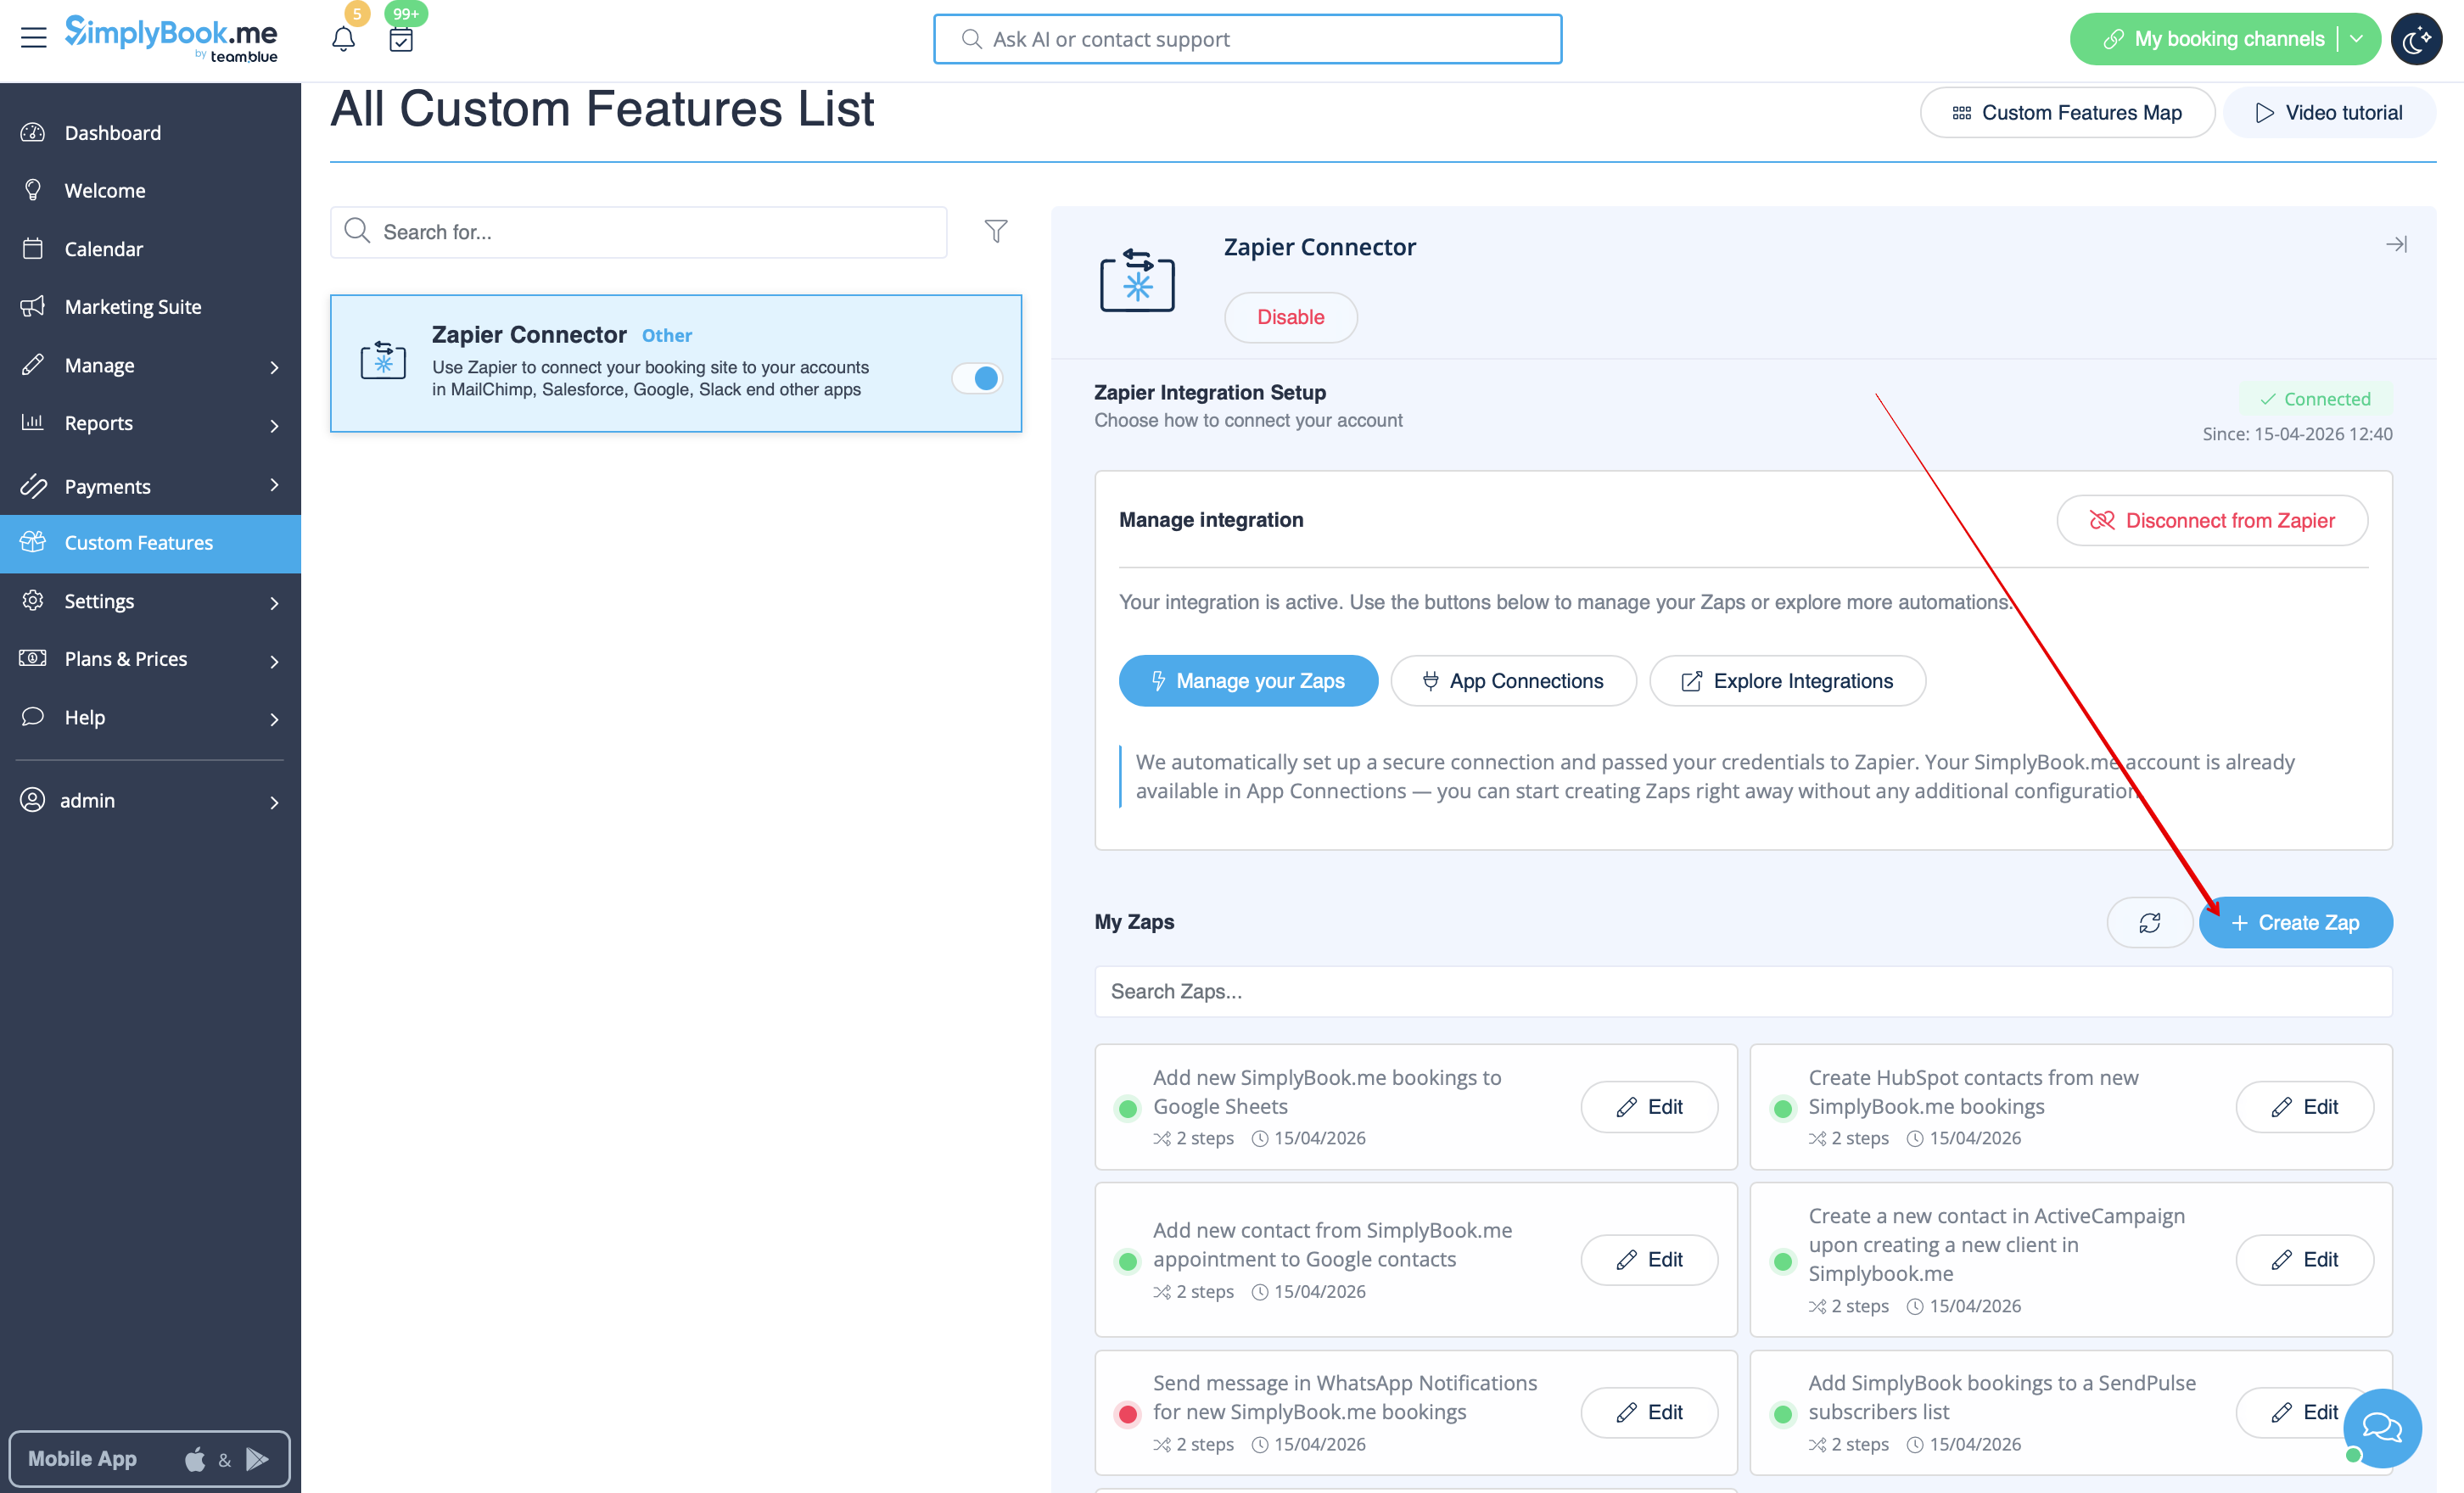
- 3. Click on + Create Zap button.
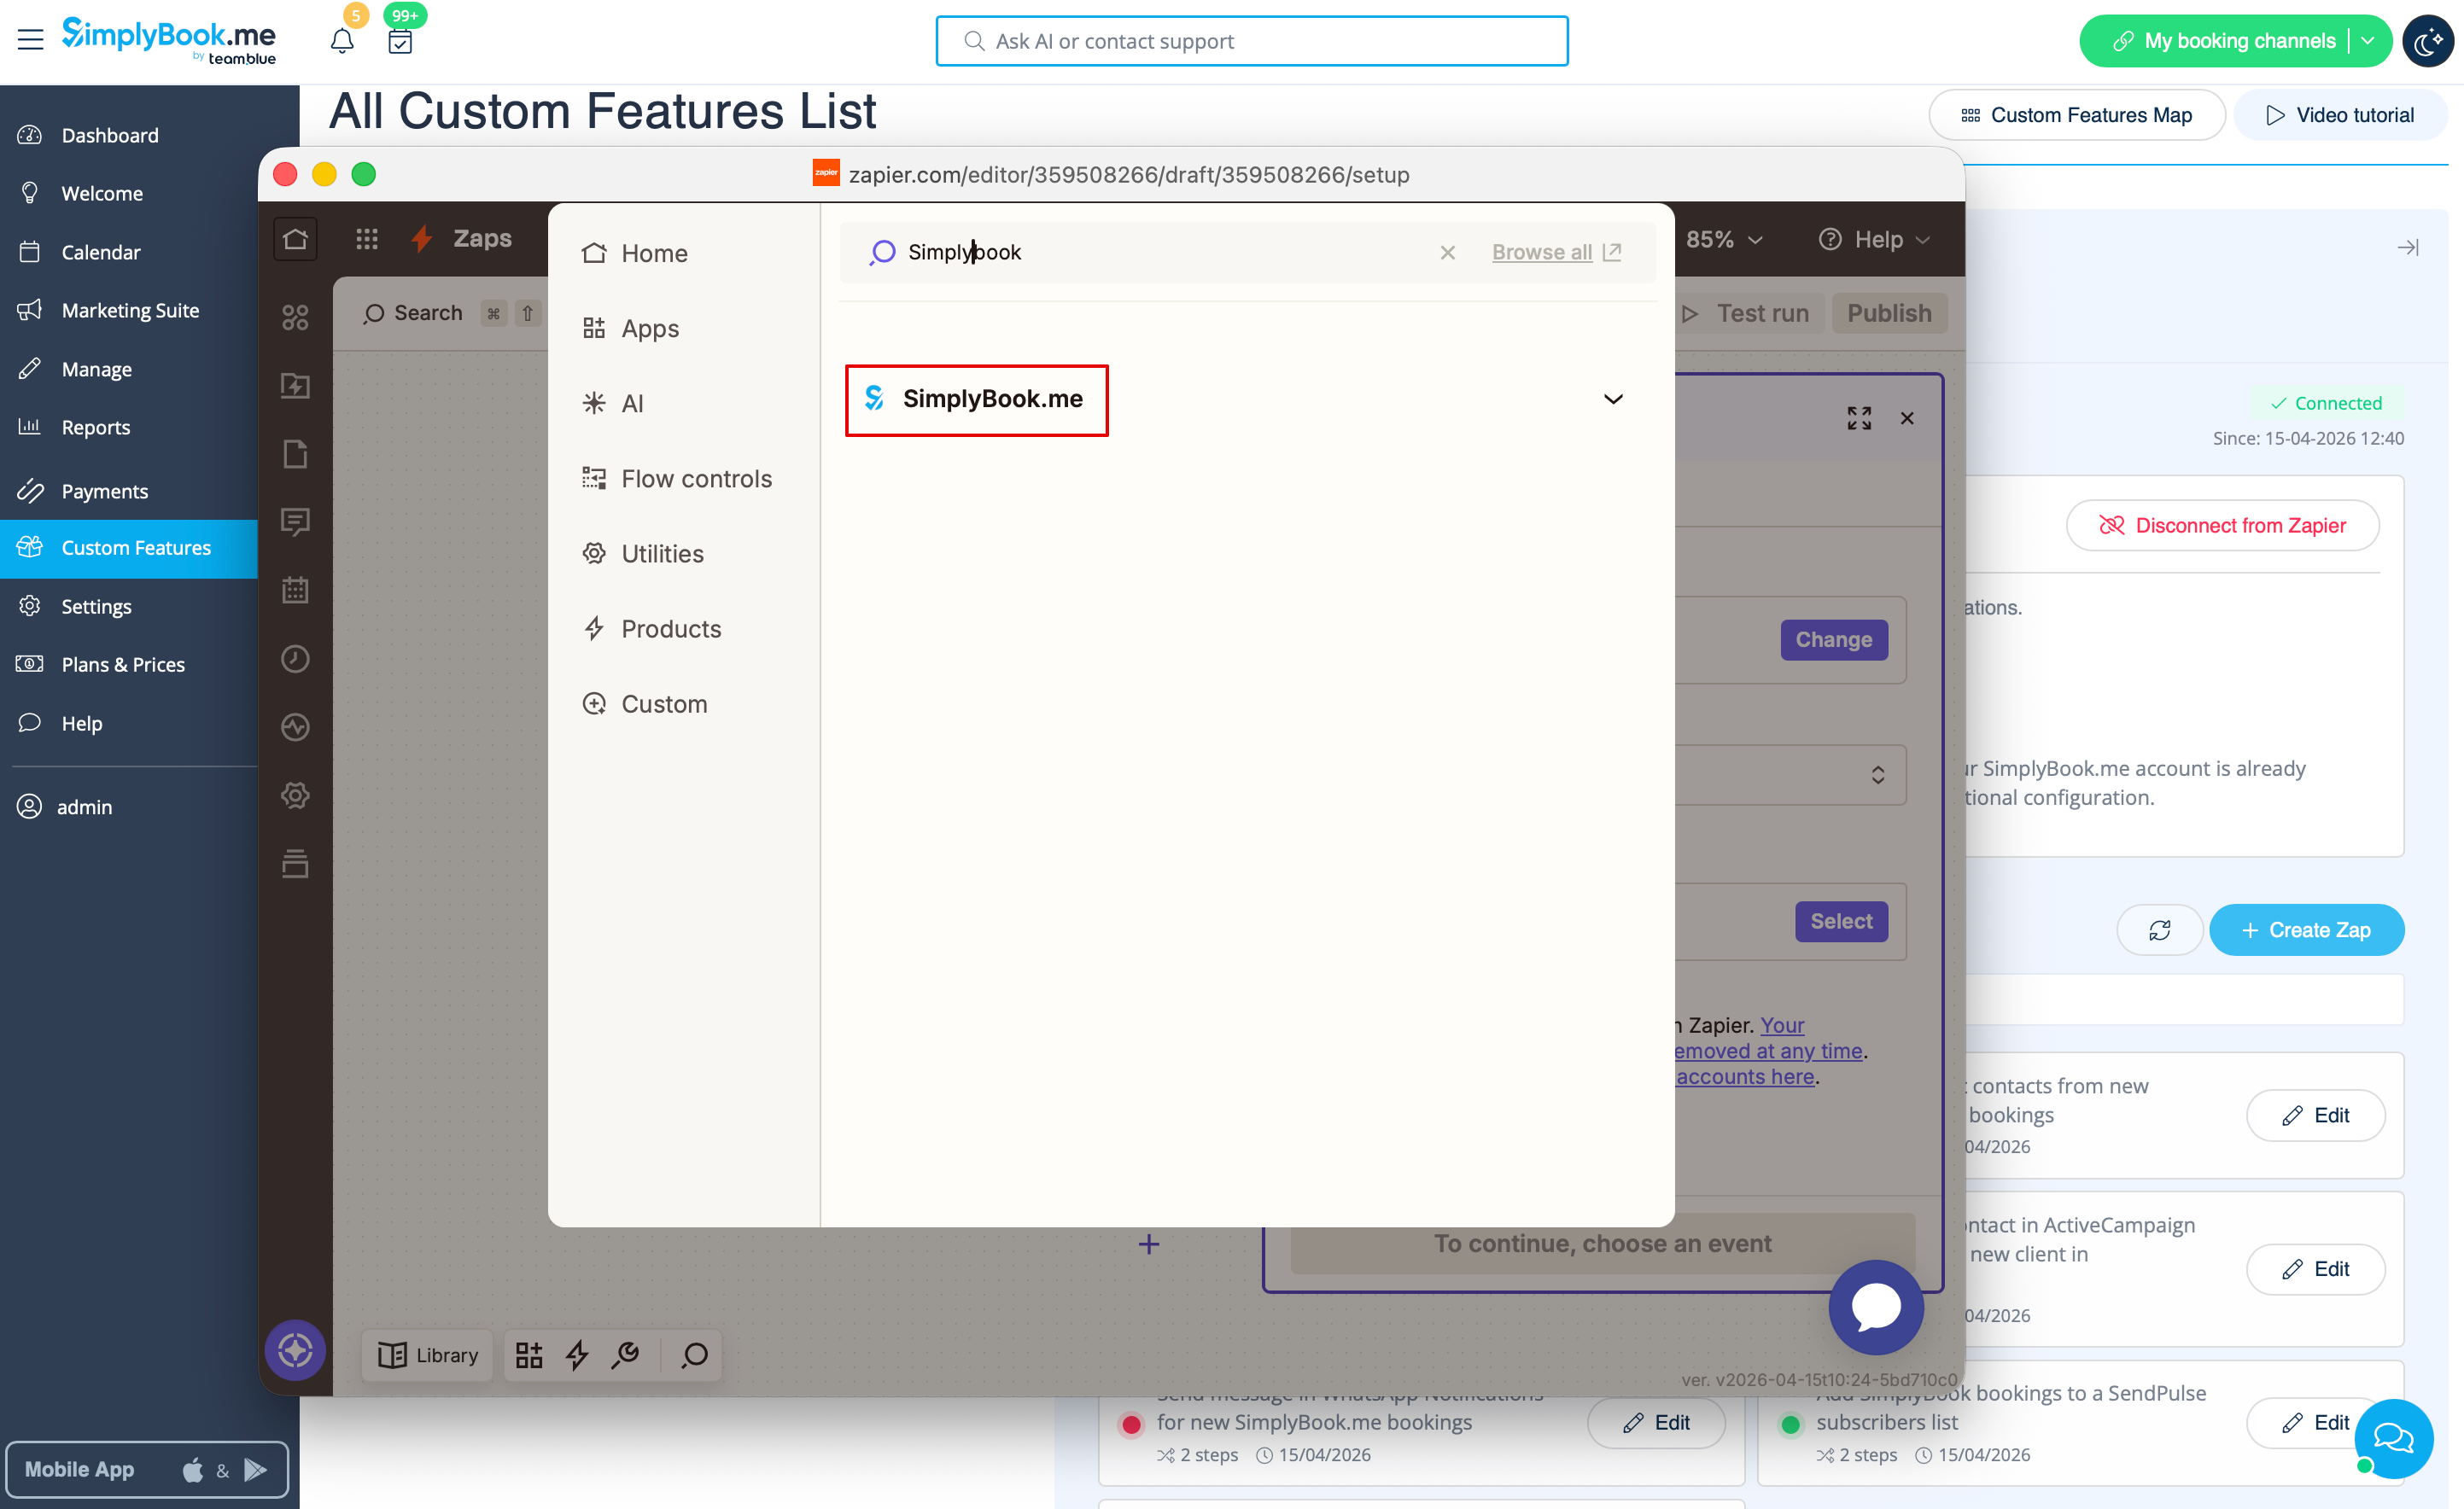
- 4. In the popup that appears find SimplyBook.me in the list of apps to connect to.
- 5. Choose "New booking" trigger and the account that you have previously connected. Click "Continue".
- 6. Test your trigger, select the sample record and proceed to the action step.
If Zapier shows an error "We could not find the booking" on test step don't worry, it may occur when your account is new or you have not got new bookings recently.
You can skip test step and continue with setup.
- 7. Now you will be setting up actions step and as it is related to emails please find Gmail option using searchbox.

- 8. From the list of available actions please choose "Send email" and connect Gmail account that will be used for sending notifications.
- 9. On the next step please add email address(es) that you wish notification to be sent to. You may add only one address in "To(required)" email box or add some more addresses with the help of "Cc" and "Bcc" options or by clicking on "+" icon to add another email box.
- 10. Now you come to template step.
- Please use available variables by clicking on the textbox ands selecting the necessary ones from the list.
- Here you can see the example how notification template can be set up.

- 11. Now you can turn your Zap on. It will send emails automatically to the indicated addresses when new booking is received by SimplyBook.me system.