Created page with "= Опція "Змінити часовий пояс" = У розділі <span style="background-color:#d4f8e5; padding:5px; border-radius:5px;">Налаштування</span> -> <span style="background-color:#d4f8e5; padding:5px; border-radius:5px;">Основна конфігурація</span> встановіть для параметрів <span style="background-color:#d4f8e5; padding:5px; border-radius:5px;">Показувати сторінку бронюв..." |
Created page with "= Відгуки = Ви можете переглянути всі свої відгуки на вкладці " <span style="background-color:#d4f8e5; padding:5px; border-radius:5px;">Відгуки</span> " в лівому боковому меню в розділі " <span style="background-color:#d4f8e5; padding:5px; border-radius:5px;">Звіти</span>". Там же ви можете видалити відгуки, якщо це необхідно. Якщо ви..." |
||
| Line 35: | Line 35: | ||
< | = Відгуки = | ||
Ви можете переглянути всі свої відгуки на вкладці " <span style="background-color:#d4f8e5; padding:5px; border-radius:5px;">Відгуки</span> " в лівому боковому меню в розділі " <span style="background-color:#d4f8e5; padding:5px; border-radius:5px;">Звіти</span>". Там же ви можете видалити відгуки, якщо це необхідно. Якщо ви хочете видалити можливість залишити відгук на вашому сайті бронювання і не надсилати запит на відгук, то в <span style="background-color:#d4f8e5; padding:5px; border-radius:5px;">Налаштуваннях</span> -> <span style="background-color:#d4f8e5; padding:5px; border-radius:5px;">Налаштування електронної пошти та</span> <span style="background-color:#d4f8e5; padding:5px; border-radius:5px;">SMS</span> -> <span style="background-color:#d4f8e5; padding:5px; border-radius:5px;">Налаштування сповіщень електронною поштою та SMS</span> -> встановіть <span style="background-color:#d4f8e5; padding:5px; border-radius:5px;">для</span> опції <span style="background-color:#d4f8e5; padding:5px; border-radius:5px;">Надсилати запит на відгук через X днів після бронювання</span> значення <span style="background-color:#d4f8e5; padding:5px; border-radius:5px;">Вимкнути.</span><br/> | |||
[[File:Feedback disable path redesigned.png|1200px | center|link=https://help.simplybook.me/images/1/12/Feedback_disable_path_redesigned.png]] | |||
[[File:Feedback disable path redesigned.png|1200px | center|link=https://help.simplybook.me/images/1/12/Feedback_disable_path_redesigned.png ]] | |||
<br><br> | <br><br> | ||
Revision as of 10:07, 15 May 2025
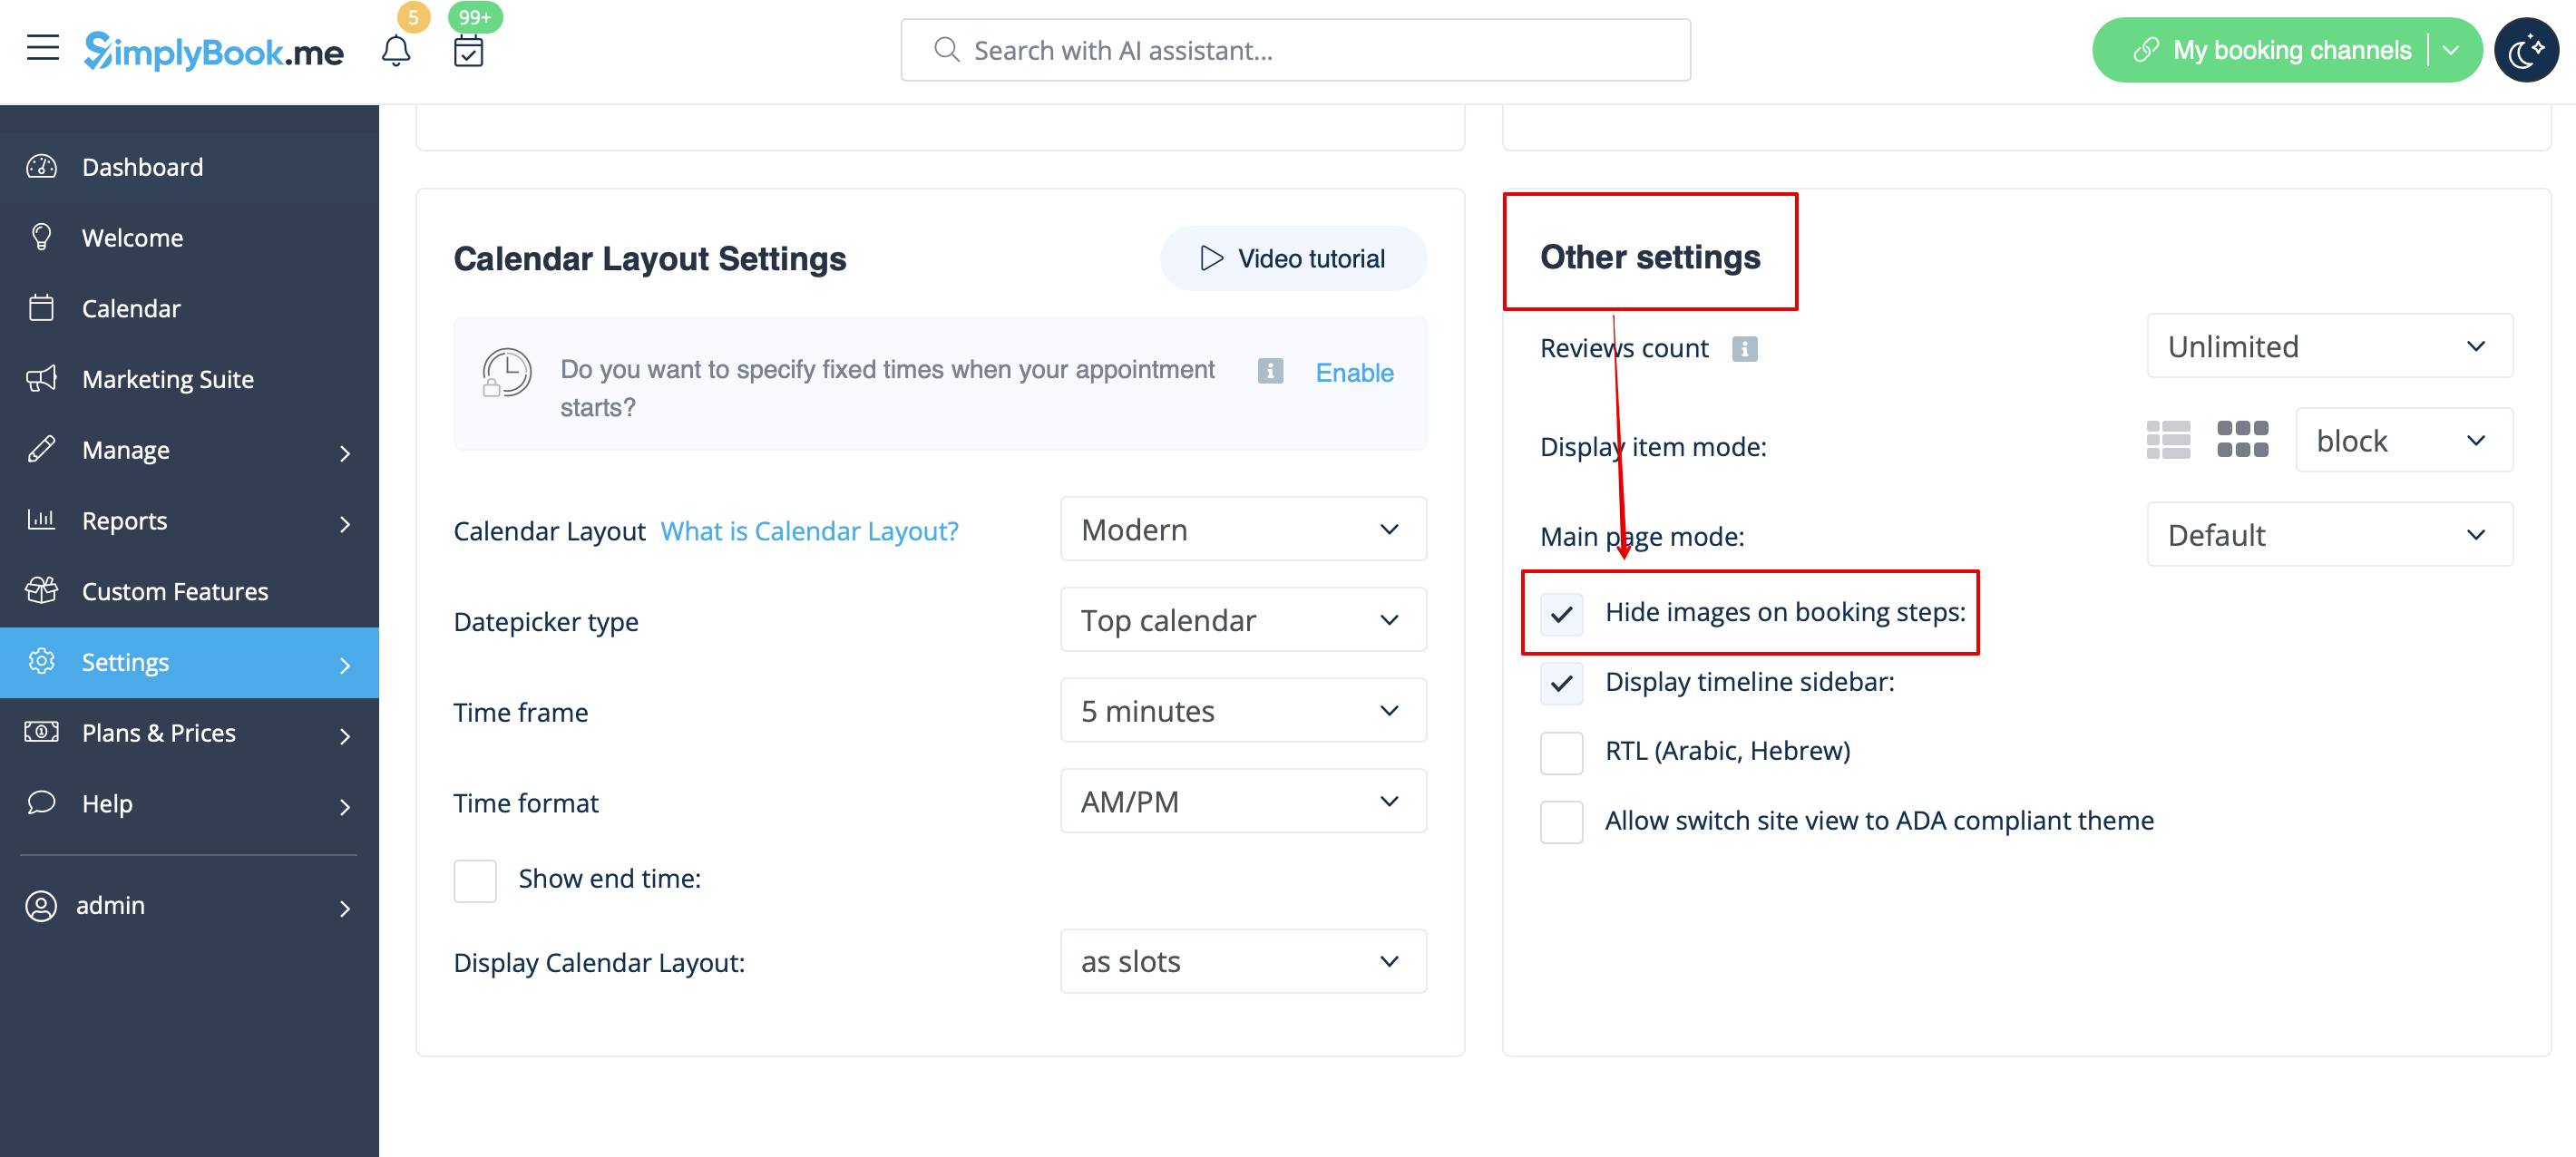
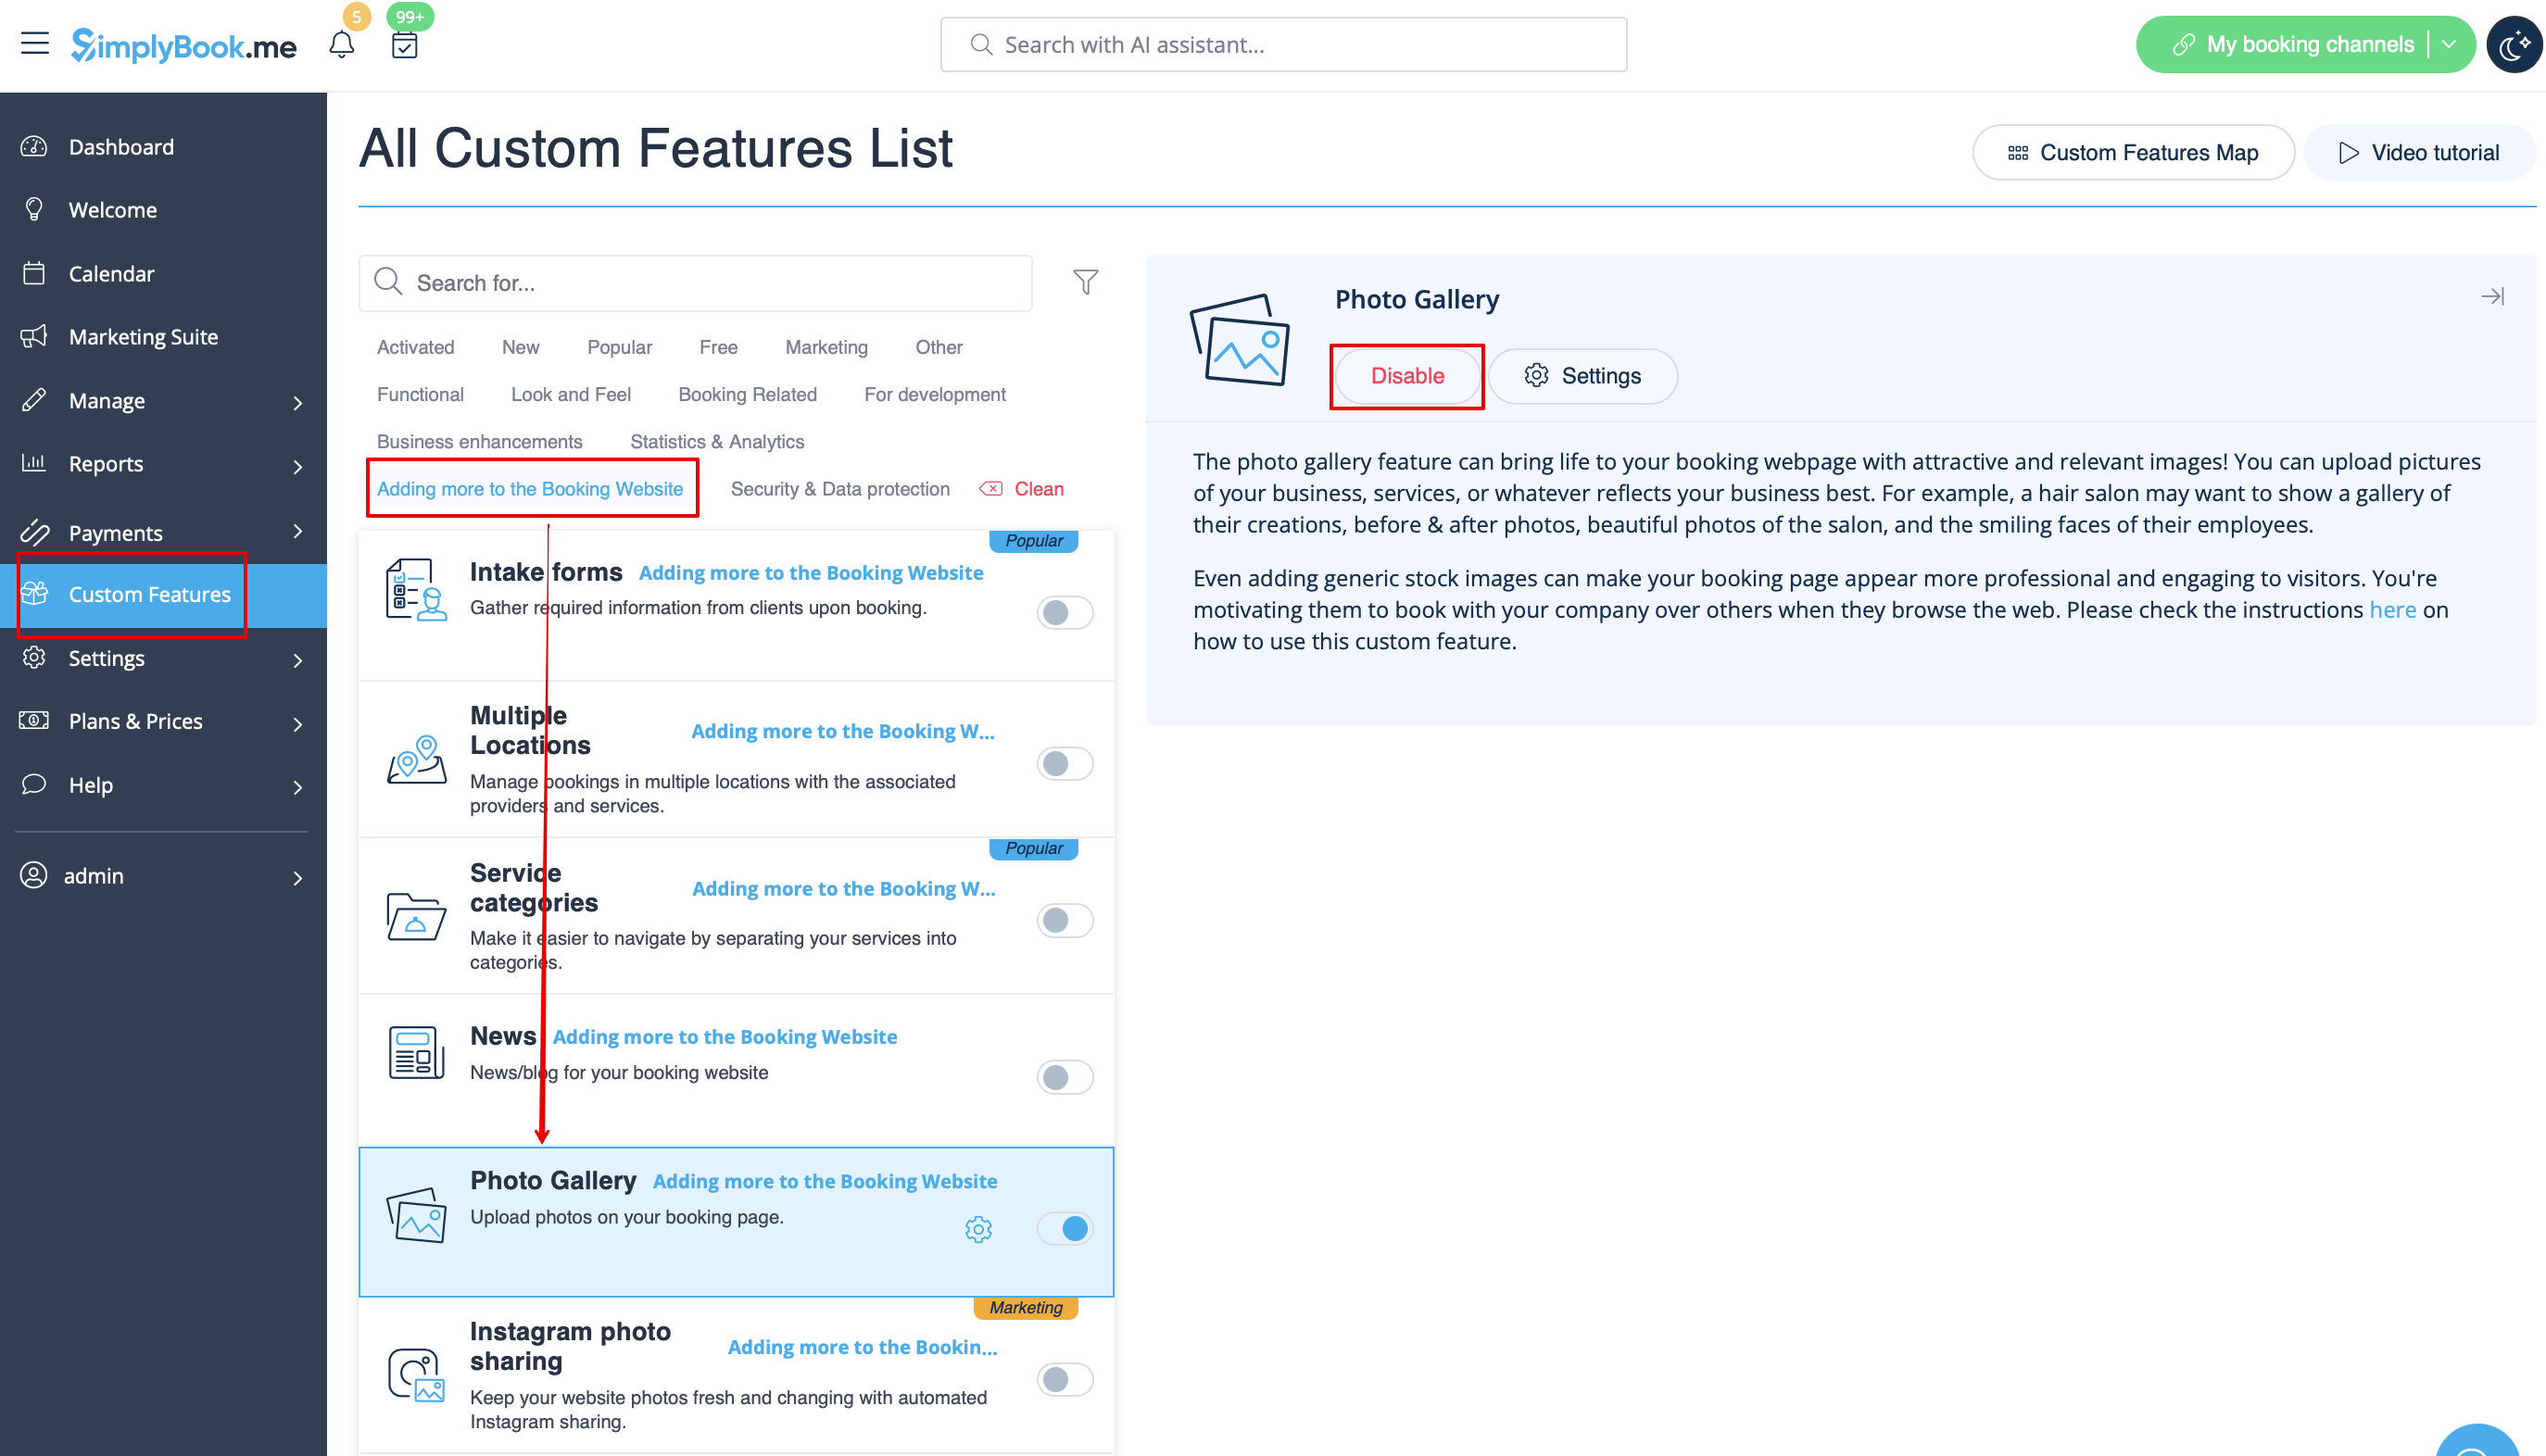
Зображення для кроків "Послуга", "Постачальник послуг", "Категорія" та "Місцезнаходження
Перейдіть до Налаштування -> Налаштування дизайну -> Інші налаштування і встановіть прапорець Приховувати зображення на кроках бронювання. Збережіть налаштування.
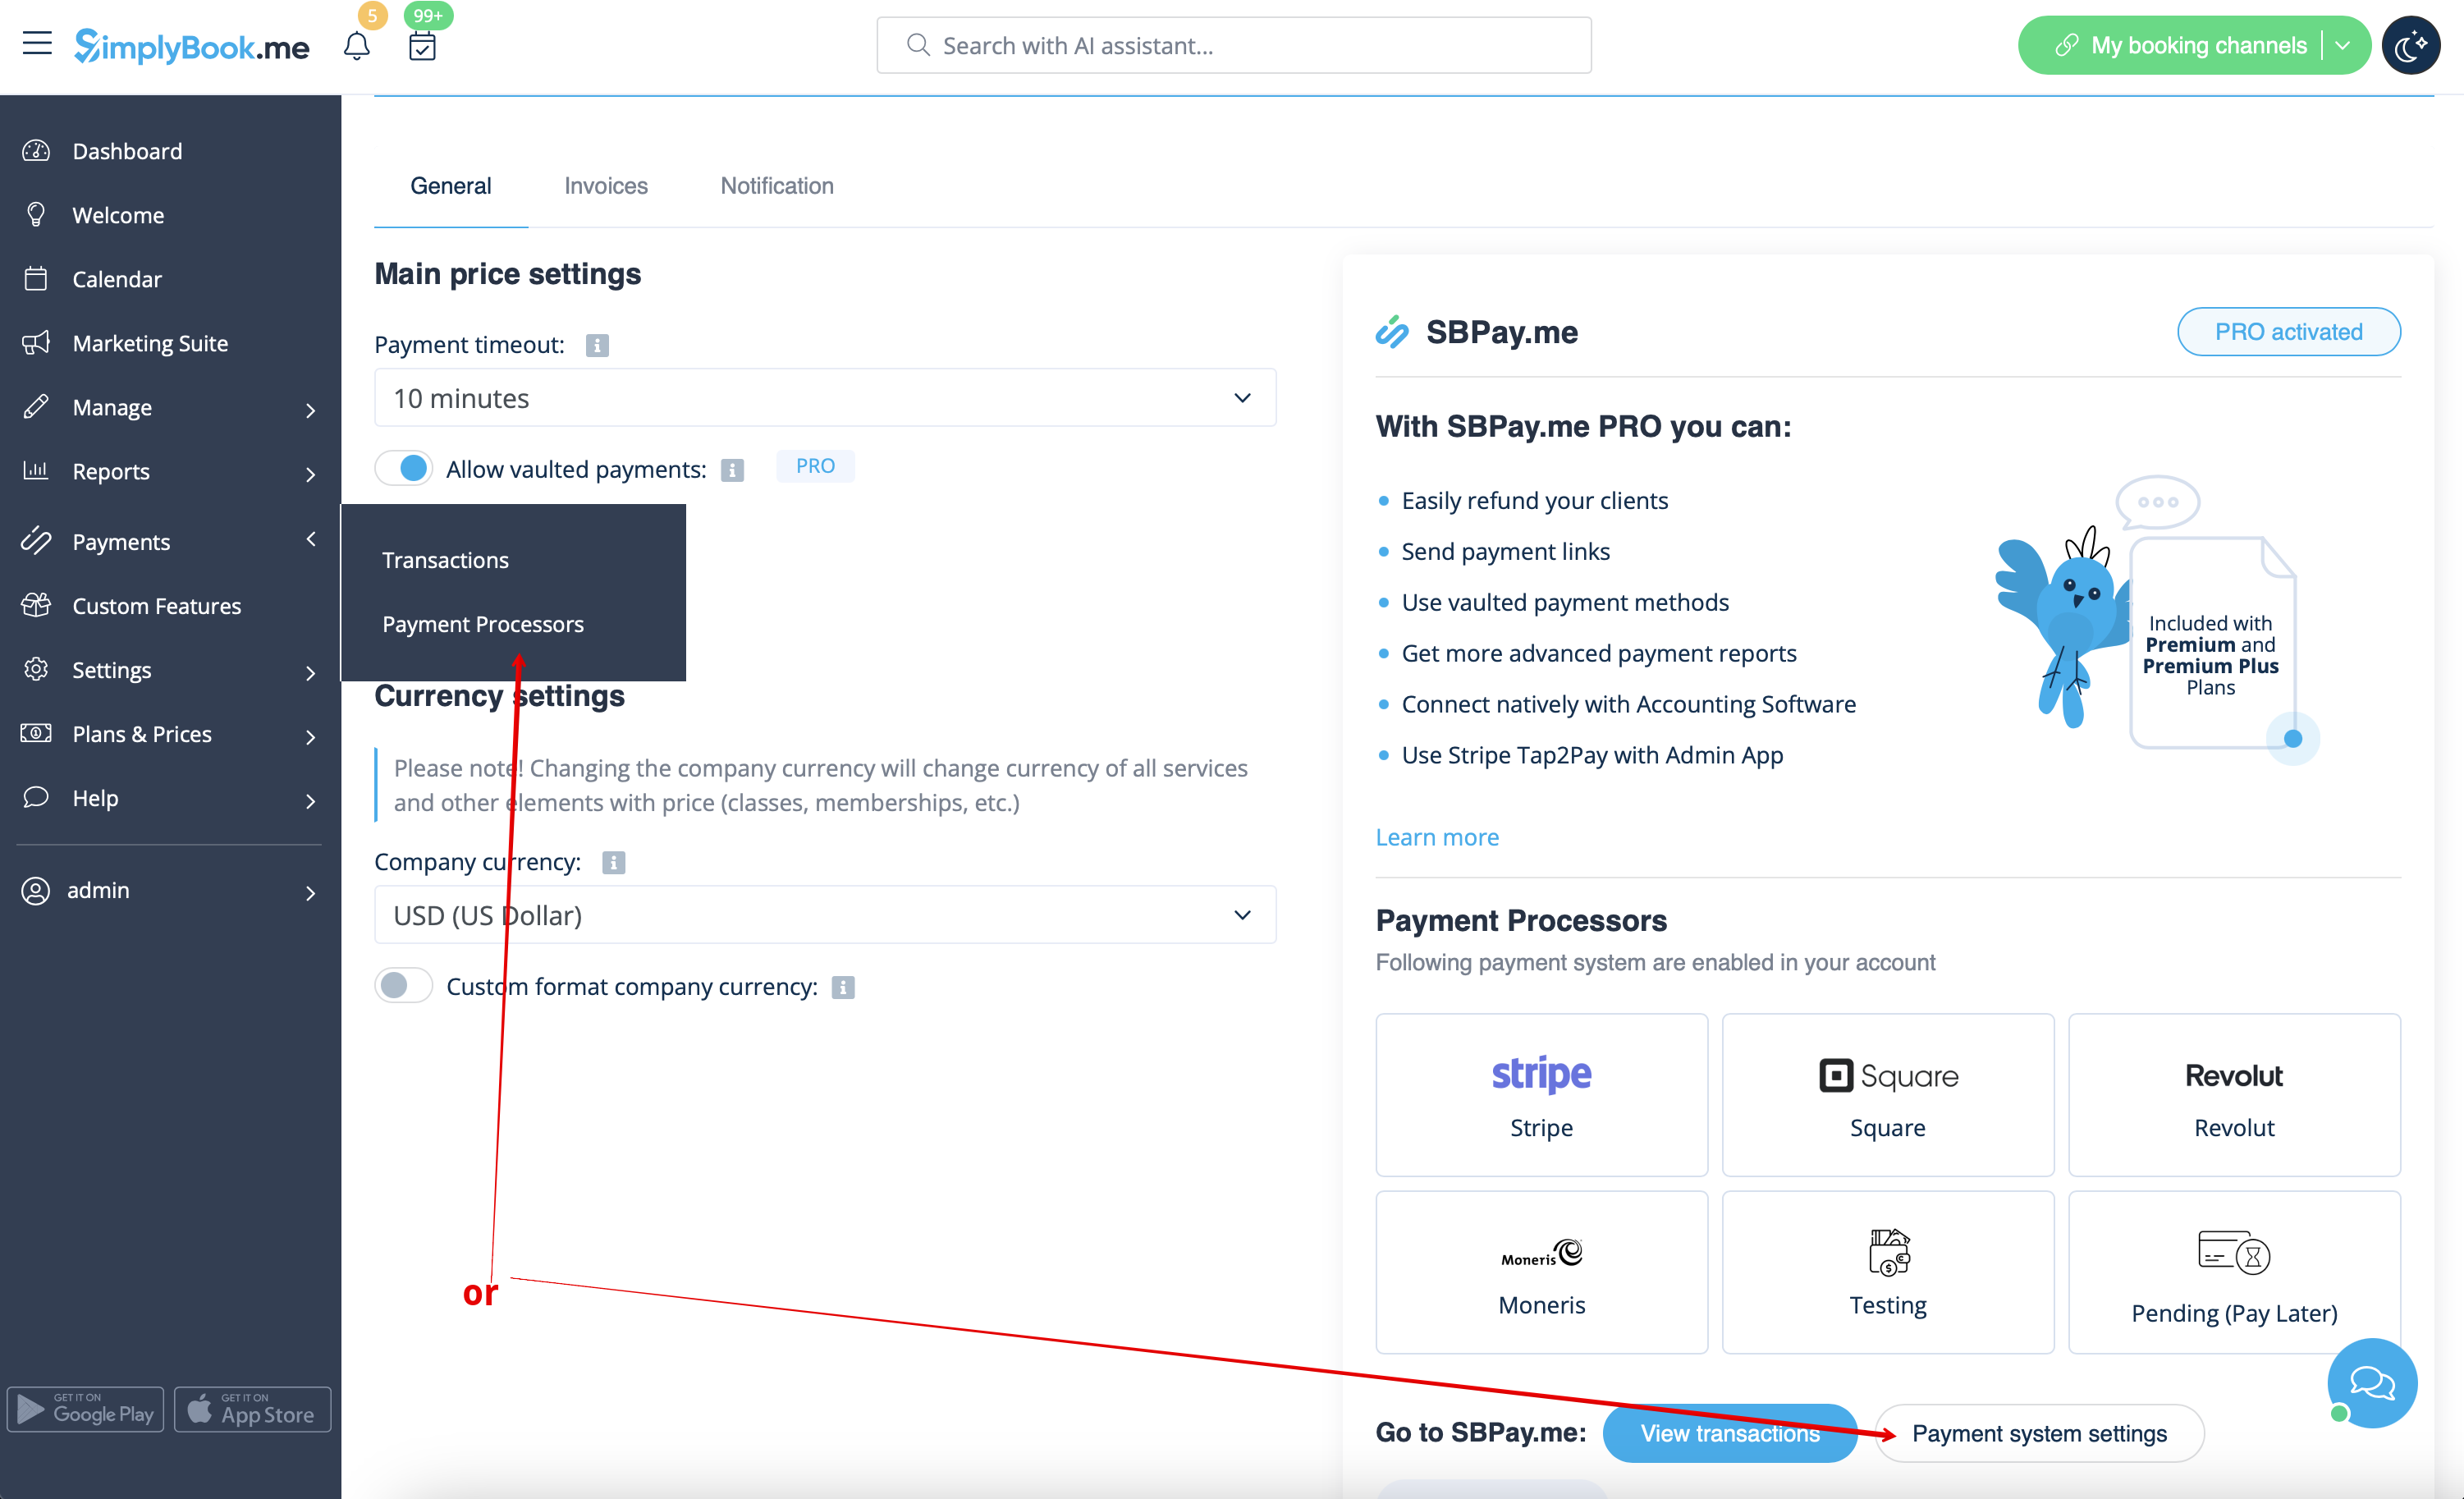
Можливість сплатити пізніше
Перейдіть до Платежі -> Платіжні системи або користувацькі функції -> Приймати платежі -> Налаштування -> Налаштування платіжної системи, щоб перейти до інтерфейсу SBPay.me і вимкнути там опцію Сплатити пізніше.
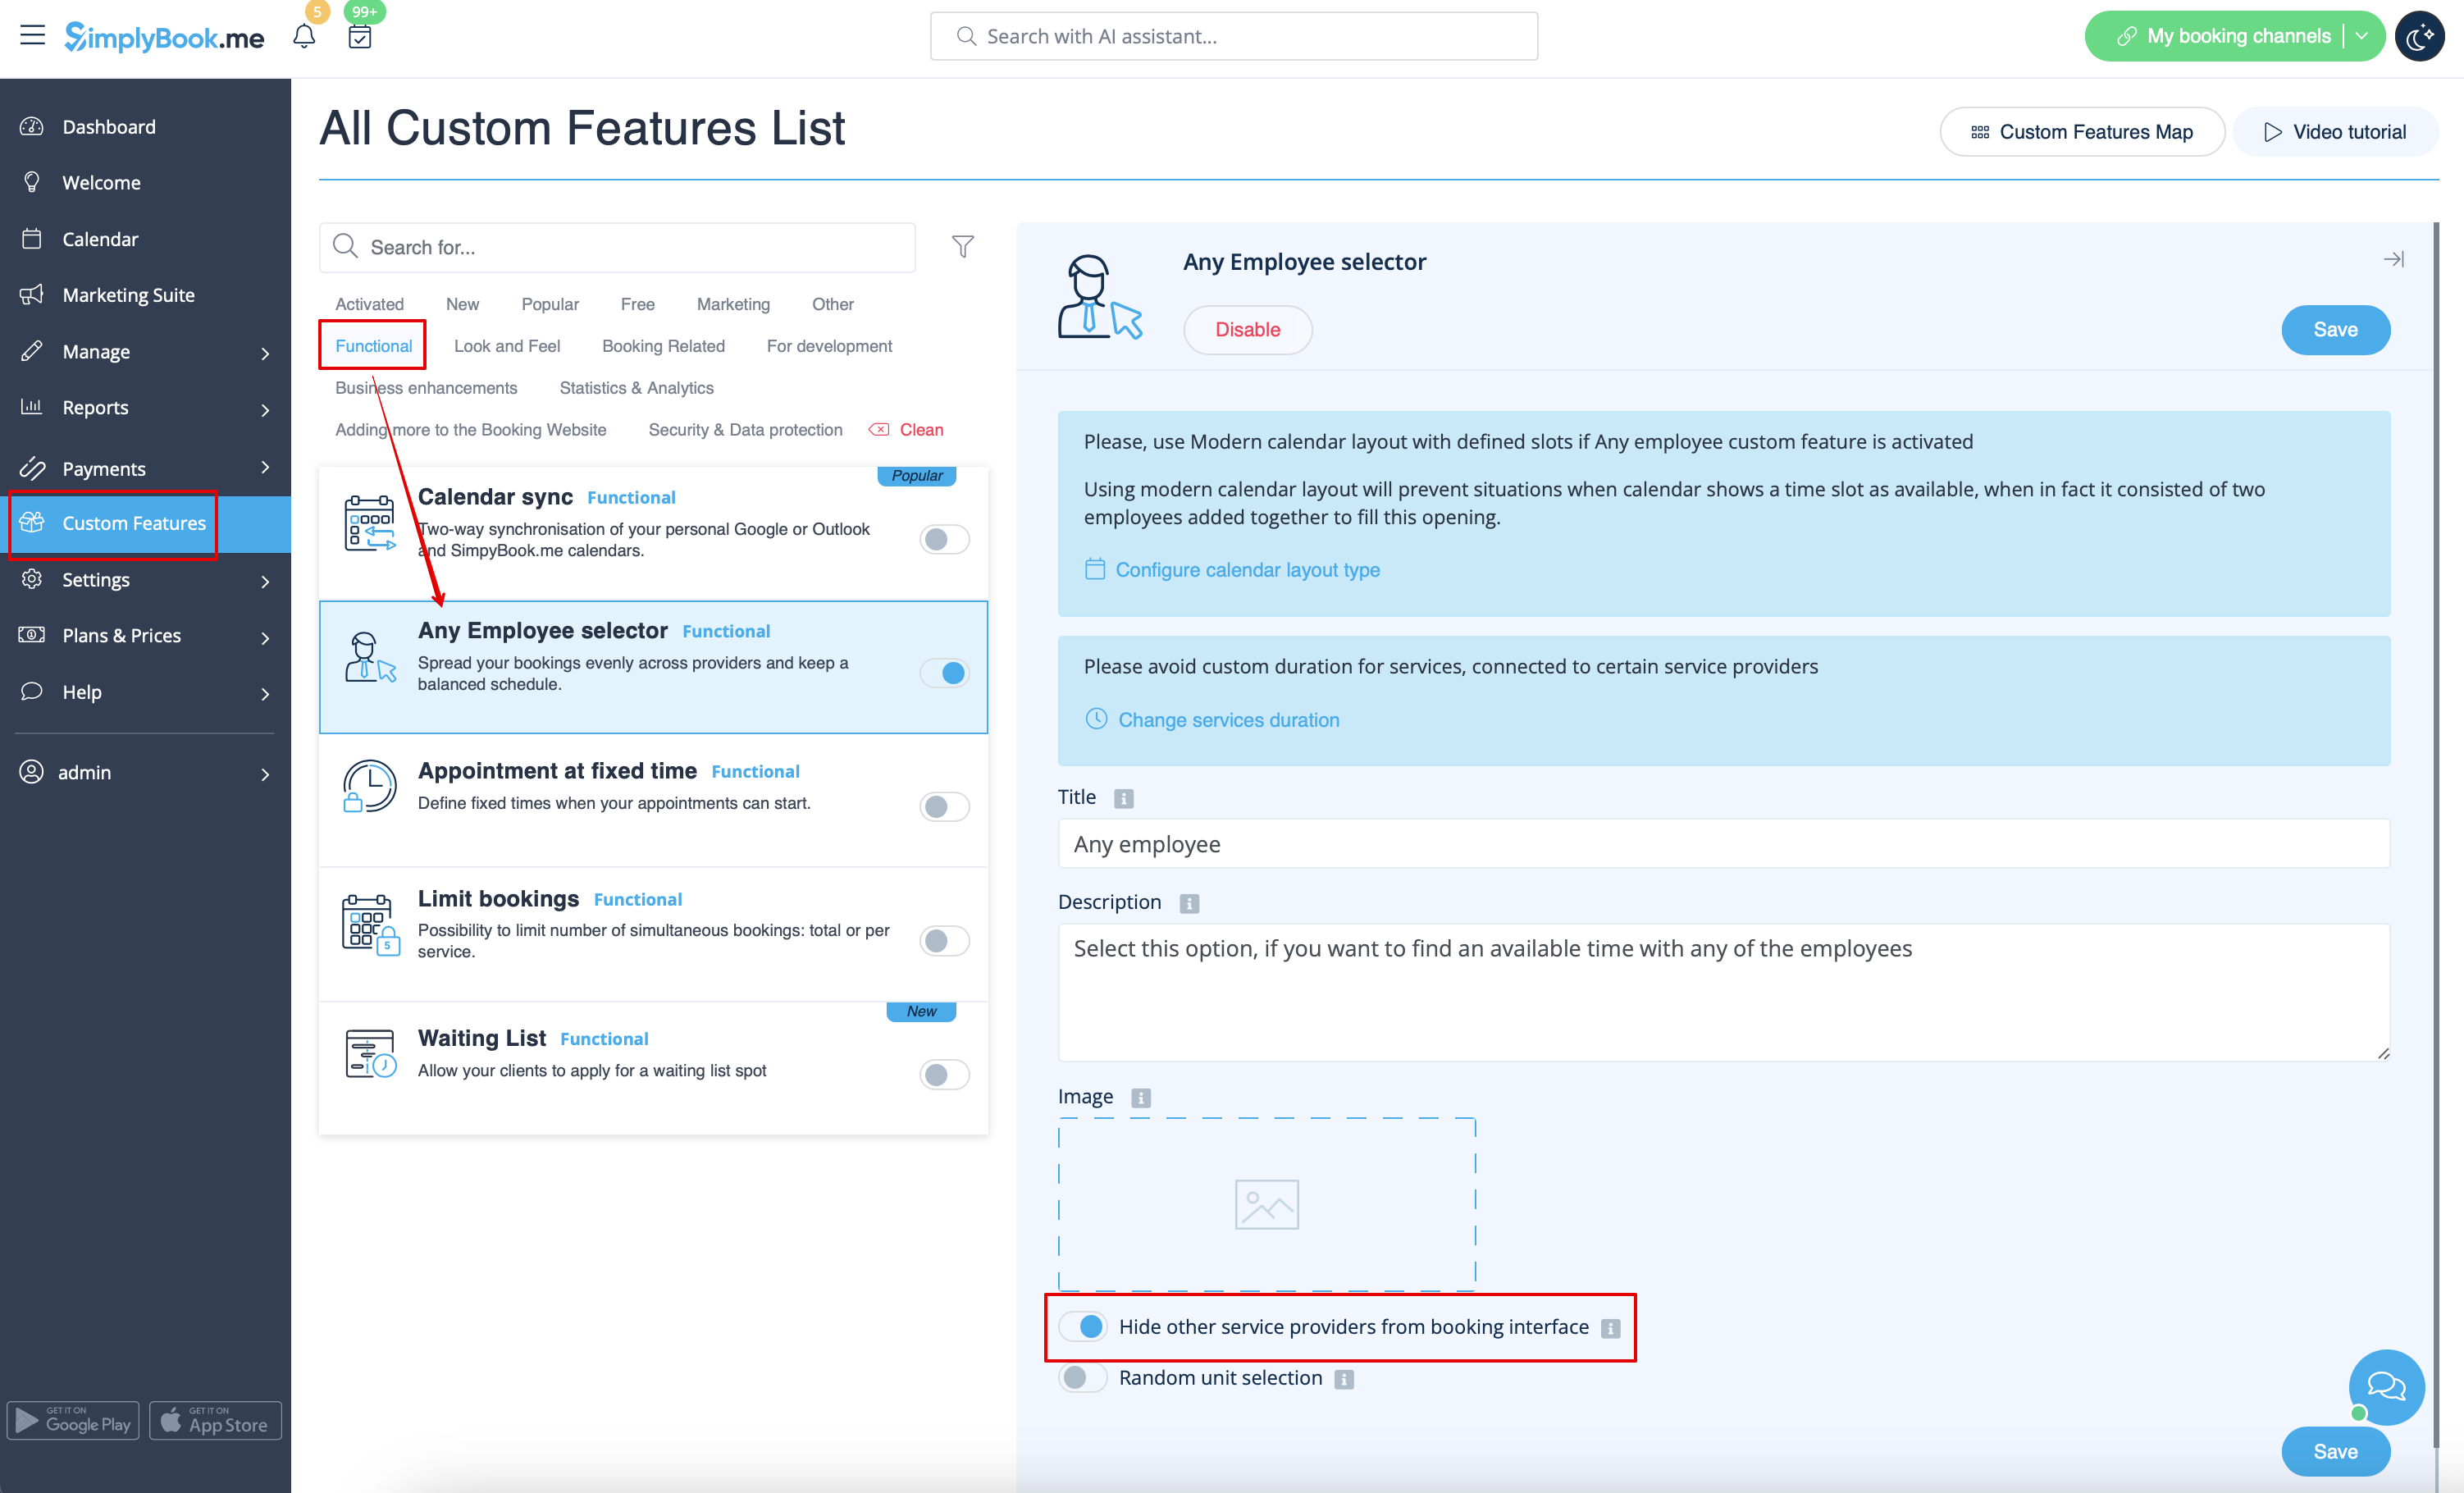
Крок для співробітника
Увімкніть селектор "Будь-який працівник " у розділі "Користувацькі функції " та в його налаштуваннях з правого боку сторінки увімкніть опцію " Приховати інших постачальників послуг з інтерфейсу бронювання
Карта
В Налаштуваннях -> Інформація про компанію -> Не використовувати адресу.
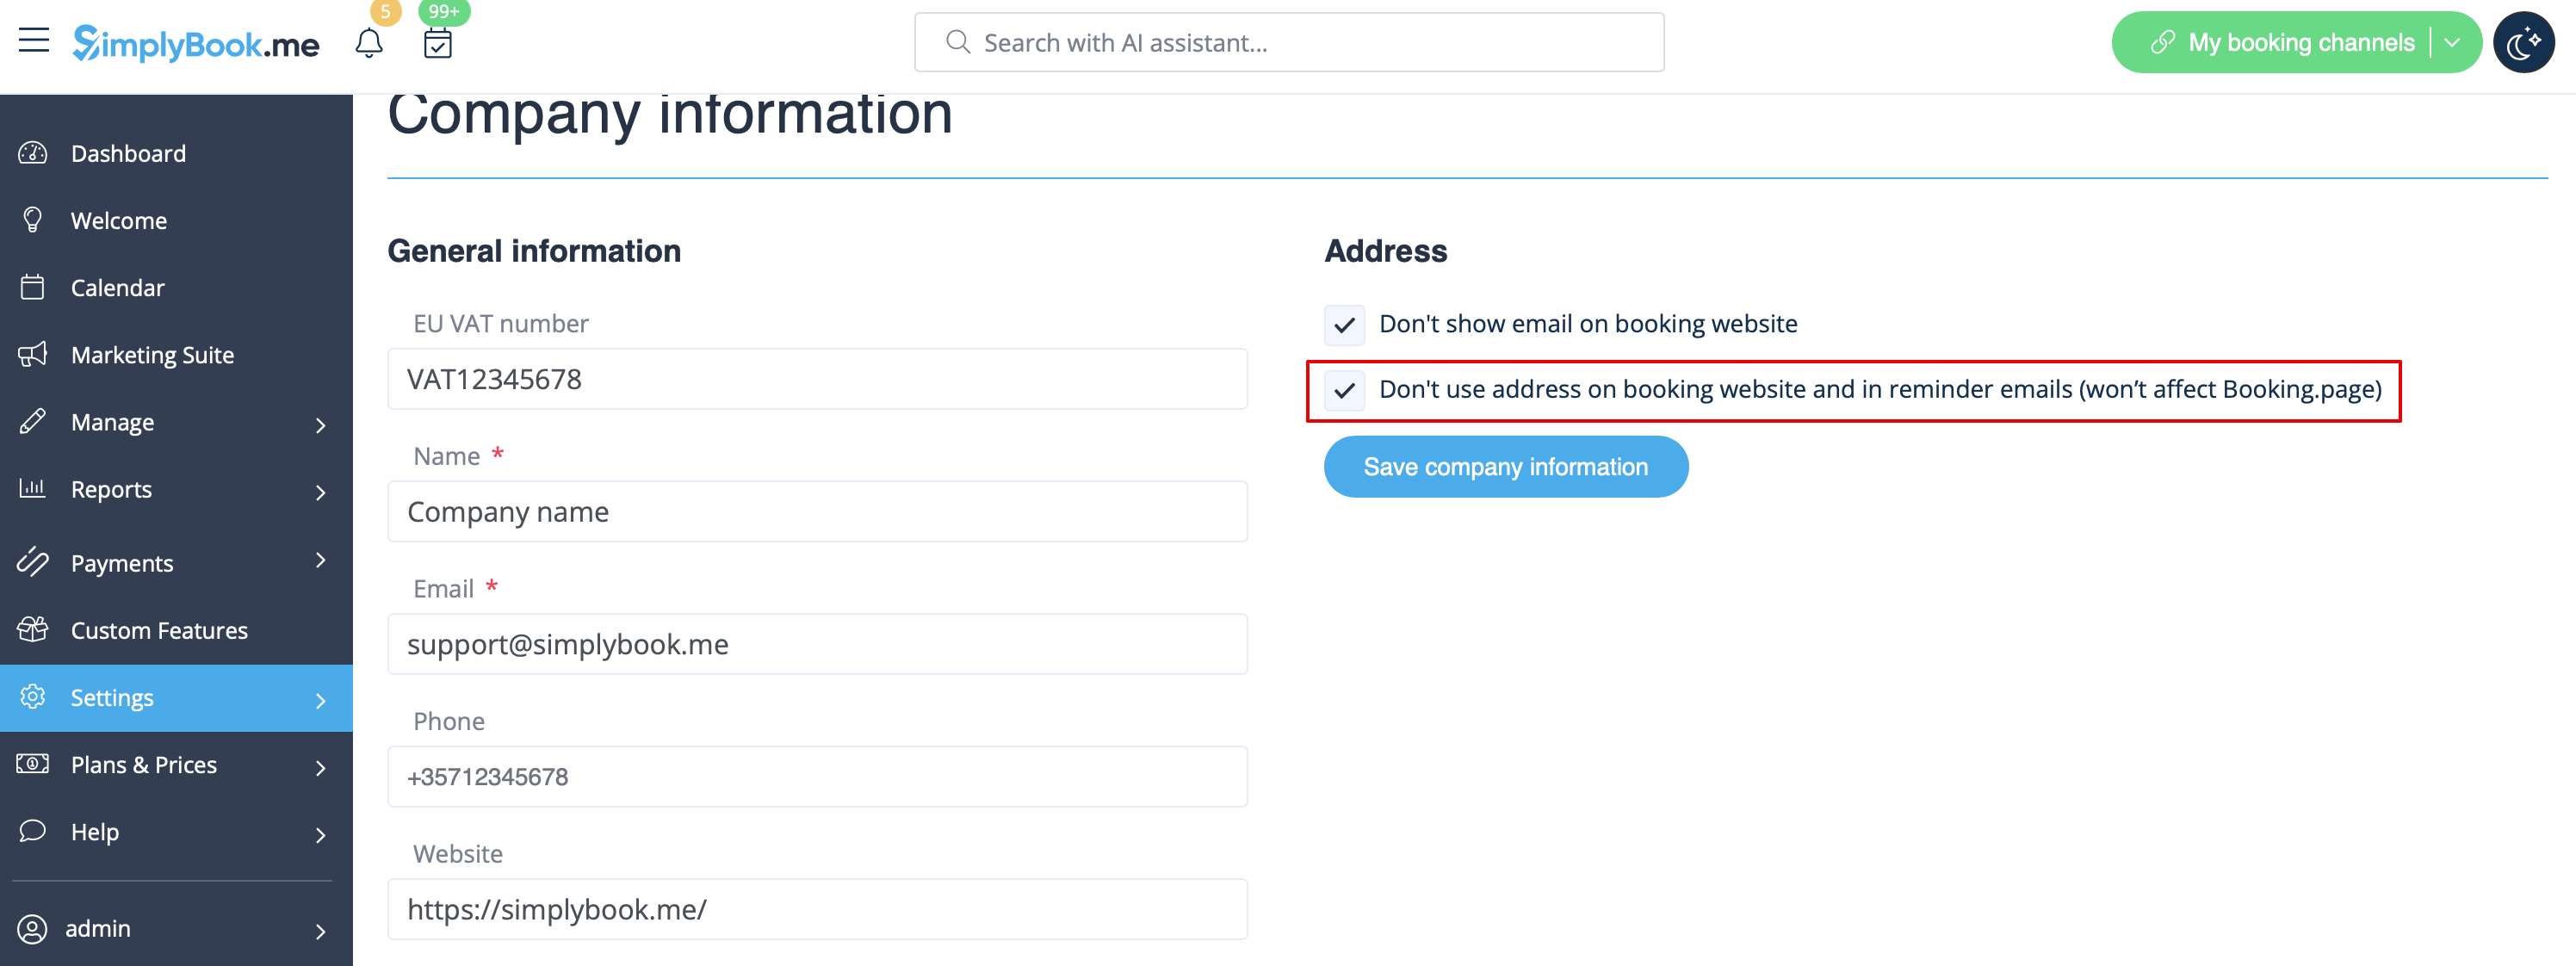
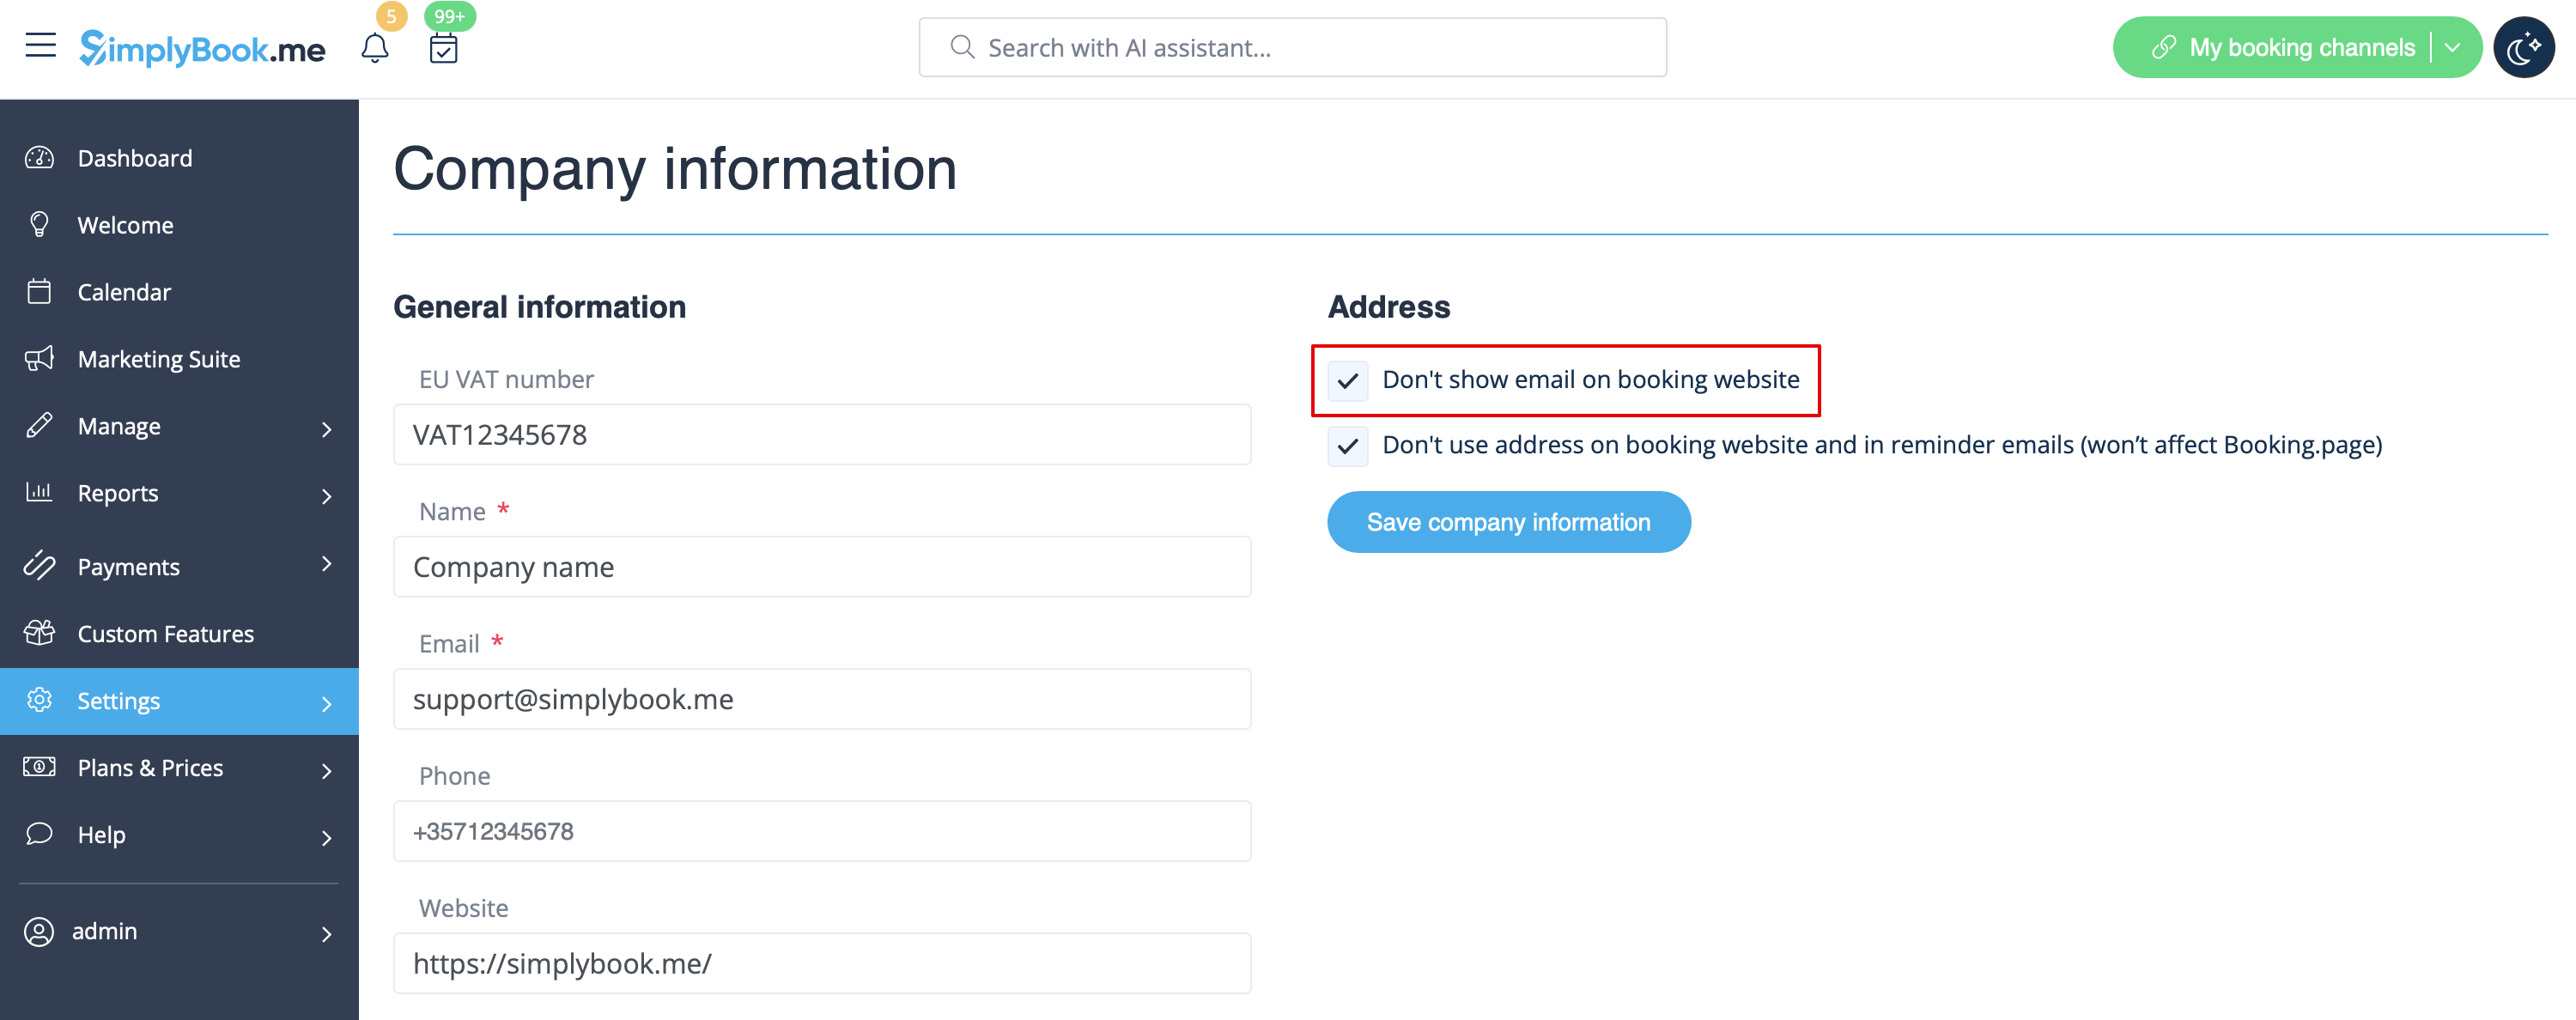
Адреса електронної пошти компанії
У Налаштуваннях -> Інформація про компанію -> Не показувати електронну пошту на сторінці бронювання встановіть прапорець.
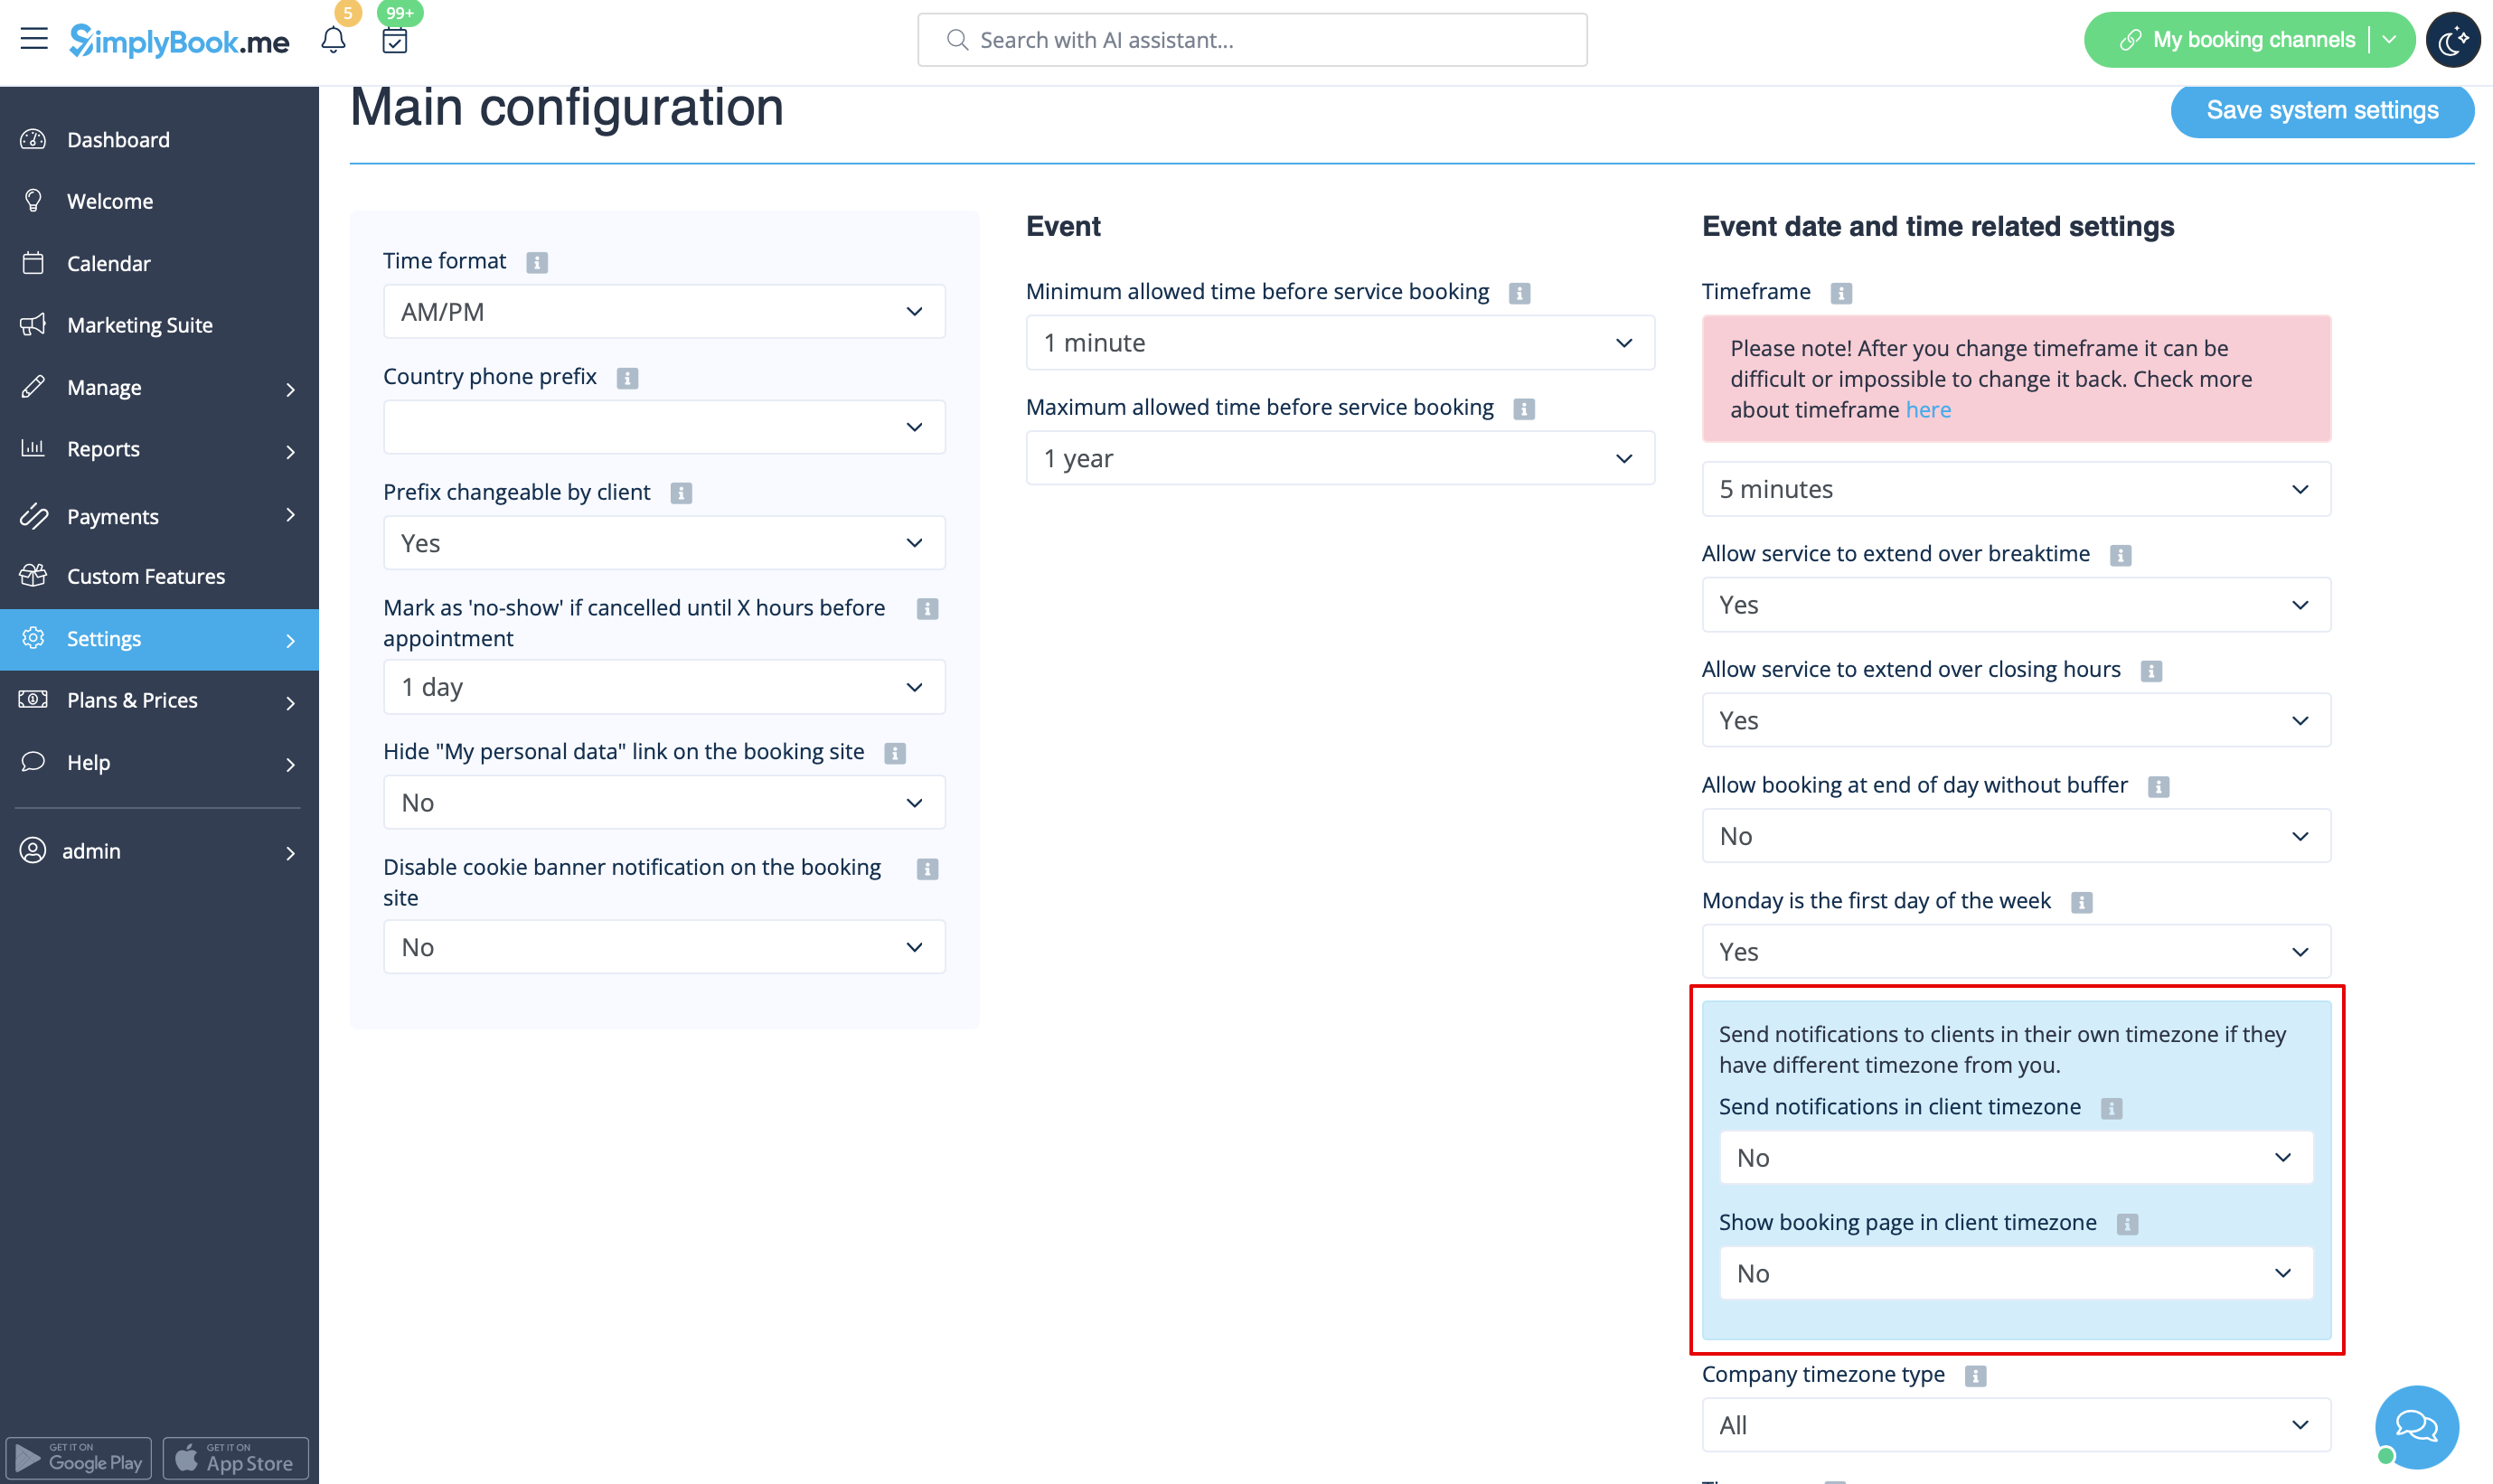
Опція "Змінити часовий пояс"
У розділі Налаштування -> Основна конфігурація встановіть для параметрів Показувати сторінку бронювання в часовому поясі клієнта та Надсилати сповіщення в часовому поясі клієнта значення Ні та збережіть налаштування.
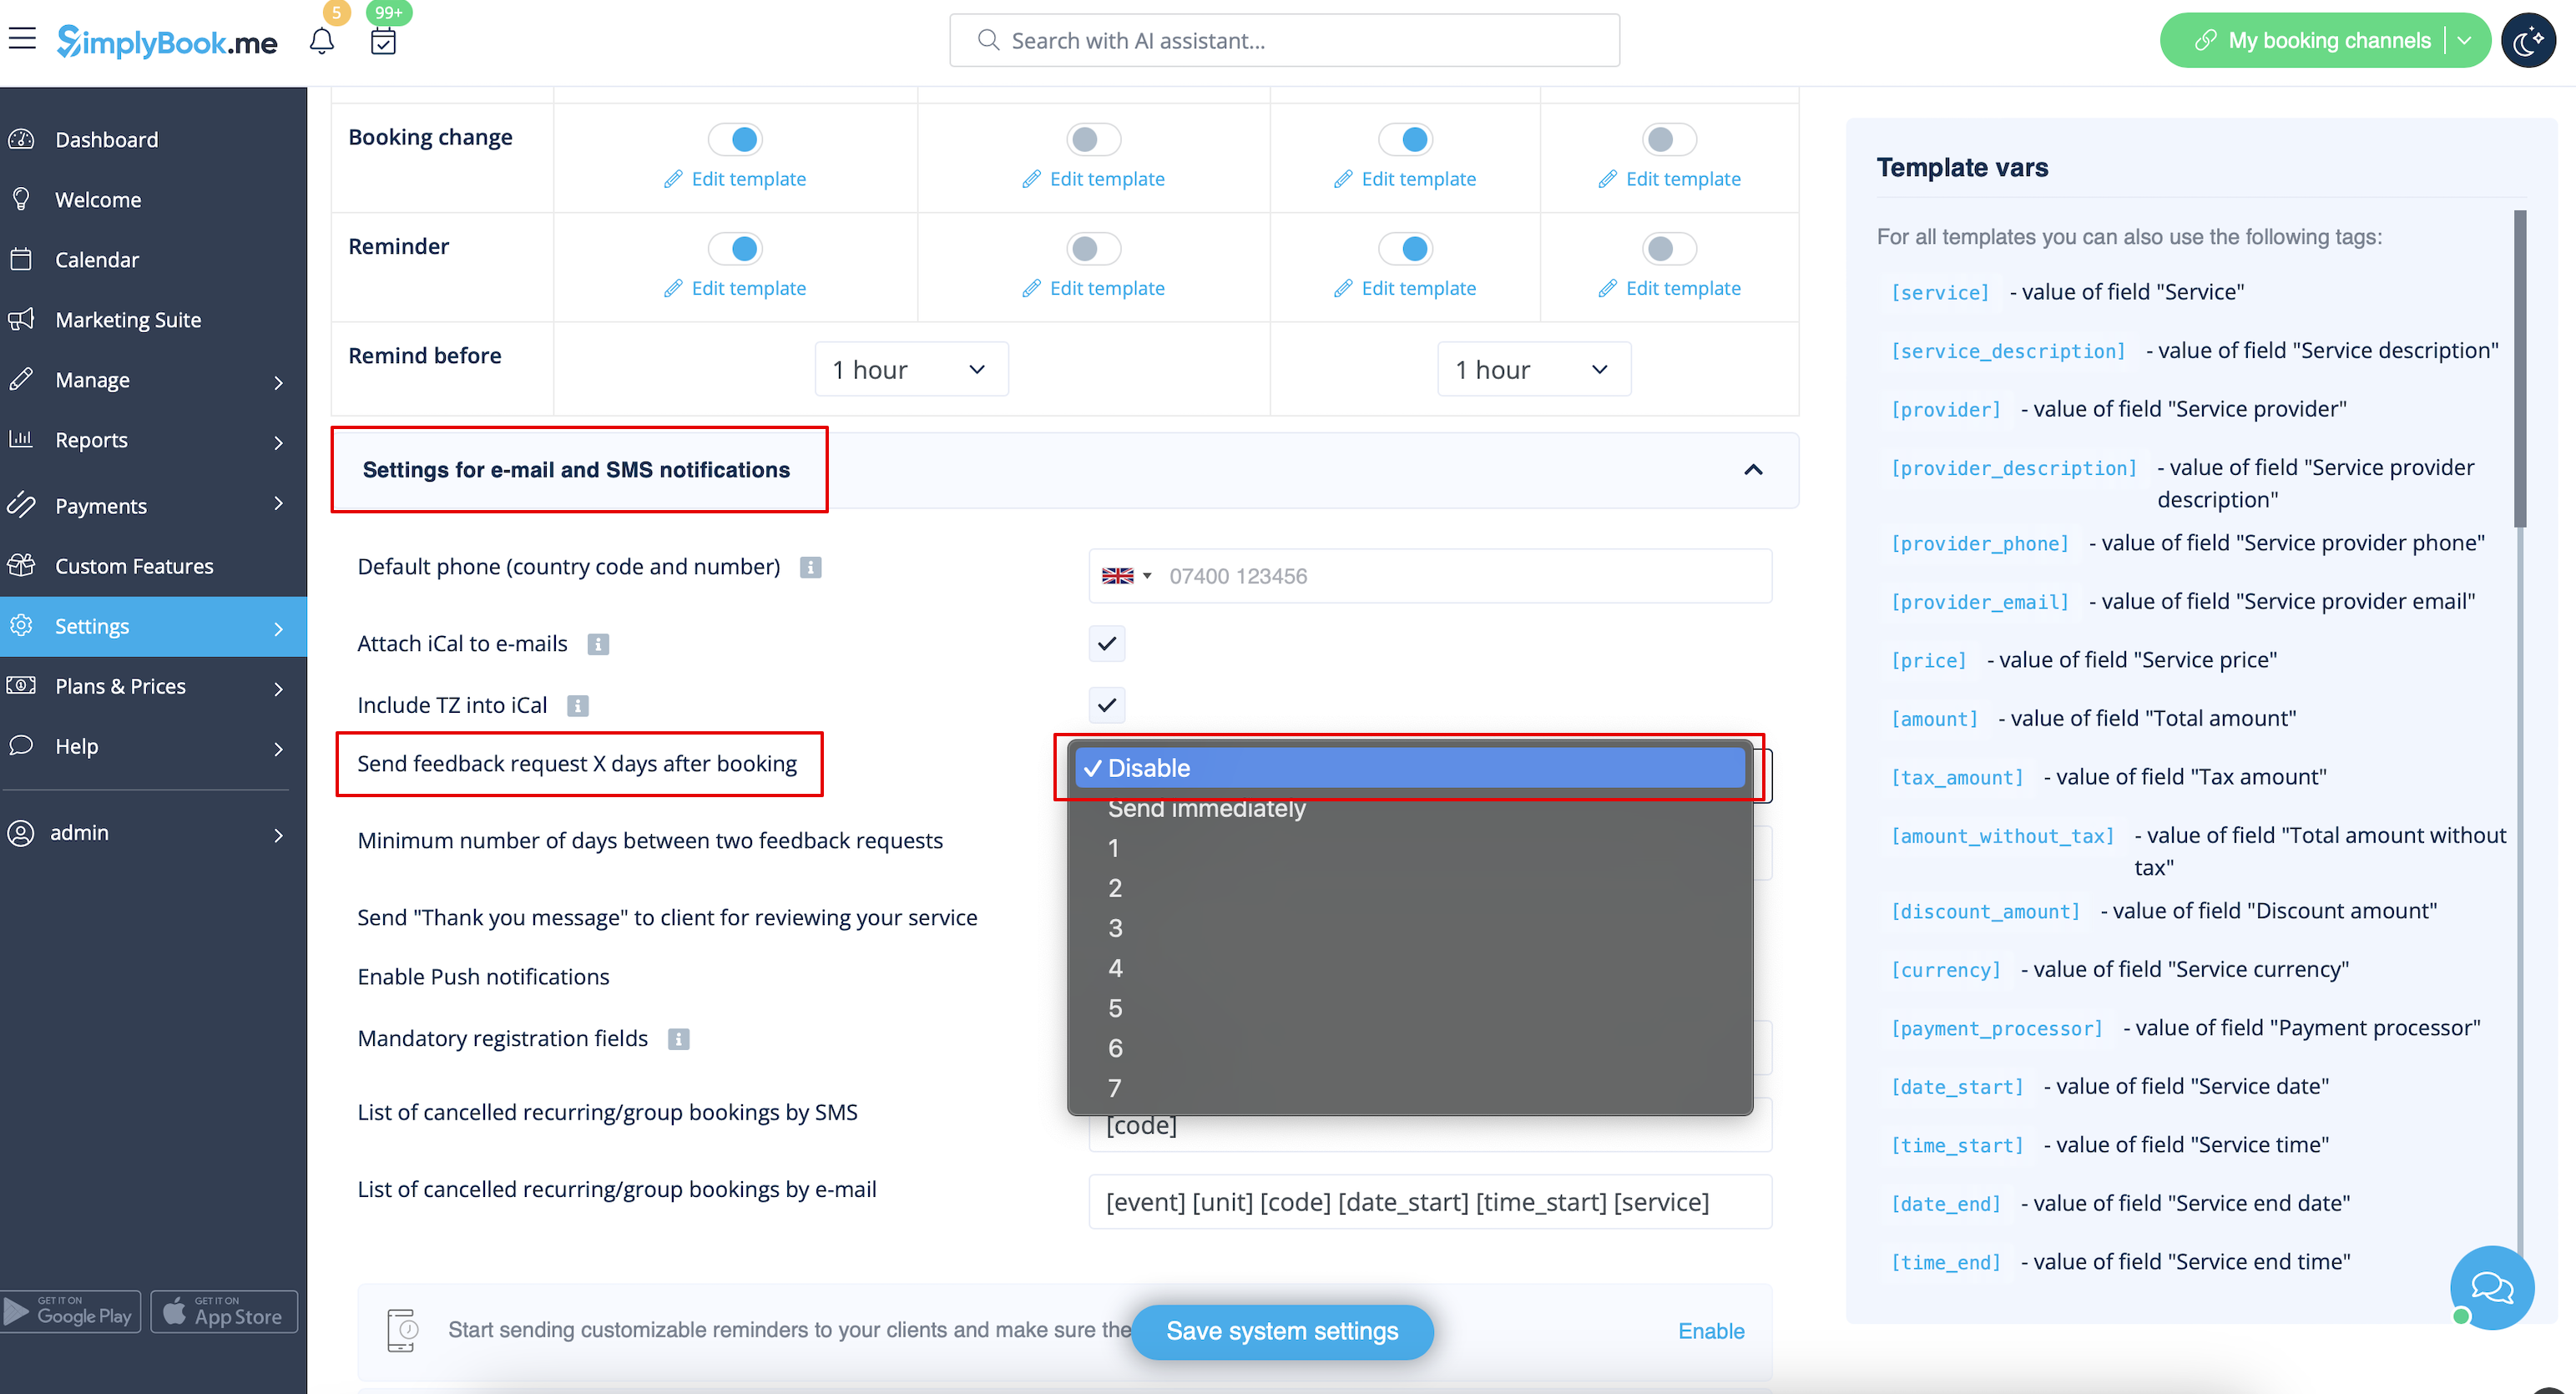
Відгуки
Ви можете переглянути всі свої відгуки на вкладці " Відгуки " в лівому боковому меню в розділі " Звіти". Там же ви можете видалити відгуки, якщо це необхідно. Якщо ви хочете видалити можливість залишити відгук на вашому сайті бронювання і не надсилати запит на відгук, то в Налаштуваннях -> Налаштування електронної пошти та SMS -> Налаштування сповіщень електронною поштою та SMS -> встановіть для опції Надсилати запит на відгук через X днів після бронювання значення Вимкнути.
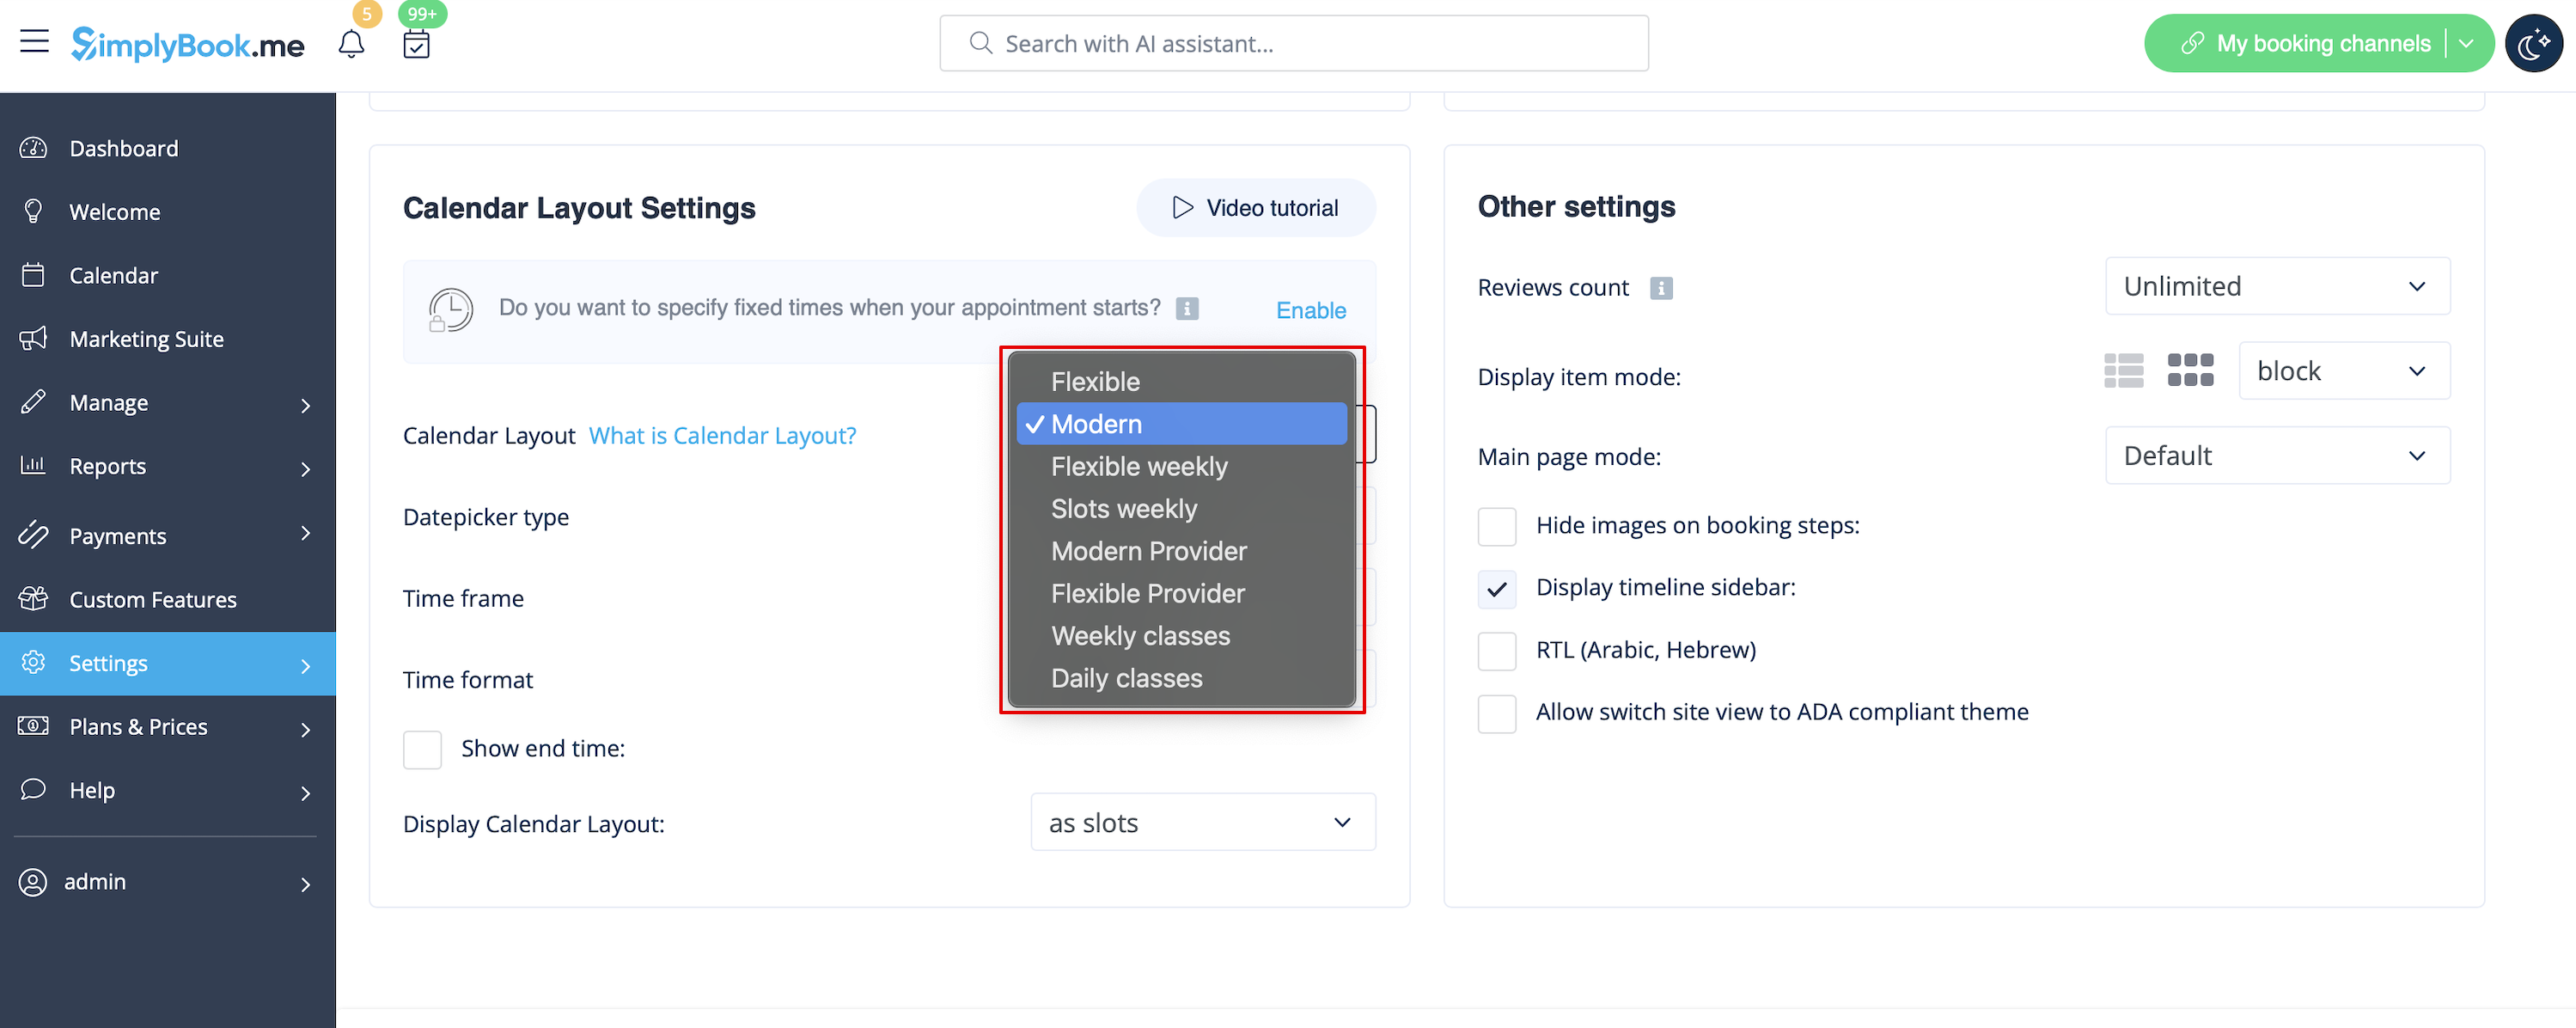
Working hours
If you want to remove this section for new themes please go to Settings -> Design settings -> Other settings -> Main page mode and choose mode without working hours.
SimplyBook.me Terms and Conditions
- Please note, that you need to confirm that you've added information about SimplyBook.me Ltd. as a supplier to your Terms&Conditions.
To remove the checkbox you need to have enabled and correctly set all the options mentioned:
Either:
1. SMTP + Custom domain + Terms and Conditions + theme different from blank.
Or:
2. SMTP + Terms and Conditions + blank theme + Widget on your website.
After that you will be able to enable I confirm that I've added information about SimplyBook.me Ltd. as a supplier to my T&C option in Custom features -> Terms&Conditions and after you save settings there the SimplyBook.me terms and conditions checkbox will be removed from the booking site.

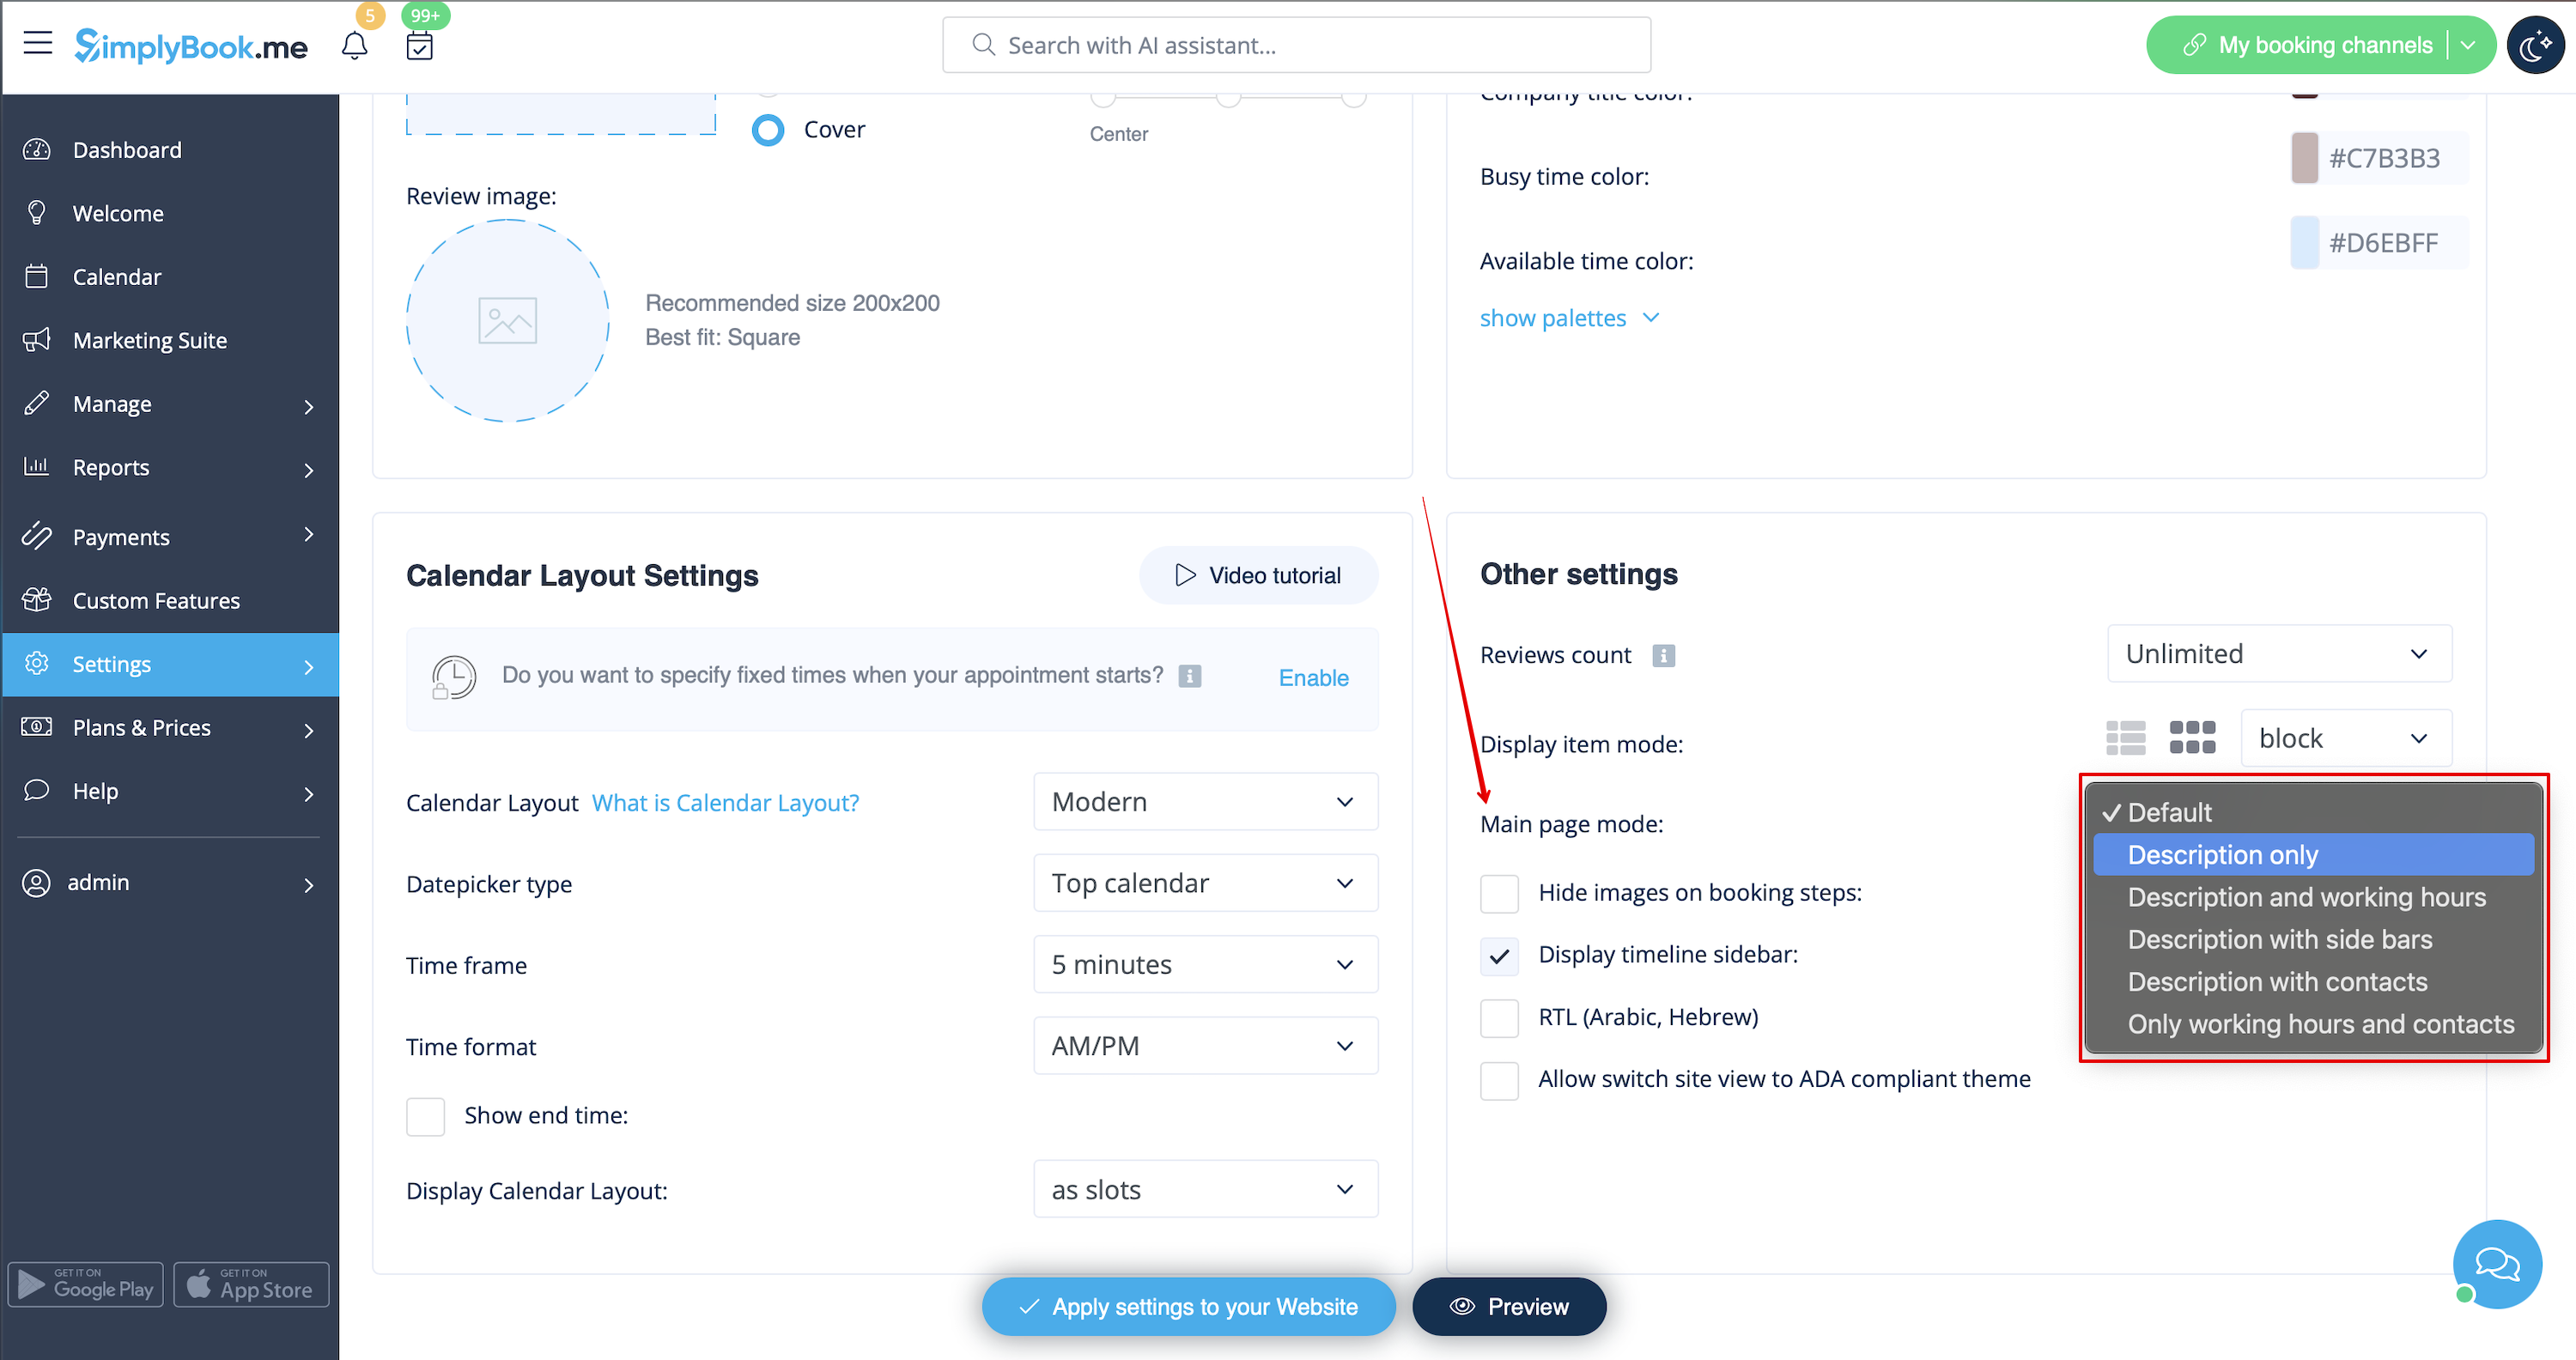
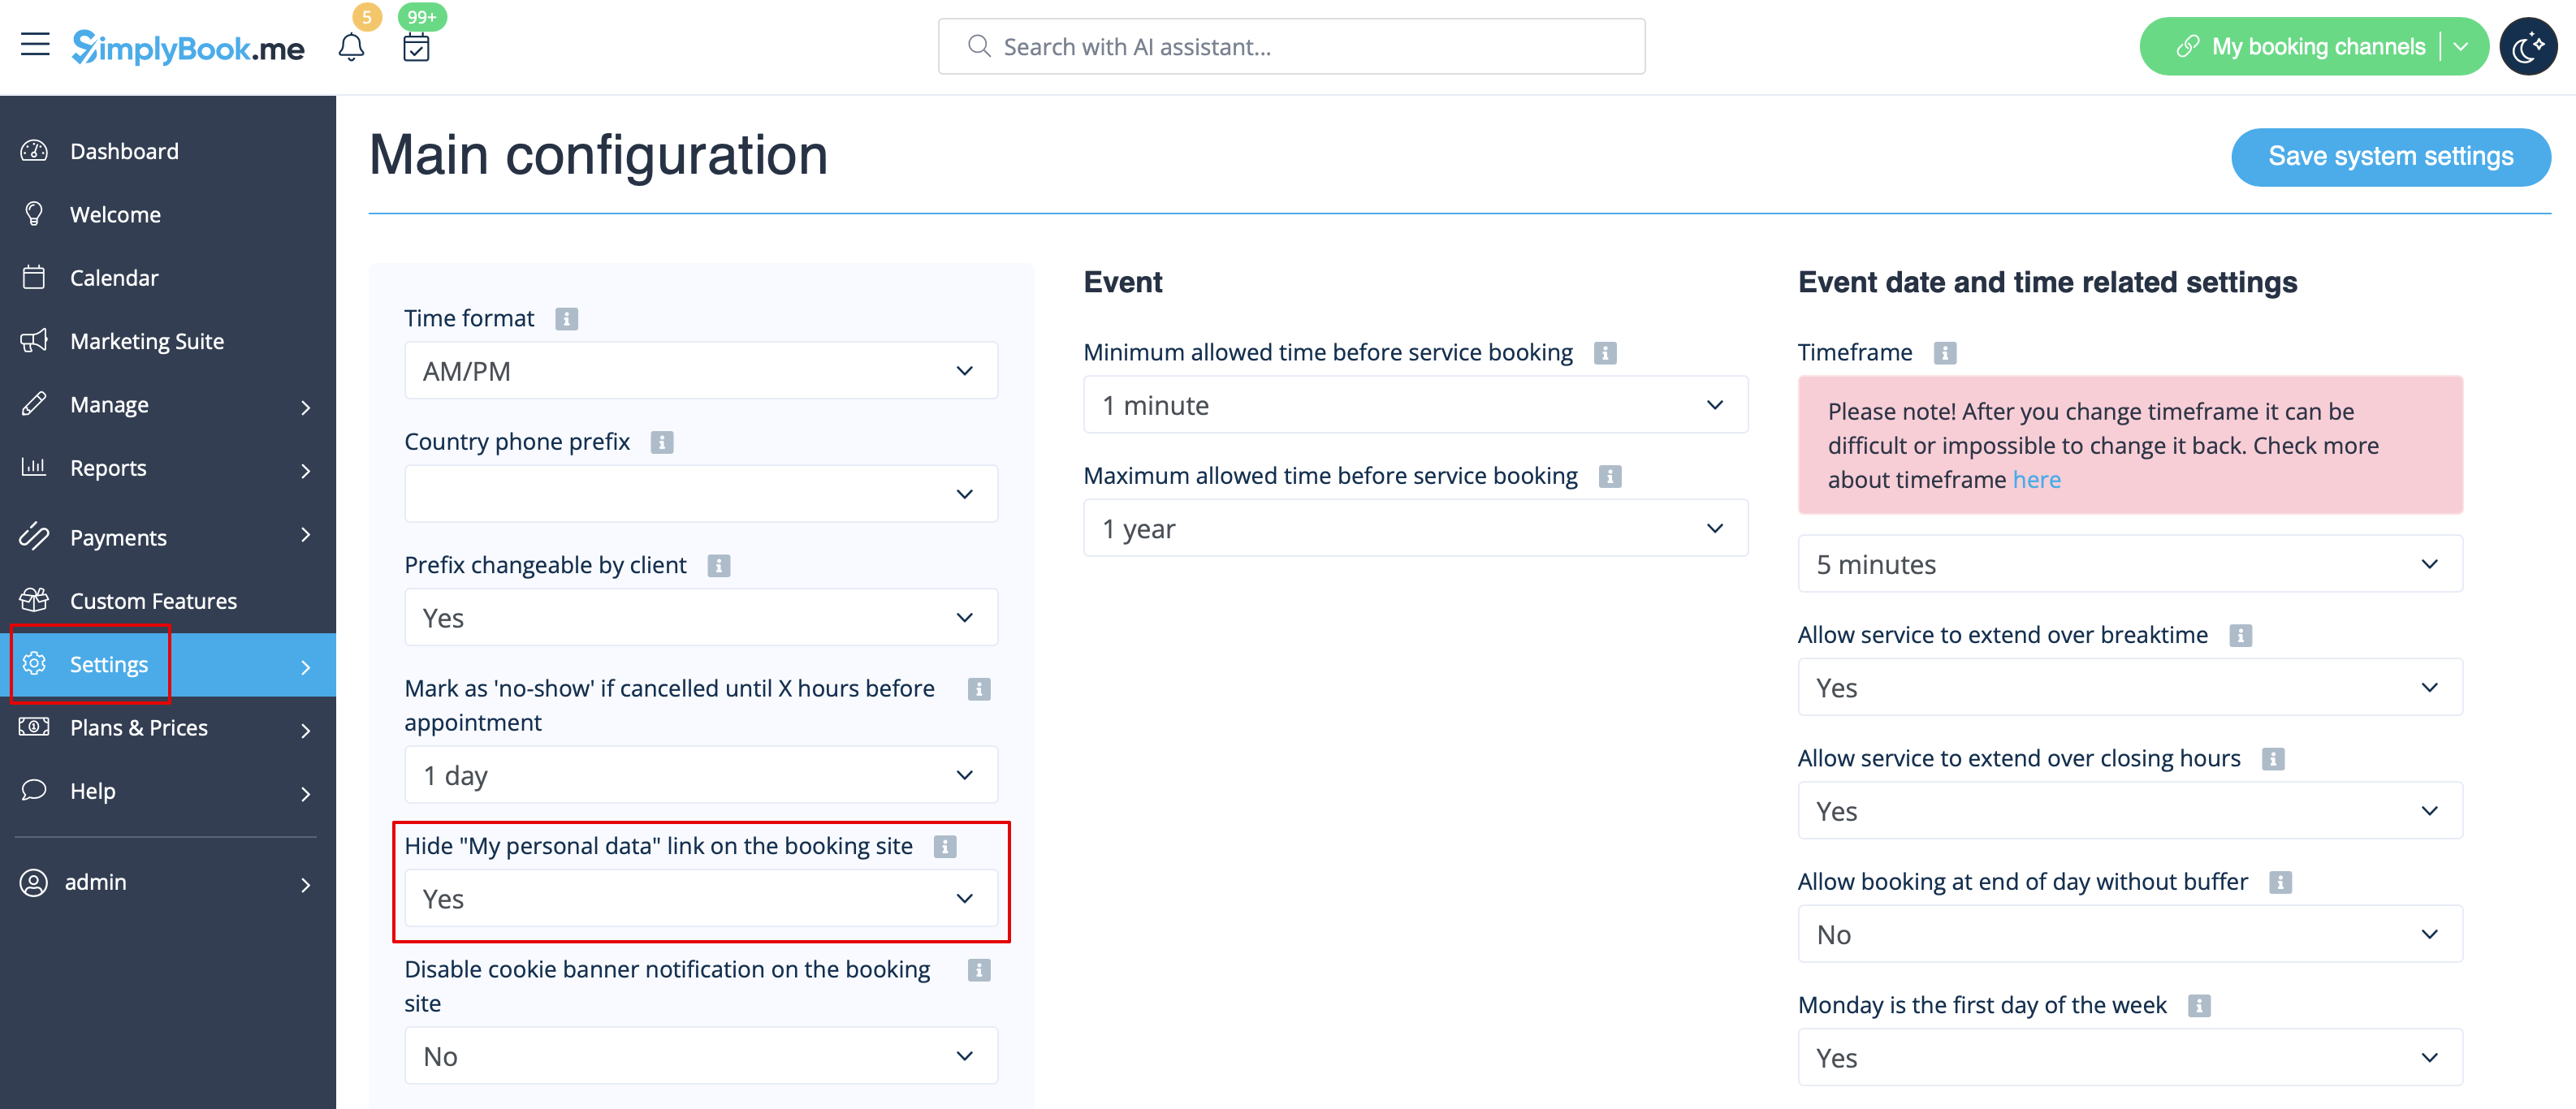
My personal data link
Go to Settings -> Main configuration and select Yes in Hide "My personal data" link on the booking site. save settings.
Please select modern, modern provider, daily(available with Classes feature enabled) or weekly classes calendar layout in Settings -> Design settings -> Calendar Layout -> Calendar Layout settings -> Calendar Layout drop-down.
Disable booking page(available for paid accounts only)
In order not to show any info on your booking page (make it blank), you can put blank theme on your booking page in Settings -> Design settings.
Please select to show all themes and choose the last one without image, add the link to the page your clients should be redirected to in case they open your booking page and save settings.
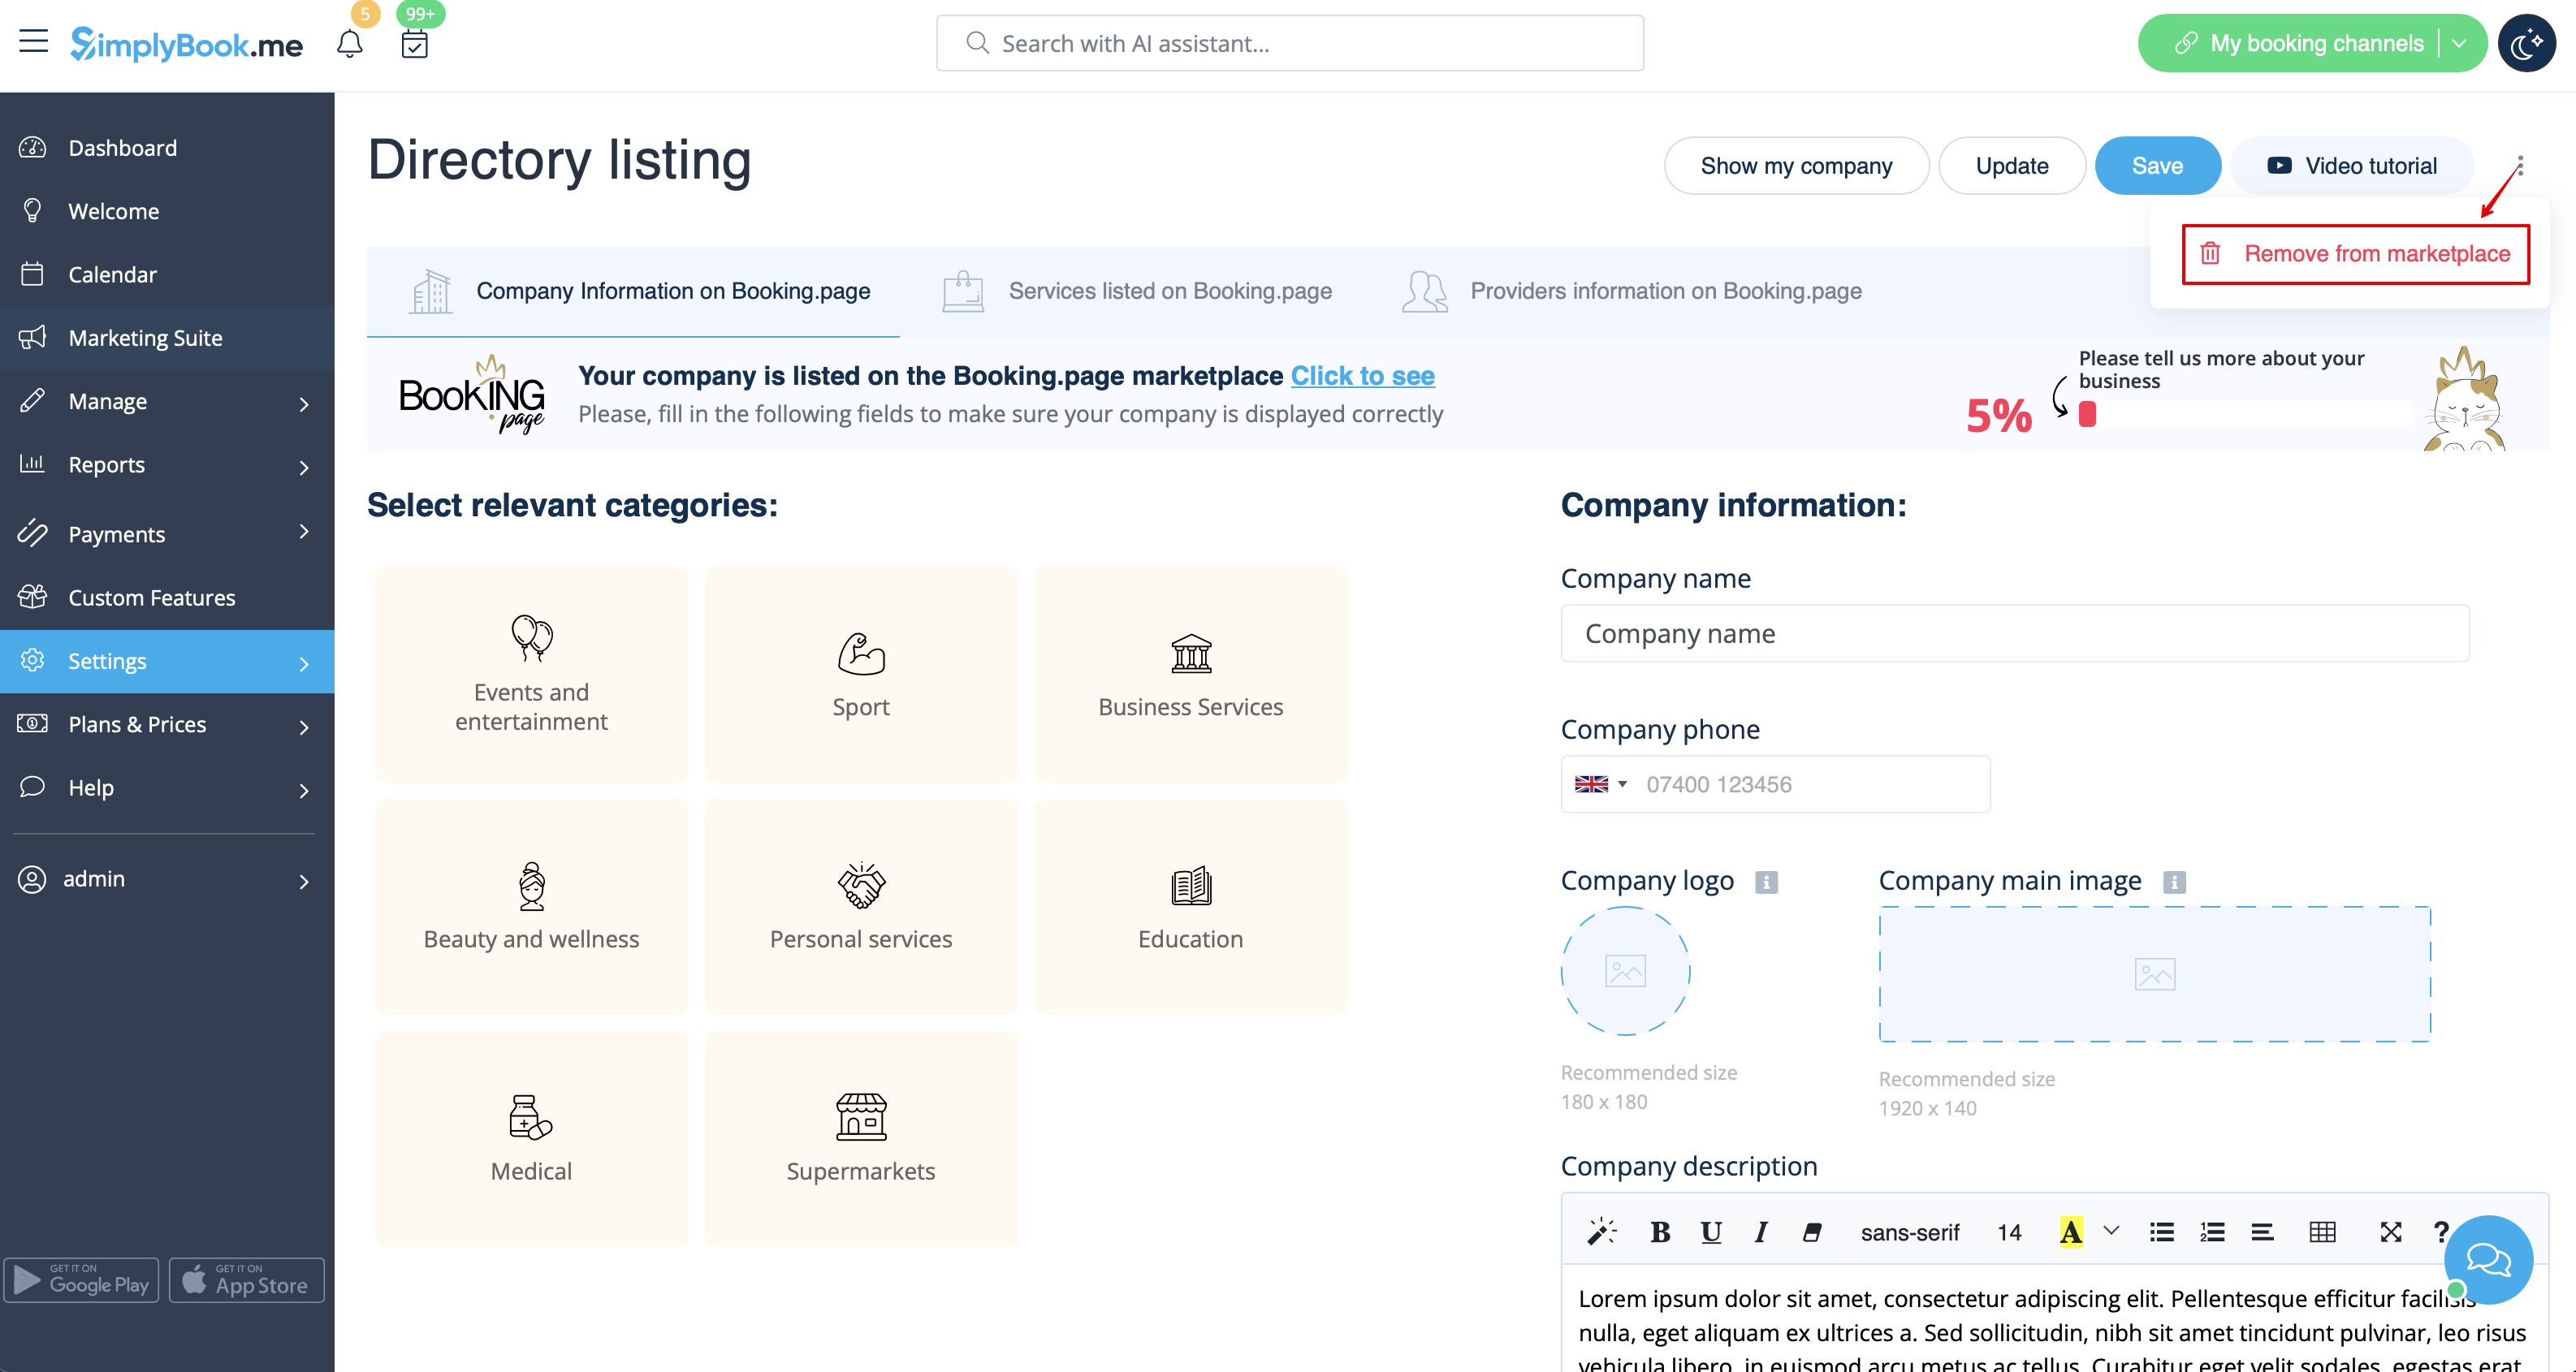
Please note! Even with blank theme your booking page will appear in Google and information will be shown in Booking.Page directory. To remove your company from directory, please click on Remove from marketplace button Settings -> Directory listing.
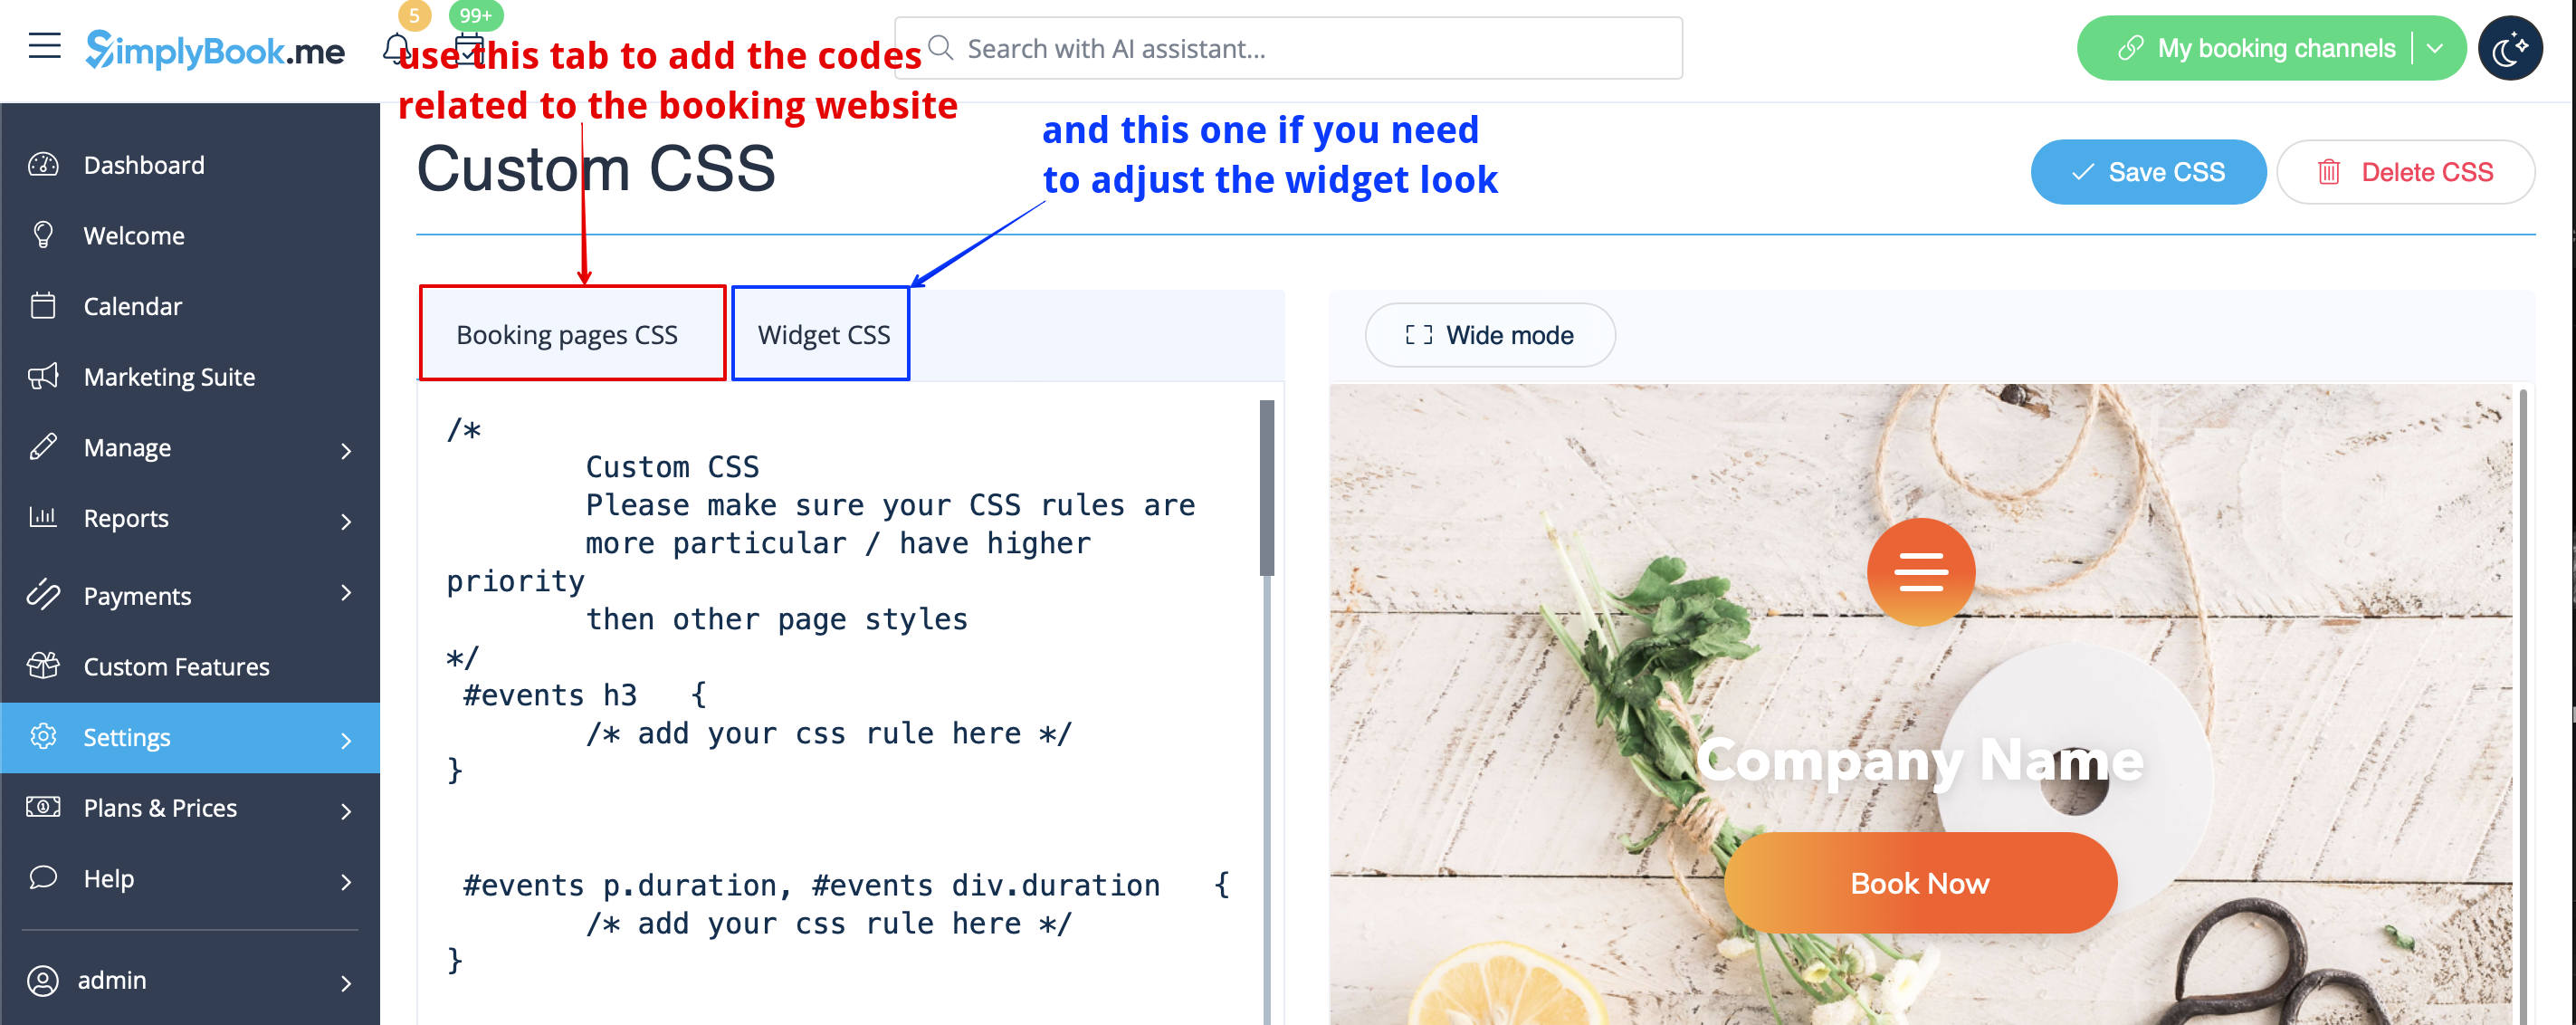
Removing with Custom CSS
- Please note! Add the code(s) to adjust the styles to "Booking pages CSS" tab if you wish to edit the booking website
- or "Widget CSS" if you are editing widget on your website.
Phone field
(Client login feature is disabled)
- 1. Go to Settings -> Email and SMS settings -> Settings for email and SMS notifications -> Mandatory registration fields -> Email (to make phone not mandatory).
- 2. Please go to Custom Features -> Custom Features and enable Custom CSS feature. Then in this feature Settings or in Custom Features -> Custom CSS paste to Booking pages CSS window at the very top the following code:
.form-group.form-client-phone{
    display: none;
}
Email field
(Client login feature is disabled)
- 1. Go to Settings -> Email and SMS settings -> Settings for email and SMS notifications -> Mandatory registration fields -> Phone (to make email not mandatory).
- 2. Please go to Custom Features -> Custom Features and enable Custom CSS feature. Then in this feature Settings or in Custom Features -> Custom CSS paste to Booking pages CSS window at the very top the following code:
.form-group.form-client-email{
    display: none;
}
Our time
Please go to Custom Features -> Custom Features and enable Custom CSS feature. Then in this feature Settings or in Custom Features -> Custom CSS paste to Booking page CSS window at the very top the following code:
div#sb_booking_company_time {
    display: none;
}
May we send you promotions and relevant information
Please go to Custom Features -> Custom Features and enable Custom CSS feature. Then in this feature Settings or in Custom Features -> Custom CSS paste to Booking page CSS window at the very top the following code:
- Client login feature enabled:
#main #client-login .custom-form #sb_terms_and_conditions .promotions-letter-flag label[role=button]{
    display: none;
}
- Client login feature disabled:
#sb-main-container #main #sb-timeline #steps #details .detail-step-wrap .detail-step .license-links-container .promotions-letter-flag label[role=button]{
    display: none;
}
Filter by Services on Membership page
Please go to Custom Features -> Custom Features and enable Custom CSS feature. Then in this feature Settings or in Custom Features -> Custom CSS paste to Booking page CSS window at the very top the following code:
#membership-view #membership-filters {
   display: none;
}
Remove banner image
- Please note! "Book now" and other buttons that are displayed on top of banner will be hidden as well. The code may not work with some themes.
Please go to Custom Features -> Custom Features and enable Custom CSS feature. Then in this feature Settings or in Custom Features -> Custom CSS paste to Booking page CSS window at the very top the following code:
#main-buttons {
    display: none;
}
Remove some specific element
If you need to remove a specific element from your booking page, you will need to use Custom CSS feature and the corresponding code. If you don't know CSS, please contact support and they will create a request to check whether such change is possible.
Please note, that big requests may be done on a paid basis.