Created page with "Il peut être nécessaire d'afficher ou de masquer certaines données ou de modifier l'apparence des factures que le système envoie aux clients après qu'ils ont effectué un achat sur votre site web de réservation.<br> Vous pouvez modifier les éléments suivants : <br><br>" |
Created page with "4. '''<span style="background-color:#cdeffc; padding:5px; border-radius:5px;">Formulaires d'admission</span> et <span style="background-color:#cdeffc; padding:5px; border-radius:5px;">champs client</span>'''<br> Vous pouvez ajouter certains formulaires à afficher dans le bloc d'informations client.<br> S'il s'agit d'un formulaire d'admission, allez dans <span style="background-color:#d4f8e5; padding:5px; b..." |
||
| Line 15: | Line 15: | ||
<br><br> | <br><br> | ||
2. '''Numéro de TVA de l'entreprise.'''<br> | |||
2. ''' | Si elle est ajoutée dans <span style="background-color:#d4f8e5; padding:5px; border-radius:5px;">Paiements (SBPay.me)</span> -> <span style="background-color:#d4f8e5; padding:5px; border-radius:5px;">Systèmes de paiement - </span> > <span style="background-color:#d4f8e5; padding:5px; border-radius:5px;">Paramètres</span> -> <span style="background-color:#d4f8e5; padding:5px; border-radius:5px;">Profil de l'entreprise</span> -> <span style="background-color:#d4f8e5; padding:5px; border-radius:5px;">Informations fiscales</span>, elle sera incluse dans l'en-tête de la facture. | ||
[[File:Sbpay company settings page - tax info.png|1200px|border|center|link=https://help.simplybook.me/images/8/8e/Sbpay_company_settings_page_-_tax_info.png]] | [[File:Sbpay company settings page - tax info.png|1200px|border|center|link=https://help.simplybook.me/images/8/8e/Sbpay_company_settings_page_-_tax_info.png]] | ||
<br><br> | <br><br> | ||
[[File:Sbpay printed invoice example with comoany vat number.png|1200px|border|center|link=https://help.simplybook.me/images/d/d0/Sbpay_printed_invoice_example_with_comoany_vat_number.png]] | [[File:Sbpay printed invoice example with comoany vat number.png|1200px|border|center|link=https://help.simplybook.me/images/d/d0/Sbpay_printed_invoice_example_with_comoany_vat_number.png]] | ||
<br><br> | <br><br> | ||
3. '''Adresse du client.'''<br> | |||
3. ''' | Pour que l'adresse du client s'affiche, veuillez activer la fonctionnalité personnalisée [[Client_Login_custom_feature|Connexion client]], puis cocher les cases <span style="background-color:#d4f8e5; padding:5px; border-radius:5px;">Afficher l'adresse sur la page de réservation</span> et <span style="background-color:#d4f8e5; padding:5px; border-radius:5px;">Rendre l'adresse obligatoire</span> dans <span style="background-color:#d4f8e5; padding:5px; border-radius:5px;">la section</span> <span style="background-color:#d4f8e5; padding:5px; border-radius:5px;">Accessibilité</span>. Enregistrez les paramètres. | ||
[[File:Make address mandatory redesigned.png|1200px|border|center|link=https://help.simplybook.me/images/6/68/Make_address_mandatory_redesigned.png]] | [[File:Make address mandatory redesigned.png|1200px|border|center|link=https://help.simplybook.me/images/6/68/Make_address_mandatory_redesigned.png]] | ||
<br><br> | <br><br> | ||
[[File:Sbpay printed invoice example with client address.png|1200px|border|center|link=https://help.simplybook.me/images/4/4d/Sbpay_printed_invoice_example_with_client_address.png]] | [[File:Sbpay printed invoice example with client address.png|1200px|border|center|link=https://help.simplybook.me/images/4/4d/Sbpay_printed_invoice_example_with_client_address.png]] | ||
<br><br> | <br><br> | ||
4. '''<span style="background-color:#cdeffc; padding:5px; border-radius:5px;">[[Intake_Forms_custom_feature|Formulaires d'admission]]</span> et <span style="background-color:#cdeffc; padding:5px; border-radius:5px;">[[Client_Fields_Custom_Feature|champs client]]</span>'''<br> | |||
4. '''<span style="background-color:#cdeffc; padding:5px; border-radius:5px;">[[Intake_Forms_custom_feature| | Vous pouvez ajouter certains formulaires à afficher dans le bloc d'informations client.<br> | ||
S'il s'agit d'un formulaire d'admission, allez dans <span style="background-color:#d4f8e5; padding:5px; border-radius:5px;">Gérer</span> -> <span style="background-color:#d4f8e5; padding:5px; border-radius:5px;">Formulaires d'admission</span> -> cliquez sur le formulaire souhaité pour le sélectionner -> activez <span style="background-color:#d4f8e5; padding:5px; border-radius:5px;">Ajouter un champ à la facture,</span> puis enregistrez les paramètres.<br> | |||
[[File:Add intake form to invoice redesigned.png|1200px|border|center|link=https://help.simplybook.me/images/1/16/Add_intake_form_to_invoice_redesigned.png]] | [[File:Add intake form to invoice redesigned.png|1200px|border|center|link=https://help.simplybook.me/images/1/16/Add_intake_form_to_invoice_redesigned.png]] | ||
<br><br> | <br><br> | ||
<div lang="en" dir="ltr" class="mw-content-ltr"> | <div lang="en" dir="ltr" class="mw-content-ltr"> | ||
Revision as of 15:01, 15 May 2025
Il peut être nécessaire d'afficher ou de masquer certaines données ou de modifier l'apparence des factures que le système envoie aux clients après qu'ils ont effectué un achat sur votre site web de réservation.
Vous pouvez modifier les éléments suivants :
1. Adresse de l'entreprise.
L'adresse de l'entreprise ajoutée dans Paiements (SBPay.me) -> Systèmes de paiement - > Paramètres -> Profil de l'entreprise -> Adresse sera indiquée sur les factures.
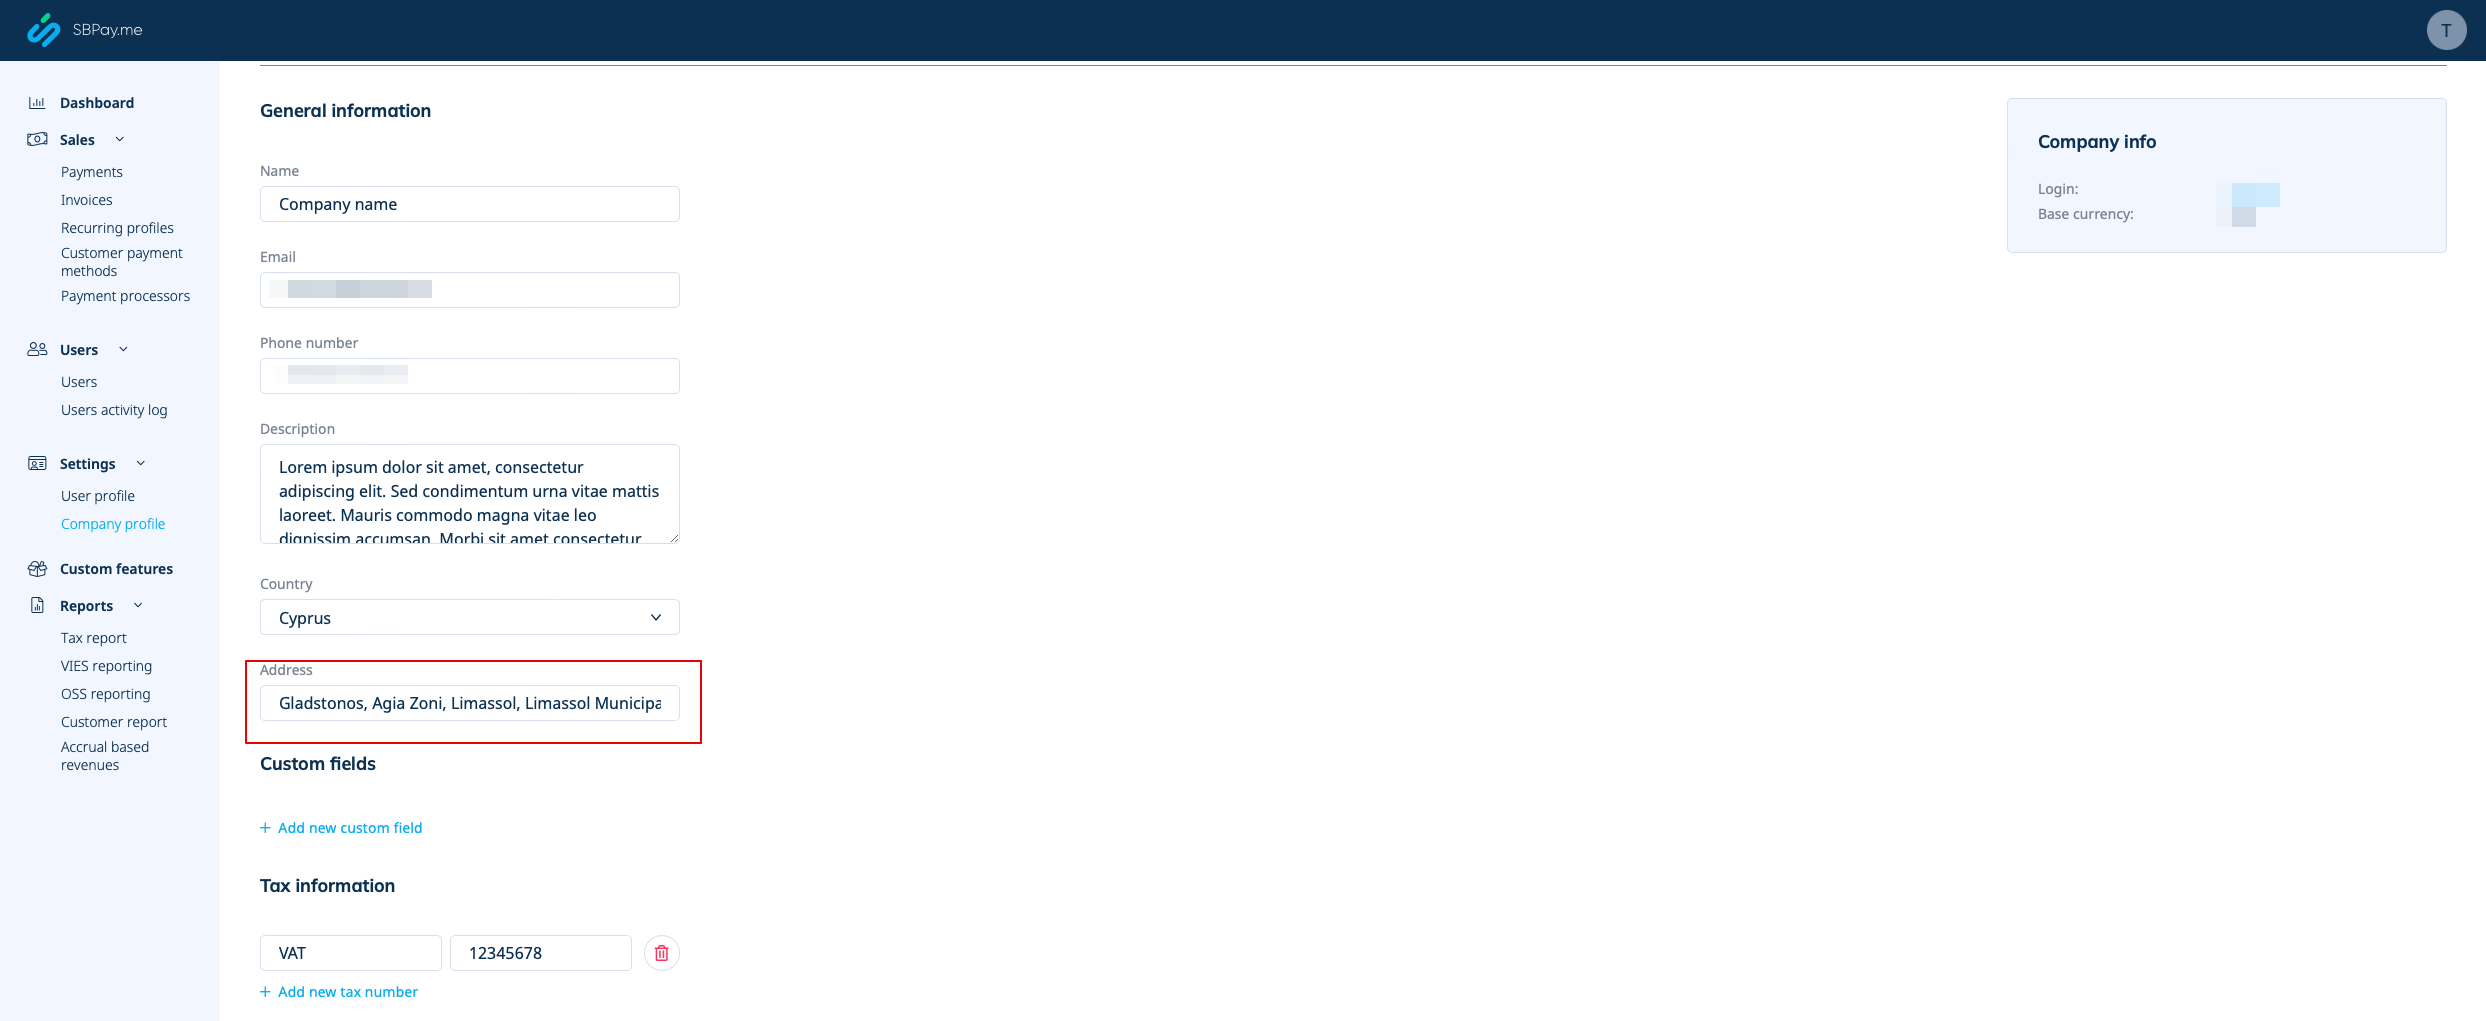
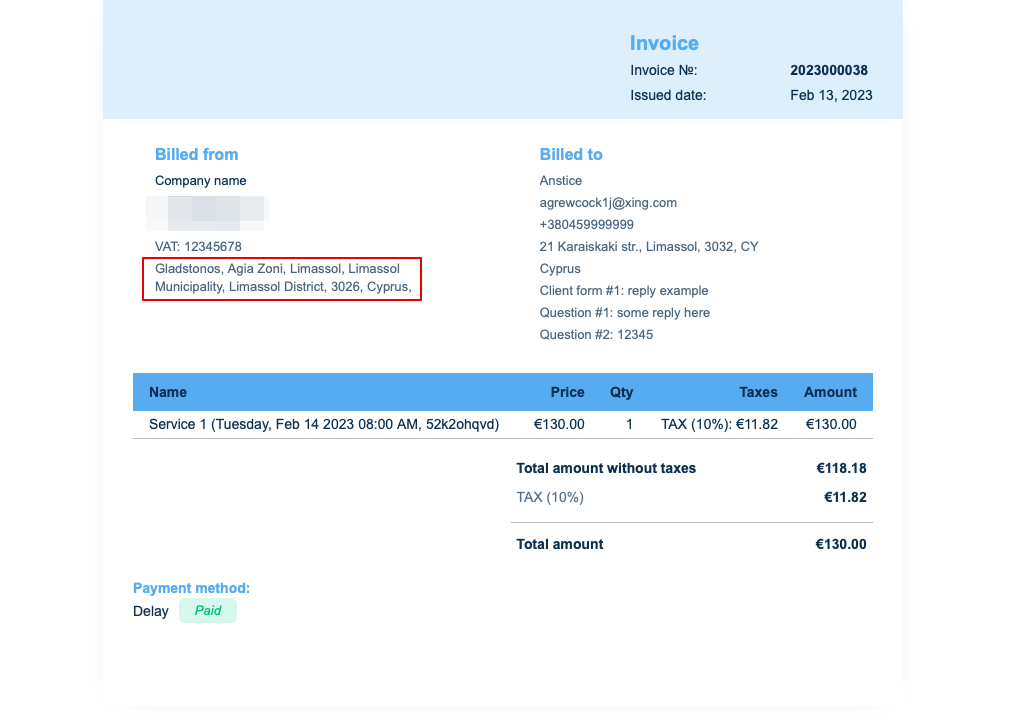
Si vous souhaitez le masquer, supprimez simplement l'adresse de ce champ et enregistrez les paramètres.
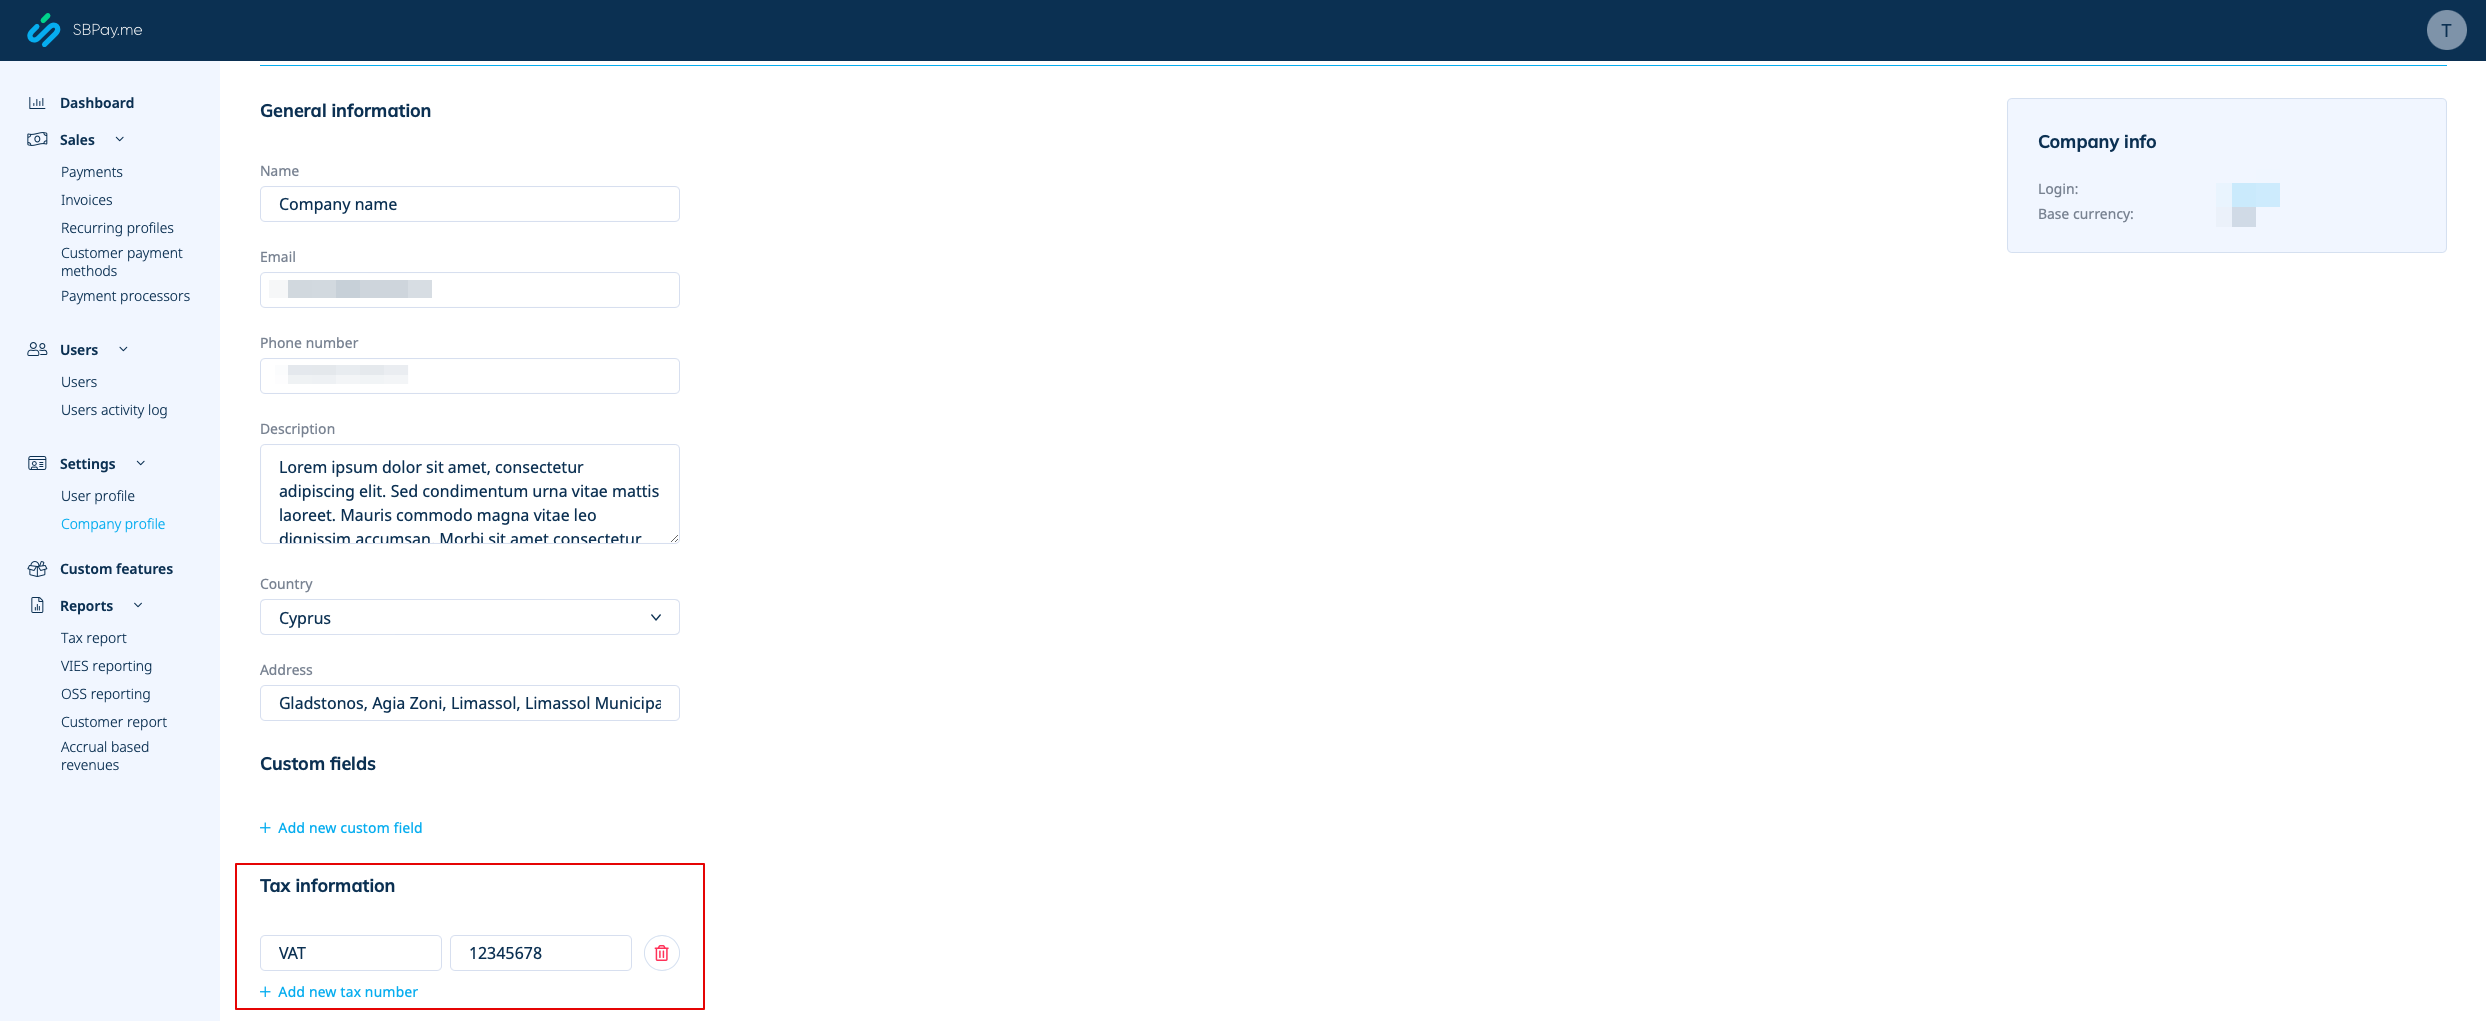
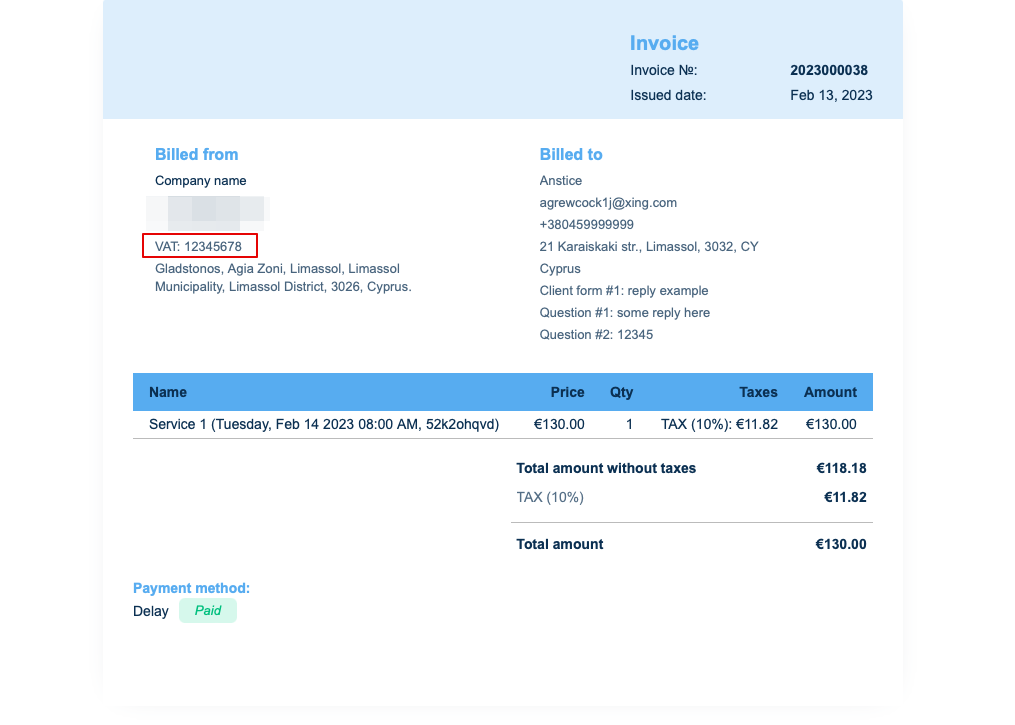
2. Numéro de TVA de l'entreprise.
Si elle est ajoutée dans Paiements (SBPay.me) -> Systèmes de paiement - > Paramètres -> Profil de l'entreprise -> Informations fiscales, elle sera incluse dans l'en-tête de la facture.
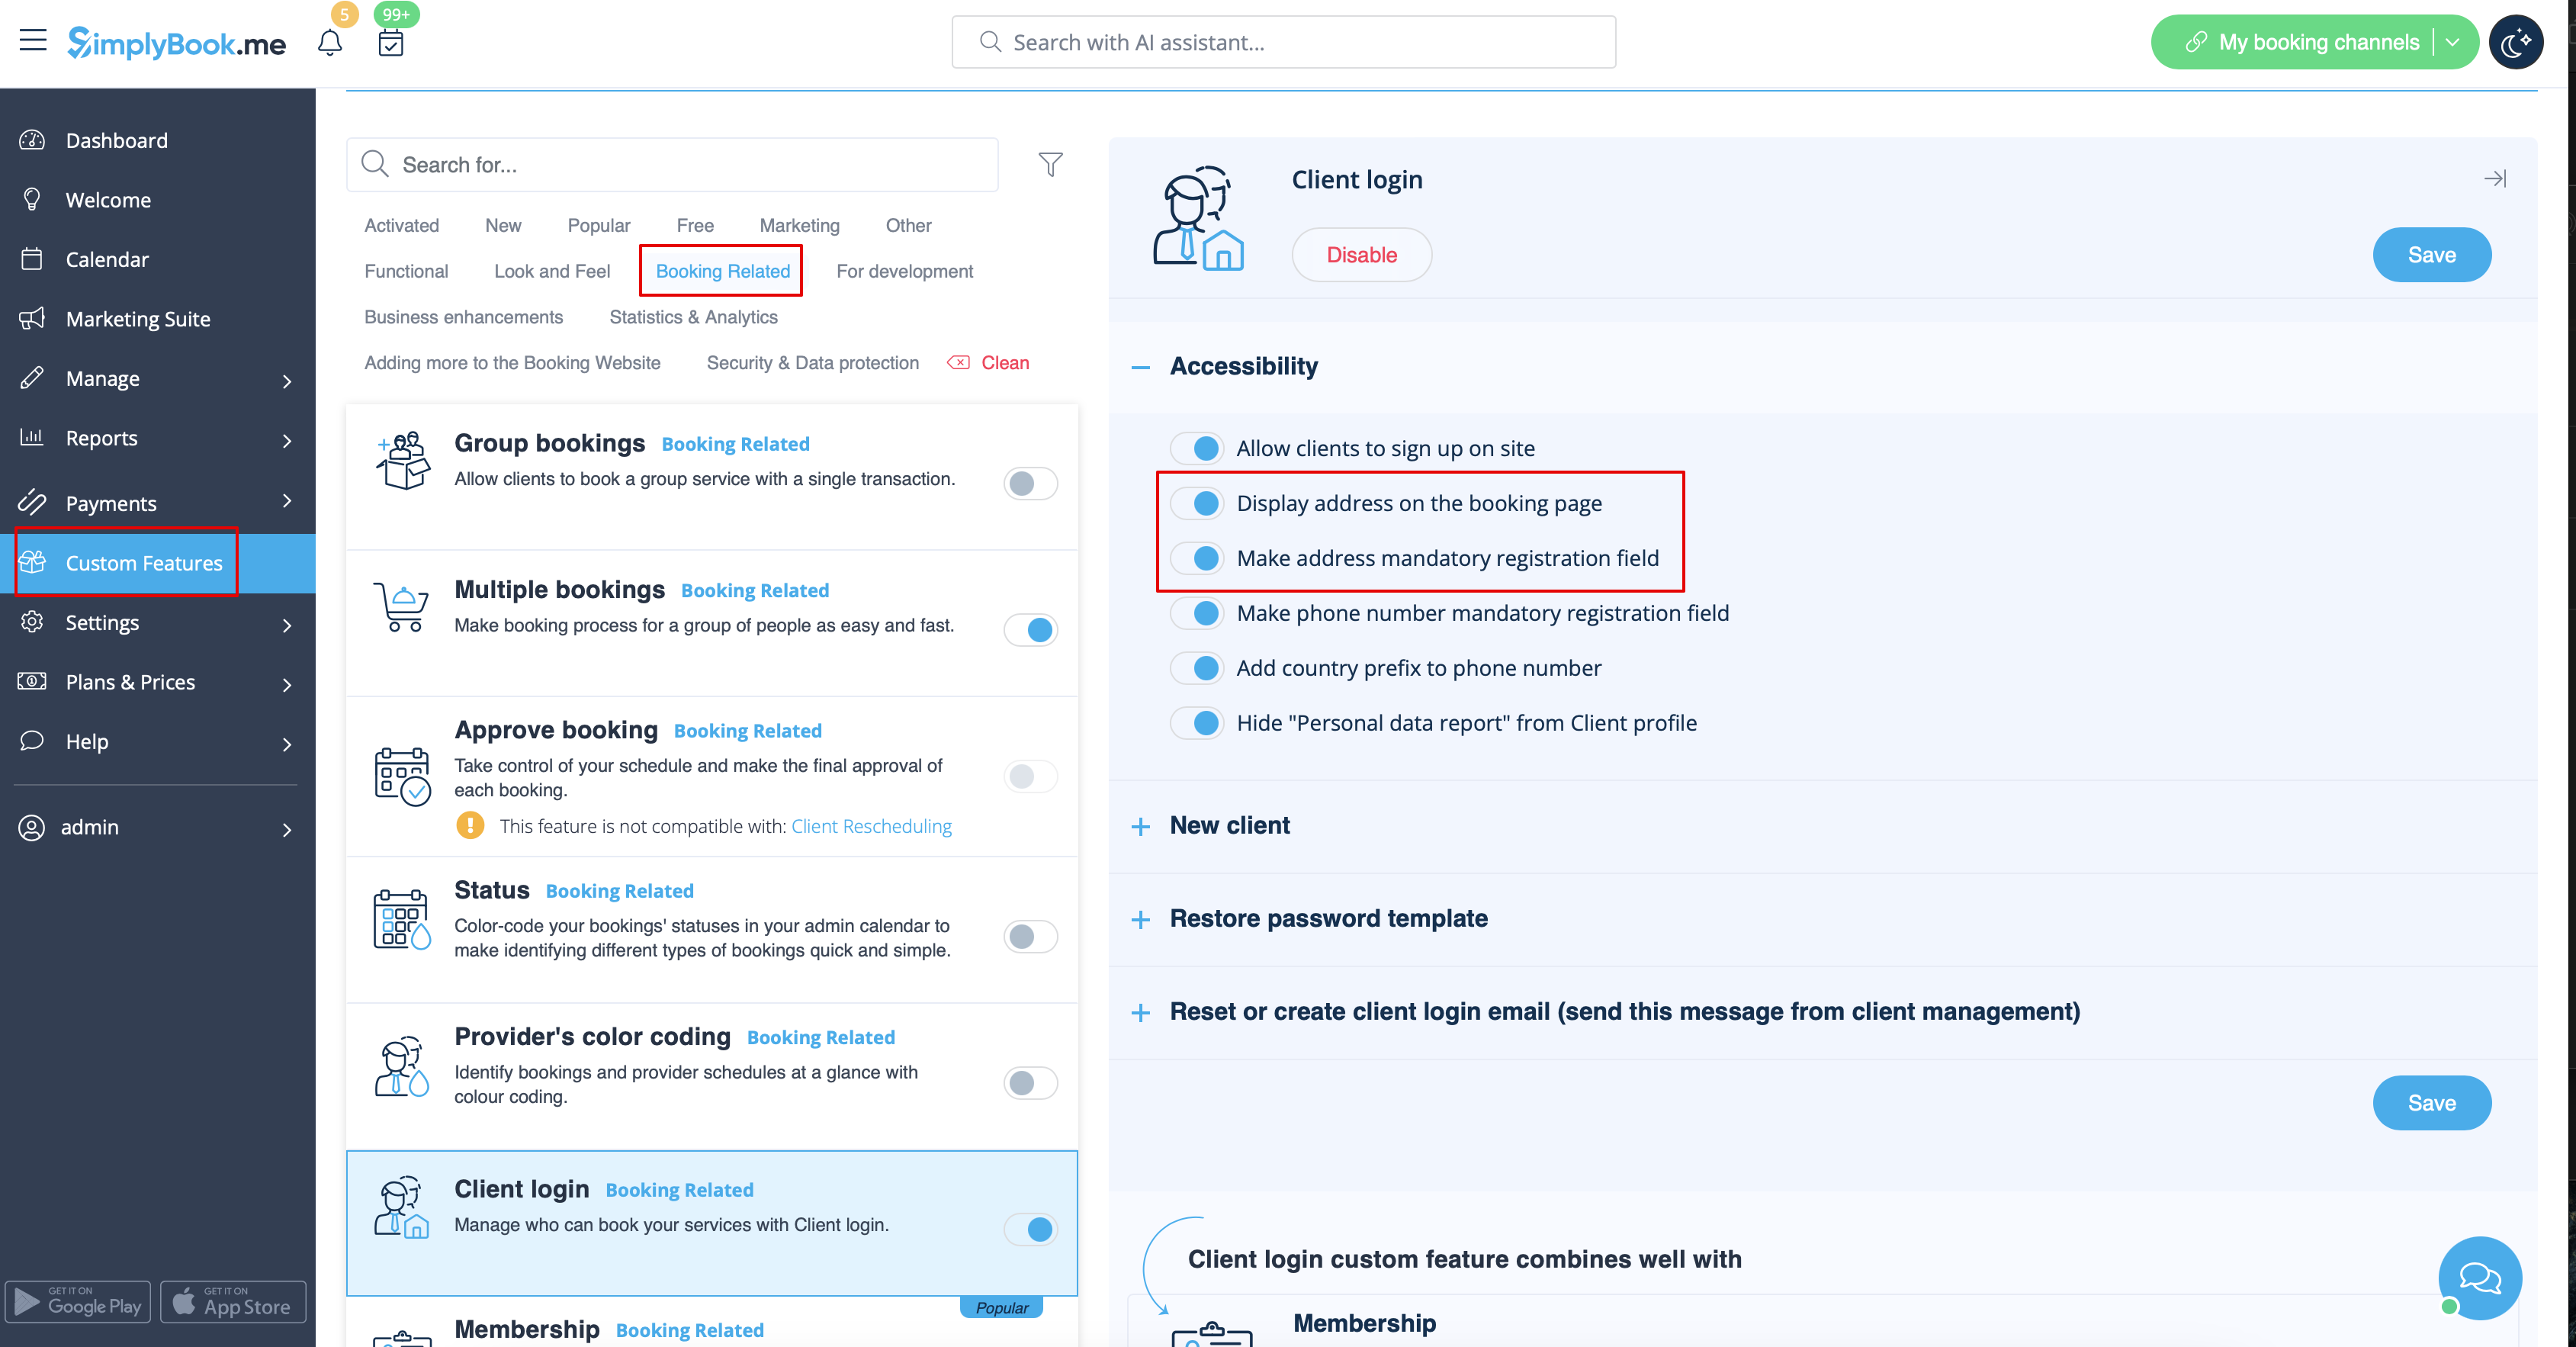
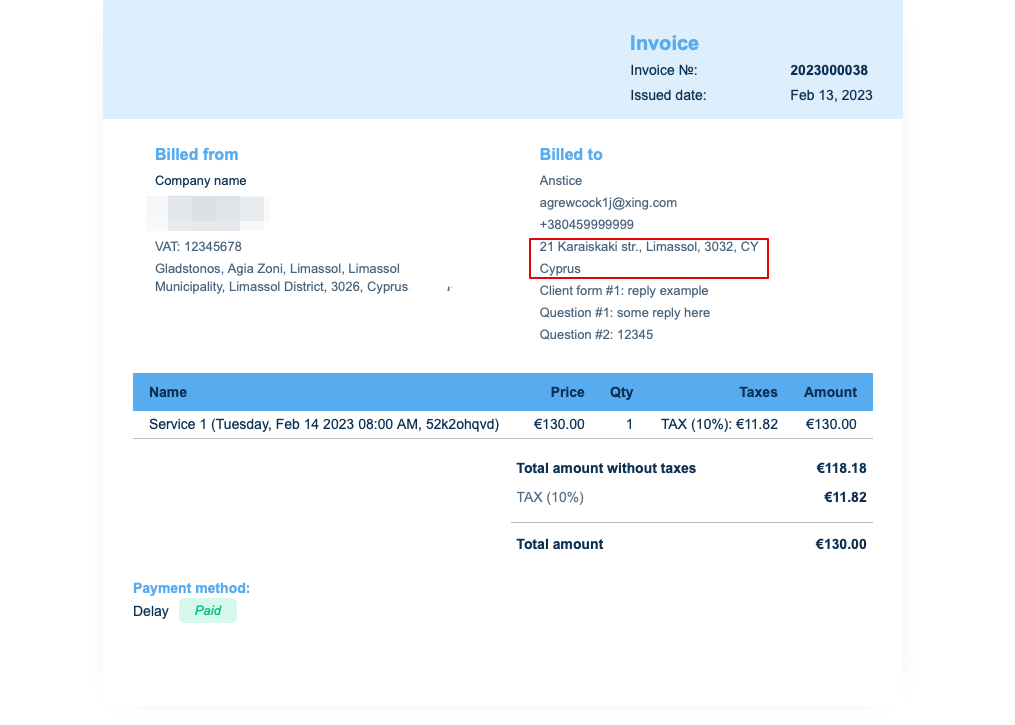
3. Adresse du client.
Pour que l'adresse du client s'affiche, veuillez activer la fonctionnalité personnalisée Connexion client, puis cocher les cases Afficher l'adresse sur la page de réservation et Rendre l'adresse obligatoire dans la section Accessibilité. Enregistrez les paramètres.
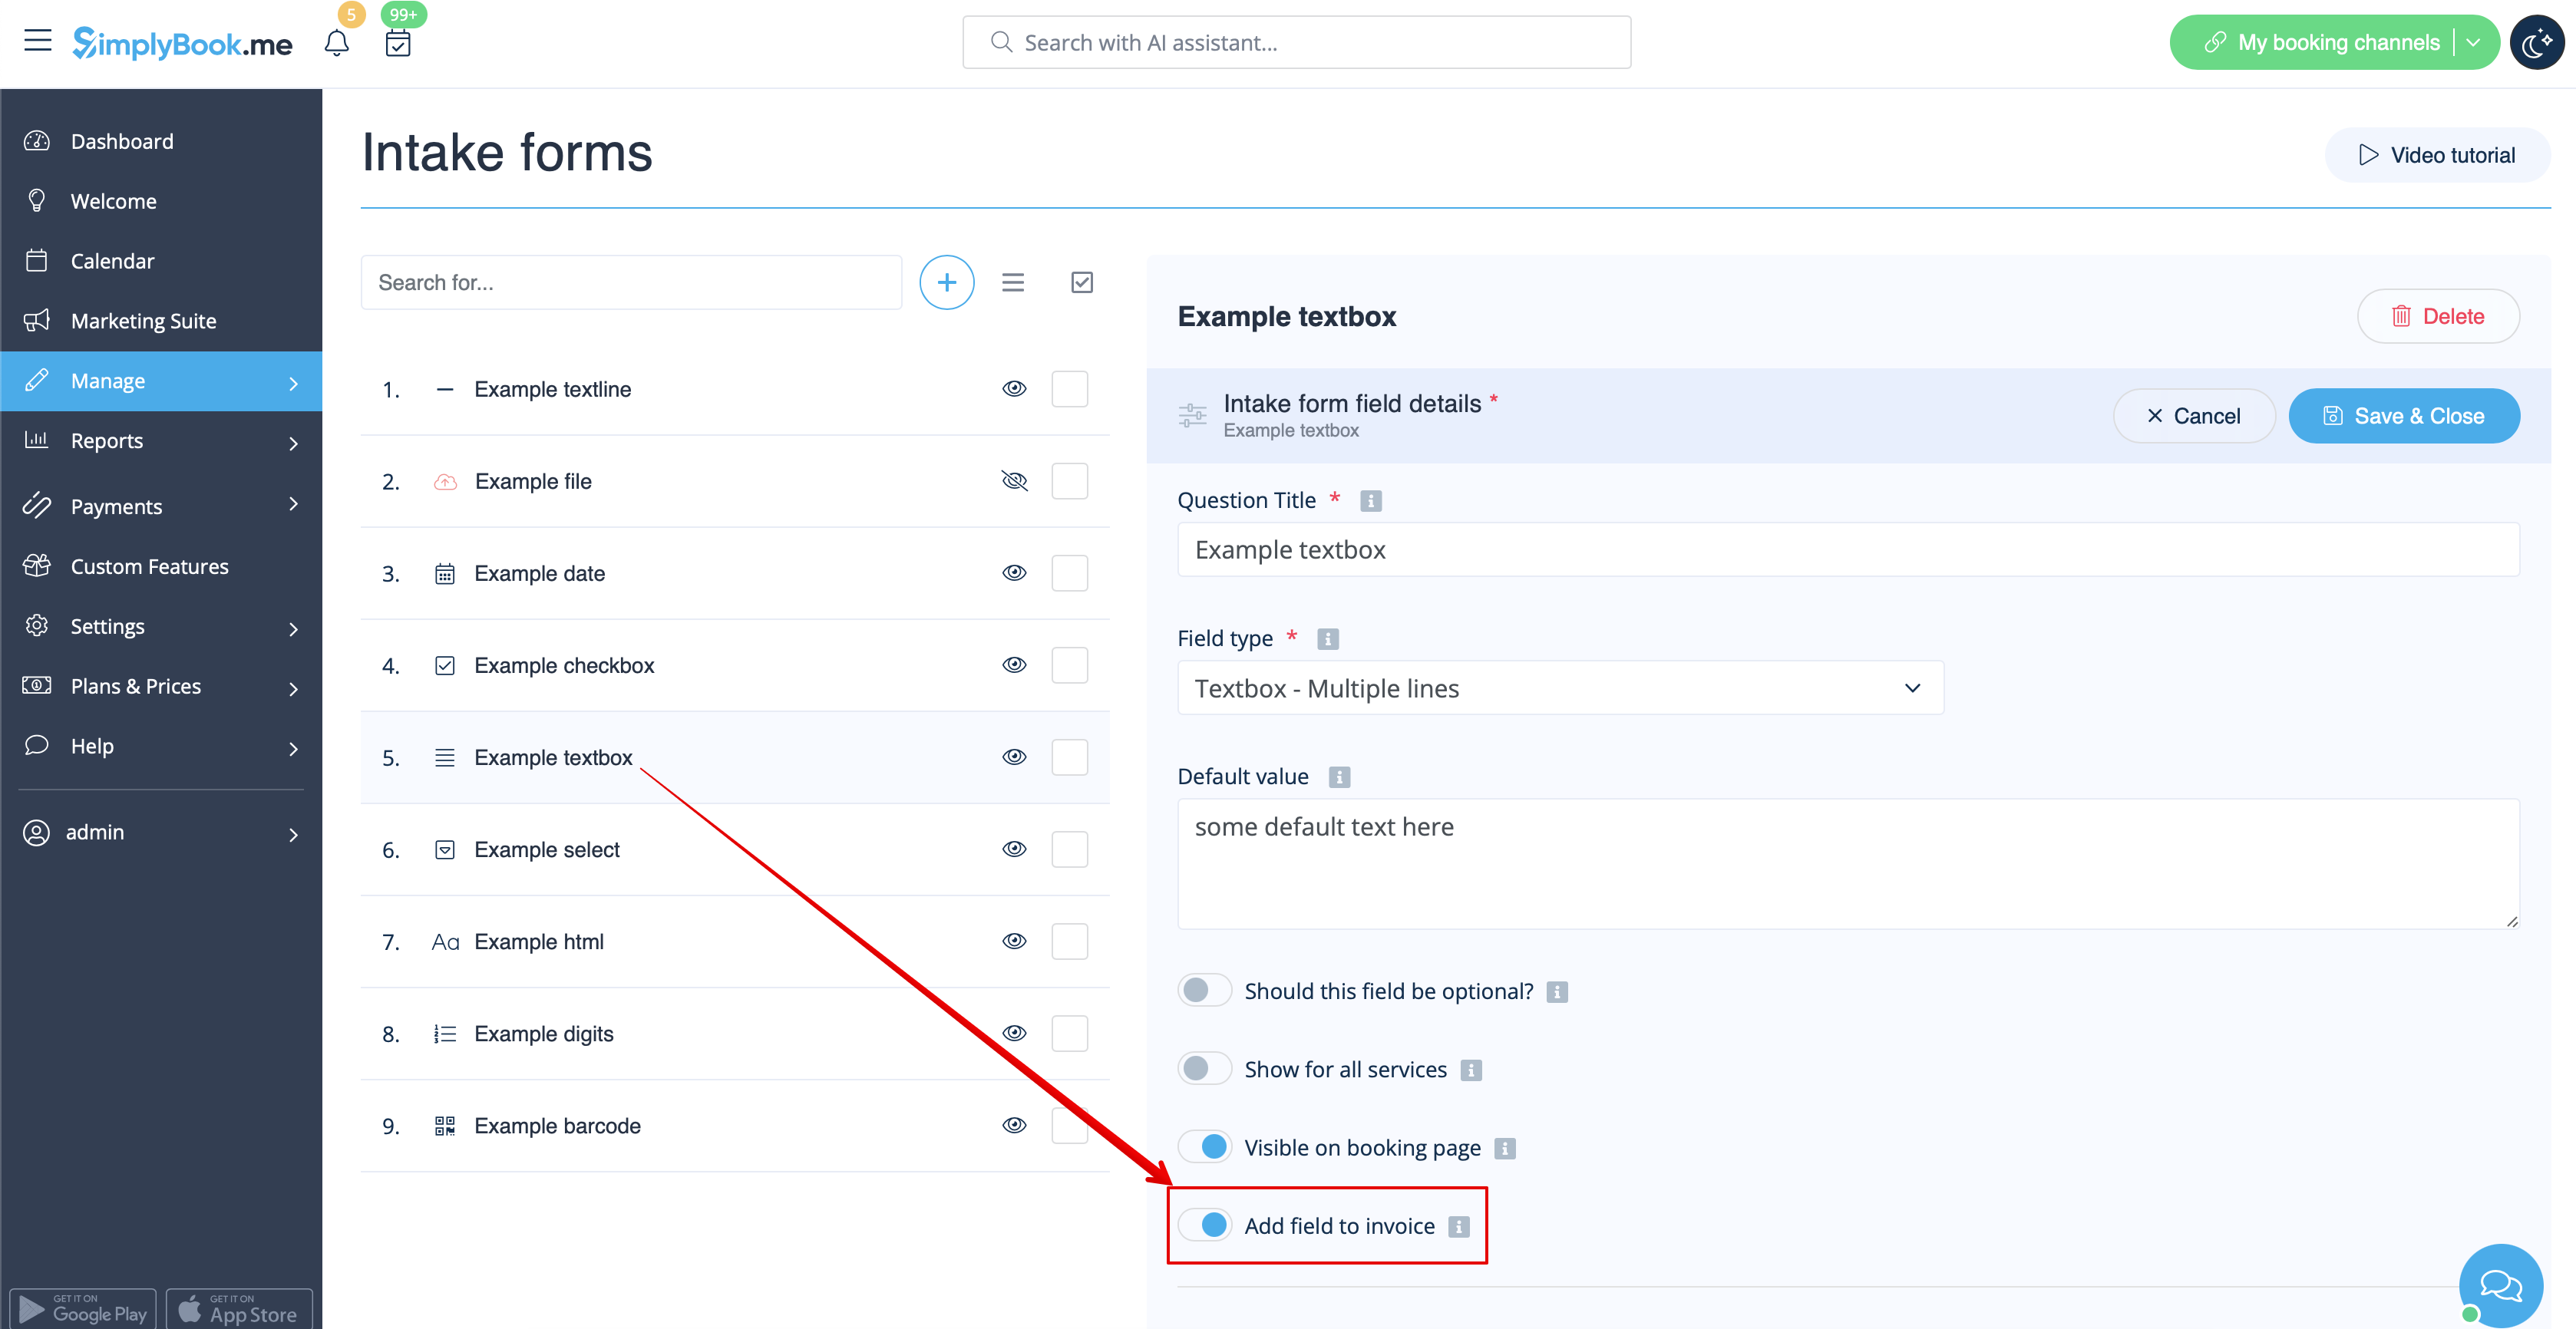
4. Formulaires d'admission et champs client
Vous pouvez ajouter certains formulaires à afficher dans le bloc d'informations client.
S'il s'agit d'un formulaire d'admission, allez dans Gérer -> Formulaires d'admission -> cliquez sur le formulaire souhaité pour le sélectionner -> activez Ajouter un champ à la facture, puis enregistrez les paramètres.
Or if you wish to add a client form then navigate to Manage -> Client fields -> click on the desired field to edit it -> enable Add field to invoice, save.
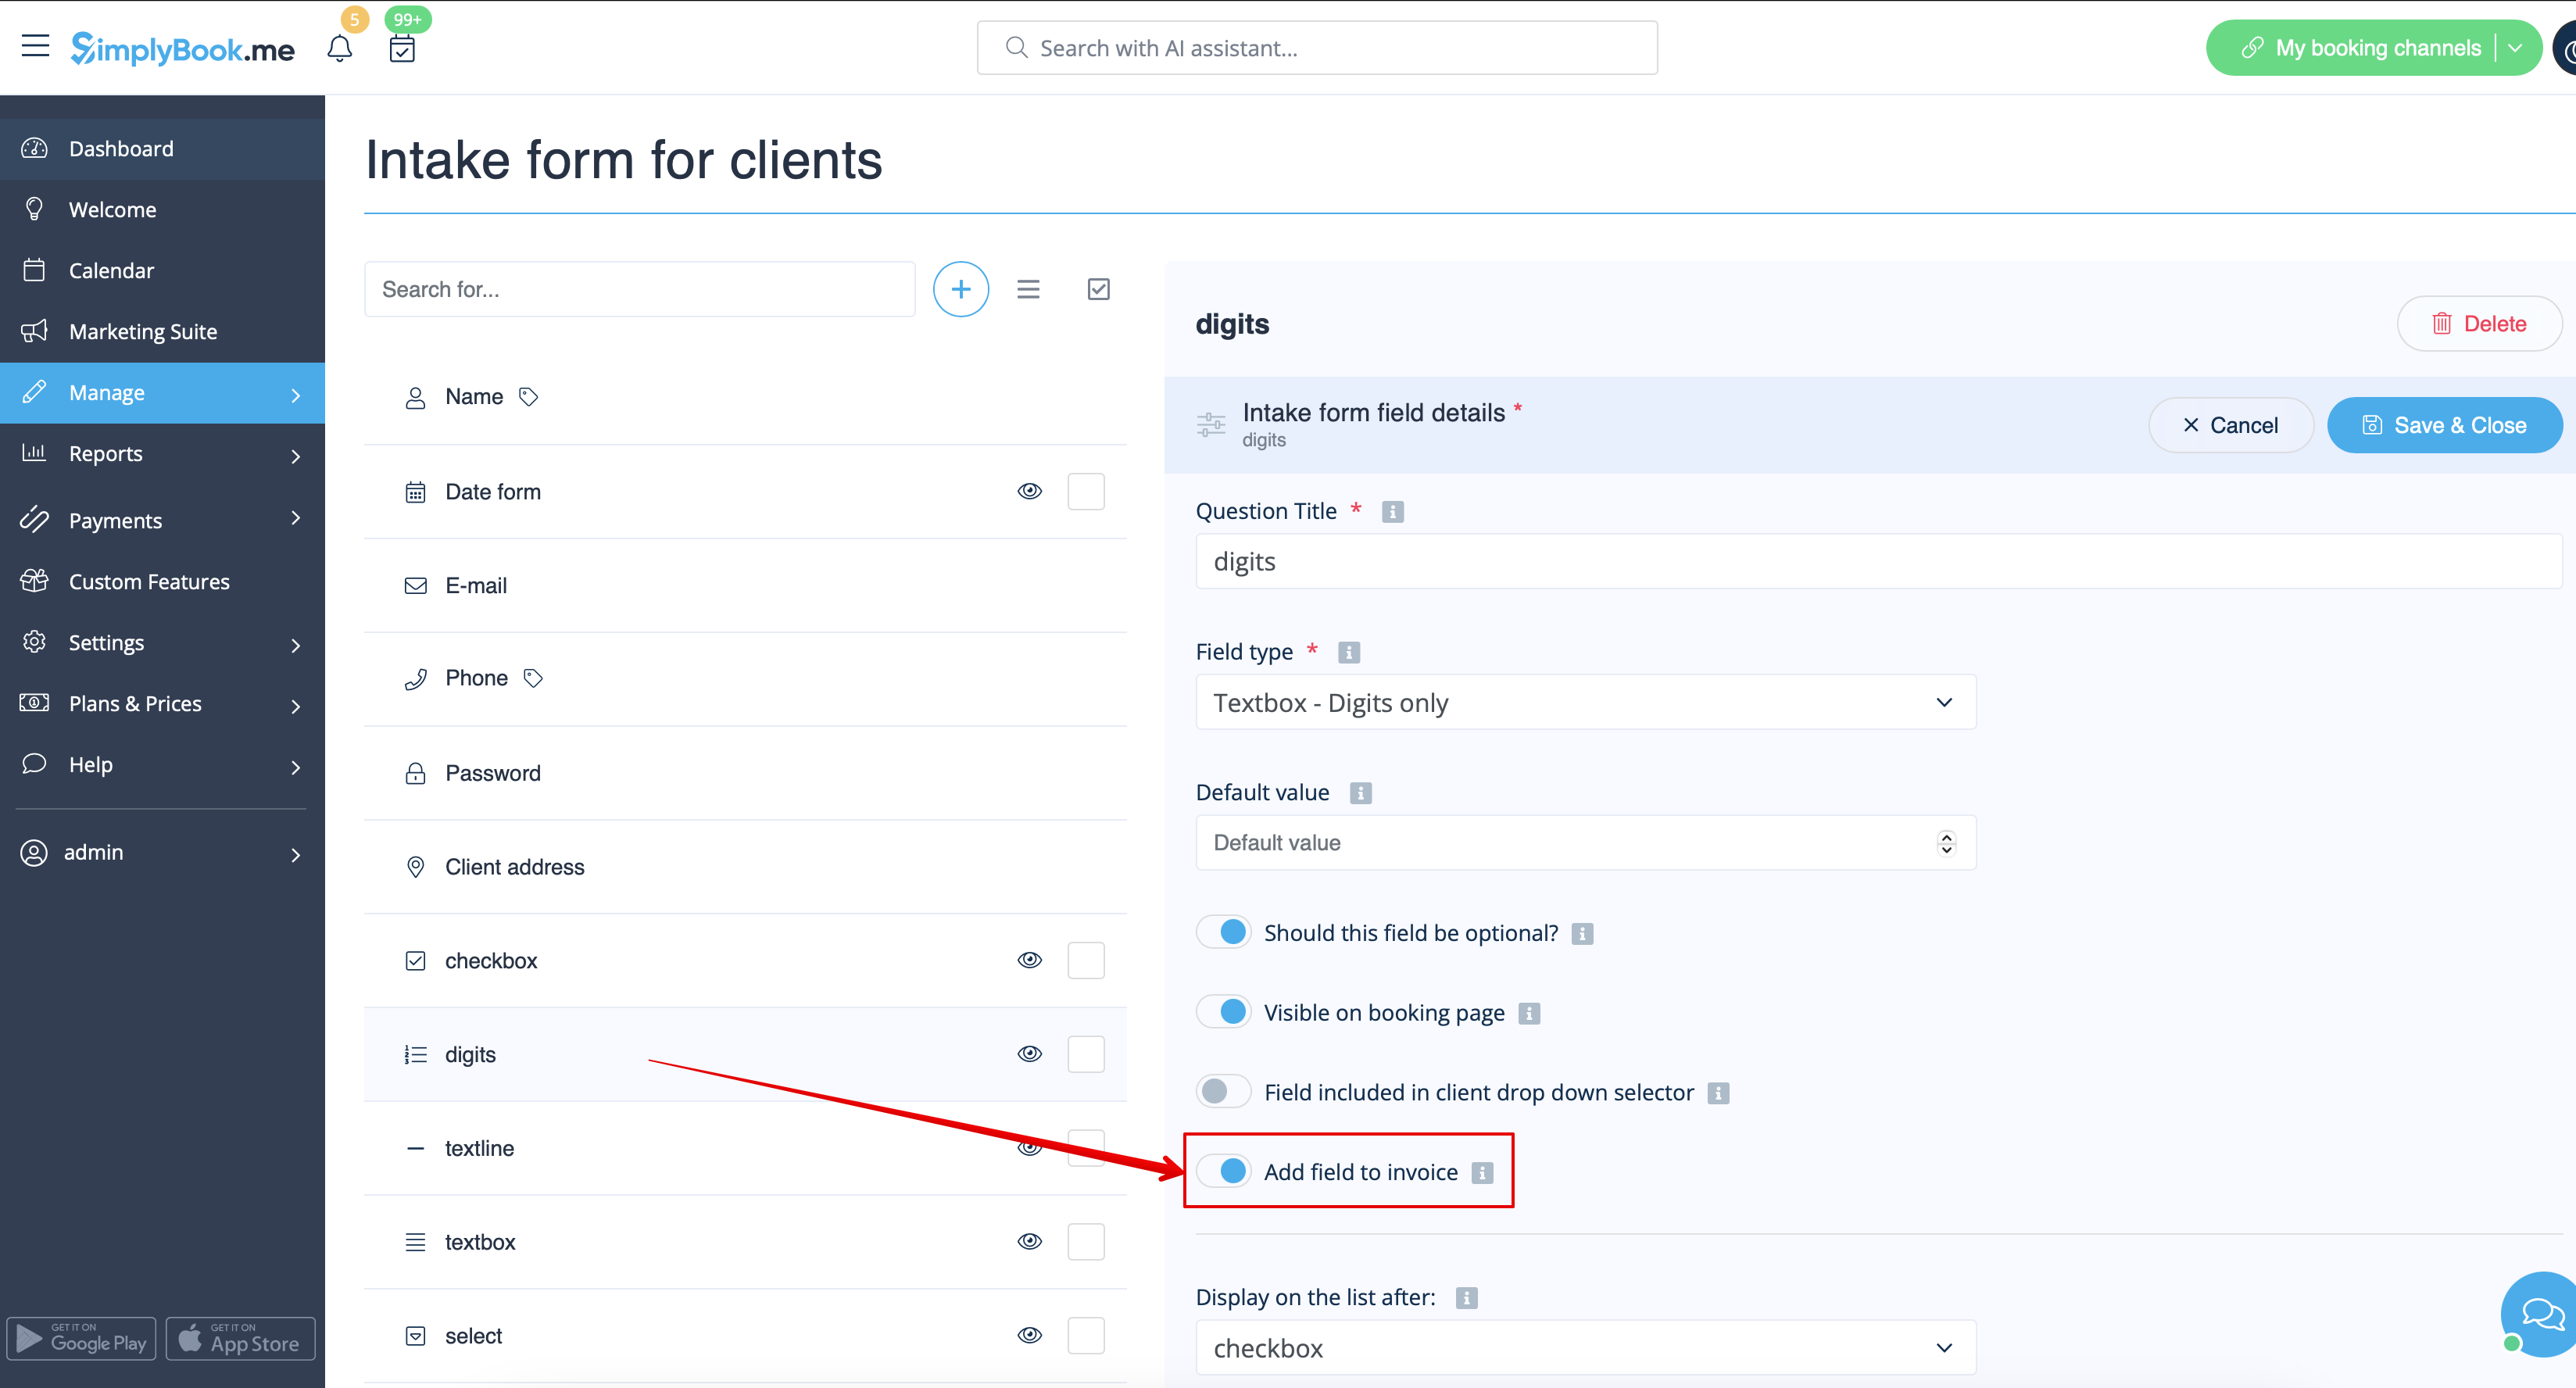
As the result both the form title and the client response will be reflected in the invoice.

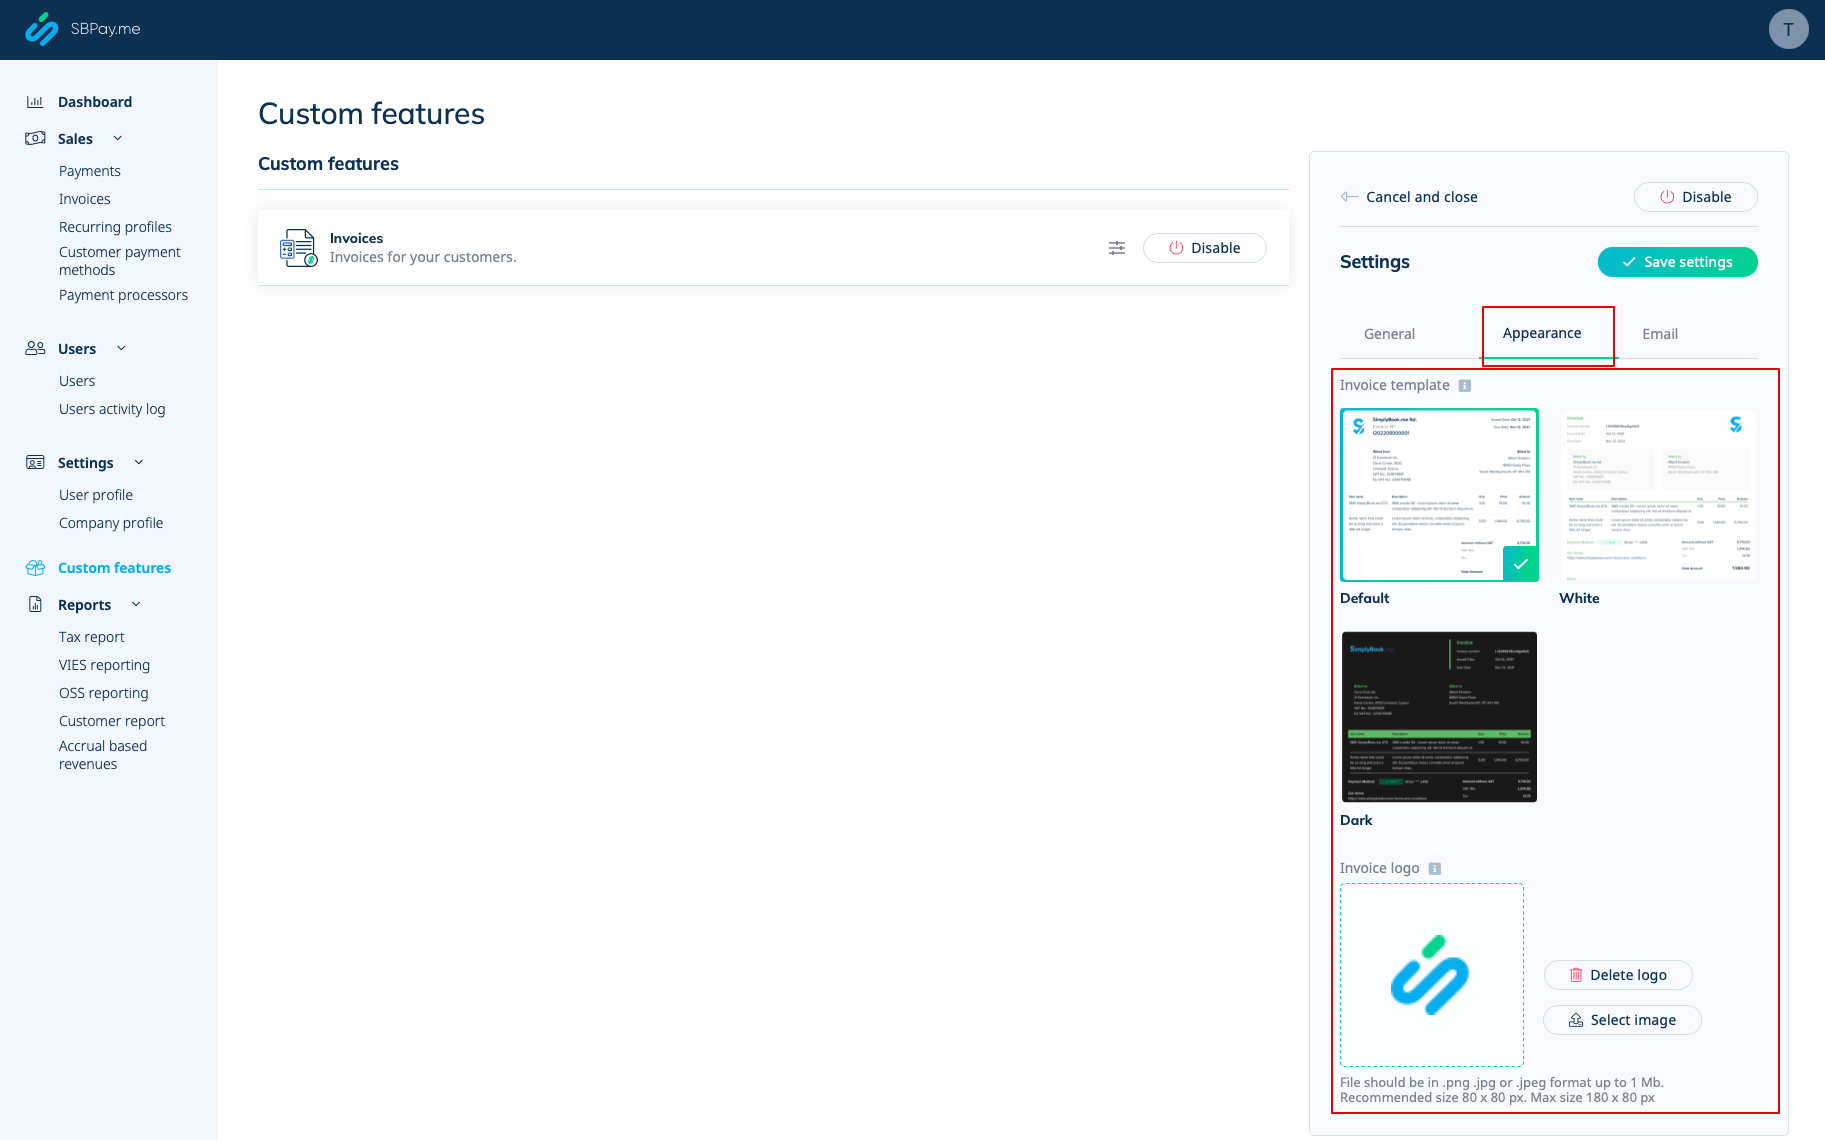
5. Invoice design.
There are three templates to choose from in Payments(SBPay.me) -> Payment systems -> Custom features -> Invoices -> Settings -> Appearance.
Please cheese the one you like the most, add your comopany logo and save settings.
Please note! Importing invoices from external platforms directly into the system is not supported. However, SimplyBook.me offers integration options with various accounting software, including Xero, QuickBooks, and FreshBooks. You can efficiently manage your invoices within your preferred accounting system.