No edit summary |
No edit summary |
||
| Line 73: | Line 73: | ||
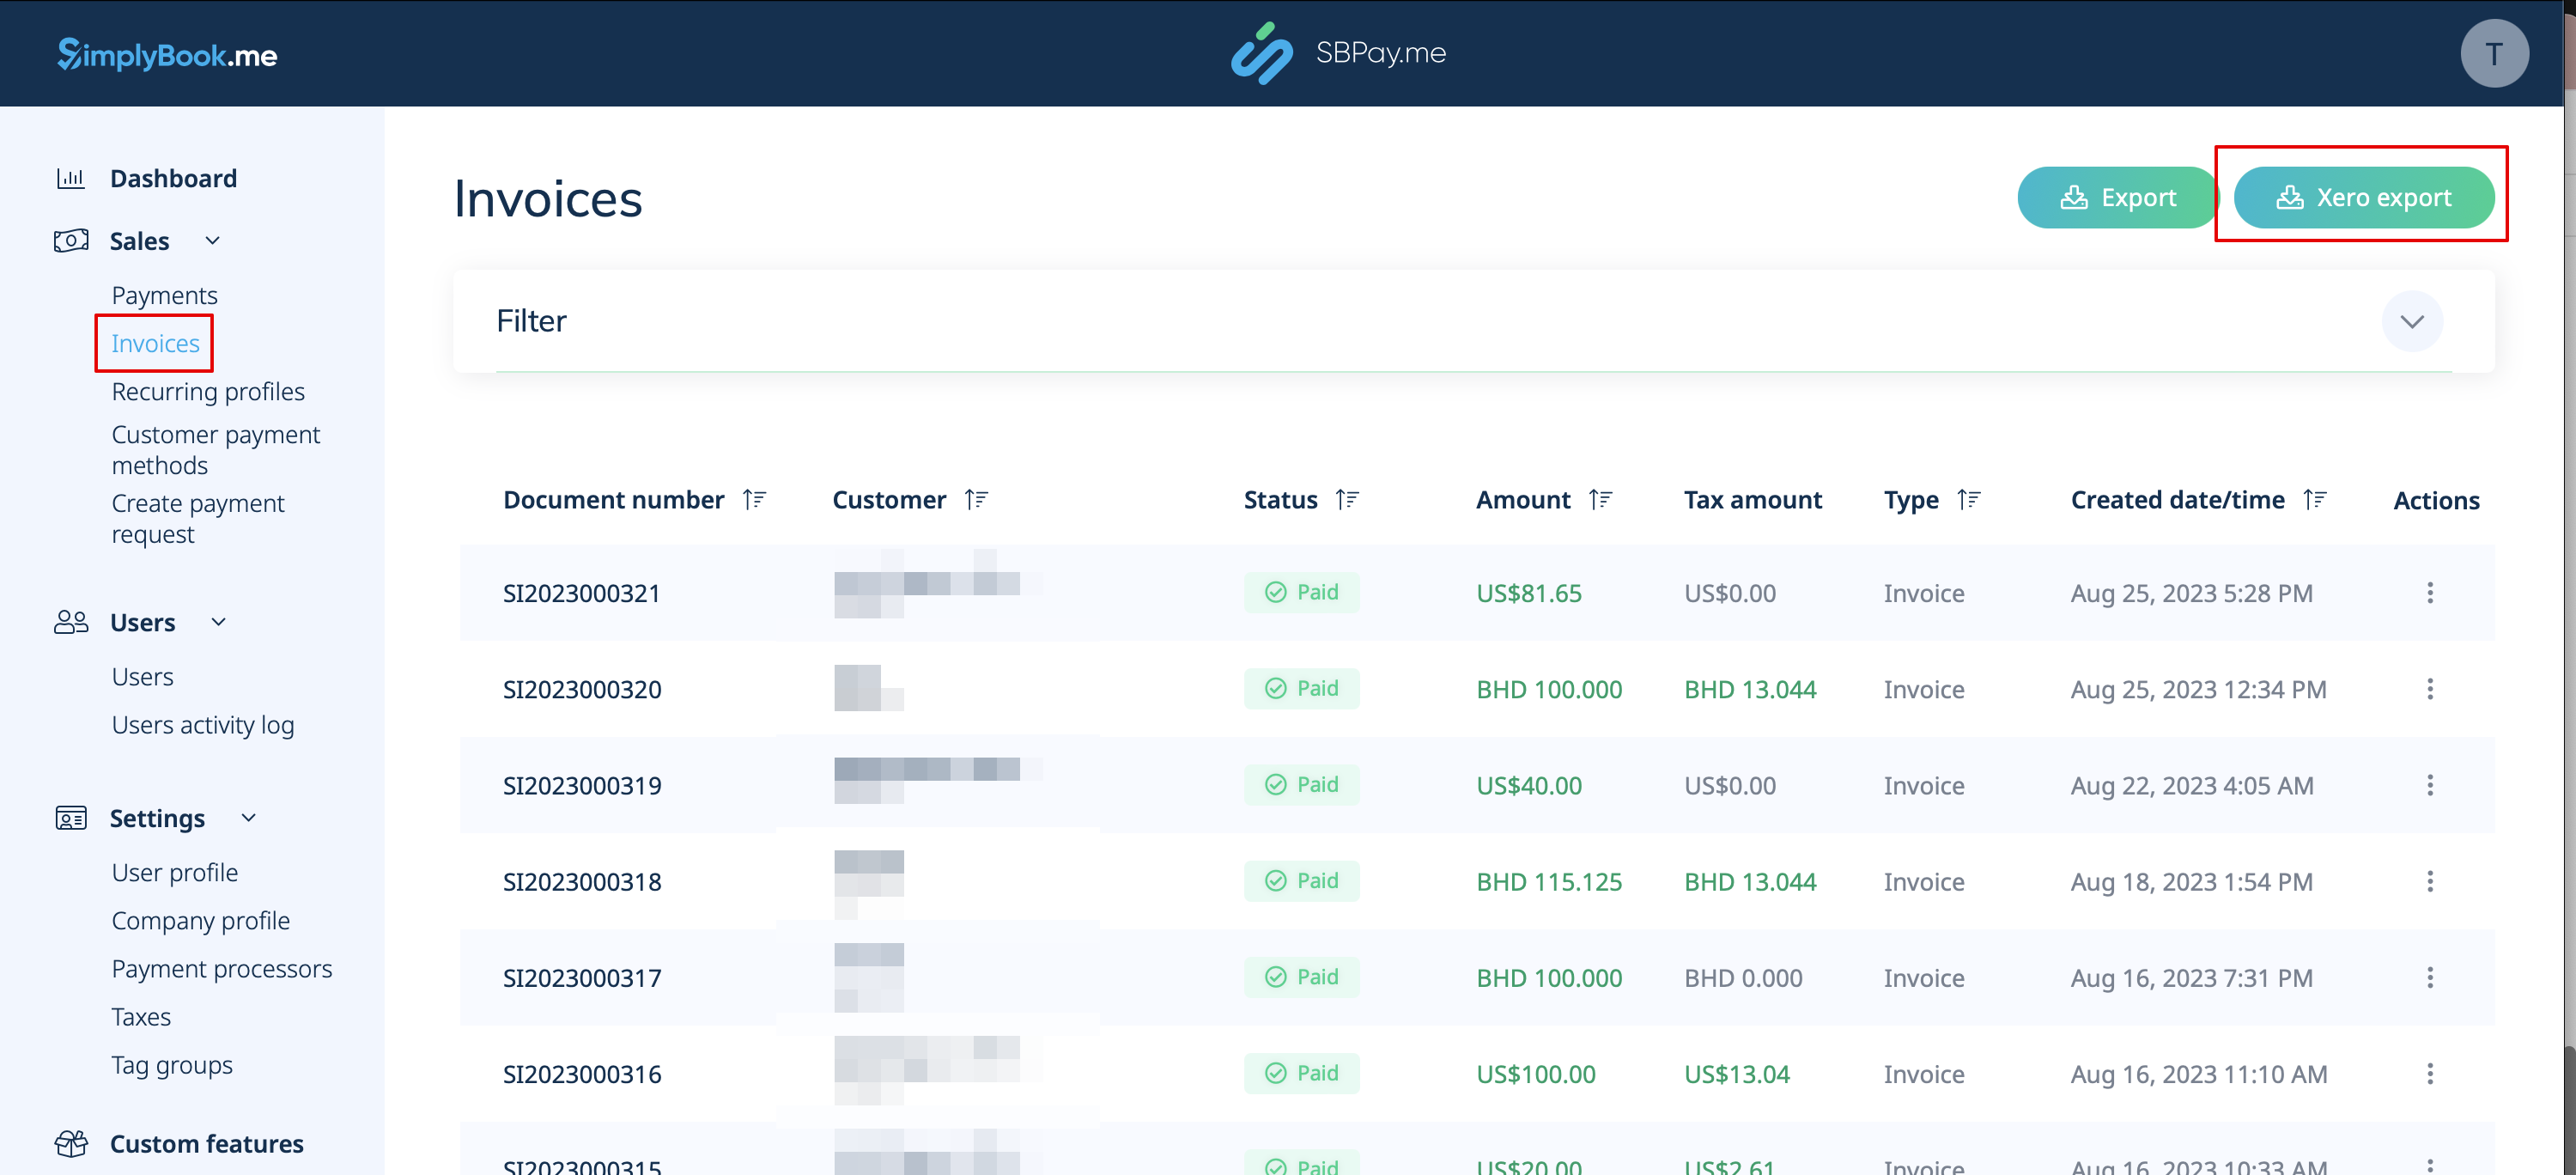
8. After enabling and configuring the Xero Custom Feature, you can now go to <span style="background-color:#d4f8e5; padding:5px; border-radius:5px;">Invoices</span> in your SBPay account and click on the <span style="background-color:#d4f8e5; padding:5px; border-radius:5px;">Xero Export</span> button to generate the .csv file which can be imported on the Xero side. | 8. After enabling and configuring the Xero Custom Feature, you can now go to <span style="background-color:#d4f8e5; padding:5px; border-radius:5px;">Invoices</span> in your SBPay account and click on the <span style="background-color:#d4f8e5; padding:5px; border-radius:5px;">Xero Export</span> button to generate the .csv file which can be imported on the Xero side. | ||
[[File:Xero export file path.png|1200px|center|link=https://help.simplybook.me/images/6/61/Xero_export_file_path.png]] | [[File:Xero export file path.png|1200px|center|link=https://help.simplybook.me/images/6/61/Xero_export_file_path.png]] | ||
<br>< | <br><br> | ||
</translate> | </translate> | ||
Revision as of 15:20, 15 May 2025

Integrating SBPay.me with Xero allows you to facilitate the flow of financial data between your booking system and accounting software. The integration allows you to export invoices from SBPay.me and import them directly to your Xero account.
Video tutorial ![]()
Please note!
- The process is not fully automated. You will need to export the invoices from the SBPay.me Invoices page and import them on the Xero side.
(we have prepared the specific file format to make it easy)
- If standard Xero import functionality is used, invoices will be imported as Draft. For invoices to be Approved or Paid, Xero Conversion Toolbox should be used.
- Tax amount is not exported since Xero imports final amounts as tax exclusive. Taxes are calculated and added to the final amounts within the Xero platform itself.
- Xero Custom Feature will work only if the Invoices custom feature is enabled in the SBPay.me
- How to set and use?
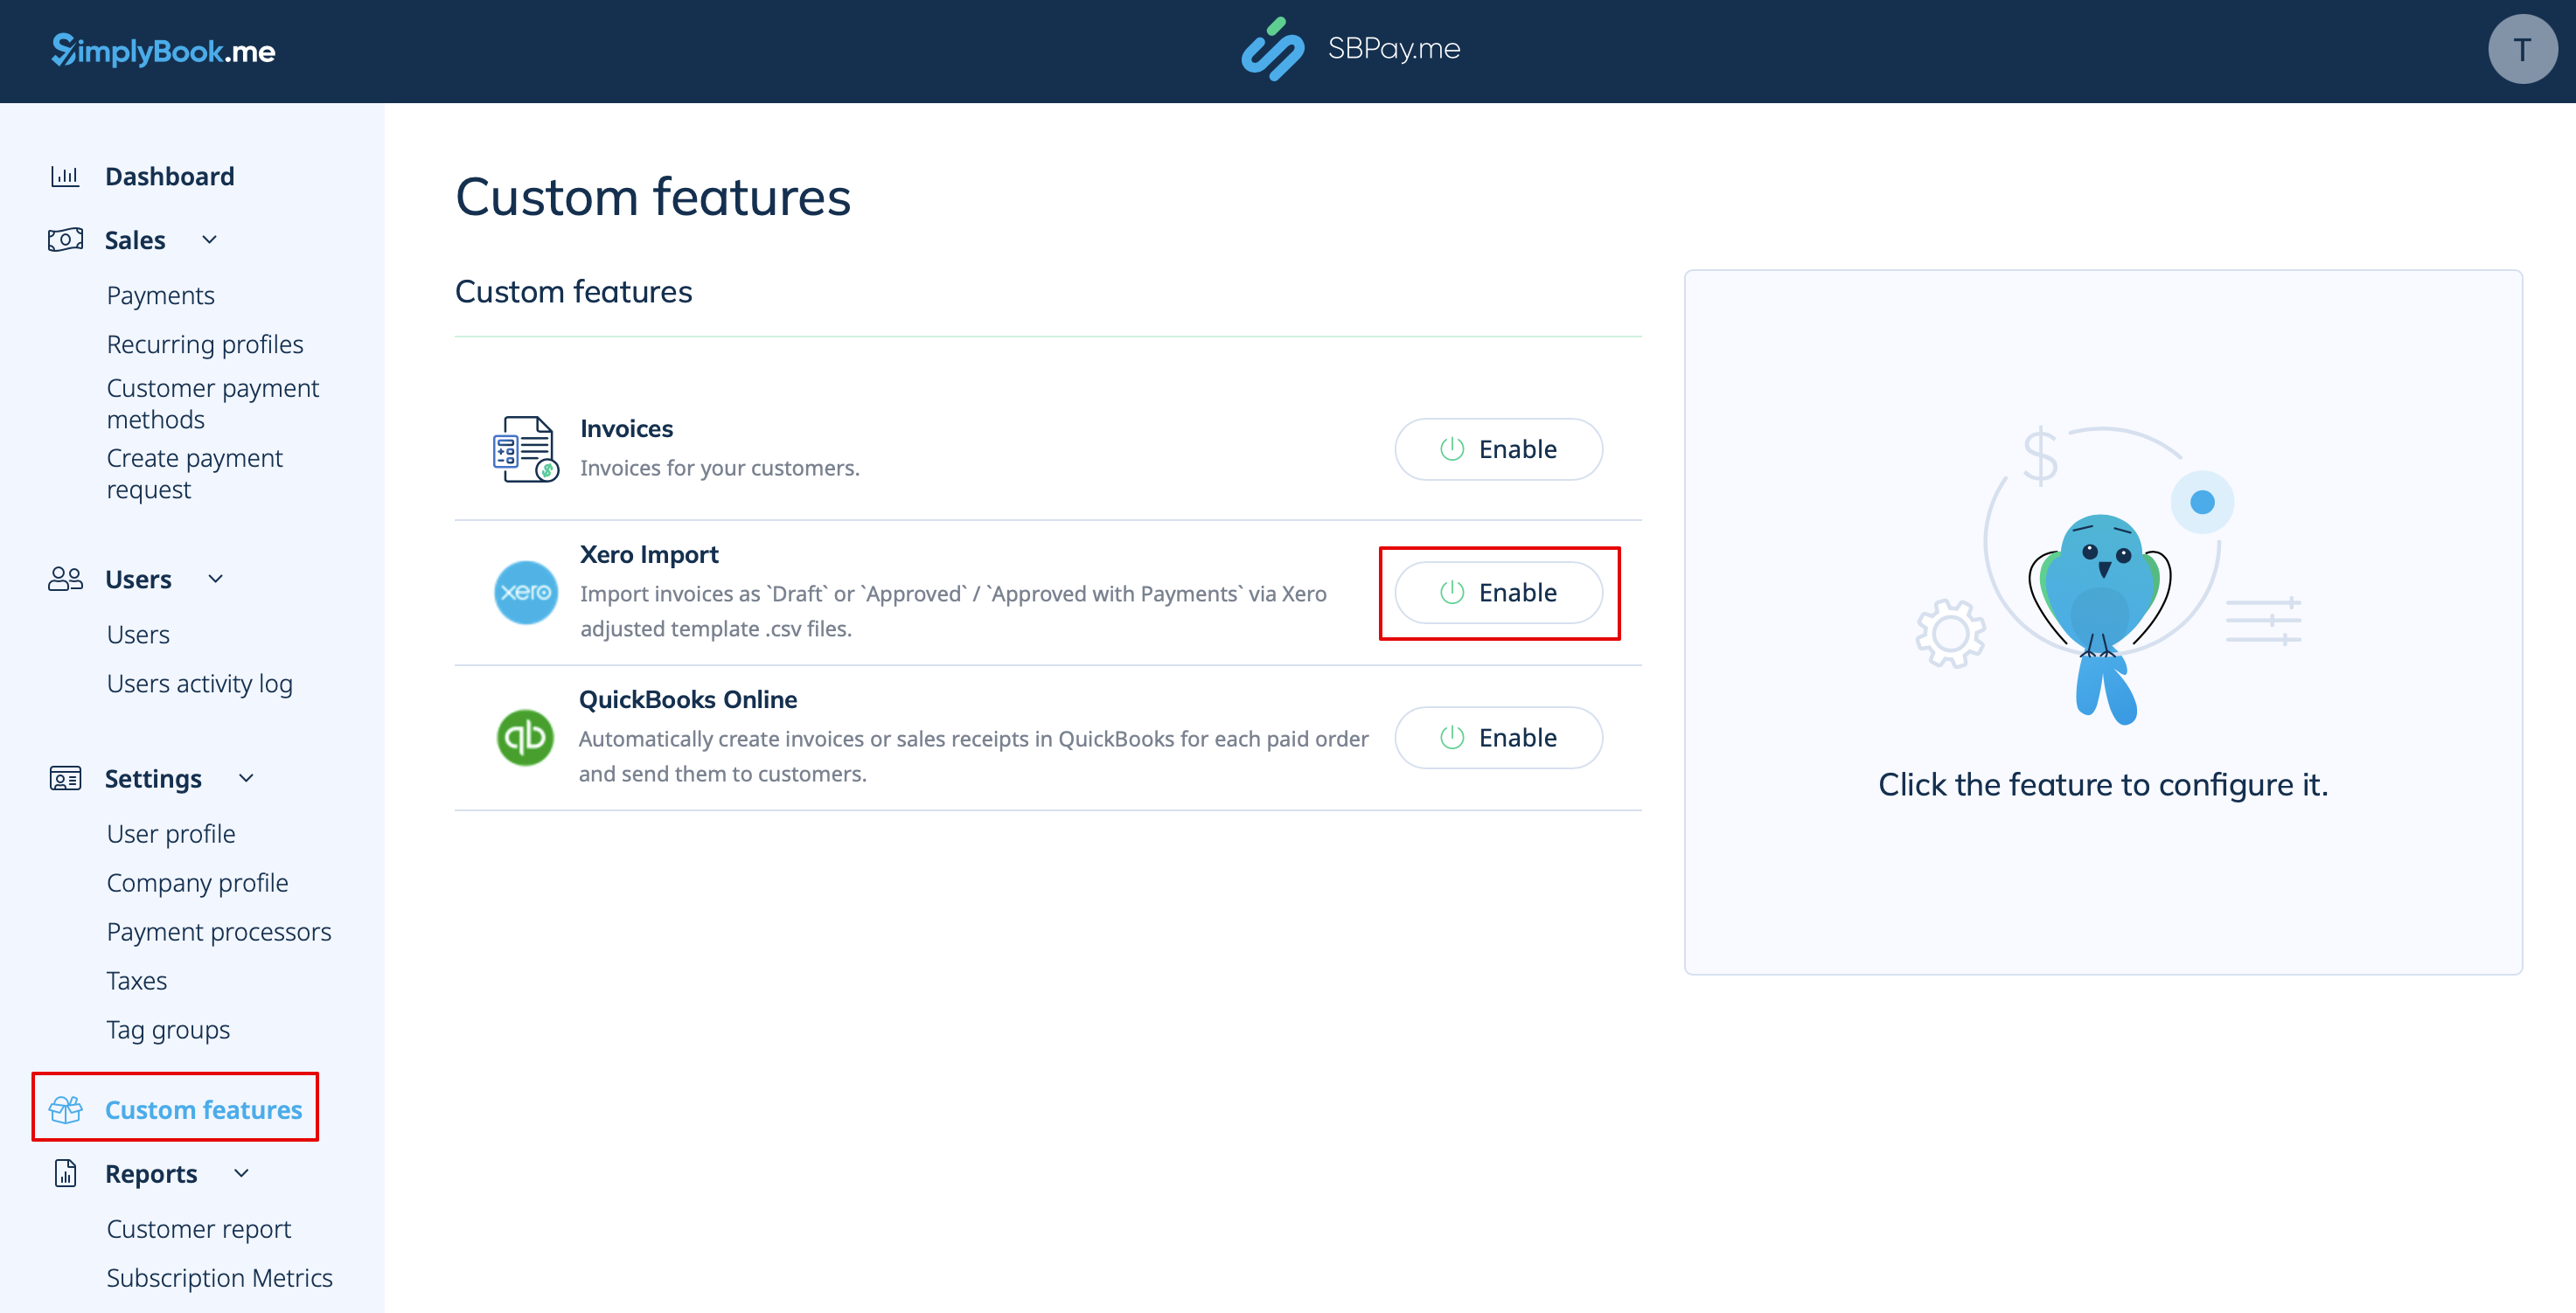
1. Navigate to the Custom Features page within your SBPay.me interface and click on the Enable button next to Xero.
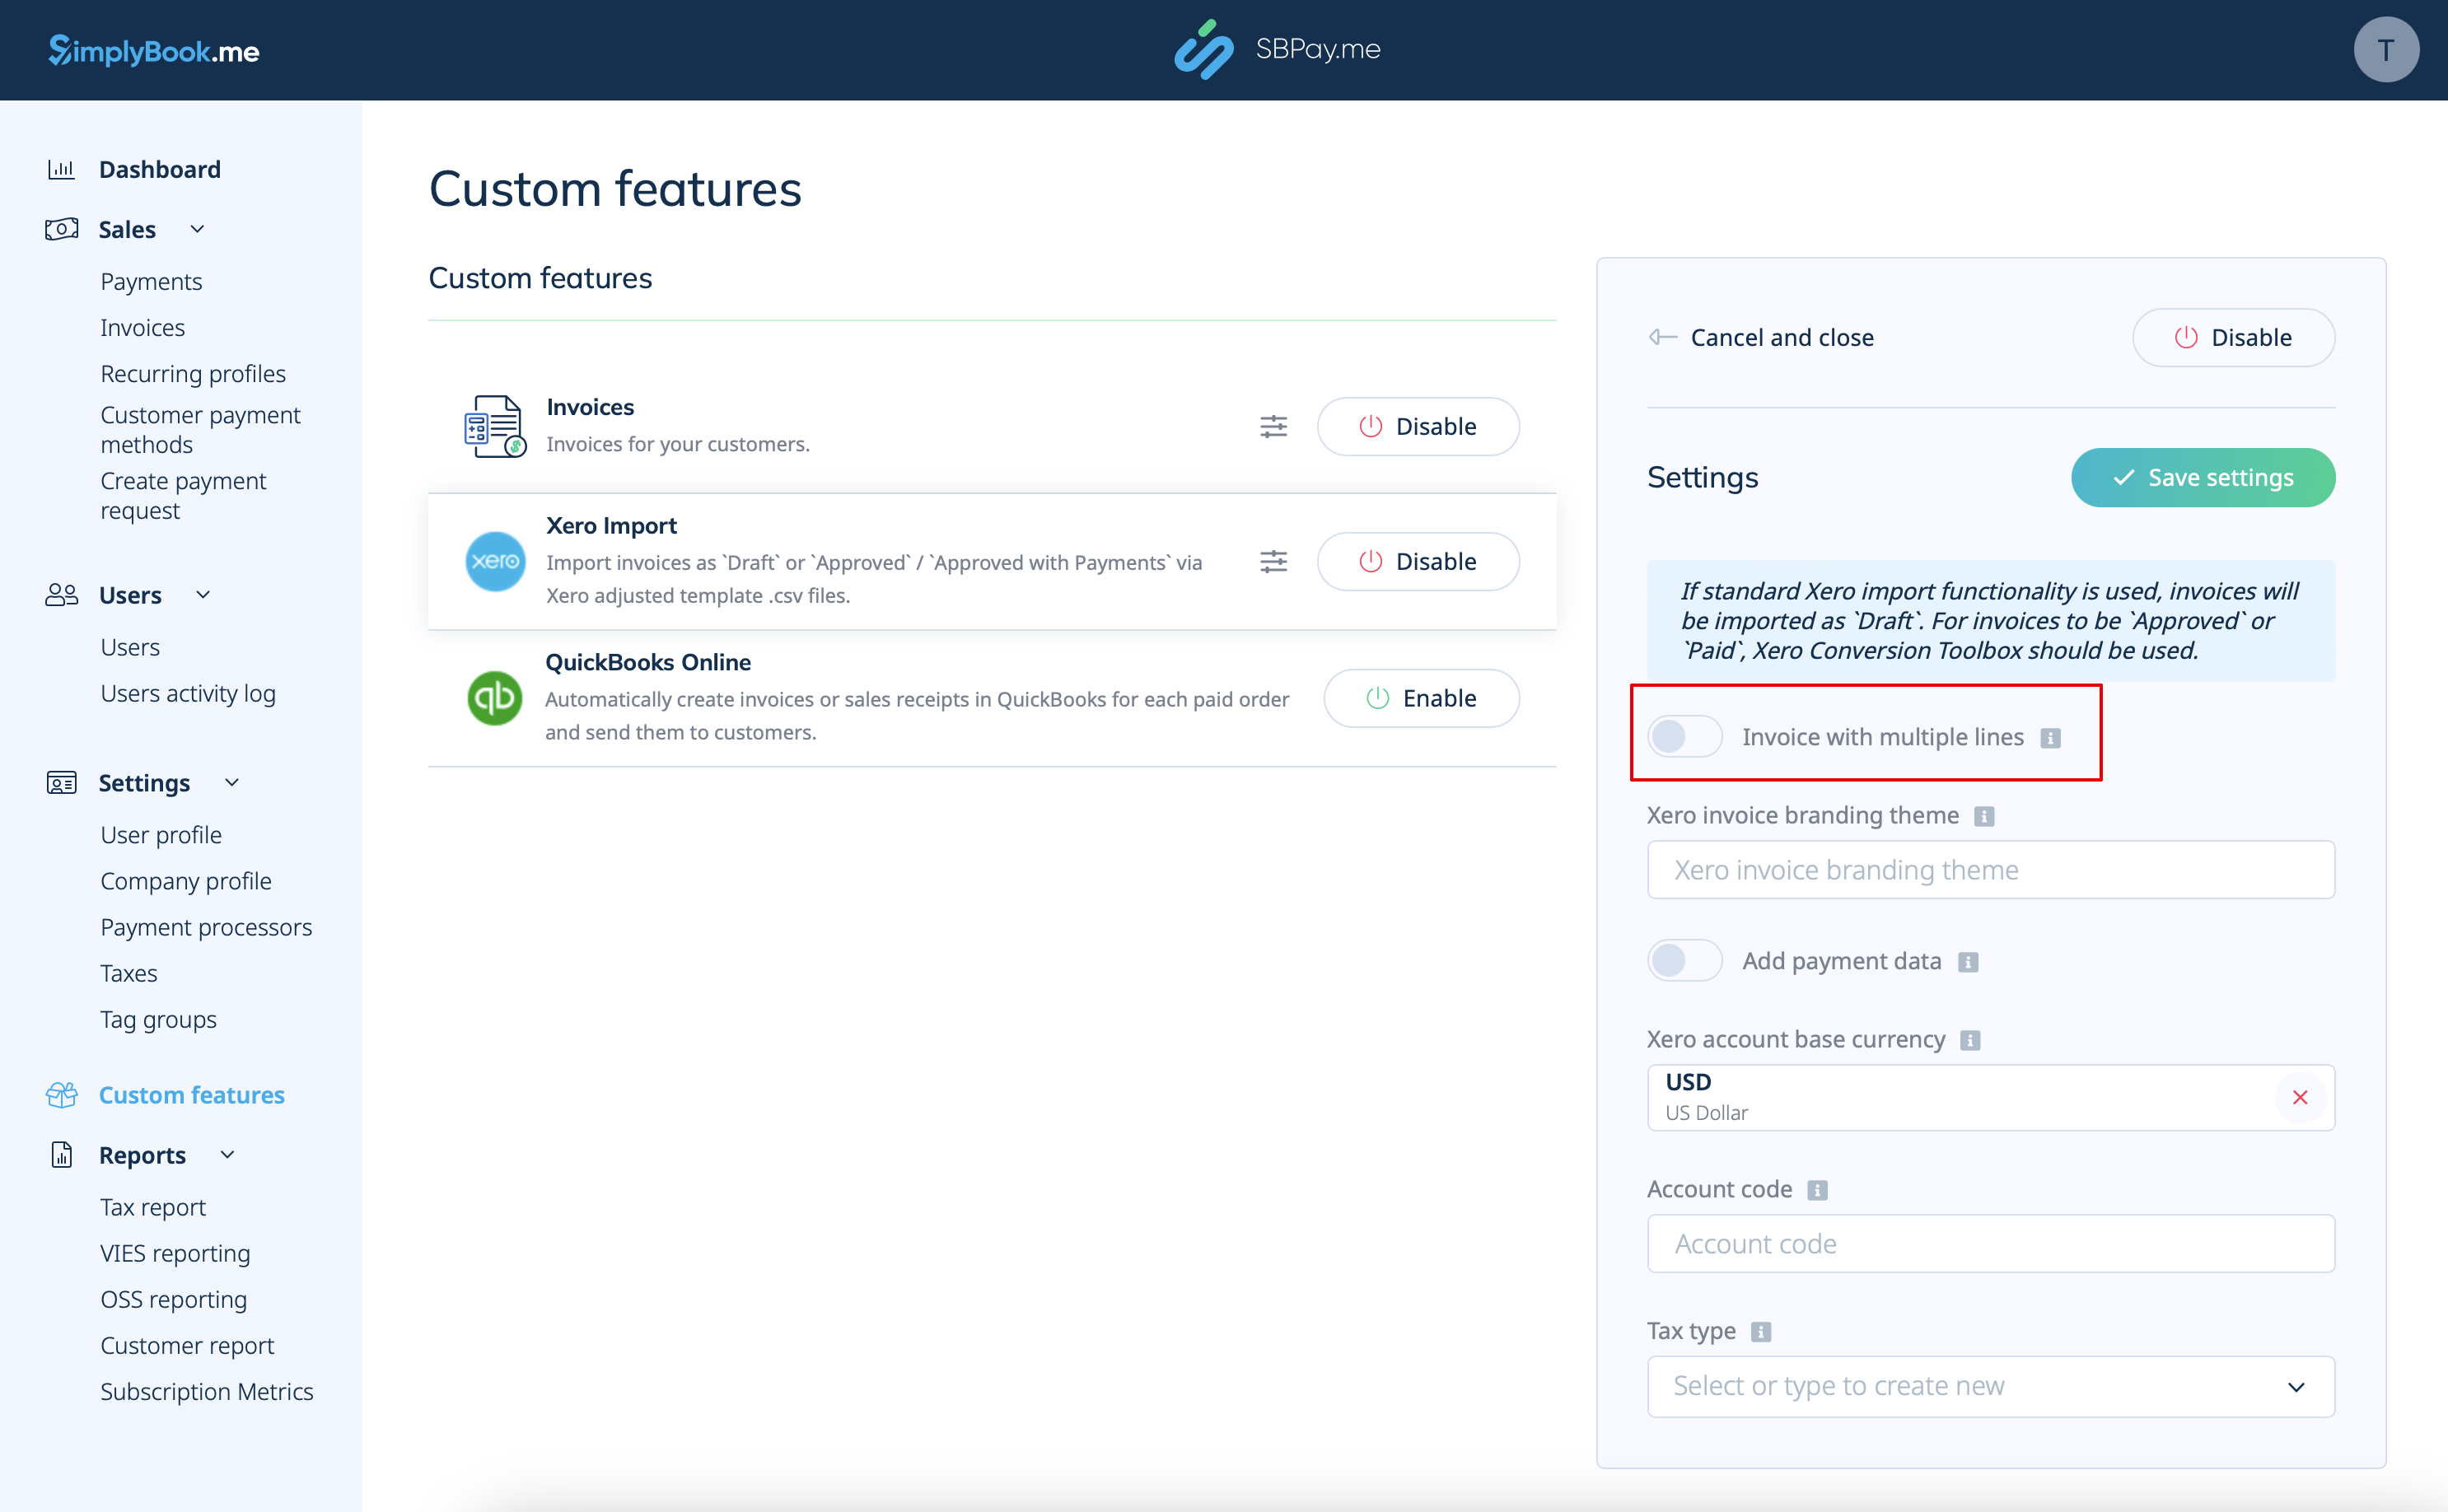
2. Choose if the invoice should be imported with multiple lines. This option determines how the information from your invoices is structured when transferred from SBPay.me to Xero.
If enabled, each row in the export file will correspond to a specific invoice line item. This means that detailed information about each item within an order is organized in separate rows of the resulting .csv file.
If disabled, all invoice line items within an order are combined into a single line. This results in a concise summary of the invoice with the total amount displayed in one row of the .csv file.
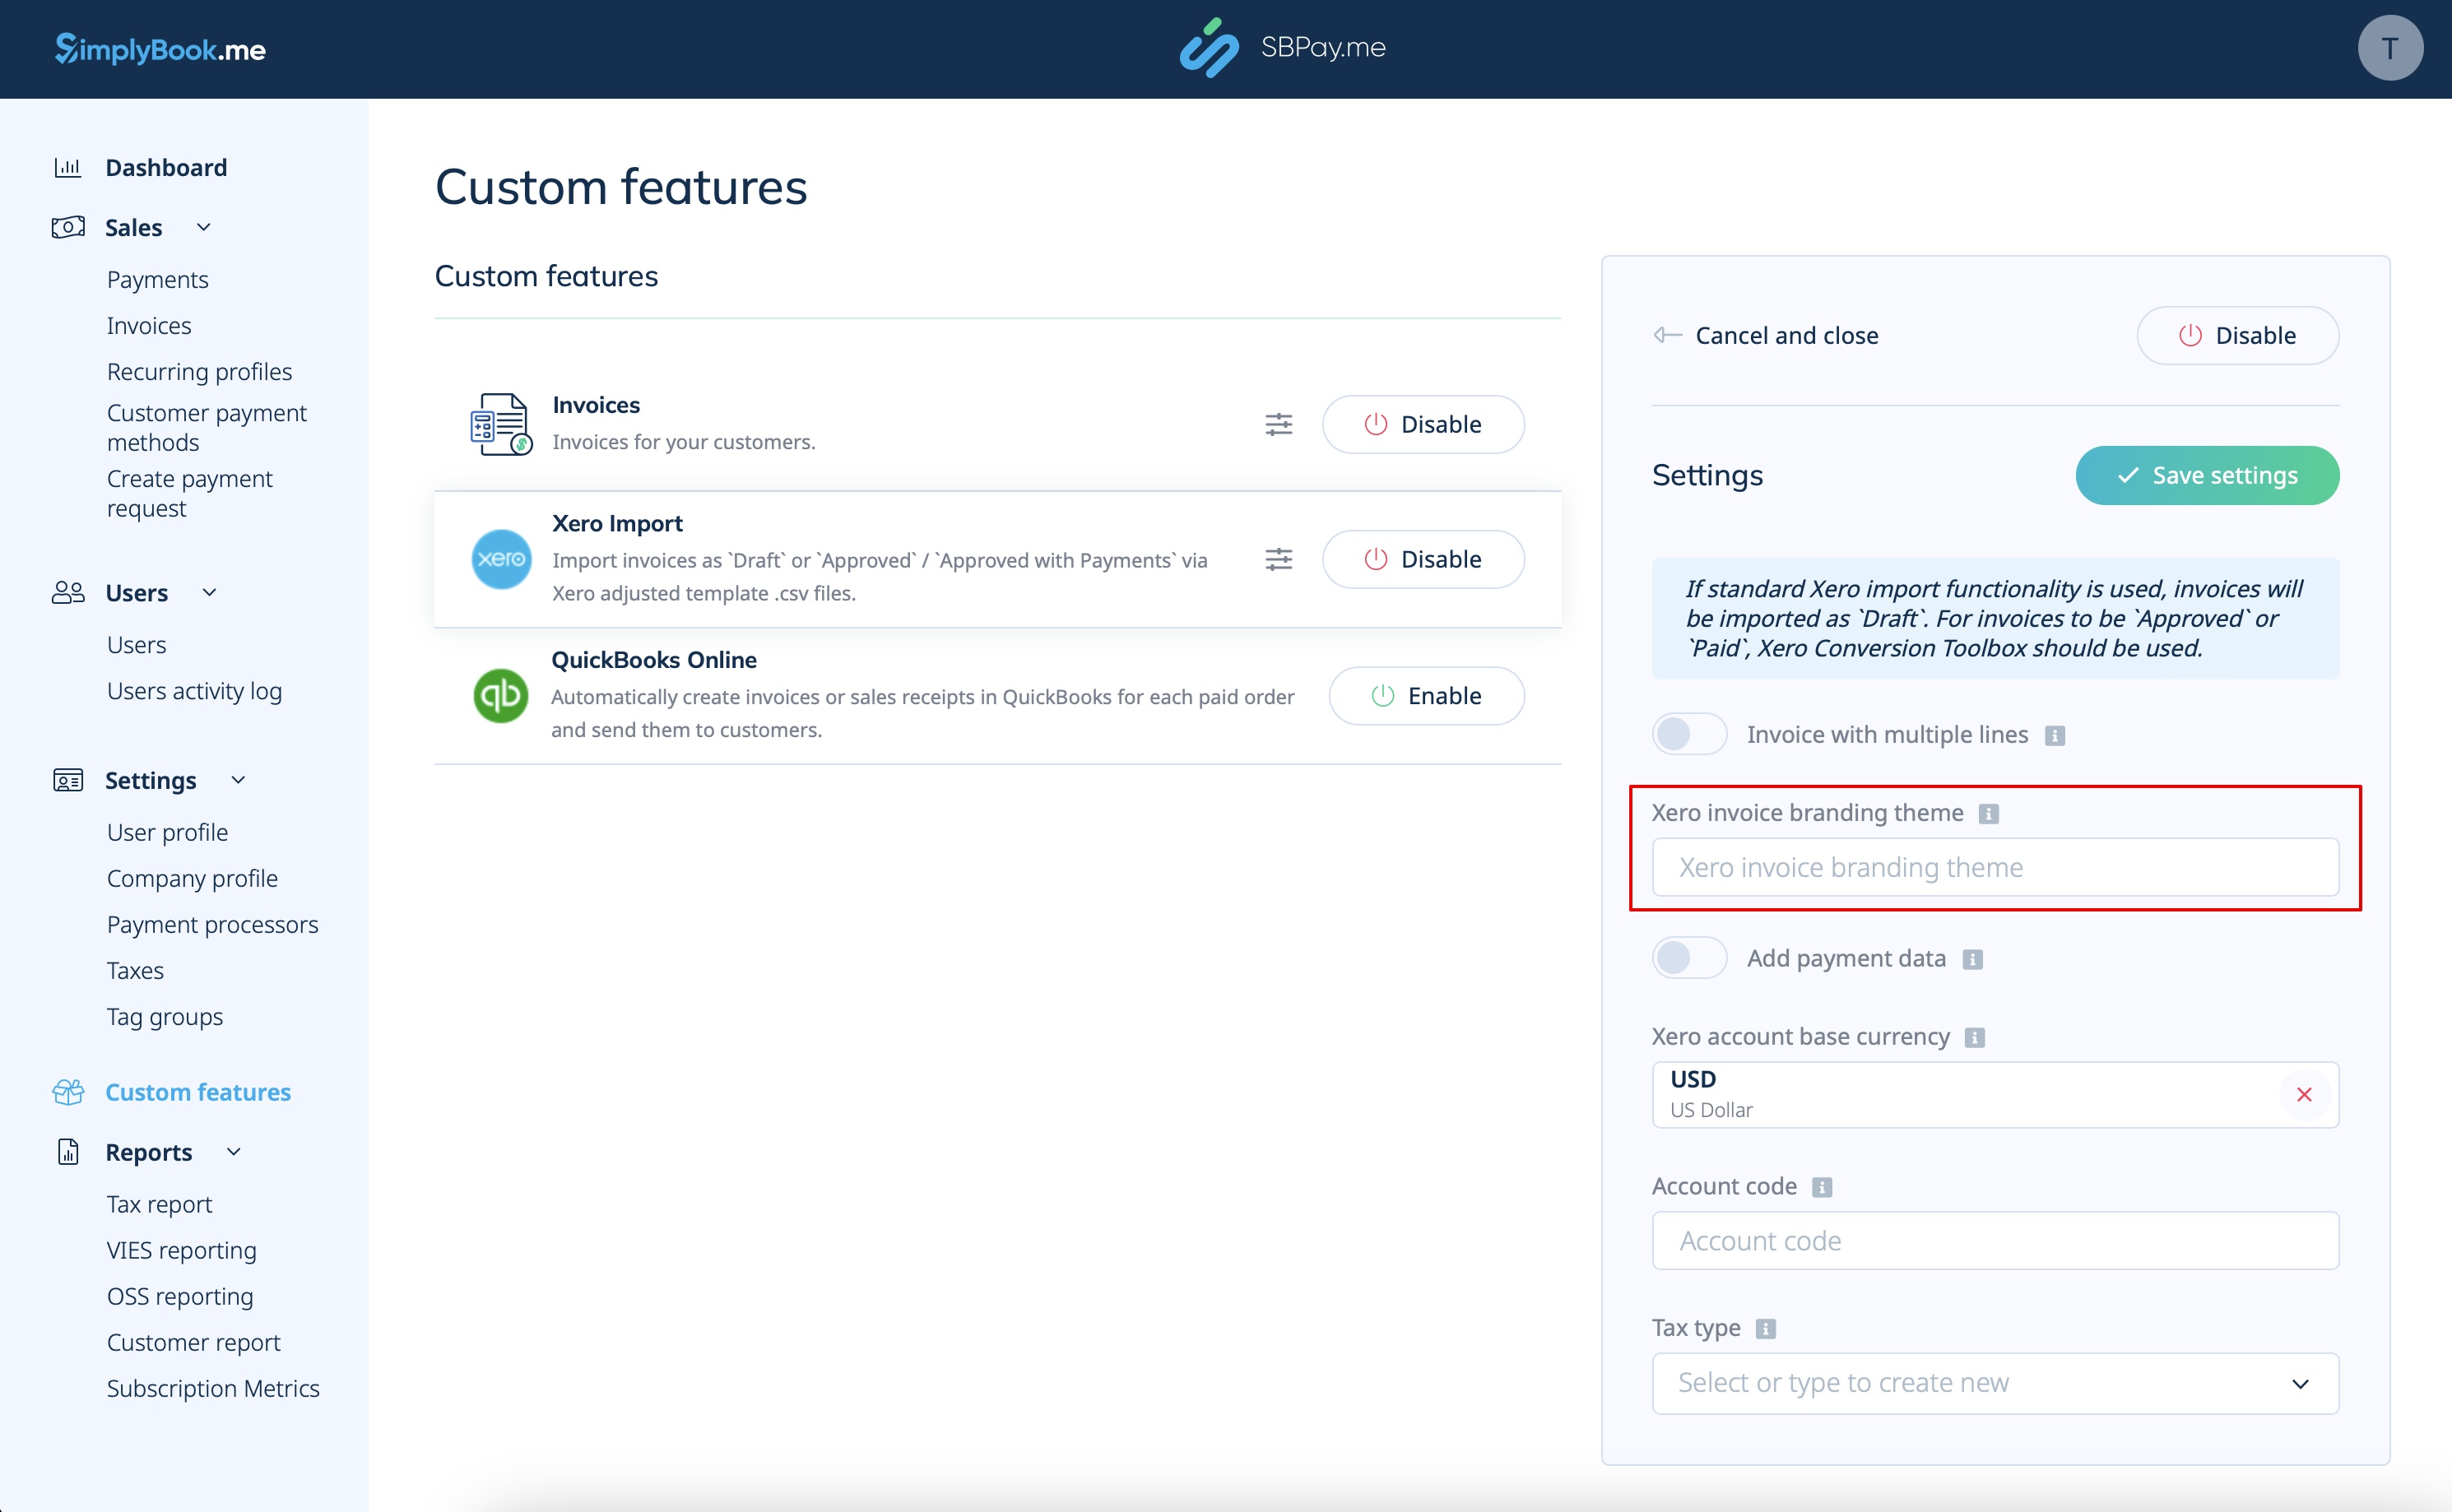
3. Insert Xero Invoice Branding Theme Name. In Xero, a branding theme name is the name of the invoice template that determines the layout and design of your invoices.
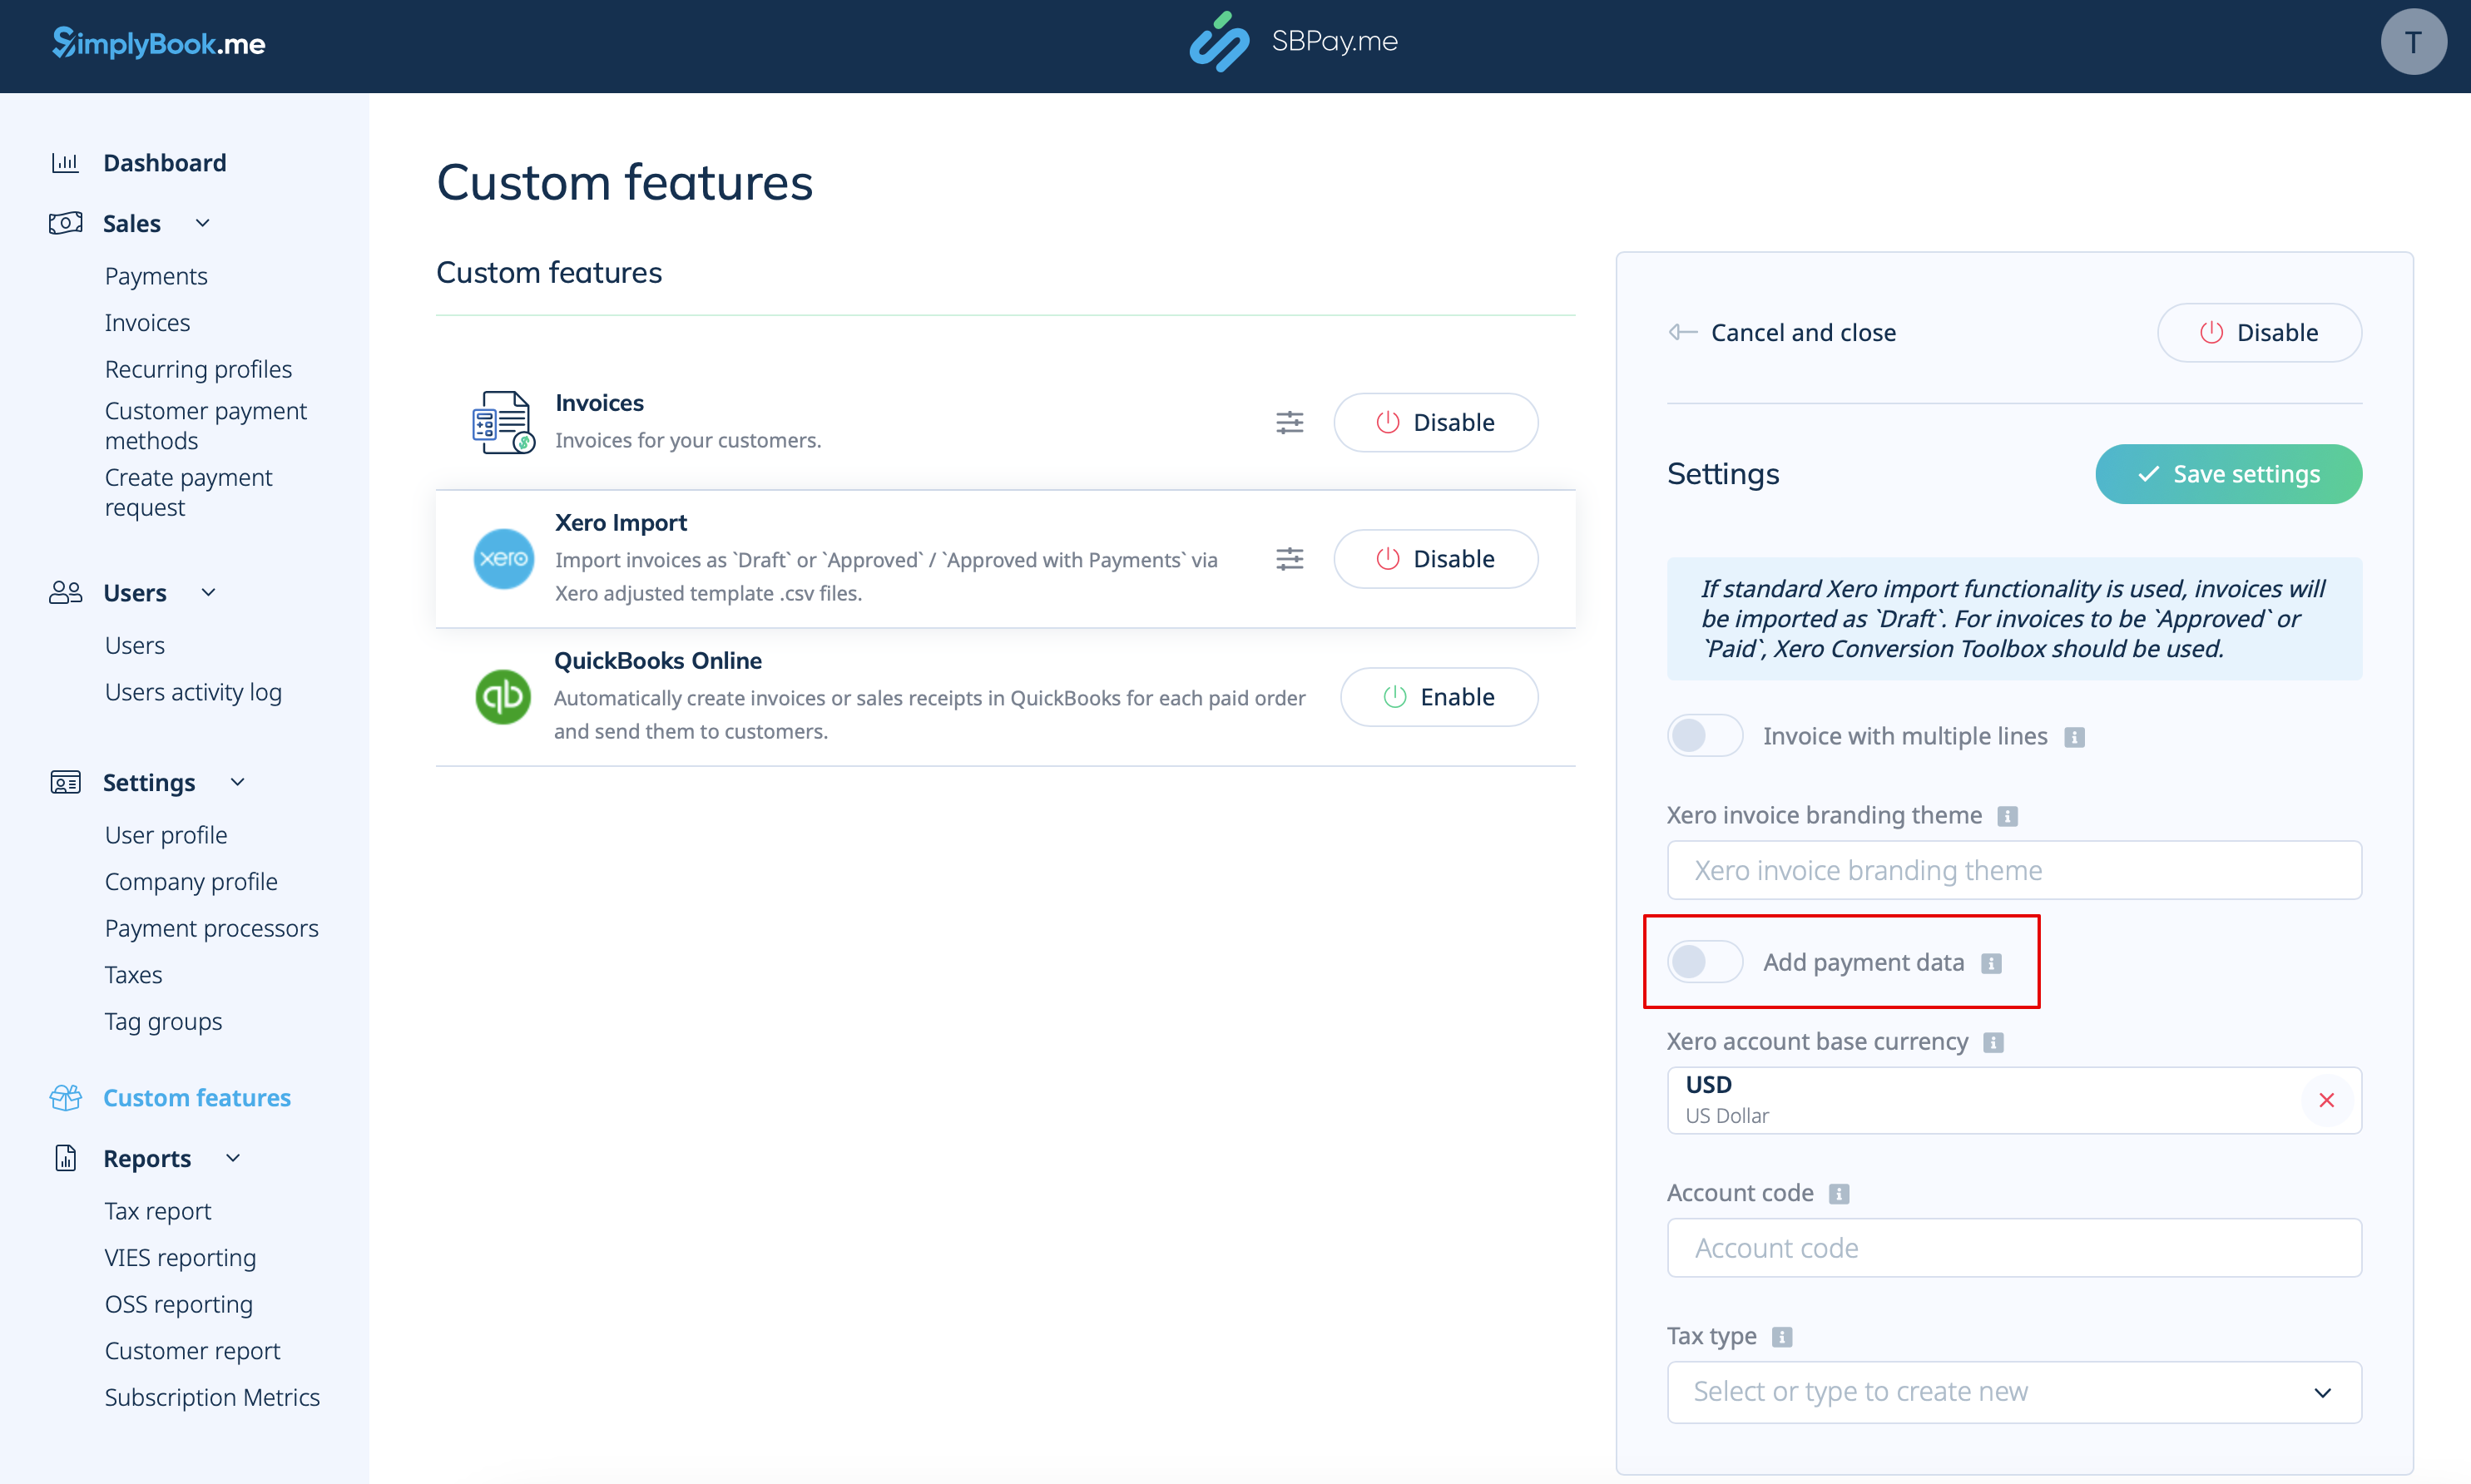
4. Add Payment Data. If enabled, additional payment data, including the amount paid, Xero account code, invoice paid date, and payment exchange rate will be exported to the .csv file.
By including this payment data during the export process, you ensure that Xero has all the necessary information to accurately record payments against the corresponding invoices.
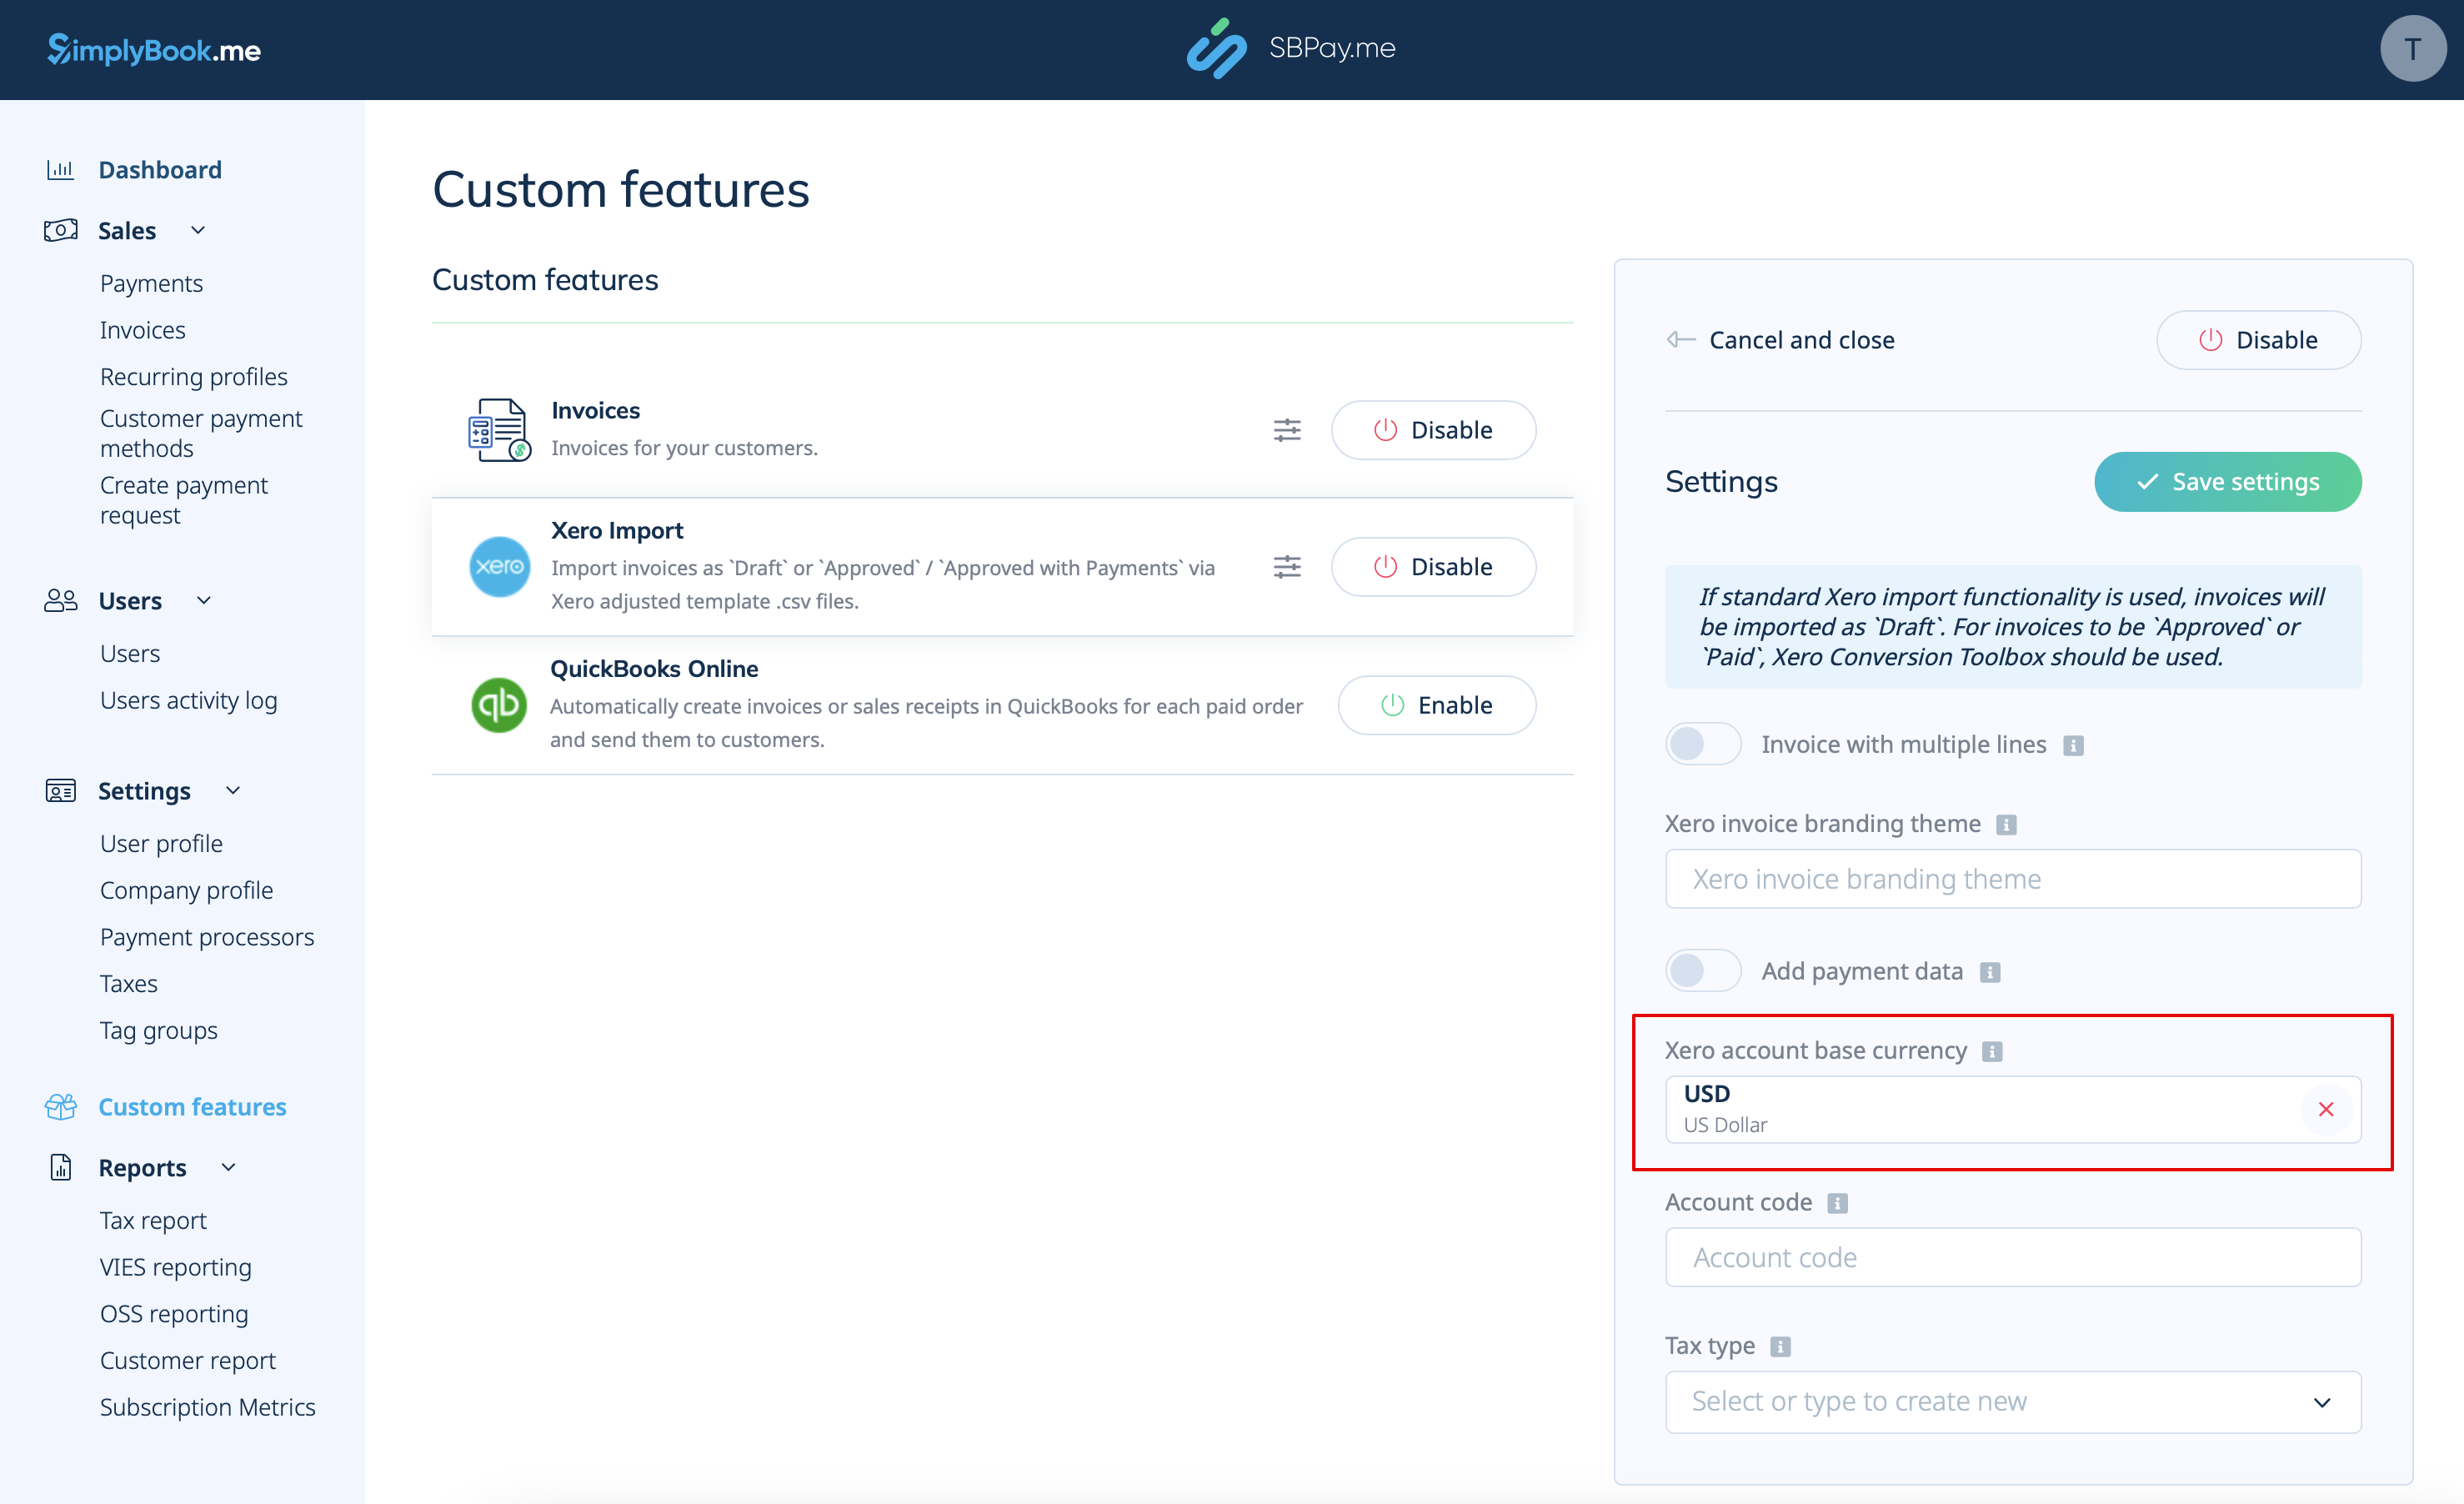
5. Select Xero Account Base Currency. In Xero, the account base currency is the primary currency in which your financial records are kept. It serves as the standard currency for your accounting and reporting purposes. Specify it if you accept payments in multiple currencies or if the SBPay.me invoices currency is different from the Xero account base currency.
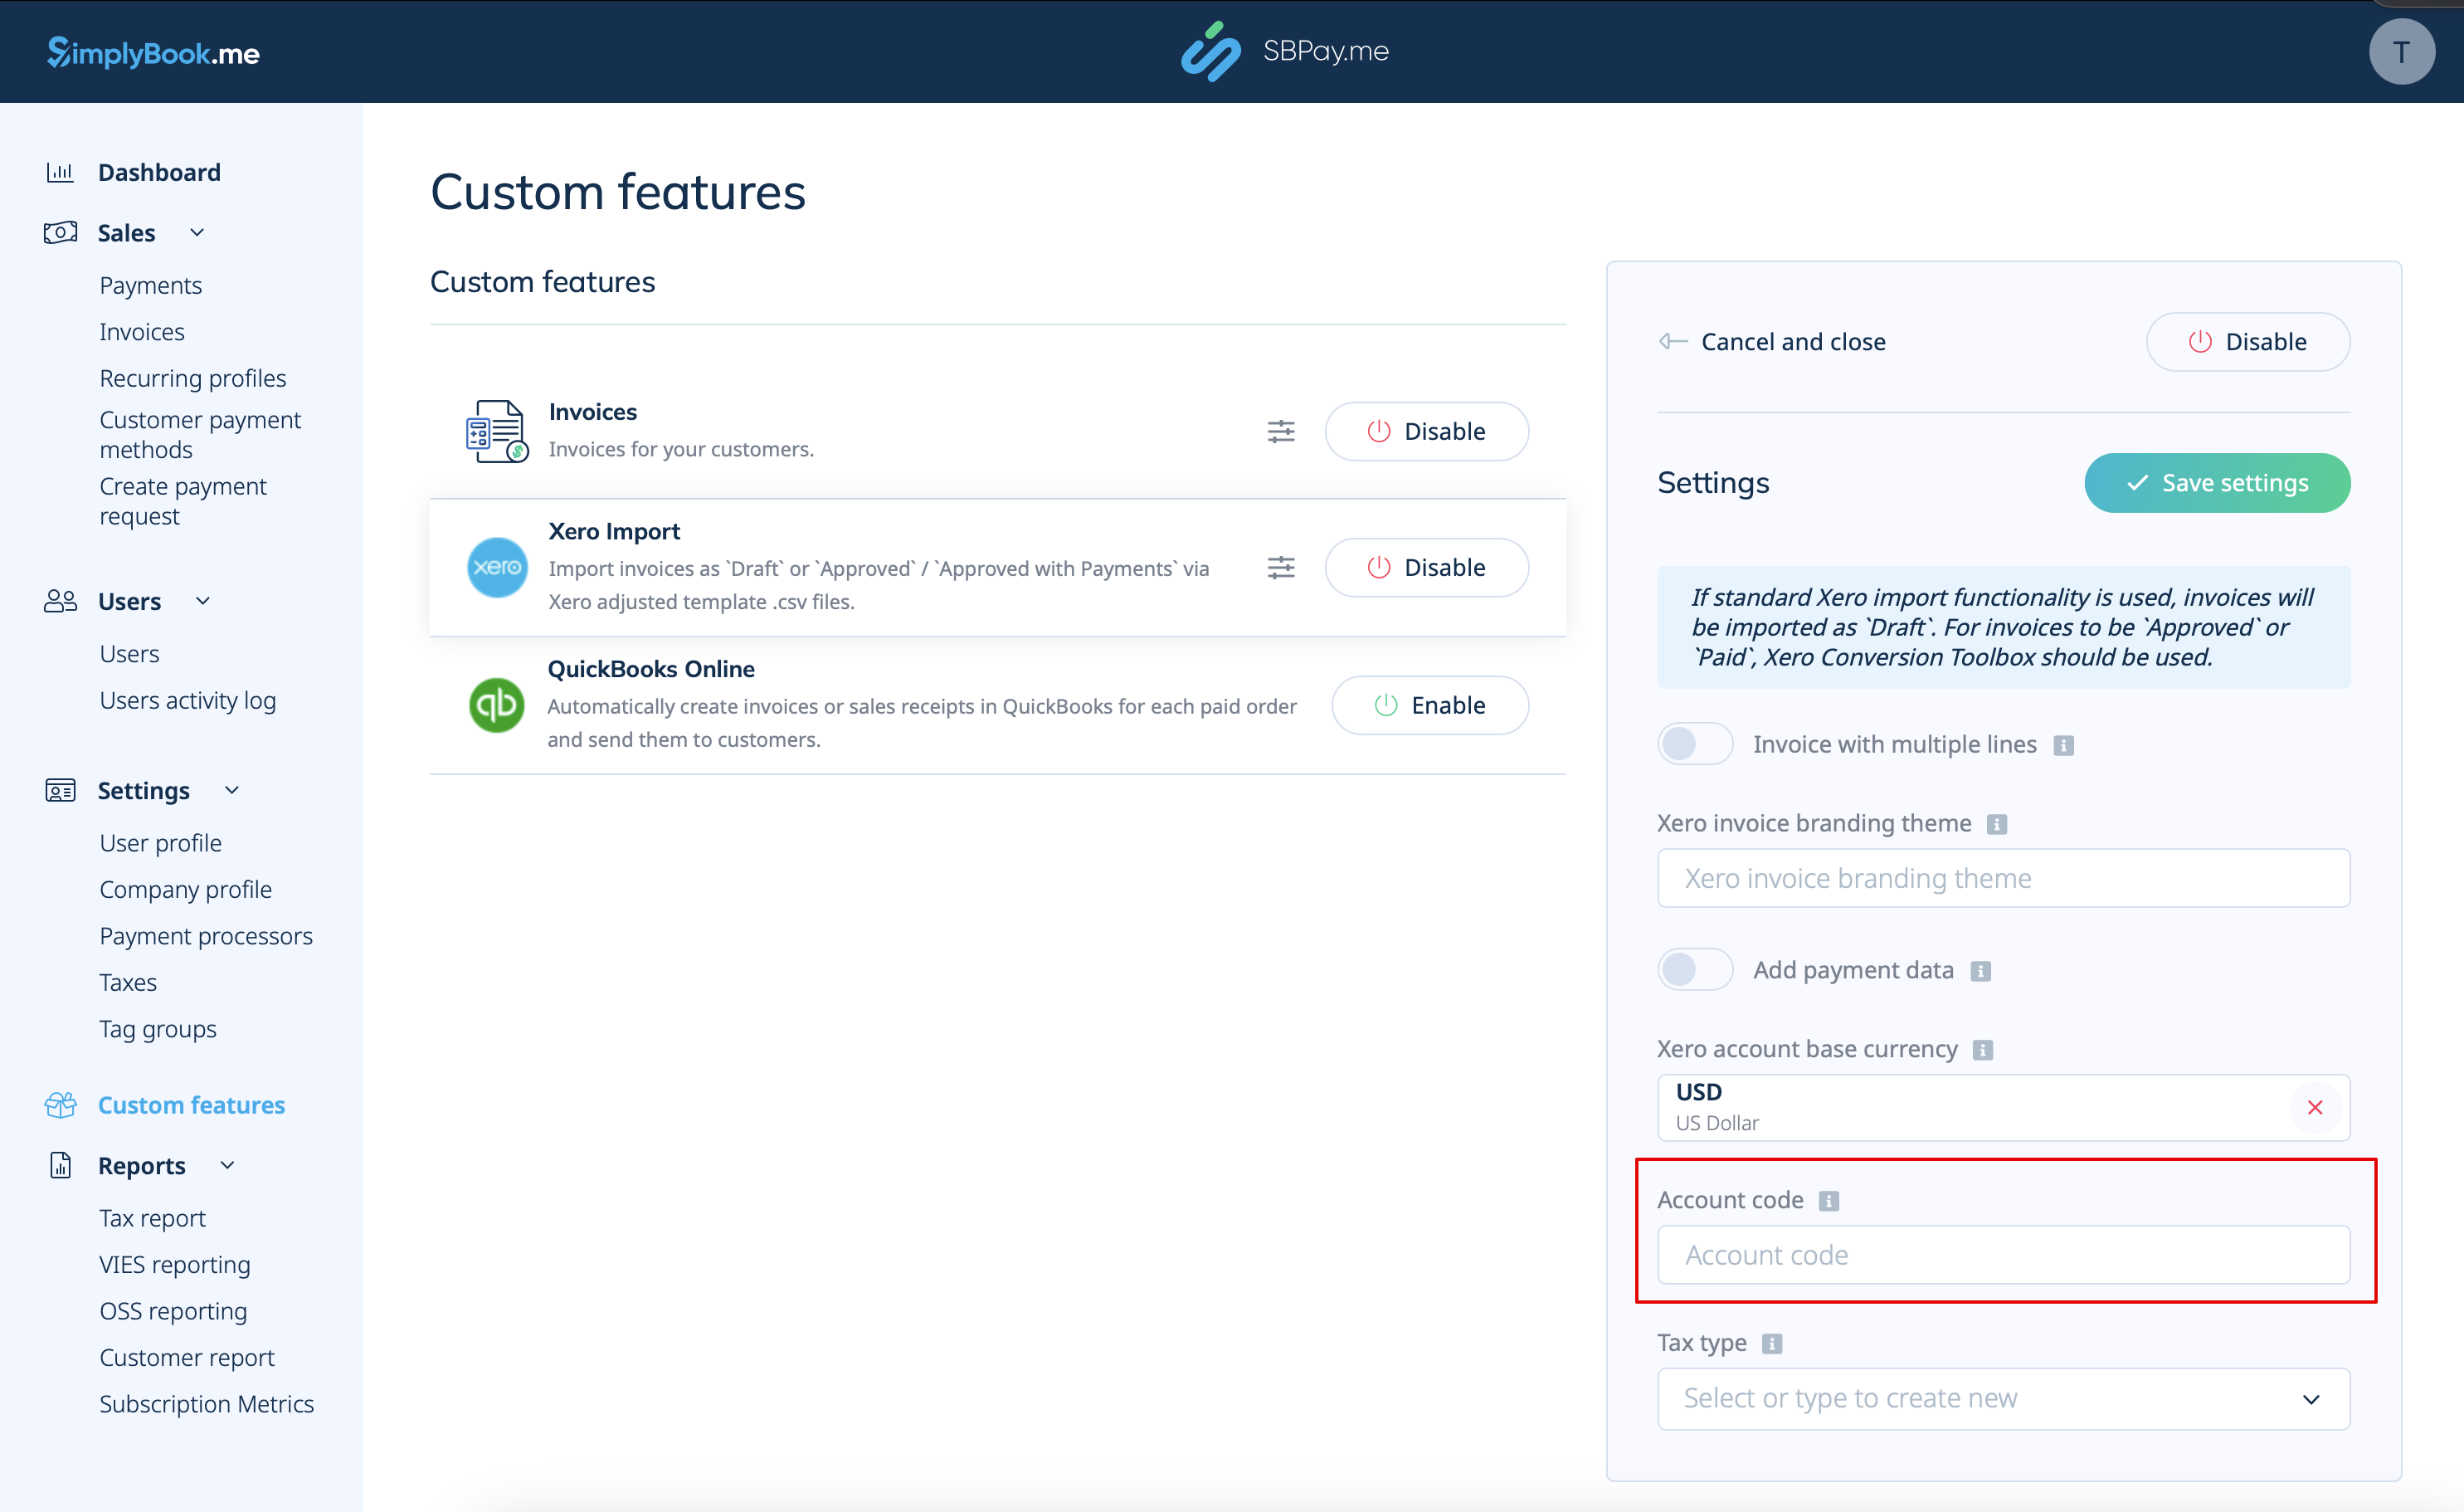
6. For paid invoices, specify the relevant Deposit Account Code as it appears in the chart of accounts in Xero. This ensures that transactions are automatically categorized into the appropriate account within Xero. Alternatively, you can leave it blank to manually specify the account code during the invoices import.
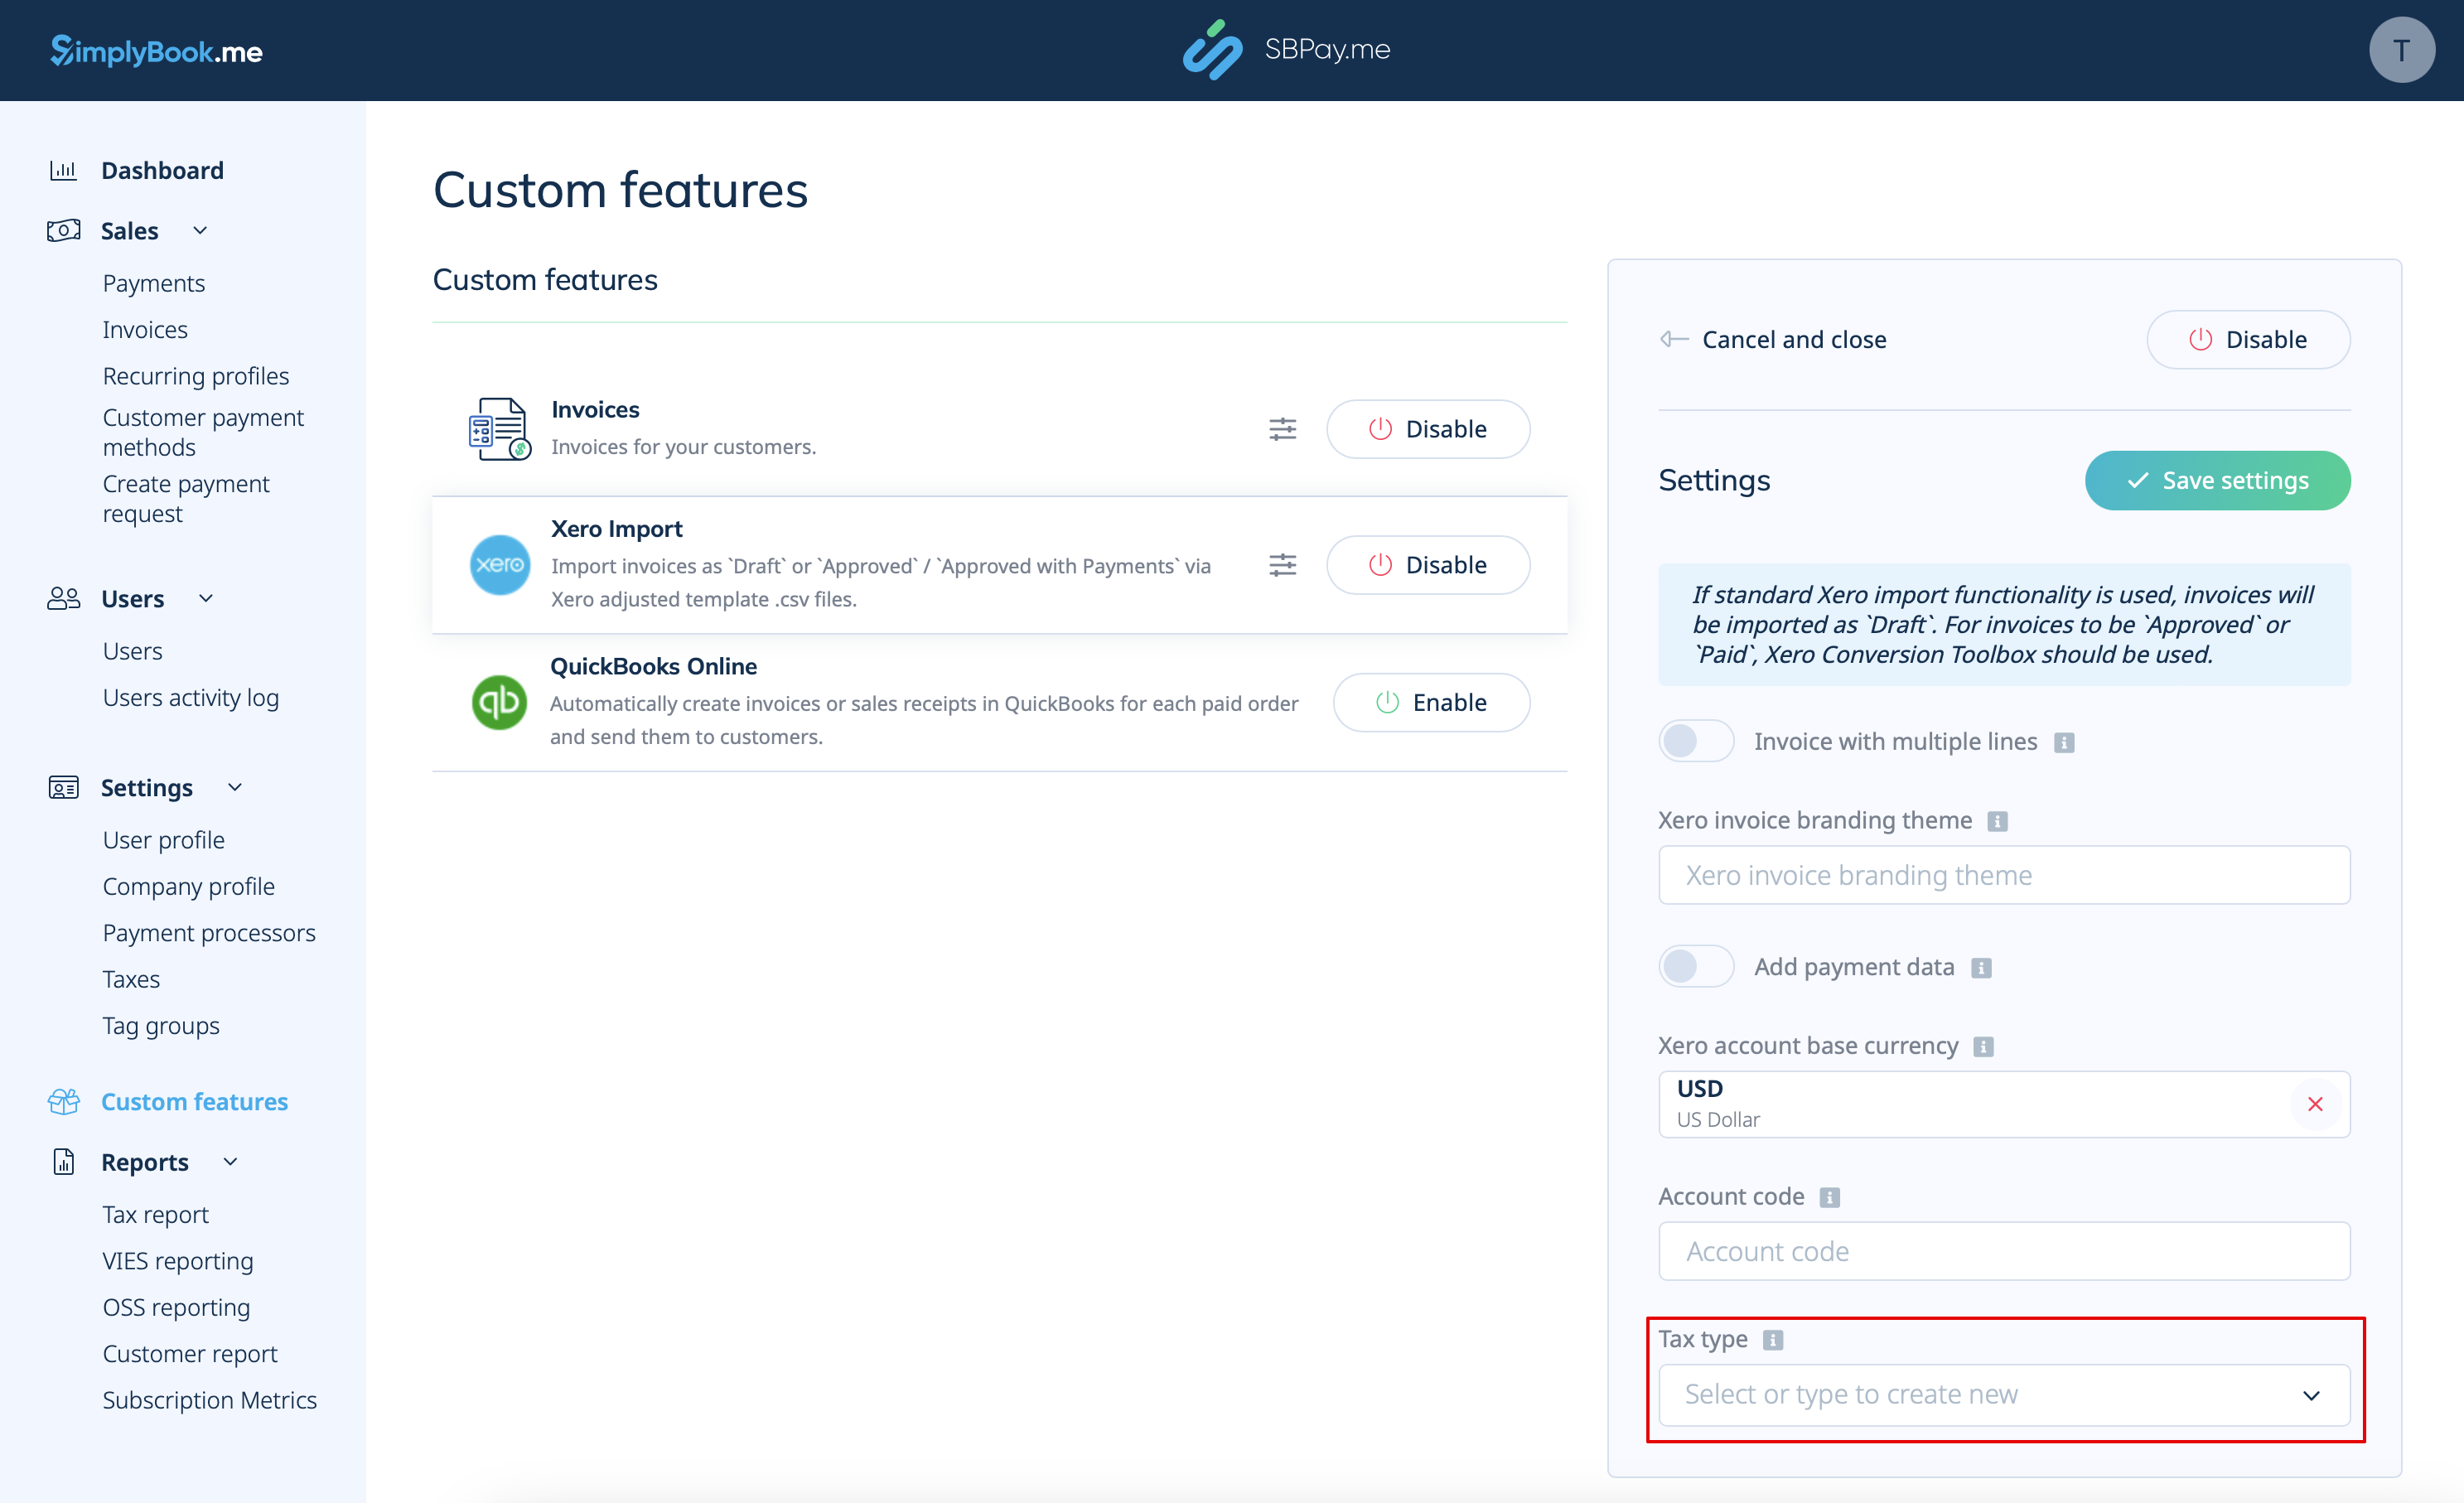
7. Select Tax Type. Enter the exact tax rate name from your Xero settings to ensure that each transaction is correctly linked to the corresponding tax rate.
8. After enabling and configuring the Xero Custom Feature, you can now go to Invoices in your SBPay account and click on the Xero Export button to generate the .csv file which can be imported on the Xero side.