From SimplyBook.me
Created page with "== Mulighed 1 (som tjeneste med egen tidsplan) == :1. I Administrer//Tjenester skal du klikke på ikonet "+" for at oprette en ny tjeneste. <br> 1200px| center|link=https://help.simplybook.me/images/2/2d/Create_new_service_redesigned.png <br>" |
Created page with ":3. Brug derefter kalenderen, klik på de datoer, du vil åbne, og indstil tidsplanen for disse datoer ved at flytte skyderne (den lyseblå zone er åben tid). <br> 1200px | center|link=https://help.simplybook.me/images/c/c6/Events_set_schedule_by_date_redesigned.png <br><br>" Tags: Mobile edit Mobile web edit |
||
| Line 21: | Line 21: | ||
[[File:Events set schedule by date redesigned.png|1200px | center|link=https://help.simplybook.me/images/c/c6/Events_set_schedule_by_date_redesigned.png]] | [[File:Events set schedule by date redesigned.png|1200px | center|link=https://help.simplybook.me/images/c/c6/Events_set_schedule_by_date_redesigned.png]] | ||
<br><br> | <br><br> | ||
:Hvis du skal vælge flere datoer på én gang, skal du aktivere "Aktiver valg af gruppedatoer?", vælge de datoer, der skal redigeres, og klikke på "Opsæt tidsplan" for at indstille tidspunkterne. | |||
: | |||
<br> | <br> | ||
[[File:Events group dates selection redesigned.png|1200px |center|link=https://help.simplybook.me/images/6/61/Events_group_dates_selection_redesigned.png]] | [[File:Events group dates selection redesigned.png|1200px |center|link=https://help.simplybook.me/images/6/61/Events_group_dates_selection_redesigned.png]] | ||
<br><br> | <br><br> | ||
<div lang="en" dir="ltr" class="mw-content-ltr"> | <div lang="en" dir="ltr" class="mw-content-ltr"> | ||
:4. Connect service to necessary provider in "Service providers" tab. | :4. Connect service to necessary provider in "Service providers" tab. | ||
Revision as of 09:29, 16 May 2025
- Video-tutorial om begivenheder og særlige dage findes på

Mulighed 1 (som tjeneste med egen tidsplan)
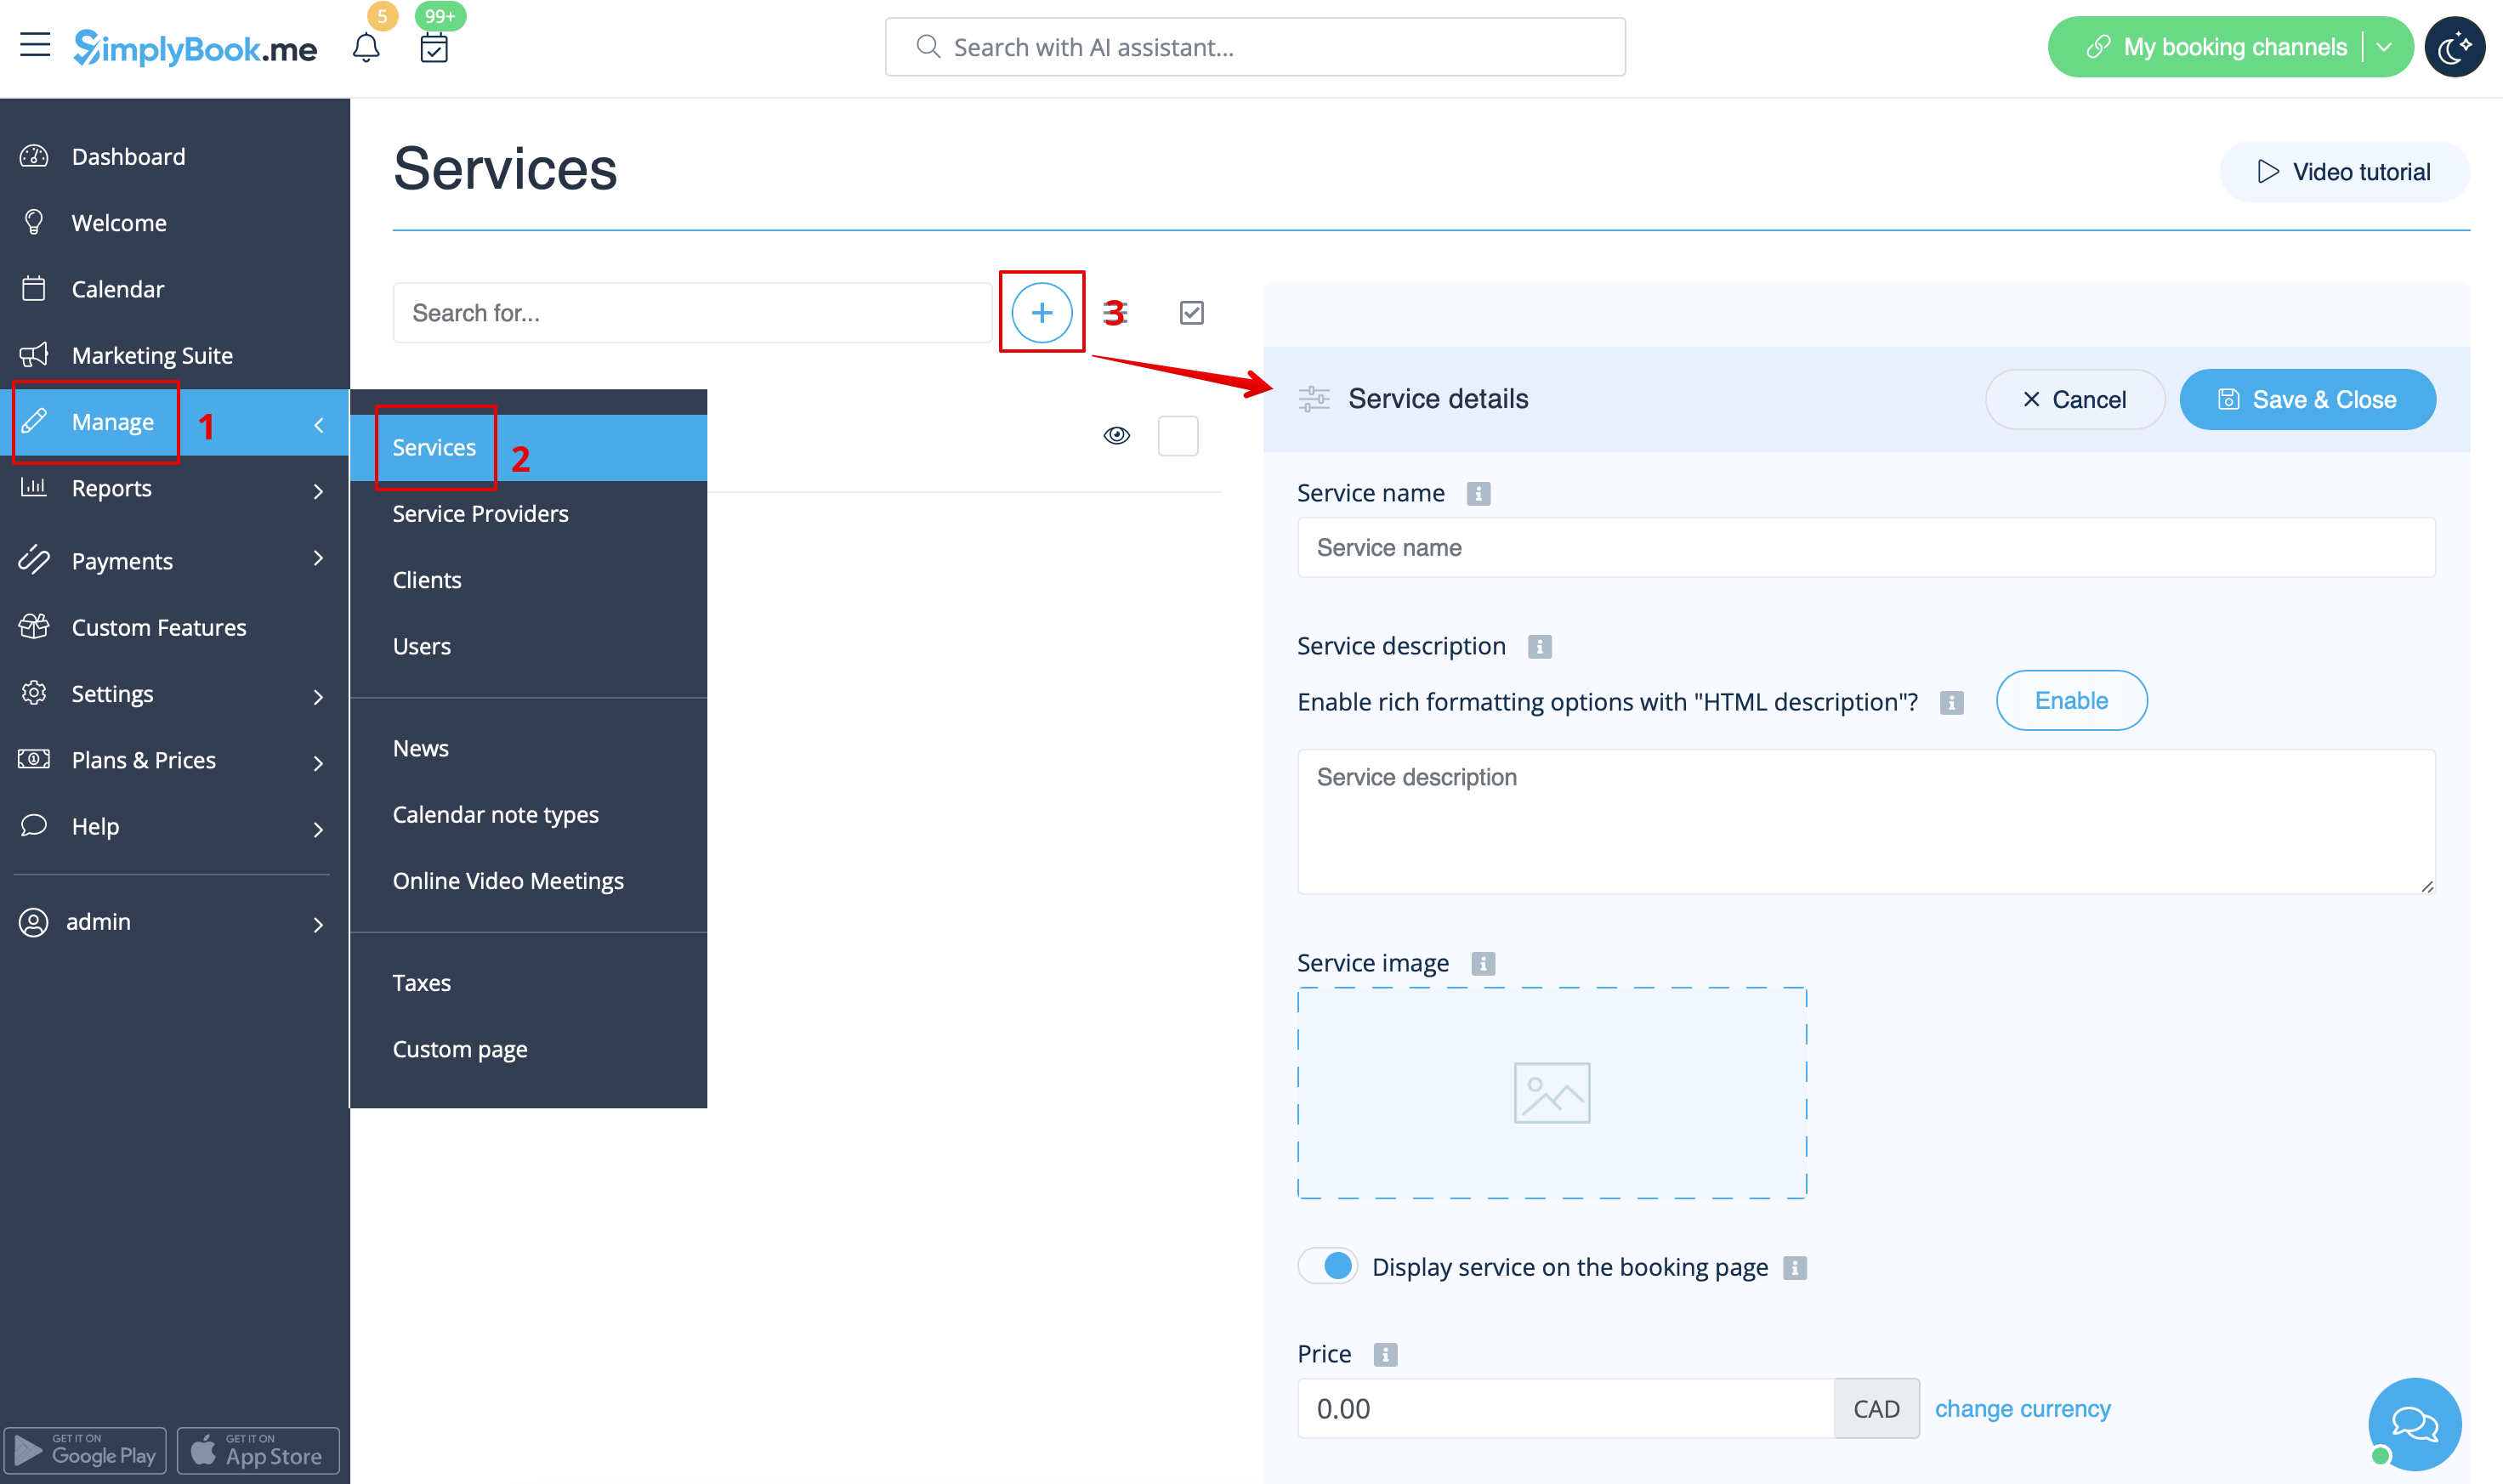
- 1. I Administrer//Tjenester skal du klikke på ikonet "+" for at oprette en ny tjeneste.
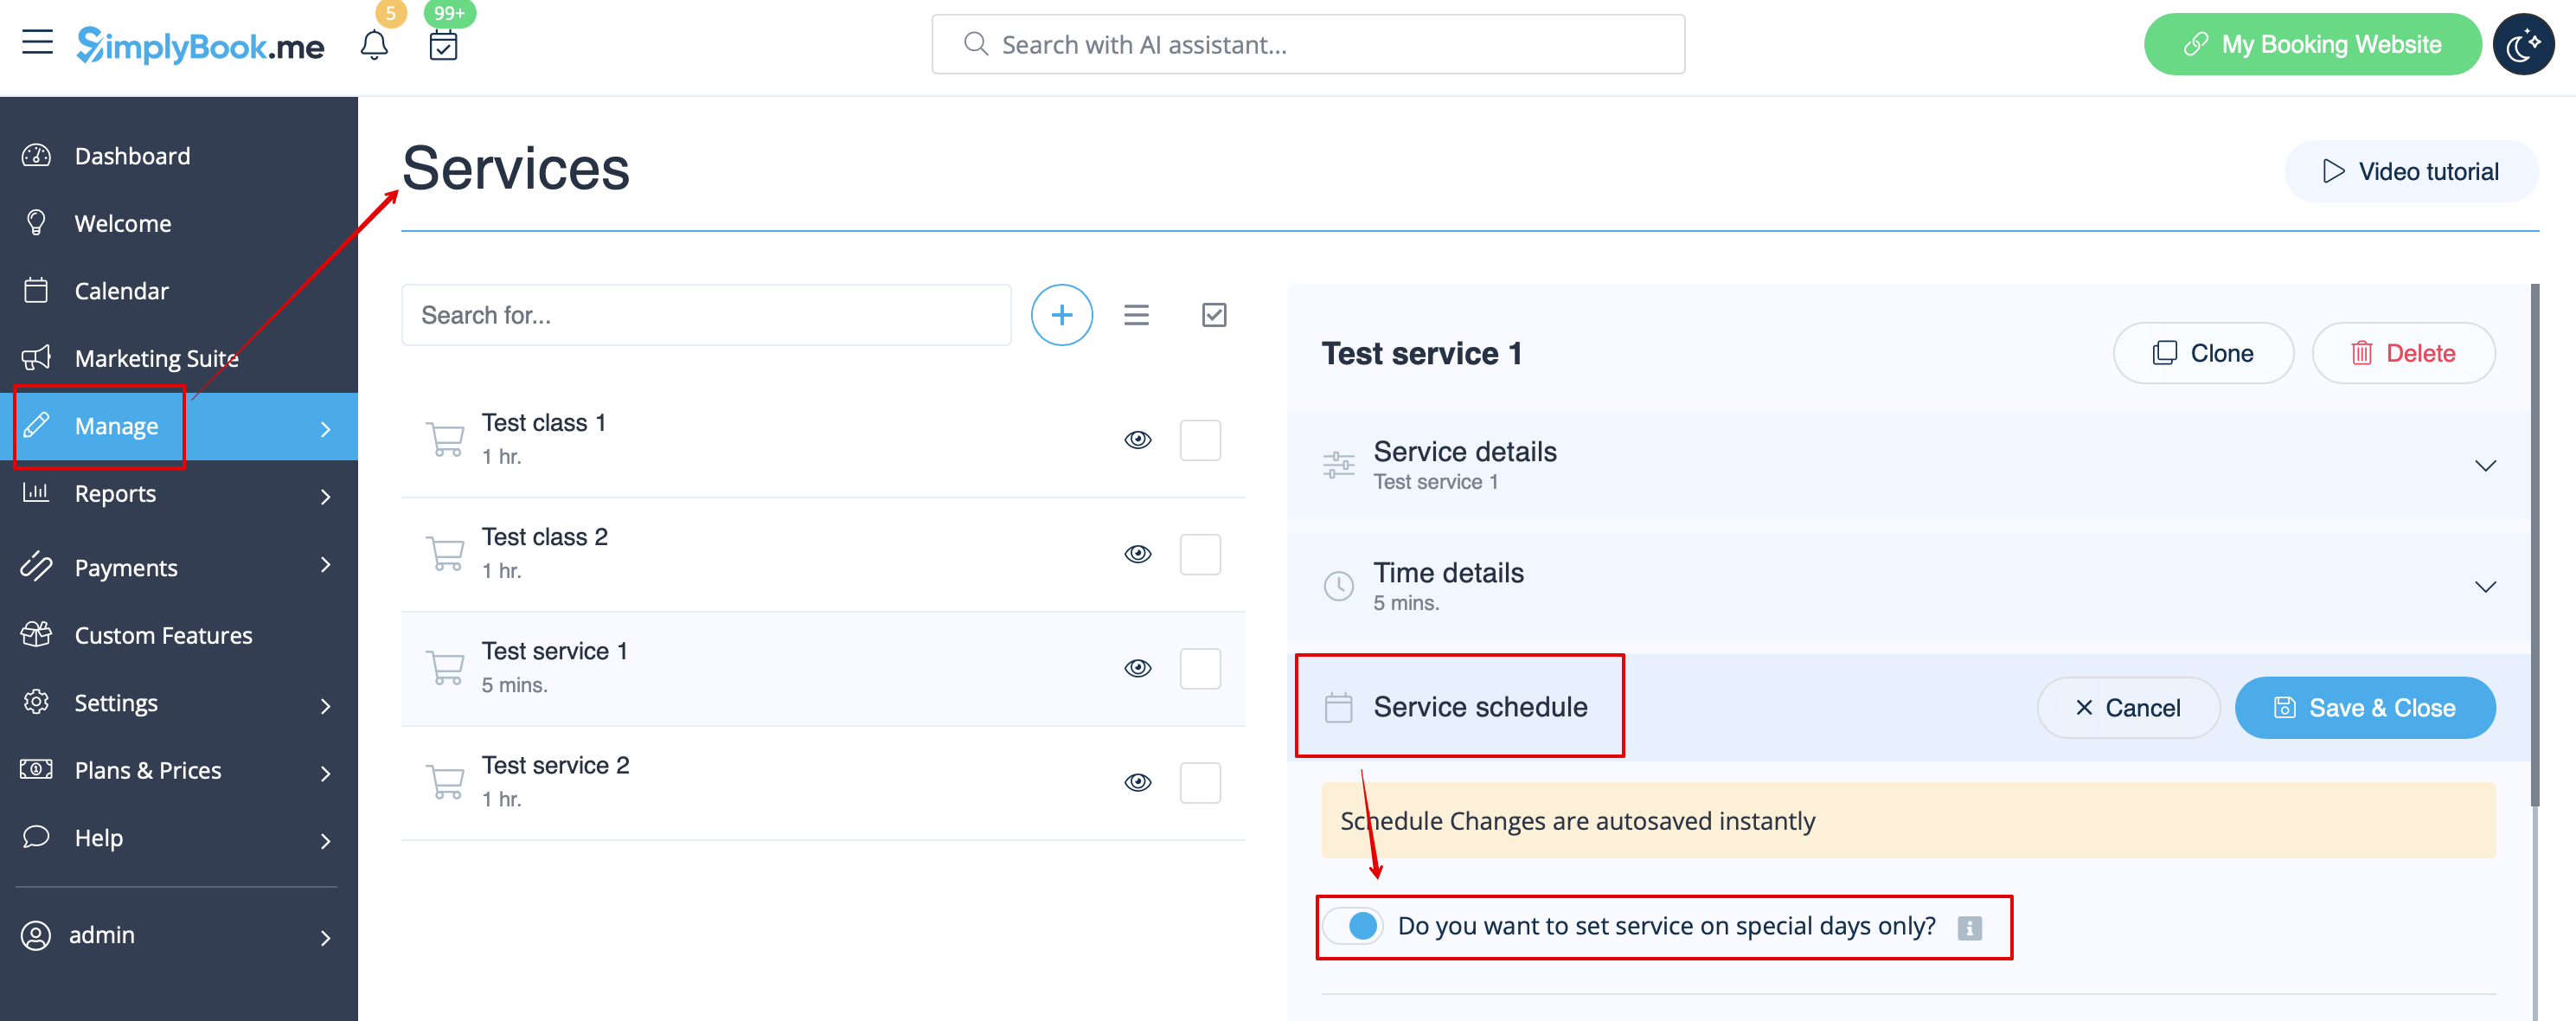
- 2. I Administrer//Tjenester skal du vælge fanen "Tjenesteplan" på den nyoprettede tjeneste og aktivere indstillingen "Vil du kun indstille tjenesten på bestemte dage?".
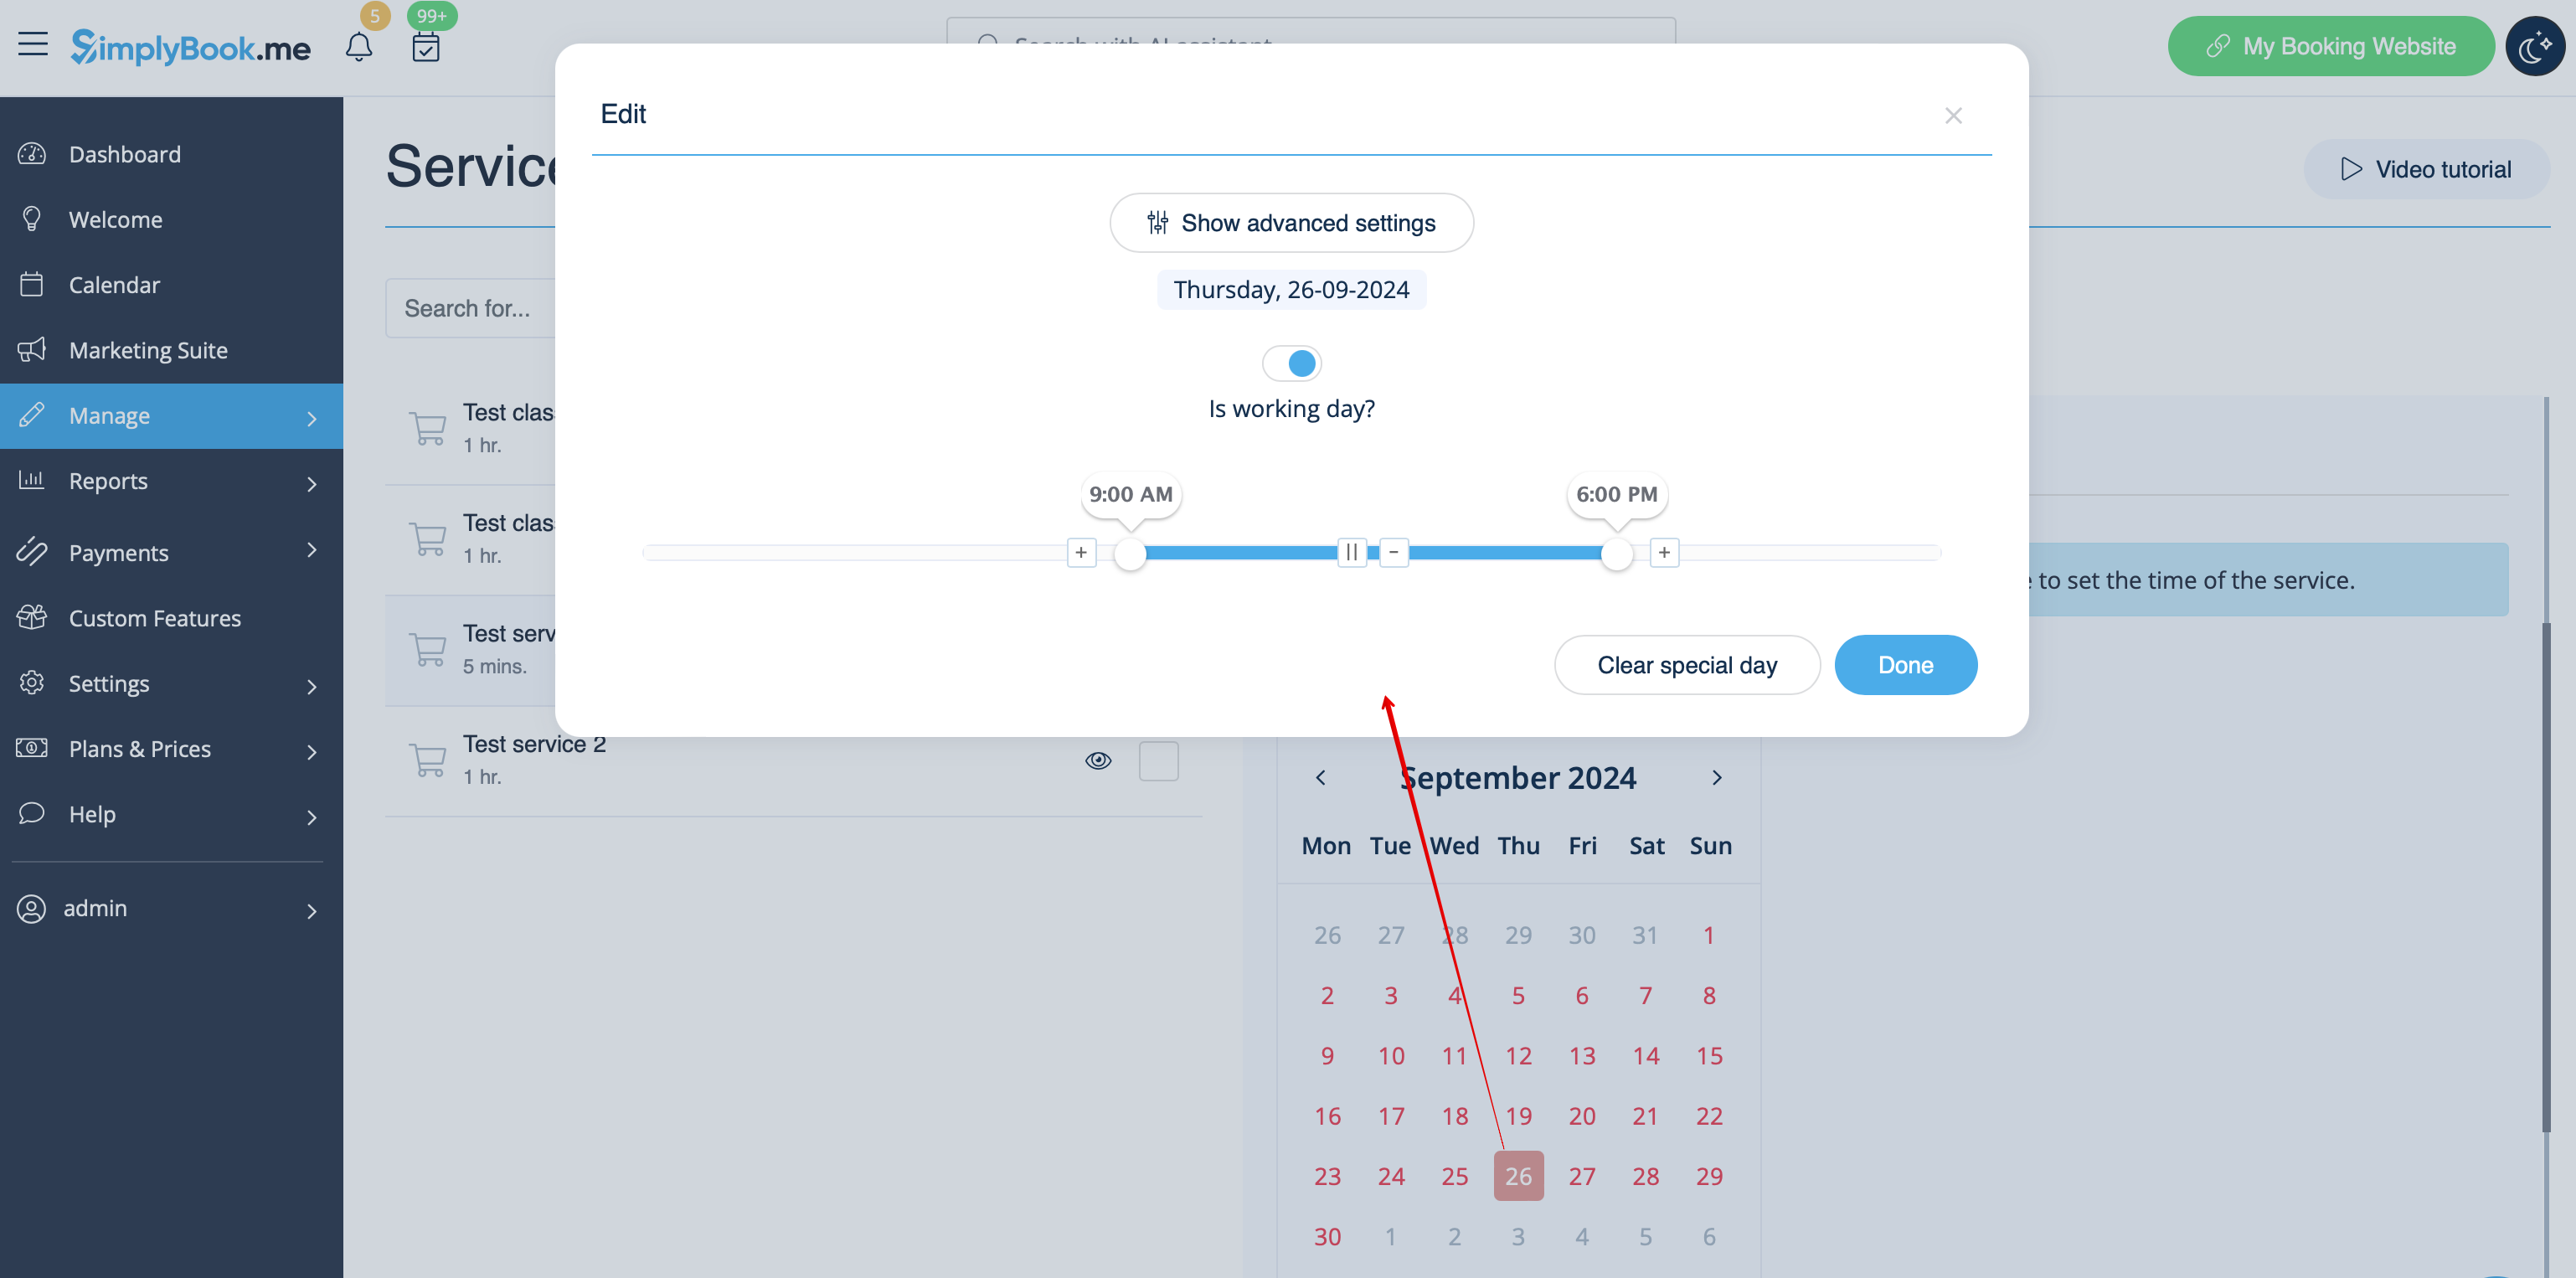
- 3. Brug derefter kalenderen, klik på de datoer, du vil åbne, og indstil tidsplanen for disse datoer ved at flytte skyderne (den lyseblå zone er åben tid).
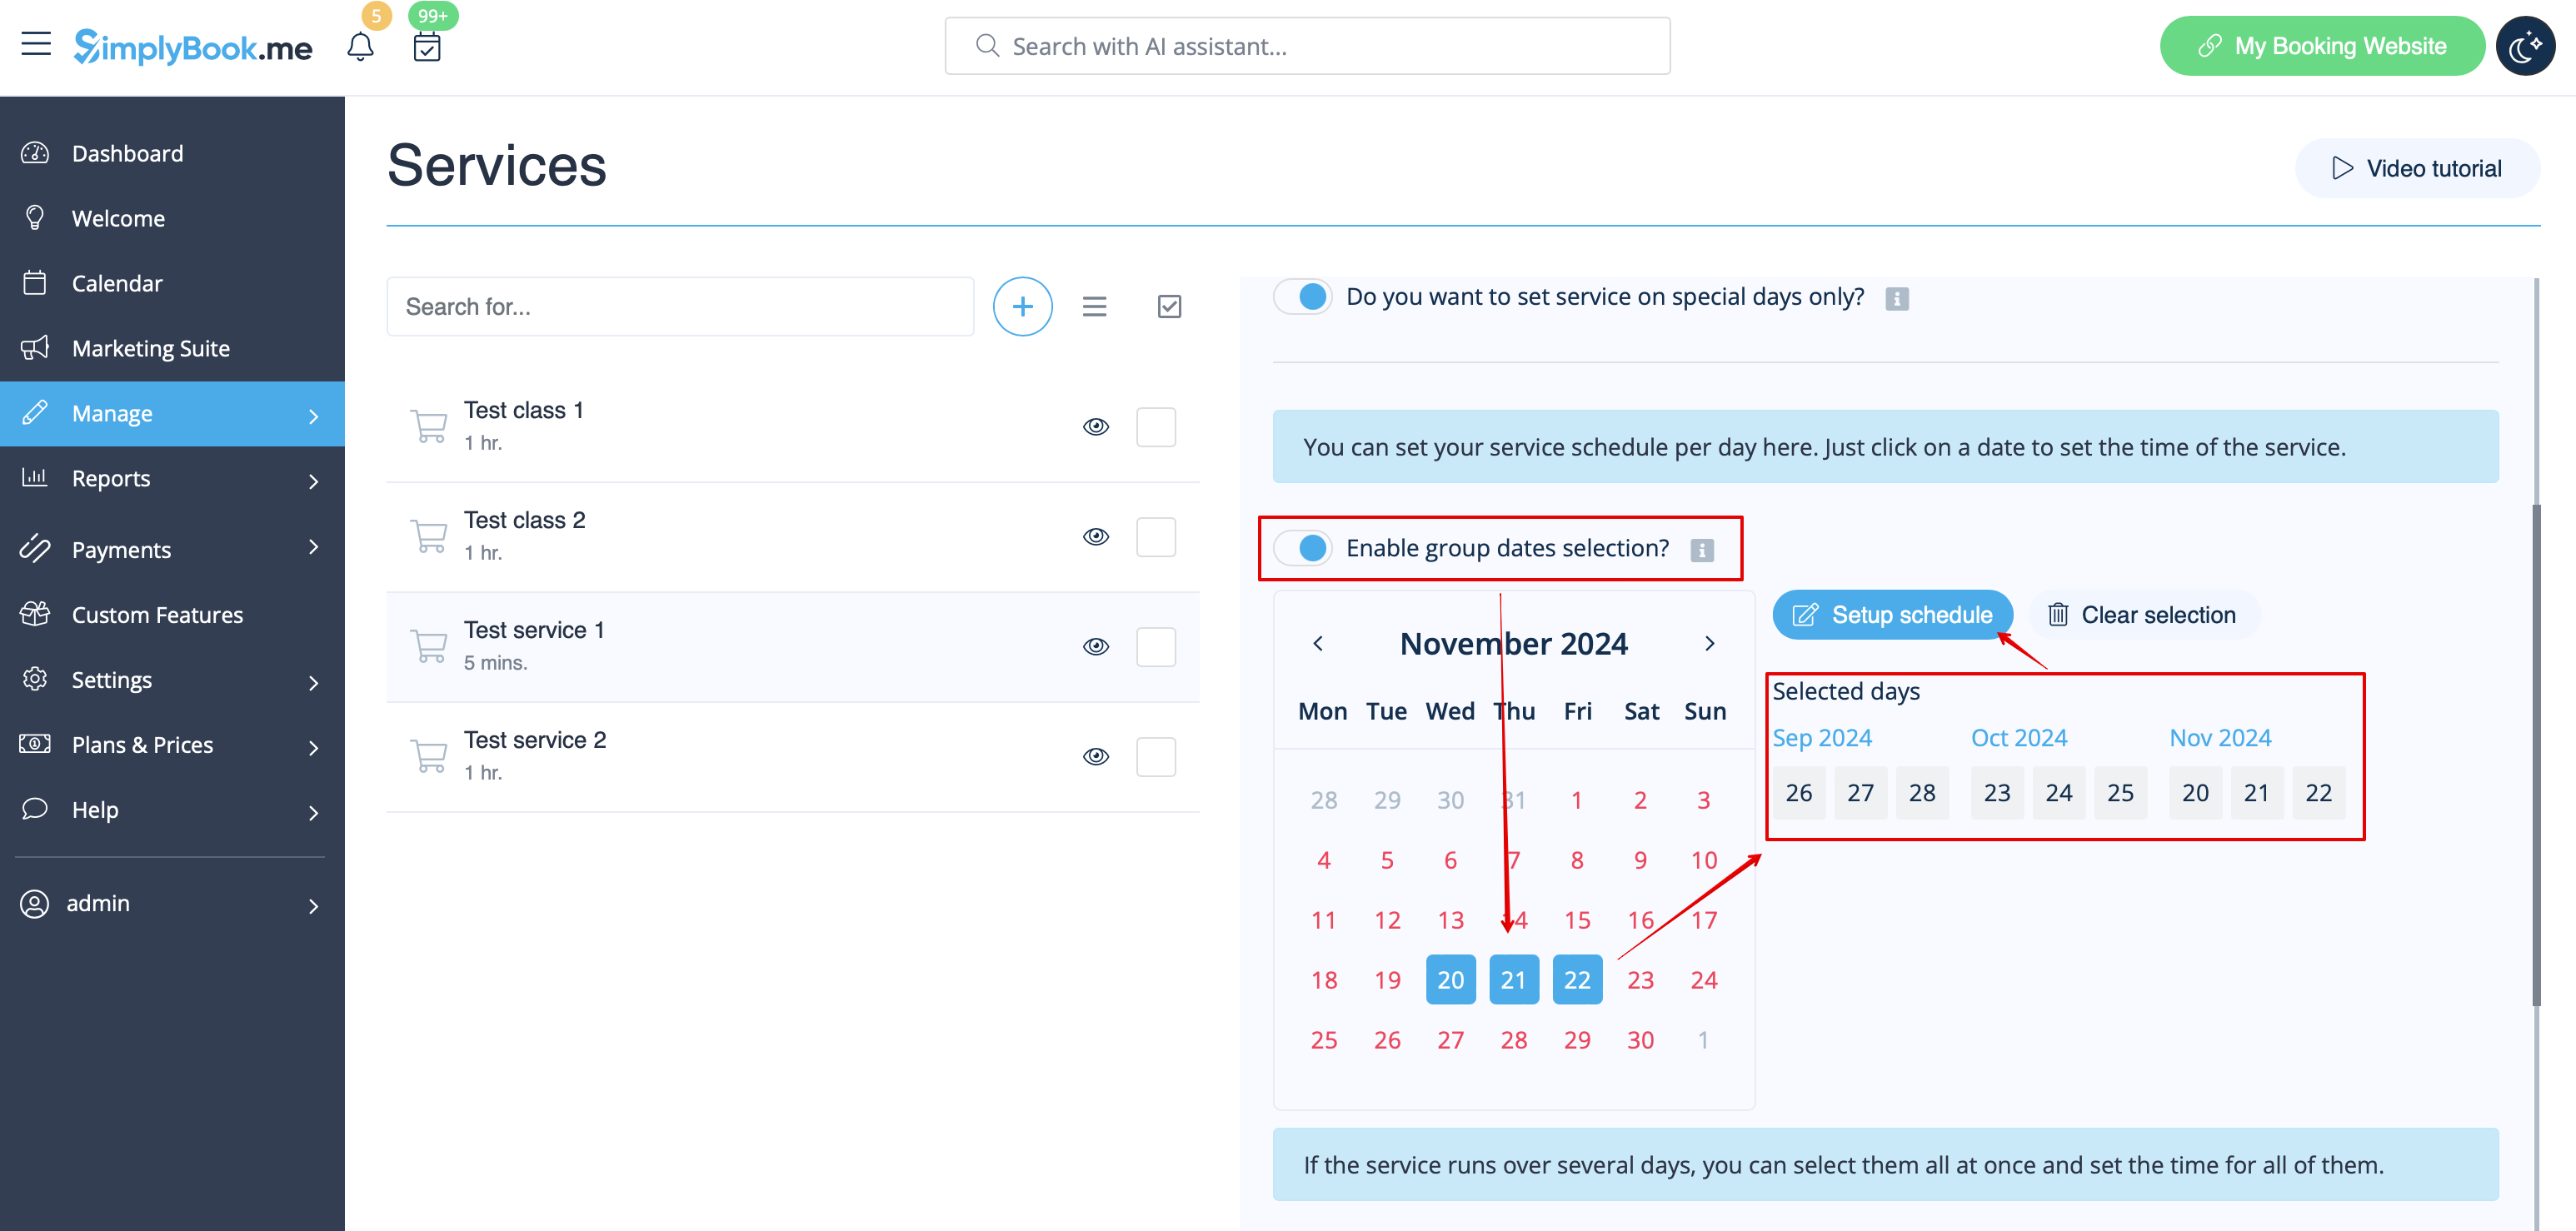
- Hvis du skal vælge flere datoer på én gang, skal du aktivere "Aktiver valg af gruppedatoer?", vælge de datoer, der skal redigeres, og klikke på "Opsæt tidsplan" for at indstille tidspunkterne.
- 4. Connect service to necessary provider in "Service providers" tab.
Option 2 (as Event with the help of Classes custom feature)
- 1. Enable Classes custom feature on your Custom features page.
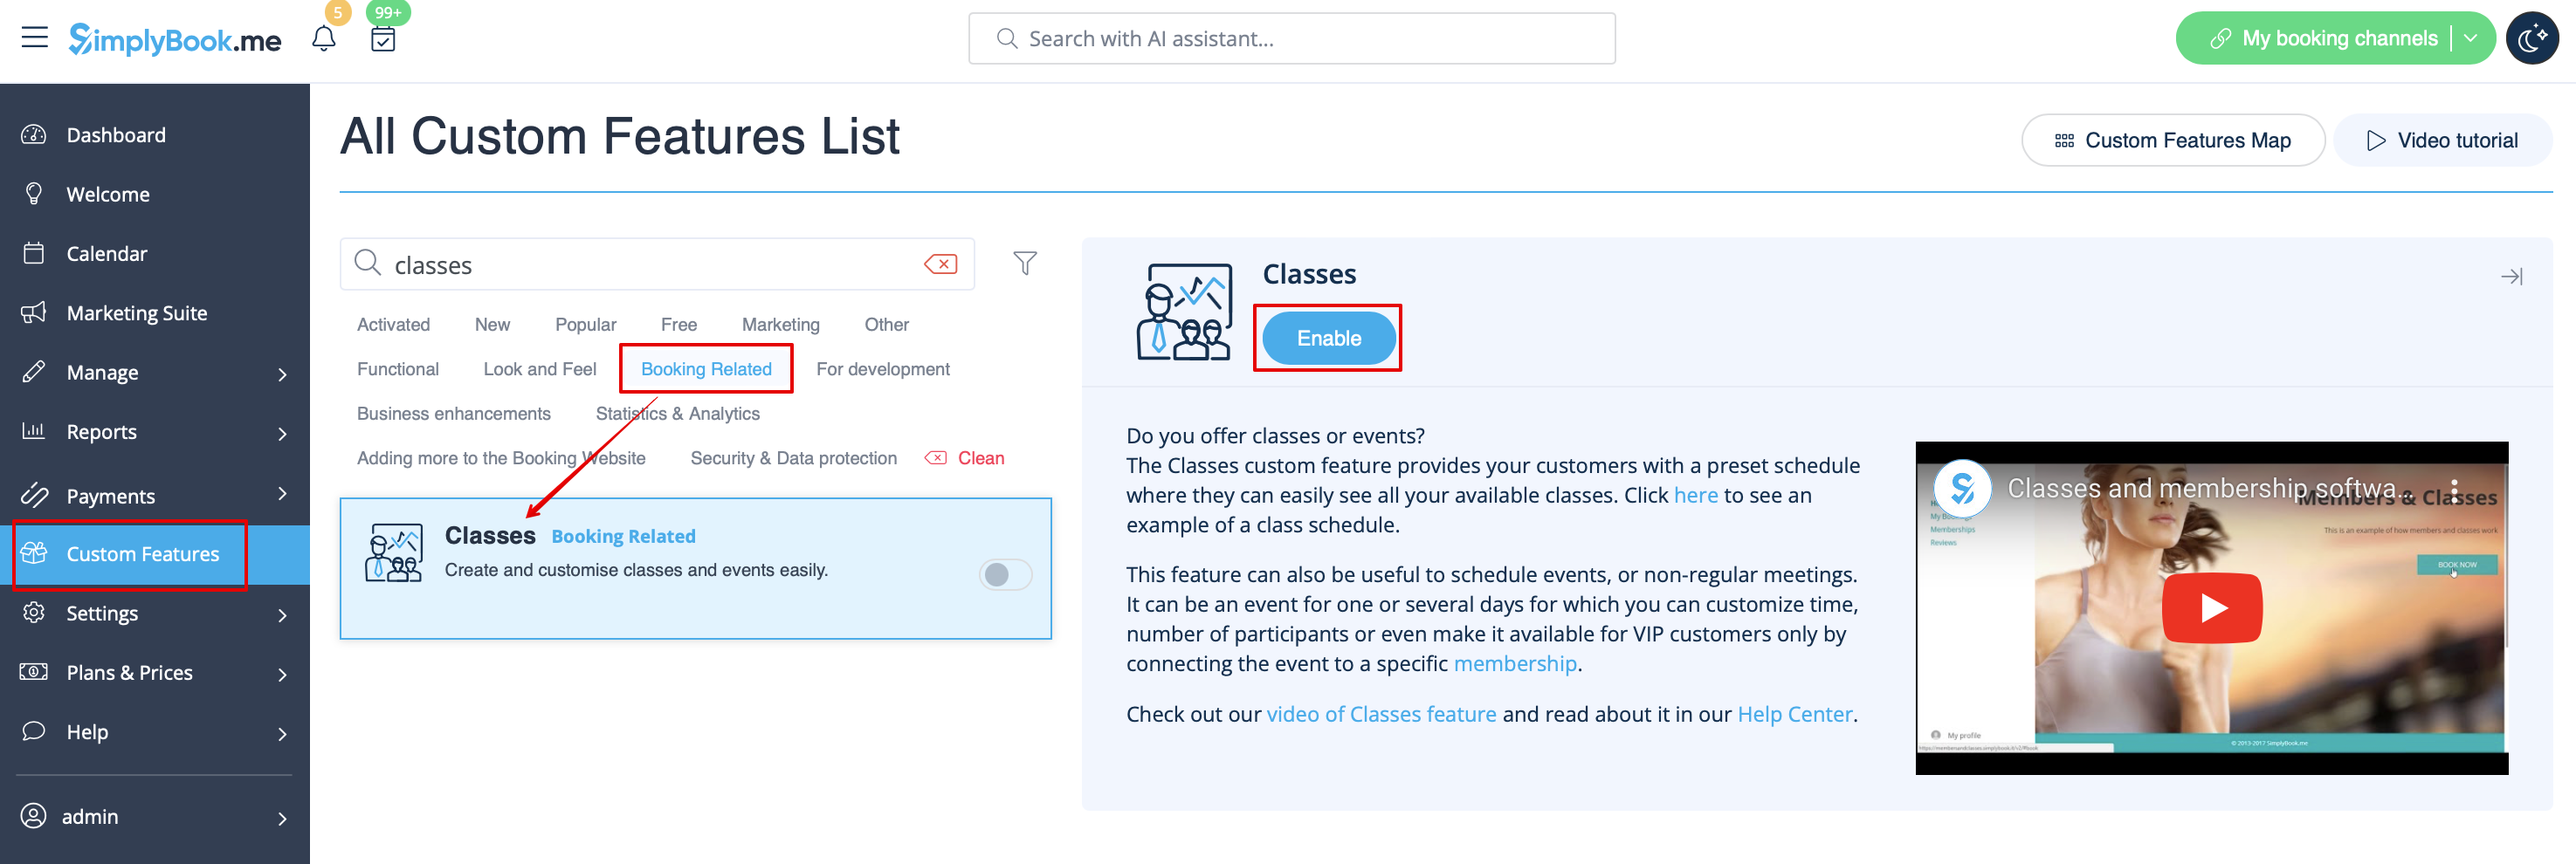
- 2. Navigate to Manage//Classes page and create a new class.
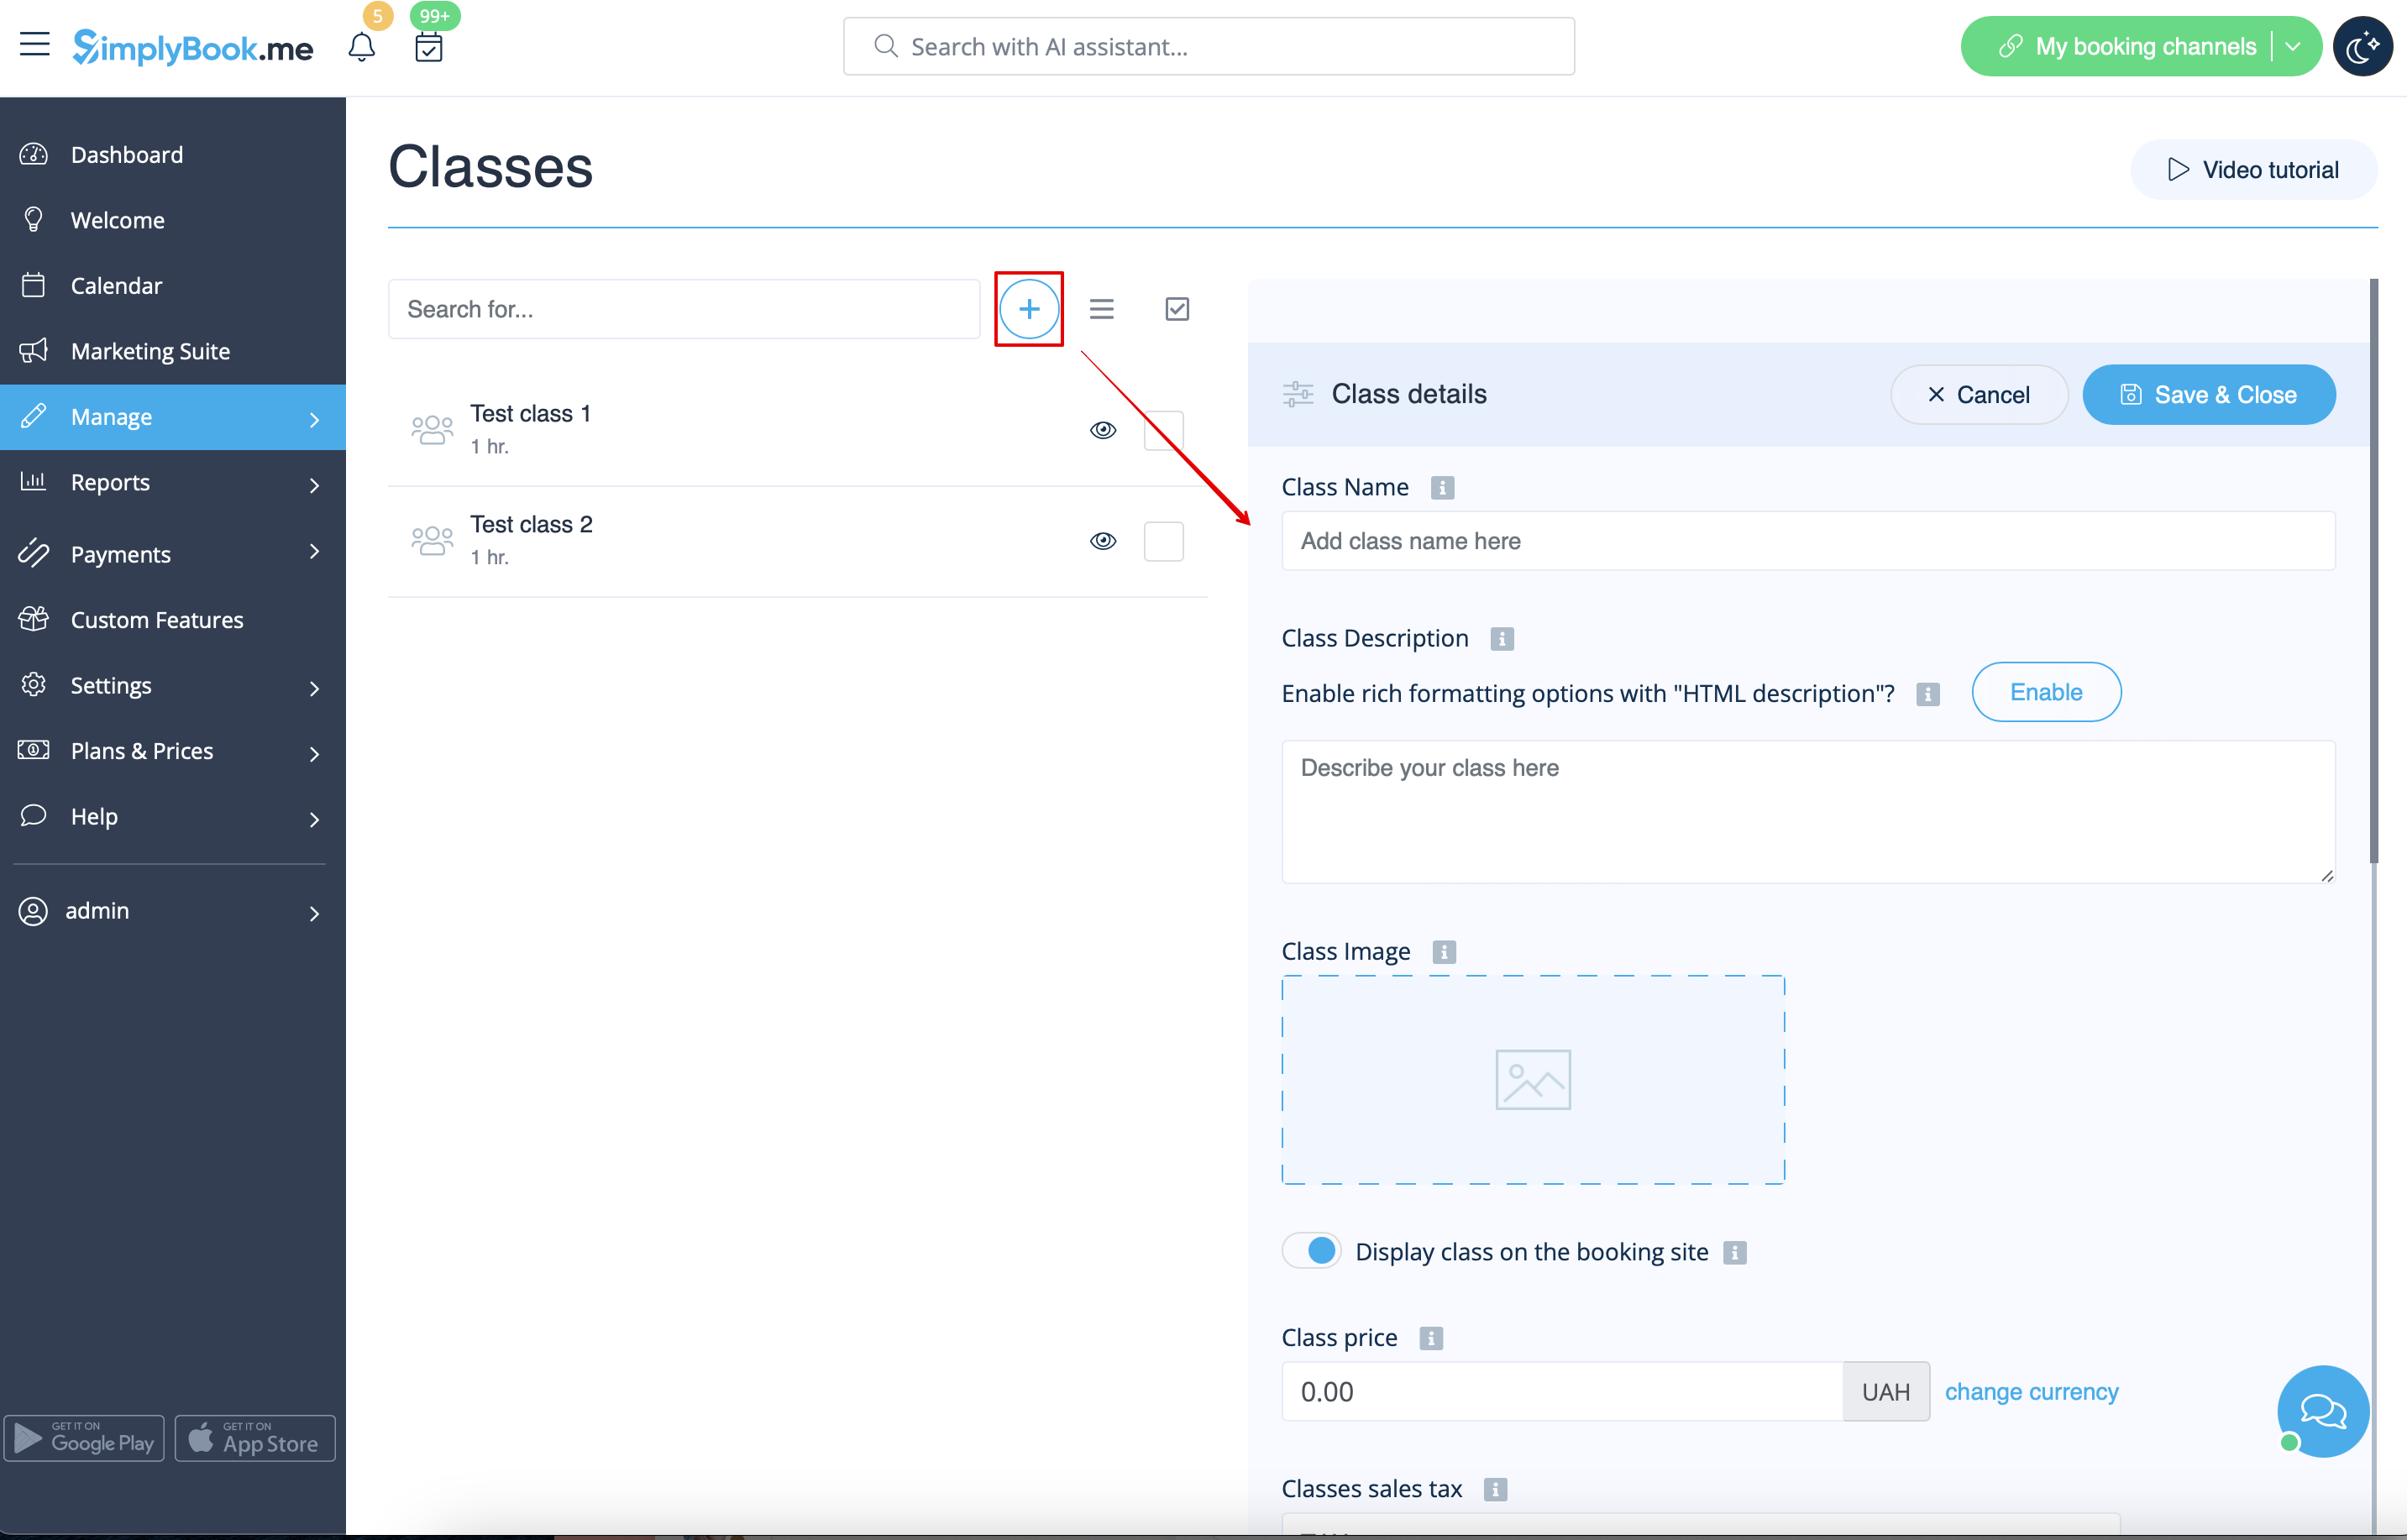
- 3. Choose "Class schedule" tab on the newly created class and switch on the option "Do you want to set service on special days only?"
- 4. Then use the calendar, click on the dates that you want to open and set the schedule for these dates by moving the sliders(bright blue zone is open time).
- How events(classes) work
The general logic of event(class) is creating Service + Provider related to it with dates selected in the settings of the event(class) as special days. When you use Classes custom feature the event creates service+provider related to it with identical name. In order to preserve proper functioning of the event on the dates needed, you should not delete provider with identical name related to event (but you can easily change his/her name) and should not disconnect provider from the event.

Events only
Video available ![]()
If you plan to have 1 event or several events without regular services you should do the following:
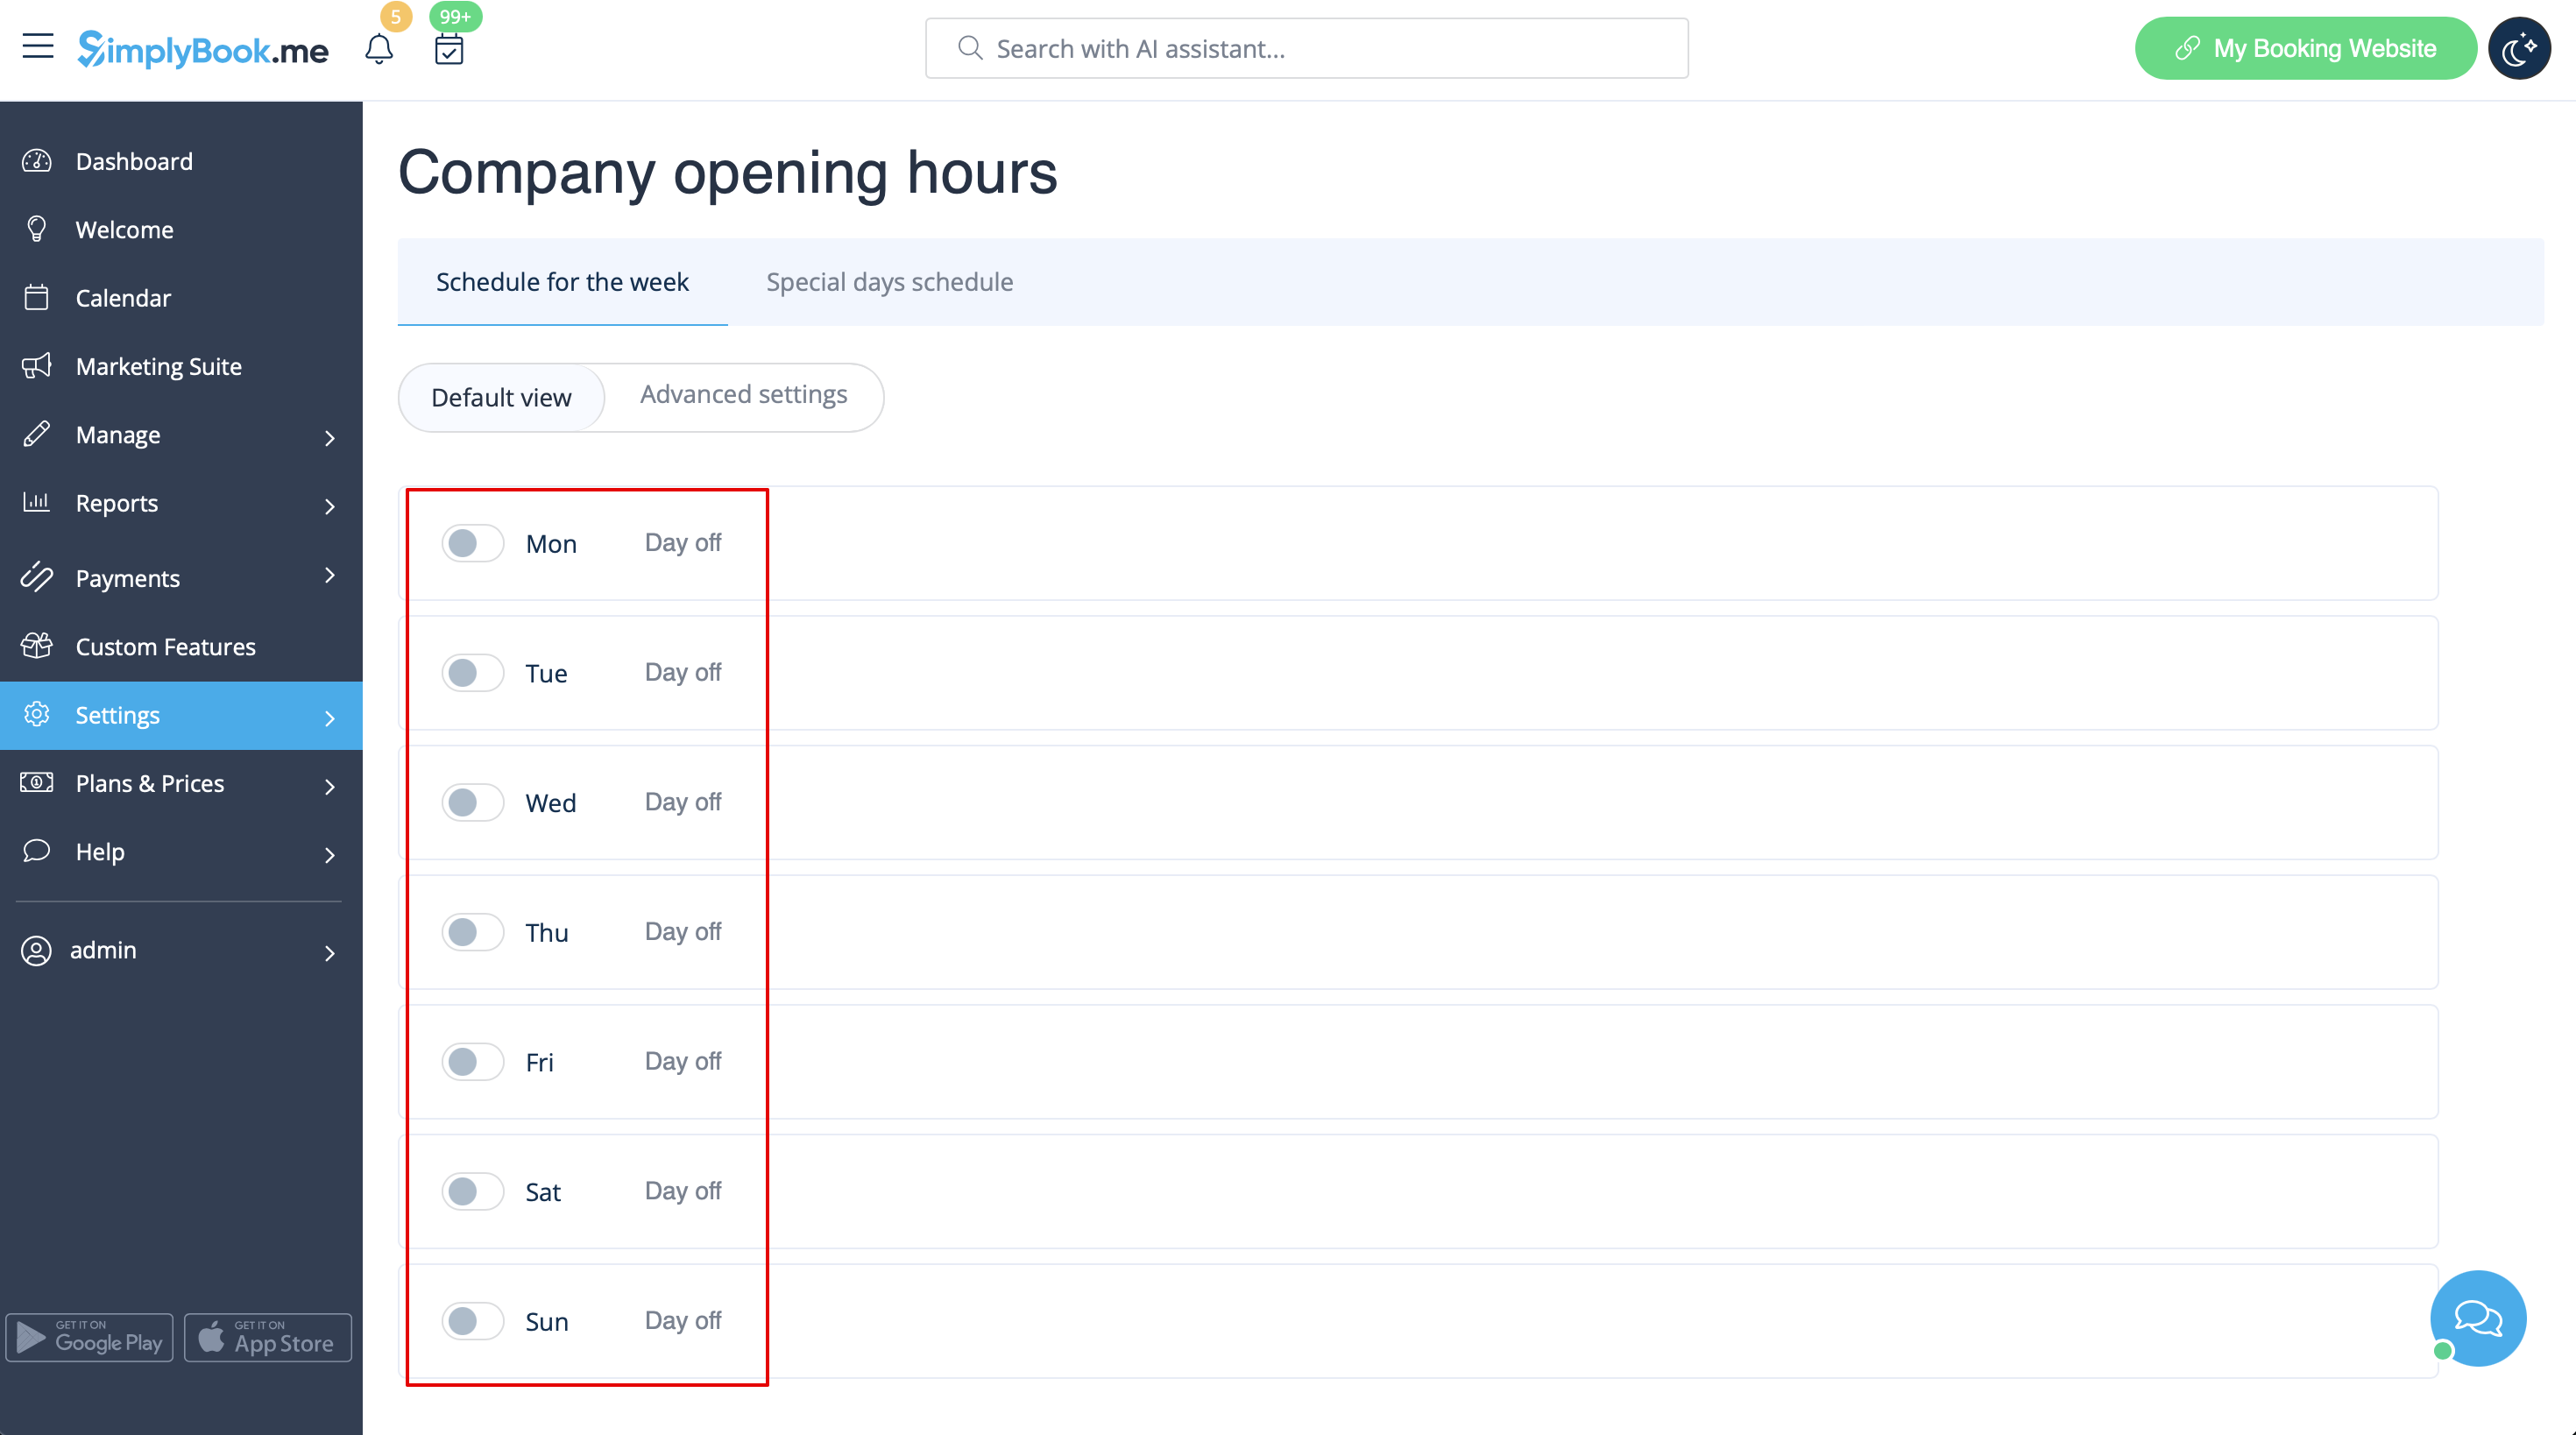
- 1. Close all company opening hours in Settings // Company opening hours - use switcher to set it to off position
- 2. Create events you need in Manage // Services // "+". See detailed tutorial about services here.