From SimplyBook.me
Created page with ";Comment définir" |
Updating to match new version of source page |
||
| Line 4: | Line 4: | ||
Notre widget iFrame vous permet de connecter le site web Shopify à SimplyBook.com et de permettre à vos clients de réserver directement depuis le site web, aussi bien depuis leur PC que depuis leurs appareils mobiles. Cette solution rendra votre processus de réservation plus pratique et plus facile. | Notre widget iFrame vous permet de connecter le site web Shopify à SimplyBook.com et de permettre à vos clients de réserver directement depuis le site web, aussi bien depuis leur PC que depuis leurs appareils mobiles. Cette solution rendra votre processus de réservation plus pratique et plus facile. | ||
;Comment définir | ;Comment définir | ||
<div class="mw-translate-fuzzy"> | |||
:1. Veuillez vous rendre dans <span style="background-color:#d4f8e5; padding:5px; border-radius:5px;">Boutique en ligne</span> -> <span style="background-color:#d4f8e5; padding:5px; border-radius:5px;">Thèmes</span> -> <span style="background-color:#d4f8e5; padding:5px; border-radius:5px;">Personnaliser</span> dans votre <span style="background-color:#d4f8e5; padding:5px; border-radius:5px;">compte Shopify.</span> | :1. Veuillez vous rendre dans <span style="background-color:#d4f8e5; padding:5px; border-radius:5px;">Boutique en ligne</span> -> <span style="background-color:#d4f8e5; padding:5px; border-radius:5px;">Thèmes</span> -> <span style="background-color:#d4f8e5; padding:5px; border-radius:5px;">Personnaliser</span> dans votre <span style="background-color:#d4f8e5; padding:5px; border-radius:5px;">compte Shopify.</span> | ||
[[File:Shopify customize theme.png|border|center]] | [[File:Shopify customize theme.png|border|center]] | ||
| Line 32: | Line 32: | ||
[[File:Shopify widget result.png|border|center]] | [[File:Shopify widget result.png|border|center]] | ||
<br><br><br><br> | <br><br><br><br> | ||
</div> | |||
<div lang="en" dir="ltr" class="mw-content-ltr"> | |||
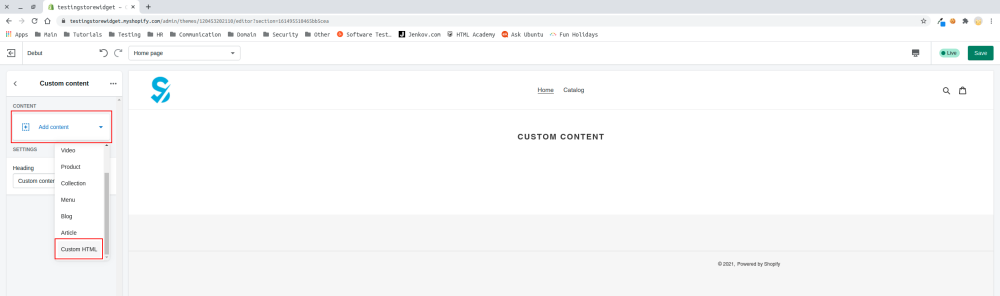
:4. Click on <span style="background-color:#d4f8e5; padding:5px; border-radius:5px;">Add content</span> and select <span style="background-color:#d4f8e5; padding:5px; border-radius:5px;">Custom HTML</span> | |||
[[File:Select html.png|border|center]] | |||
<br><br> | |||
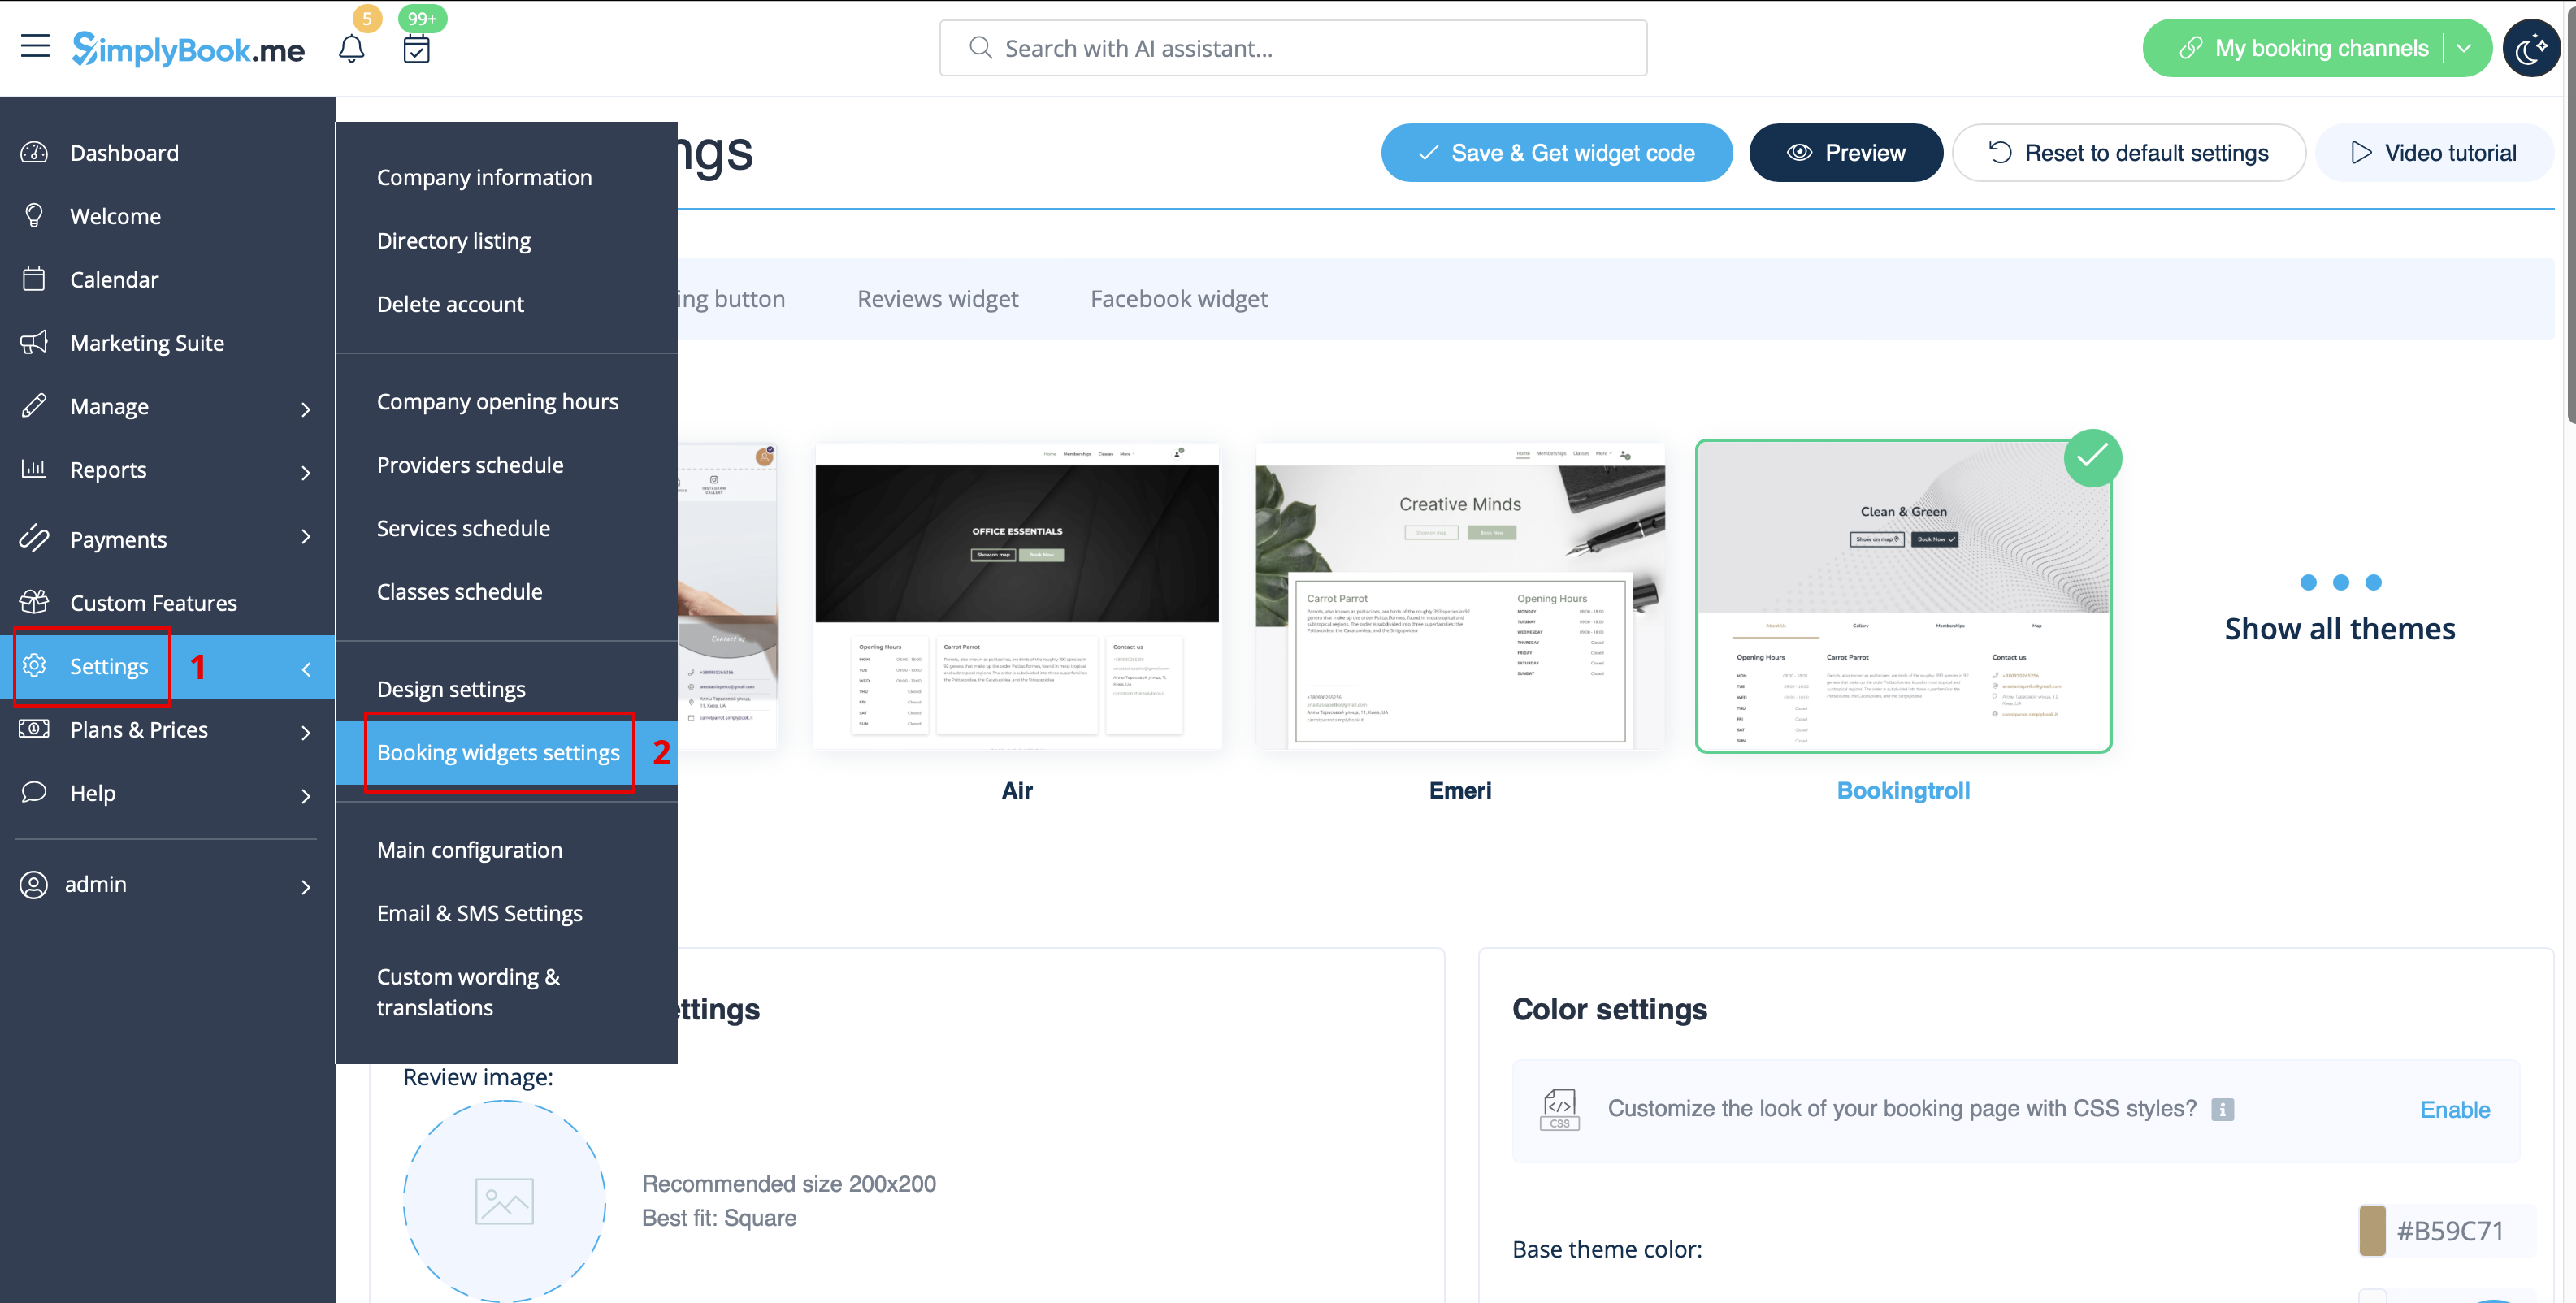
:5. Navigate to your <span style="background-color:#d4f8e5; padding:5px; border-radius:5px;">SimplyBook.me account</span> -> <span style="background-color:#d4f8e5; padding:5px; border-radius:5px;">Settings</span> -> <span style="background-color:#d4f8e5; padding:5px; border-radius:5px;">Booking widgets settings</span> -> <span style="background-color:#d4f8e5; padding:5px; border-radius:5px;">iFrame widget</span> | |||
[[File:Booking widget path redesigned.png|1200px|border|center|link=https://help.simplybook.me/images/6/68/Booking_widget_path_redesigned.png]] | |||
<br><br> | |||
:6. Adjust the design to your taste and needs, <span style="background-color:#d4f8e5; padding:5px; border-radius:5px;">get widget code.</span> | |||
[[File:Copy widget code redesigned.png|1200px|border|center|link=https://help.simplybook.me/images/b/b4/Copy_widget_code_redesigned.png]] | |||
<br><br> | |||
</div> | |||
<div lang="en" dir="ltr" class="mw-content-ltr"> | |||
:7. Copy the whole code from the popup and insert it to <span style="background-color:#d4f8e5; padding:5px; border-radius:5px;">HTML</span> field on Shopify side. Adjust container width if necessary. <span style="background-color:#d4f8e5; padding:5px; border-radius:5px;">Save</span> the changes | |||
[[File:Insert html to shopify side.png|border|center]] | |||
<br><br> | |||
:8. As the result you will see how the booking widget looks like right away. | |||
[[File:Shopify widget result.png|border|center]] | |||
<br><br><br><br> | |||
</div> | |||
Revision as of 08:04, 1 July 2025
Si vous utilisez Shopify et que vous souhaitez ajouter la possibilité de réserver sur votre site web, nous avons la solution qu'il vous faut !
Notre widget iFrame vous permet de connecter le site web Shopify à SimplyBook.com et de permettre à vos clients de réserver directement depuis le site web, aussi bien depuis leur PC que depuis leurs appareils mobiles. Cette solution rendra votre processus de réservation plus pratique et plus facile.
- Comment définir
- 1. Veuillez vous rendre dans Boutique en ligne -> Thèmes -> Personnaliser dans votre compte Shopify.

- 2. Sélectionnez la section que vous souhaitez modifier à gauche ou ajoutez-en une nouvelle.

- 3. Choisissez d'ajouter du contenu personnalisé.

- 4. Cliquez sur Ajouter du contenu et sélectionnez HTML personnalisé

- 5. Accédez à votre compte SimplyBook.me -> Paramètres -> Paramètres des widgets de réservation -> Widget iFrame

- 6. Ajustez le design à votre goût et à vos besoins, puis récupérez le code du widget.
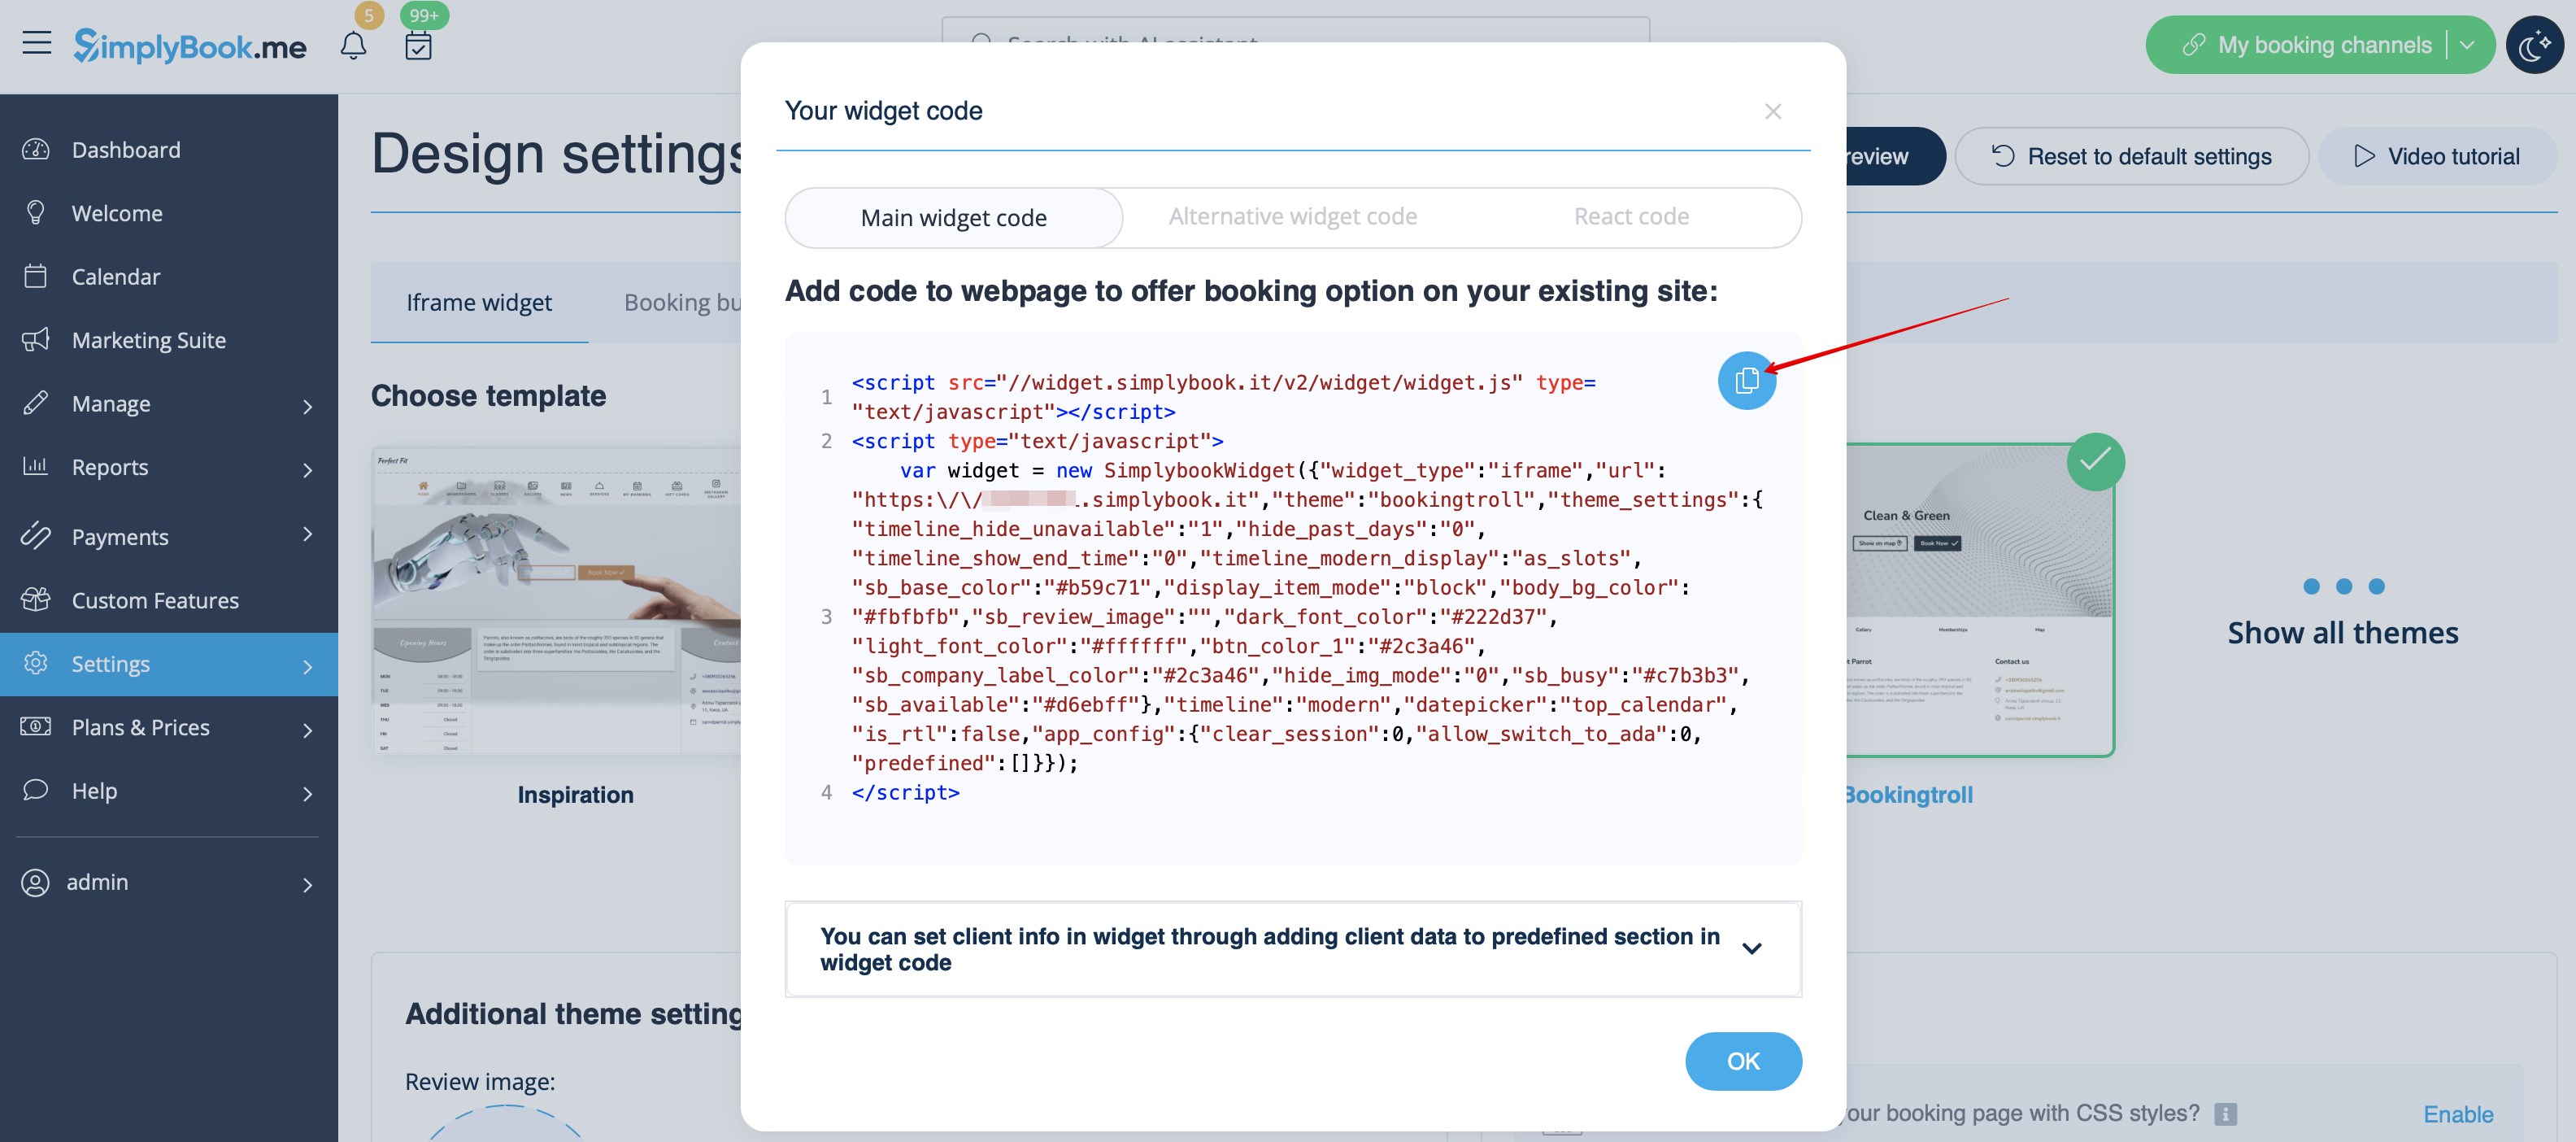
- 7. Copiez l'intégralité du code de la fenêtre contextuelle et collez-le dans le champ HTML du côté Shopify. Ajustez la largeur du conteneur si nécessaire. Enregistrez les modifications

- 8. Vous verrez immédiatement à quoi ressemble le widget de réservation.

- 4. Click on Add content and select Custom HTML
- 5. Navigate to your SimplyBook.me account -> Settings -> Booking widgets settings -> iFrame widget
- 6. Adjust the design to your taste and needs, get widget code.
- 7. Copy the whole code from the popup and insert it to HTML field on Shopify side. Adjust container width if necessary. Save the changes
- 8. As the result you will see how the booking widget looks like right away.