From SimplyBook.me
Created page with "Zugriff auf das System für andere Personen gewähren" |
Updating to match new version of source page |
||
| Line 2: | Line 2: | ||
{{#seo: |title=Zugriff auf das System für andere Personen gewähren – SimplyBook.me |description=Teilen Sie den Systemzugriff sicher mit Ihren Teammitgliedern. Verwalten Sie Berechtigungen und Rollen effektiv. Erfahren Sie hier, wie das geht! |titlemode=anhängen |keywords=fAQ, häufig gestellte Fragen, Buchungssoftware, Fragen zum Terminsystem, Online-Termine, Kalender-Software, Buchungssystem, Buchungskalender, Terminplanungs-Software, Online-Terminplanung, Online-Terminplanung, Plugins, benutzerdefinierte Funktionen, benutzerdefinierter Link zur Buchungsseite, Domainname, benutzerdefinierter Domainname, benutzerdefinierte URL }} | {{#seo: |title=Zugriff auf das System für andere Personen gewähren – SimplyBook.me |description=Teilen Sie den Systemzugriff sicher mit Ihren Teammitgliedern. Verwalten Sie Berechtigungen und Rollen effektiv. Erfahren Sie hier, wie das geht! |titlemode=anhängen |keywords=fAQ, häufig gestellte Fragen, Buchungssoftware, Fragen zum Terminsystem, Online-Termine, Kalender-Software, Buchungssystem, Buchungskalender, Terminplanungs-Software, Online-Terminplanung, Online-Terminplanung, Plugins, benutzerdefinierte Funktionen, benutzerdefinierter Link zur Buchungsseite, Domainname, benutzerdefinierter Domainname, benutzerdefinierte URL }} | ||
<div lang="en" dir="ltr" class="mw-content-ltr"> | |||
<br><br> | <br><br> | ||
You can create a separate user for the person who needs to access your admin page in <span style="background-color:#d4f8e5; padding:5px; border-radius:5px;">Manage</span> -> <span style="background-color:#d4f8e5; padding:5px; border-radius:5px;">Users</span> and assign the corresponding rights to him/her. <br>See the list of available user roles <span style="background-color:#cdeffc; padding:5px; border-radius:5px;">[[Adding_other_users_to_the_system#User_Roles| here]].</span> | You can create a separate user for the person who needs to access your admin page in <span style="background-color:#d4f8e5; padding:5px; border-radius:5px;">Manage</span> -> <span style="background-color:#d4f8e5; padding:5px; border-radius:5px;">Users</span> and assign the corresponding rights to him/her. <br>See the list of available user roles <span style="background-color:#cdeffc; padding:5px; border-radius:5px;">[[Adding_other_users_to_the_system#User_Roles| here]].</span> | ||
</div> | |||
<div lang="en" dir="ltr" class="mw-content-ltr"> | |||
[[File:Create new user path redesigned.png|1200px | center|link=https://help.simplybook.me/images/f/f0/Create_new_user_path_redesigned.png]] | [[File:Create new user path redesigned.png|1200px | center|link=https://help.simplybook.me/images/f/f0/Create_new_user_path_redesigned.png]] | ||
</div> | |||
<div lang="en" dir="ltr" class="mw-content-ltr"> | |||
[[File:Relate user with provider redesined.png|1200px | center|link=https://help.simplybook.me/images/4/4b/Relate_user_with_provider_redesined.png]] | [[File:Relate user with provider redesined.png|1200px | center|link=https://help.simplybook.me/images/4/4b/Relate_user_with_provider_redesined.png]] | ||
</div> | |||
<div lang="en" dir="ltr" class="mw-content-ltr"> | |||
<br><br> | <br><br> | ||
When adding new user details just enable the switch <span style="background-color:#d4f8e5; padding:5px; border-radius:5px;">Send login information to user</span> and save the user record.<br> | When adding new user details just enable the switch <span style="background-color:#d4f8e5; padding:5px; border-radius:5px;">Send login information to user</span> and save the user record.<br> | ||
| Line 18: | Line 24: | ||
Or you can manually send login and password to your users along with the link to your admin page after saving the user. | Or you can manually send login and password to your users along with the link to your admin page after saving the user. | ||
<br><br> | <br><br> | ||
</div> | |||
Revision as of 07:58, 1 July 2025
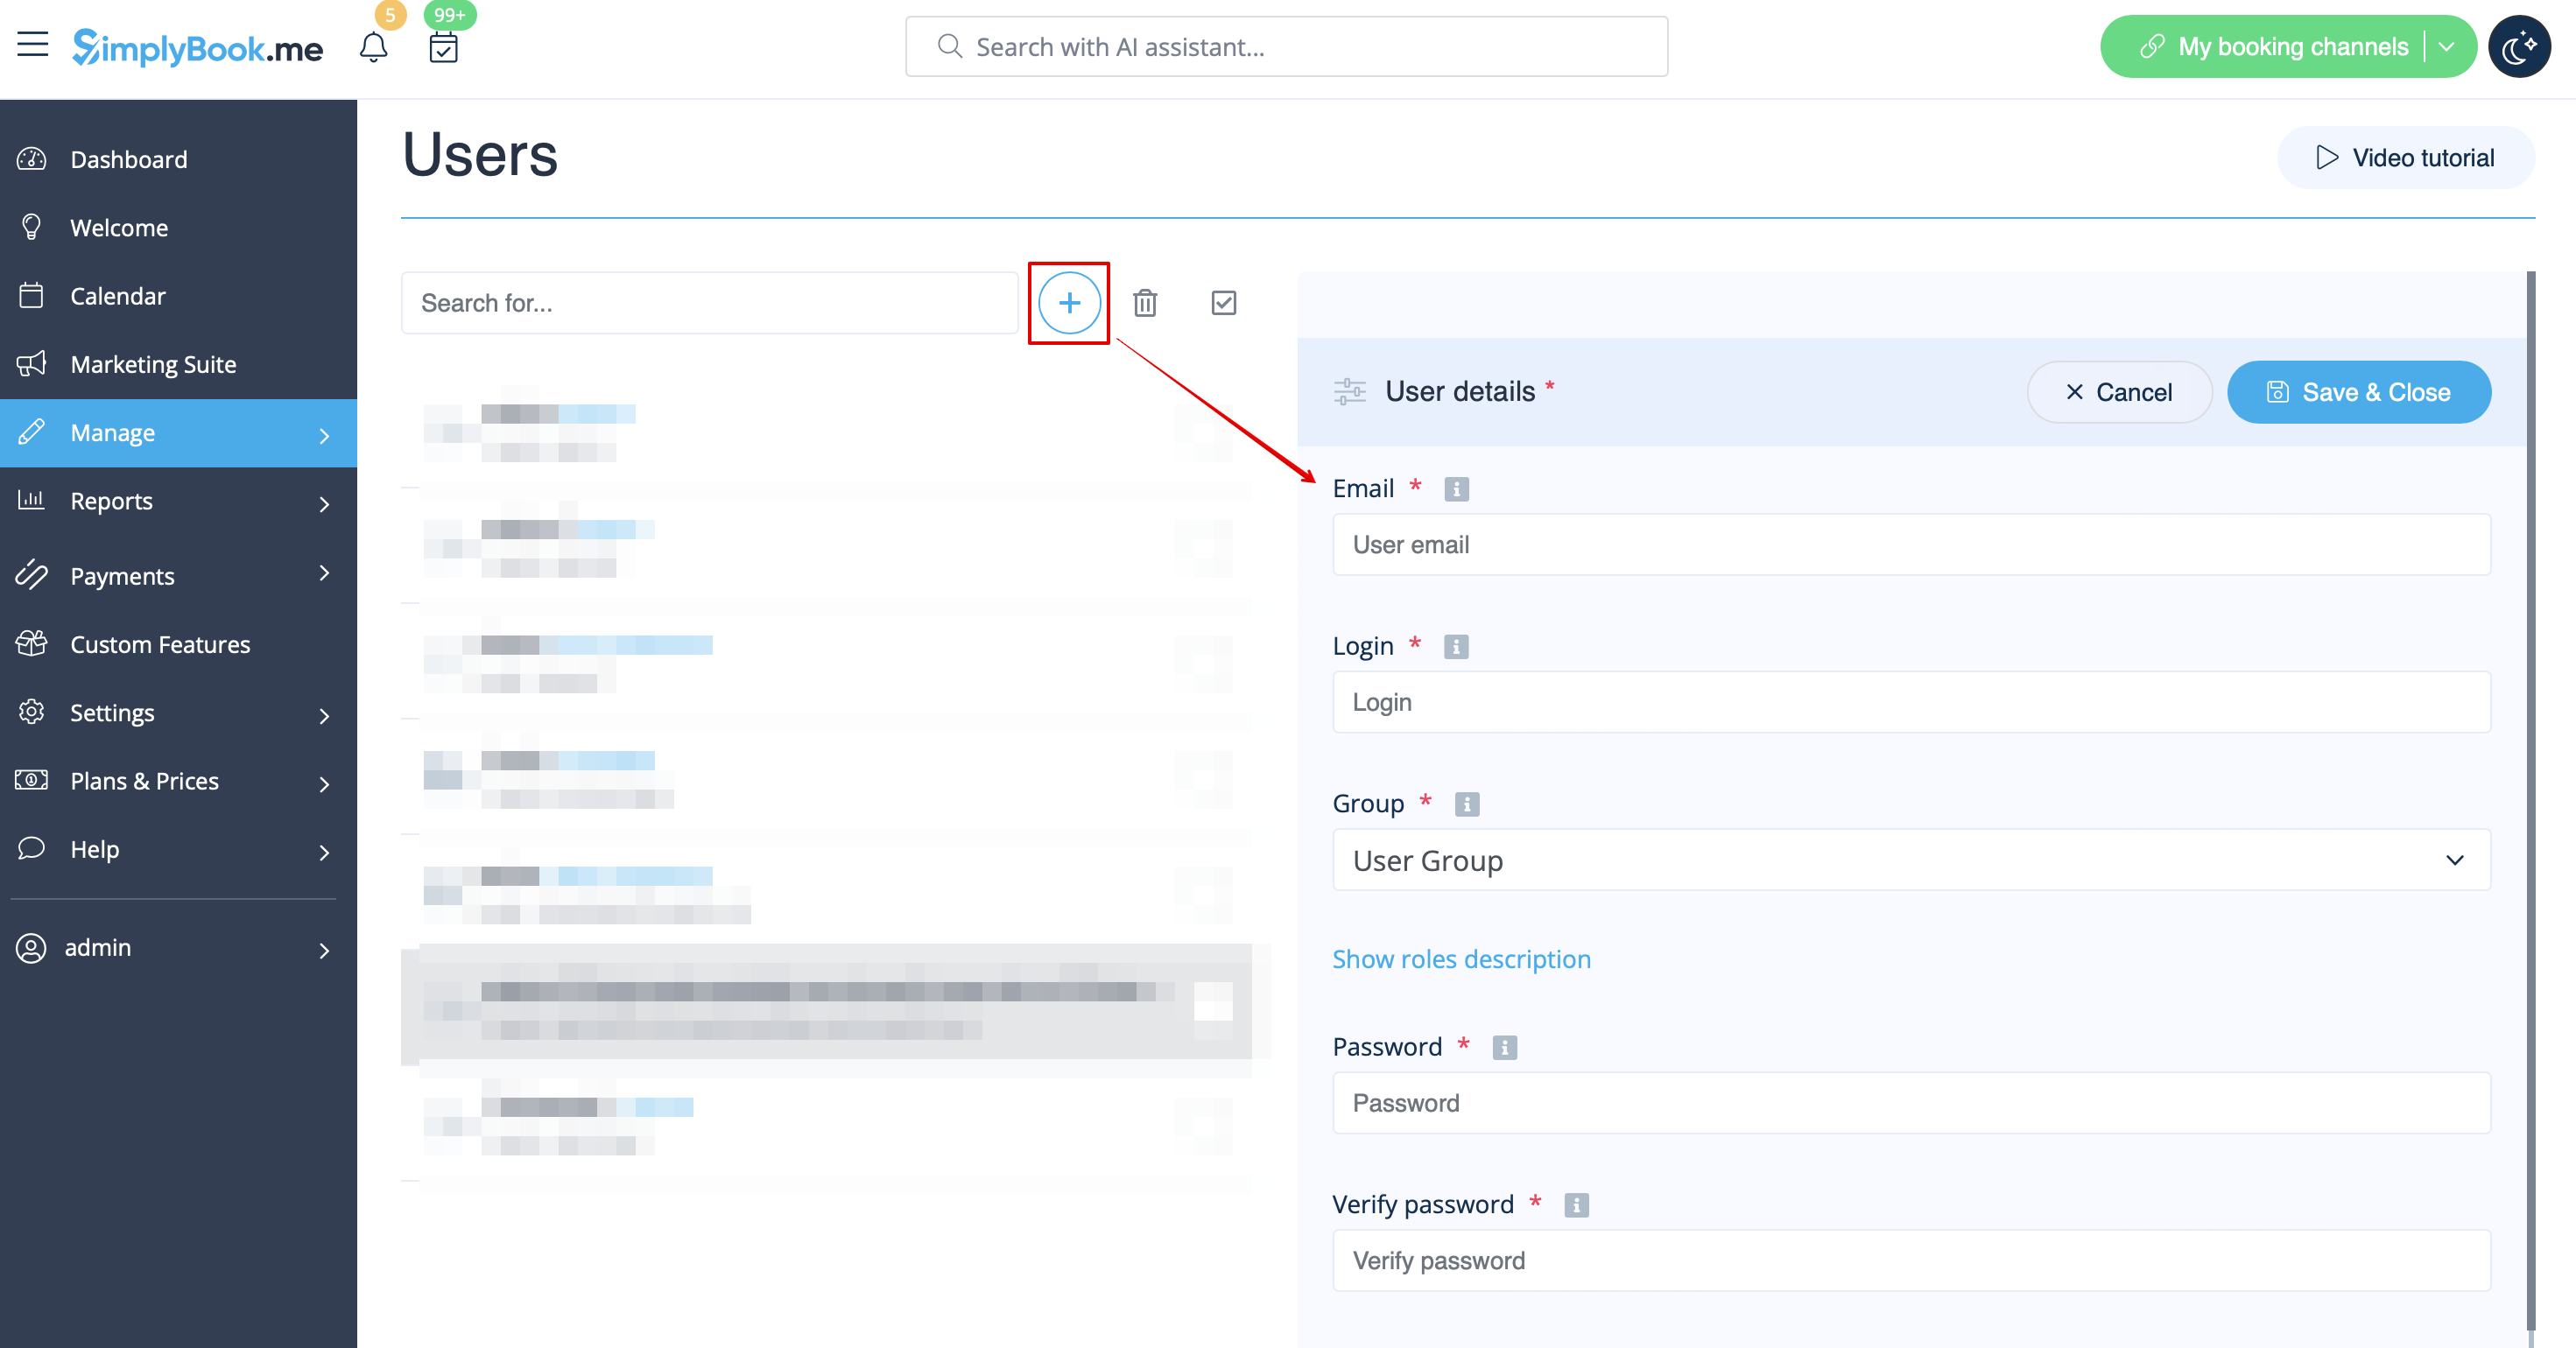
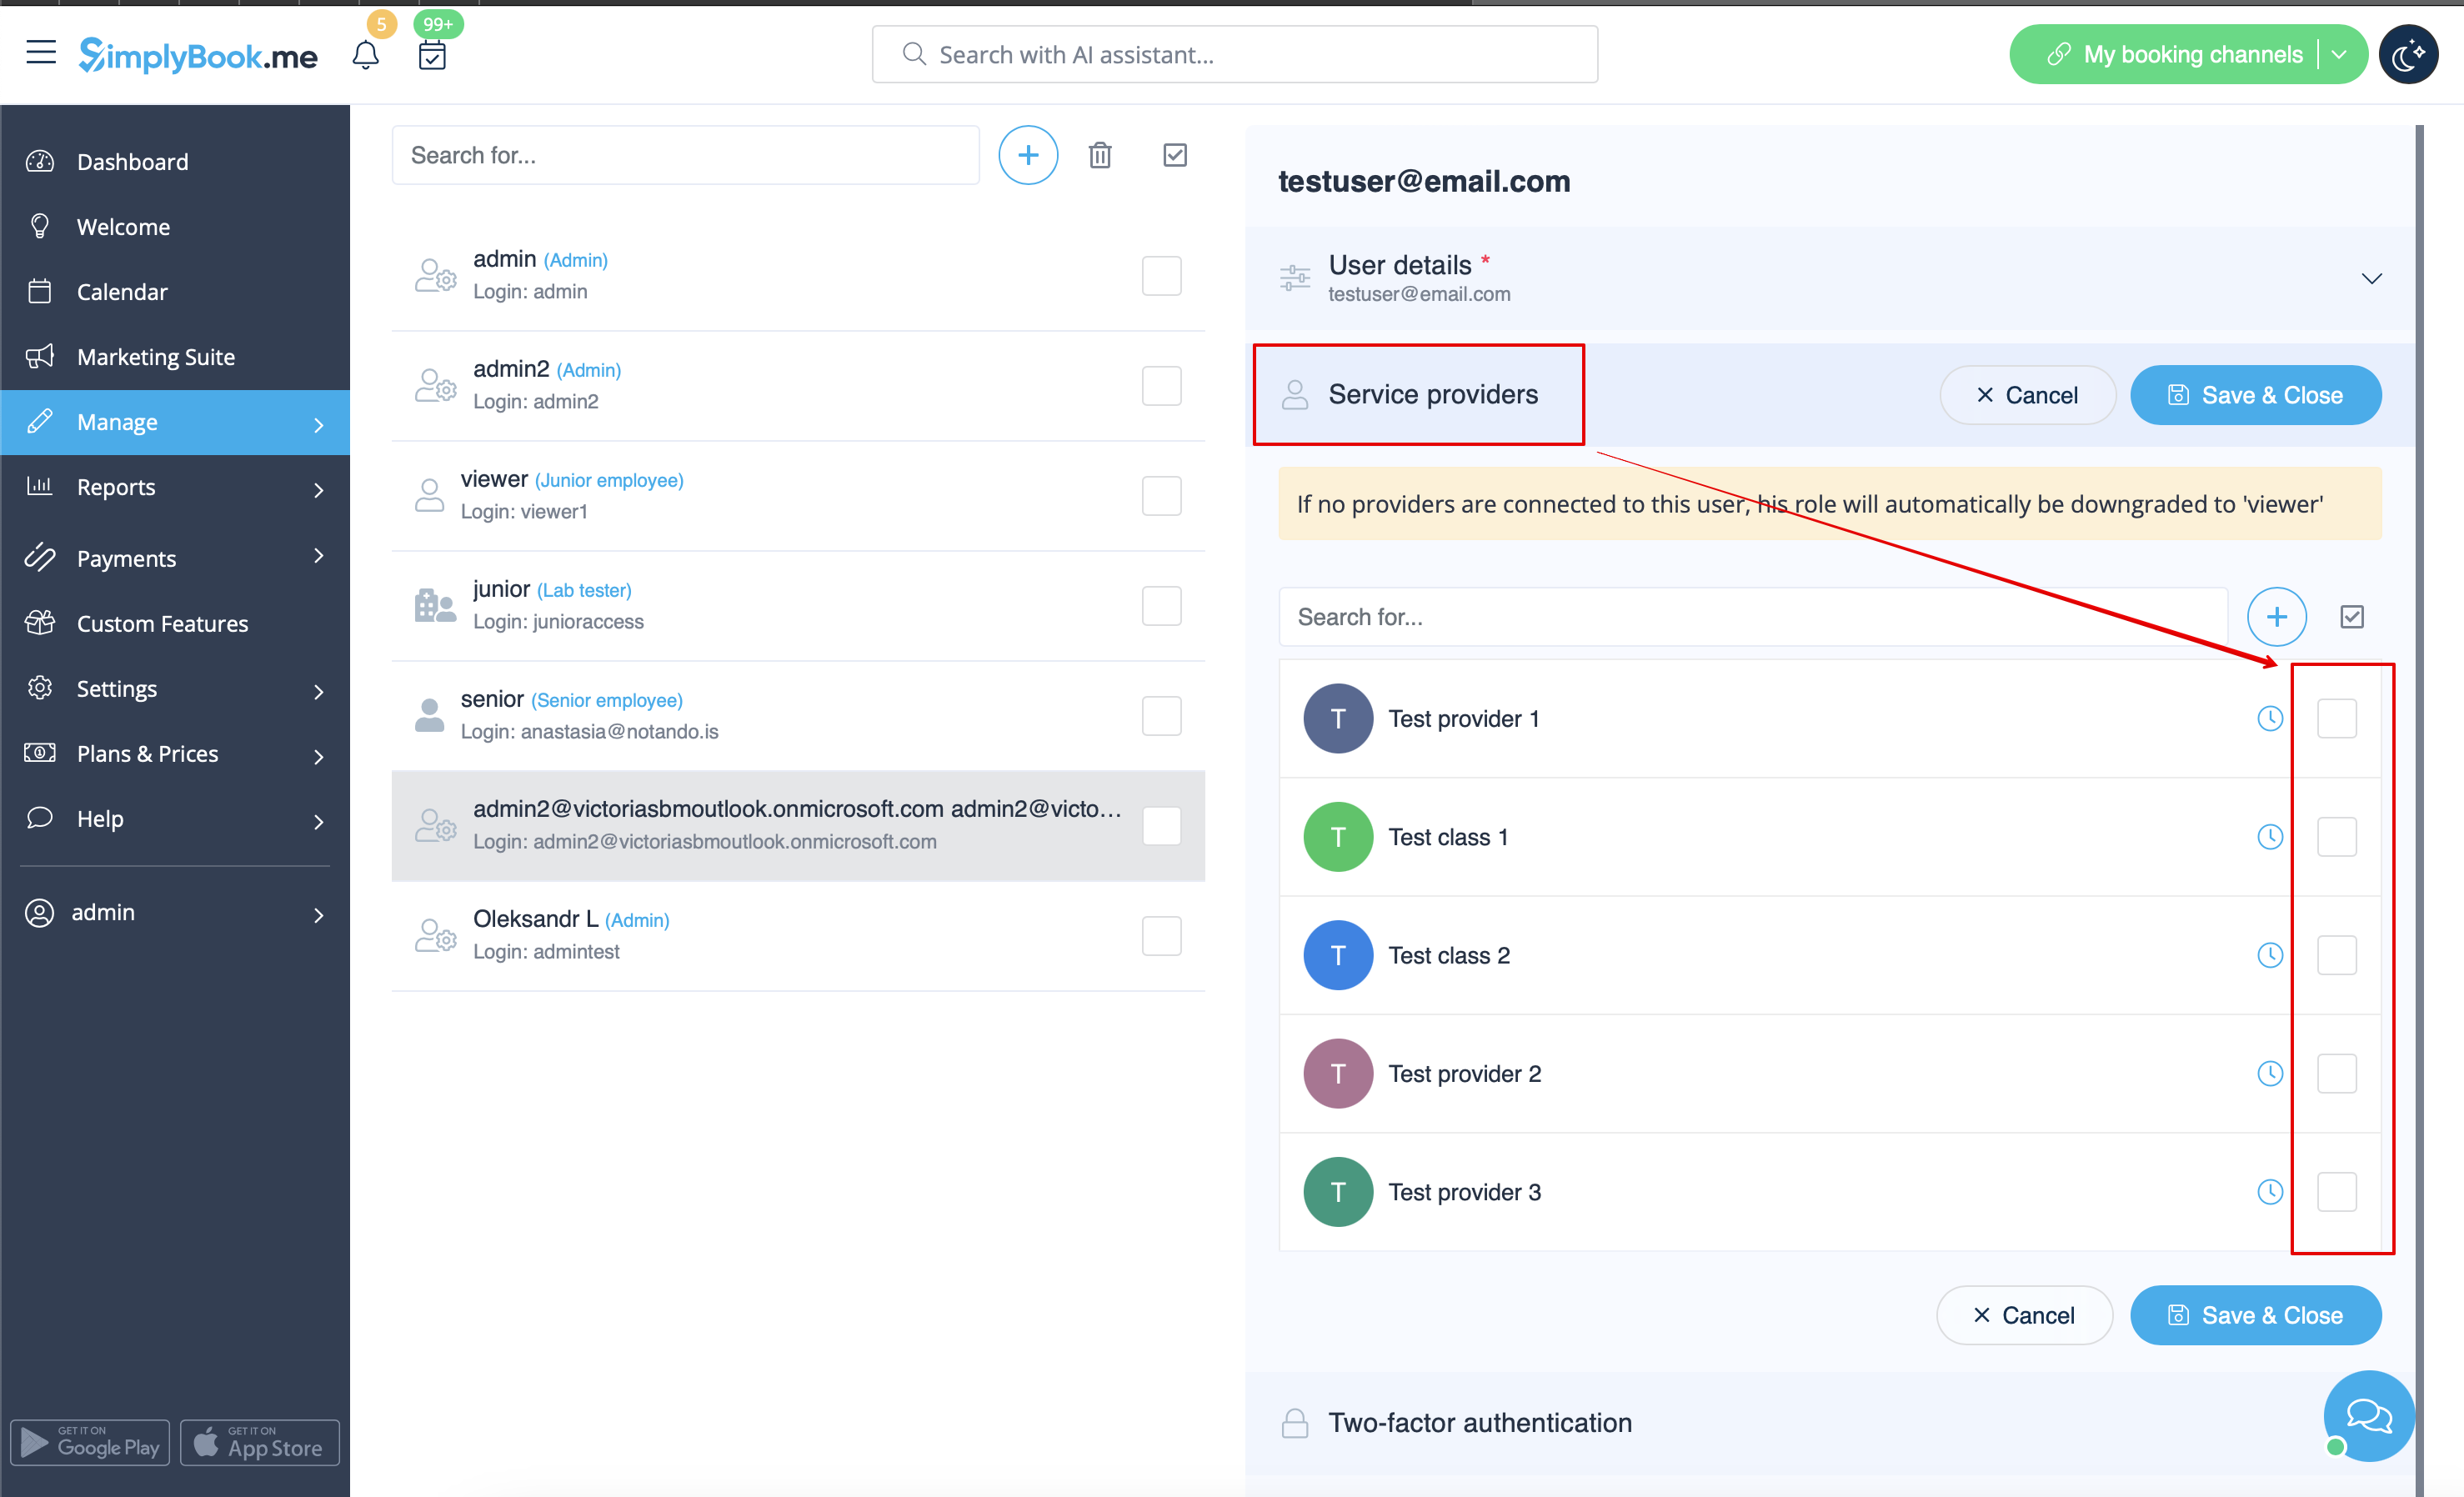
You can create a separate user for the person who needs to access your admin page in Manage -> Users and assign the corresponding rights to him/her.
See the list of available user roles here.
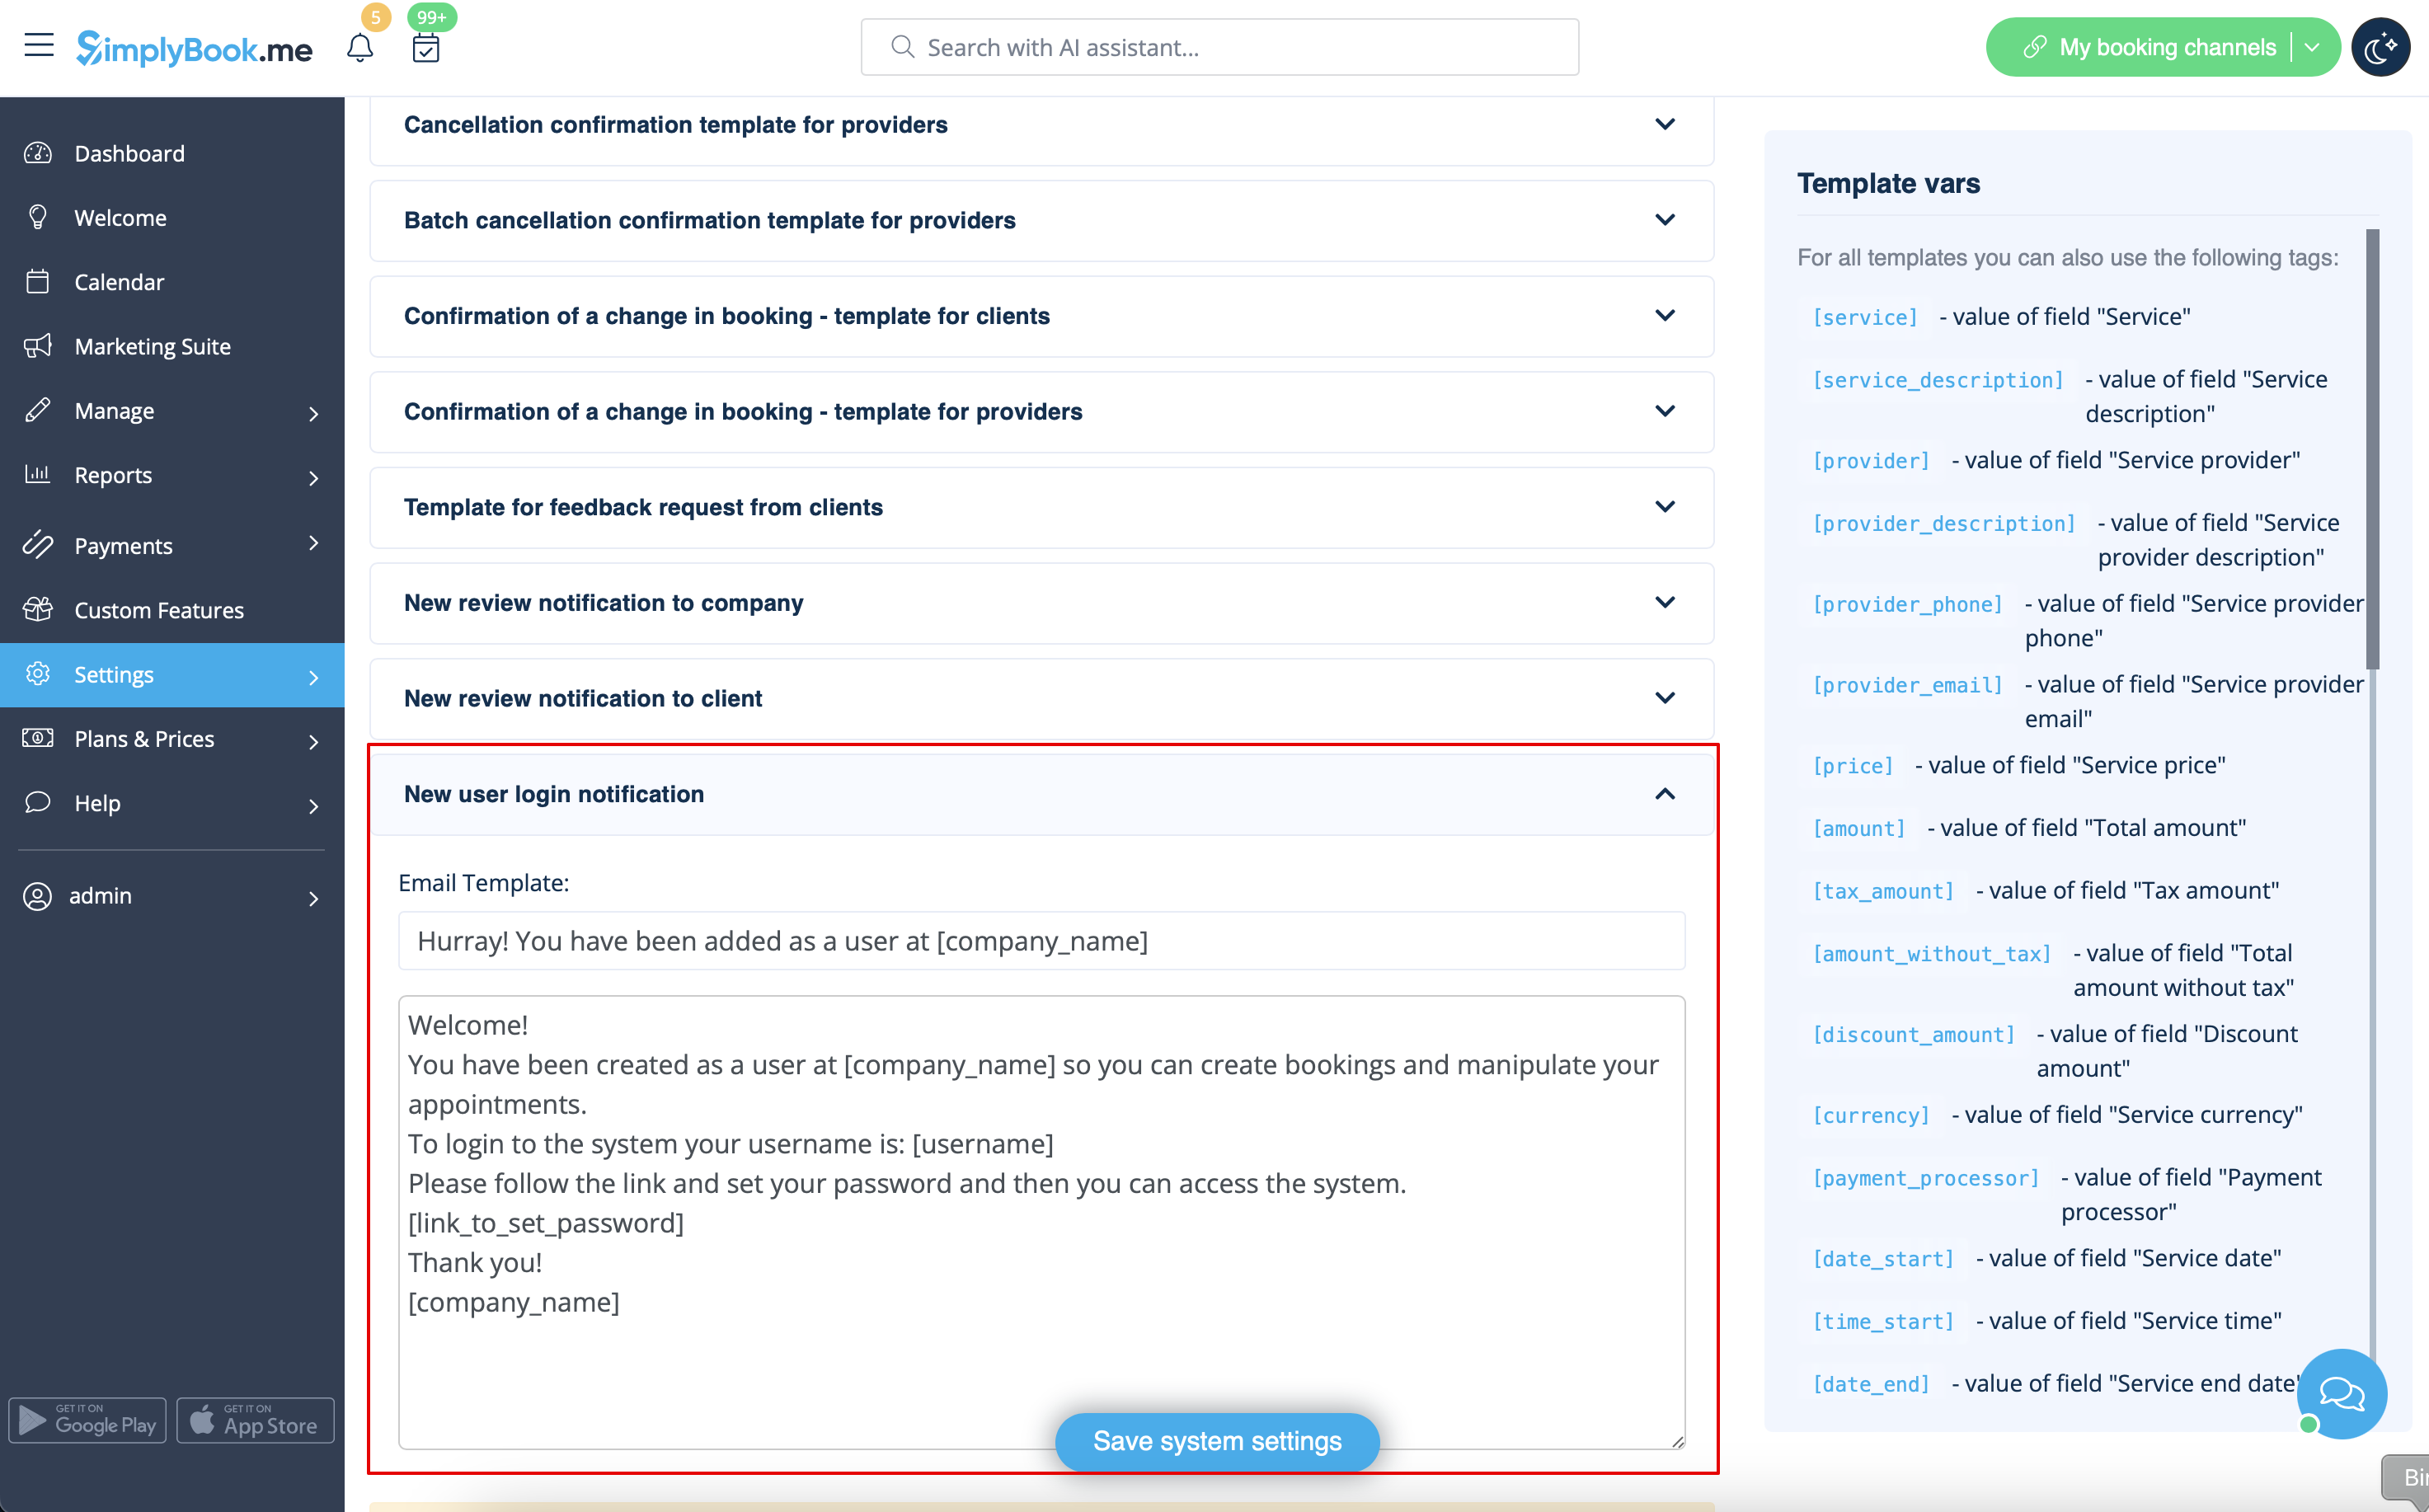
When adding new user details just enable the switch Send login information to user and save the user record.
The system will automatically send the email with the login credentials according to the template you have set in Settings -> Email and SMS Settings -> New user login notification.
Or you can manually send login and password to your users along with the link to your admin page after saving the user.