From SimplyBook.me
No edit summary |
No edit summary |
||
| Line 16: | Line 16: | ||
;How to use | ;How to use | ||
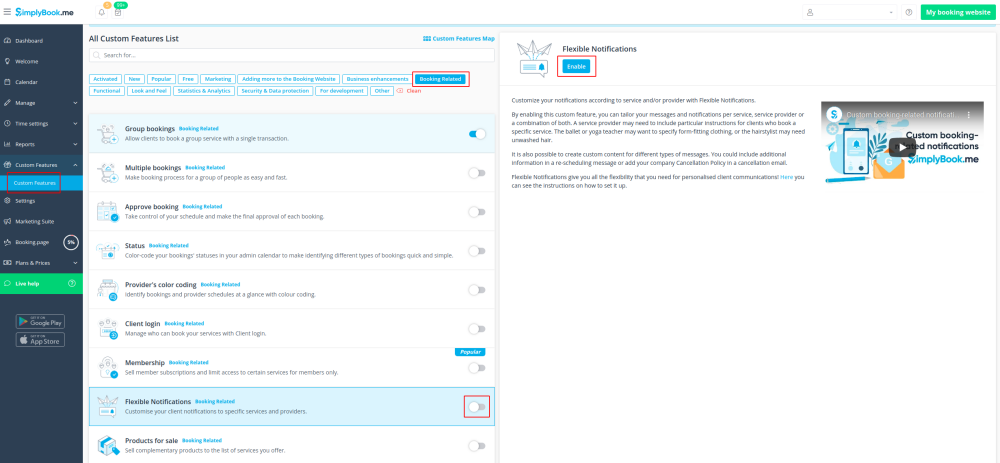
:1. Go to Custom Features//Booking related section | :1. Go to Custom Features//Booking related section, find Flexible Notifications Custom Feature and press "Enable". | ||
[[File:Flexible notifications enable path new cf.png | center]] | [[File:Flexible notifications enable path new cf.png | center]] | ||
<br><br> | <br><br> | ||
| Line 22: | Line 22: | ||
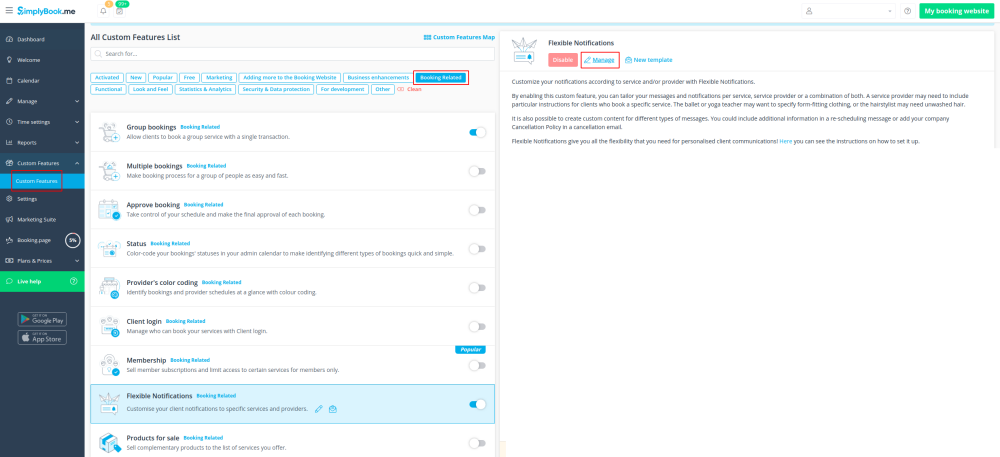
[[File:Flexible notifications manage path new cf.png | center]] | [[File:Flexible notifications manage path new cf.png | center]] | ||
<br><br> | <br><br> | ||
:3. On the page you see press " | :3. On the page you see press "New flexible template settings". | ||
[[File:Flexible notifications create new template.png| center]] | [[File:Flexible notifications create new template.png| center]] | ||
<br><br> | <br><br> | ||
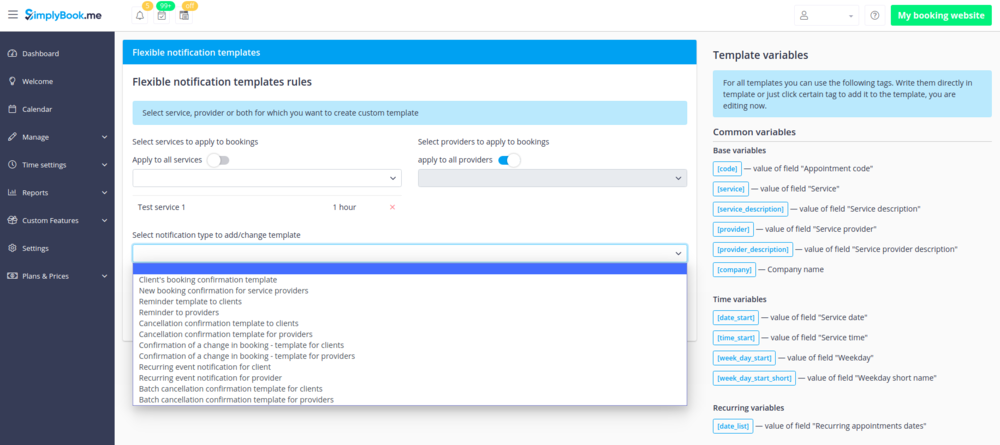
:4. In the new template select services | :4. In the new template select services and/or select providers that the customized templates will be applied to. Then select the notification type to add/change template and edit the text. Please use variables on the right to include to your templates if necessary. | ||
[[File:Flexible template creation.png | center]] | [[File:Flexible template creation.png | center]] | ||
<br><br> | <br><br> | ||
Revision as of 14:08, 30 July 2021

The Flexible Notifications Custom Feature allows you to customize messages per service, per provider or using a combination of services and providers. It means that certain service can have a message different from the general outgoing reminder message for other services. A certain provider may also want to include different instructions for clients who book a certain service. The Flexible Notifications Custom Feature gives you all the flexibility that you may need in such instances!
- How to use
- 1. Go to Custom Features//Booking related section, find Flexible Notifications Custom Feature and press "Enable".

- 2. Click on "Manage" near this feature.

- 3. On the page you see press "New flexible template settings".

- 4. In the new template select services and/or select providers that the customized templates will be applied to. Then select the notification type to add/change template and edit the text. Please use variables on the right to include to your templates if necessary.
