From SimplyBook.me
No edit summary |
No edit summary |
||
| Line 14: | Line 14: | ||
;How to use | ;How to use | ||
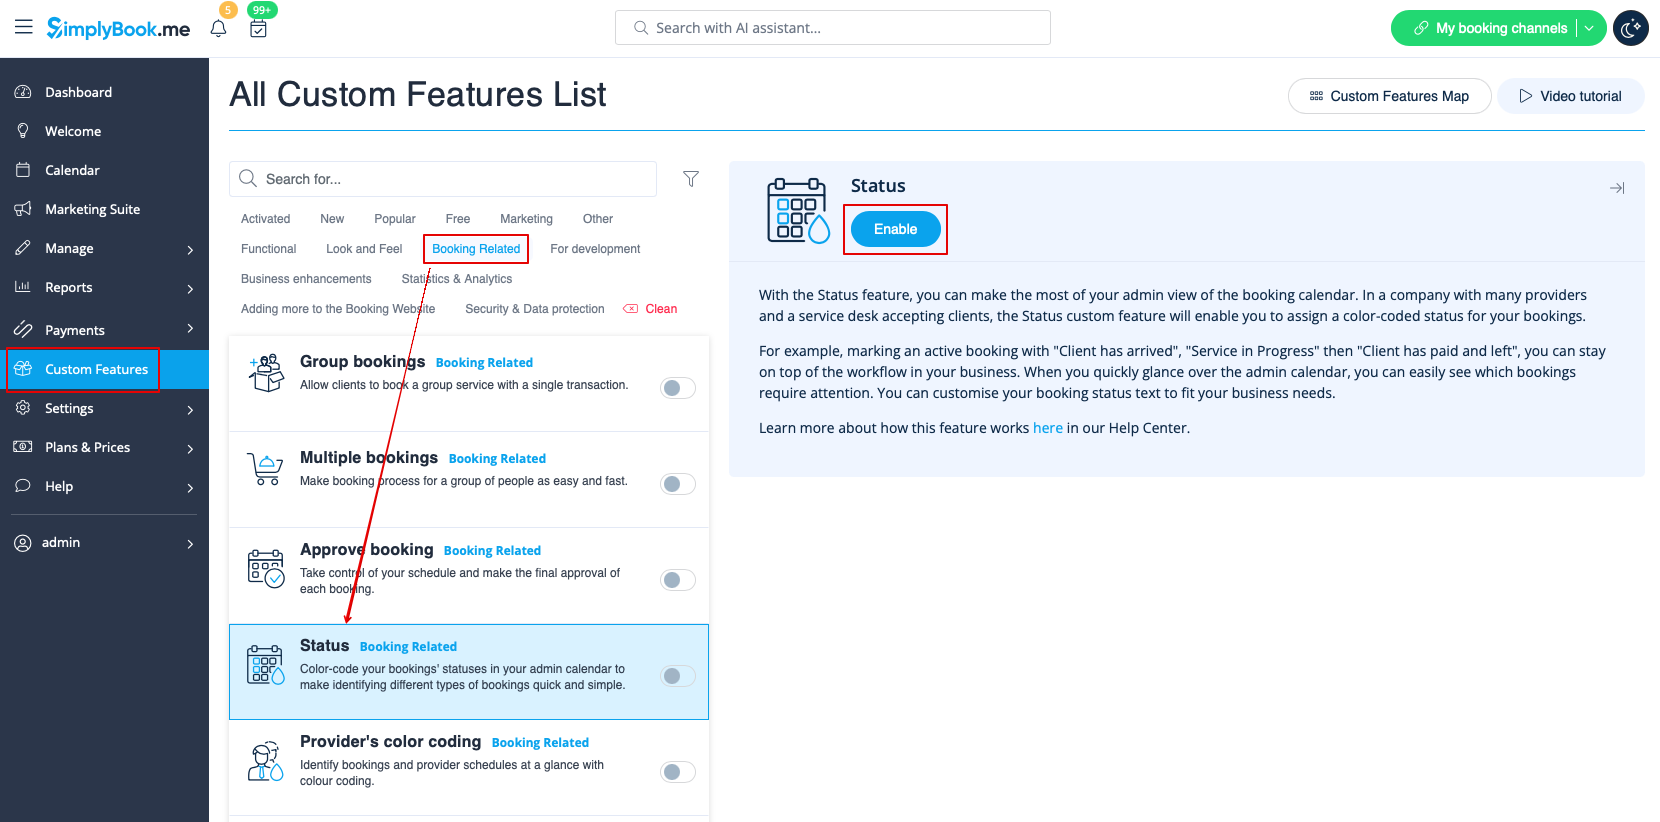
:1. Activate this custom feature in the Custom Features section//Booking related. | :1. Activate this custom feature in the Custom Features section//Booking related. | ||
[[File:Status enable path | [[File:Status enable path redesigned.png|1200px|border | center|link=https://help.simplybook.me/images/b/bf/Status_enable_path_redesigned.png]] | ||
<br><br> | <br><br> | ||
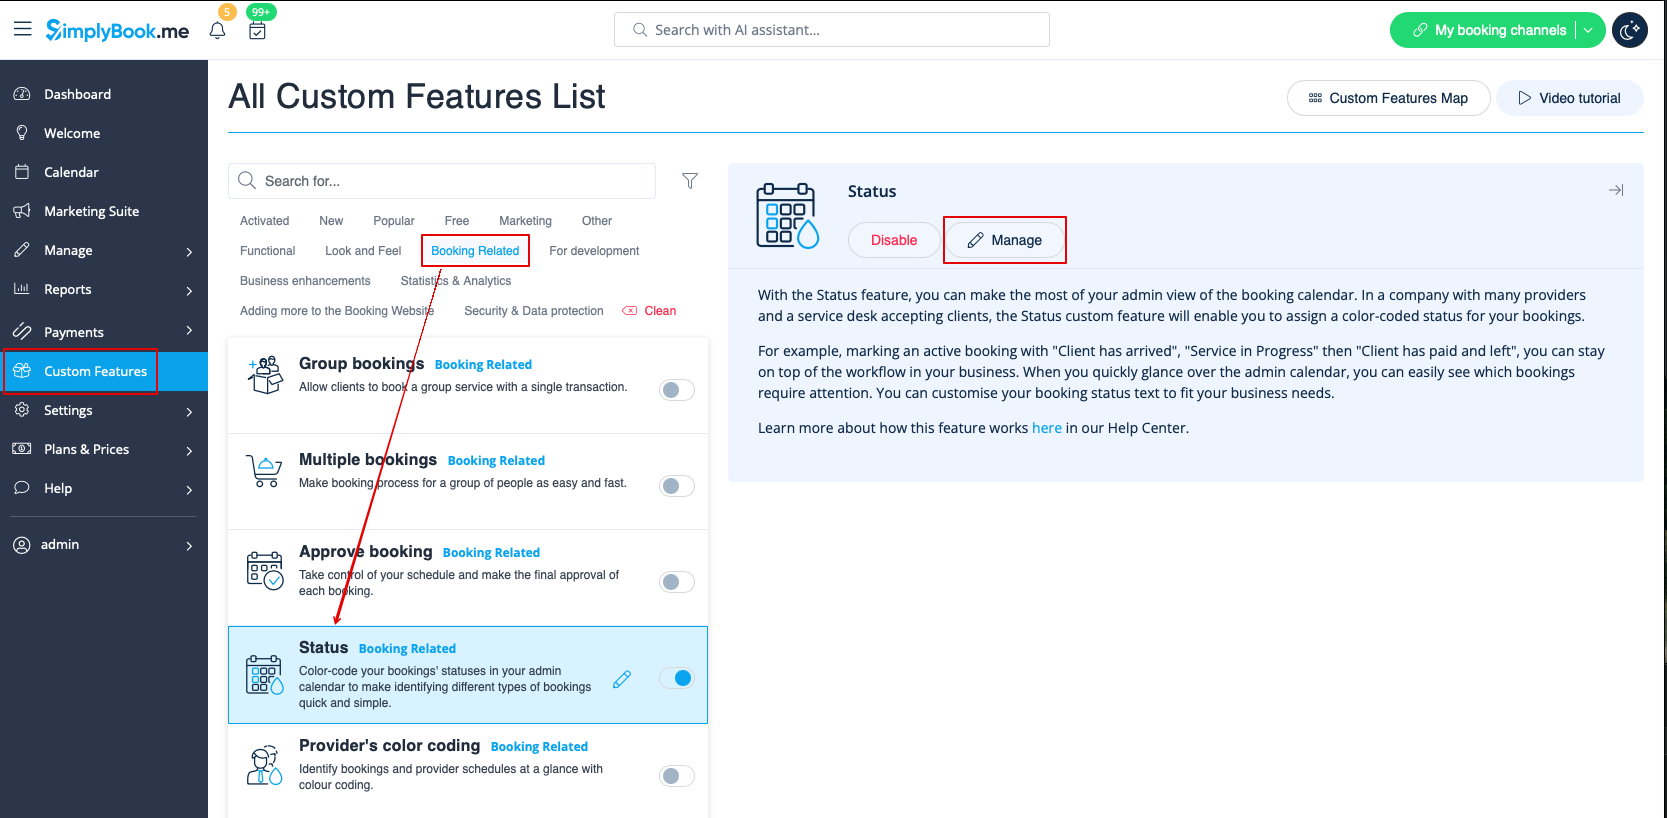
:2. Go to the settings of this custom feature by click on "Manage". | :2. Go to the settings of this custom feature by click on "Manage". | ||
[[File:Status | [[File:Status manage path redesigned.png|1200px|border | center|link=https://help.simplybook.me/images/4/4e/Status_manage_path_redesigned.png]] | ||
<br><br> | <br><br> | ||
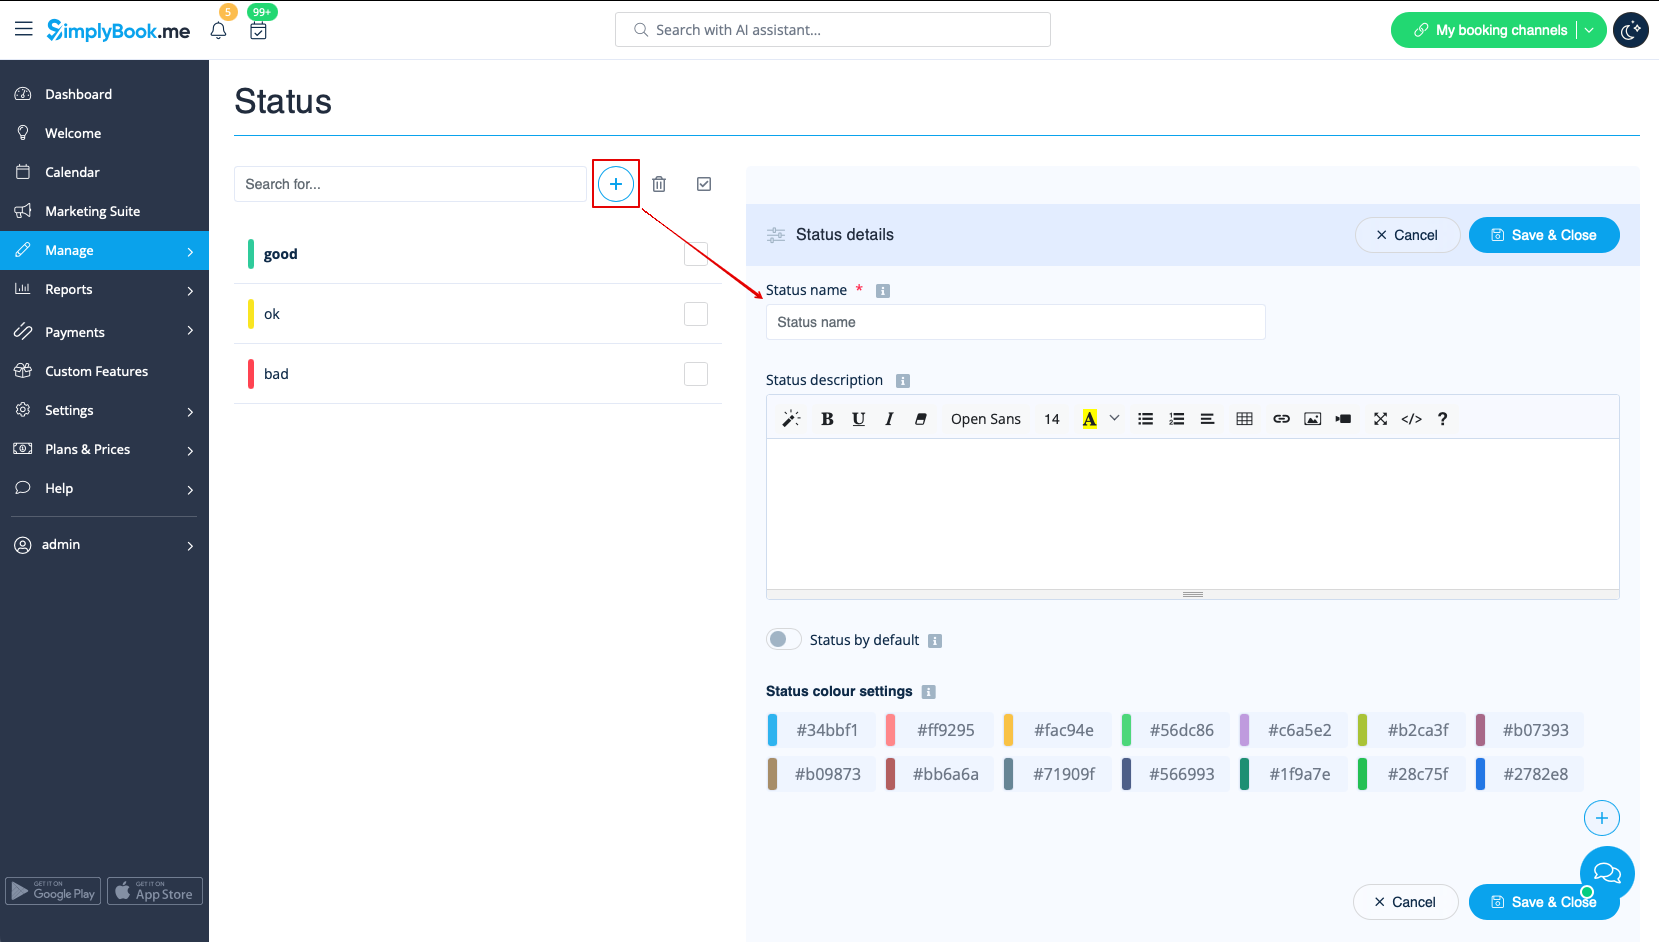
:3. Press "+" to add new status.<br> | :3. Press "+" to add new status.<br> | ||
:Insert "Name", "Description" and assign the color to this status. If you leave the switcher "Status by default" on, such status will automatically apply to all new bookings. | :Insert "Name", "Description" and assign the color to this status. If you leave the switcher "Status by default" on, such status will automatically apply to all new bookings. | ||
[[File:Create | [[File:Create new status form redesigned.png|1200px|border | center|link=https://help.simplybook.me/images/5/52/Create_new_status_form_redesigned.png]] | ||
<br><br> | <br><br> | ||
Revision as of 11:07, 30 October 2024
If you have a company with many providers, and a service desk accepting clients you can add status possibility to events to see the status. This is for example used to mark appointment with one status as "client has arrived", and then another as "Client has left and paid" whatever suits your needs.
- How to use
- 1. Activate this custom feature in the Custom Features section//Booking related.
- 2. Go to the settings of this custom feature by click on "Manage".
- 3. Press "+" to add new status.
- Insert "Name", "Description" and assign the color to this status. If you leave the switcher "Status by default" on, such status will automatically apply to all new bookings.