Created page with "'''Безкоштовно:''' Ви можете створити нову компанію з потрібною назвою в url і вручну перенести туди всі дані та налаштування. Ви можете створювати послуги та провайдерів, а також копіювати список клієнтів до нової системи за допомогою Custom_Features#Import_Clients | функції..." |
Created page with "=Логотип та фон компанії= В Налаштуваннях // Налаштування дизайну // Додаткові налаштування теми. <br/> 1200px | 0 border| center|link=https://help.simplybook.me/images/d/dd/Design_settings_path_redesigned.png <br/><br/> File:Logo & banner settings redesigned.png|1200px | border | center|link=https://help.simplybook.me/images/a/a4/Logo_%26_banner_s..." |
||
| Line 27: | Line 27: | ||
<br/><br/> | <br/><br/> | ||
=Логотип та фон компанії= | |||
В Налаштуваннях // Налаштування дизайну // Додаткові налаштування теми. <br/> | |||
[[File:Design settings path redesigned.png|1200px | 0 border| center|link=https://help.simplybook.me/images/d/dd/Design_settings_path_redesigned.png ]]<br/><br/> | |||
[[File:Design settings path redesigned.png|1200px | border| center|link=https://help.simplybook.me/images/d/dd/Design_settings_path_redesigned.png ]]<br/><br/> | |||
[[File:Logo & banner settings redesigned.png|1200px | border | center|link=https://help.simplybook.me/images/a/a4/Logo_%26_banner_settings_redesigned.png]] | [[File:Logo & banner settings redesigned.png|1200px | border | center|link=https://help.simplybook.me/images/a/a4/Logo_%26_banner_settings_redesigned.png]] | ||
<br/><br/> | <br/><br/> | ||
<div lang="en" dir="ltr" class="mw-content-ltr"> | <div lang="en" dir="ltr" class="mw-content-ltr"> | ||
Revision as of 16:14, 14 May 2025
Назва компанії= =Назва компанії
В Налаштуваннях // Інформація про компанію // Назва.
Урл компанії
На жаль, в системі немає можливості змінювати урл компанії. Для того, щоб змінити його, вам потрібно зареєструвати нову компанію з потрібною адресою.
Безкоштовно:
Ви можете створити нову компанію з потрібною назвою в url і вручну перенести туди всі дані та налаштування. Ви можете створювати послуги та провайдерів, а також копіювати список клієнтів до нової системи за допомогою функції імпорту клієнтів (див. інструкцію тут). Бронювання та інші налаштування перенести неможливо.
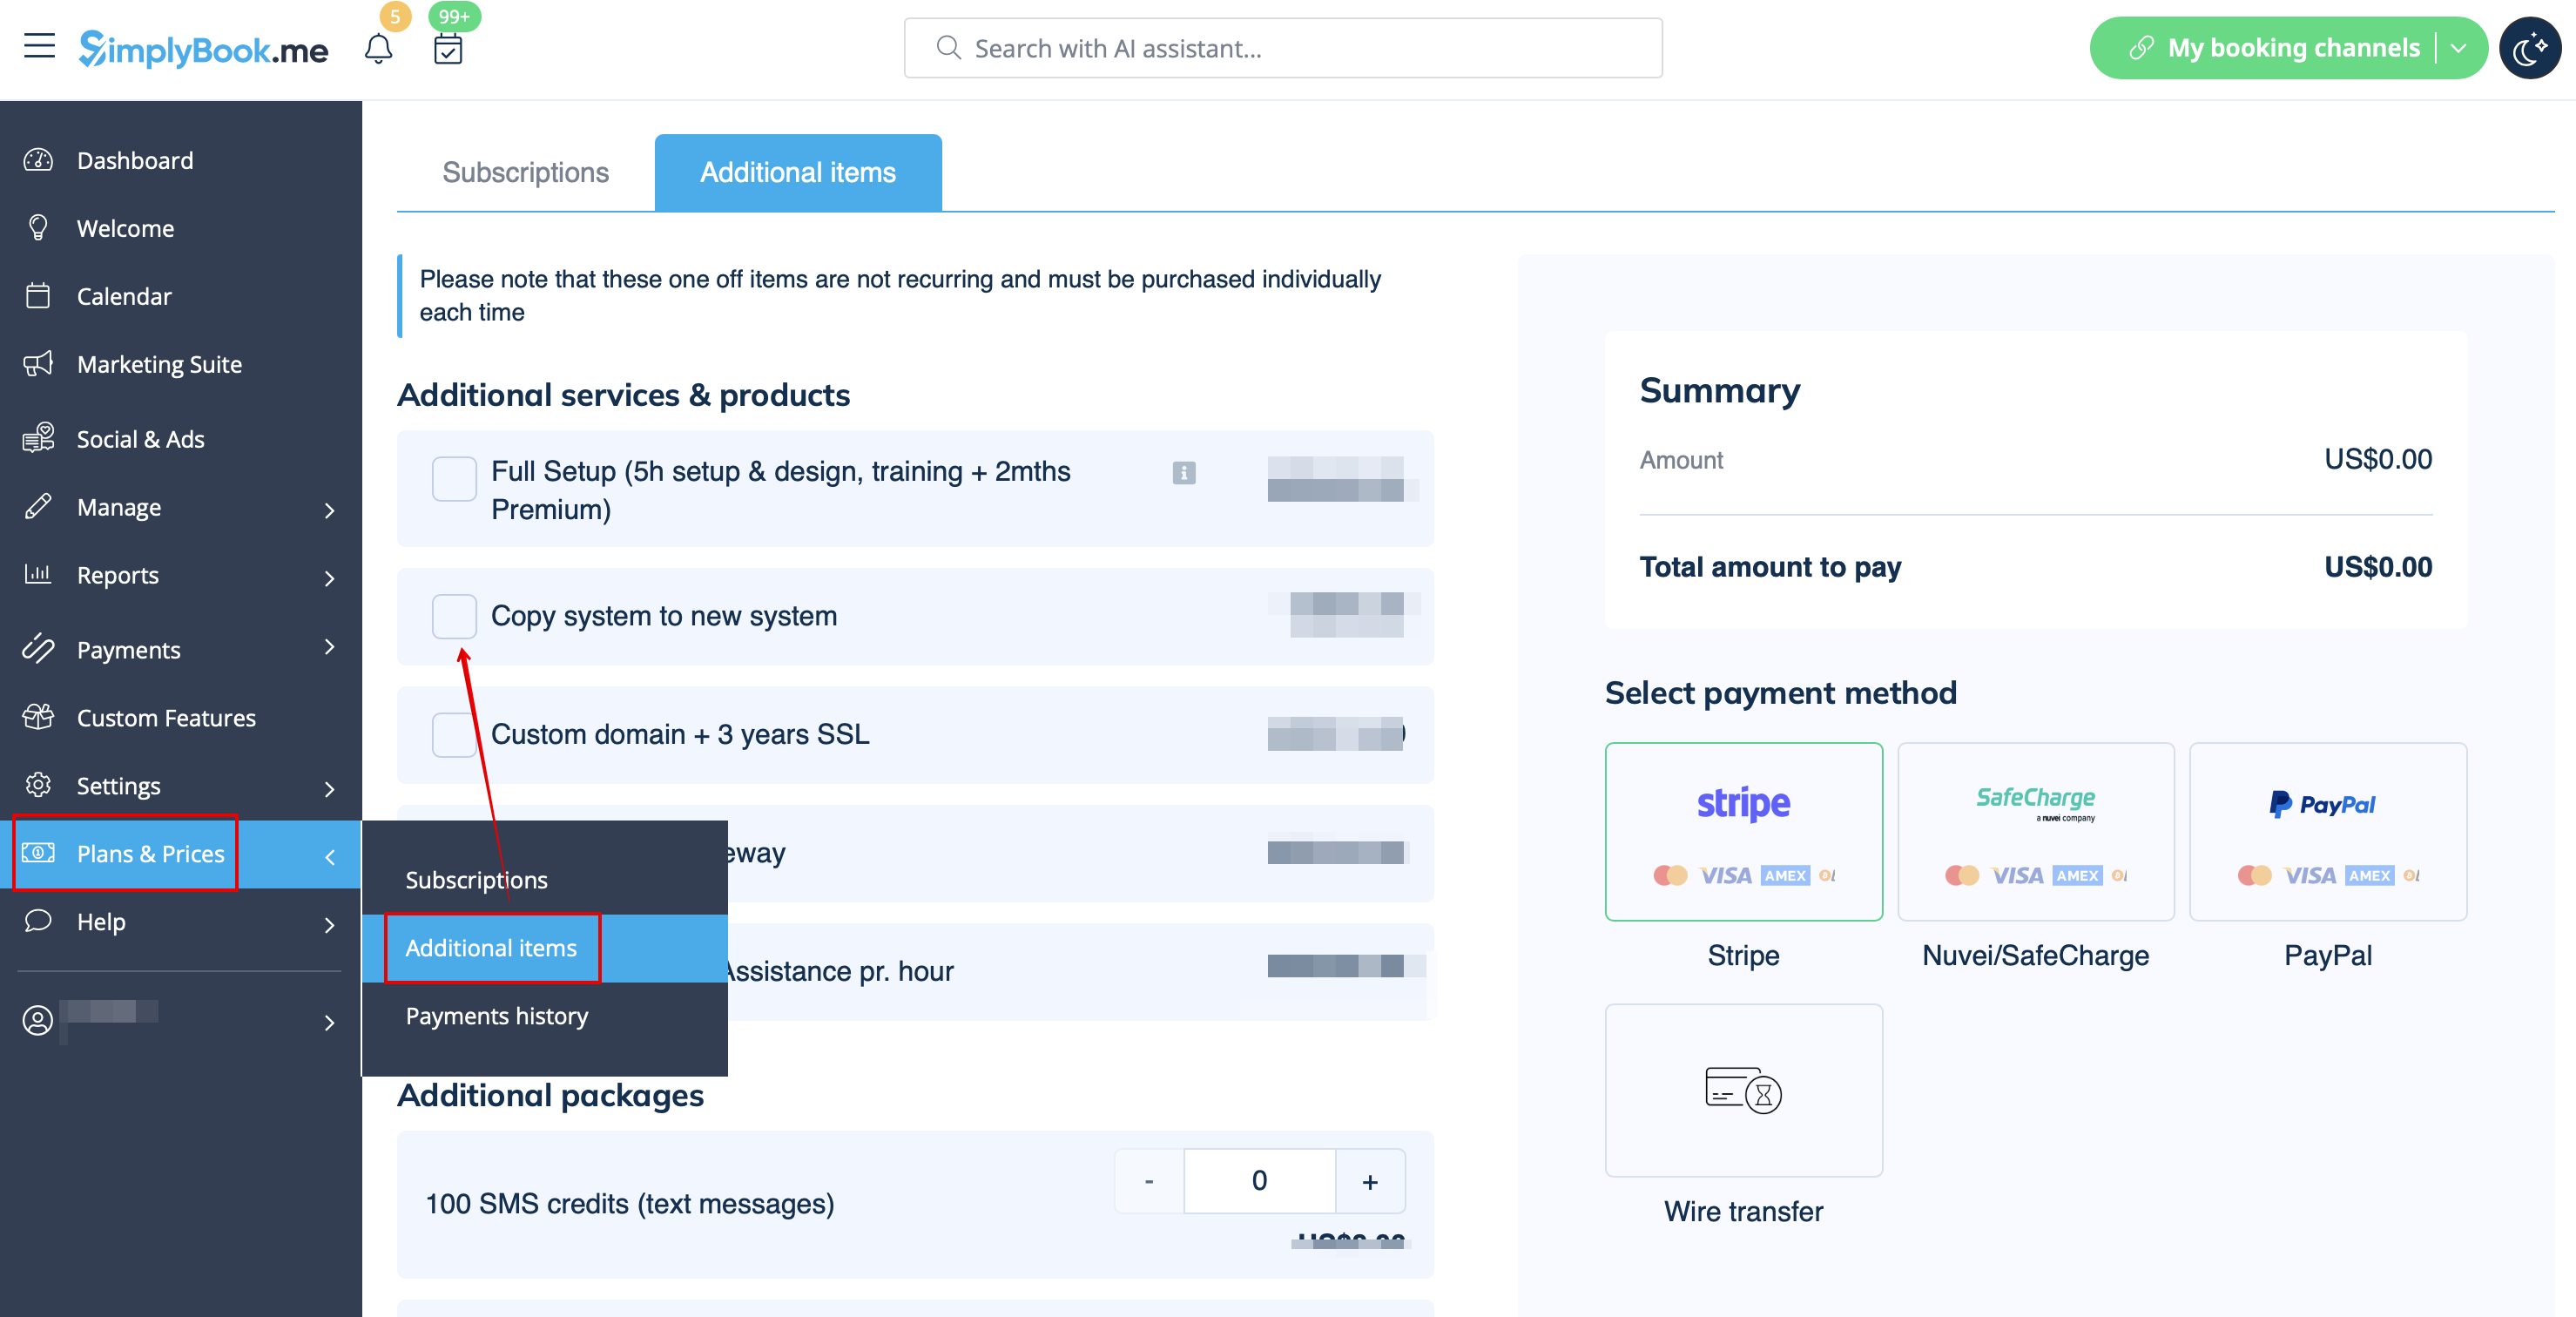
Платно:
Створіть нову систему з бажаною назвою в url, перейдіть в Плани і ціни // Додаткові елементи і виберіть "Скопіювати систему в нову систему", зробіть оплату і наші розробники перенесуть ваші дані. Після оплати вам необхідно зв'язатися зі службою підтримки, повідомити їм стару назву компанії та нову назву компанії (підтвердити володіння обома акаунтами) і запросити перенесення системи.
Будь ласка, зверніть увагу! Відгуки, а також HTML-форматування в описах не будуть скопійовані в нову систему.
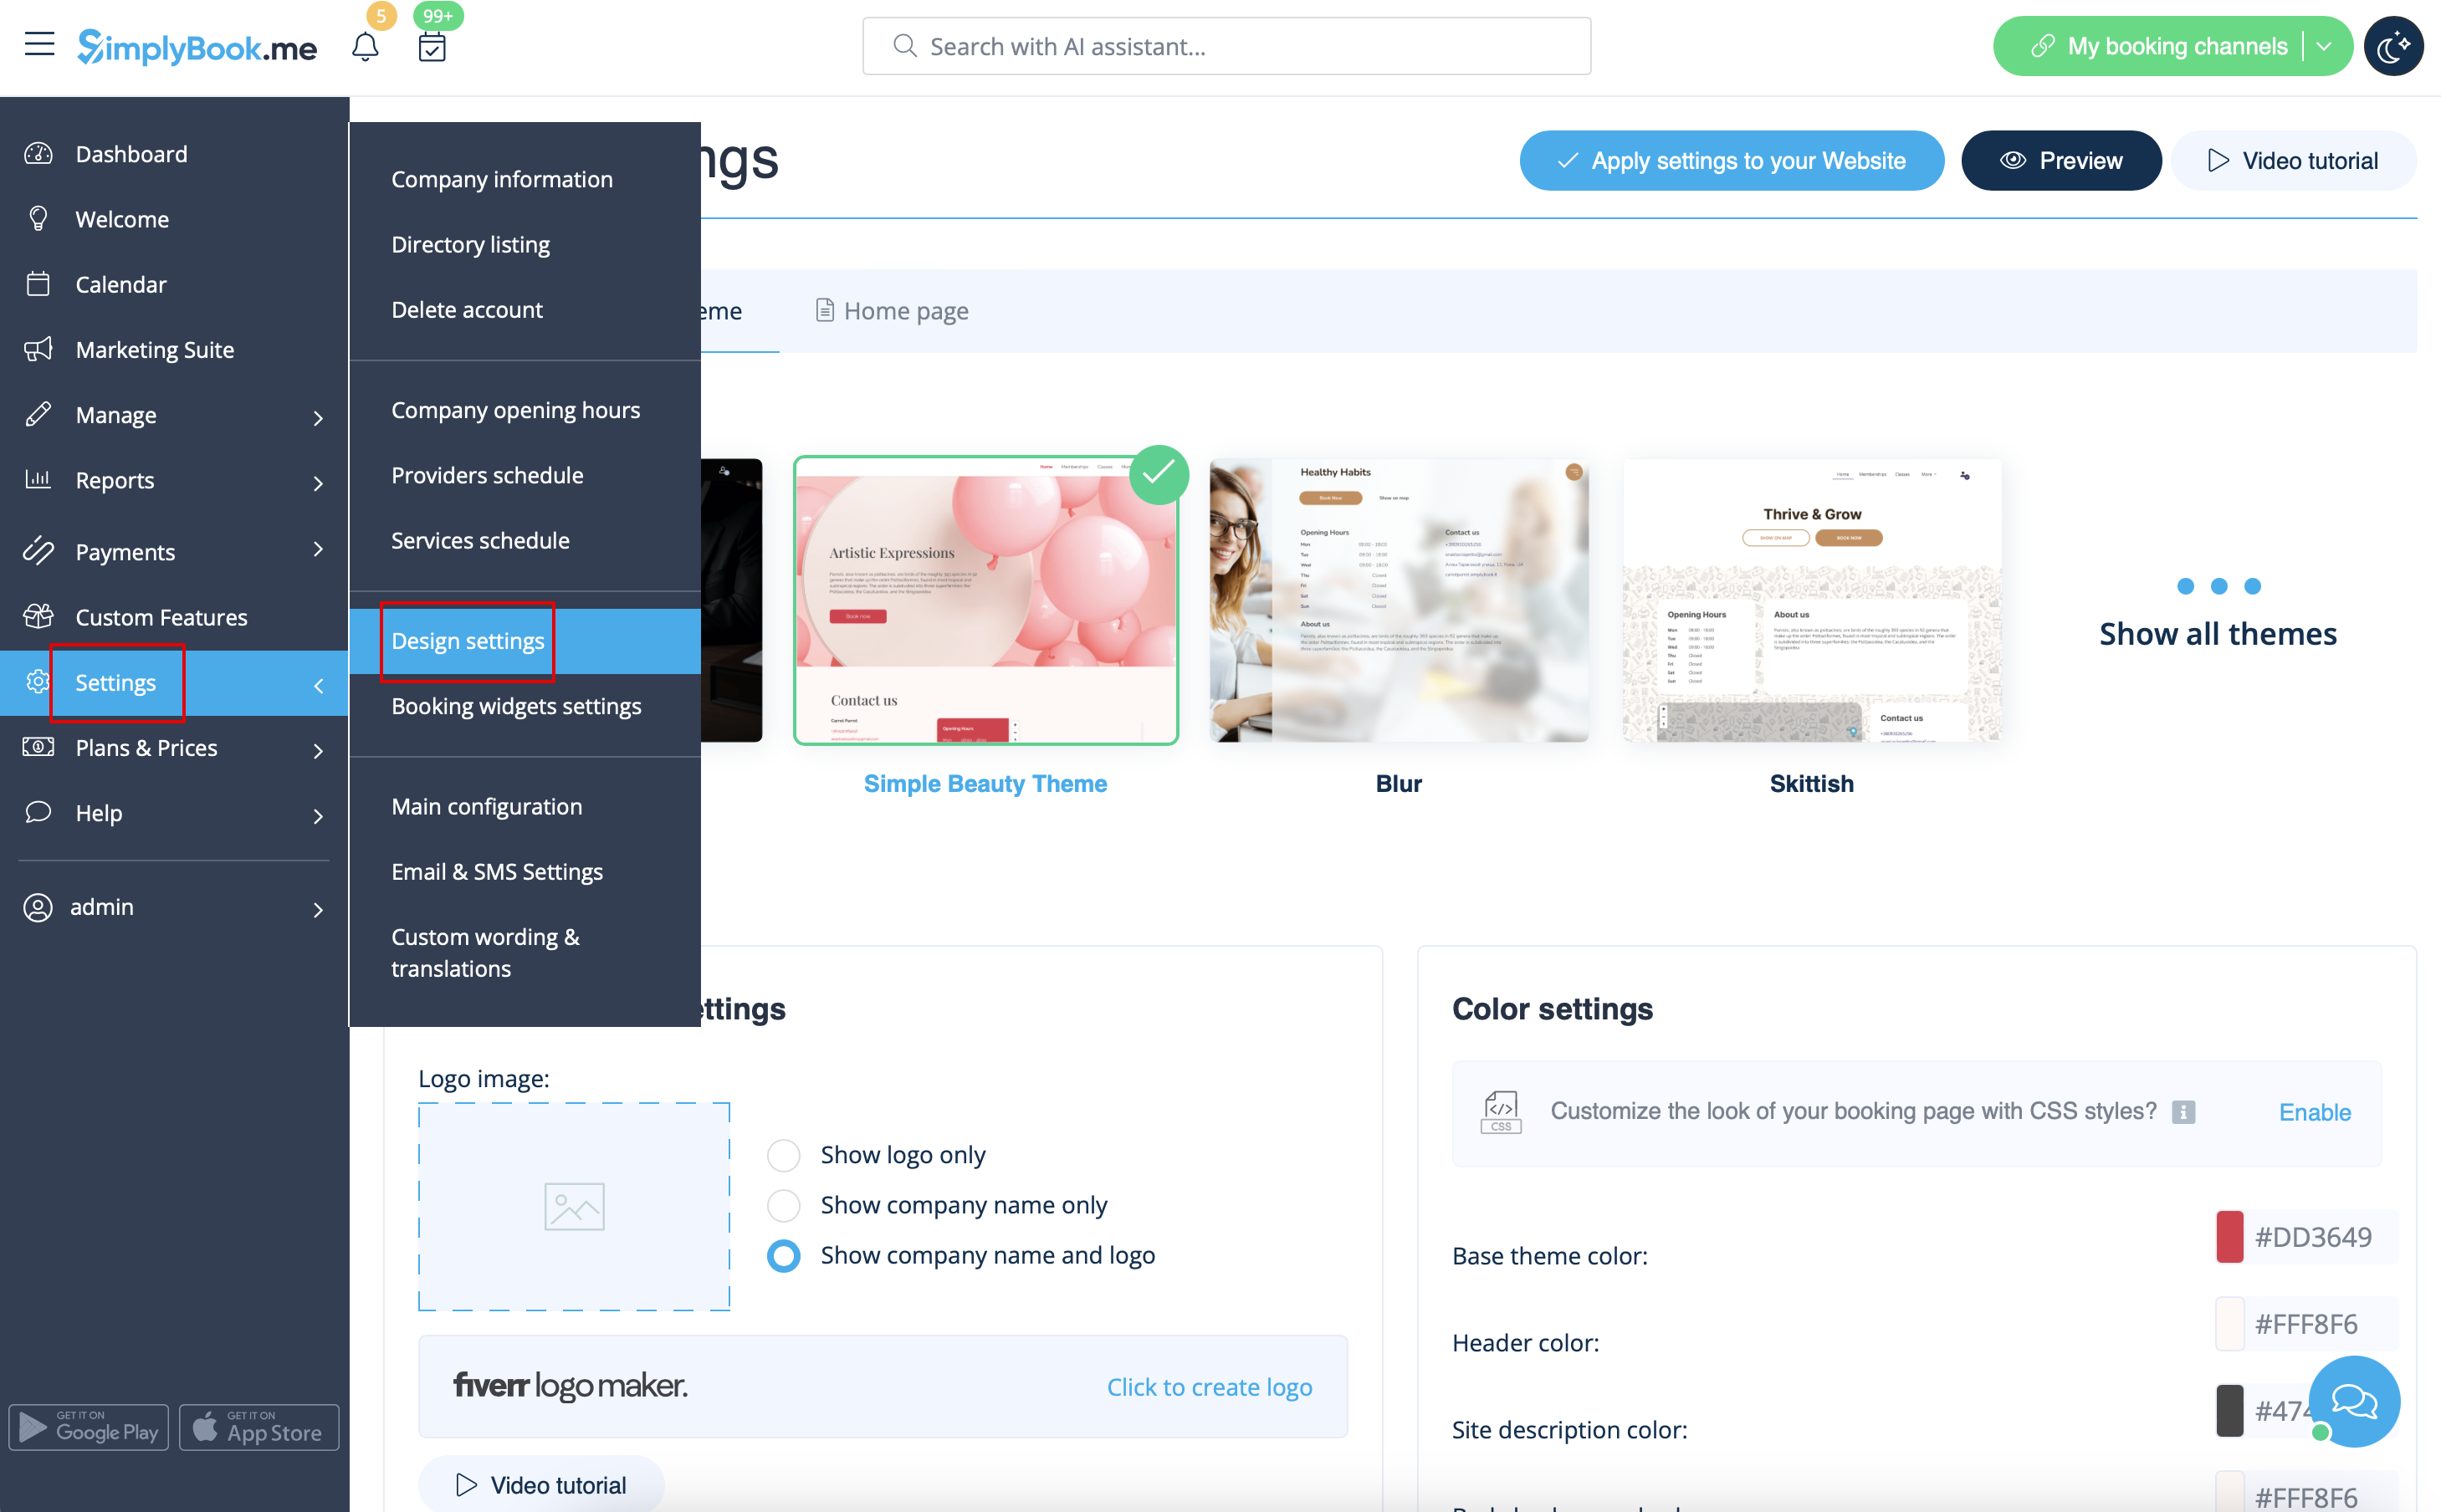
Логотип та фон компанії
В Налаштуваннях // Налаштування дизайну // Додаткові налаштування теми.
Favicon
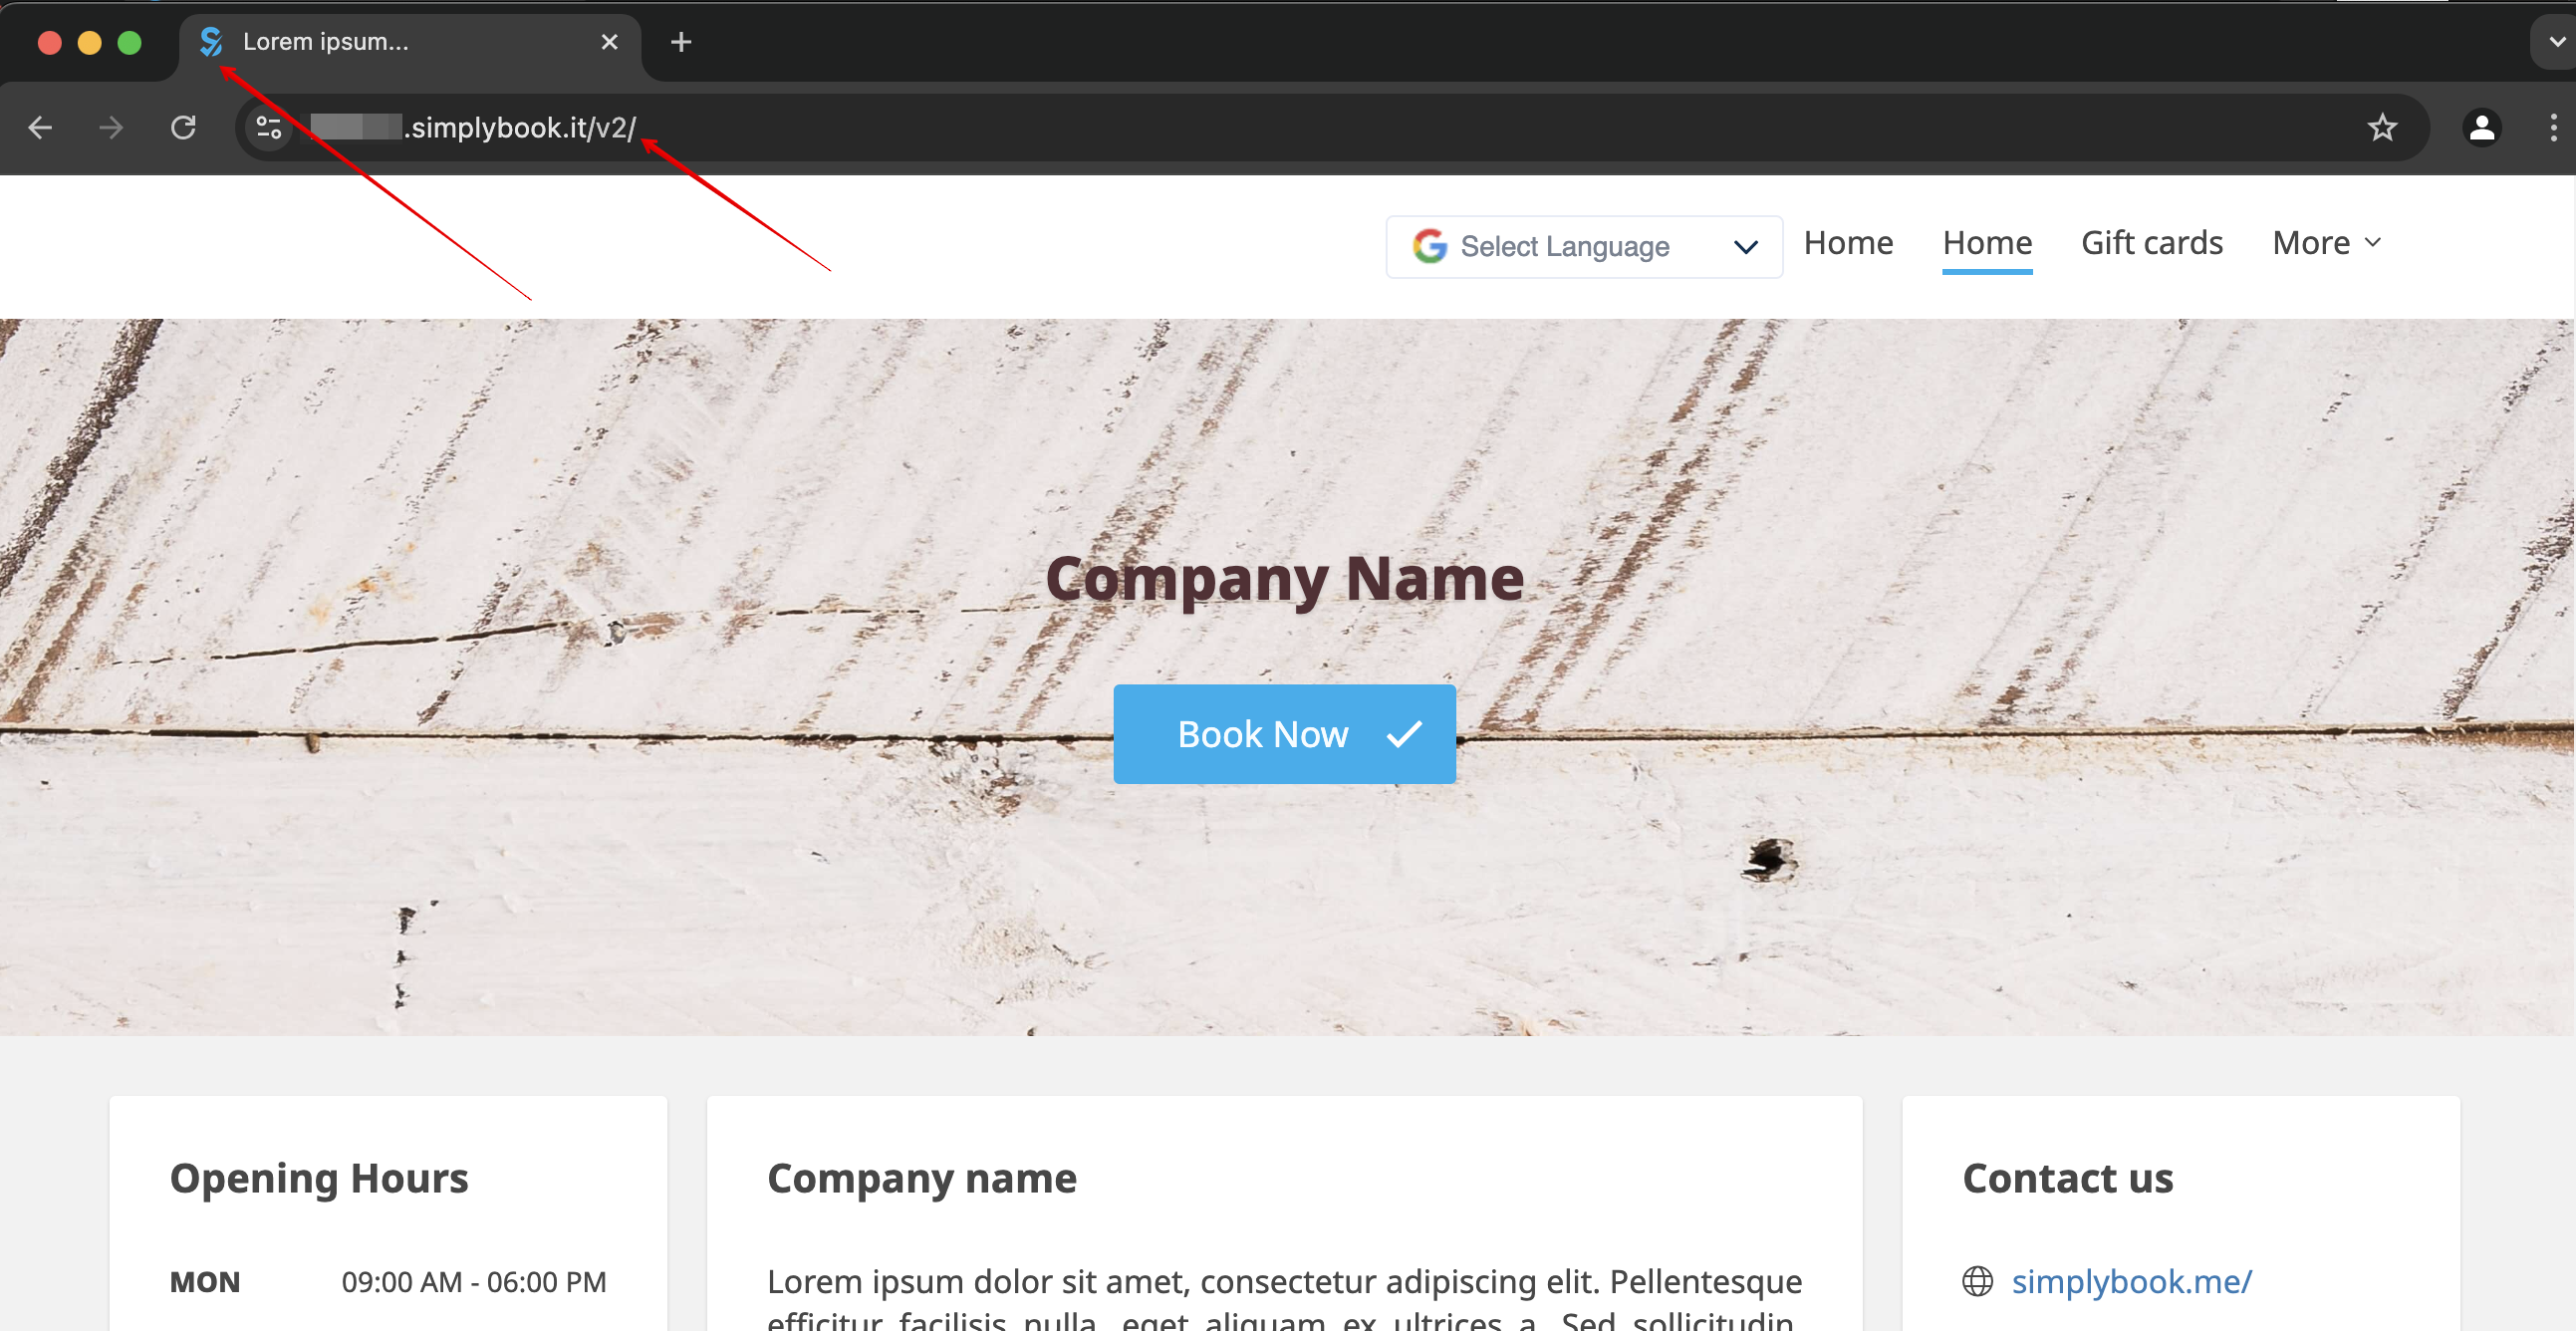
The /v2/ part in the URL of the booking website cannot be removed or changed.
This element is fixed and cannot be altered.
Favicon (logo shown in the browser tab) can be changed on Enterprise level only.
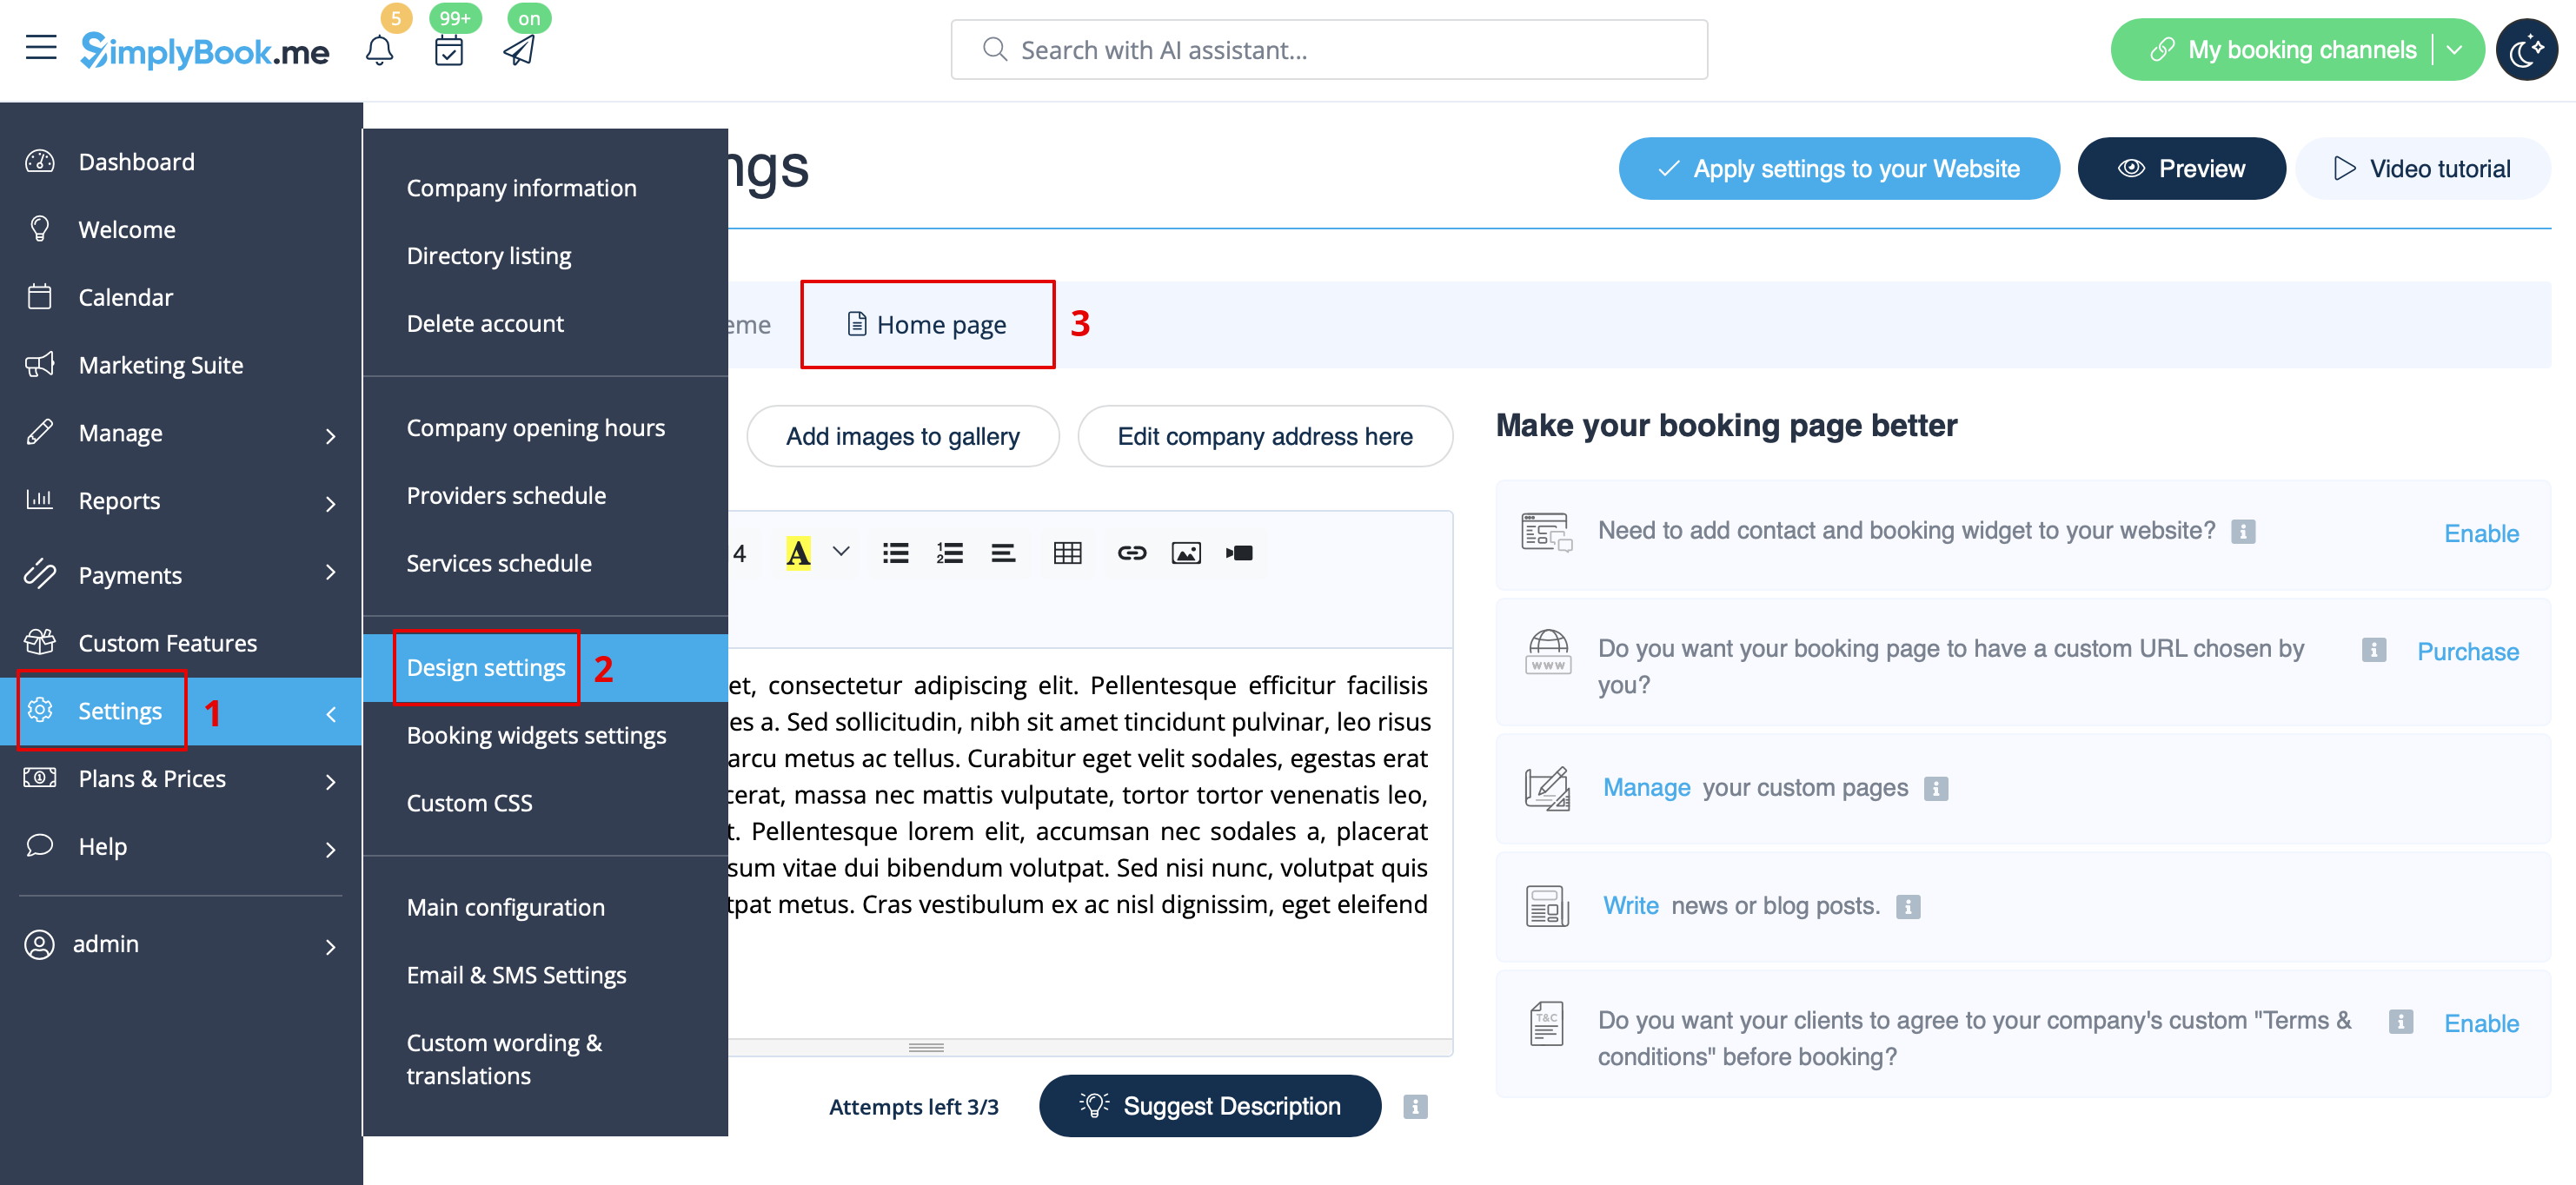
Design
In Settings // Design settings.
- Recommended themes
- All new ones
Those themes support all new functionality and have the option to adjust the colors of your booking page.
Texts and language
If you need to adjust any texts on your booking page (for example change Employee to Therapist, Coach or Room), you can do it in Settings // Custom Wording & Translations.
There, you can also change language of your booking page by clicking on the corresponding flag and pressing "Save custom translations". If your language is not in the list you can translate the system yourself.
SEO Settings
By default the Title tag is represented by your company name that you have inserted in Settings -> Company information -> Name and automatic addition of Scheduling and Booking Website text.
Meta description is taken from the text that you have added in Settings -> Design settings -> Home page -> description text for About Us booking website block.
If you need you can set these two options to contain different data and thus influence your booking website SEO.
To set own Title tag and Meta description please navigate to Settings -> Design settings -> Home page and add the desired texts to the corresponding fields there.
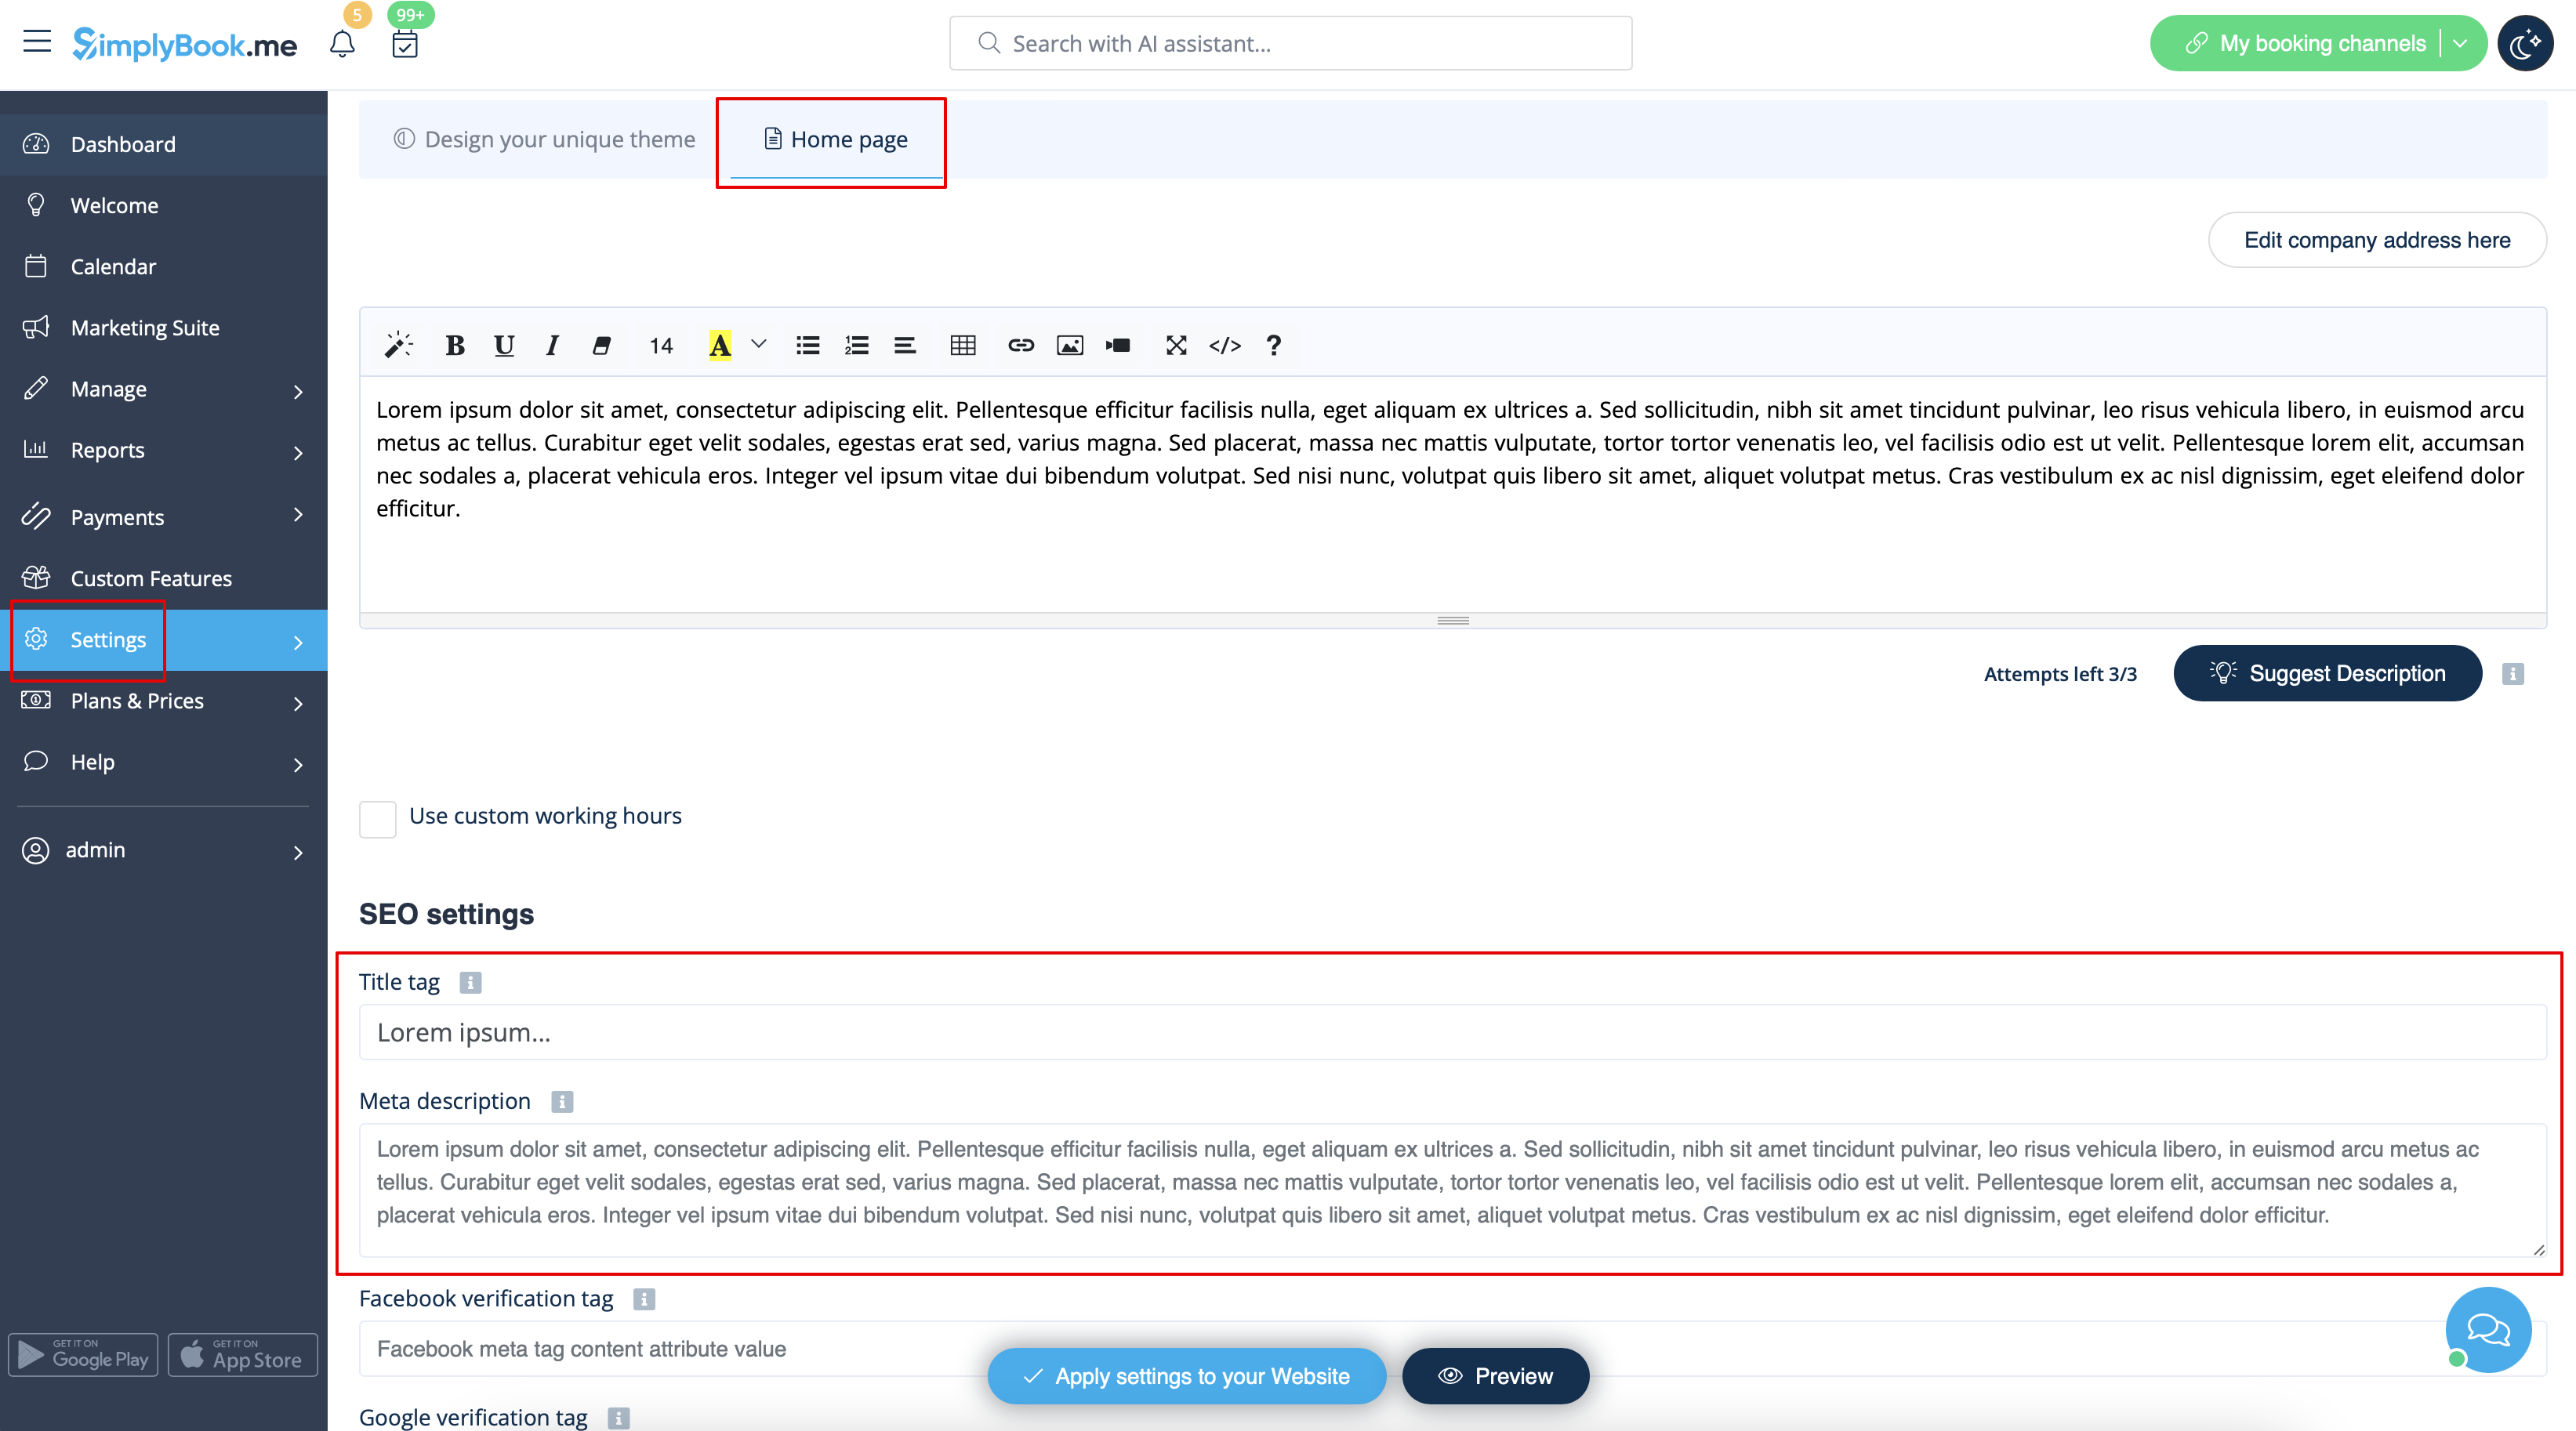
Please note!We recommend using no more than 60 symbols for Title tag.
Meta description is limited to 400 characters and if you try to add a longer abstract it will be automatically cut when saving the settings.
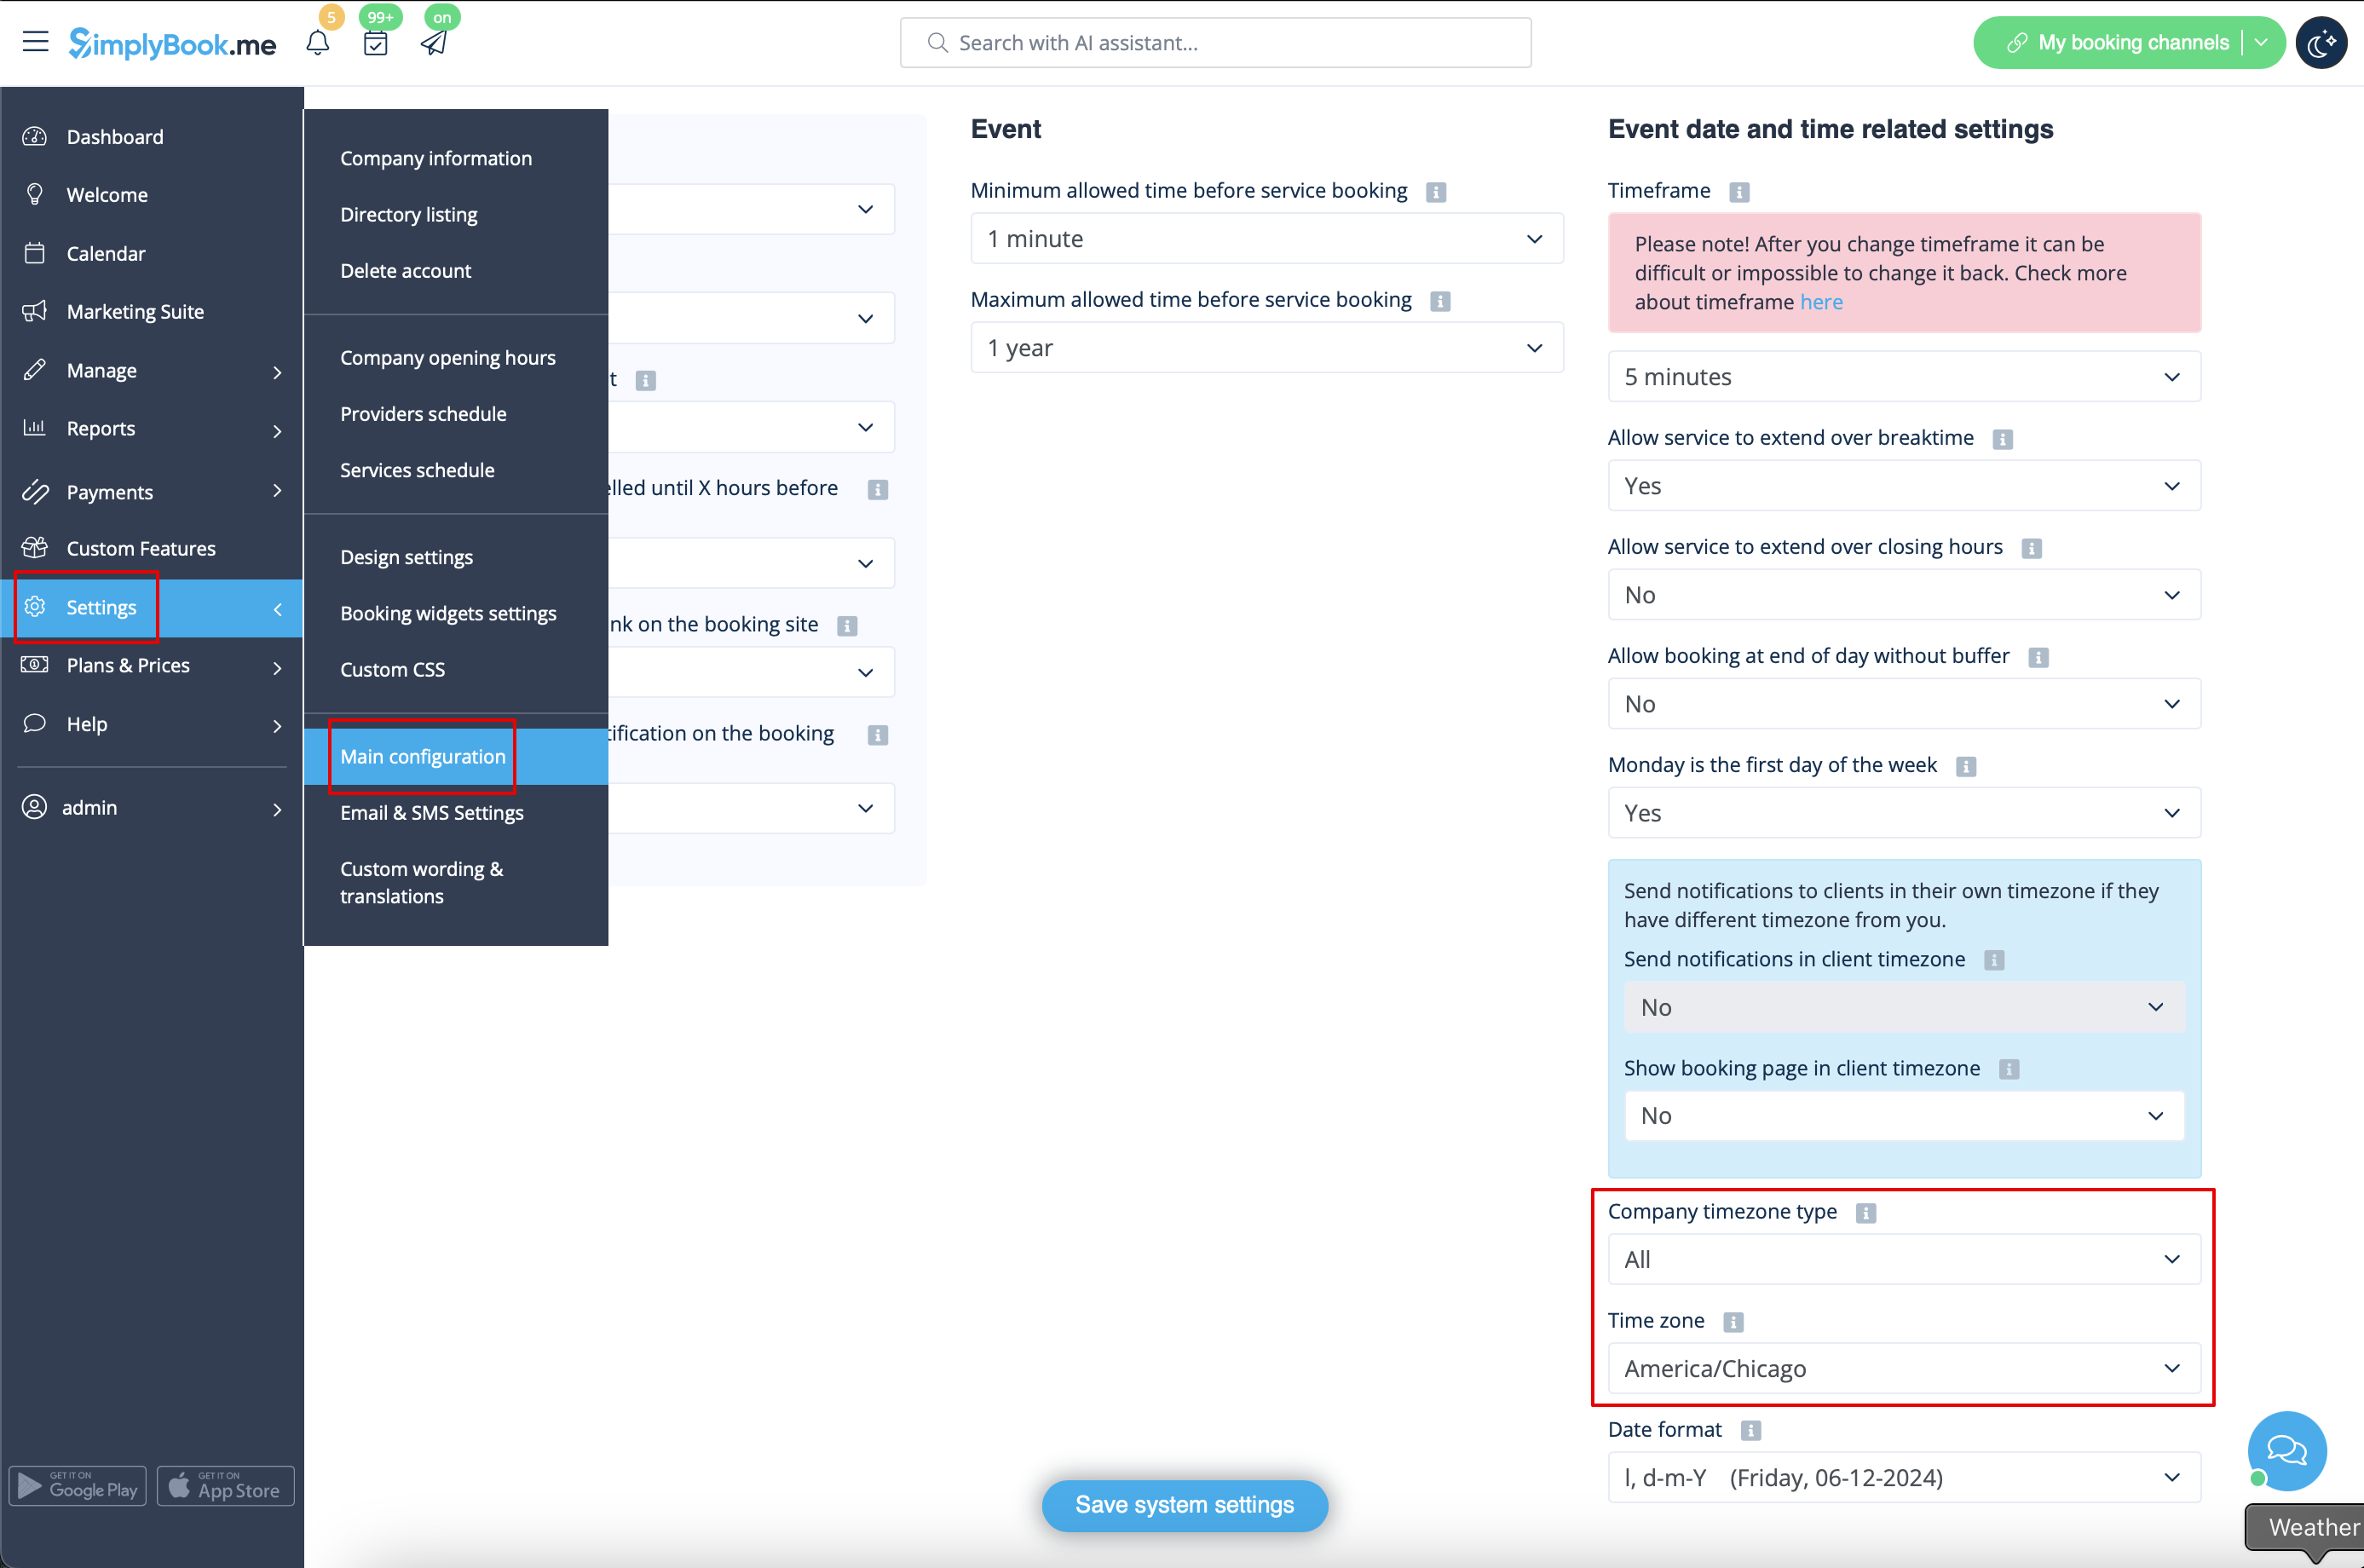
Our Time
Your time on the booking page is the time of the company's time zone. You can change your time zone in Settings -> Main configuration -> Time zone.
About section
In Settings // Design settings // Home page // Company description.
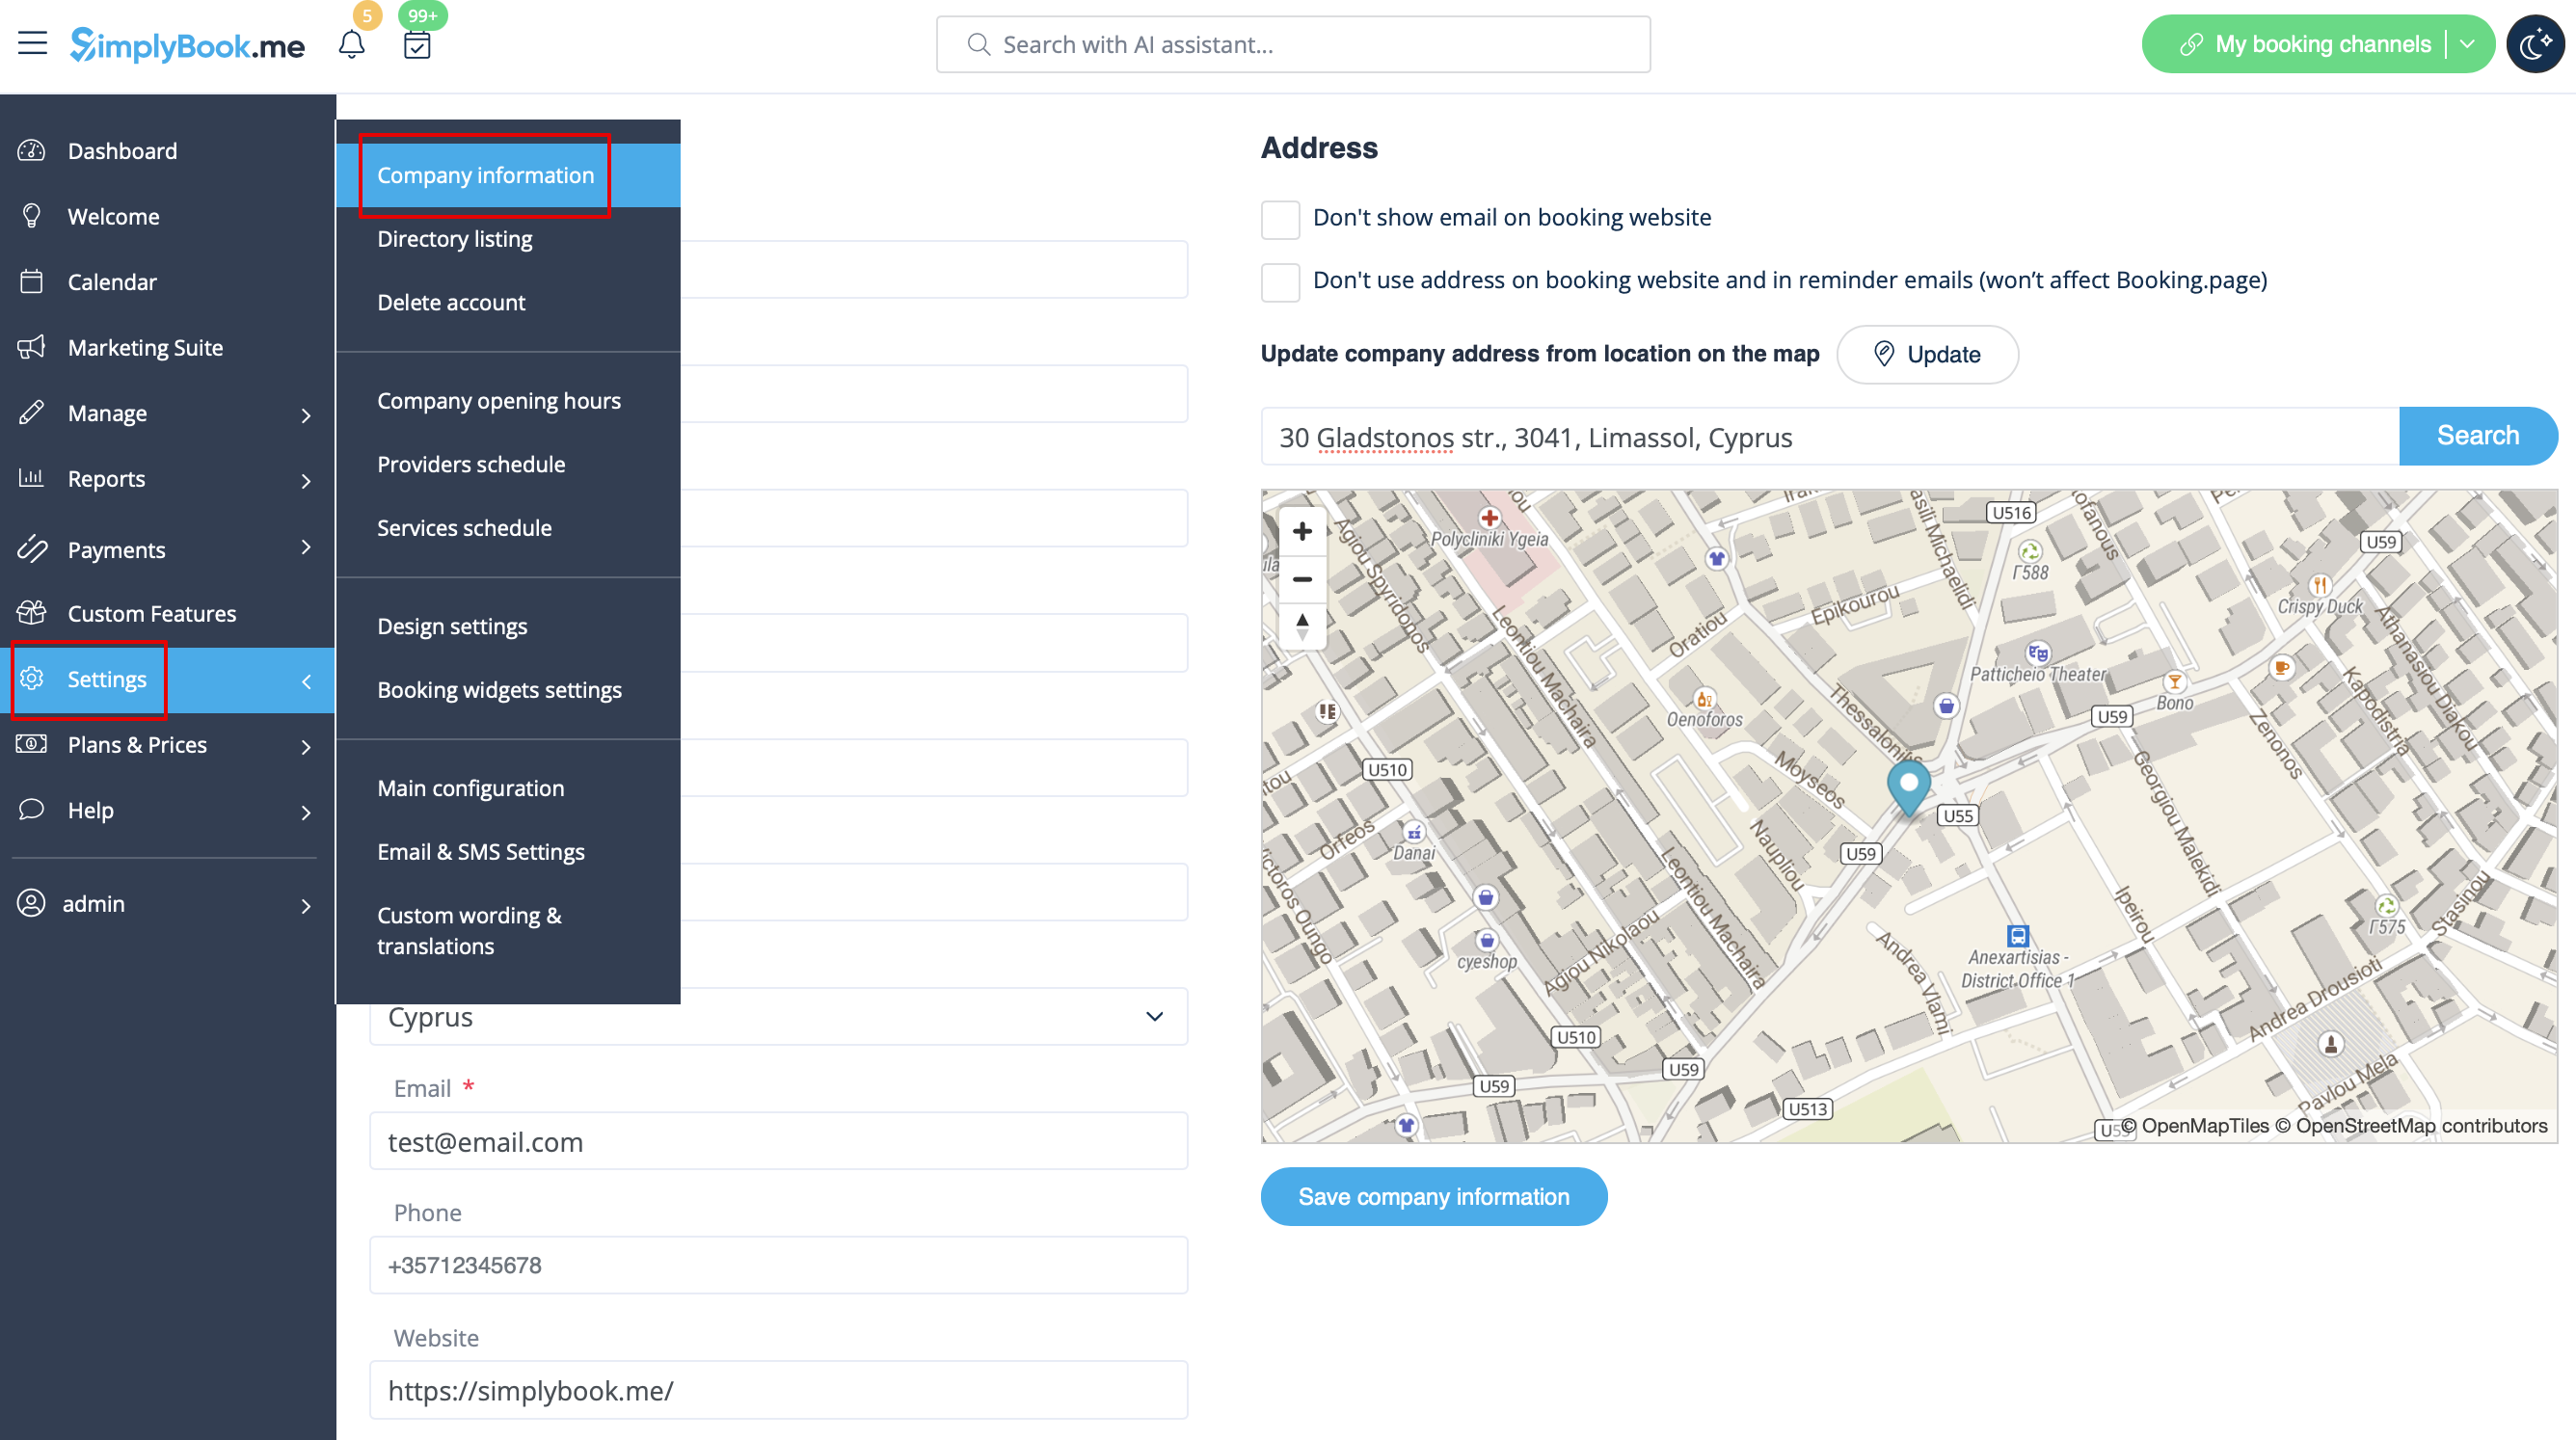
Address
In Settings // Company Information // Address.
Company Contacts
You can edit them in Settings -> Company information
The following details can be added/edited:
- Email address
- Phone number
- Website address
- WhatsApp phone
- Facebook profile url
- X.com (Twitter) page link
- Instagram page url
- LinkedIn page
An example of the client side look.
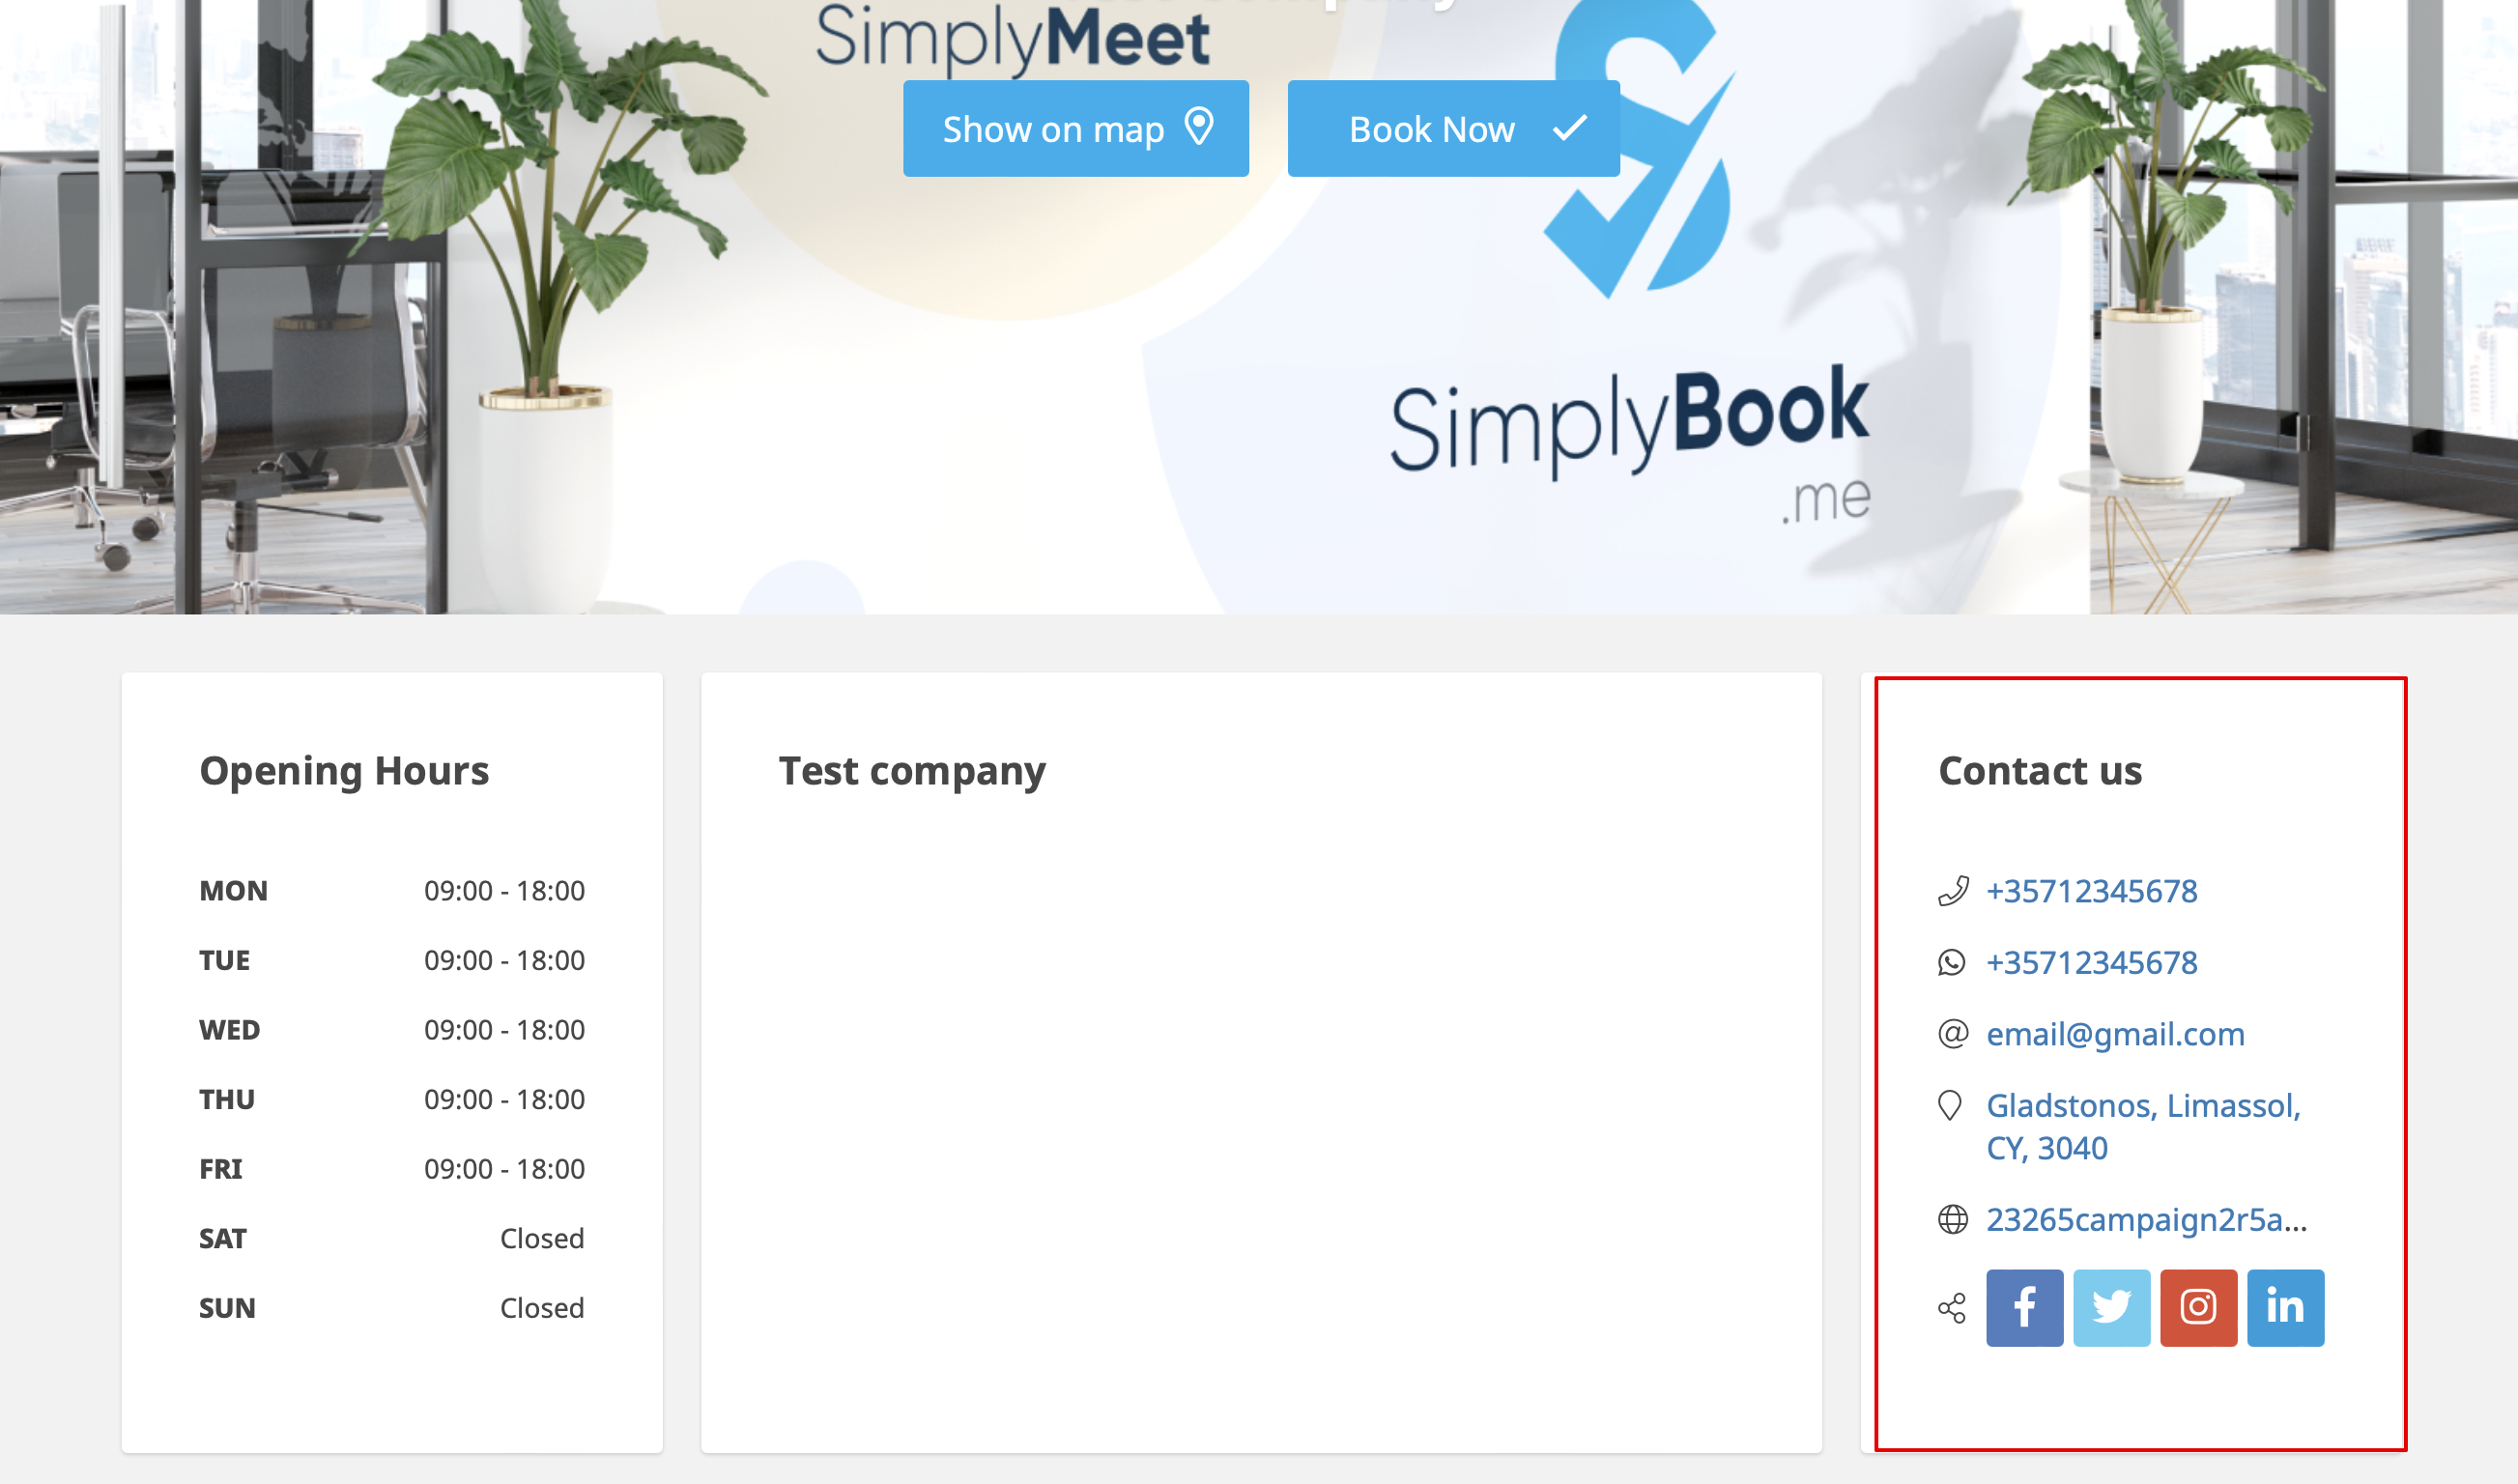
The clients will be able to, for example, click on WhatsApp number and be redirected to the WhatsApp messenger to easily contact you there.
Working hours
Working hours block on the booking page:

To change working hours block go to Settings // Company opening hours.
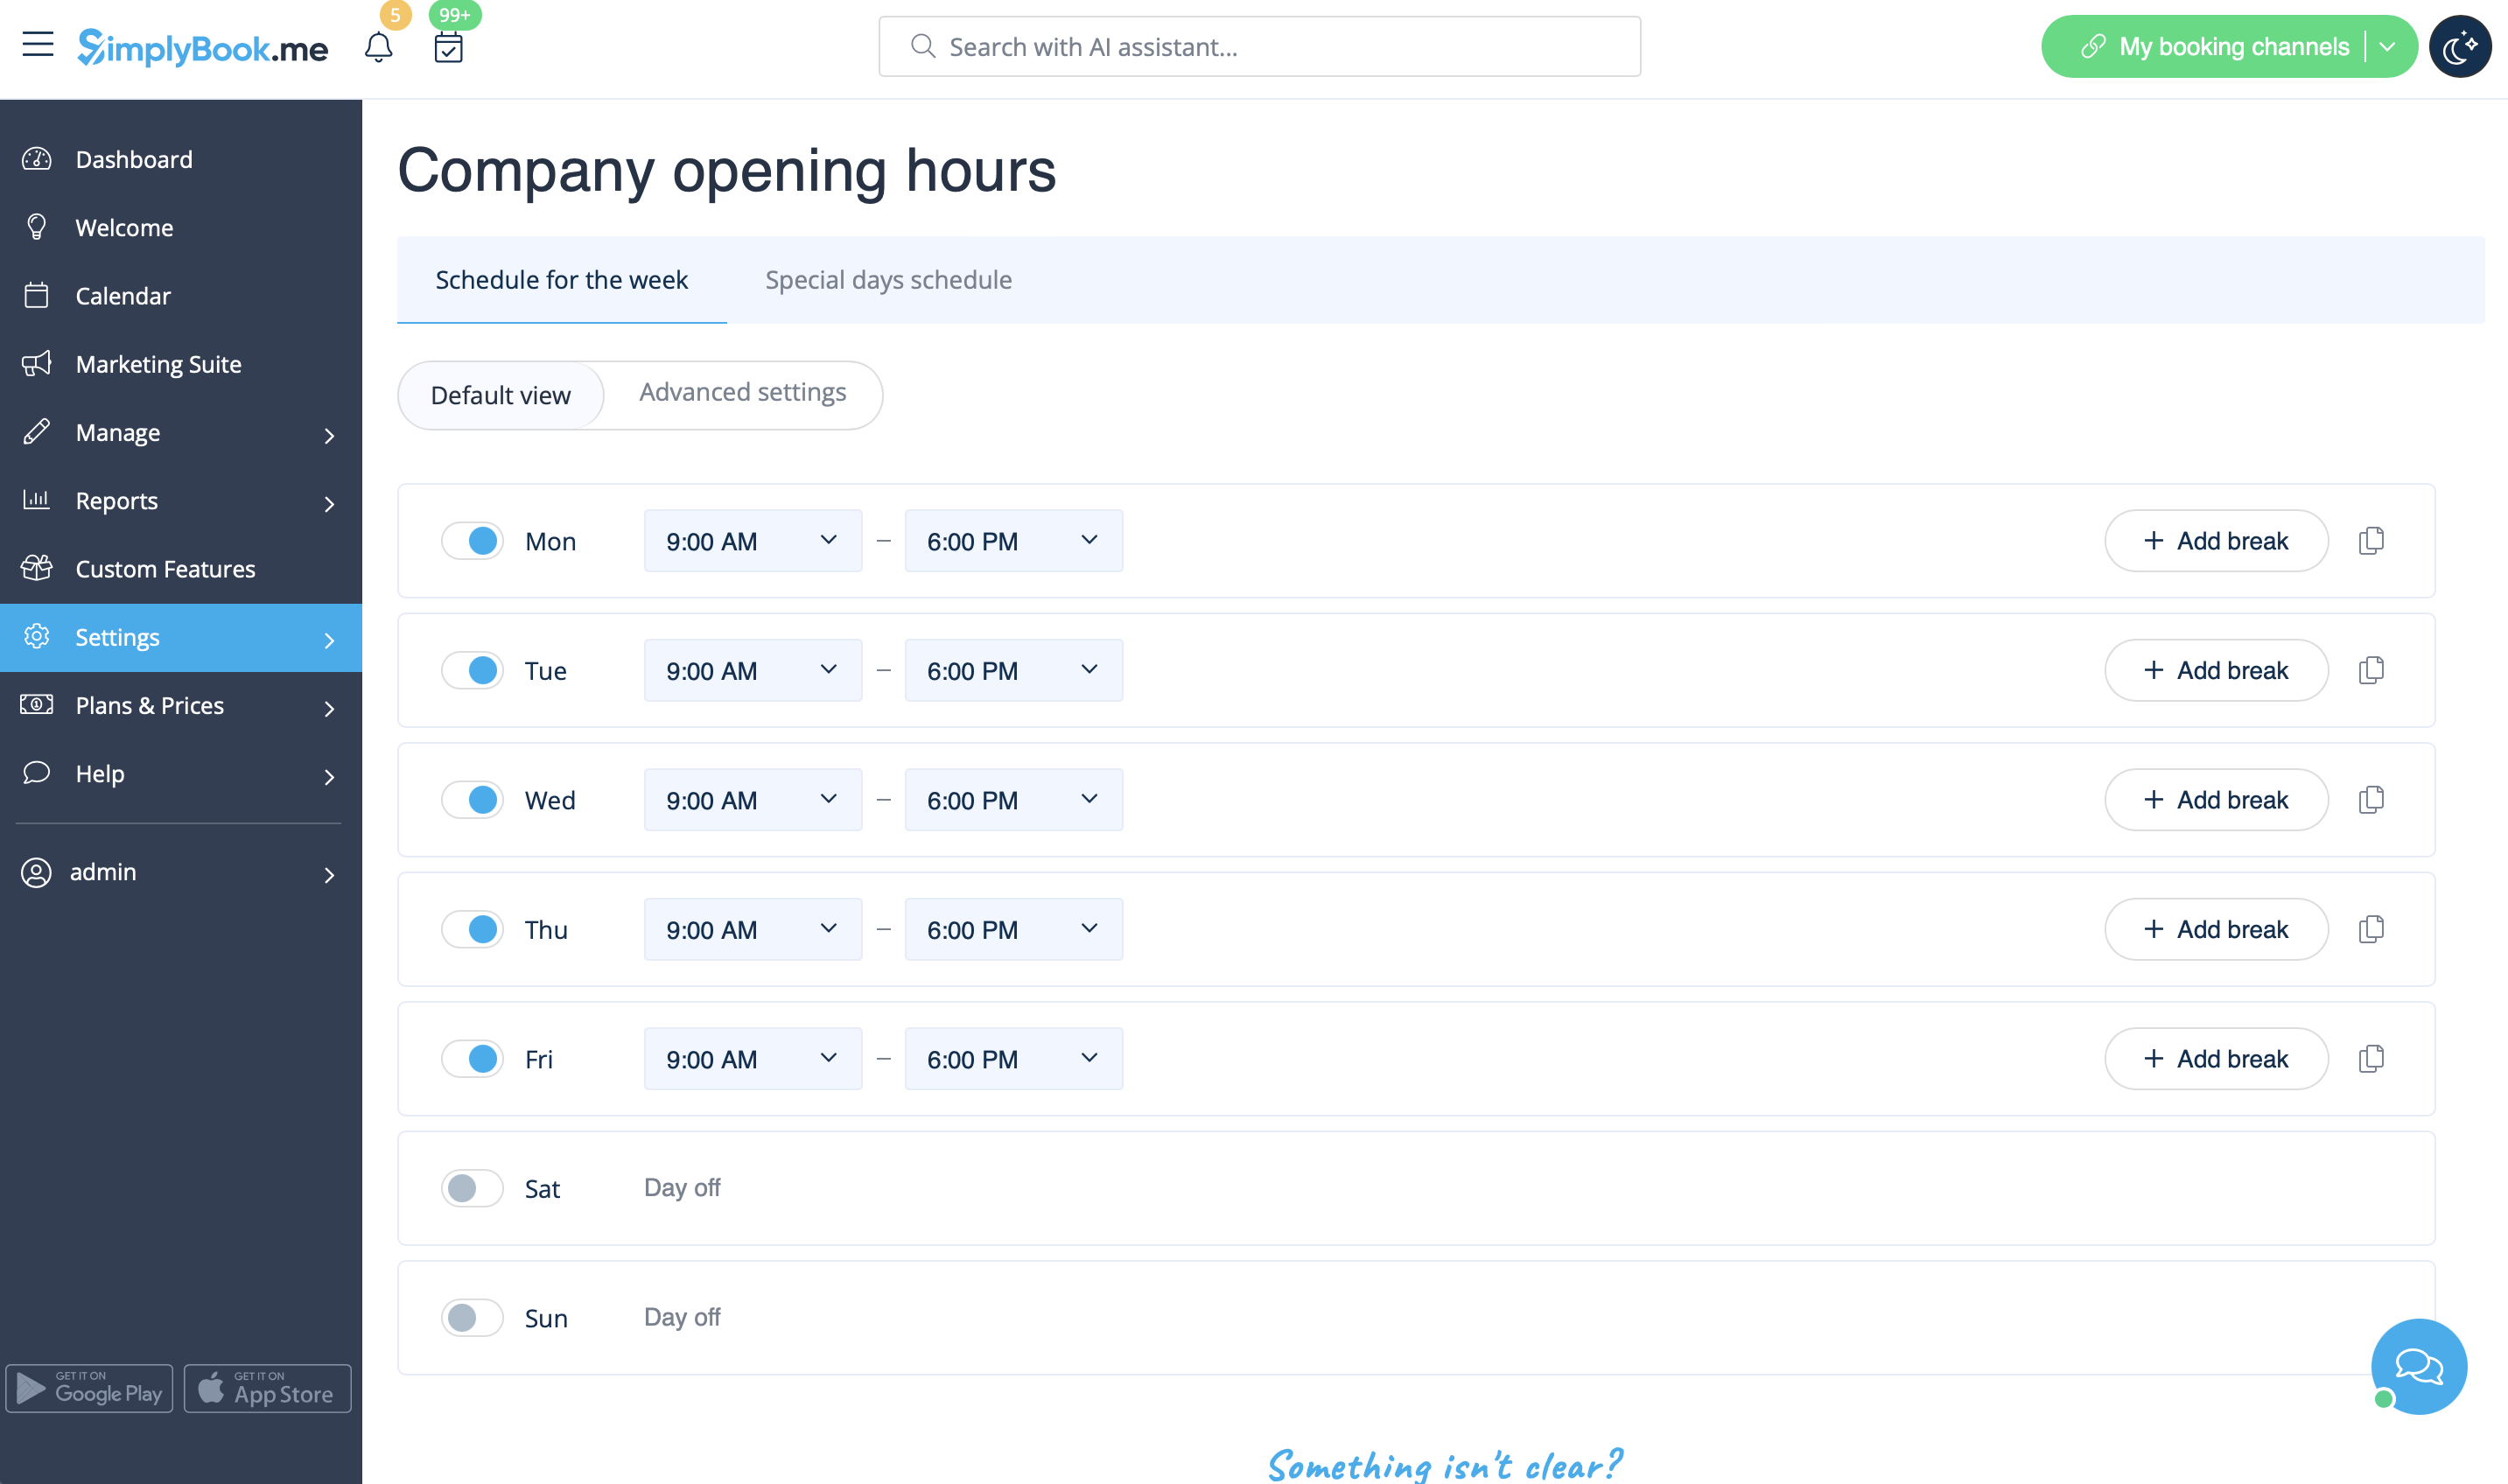
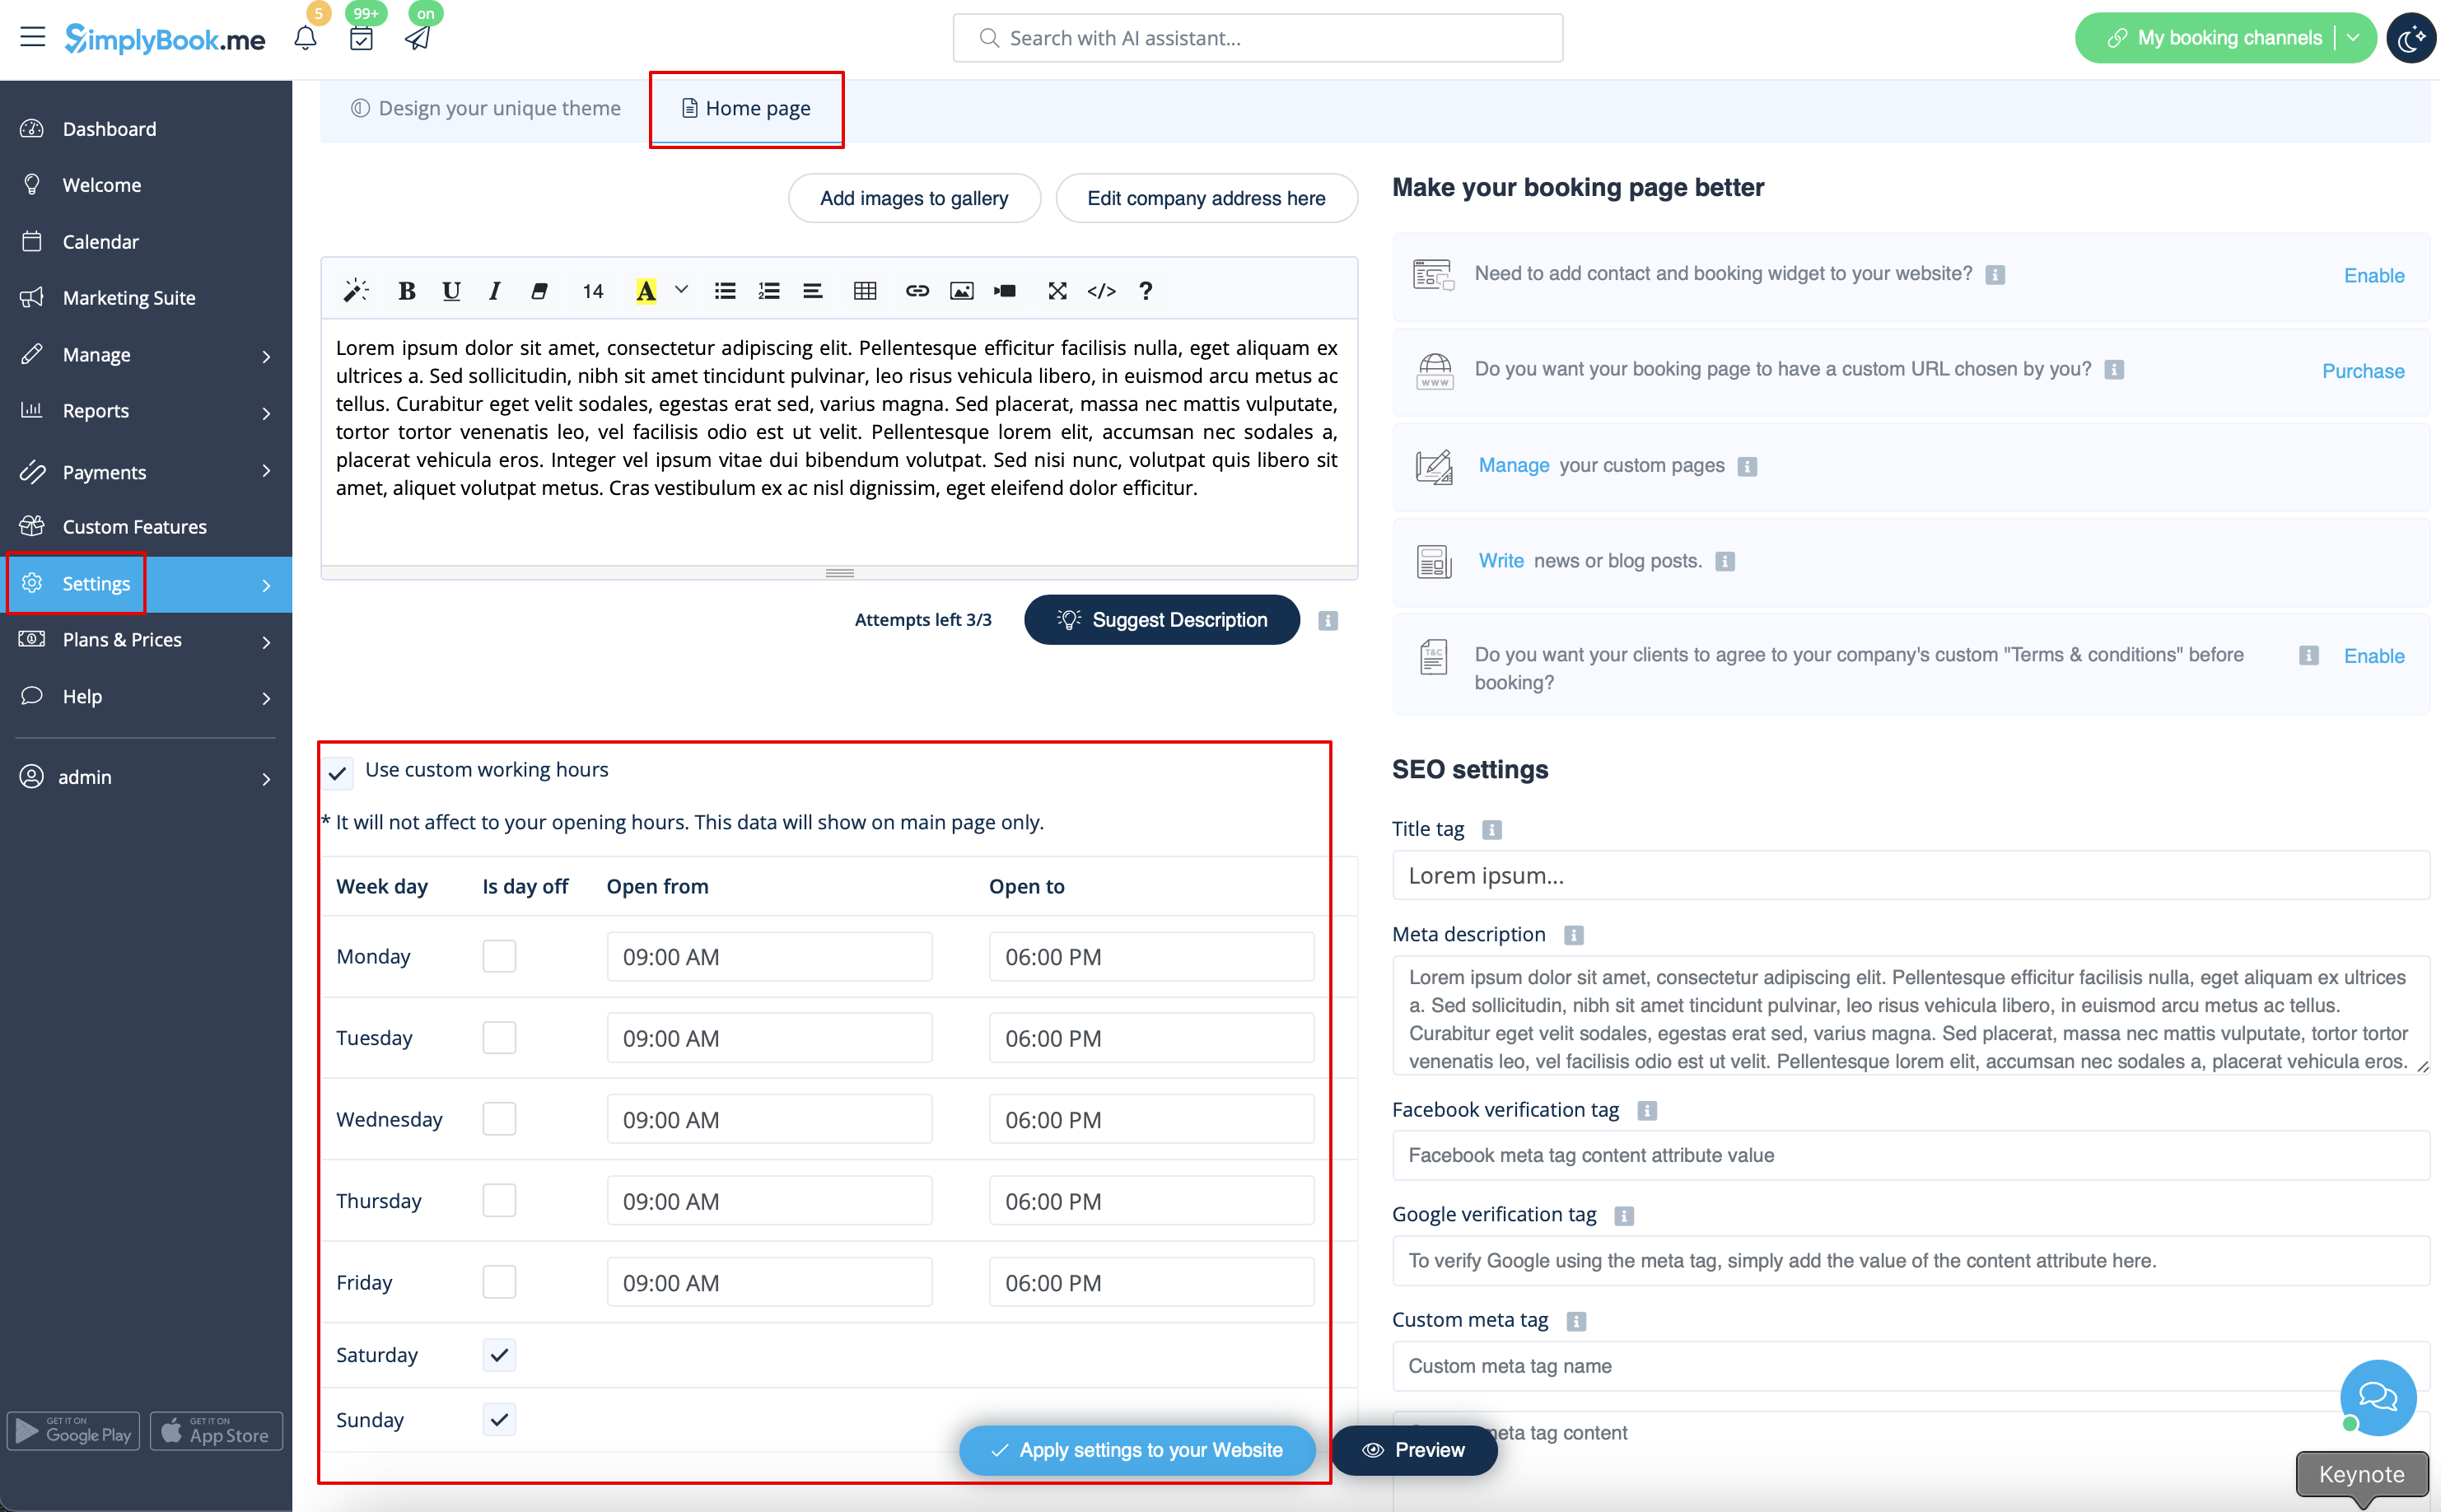
If you wish to display times different from real working hours there you can use "Use custom working hours" in Settings//Design settings//Home page.
Calendar Layout
You can change calendar layout in Settings // Design settings // Calendar Layout settings // Calendar Layout drop-down
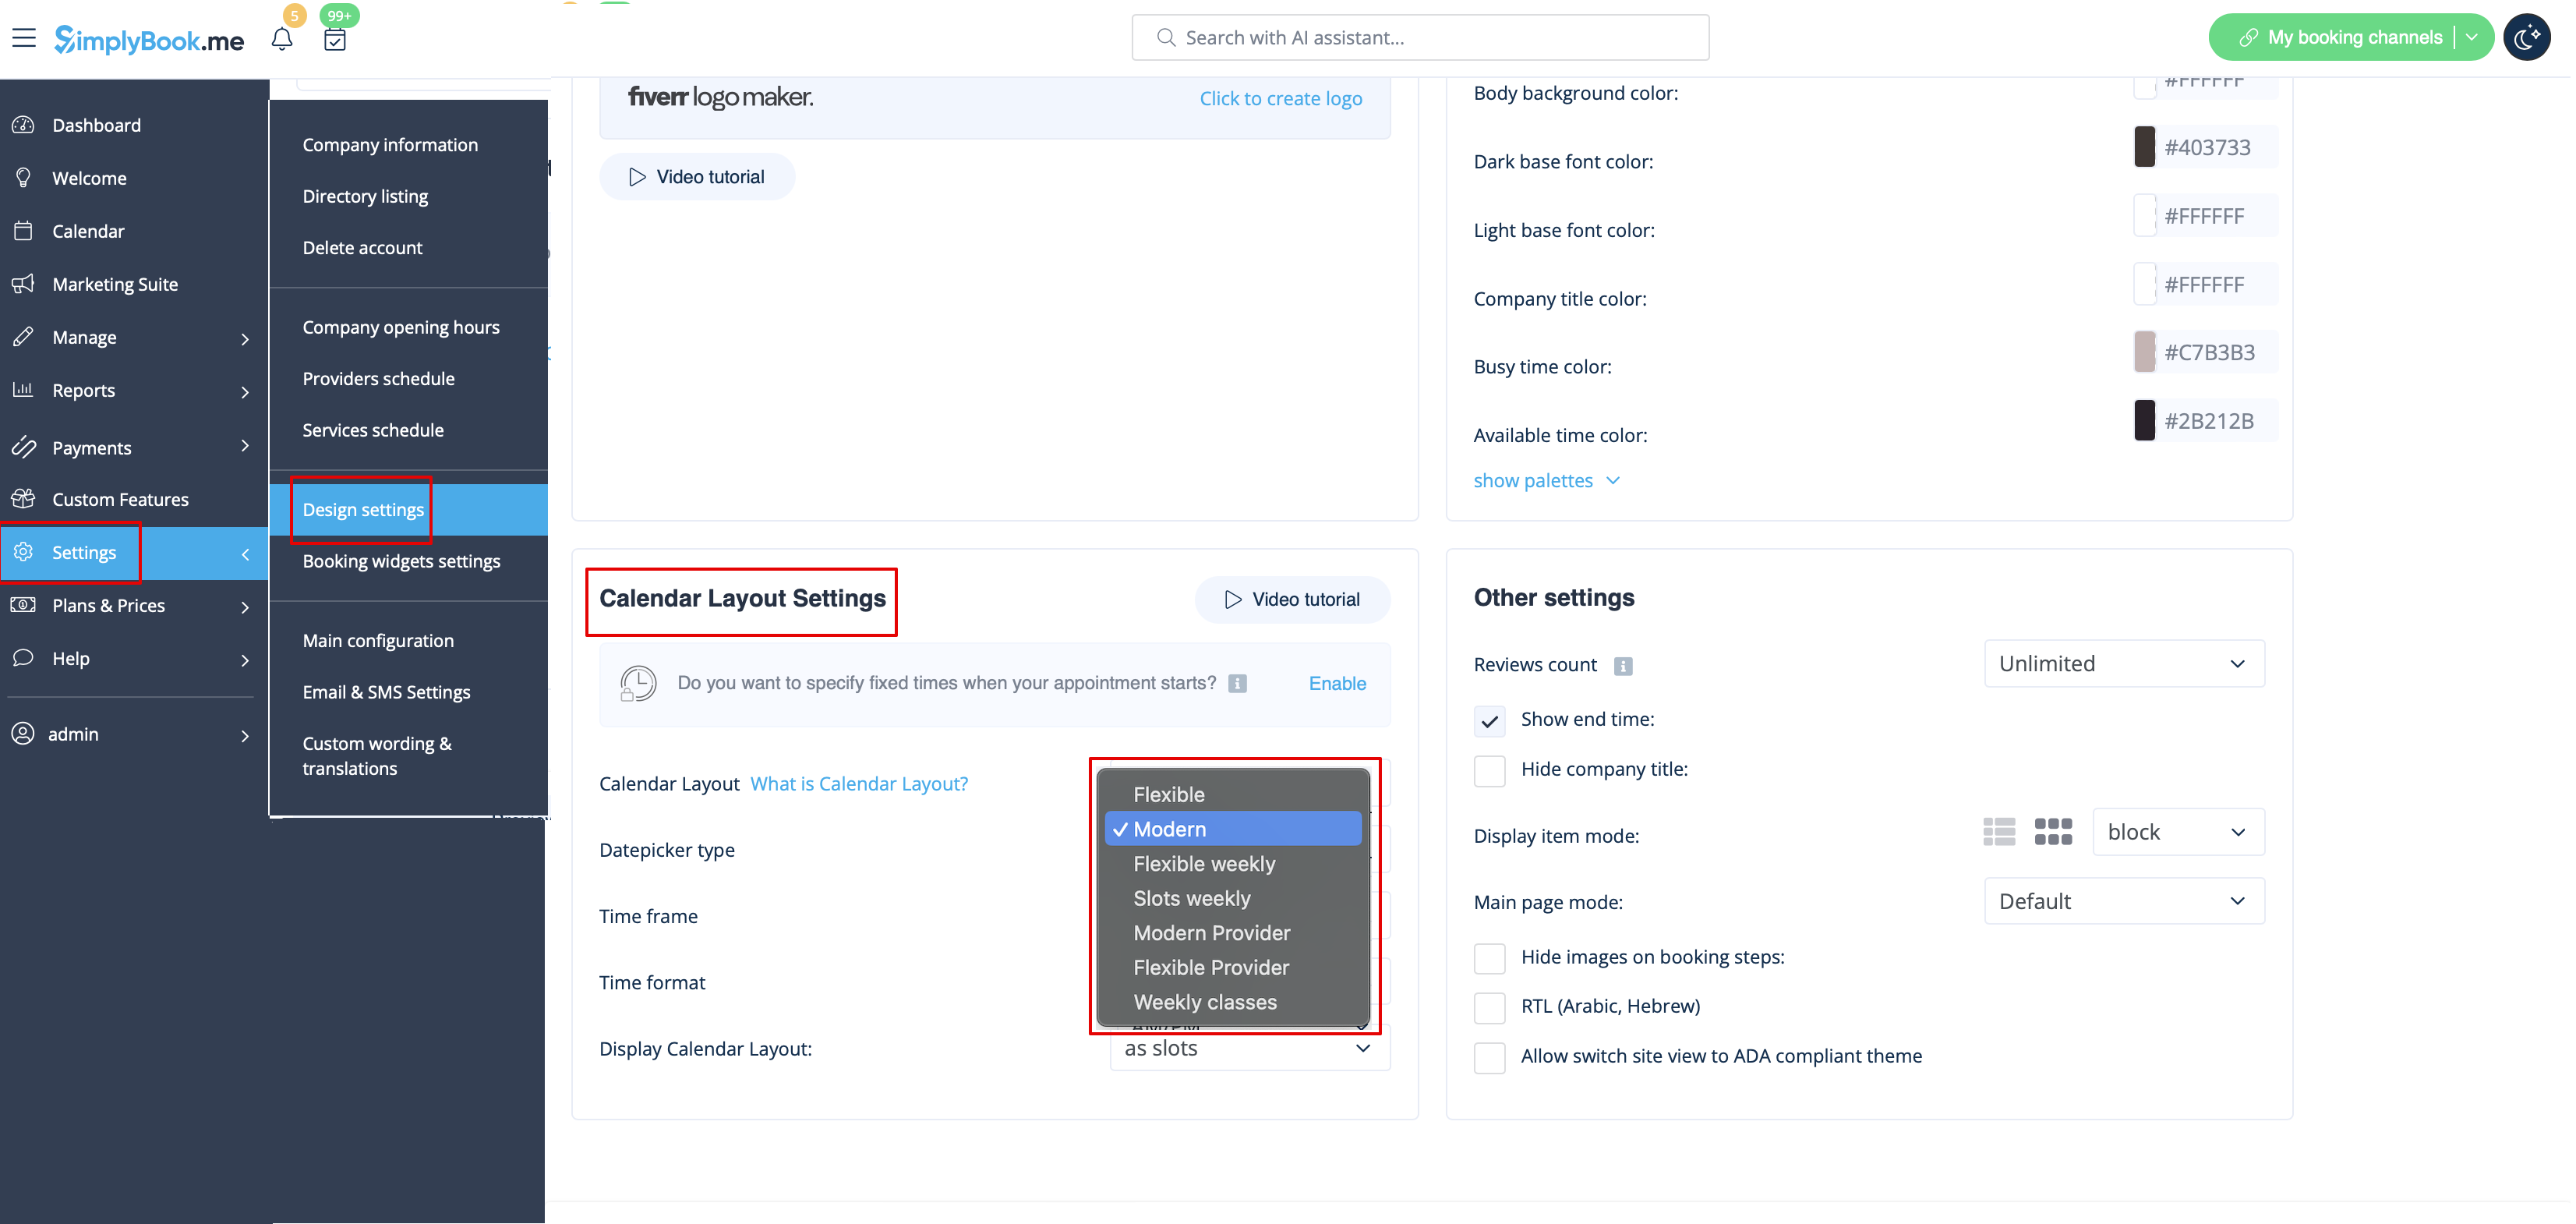
There are 9 types of calendar layout:
- Slots weekly - shows available time in the intervals equal to your service duration for a week. Starts counting from the first available time.
- Modern - shows available time in the intervals equal to your service duration for a day. Starts counting from the first available time.
- Flexible weekly - shows available time in the intervals equal to your timeframe duration for a week. Starts counting from the first available time.
- Flexible - shows available time in the intervals equal to your timeframe duration for a day. Starts counting from the first available time.
- Modern provider - shows available time for providers for chosen date. Starts counting from the first available time of all providers.
- Flexible provider- shows available times for providers in the intervals equal to your timeframe duration. Starts counting from the first available time on selected date.
- Daily Classes- shows available times for classes in the intervals equal to class duration. Starts counting from the first available time.
- Please note! Multiple Bookings custom feature currently does not work with Classes layout.
- Weekly Classes shows available times for classes in the intervals equal to class duration with weekly options. Starts counting from the first available time for a date. Only available times are displayed, unavailable slots are hidden.
If you have services that have fixed start times, you can try using Appointment at fixed time Custom Feature.
Interval
You can change it in Settings // Main configuration // Timeframe.
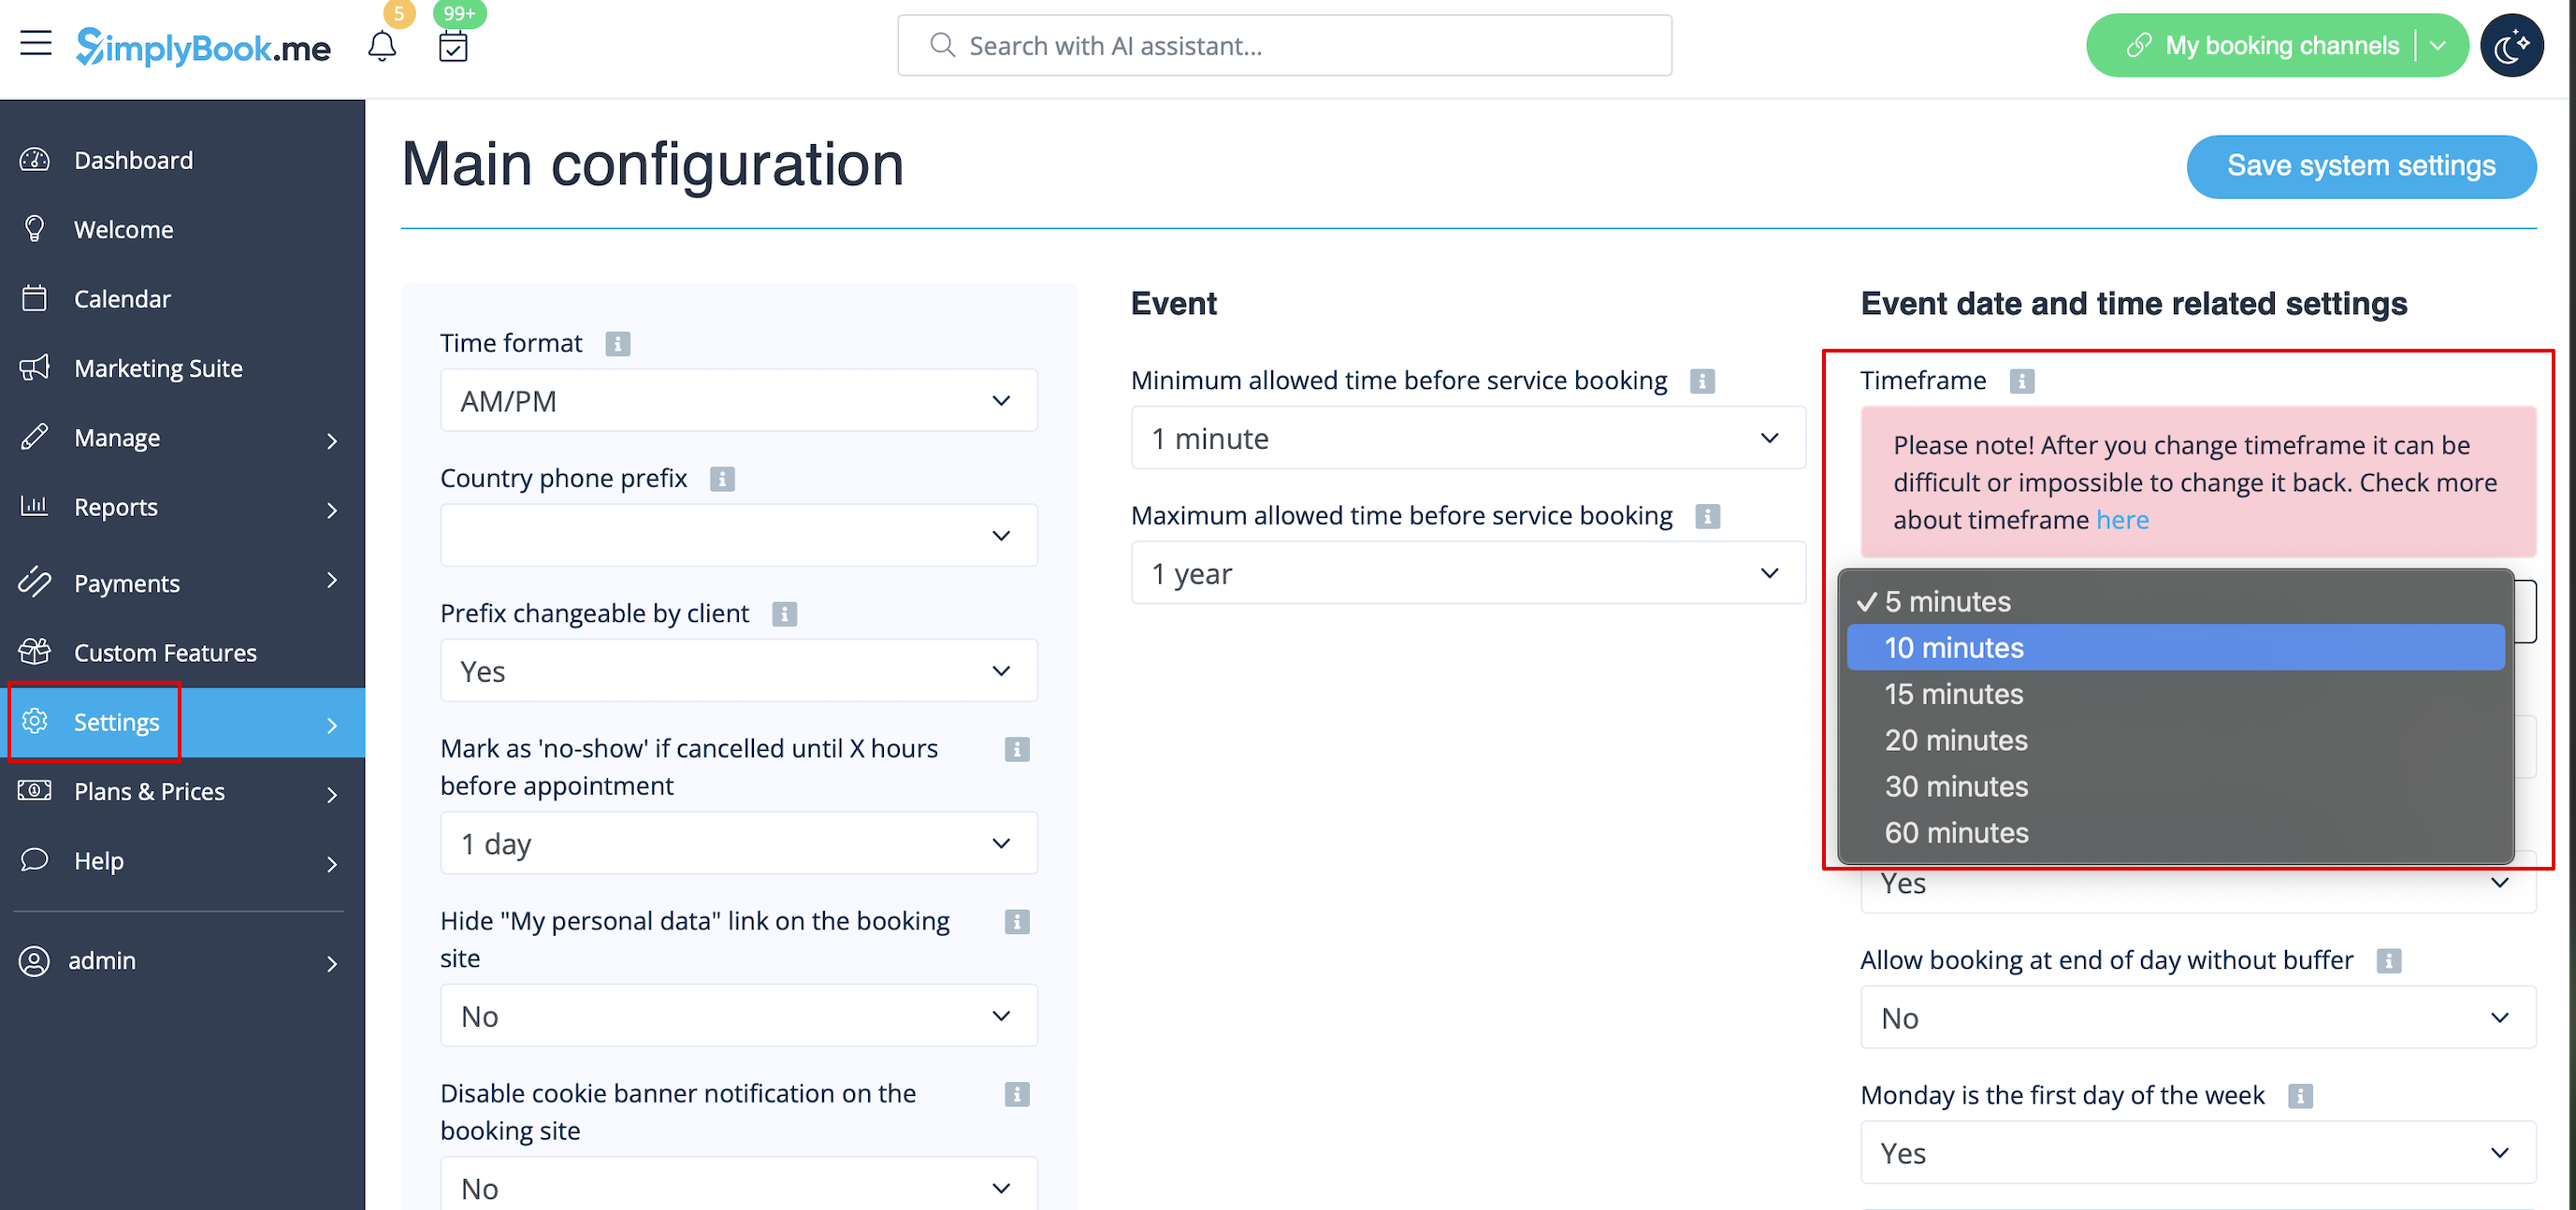
You can also try to change calendar layout to flexible in order to show availability according to your interval. Check types of Calendar Layouts here.