Created page with "I Indstillinger // Virksomhedsoplysninger // Navn. 1200px| center|link=https://help.simplybook.me/images/d/da/Company_information_path_redesigned.png <br/><br/>" |
Created page with "=Firmalogo og baggrund= I Indstillinger // Designindstillinger // Yderligere temaindstillinger. <br/> 1200px | border| center|link=https://help.simplybook.me/images/d/dd/Design_settings_path_redesigned.png <br/><br/> 1200px | border | center|link=https://help.simplybook.me/images/a/a4/Logo_%26_banner_settings_redesigned.png <br/><br/>" |
||
| Line 47: | Line 47: | ||
<br/><br/> | <br/><br/> | ||
=Tekster og sprog= | |||
Hvis du har brug for at justere tekster på din bookingside (f.eks. ændre Employee til Therapist, Coach eller Room), kan du gøre det i Settings // Custom Wording & Translations. | |||
[[File:Custom translations path redesigned.png|1200px| center|link=https://help.simplybook.me/images/9/91/Custom_translations_path_redesigned.png ]] | [[File:Custom translations path redesigned.png|1200px| center|link=https://help.simplybook.me/images/9/91/Custom_translations_path_redesigned.png ]] | ||
<br/><br/> | <br/><br/> | ||
Der kan du også ændre sproget på din bookingside ved at klikke på det tilsvarende flag og trykke på "Gem tilpassede oversættelser". Hvis dit sprog ikke er på listen, kan du selv oversætte systemet. | |||
[[File:Custom transaltions languages redesigned.png|1200px| center|link=https://help.simplybook.me/images/4/49/Custom_transaltions_languages_redesigned.png ]] | [[File:Custom transaltions languages redesigned.png|1200px| center|link=https://help.simplybook.me/images/4/49/Custom_transaltions_languages_redesigned.png ]] | ||
<br/><br/> | <br/><br/> | ||
=SEO Settings= | =SEO Settings= | ||
Som standard er <span style="background-color:#d4f8e5; padding:5px; border-radius:5px;">Title-tagget</span> repræsenteret af dit firmanavn, som du har indsat i <span style="background-color:#d4f8e5; padding:5px; border-radius:5px;">Settings</span> -> <span style="background-color:#d4f8e5; padding:5px; border-radius:5px;">Company information</span> -> <span style="background-color:#d4f8e5; padding:5px; border-radius:5px;">Name</span> og automatisk tilføjelse af <span style="background-color:#d4f8e5; padding:5px; border-radius:5px;">Scheduling and Booking Website-tekst</span>.<br> | |||
<span style="background-color:#d4f8e5; padding:5px; border-radius:5px;"> | <span style="background-color:#d4f8e5; padding:5px; border-radius:5px;">Metabeskrivelsen</span> er taget fra den tekst, du har tilføjet i <span style="background-color:#d4f8e5; padding:5px; border-radius:5px;">Indstillinger</span> -> <span style="background-color:#d4f8e5; padding:5px; border-radius:5px;">Designindstillinger</span> -> Hjemmeside -> Beskrivelsestekst til <span style="background-color:#d4f8e5; padding:5px; border-radius:5px;">Om os-bookinghjemmesideblokken</span>. | ||
<br><br> | <br><br> | ||
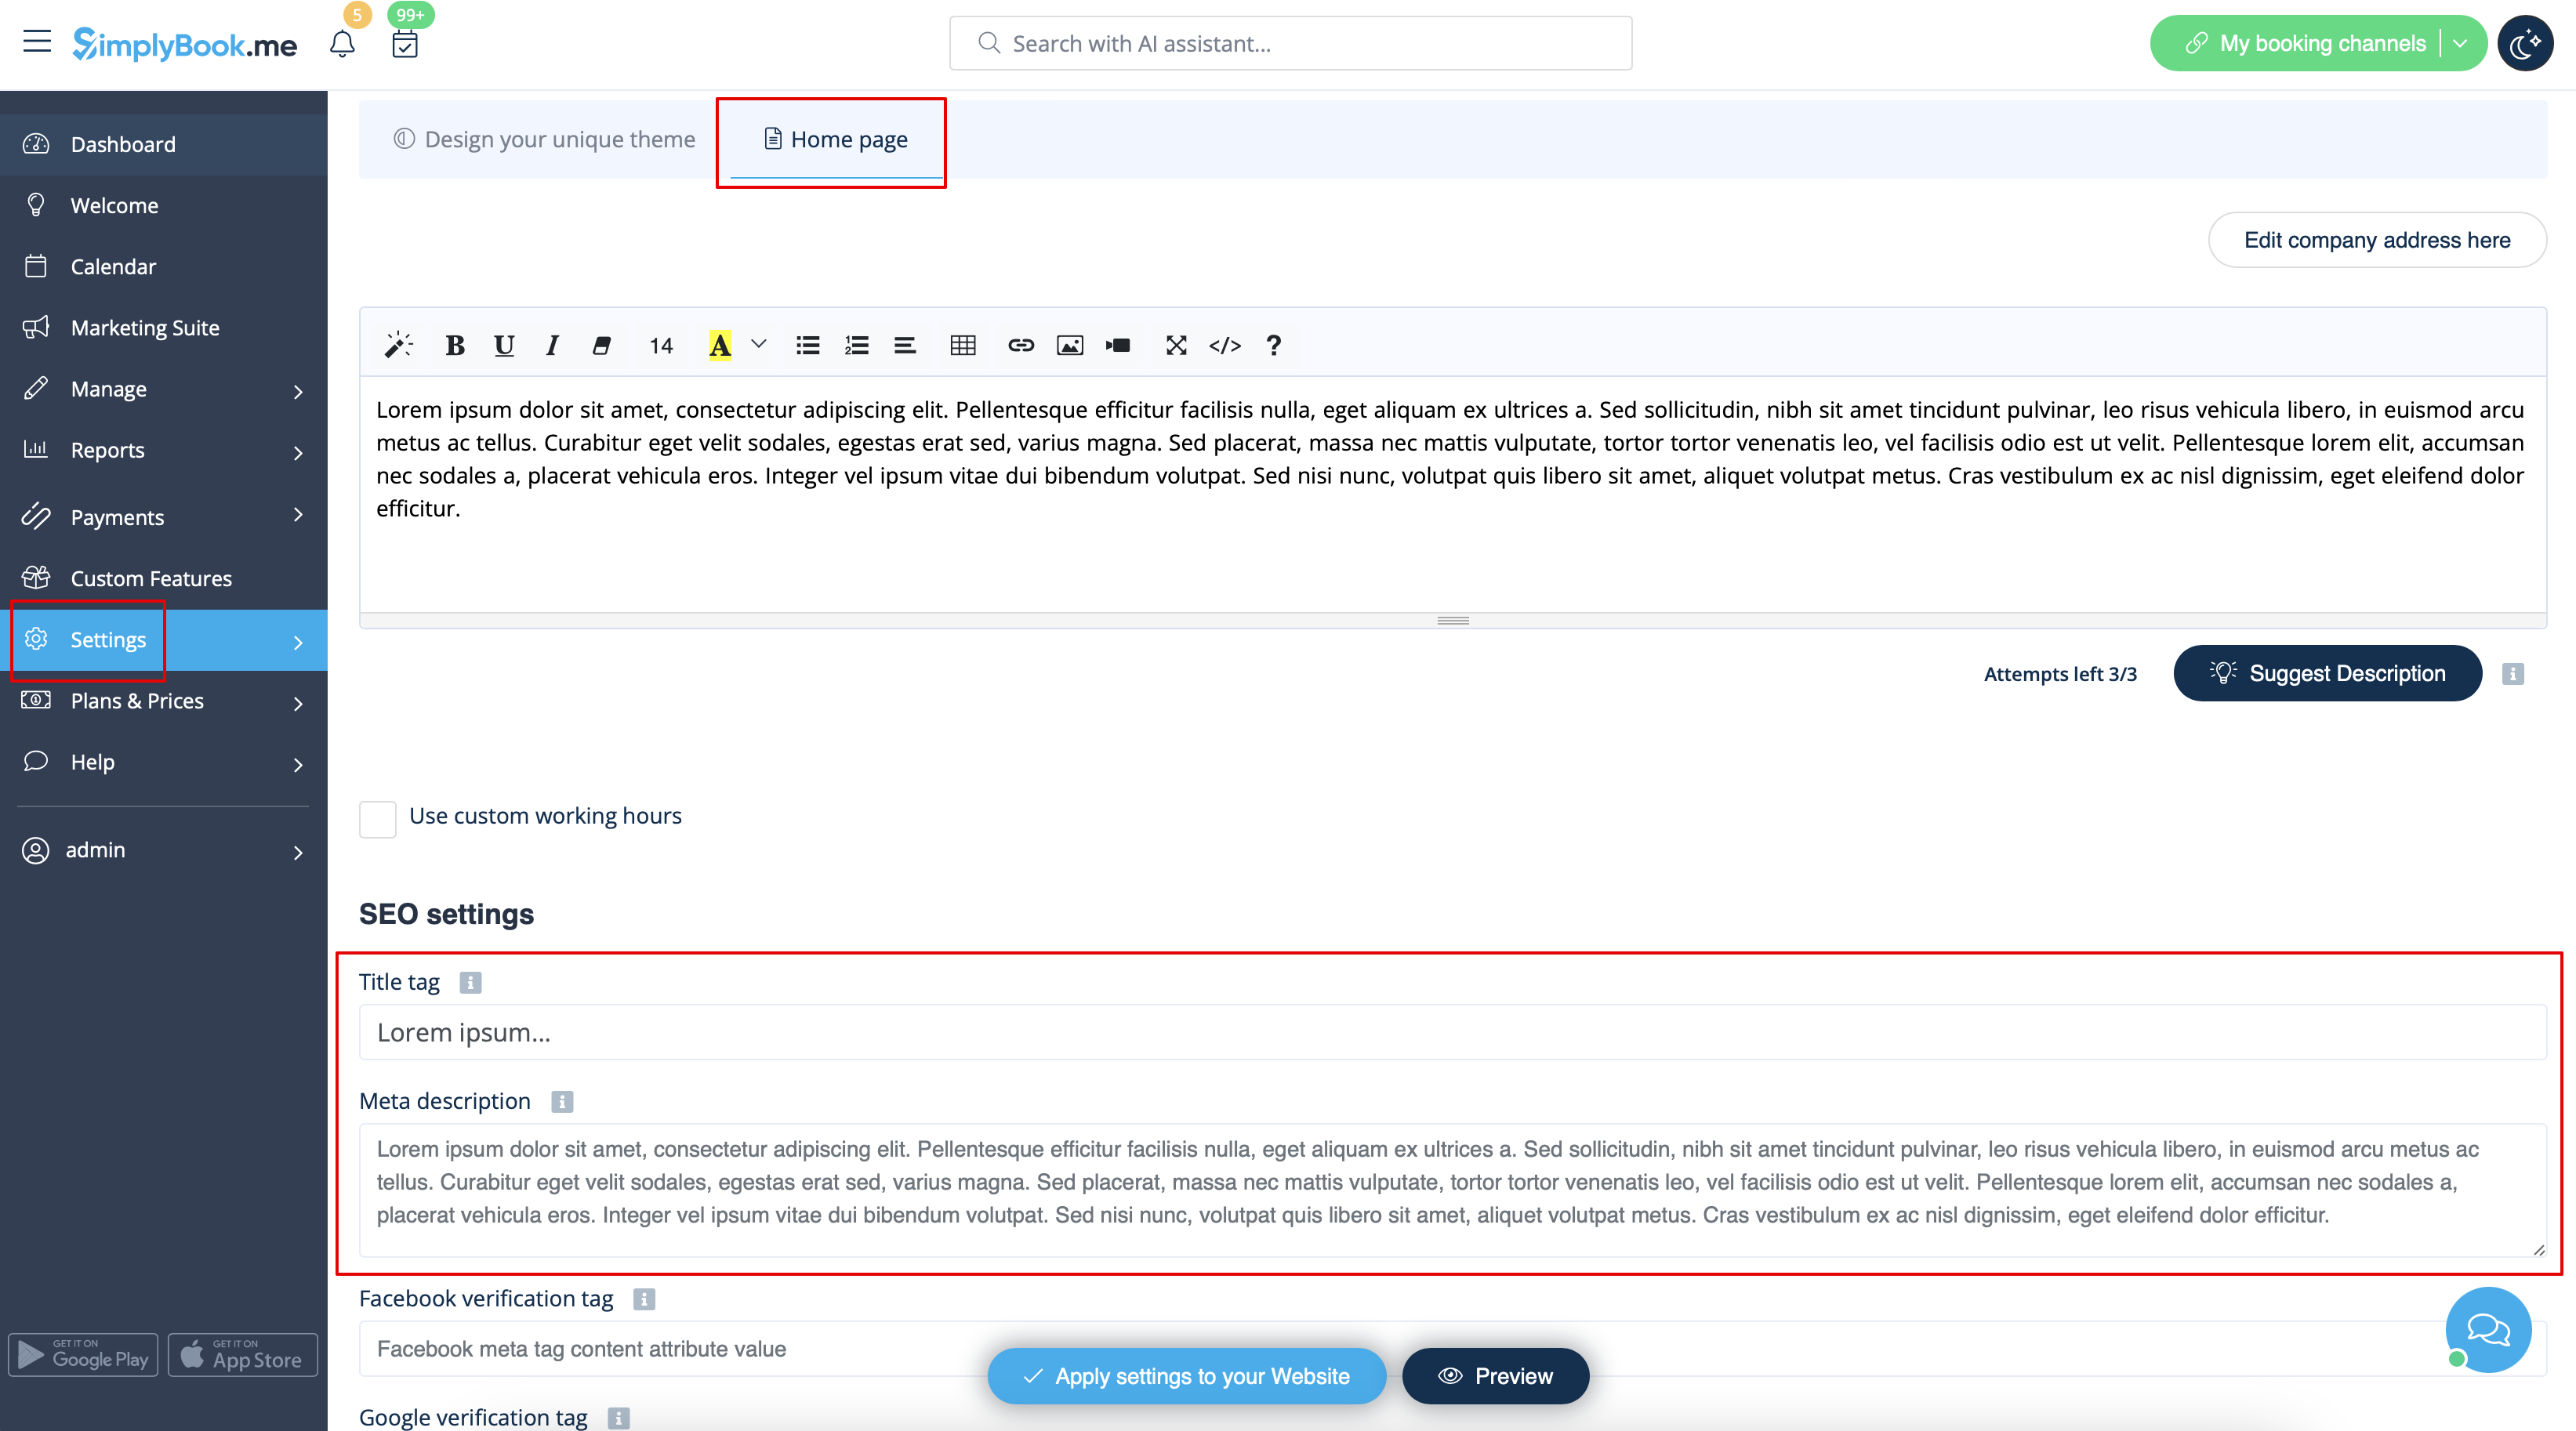
Hvis du har brug for det, kan du indstille disse to muligheder til at indeholde forskellige data og dermed påvirke din bookinghjemmesides SEO.<br> | |||
For at indstille dit eget <span style="background-color:#d4f8e5; padding:5px; border-radius:5px;">titeltag</span> og <span style="background-color:#d4f8e5; padding:5px; border-radius:5px;">metabeskrivelse</span> skal du navigere til <span style="background-color:#d4f8e5; padding:5px; border-radius:5px;">Indstillinger</span> -> <span style="background-color:#d4f8e5; padding:5px; border-radius:5px;">Designindstillinger</span> -> <span style="background-color:#d4f8e5; padding:5px; border-radius:5px;">Hjemmeside</span> og tilføje de ønskede tekster til de tilsvarende felter der.<br> | |||
[[File:Seo settings path redesigned.png|1200px|border|center|link=https://help.simplybook.me/images/f/fd/Seo_settings_path_redesigned.png]] | [[File:Seo settings path redesigned.png|1200px|border|center|link=https://help.simplybook.me/images/f/fd/Seo_settings_path_redesigned.png]] | ||
<br><br> | <br><br> | ||
'''<span style="background-color:#ffe9e9; padding:5px; border-radius:5px;"> | '''<span style="background-color:#ffe9e9; padding:5px; border-radius:5px;">Bemærk venligst!'''<span style="background-color:#ffe9e9; padding:5px; border-radius:5px;">Vi anbefaler, at du ikke bruger mere end 60 symboler til Title tag.</span></span><br> | ||
<span style="background-color:#ffe9e9; padding:5px; border-radius:5px;">Meta description | <span style="background-color:#ffe9e9; padding:5px; border-radius:5px;">Meta description er begrænset til 400 tegn, og hvis du forsøger at tilføje et længere abstrakt, vil det automatisk blive skåret fra, når du gemmer indstillingerne.</span> | ||
<br><br> | <br><br> | ||
<div lang="en" dir="ltr" class="mw-content-ltr"> | <div lang="en" dir="ltr" class="mw-content-ltr"> | ||
Revision as of 06:38, 15 May 2025
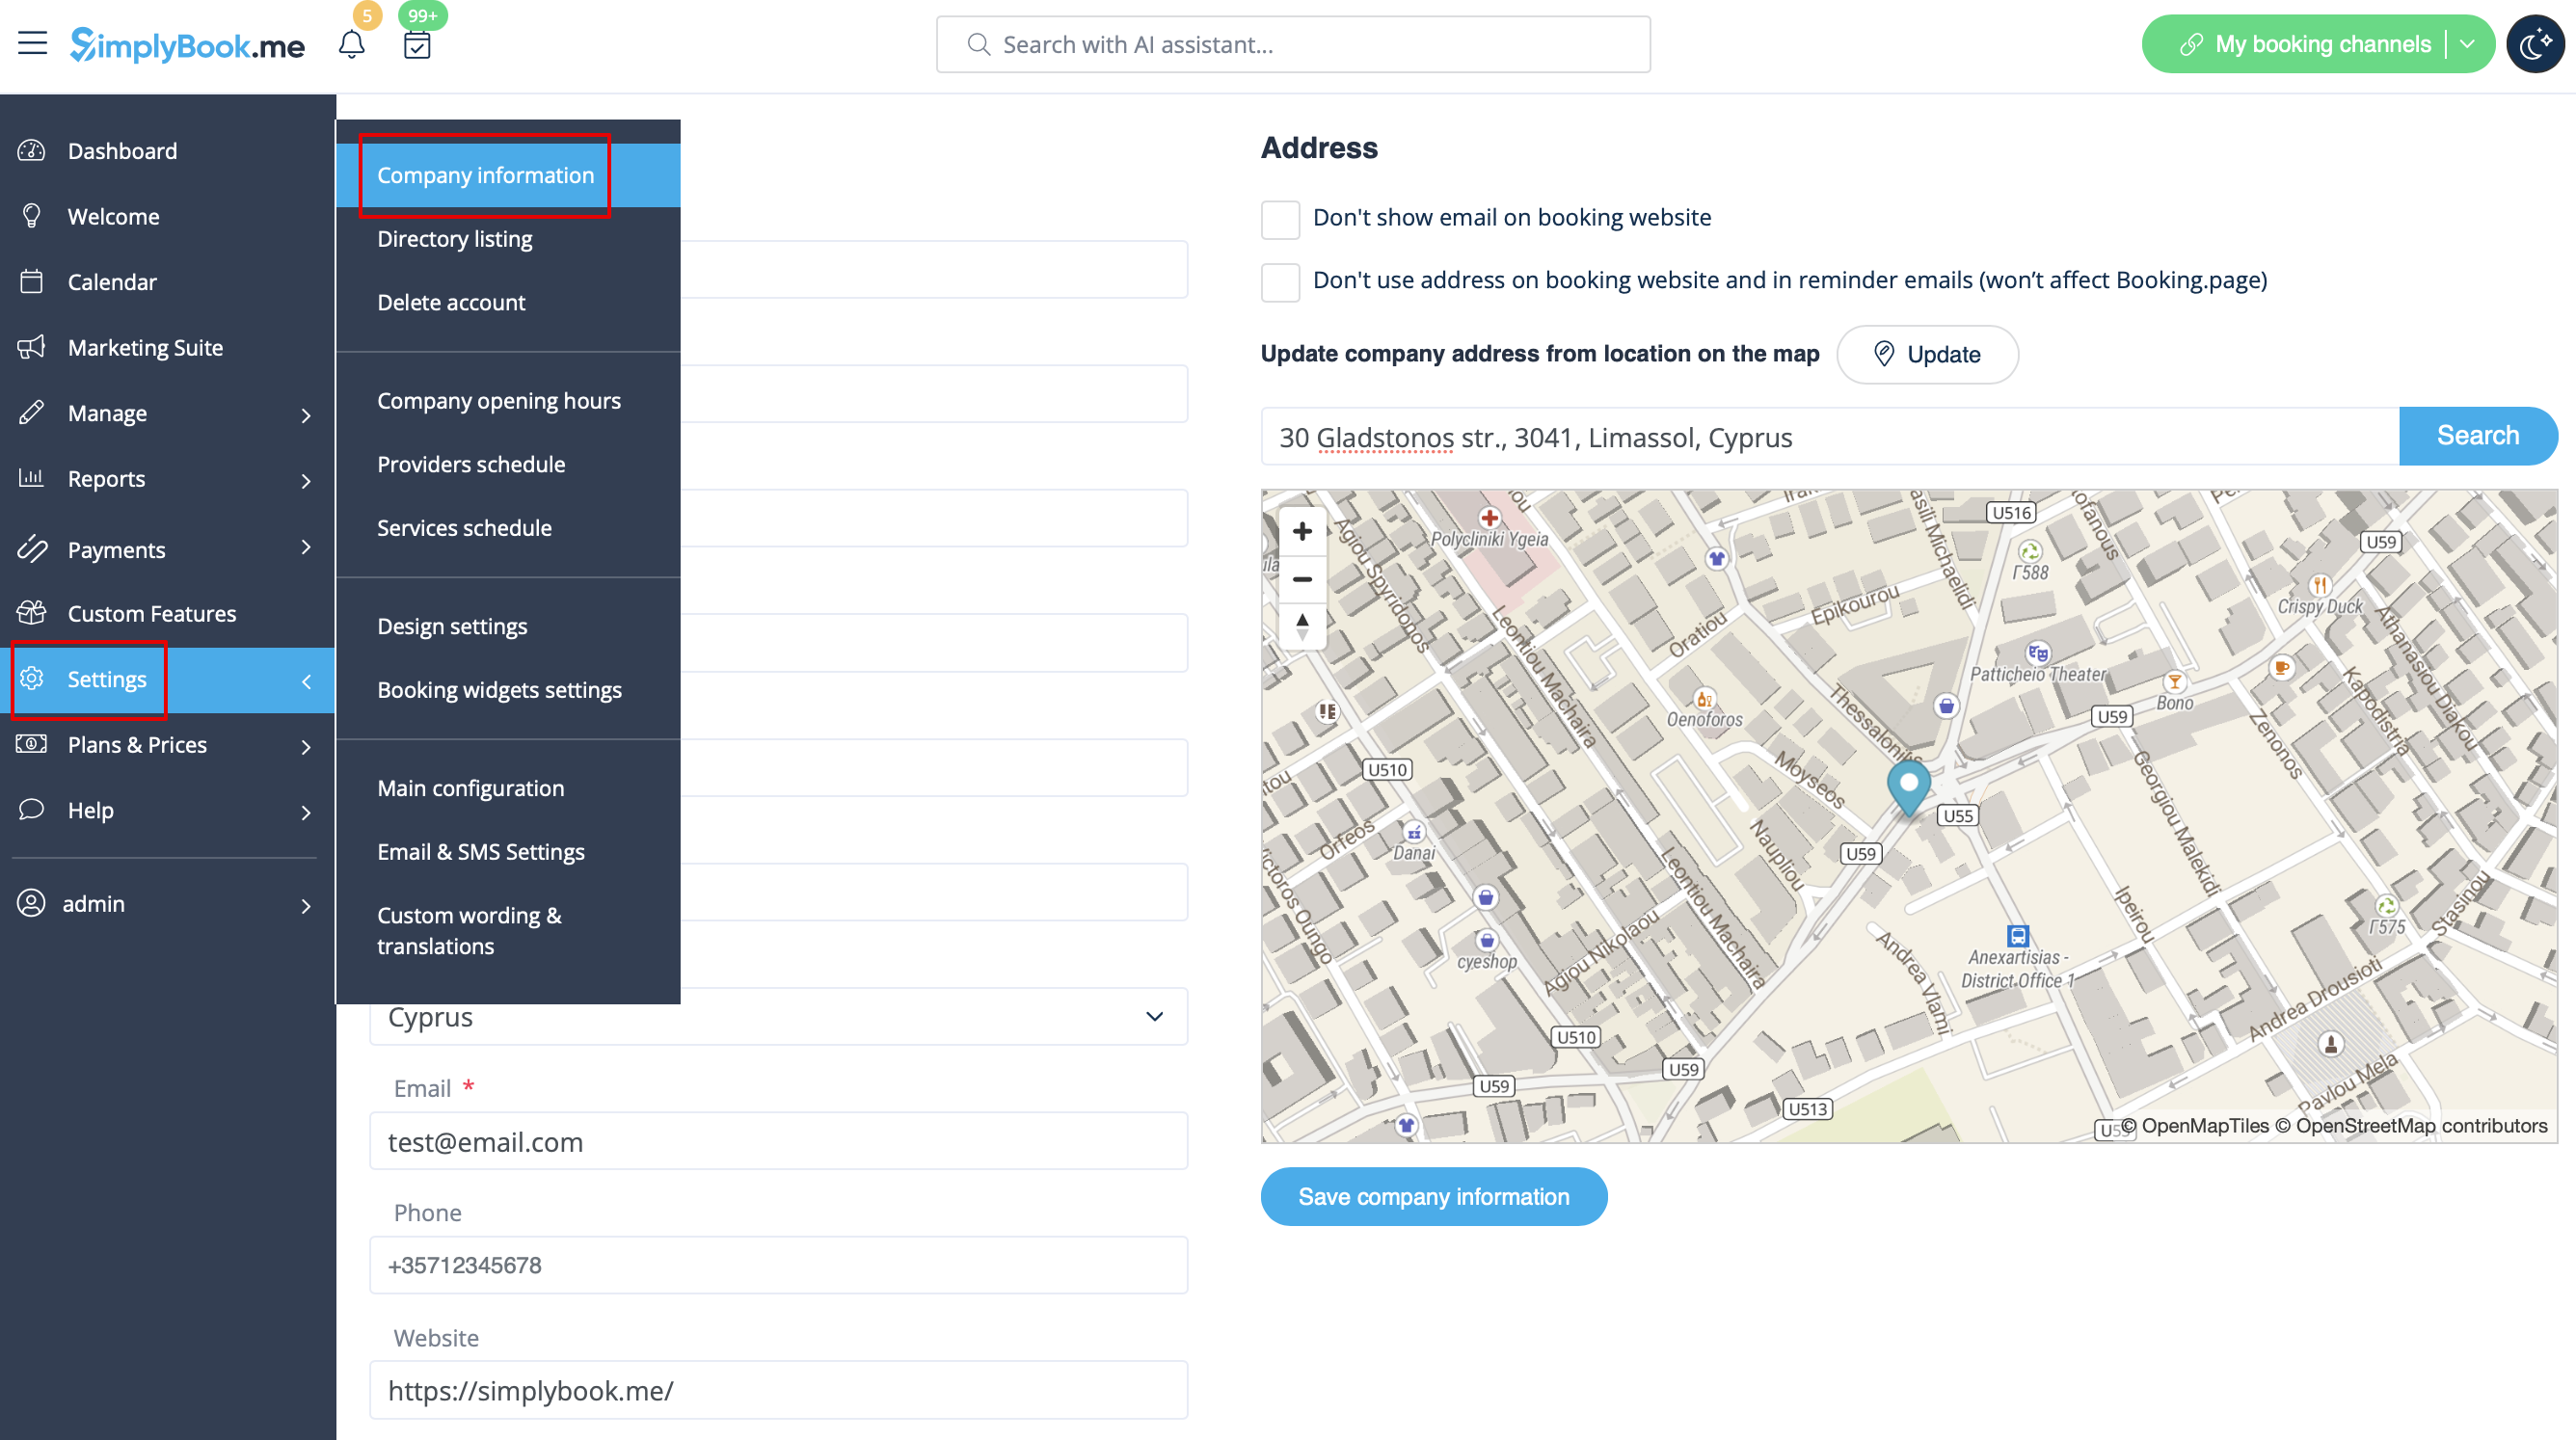
=Firma titel
I Indstillinger // Virksomhedsoplysninger // Navn.
Company url
Desværre er der ingen mulighed for at ændre url i systemet. For at ændre den skal du registrere en ny virksomhed med den ønskede url.
Gratis:
Du kan oprette en ny virksomhed med det ønskede navn i url og manuelt overføre alle data og indstillinger dertil. Du kan oprette tjenester og udbydere og kopiere en liste over kunder til det nye system med den brugerdefinerede funktion Import Clients (se vejledningen her). Bookinger og andre indstillinger kan ikke overføres.
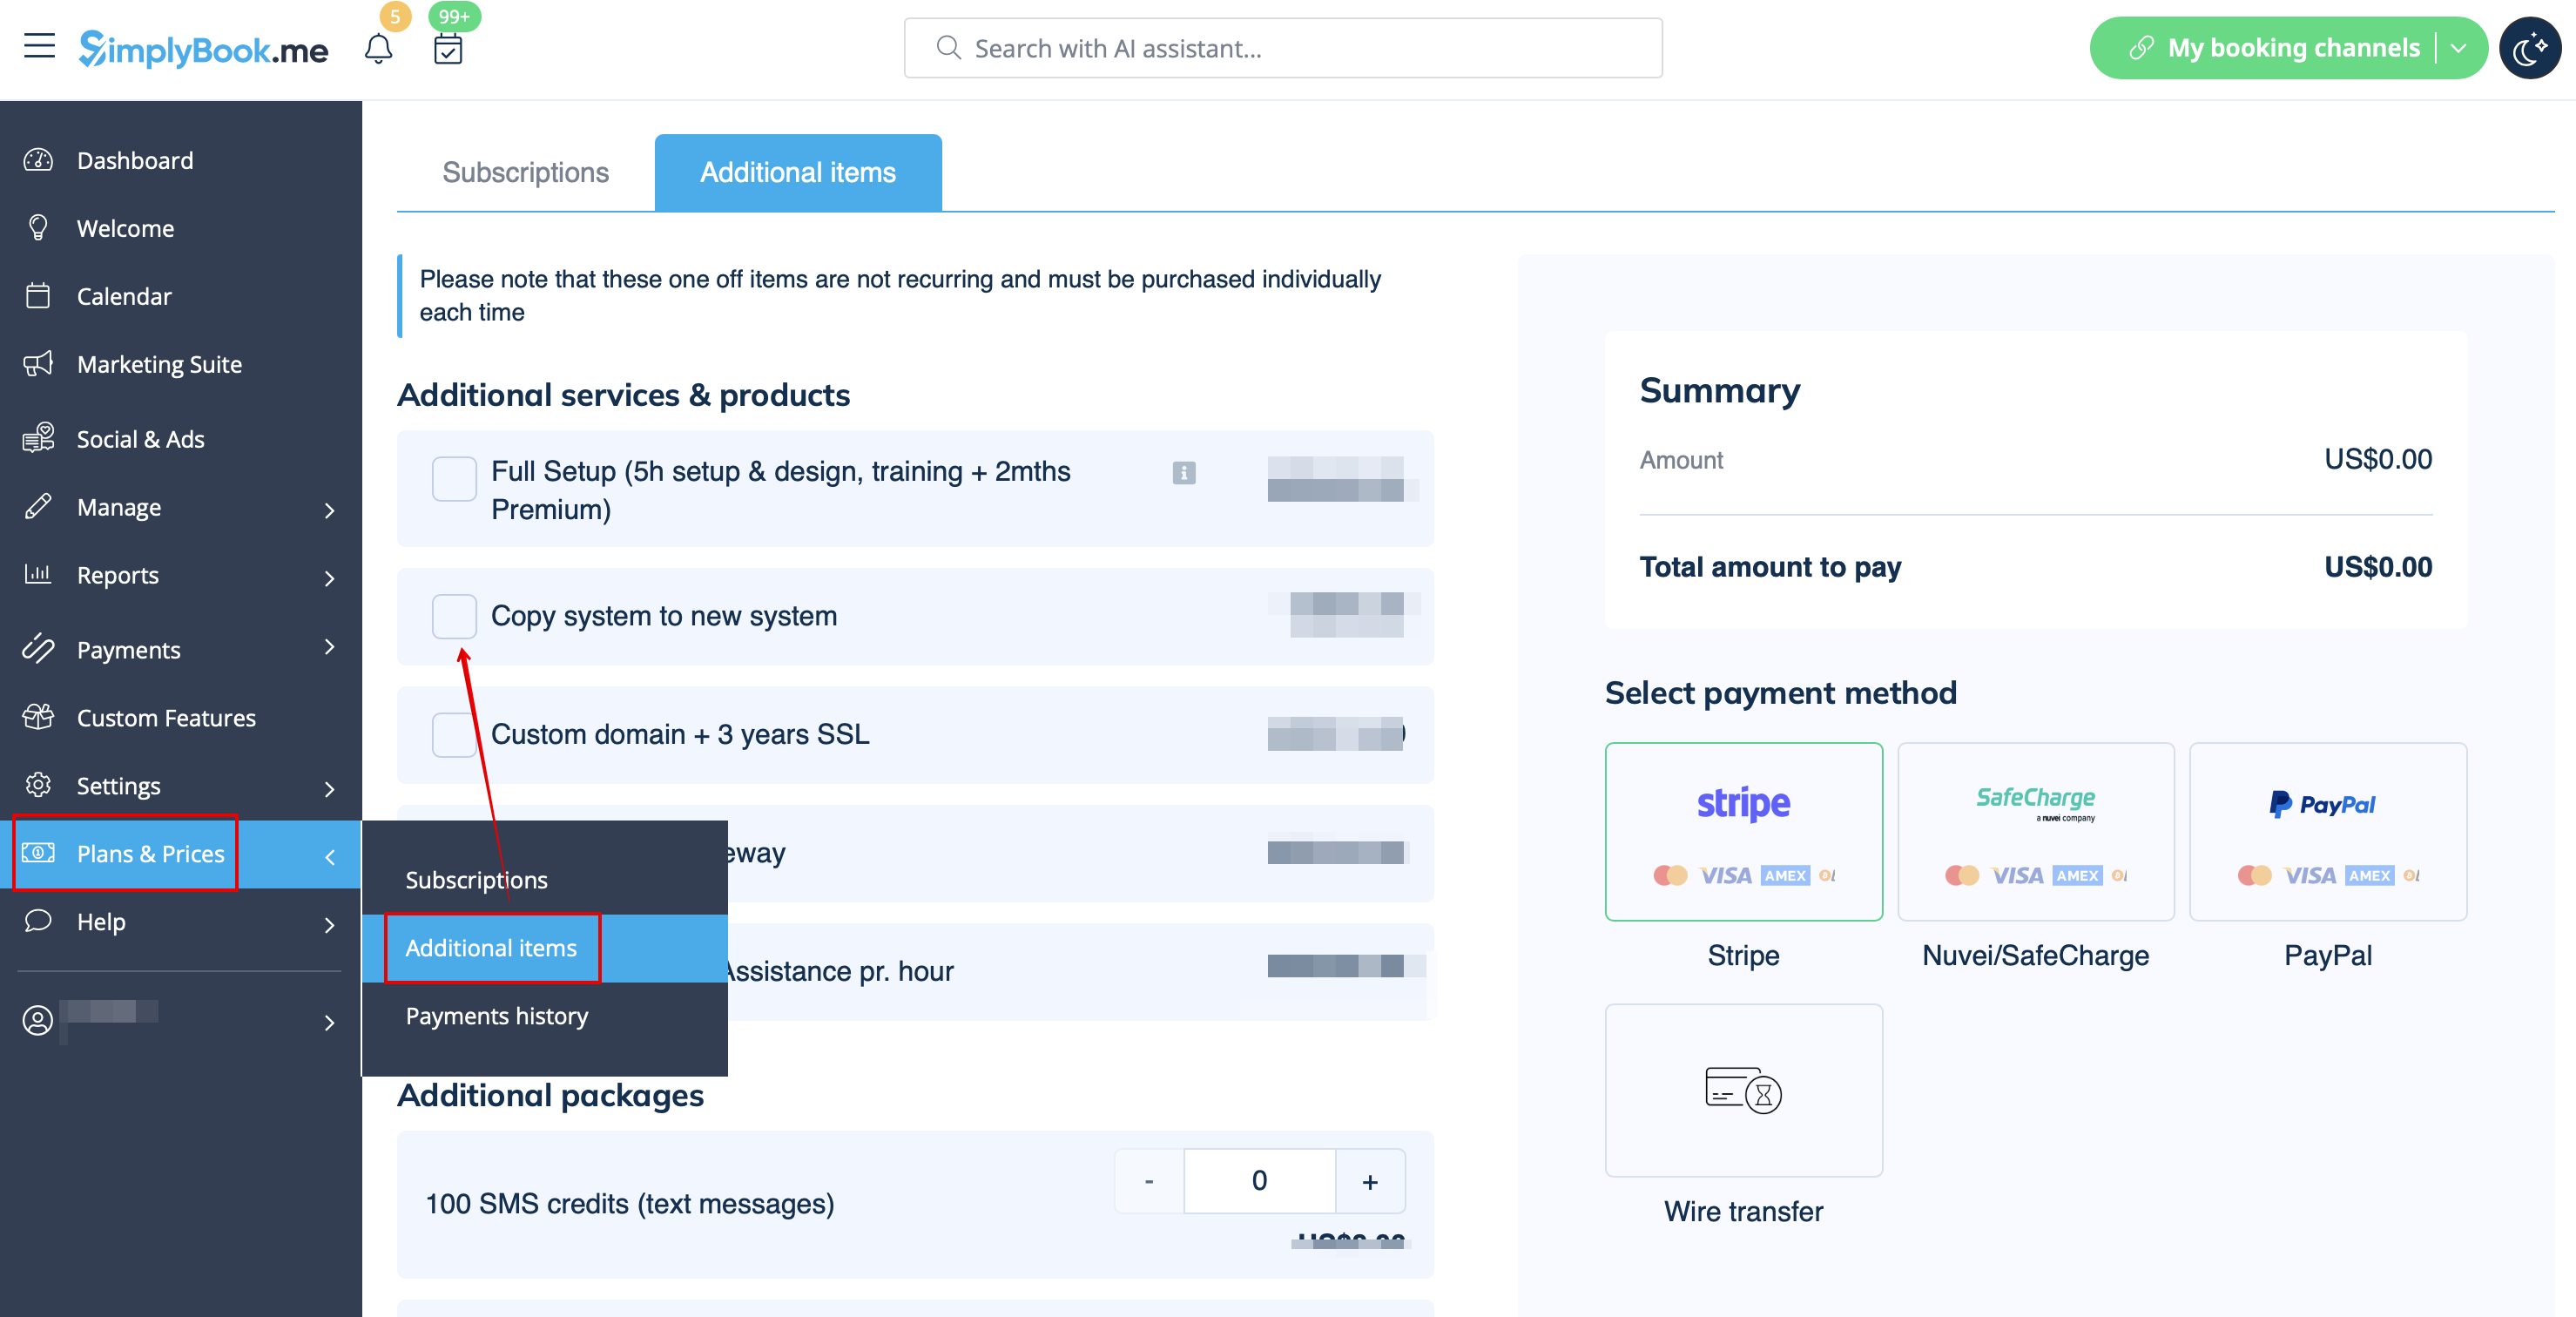
Betalt:
Opret et nyt system med det ønskede navn i url, gå til Plans&Prices // Additional items og vælg "Copy system to new system", foretag betaling, og vores udviklere vil overføre dine data. Når du har foretaget en betaling, skal du kontakte support, fortælle dem det gamle firmanavn og det nye firmanavn (bekræft ejerskab af begge konti) og anmode om overførsel af systemet.
Bemærk venligst! Anmeldelser og HTML-formatering i beskrivelser vil ikke blive kopieret til det nye system.
Firmalogo og baggrund
I Indstillinger // Designindstillinger // Yderligere temaindstillinger.
Favicon
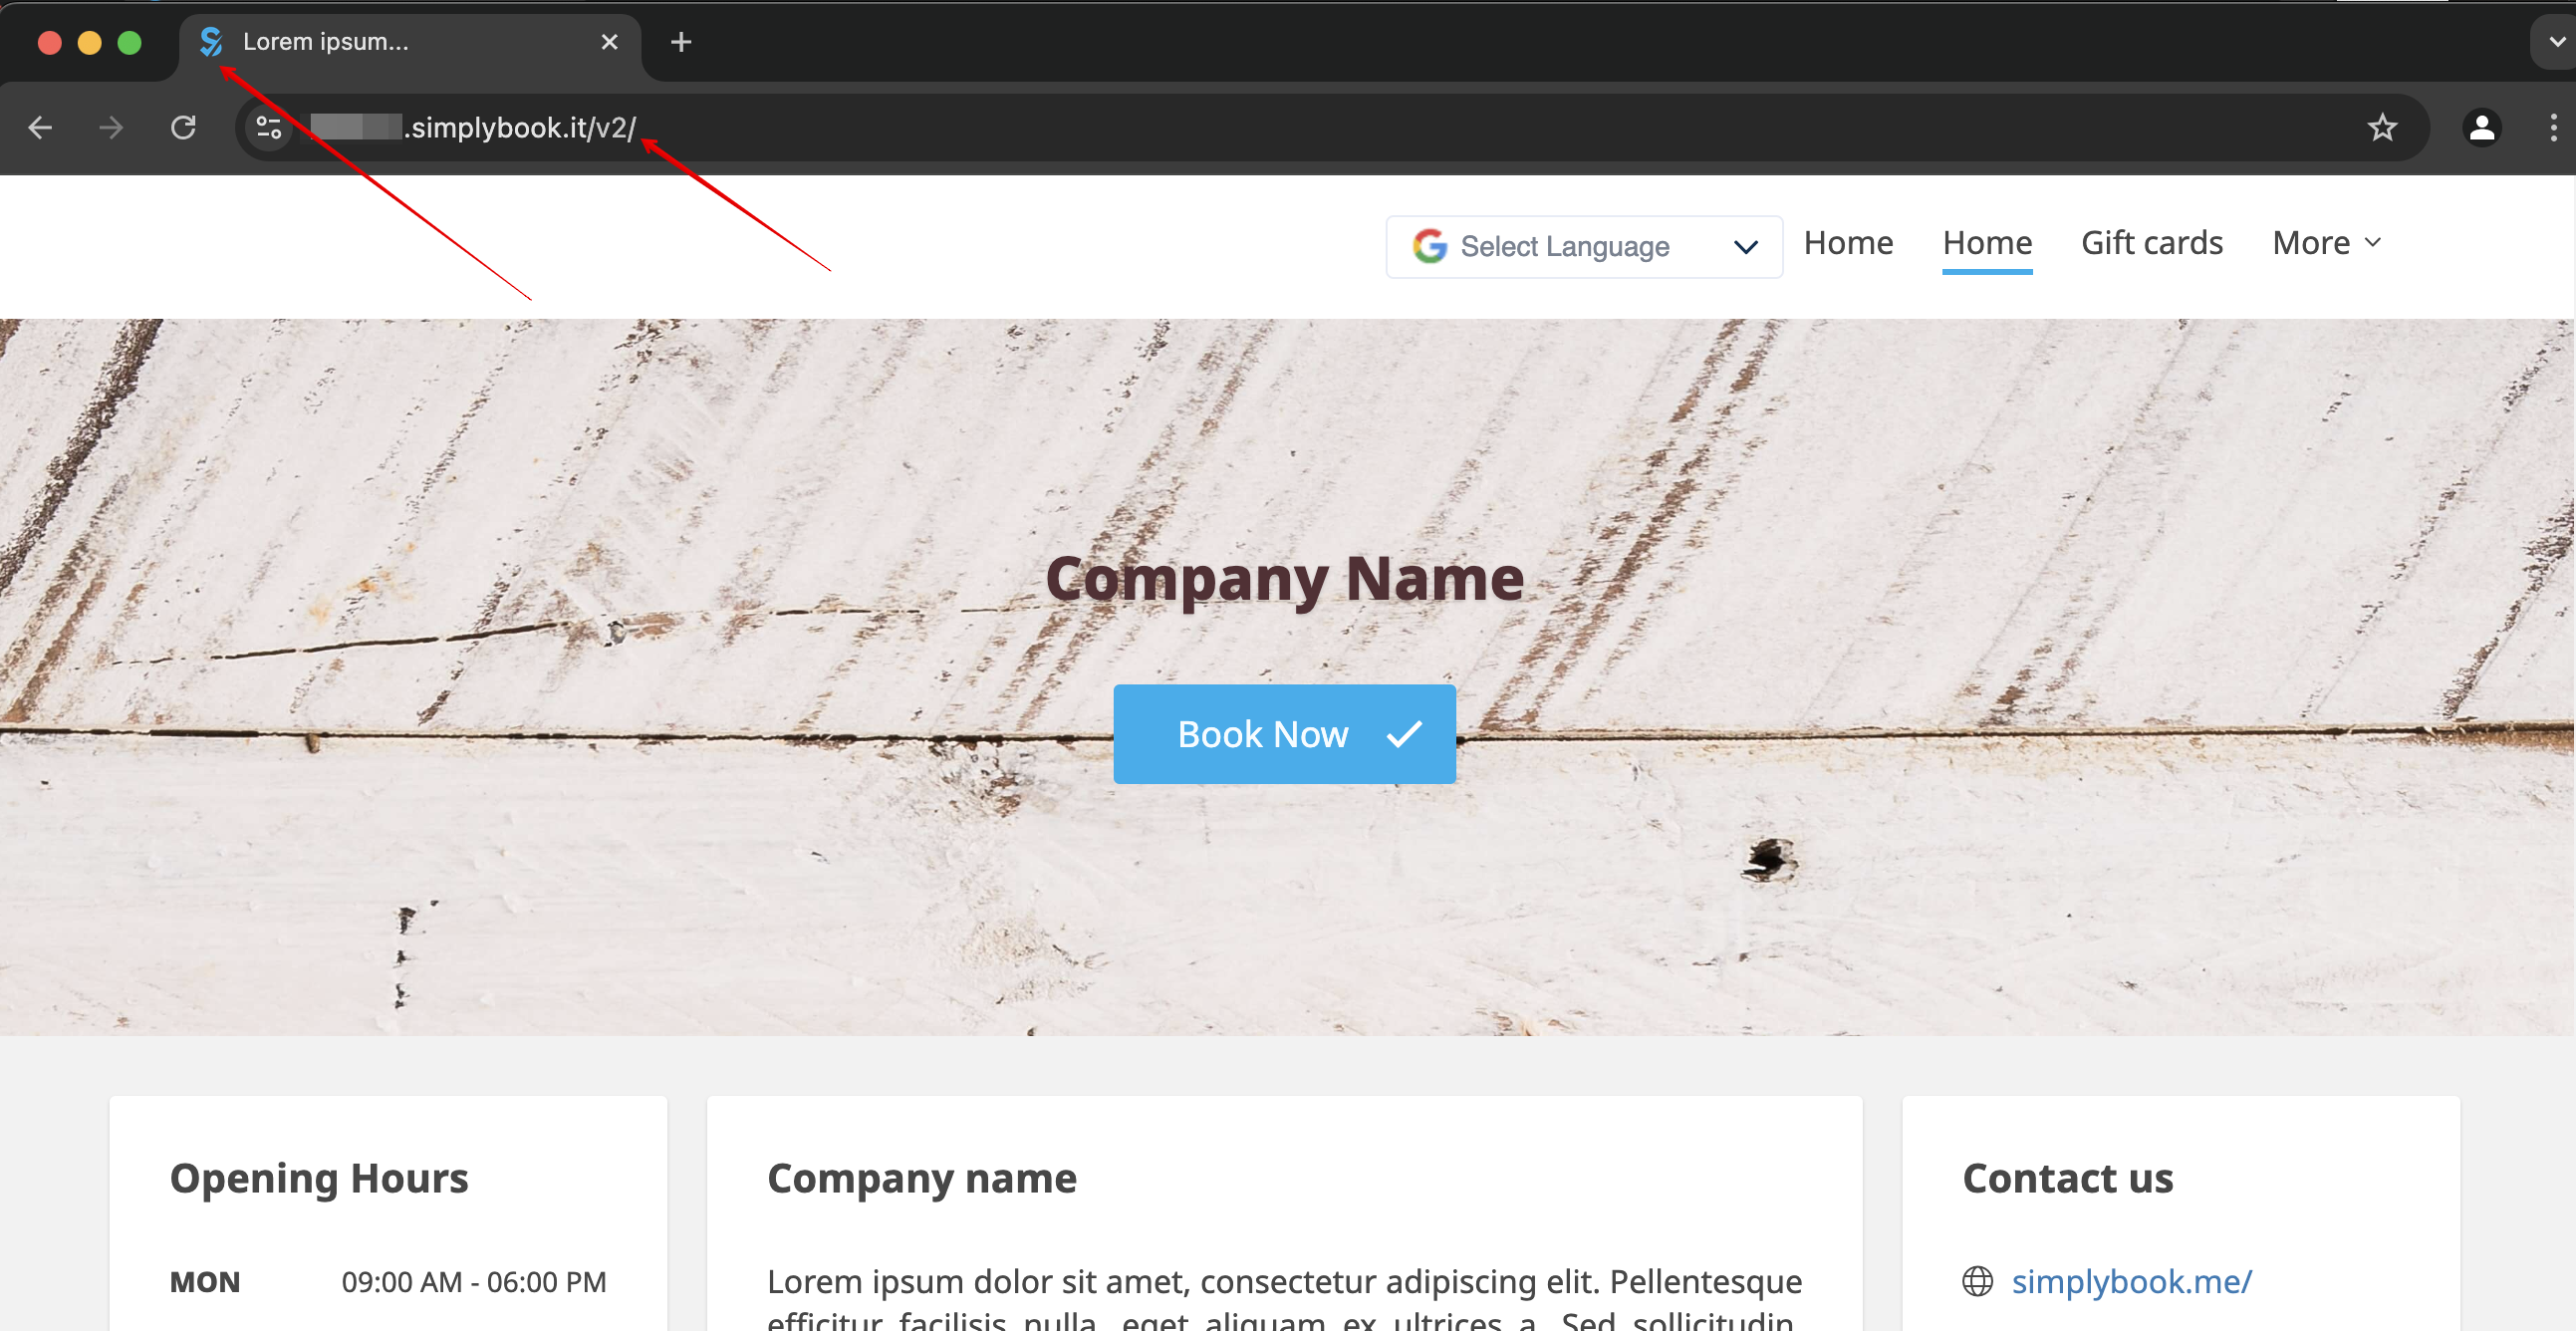
Delen /v2/ i URL'en til bookingwebstedet kan ikke fjernes eller ændres.
Dette element er fast og kan ikke ændres.
Favicon (logo vist i browserfanen) kan kun ændres på virksomhedsniveau.
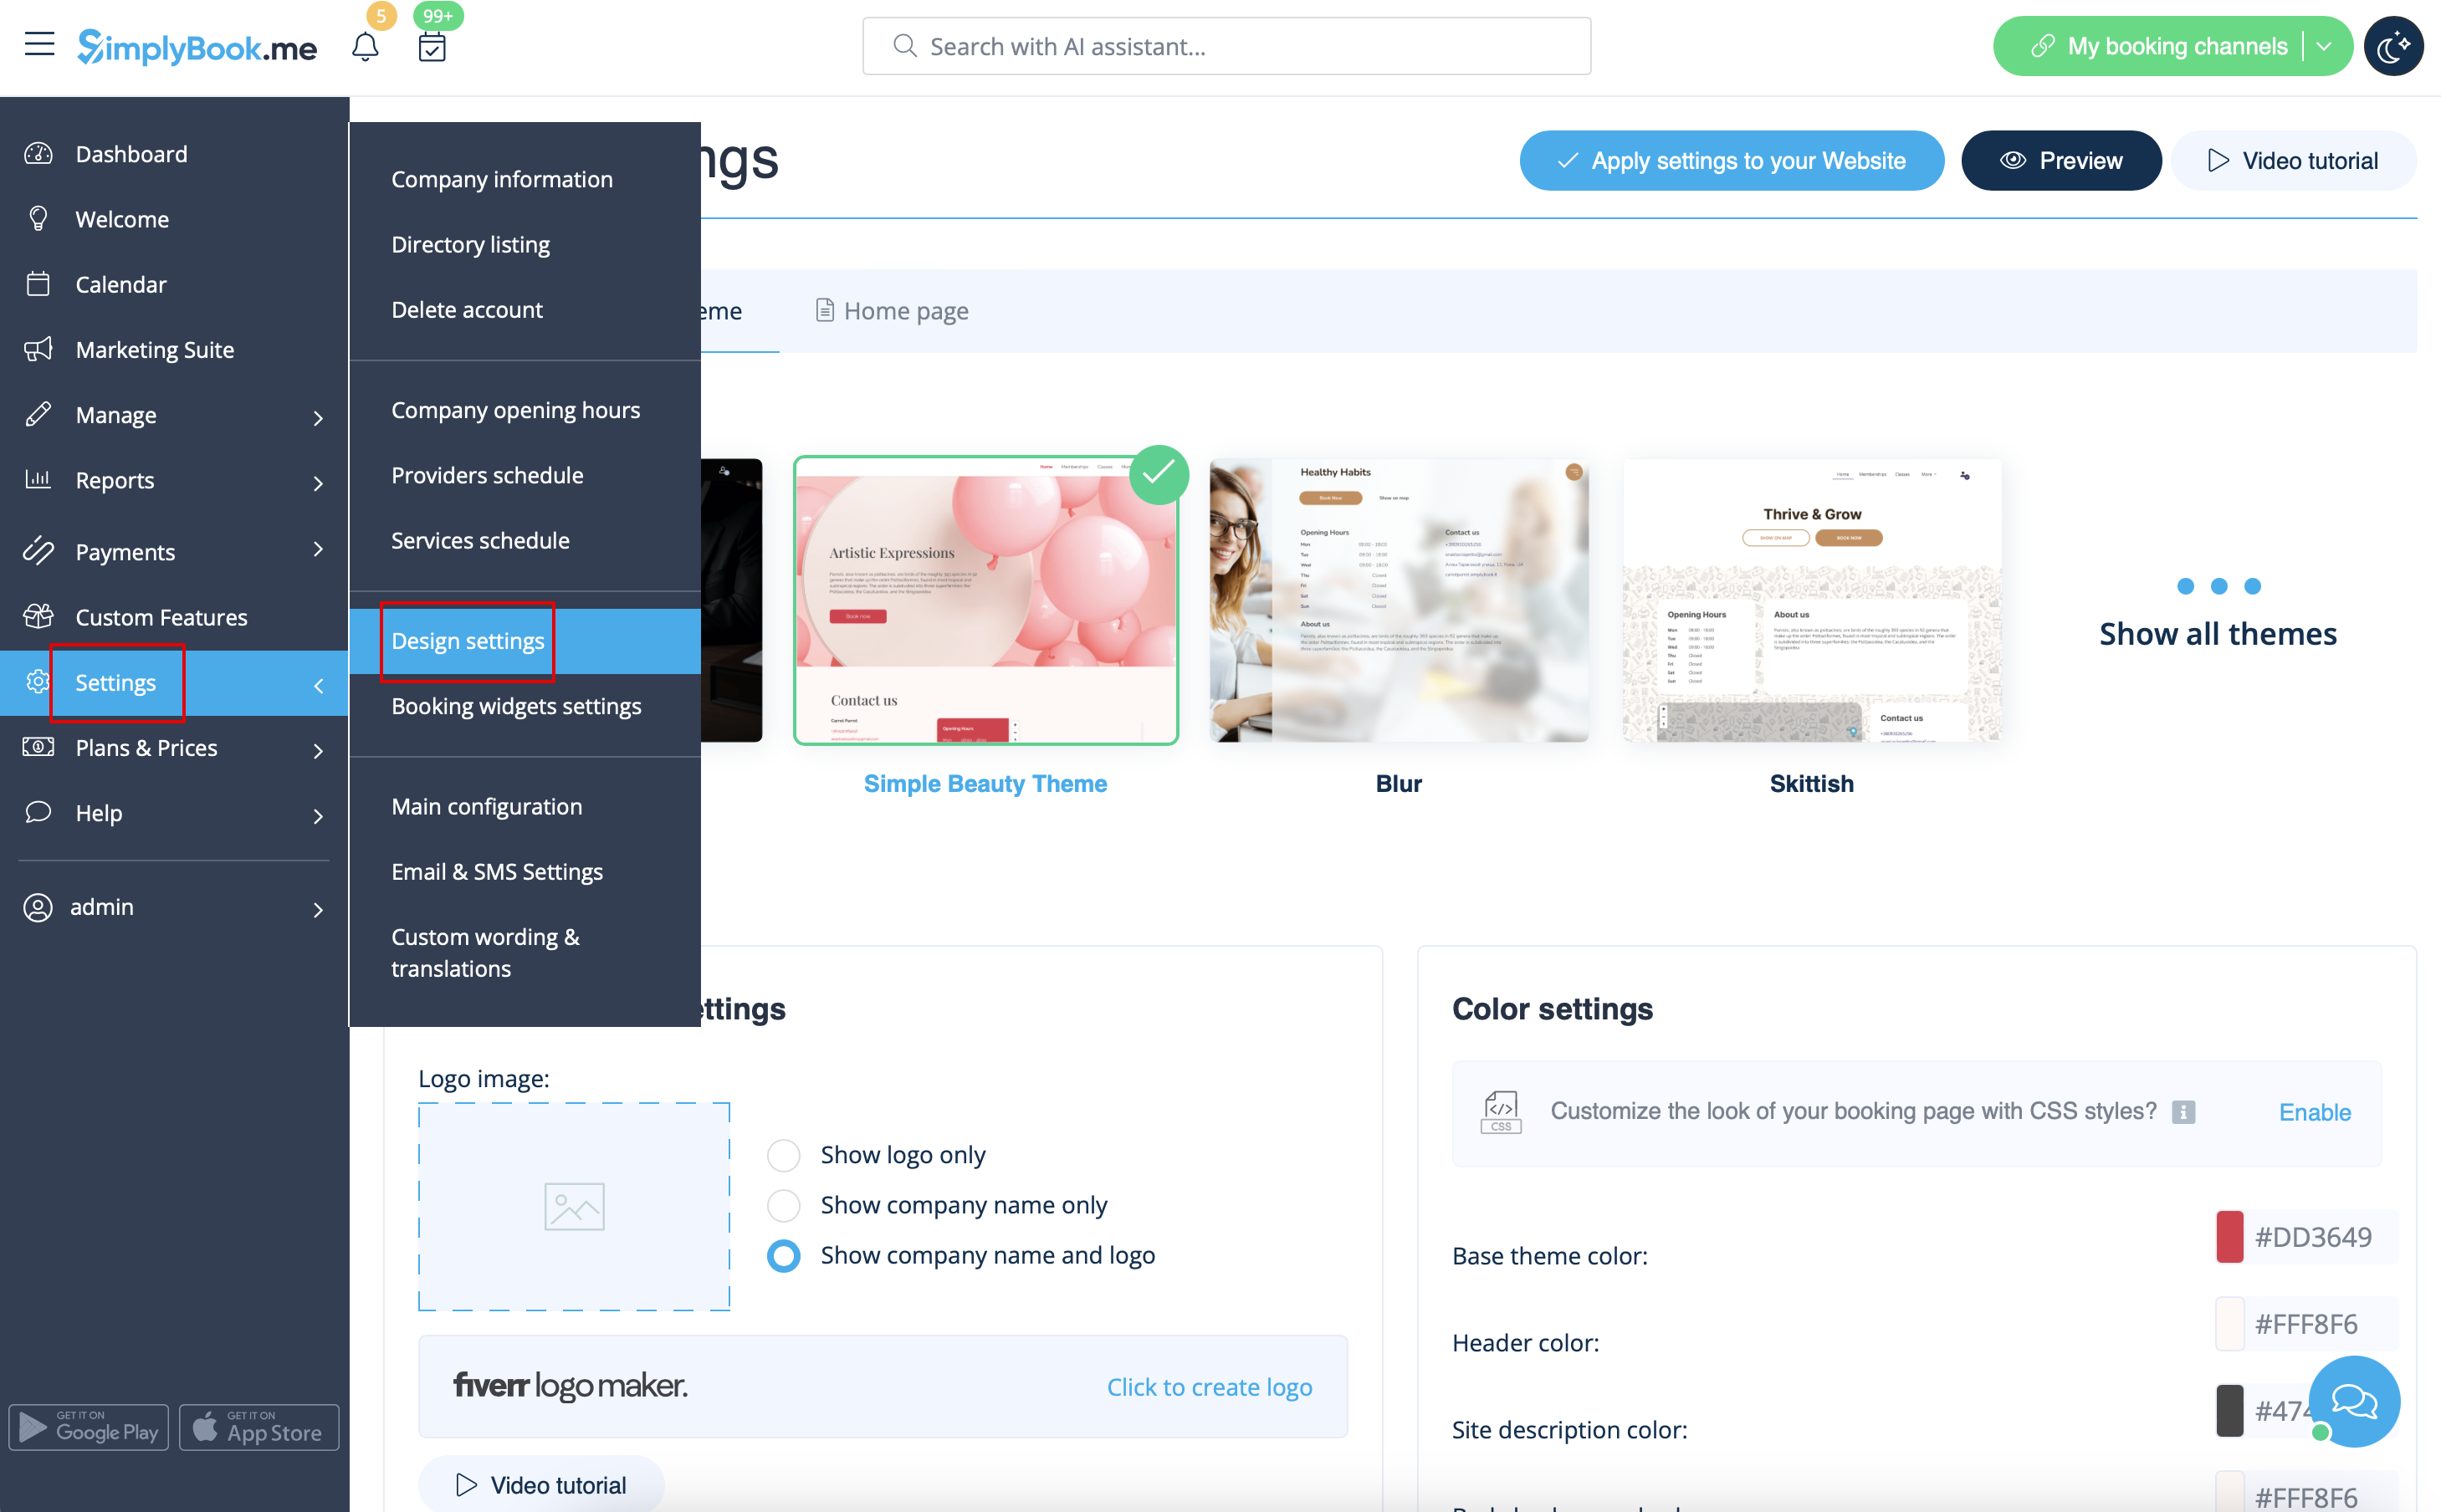
Design
I indstillinger // Designindstillinger.
- Anbefalede temaer
- Alle nye temaer
Disse temaer understøtter alle nye funktioner og har mulighed for at justere farverne på din bookingside.
Tekster og sprog
Hvis du har brug for at justere tekster på din bookingside (f.eks. ændre Employee til Therapist, Coach eller Room), kan du gøre det i Settings // Custom Wording & Translations.
Der kan du også ændre sproget på din bookingside ved at klikke på det tilsvarende flag og trykke på "Gem tilpassede oversættelser". Hvis dit sprog ikke er på listen, kan du selv oversætte systemet.
SEO Settings
Som standard er Title-tagget repræsenteret af dit firmanavn, som du har indsat i Settings -> Company information -> Name og automatisk tilføjelse af Scheduling and Booking Website-tekst.
Metabeskrivelsen er taget fra den tekst, du har tilføjet i Indstillinger -> Designindstillinger -> Hjemmeside -> Beskrivelsestekst til Om os-bookinghjemmesideblokken.
Hvis du har brug for det, kan du indstille disse to muligheder til at indeholde forskellige data og dermed påvirke din bookinghjemmesides SEO.
For at indstille dit eget titeltag og metabeskrivelse skal du navigere til Indstillinger -> Designindstillinger -> Hjemmeside og tilføje de ønskede tekster til de tilsvarende felter der.
Bemærk venligst!Vi anbefaler, at du ikke bruger mere end 60 symboler til Title tag.
Meta description er begrænset til 400 tegn, og hvis du forsøger at tilføje et længere abstrakt, vil det automatisk blive skåret fra, når du gemmer indstillingerne.
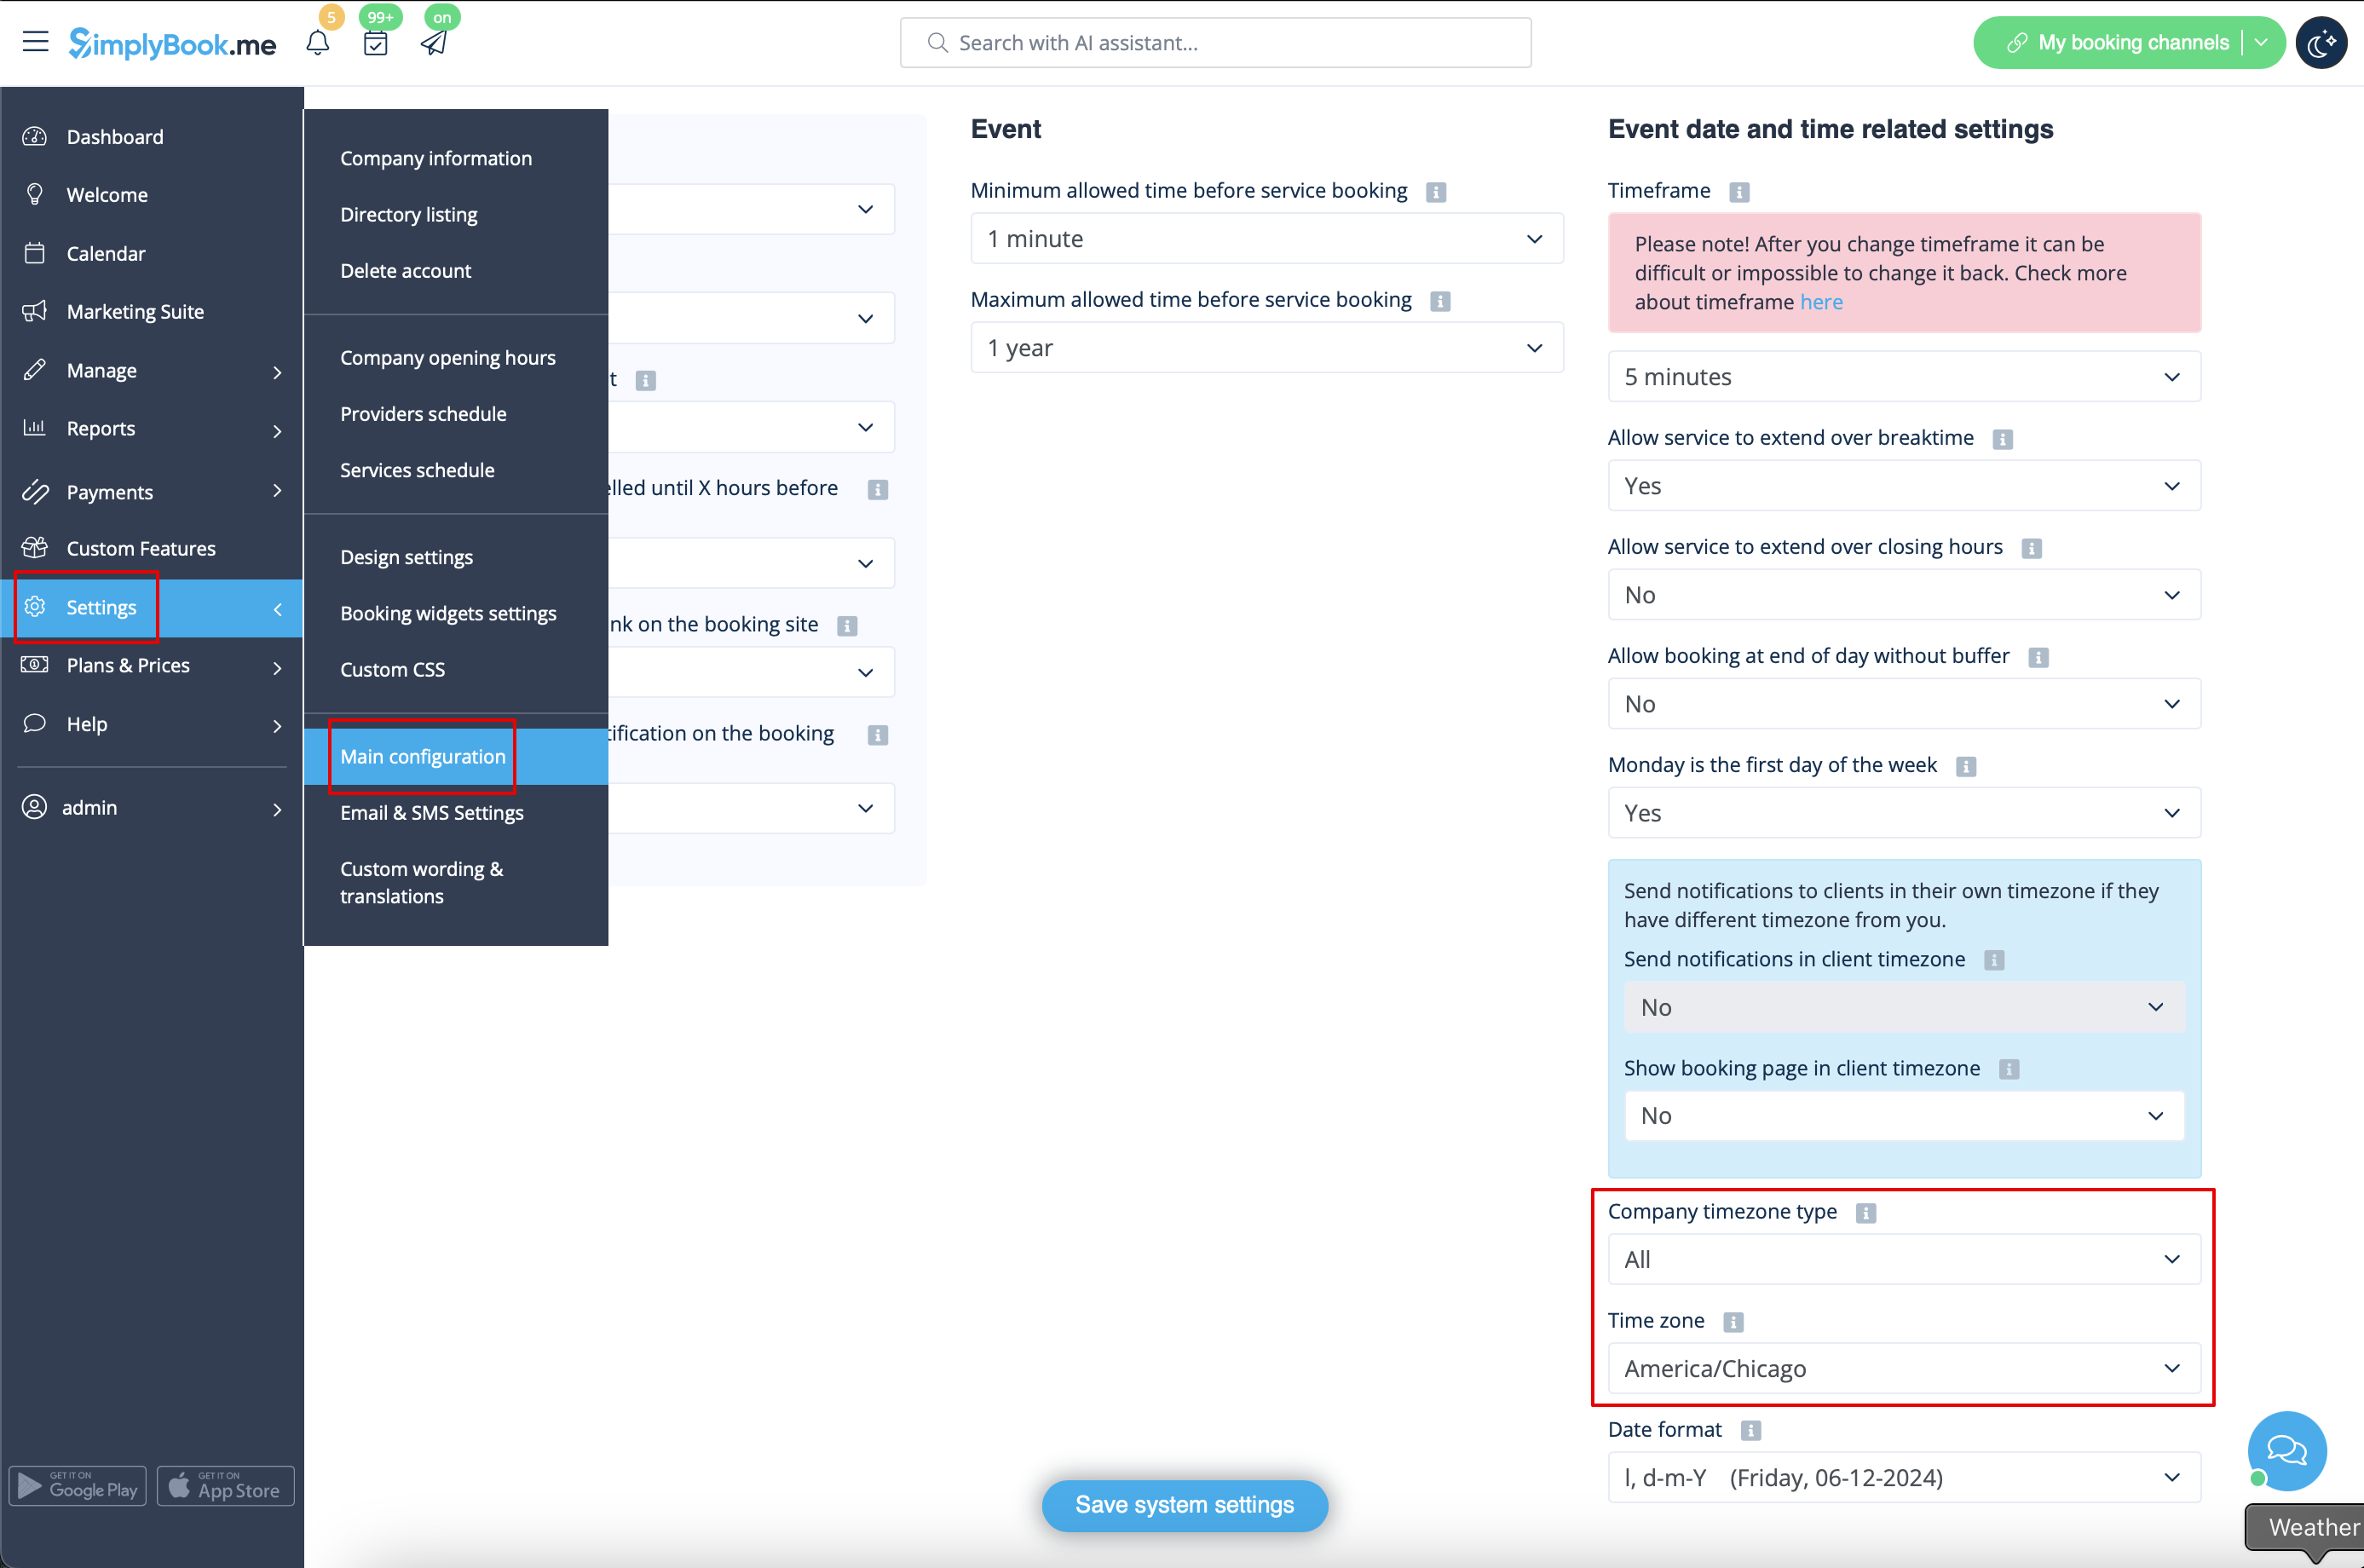
Our Time
Your time on the booking page is the time of the company's time zone. You can change your time zone in Settings -> Main configuration -> Time zone.
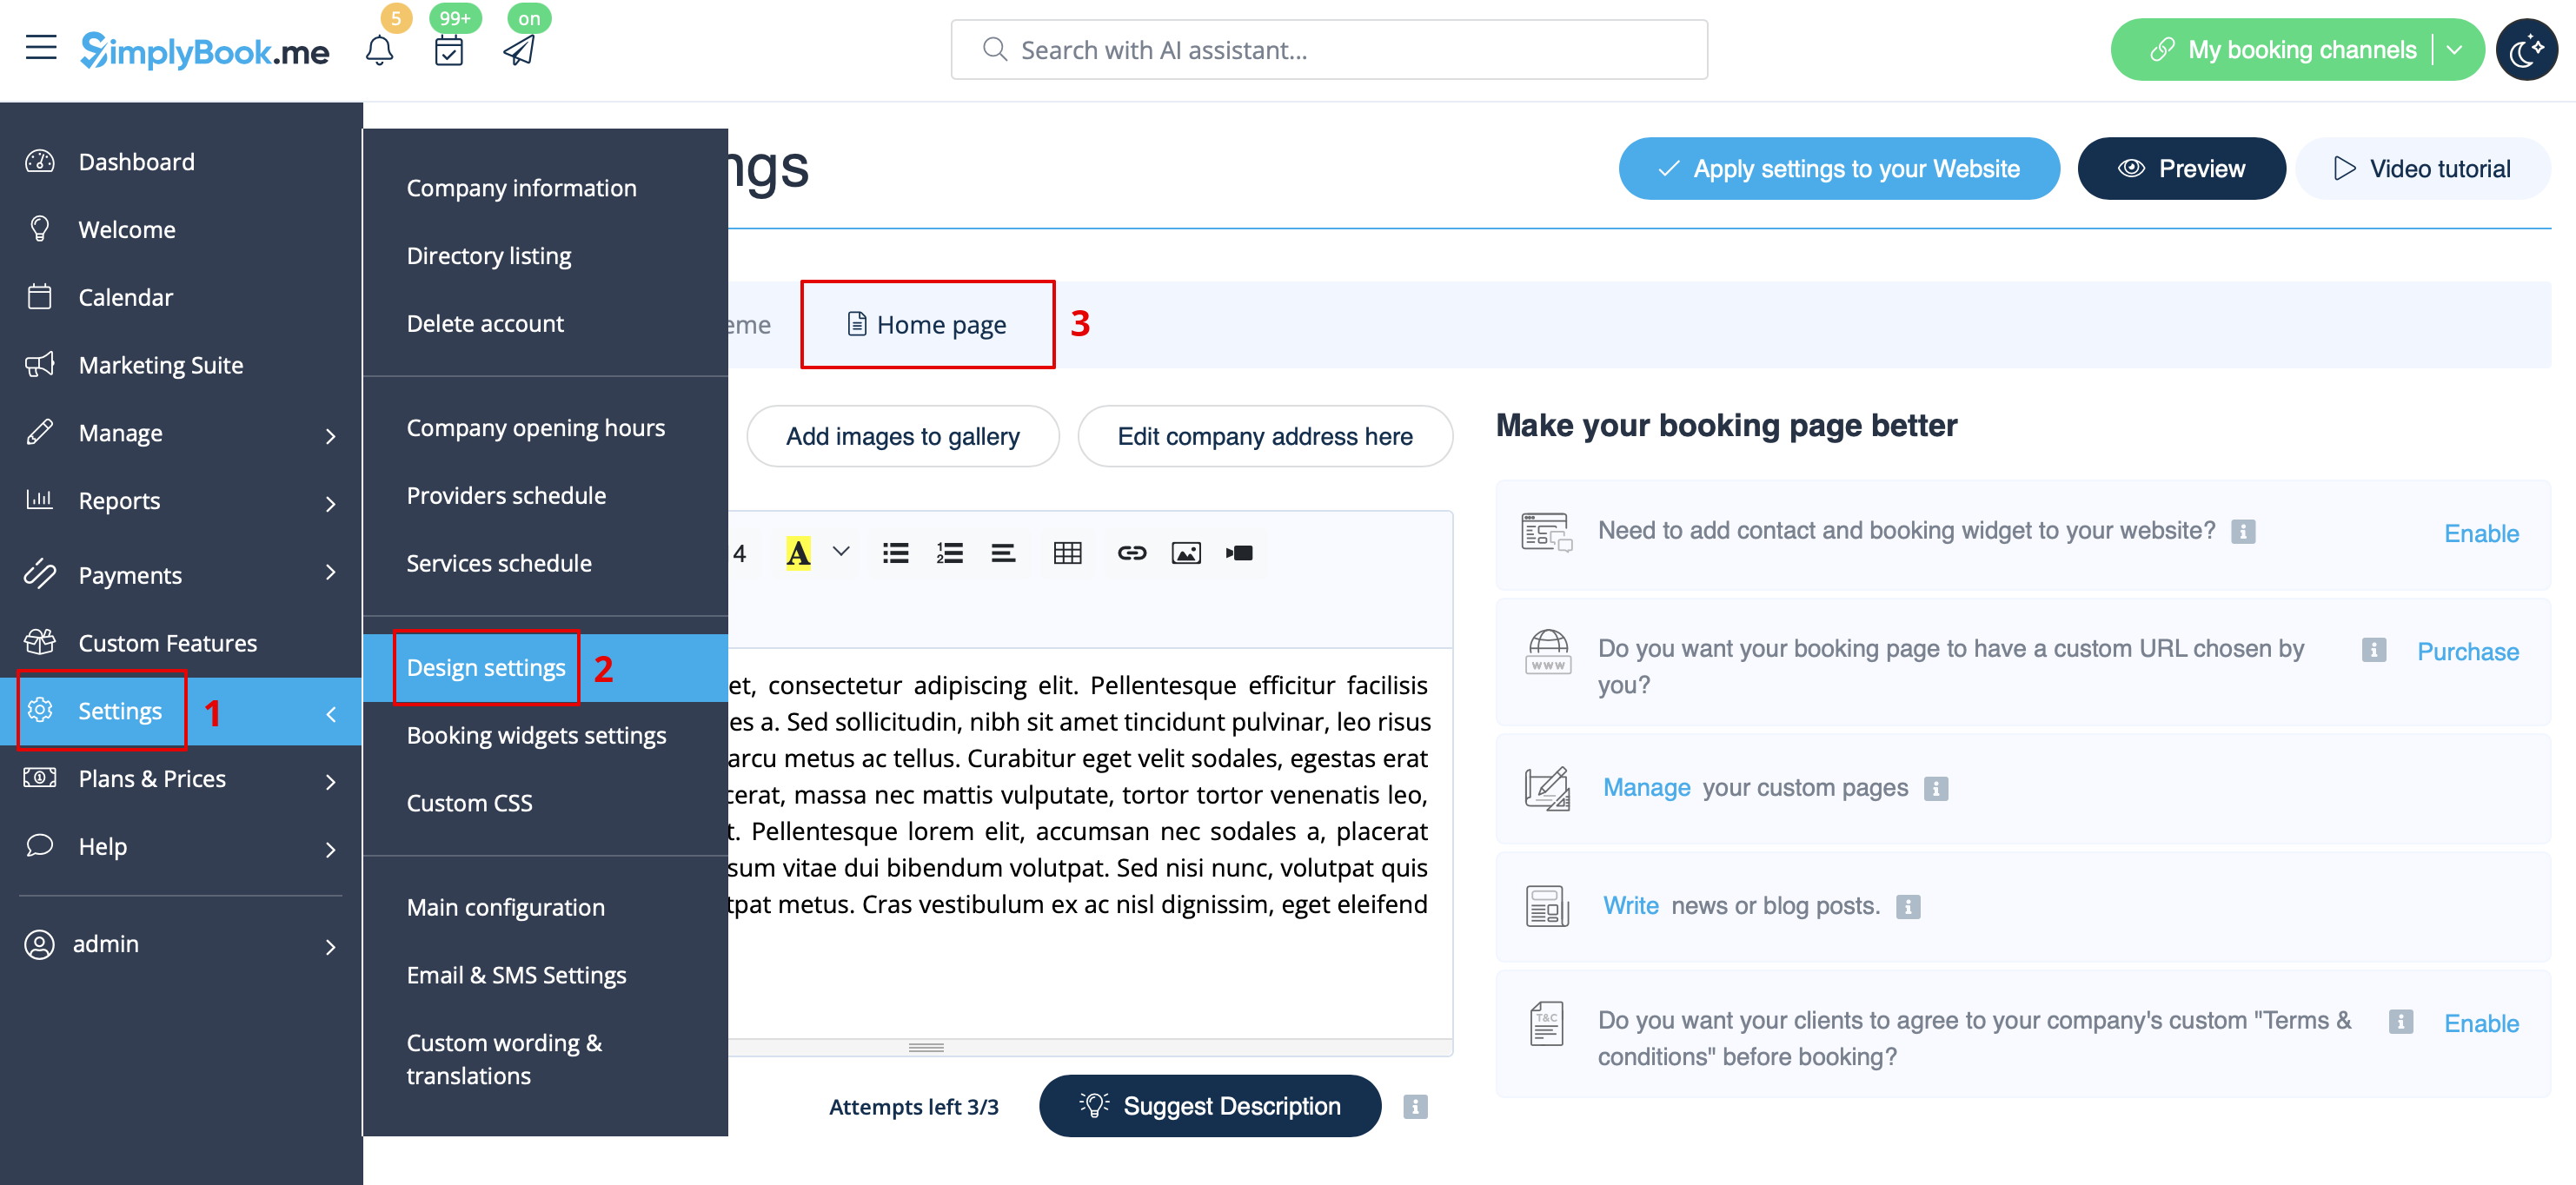
About section
In Settings // Design settings // Home page // Company description.
Address
In Settings // Company Information // Address.
Company Contacts
You can edit them in Settings -> Company information
The following details can be added/edited:
- Email address
- Phone number
- Website address
- WhatsApp phone
- Facebook profile url
- X.com (Twitter) page link
- Instagram page url
- LinkedIn page
An example of the client side look.
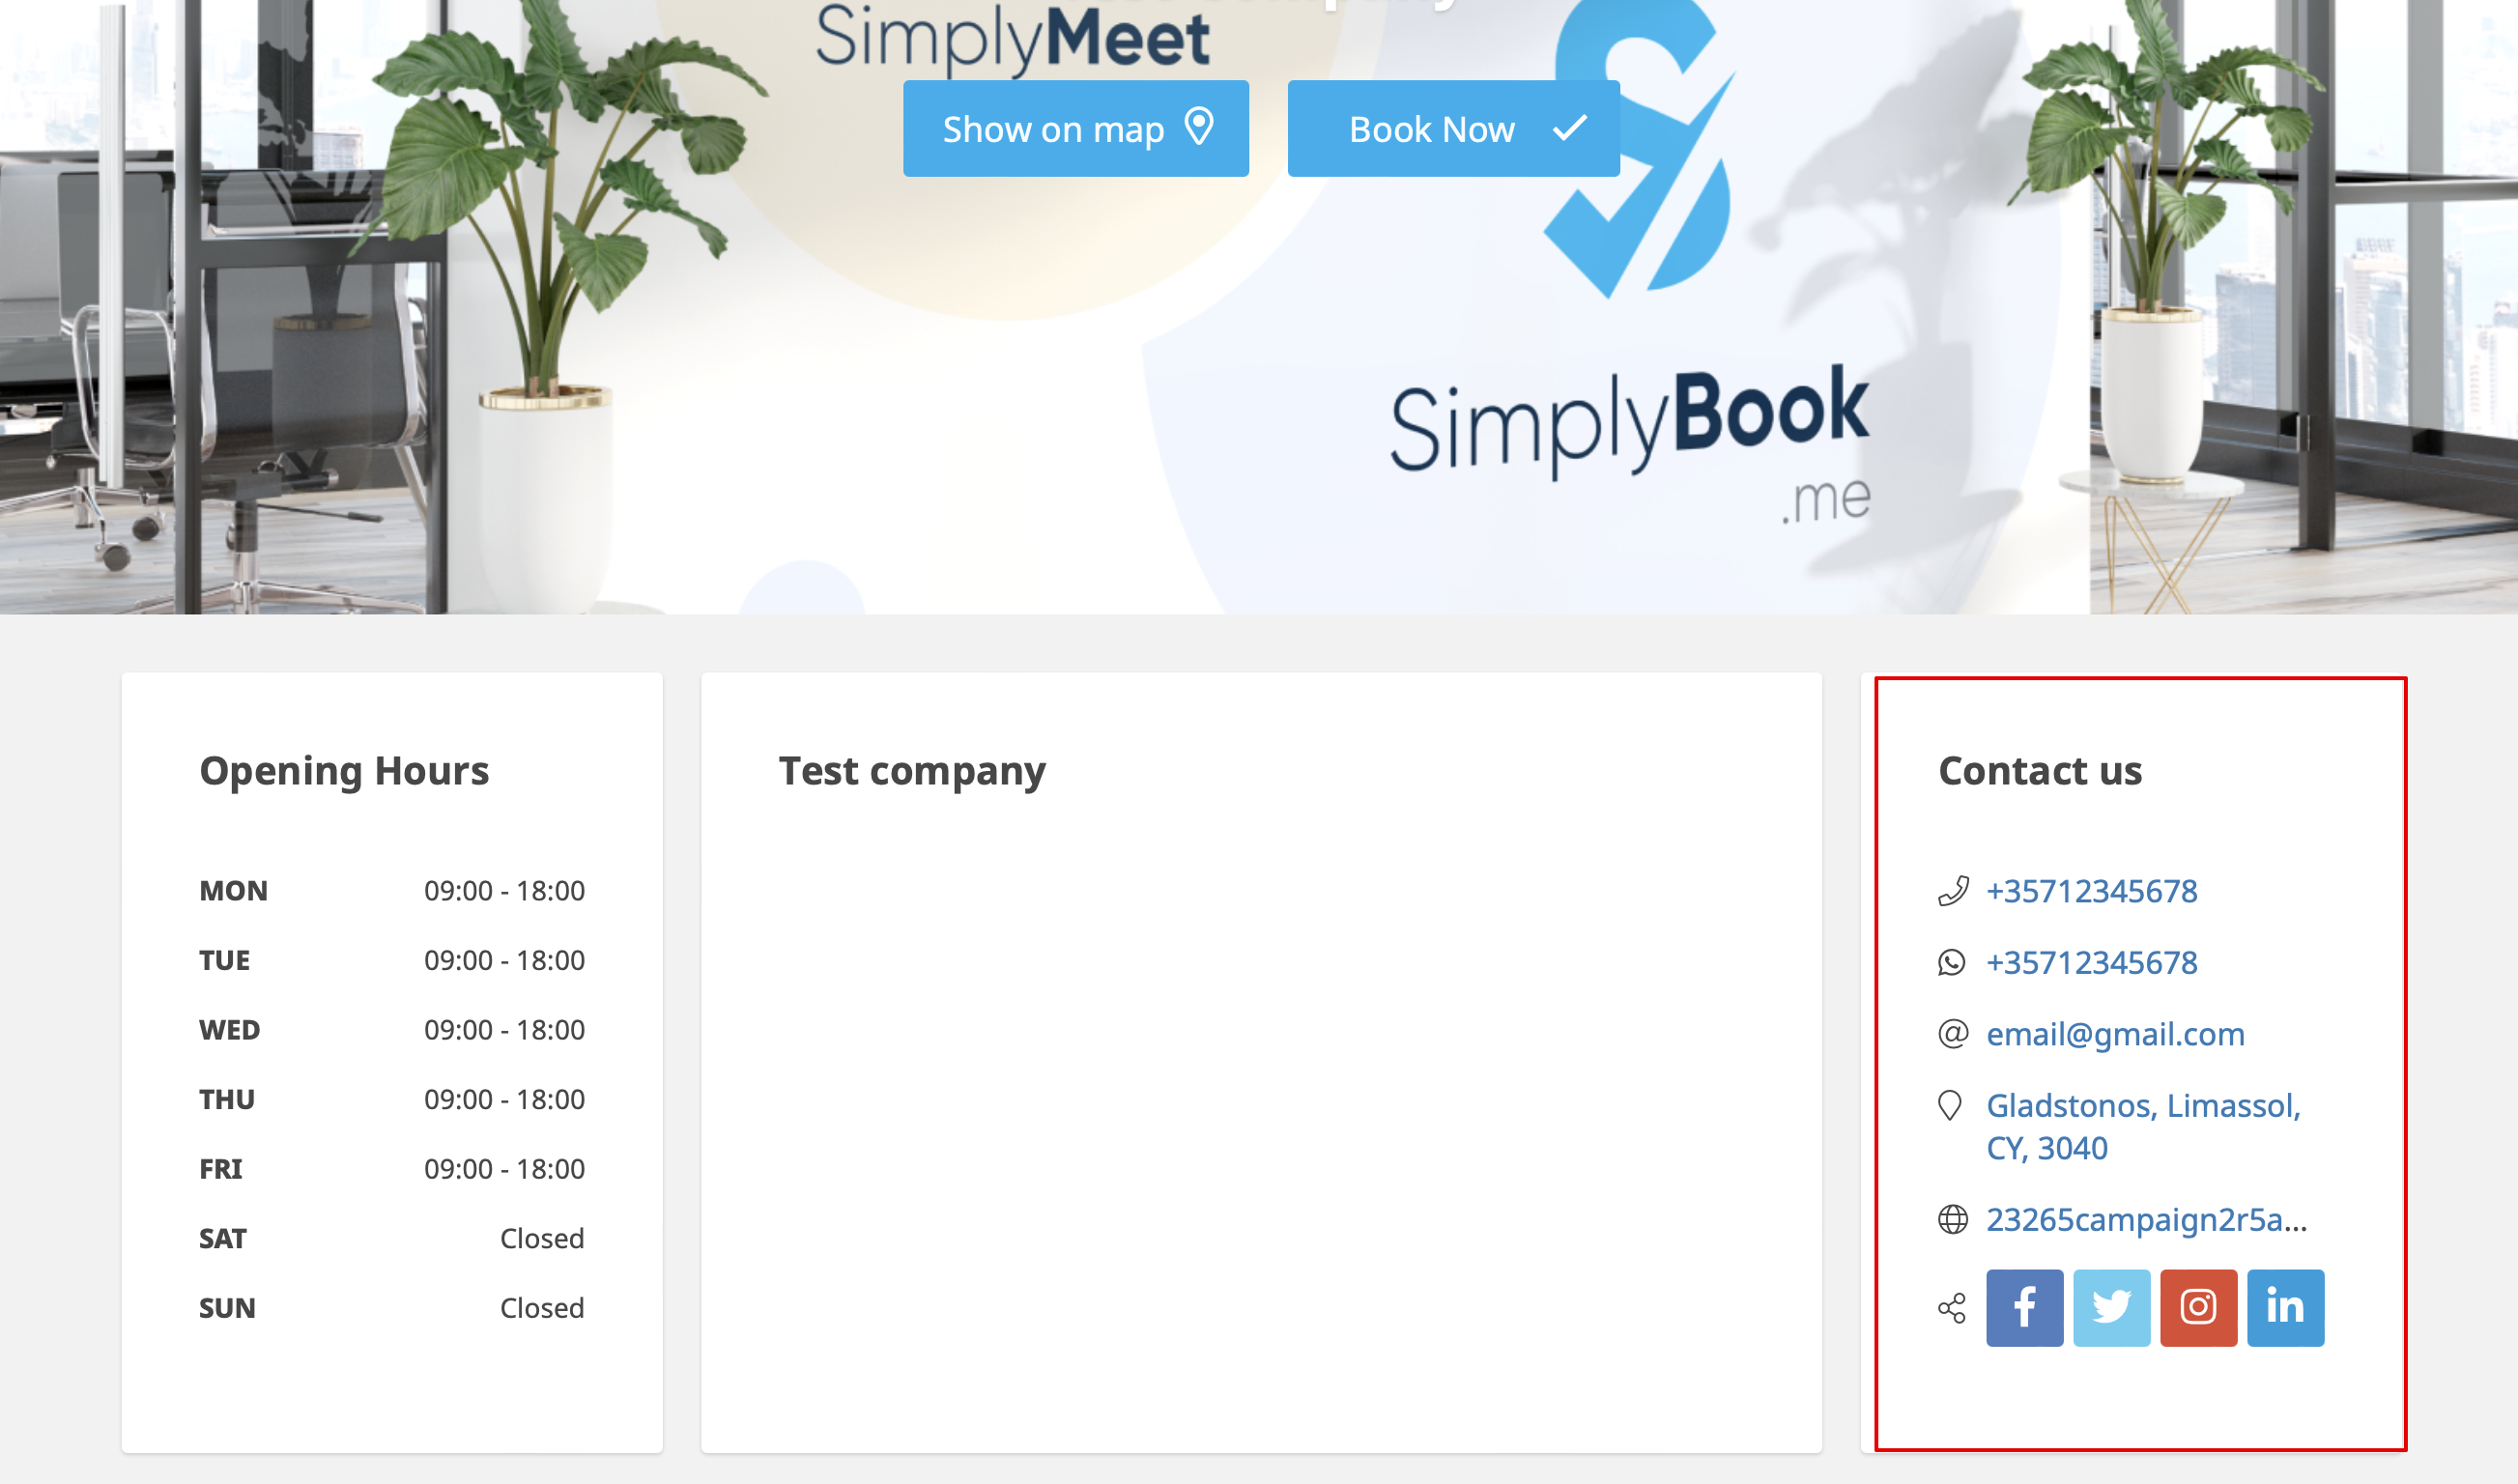
The clients will be able to, for example, click on WhatsApp number and be redirected to the WhatsApp messenger to easily contact you there.
Working hours
Working hours block on the booking page:

To change working hours block go to Settings // Company opening hours.
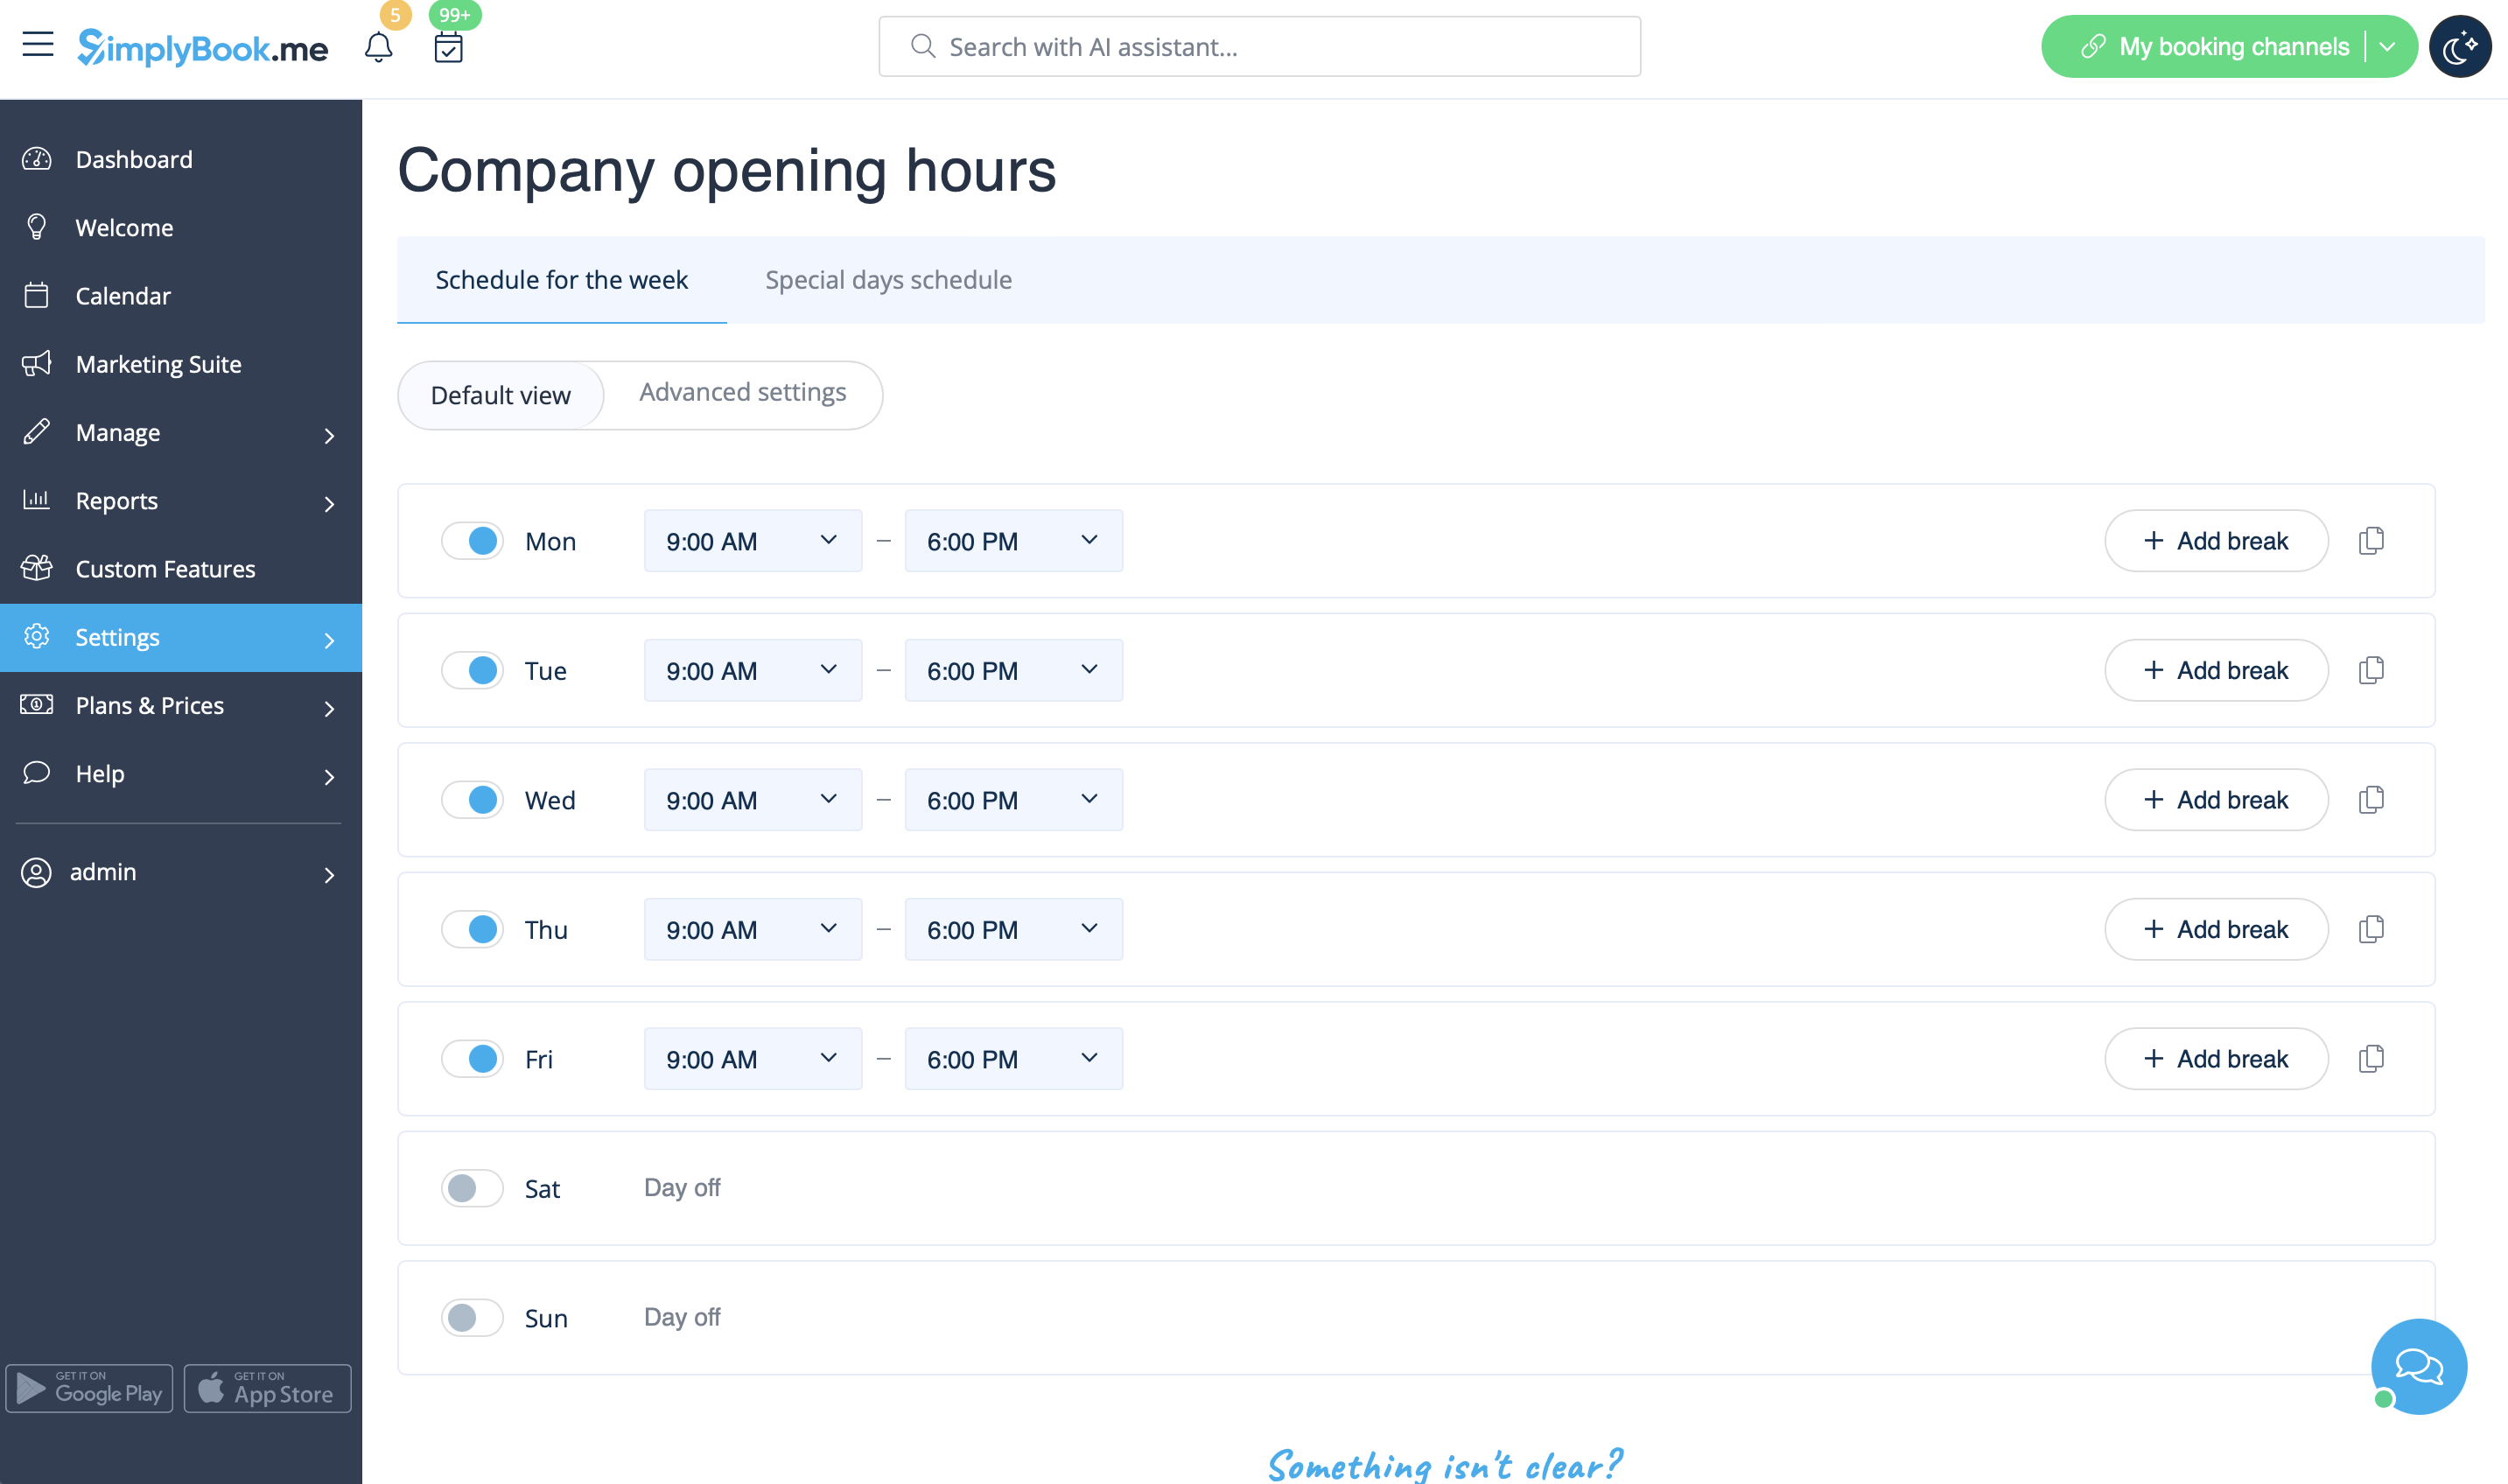
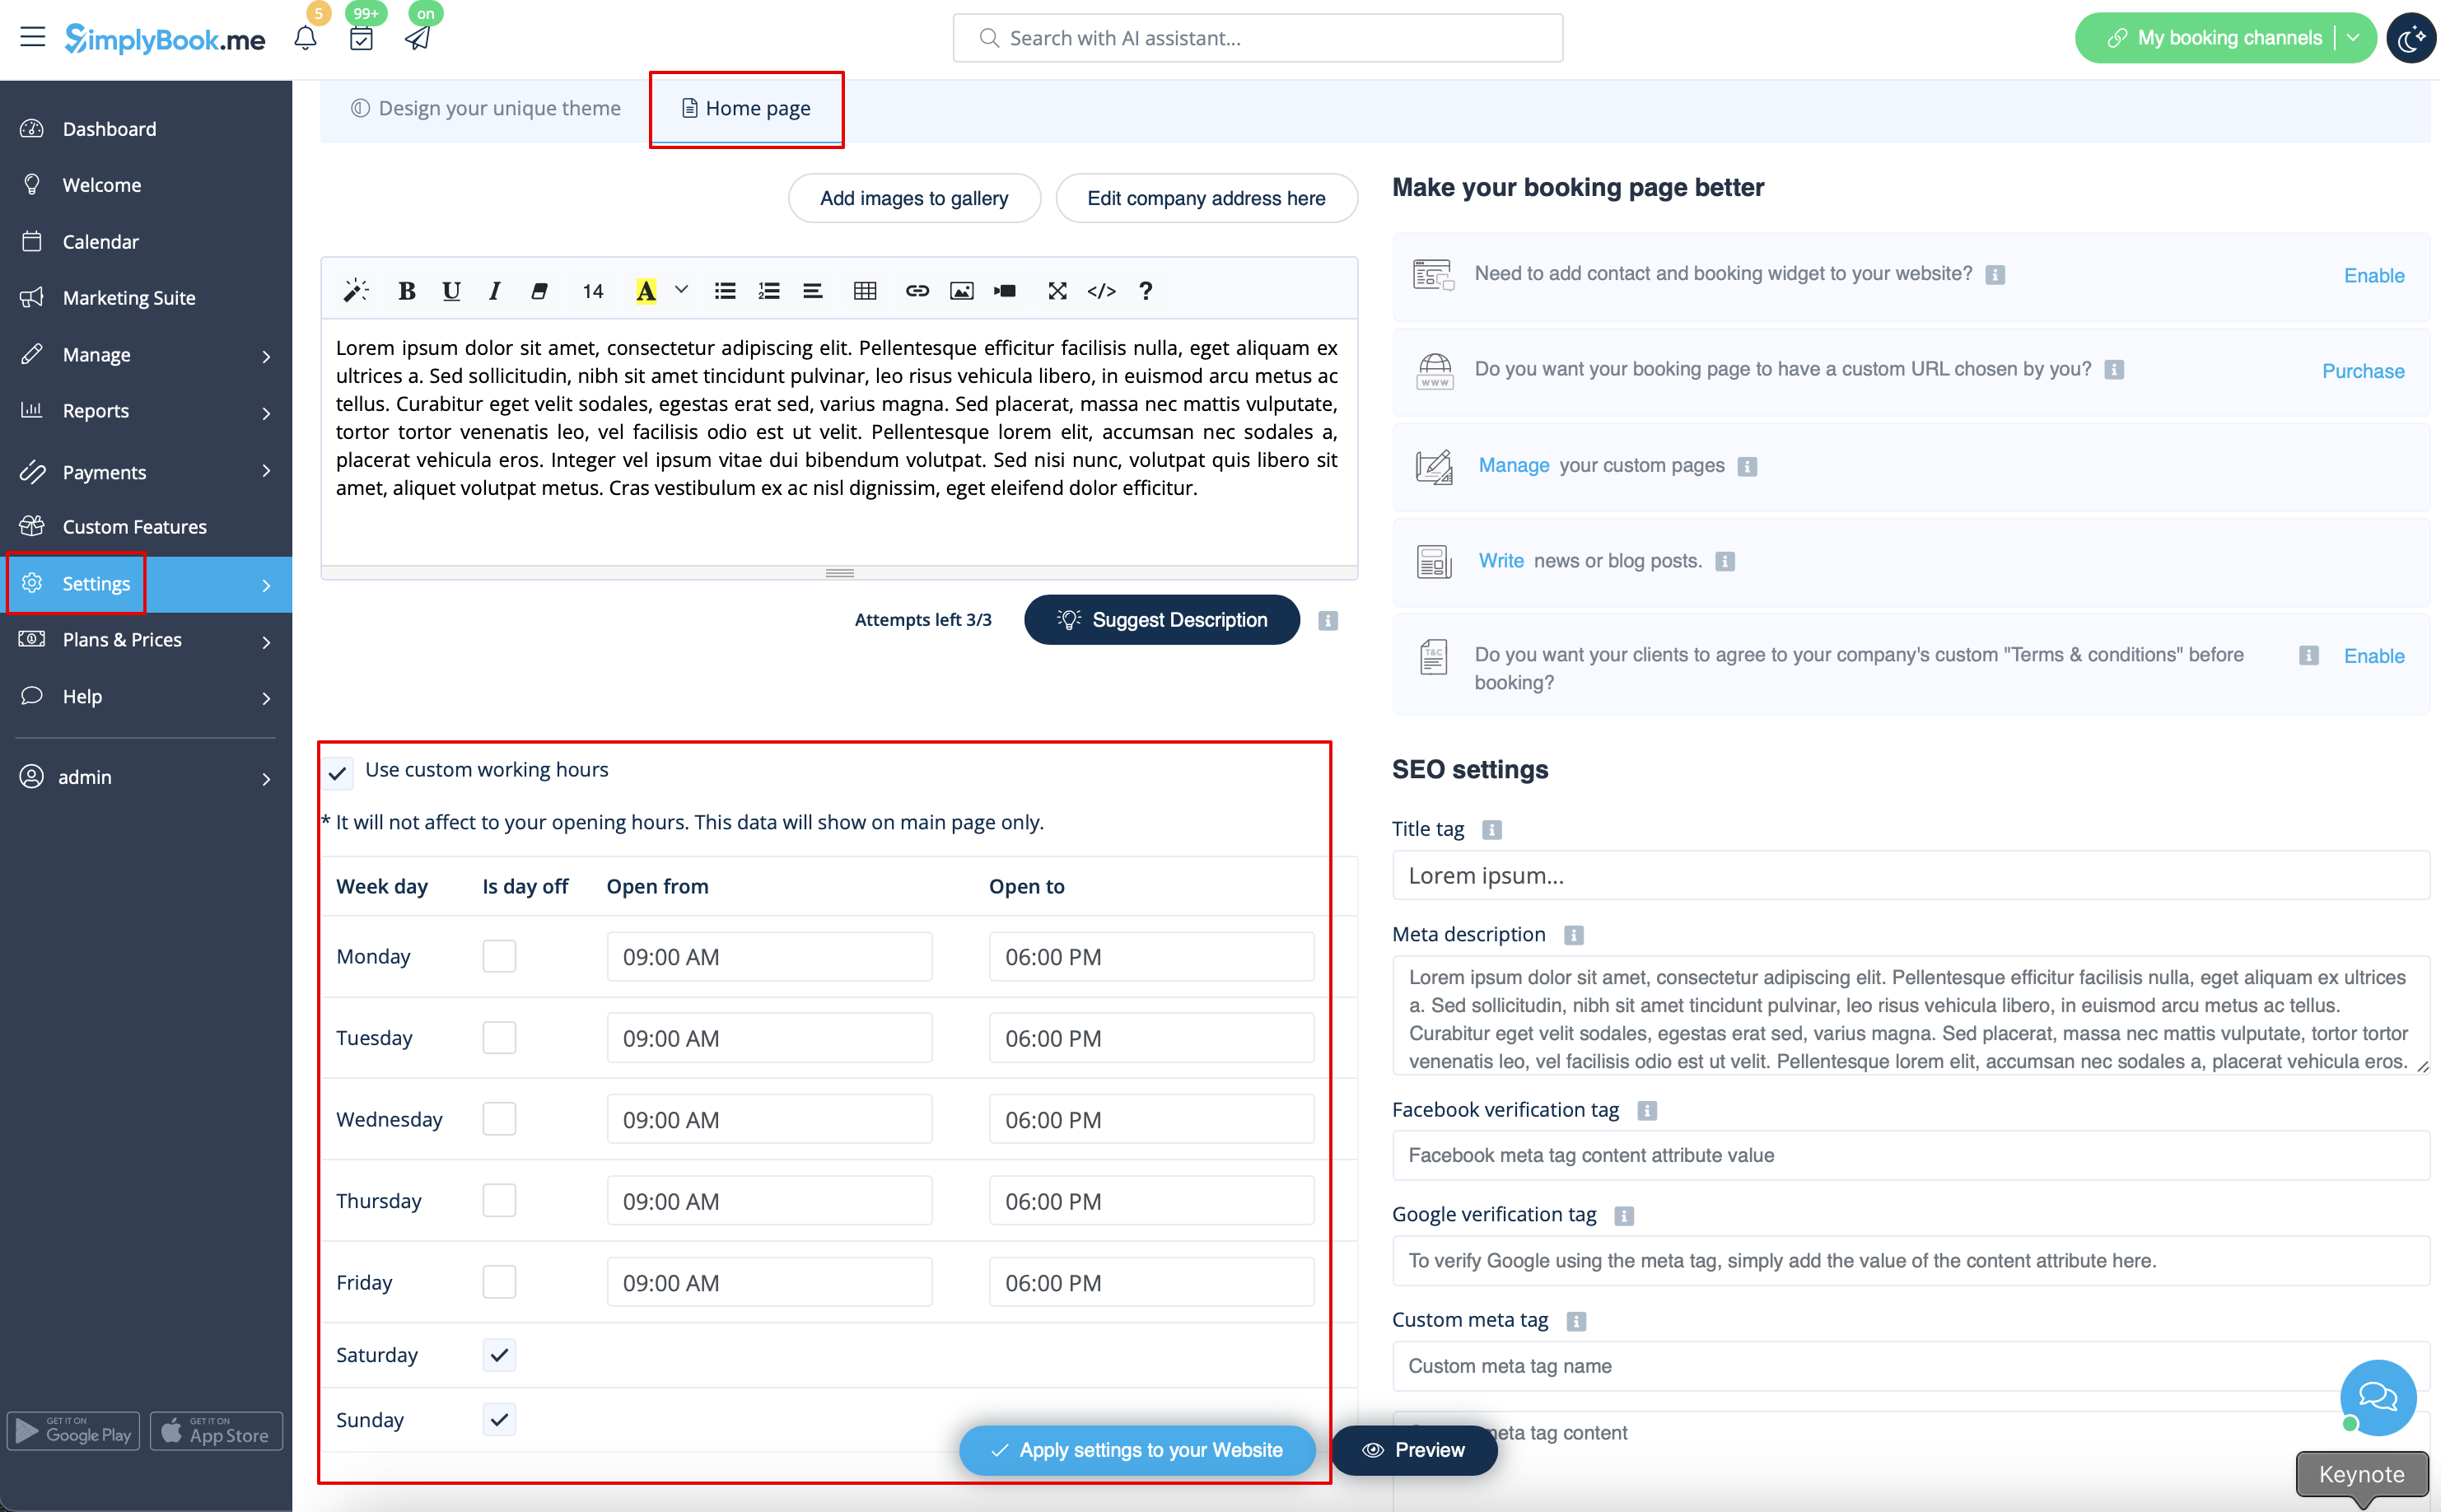
If you wish to display times different from real working hours there you can use "Use custom working hours" in Settings//Design settings//Home page.
Calendar Layout
You can change calendar layout in Settings // Design settings // Calendar Layout settings // Calendar Layout drop-down
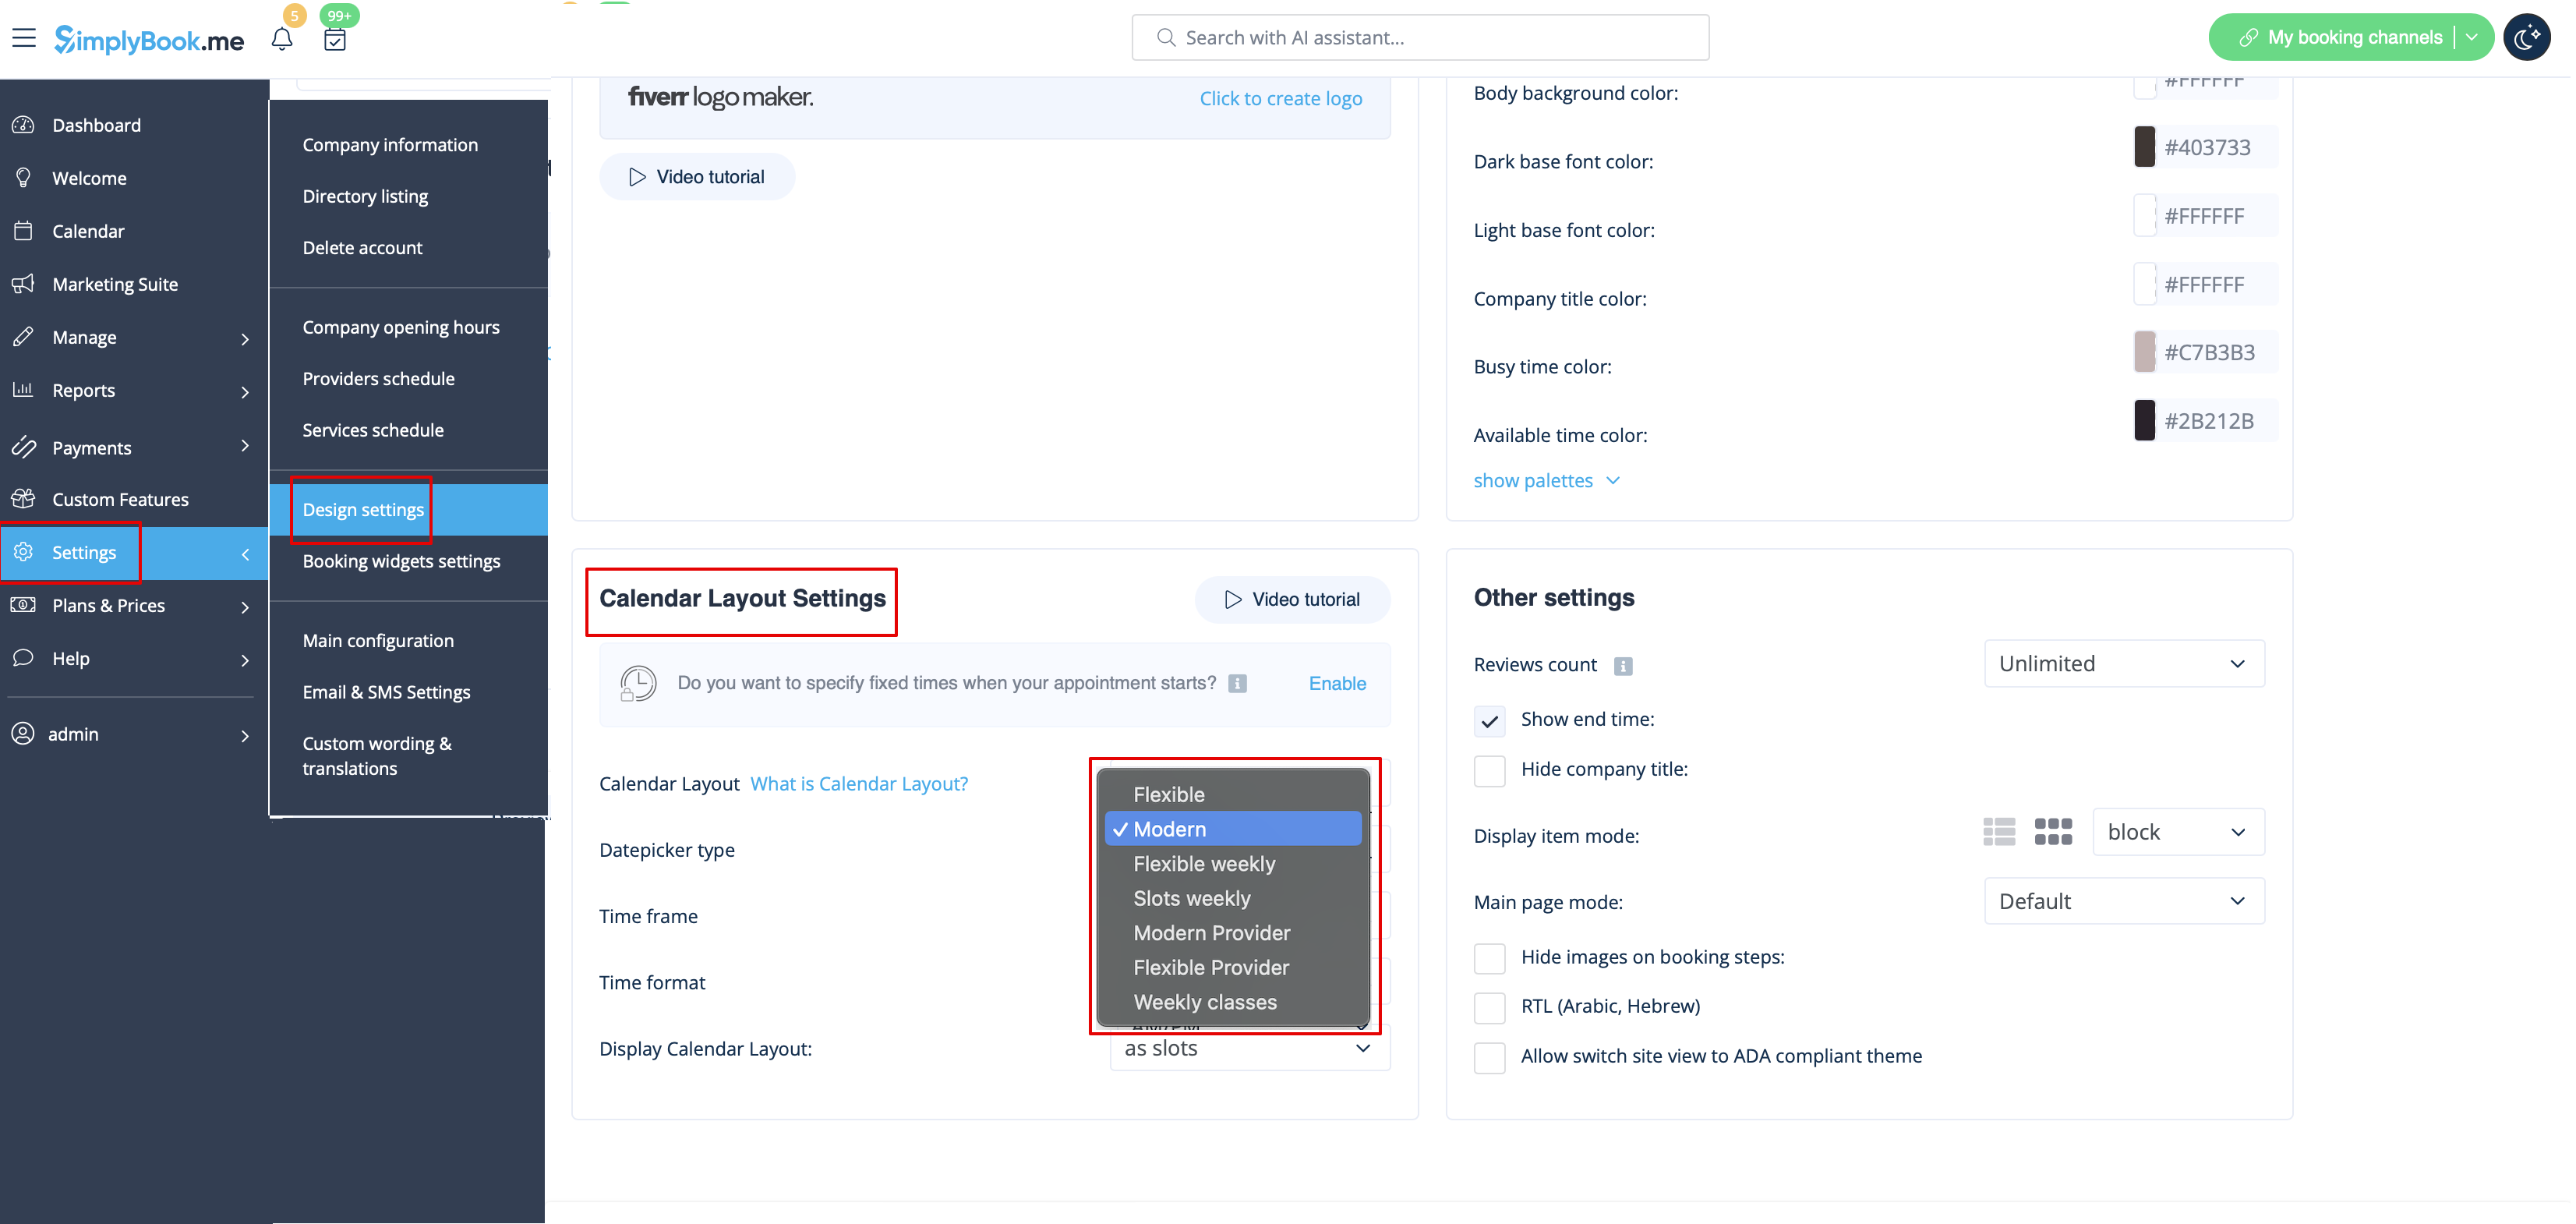
There are 9 types of calendar layout:
- Slots weekly - shows available time in the intervals equal to your service duration for a week. Starts counting from the first available time.
- Modern - shows available time in the intervals equal to your service duration for a day. Starts counting from the first available time.
- Flexible weekly - shows available time in the intervals equal to your timeframe duration for a week. Starts counting from the first available time.
- Flexible - shows available time in the intervals equal to your timeframe duration for a day. Starts counting from the first available time.
- Modern provider - shows available time for providers for chosen date. Starts counting from the first available time of all providers.
- Flexible provider- shows available times for providers in the intervals equal to your timeframe duration. Starts counting from the first available time on selected date.
- Daily Classes- shows available times for classes in the intervals equal to class duration. Starts counting from the first available time.
- Please note! Multiple Bookings custom feature currently does not work with Classes layout.
- Weekly Classes shows available times for classes in the intervals equal to class duration with weekly options. Starts counting from the first available time for a date. Only available times are displayed, unavailable slots are hidden.
If you have services that have fixed start times, you can try using Appointment at fixed time Custom Feature.
Interval
You can change it in Settings // Main configuration // Timeframe.
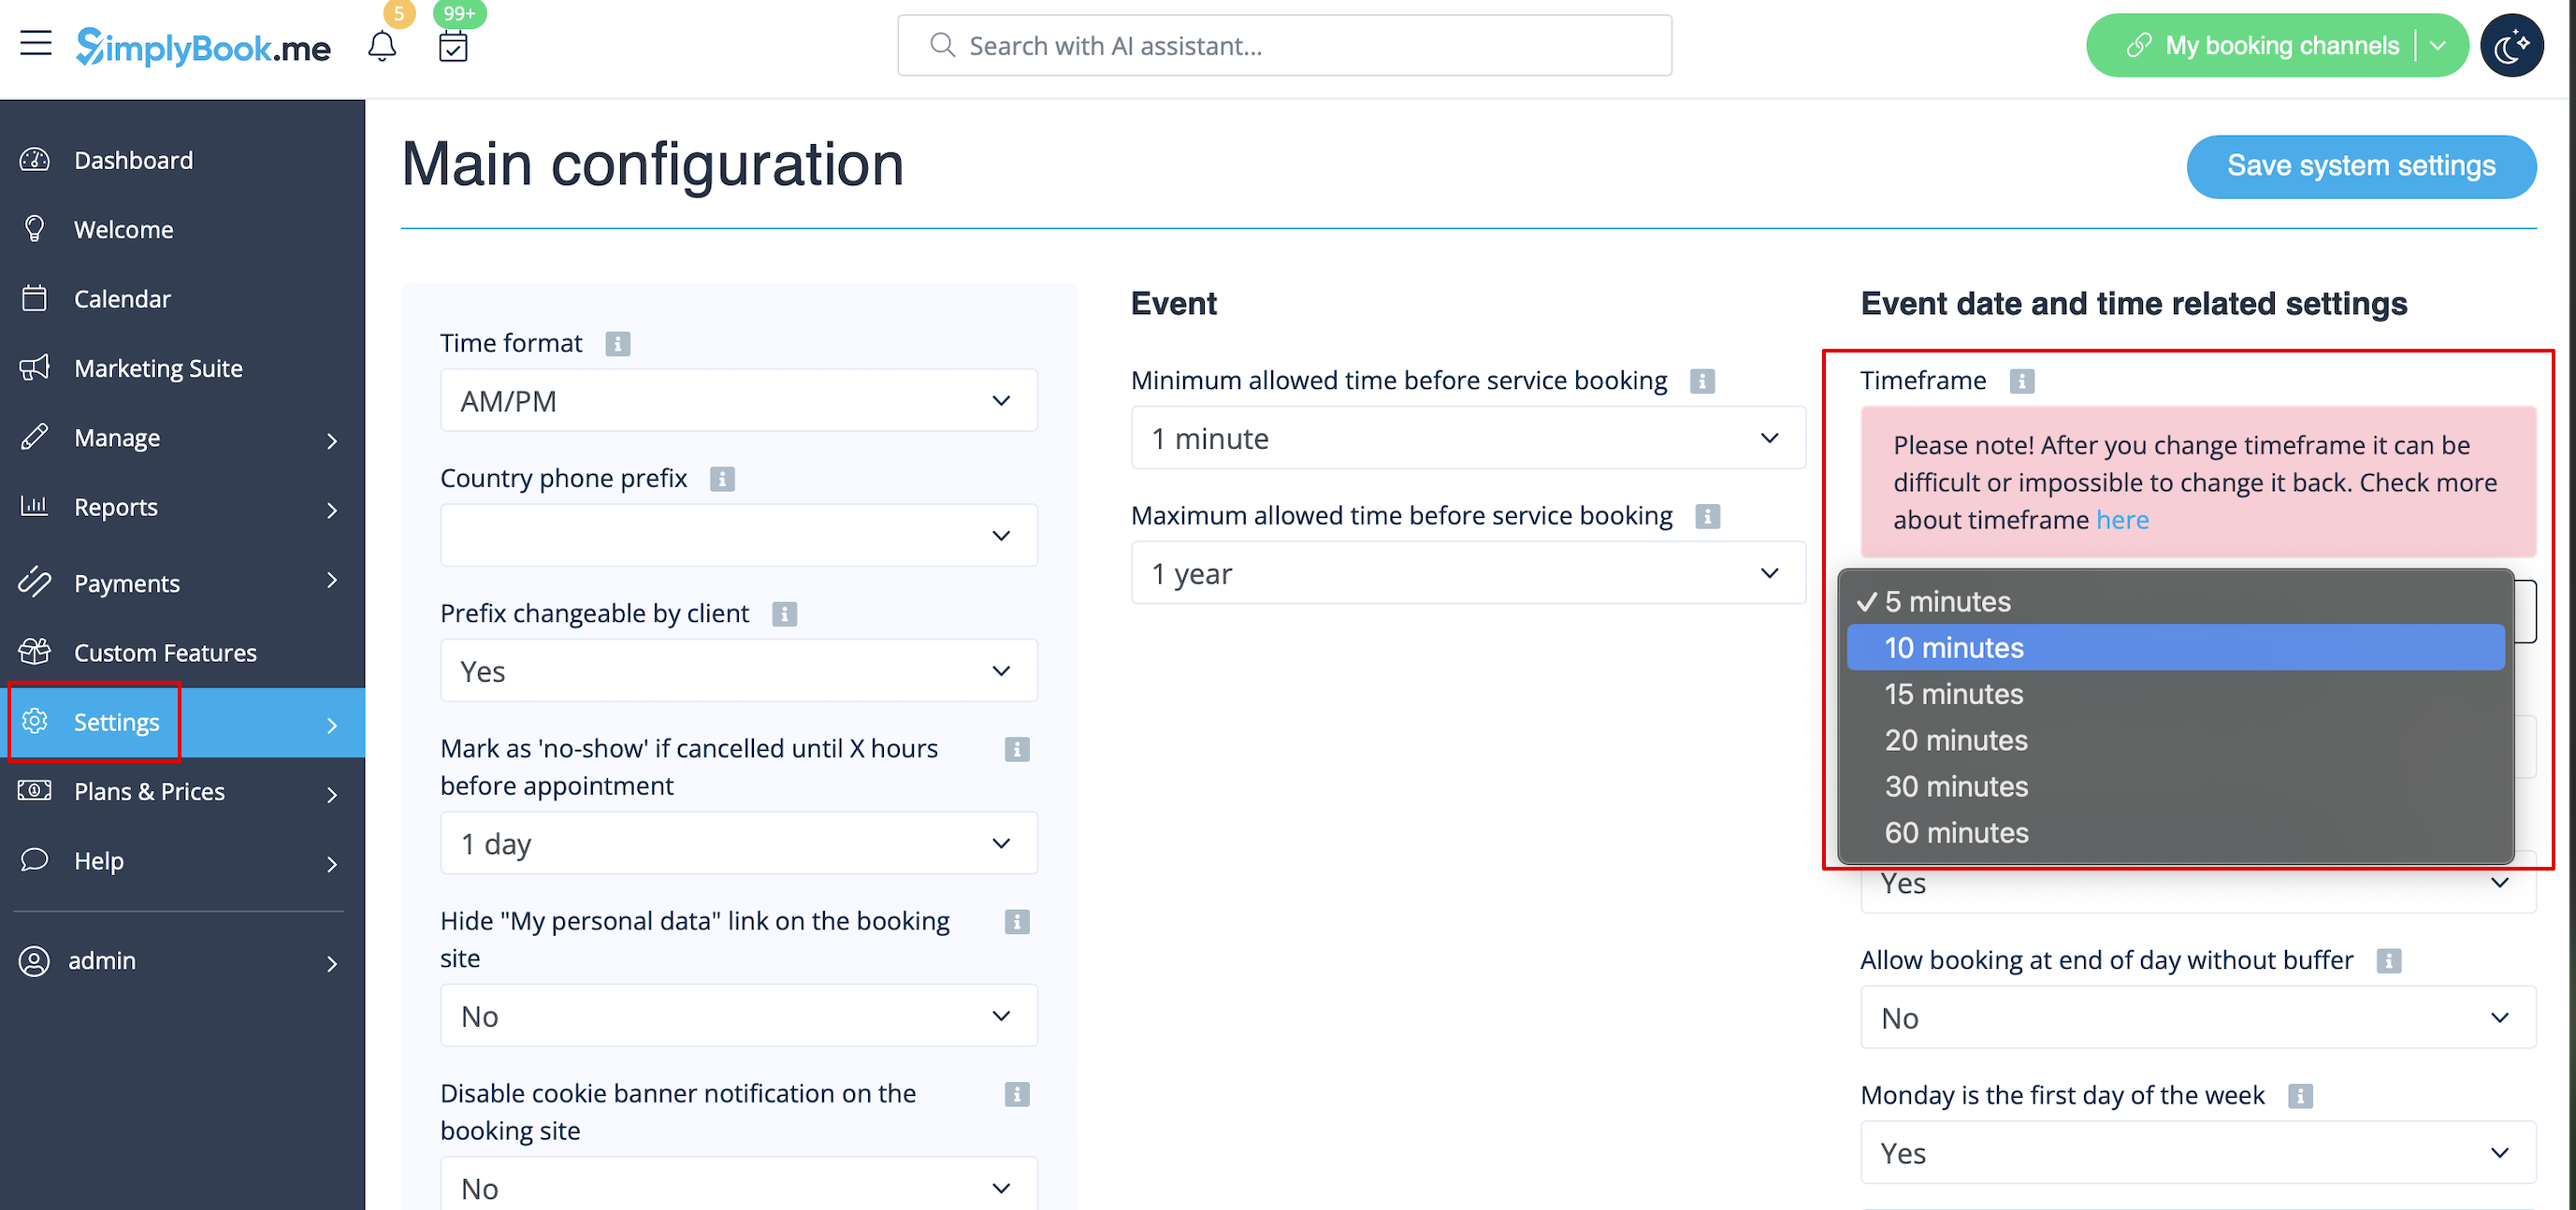
You can also try to change calendar layout to flexible in order to show availability according to your interval. Check types of Calendar Layouts here.