From SimplyBook.me
Created page with "Go Daddy" Tags: Mobile edit Mobile web edit |
Created page with "{{#seo: |title=Go Daddy-vejledning til SimplyBook.me |description=Forbind din SimplyBook.me-bookingside med dit GoDaddy-domæne. Følg vores guide for at komme i gang i dag! |titlemode=tilføj |keywords=faq, ofte stillede spørgsmål, bookingssoftware, spørgsmål om aftalesystem, onlineaftaler, kalendersoftware, bookingsystem, bookingkalender, planlægningssoftware, online aftaleplanlægning, online planlægning, opsætning, hjælp til opsætning, support, hjælpeindhol..." |
||
| Line 1: | Line 1: | ||
<languages/> | <languages/> | ||
{{#seo: |title=Go Daddy-vejledning til SimplyBook.me |description=Forbind din SimplyBook.me-bookingside med dit GoDaddy-domæne. Følg vores guide for at komme i gang i dag! |titlemode=tilføj |keywords=faq, ofte stillede spørgsmål, bookingssoftware, spørgsmål om aftalesystem, onlineaftaler, kalendersoftware, bookingsystem, bookingkalender, planlægningssoftware, online aftaleplanlægning, online planlægning, opsætning, hjælp til opsætning, support, hjælpeindhold }} | |||
{{#seo: | |||
|title=Go Daddy | |||
|description= | |||
|titlemode= | |||
|keywords=faq, | |||
}} | |||
<div lang="en" dir="ltr" class="mw-content-ltr"> | <div lang="en" dir="ltr" class="mw-content-ltr"> | ||
[[File:Godaddy-logo (2).png| left]]<br><br> | [[File:Godaddy-logo (2).png| left]]<br><br> | ||
Revision as of 08:54, 18 June 2025
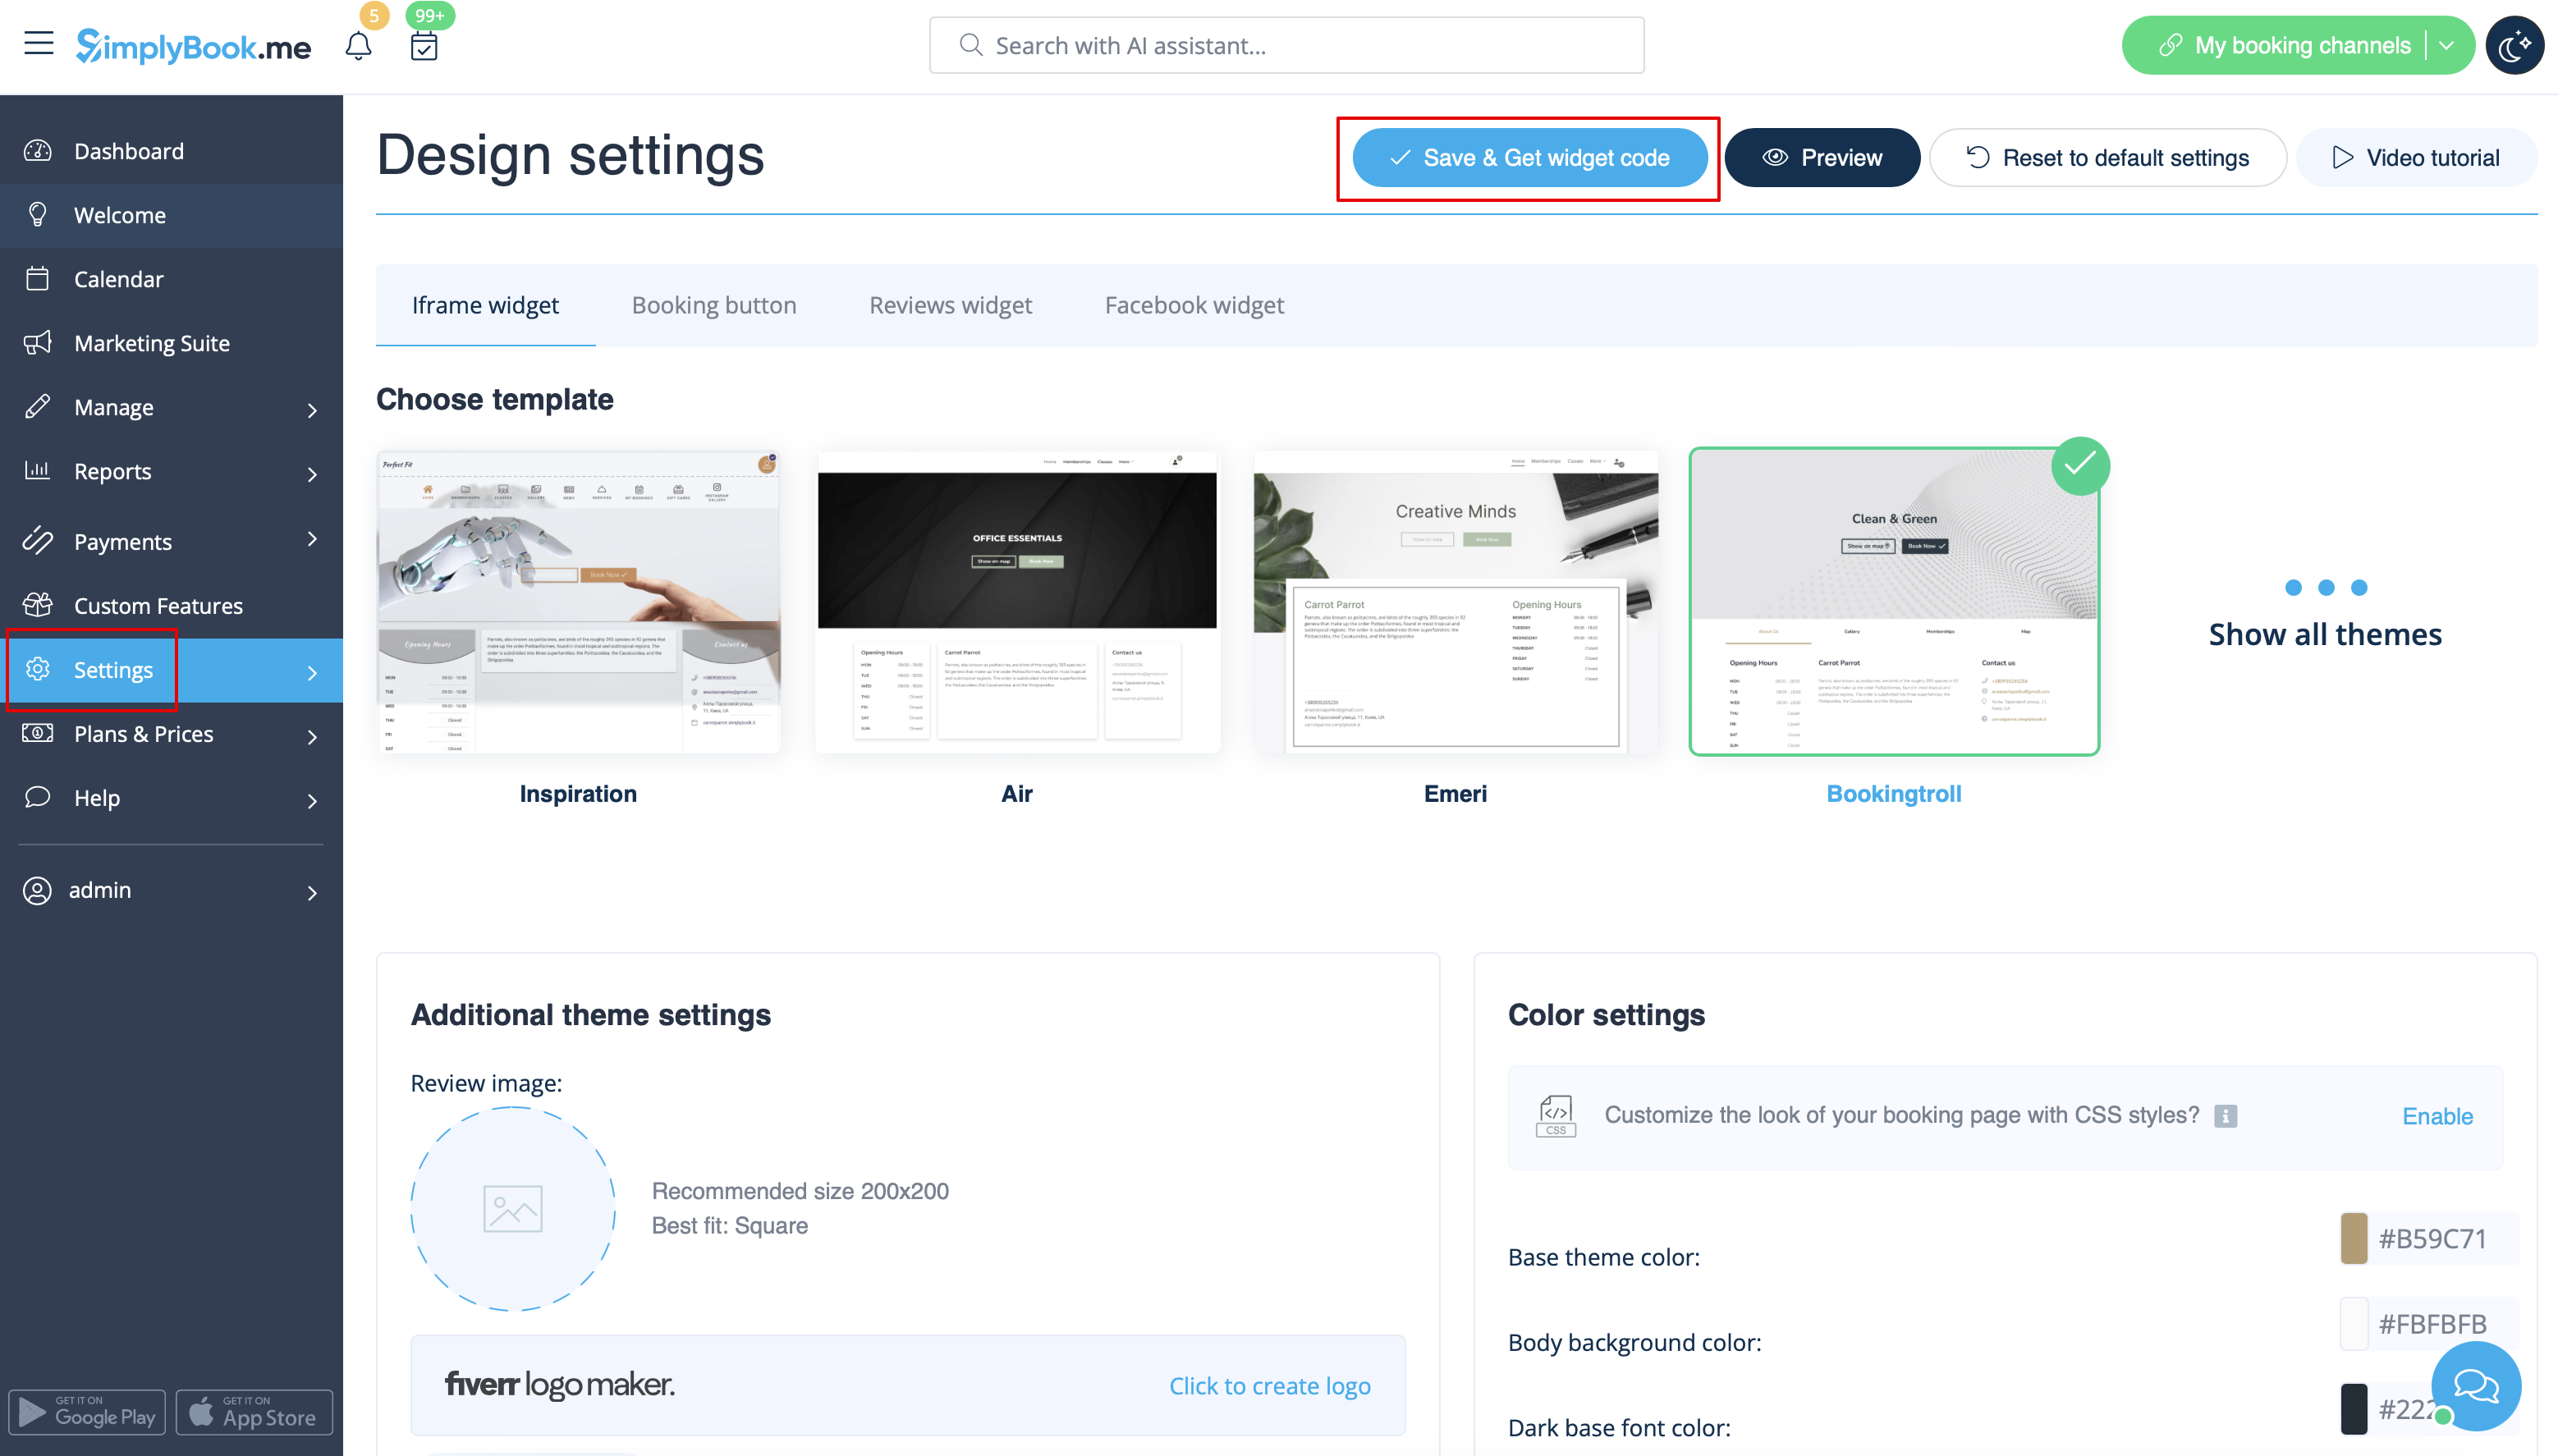
- 1. In your Simplybook admin page get the code in Settings -> Booking widgets settings -> iFrame widget -> Get widget code.
- 2. In GoDaddy system, Log in to your account and go to website editing.
- 3. Click on Pages&Sections.

- 4. Select Manage Pages option.

- 5. From the pages menu, select the page you want to modify or add a new one.

- 6. On page details add page title, set appearance options to your taste and create the page.

- 7. Proceed to adding a section.

- 8. Select to add HTML block from the side menu.

- 9. Paste the code that you have previously copied from SimplyBook.me interface to the corresponding box.

- 10. Check the preview and publish the changes.
