:6. Adjust the design to your taste and needs, <span style="background-color:#d4f8e5; padding:5px; border-radius:5px;">get widget code.</span>
:6. Pas het ontwerp aan uw smaak en behoeften aan en <span style="background-color:#d4f8e5; padding:5px; border-radius:5px;">kopieer de widgetcode.</span>
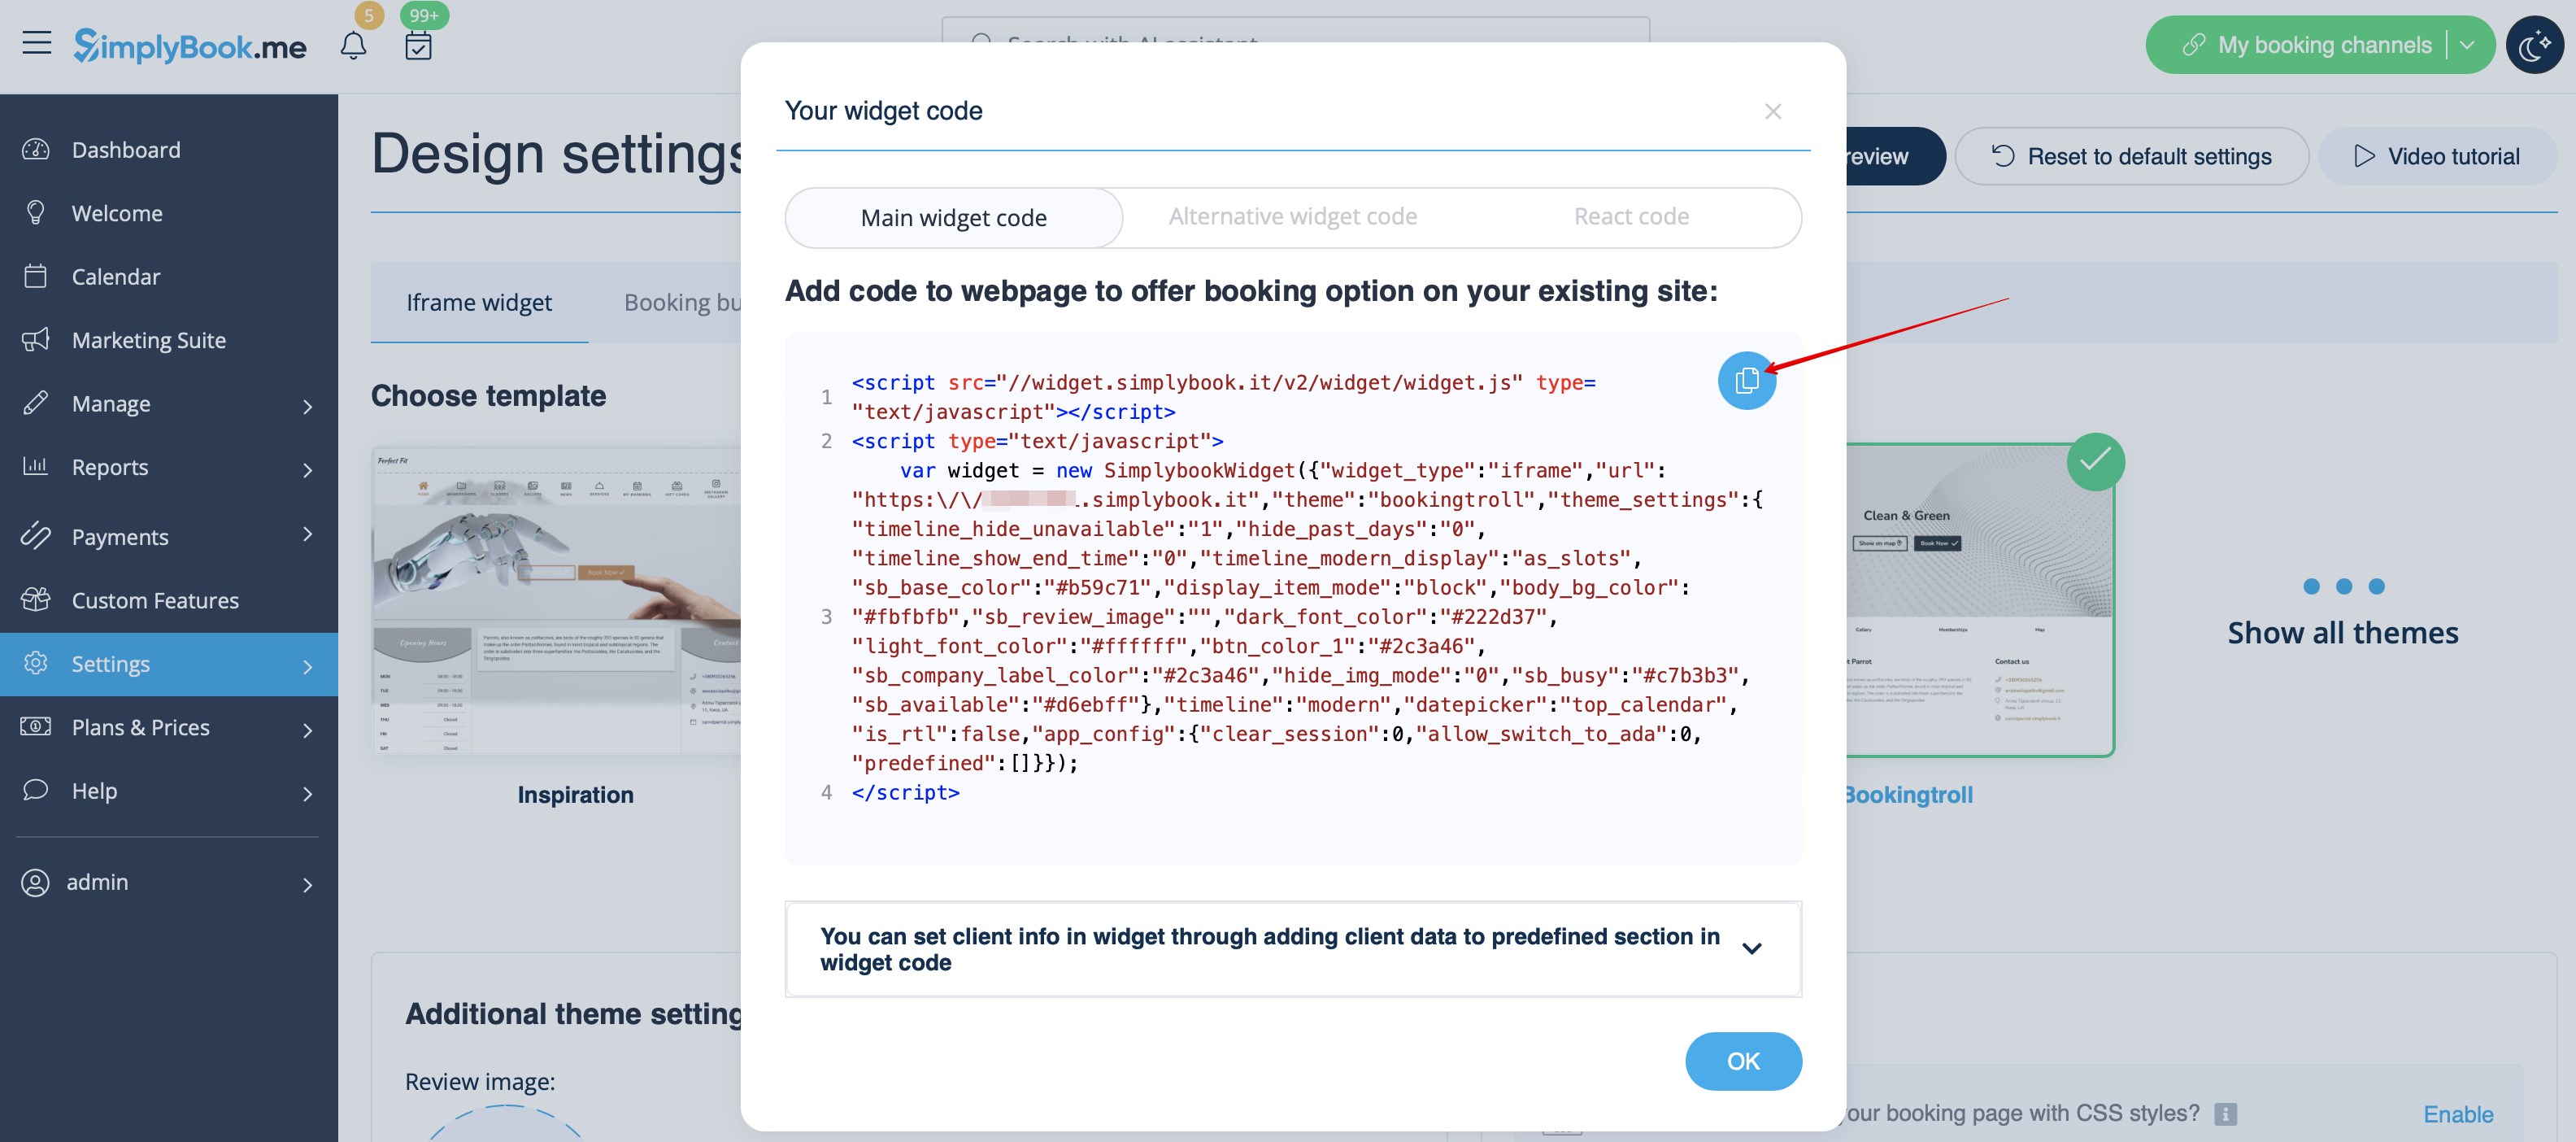
:7. Copy the whole code from the popup and insert it to <span style="background-color:#d4f8e5; padding:5px; border-radius:5px;">HTML</span> field on Shopify side. Adjust container width if necessary. <span style="background-color:#d4f8e5; padding:5px; border-radius:5px;">Save</span> the changes
:7. Kopieer de volledige code uit het pop-upvenster en plak deze in <span style="background-color:#d4f8e5; padding:5px; border-radius:5px;">het HTML-veld</span> aan de Shopify-kant. Pas indien nodig de breedte van de container aan. <span style="background-color:#d4f8e5; padding:5px; border-radius:5px;">Sla</span> de wijzigingen <span style="background-color:#d4f8e5; padding:5px; border-radius:5px;">op</span>
[[File:Insert html to shopify side.png|border|center]]
[[File:Insert html to shopify side.png|border|center]]
<br><br>
<br><br>
:8. As the result you will see how the booking widget looks like right away.
:8. Het resultaat is dat u meteen kunt zien hoe de boekingswidget eruitziet.
Als u Shopify gebruikt en de mogelijkheid om te boeken aan uw website wilt toevoegen, hebben wij de juiste oplossing voor u!
Met onze iFrame-widget kunt u de Shopify-website koppelen aan SimplyBook.com, zodat uw klanten rechtstreeks vanaf de website kunnen boeken, zowel vanaf hun pc als vanaf hun mobiele apparaten. Deze oplossing maakt uw boekingsproces gemakkelijker en overzichtelijker.
Hoe instellen
1. Ga naar Online Store -> Themes -> Customize in uw Shopify-account.
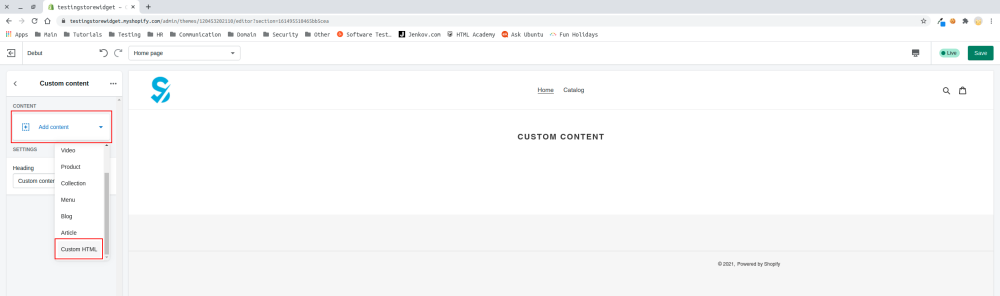
2. Selecteer de sectie die u wilt bewerken aan de linkerkant of voeg een nieuwe toe.
3. Kies voor Custom content toevoegen .
4. Klik op 'Add content' (In houd toevoegen) en selecteer 'Custom HTML' (Aangepaste HTML
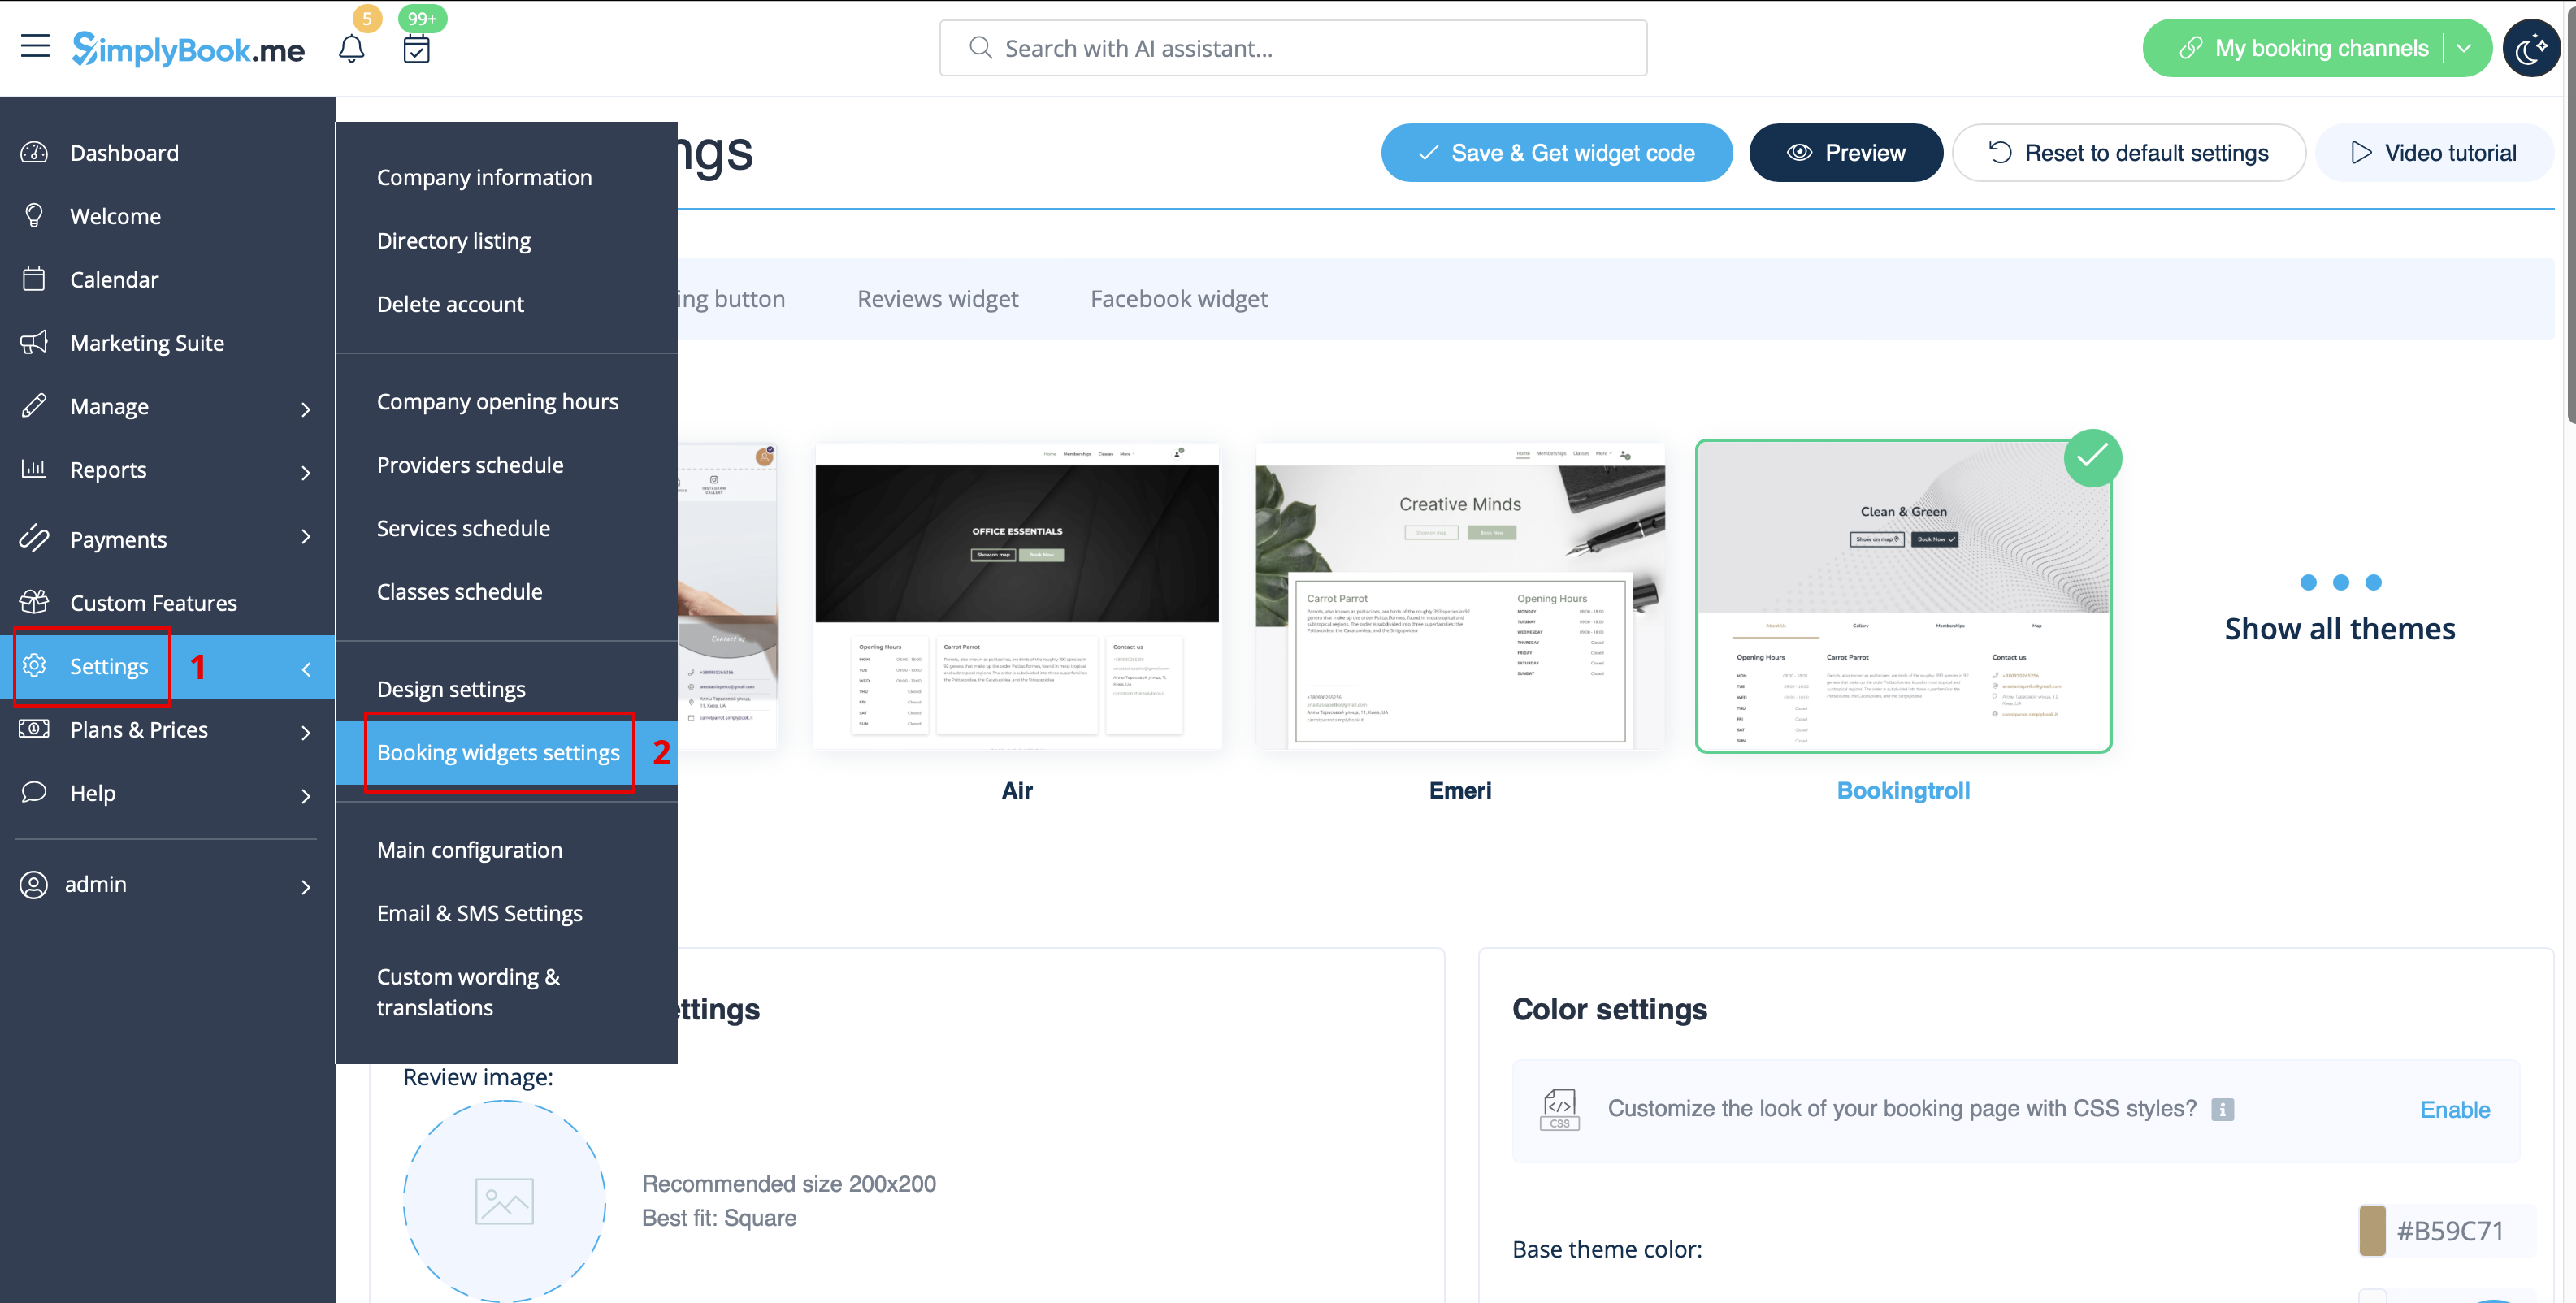
5. Ga naar uw SimplyBook.me-account -> Settings (Instellingen ) -> Booking widgets settings (Instellingen voor boekingswidgets) -> iFrame widgetiFrame-widget
6. Pas het ontwerp aan uw smaak en behoeften aan en kopieer de widgetcode.
7. Kopieer de volledige code uit het pop-upvenster en plak deze in het HTML-veld aan de Shopify-kant. Pas indien nodig de breedte van de container aan. Sla de wijzigingen op
8. Het resultaat is dat u meteen kunt zien hoe de boekingswidget eruitziet.