From SimplyBook.me
Created page with "<br><br> ===Zap-tutorial for SimplyBook og Gmail-forbindelse=== Vi bliver ofte spurgt om, hvordan man sender bekræftelsesmail til mere end én e-mailadresse. Dette kan være nødvendigt, hvis kunden har en agent, eller hvis andre personer skal modtage bekræftelsesmail for kunder. Nu er denne mulighed tilgængelig via vores applikation på Zapier!" |
Created page with ";Sådan bruges det" |
||
| Line 9: | Line 9: | ||
Vi bliver ofte spurgt om, hvordan man sender bekræftelsesmail til mere end én e-mailadresse. Dette kan være nødvendigt, hvis kunden har en agent, eller hvis andre personer skal modtage bekræftelsesmail for kunder. Nu er denne mulighed tilgængelig via vores applikation på Zapier! | Vi bliver ofte spurgt om, hvordan man sender bekræftelsesmail til mere end én e-mailadresse. Dette kan være nødvendigt, hvis kunden har en agent, eller hvis andre personer skal modtage bekræftelsesmail for kunder. Nu er denne mulighed tilgængelig via vores applikation på Zapier! | ||
;Sådan bruges det | |||
; | |||
<div lang="en" dir="ltr" class="mw-content-ltr"> | <div lang="en" dir="ltr" class="mw-content-ltr"> | ||
Revision as of 10:58, 16 March 2026
Zap-tutorial for SimplyBook og Gmail-forbindelse
Vi bliver ofte spurgt om, hvordan man sender bekræftelsesmail til mere end én e-mailadresse. Dette kan være nødvendigt, hvis kunden har en agent, eller hvis andre personer skal modtage bekræftelsesmail for kunder. Nu er denne mulighed tilgængelig via vores applikation på Zapier!
- Sådan bruges det
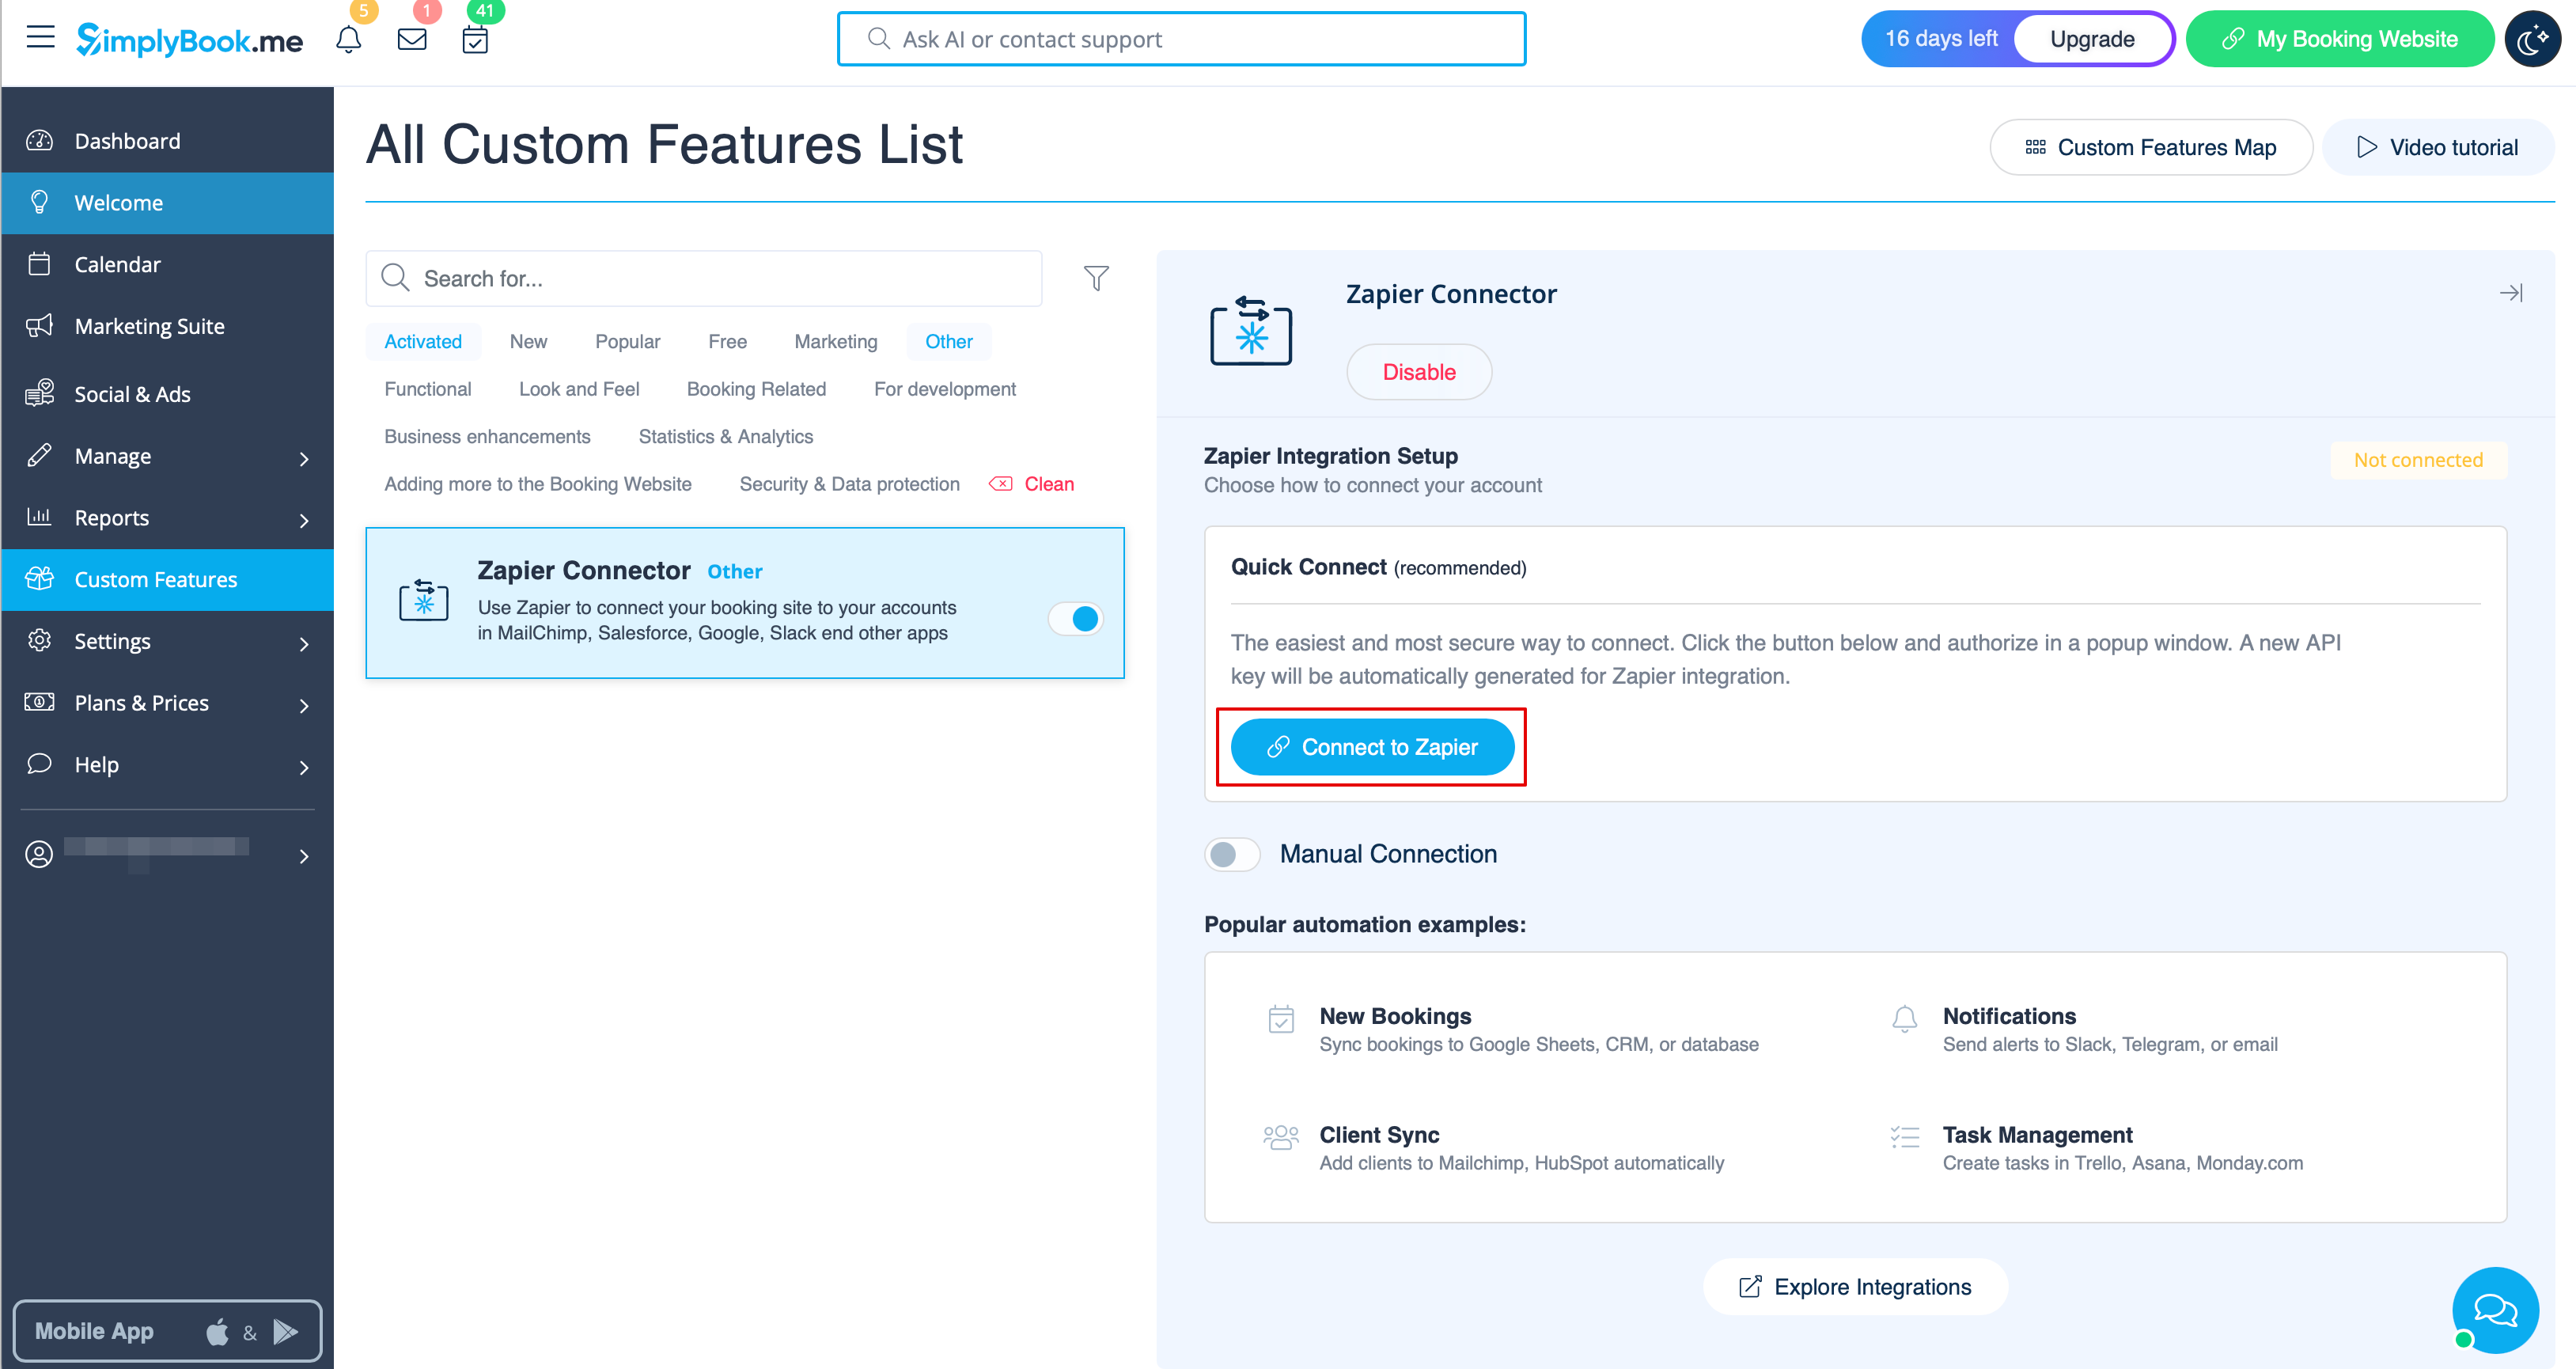
- 1. Enable Zapier connector custom feature on your Custom features page.

- 2. Connect to your Zapier account using the ‘’’Quick connect’’’ option
- 3. Or you can choose a manual connection by credentials.
- Go to Zapier.com -> App connections page and click on “Add connection” button

- Select SimplyBook.me
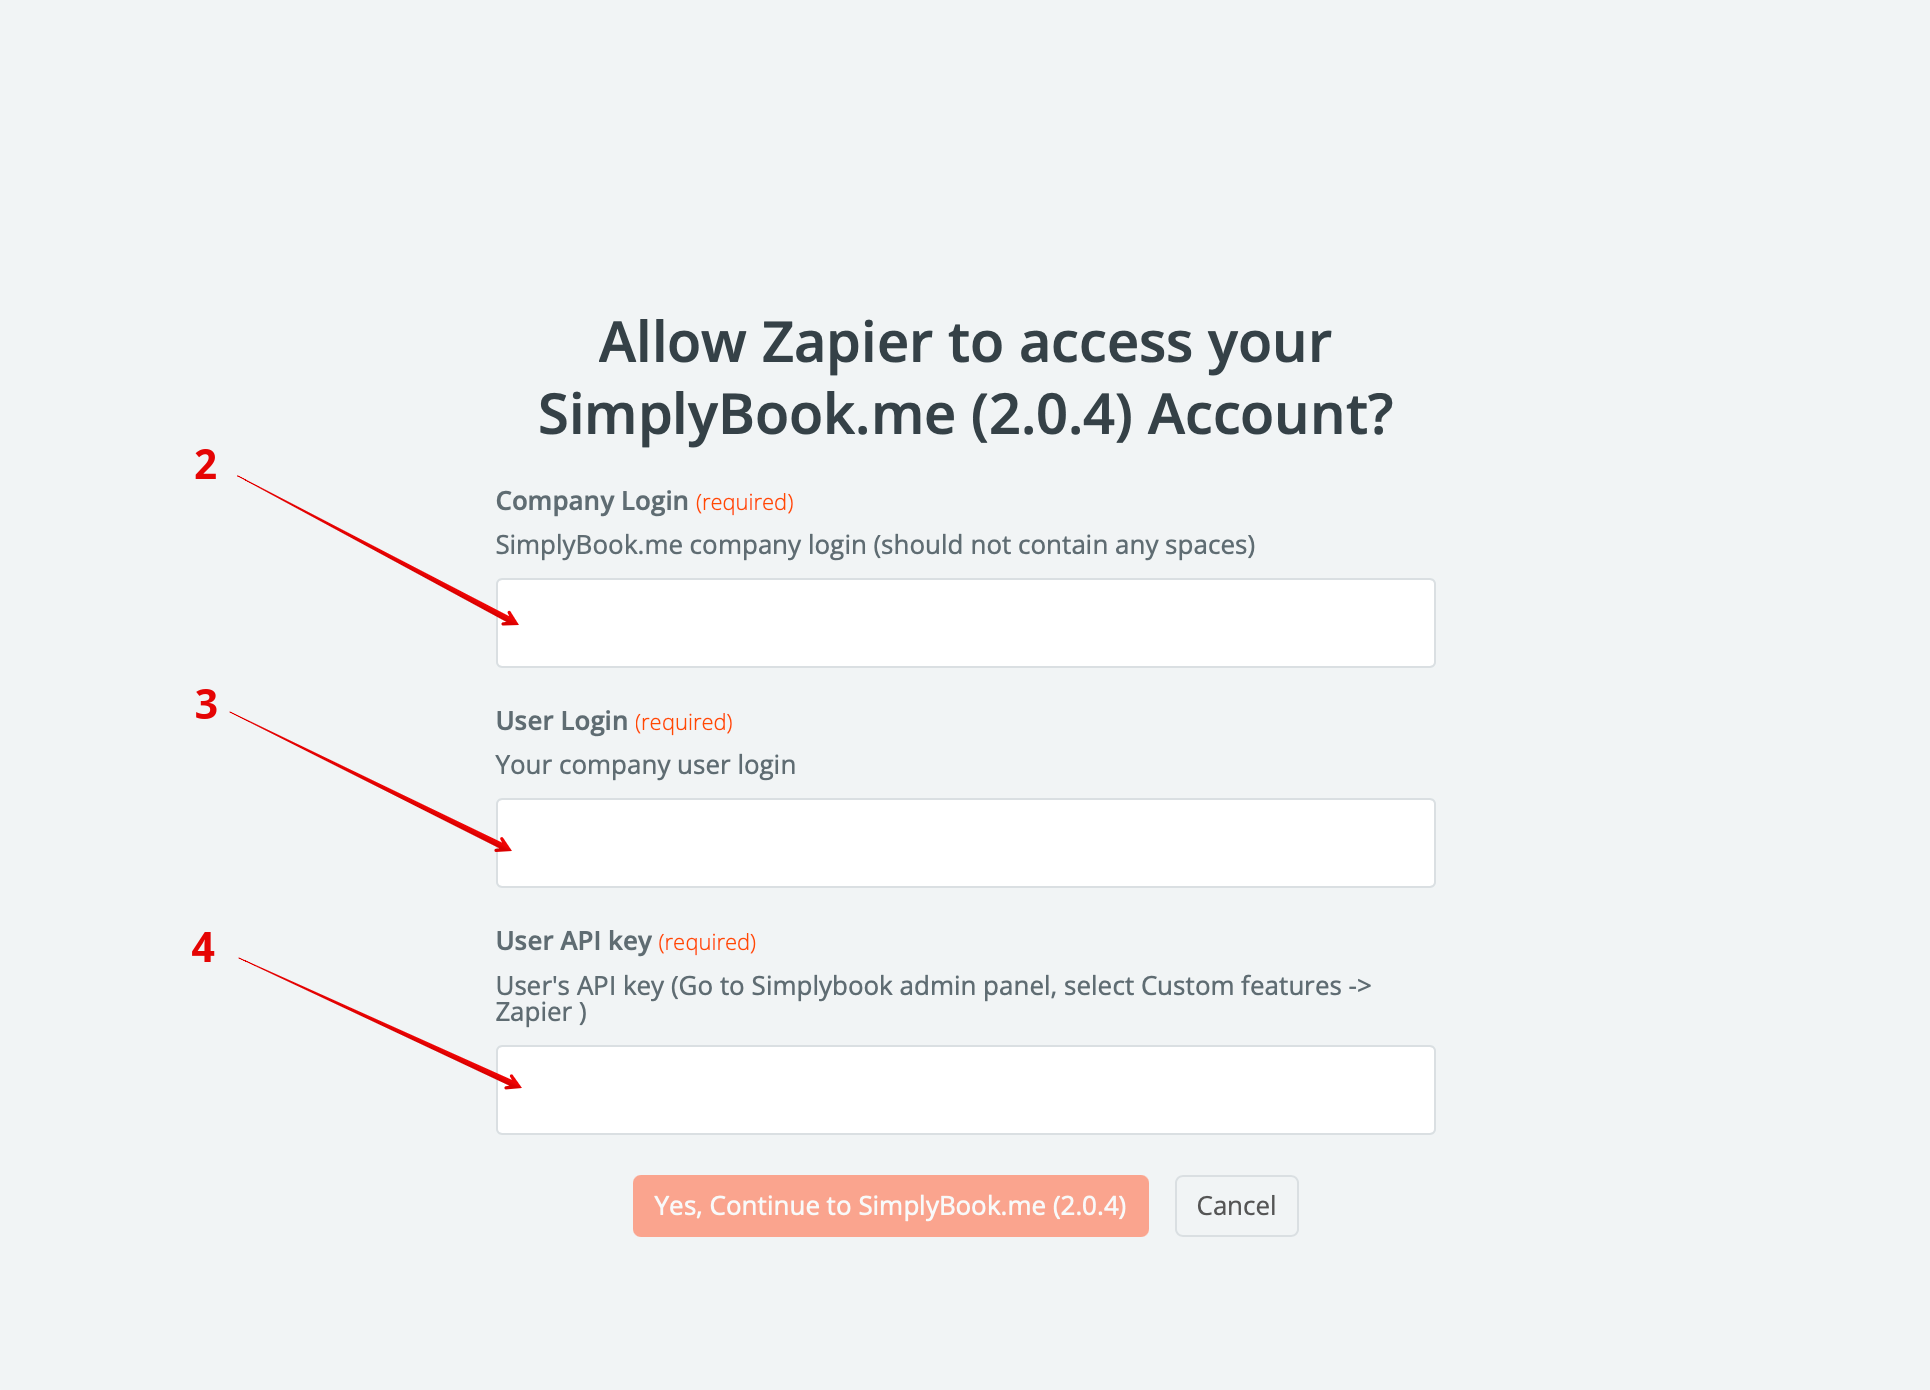
- Copy company login, user login, generate and copy API key from your SimpyBook.me account
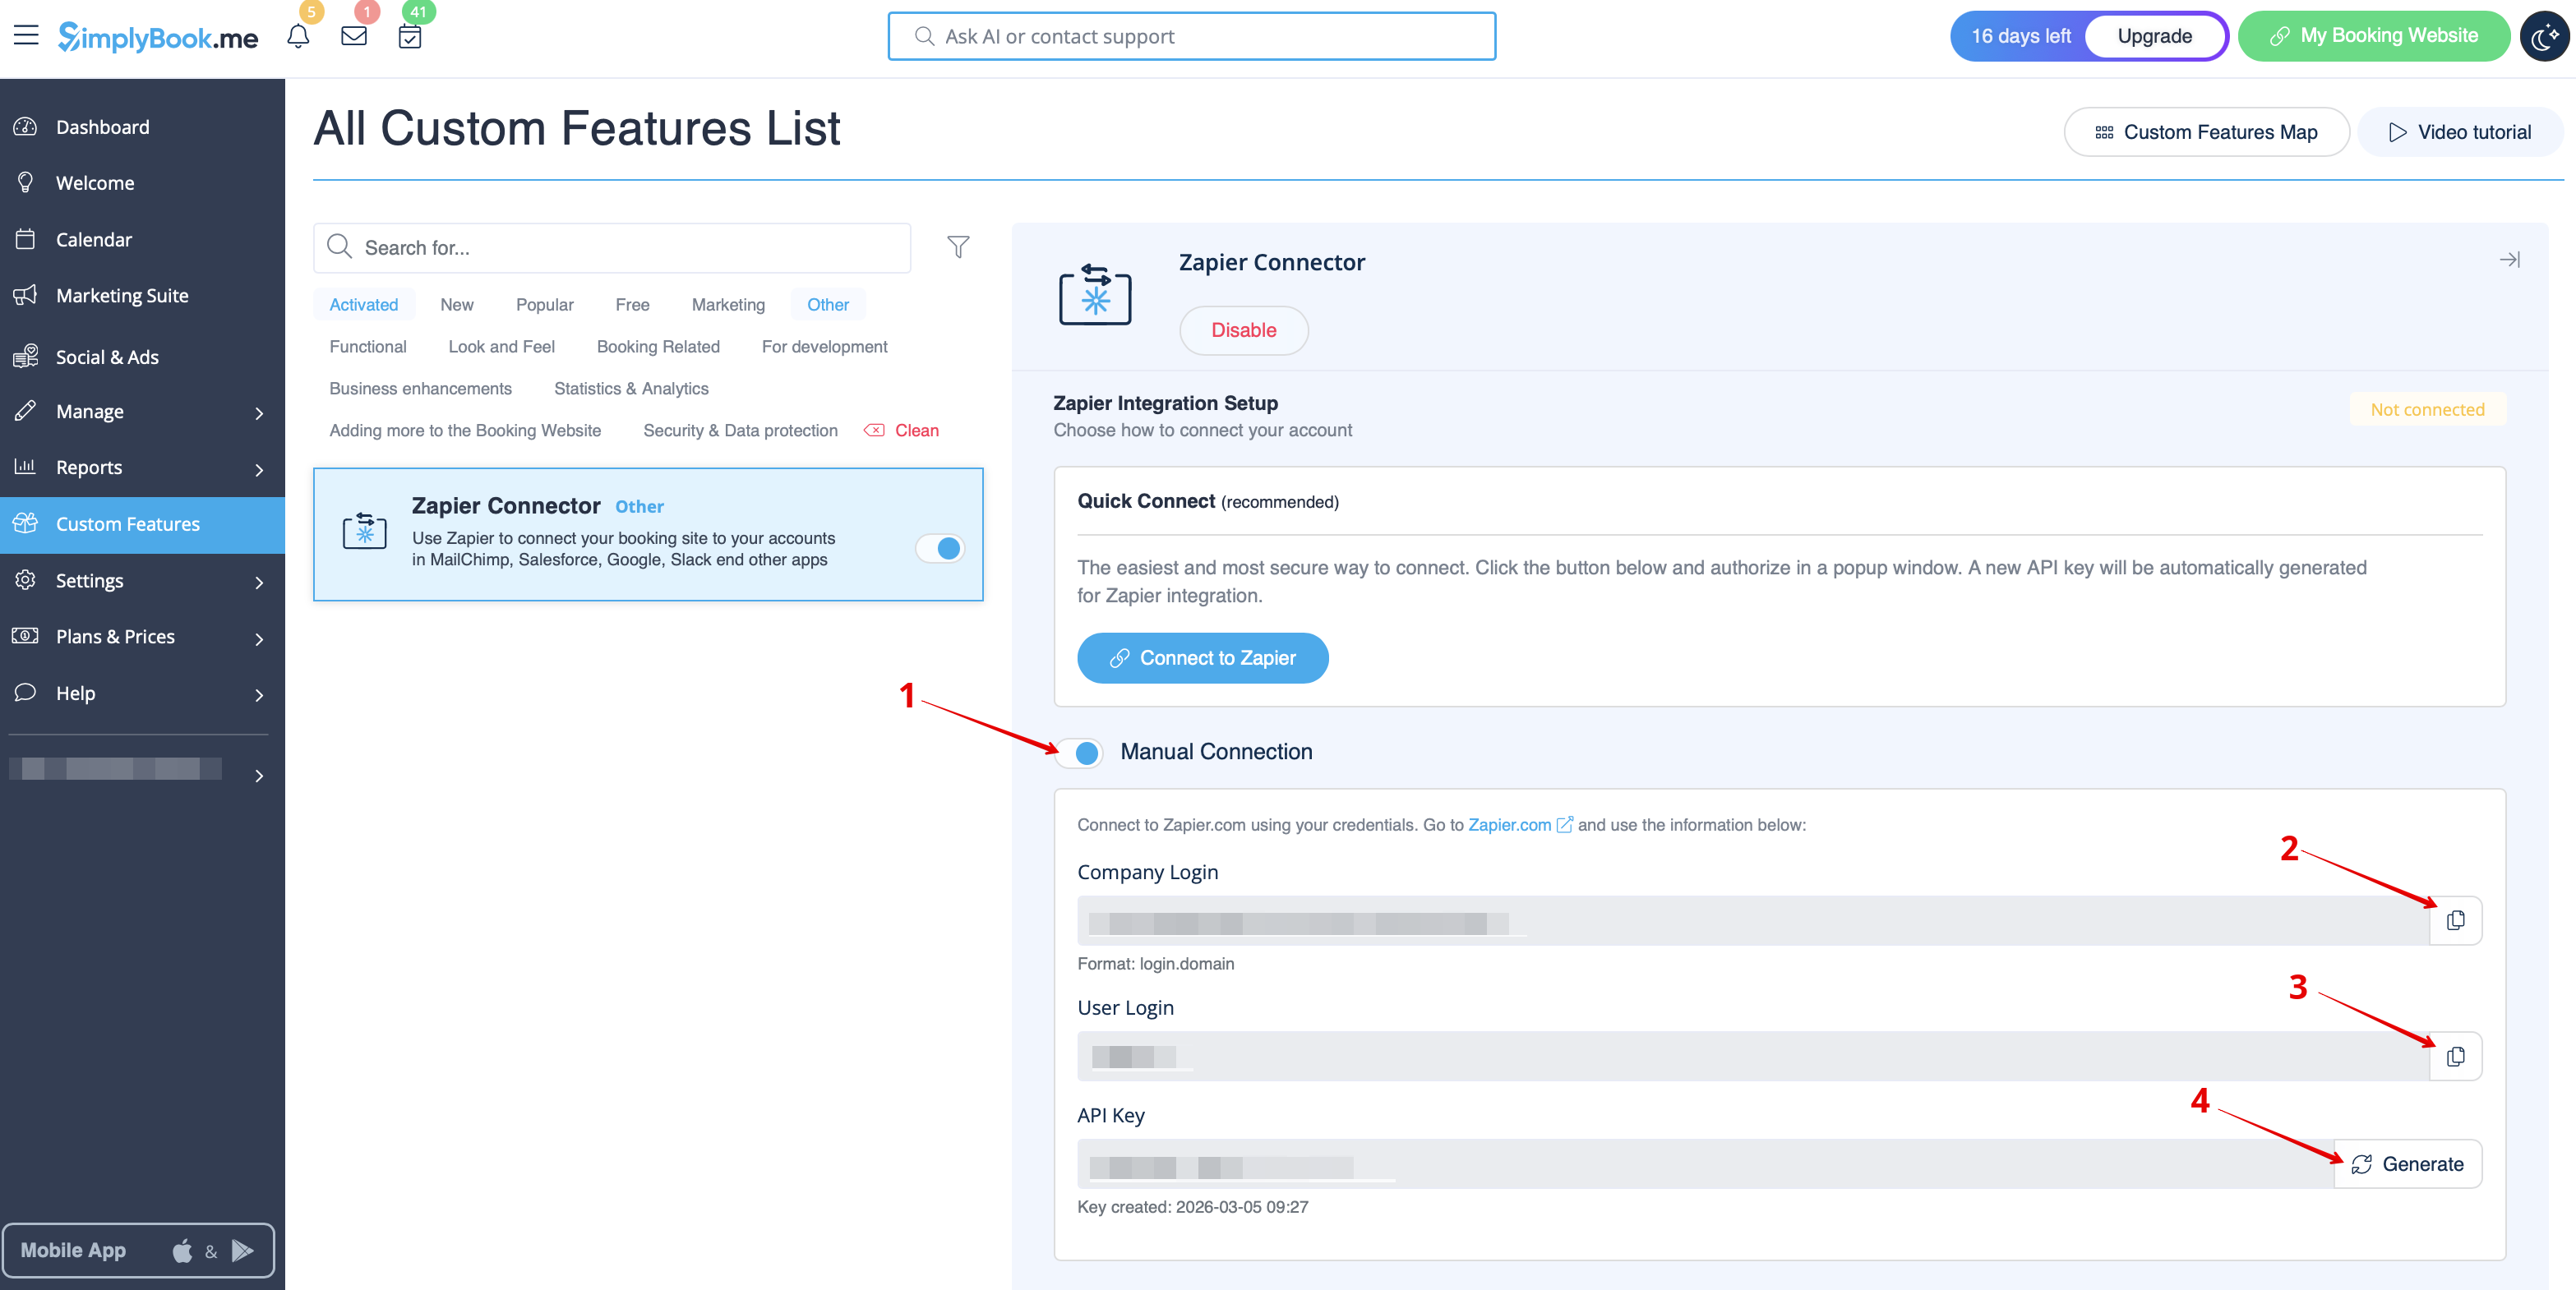
- Paste them to the corresponding fields on Zapier.com side and click on “Continue” option there. The account gets connected.
- 4. Create an intake form for the 2nd recipient in admin Simplybook app with the help of Intake Forms Custom Feature.
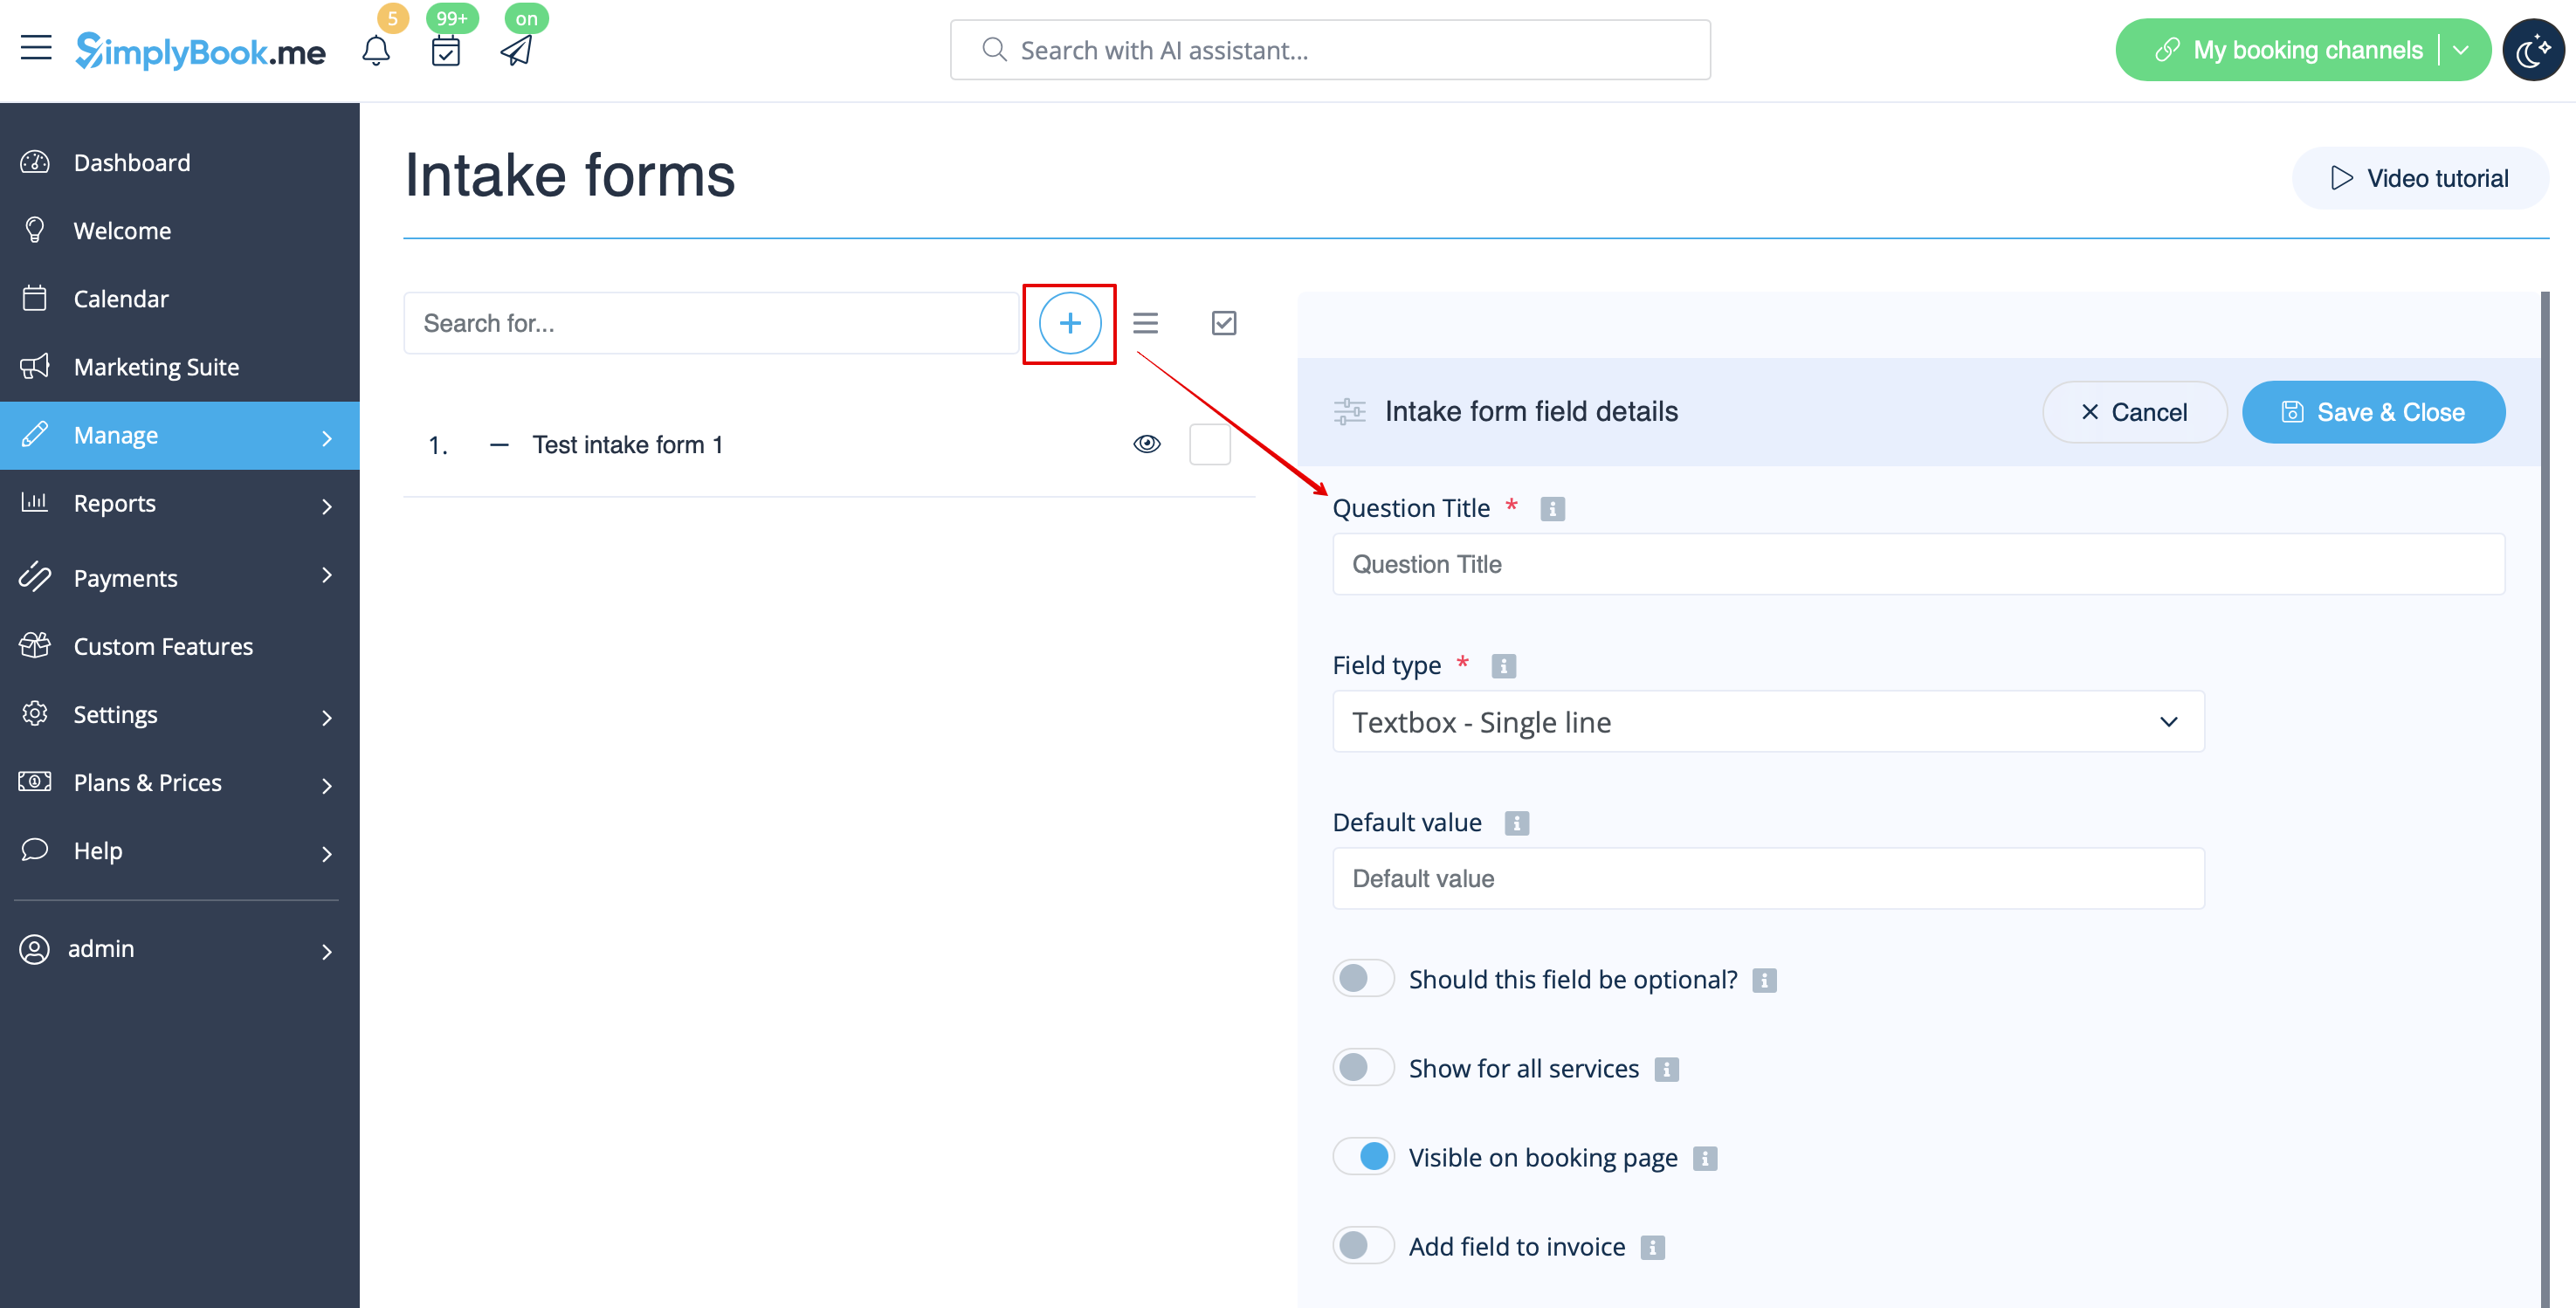
- 5. After creating an intake form, you will see the variable name at the bottom of the variables list in Settings//Email and SMS settings
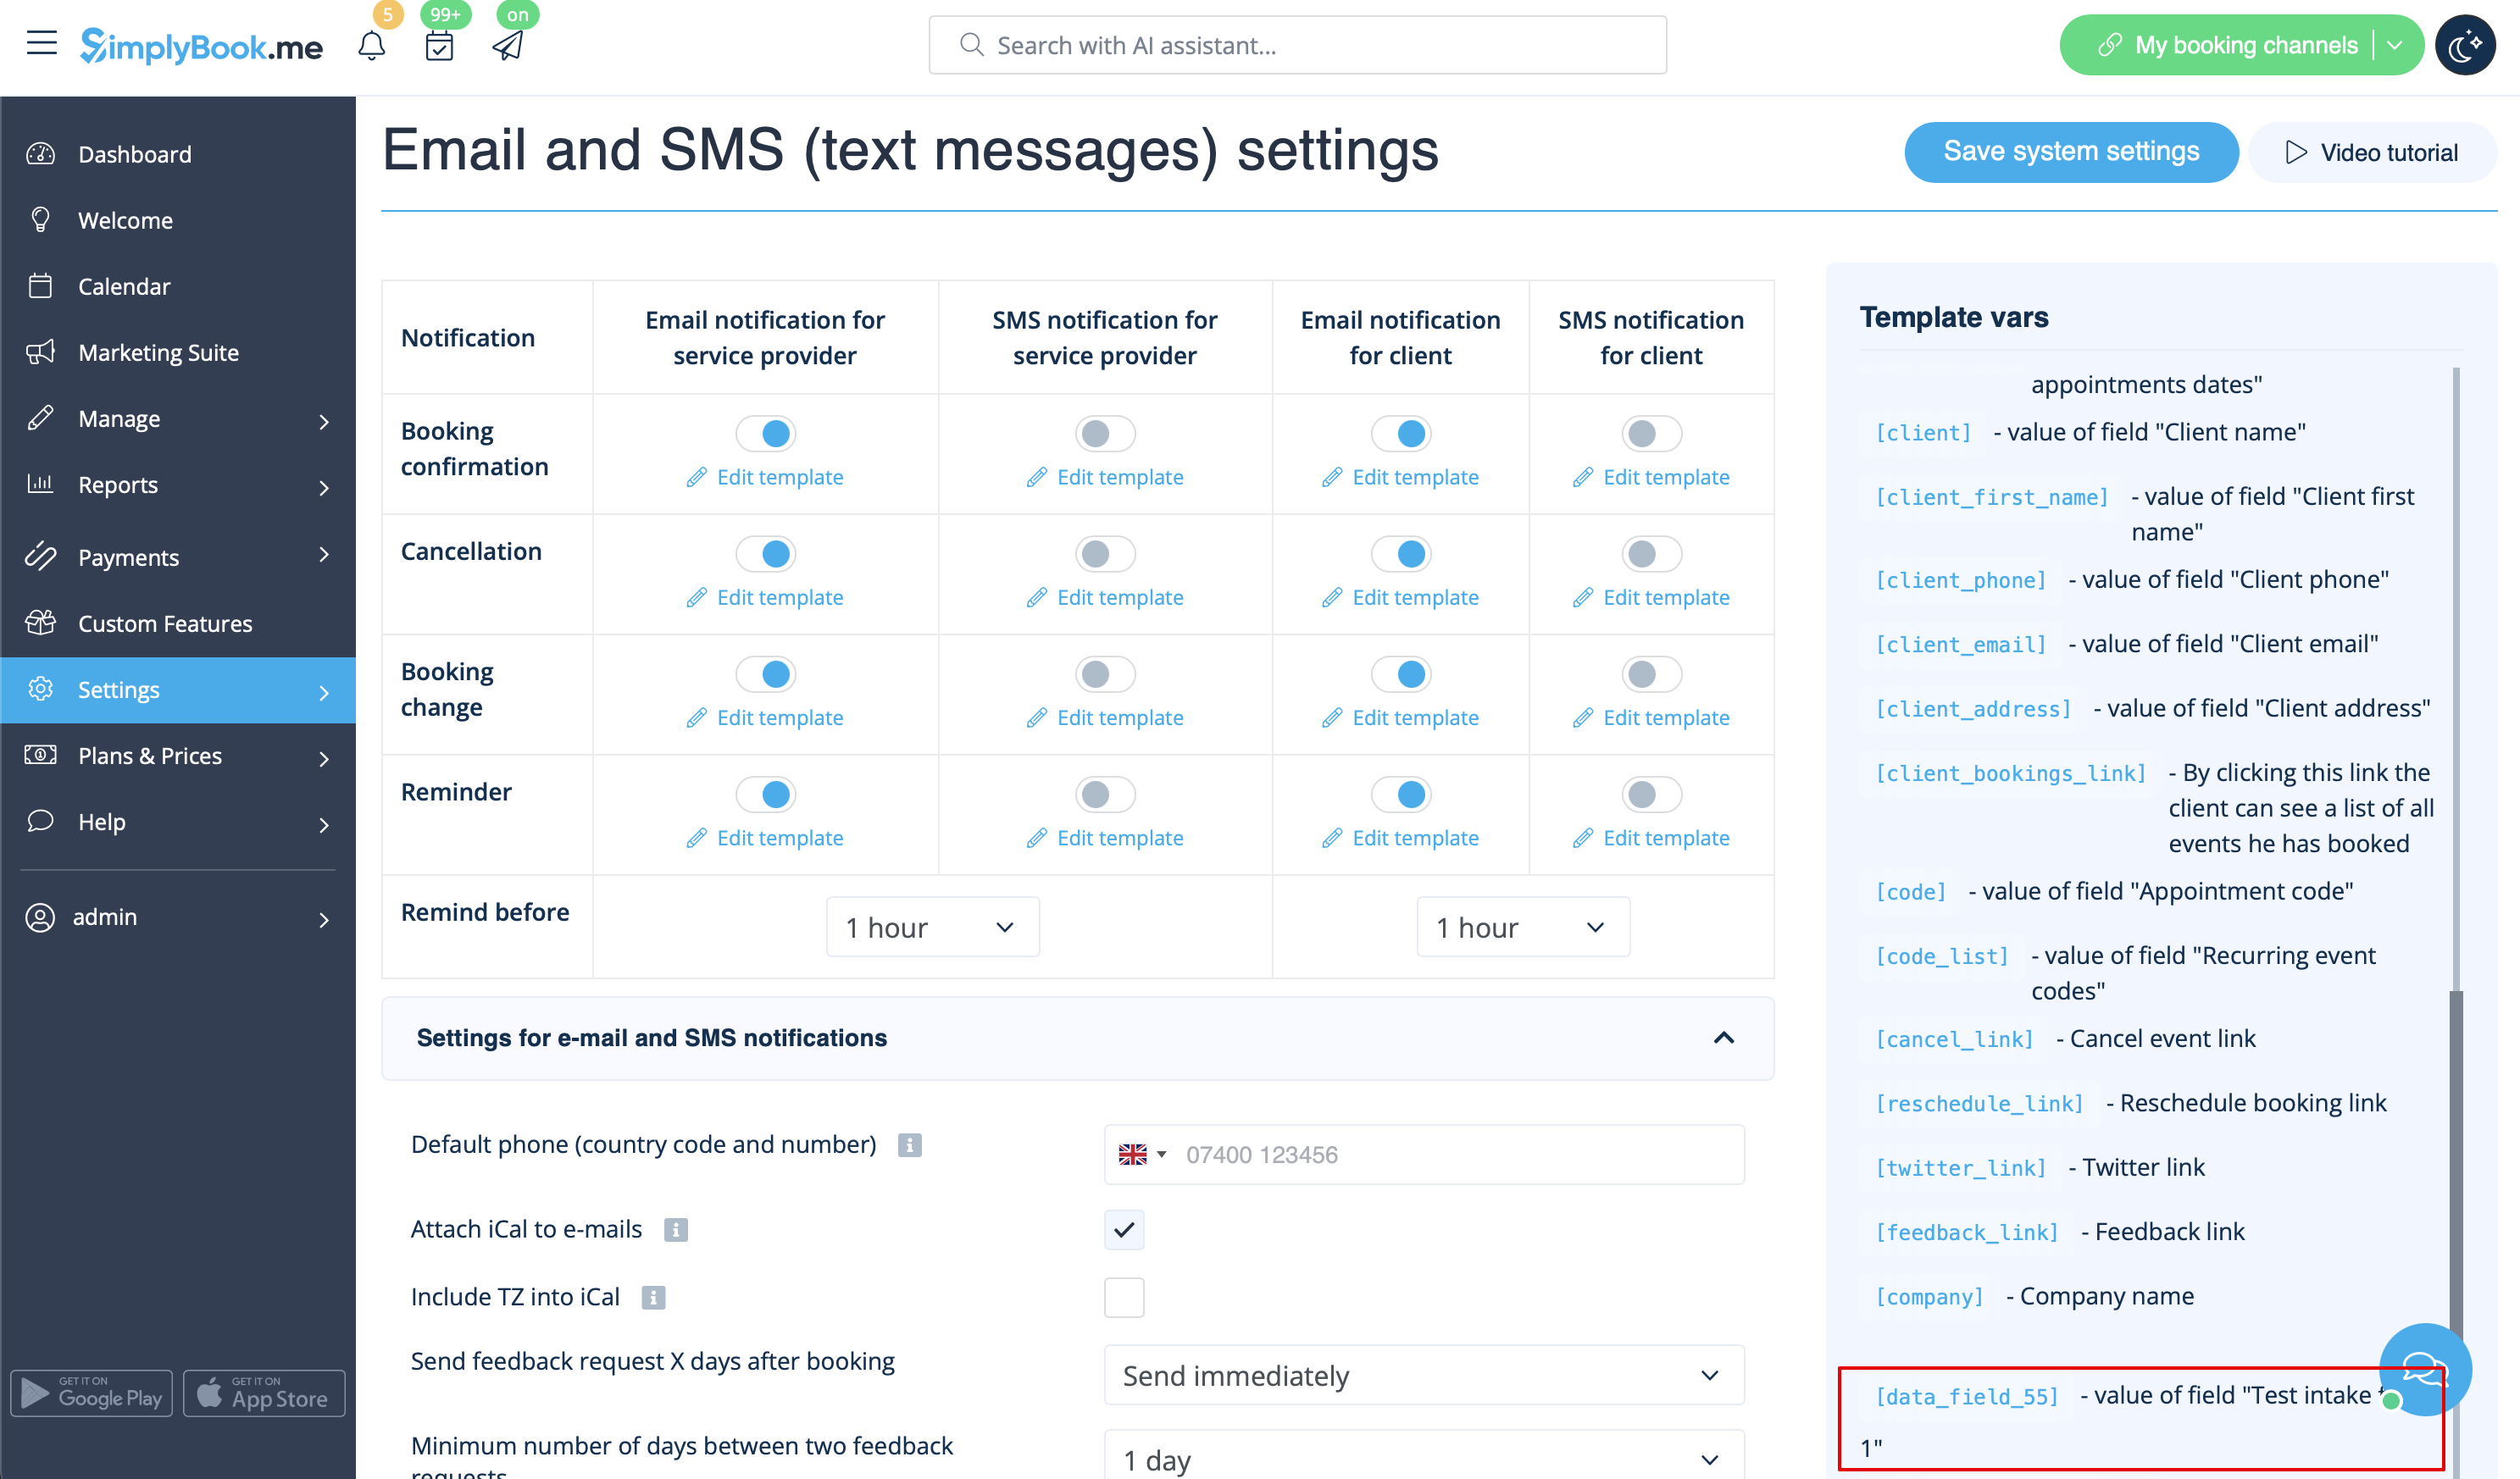
- 6. In this picture, it is [data_field_30] (but it can be data_field_2, data_field_3, etc.). This variable will contain the alternative email address needed for synchronization with Gmail.
- 7. Then create a test booking on your Simplybook booking page. It is needed to notify the system that the new form was created in the system and is ready for further usage.
- 8. When Simplybook preparations are over, it is time to switch to Zapier settings. If you don’t have Zapier account yet, please register.
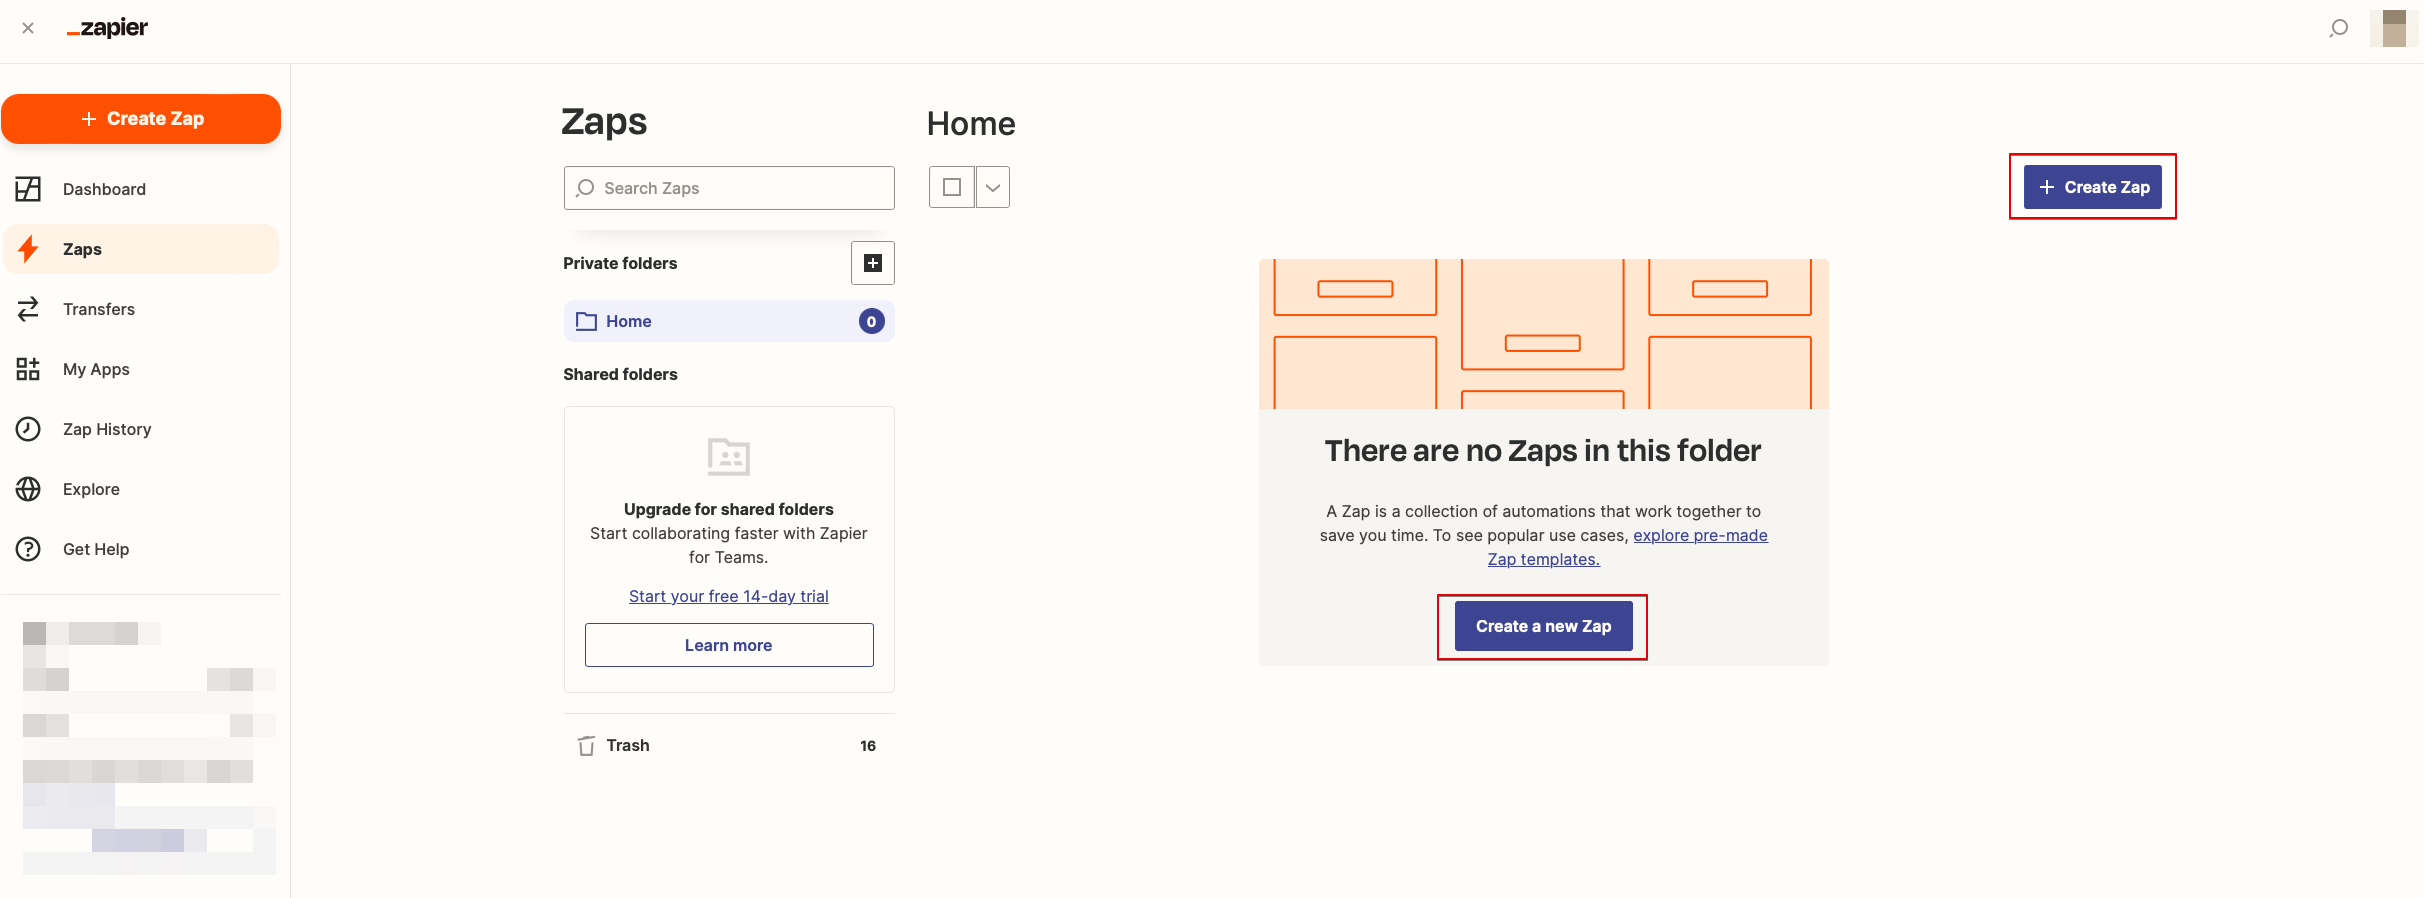
- 9. After that, press “Create a Zap”.
- 10. Find SimplyBook in the list of applications.
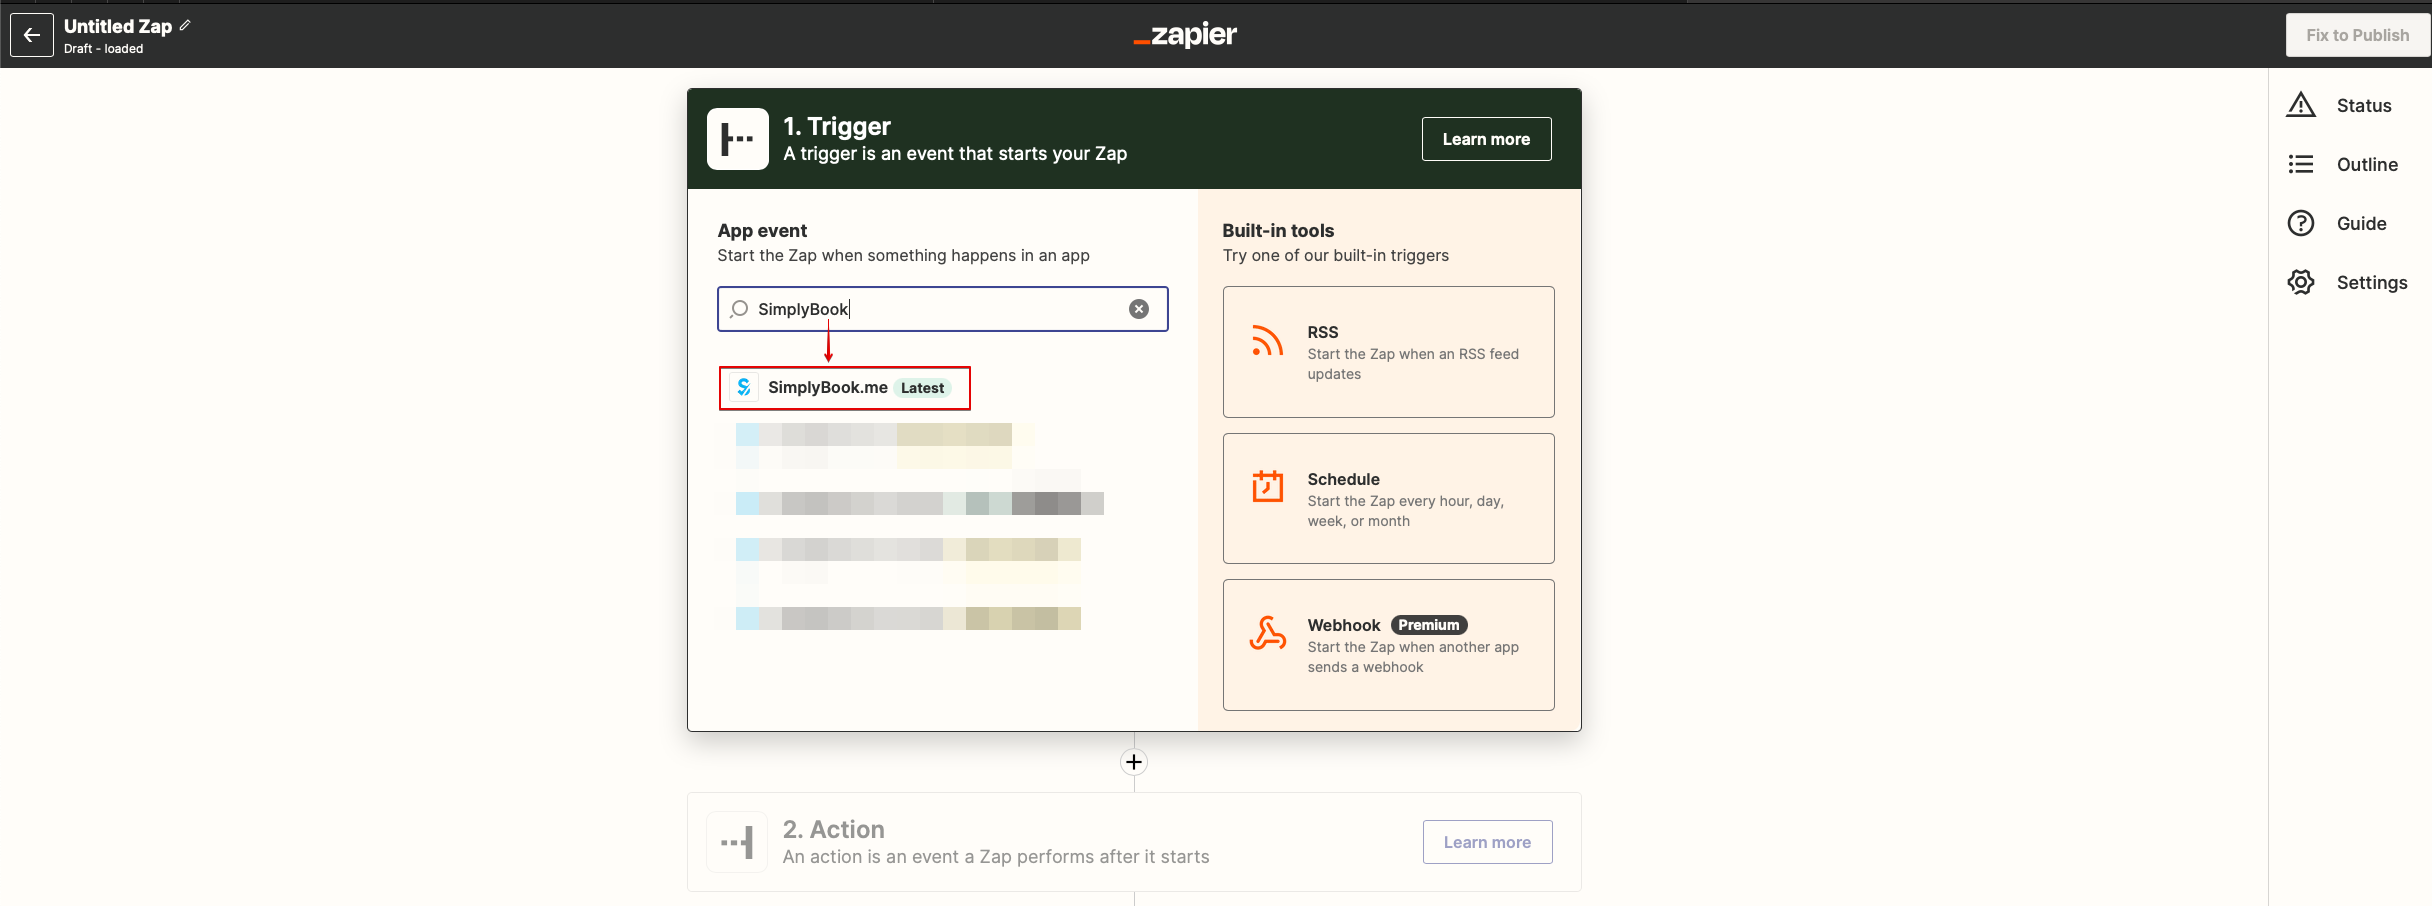
- 11. Select the connected account.
- 12. Choose New booking as trigger.
- 13. Proceed to "Action step" - connect and verify your Gmail account. Set the action to send email when the booking triggers.

- 14. Add email recipients in "To:" and "Cc:" boxes. Please use the variables for correct Zap operation(select the variable of your recently created intake form).
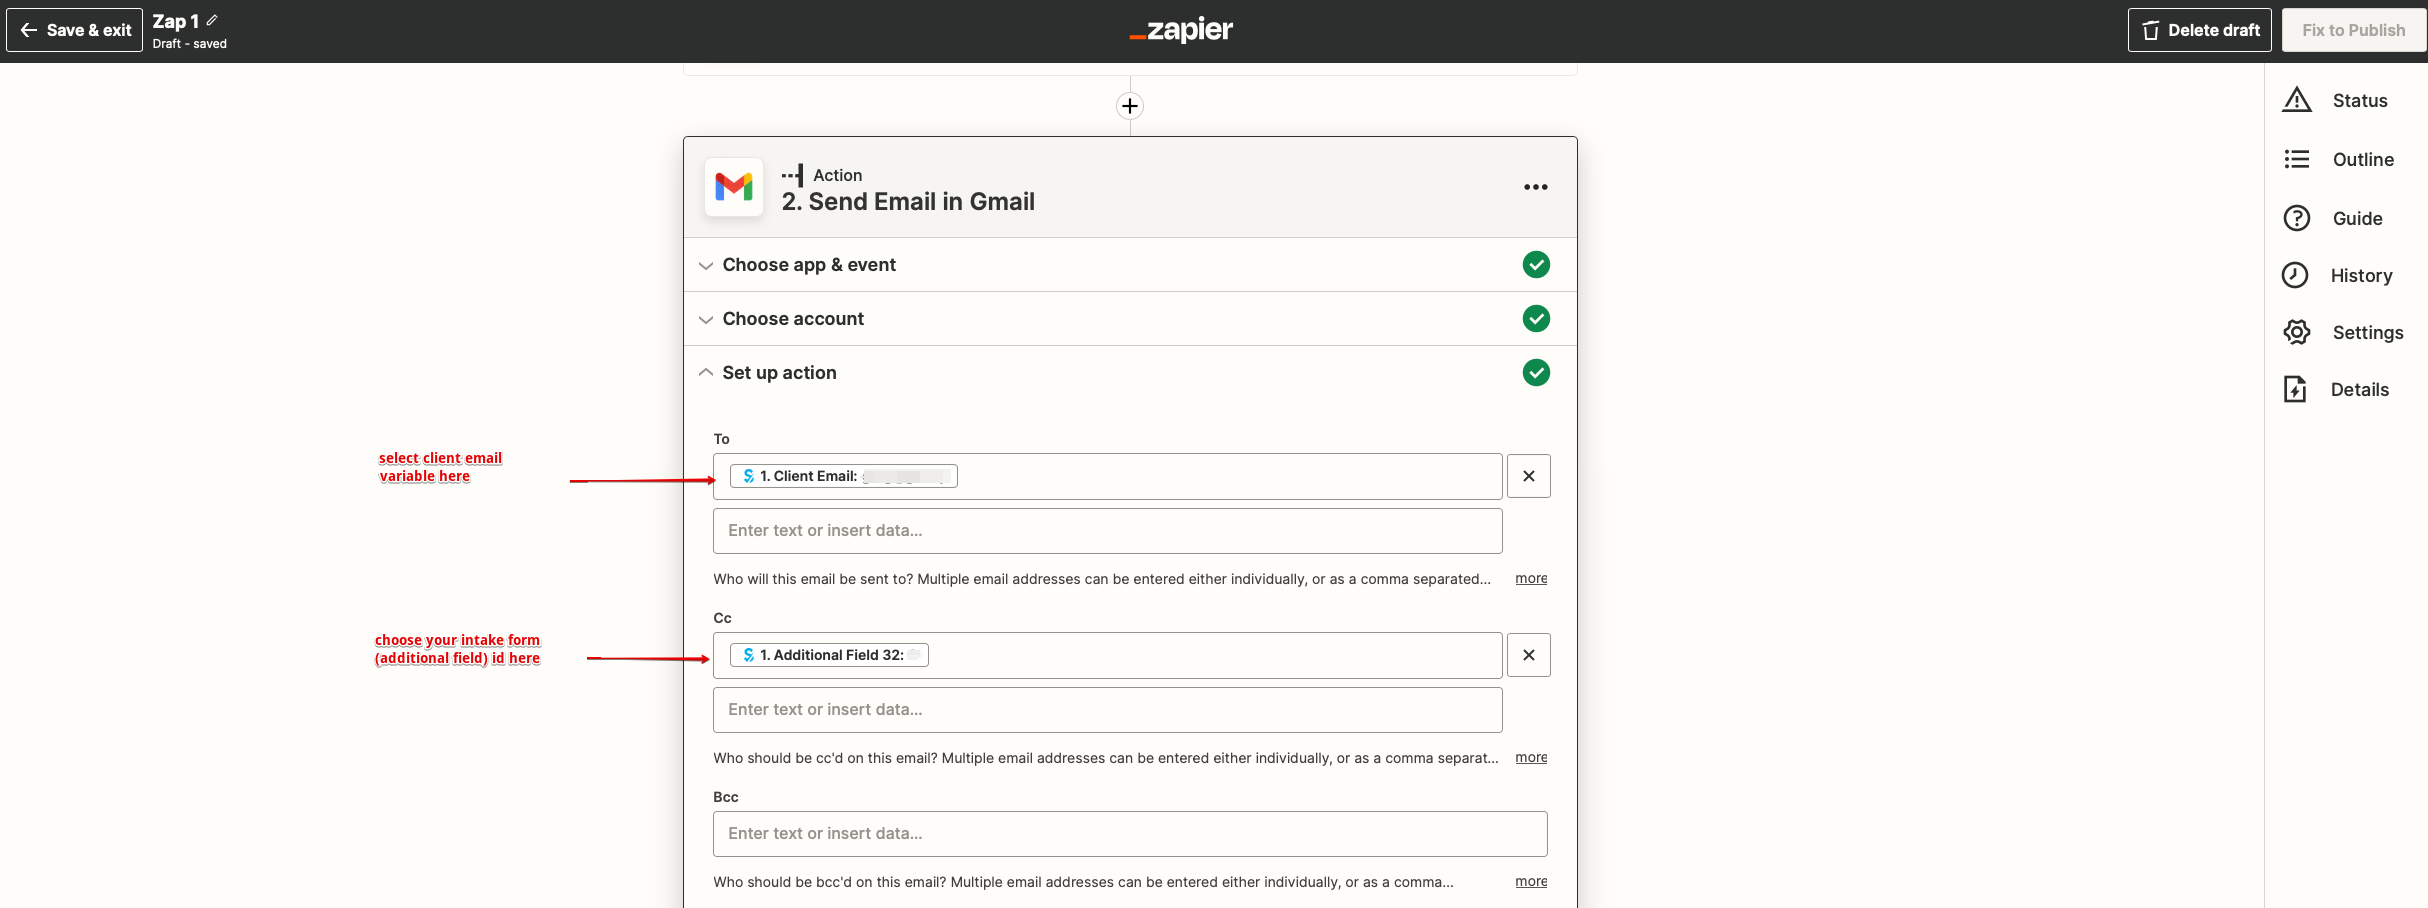
- Please note, that your client will receive 2 email notifications, one from Simplybook (sent immediately) and one from Zapier (is sent in 5 minutes after booking). You may disable email notifications for clients in Simplybook Settings//Email and SMS settings by unchecking the corresponding boxes.
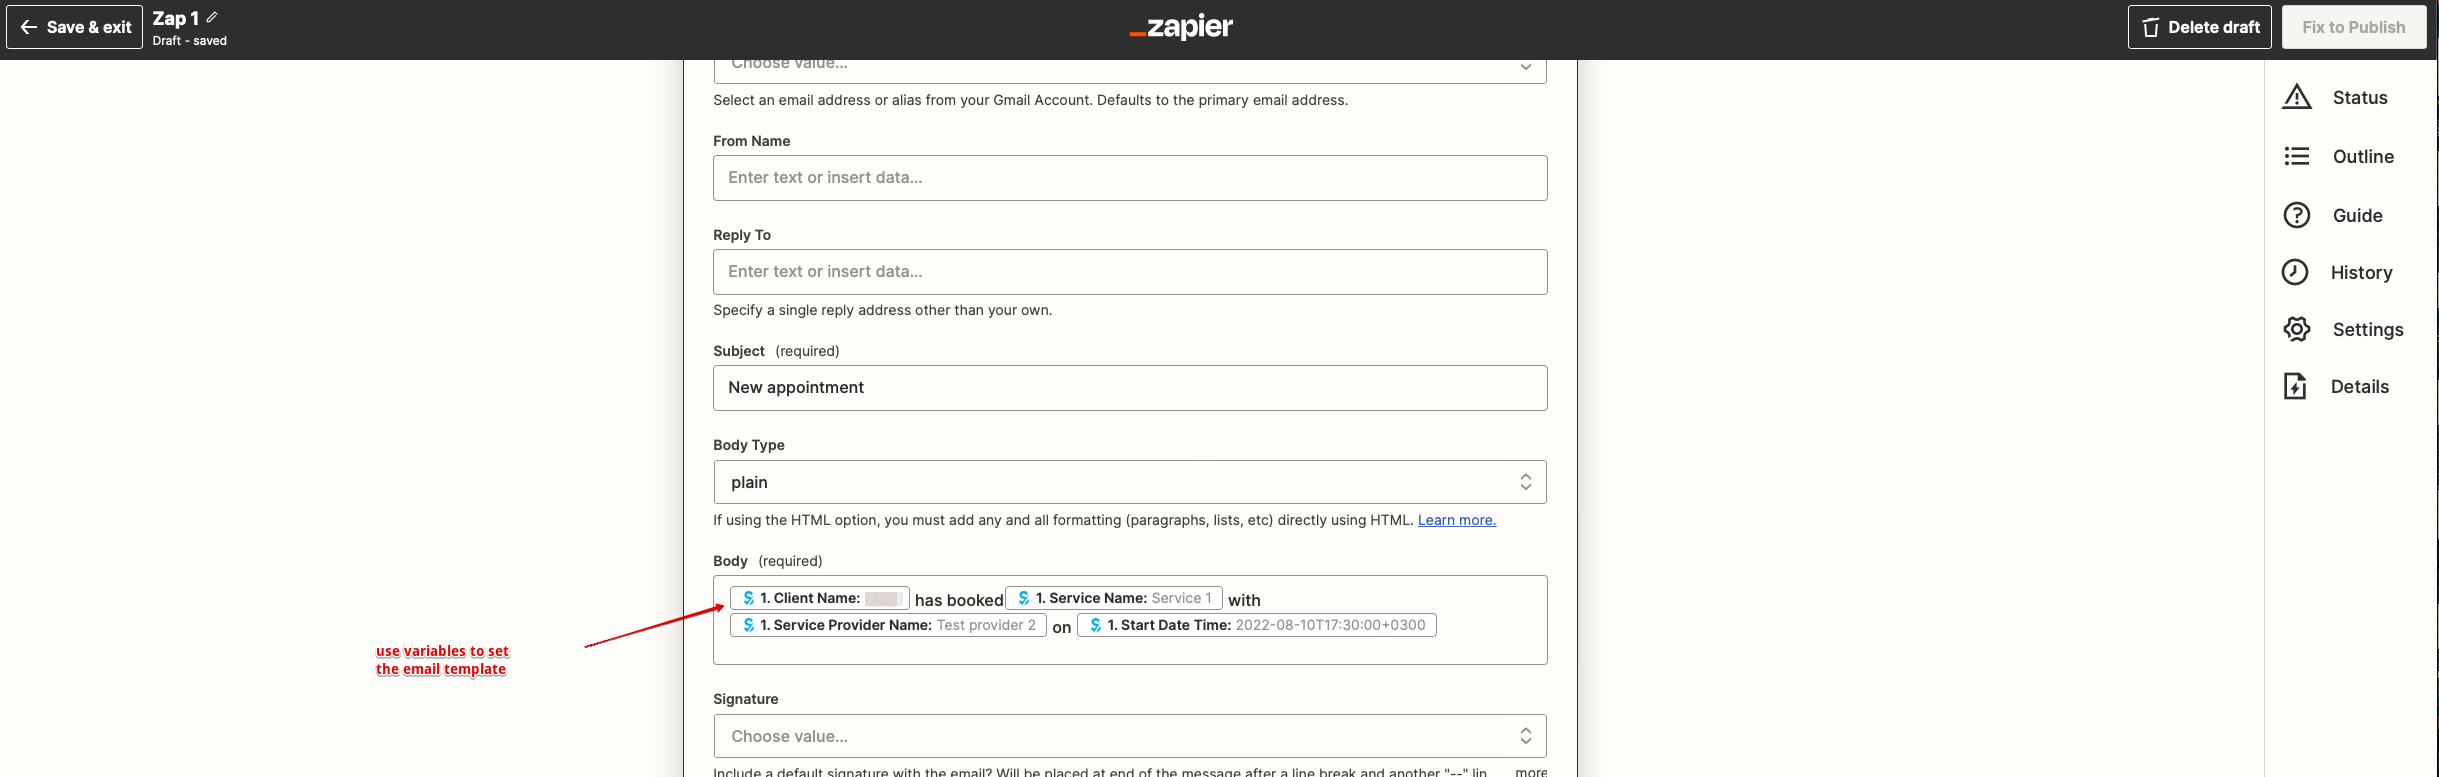
- 15. Then setup email template text. As well add the necessary variables that will be replaced with the booking information in the real email. You can create more detailed and rich notification than the one on the example.
- 16. Test your newly created Zap and turn it on.
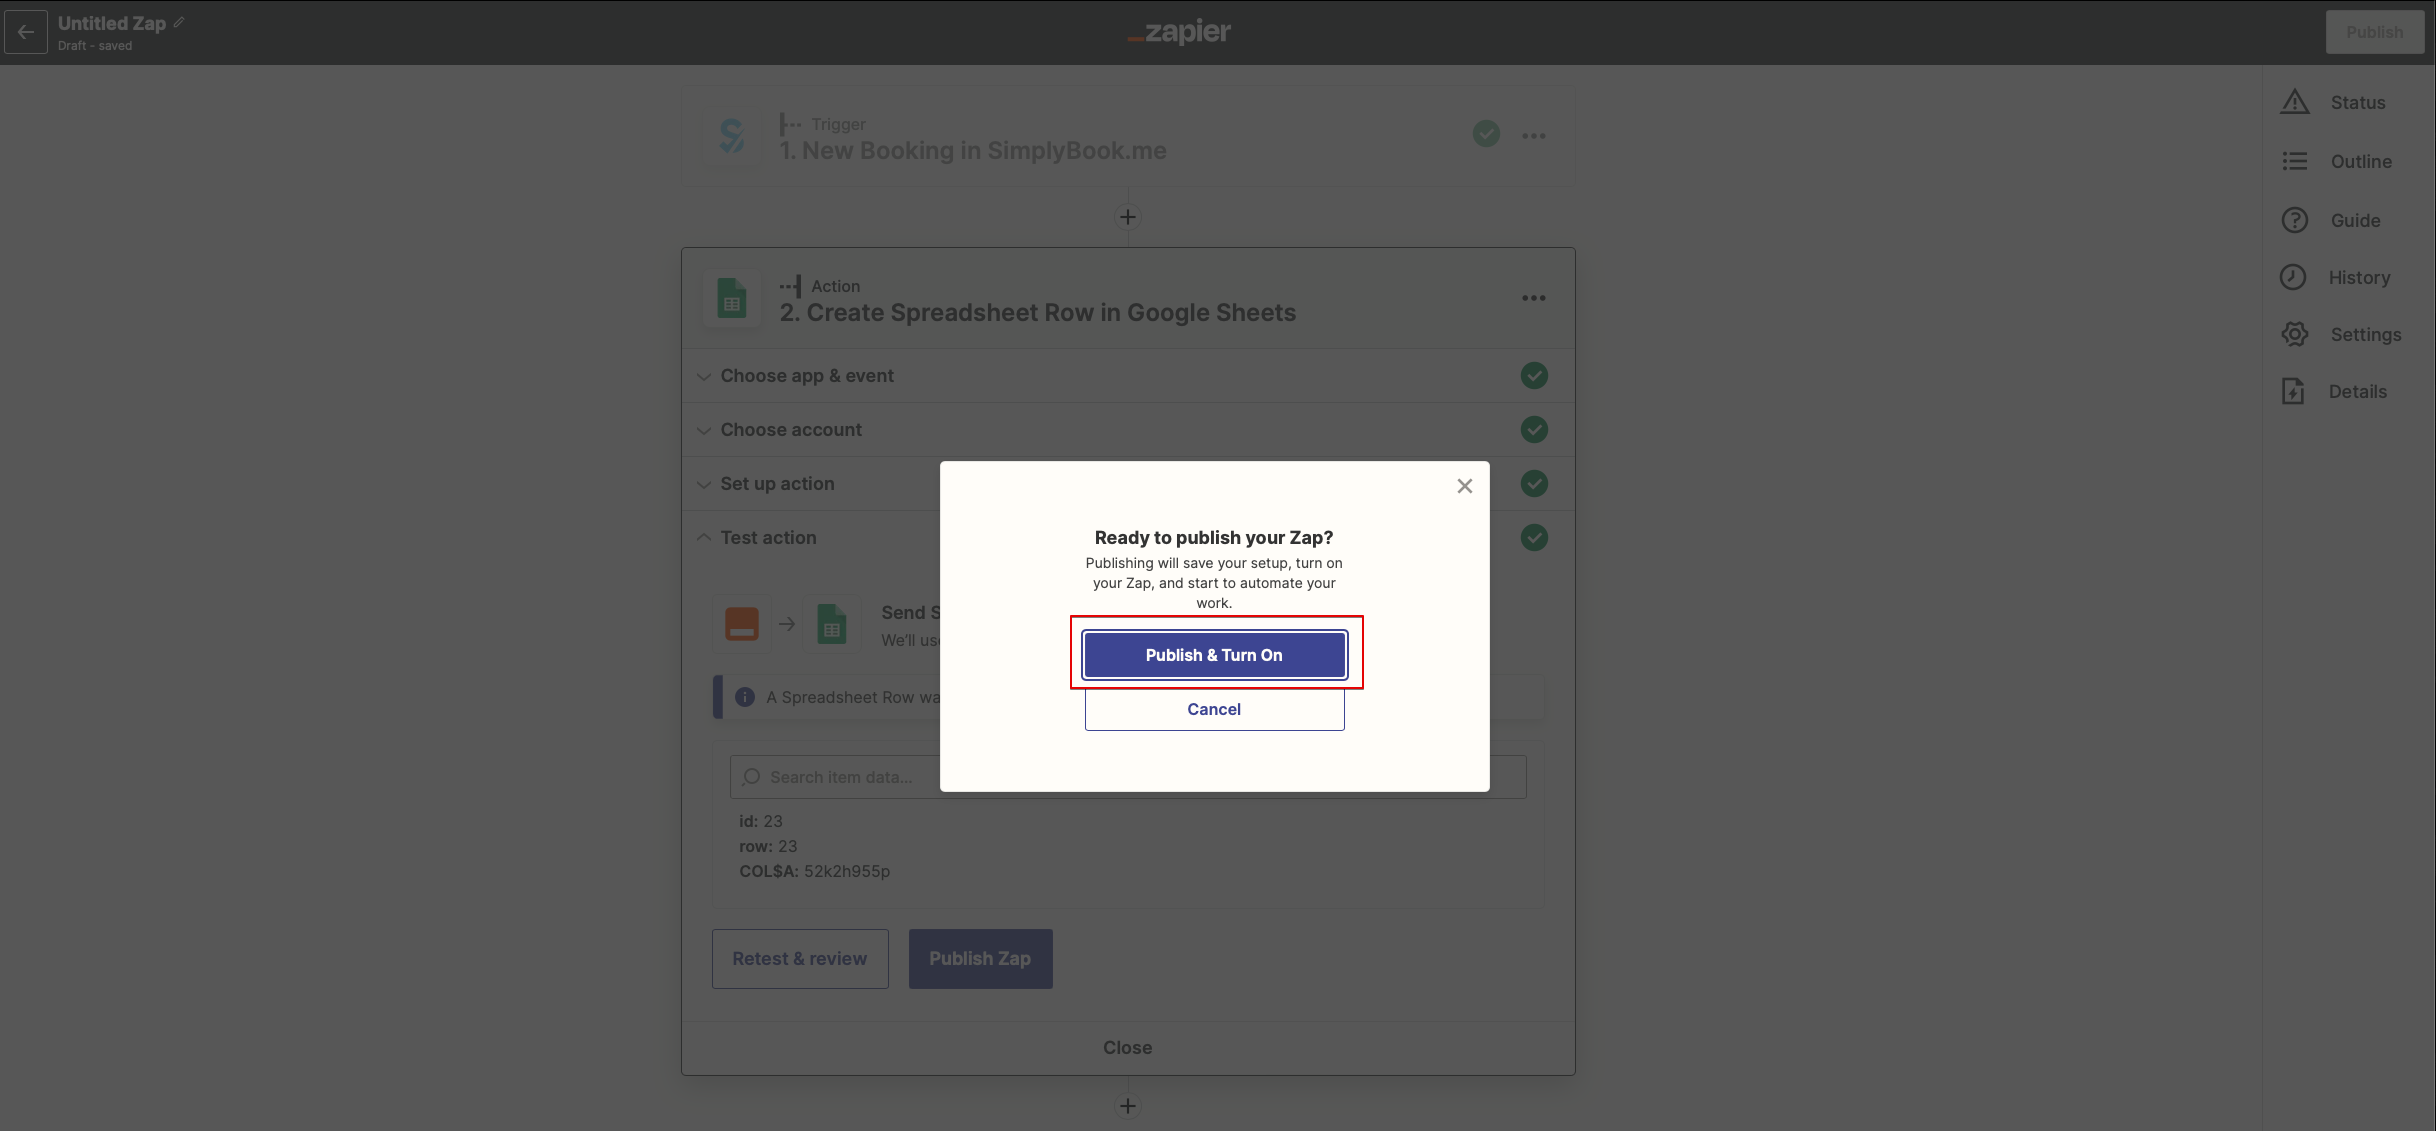
Congratulations, you have created a new connection that will send the copies of confirmation emails to various recipients!