Var kan jag ändra min information
=Företagets titel
I Inställningar // Företagsinformation // Namn.
Company url
Tyvärr finns det ingen möjlighet att ändra url i systemet. För att kunna ändra den måste du registrera ett nytt företag med önskad webbadress.
Gratis:
Du kan skapa ett nytt företag med önskat namn i url och manuellt överföra alla data och inställningar dit. Du kan skapa tjänster och leverantörer och kopiera en lista över kunder till det nya systemet med Import Clients Custom Feature (se instruktioner här). Bokningar och andra inställningar kan inte överföras.
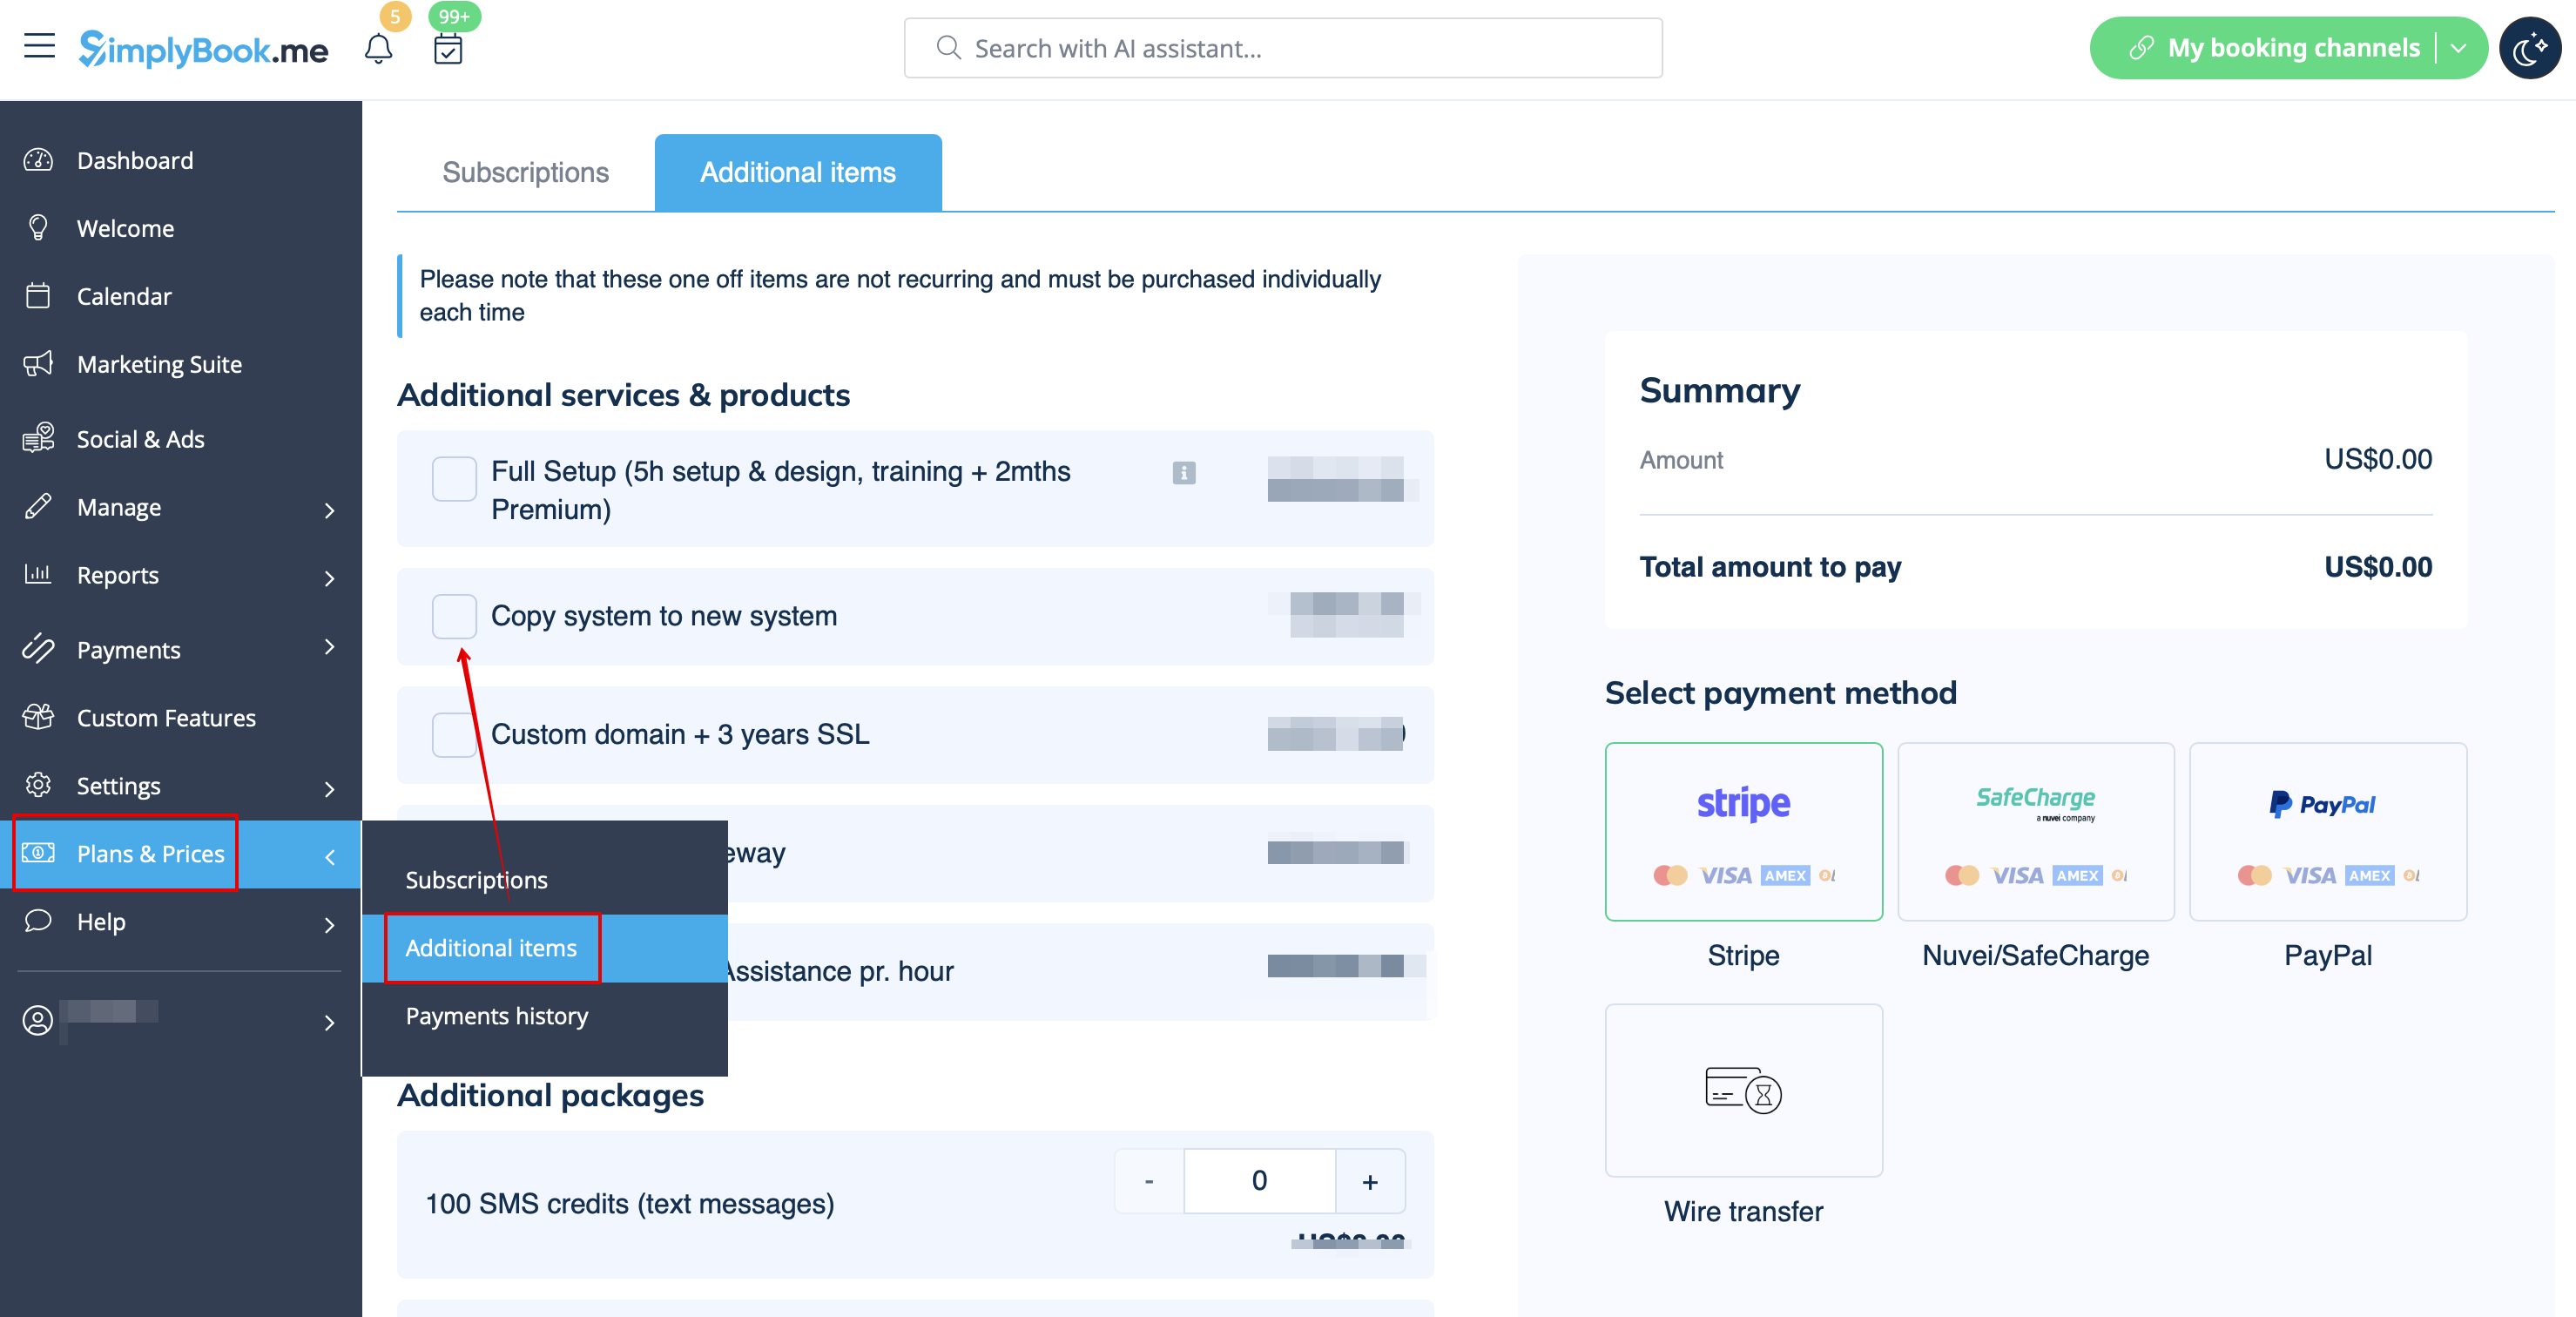
Betald:
Skapa ett nytt system med önskat namn i url, gå till Planer&Priser // Ytterligare objekt och välj "Kopiera system till nytt system", gör betalningen och våra utvecklare kommer att överföra dina data. När du har gjort en betalning måste du kontakta support, berätta för dem det gamla företagsnamnet och det nya företagsnamnet (bekräfta ägandet av båda kontona) och begära överföring av systemet.
Observera! Recensioner samt HTML-formatering i beskrivningar kommer inte att kopieras till det nya systemet.
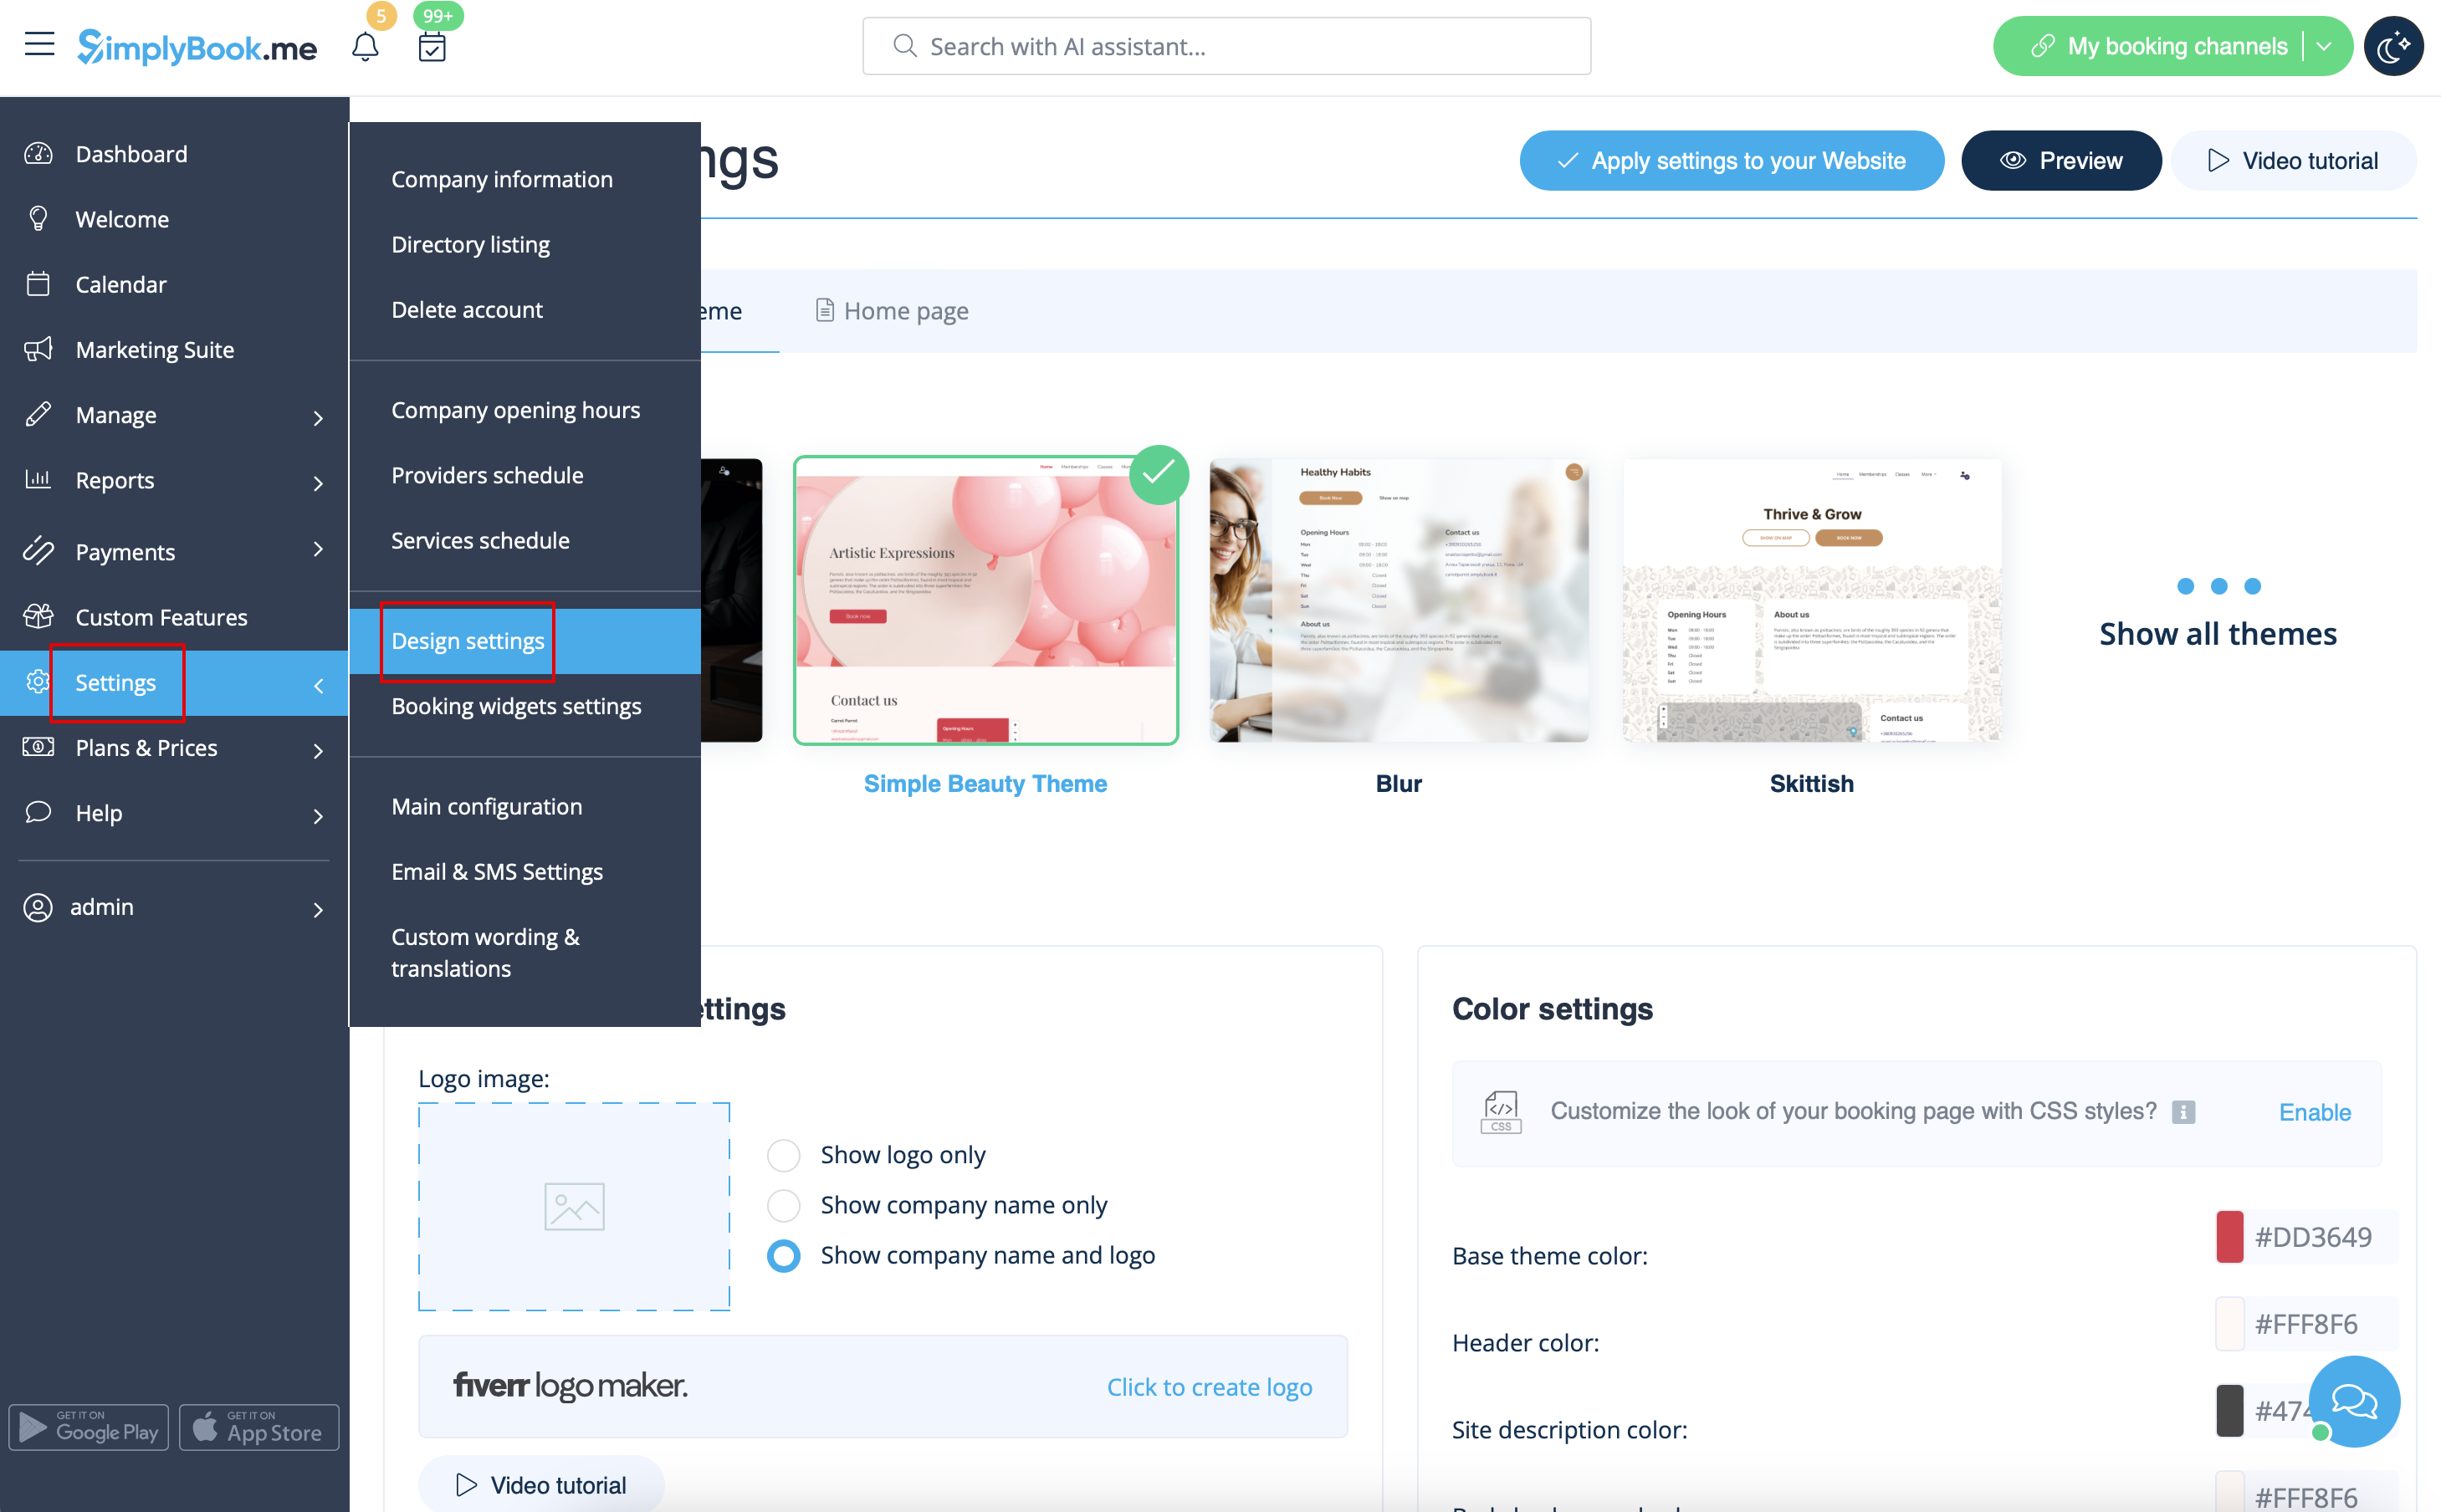
Företagets logotyp och bakgrund
I Inställningar // Designinställningar // Ytterligare temainställningar.
Favicon
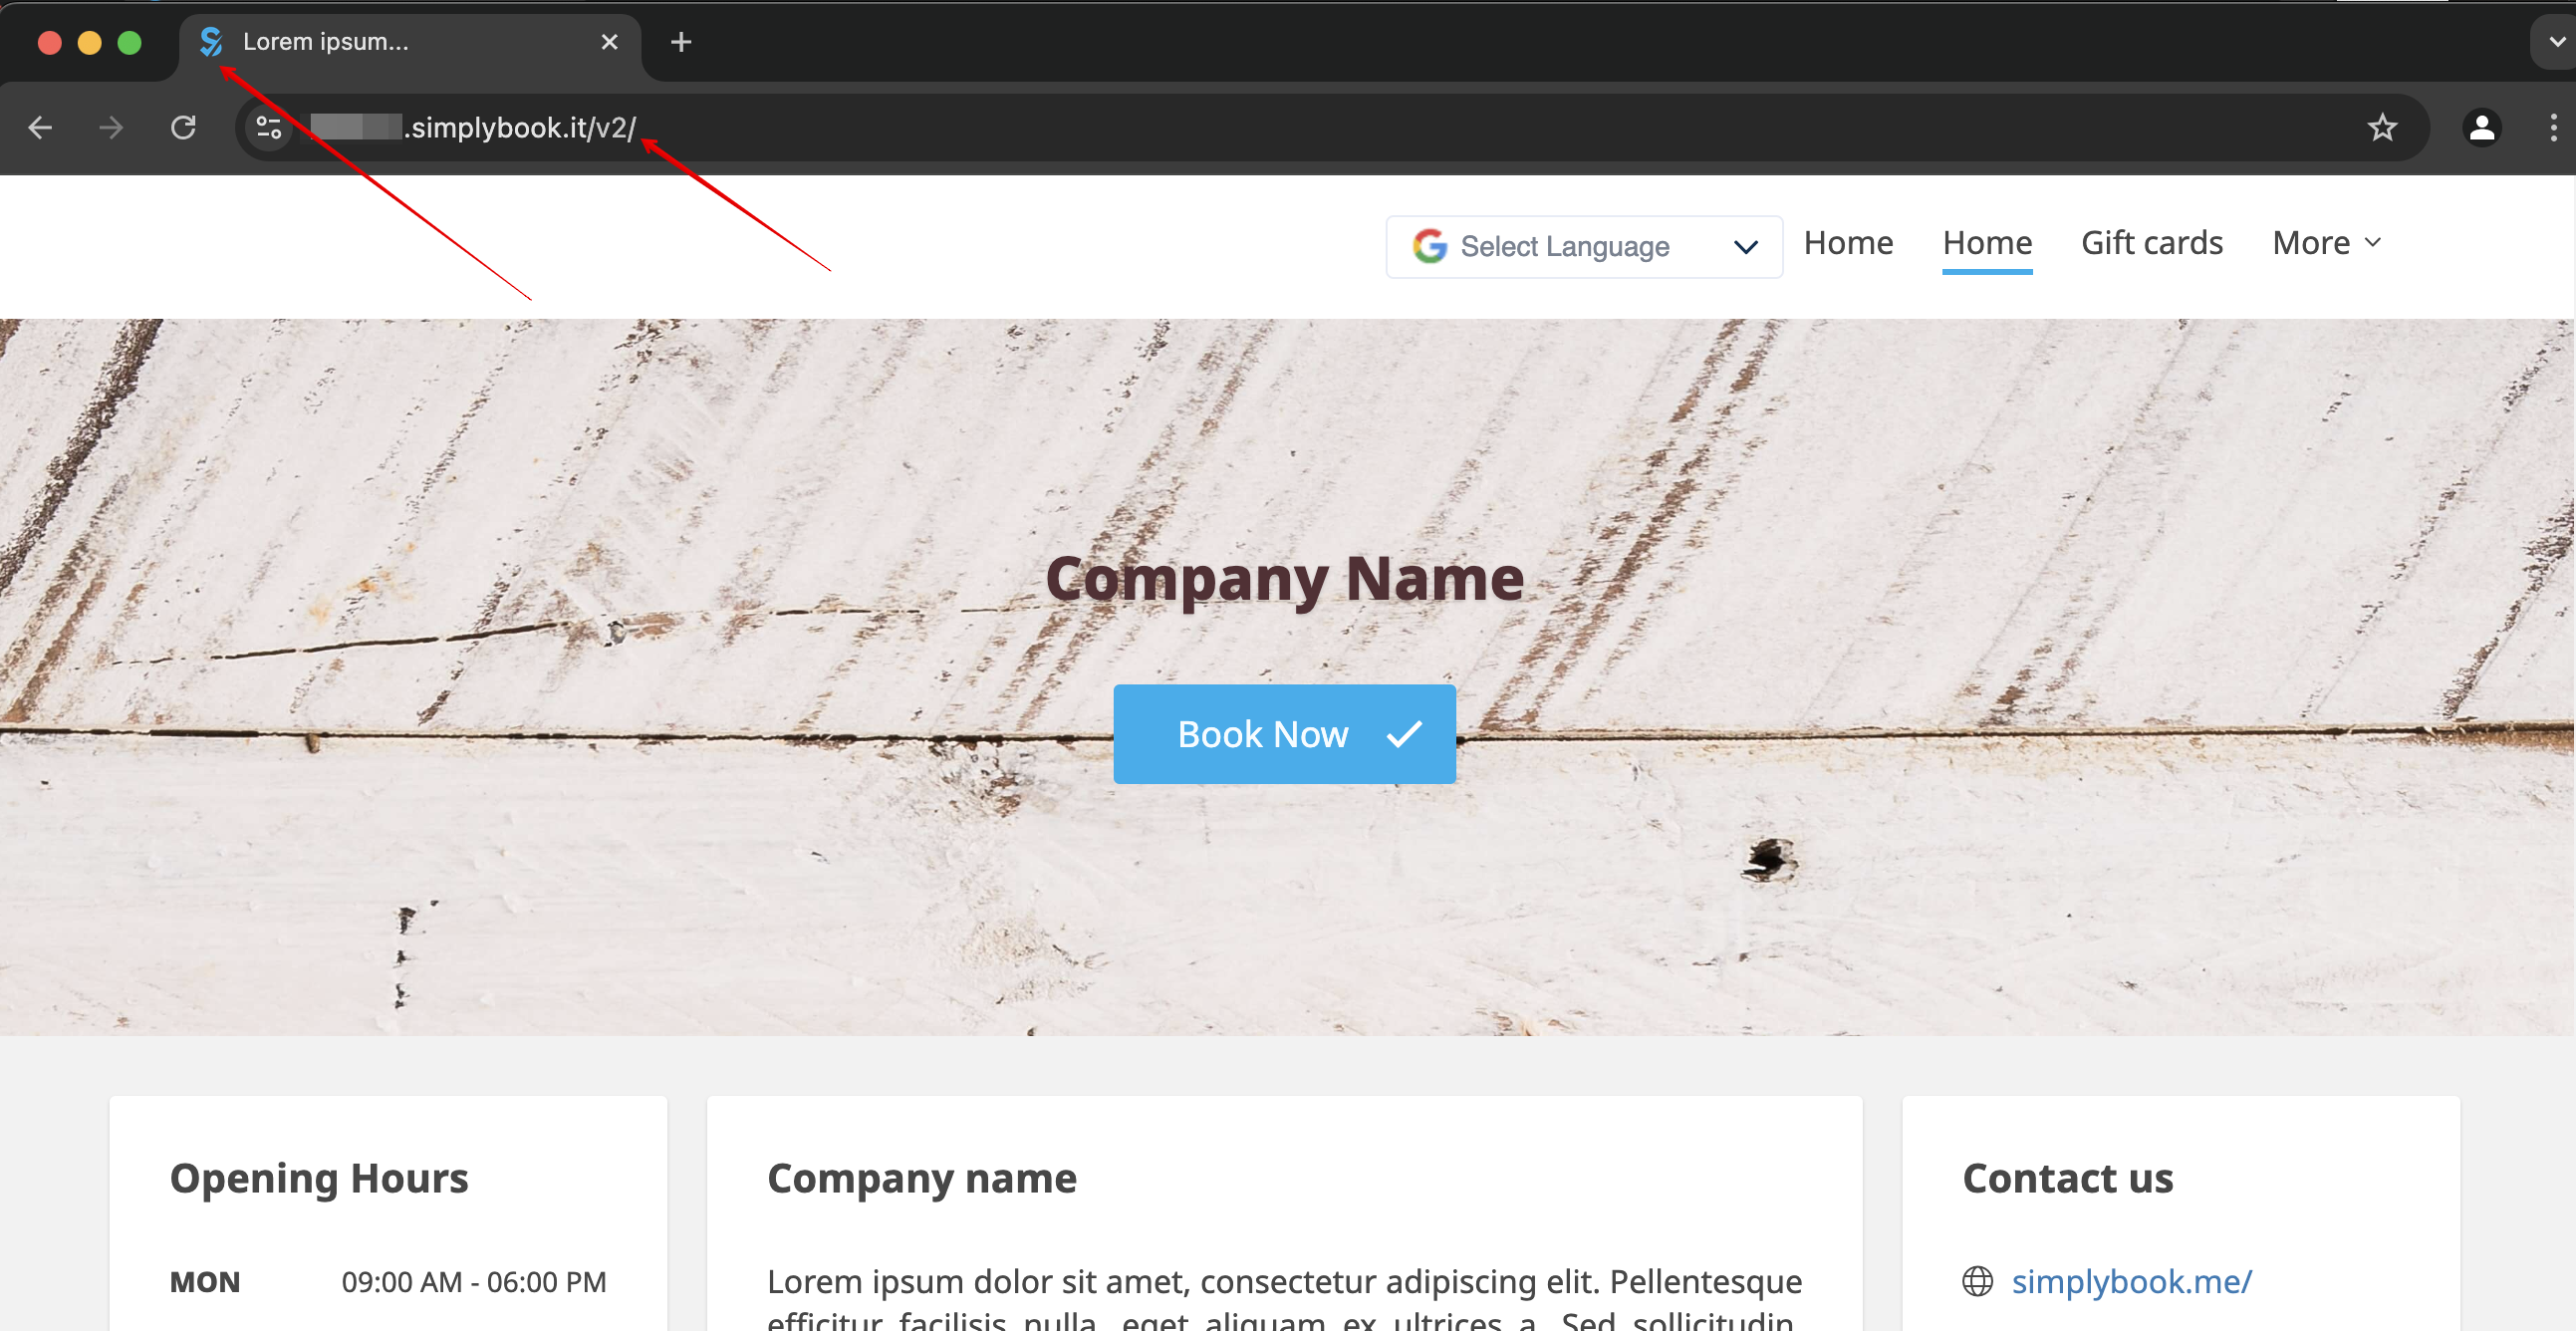
Delen /v2/ i webbadressen till bokningswebbplatsen kan inte tas bort eller ändras.
Detta element är fast och kan inte ändras.
Favicon (logotyp som visas i webbläsarfliken) kan endast ändras på Enterprise-nivå.
Design
I Inställningar // Designinställningar.
- Rekommenderade teman
- Alla nya
Dessa teman stöder alla nya funktioner och har möjlighet att justera färgerna på din bokningssida.
Texter och språk
Om du behöver justera några texter på din bokningssida (till exempel ändra anställd till terapeut, coach eller rum) kan du göra det i Inställningar // Anpassade ord och översättningar.
Där kan du också ändra språk på din bokningssida genom att klicka på motsvarande flagga och trycka på "Spara anpassade översättningar". Om ditt språk inte finns i listan kan du översätta systemet själv.
SEO Settings
By default the Title tag is represented by your company name that you have inserted in Settings -> Company information -> Name and automatic addition of Scheduling and Booking Website text.
Meta description is taken from the text that you have added in Settings -> Design settings -> Home page -> description text for About Us booking website block.
If you need you can set these two options to contain different data and thus influence your booking website SEO.
To set own Title tag and Meta description please navigate to Settings -> Design settings -> Home page and add the desired texts to the corresponding fields there.
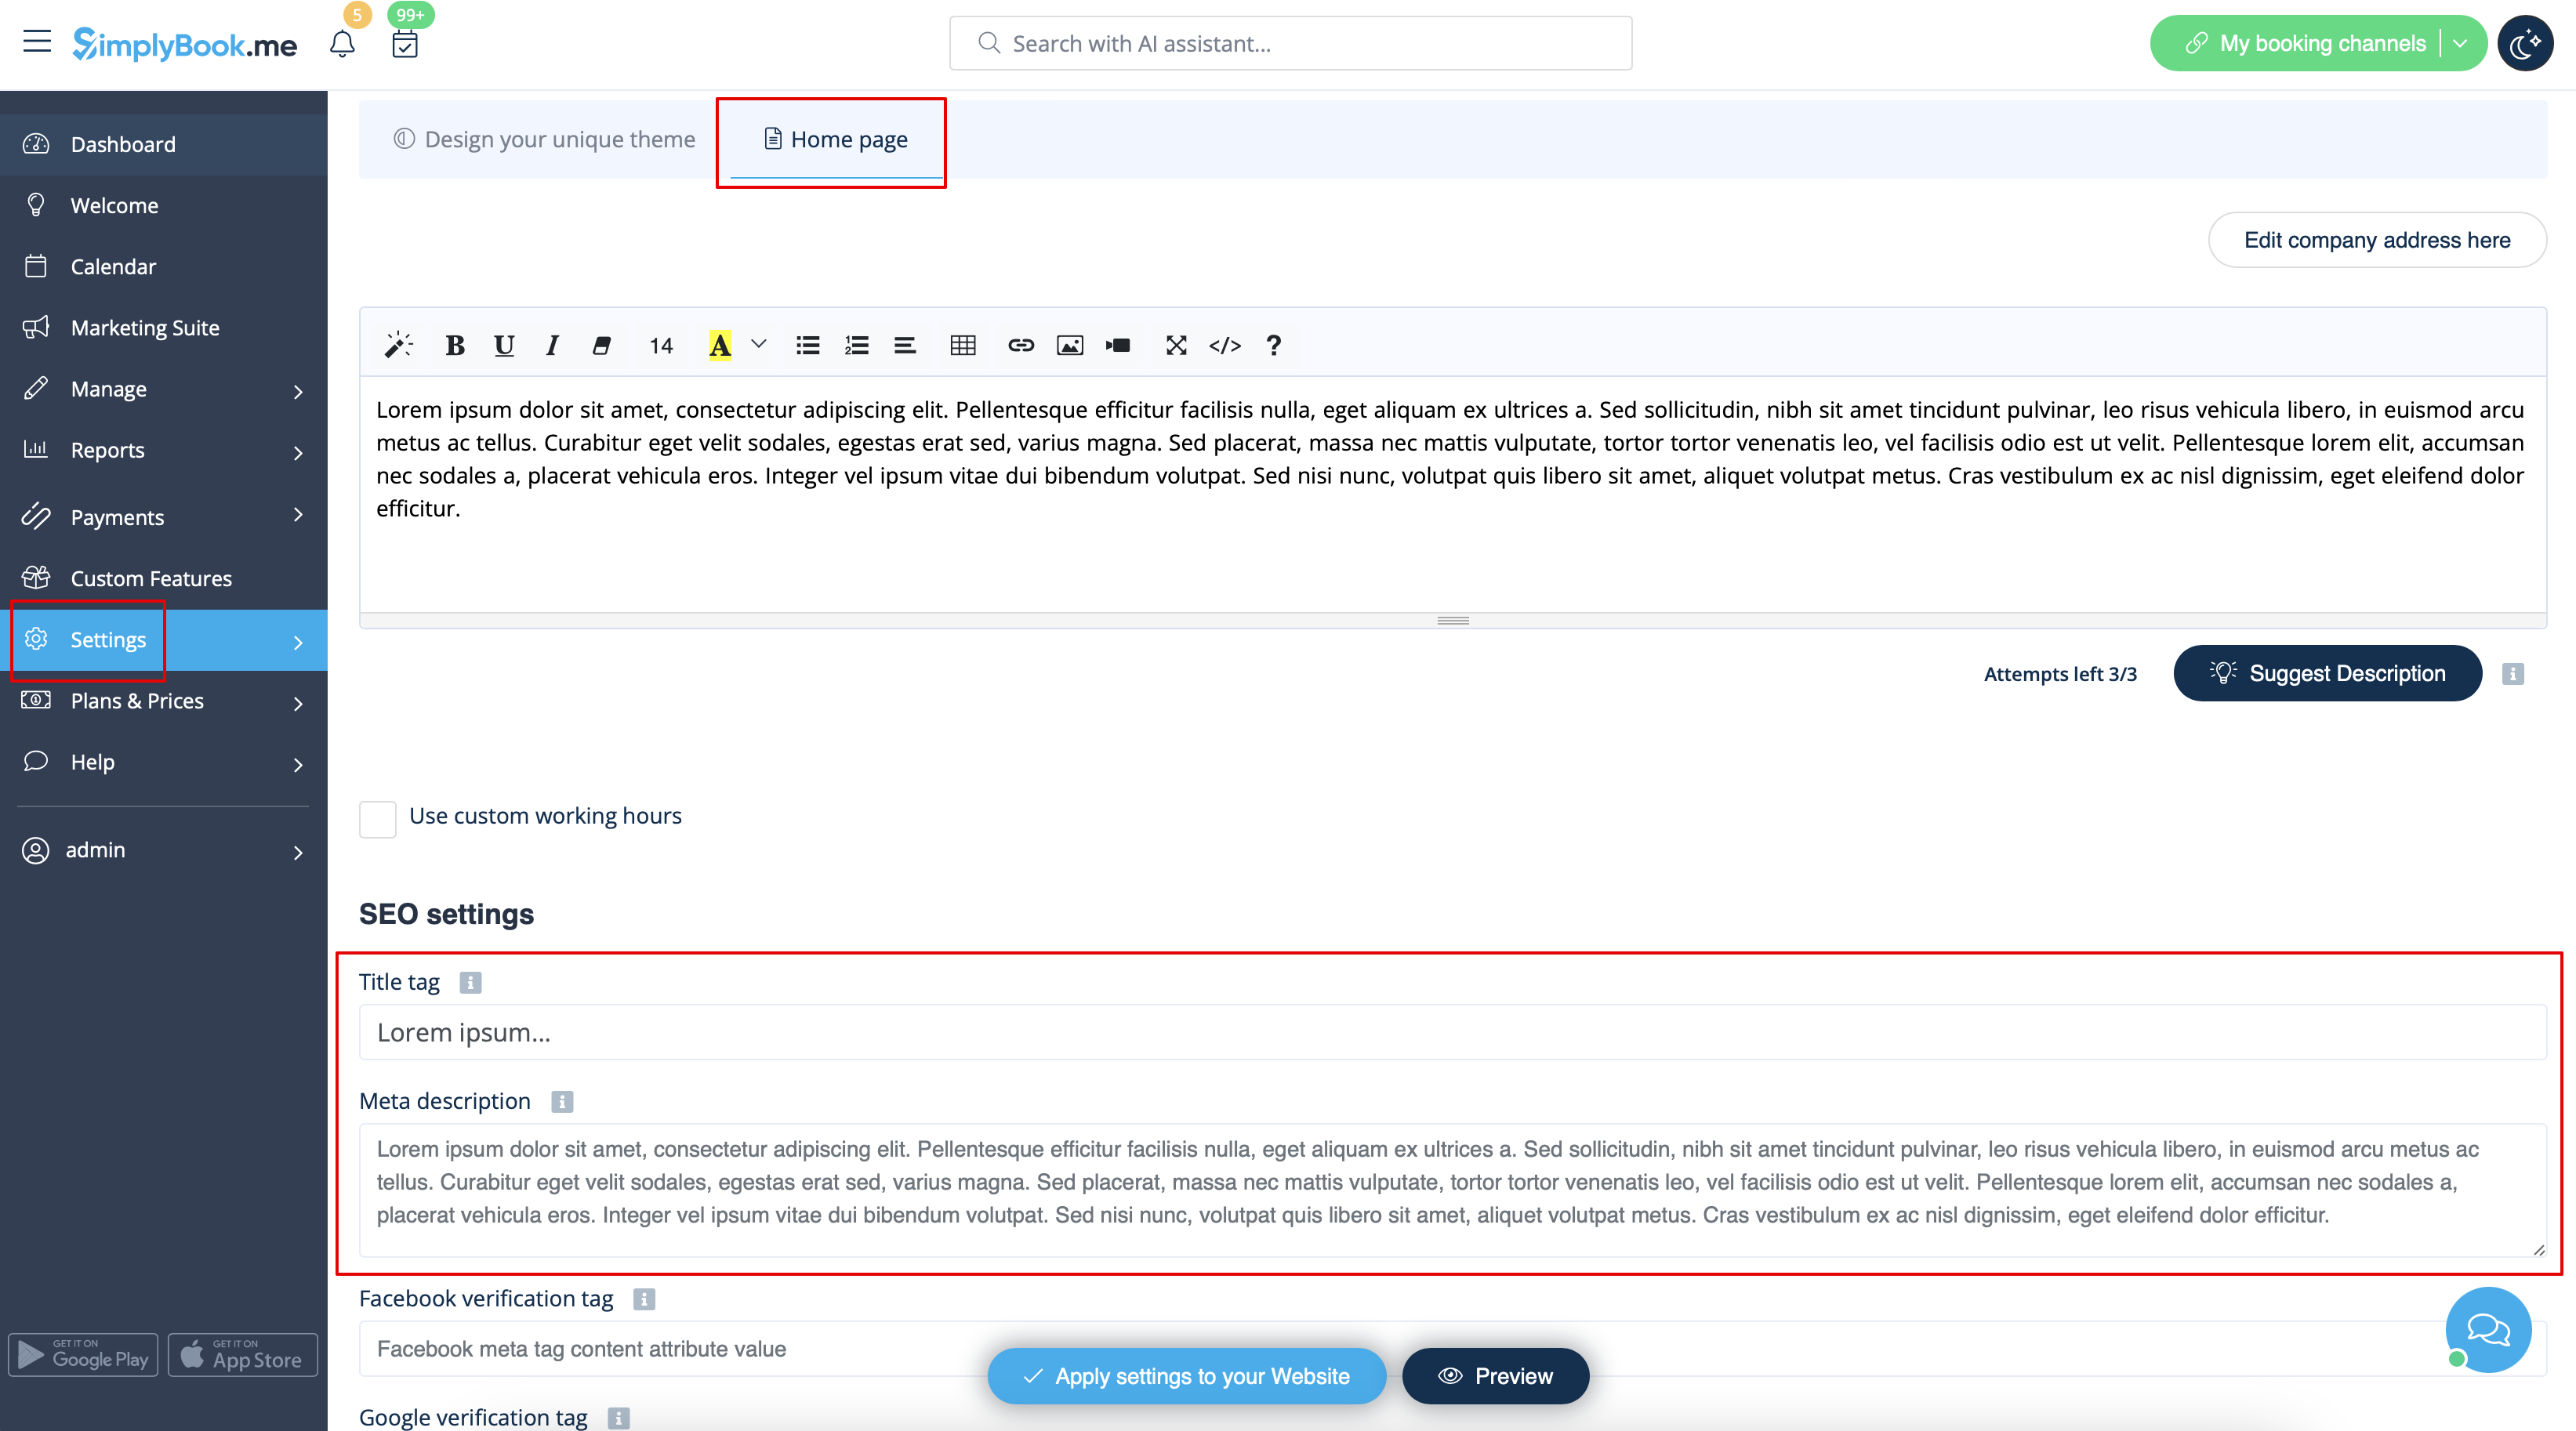
Please note!We recommend using no more than 60 symbols for Title tag.
Meta description is limited to 400 characters and if you try to add a longer abstract it will be automatically cut when saving the settings.
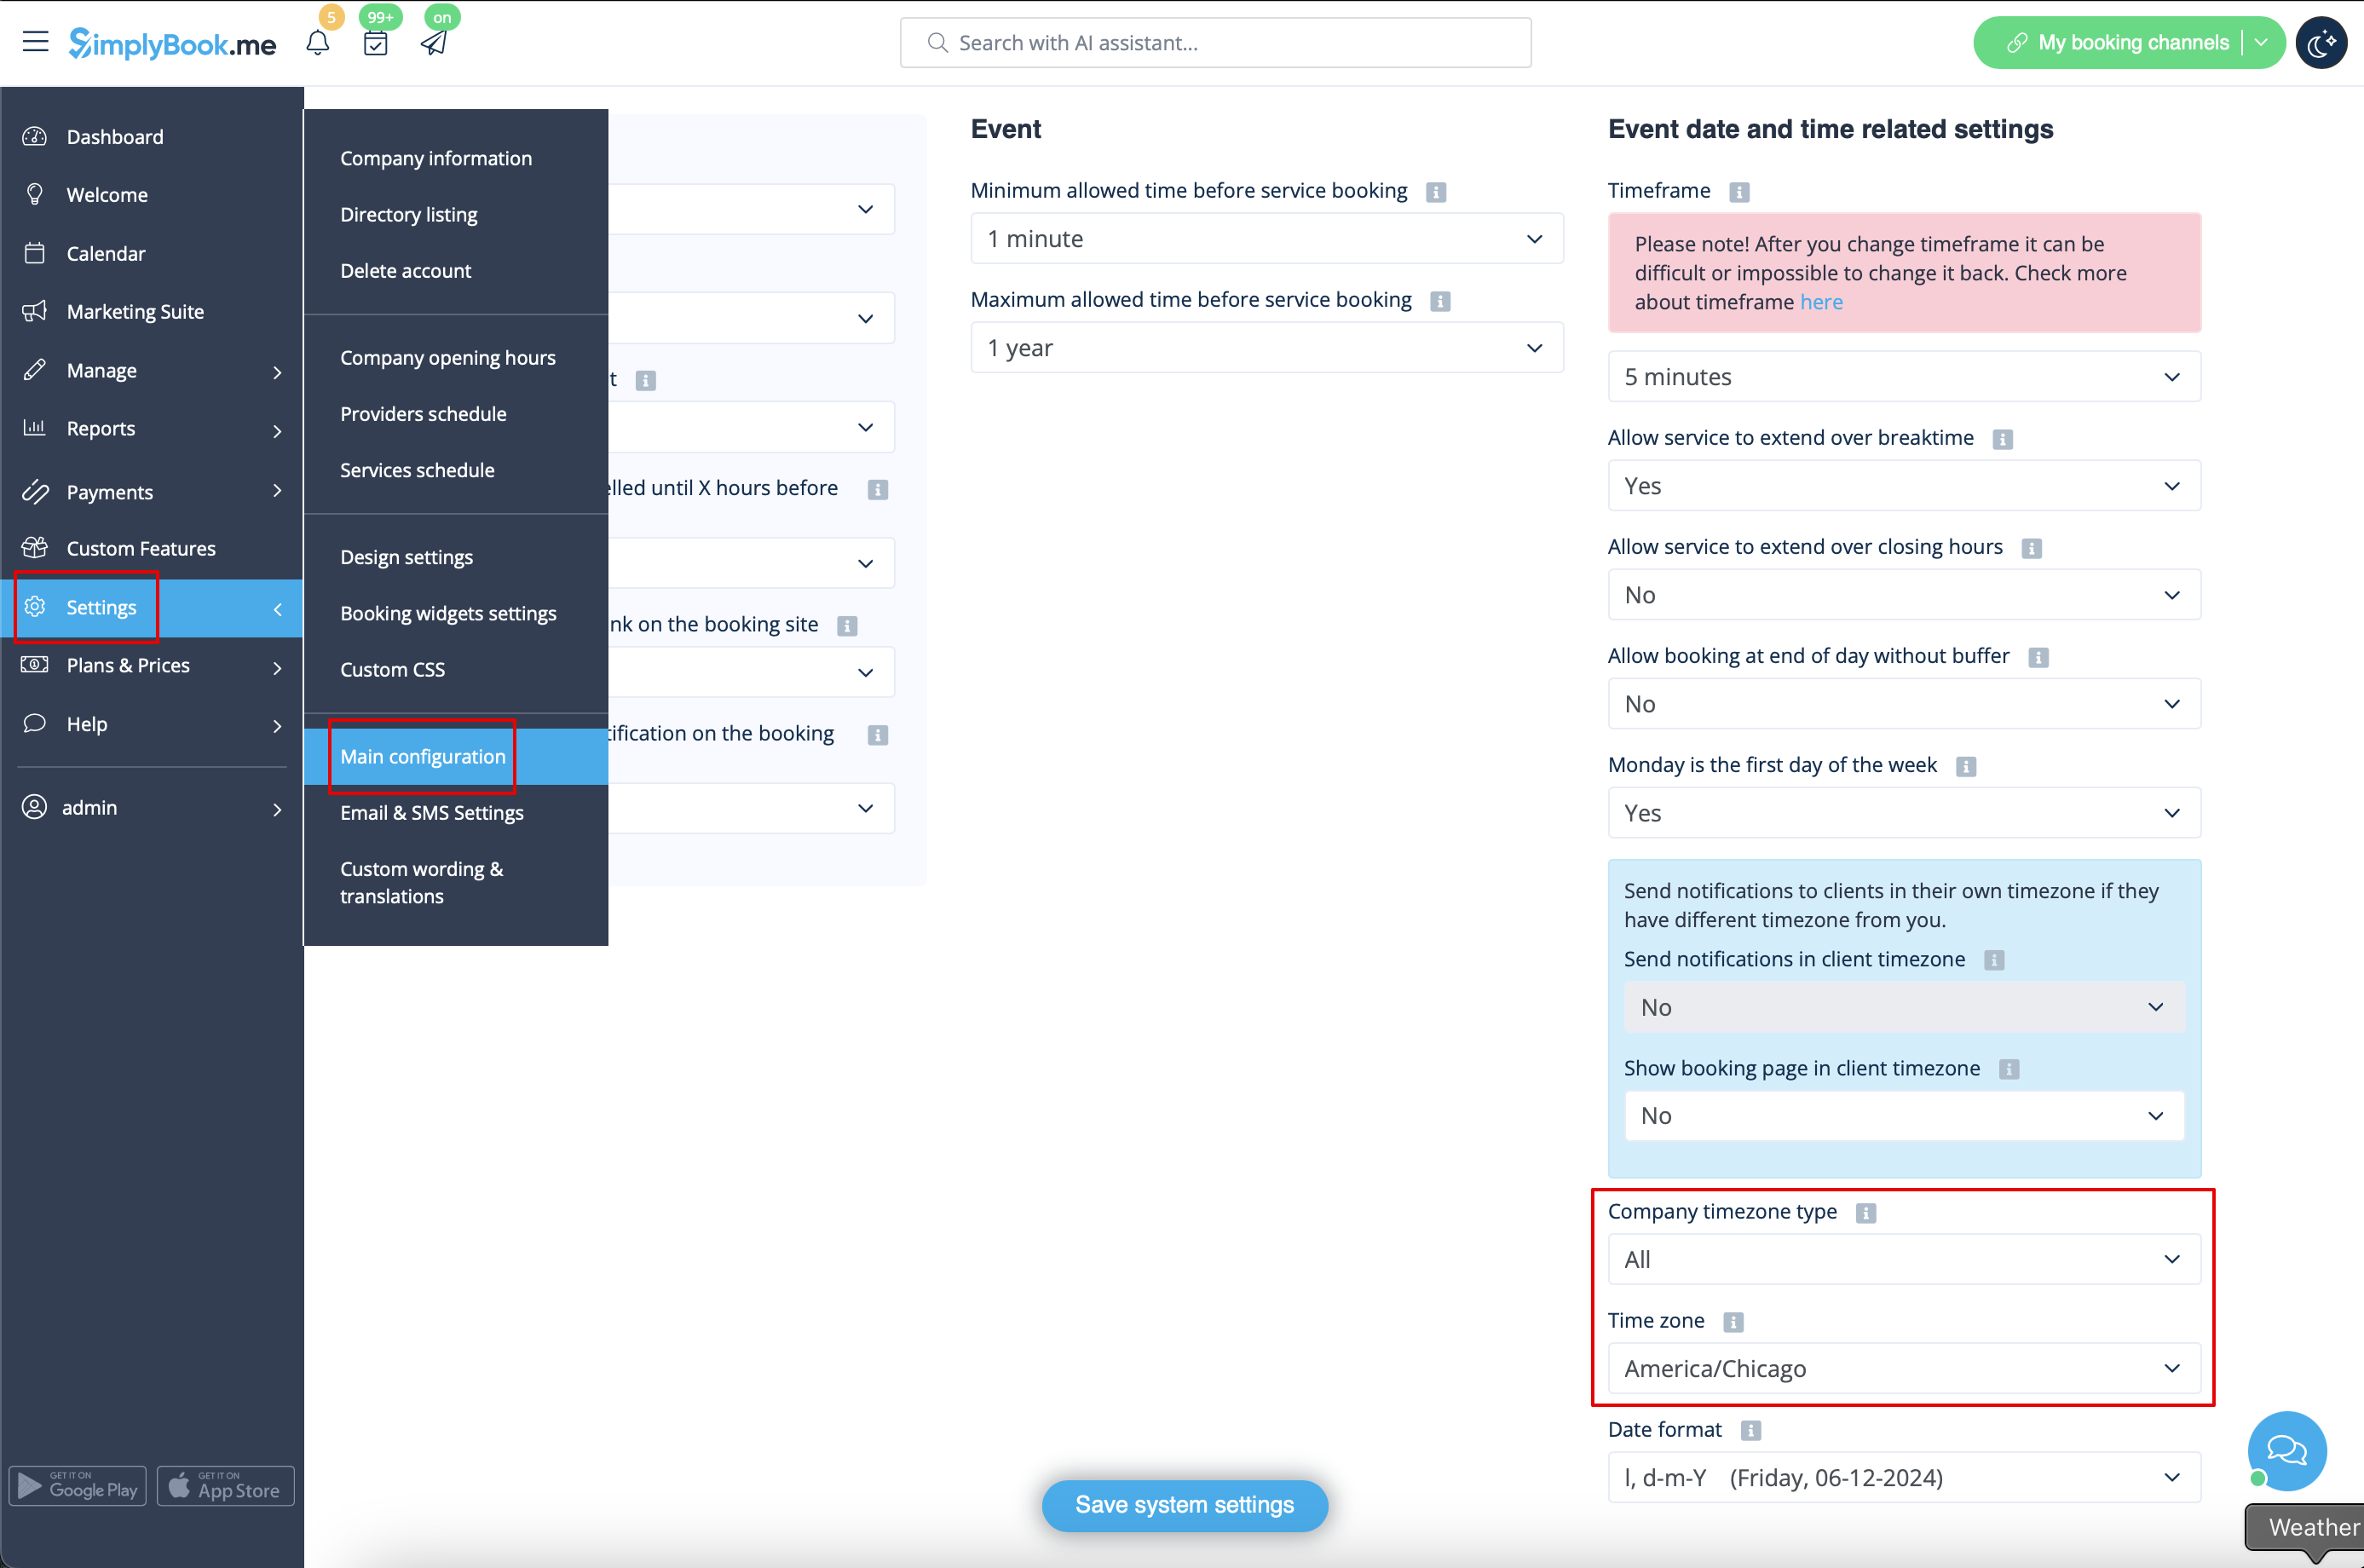
Our Time
Your time on the booking page is the time of the company's time zone. You can change your time zone in Settings -> Main configuration -> Time zone.
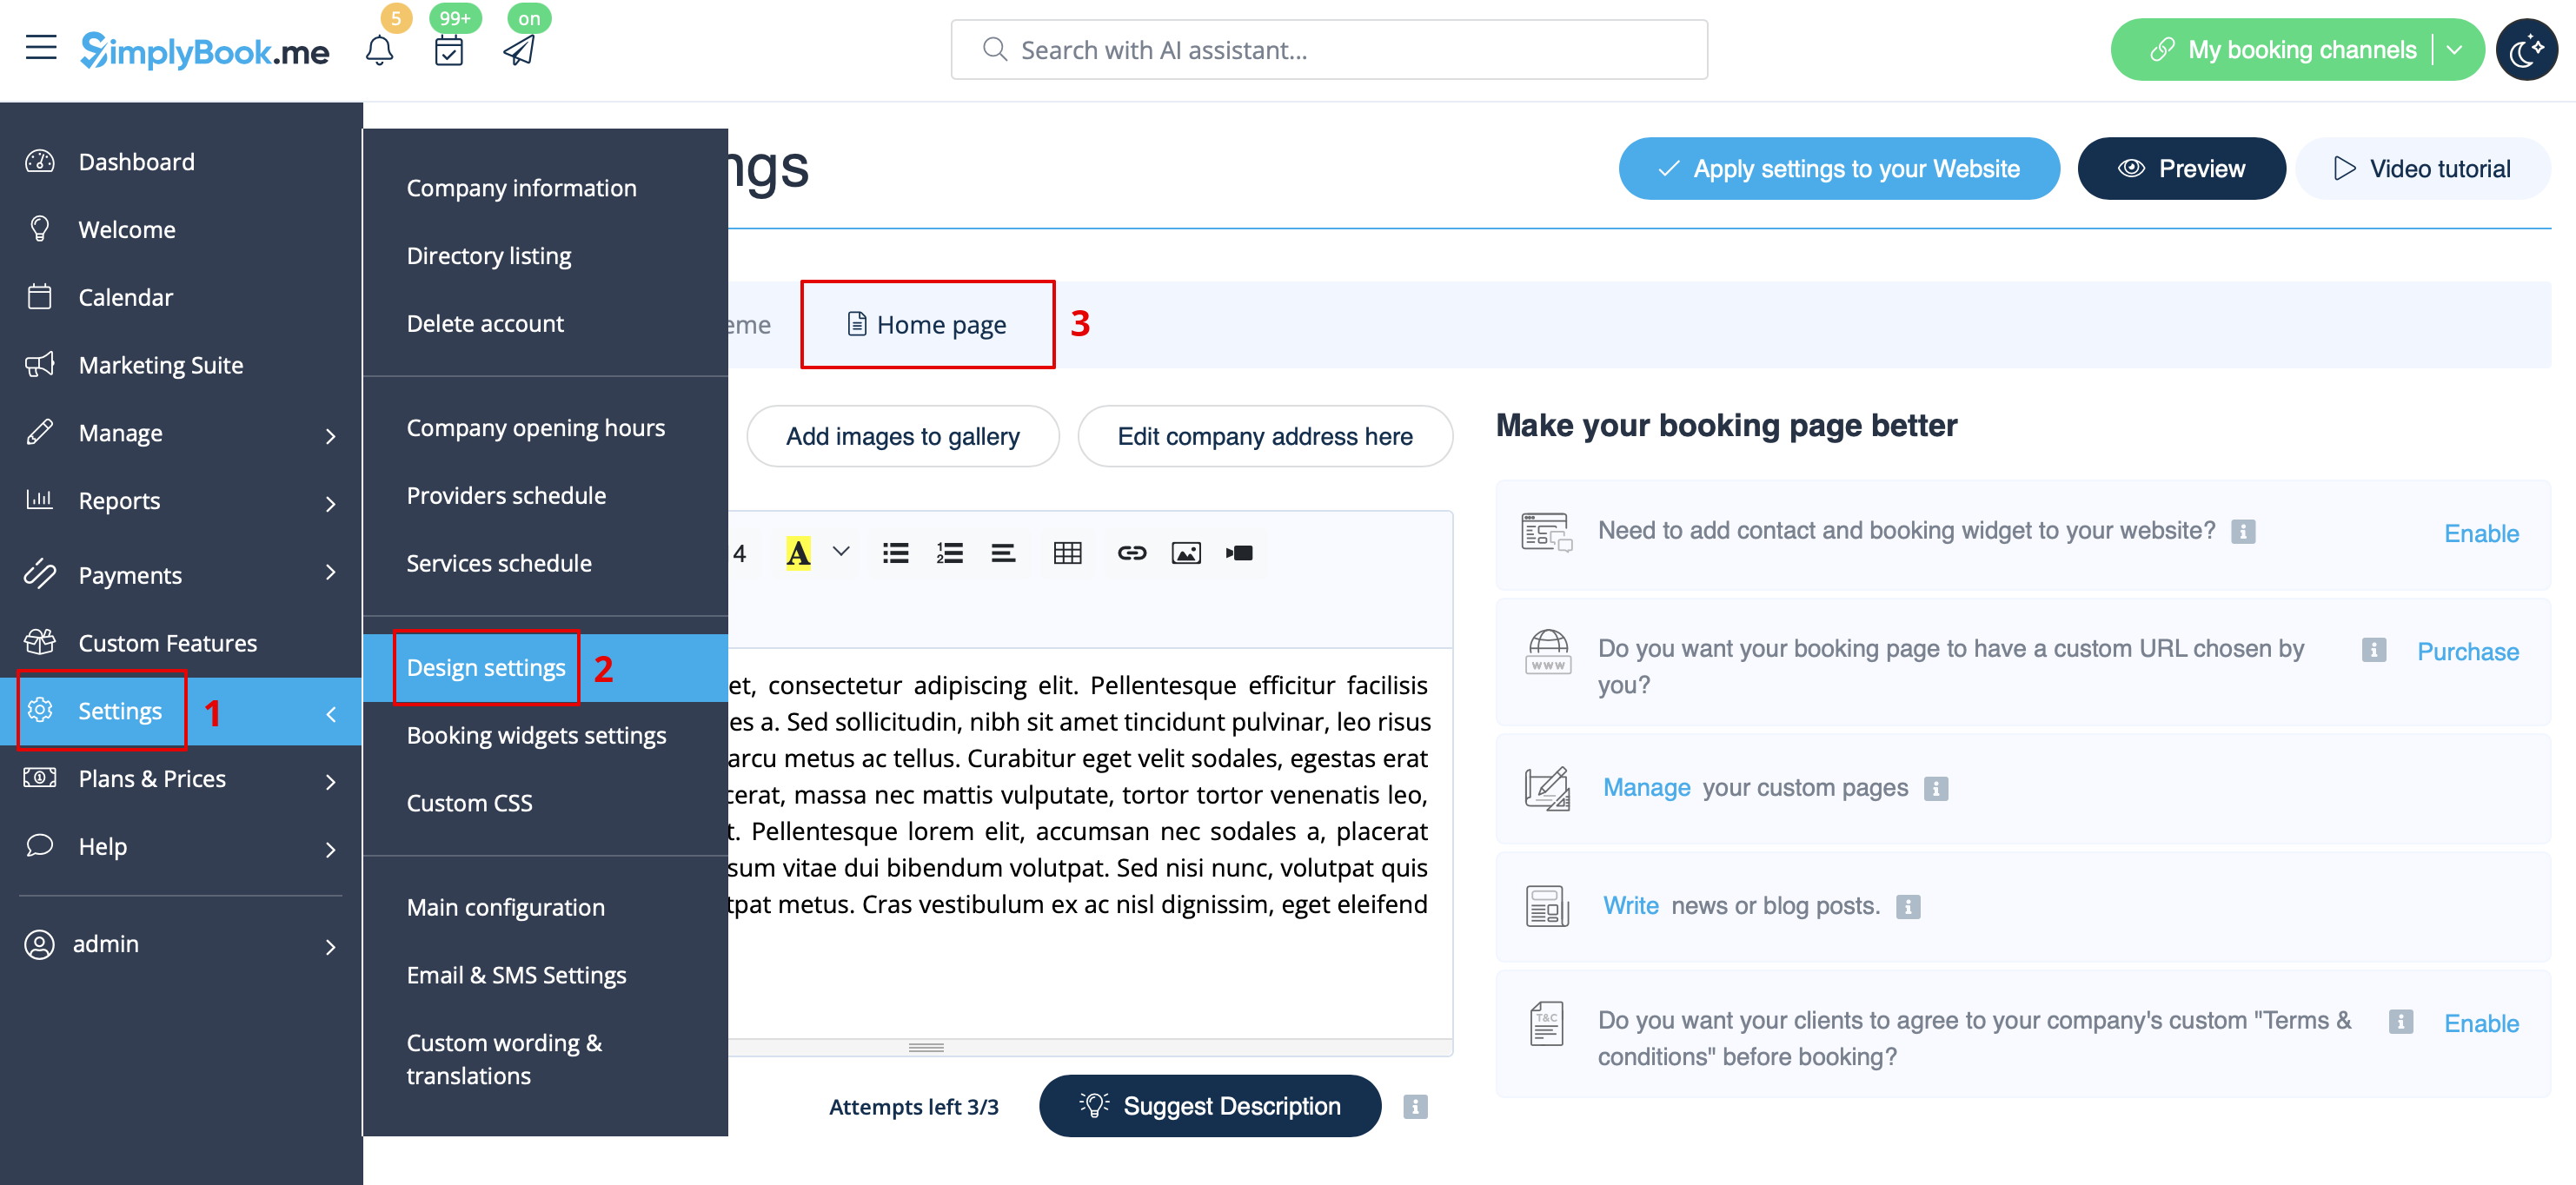
About section
In Settings // Design settings // Home page // Company description.
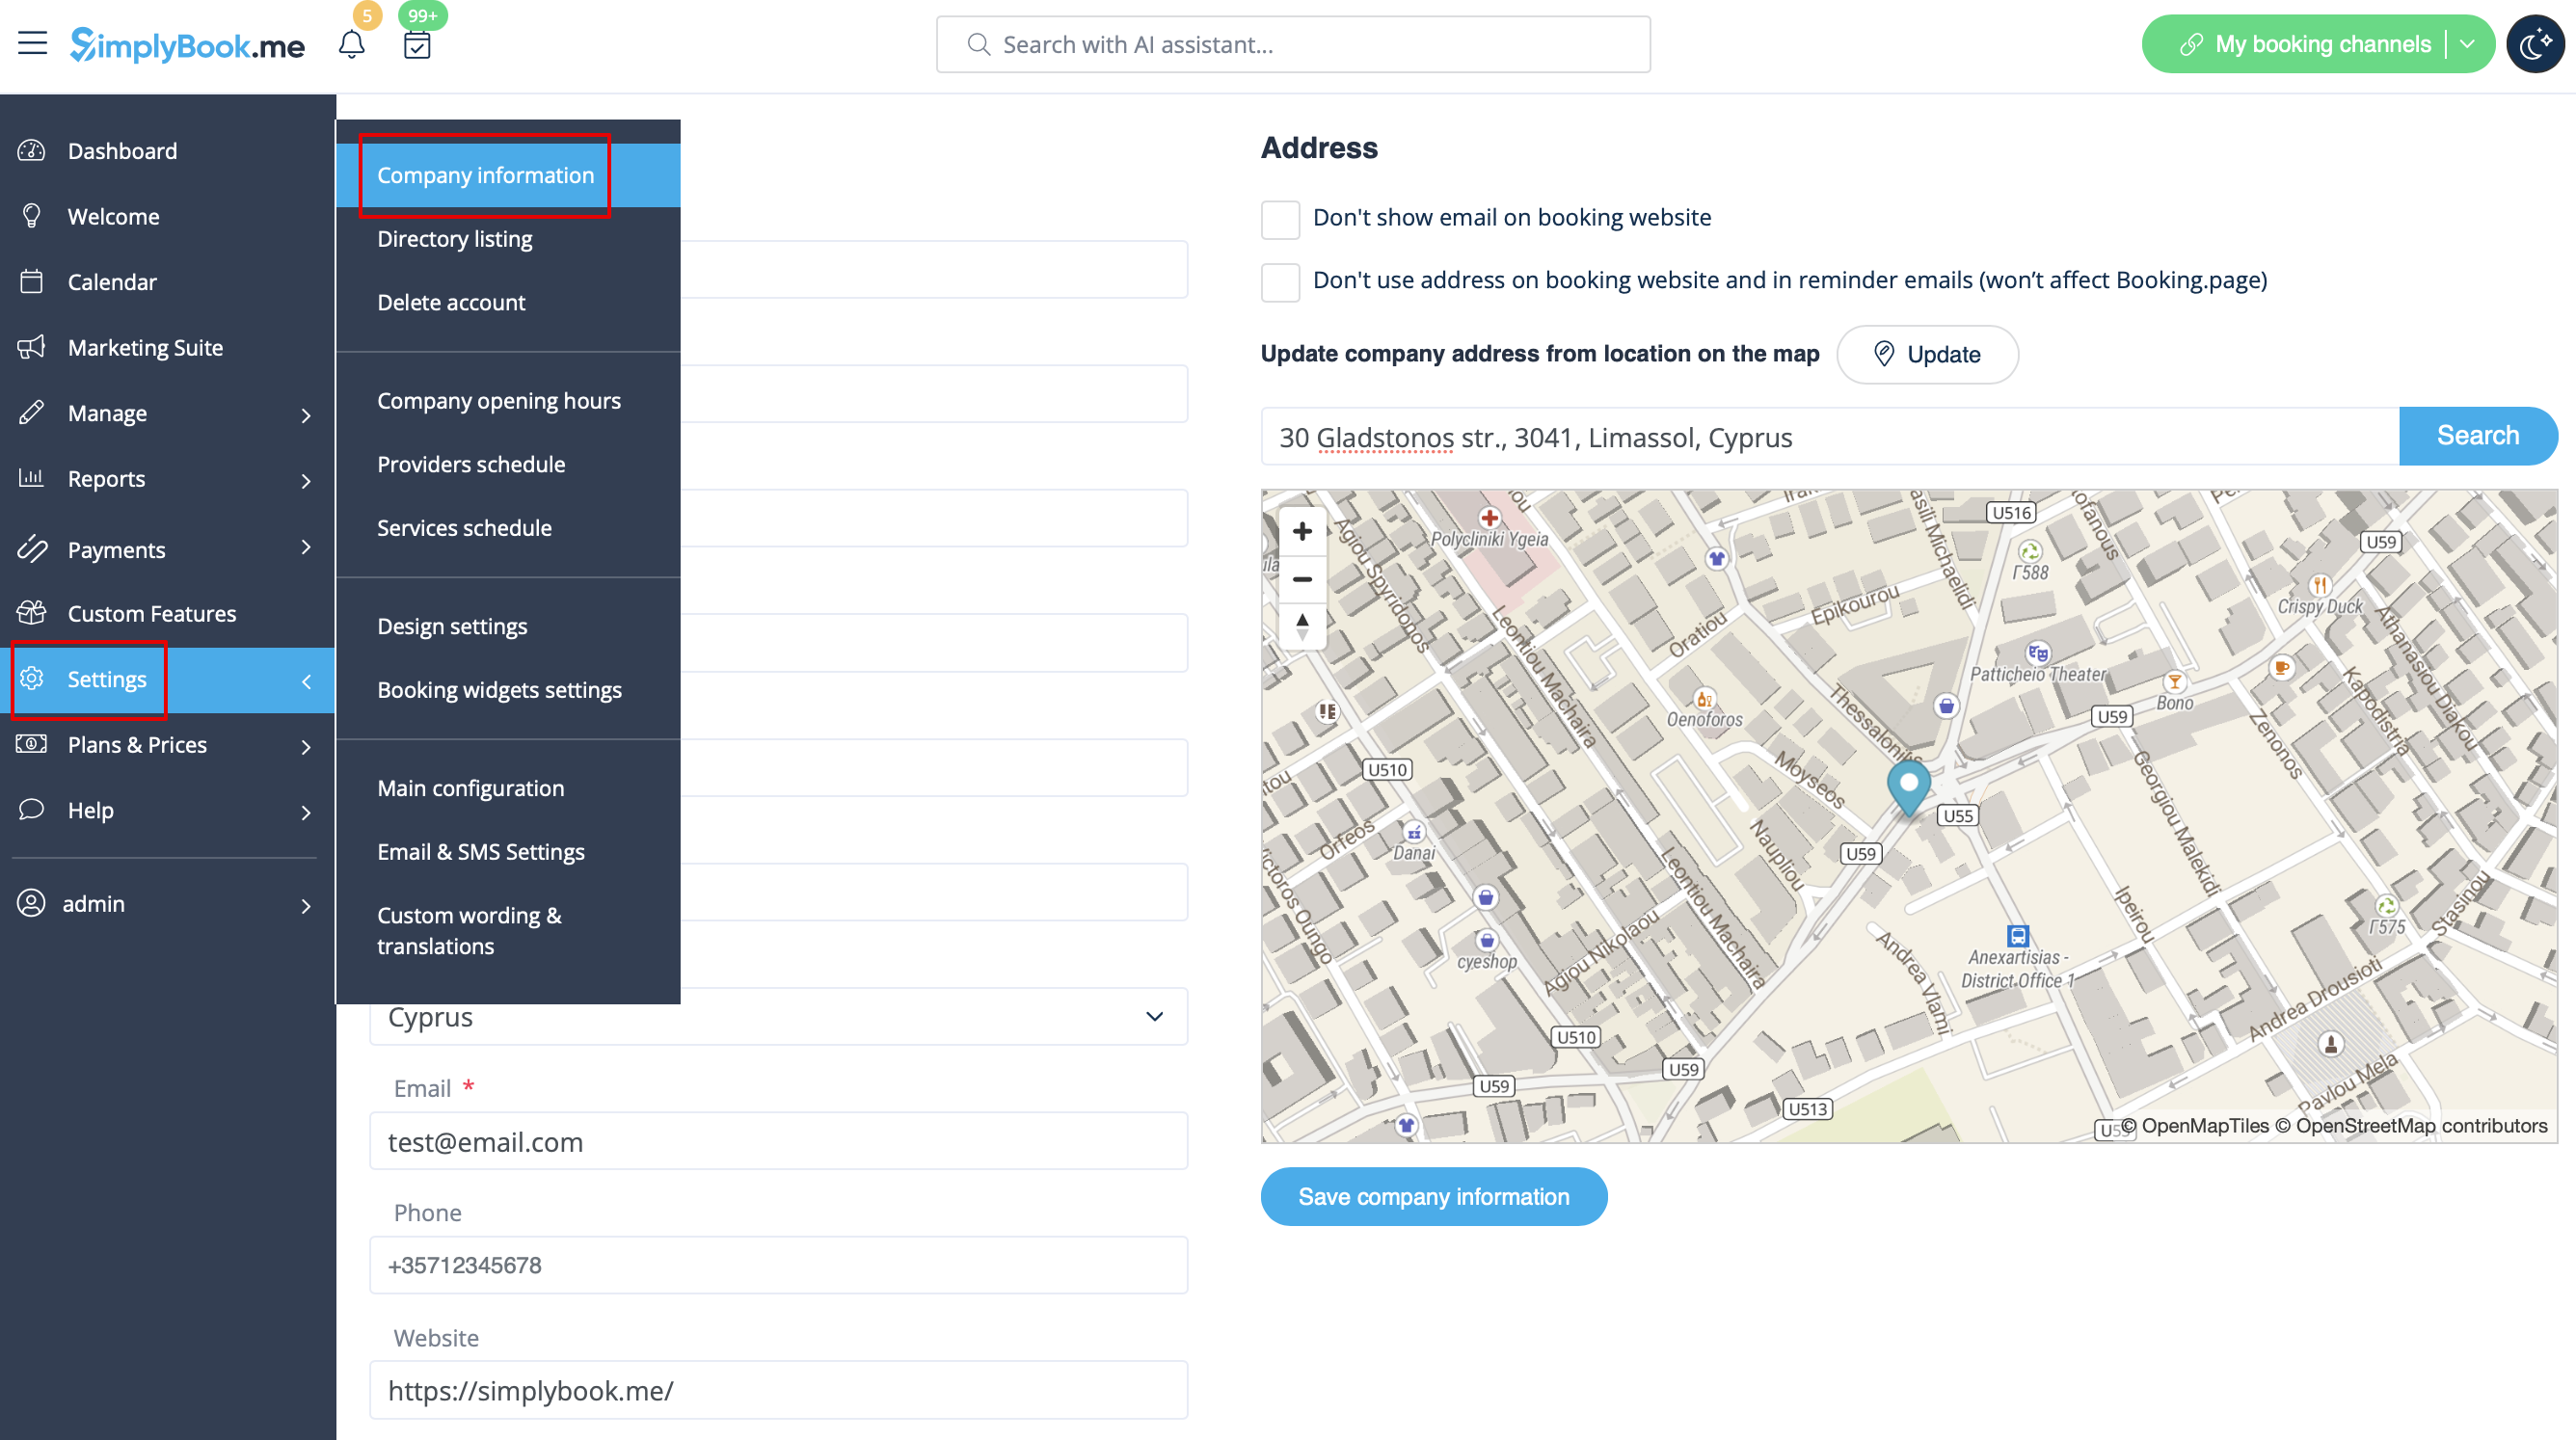
Address
In Settings // Company Information // Address.
Company Contacts
You can edit them in Settings -> Company information
The following details can be added/edited:
- Email address
- Phone number
- Website address
- WhatsApp phone
- Facebook profile url
- X.com (Twitter) page link
- Instagram page url
- LinkedIn page
An example of the client side look.
The clients will be able to, for example, click on WhatsApp number and be redirected to the WhatsApp messenger to easily contact you there.
Working hours
Working hours block on the booking page:

To change working hours block go to Settings // Company opening hours.
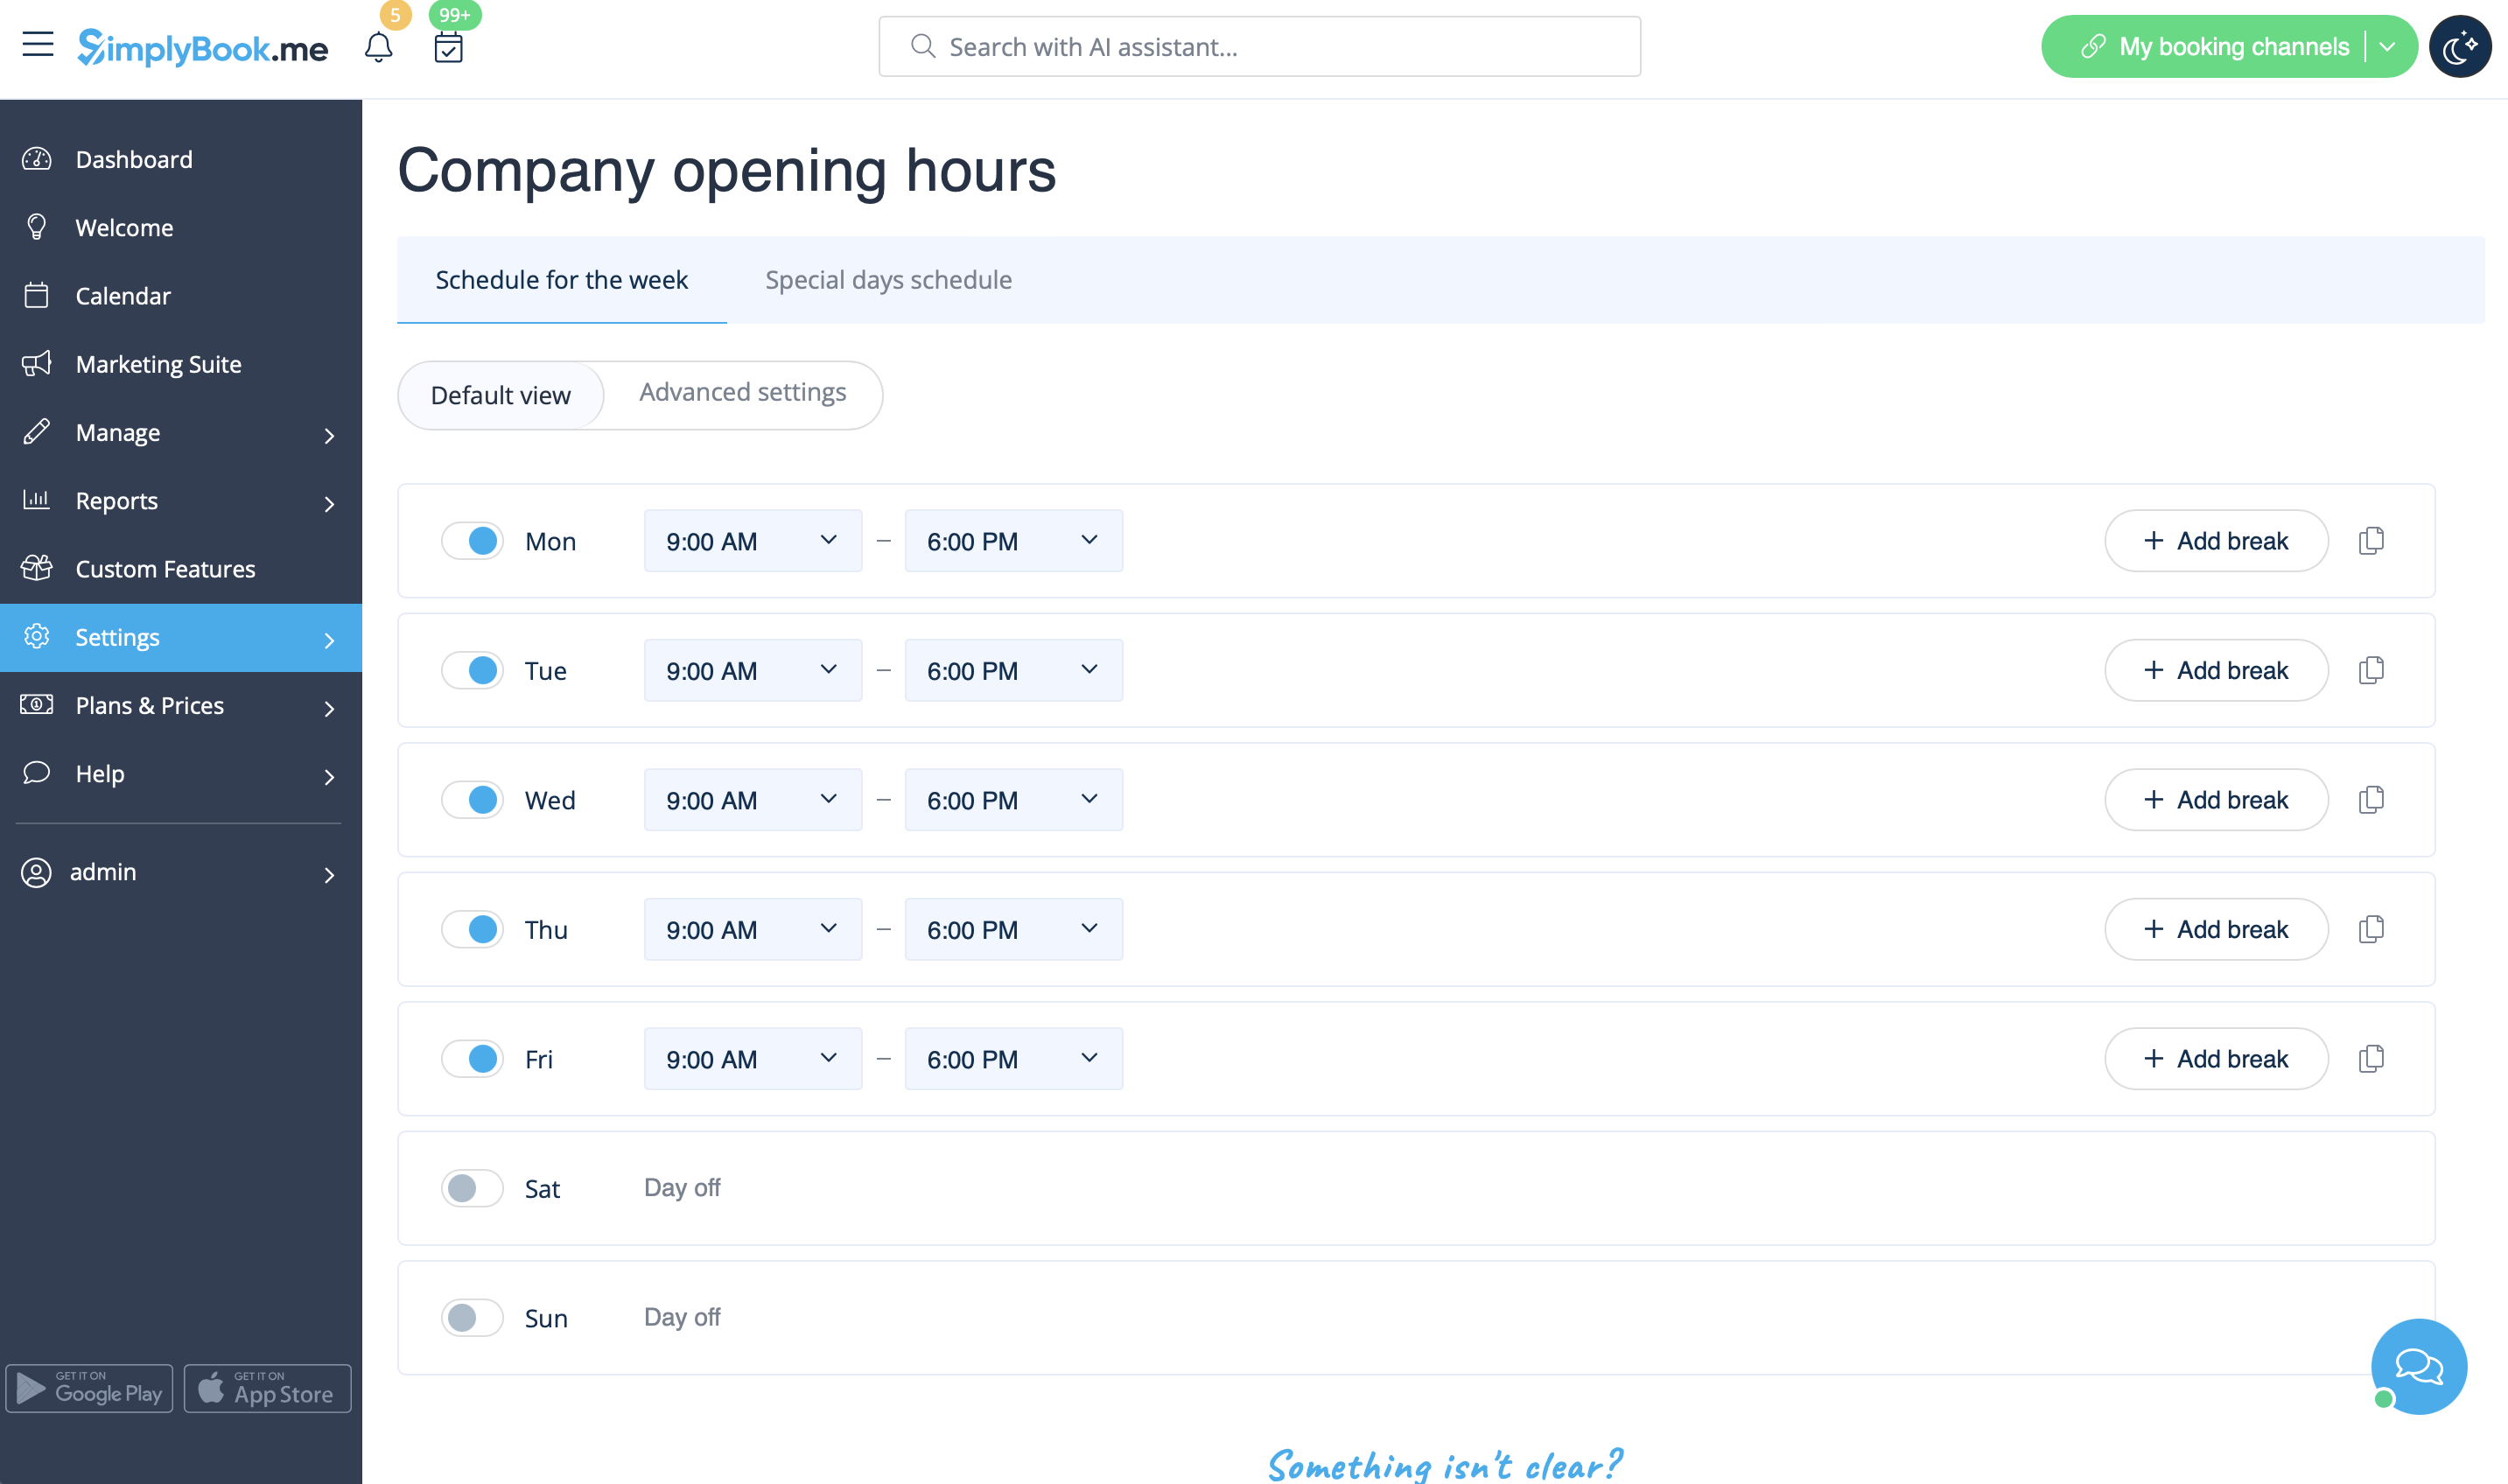
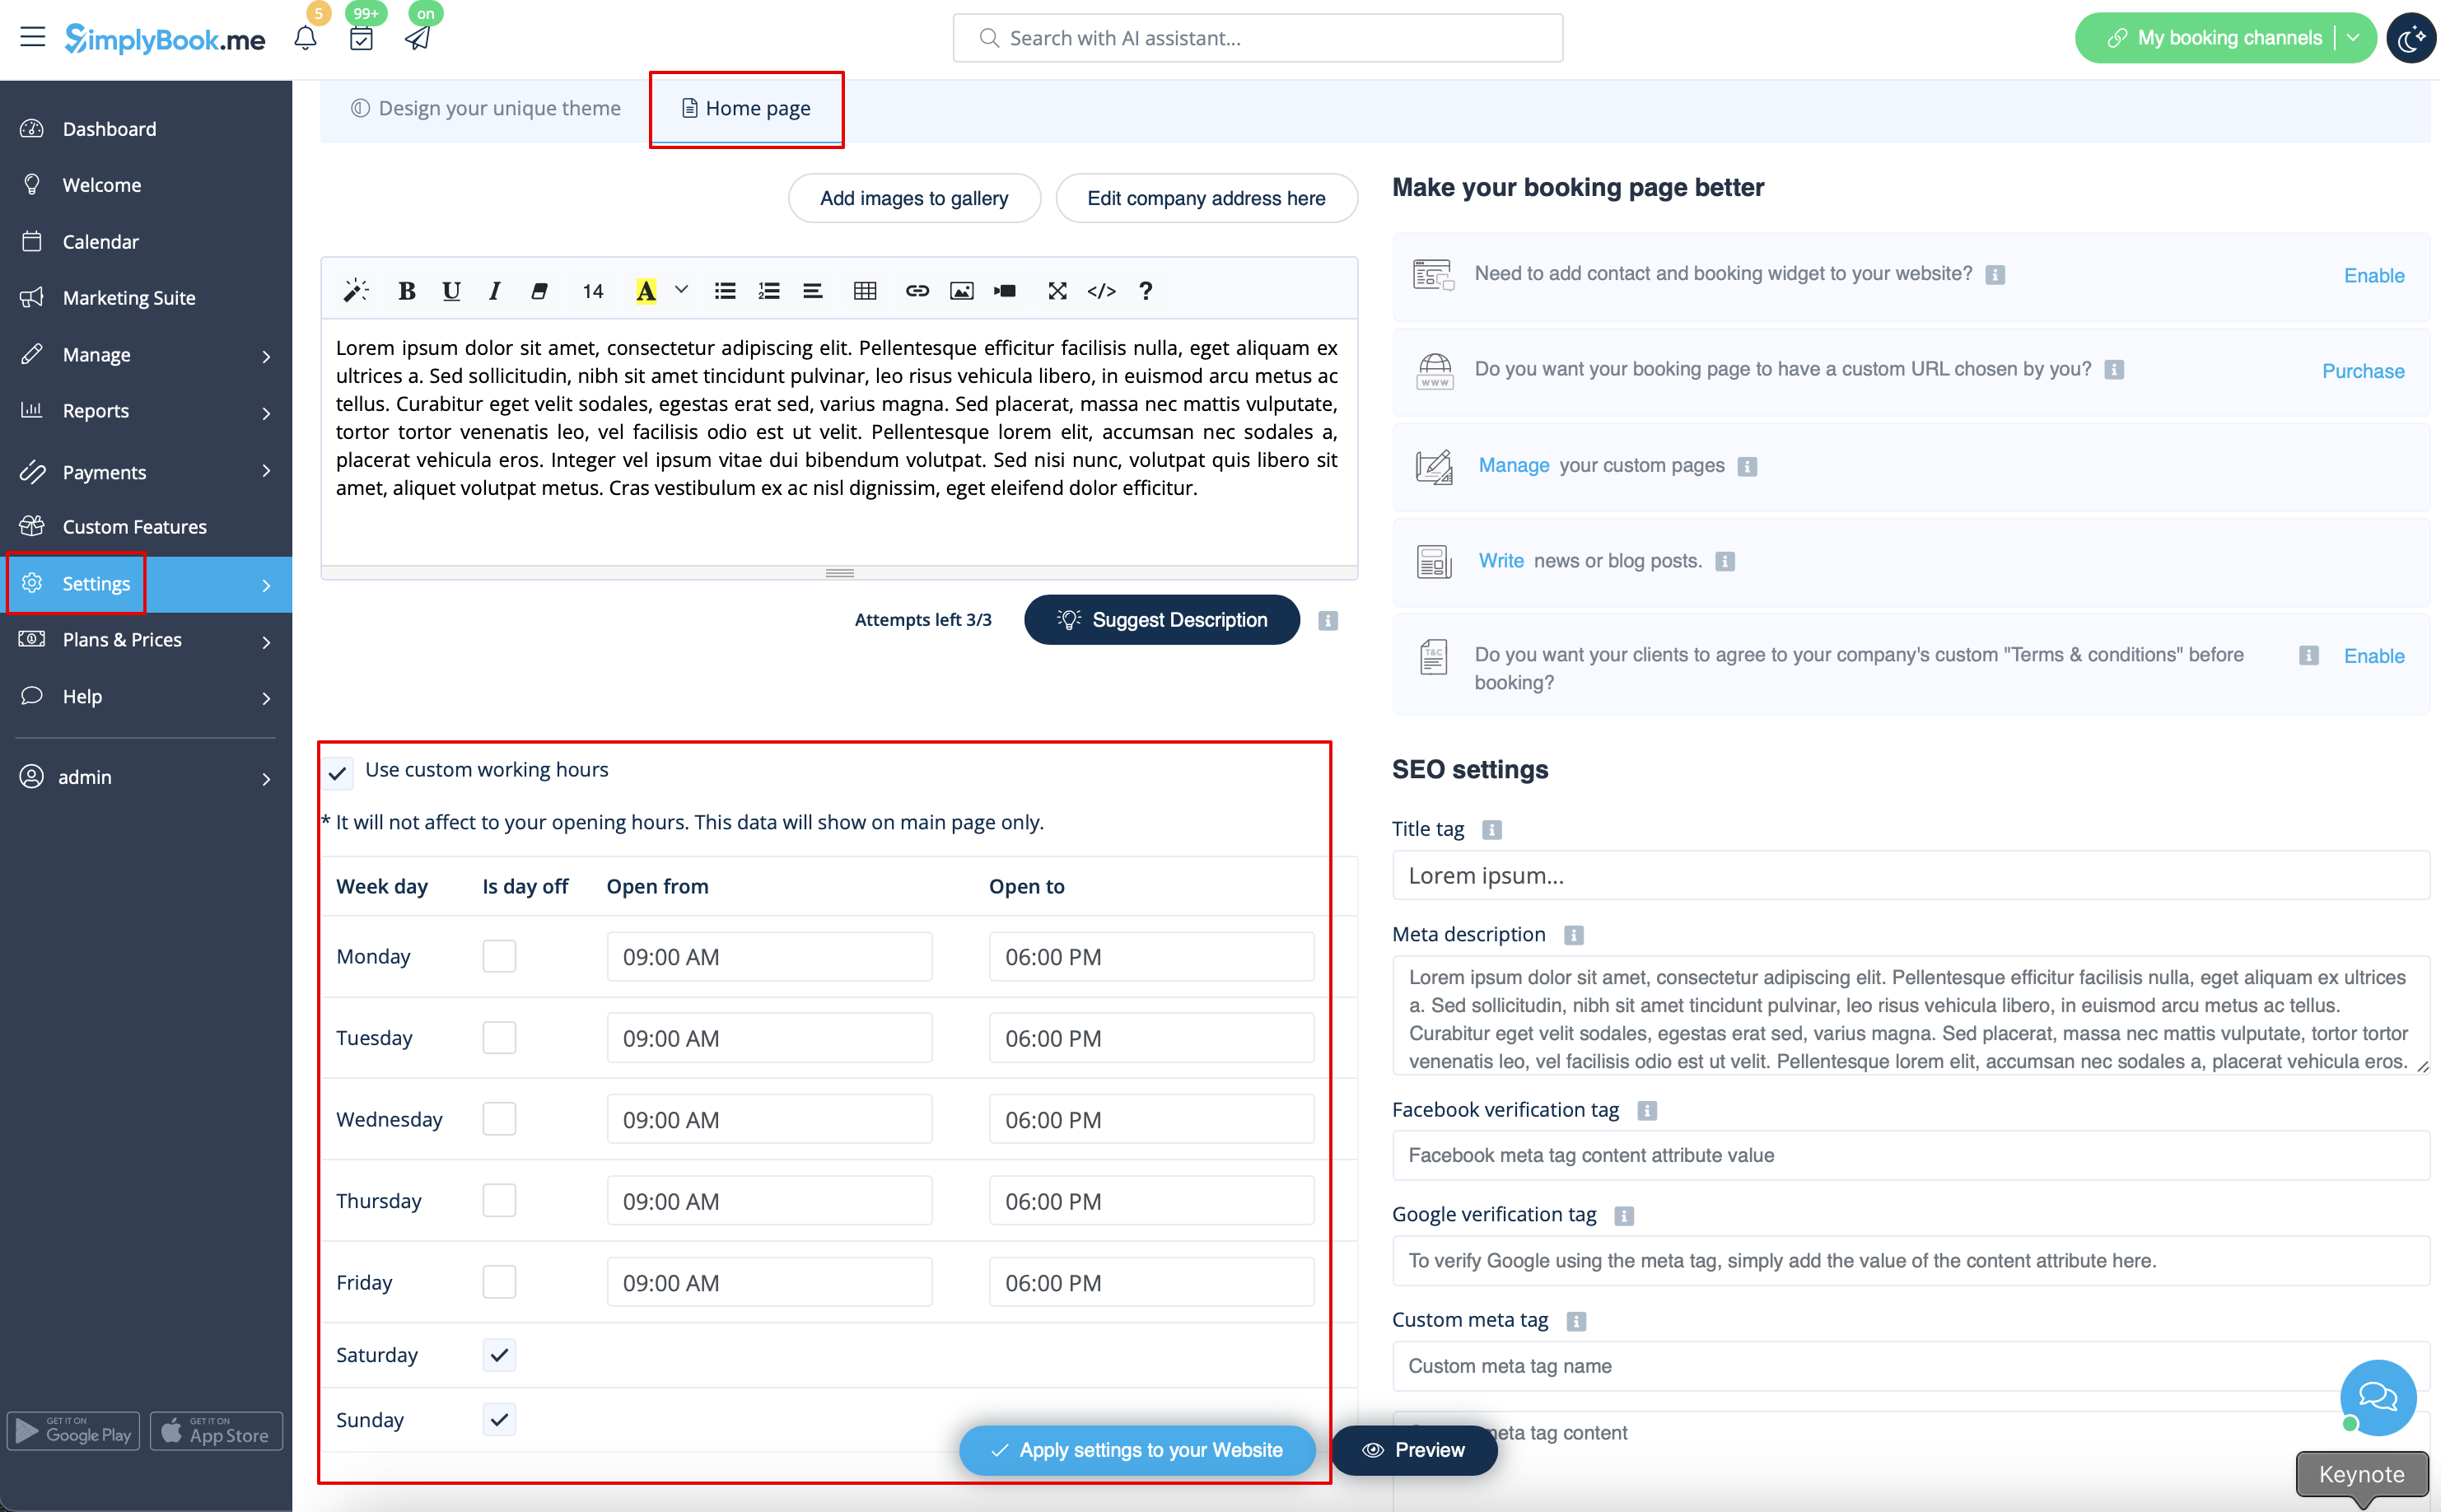
If you wish to display times different from real working hours there you can use "Use custom working hours" in Settings//Design settings//Home page.
Calendar Layout
You can change calendar layout in Settings // Design settings // Calendar Layout settings // Calendar Layout drop-down
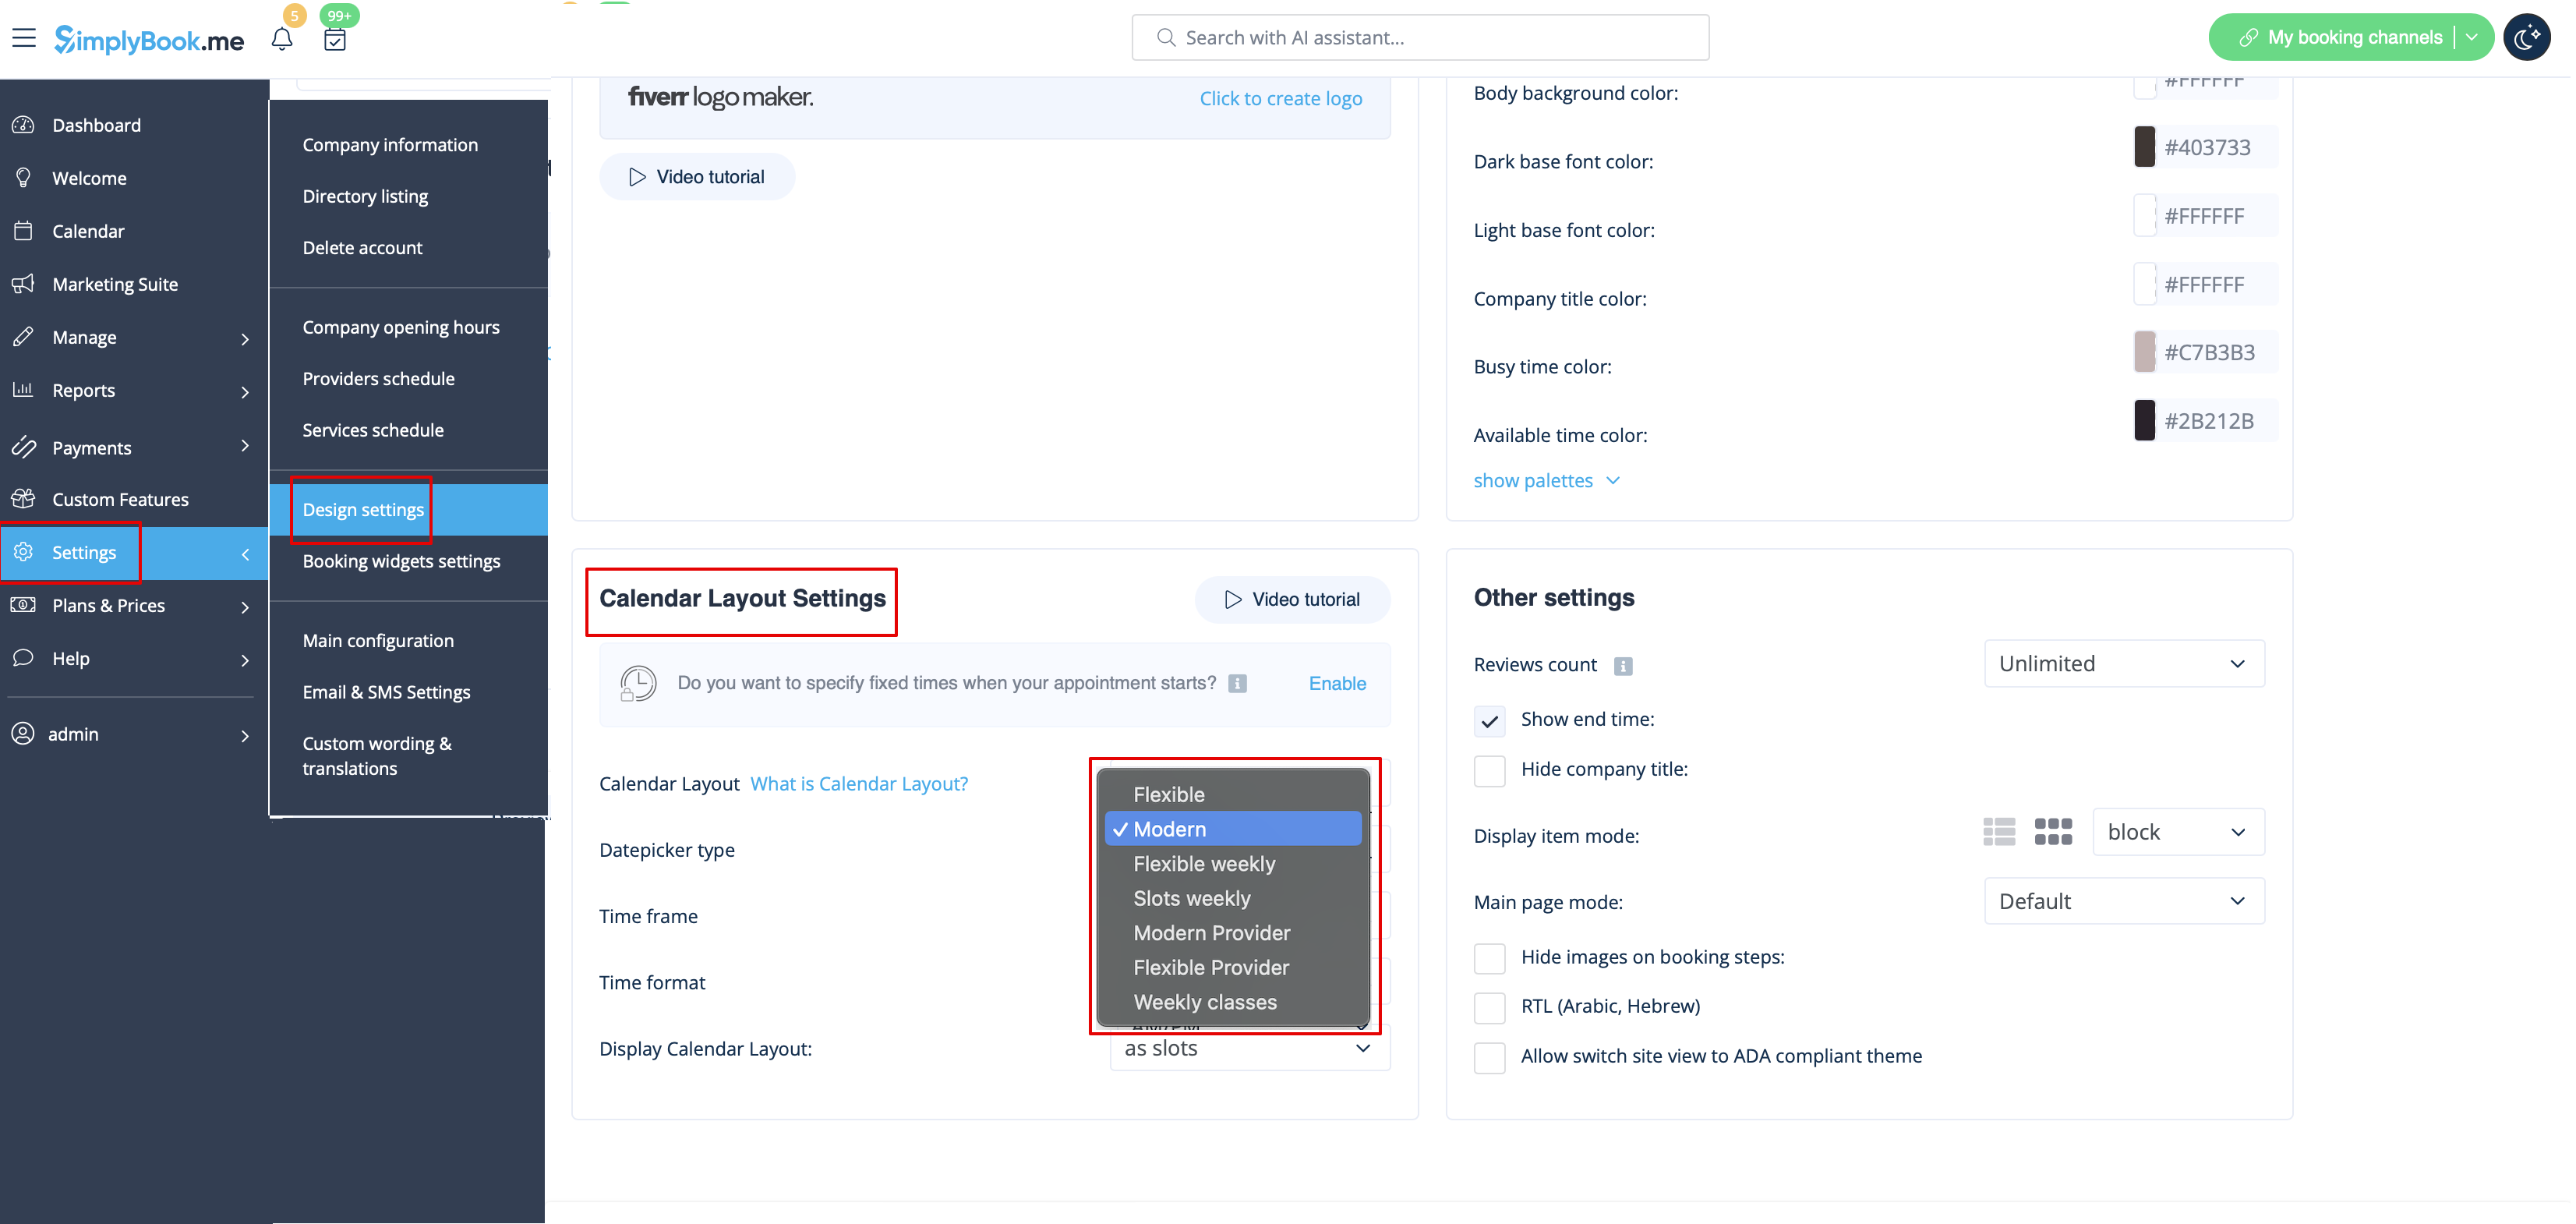
There are 9 types of calendar layout:
- Slots weekly - shows available time in the intervals equal to your service duration for a week. Starts counting from the first available time.
- Modern - shows available time in the intervals equal to your service duration for a day. Starts counting from the first available time.
- Flexible weekly - shows available time in the intervals equal to your timeframe duration for a week. Starts counting from the first available time.
- Flexible - shows available time in the intervals equal to your timeframe duration for a day. Starts counting from the first available time.
- Modern provider - shows available time for providers for chosen date. Starts counting from the first available time of all providers.
- Flexible provider- shows available times for providers in the intervals equal to your timeframe duration. Starts counting from the first available time on selected date.
- Daily Classes- shows available times for classes in the intervals equal to class duration. Starts counting from the first available time.
- Please note! Multiple Bookings custom feature currently does not work with Classes layout.
- Weekly Classes shows available times for classes in the intervals equal to class duration with weekly options. Starts counting from the first available time for a date. Only available times are displayed, unavailable slots are hidden.
If you have services that have fixed start times, you can try using Appointment at fixed time Custom Feature.
Interval
You can change it in Settings // Main configuration // Timeframe.
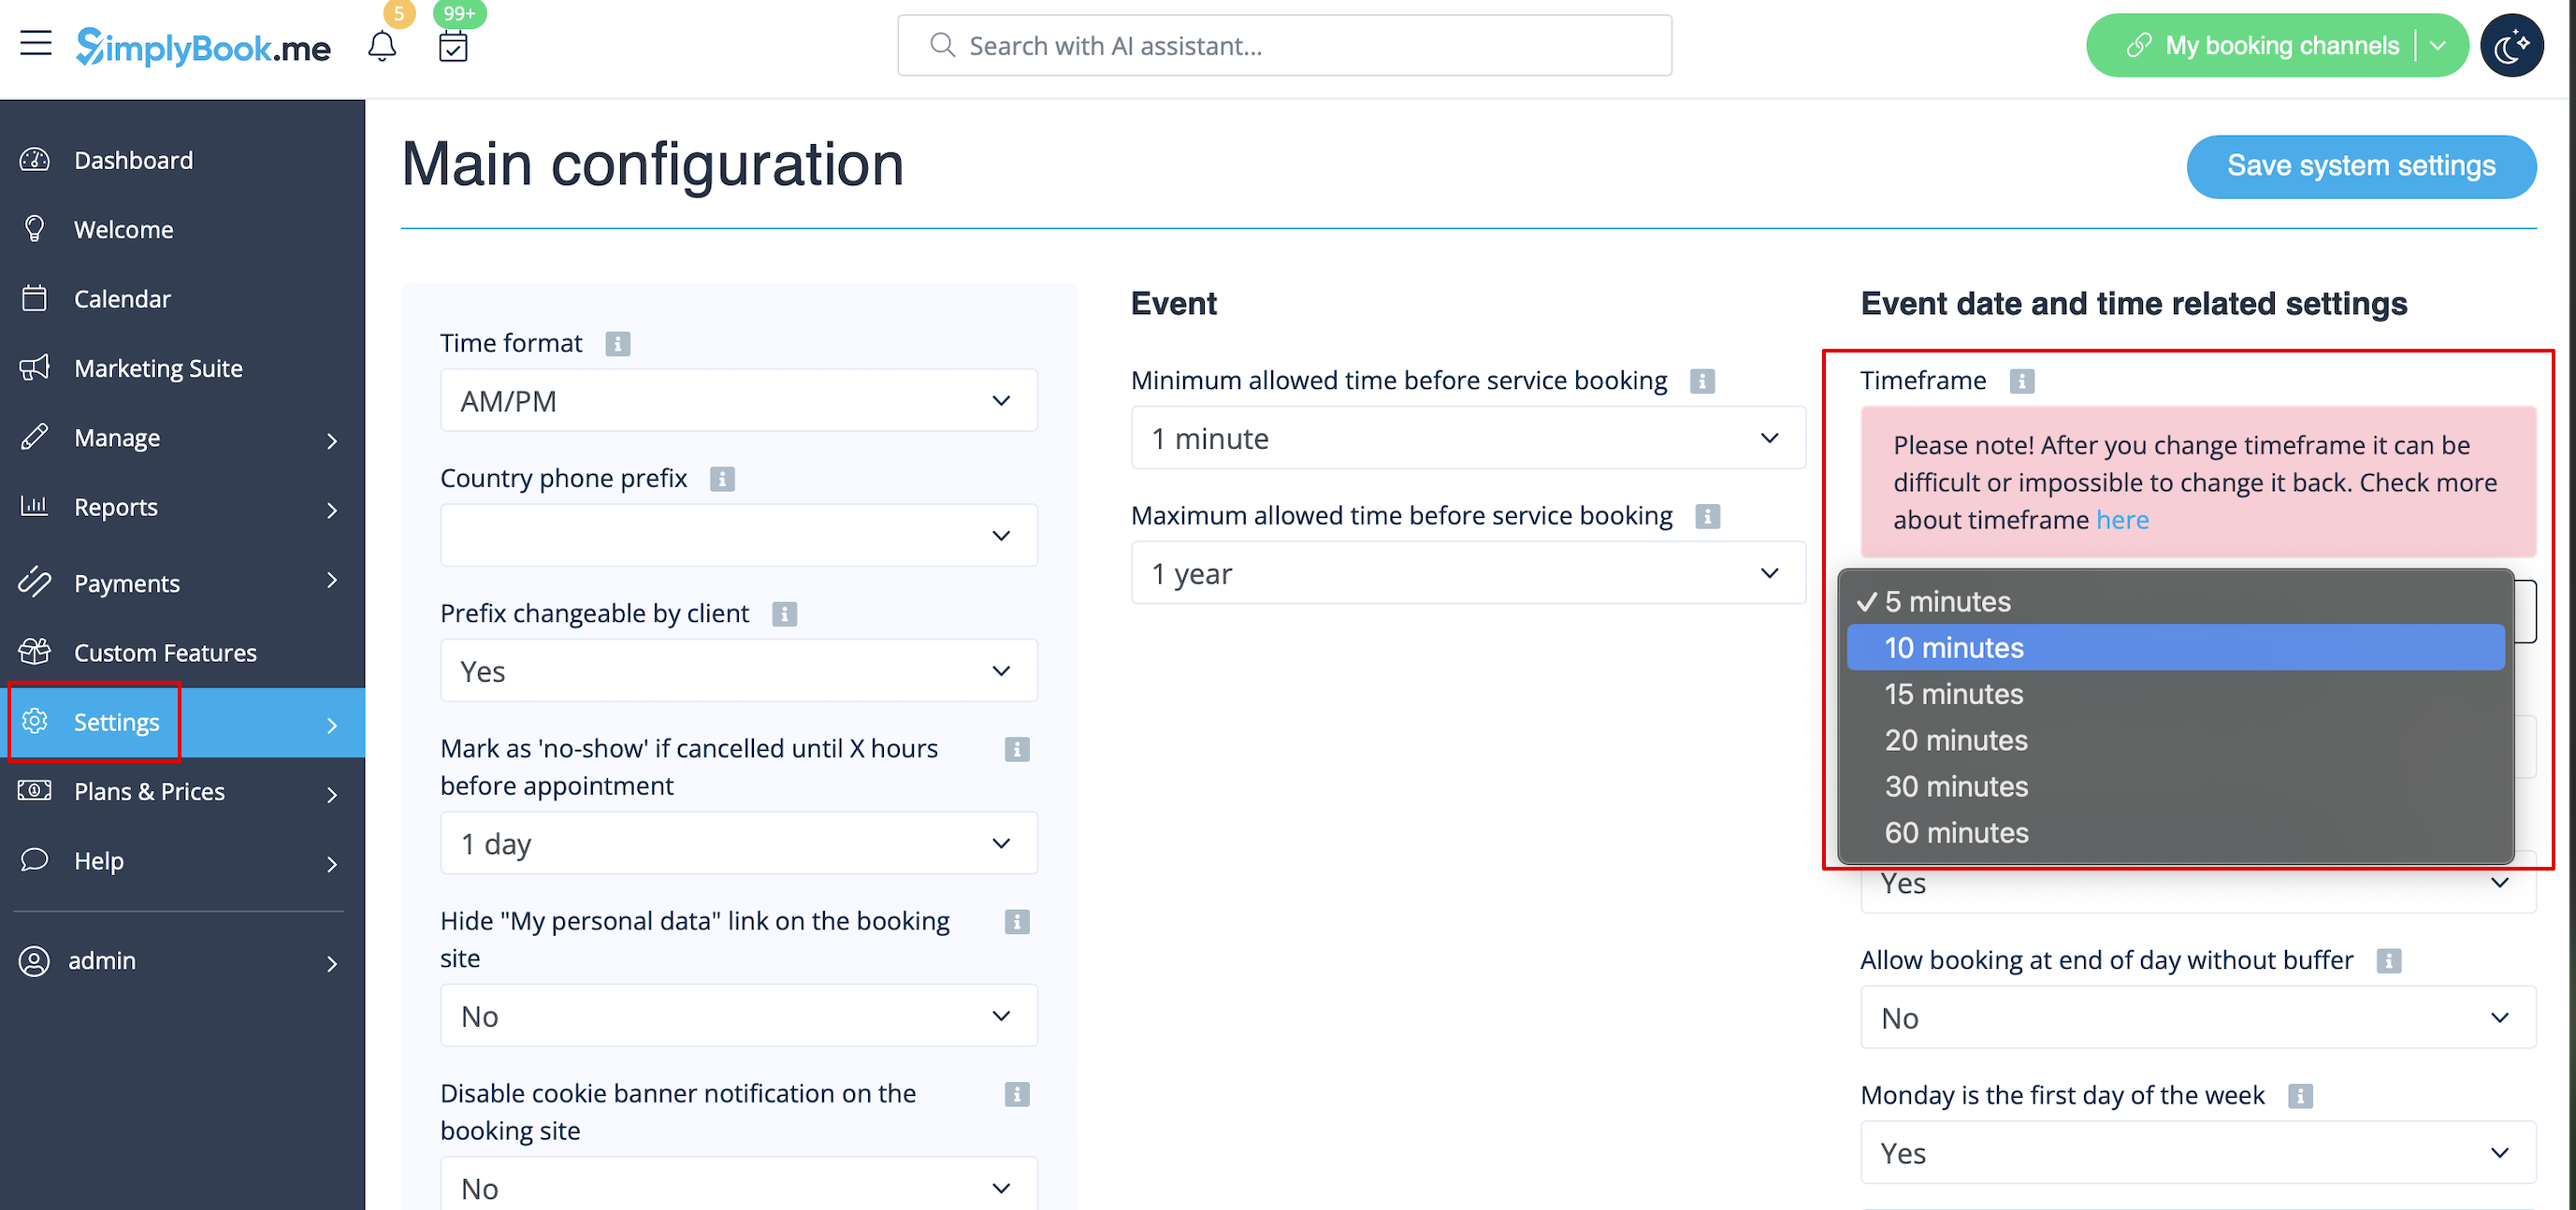
You can also try to change calendar layout to flexible in order to show availability according to your interval. Check types of Calendar Layouts here.