Prénom et nom
- Il peut arriver que vous ayez besoin de champs distincts pour le prénom et le nom de vos clients lors du processus d'inscription.
- C'est désormais possible grâce à notre fonctionnalité « Champs client » et à la nouvelle fonctionnalité de réorganisation.
- Remarque : cette configuration est disponible lorsque la fonctionnalité « Connexion client » est activée.
comment utiliser les champs client
- 1. Activez la fonctionnalité personnalisée Champs client sur la page Fonctionnalités personnalisées.
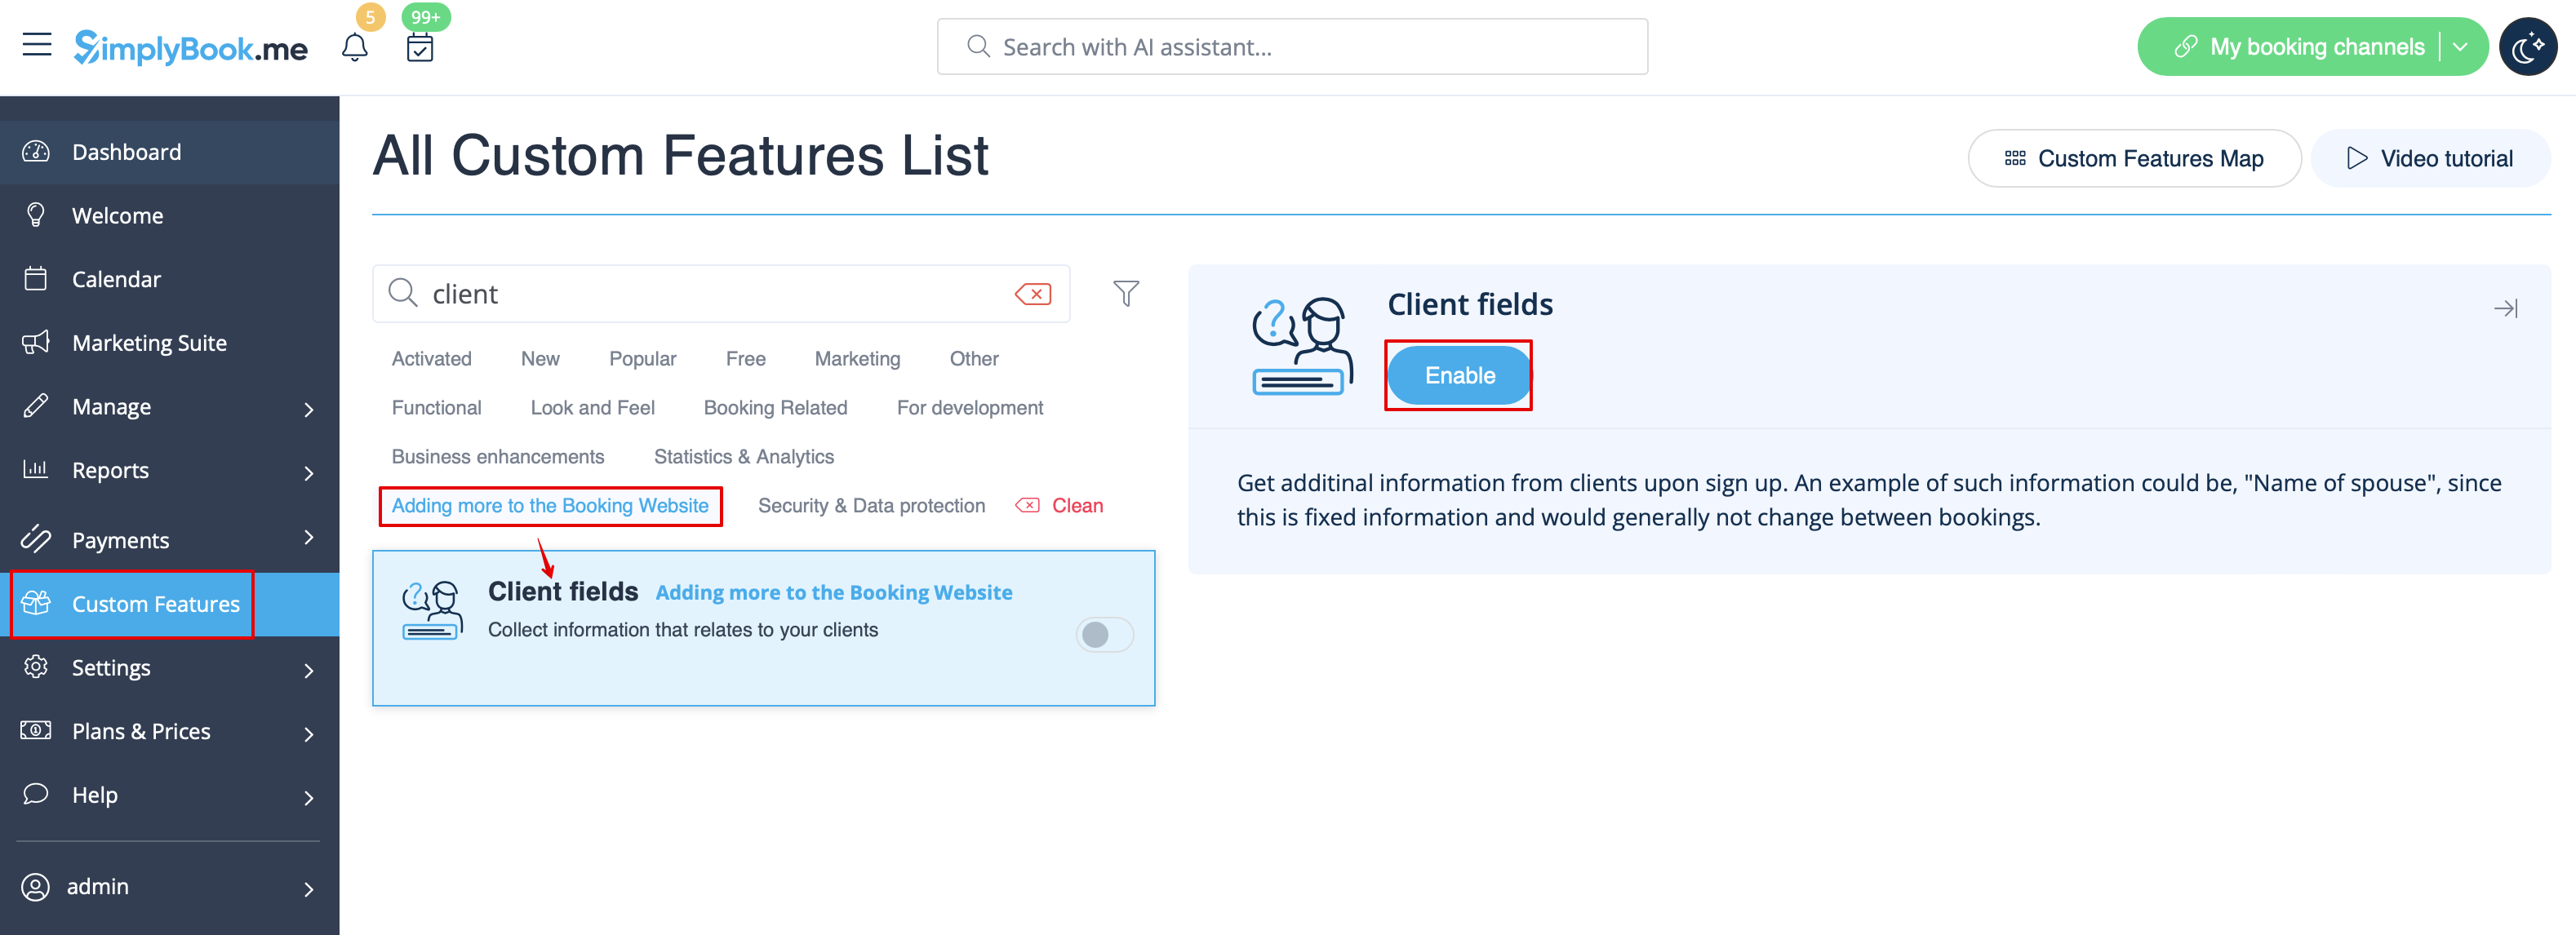
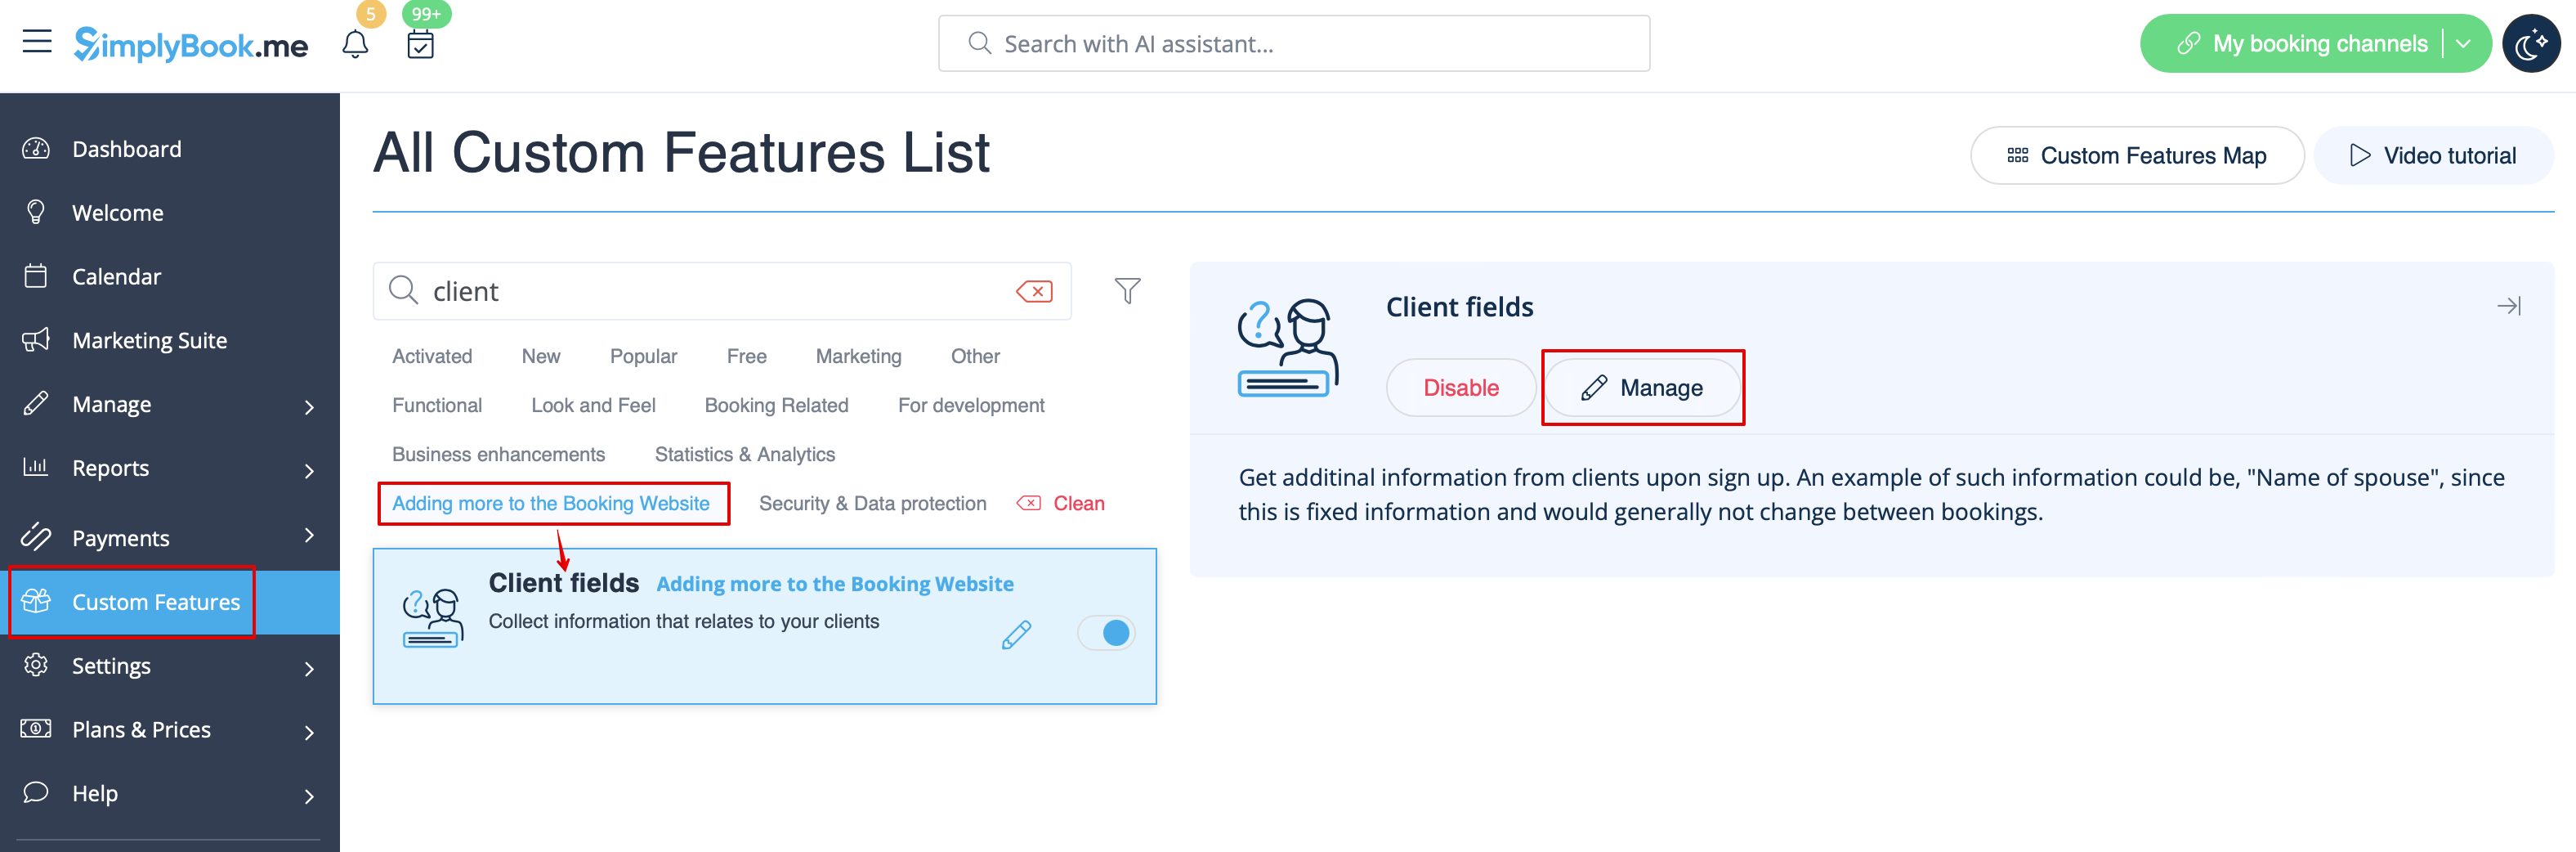
- 2. Accédez à ses paramètres en cliquant sur le lien Gérer.
- Ou accédez à Gérer -> Champs client dans le menu de gauche.
- 3. You will see default registration fields there. Select the first one called Name and rename it to First Name. Save.
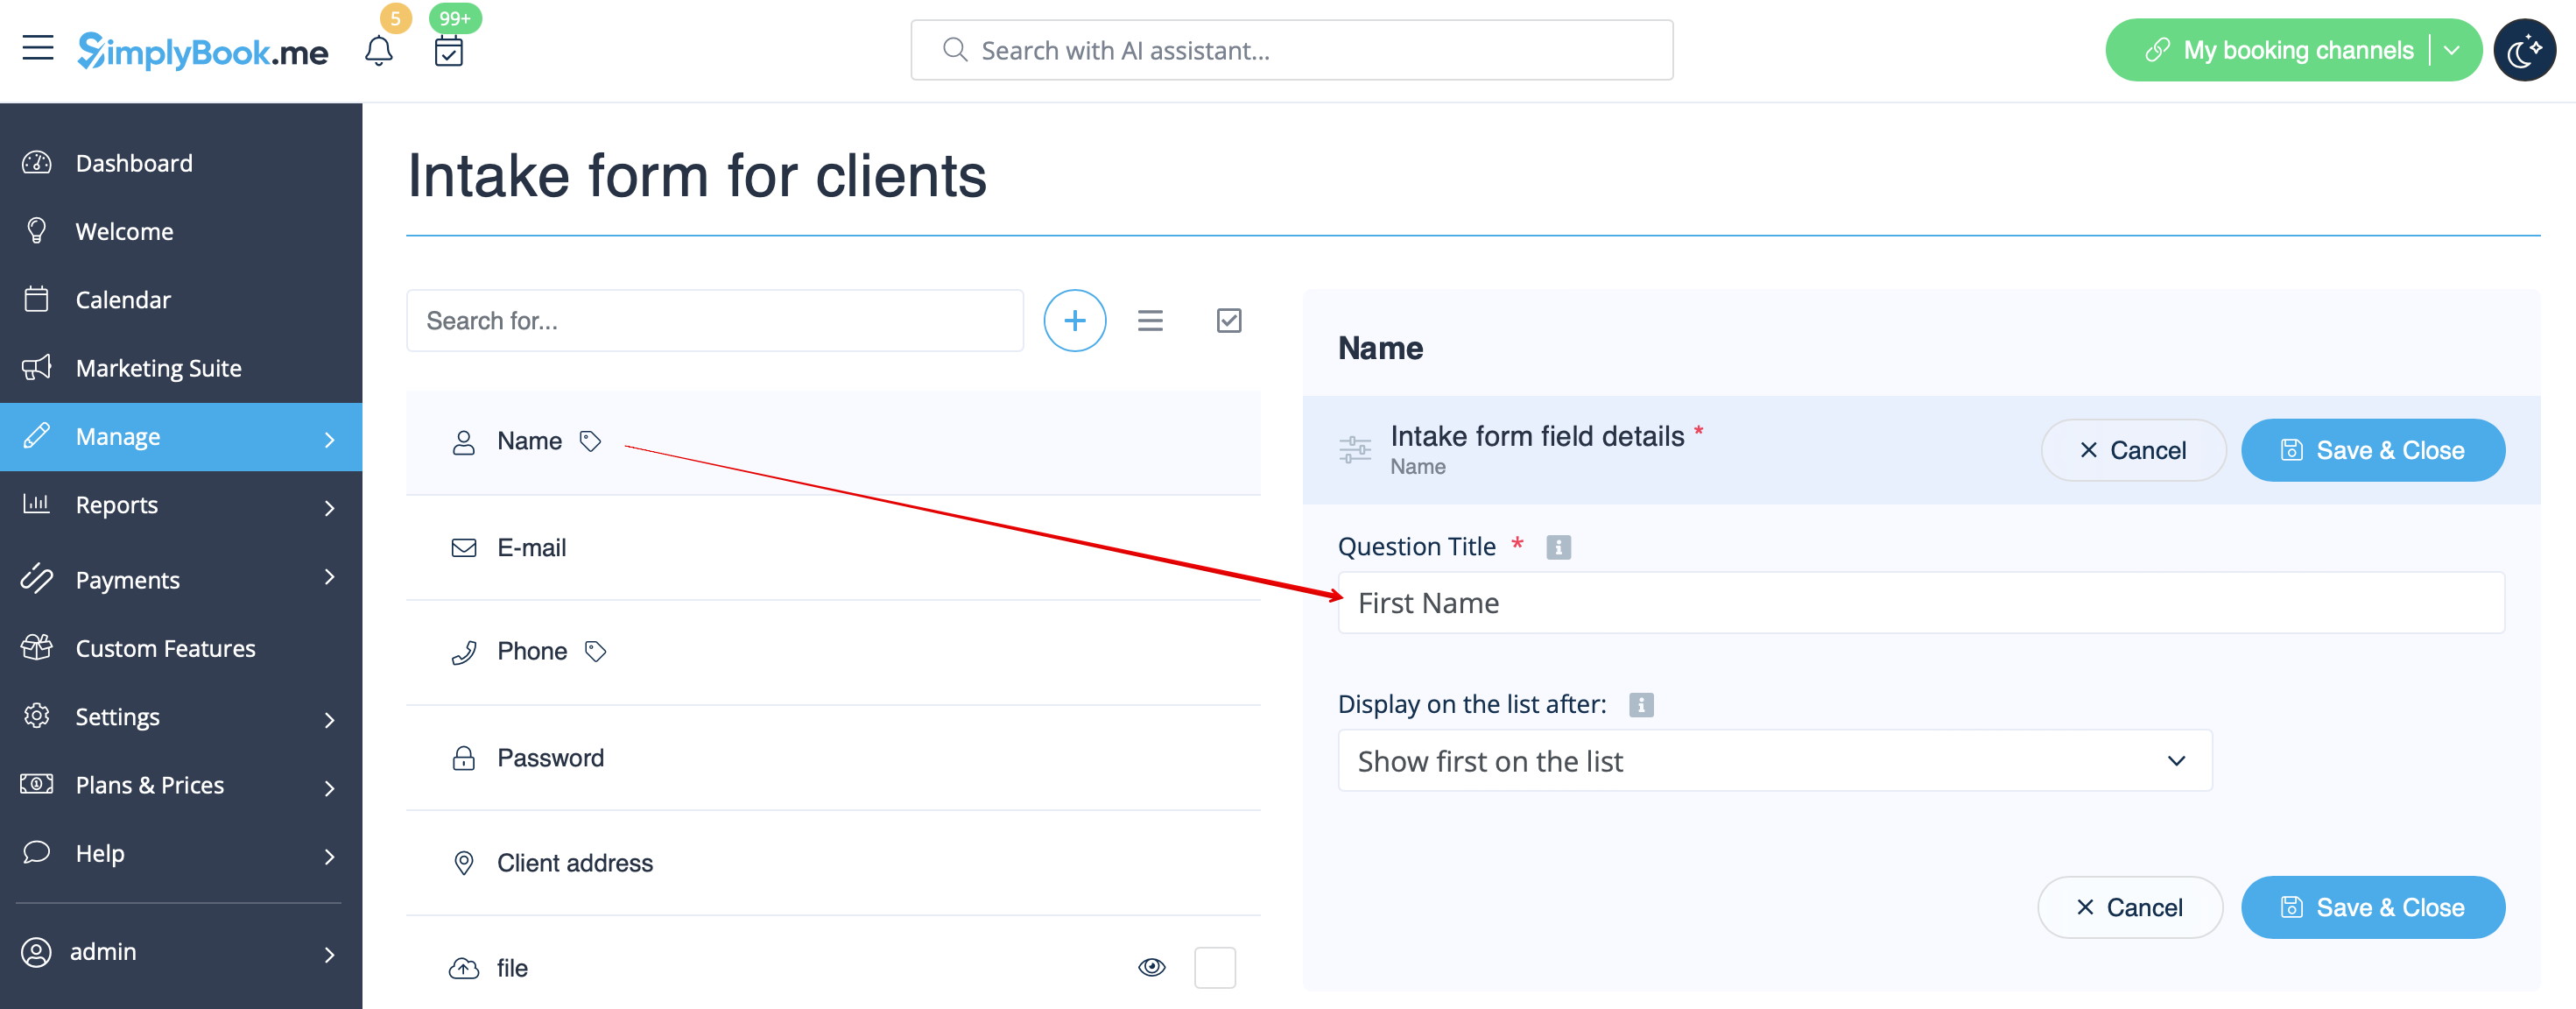
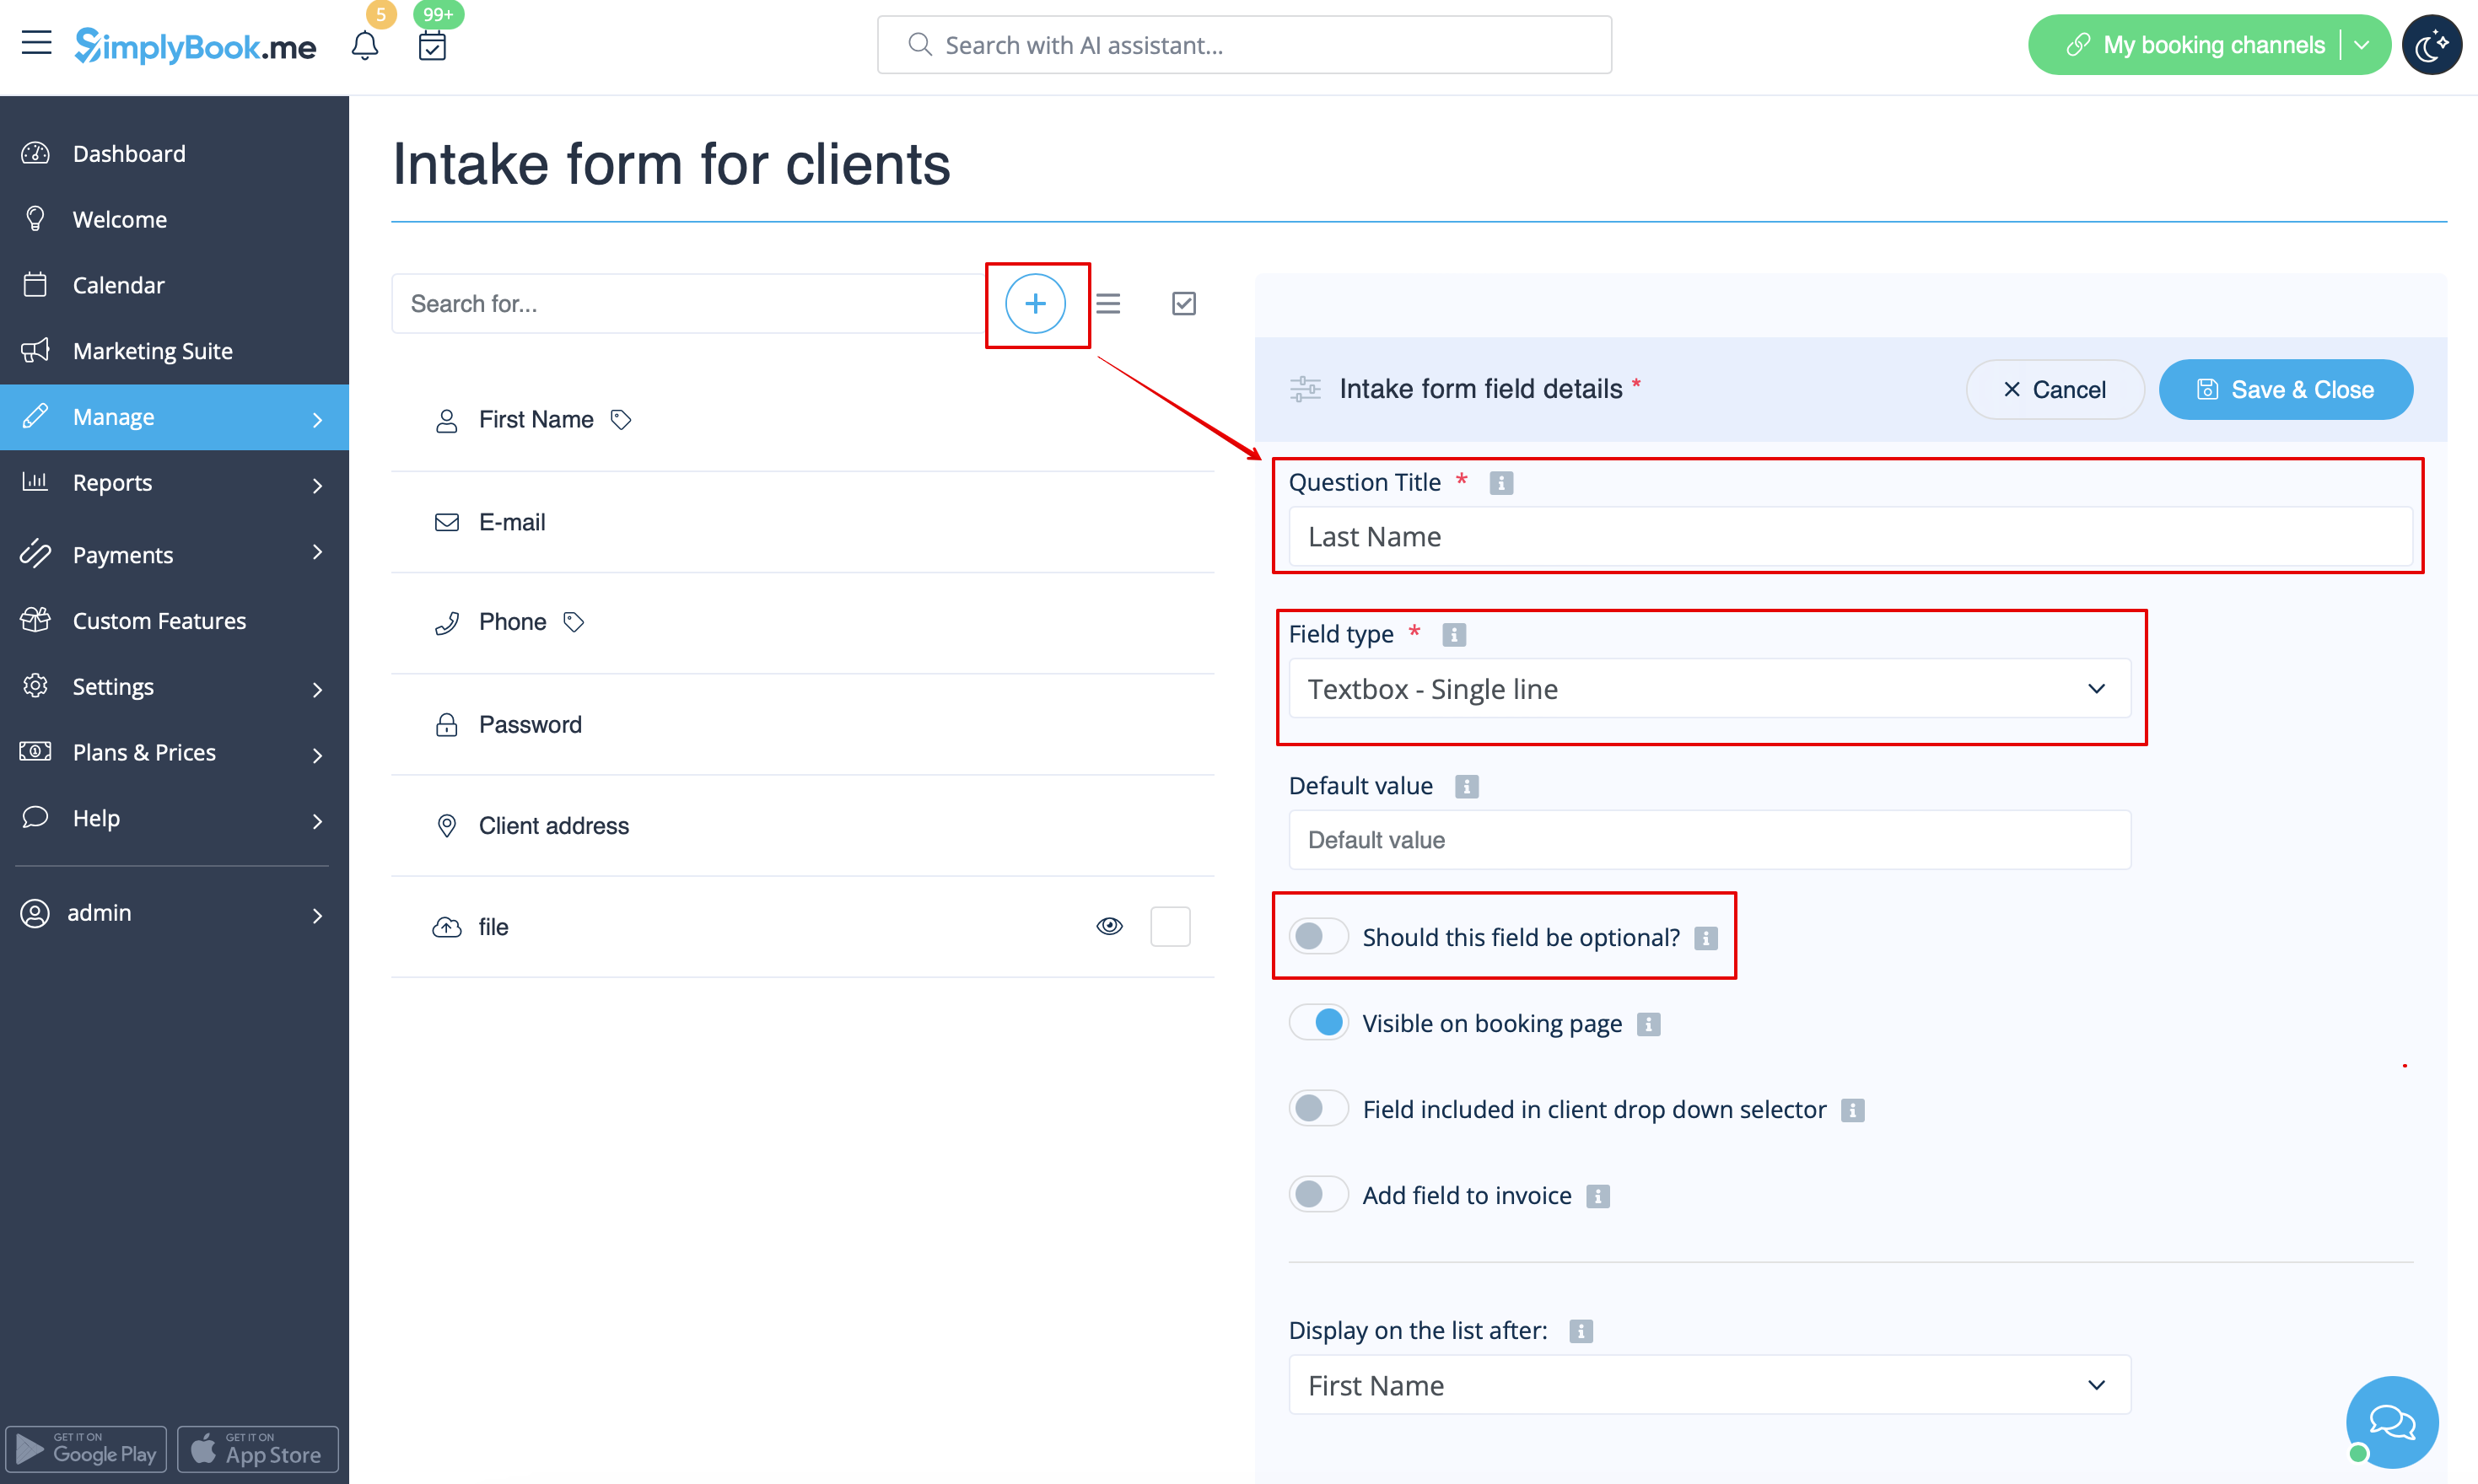
- 4. Click on + at the top to create new client field, add Last Name as a Question title and select Textbox - Single line type.
- By default the field is set to be obligatory to fill in by clients but if you need to make it non-mandatory please use the corresponding switcher.
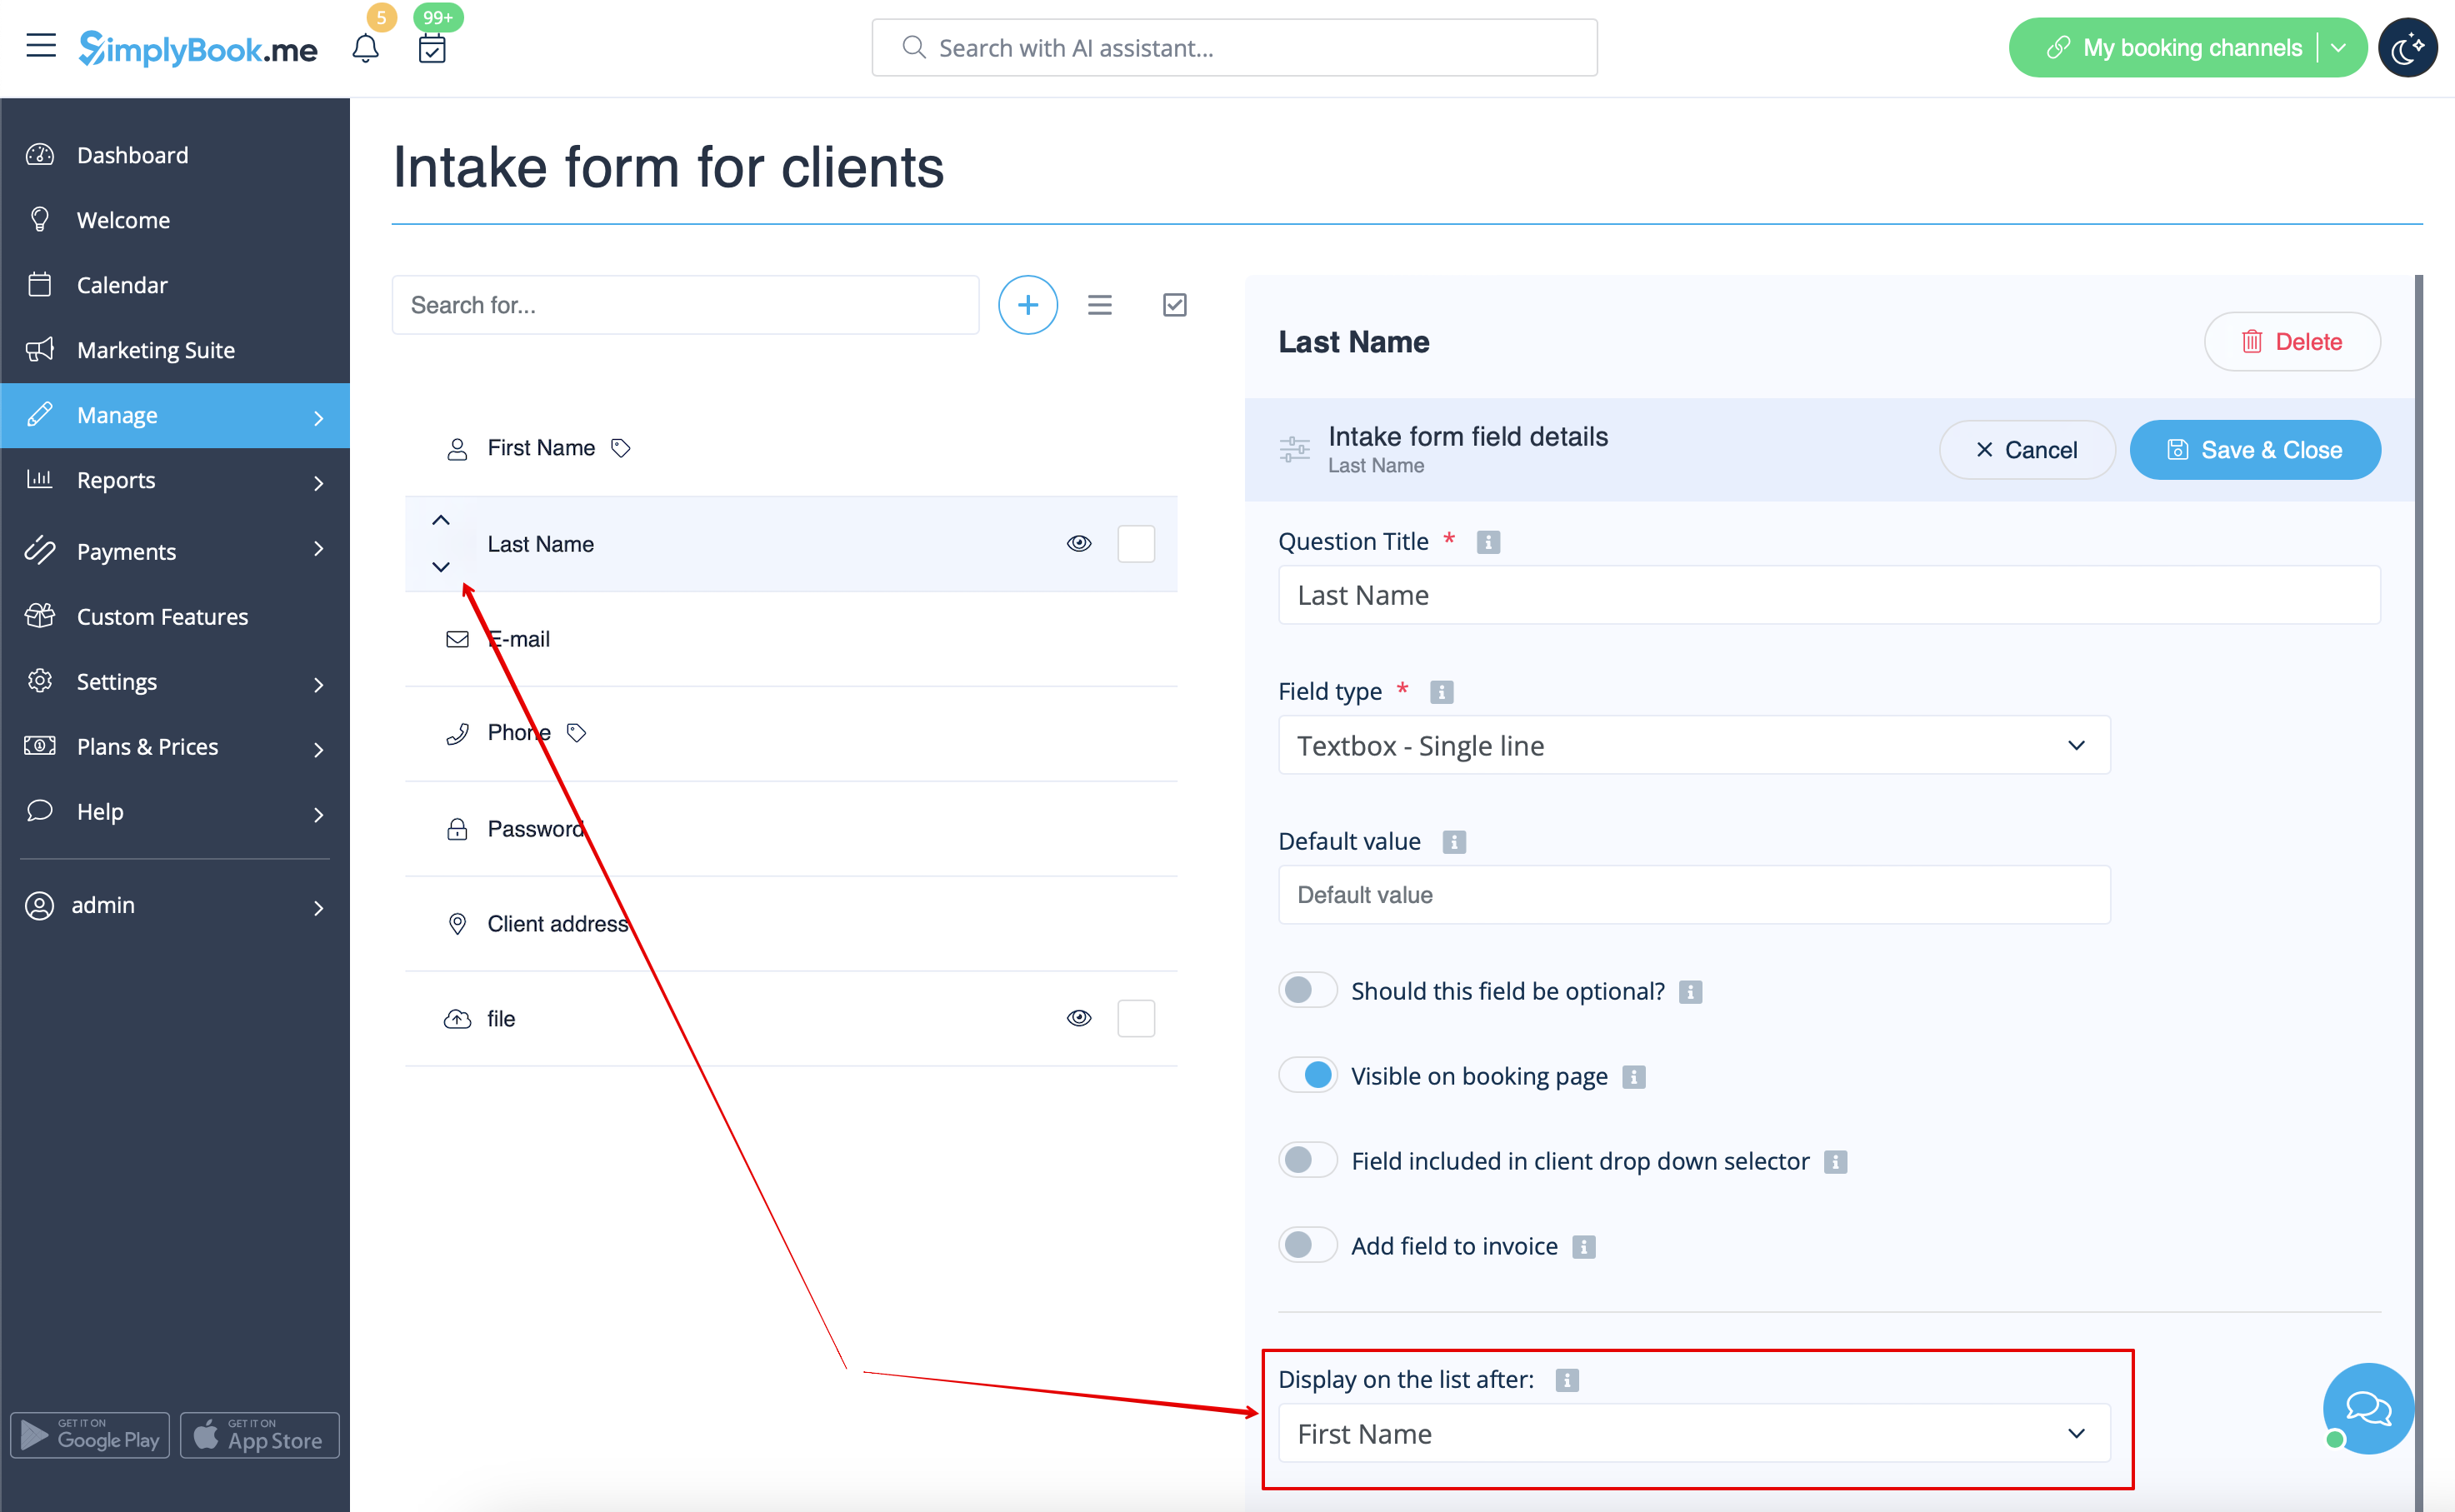
- 5. Select its position to be after First Name and save.
- Or if you have already saved the field use the arrows to re-order.
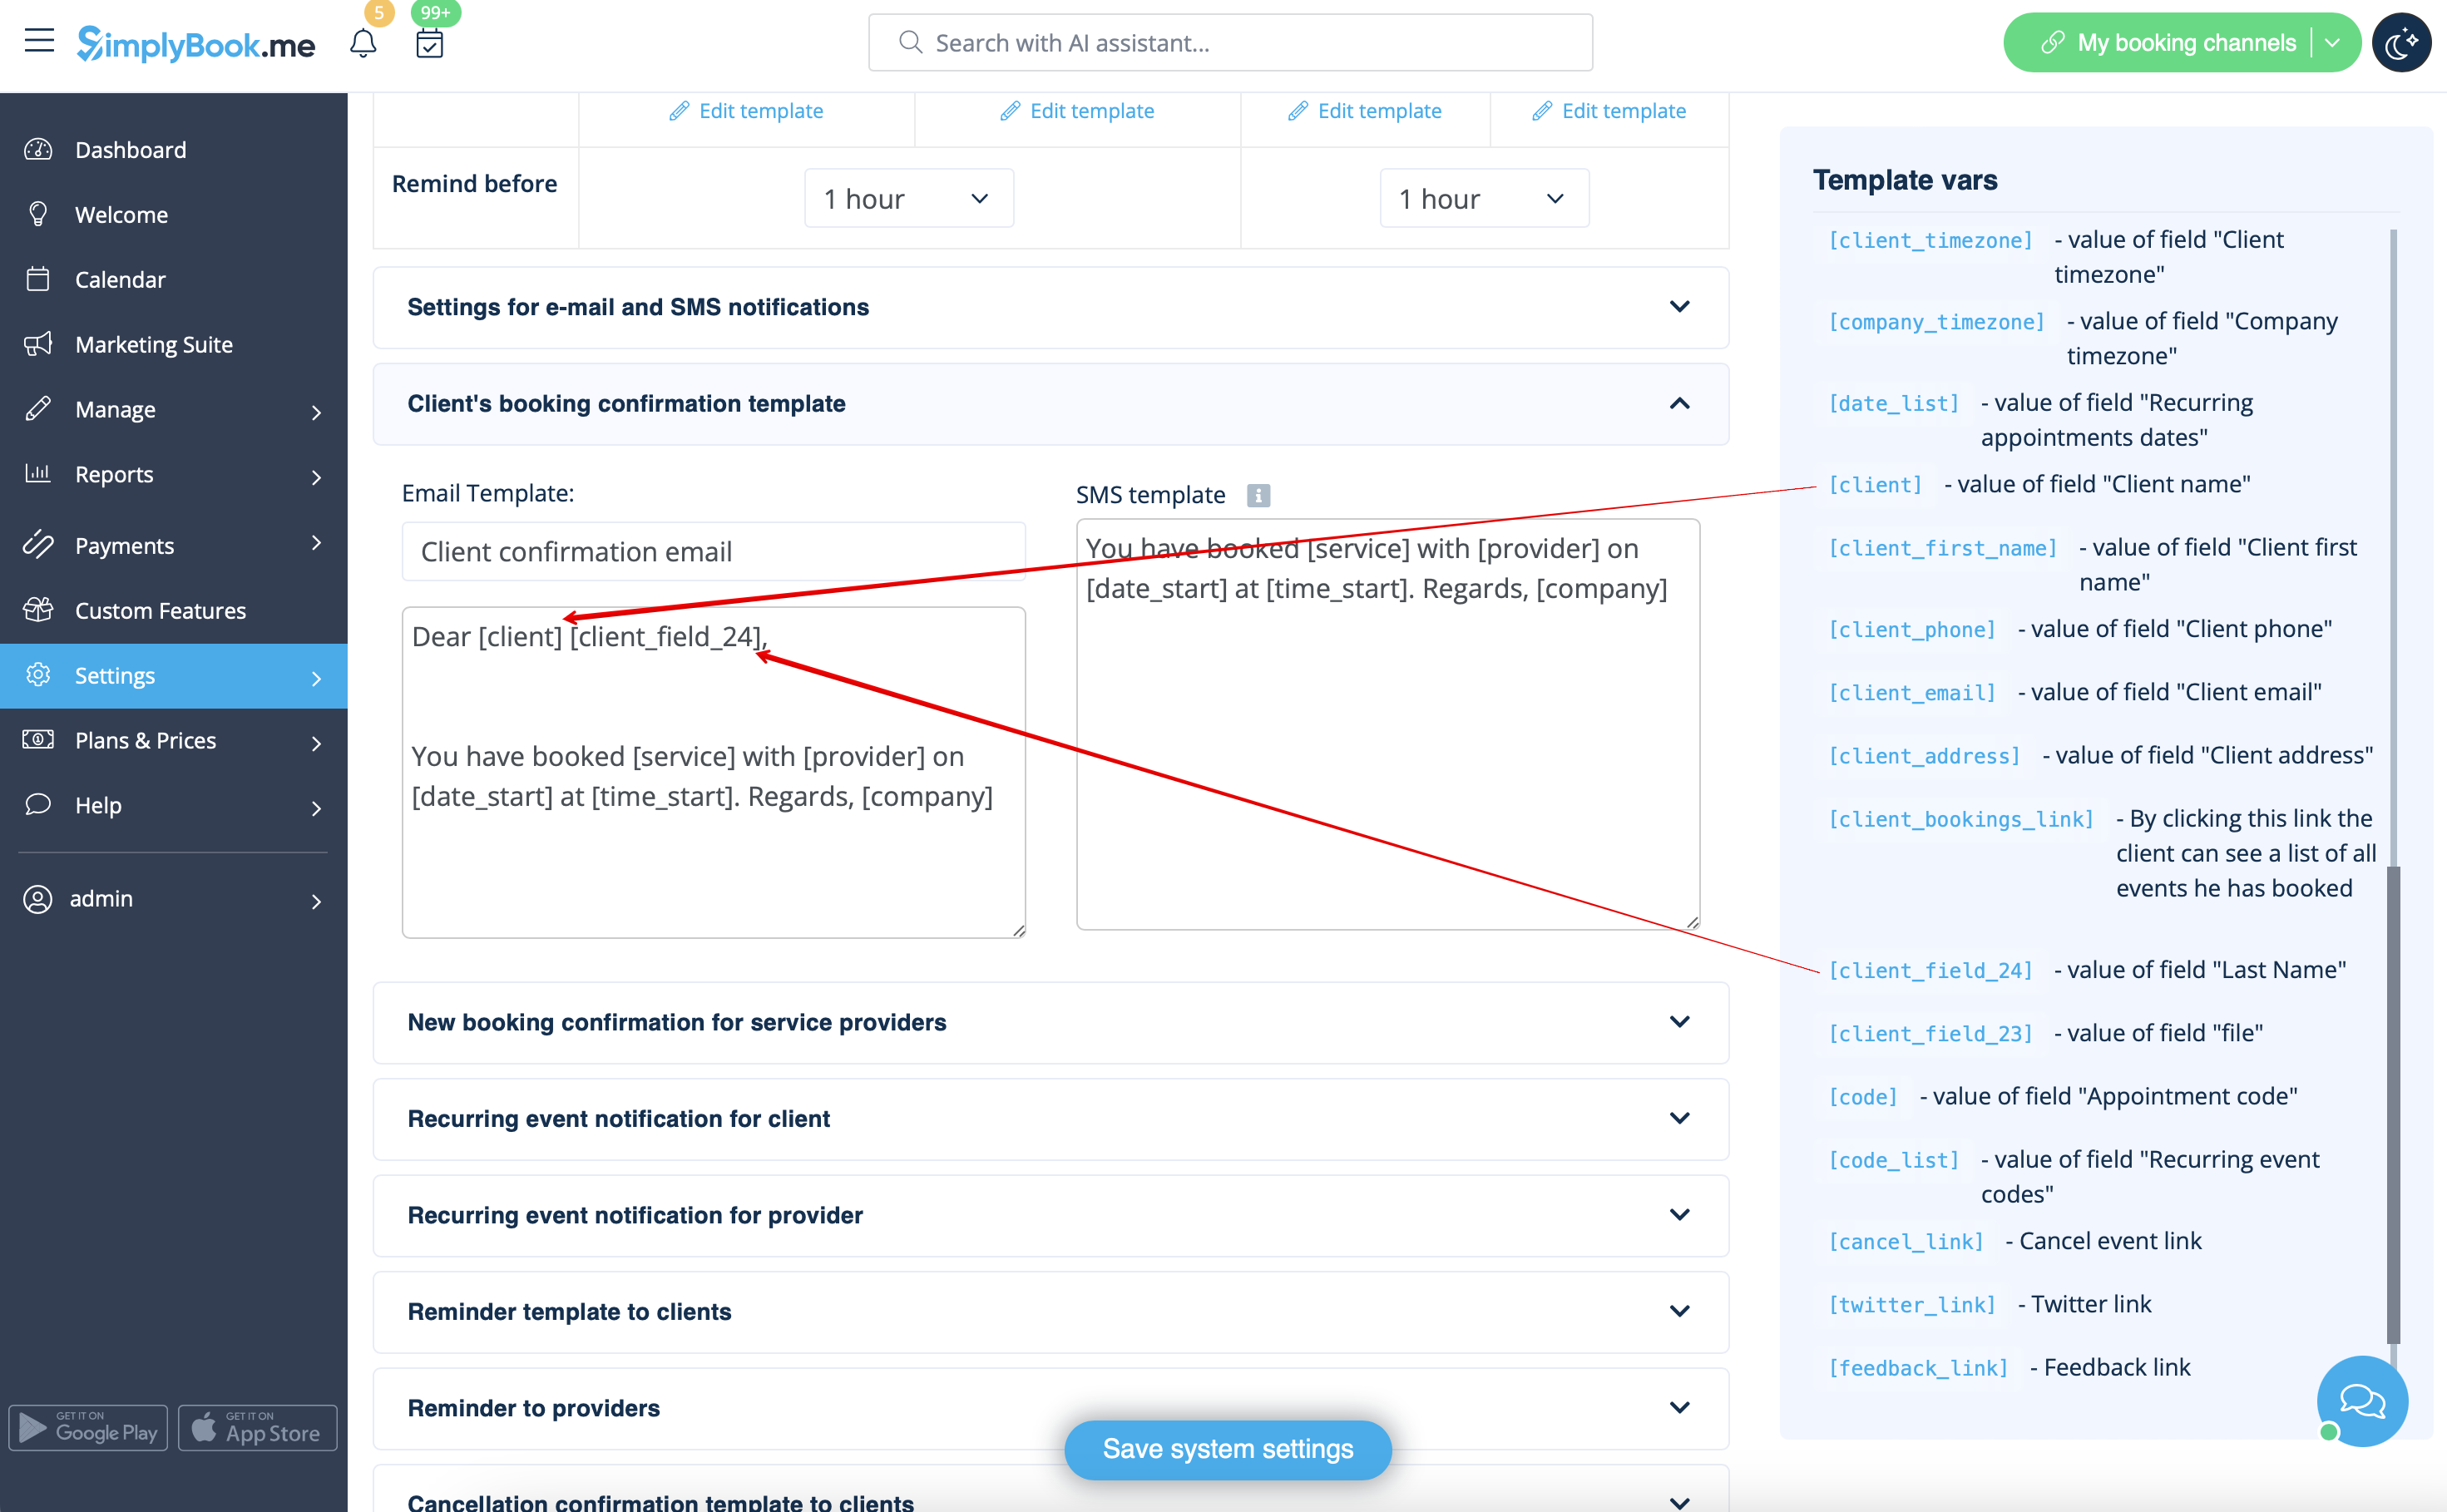
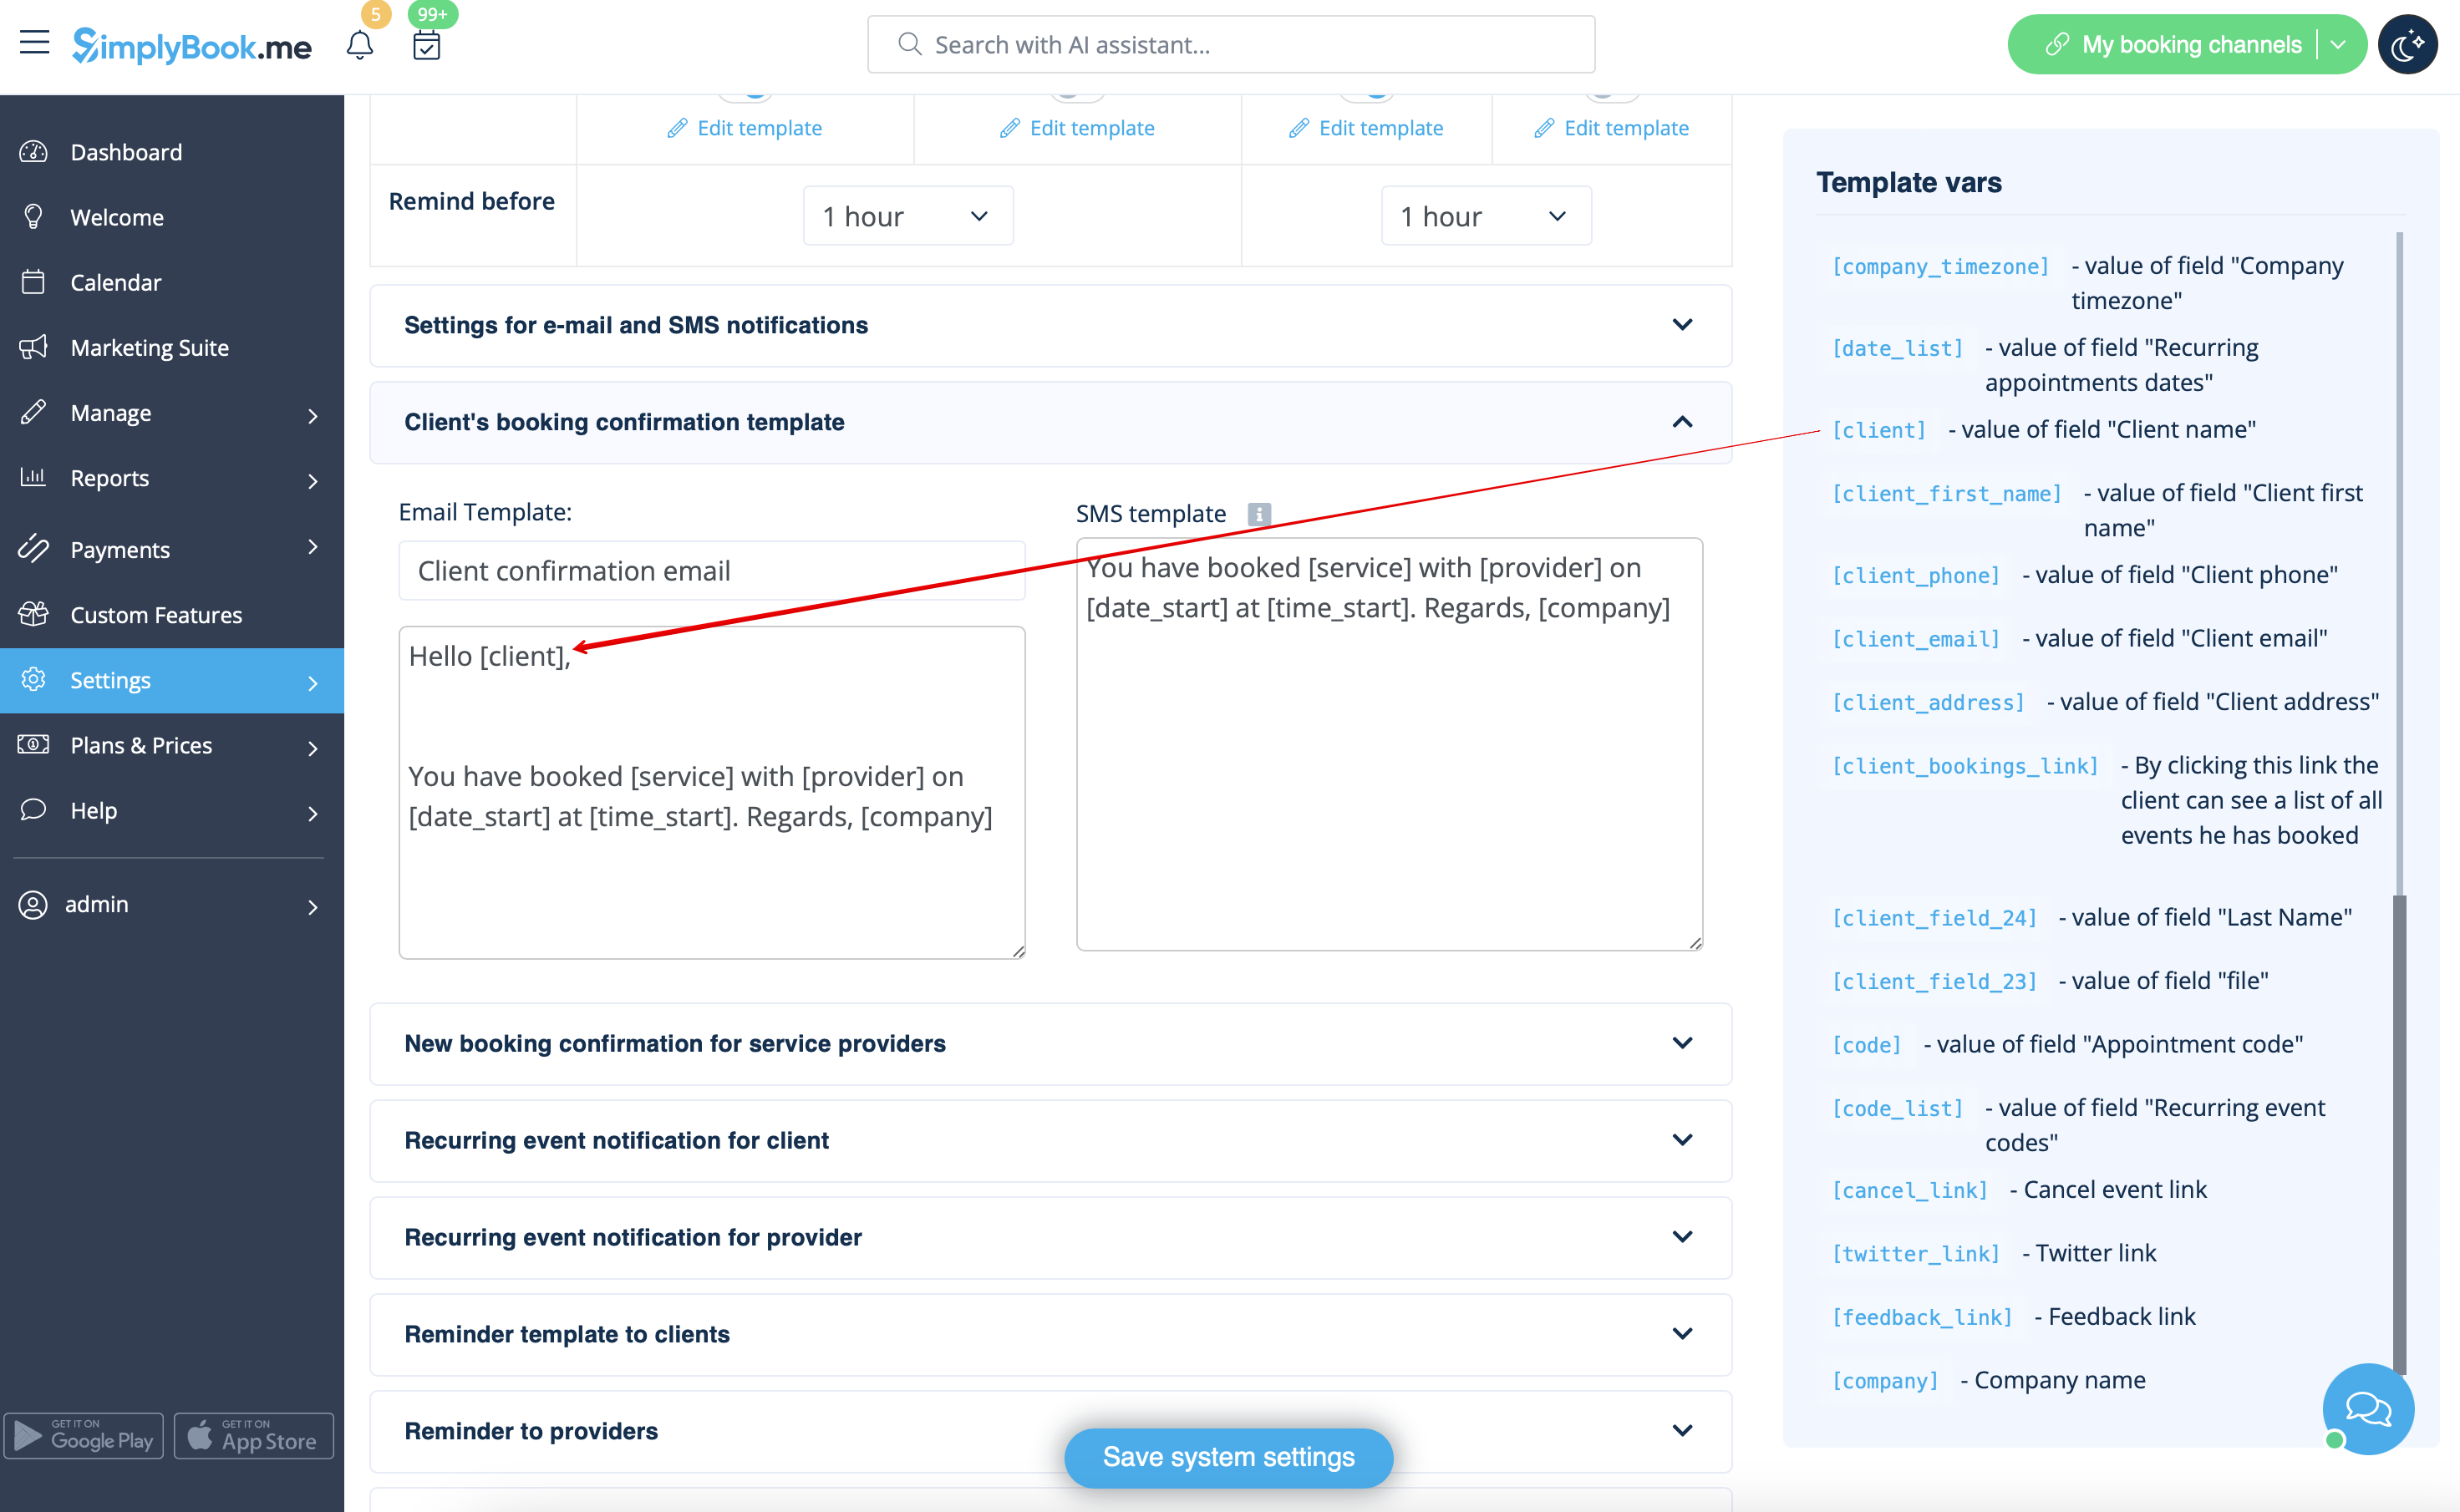
- 6. (optional) Add the desired variables to the notifications templates in Settings -> Email and SMS settings (or Flexible notifications feature if you have customized them per service/provider).
- For example, you can make booking related more personal by using only first name in the greeting.
- (here we are using default [client] variable as we have simply renamed the default field in step #3)
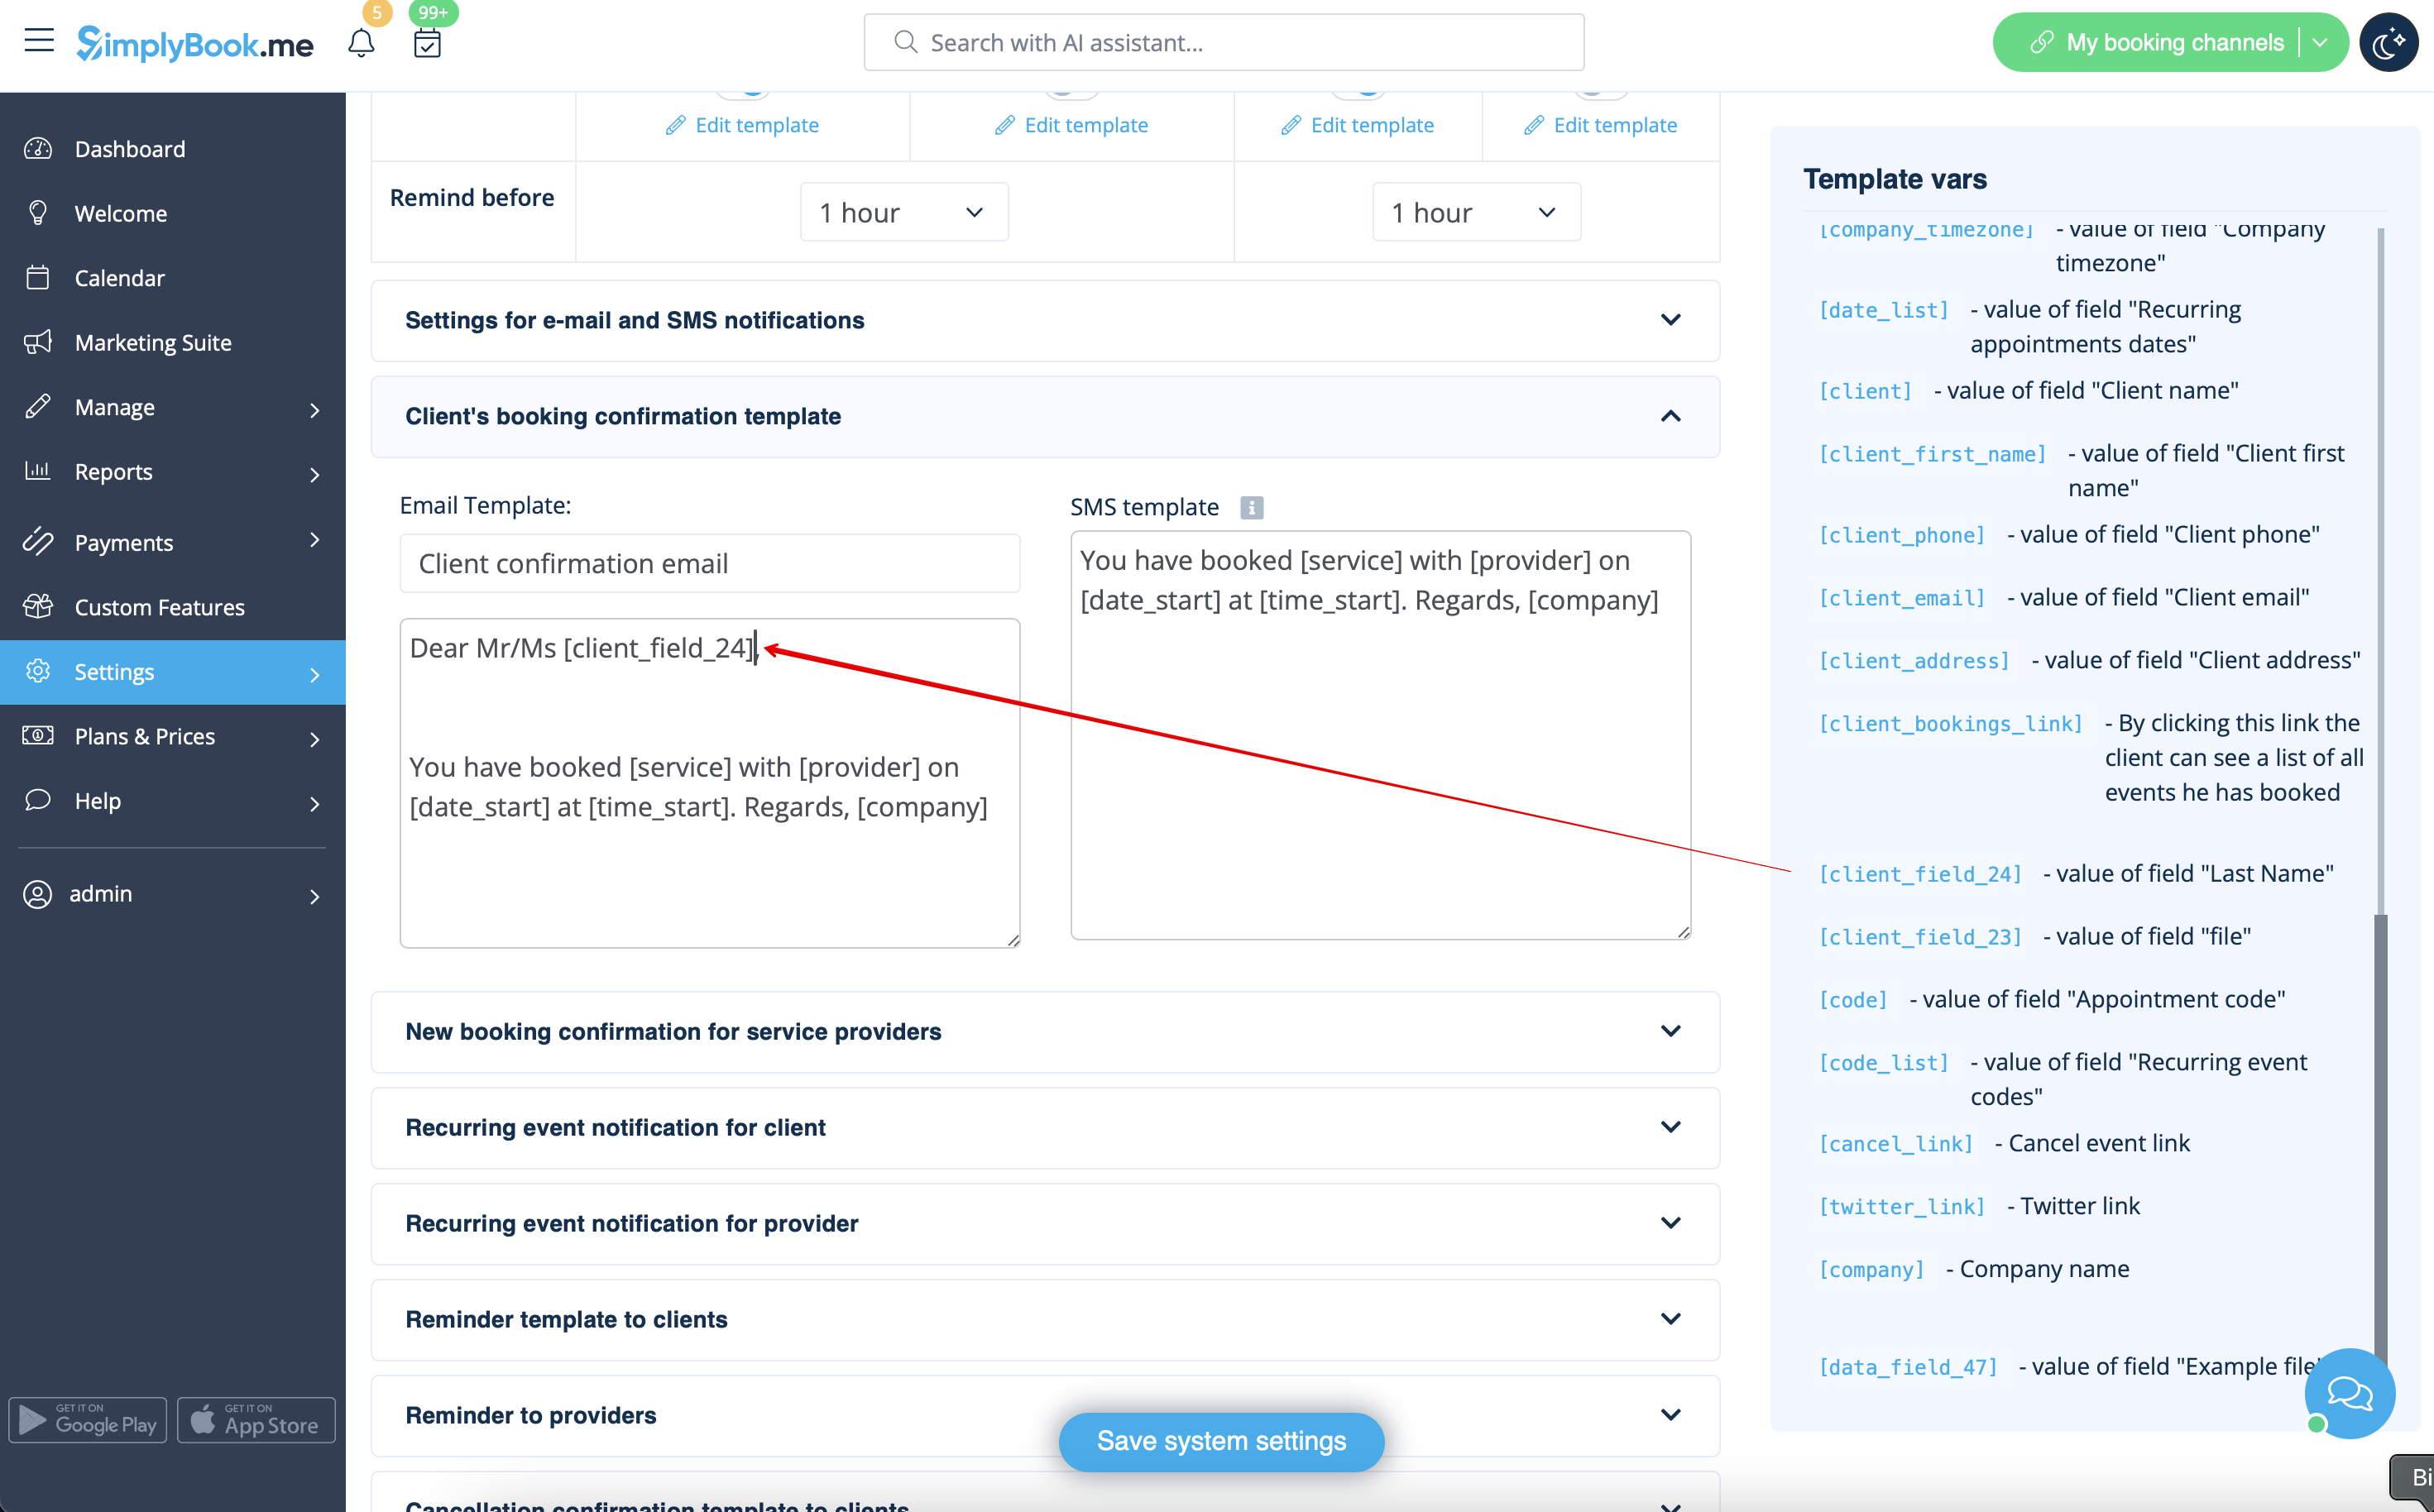
- Or sound more official with only last name use.
- (client field is used here, taken from step #4)
- Or even use both if you like.
- (default variable and client form combined)