AI Voice Booking
Add an AI-powered booking experience to your website and messaging channels. The assistant collects booking details, checks slot eligibility, and creates reservations automatically.
All-in-one AI booking module that connects your assistant to your website and messaging channels to take bookings and send confirmations and reminders. Configure integrations (Facebook Messenger, WhatsApp, web widget) and basic settings, then start accepting reservations automatically.
- How to use
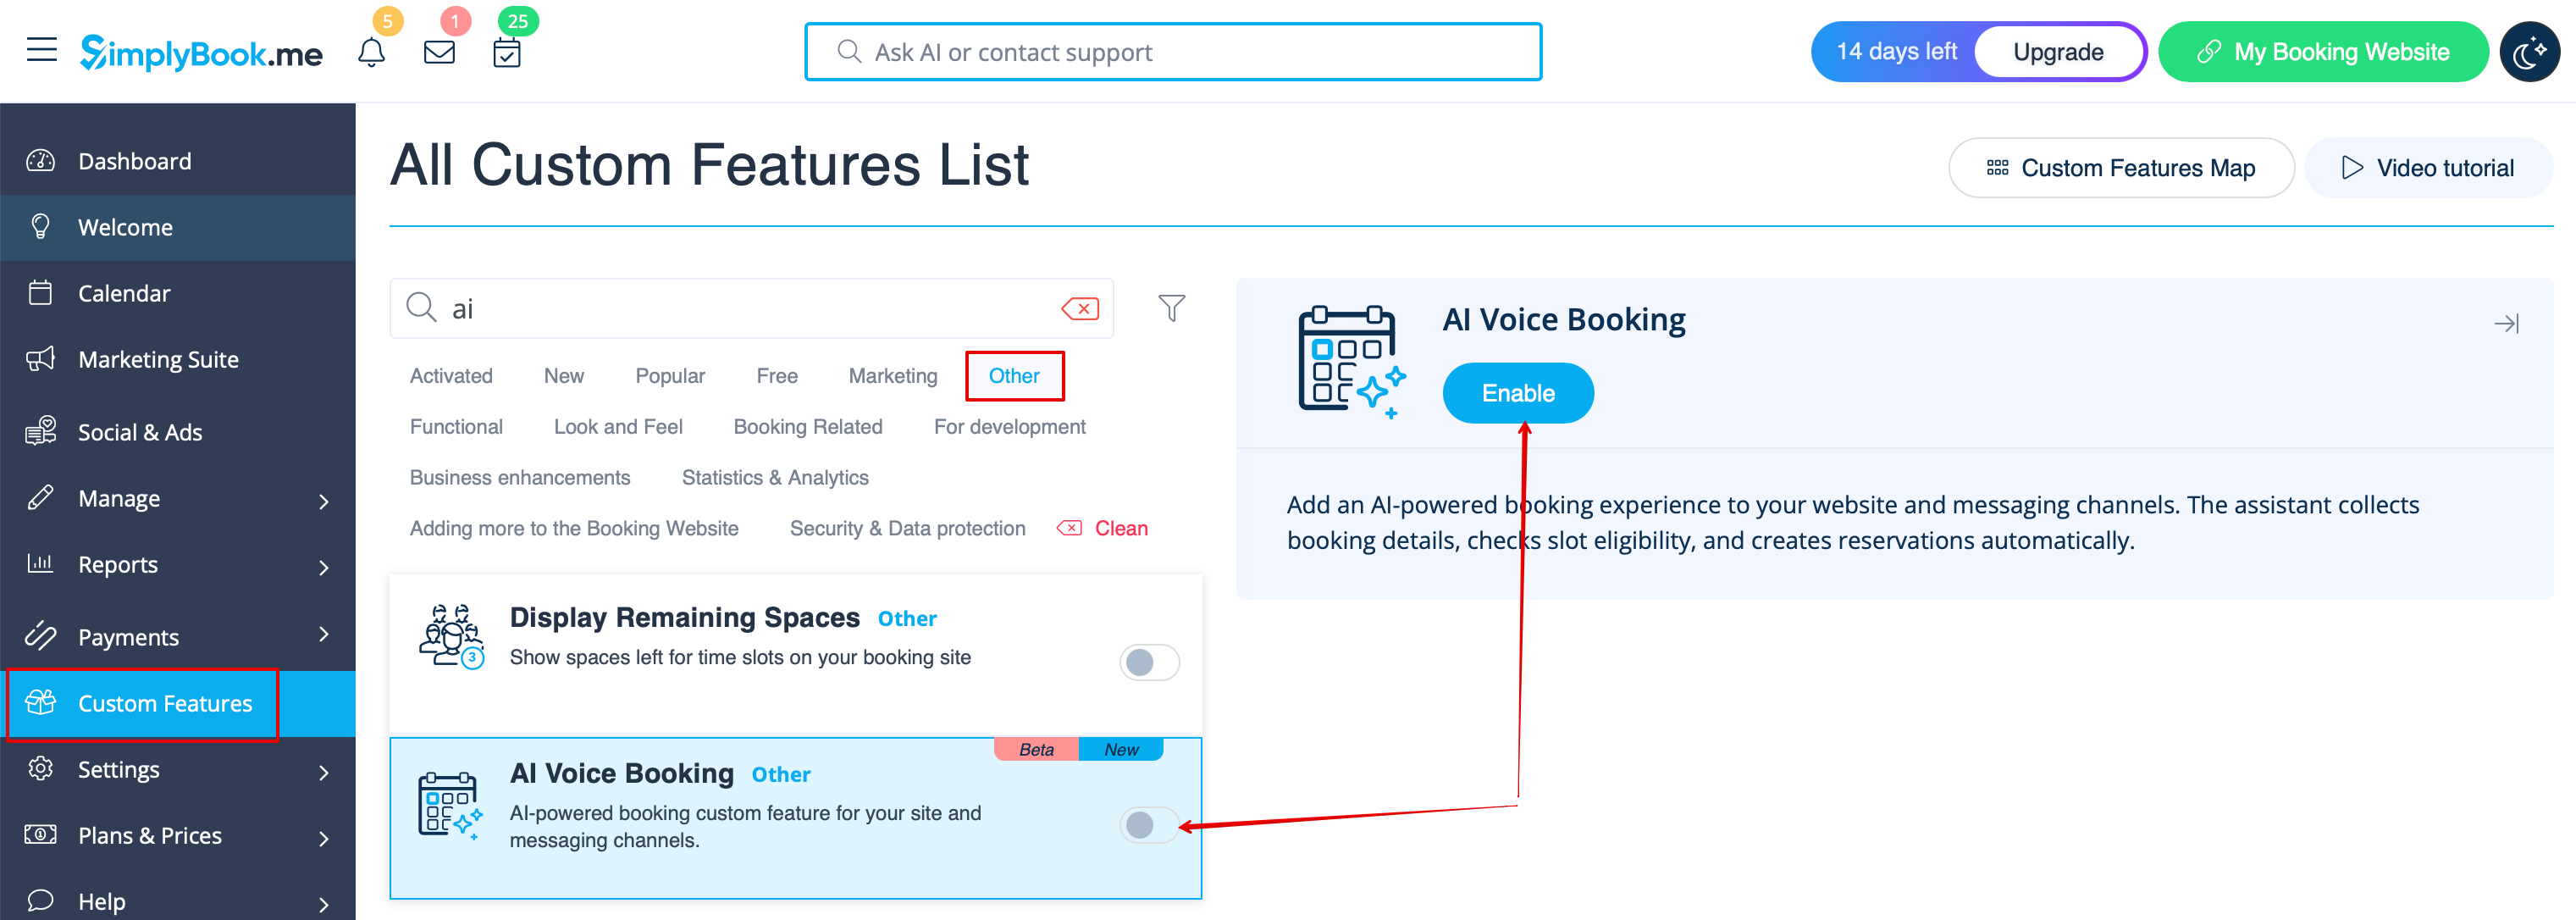
1. Enable the feature on your Custom features page -> Other -> AI Voice booking.
2. Get free trial credits there or purchase more AI booking credits on Plans& Prices page -> Addtional items
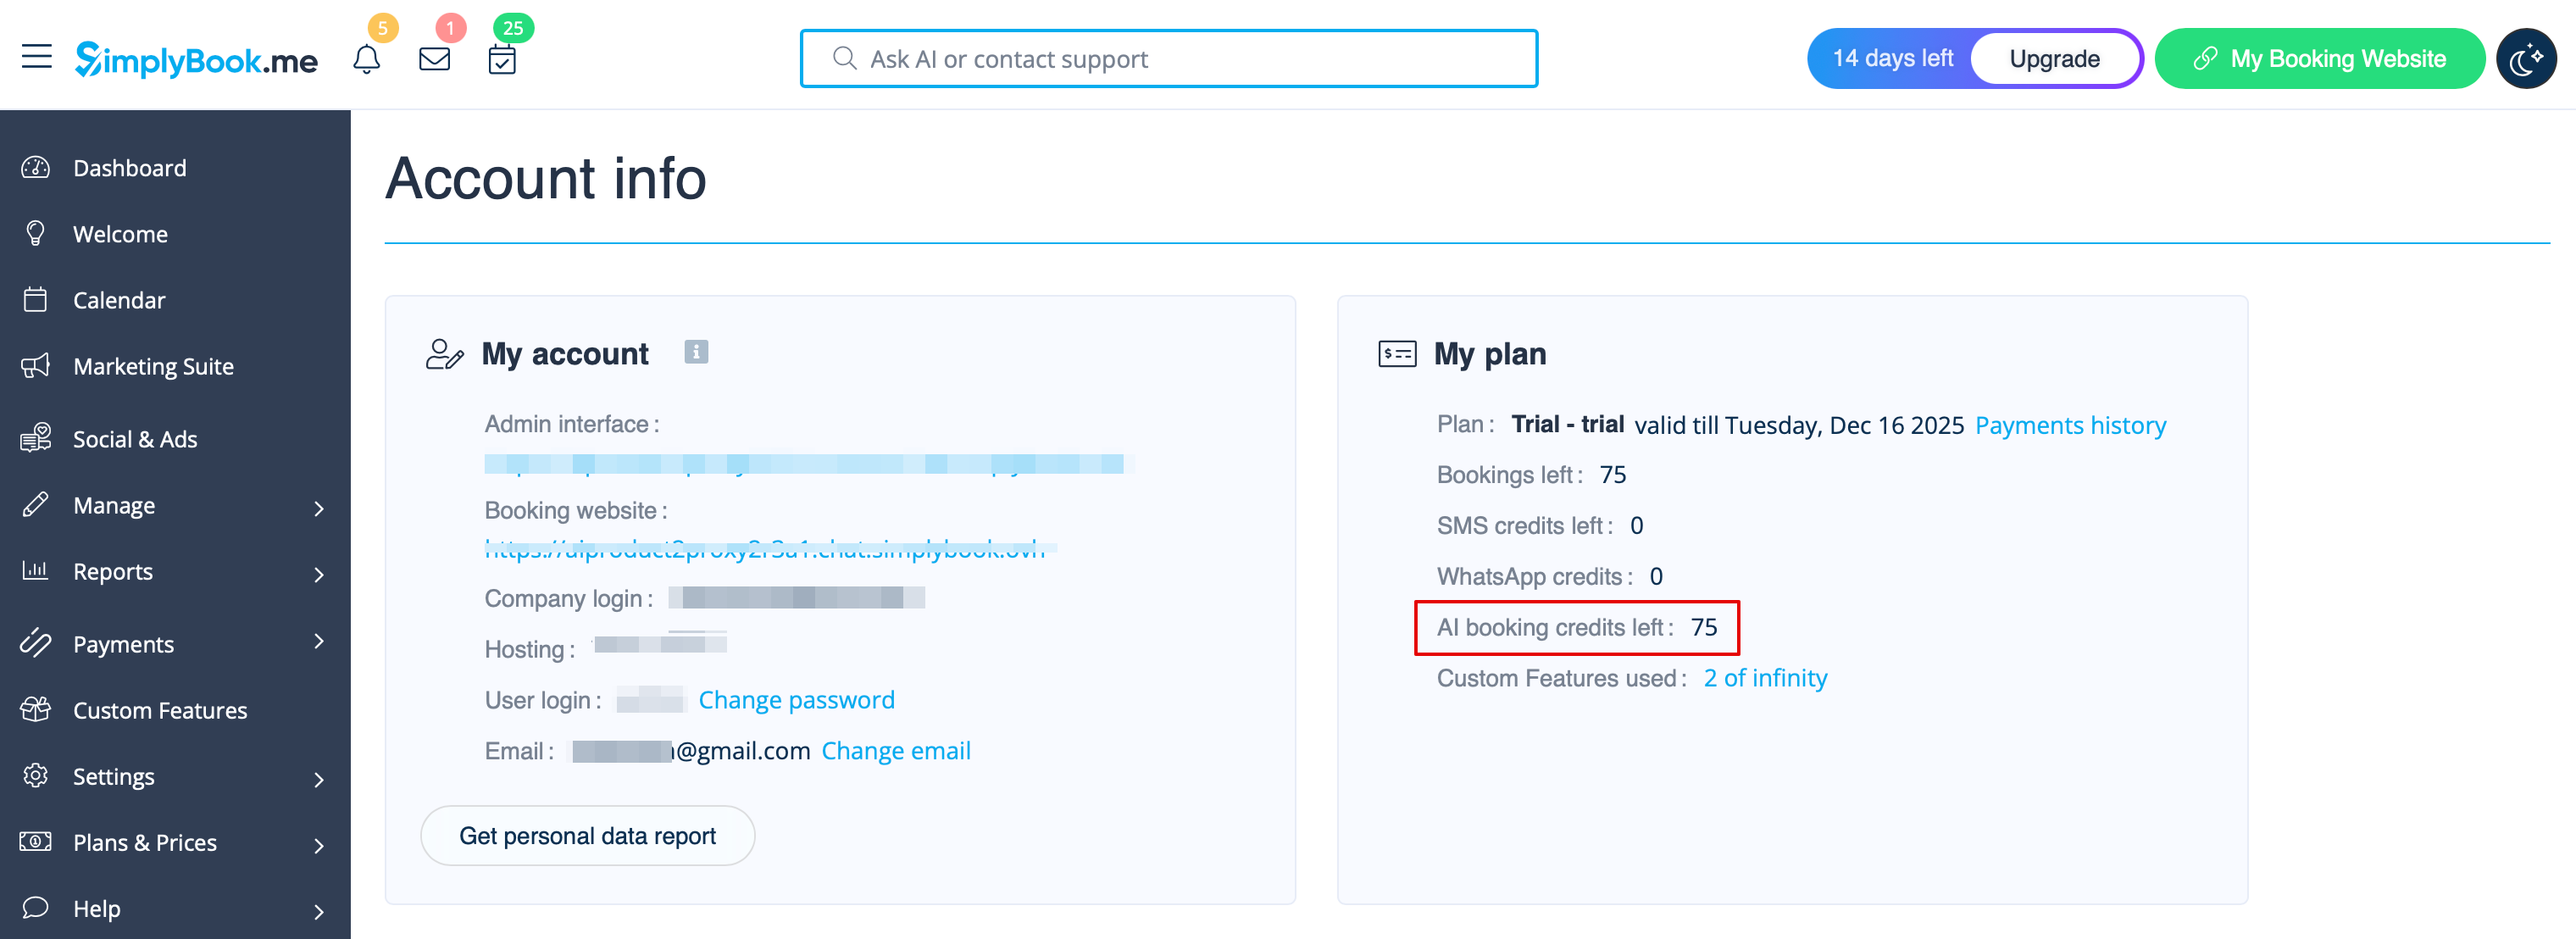
3. You will be able to see the number of remaining credits on Dashboard page or in Account info.
4. Get back to Custom features -> Other -> AI Voice booking to adjust the preferences for the AI voice, model, email verification text.
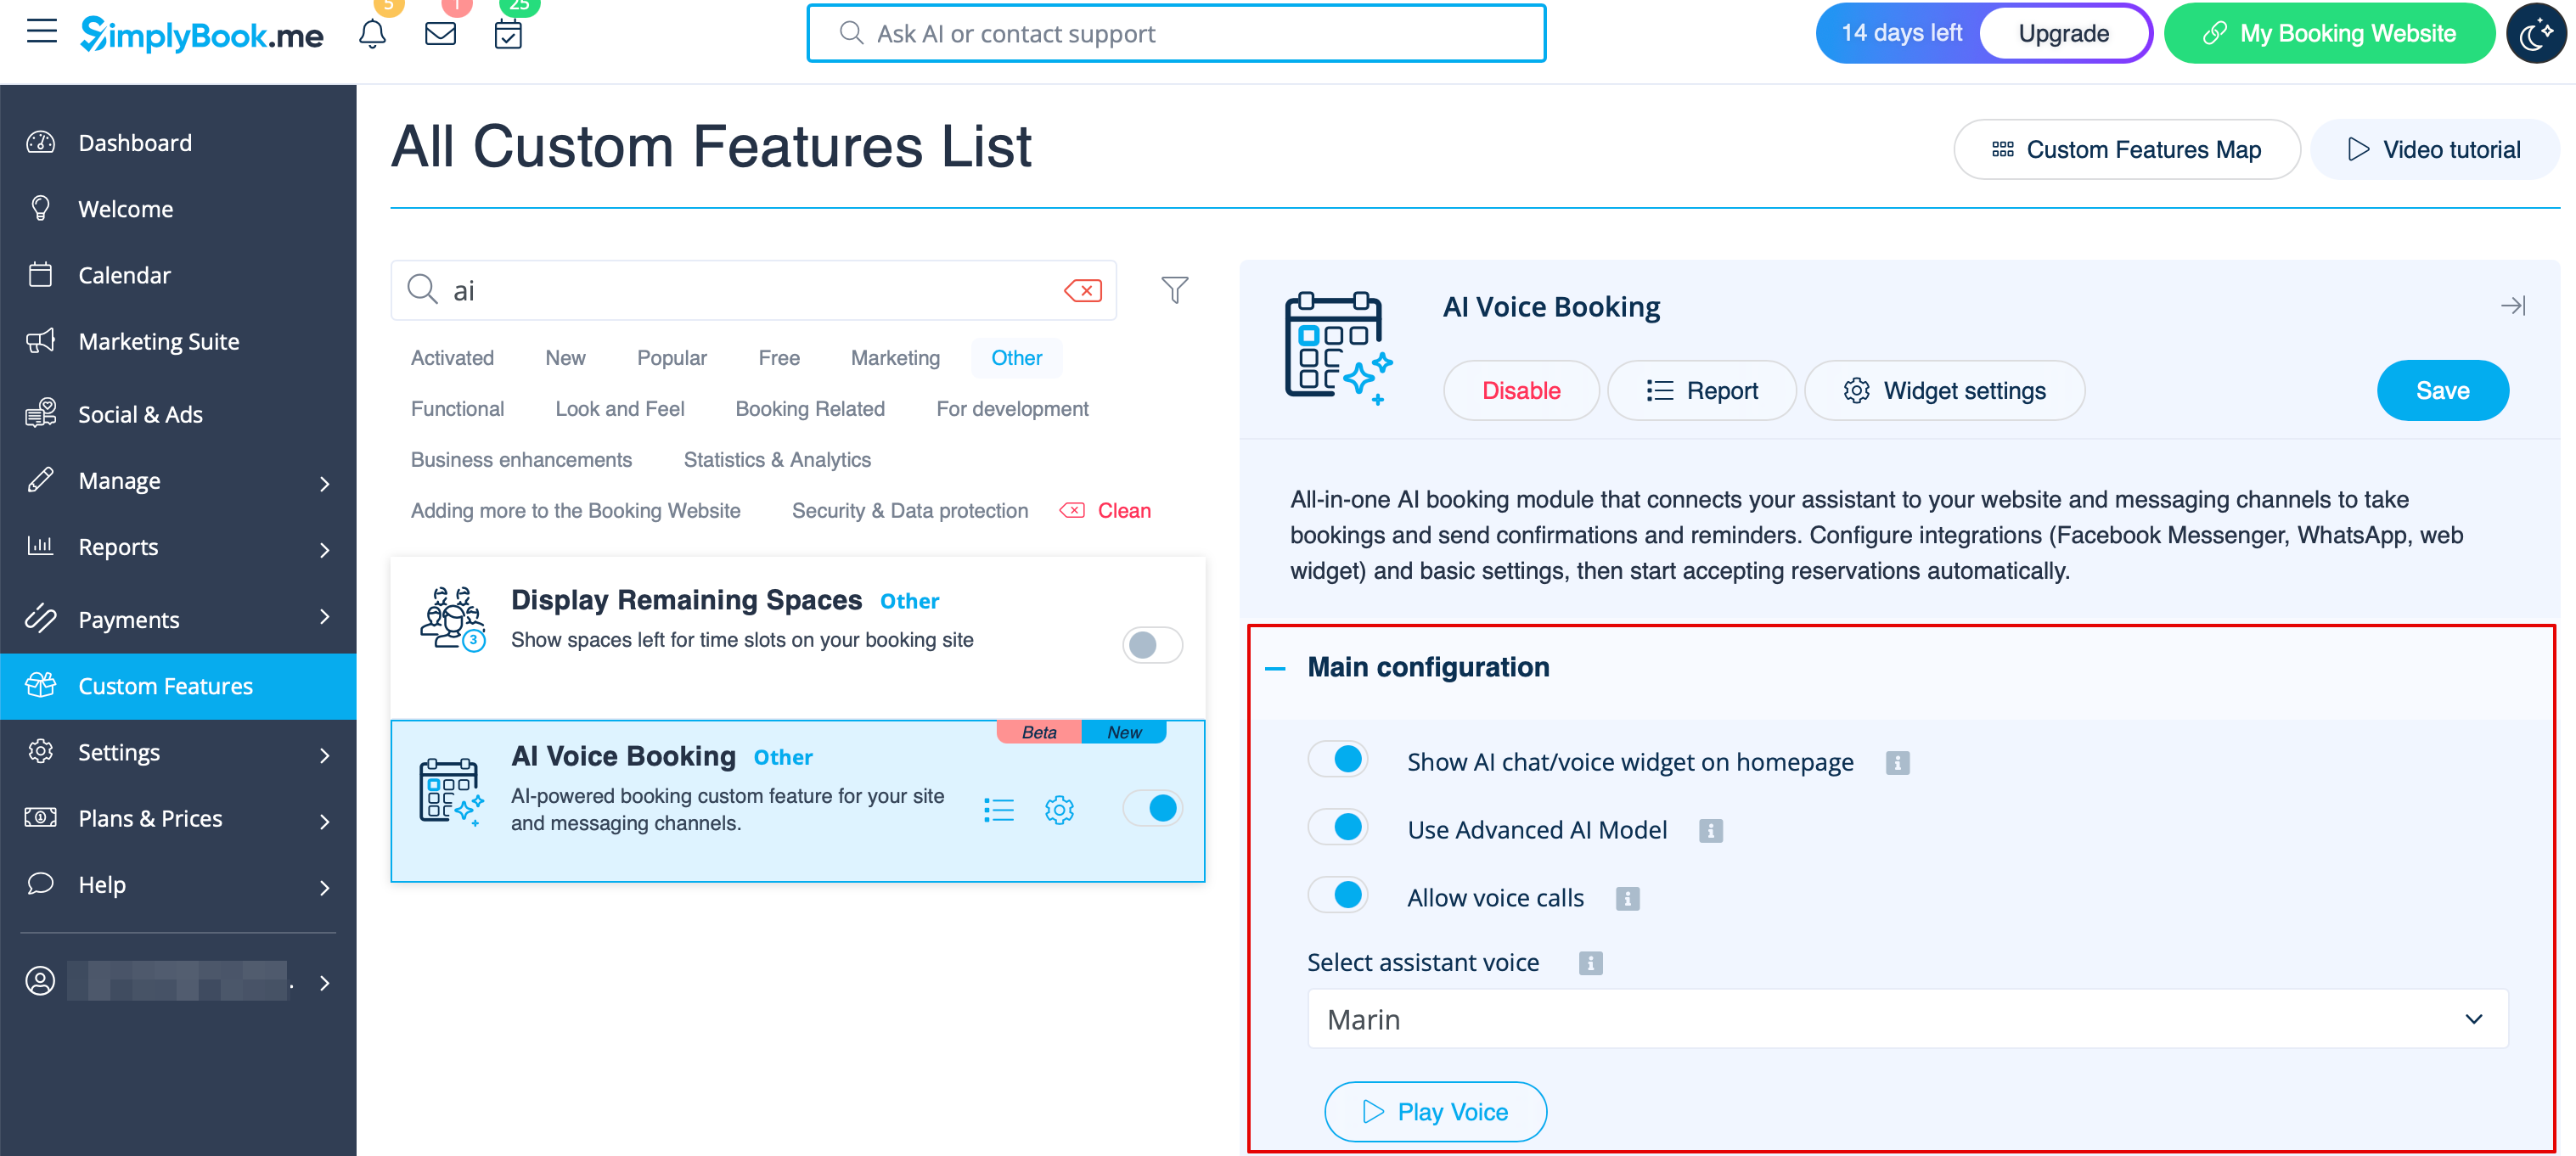
5. Now choose the option where AI booking will be available for your clients.
Widget/Booking website
1. After the credits are purchased the AI chat widget is added to your booking website by default. The clients will be able to send text or voice messages to go through the booking process with the help of AI.
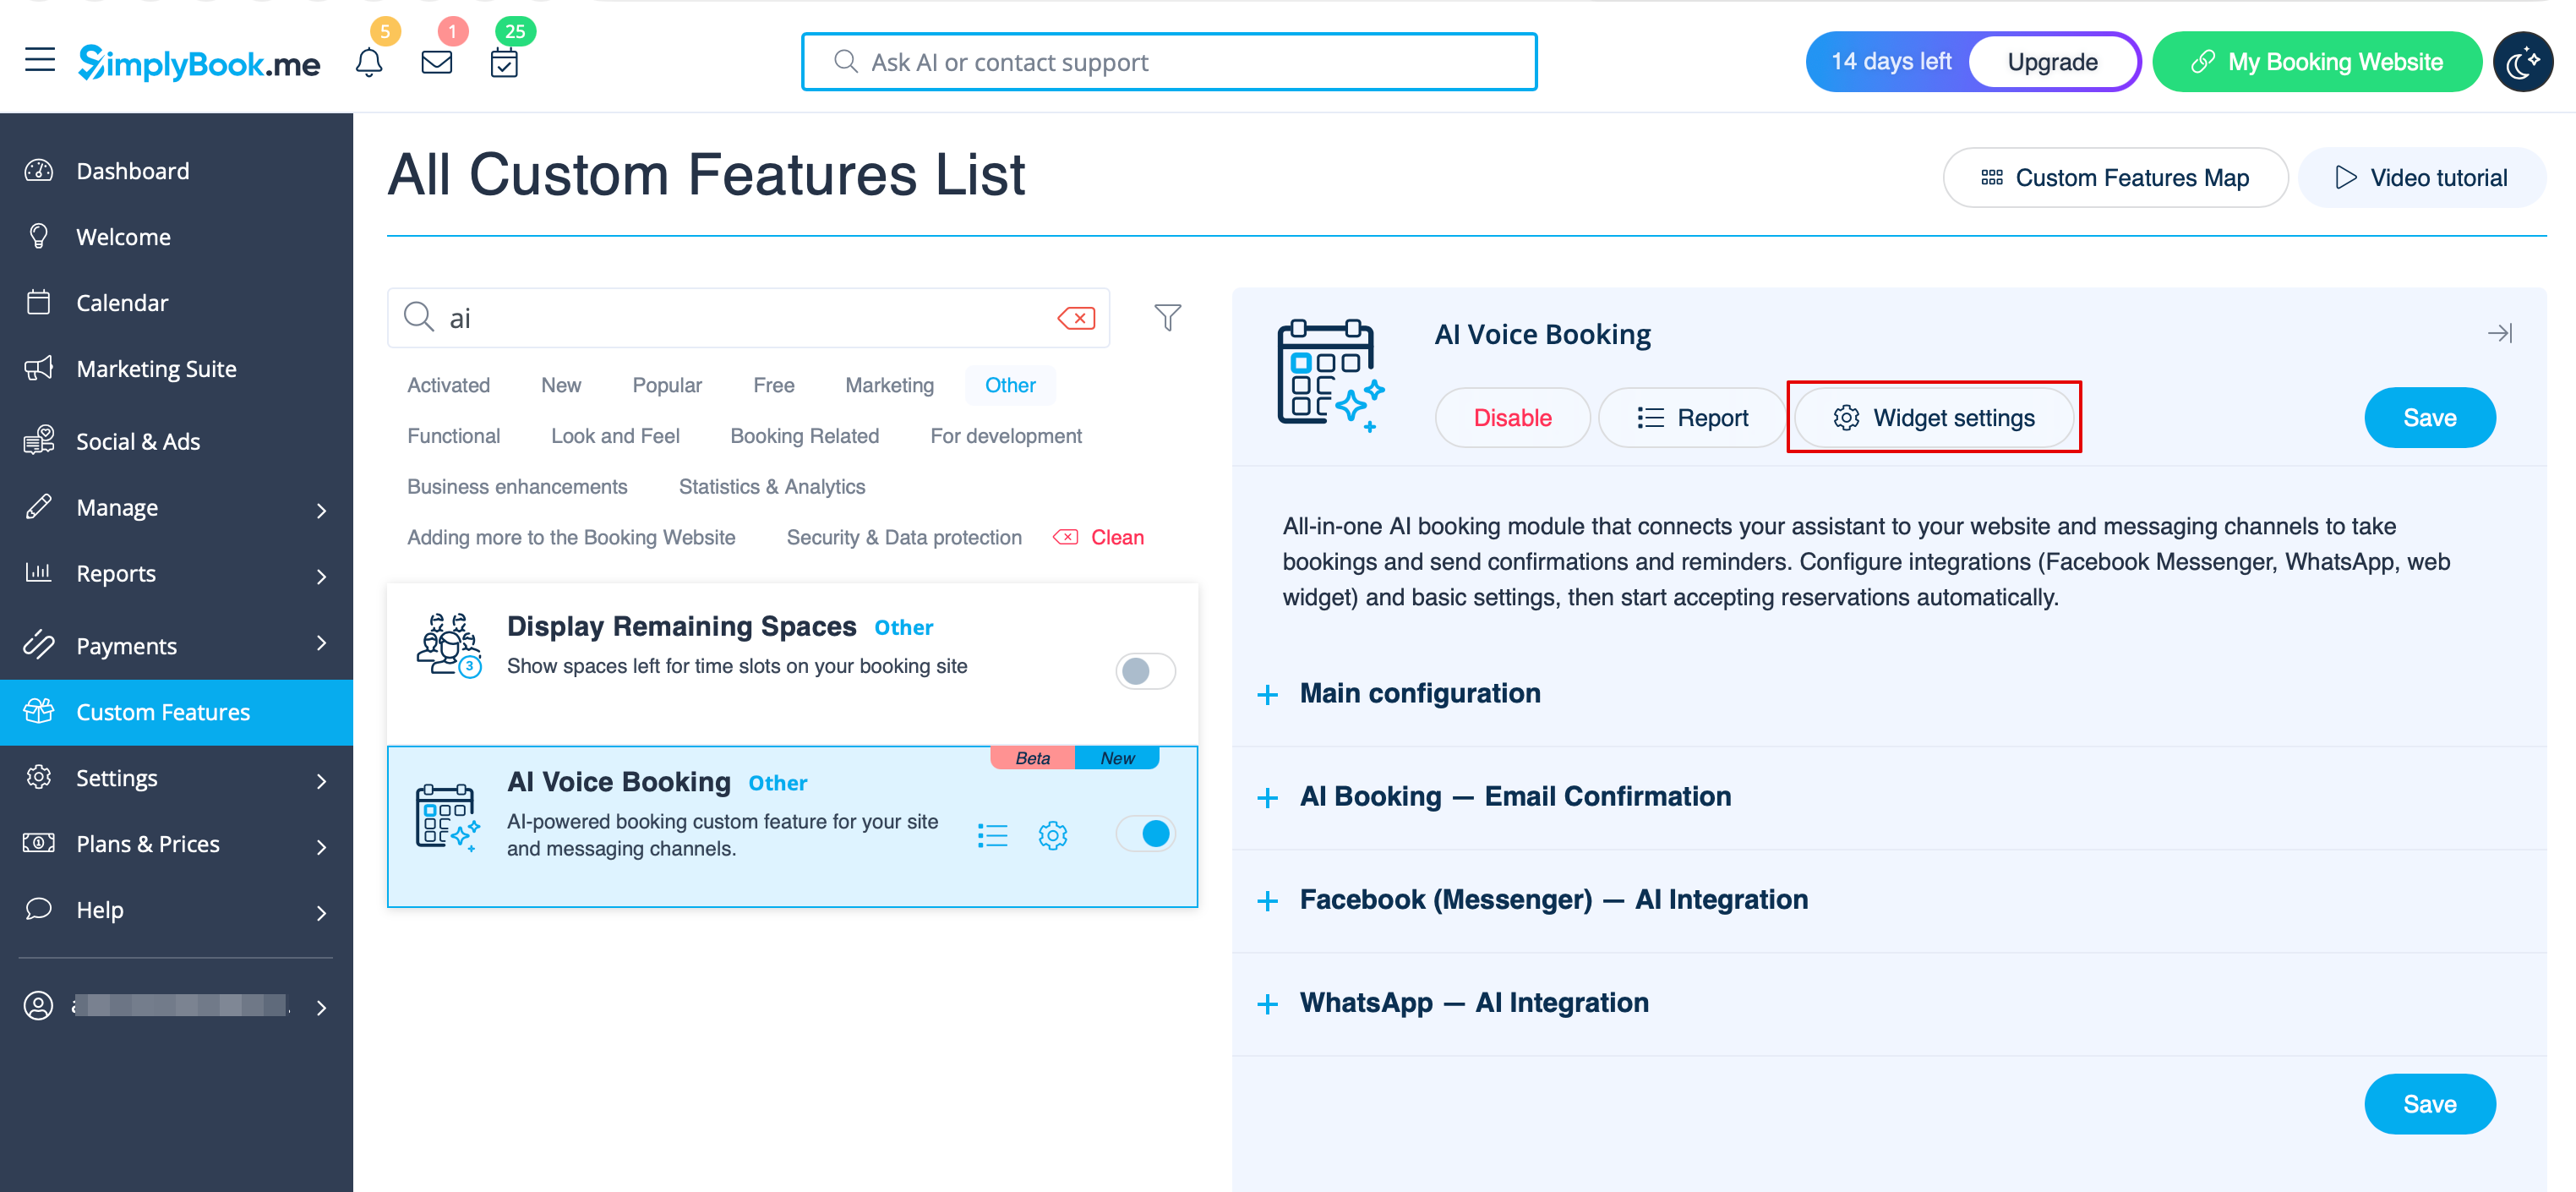
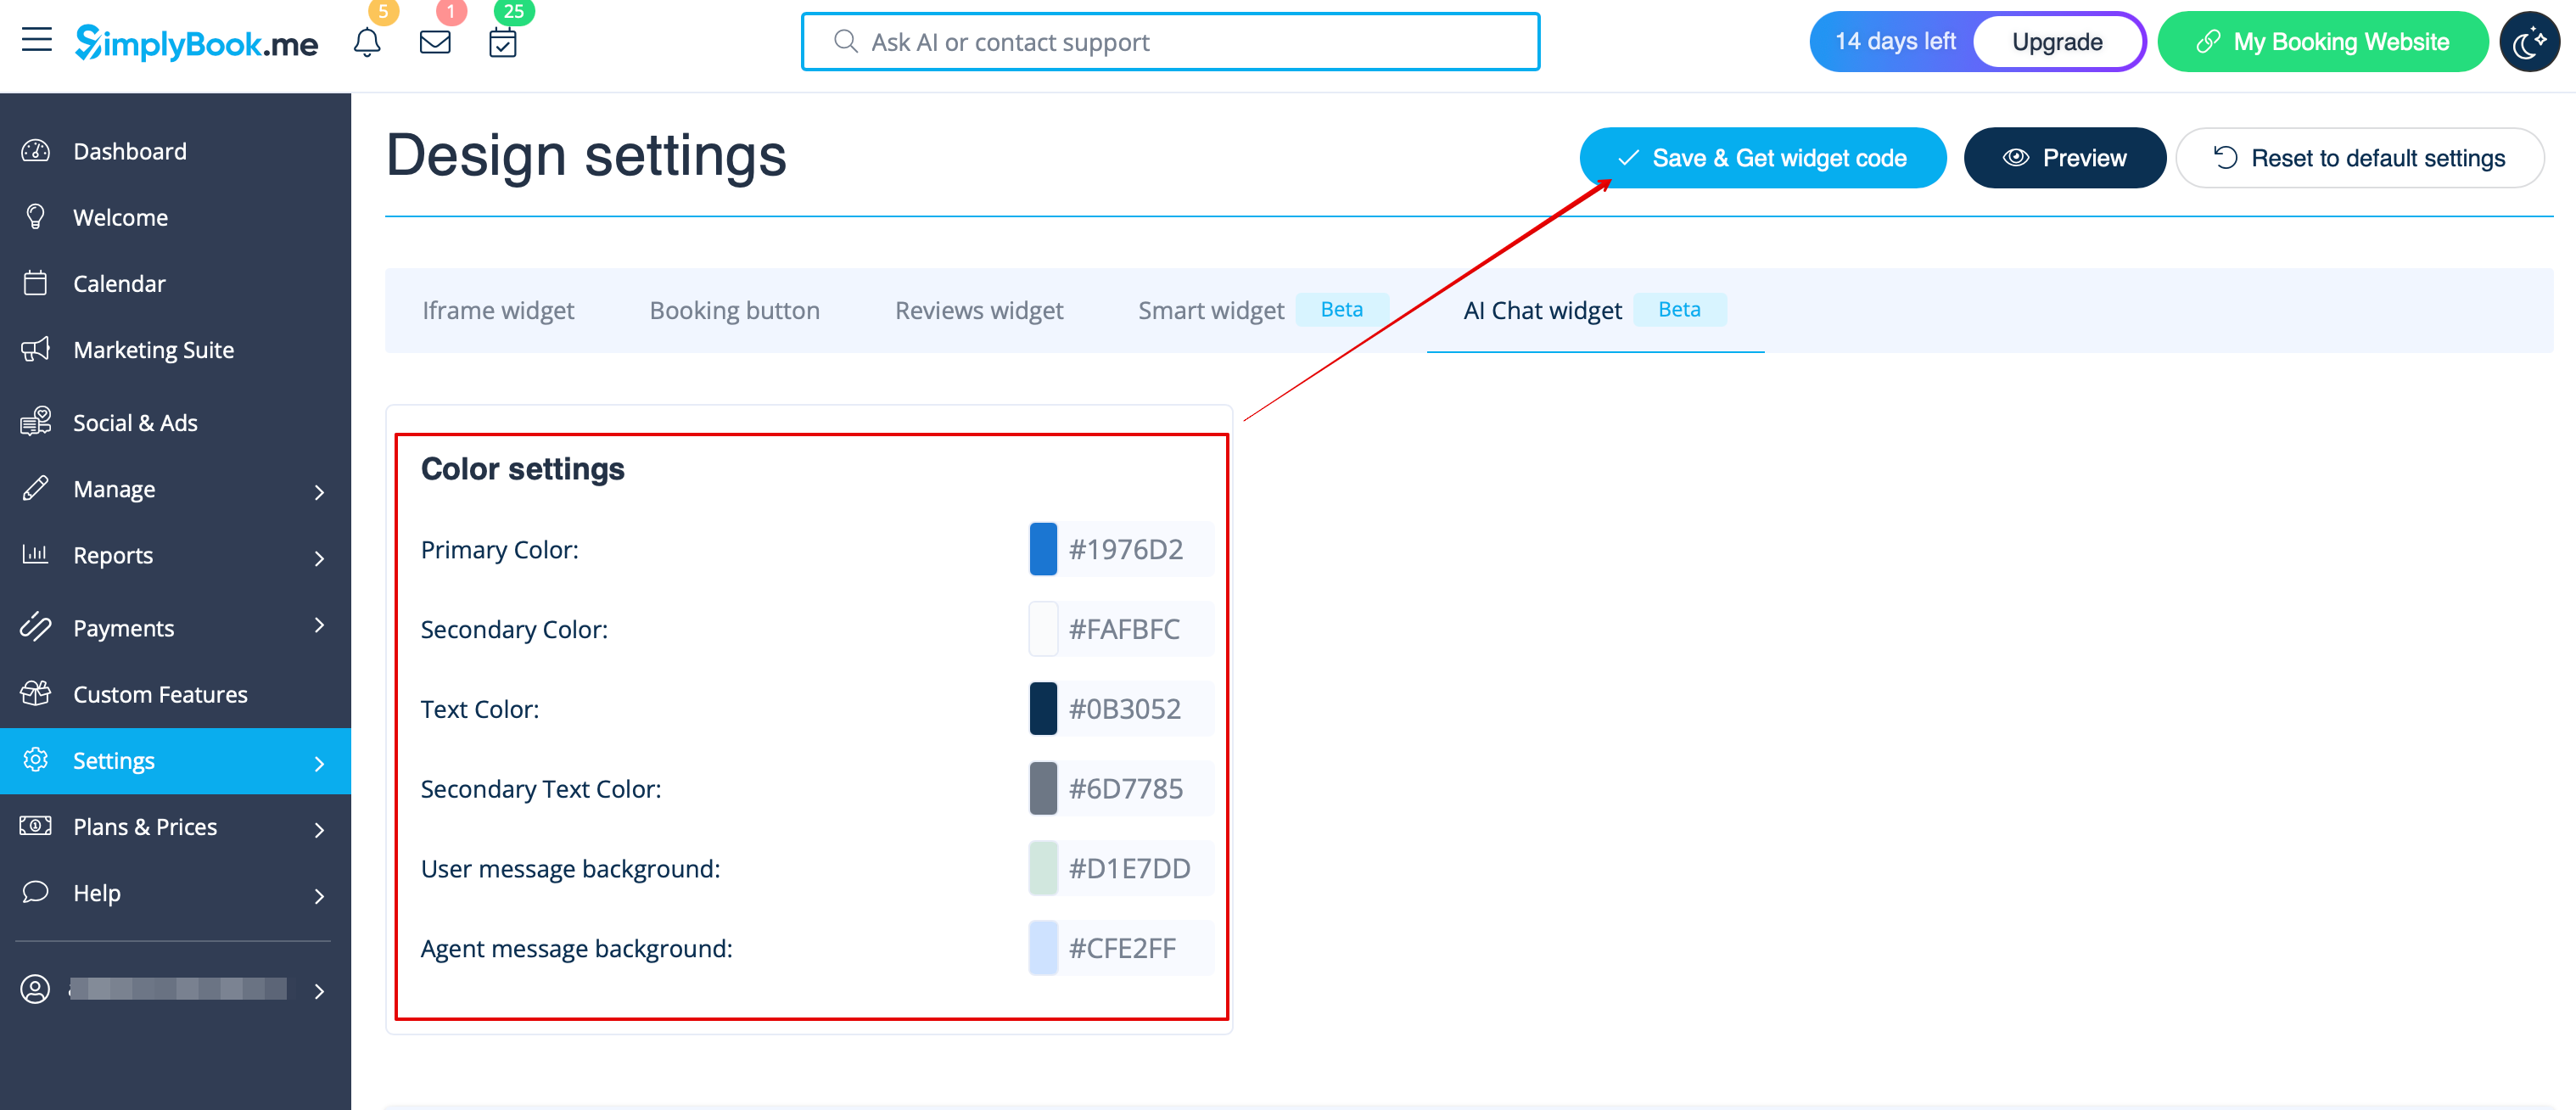
2. If you have own website you can add AI booking widget there. Simply navigate to ‘’’Widget settings’’’ there, select the preferable colors, click on “Save & get widget color” to generate the widget code.
3. Navigate to your website editor and paste the code to the page where you would like the AI booking widget to be available. That’s it.
WhatsApp AI booking
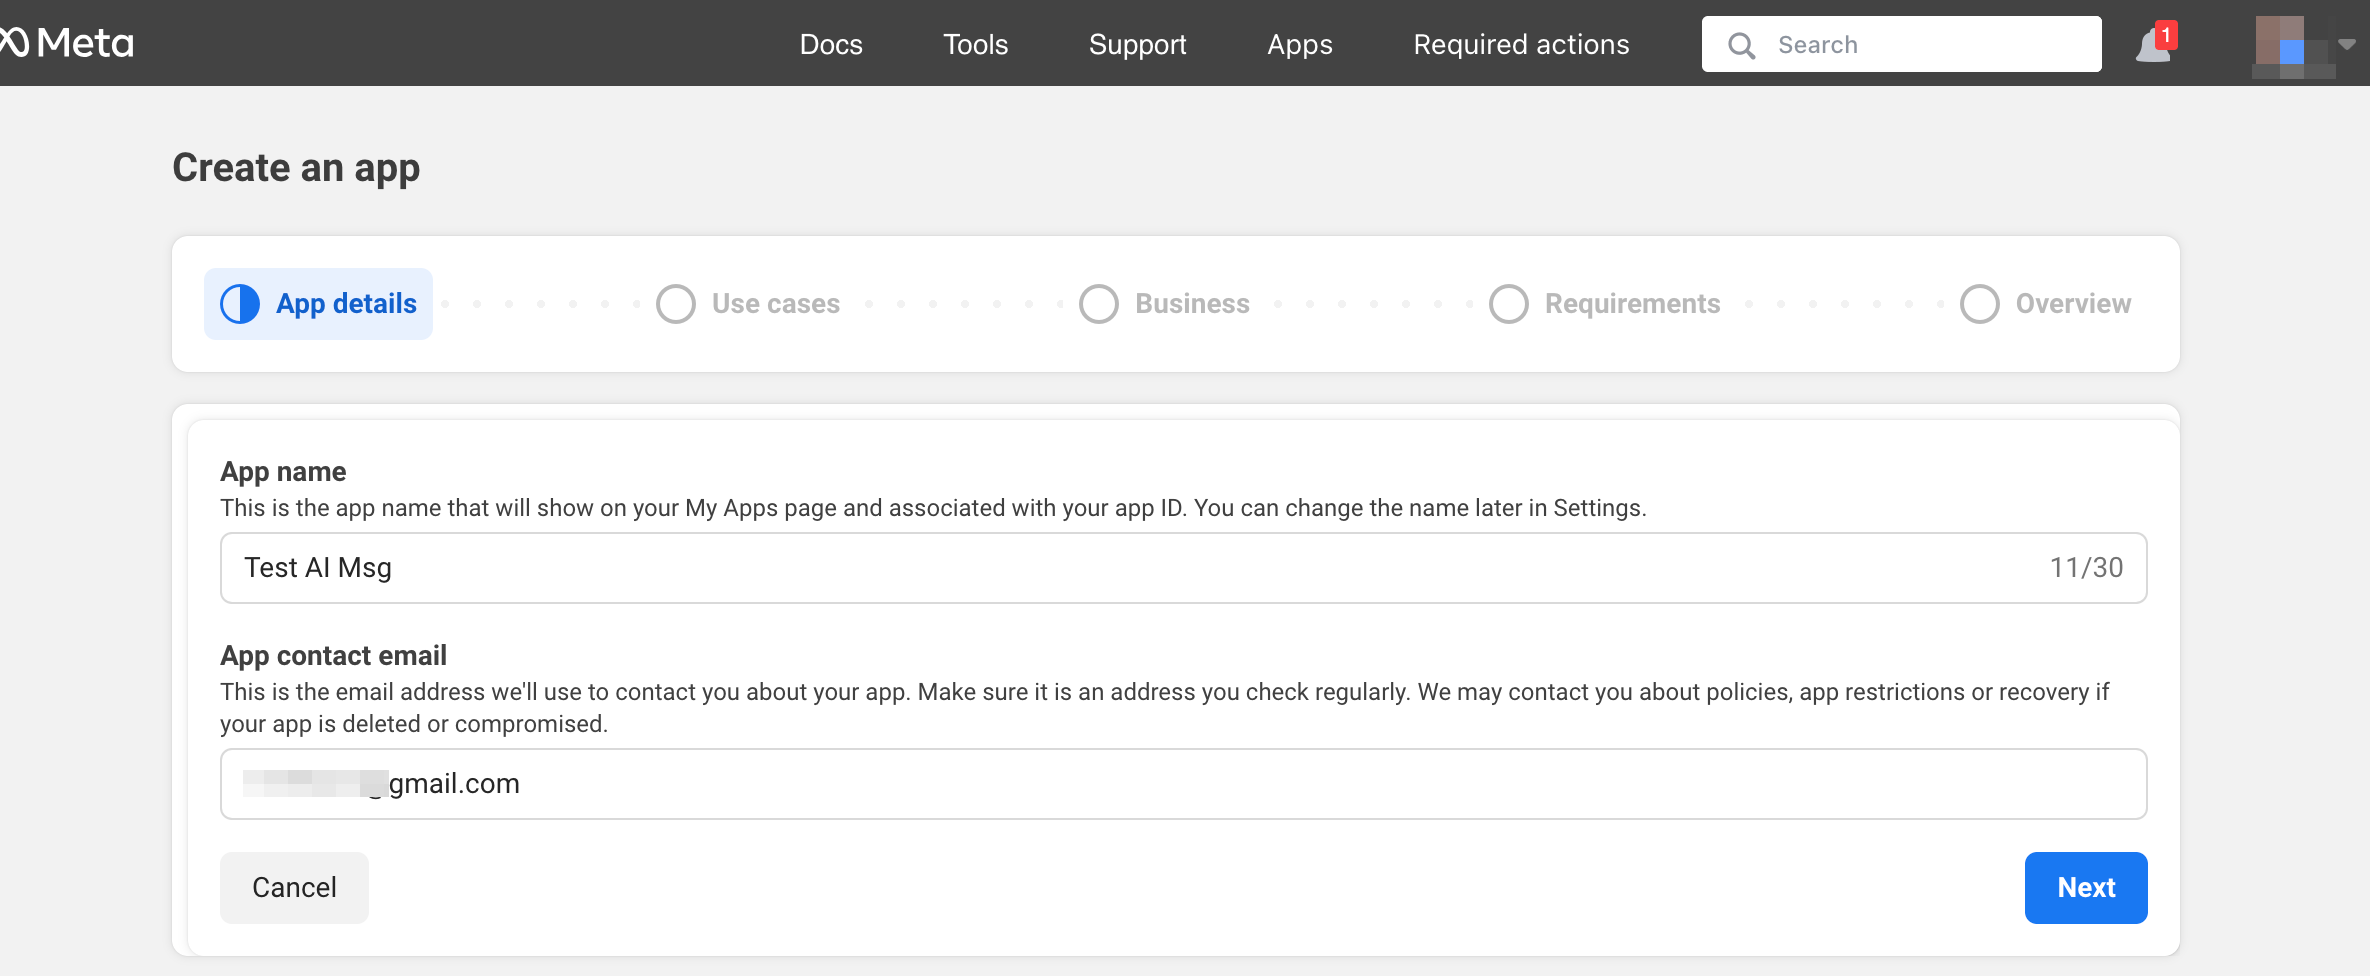
1. Open https://developers.facebook.com/apps/ and click “Create App”:

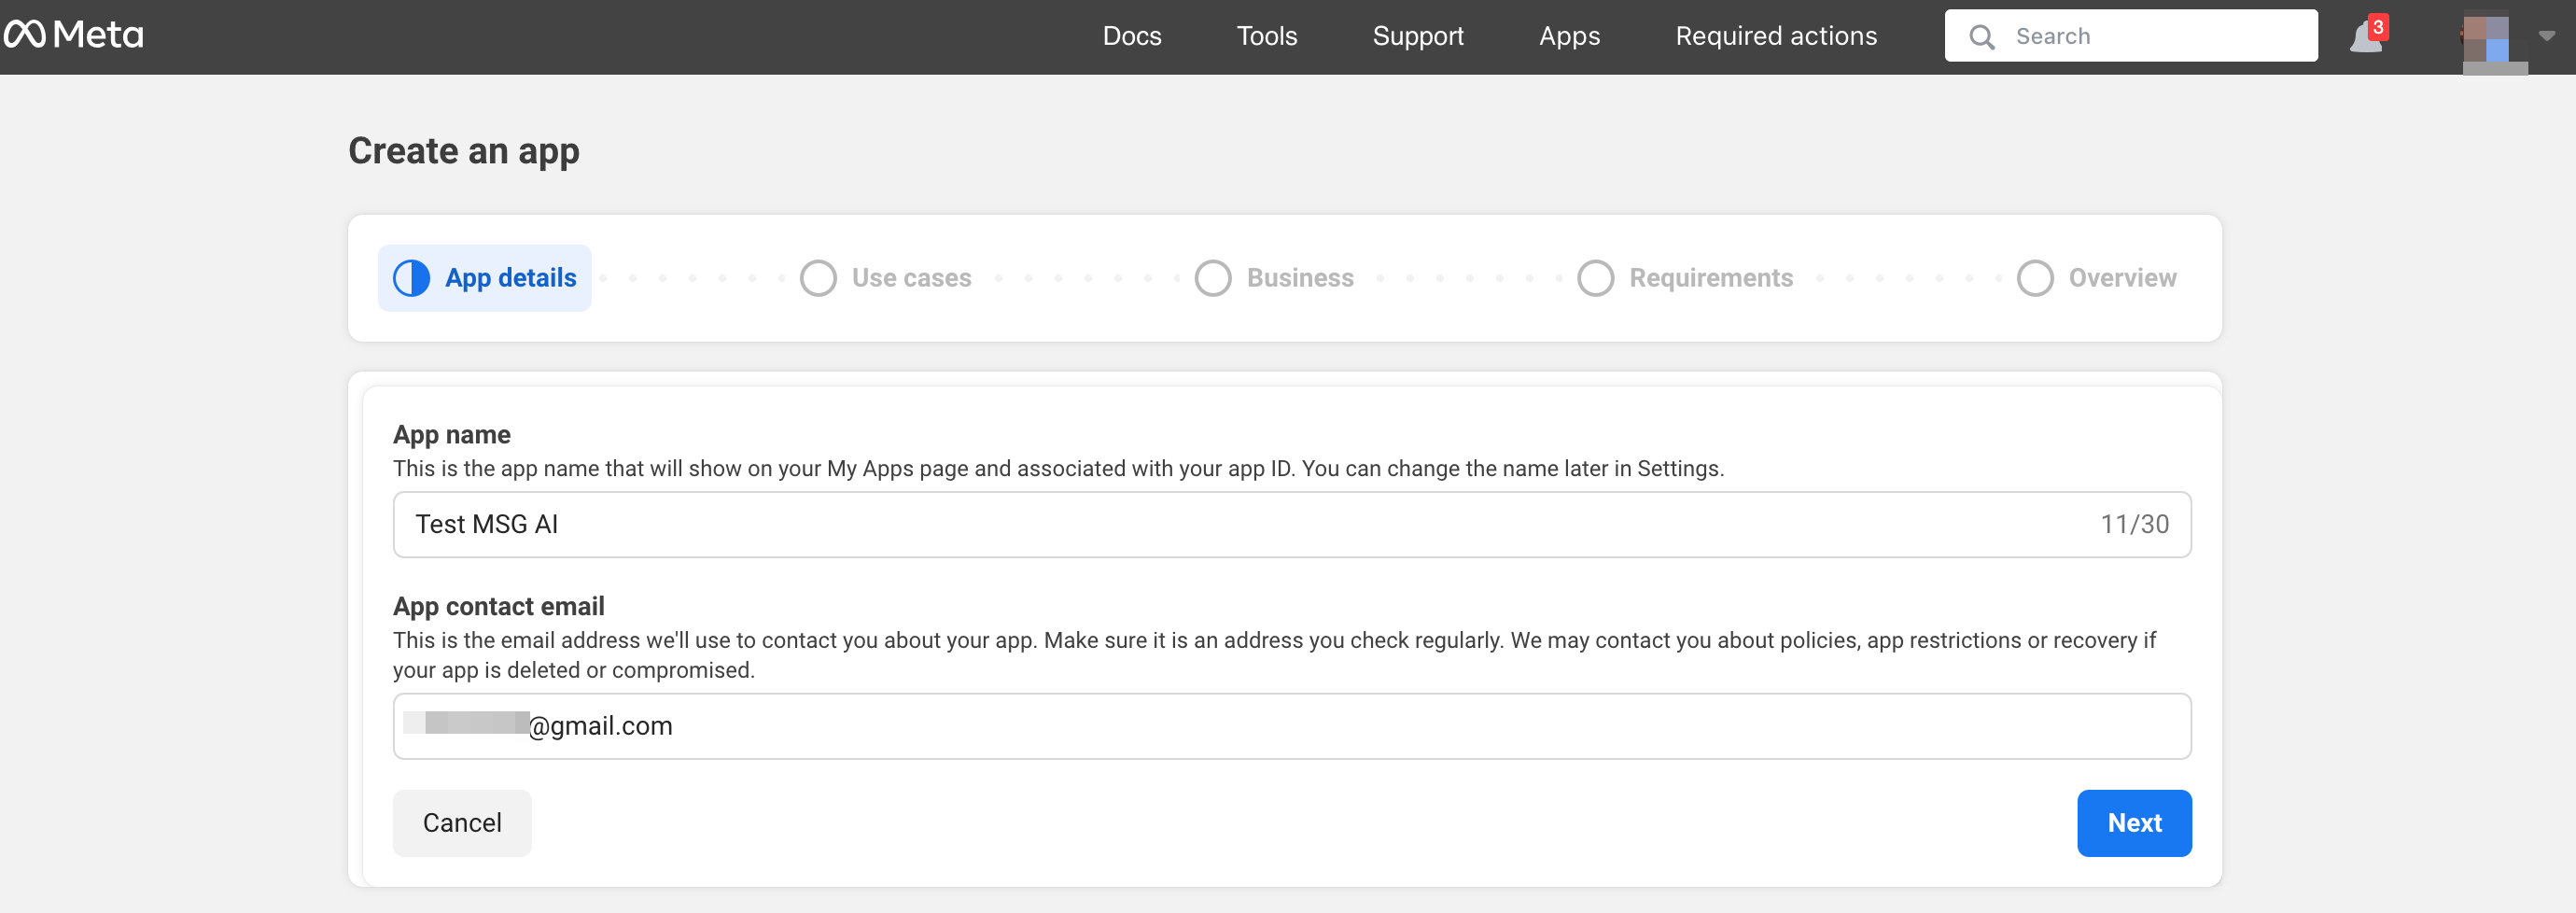
2. Enter your preferable app details:
3. Select WhatsApp use case:
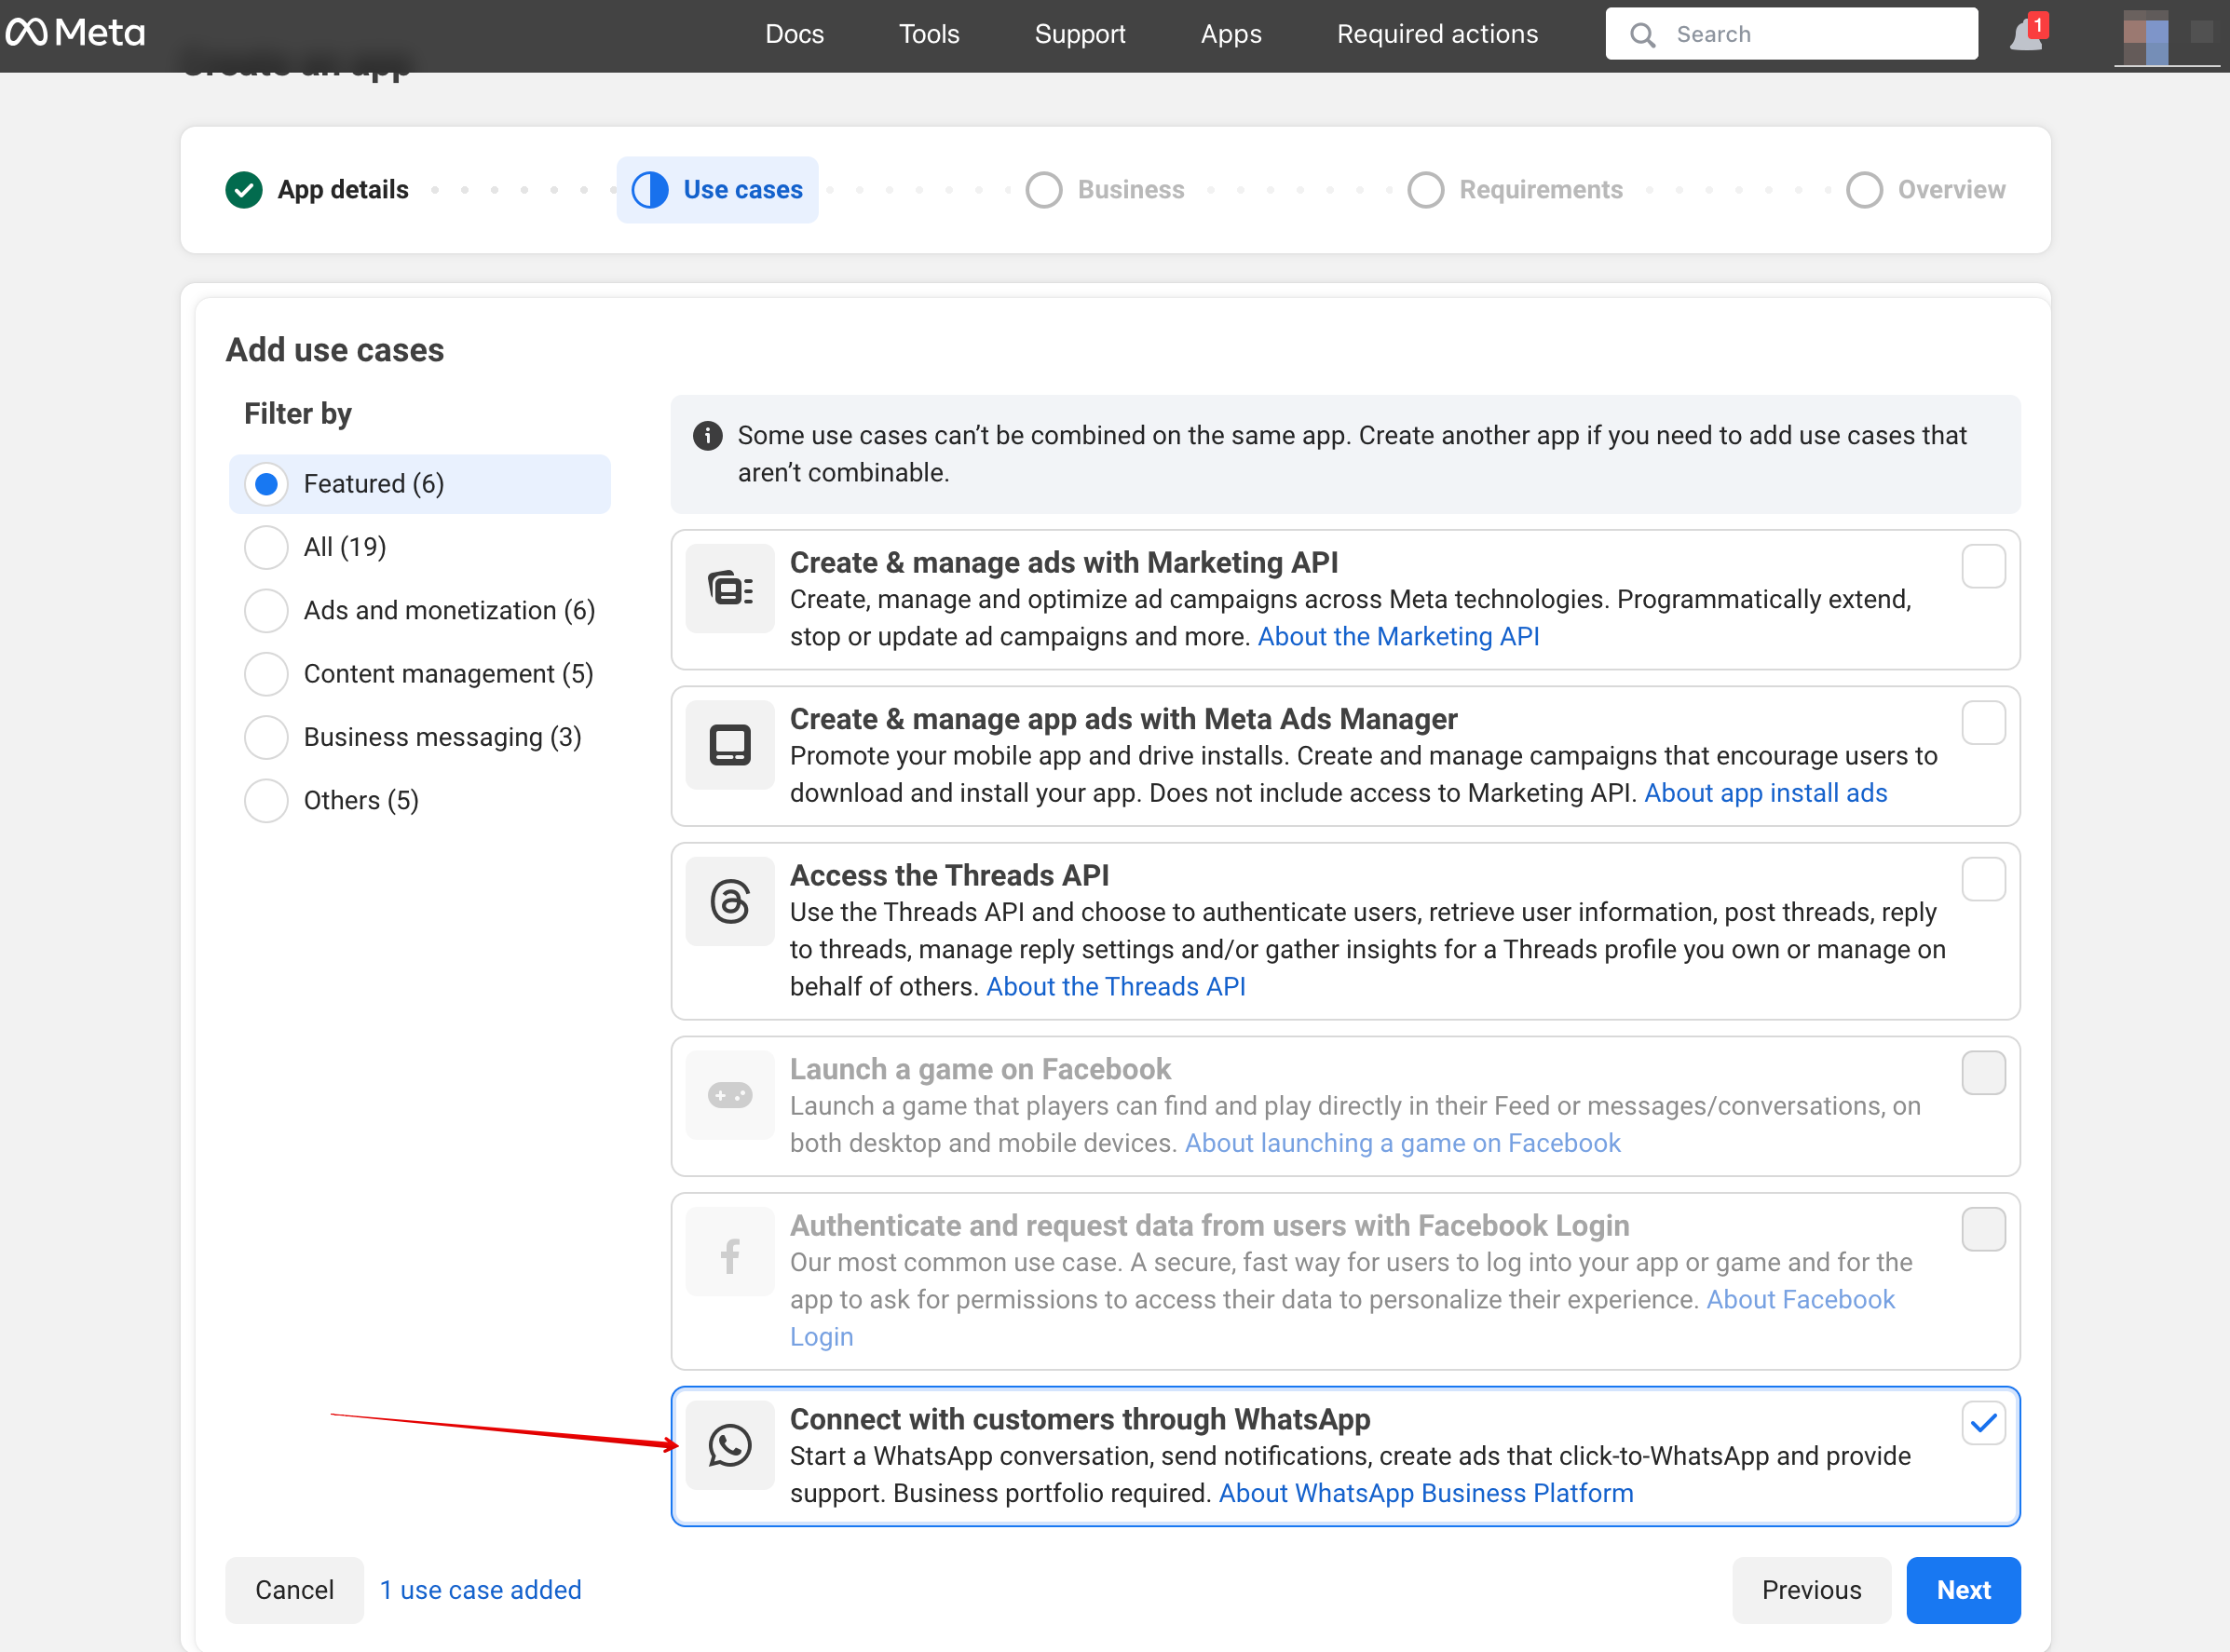
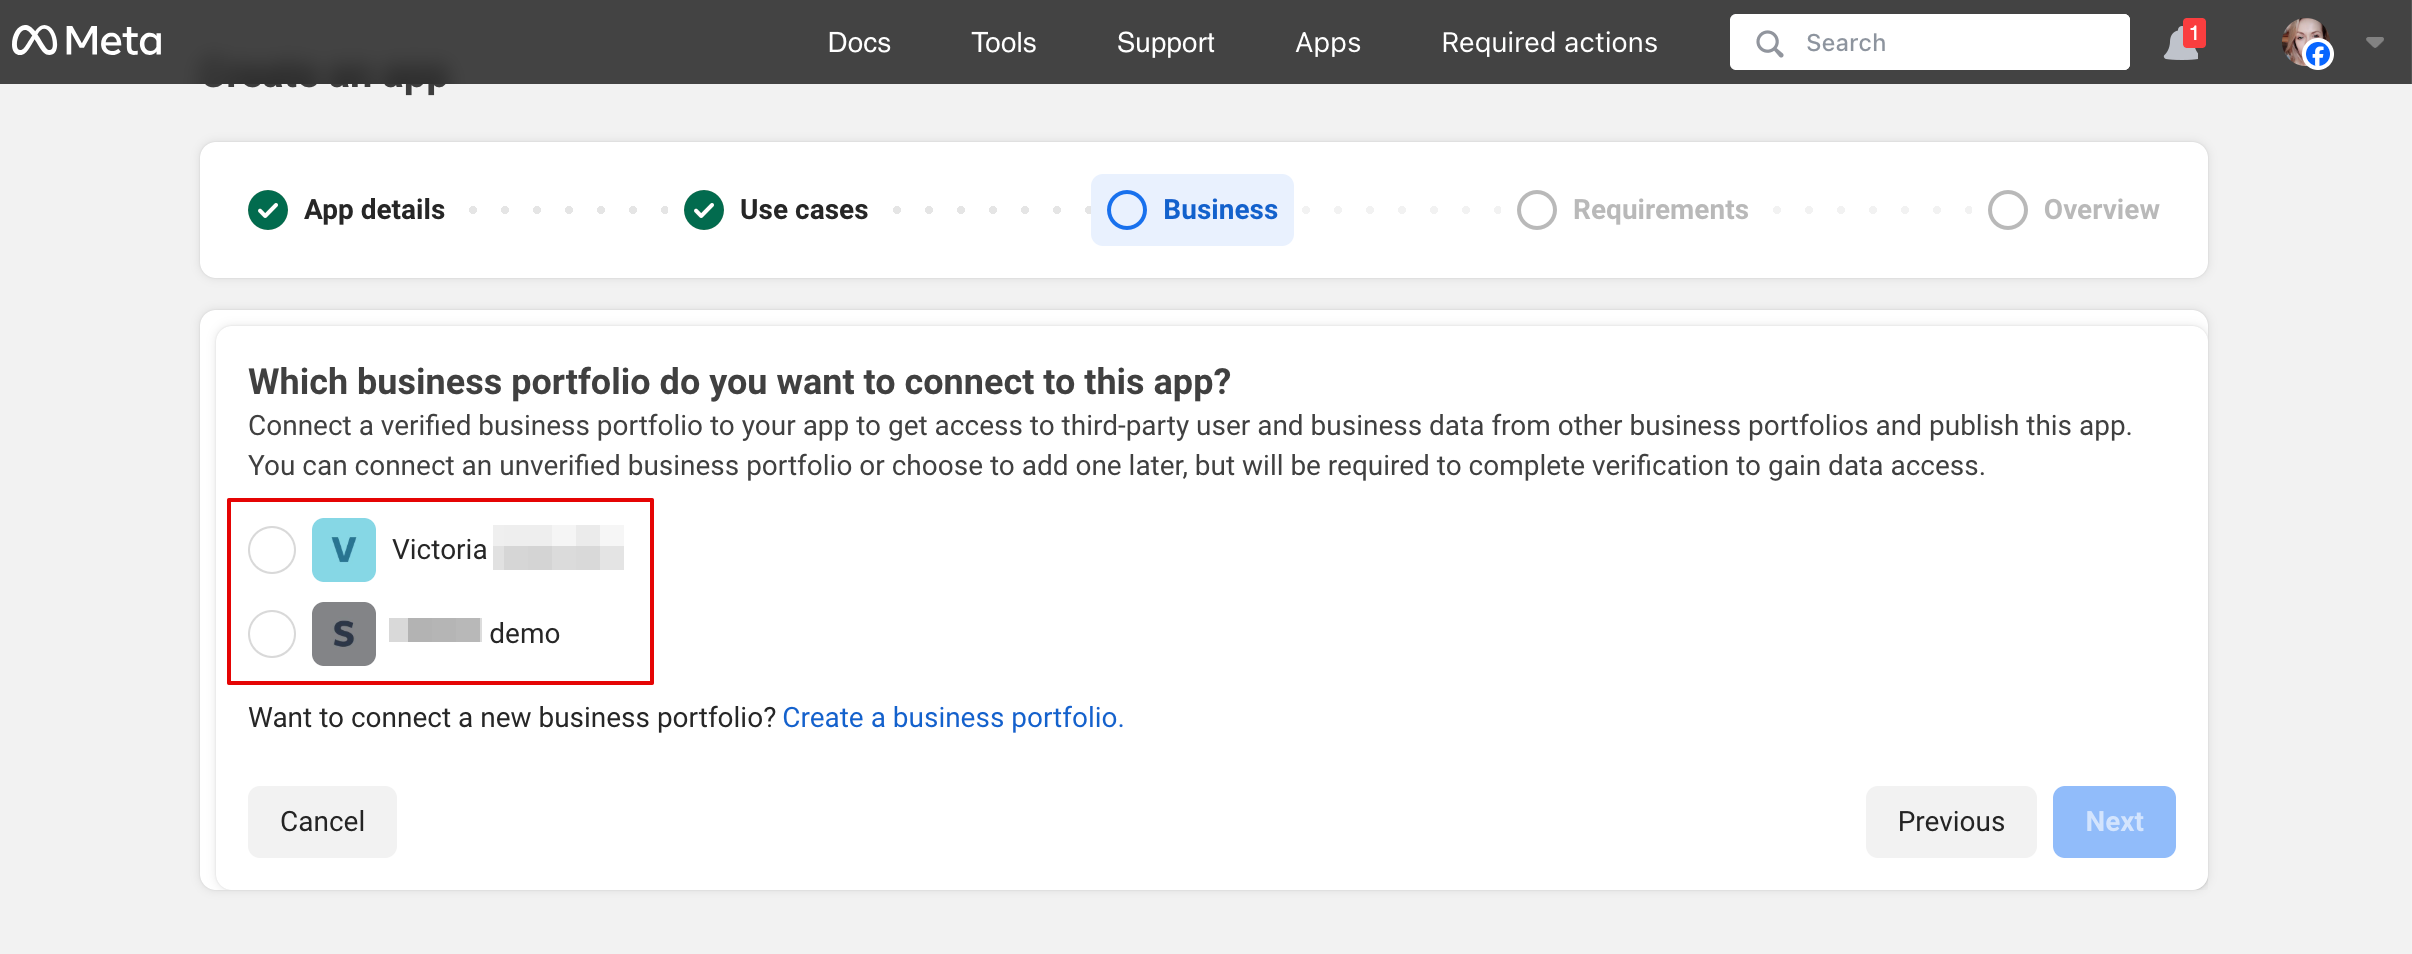
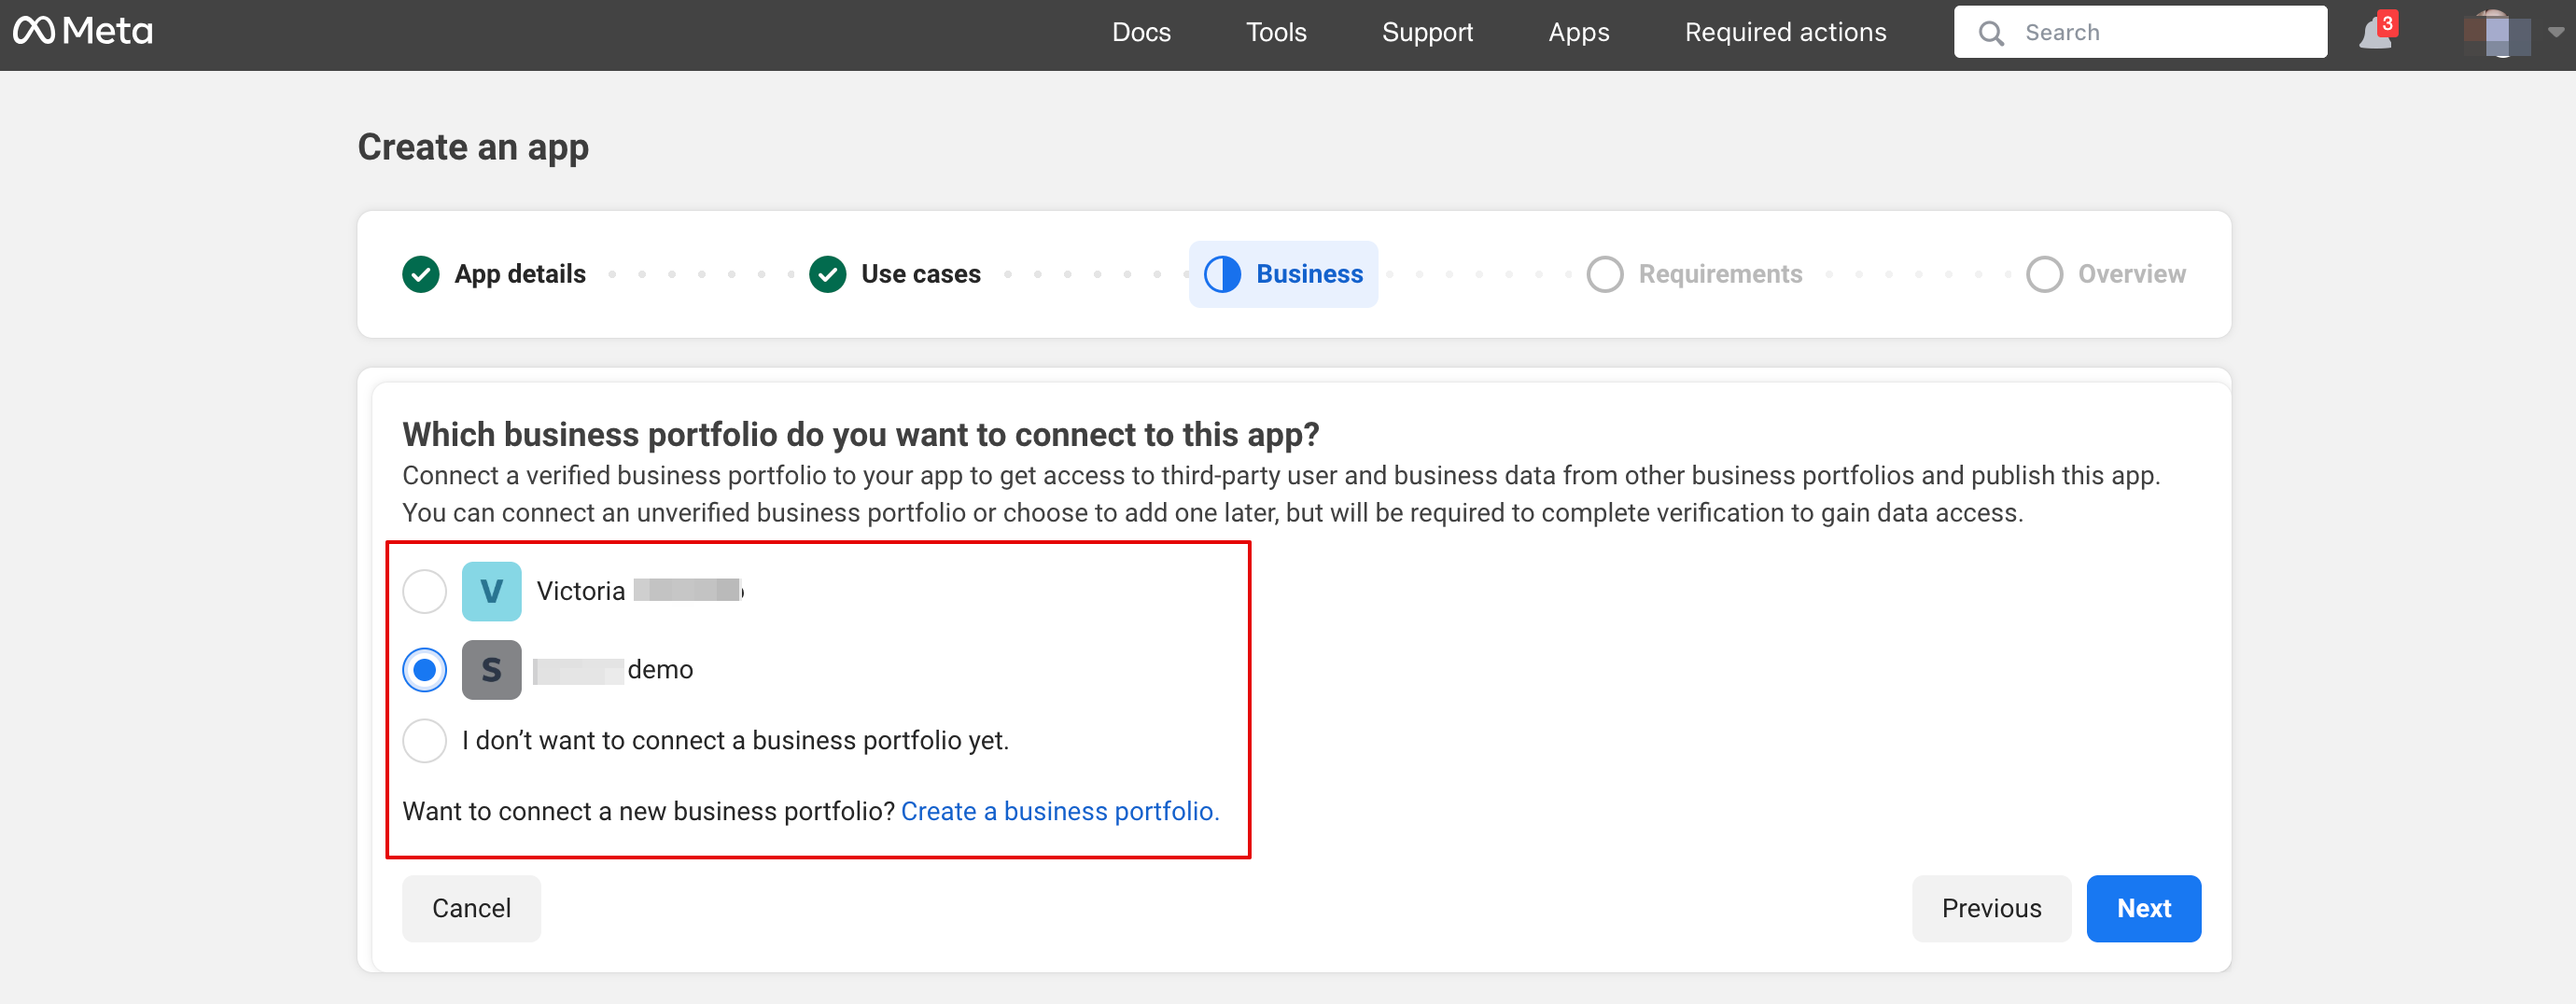
4. Select the business profile or create a new one.
5. Click on “Next” to proceed:
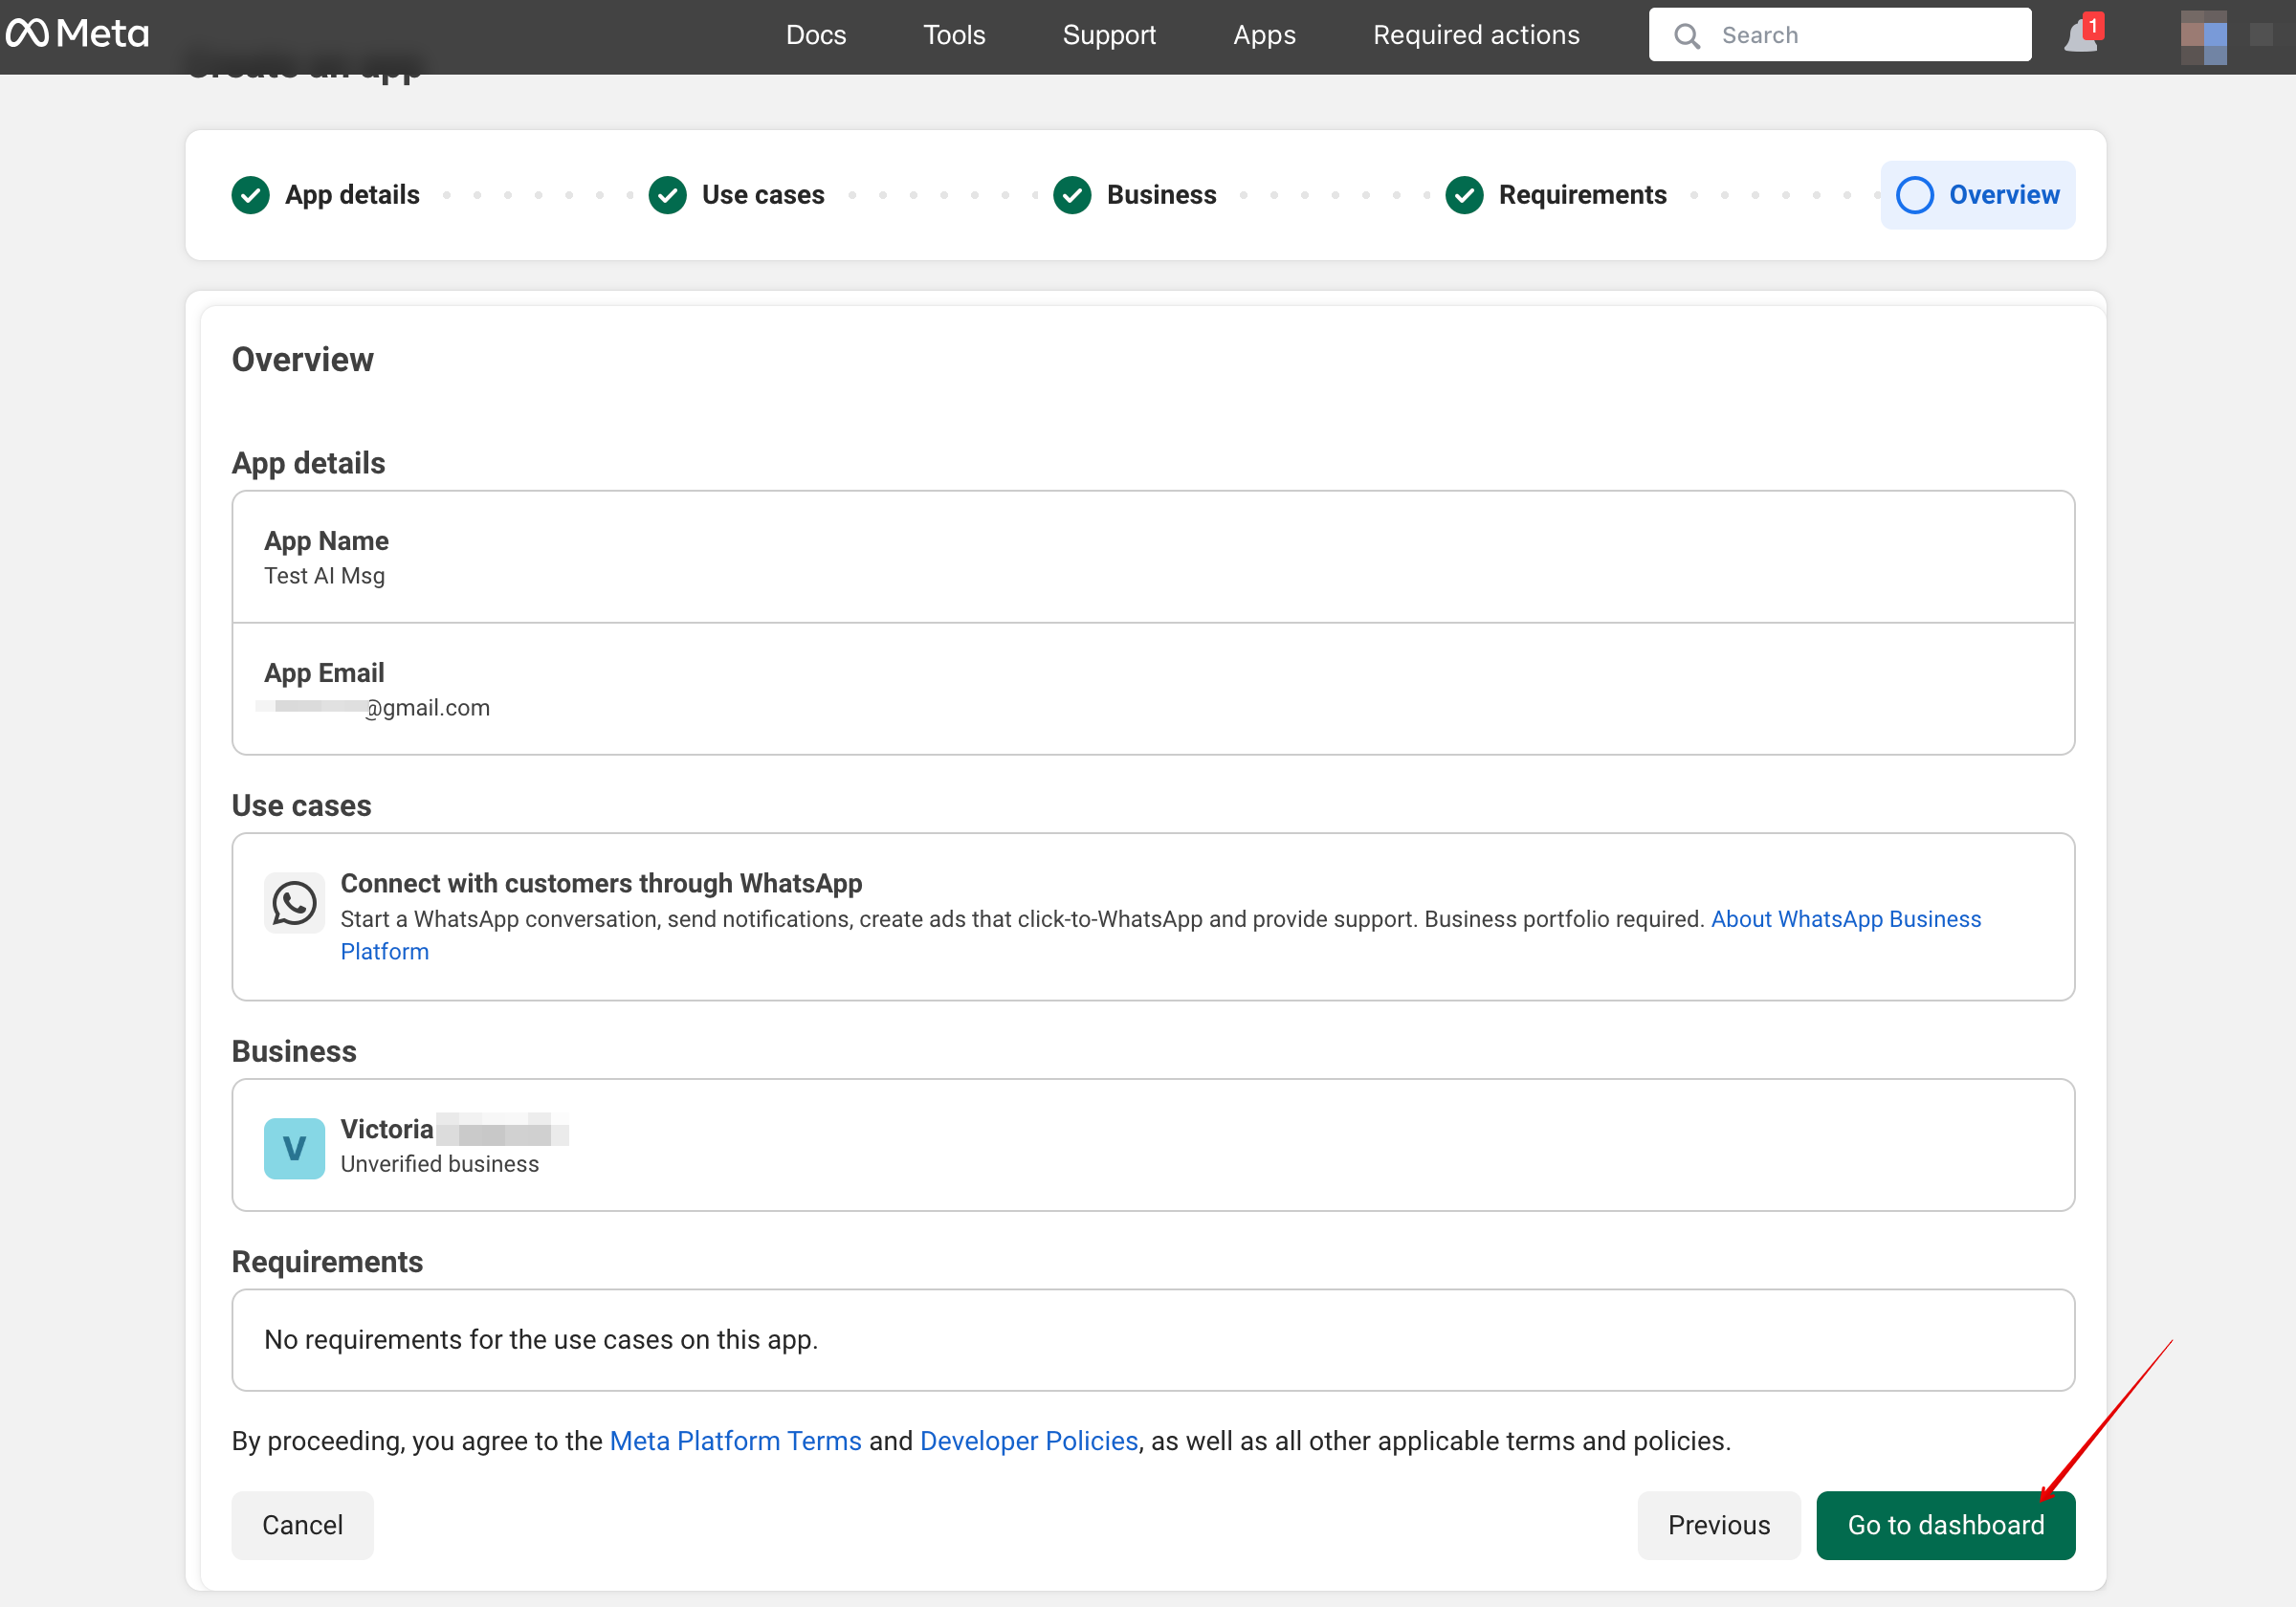
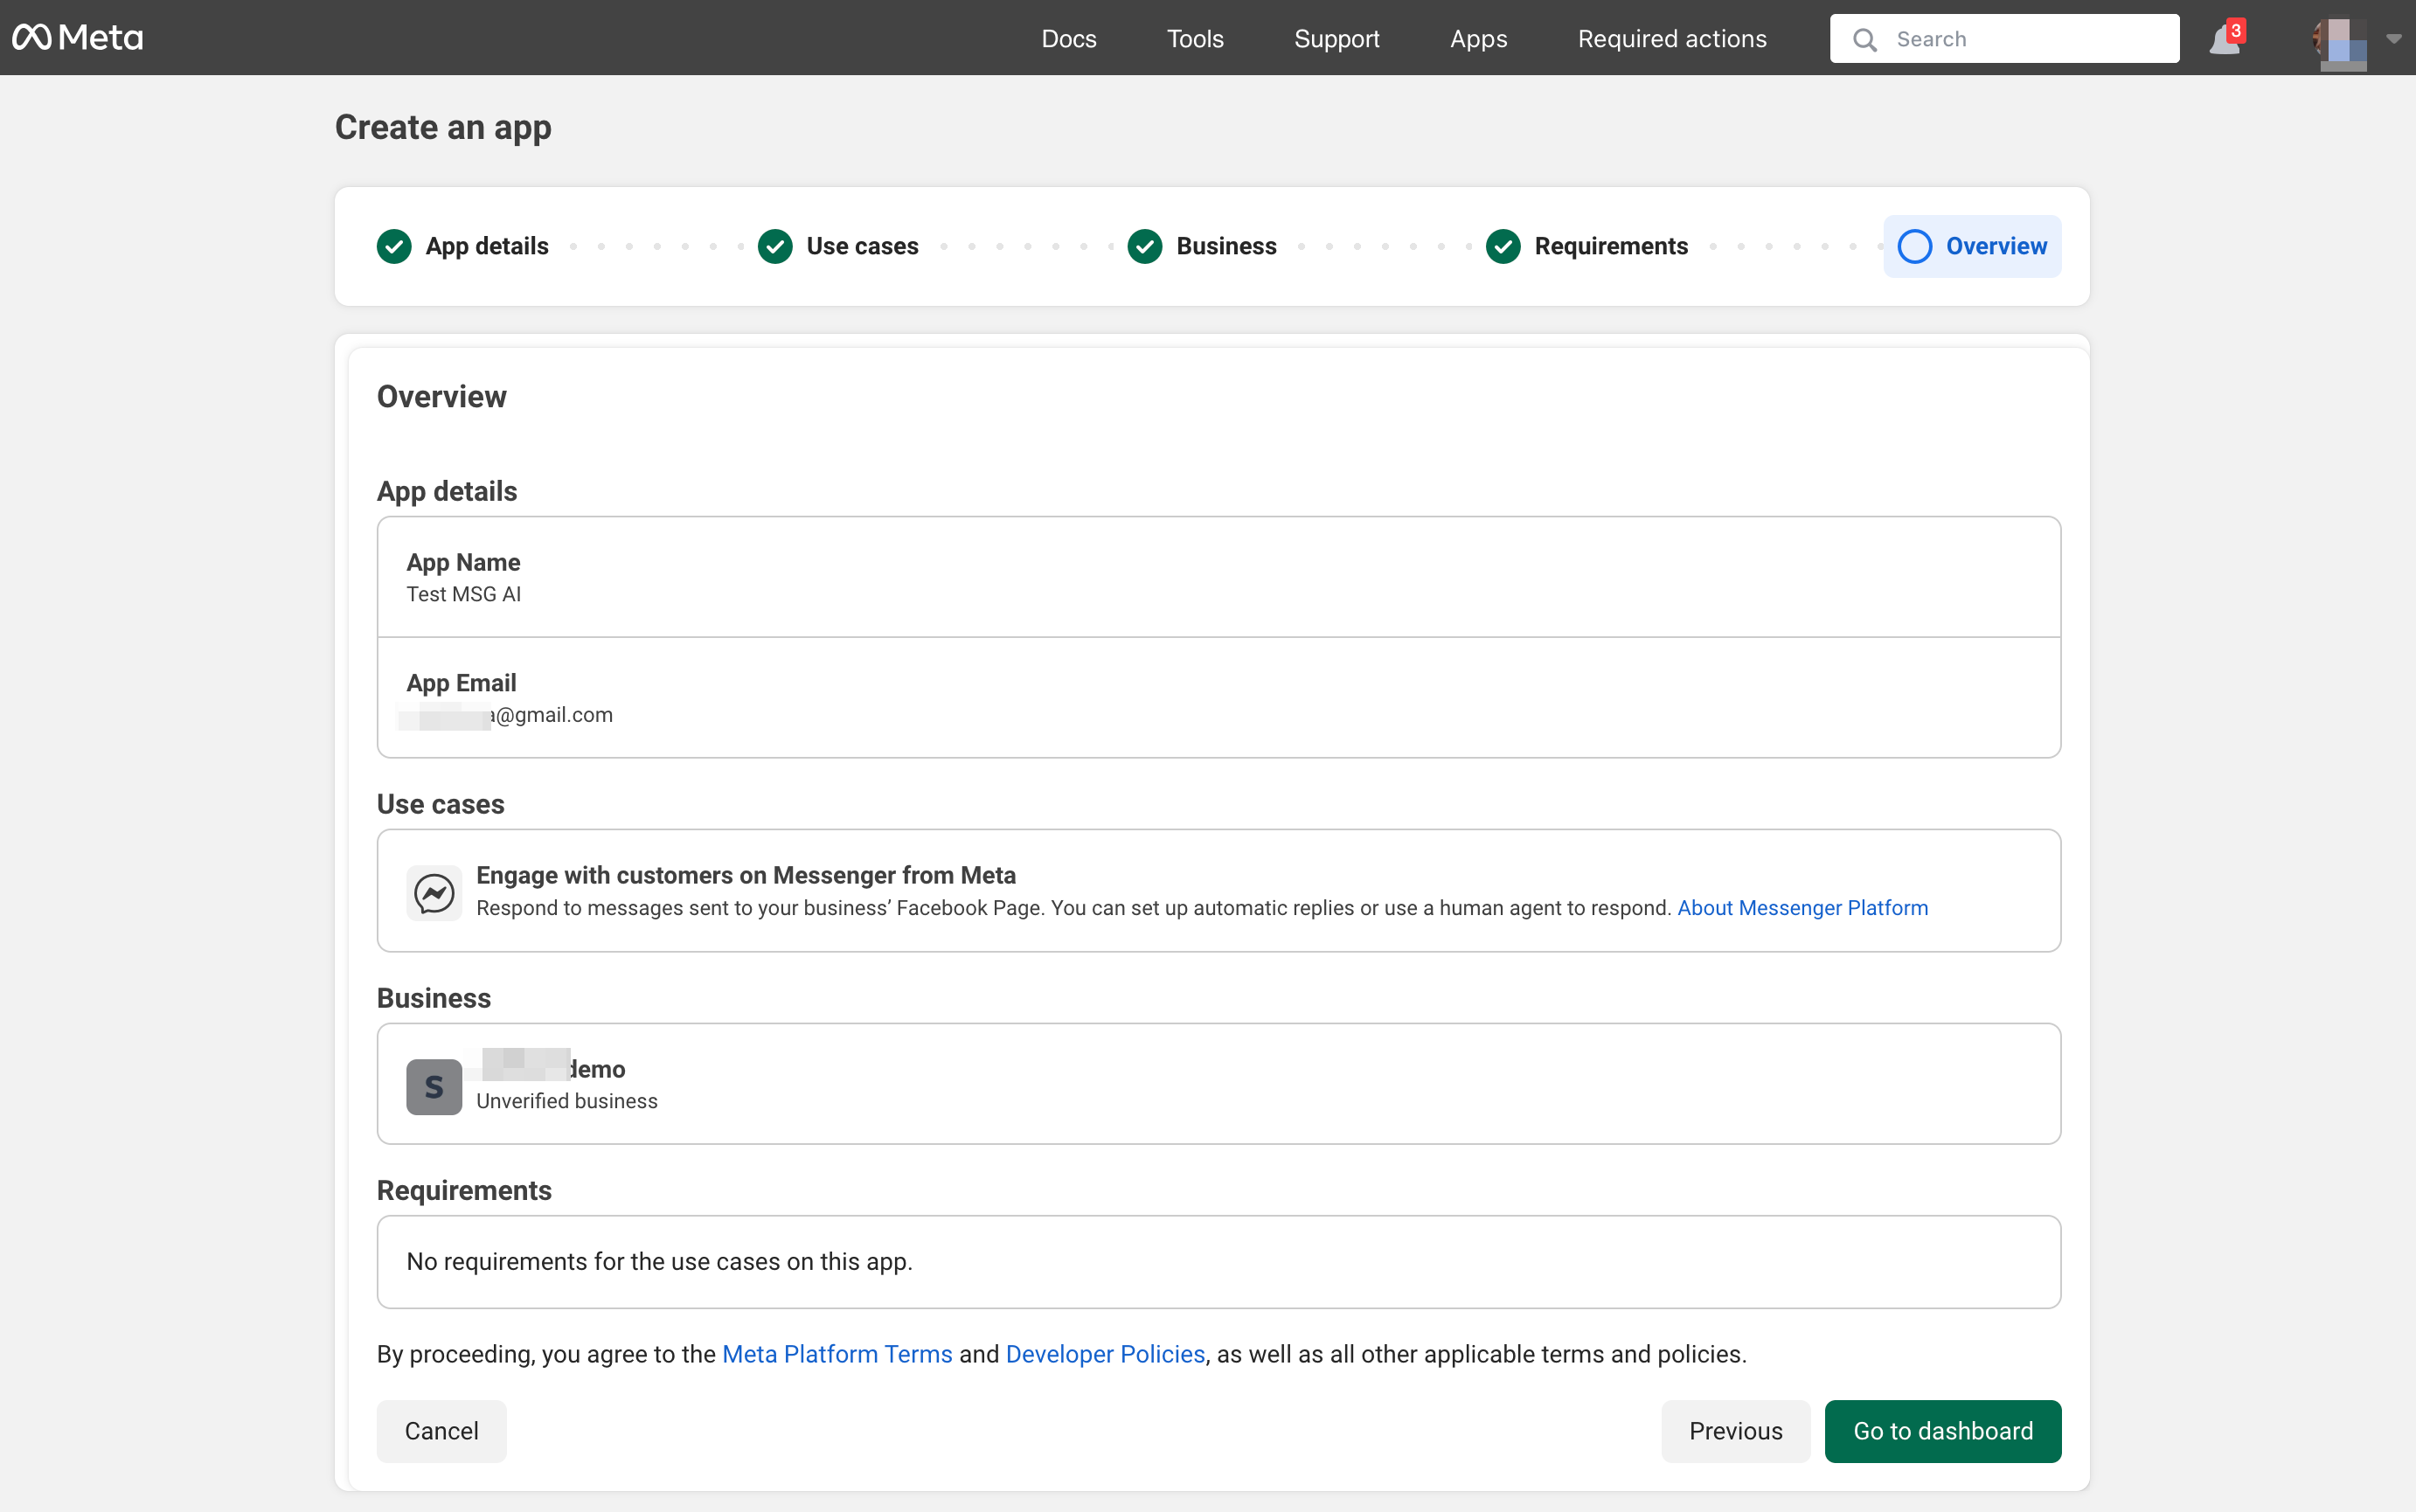
6. Review the details and click “Go to dashboard”:
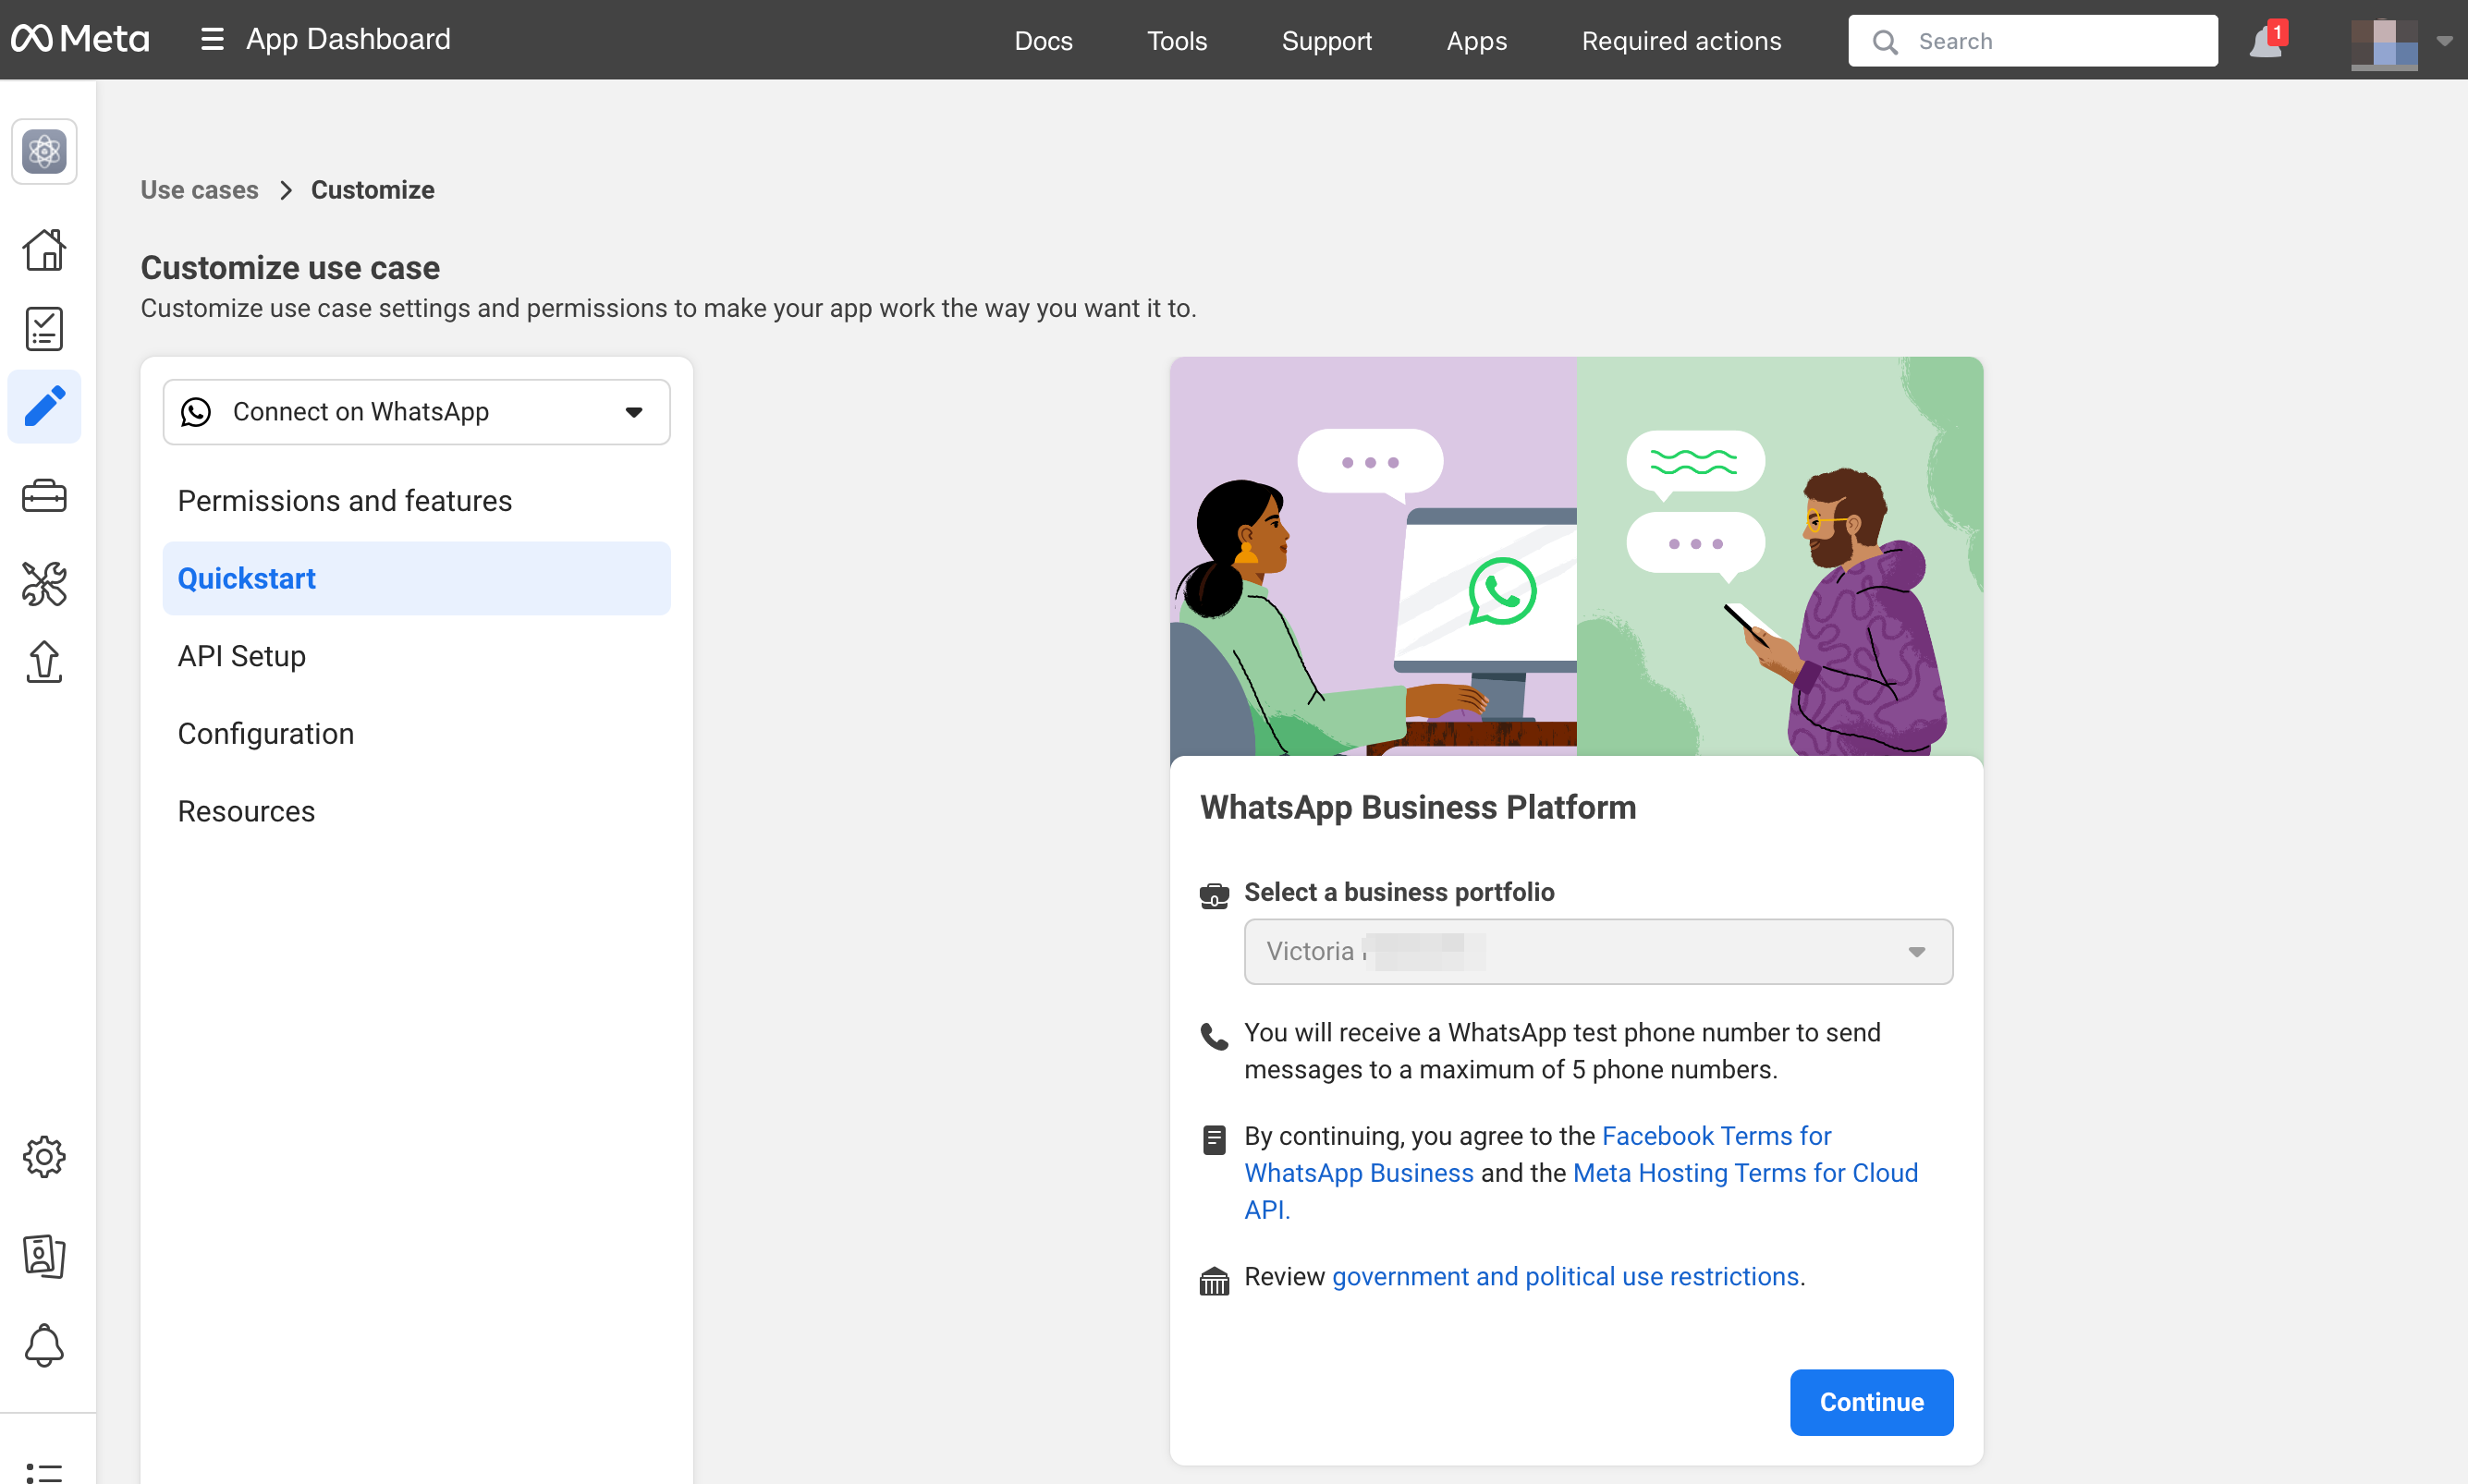
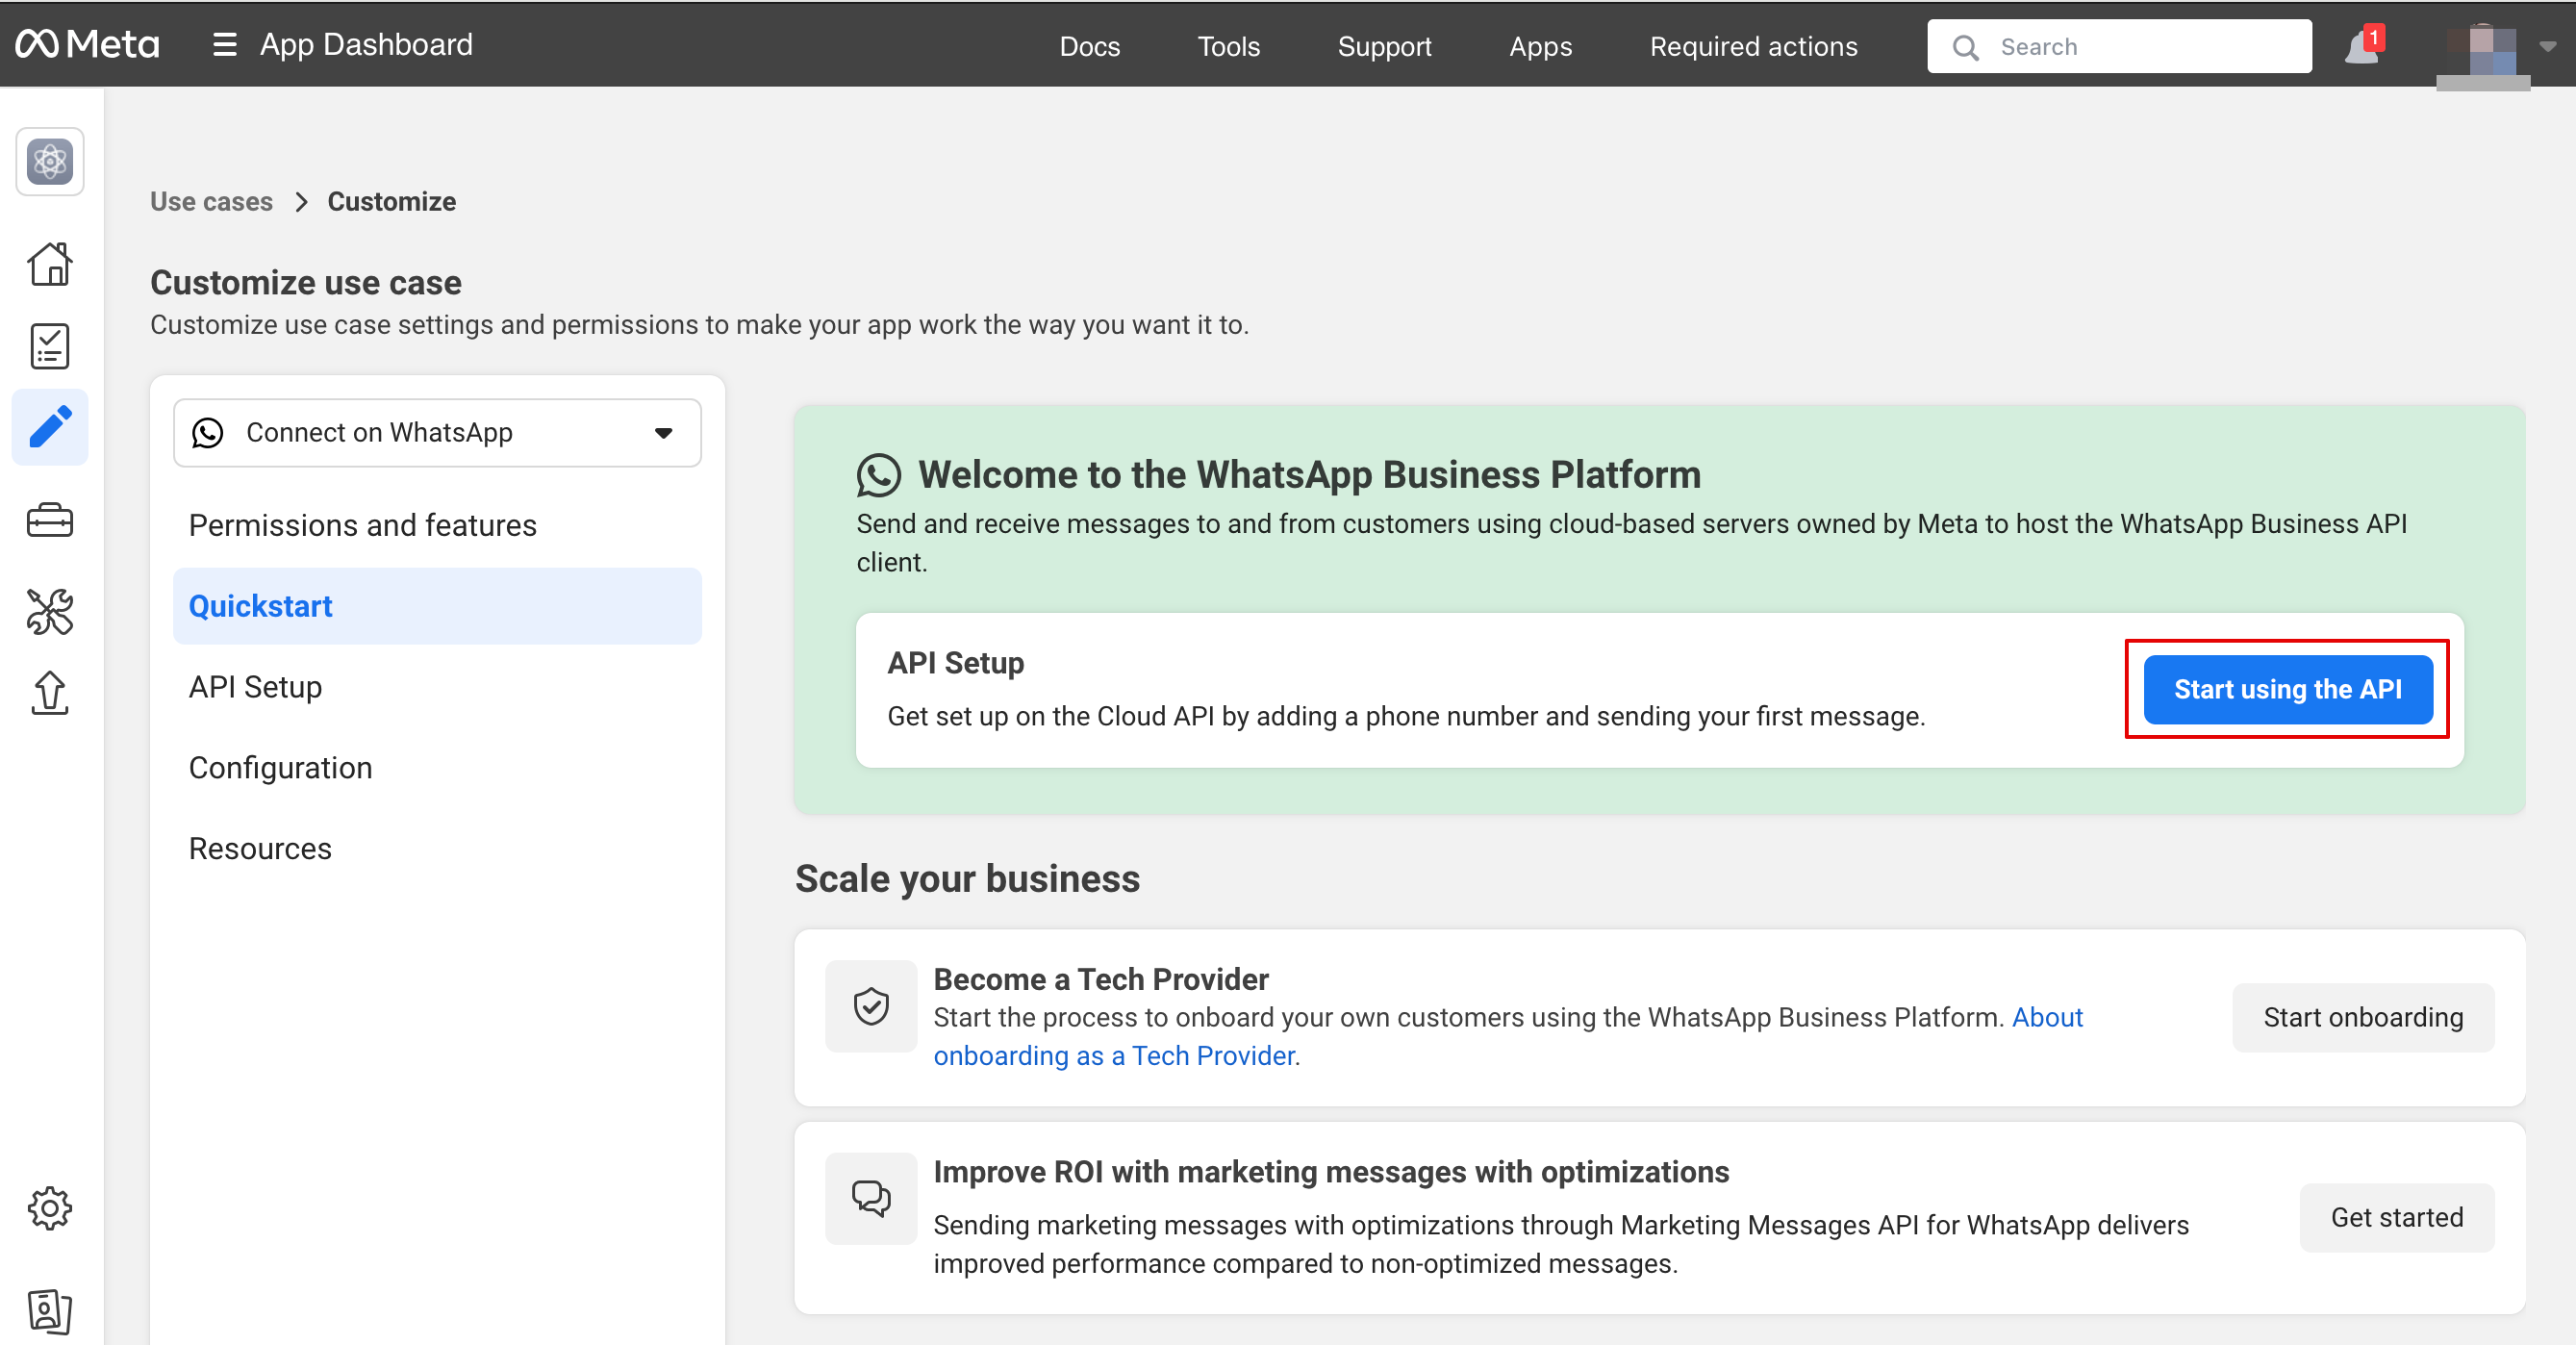
7. Select “Use cases” tab and click on “Customize” button:

8. Accept Terms of service and confirm business profile:
9. Choose “Start using the API”:
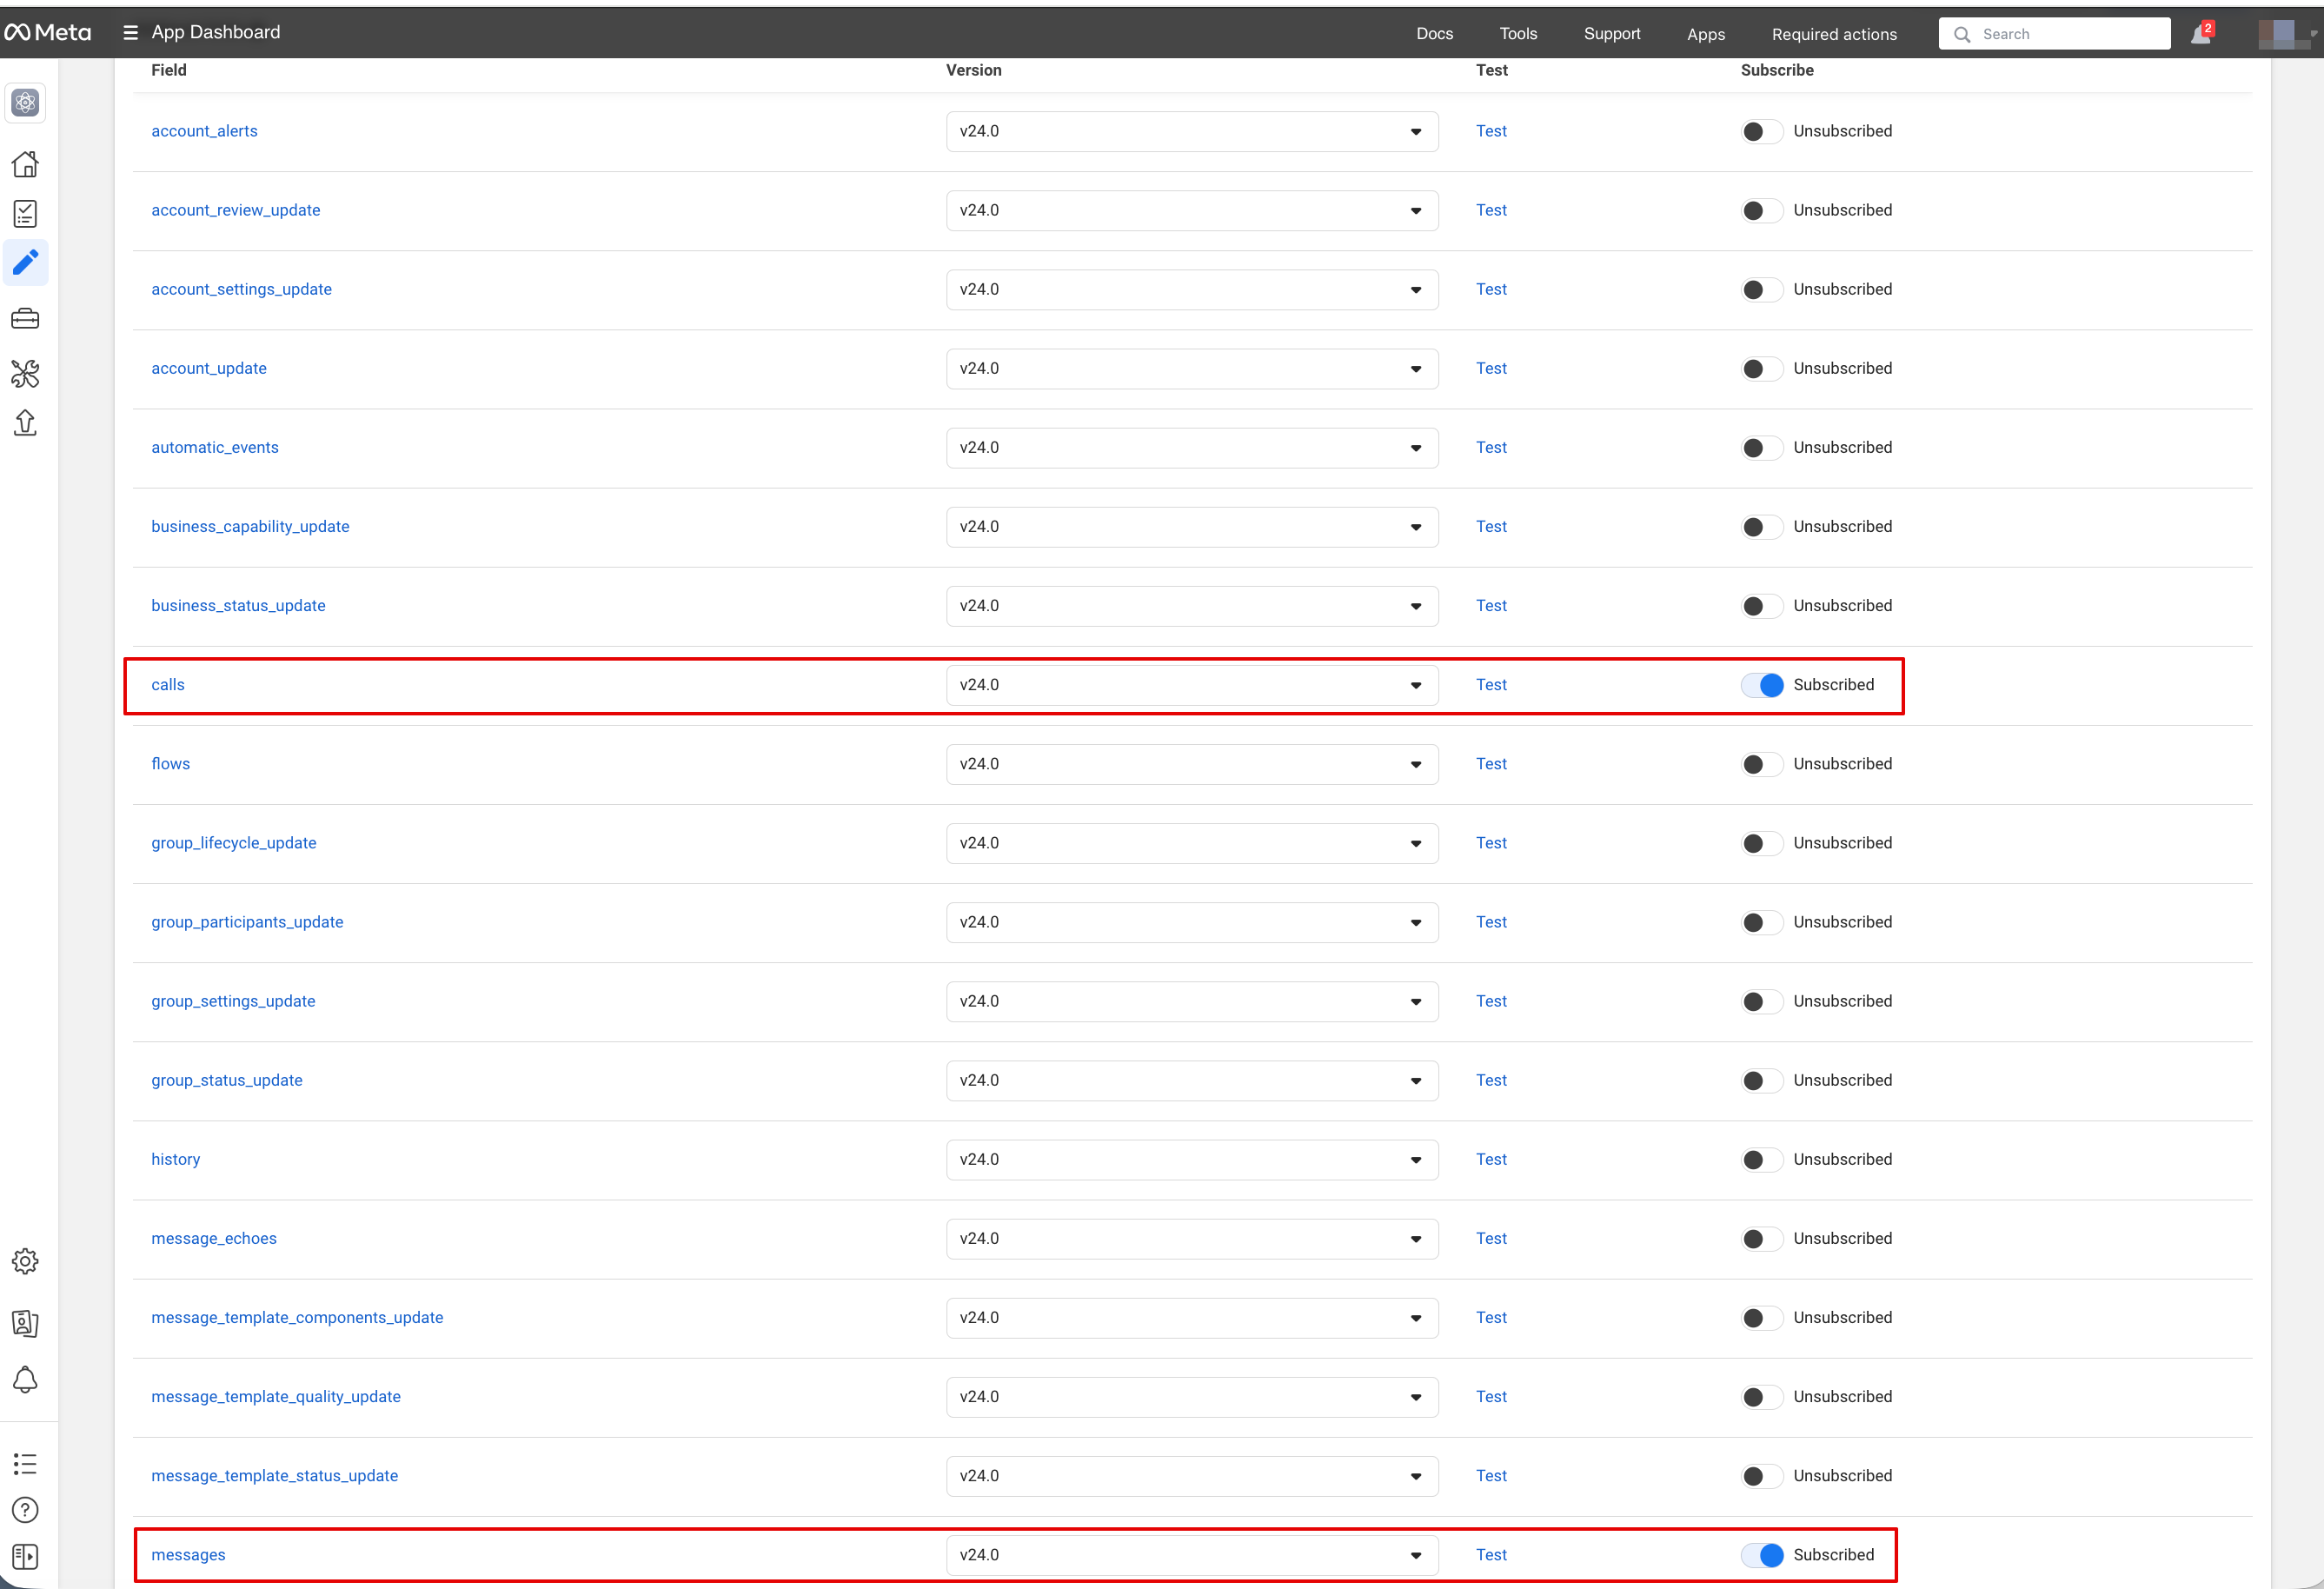
10. Then go to “Configure webhooks”:
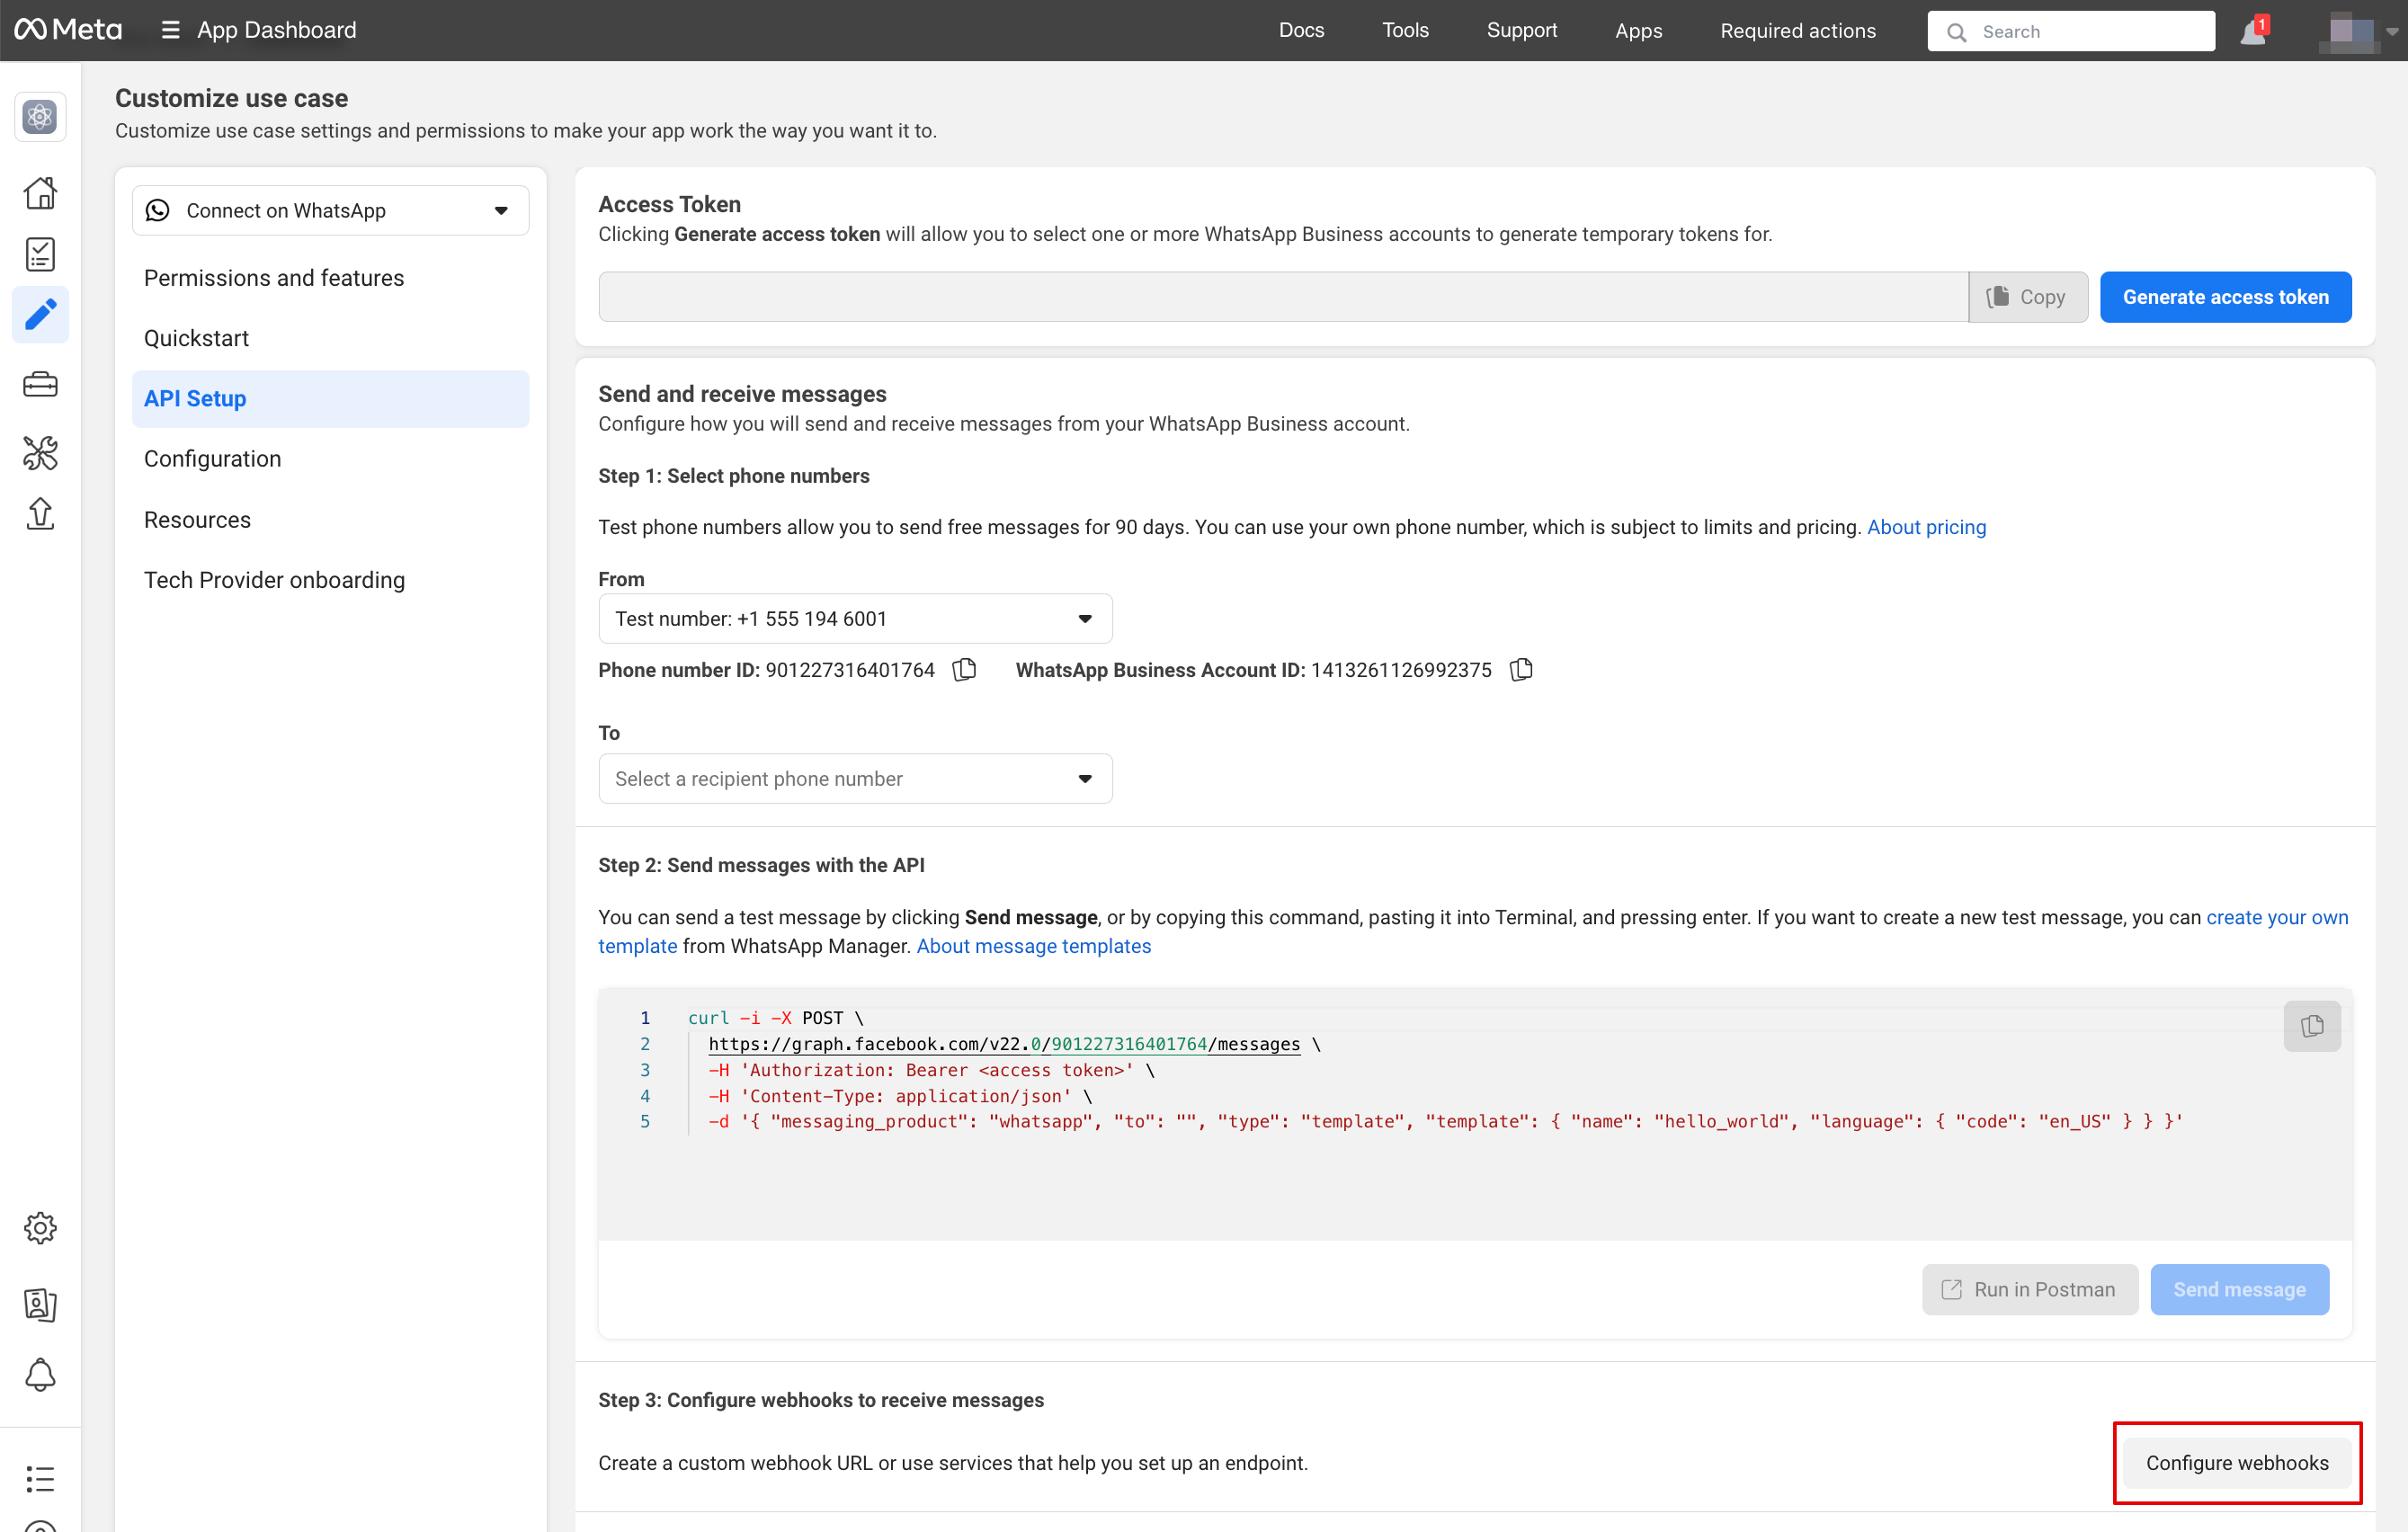
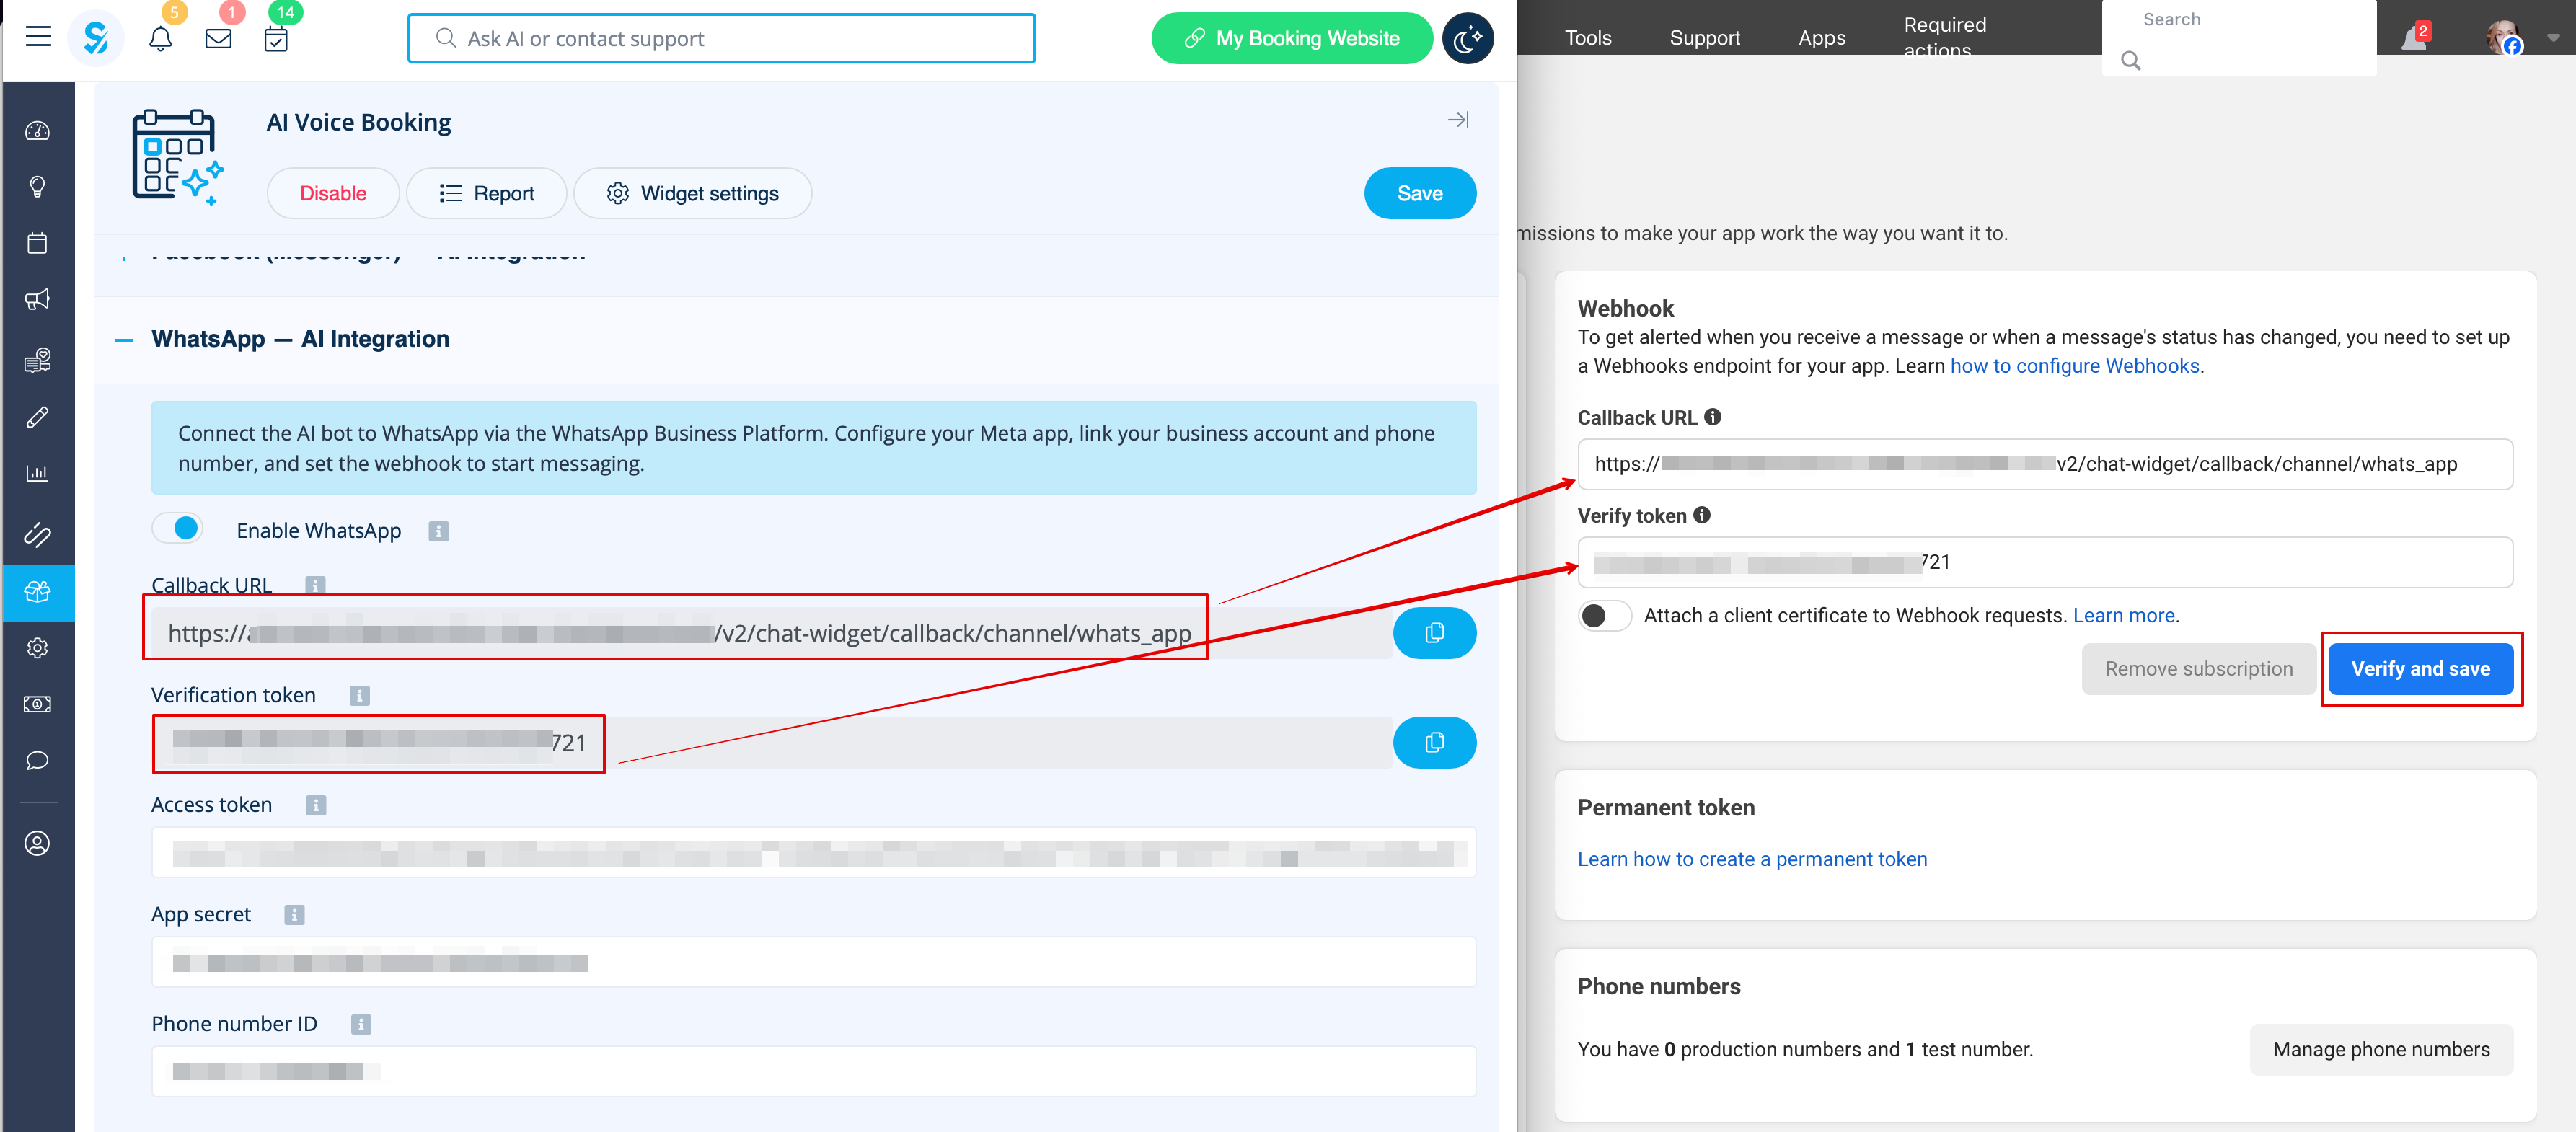
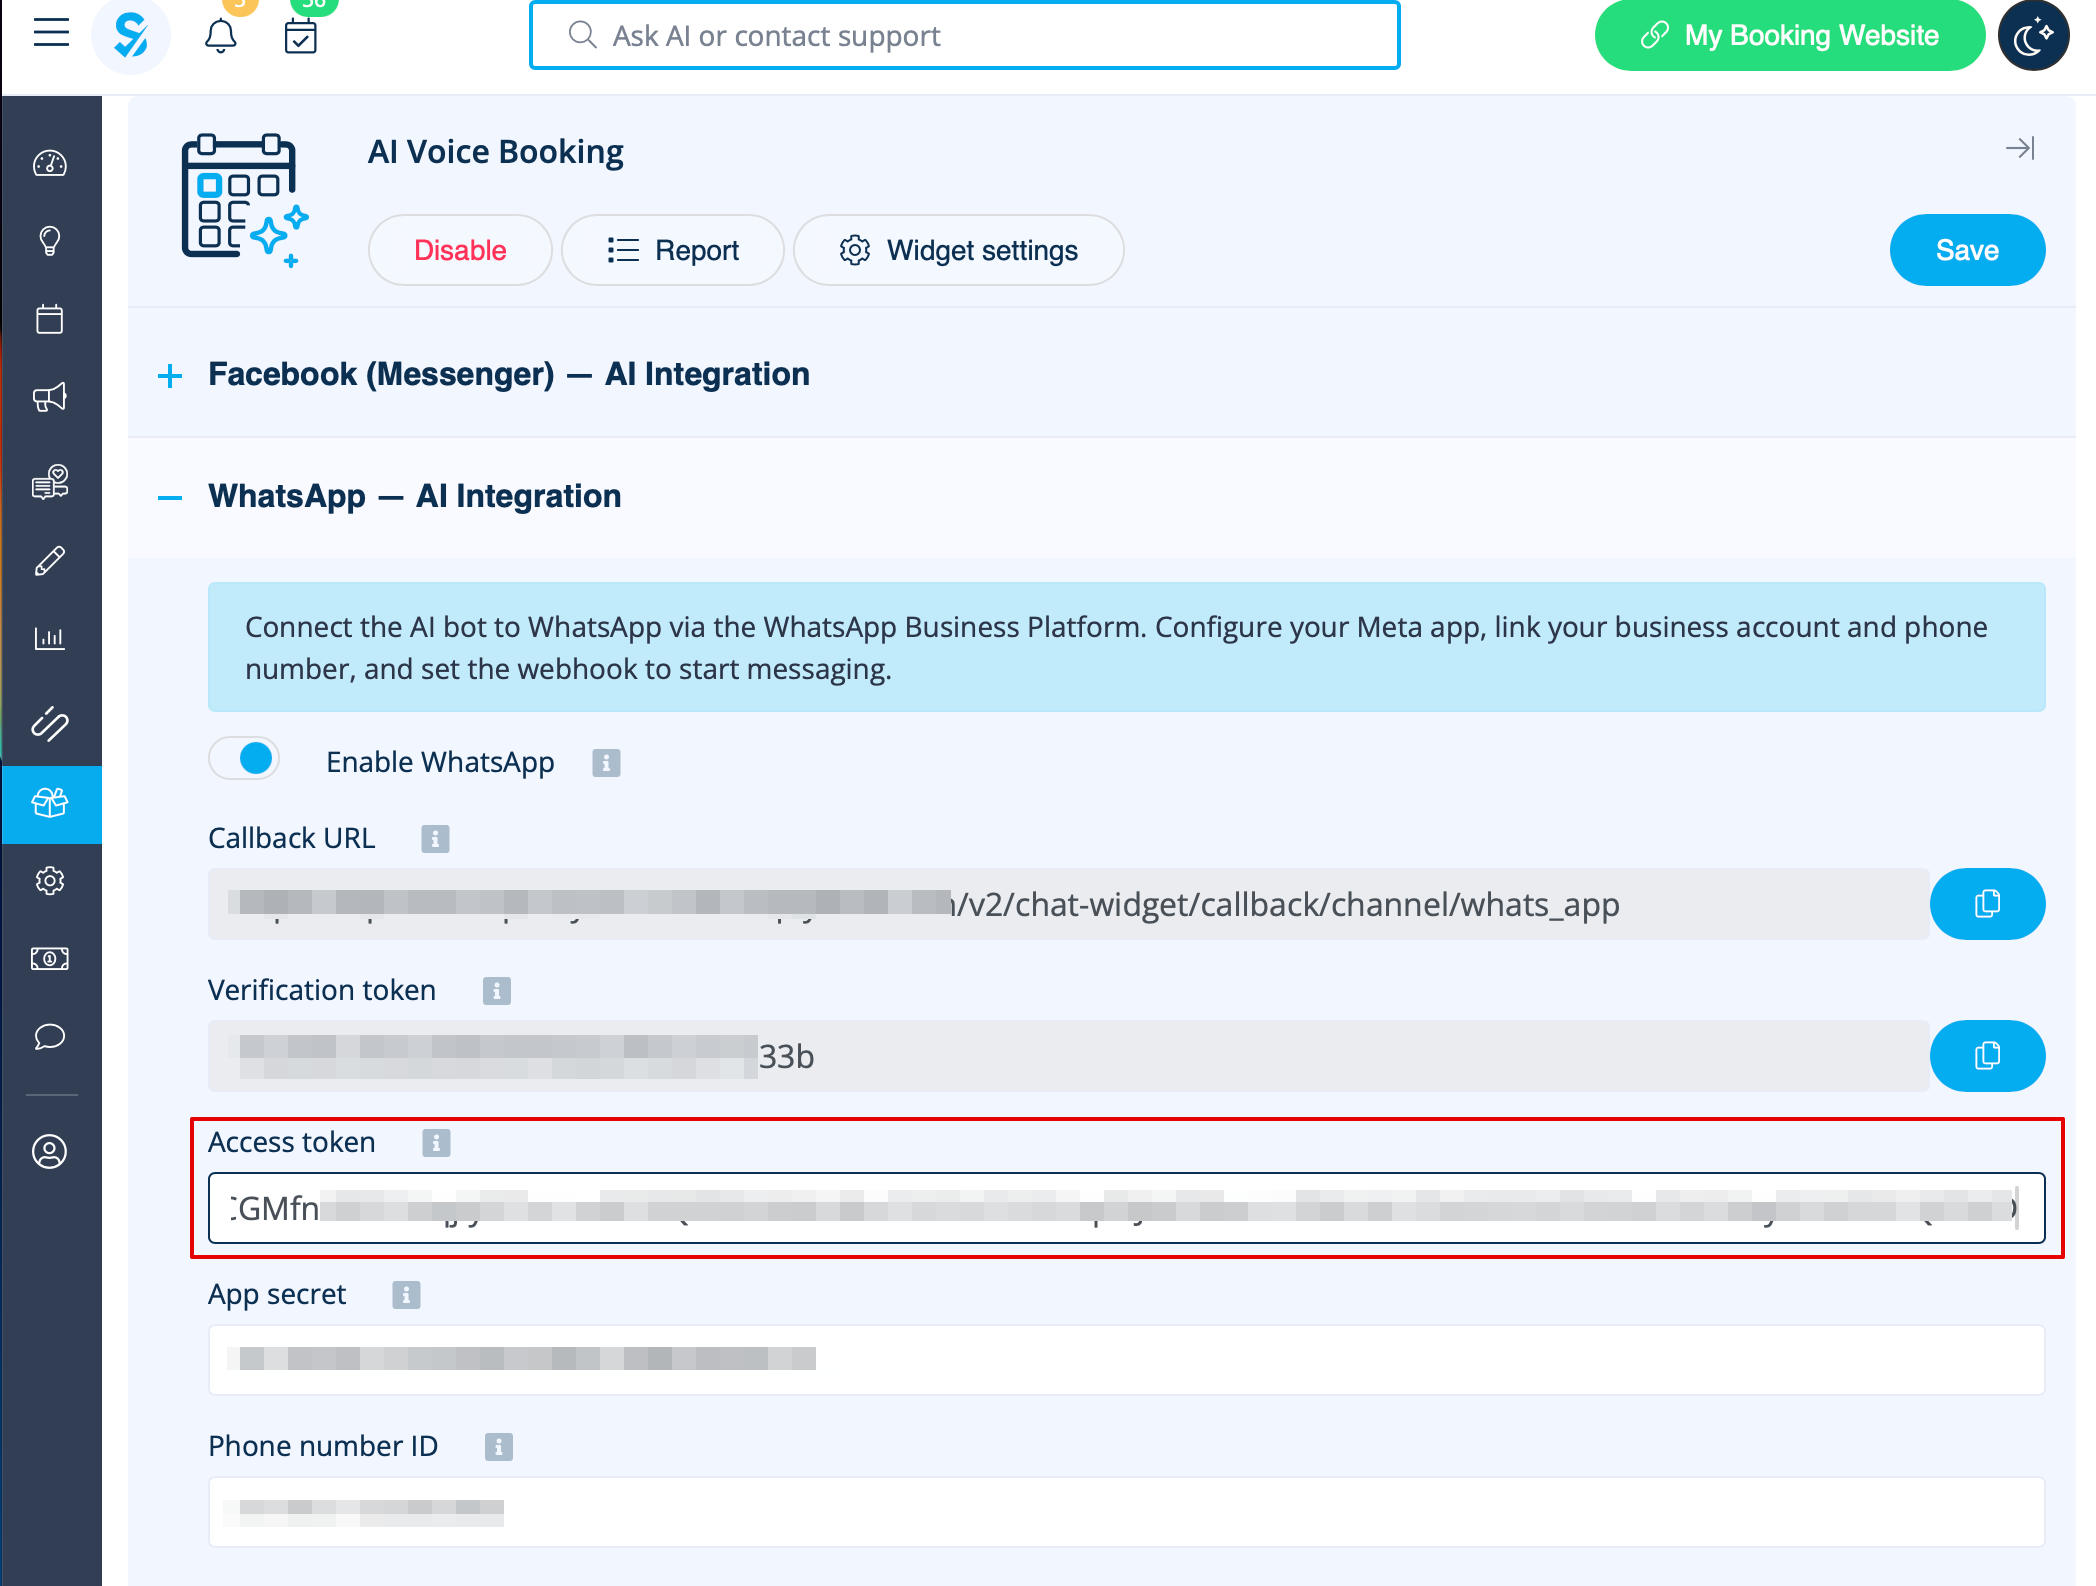
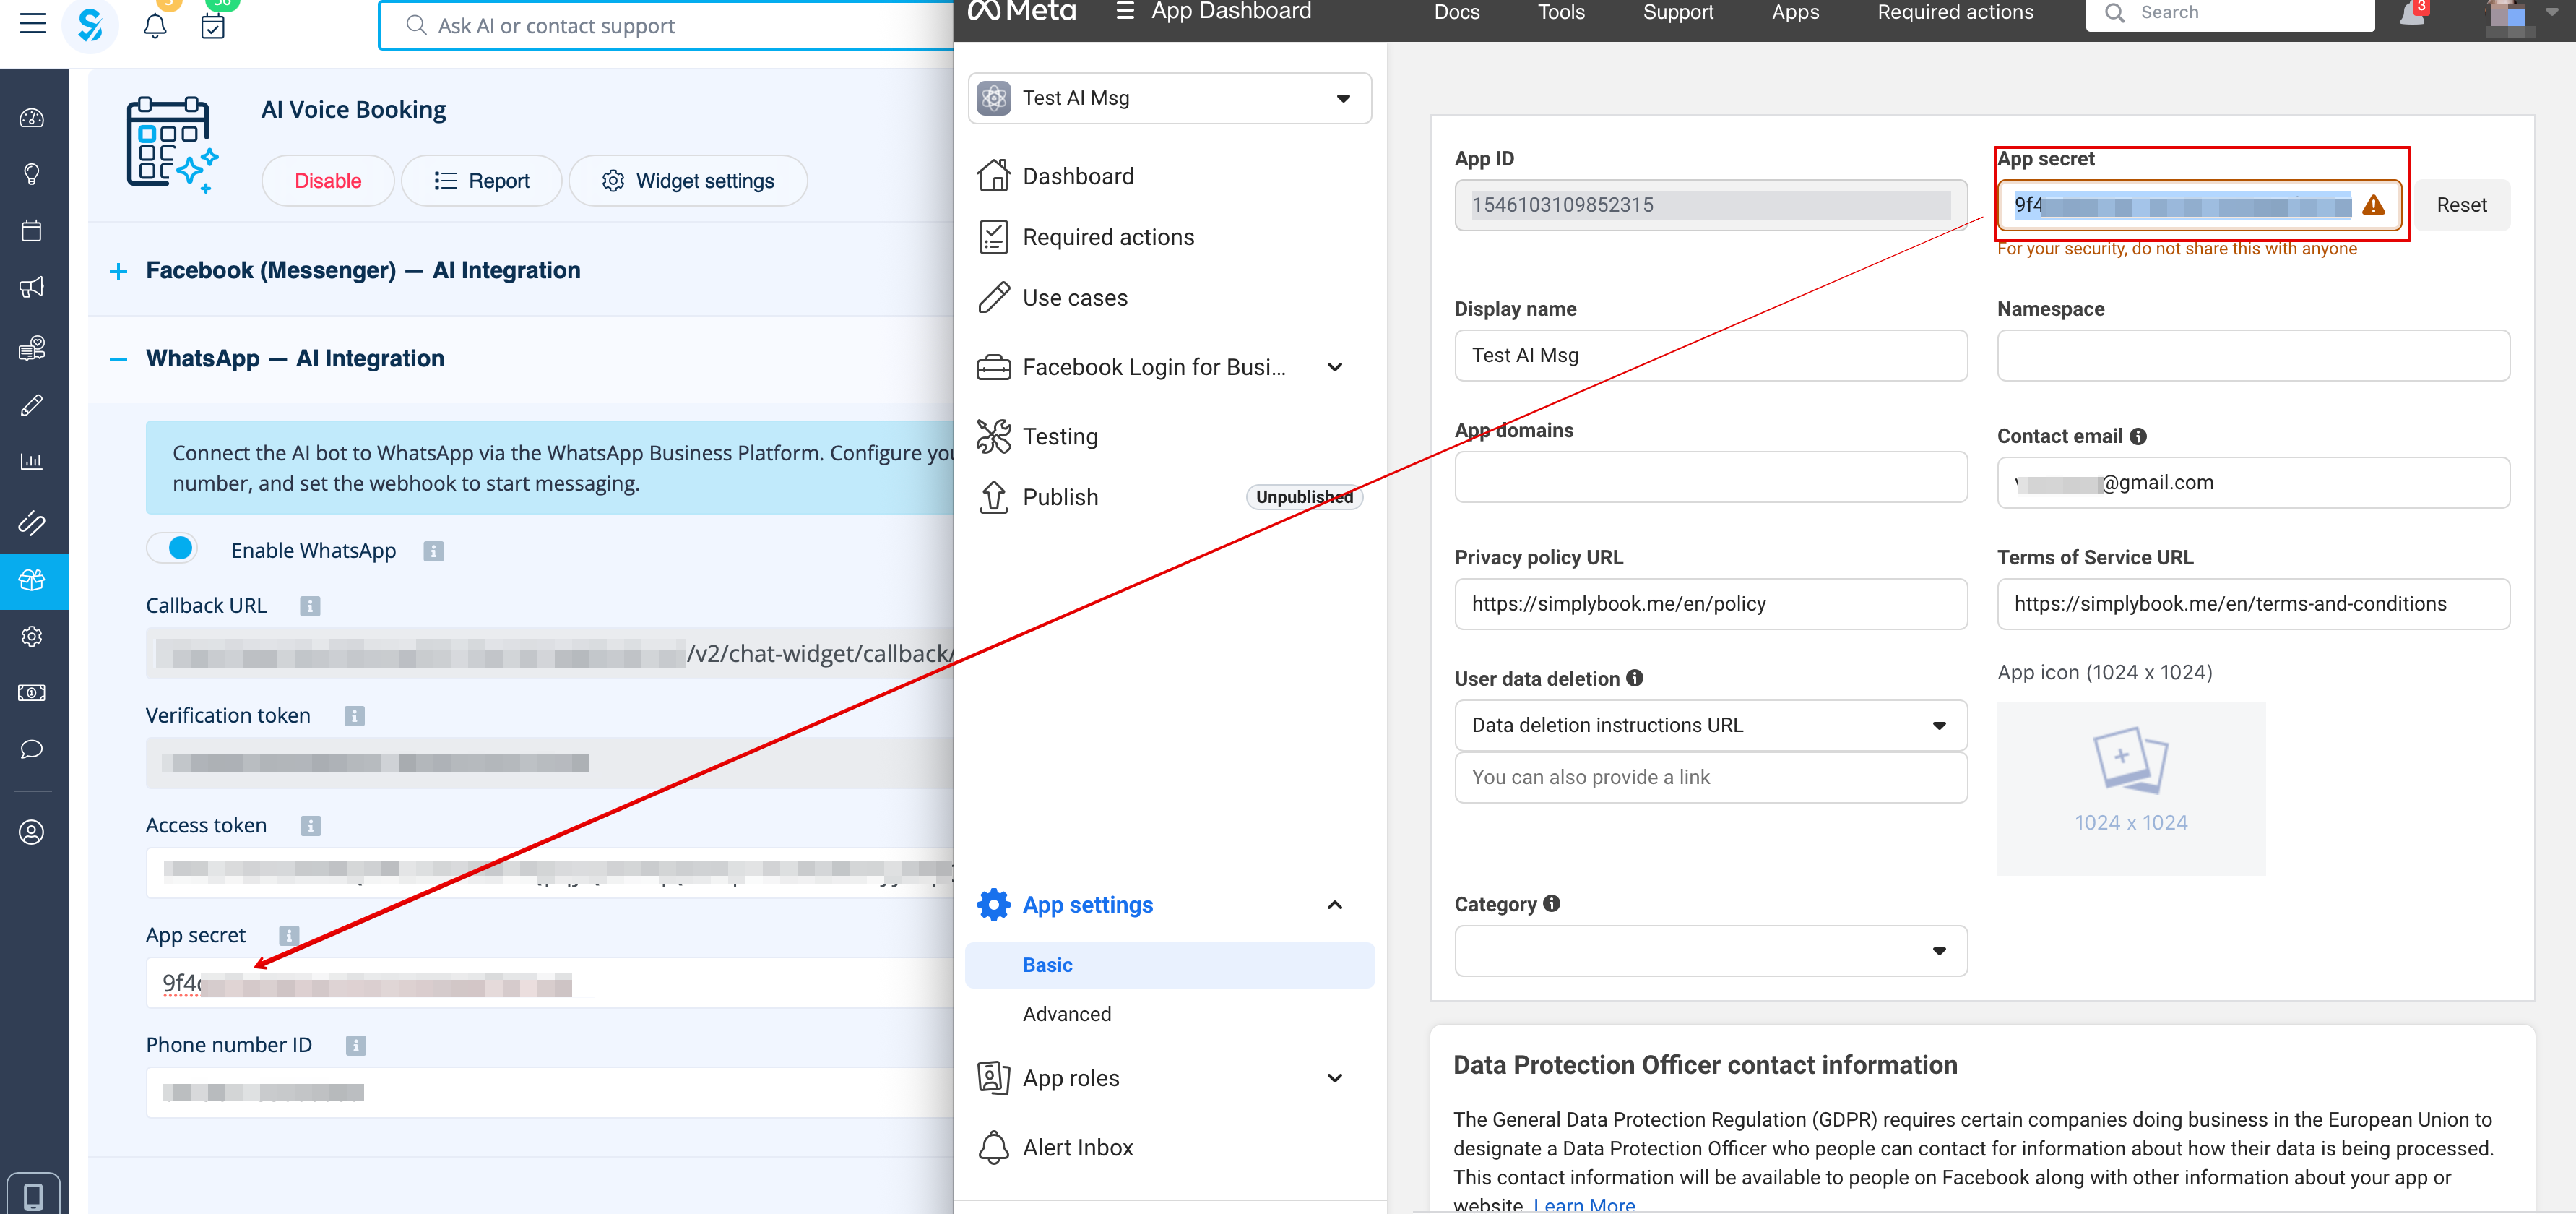
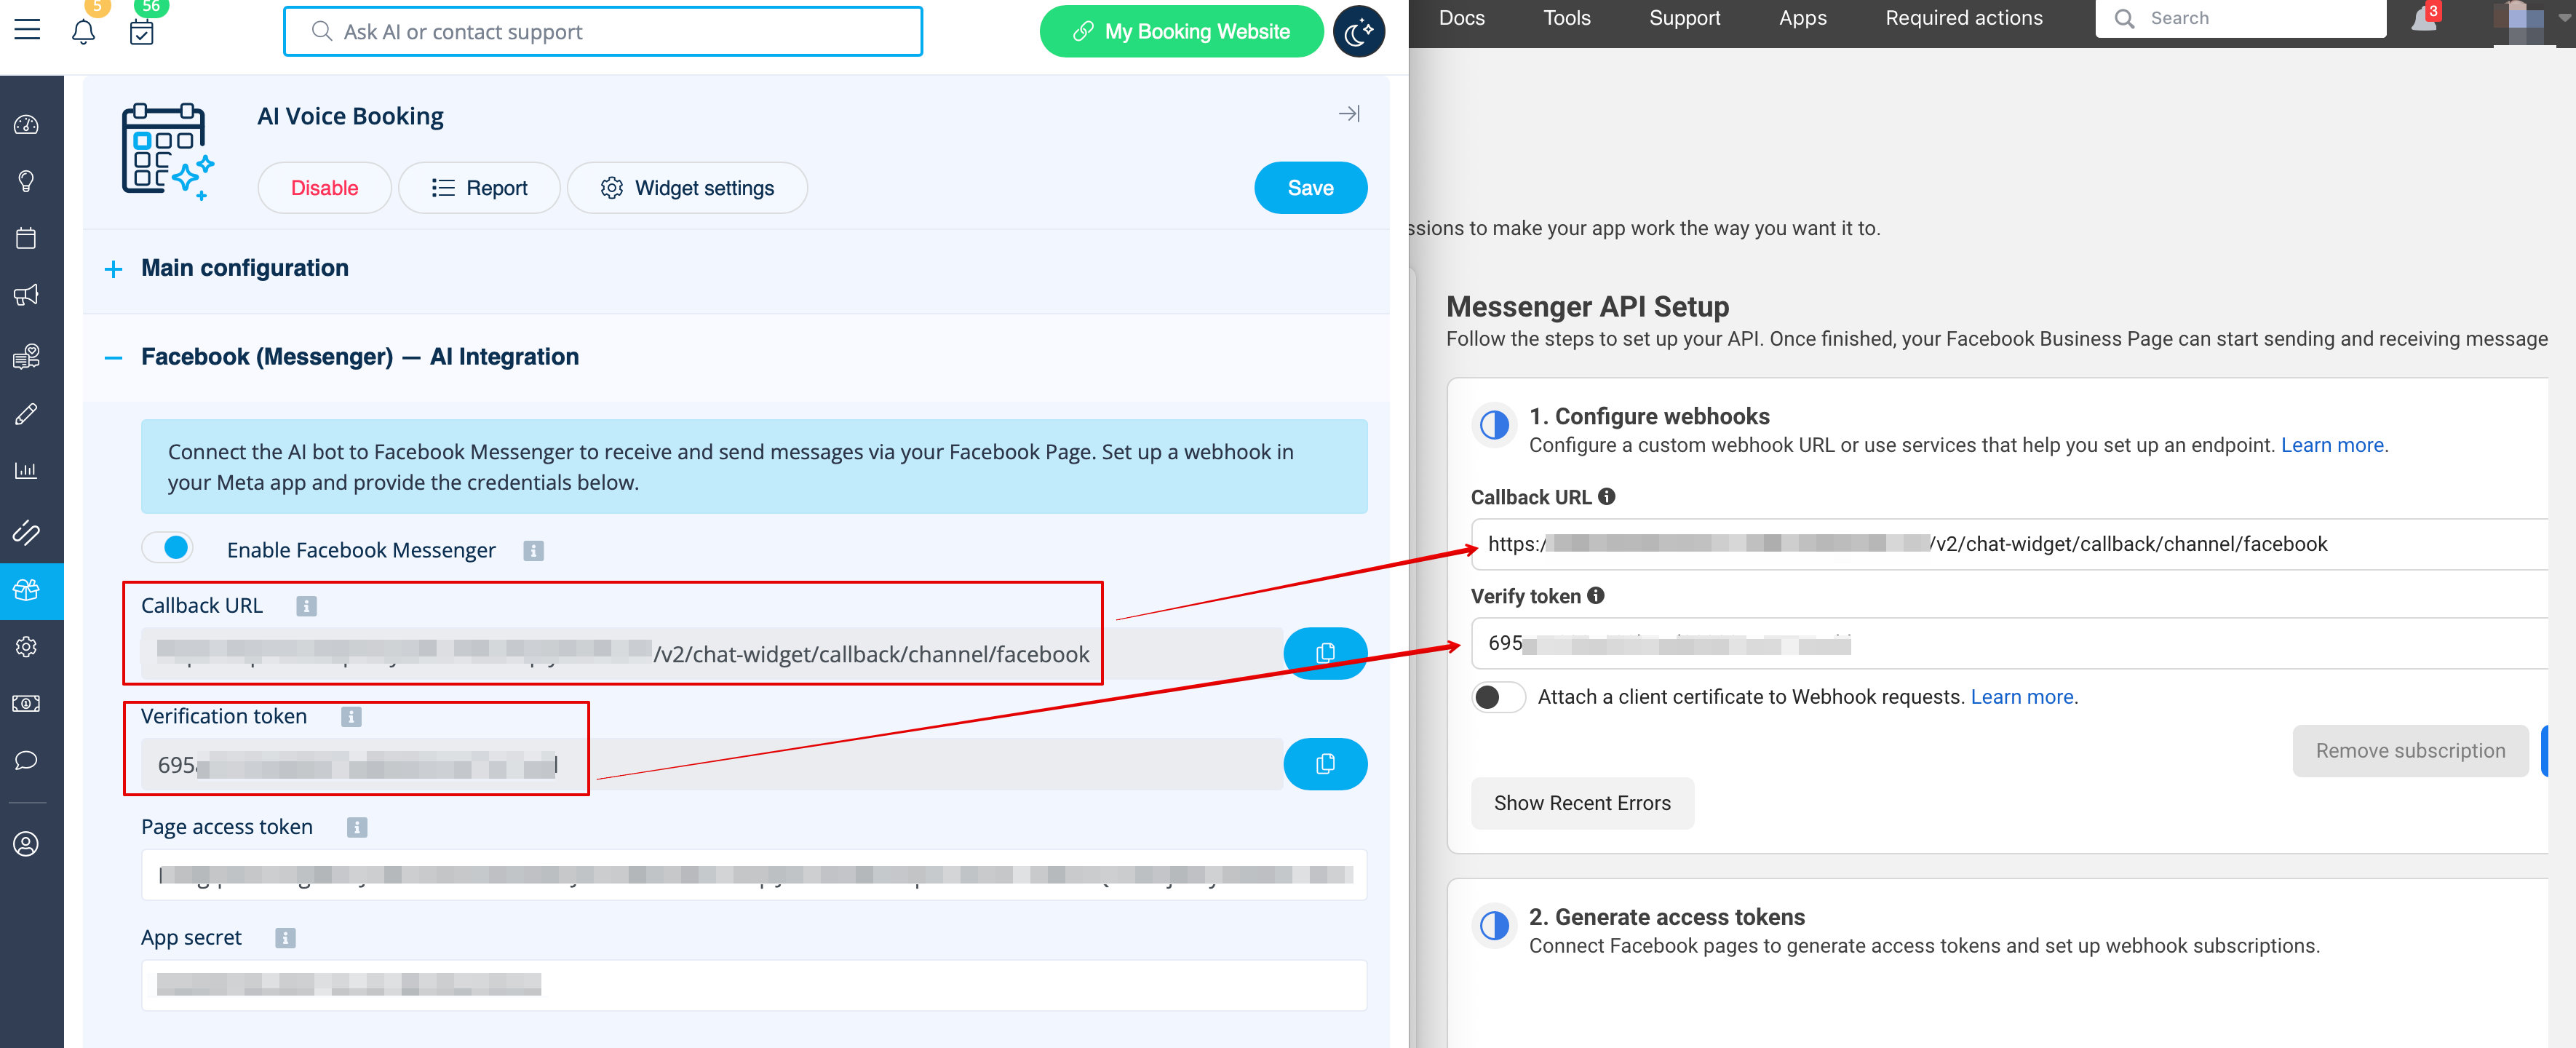
11. Copy “Callback url” and “Verification token” from your SimplyBook.me Account -> Custom features -> AI Voice booking and paste them to the corresponding fields in the app. Verify and save:
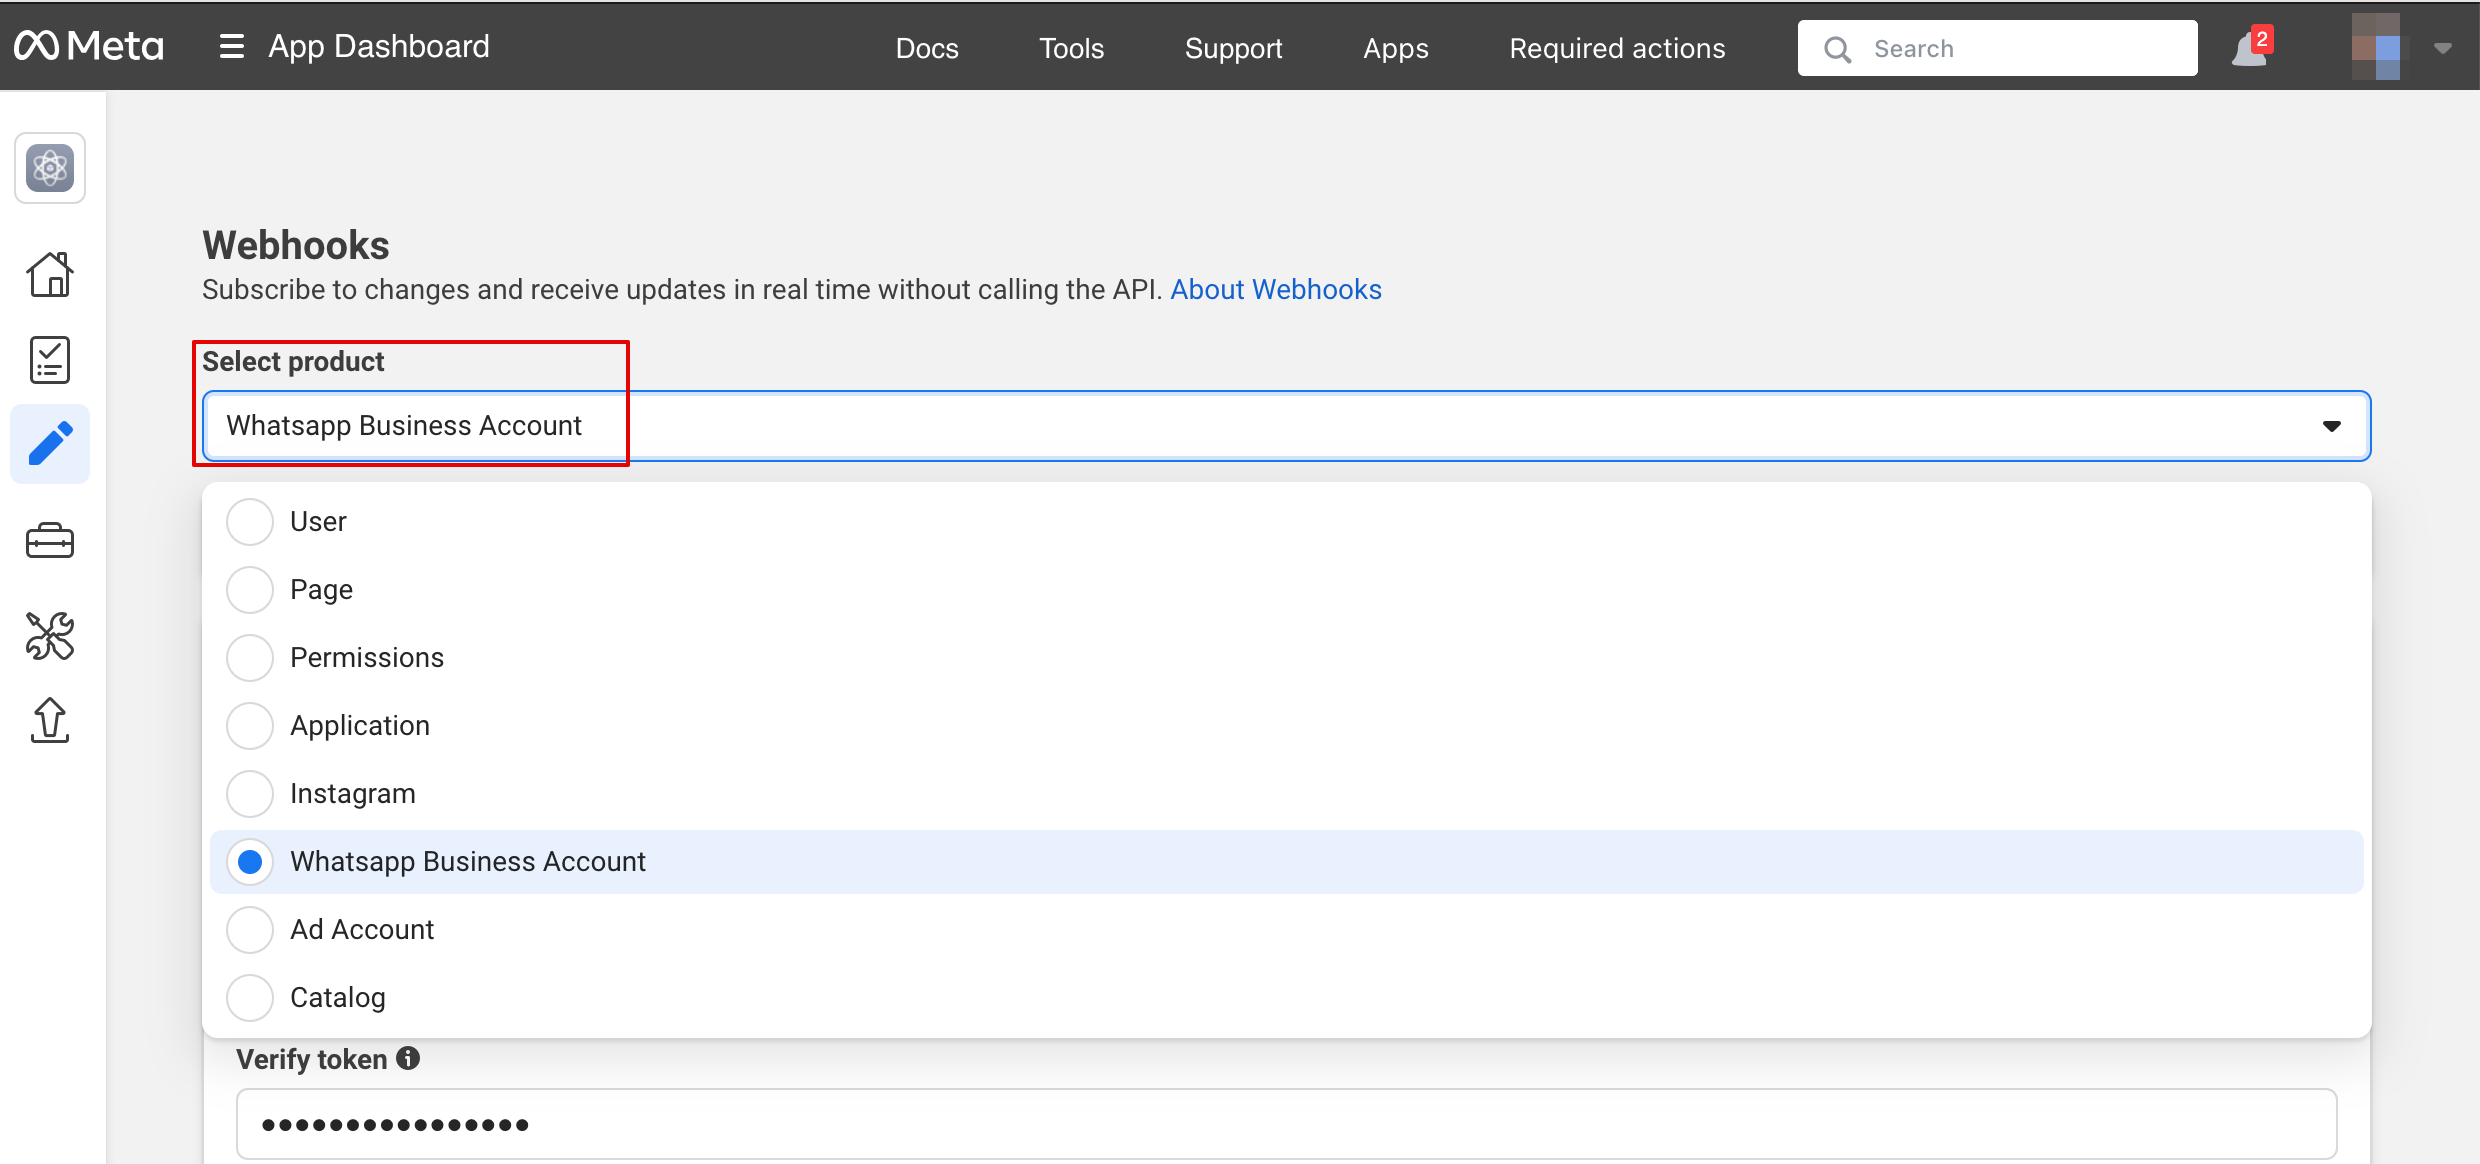
12. On the next step in the “Select product” please choose “WhatsApp Business Account”:
13. Then enable necessary webhooks: messages and calls (in case you want to accept calls):
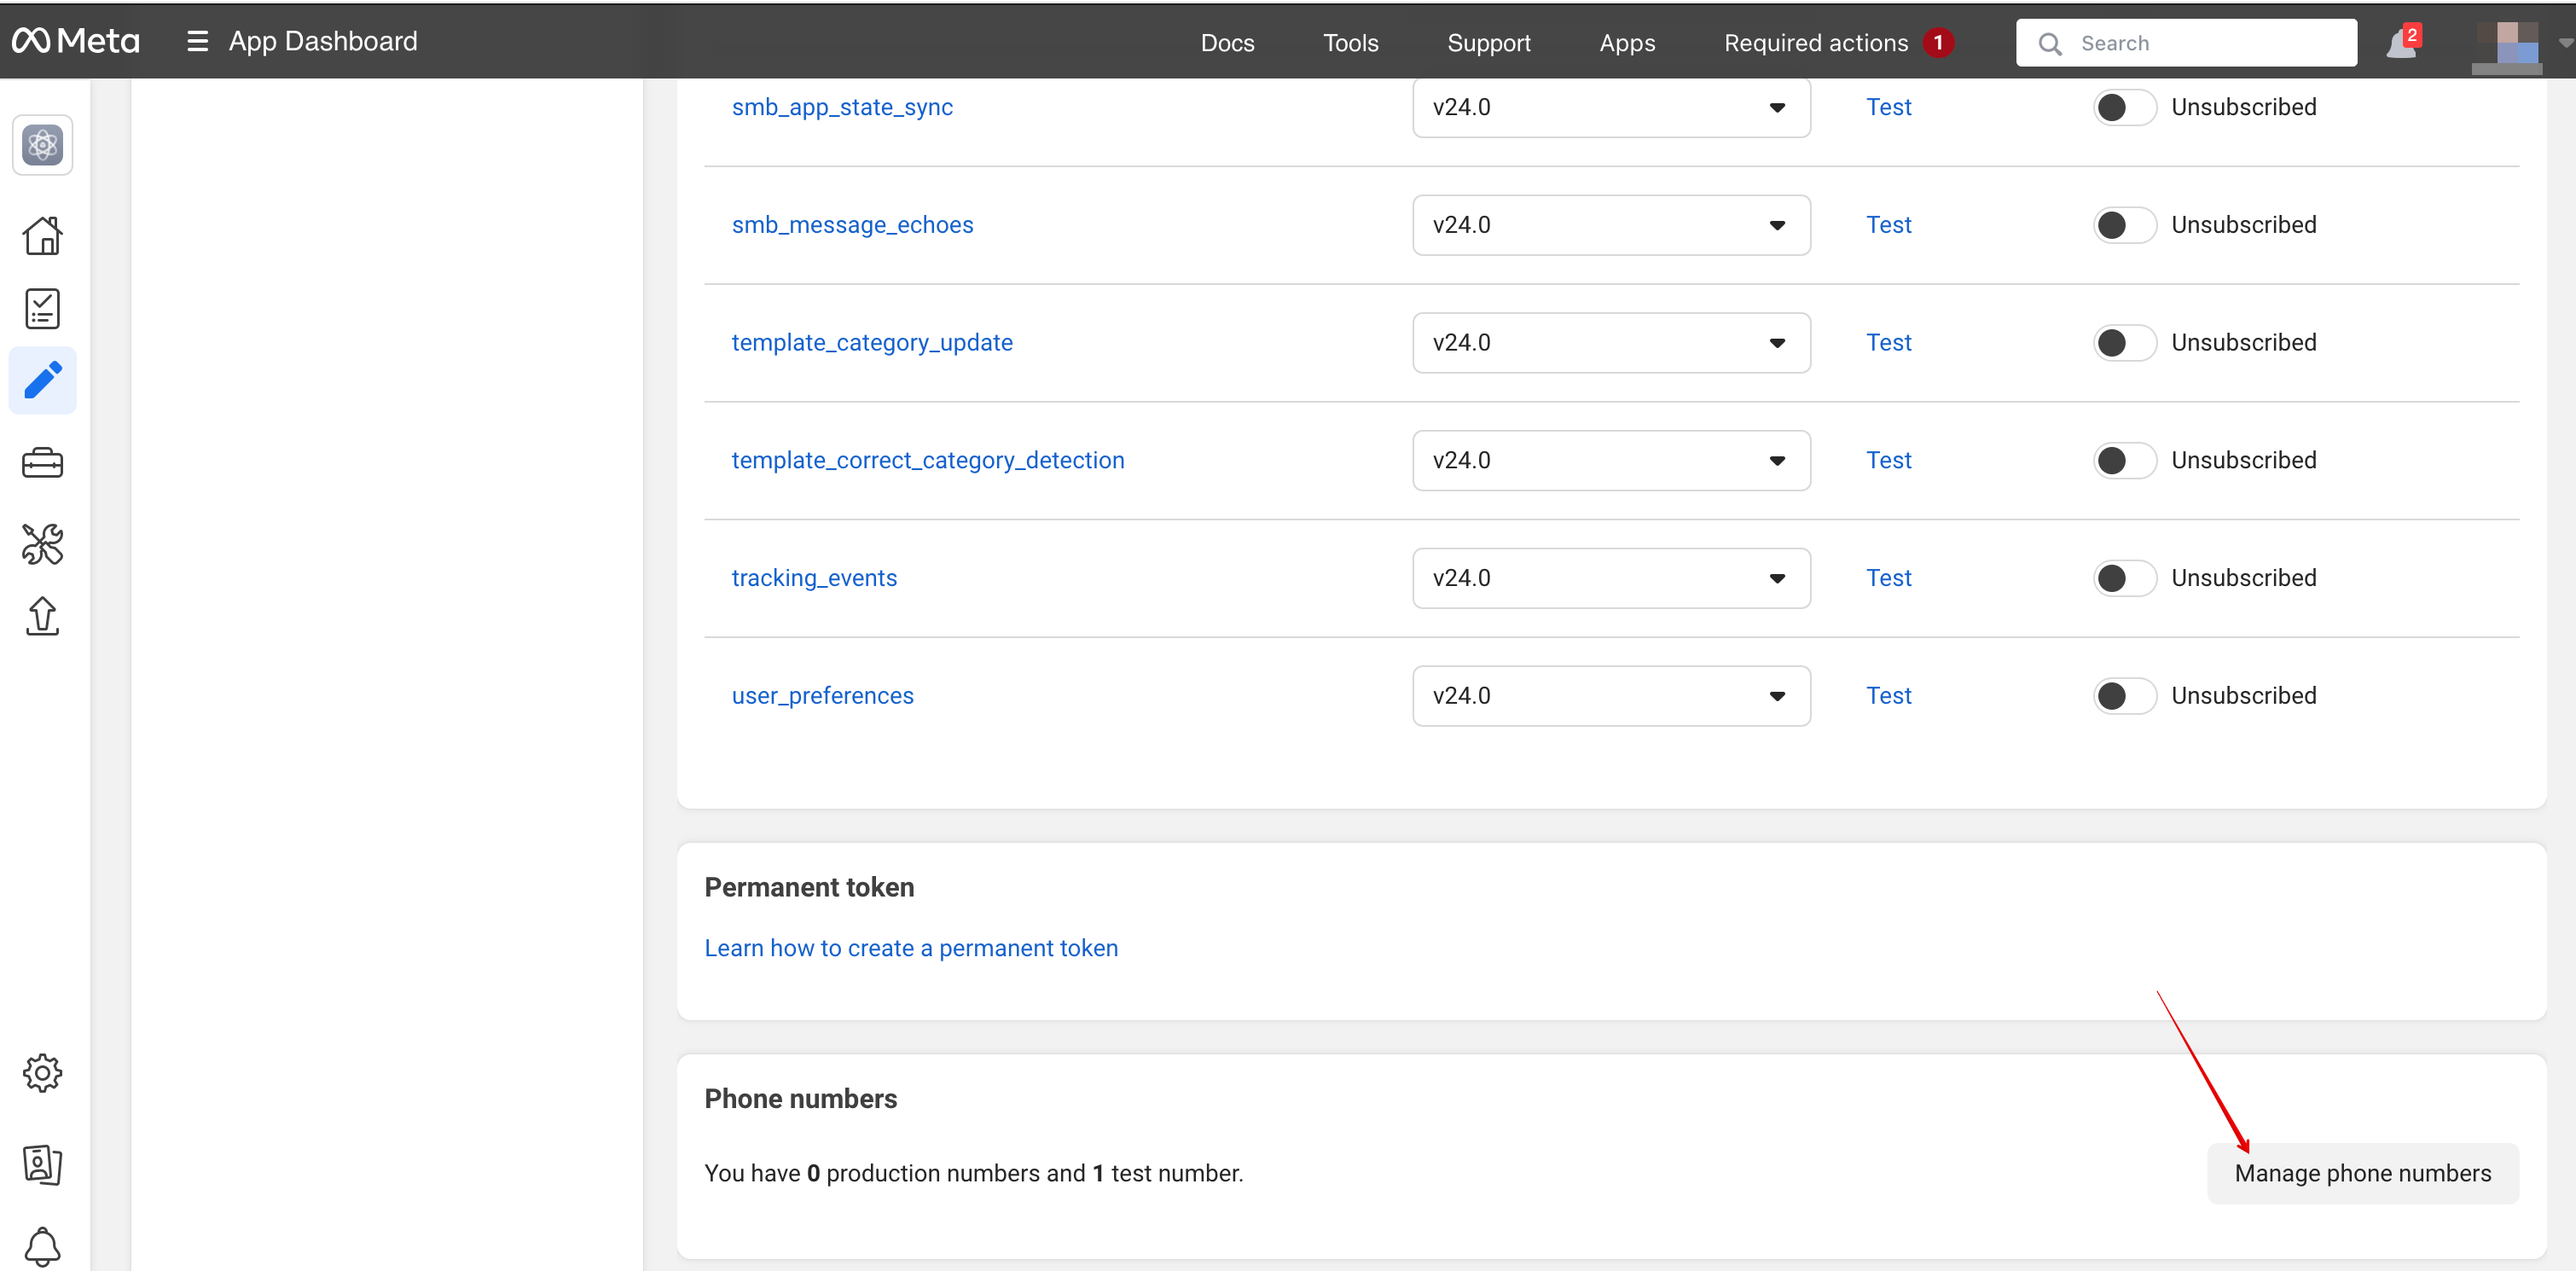
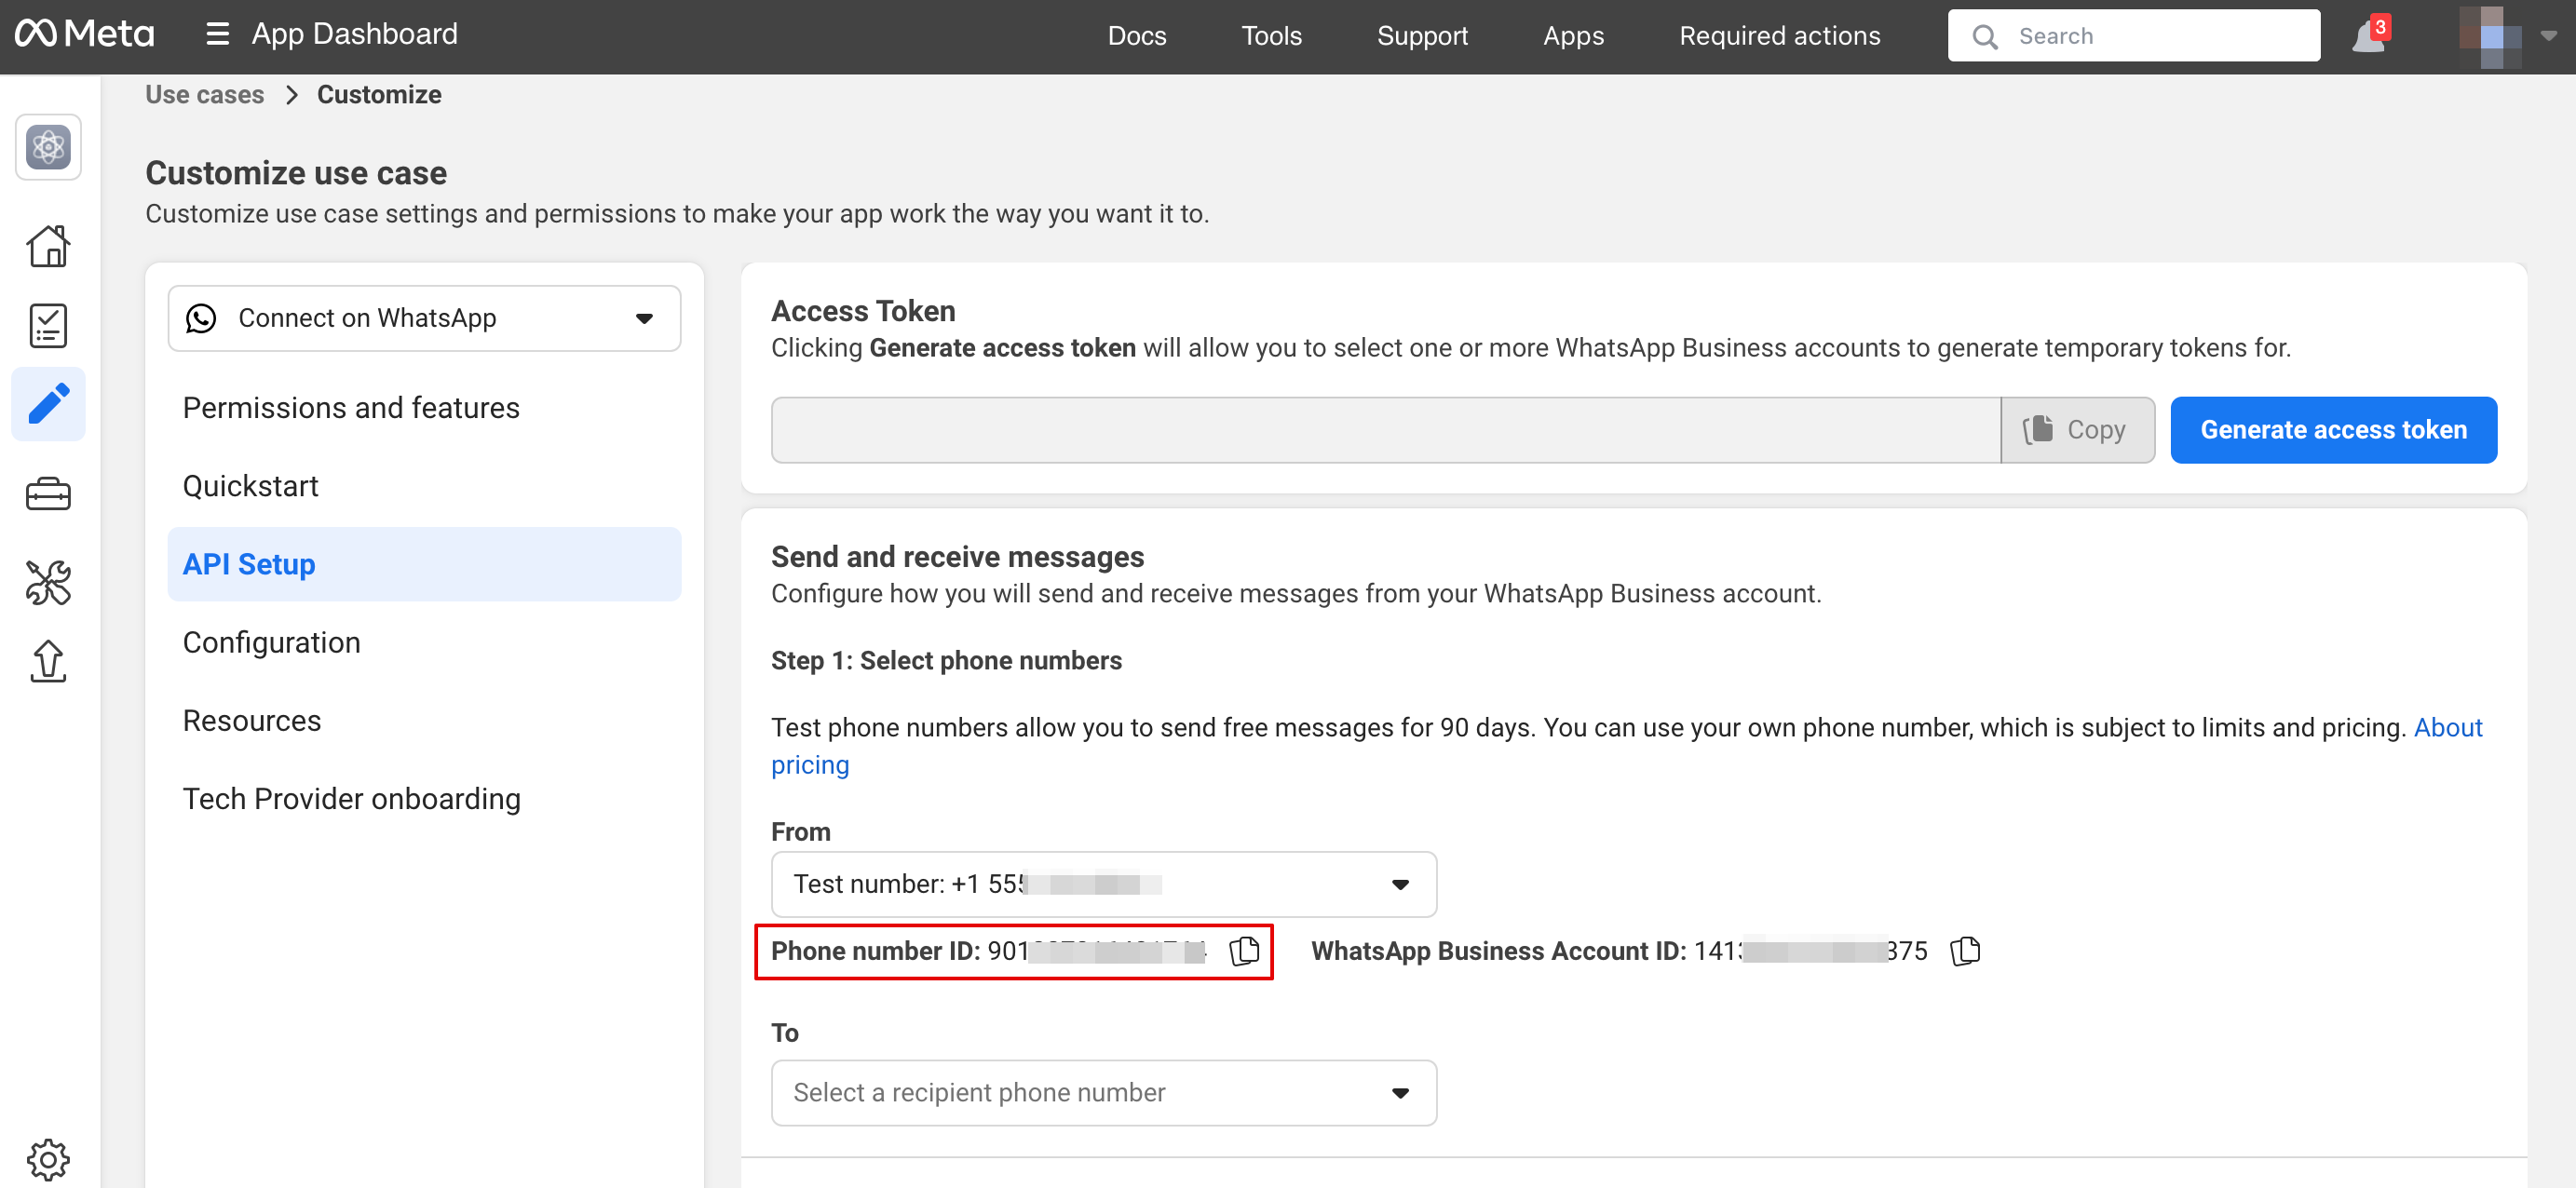
14. Now you can add phone numbers and payment method (because FB wants to charge you for messages).
Copy the phone number id from Facebook and paste it to the corresponding form in your Simplybook.me account.
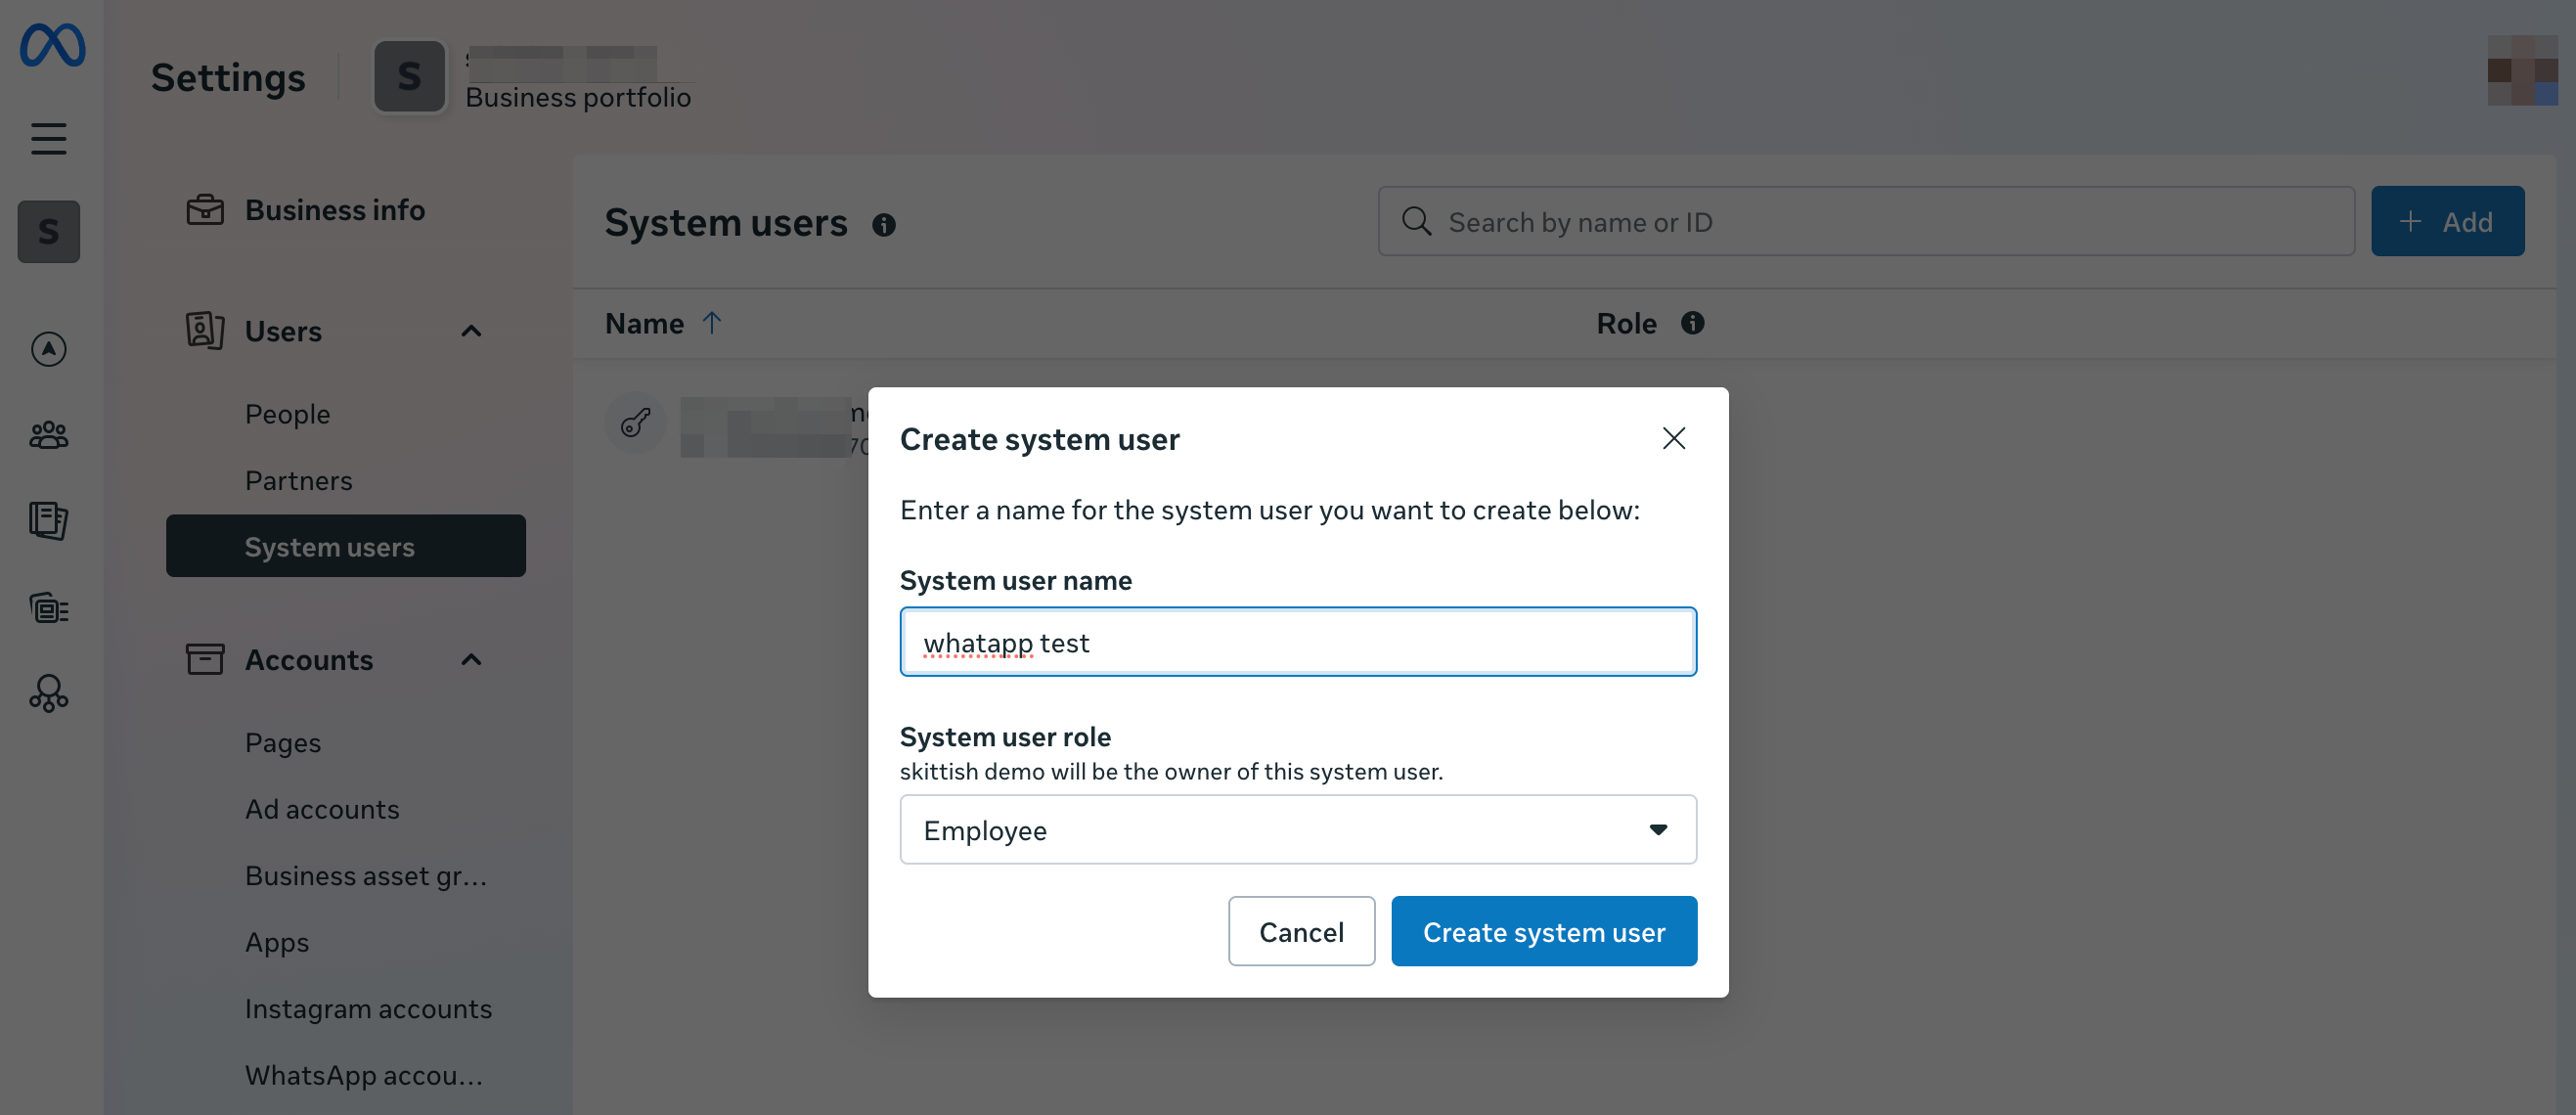
15. Now you need to create a system user. Please go to the Facebook Business profile and open System users tab:

16. Click Add new user and fill user details:
17. Then navigate to Assign Assets:
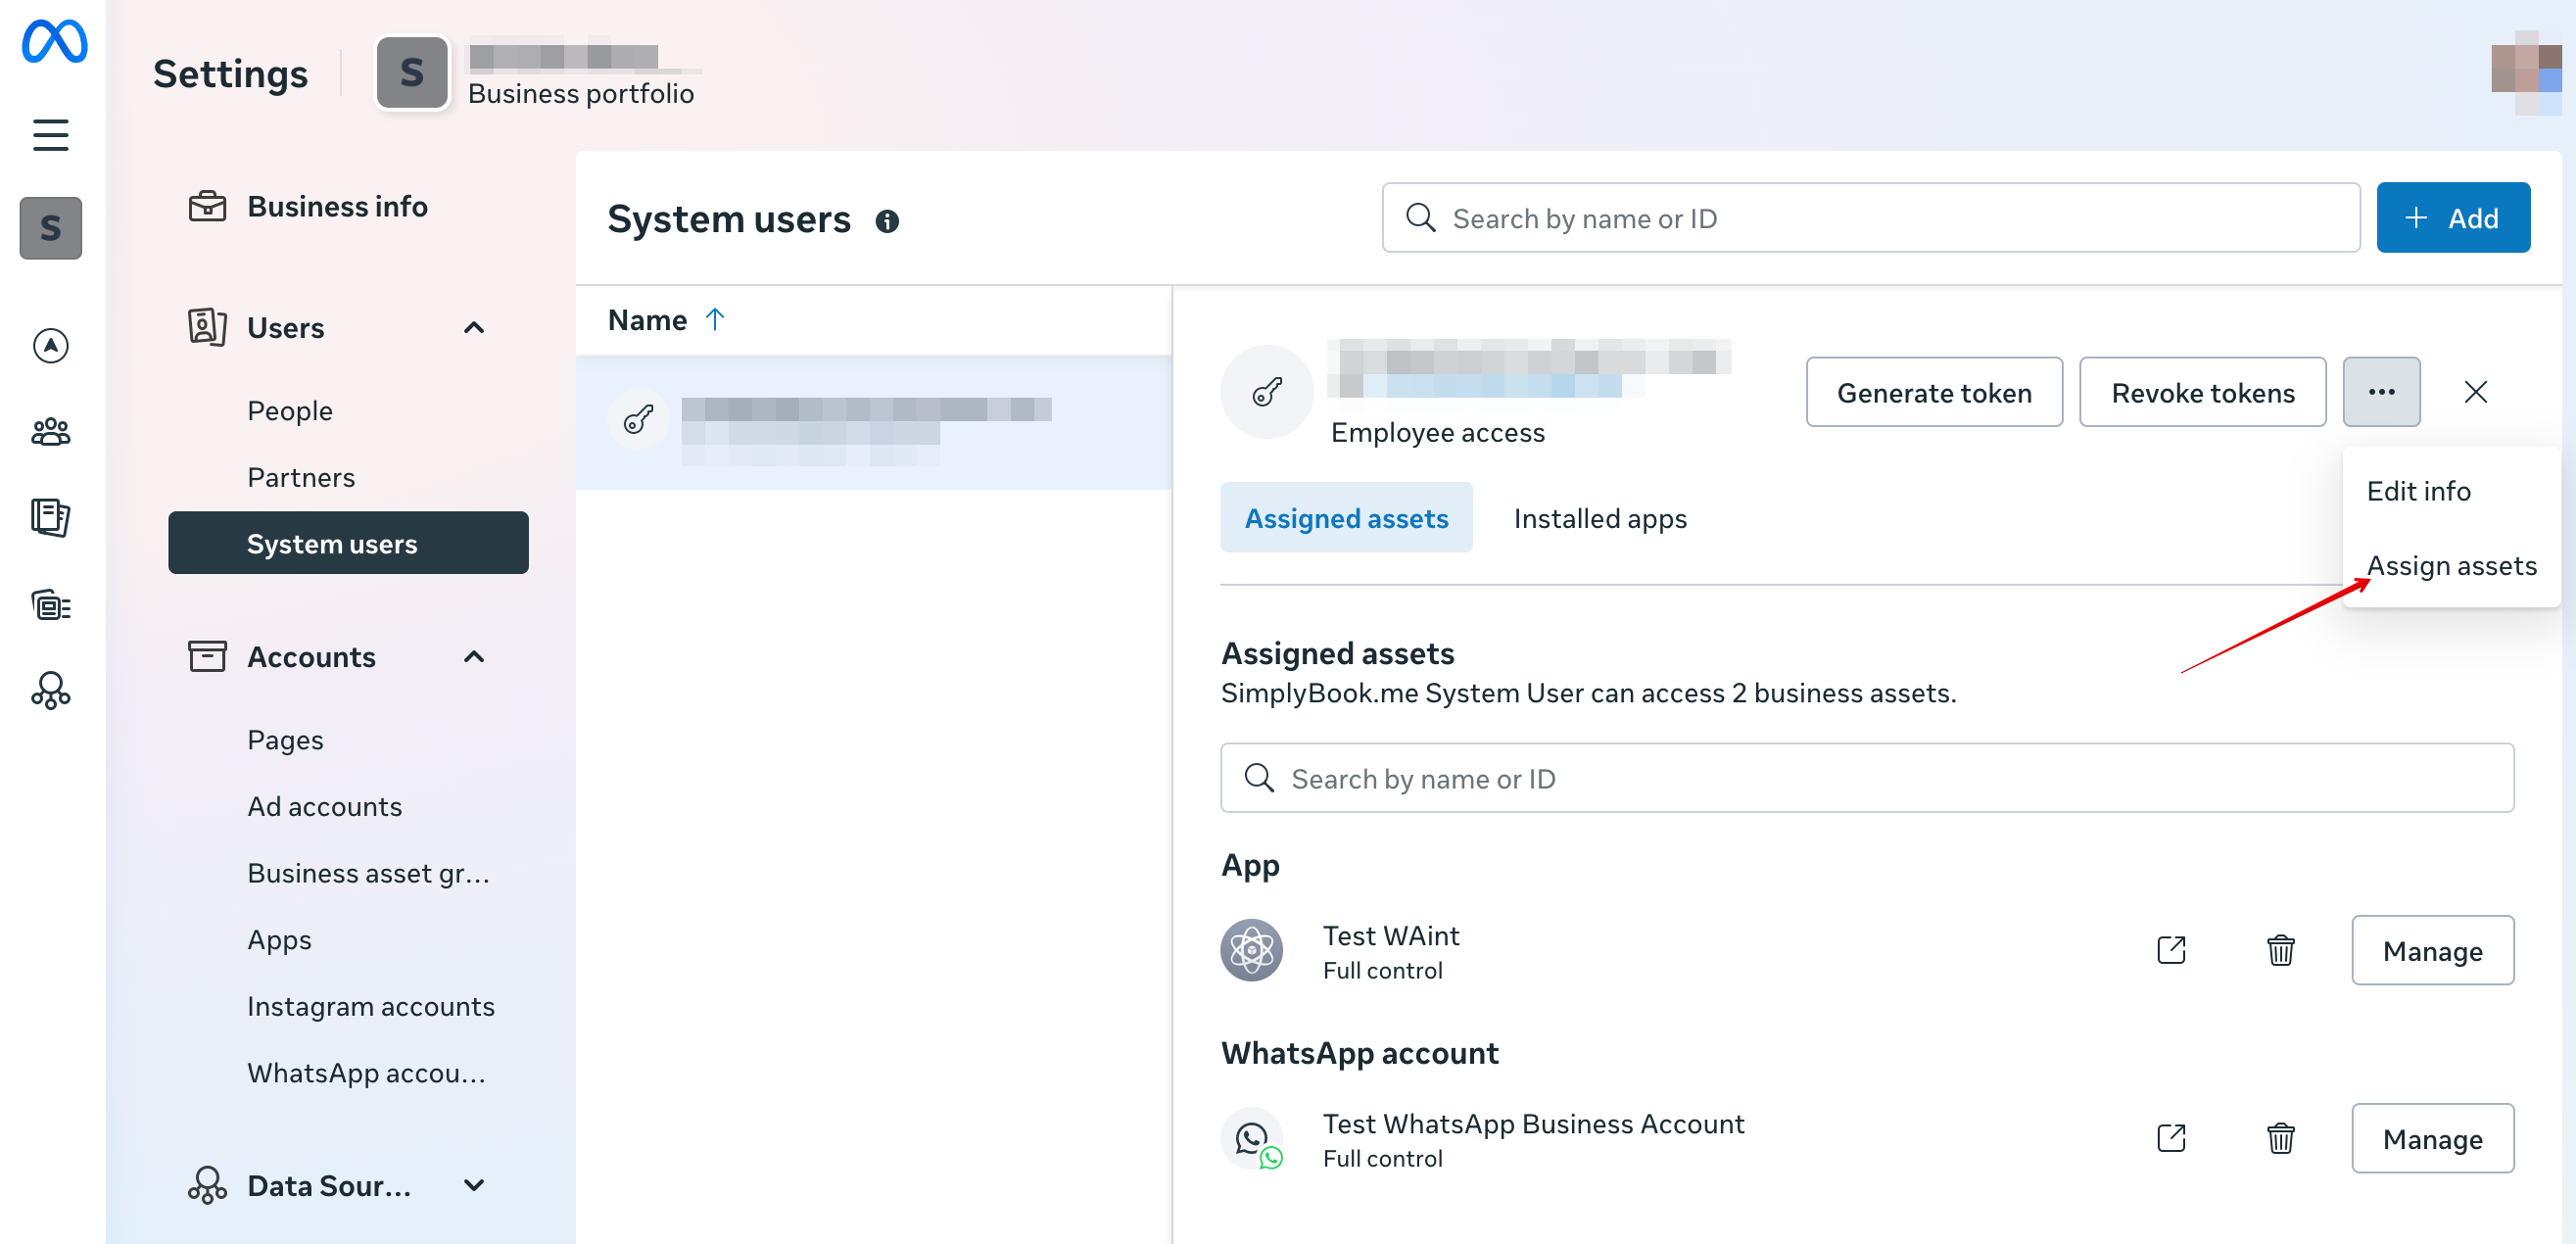
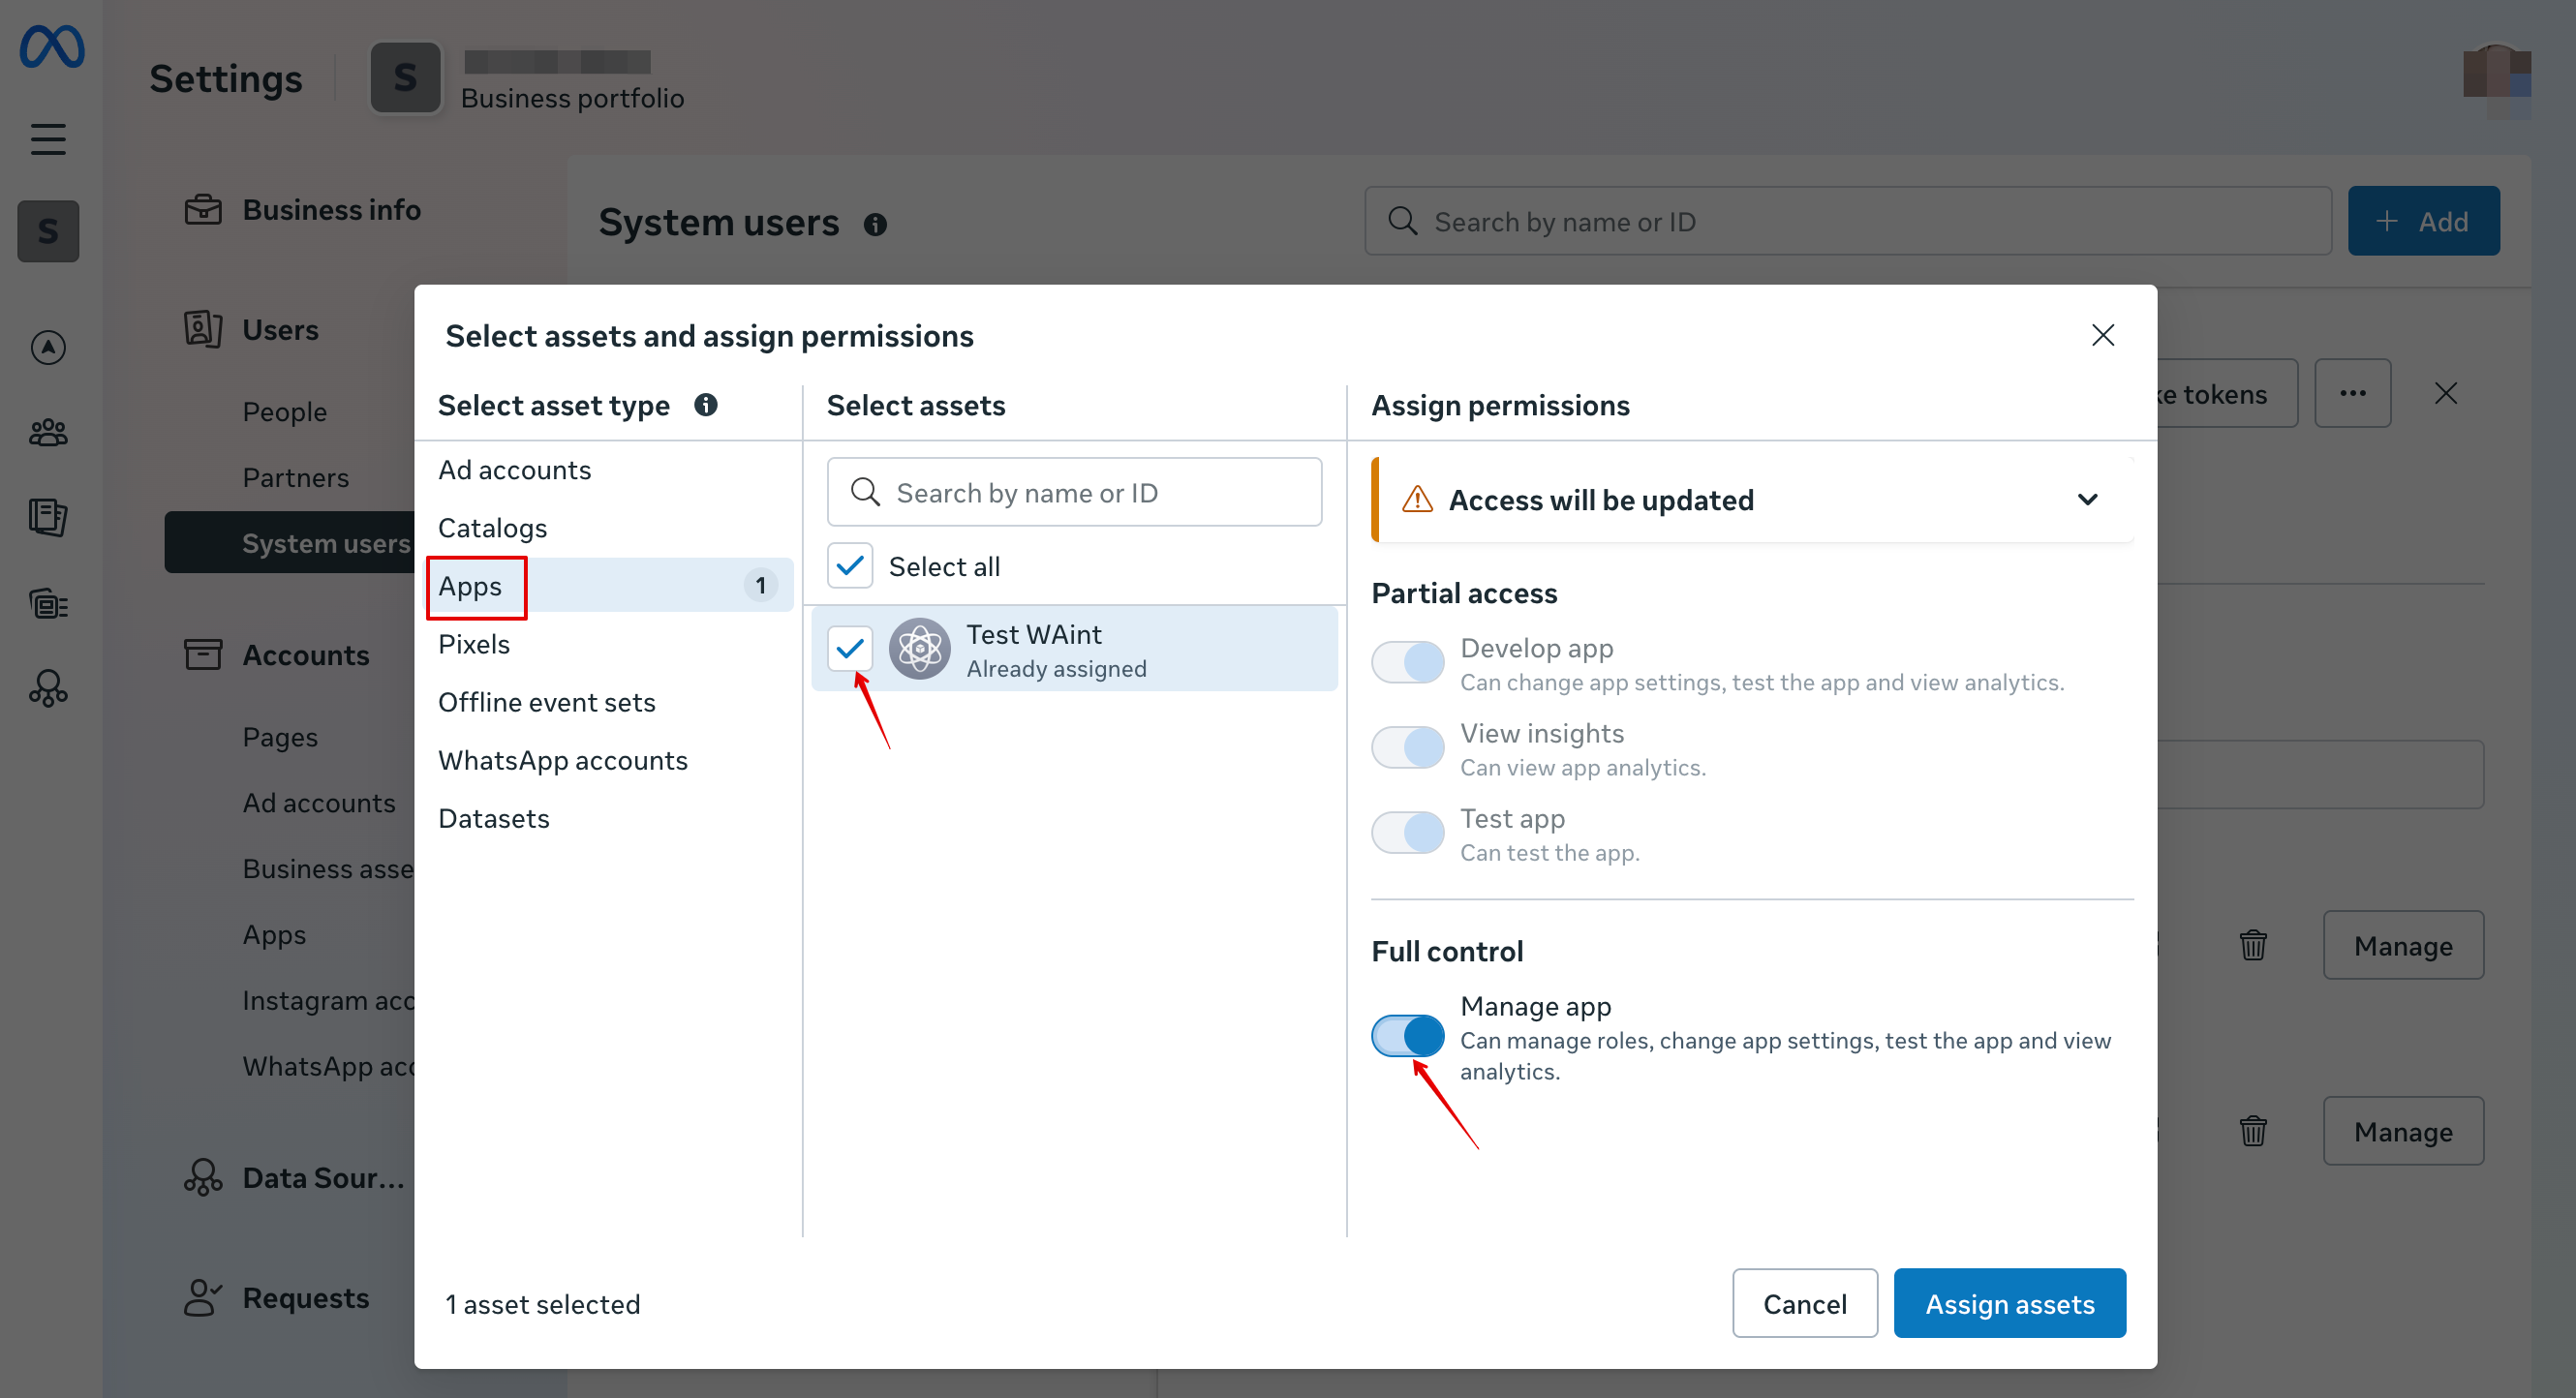
18. In Apps tab select your app and enable “Manage app” permission:
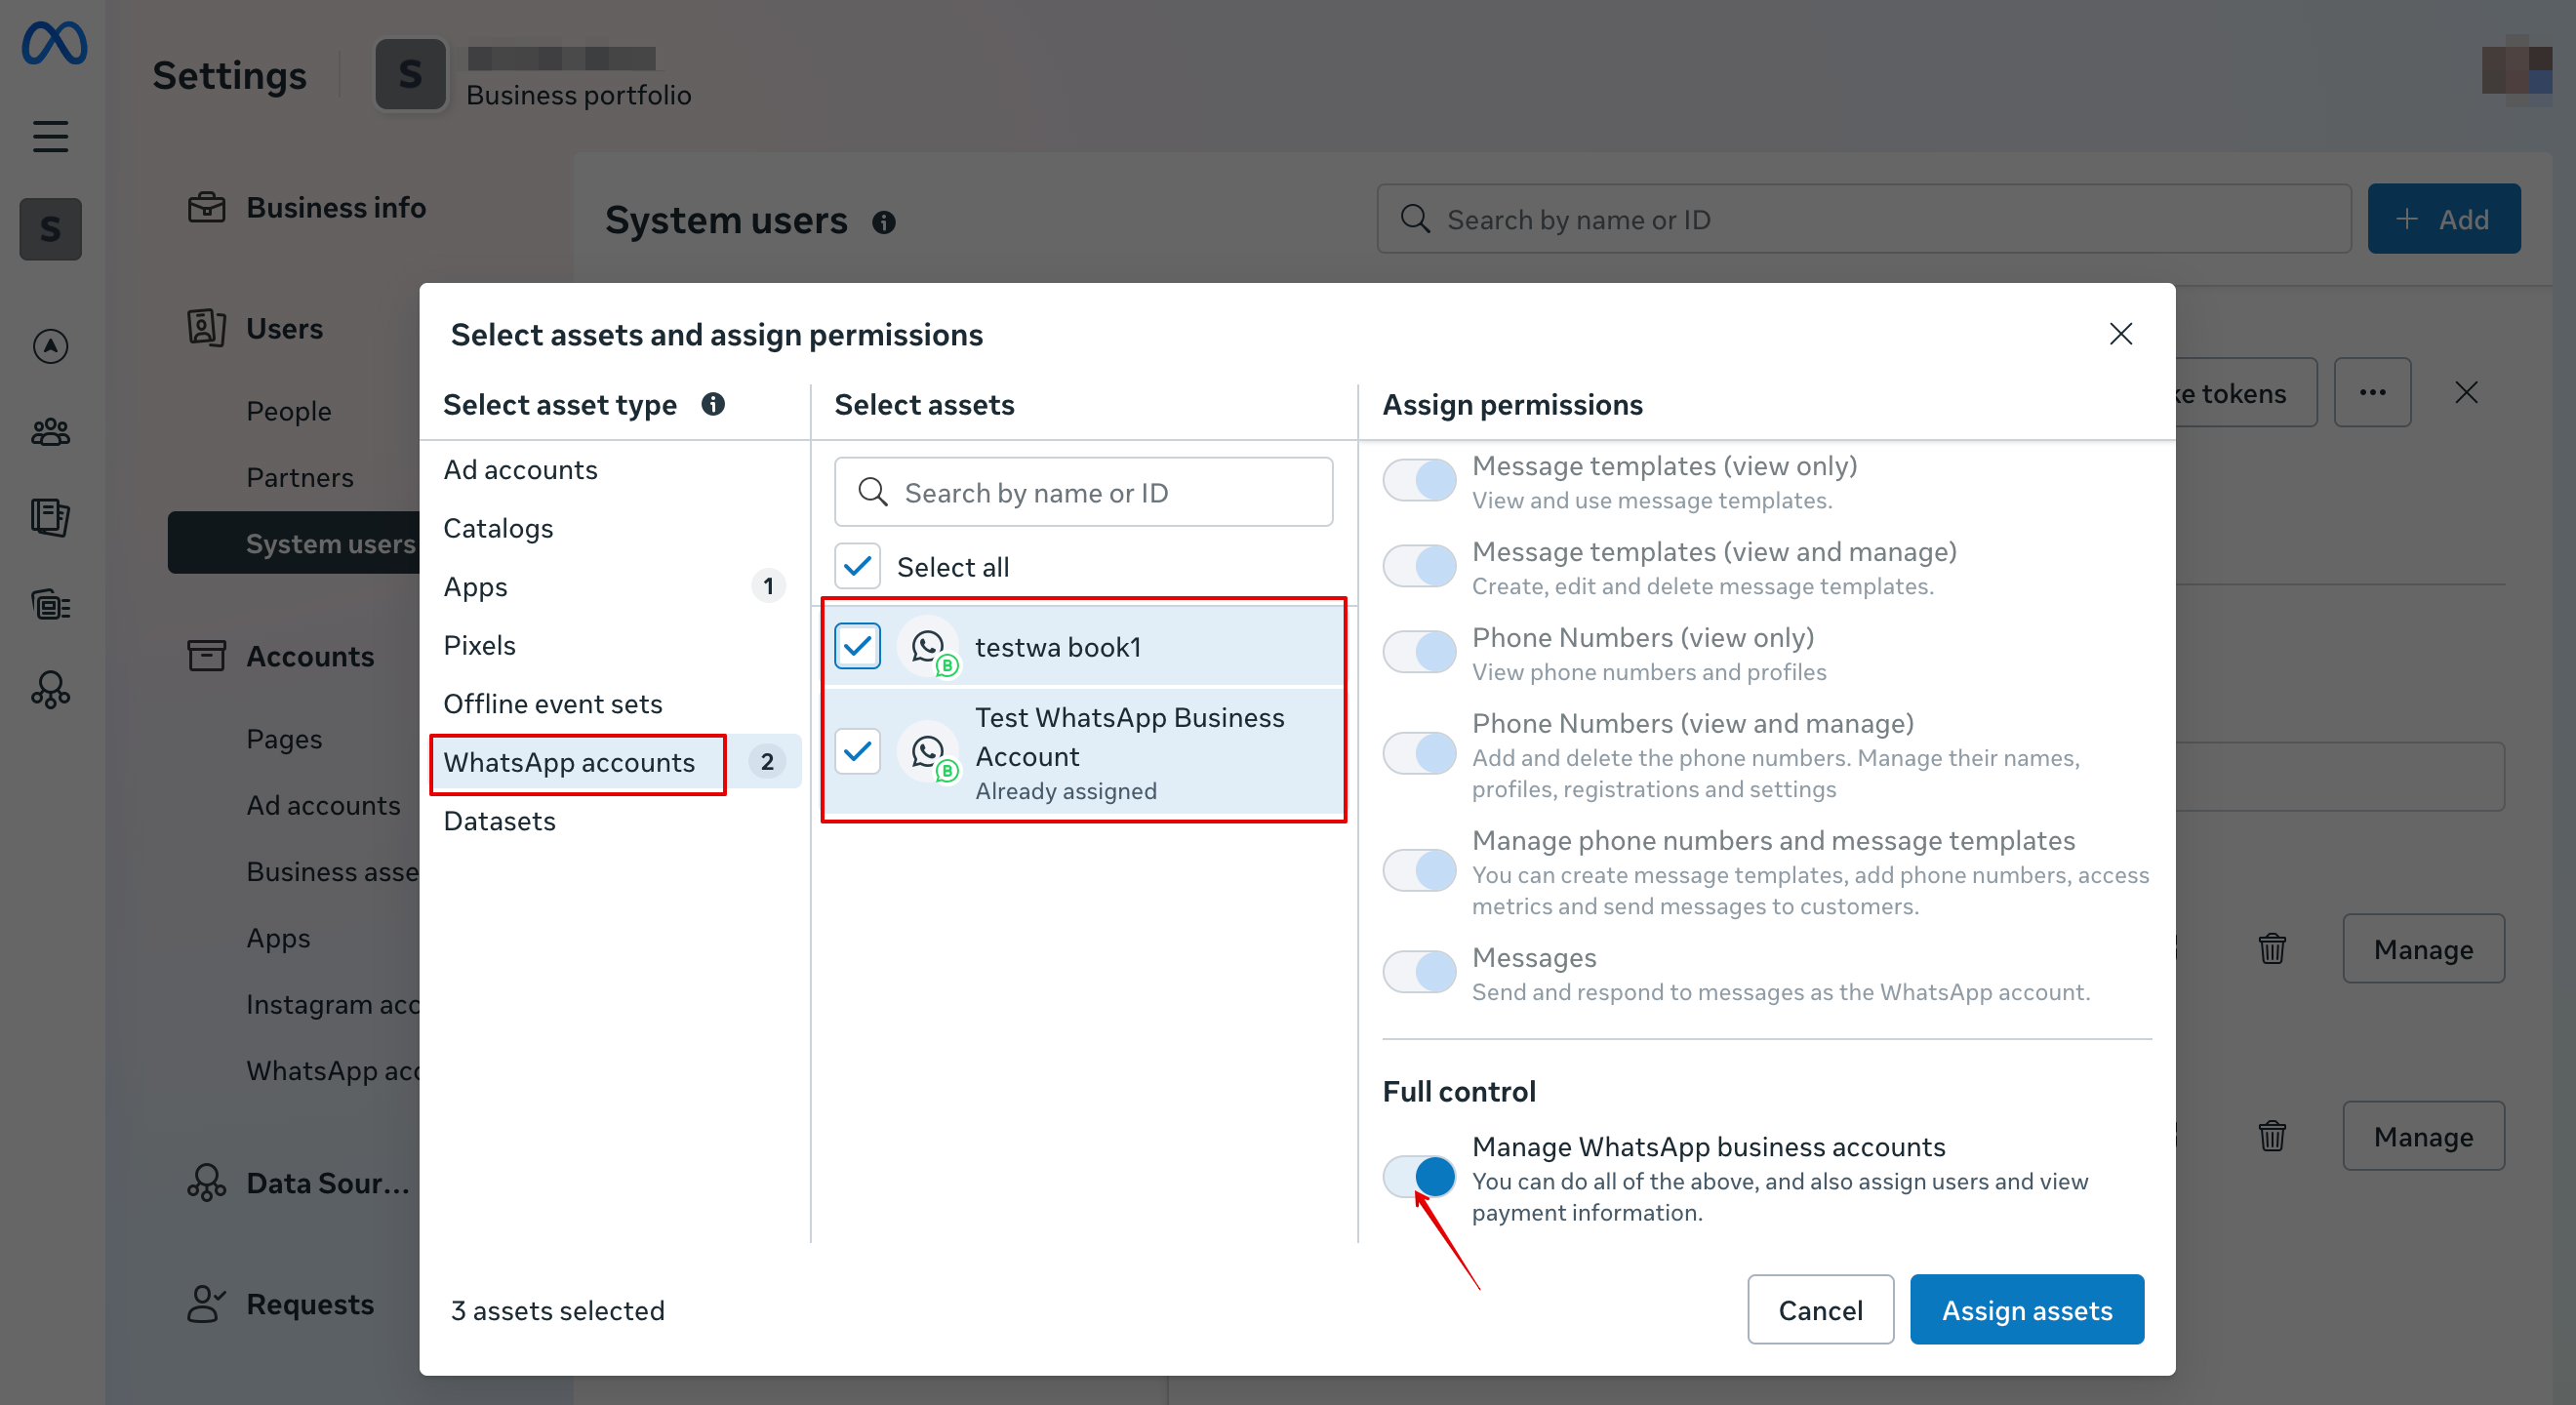
19. In WhatsApp accounts tab select your WhatsApp accounts and enable Manage WhatsApp business accounts permission:
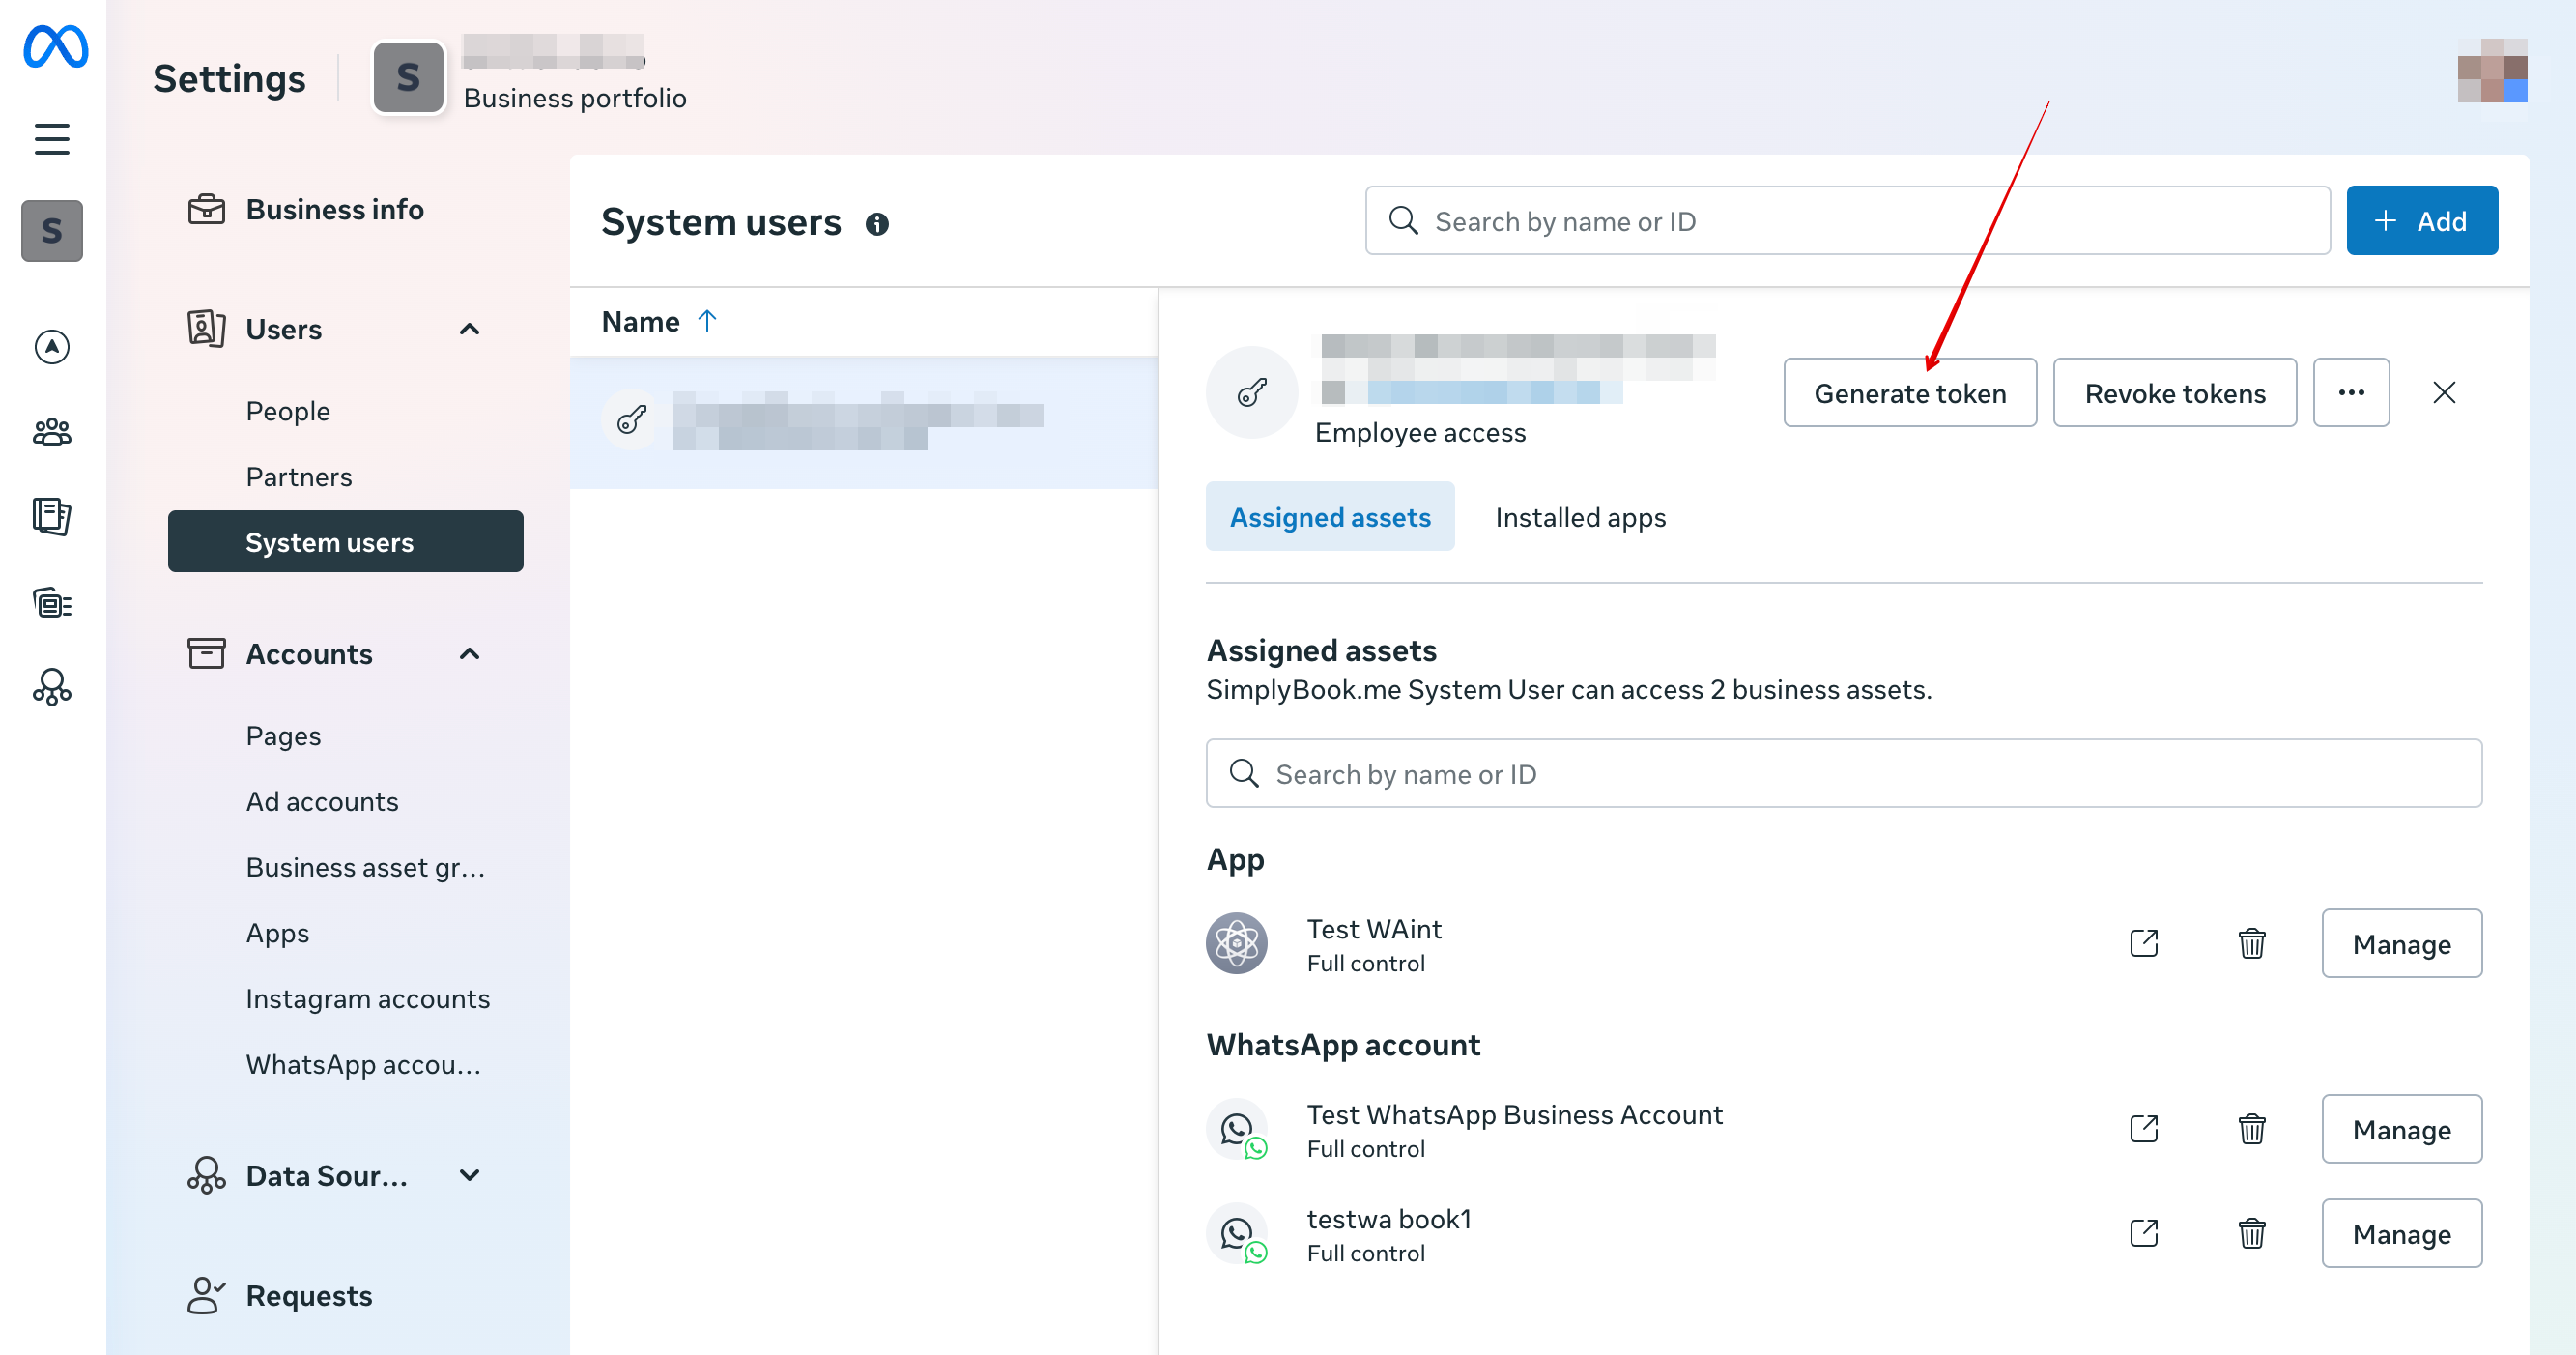
20. After assigning assets click Generate Token:
21. Select your app from the drop down menu and then set token expiration to “never”:
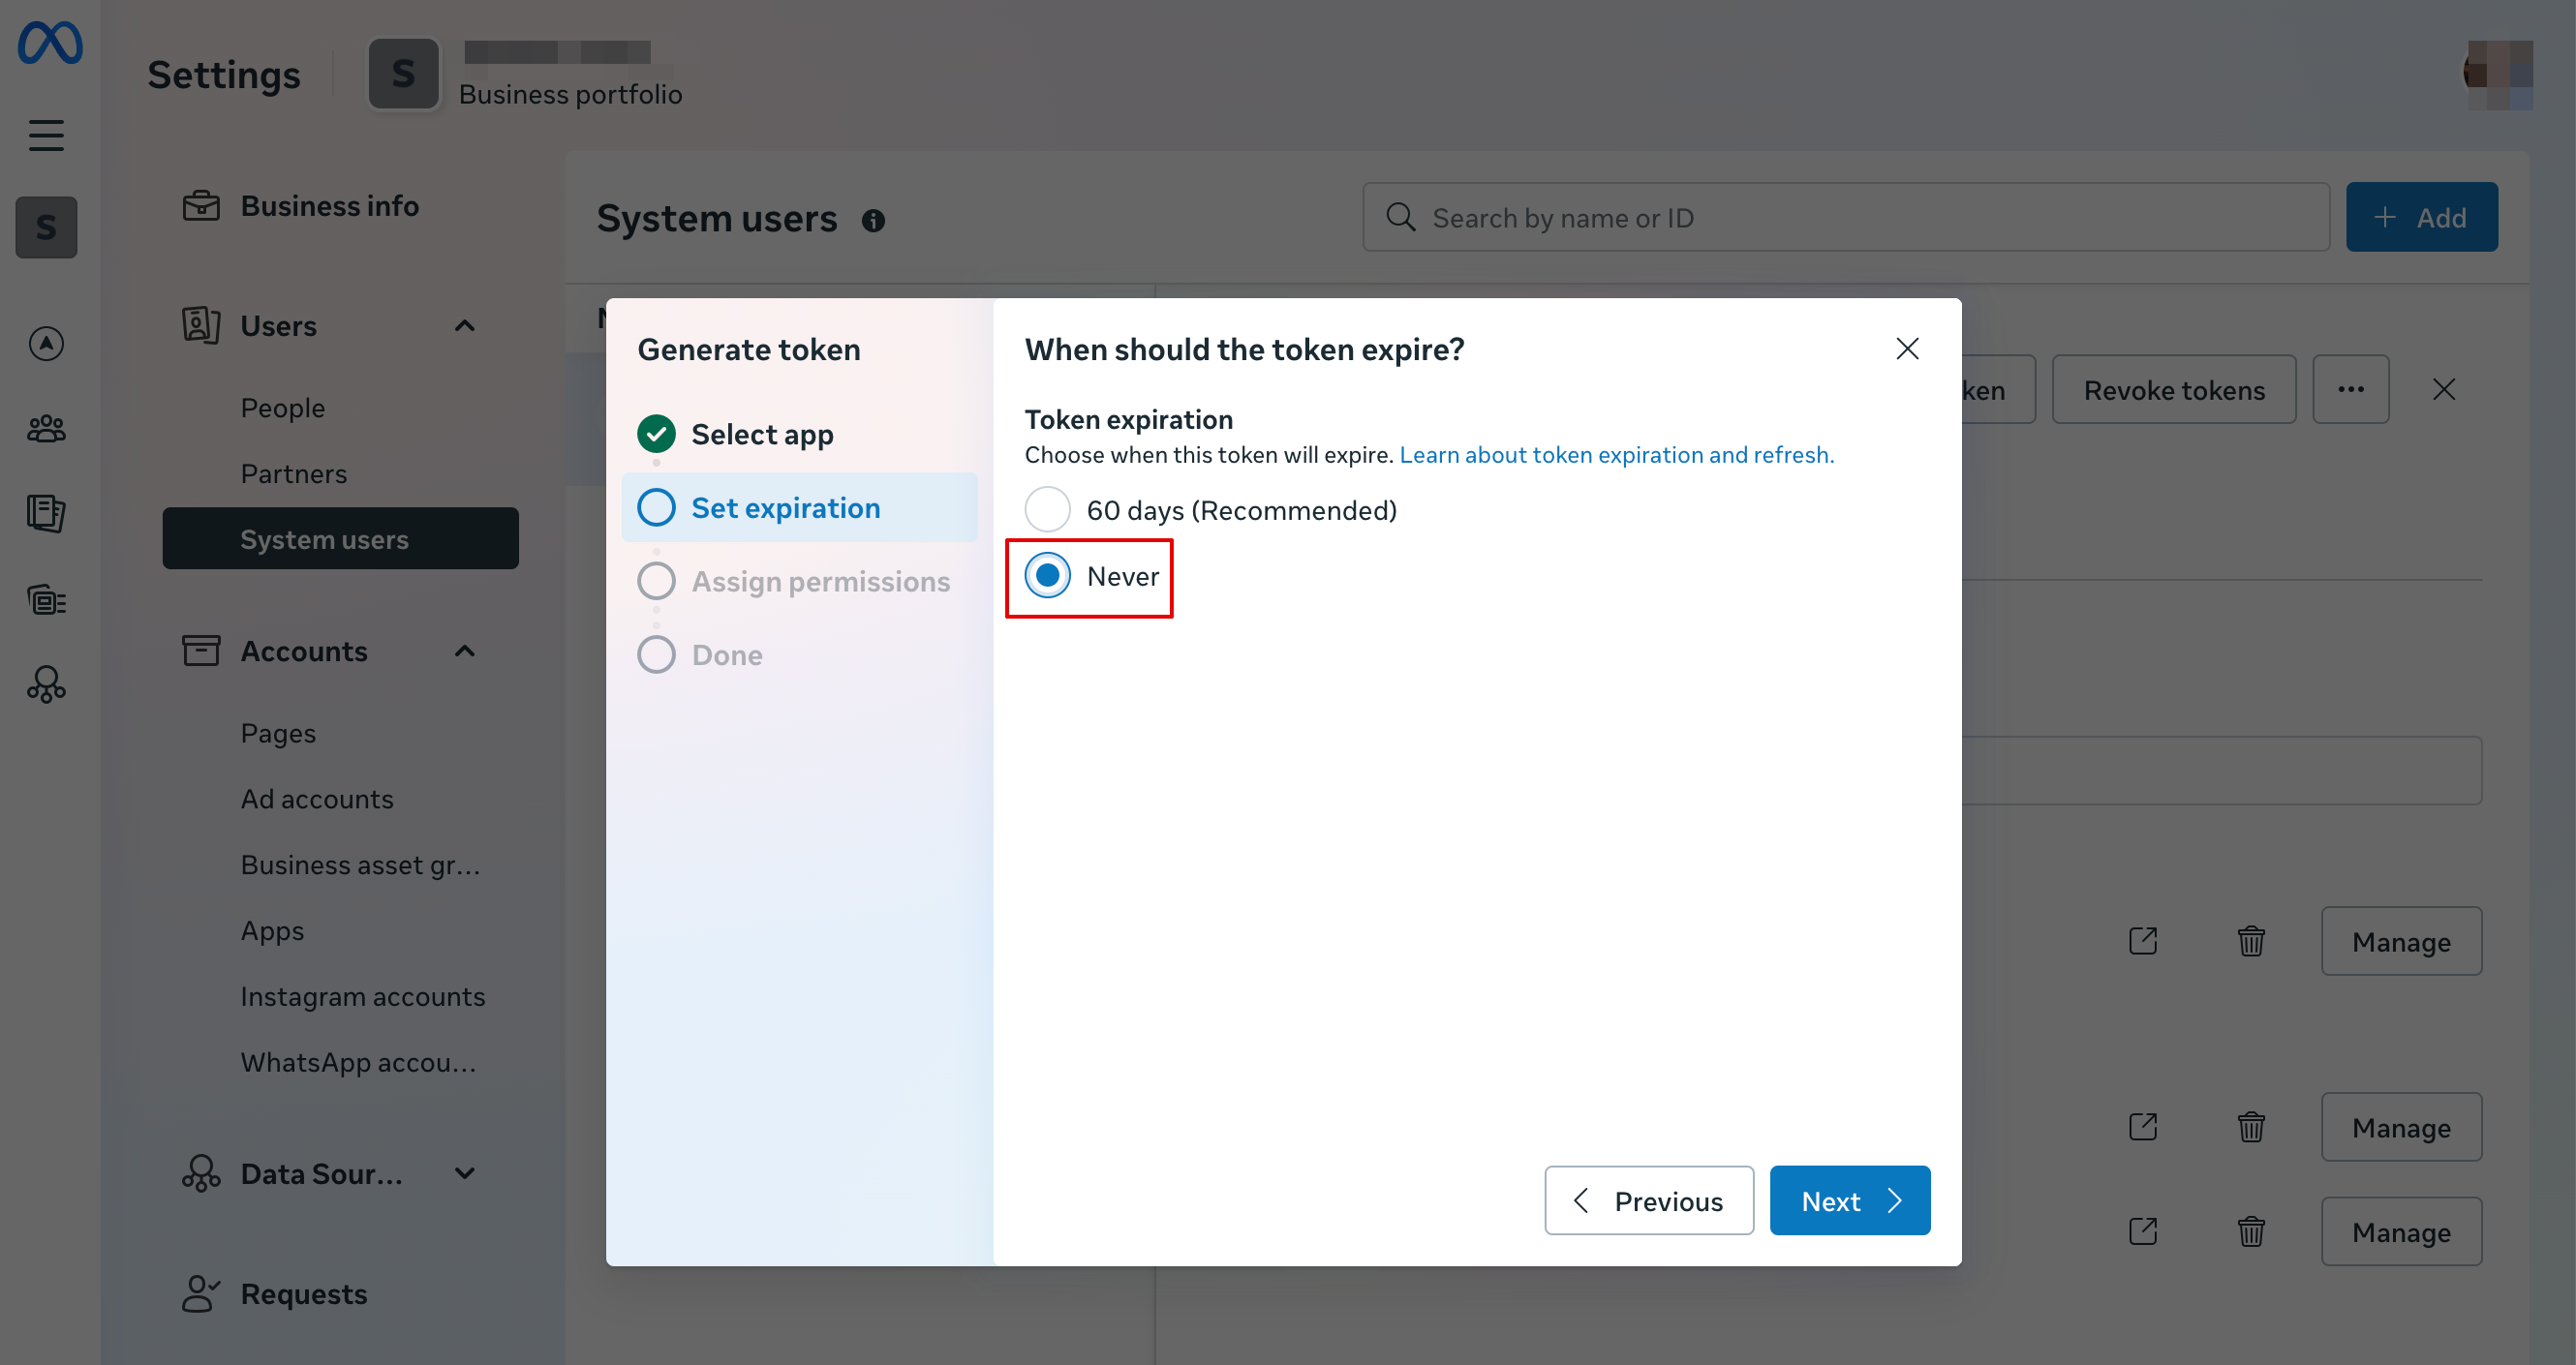
22. Select the following permissions:
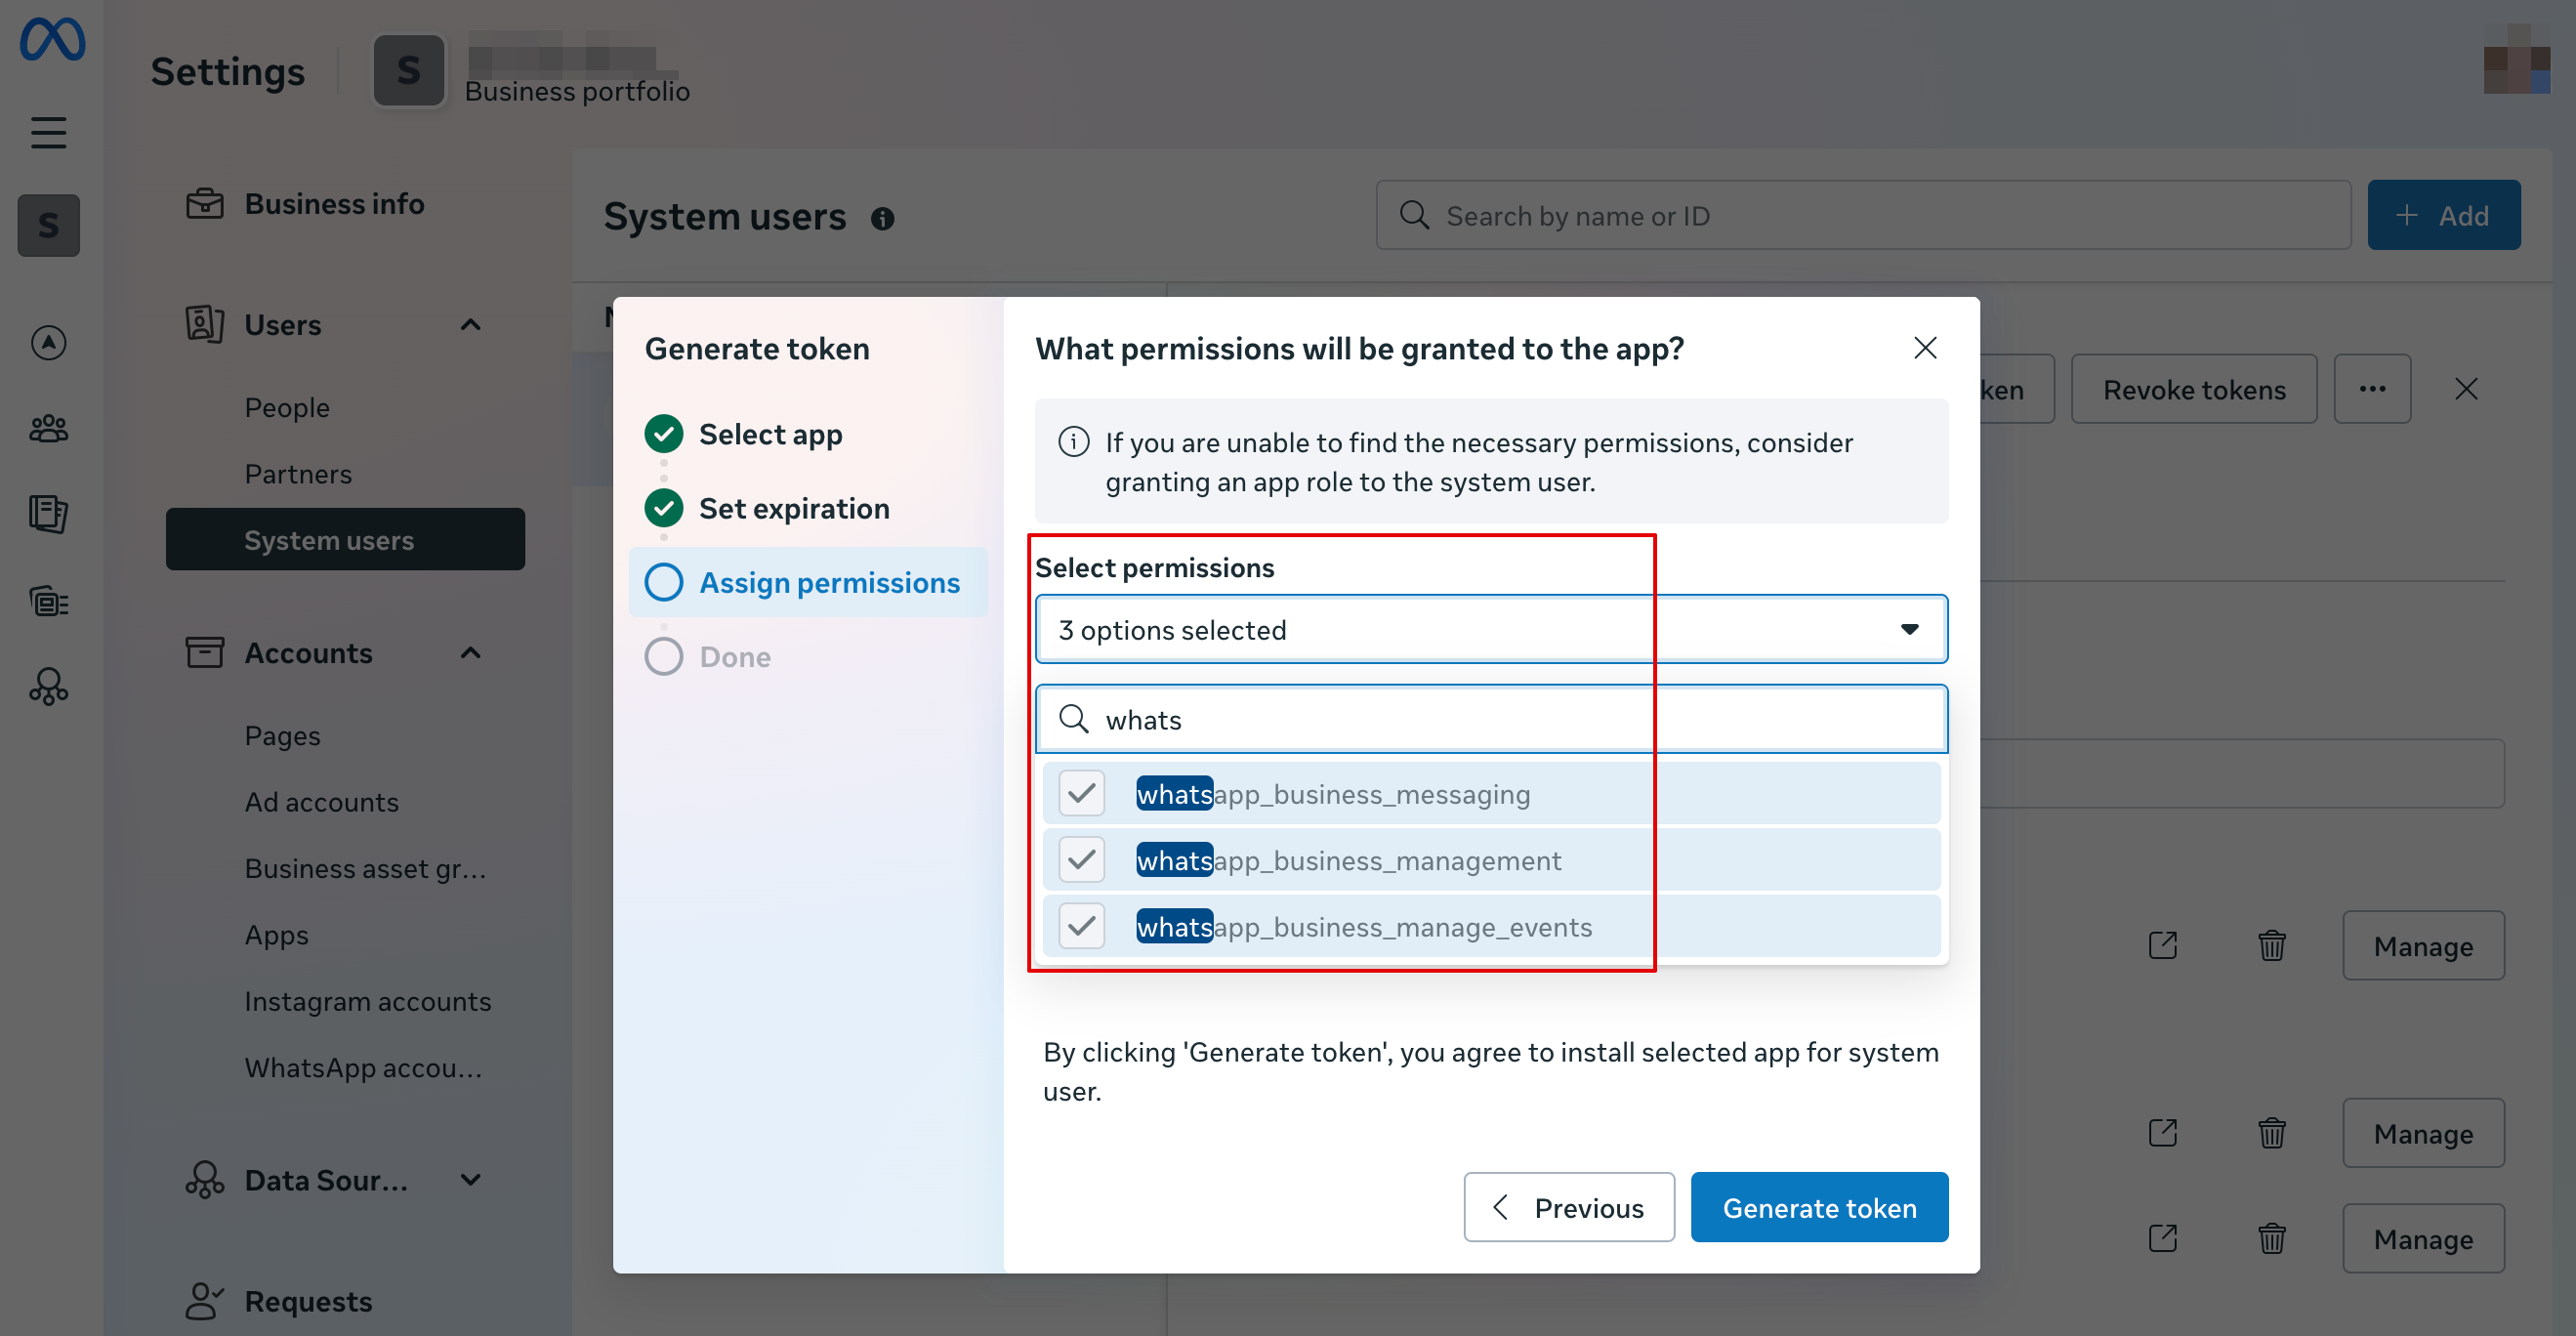
23. Copy token and paste into SB and save settings.
24. Now back to https://developers.facebook.com/apps/ select your app, click Settings -> Basic. Insert Privacy policy and Terms of service URLS
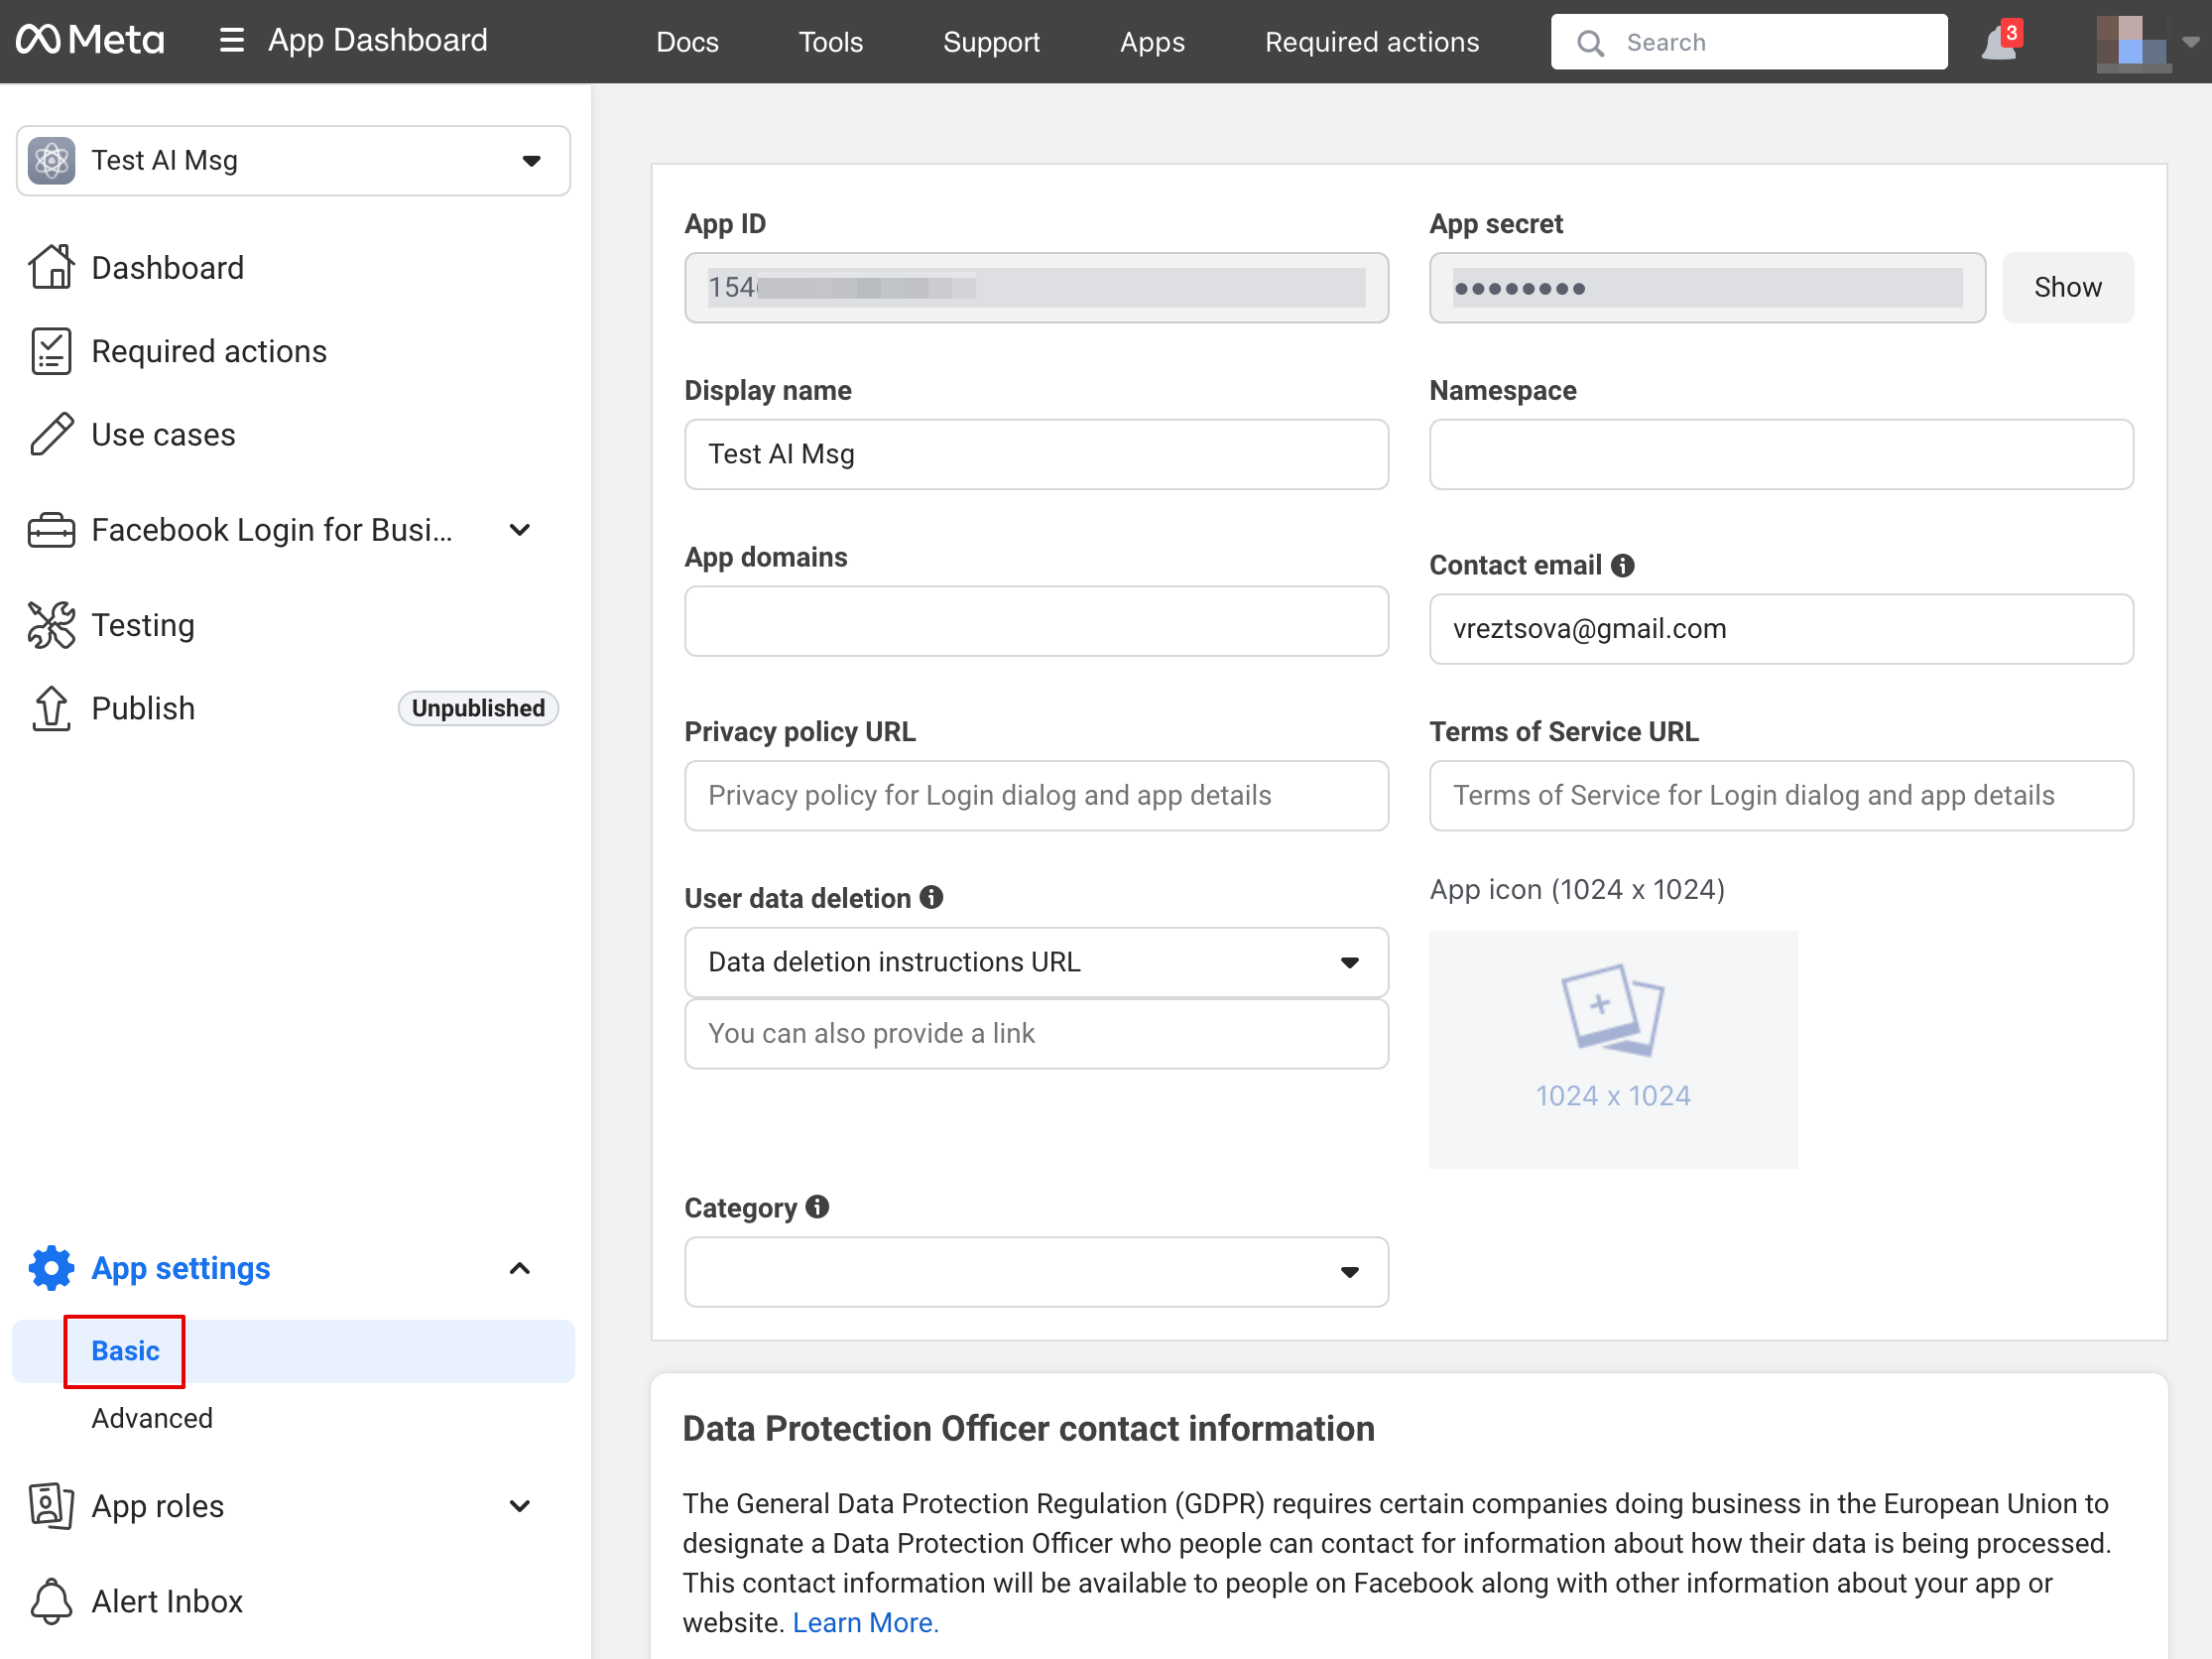
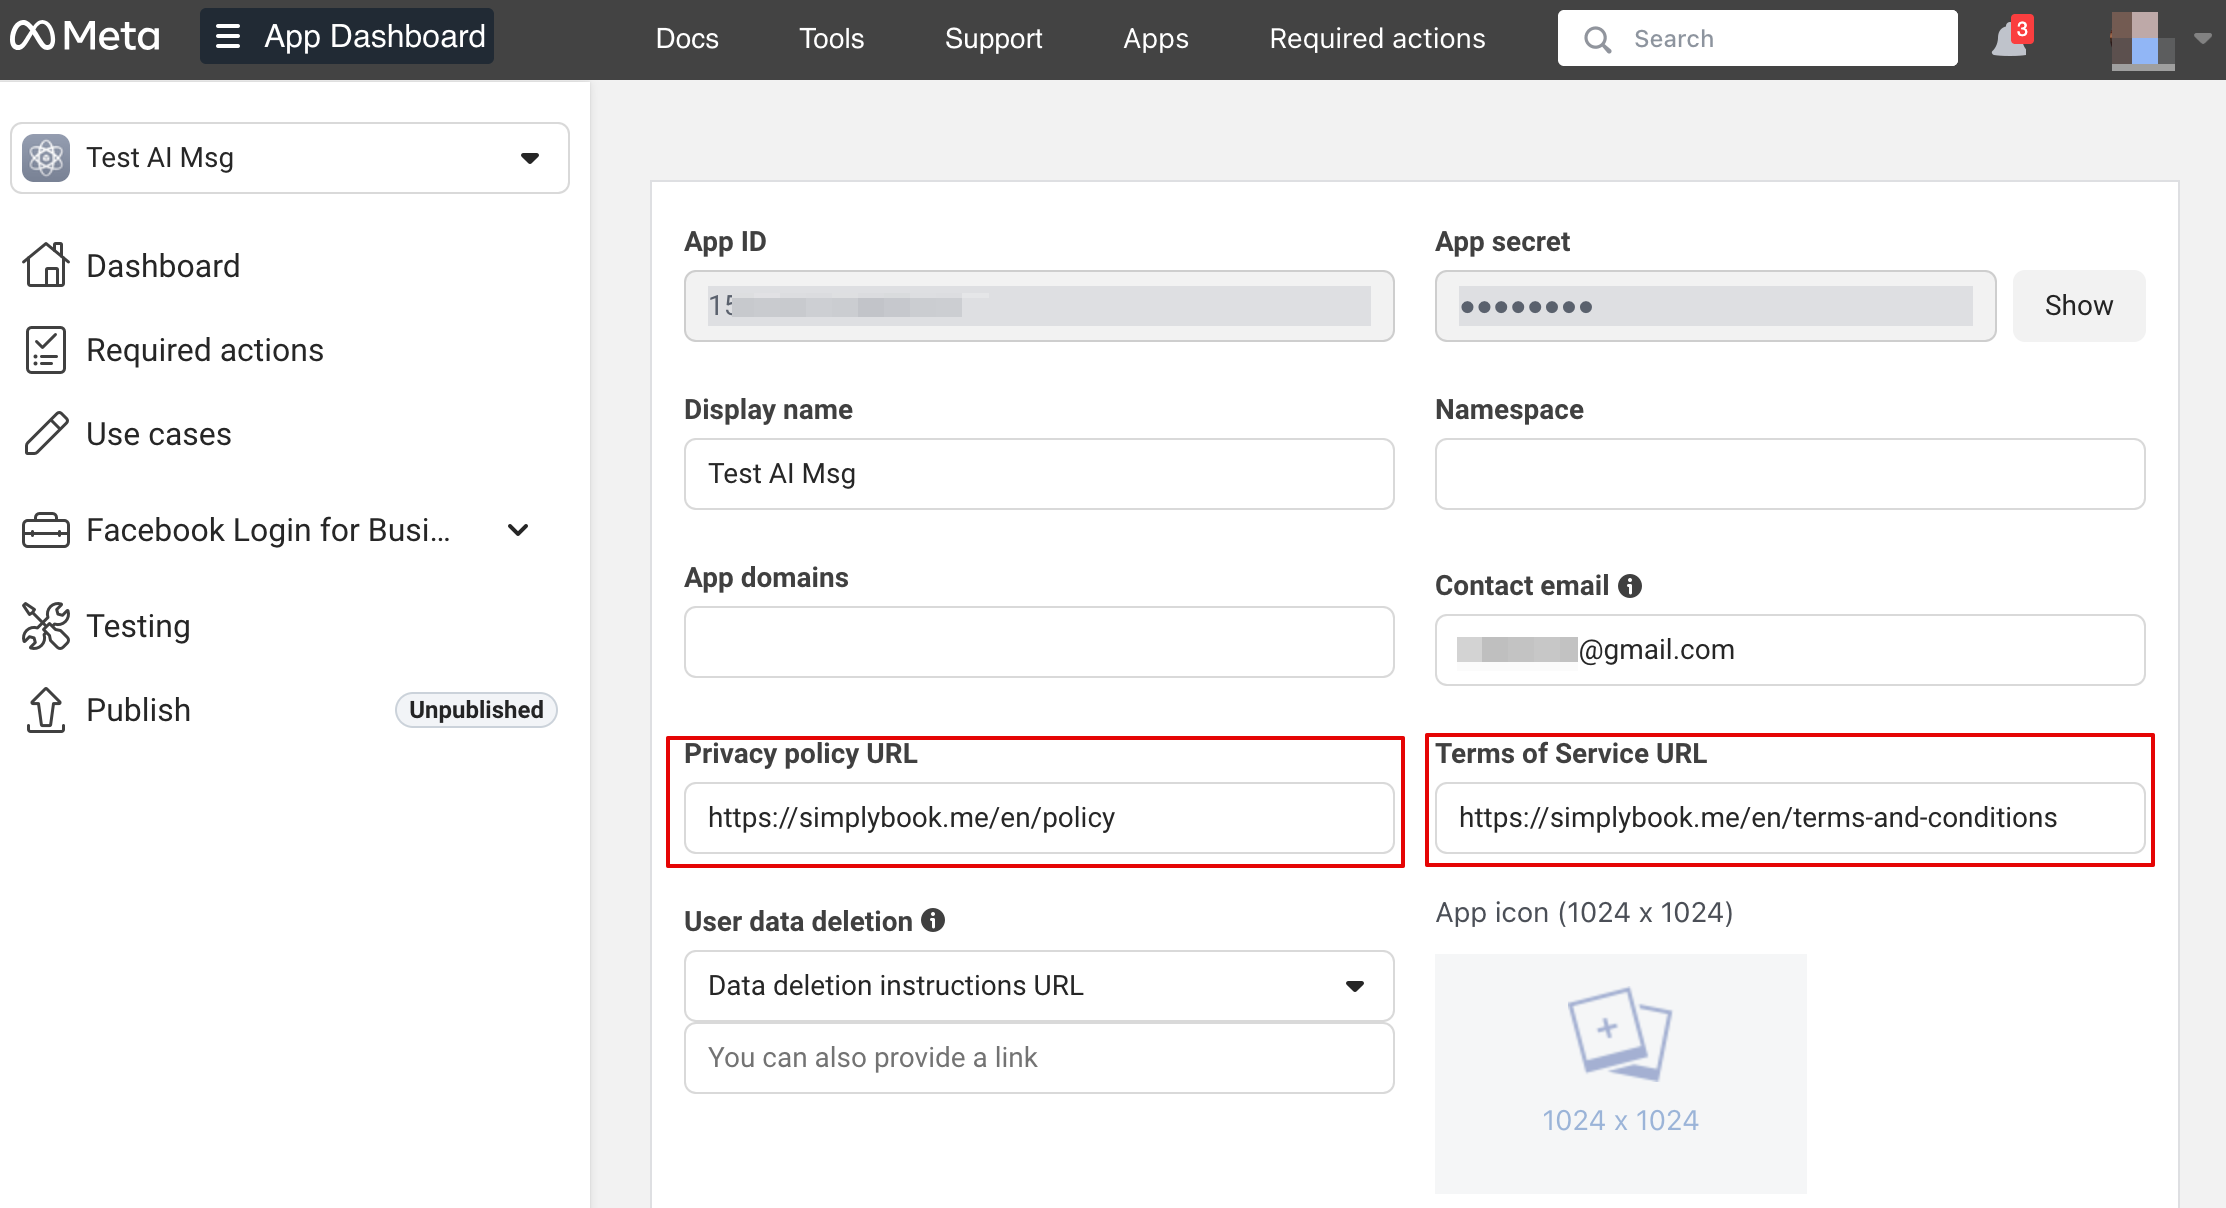
25. Copy App Secret and insert into SB.
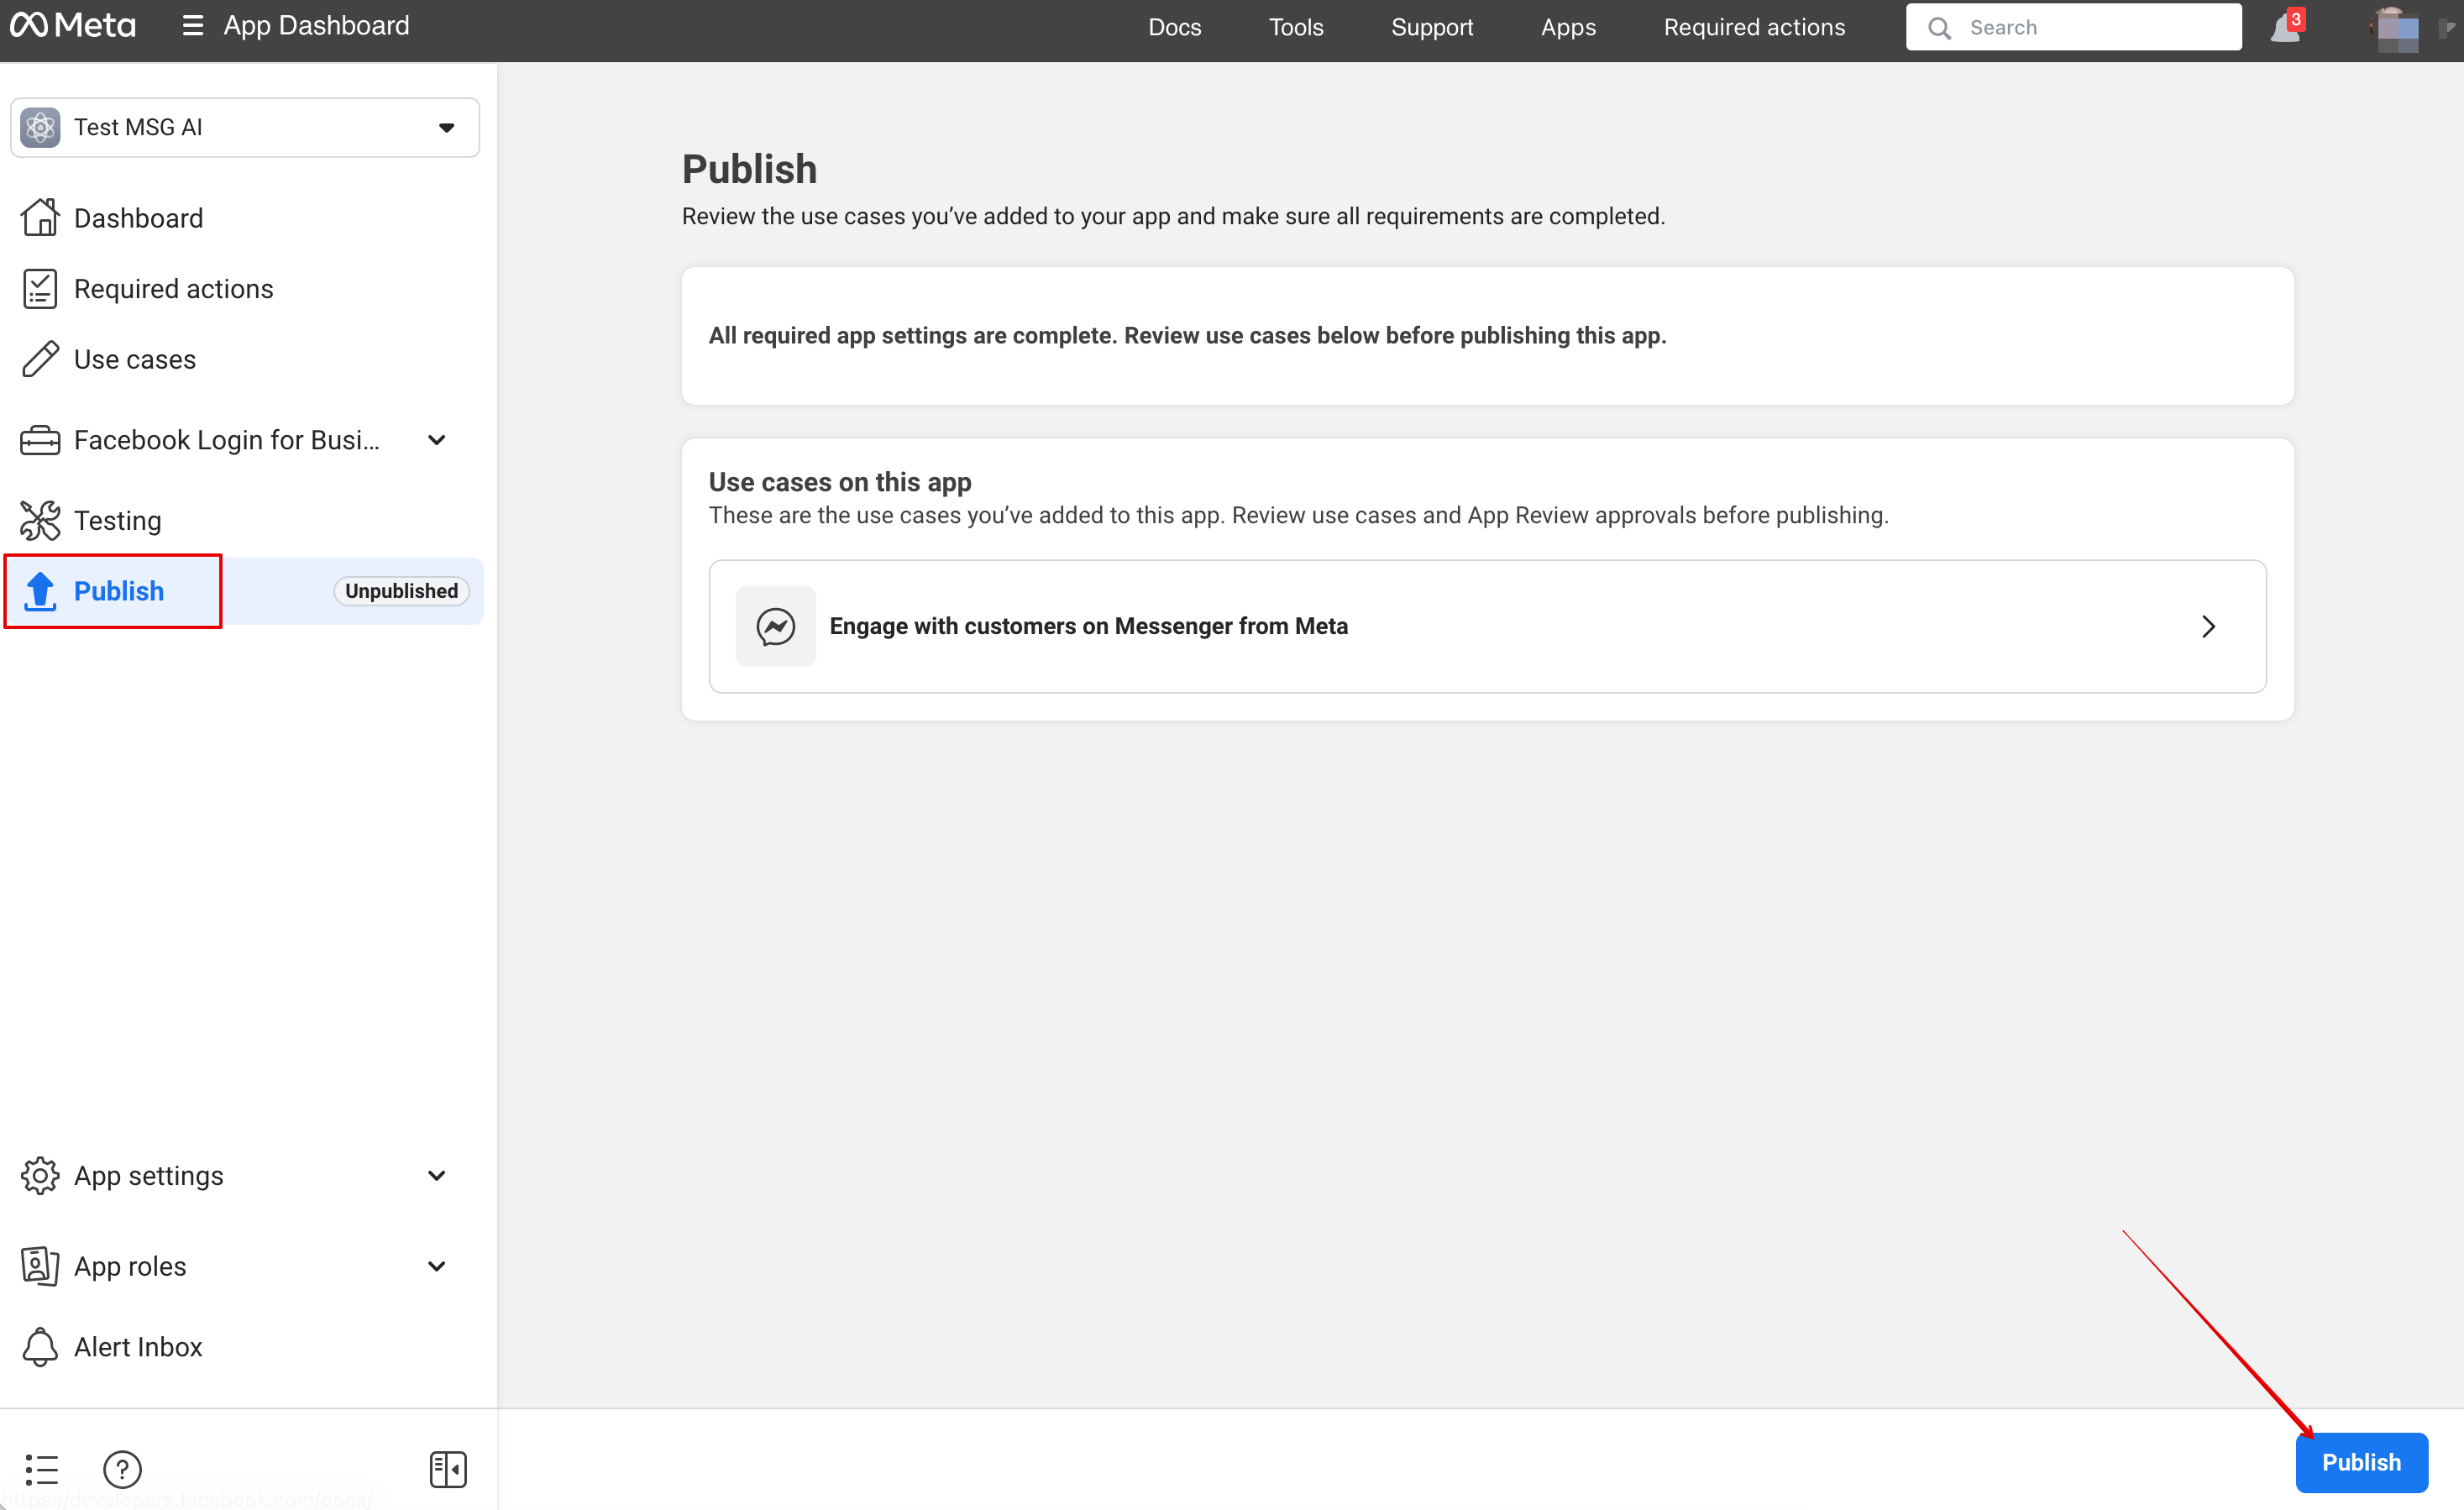
25. Now you can publish the app, provide your customers with your WhatsApp business number and let them book the services with the help of AI.

Setup Facebook Messenger
1. Open https://developers.facebook.com/apps/ and click “Create App”:
2. Enter your preferable app details:
3. Select Messenger use case from the list:

4. Choose the business profile or create a new one.
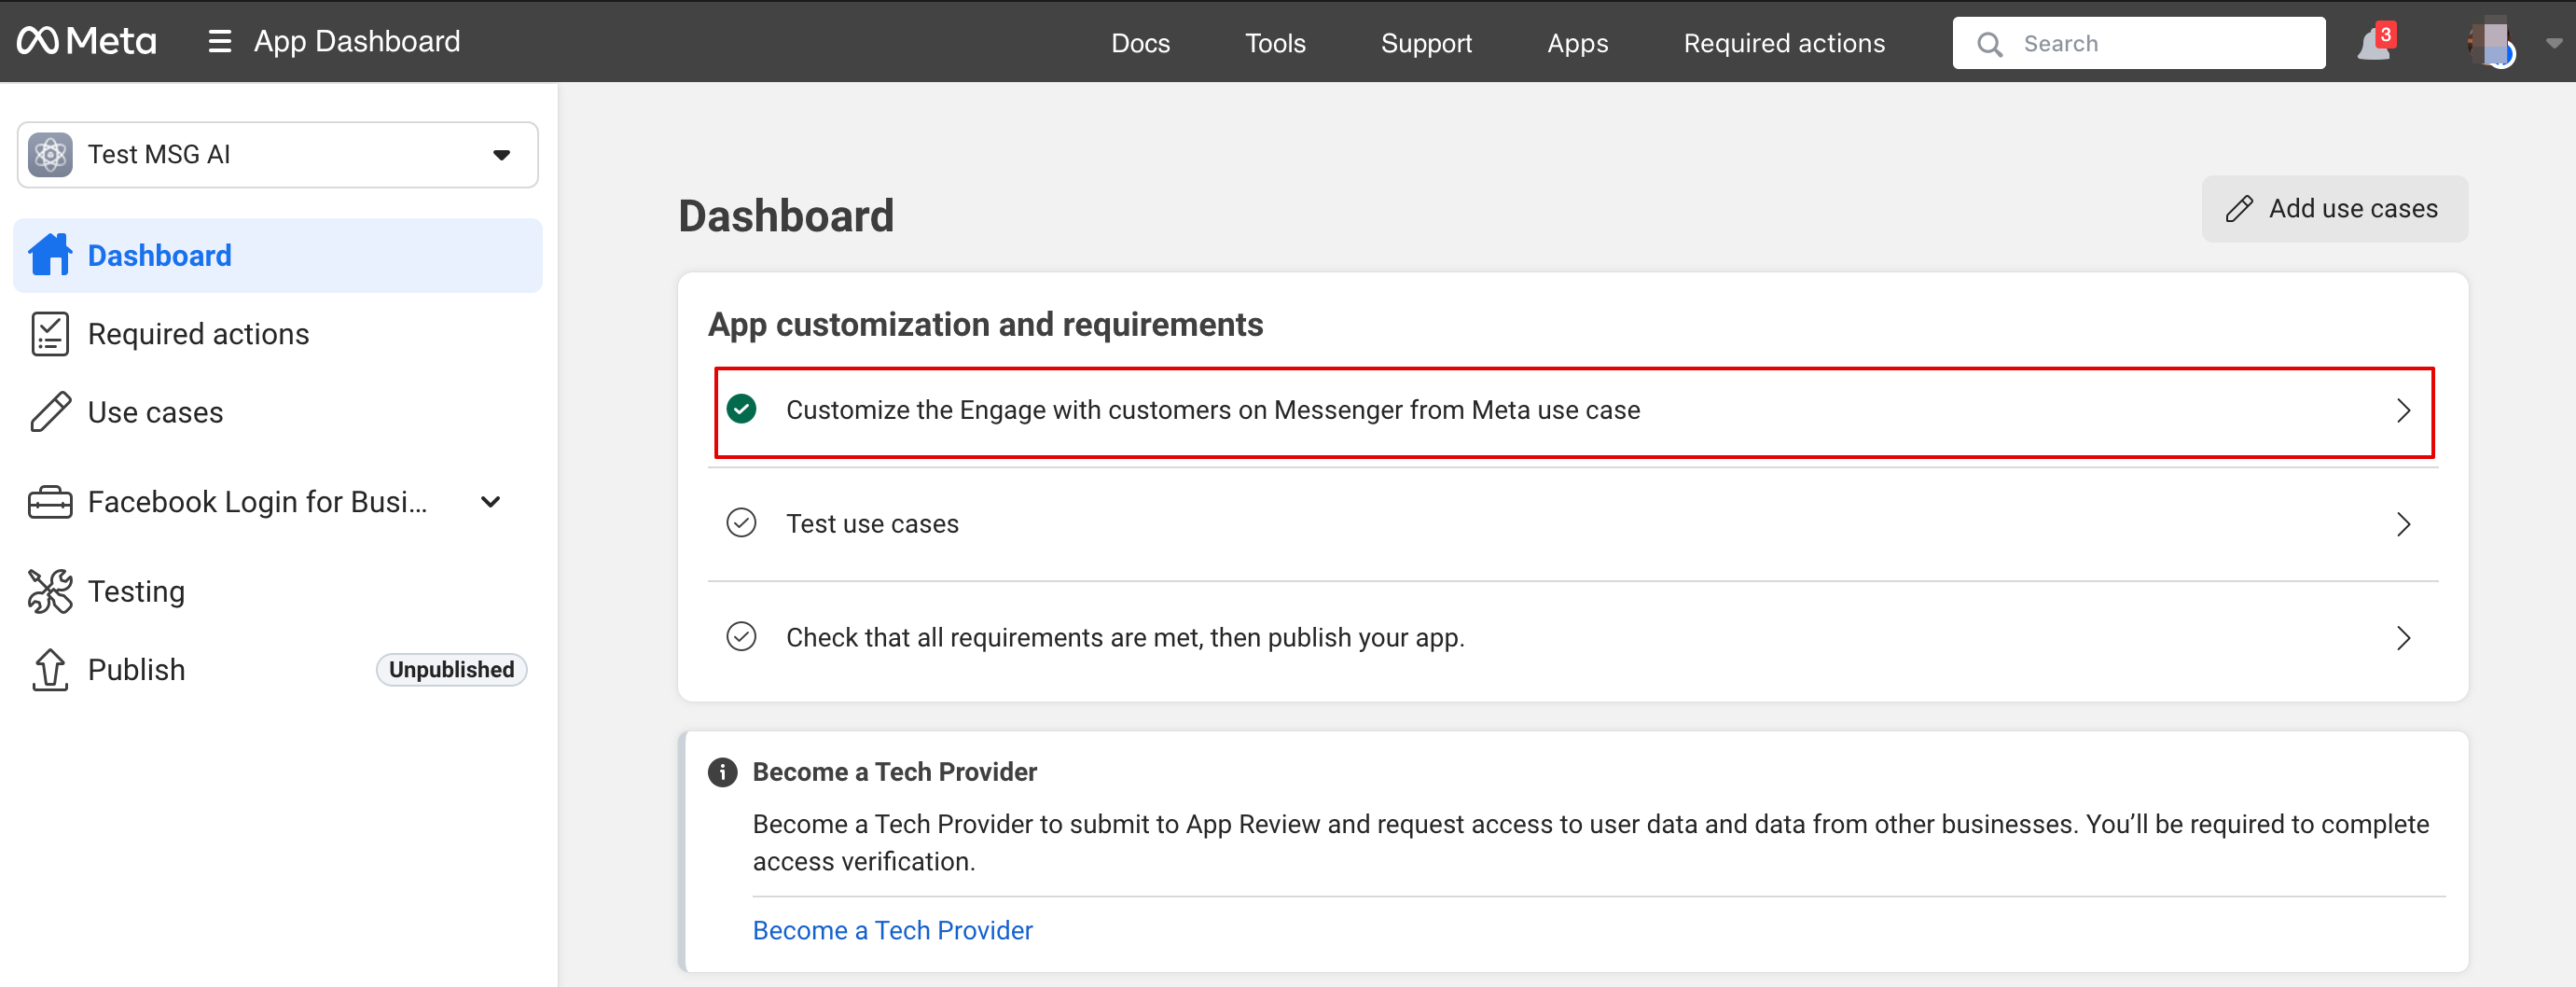
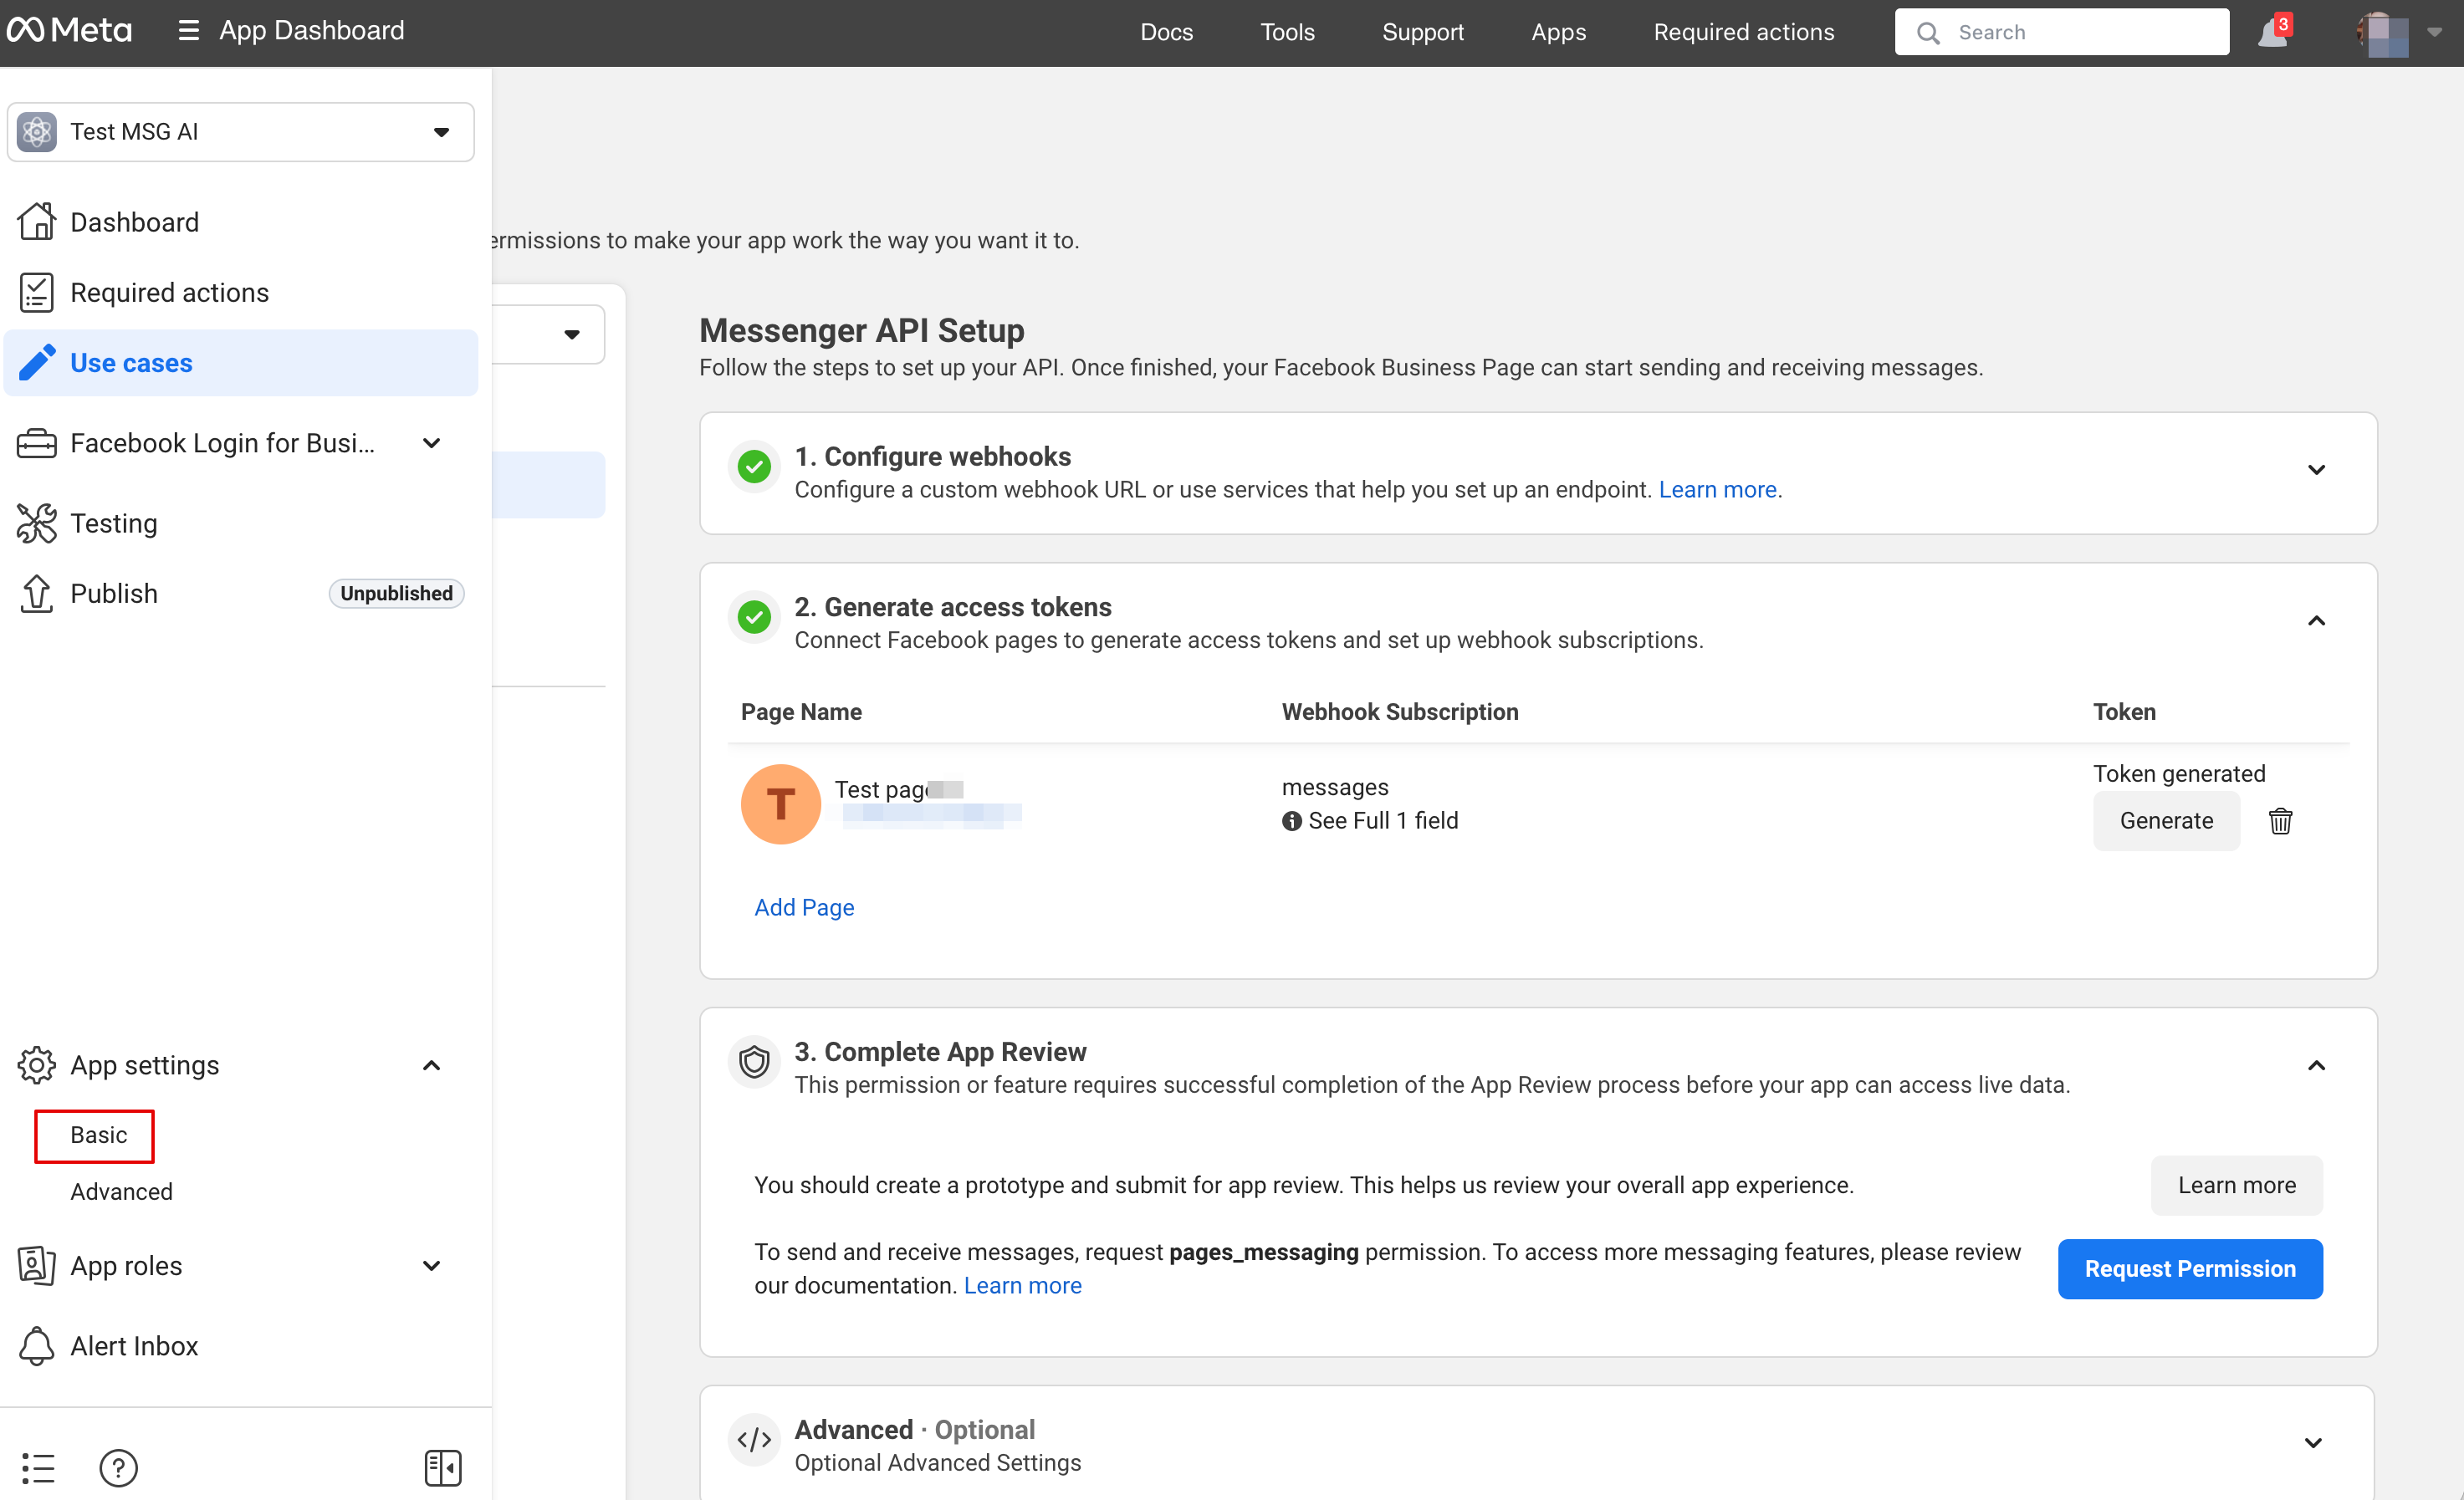
5. Proceed to app Dashboard after reviewing the details
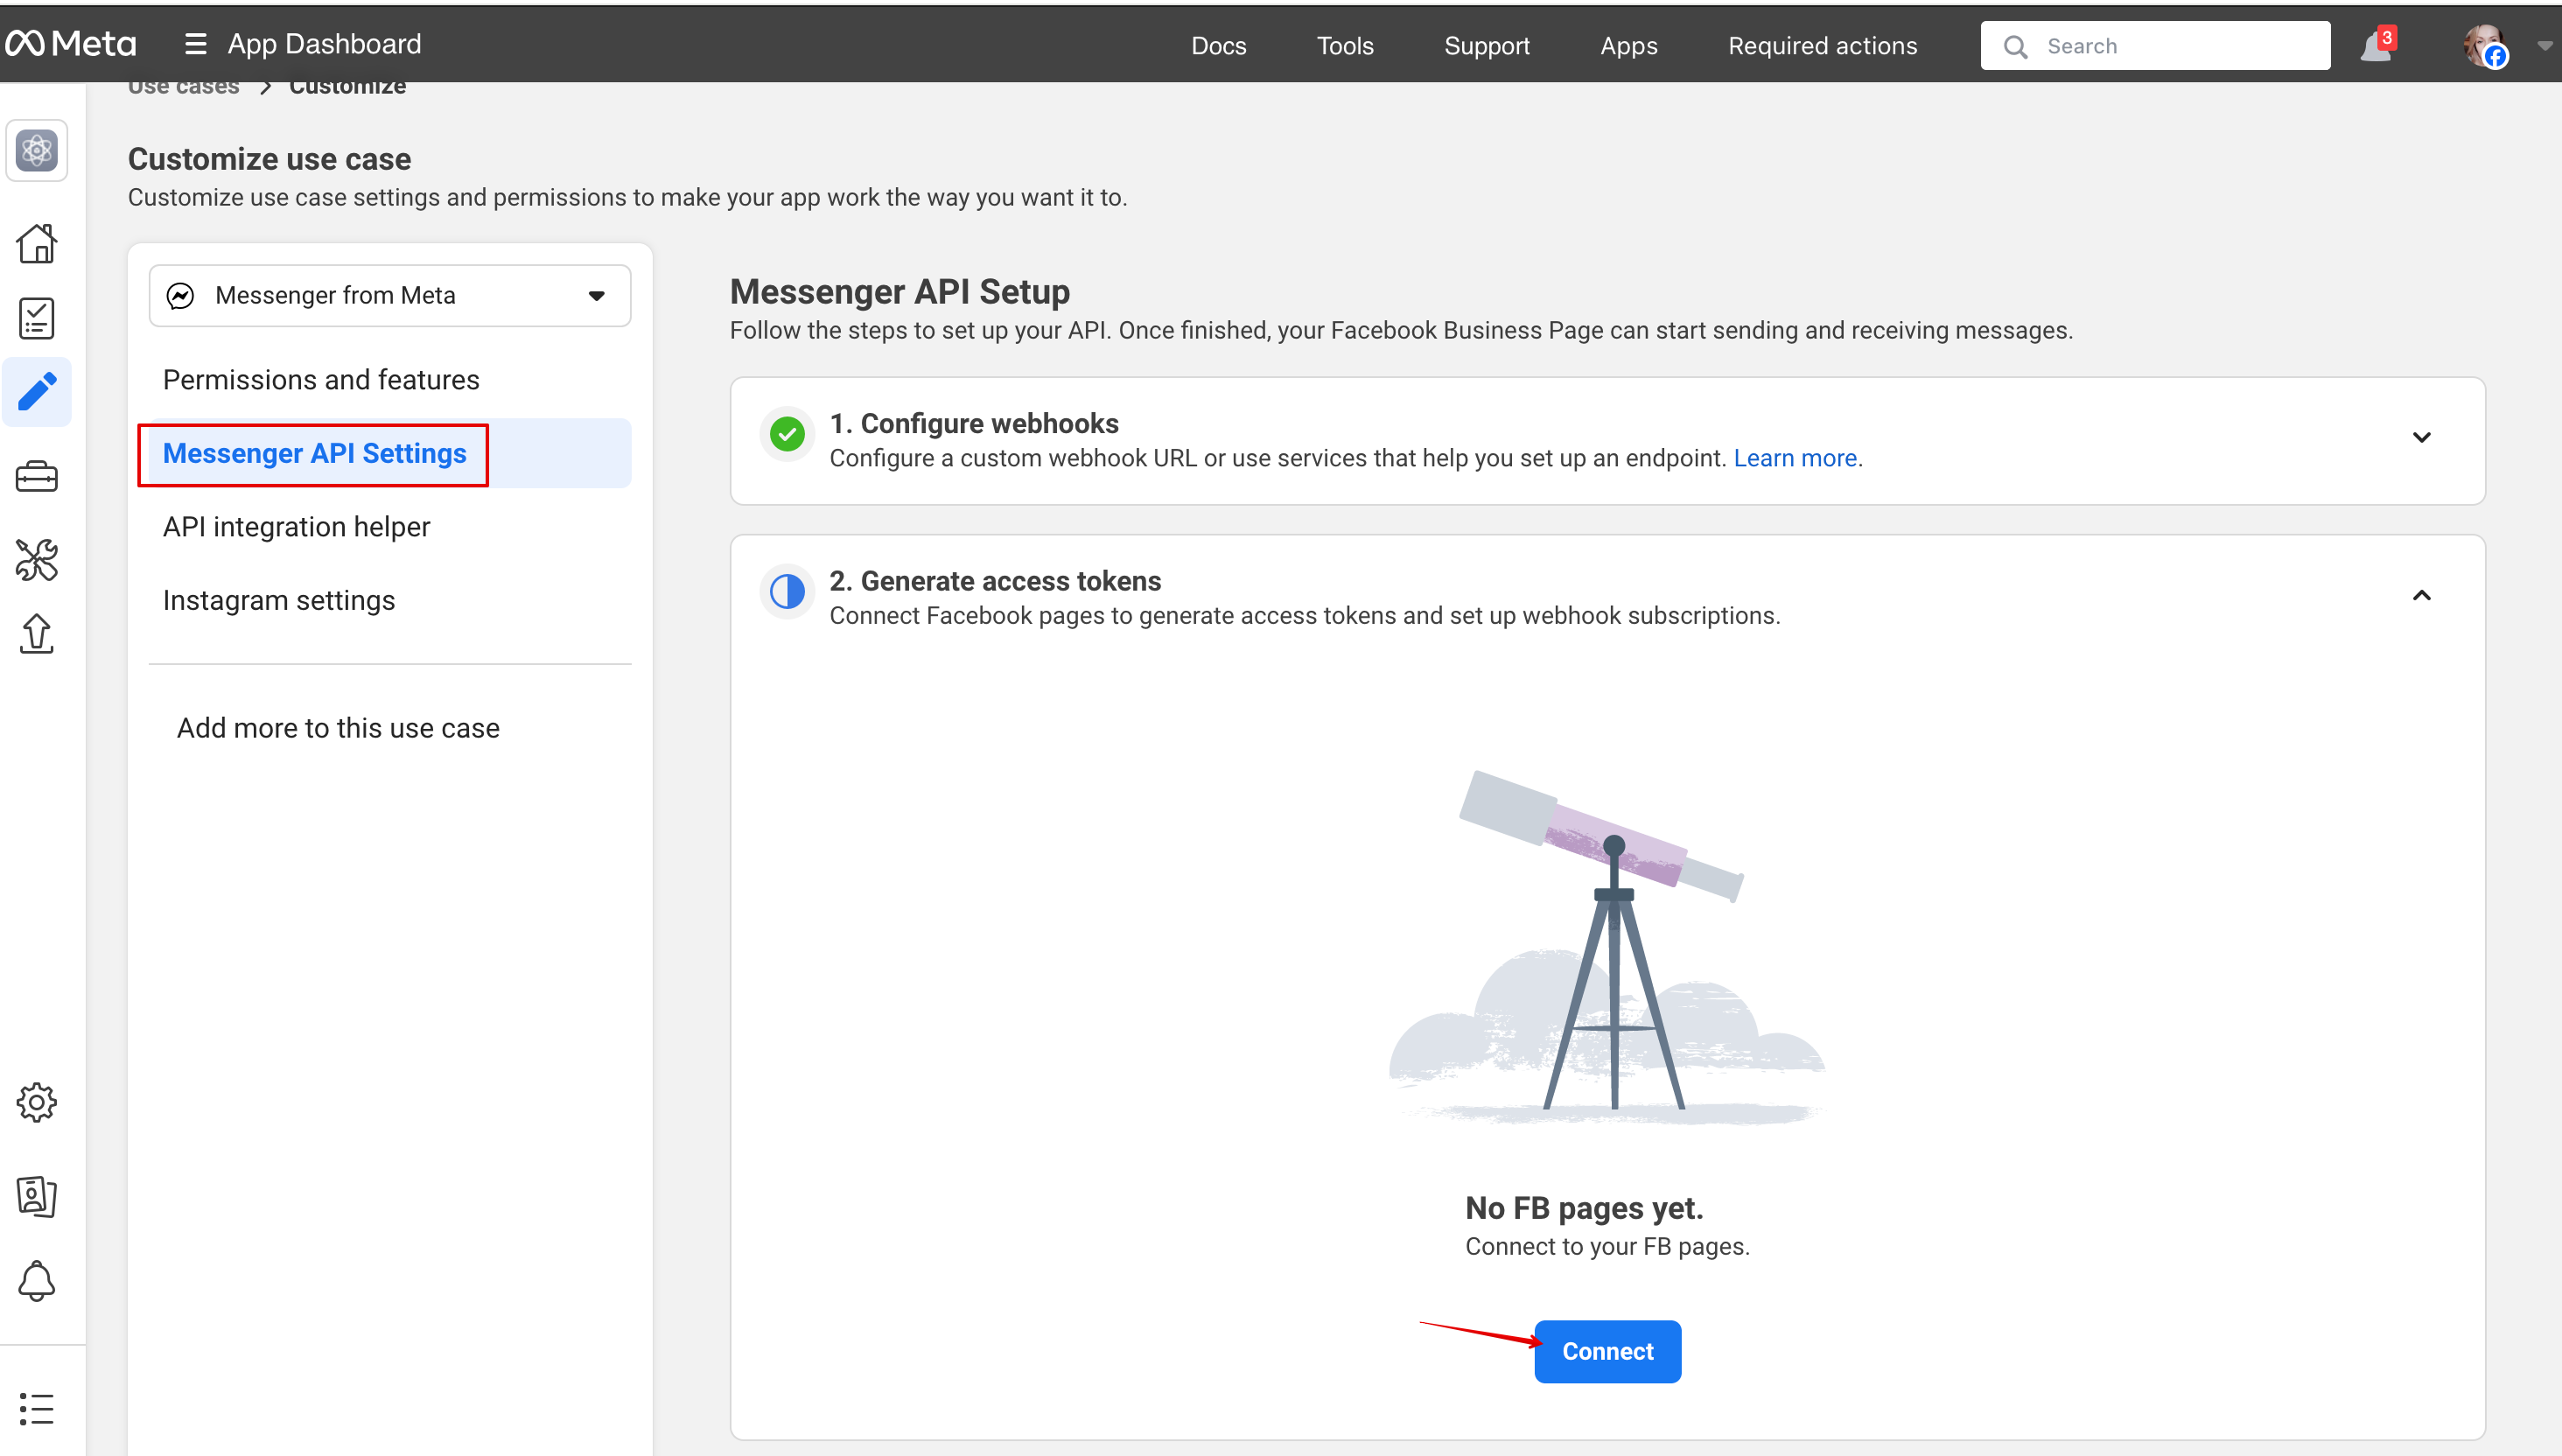
6. Click customize use case:
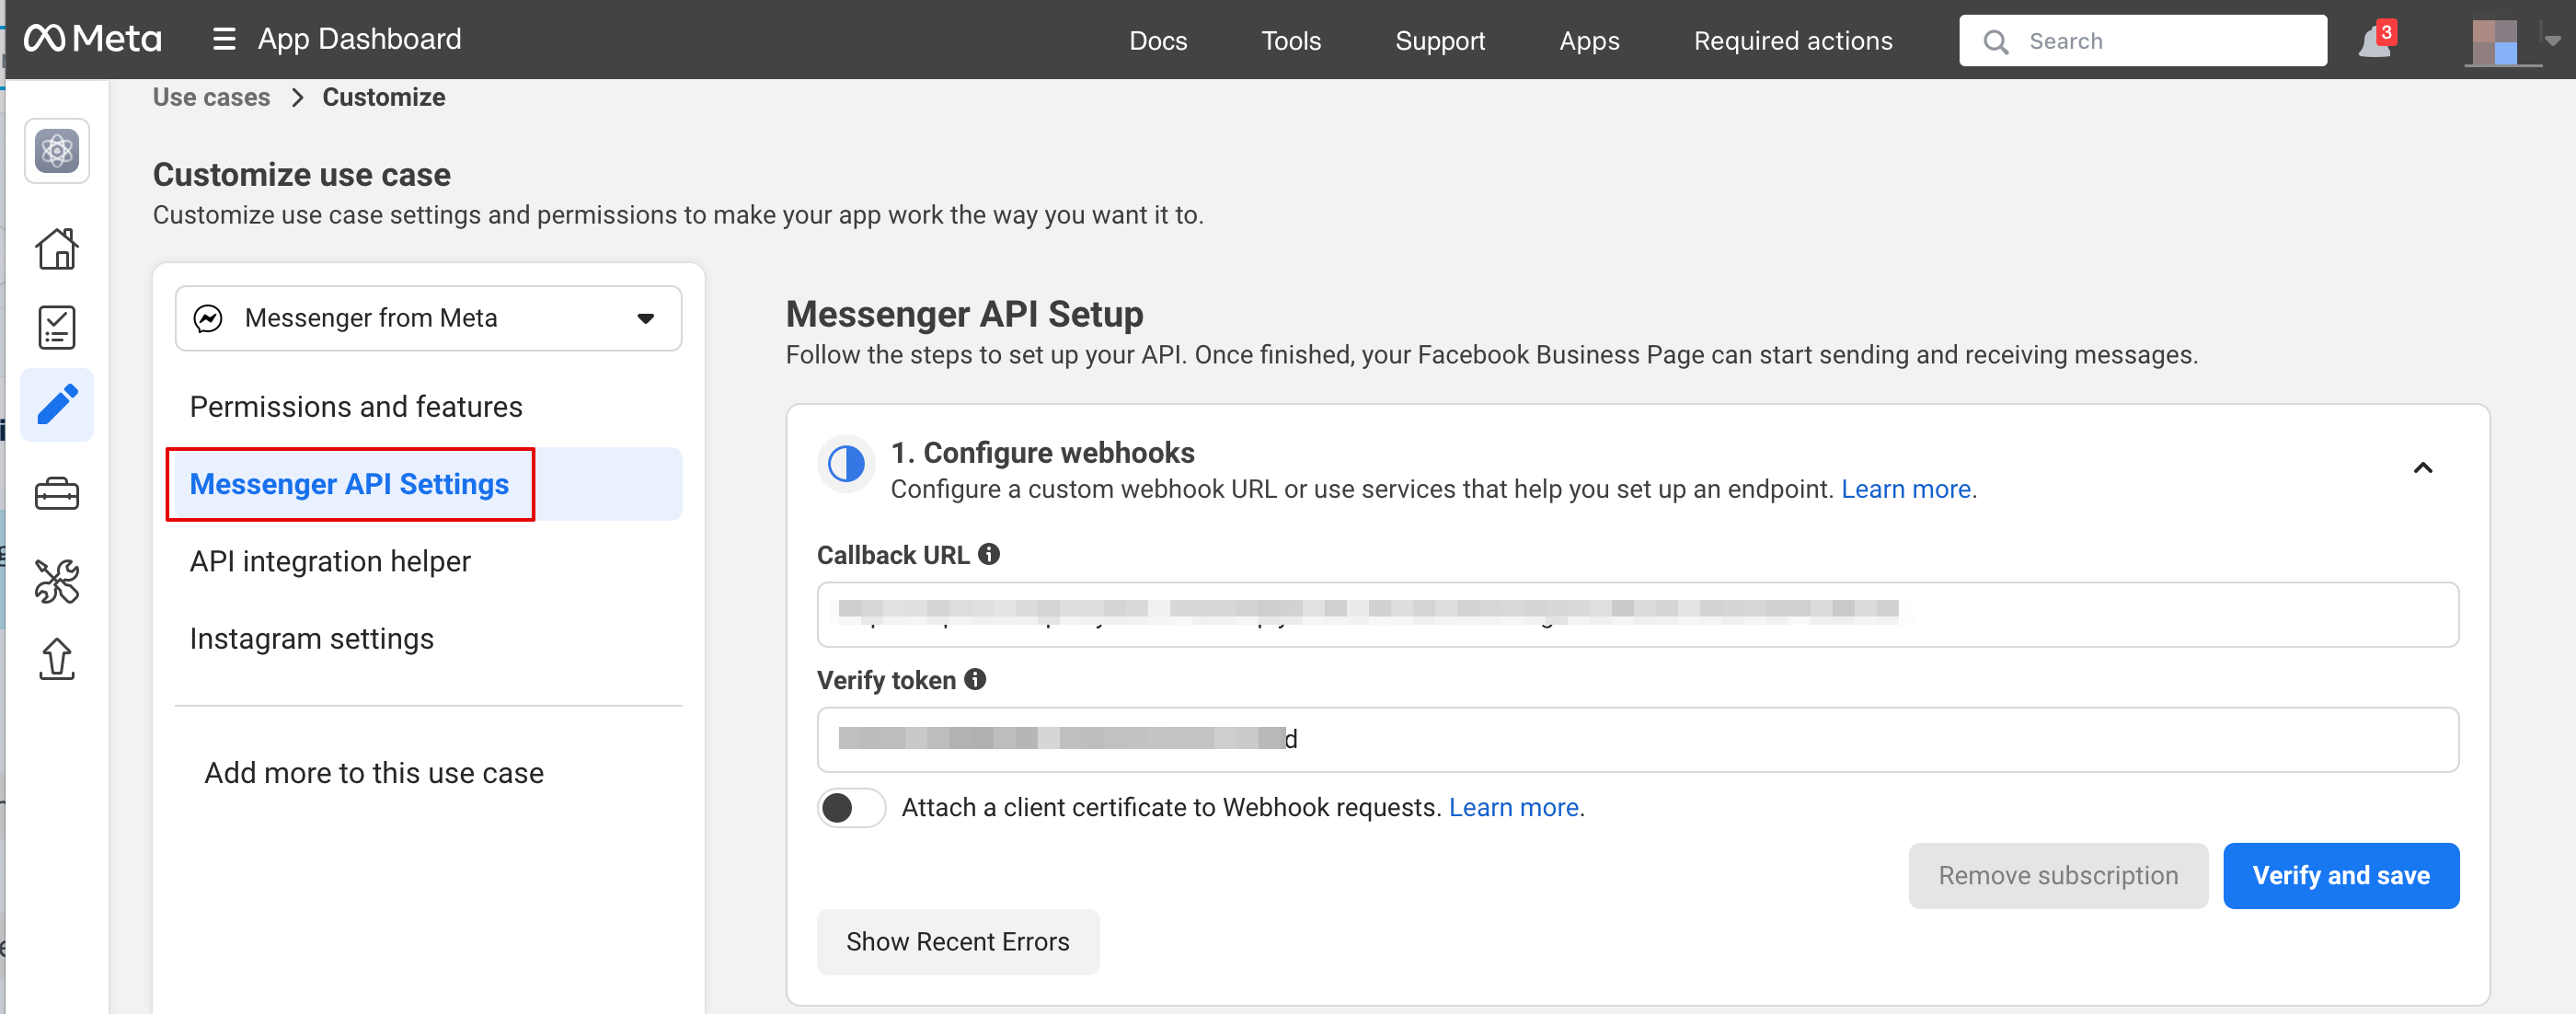
7. In Messenger API settings insert webhook URL and verification token from SB and Click Verify and save:
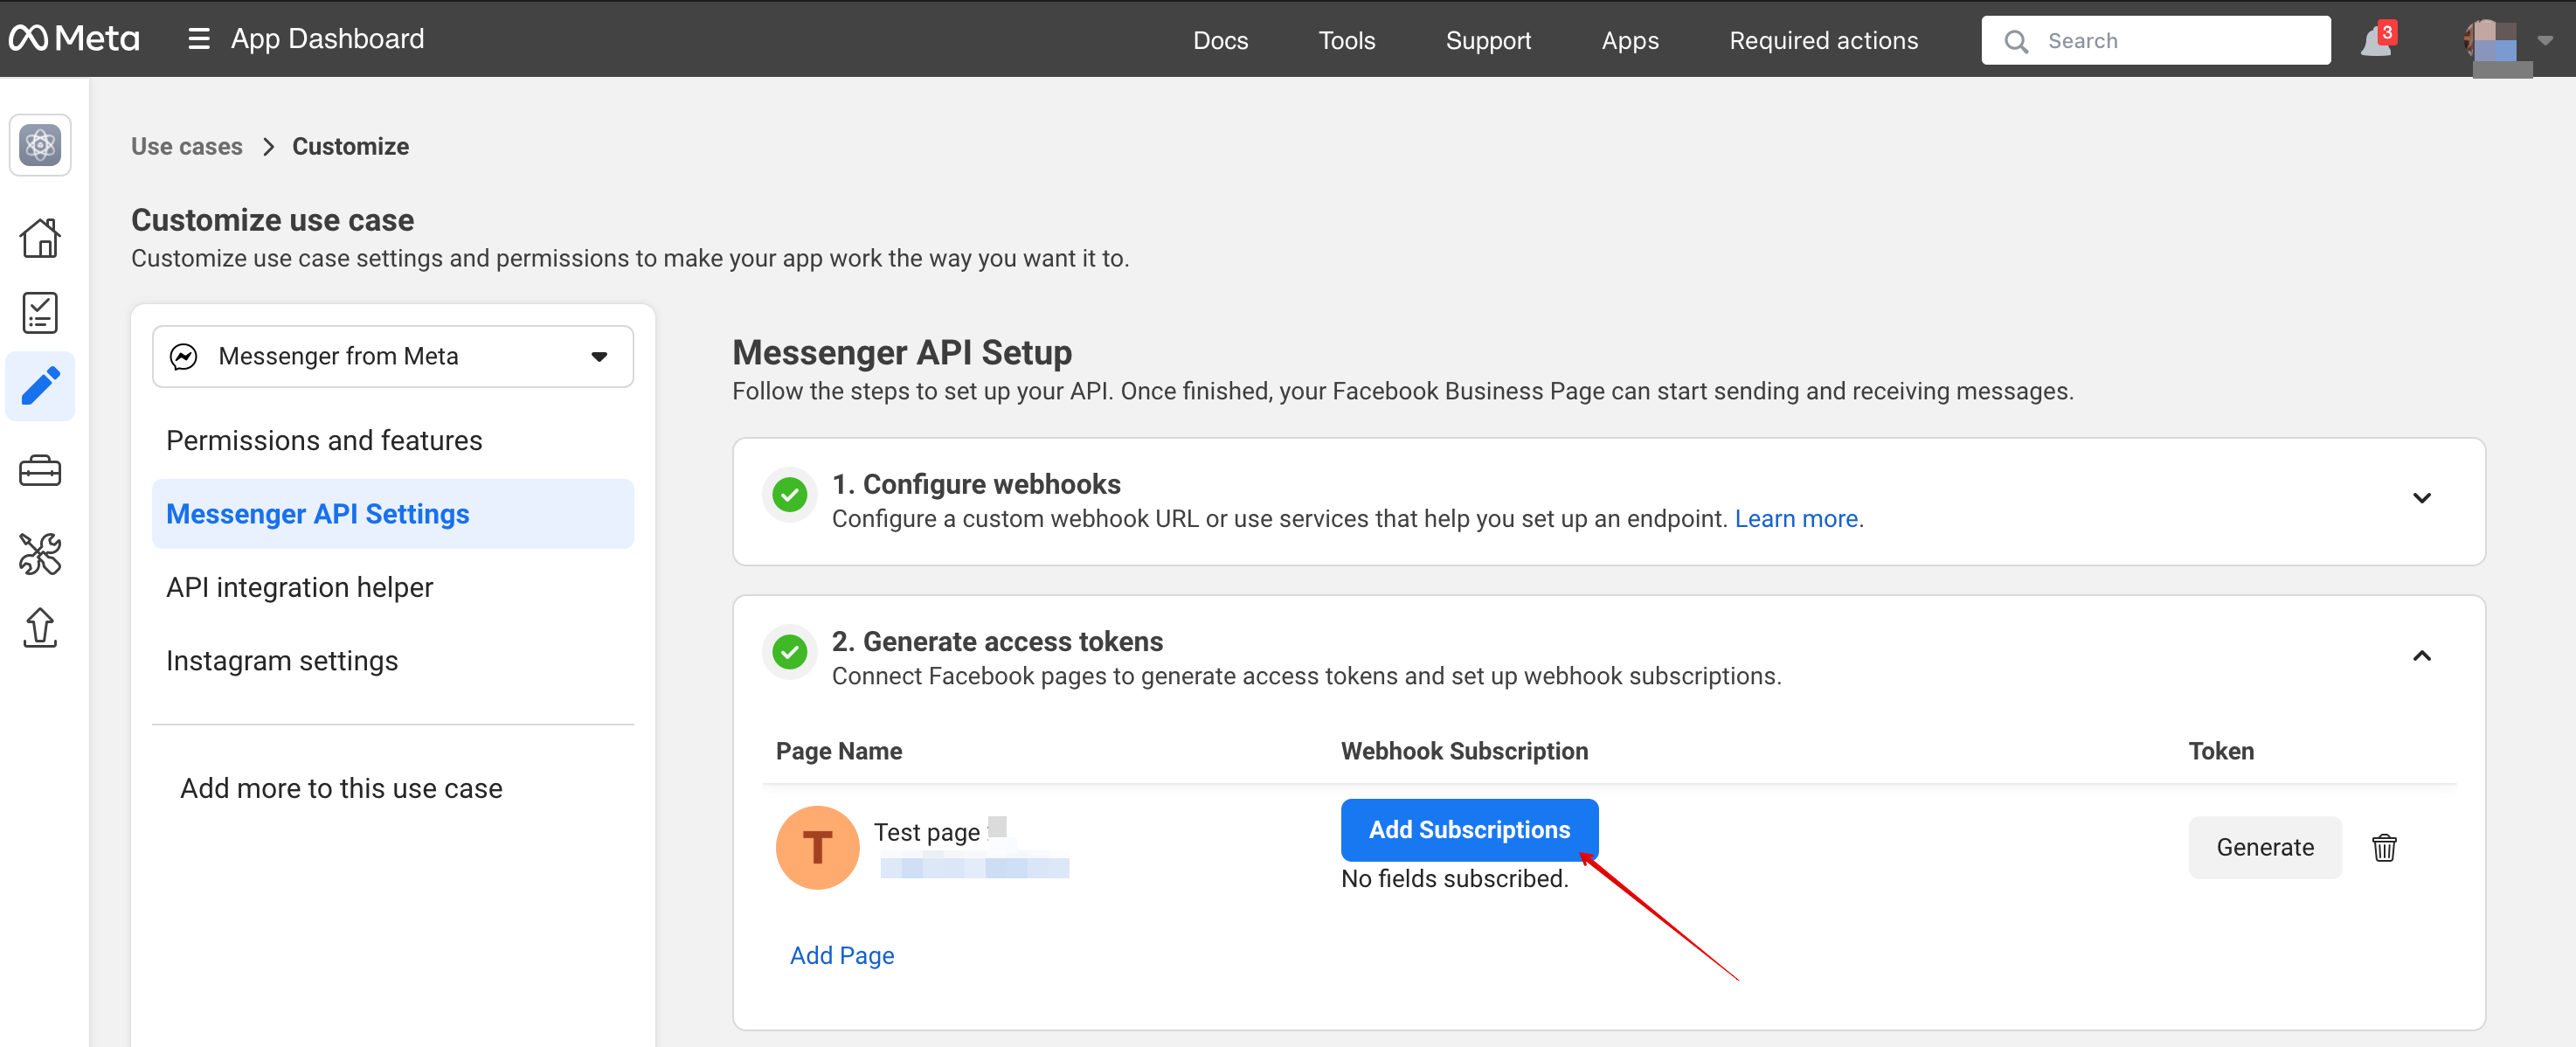
8. Back to Messenger API settings to connect the Facebook page where AI option will be added and generate a token. Click connect and select the page:
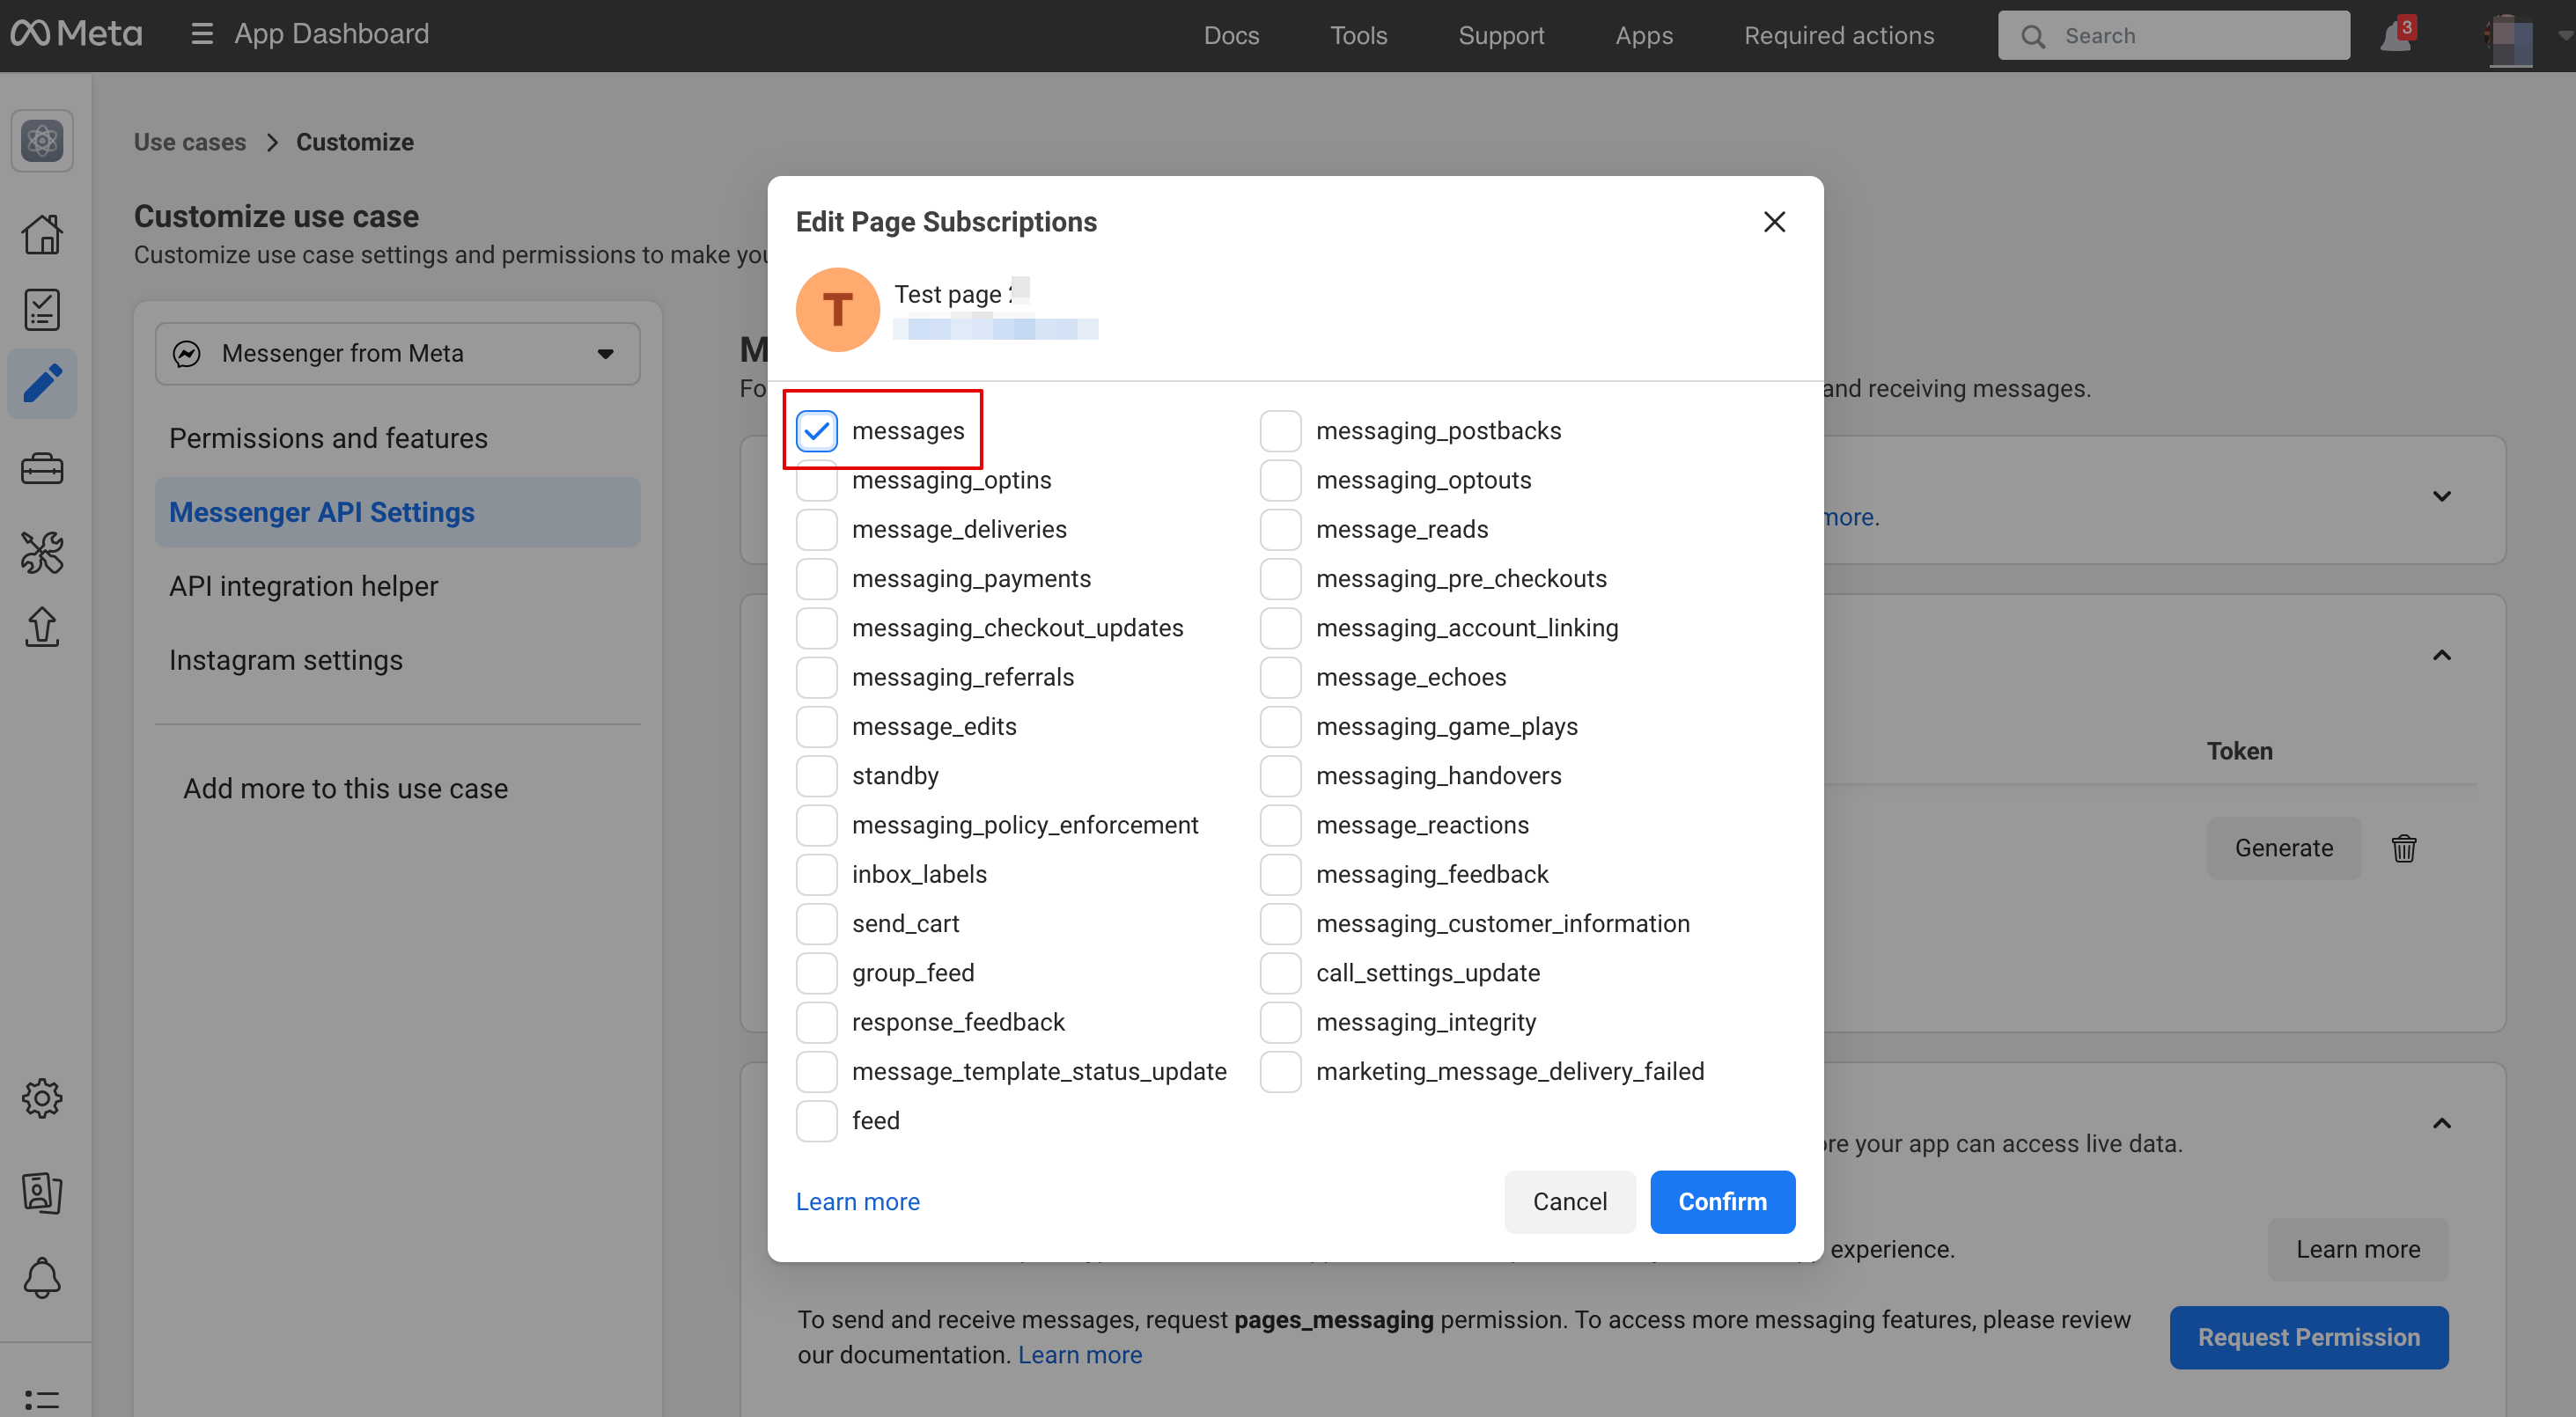
9. Click Add subscription:
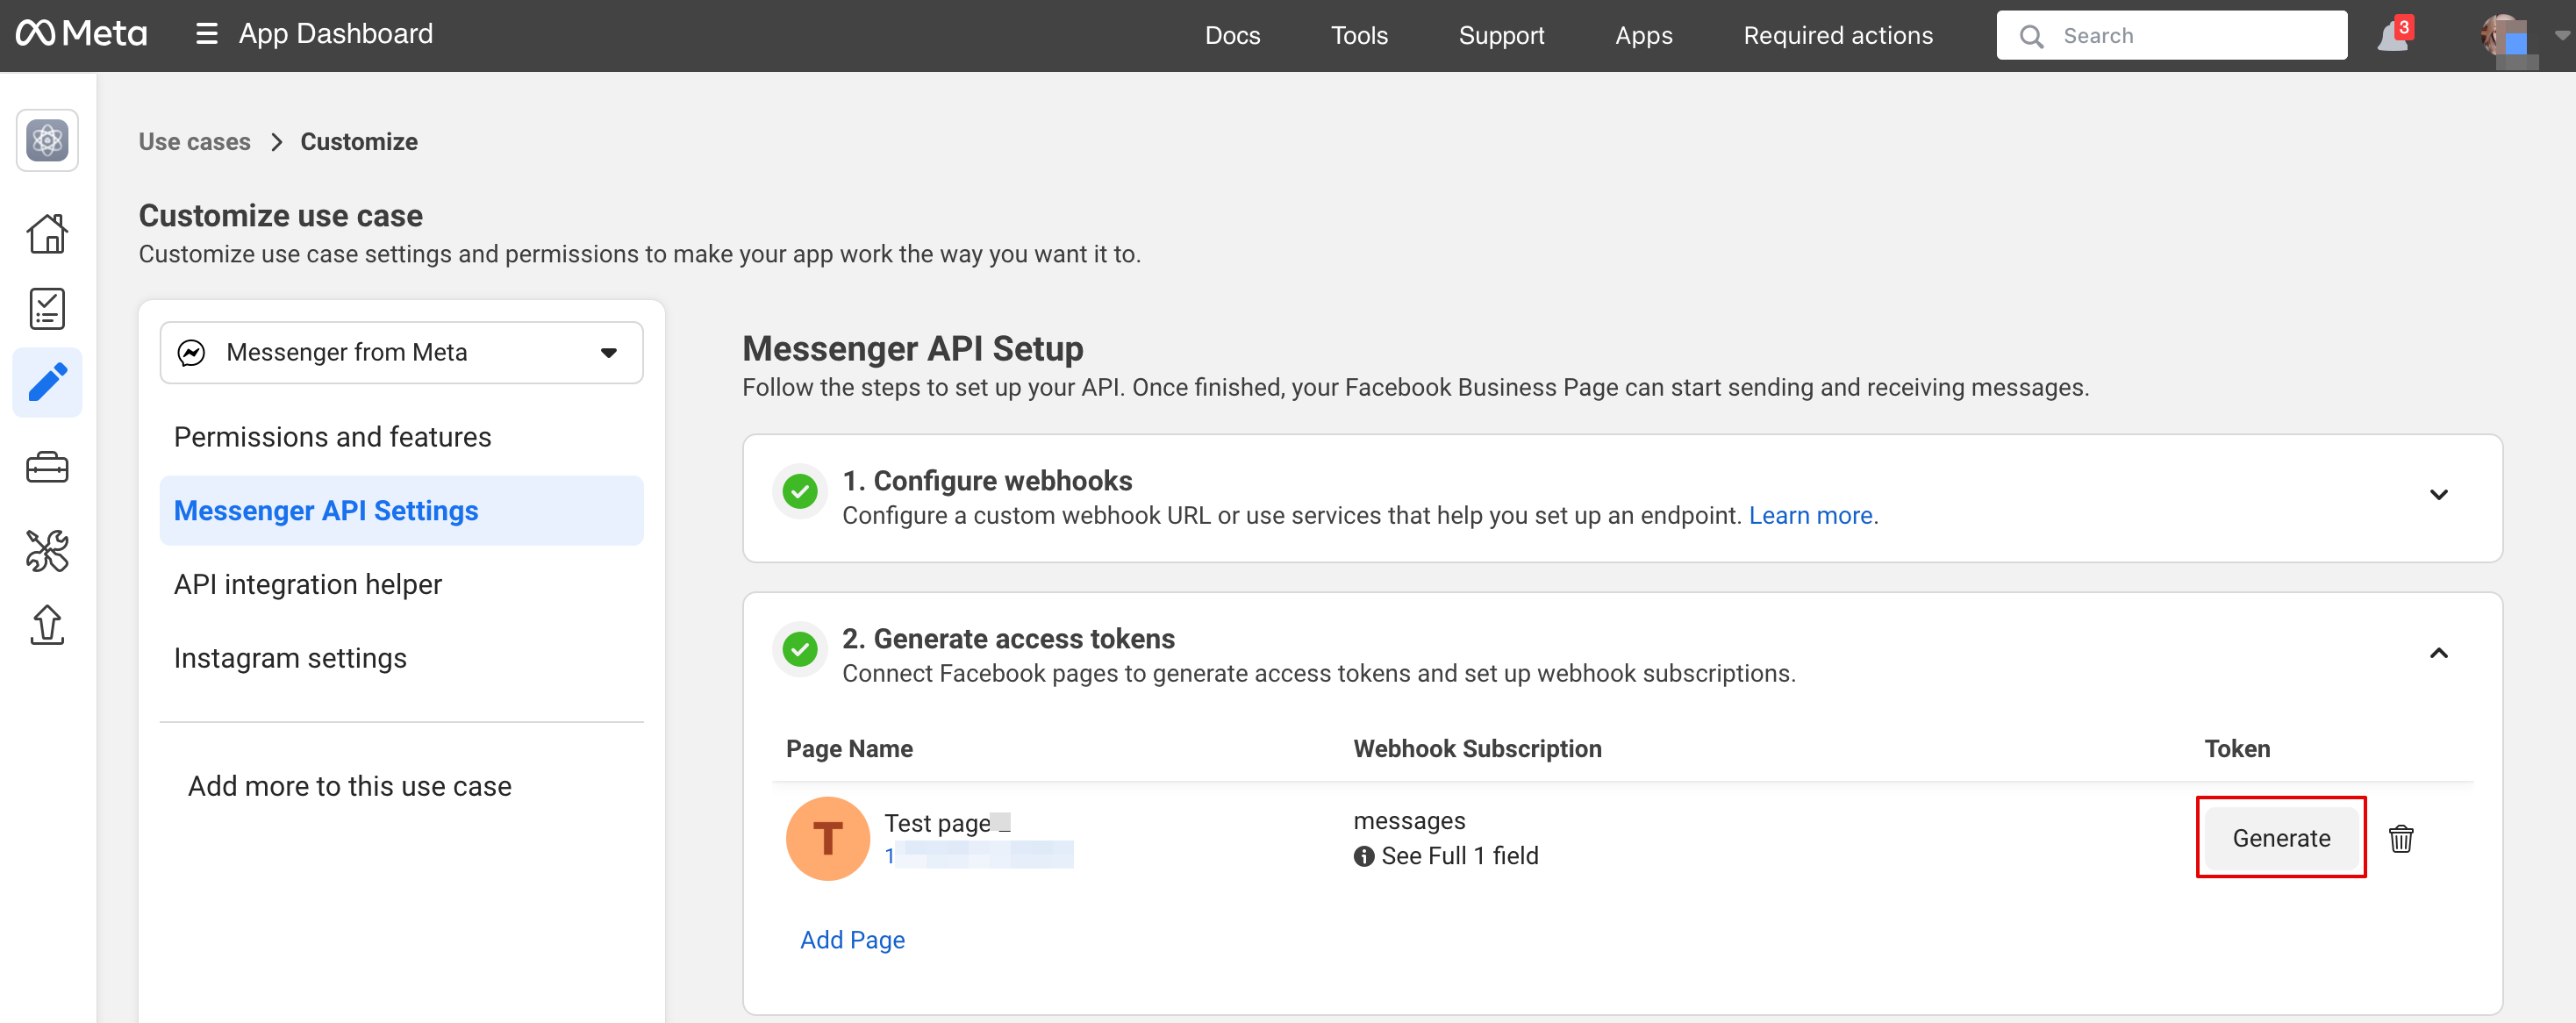
10. Select messages:
11. Click Generate token and copy token and insert into SB:
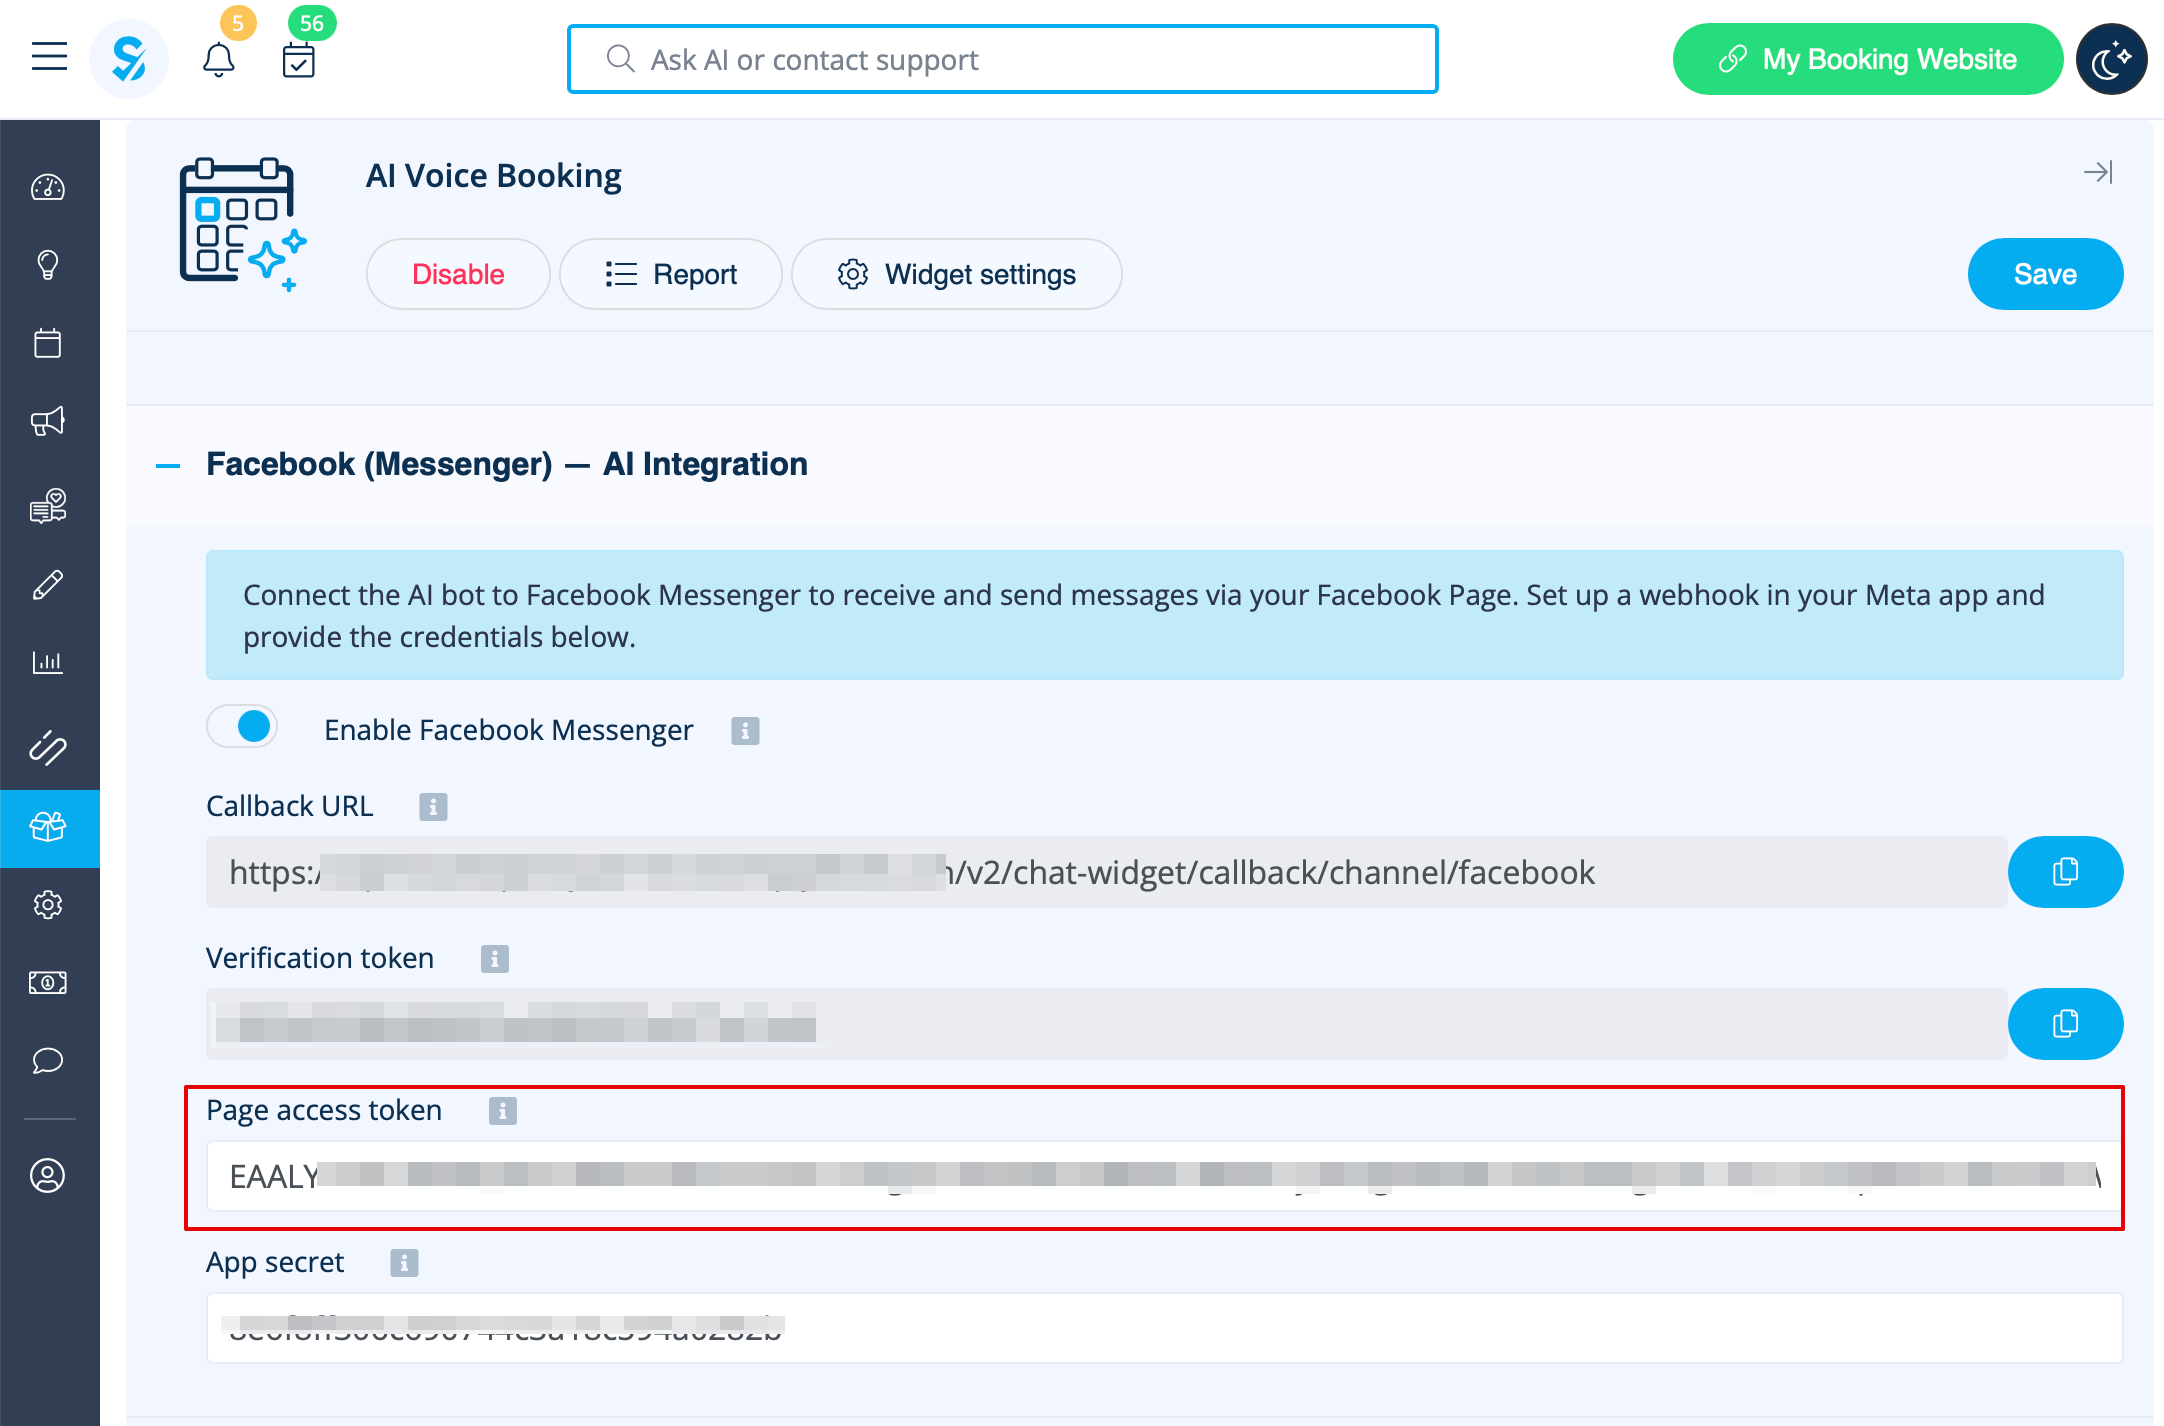
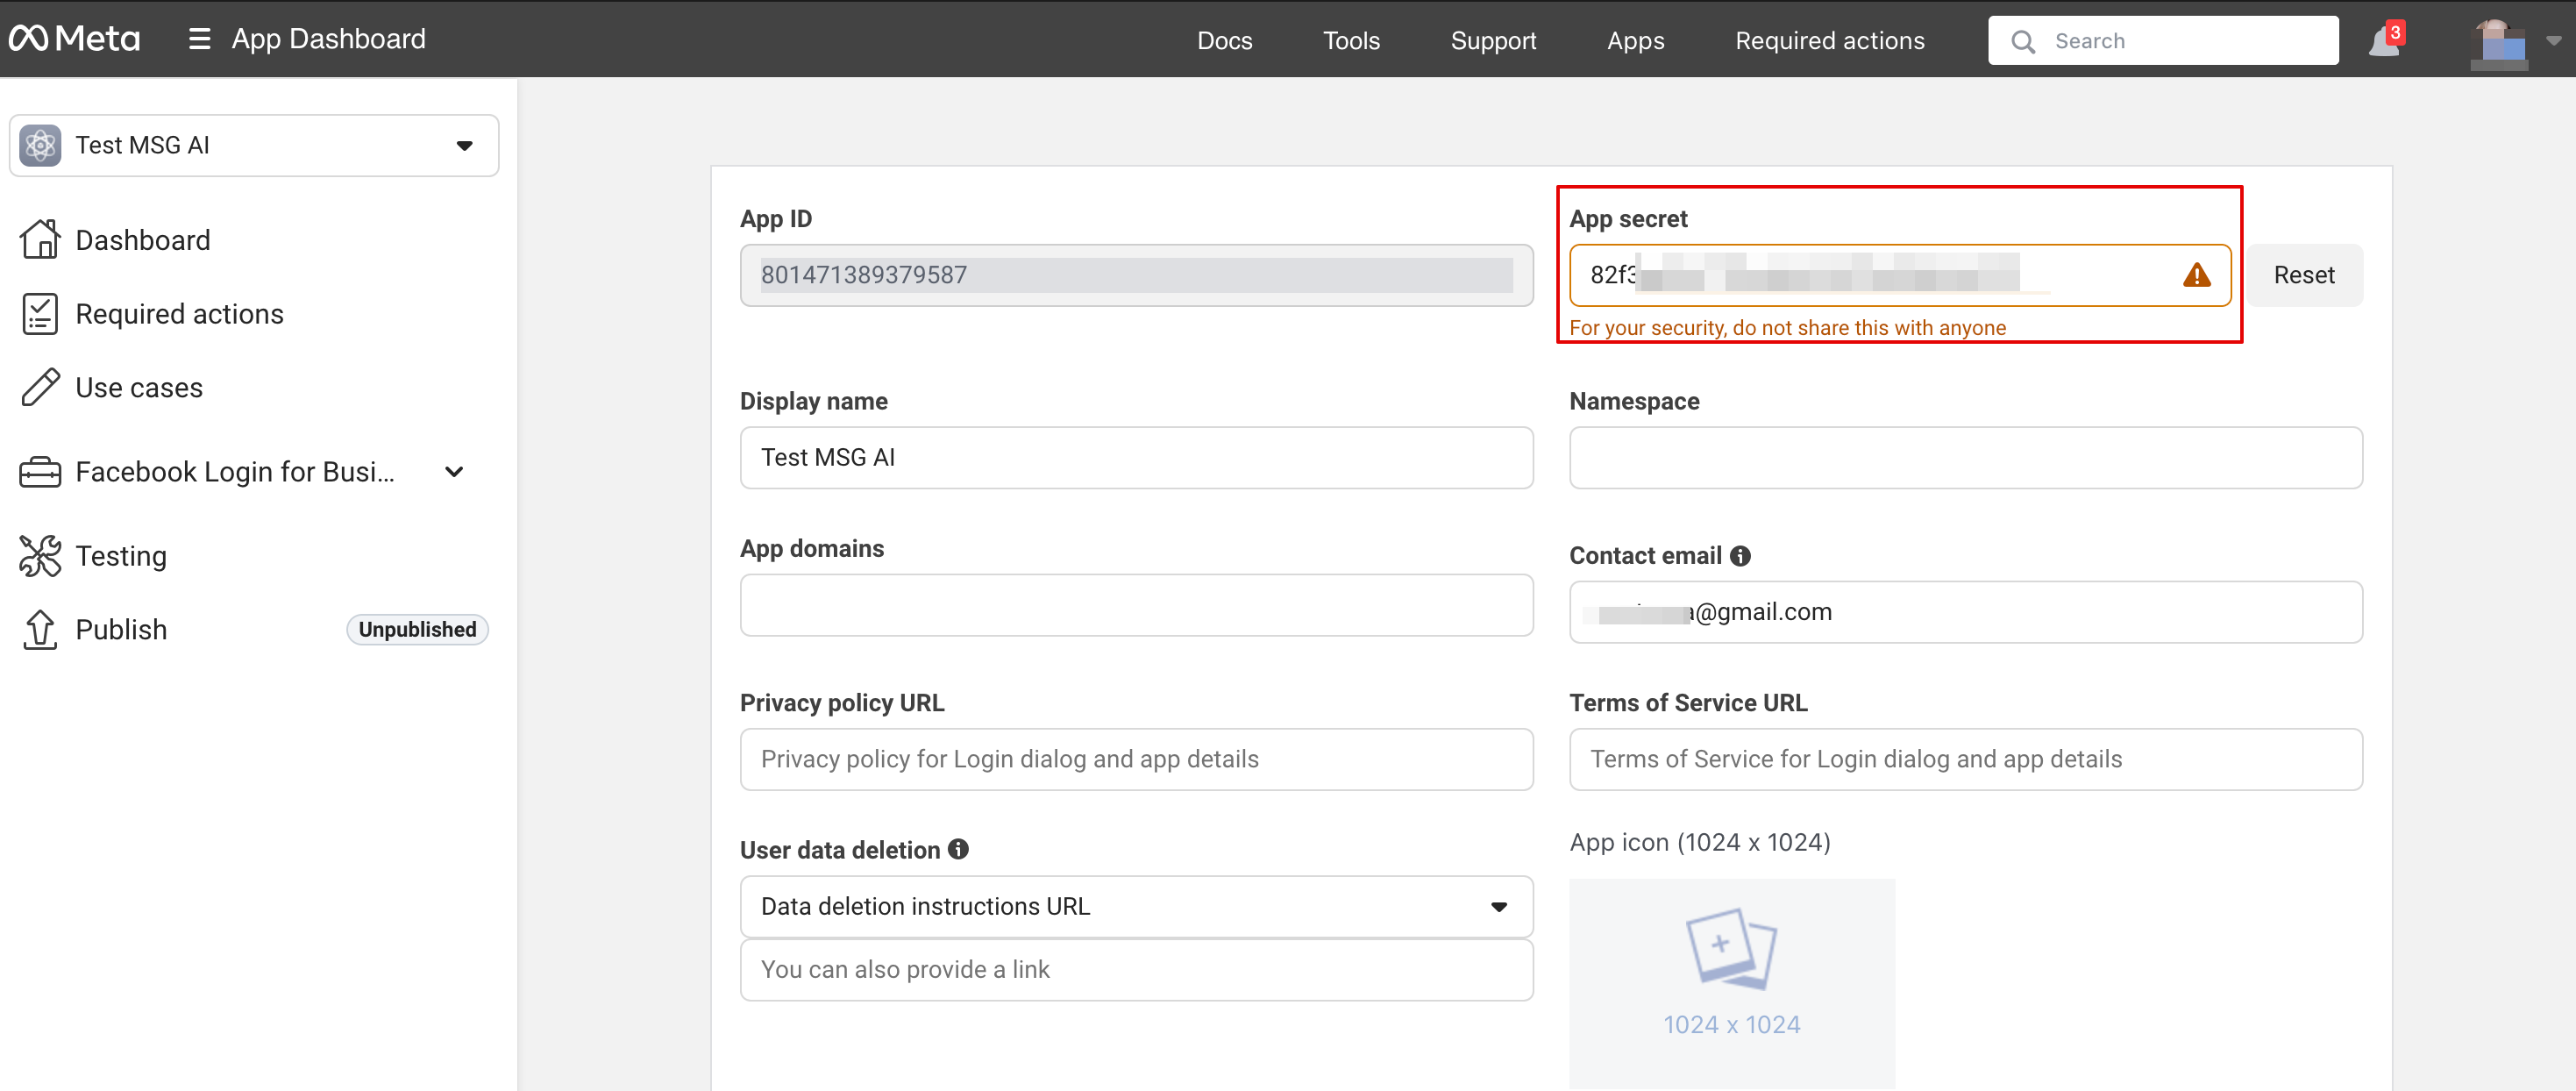
12. In Basic application settings copy App Secret and insert into SB:
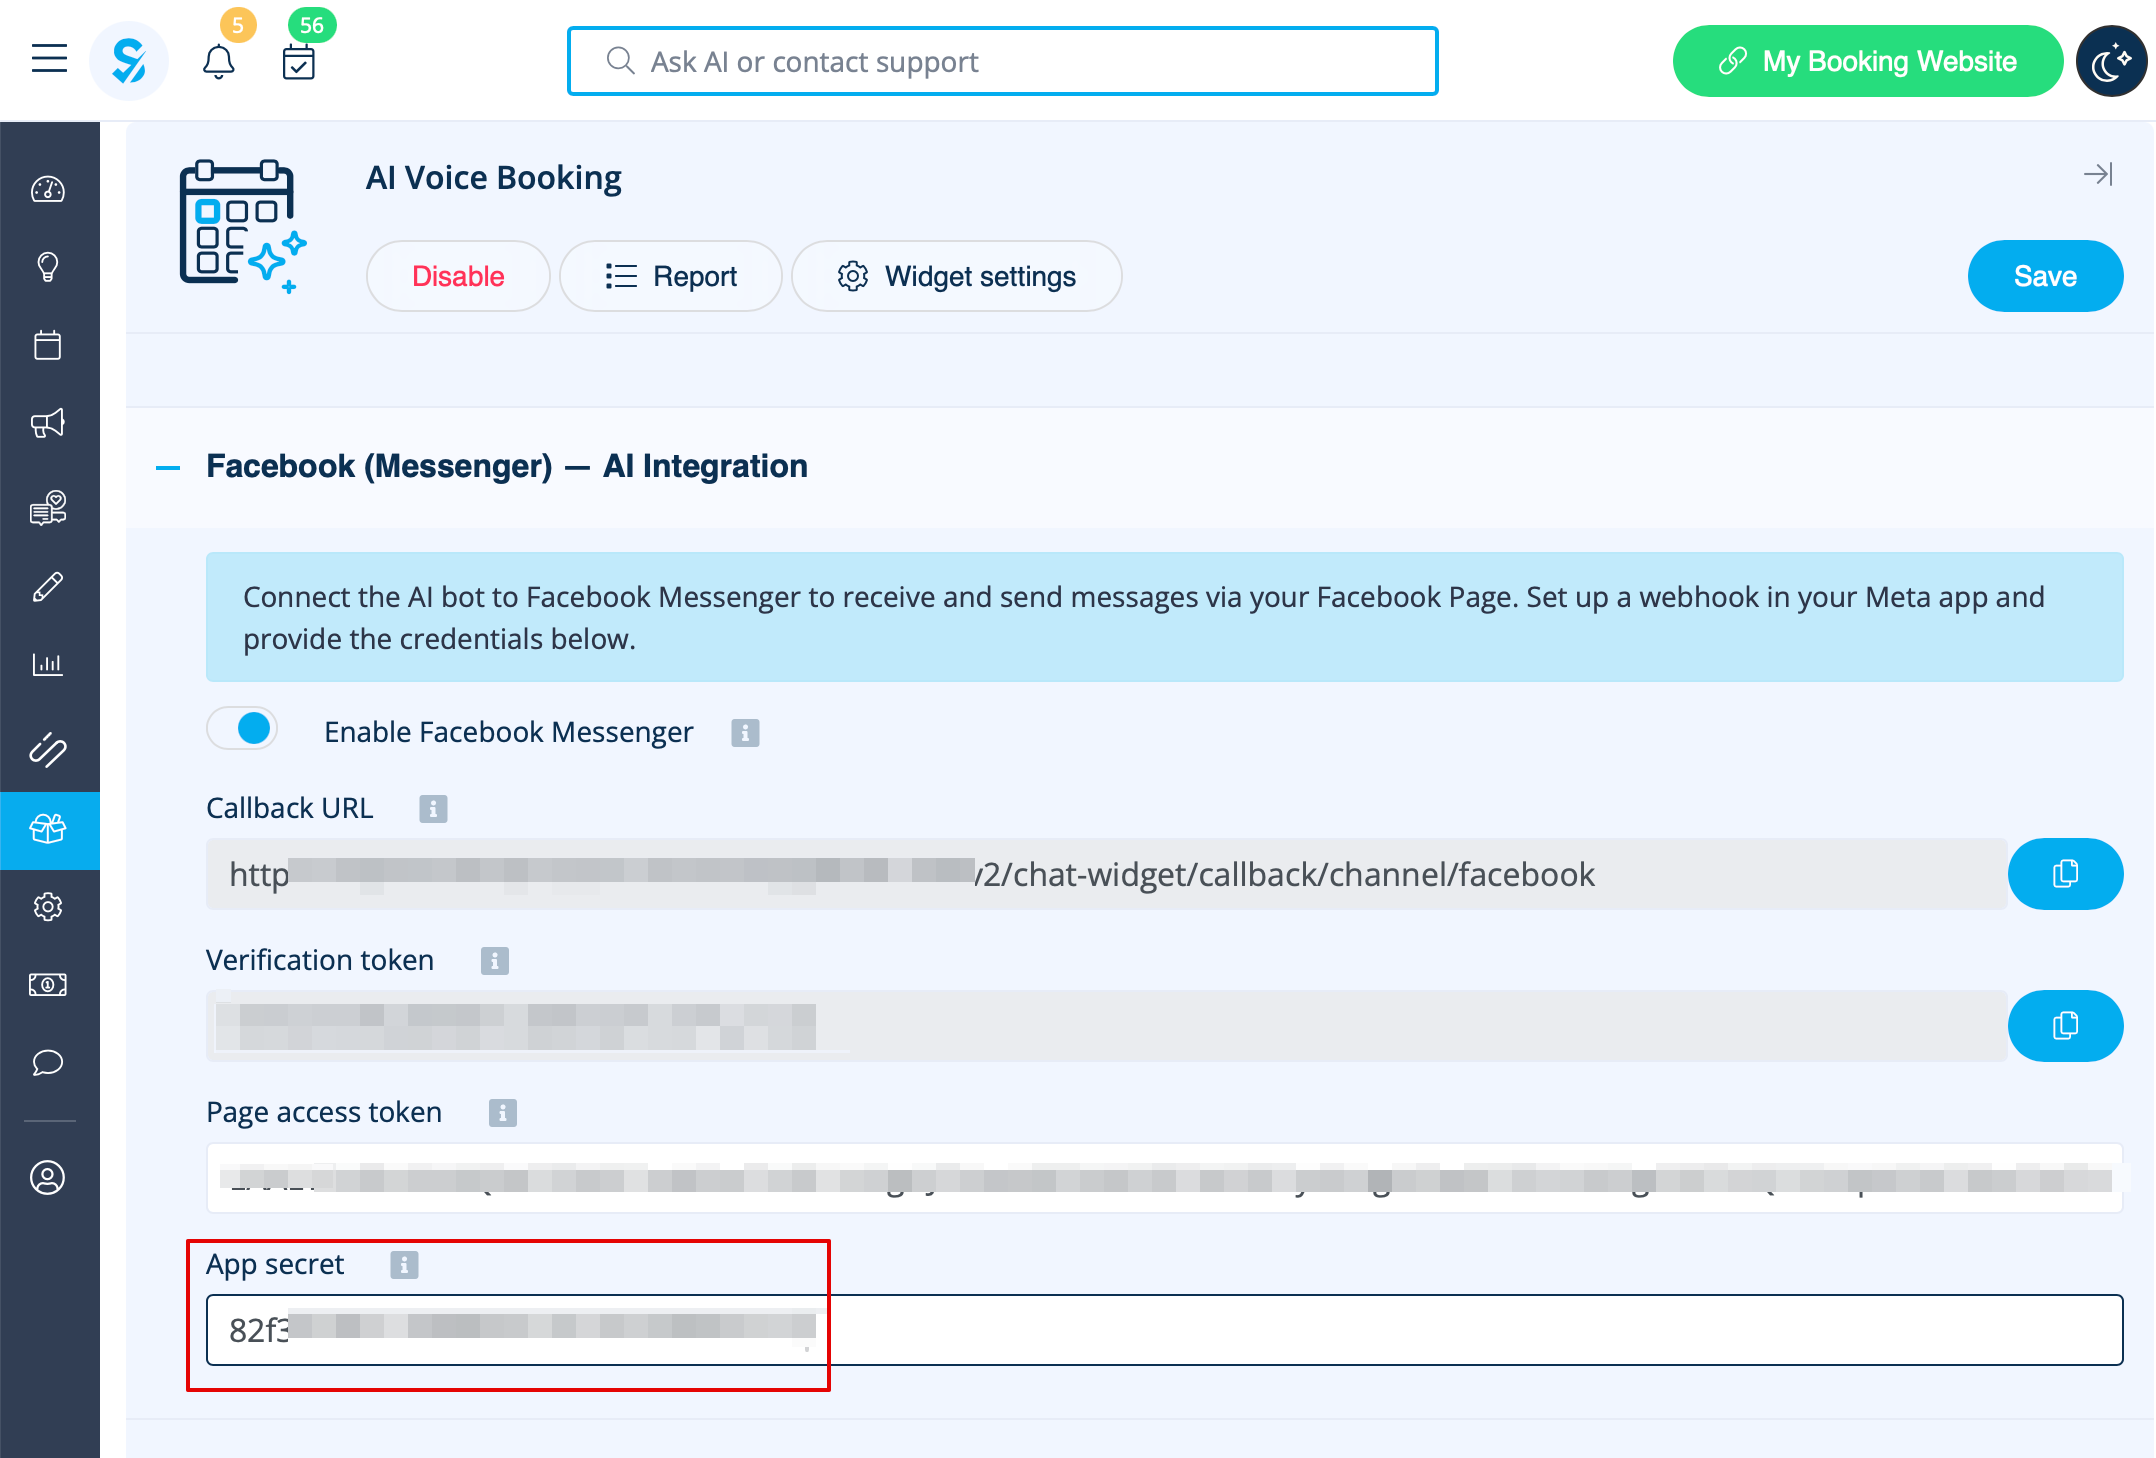
13. Now you are ready to publish an application. And your visitors can chat with bot on your page.
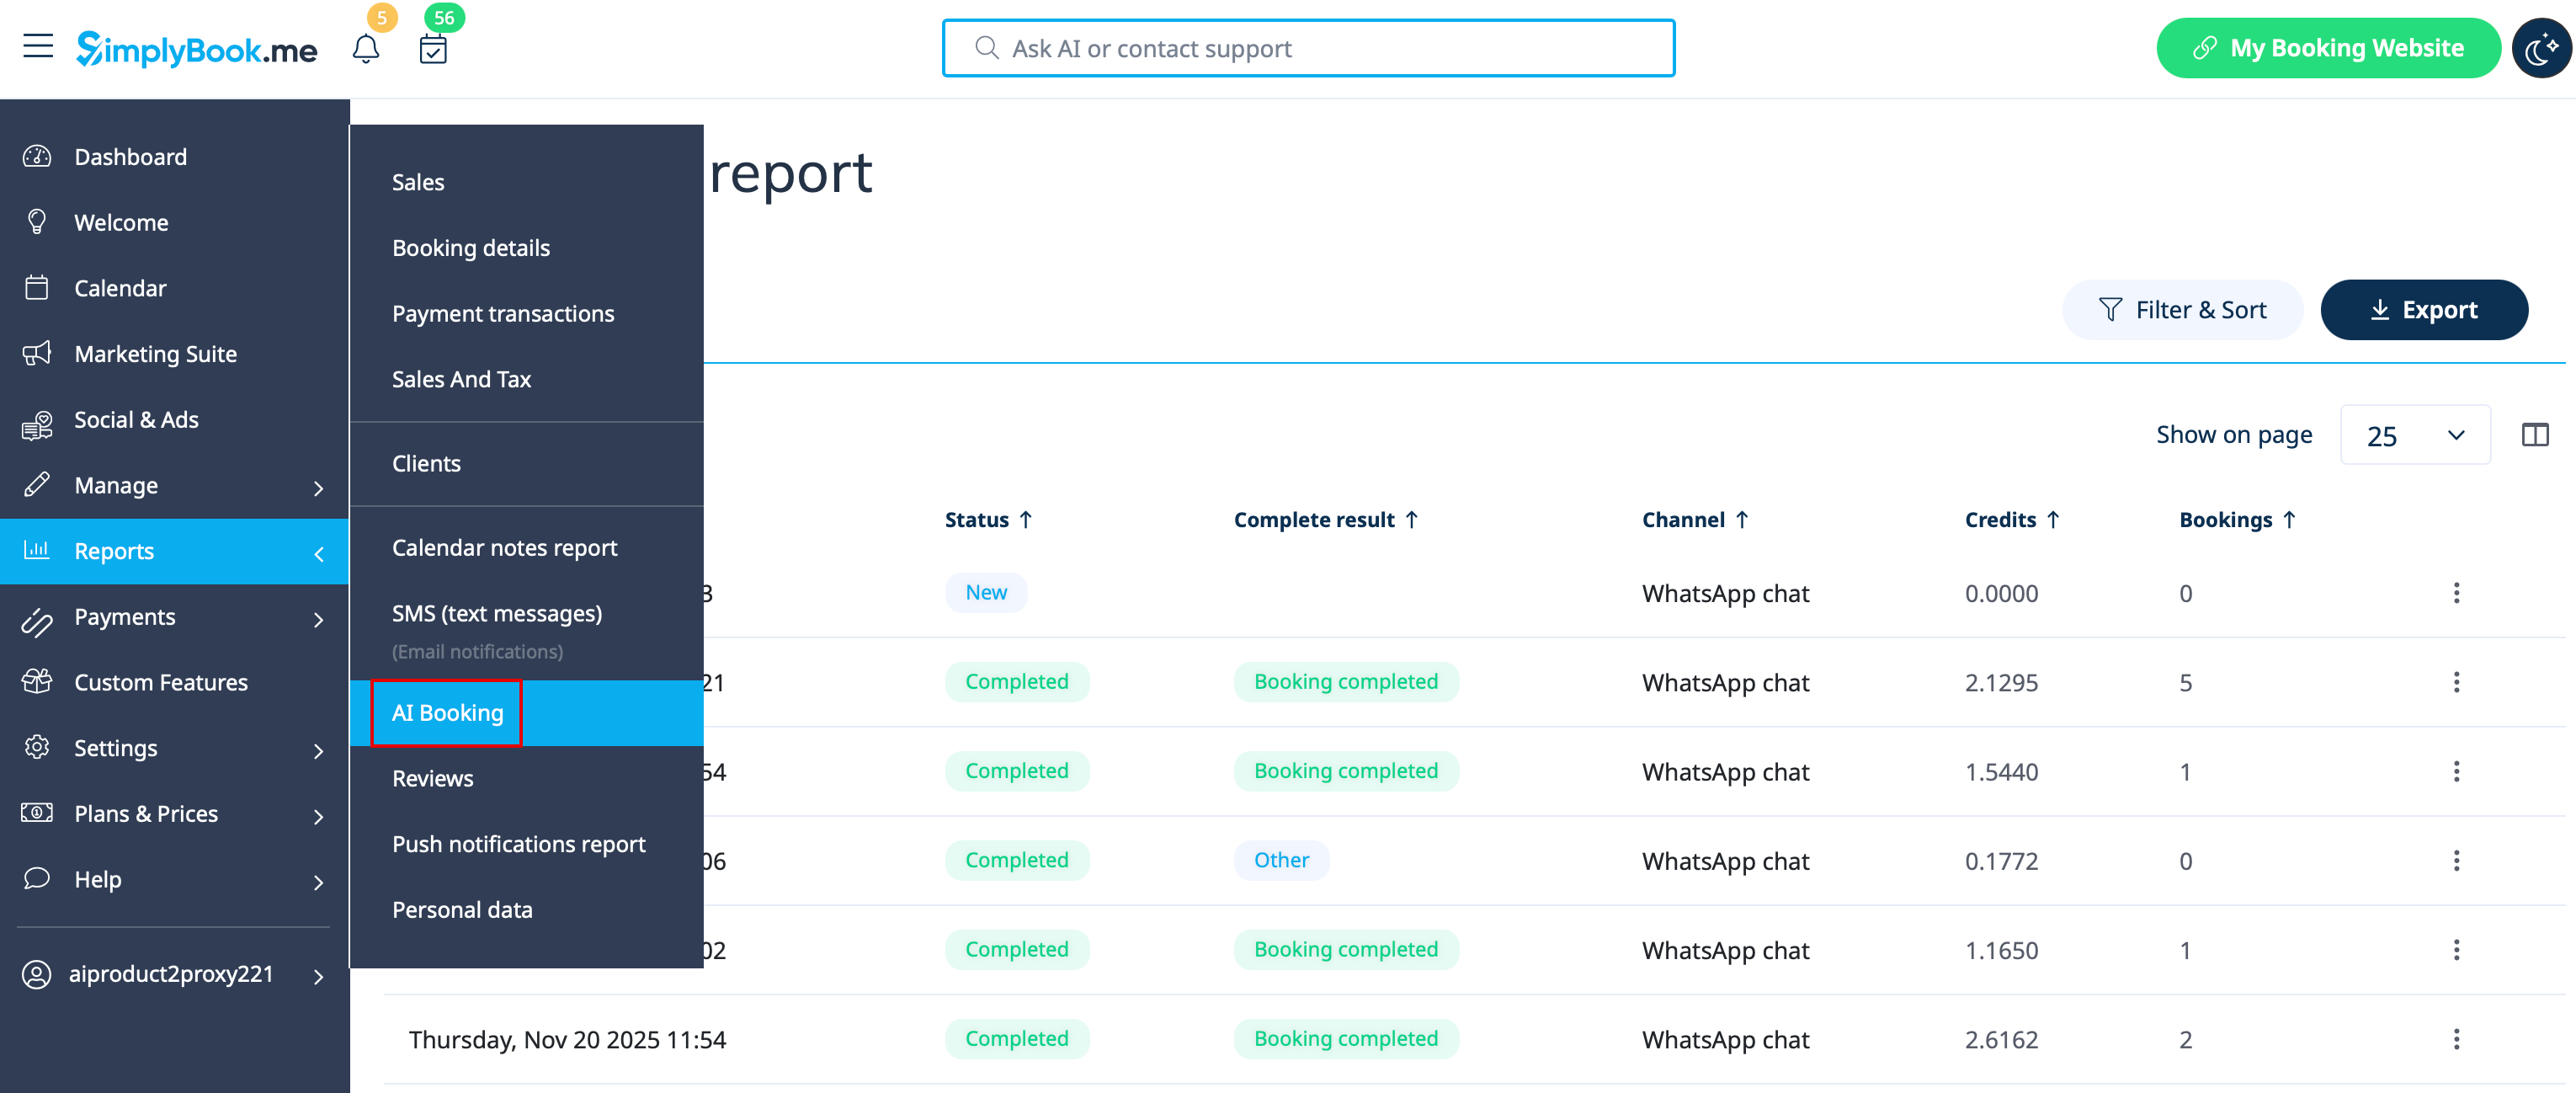
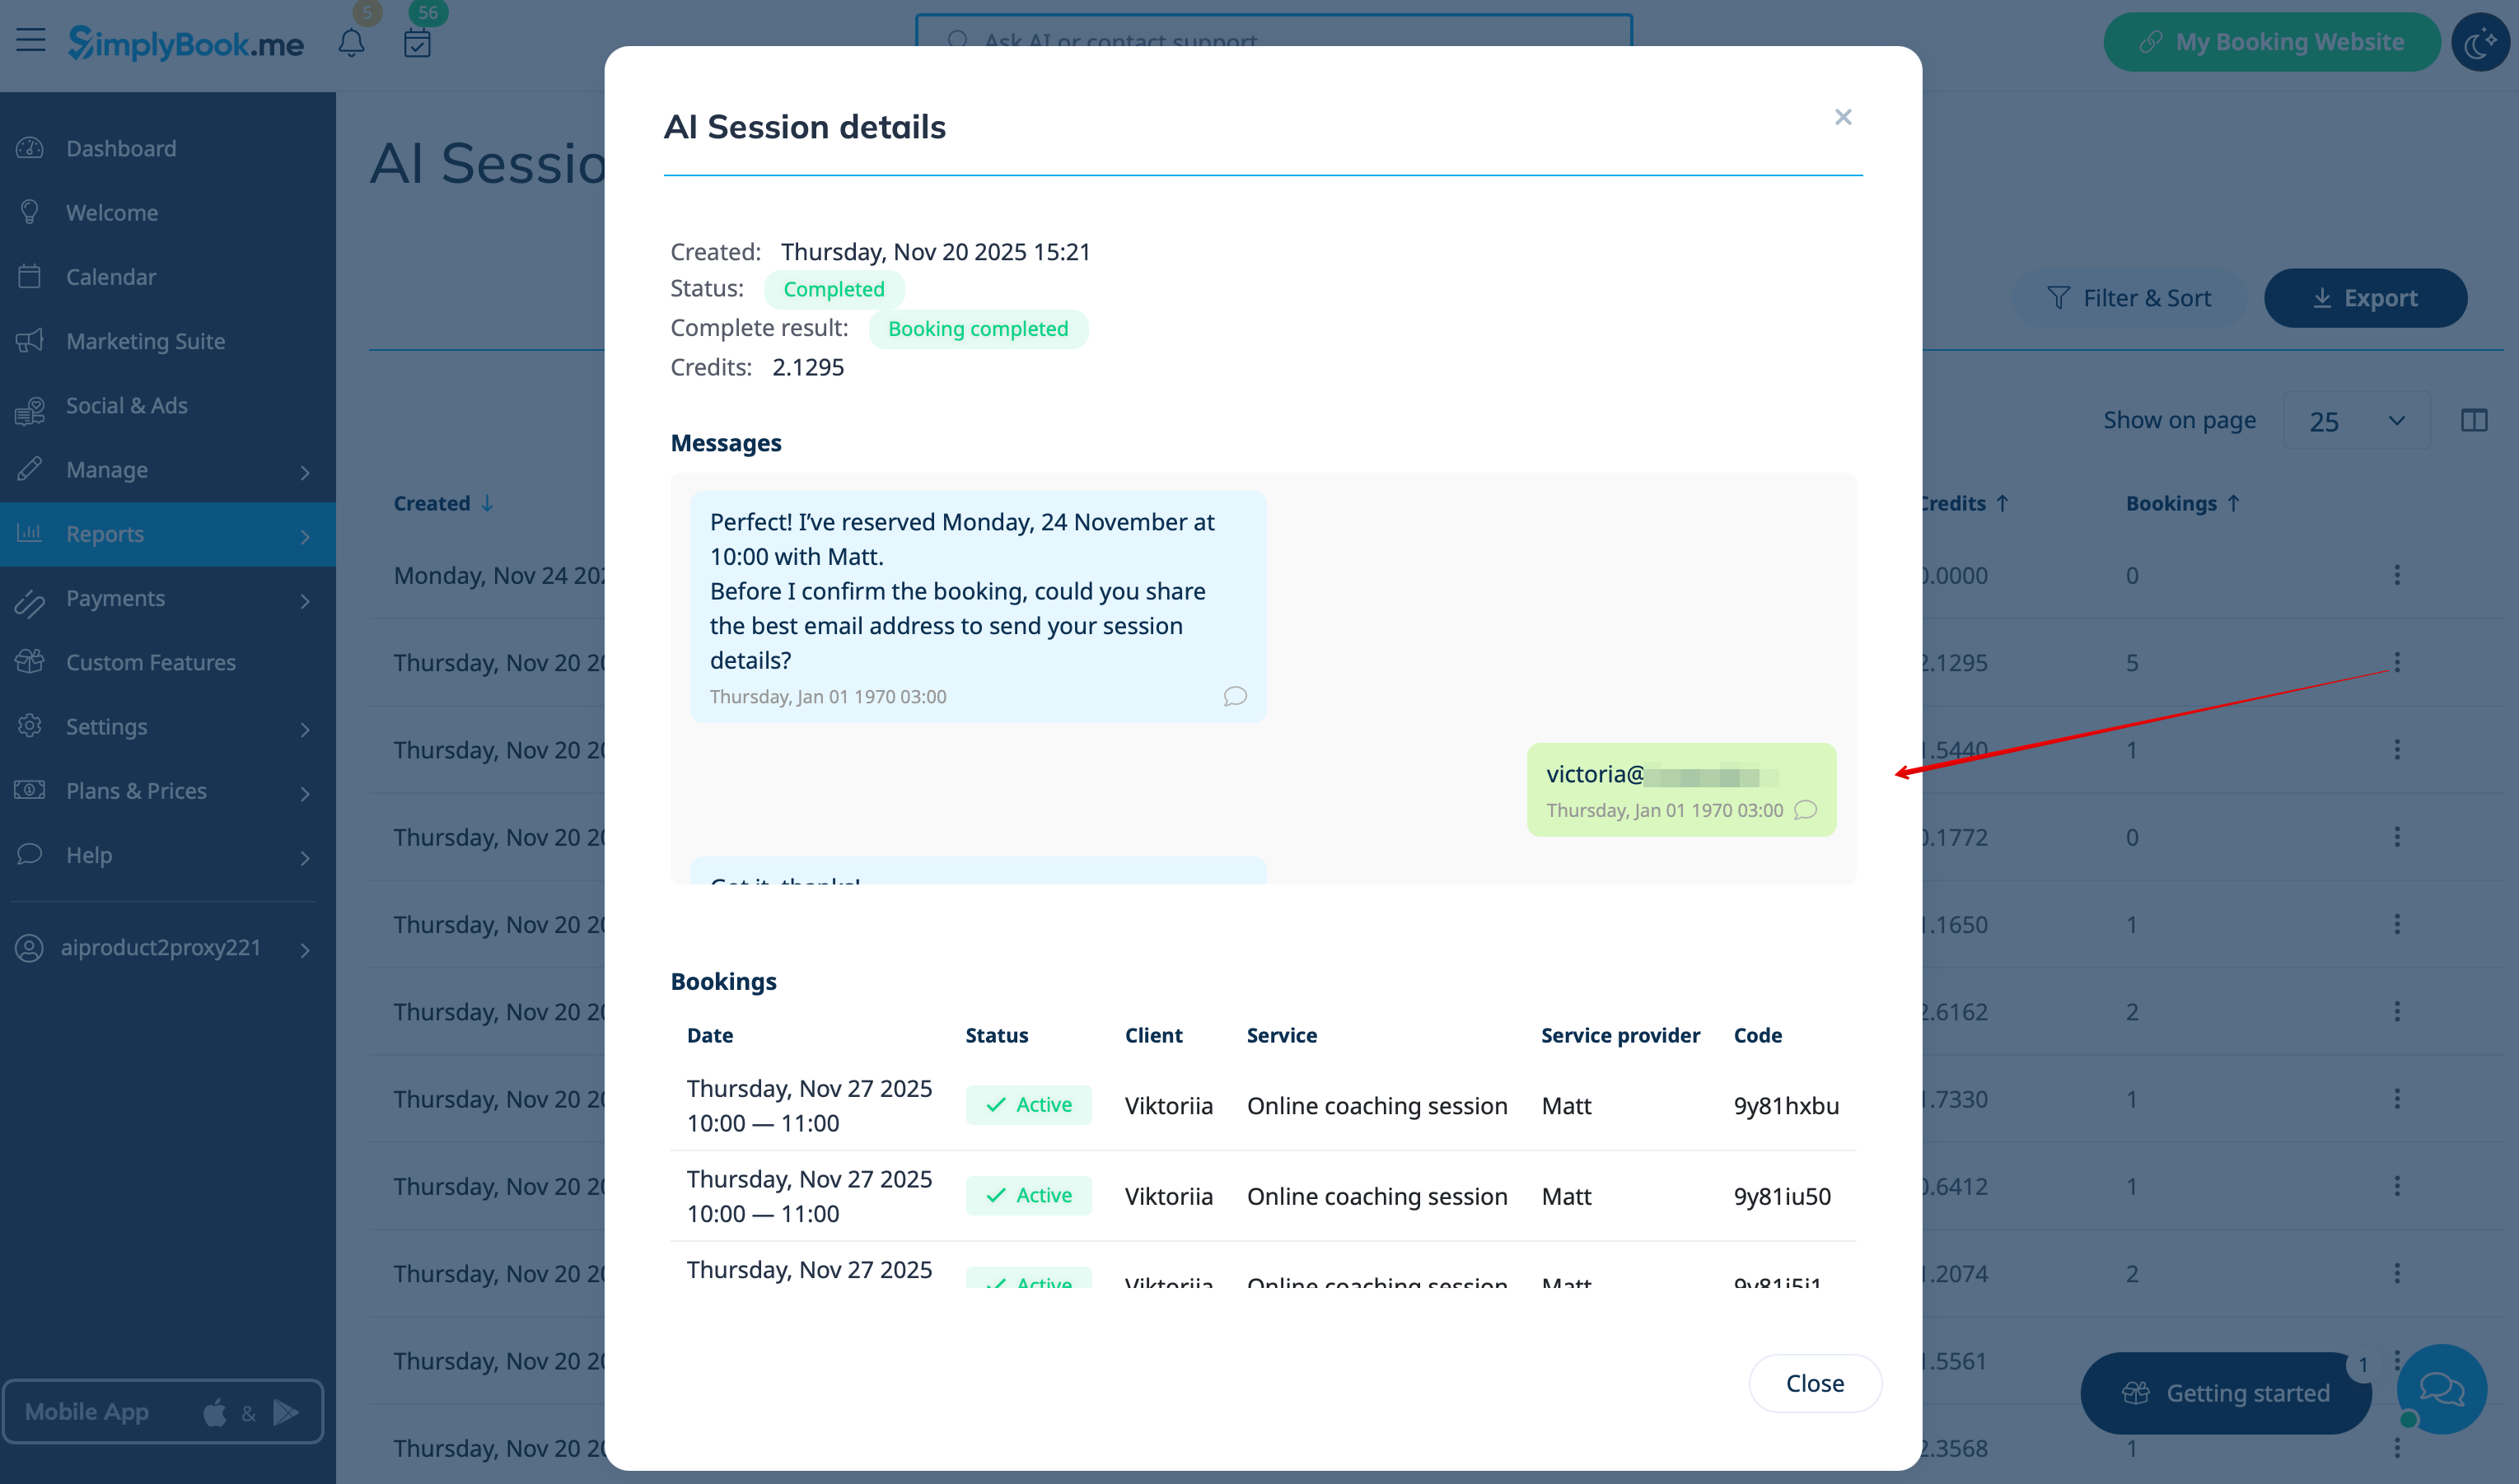
Report
You can see the chats, the number of credits used as well as view the session details with the related bookings info if the booking process was successful in Reports -> AI Booking