Brugerdefineret e-mail-funktion
Vil du sende dine kunder og medarbejdere attraktive e-mail-notifikationer med dit eget tilpassede branding, links, knapper og mange andre muligheder? Når du aktiverer denne tilpassede funktion, får du adgang til HTML-editoren, hvor du nemt kan trække og slippe forskellige indholdsblokke, tilføje billeder, tekst, kontaktoplysninger osv. Bemærk, at indhold relateret til booking eller køb samt tilføjelse af de tilhørende variabler skal redigeres enten i Indstillinger -> E-mail- og SMS-indstillinger, hvis du bruger almindelige skabeloner til aftalebekræftelser, eller i de specifikke indstillinger for tilpassede funktioner, hvis du har tilpasset dine meddelelser.
Bemærk! Denne tilpassede funktion er kun tilgængelig med betalte abonnementer.
Videovejledning tilgængelig ![]()
Bemærk!
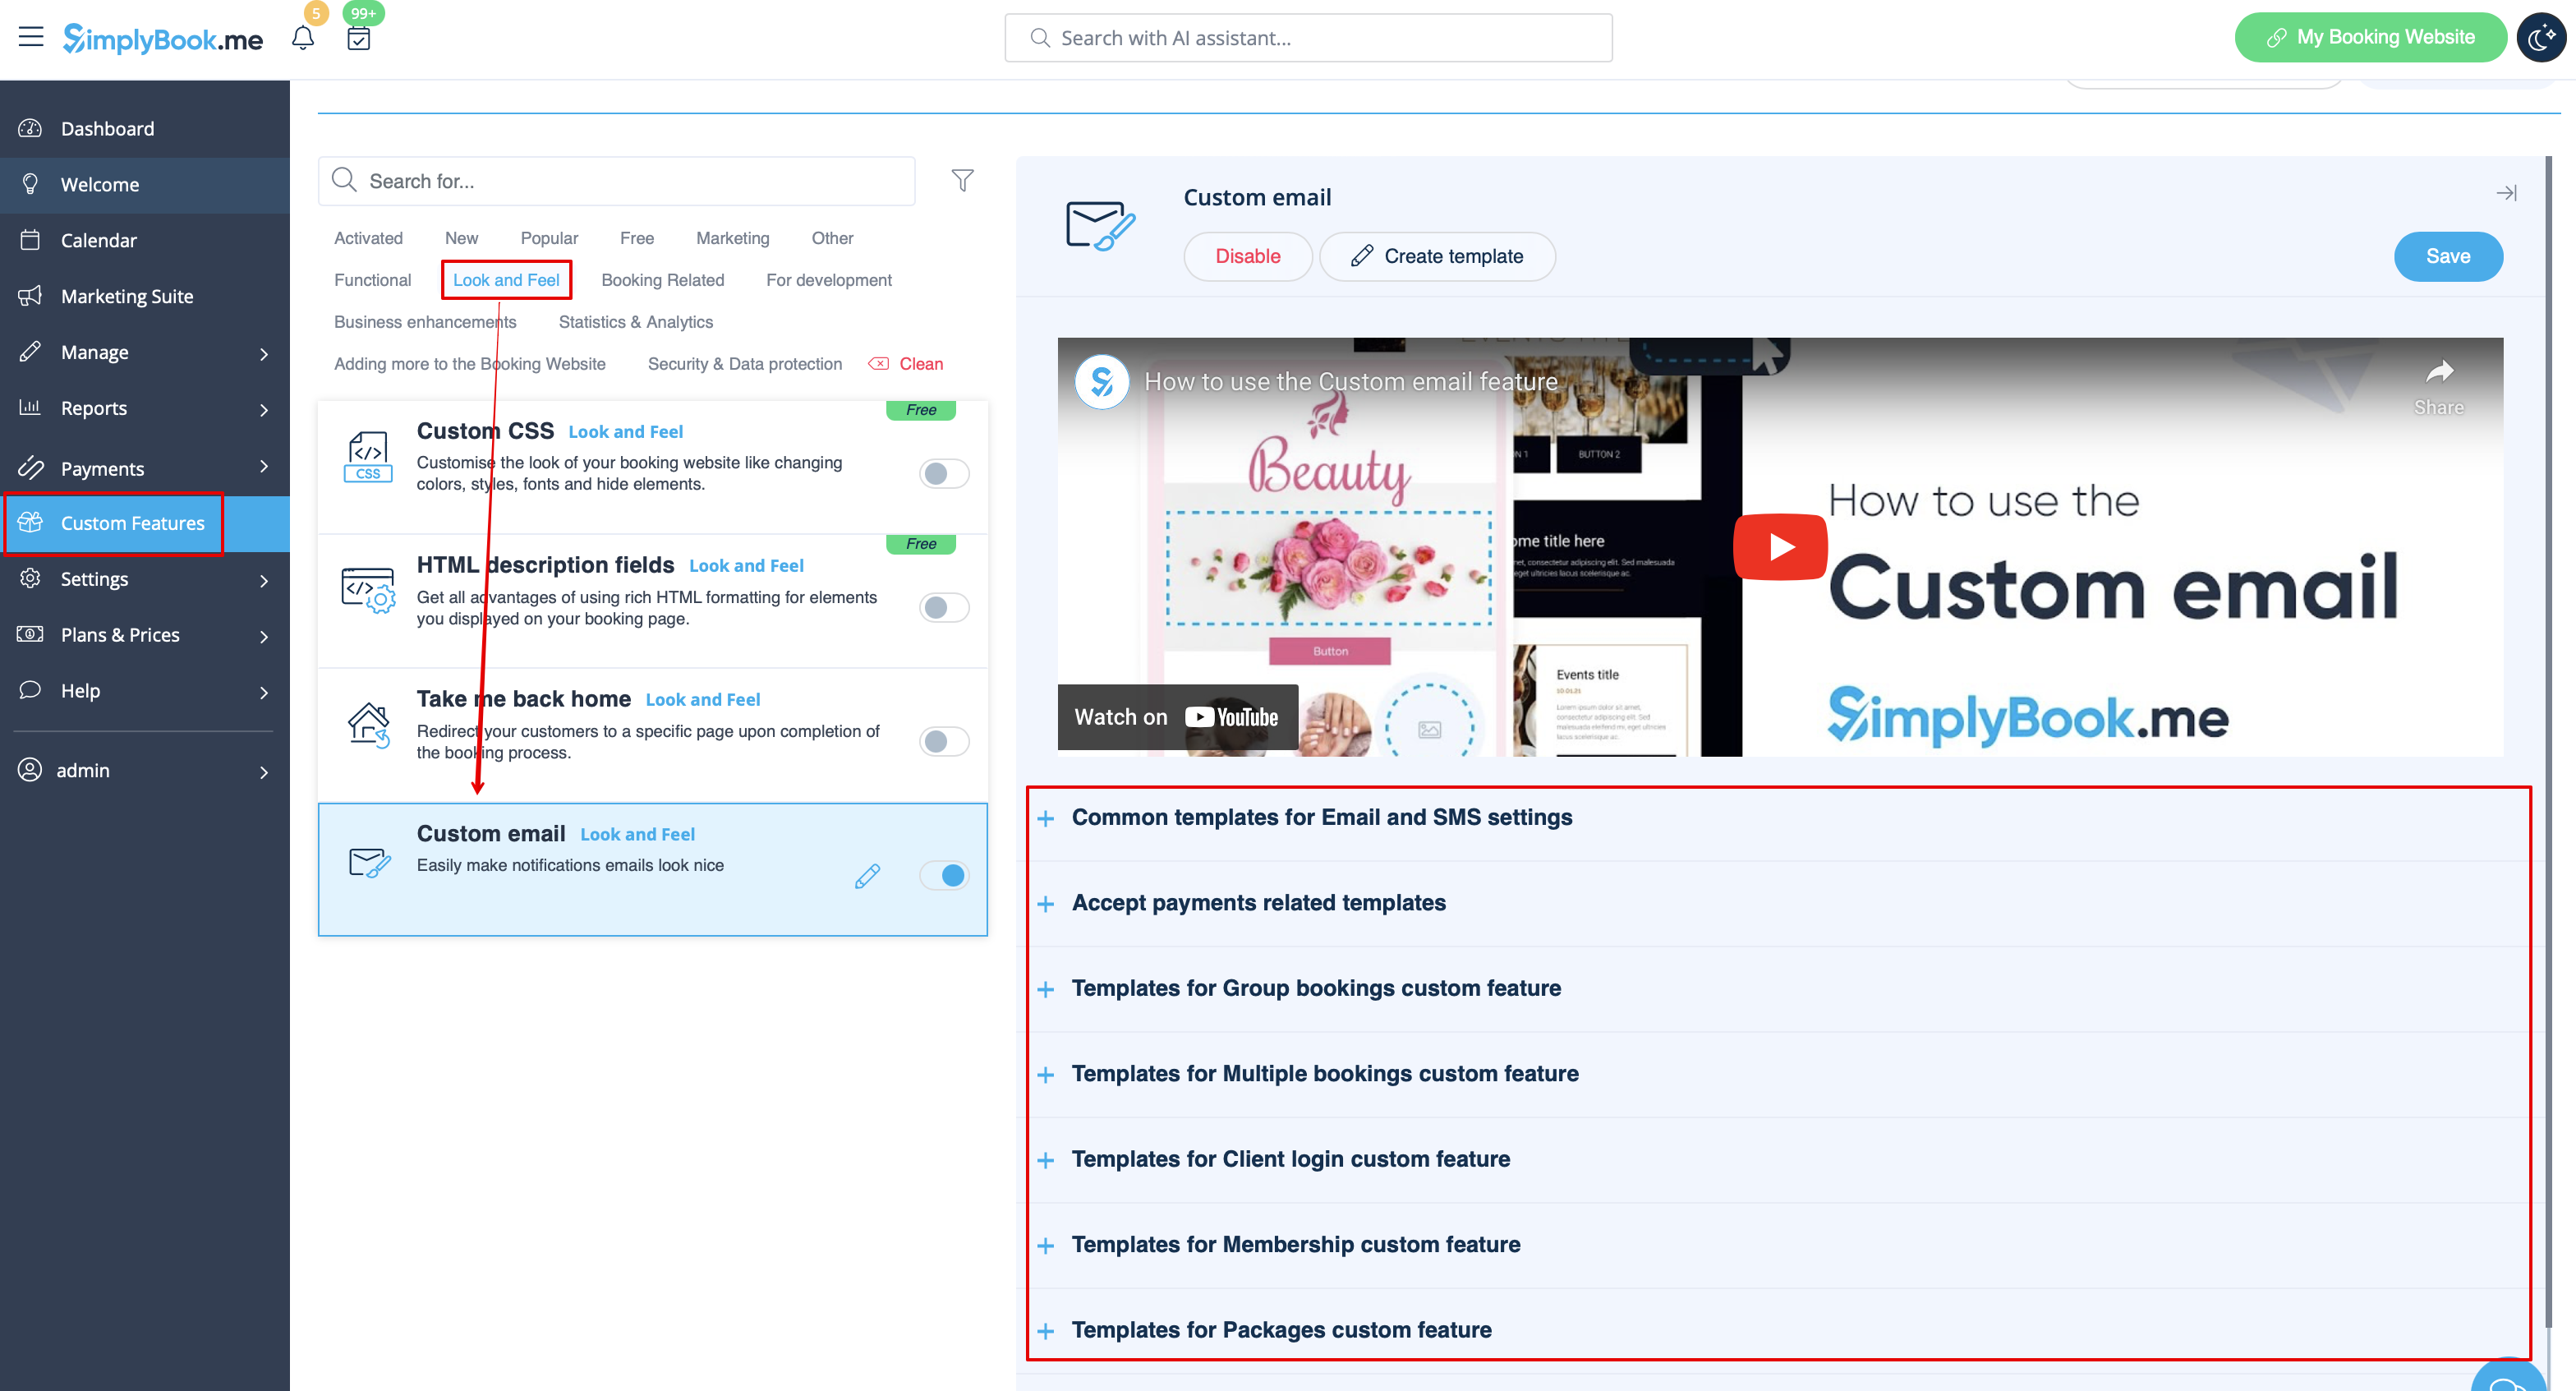
Der er i øjeblikket tilgængelige tilpasningsmuligheder for følgende e-mail-skabeloner:
- Vigtige bookingrelaterede meddelelser fra Indstillinger -> E-mail- og SMS-indstillinger;
- Gruppebookinger – meddelelser om tilpassede funktioner;
- Flere bookinger – meddelelser om tilpassede funktioner;
- Kundelogin – meddelelser om tilpassede funktioner;
- Medlemskab – meddelelser om tilpassede funktioner;
- Pakker – meddelelser om tilpassede funktioner;
- Billetter – meddelelser om tilpassede funktioner;
- Kuponer og gavekort – meddelelser om tilpassede funktioner (både: kundesiden køb på siden Tilpassede funktioner og administratoren manuel udstedelse i kuponer og gavekortadministration);
- Medicinske tests – meddelelser om tilpassede funktioner;
- Book snart – meddelelserom tilpassede funktioner.
- How to use
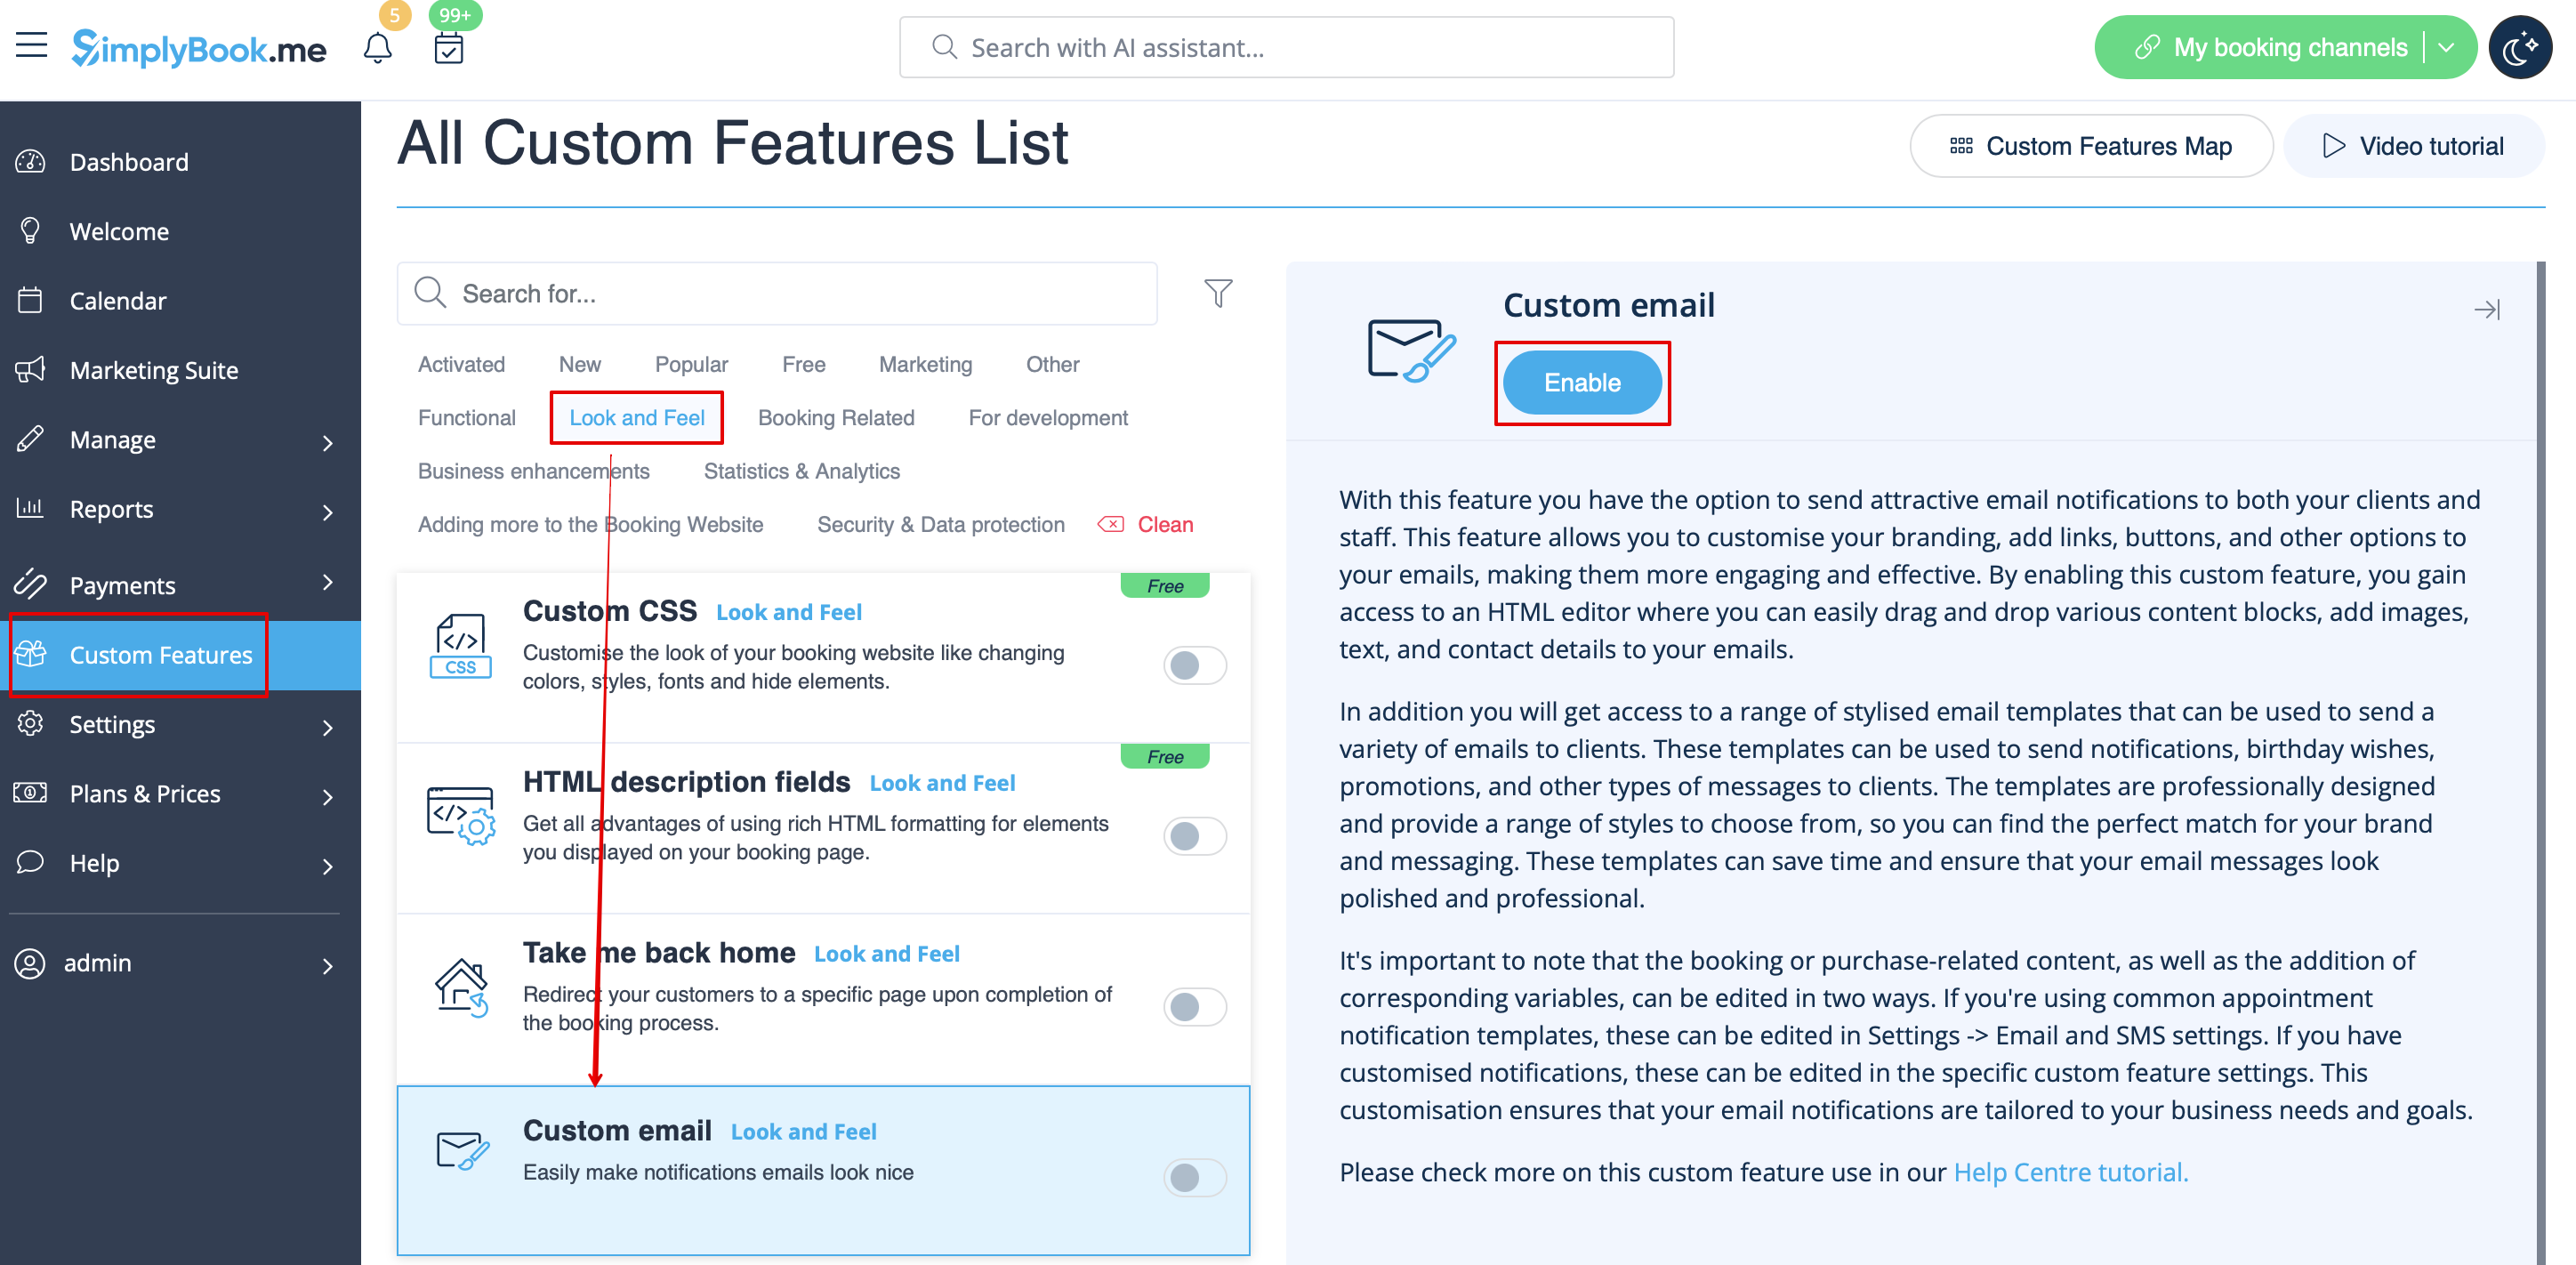
- 1. Enable Custom Email feature on your Custom features page, Look and Feel section.
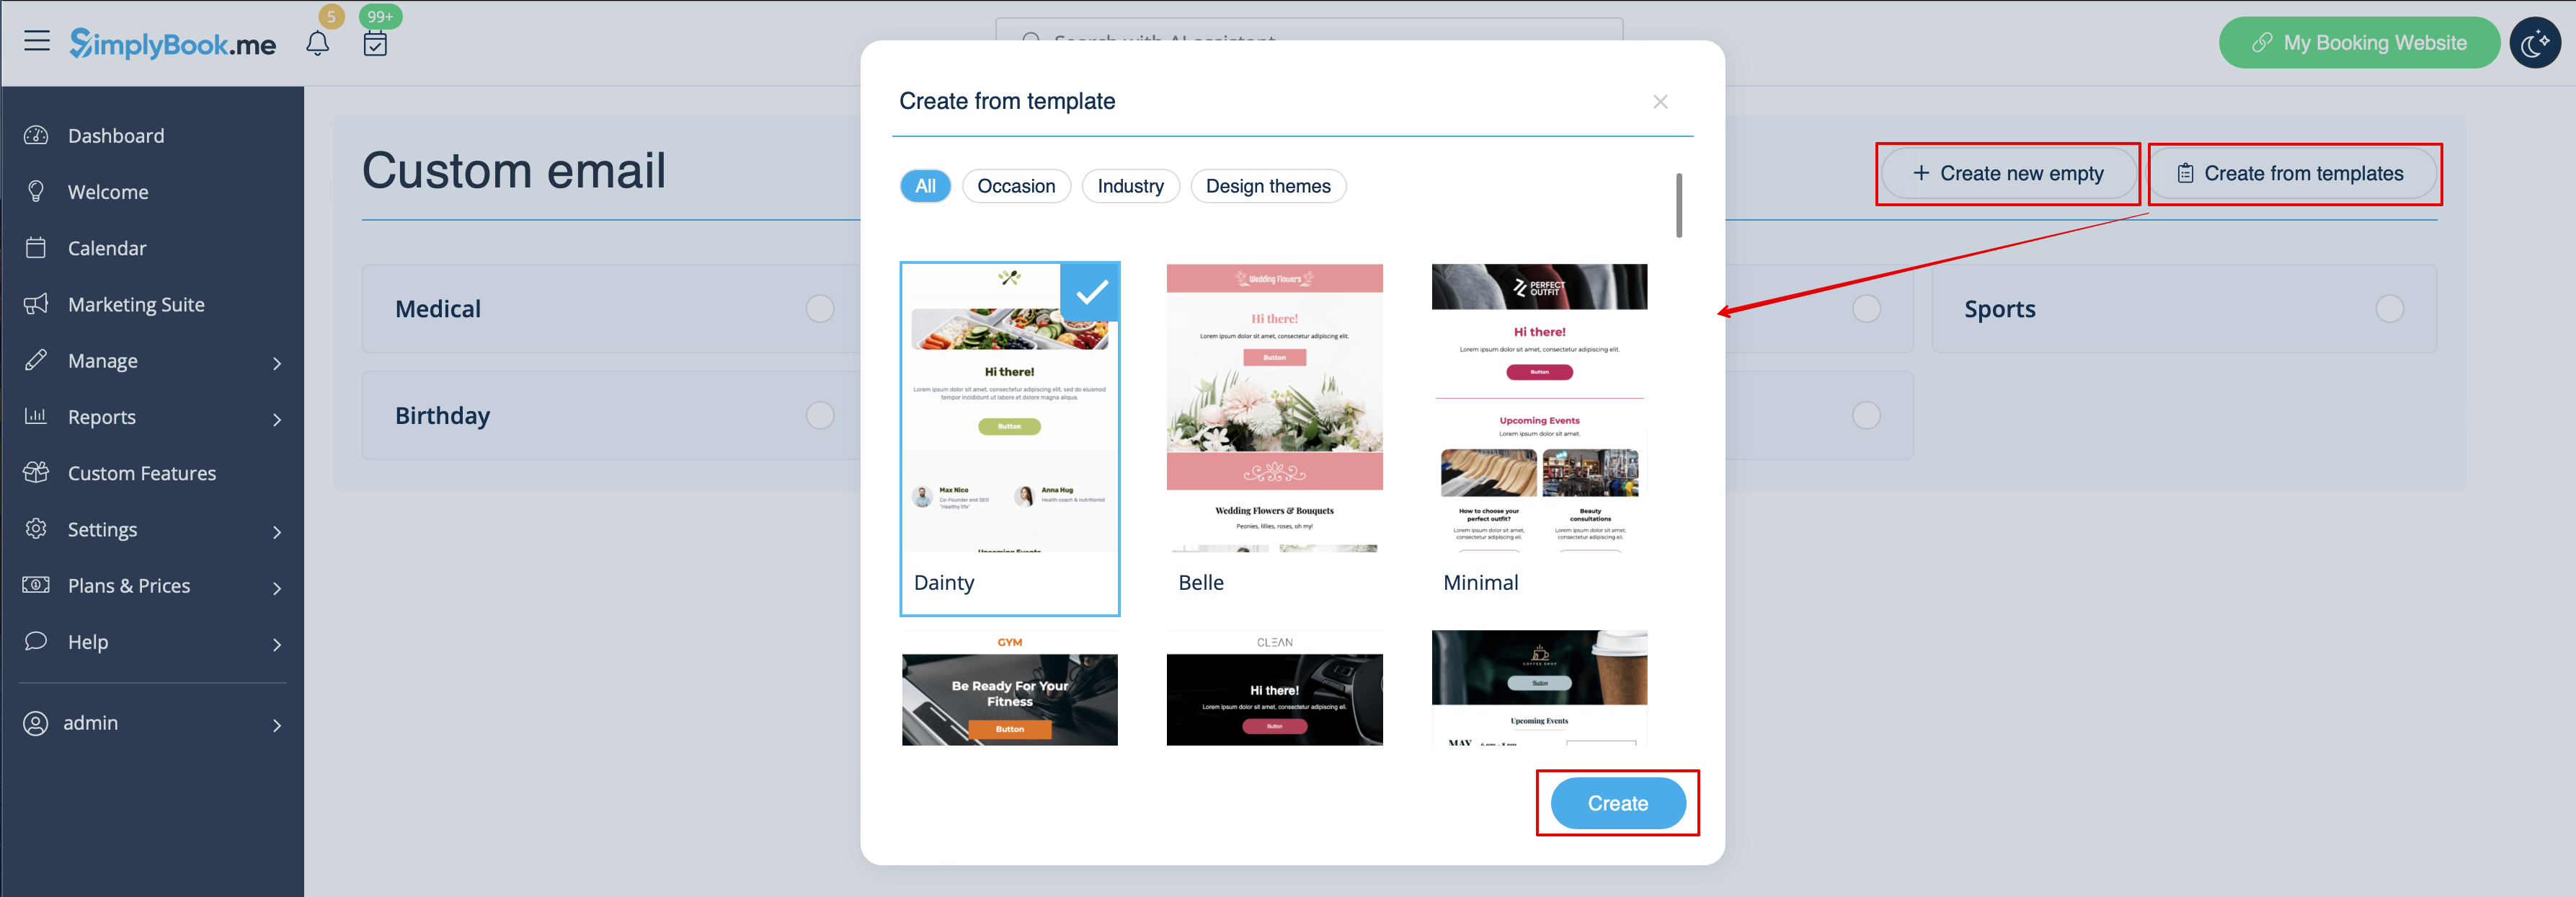
- 2. Click on Create template link to get to the editor and be able to setup your first template.
- 3. Please select either Create from templates if you would like to select one of our beautiful premade options or Create new empty to start adding all the elements from scratch.
- Add template name for the empty template type (pre-made templates can be renamed during editing) and hit Create button to get to the editing mode.
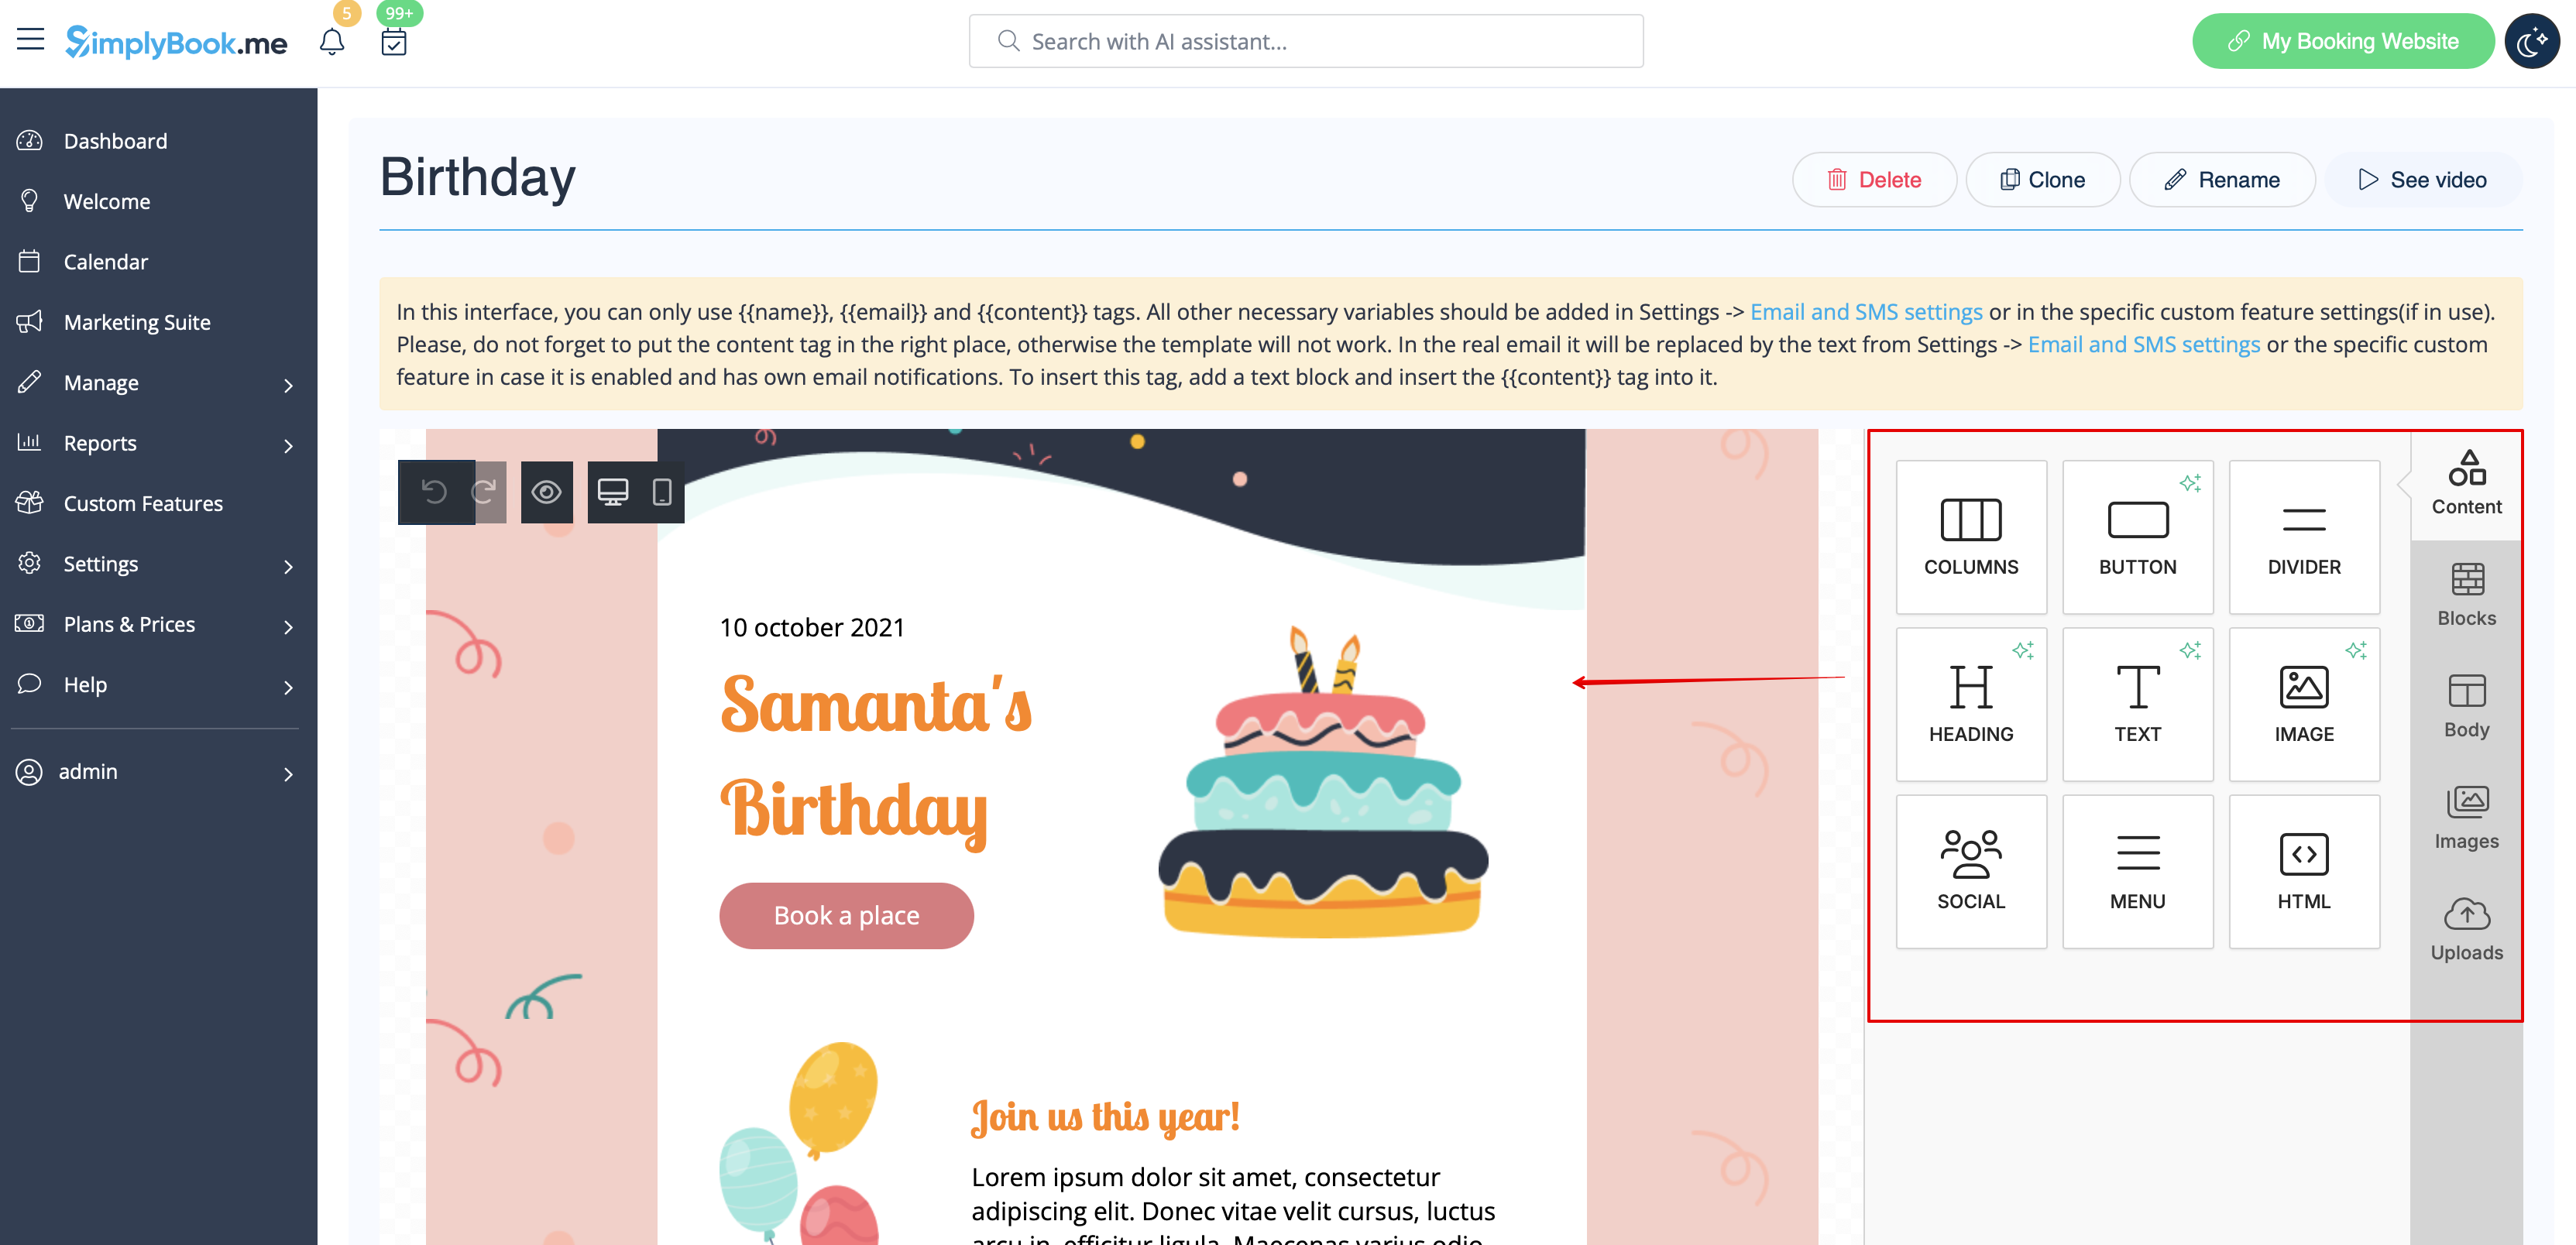
- 4. Add/Edit text blocks, add images, links, menus, columns, upload your company logo, use brand colors, and many more with the integrated editor.
- Please use the tools on the right side of the page and visualization in the center, drag and drop, adjust the desired elements to get the necessary look.
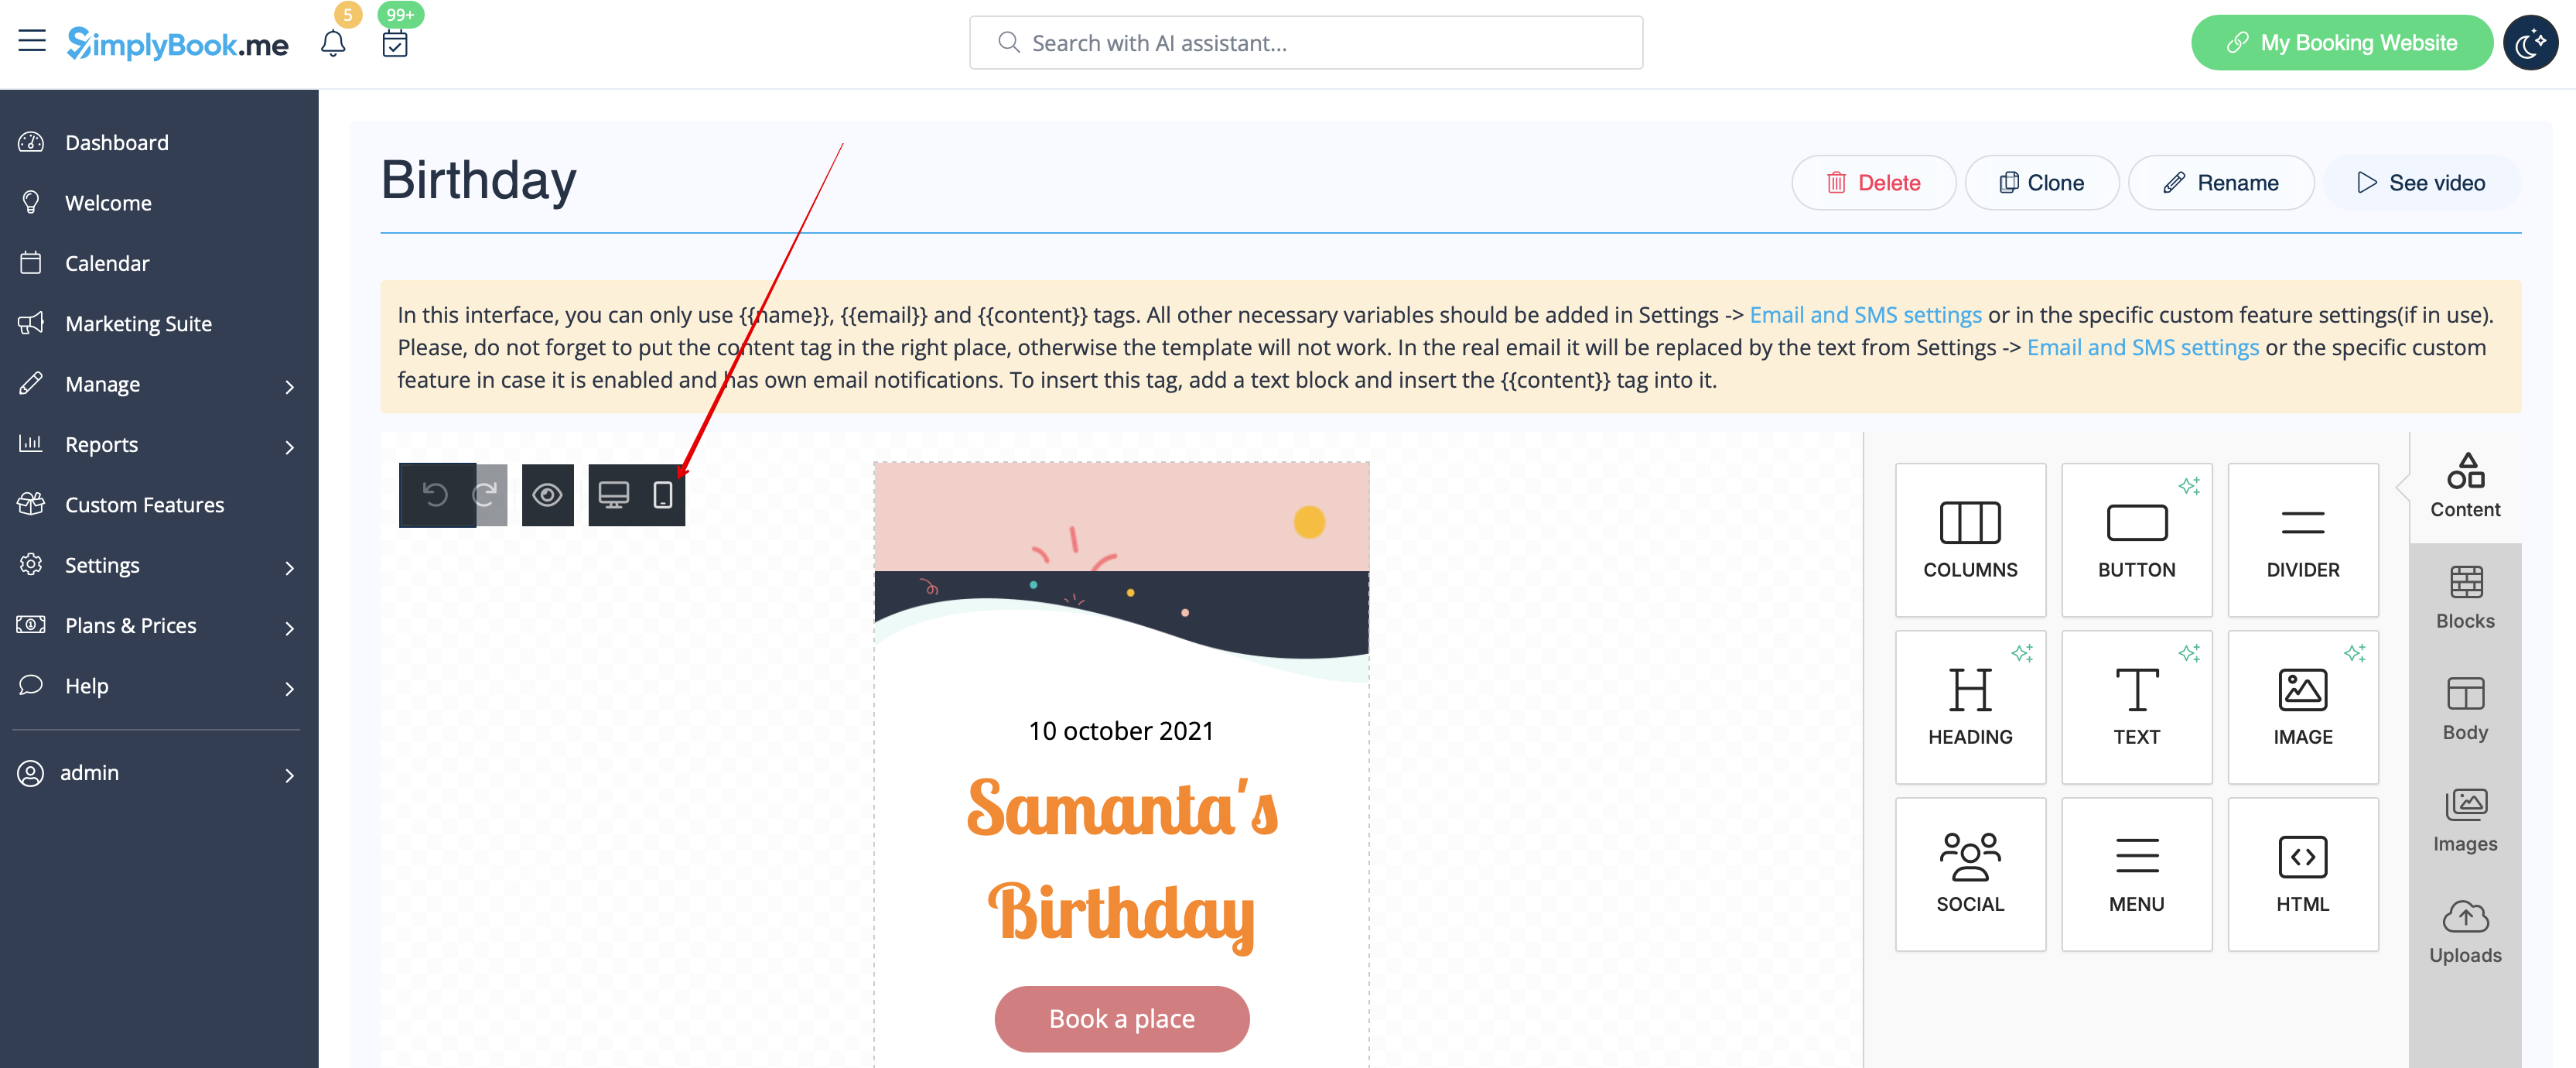
- 5. You can also switch to Mobile mode to adjust email look for mobile phones.
- 6. It is important to add {{content}} tag to the desired place in the template as in real emails it will be replaced with the booking/purchase related information.
- Without this tag the customization will not be applied to the notification and it will be sent as plain text.
- Please note! All variables that are related to appointments or purchases data should only be used either in Settings -> Email and SMS Settings or in the corresponding custom feature options.

- (optional) You can also use {{name}} and {{email}} tags here in case you need to reflect recipient's name and/or email separately from main notification content.
- Please note! The templates are regularly automatically saved so you do not need to manually save them.

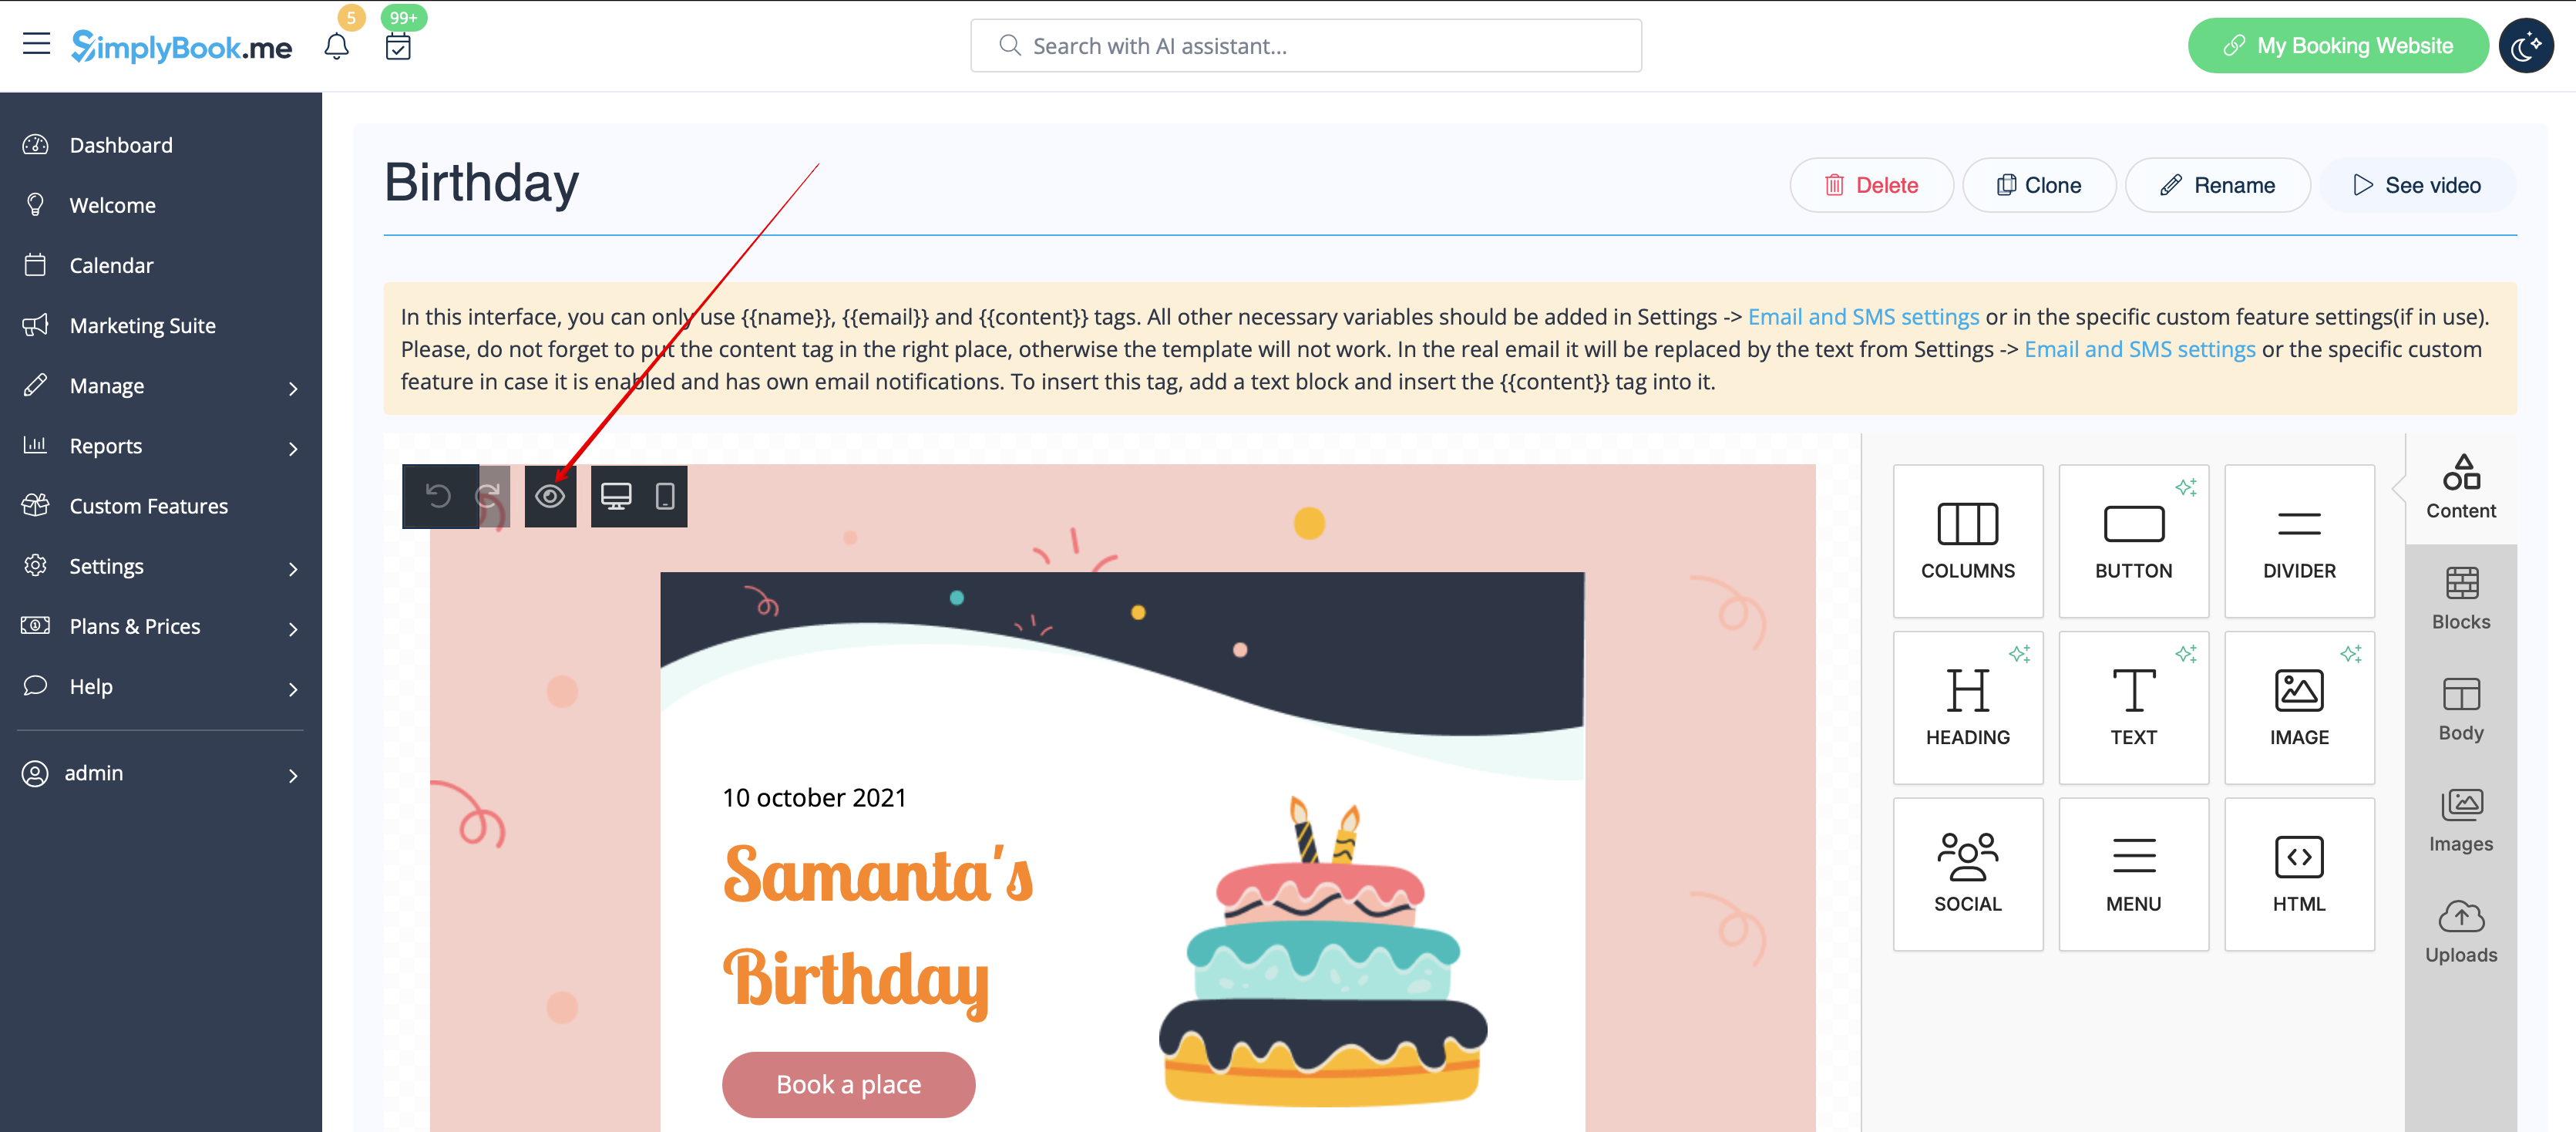
- 7. Use the Preview option at the bottom to check the look.
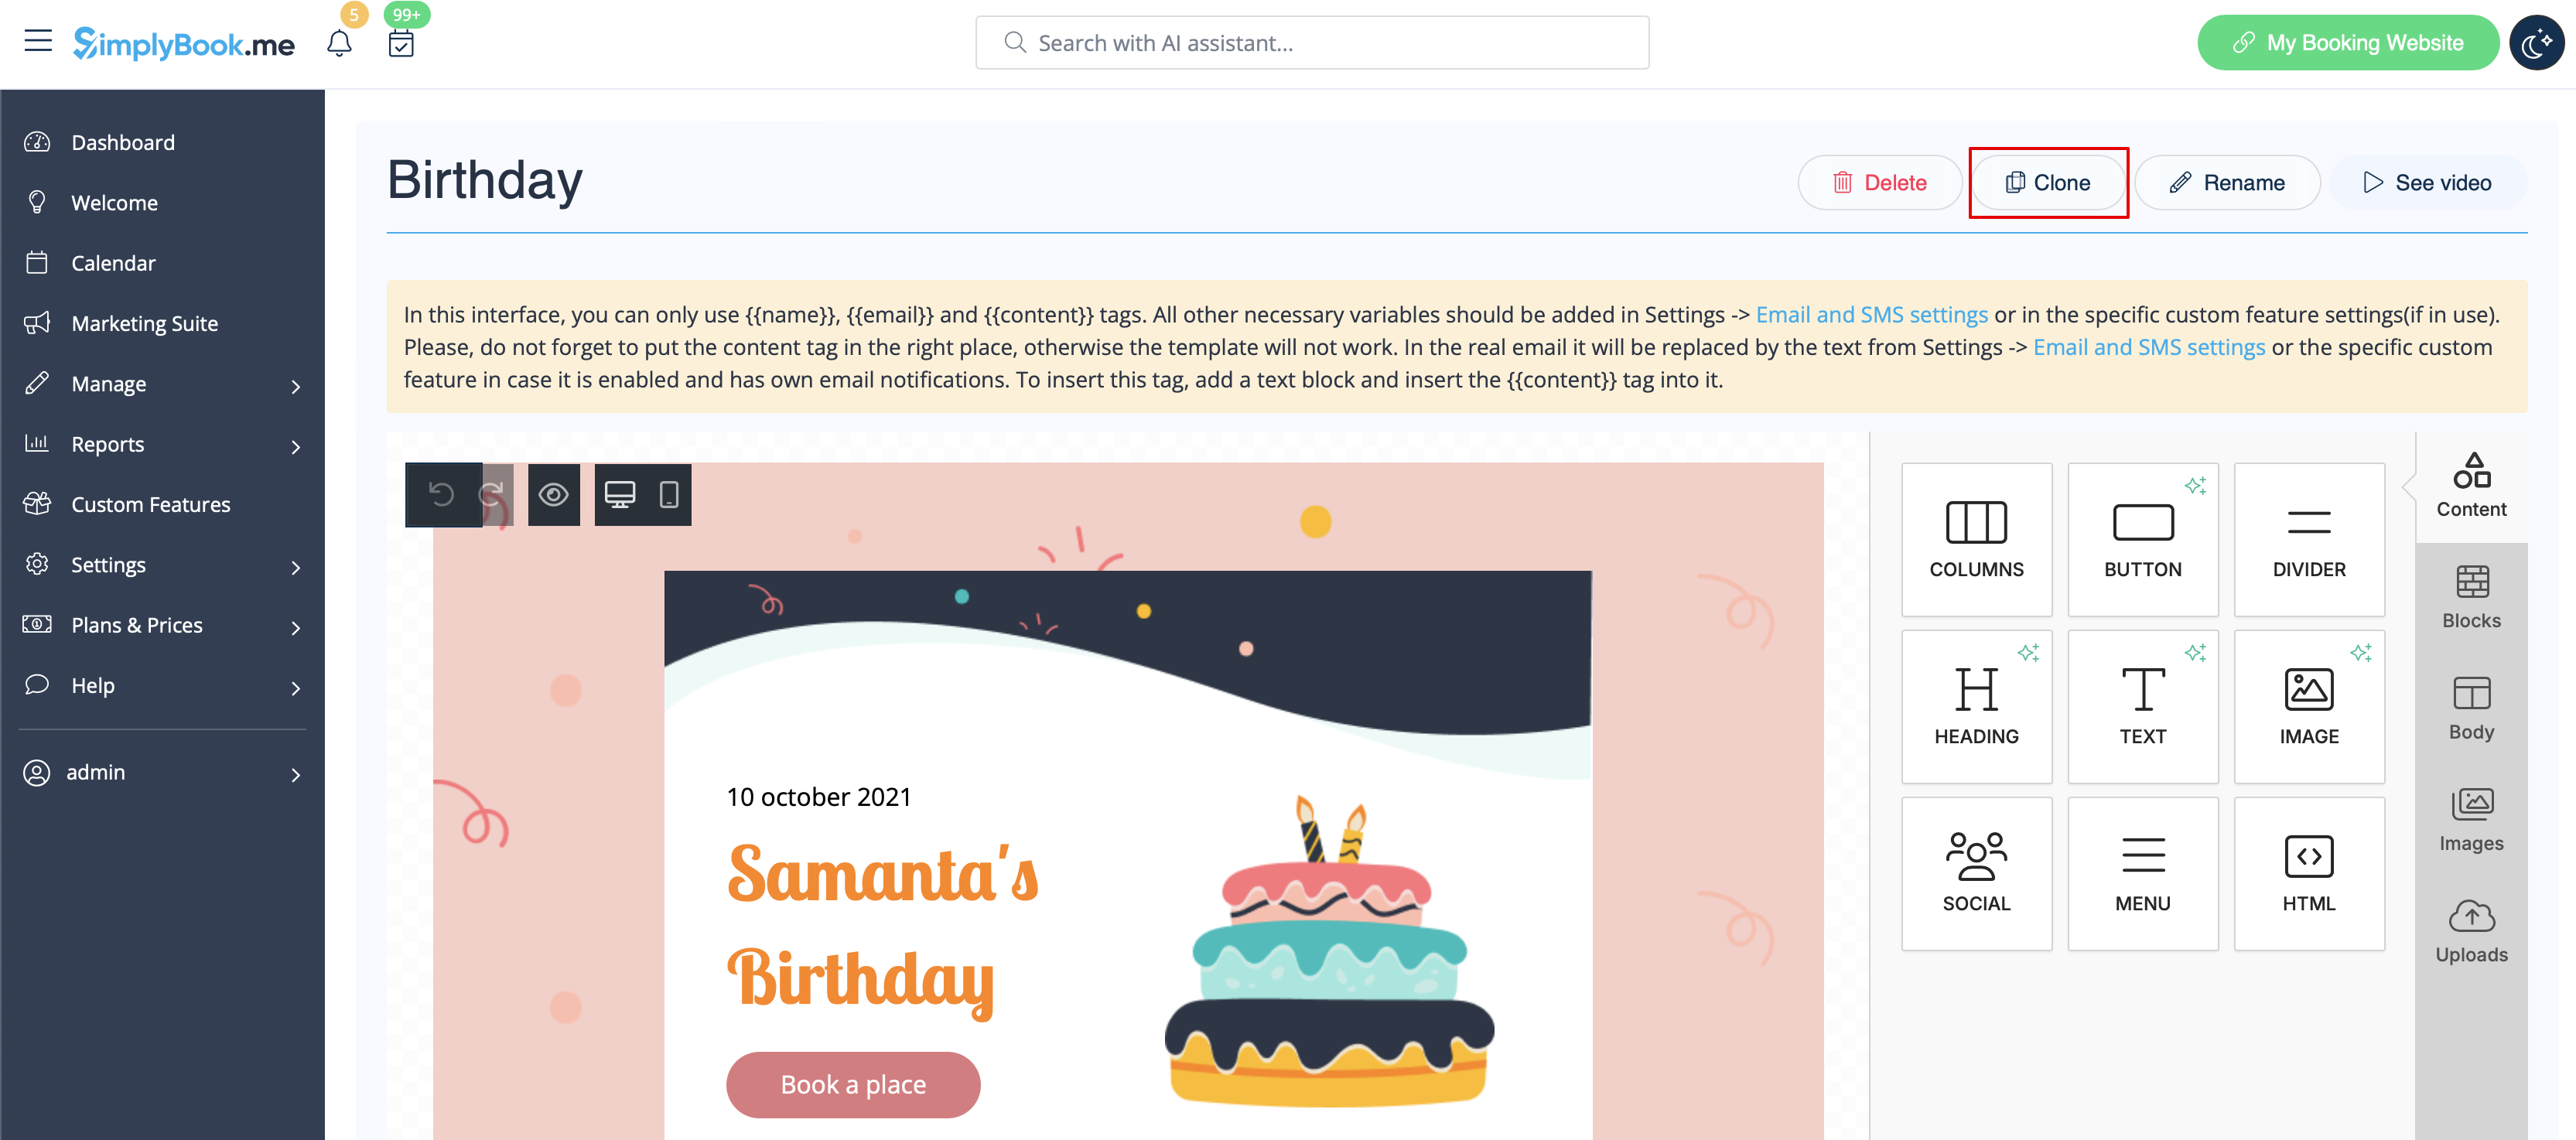
- 8. (optional) In case you need similar designs with some small changes only or with different content please use Clone option to make a copy of the previously saved template.
- 9. Once all the necessary templates are ready please go back to Custom features -> Look and Feel -> Custom email.
- 10. Please select the template for each notification type.

- 11. Send test emails to check the look with sample content.
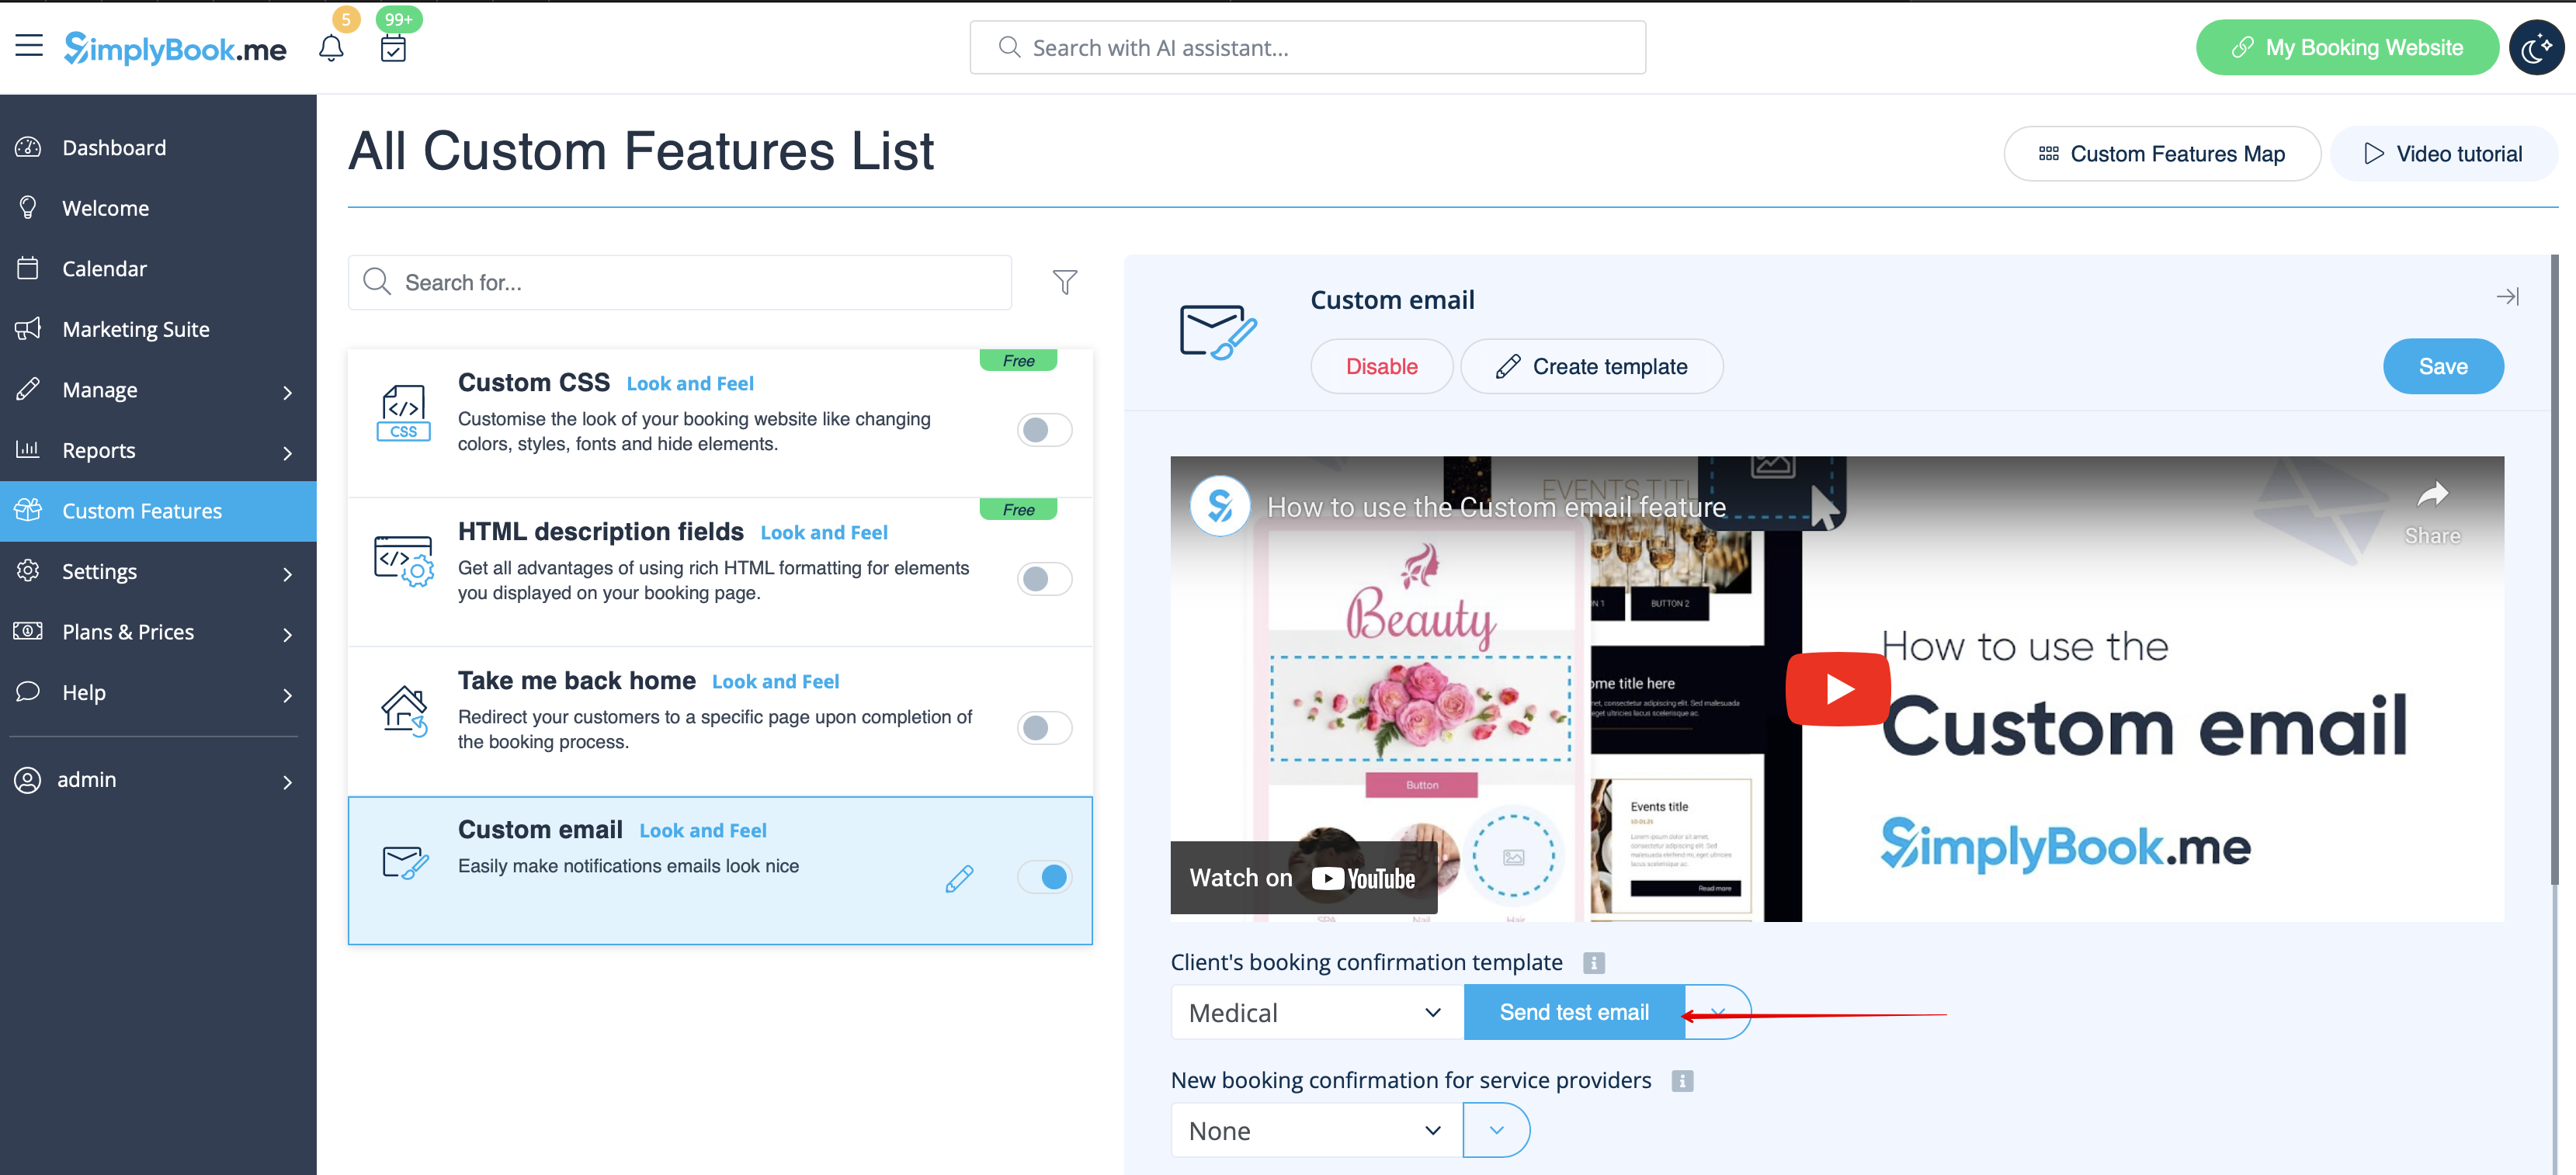
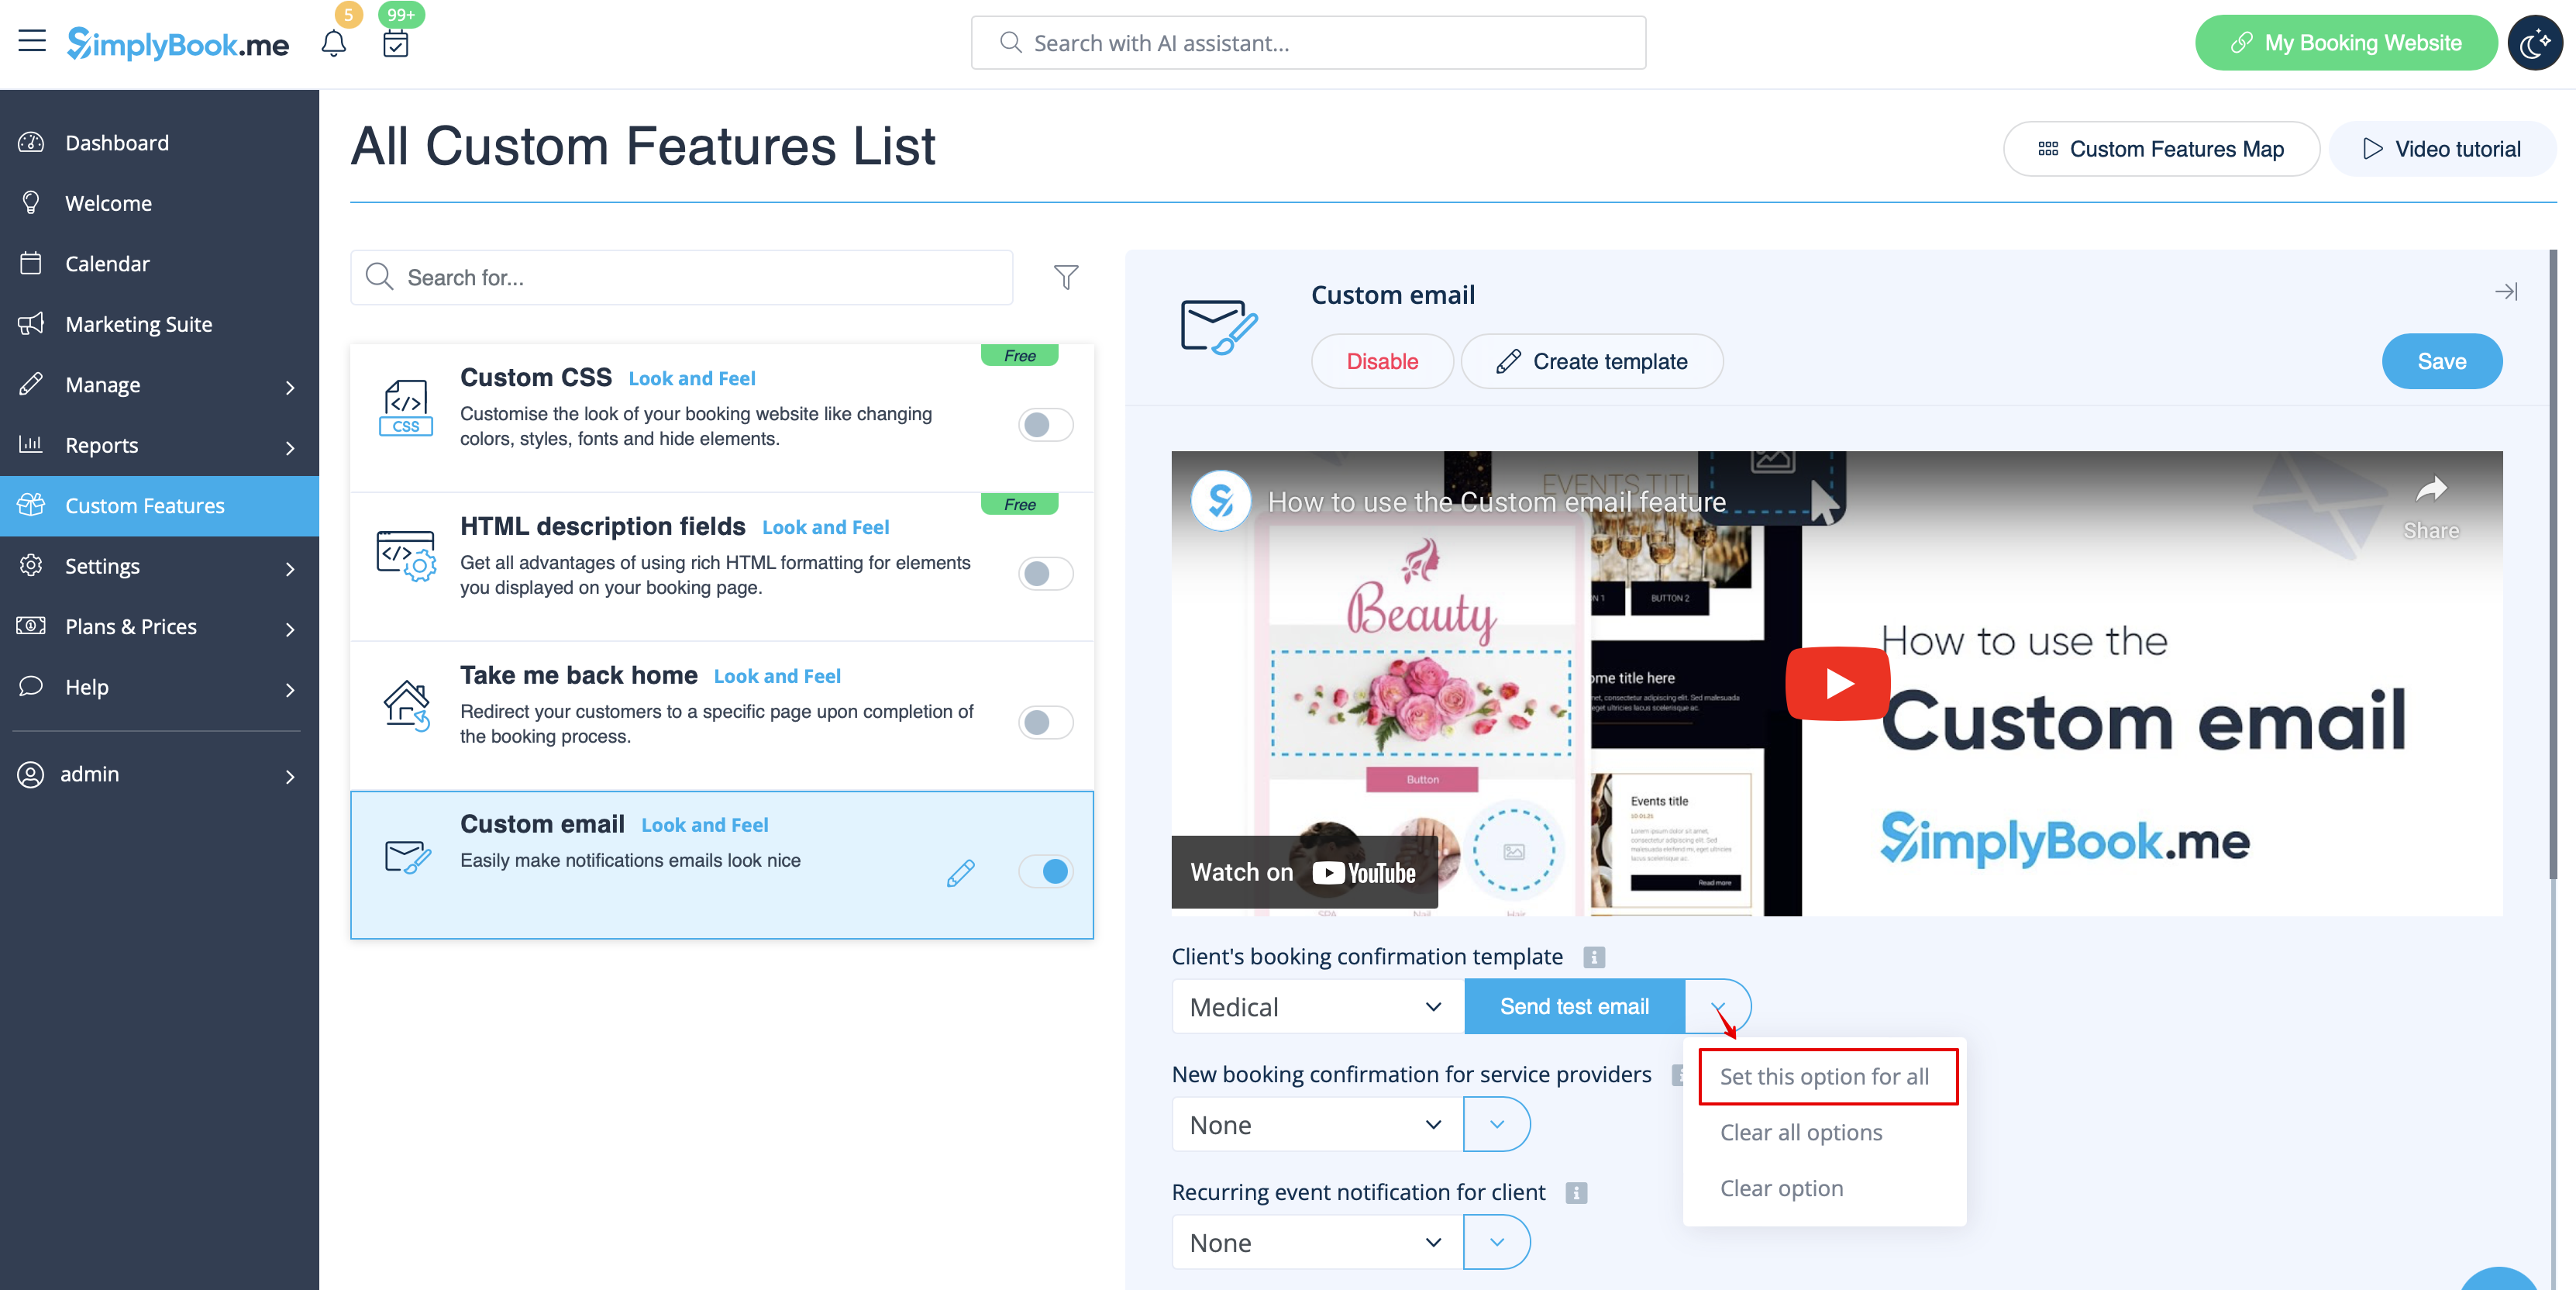
- 12. If you would like to set same template for all the notifications types within one block please use right-side drop-down menu options.
- 13. In case you have various custom features with own notification types enabled you will be able to see the corresponding blocks in Custom Email settings.
- Please open each block and set the templates for the notifications you wish to have the customized look.
- Save settings once done.
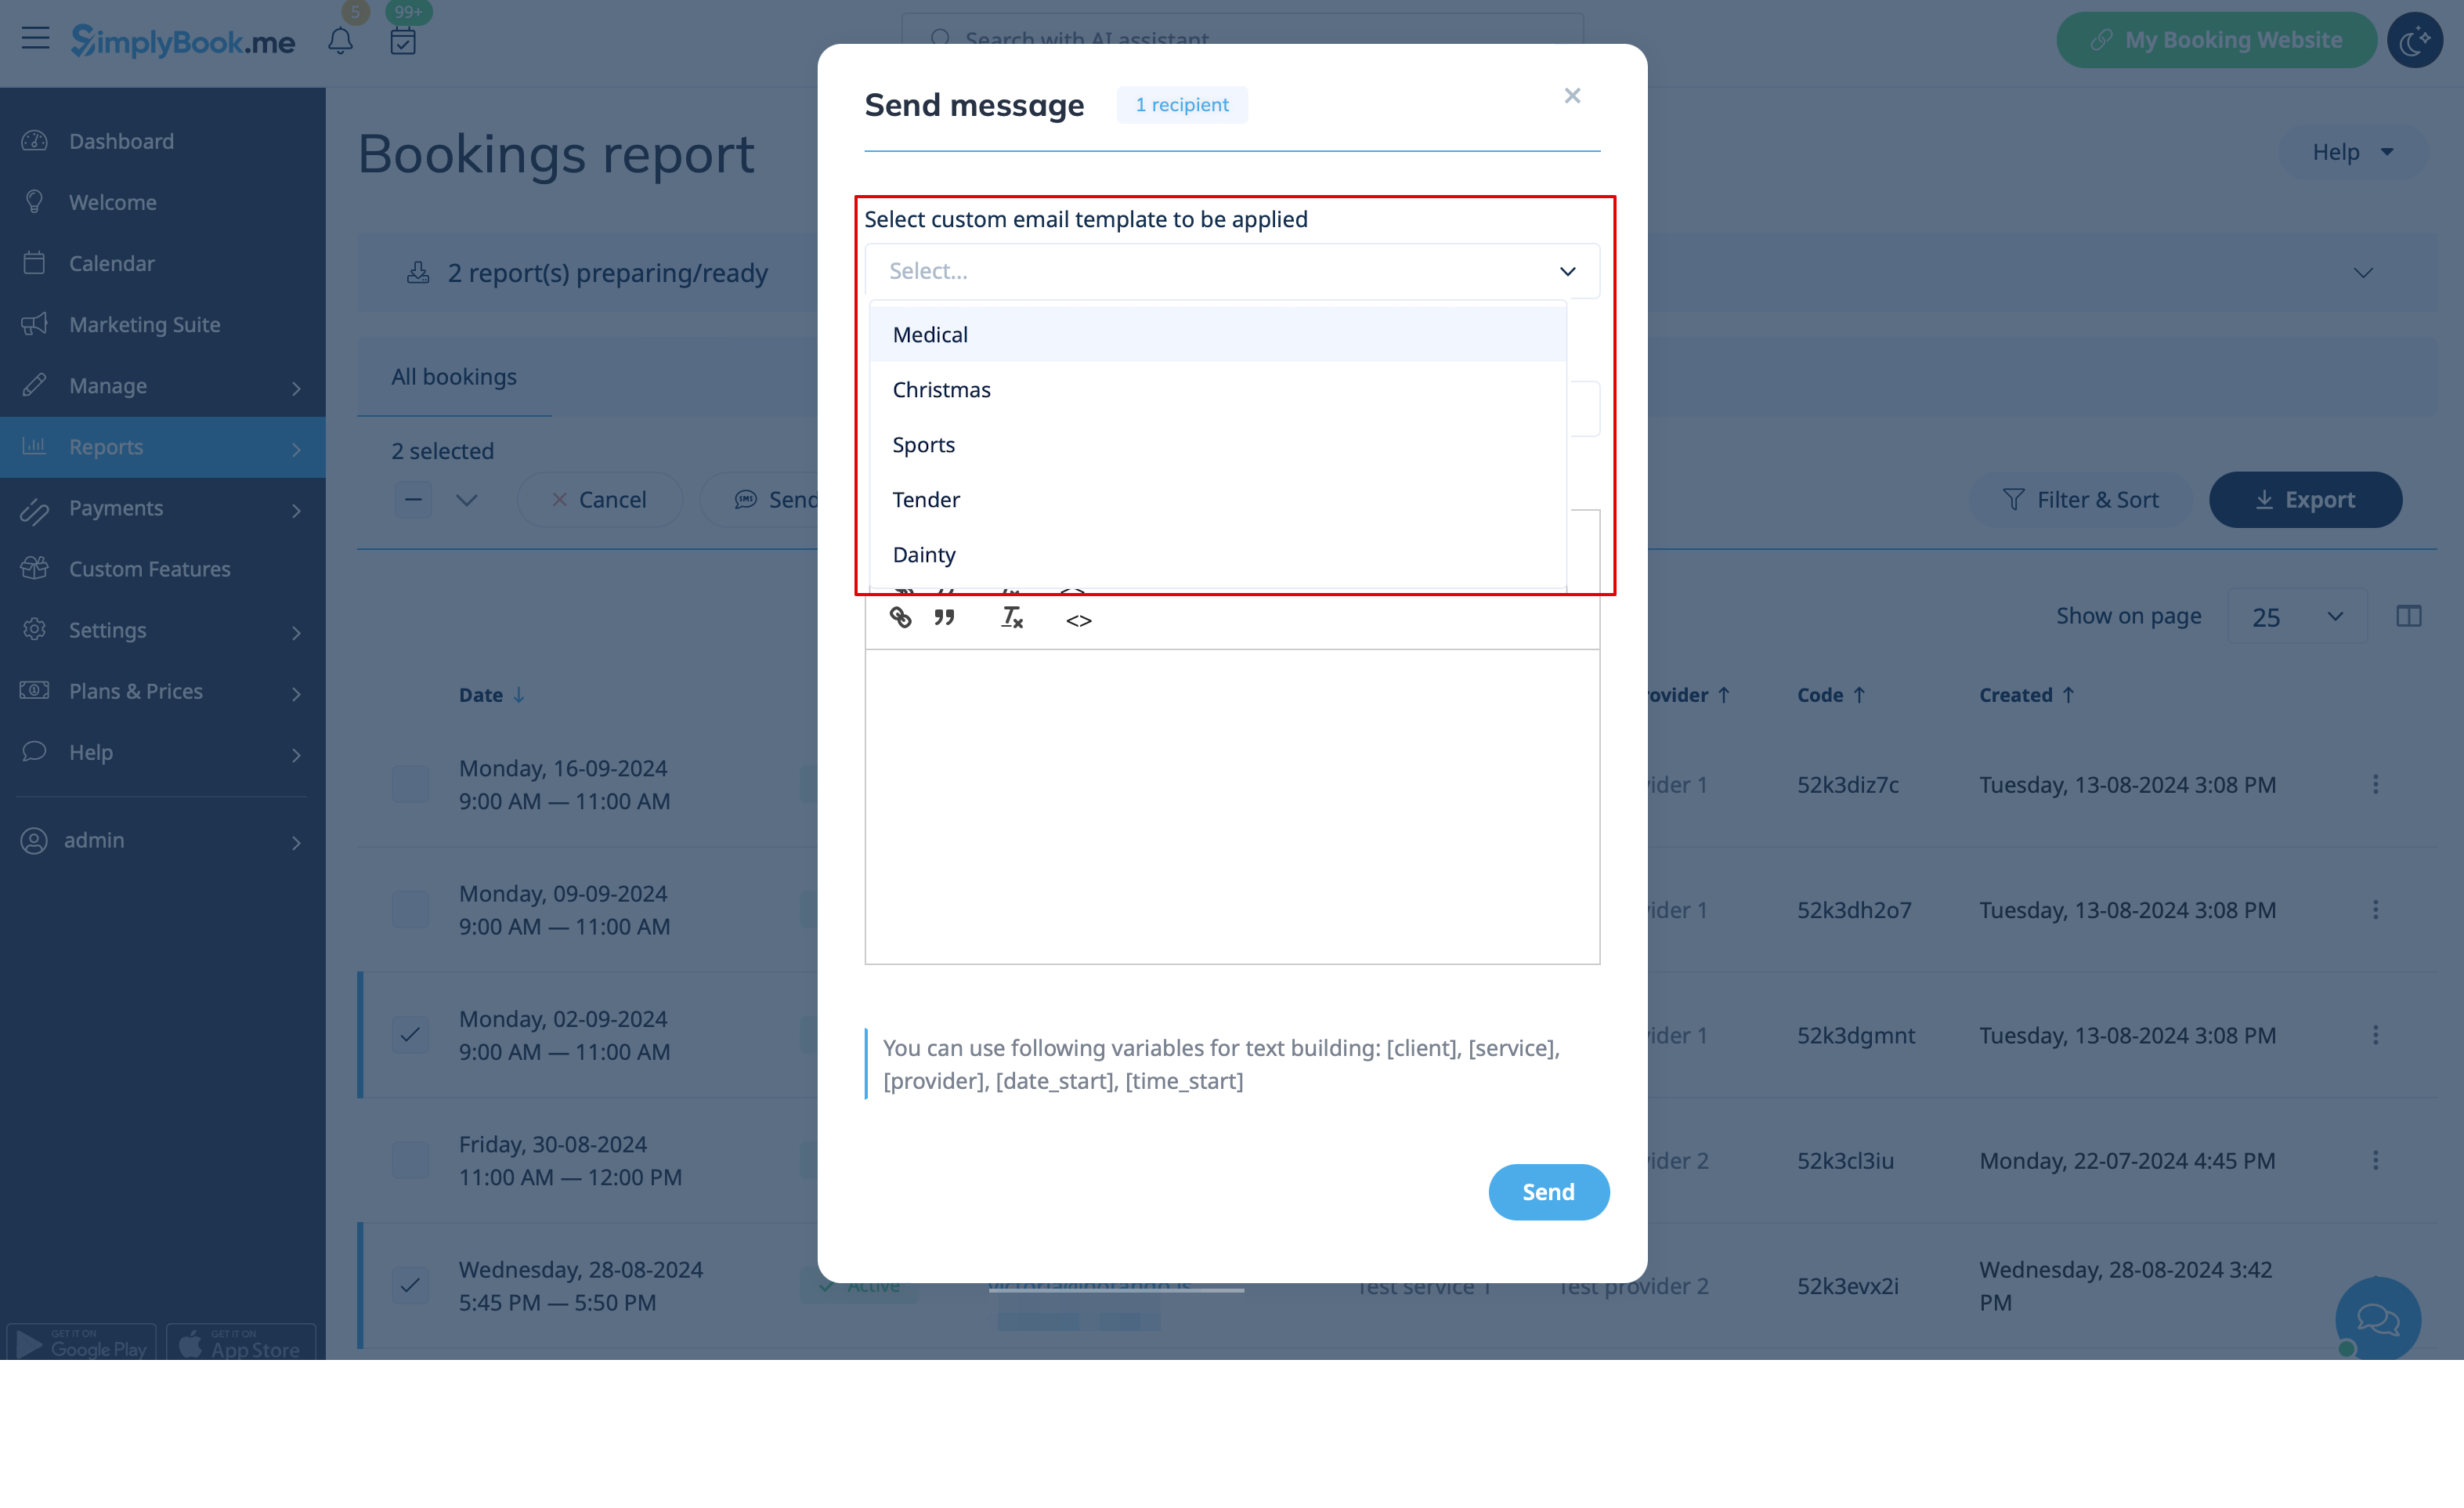
- 14. It is also possible to use customized emails when you need to manually send some email from Reports -> Bookings details or Reports -> Clients.
- Just check the desired boxes there, click on Send E-mail button and choose the template to be applied in the first drop-down in the popup. Add subject and content. Send the message.