Translations:How to manage bookings/5/en
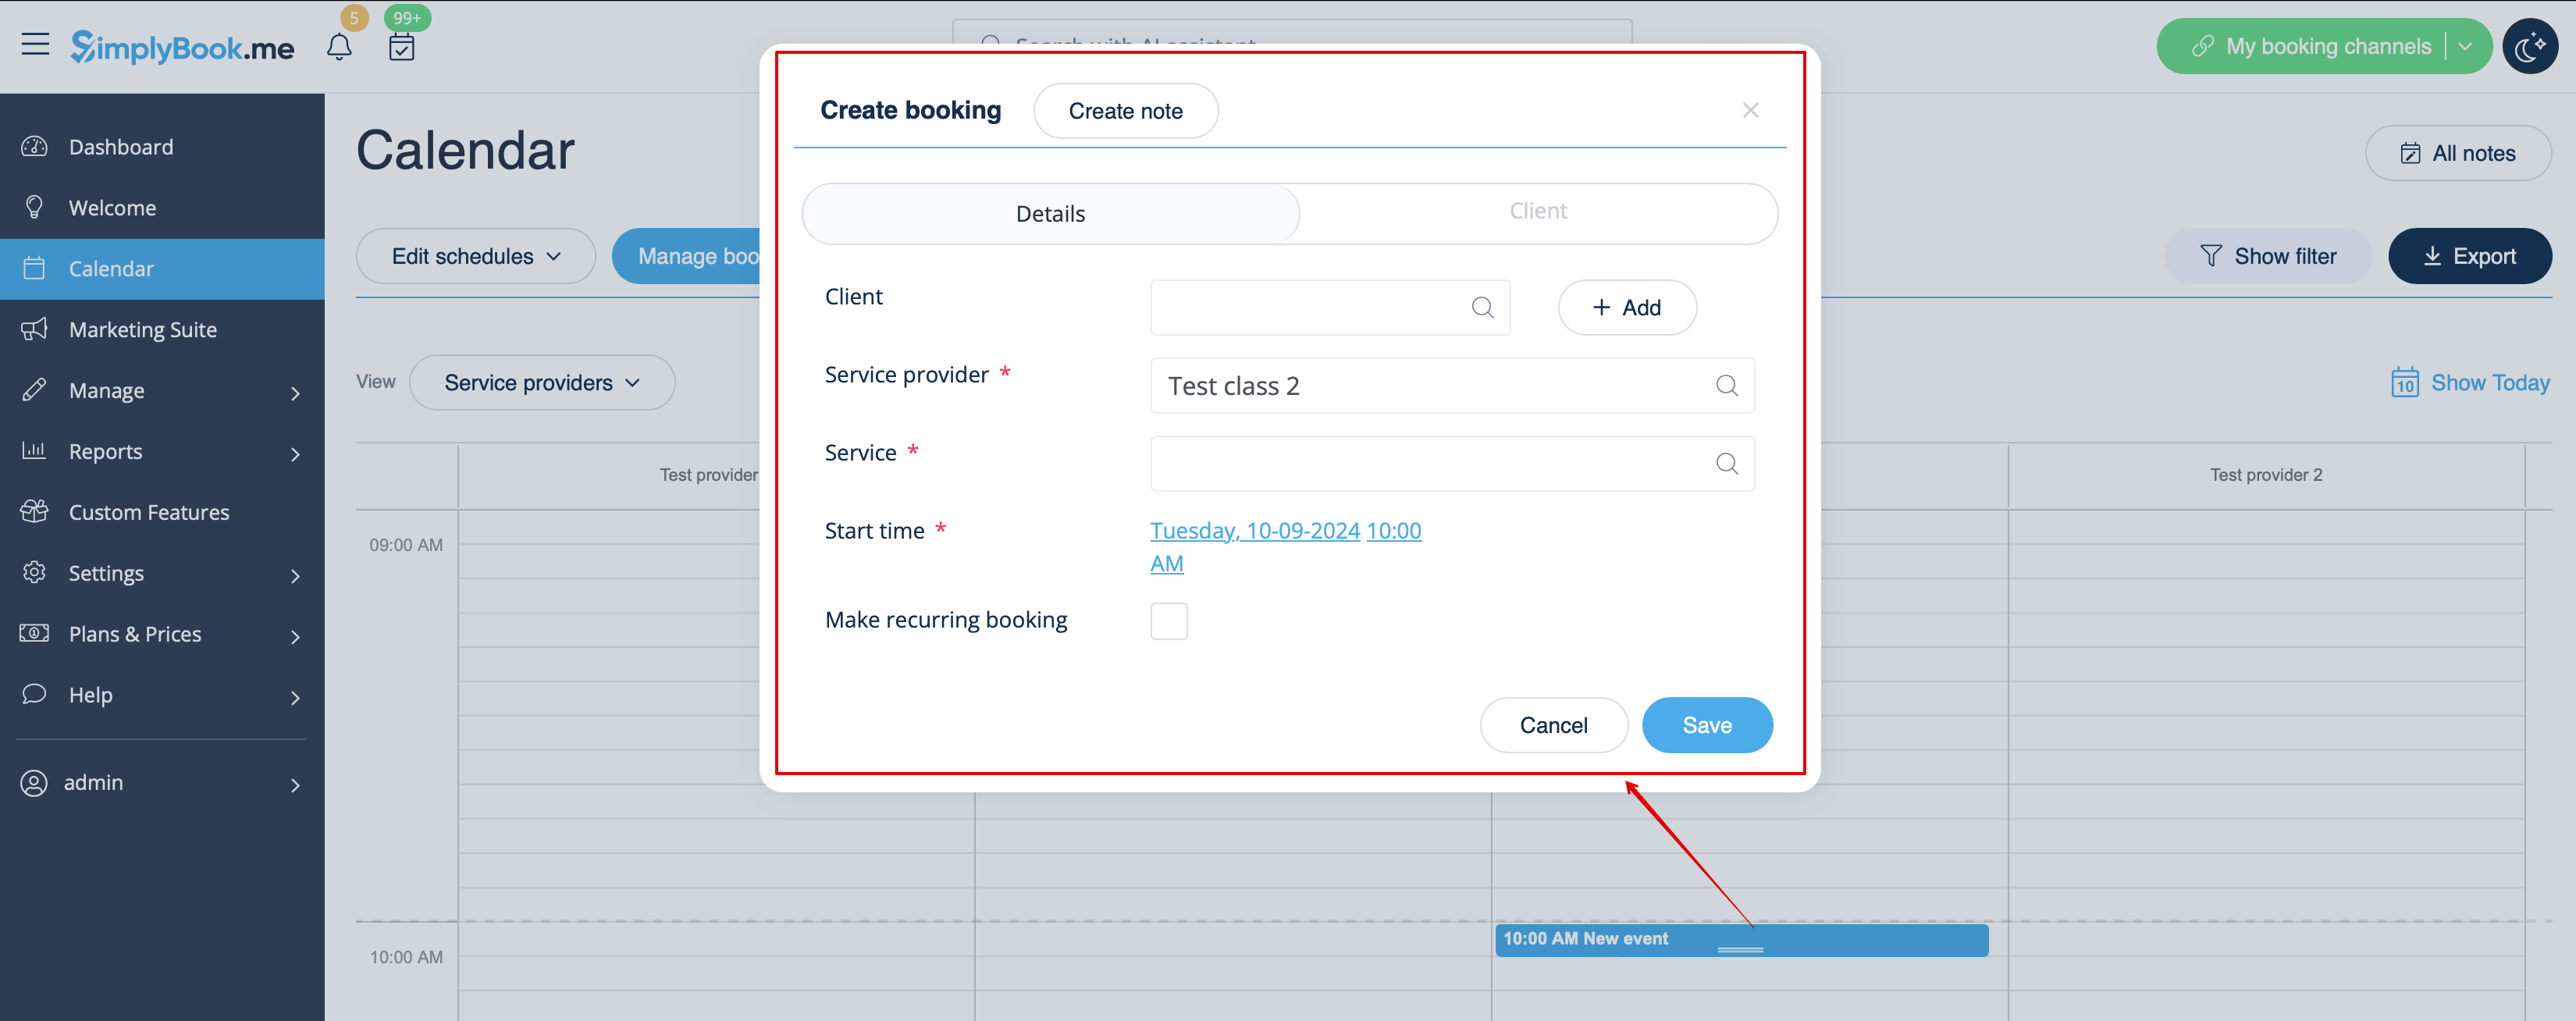
2. Fill in the pop-up form that appears: select or add the client, choose provider and service/class, set the start and end date and times. It is possible to book for a time period that is different from service duration and is multiple of the selected timeframe.
(It may be required to fill in more fields in the pop-up form in case you use additional Custom Features.
For example, if you are using Accept Payments and wish the invoice to be generated when the booking is added from the admin side you need to check the box Receive payment and select the desired payment method before saving the reservation.
Please note! This option can be selected during new booking creation only. If the booking was created without invoice generation but you need the invoice to be attached you can cancel such booking and create a new one with the use of Receive payment option selected)