Google AdWords and Analytics custom feature
Use the Google Analytics Custom Feature to see how many customers visit your site both on an everyday basis and during promotion campaigns. Use the adwords analytics to count how many actually book after clicking an adwords advertisement.
Analytics tools integration guide

- How to use
- 1. Enable "Google Adwords and Analytics" feature on your Custom Features page.
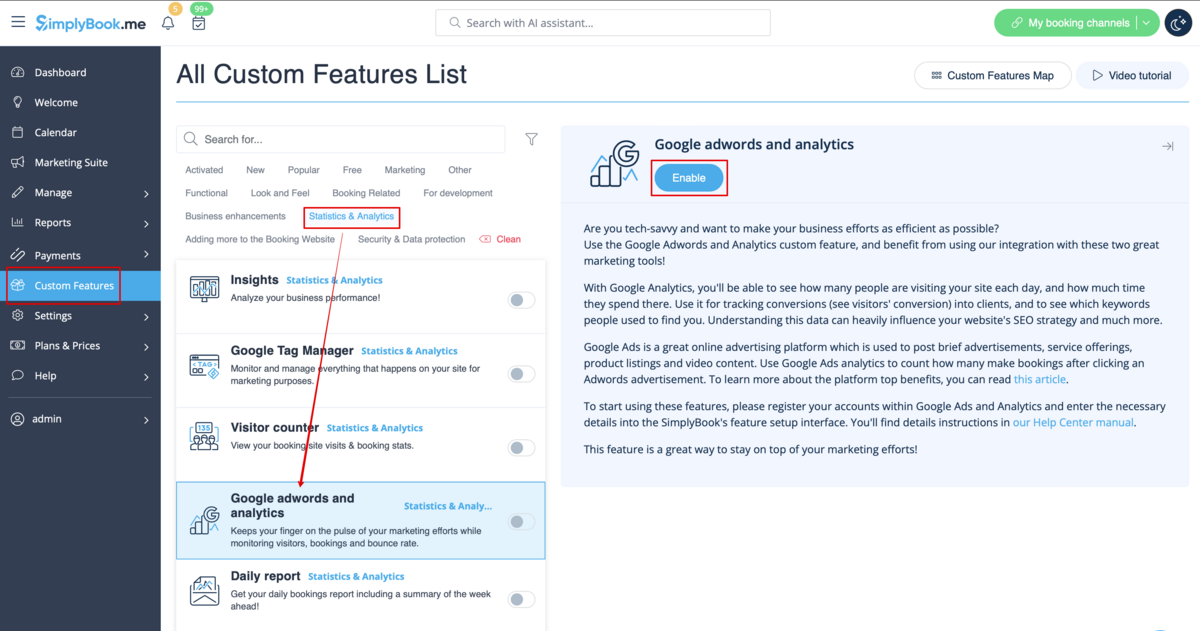
- 2. Navigate to the settings on the right.
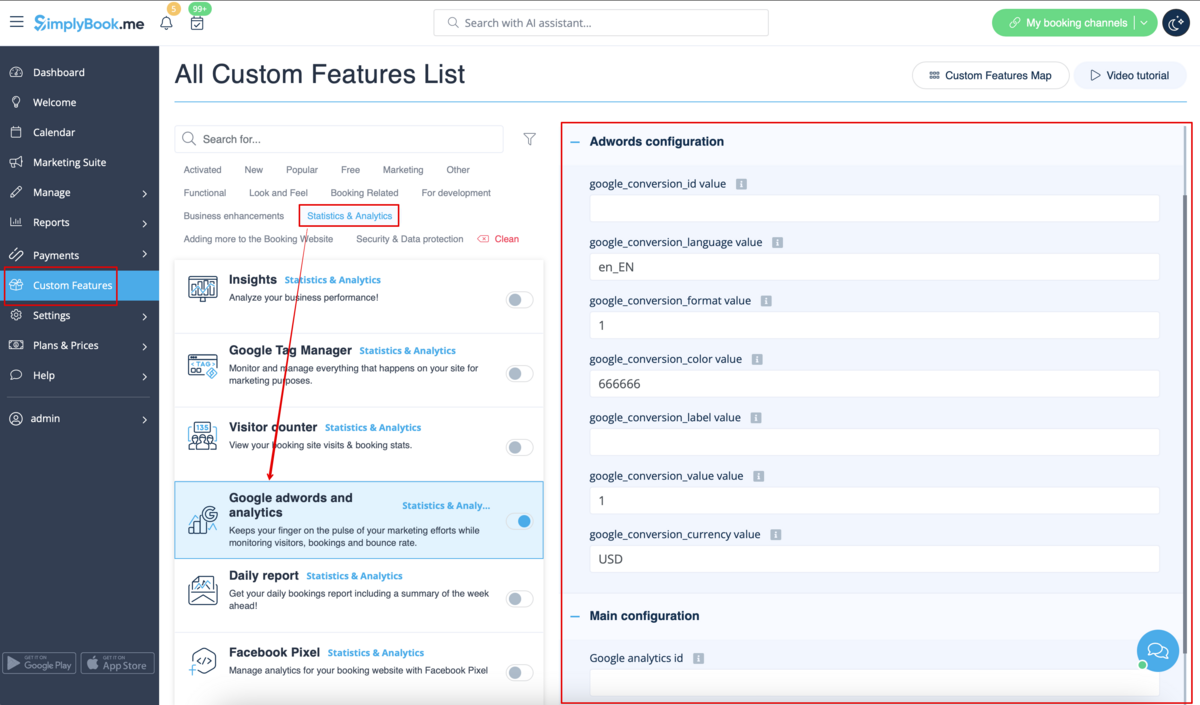
- 3. Fill in the boxes with the corresponding information.
- Where to find the details
- 1. The Google analytics id can be found in your Google analytics accounts.
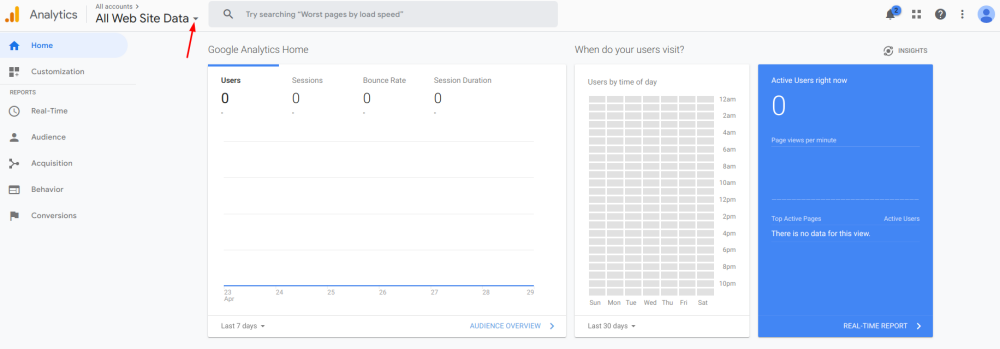
- Go to Analytics home, and click on "All Web Site data" in the top left corner.
- 2. In the pop-up you will see your Analytics ID
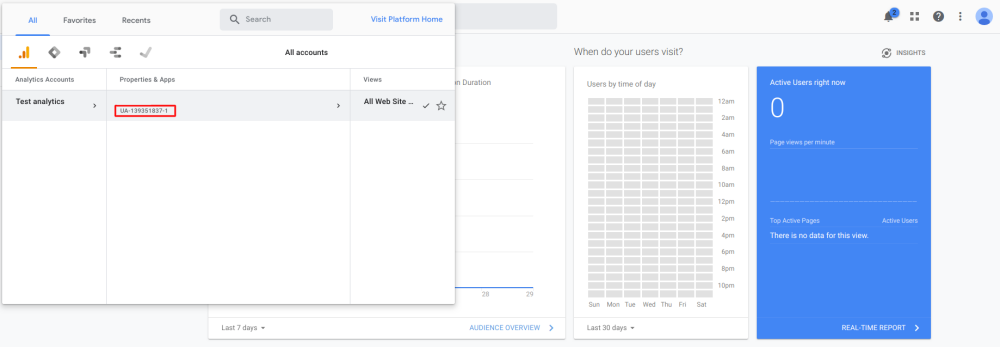
- It should be in the format: UA-XXXXXXXX-X Where XXXXXXX-X is some number.
- An example of this id would be: UA-70295750-1
- To start tracking visitors, you only need to set your analytics account id.
However to track results of an adwords campaign you need to set up an adwords campaign conversion id and insert this id into the SimplyBook.me Custom Feature.
- 1. Sign in to your Ads account at https://ads.google.com
- 2. Click Tools and select Conversions

- 3. Click + to create conversions and select Website conversions.

- 4. Set up the options.
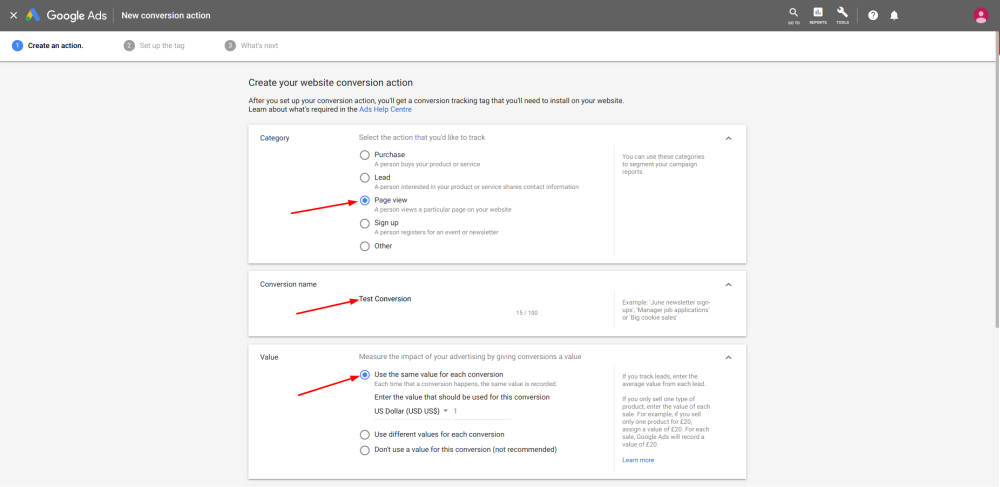
Google conversion value is the conversion value that you give to a client that hits your target. It can, for example, be set as 20 for $20 per conversion if the average price of your service is $20. We set it default to 1, which could mean $1 value per conversion but you should change this to the right value for you.
- 5. Select to insert the Tag yourself.

- 6. Then you will see a code like this:
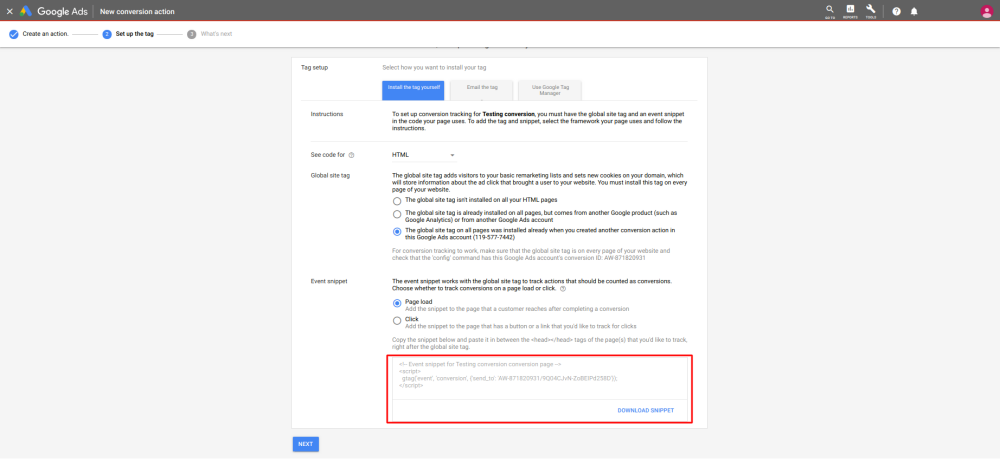
<!- Event snippet for Testing conversion page ->

<script>

gtag('event', 'conversion', {'send_to': 'AW-XXXXXXXXX/YYYYYYYY-YYYYYYYYYYY'});

</script>
where XXXXXXXXX is your conversion id(google_conversion_id value) and
YYYYYYYY-YYYYYYYYYYY is conversion label(google_conversion_label value)
- 7. Use these details to add to the corresponding fields of this custom feature settings.

Useful links: