Lägga till tjänster, leverantörer och tillgänglighet (nytt gränssnitt)
- Se videohandledning om hur du lägger till tjänster och tjänsteleverantörer
Lägga till tjänster
- Videohandledning
Hur man skapar en tjänst
I Hantera -> Tjänster trycker du på knappen +.
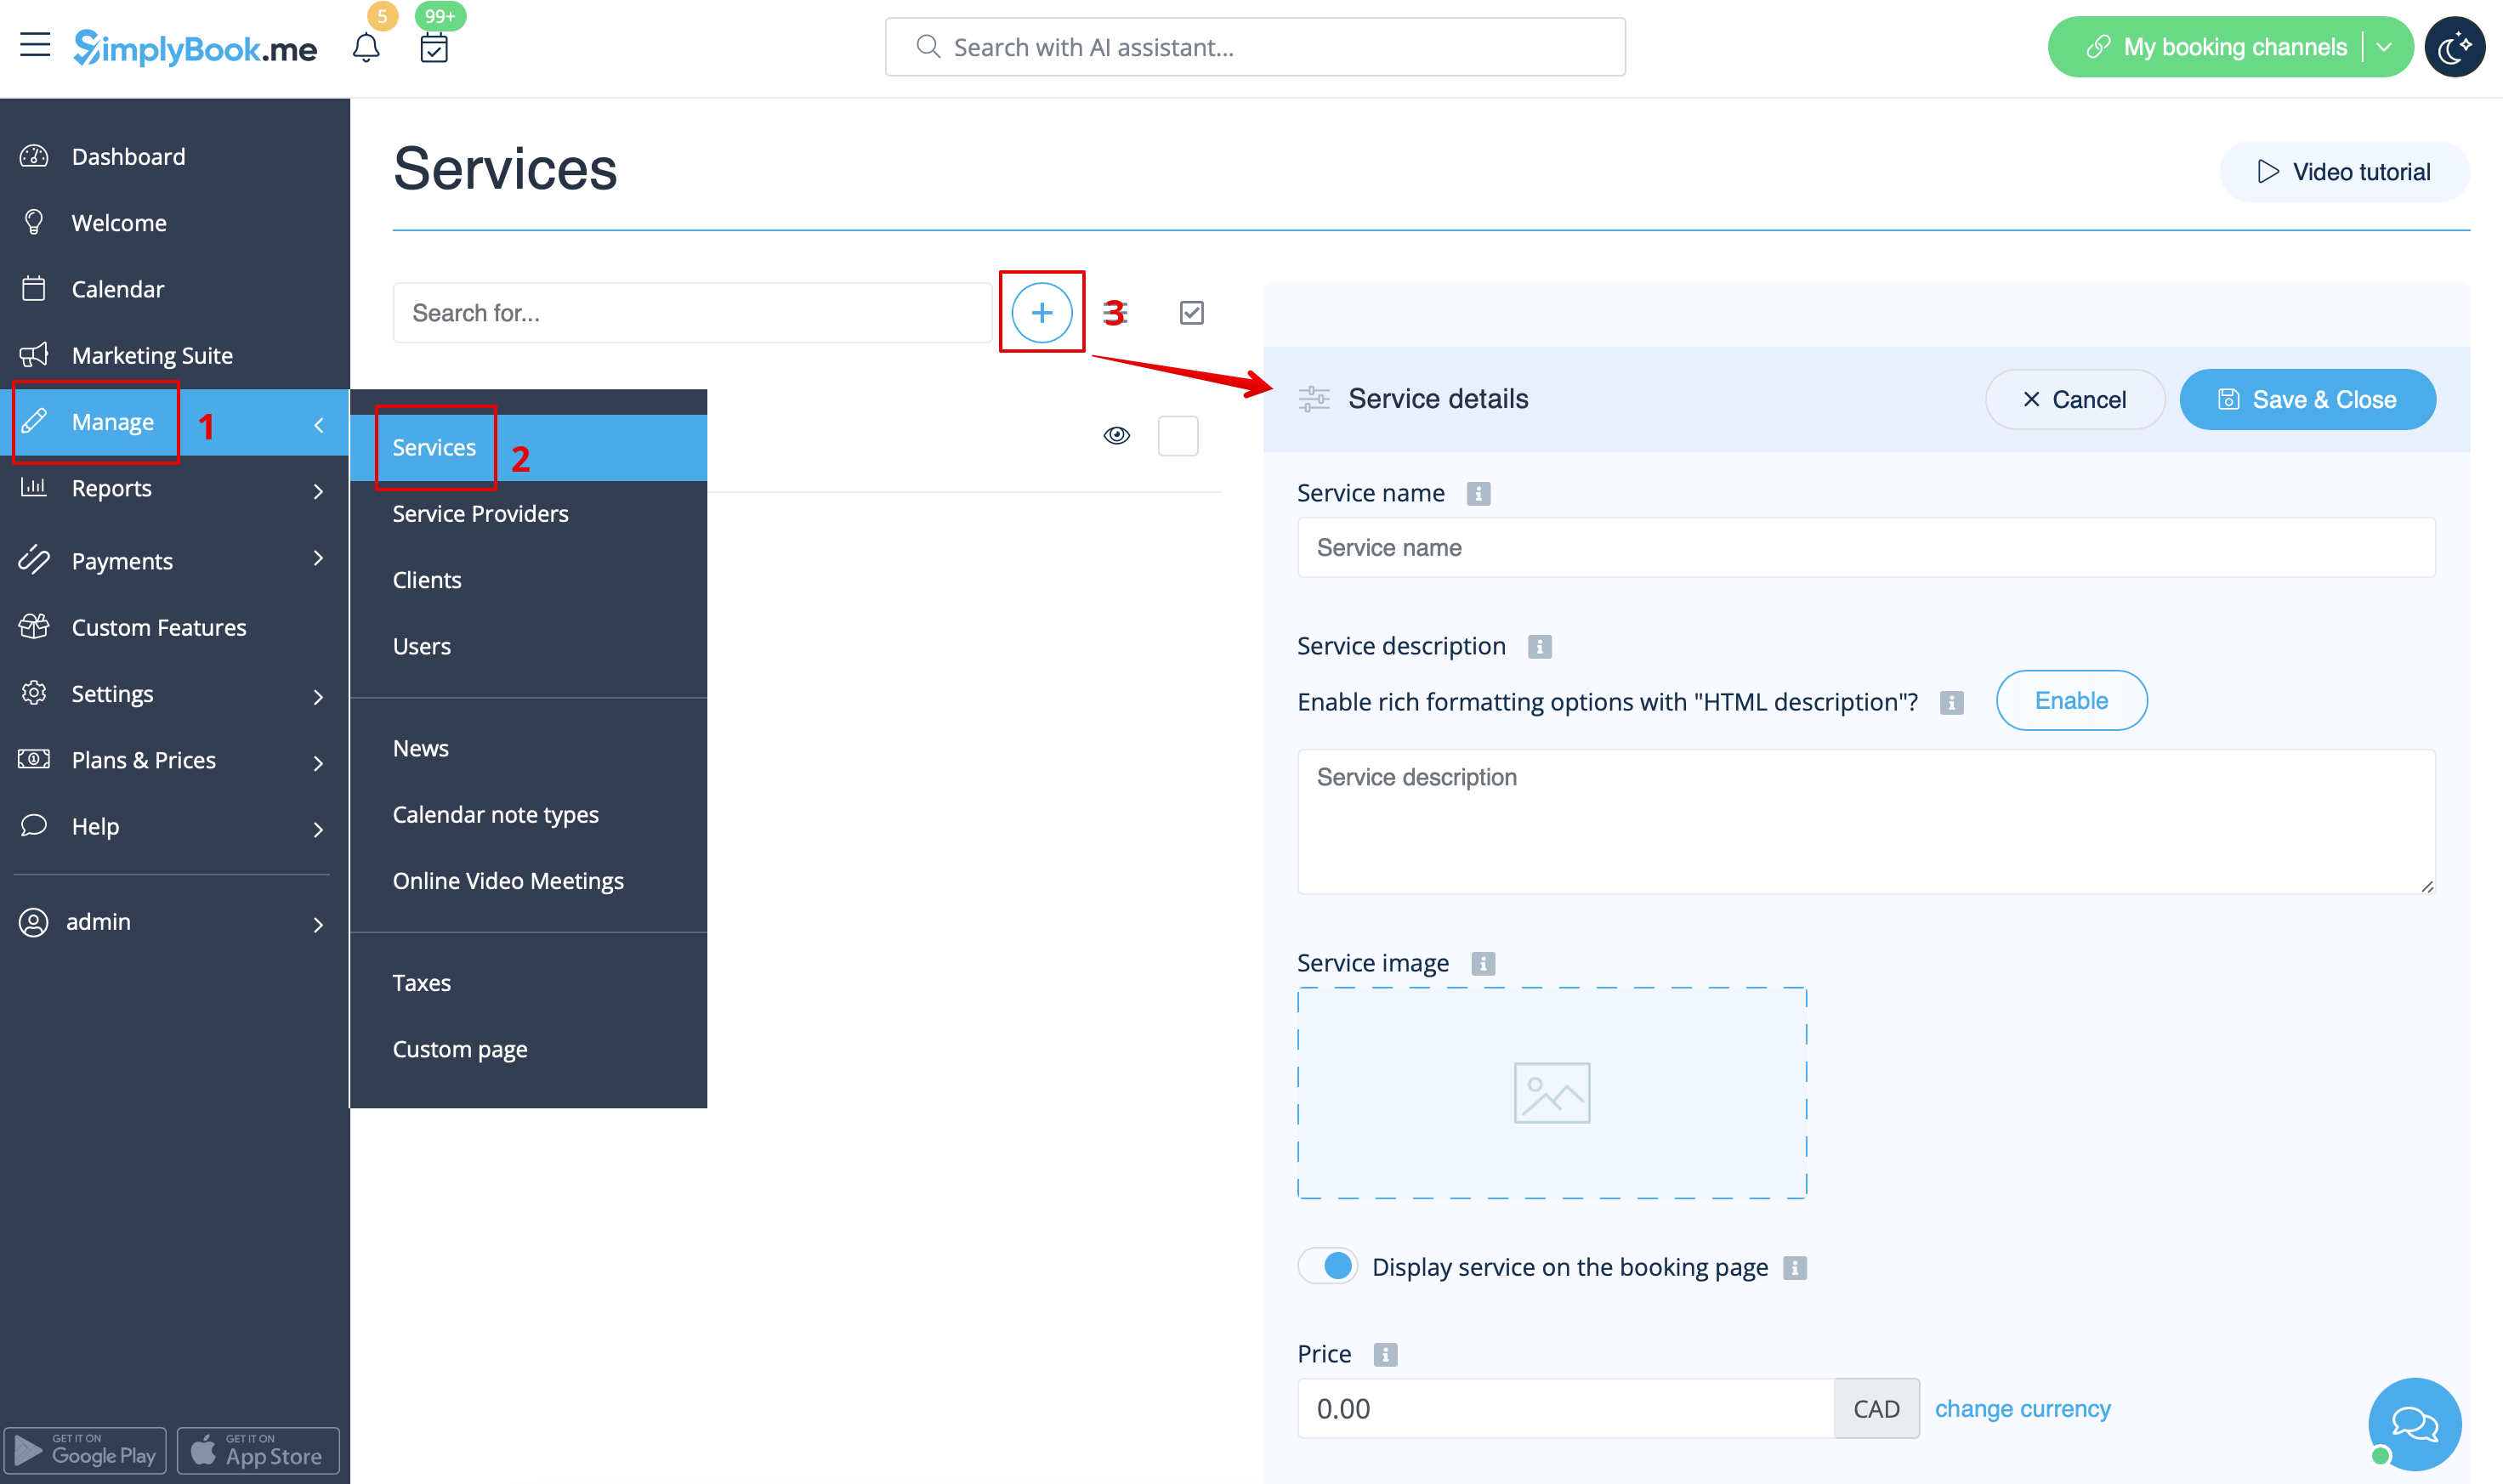
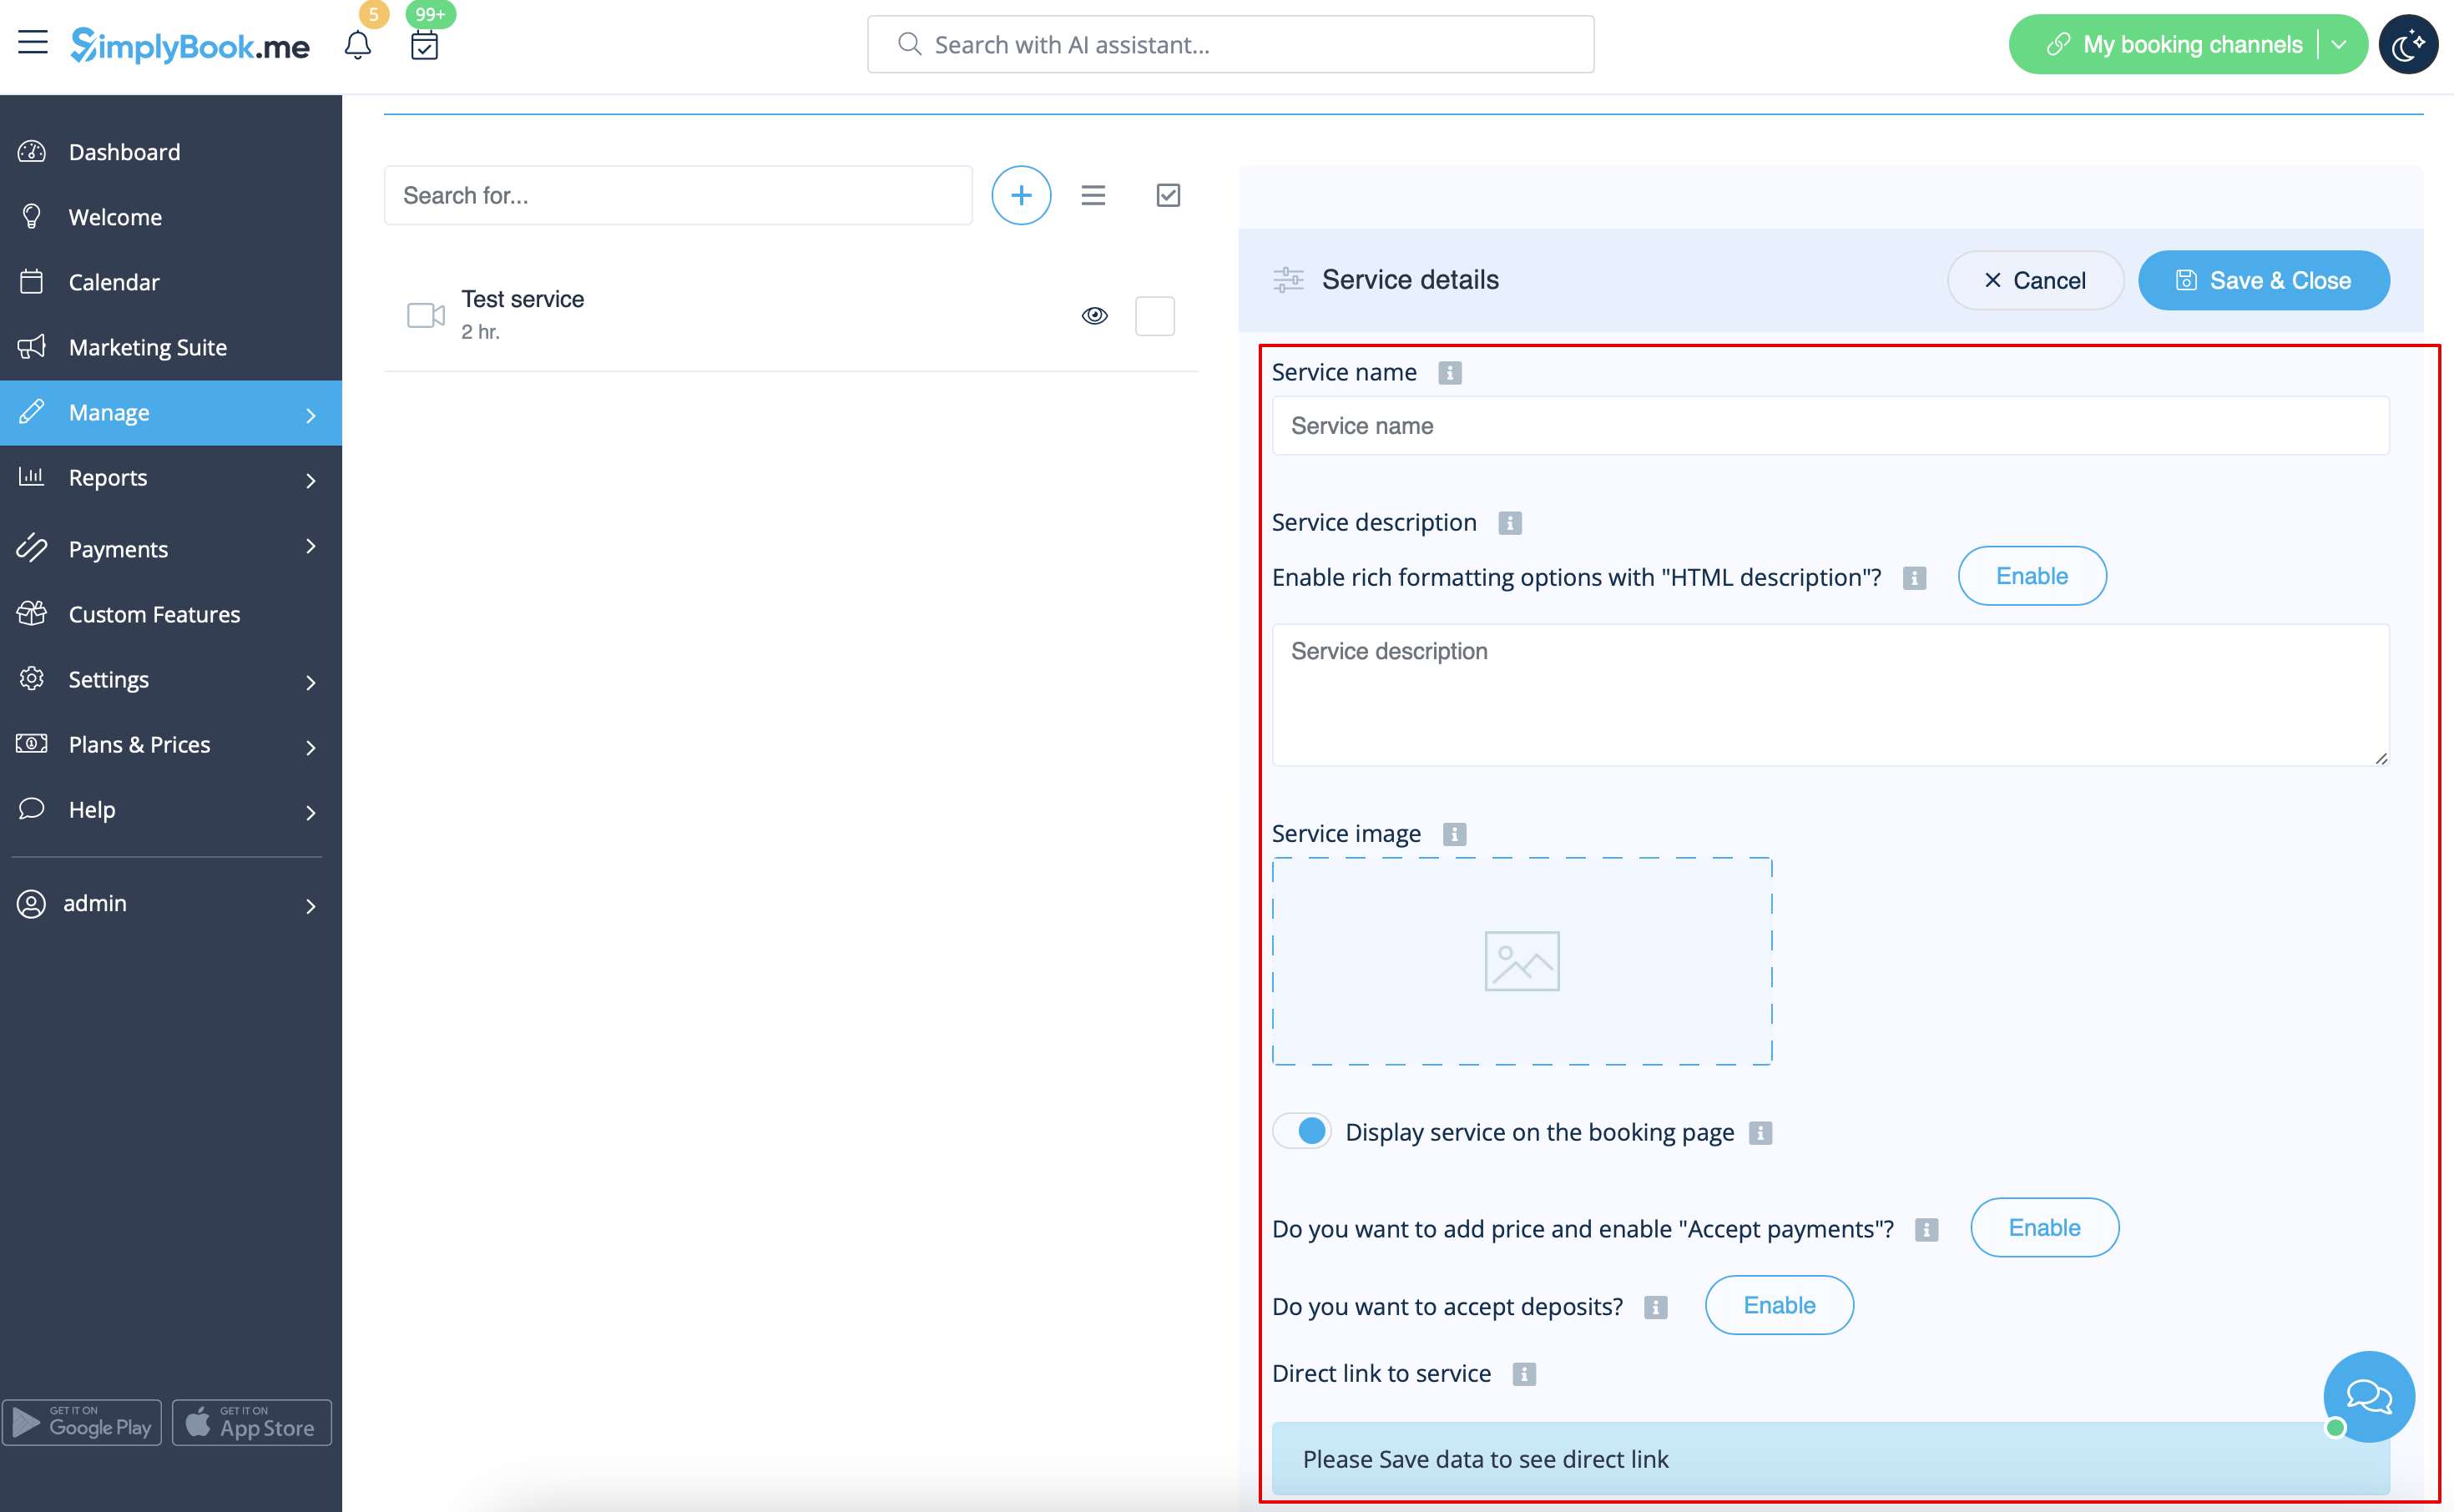
På höger sida av sidan anger du namnet på din tjänst och lägger till en beskrivning av tjänsten.
Du kan använda HTML-formatering för tjänstebeskrivningen för att ändra teckensnitt, färg osv.
Du kan också ladda upp en bild av en tjänst och aktivera priser för att acceptera betalningar online.
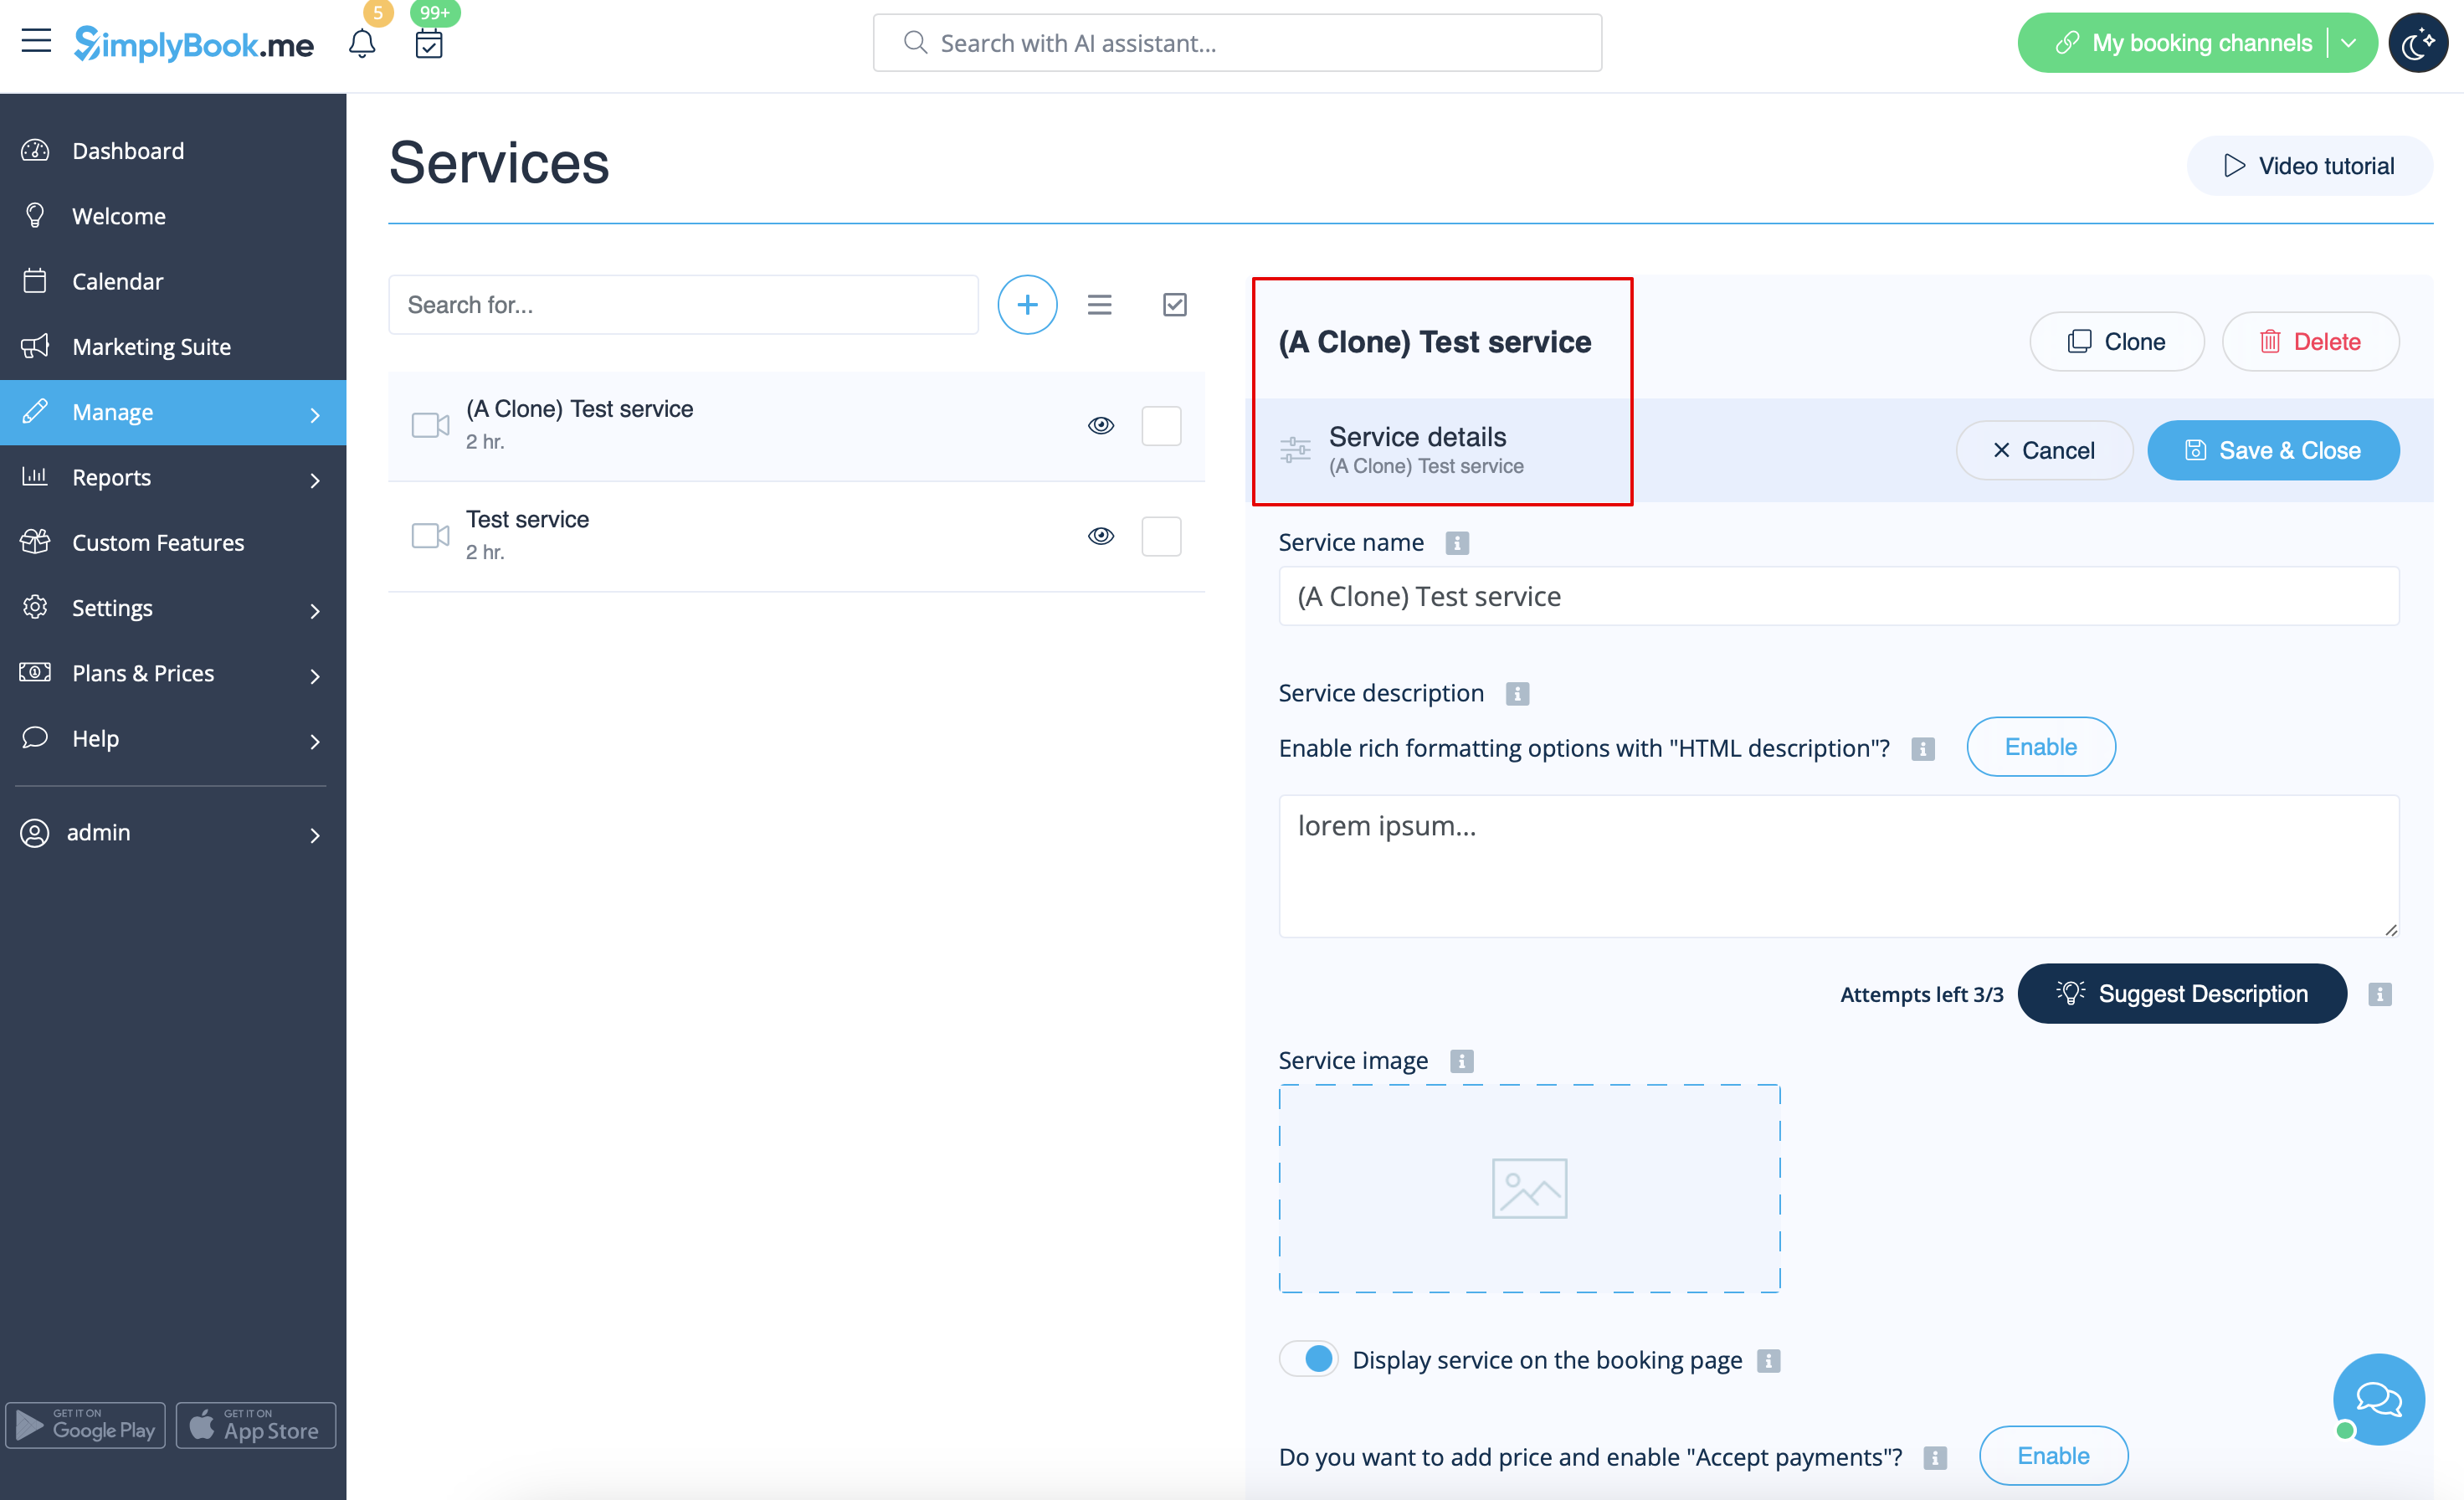
Hur man klonar en tjänst
Det kan hända att du behöver skapa flera liknande tjänster med samma inställningar.
Kloningsalternativet kommer definitivt att hjälpa dig.
Välj den tjänst som du vill kopiera.
Klicka på knappen Klona i det övre högra hörnet och bekräfta kopieringen av inställningarna.
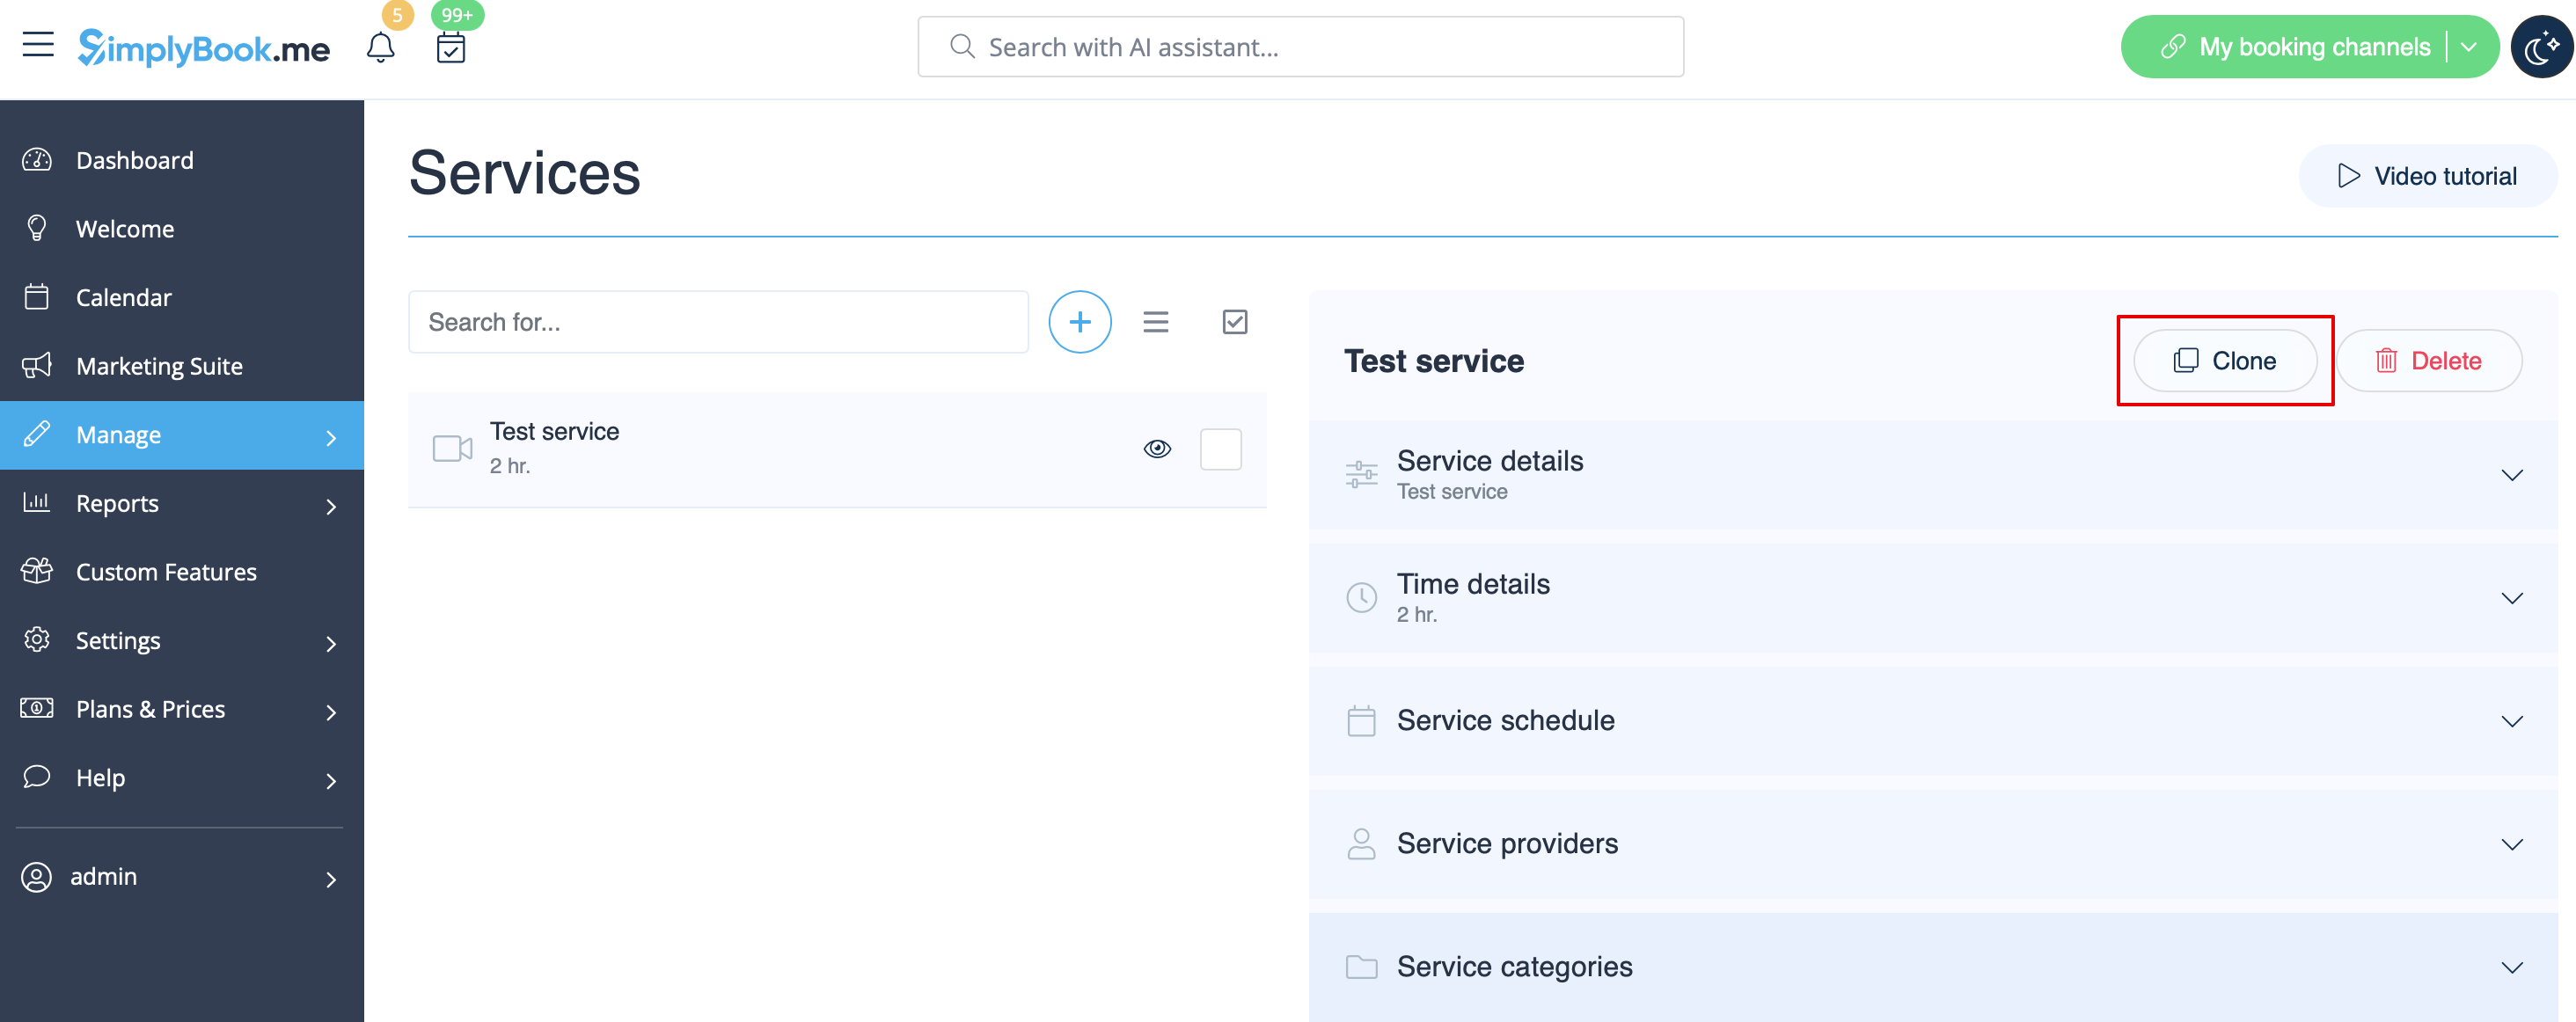
Följande tjänstinställningar kommer att kopieras:
- tjänstnamn
- tjänstbeskrivning
- tjänstpris om funktionen Acceptera betalningar är aktiverad och inställd
- tjänstbild
- tjänstschema
- Inställningar för funktionen Flexibla aviseringar om den är aktiverad och inställd
- Inställningar för funktionen Aviseringssystem för bokning snart om den är aktiverad och inställd
- Inställningar för funktionen Bokning vid fast tid om den är aktiverad och inställd
Som resultat kommer ytterligare en tjänst att läggas till med Klonat tillagt i namnet så att du enkelt kan se vilka tjänster som är kopior.
(Du kan redigera dessa tjänstnamn för att anpassa dem efter dina behov på fliken Tjänstdetaljer för motsvarande tjänst)
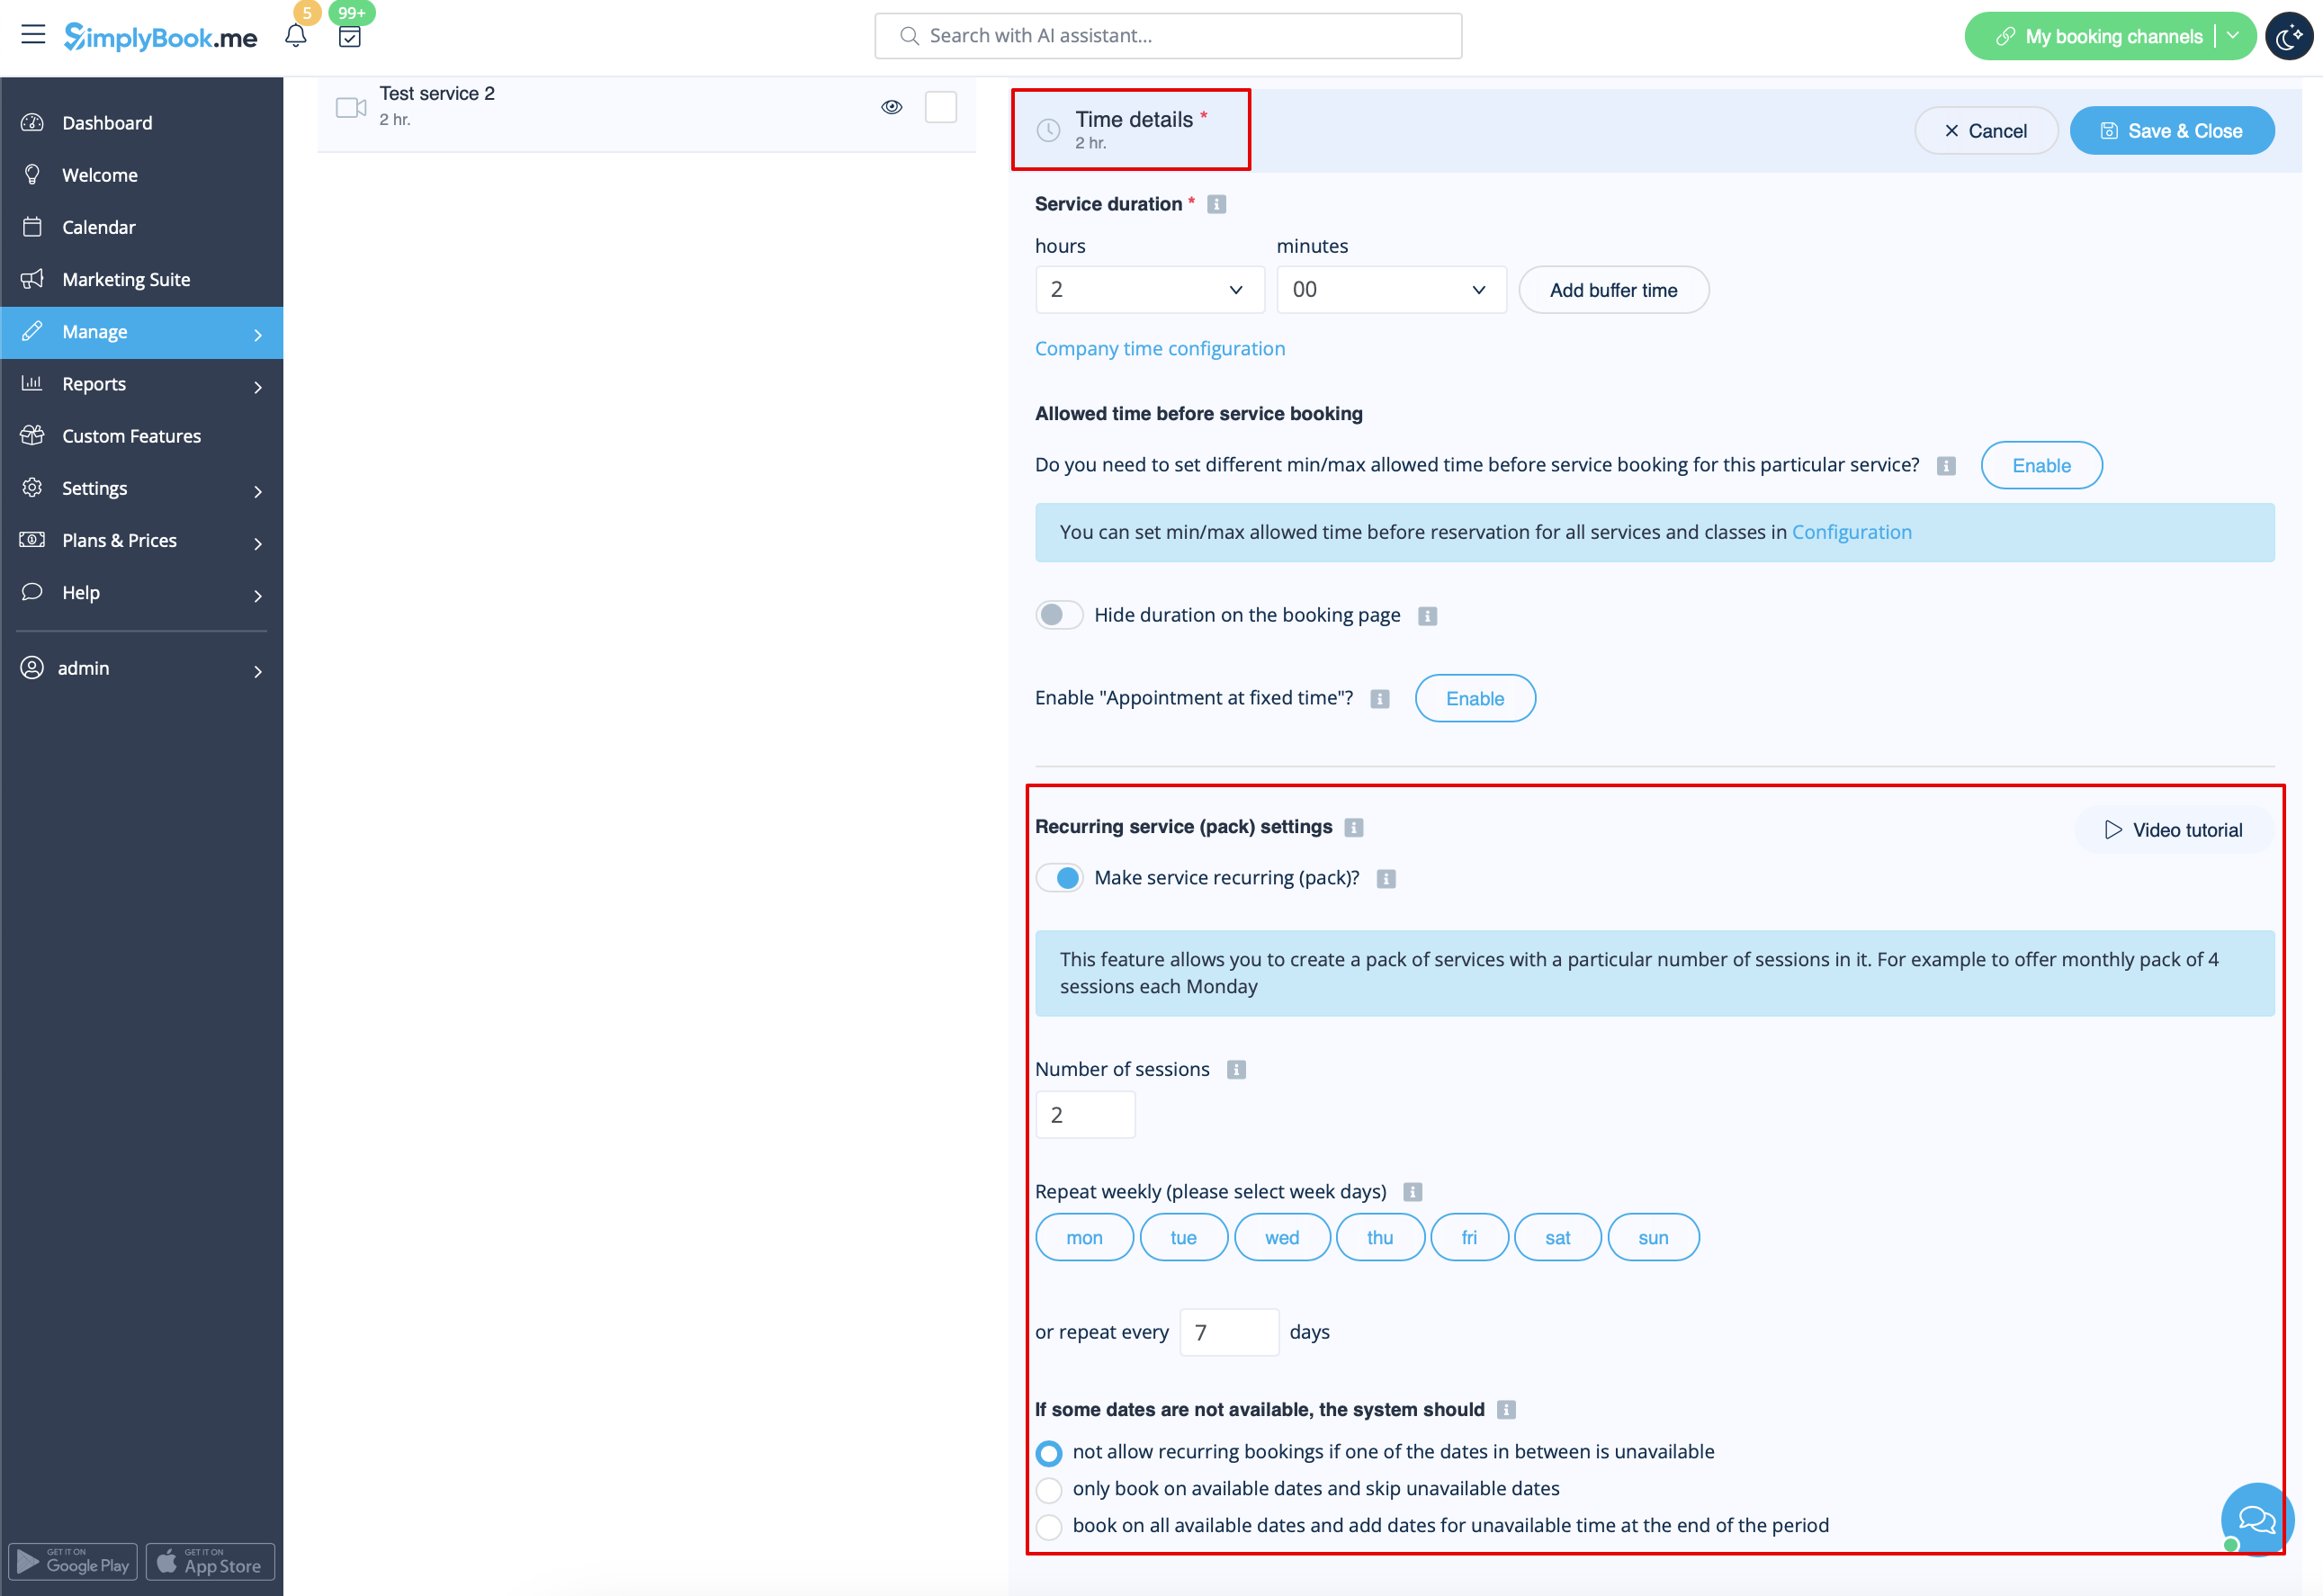
Hur man ställer in tjänstens varaktighet
I Hantera -> Tjänster, efter att du valt tjänsten på höger sida av sidan, väljer du fliken Tidsdetaljer för att ställa in varaktigheten för din tjänst.
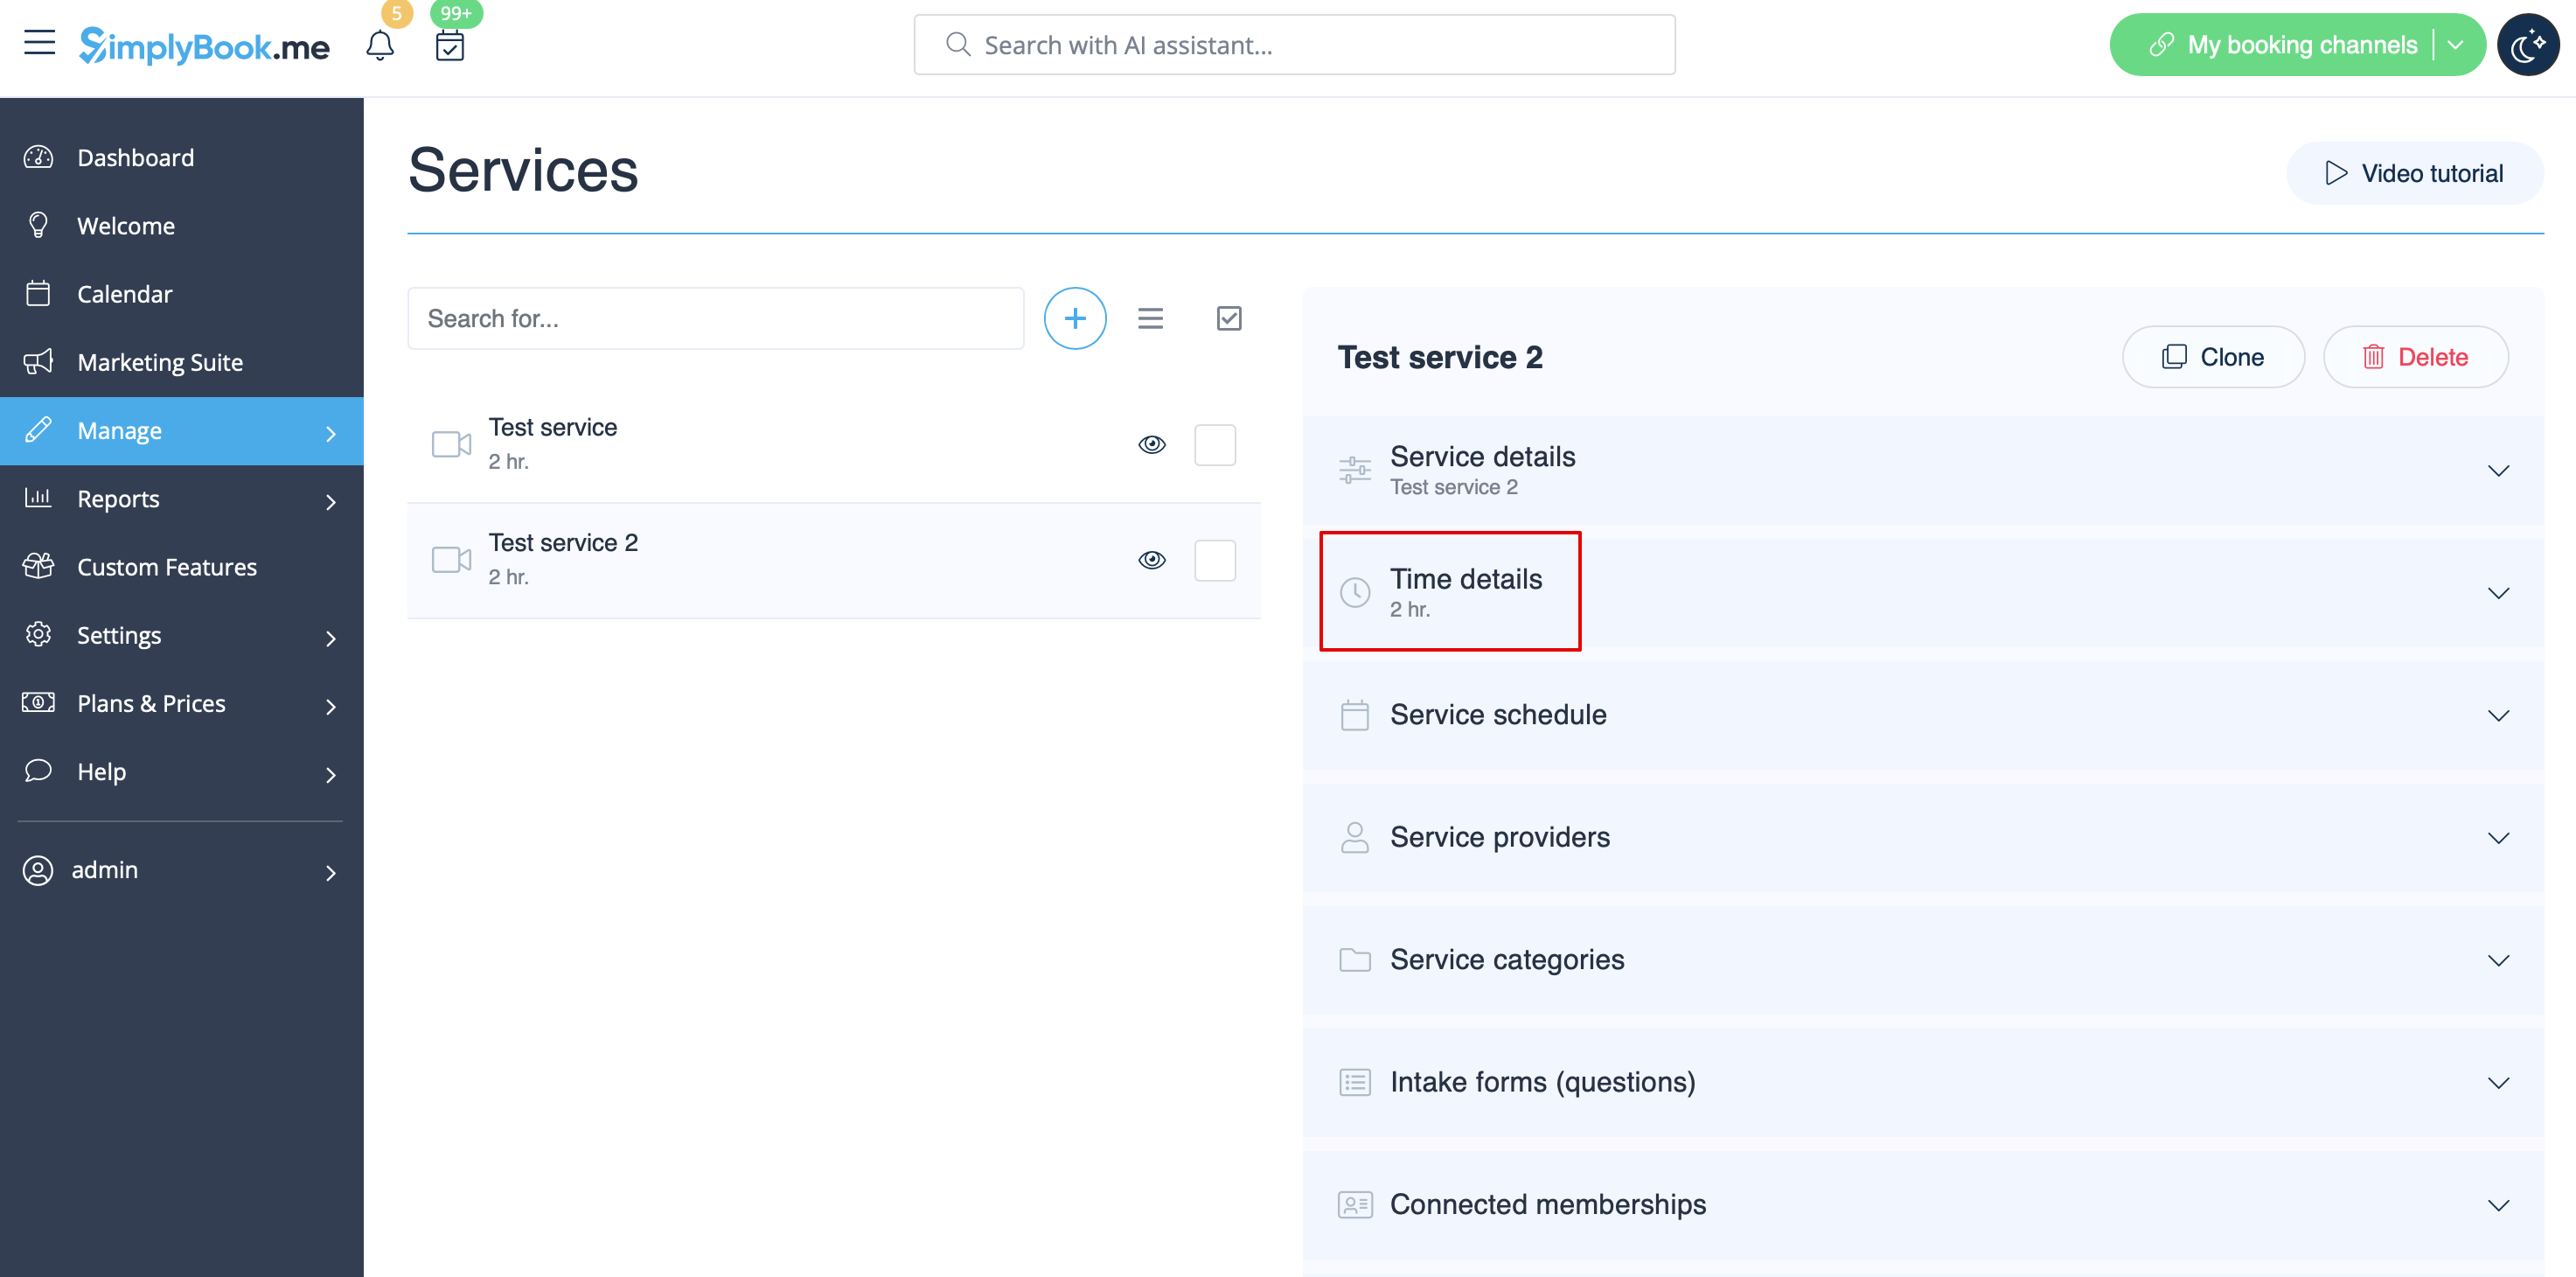
Här kan du också ställa in tjänsten som återkommande.
Du kan också ställa in fasta starttider för din tjänst. Läs mer om anpassningsfunktionen för bokningar med fast tid här.
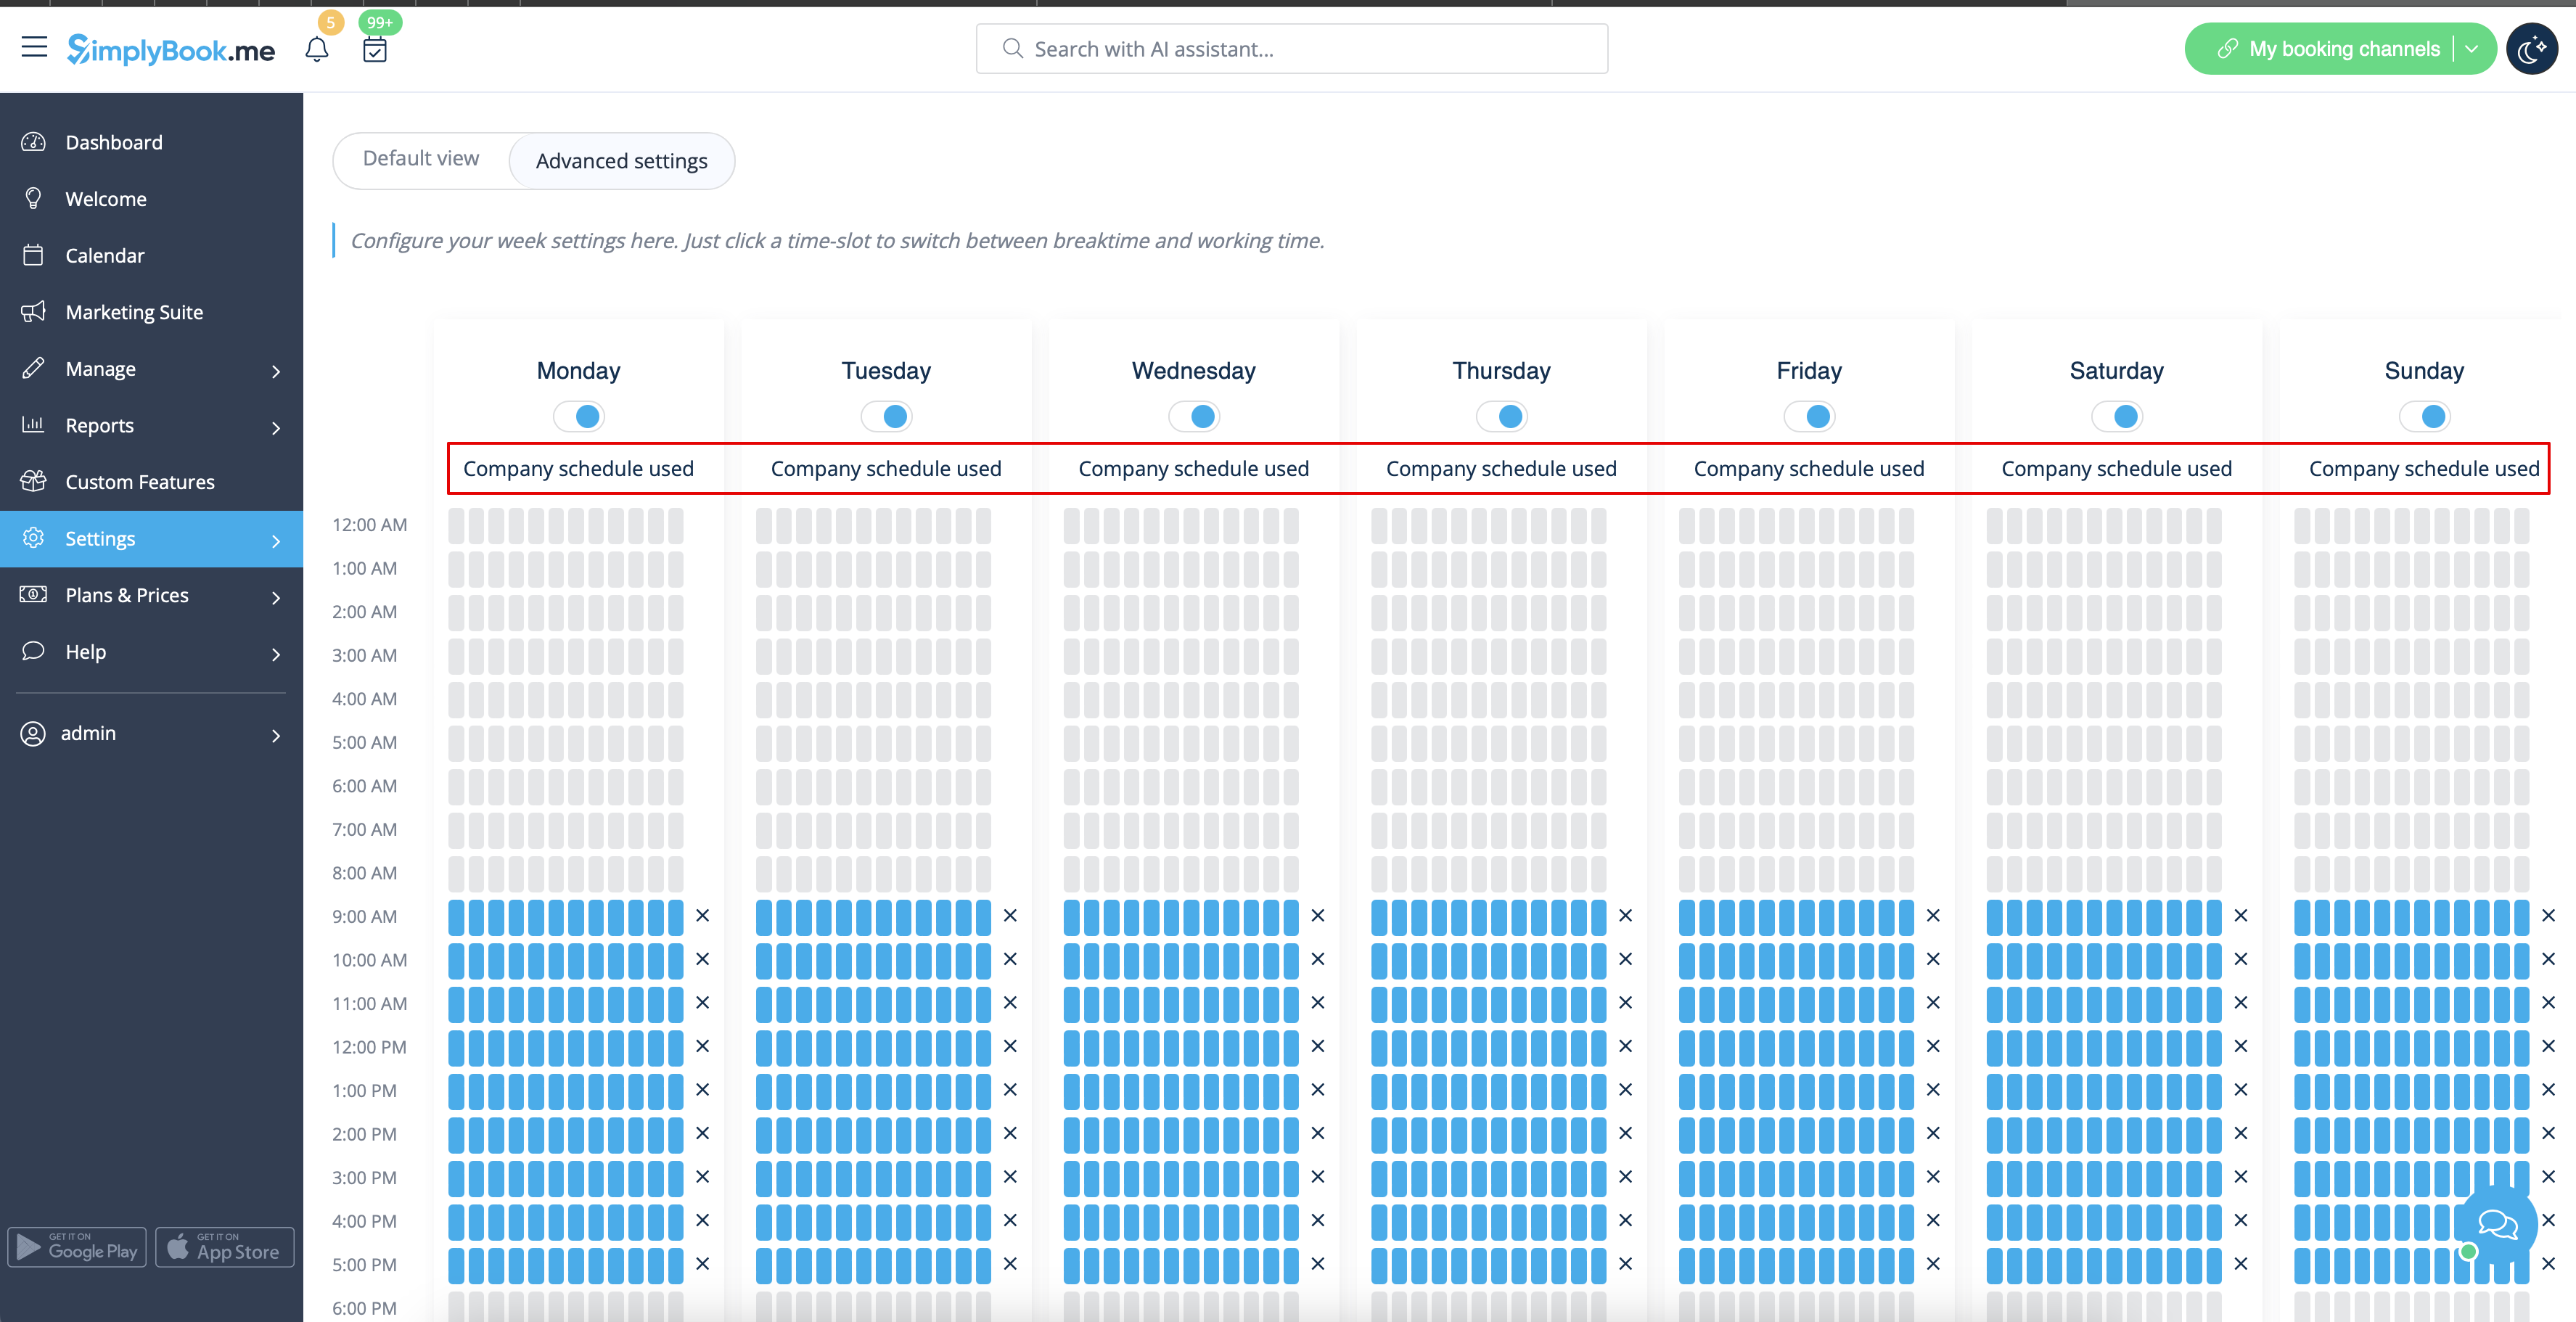
How to set specific schedule for service
In Manage -> Services -> select the service -> Service schedule tab move the sliders to set
open times for this service if it differs from usual company schedule.
Or click on Show advanced settings if using the slots view is more convenient for you.
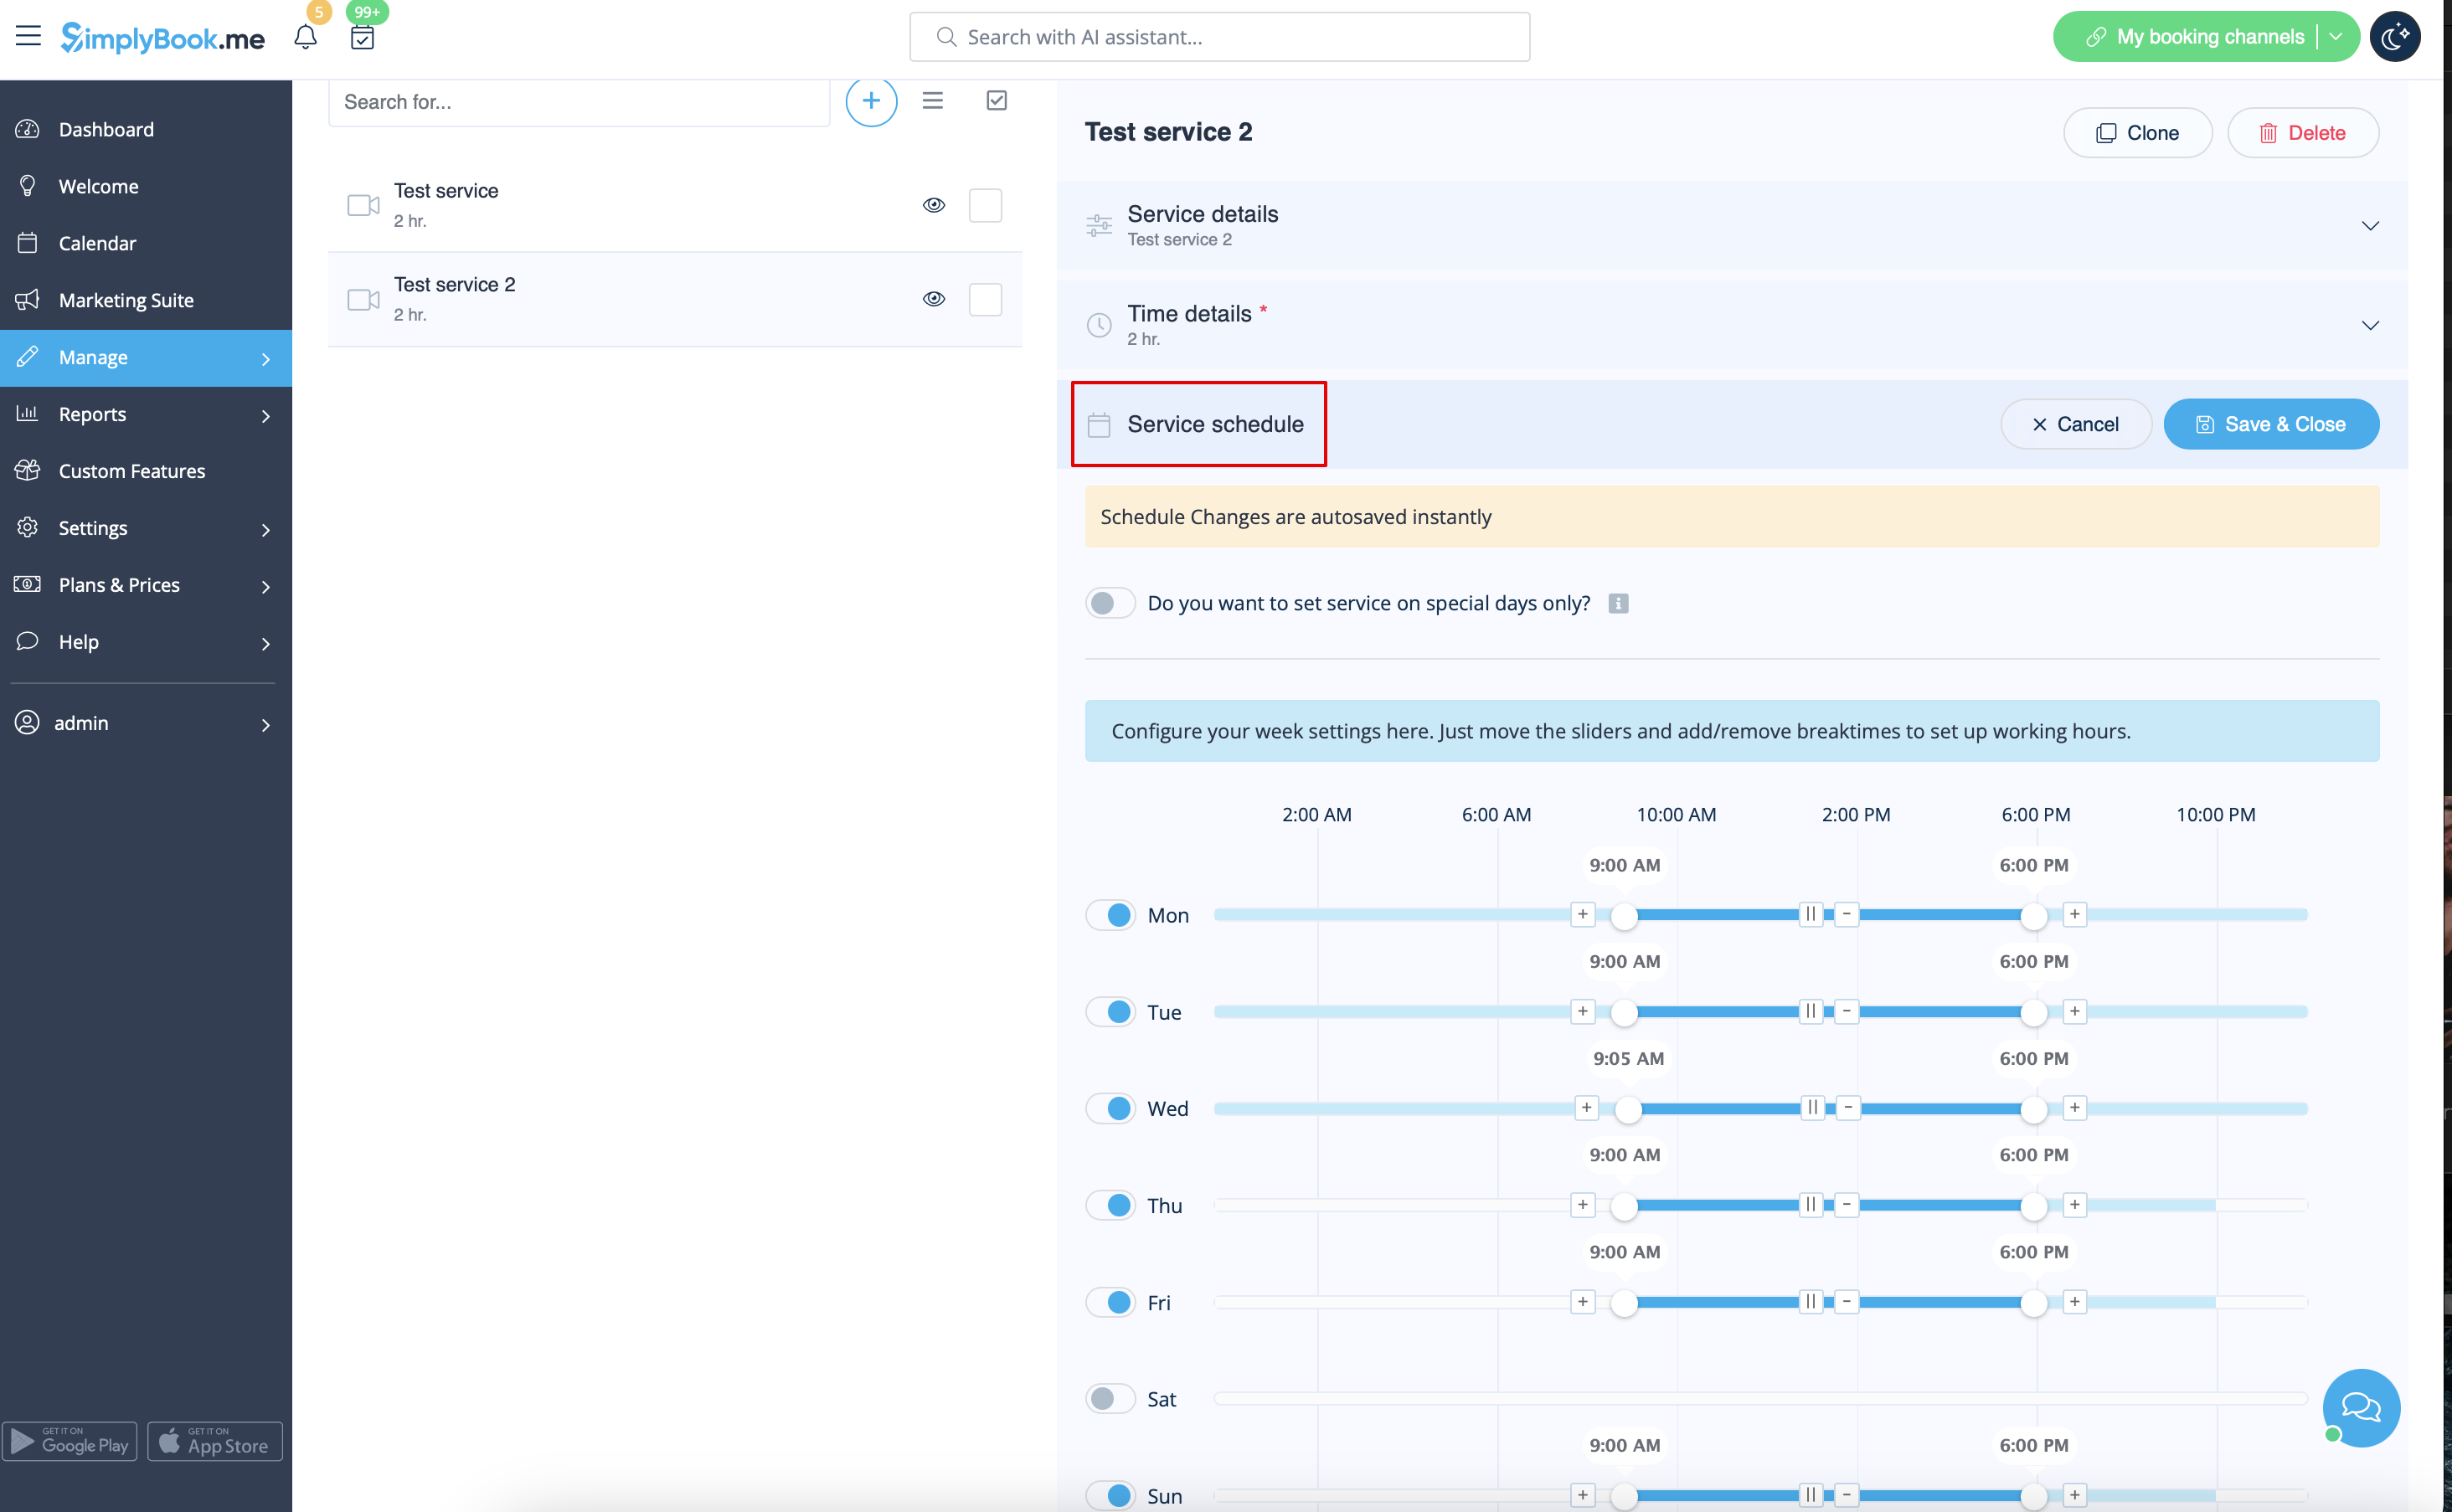
If the service has the same schedule as company you do not need to change anything there, it will be applied automatically.
You will be able to check it on Advanced schedule page.
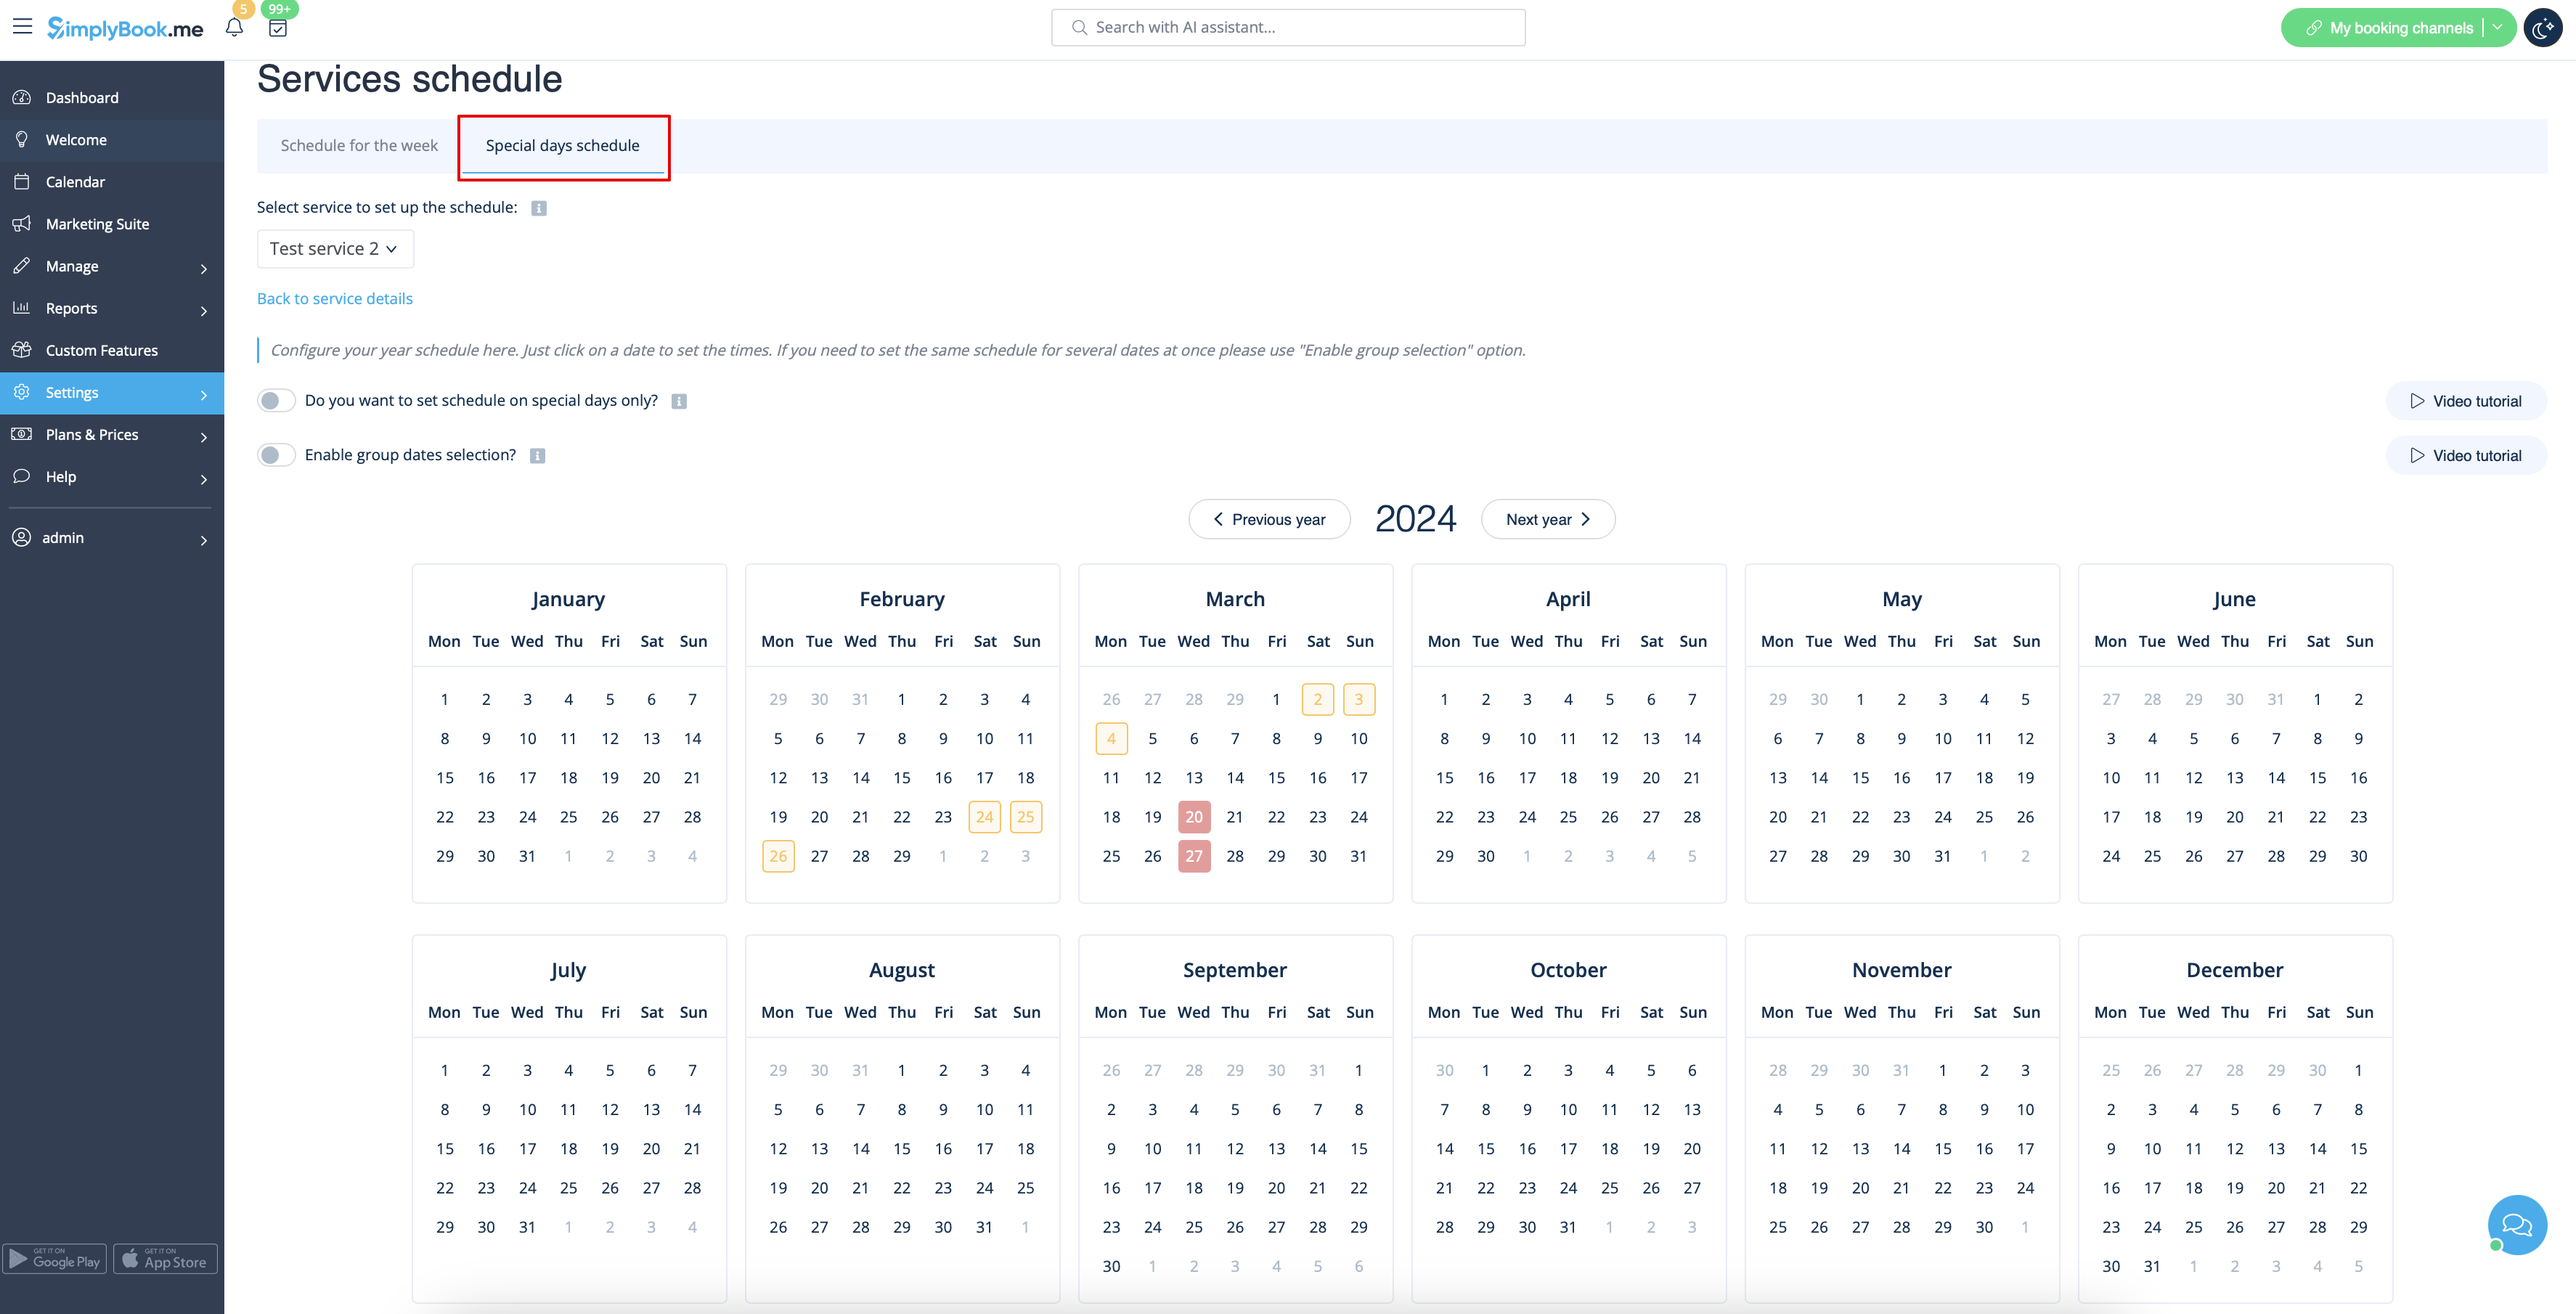
If you need to set some exceptions in service schedule for holidays or other needs please choose Special days tab there and set times for the desired dates.
How to set 24/7 or after 00.00 services
If your services will cross midnight, after you set up your availability make sure to set Allow service to extend over closing hours to Yes in Settings -> Main configuration.
- Schedules relations
- How to set service as one-time event
- How to group my services in categories
- How to require additional information from clients at checkout
- How to limit bookings per service
- How to set specific notifications per service
- How can I promote my service
- Default booking notifications
- Time and date settings
- Add reminders to book again
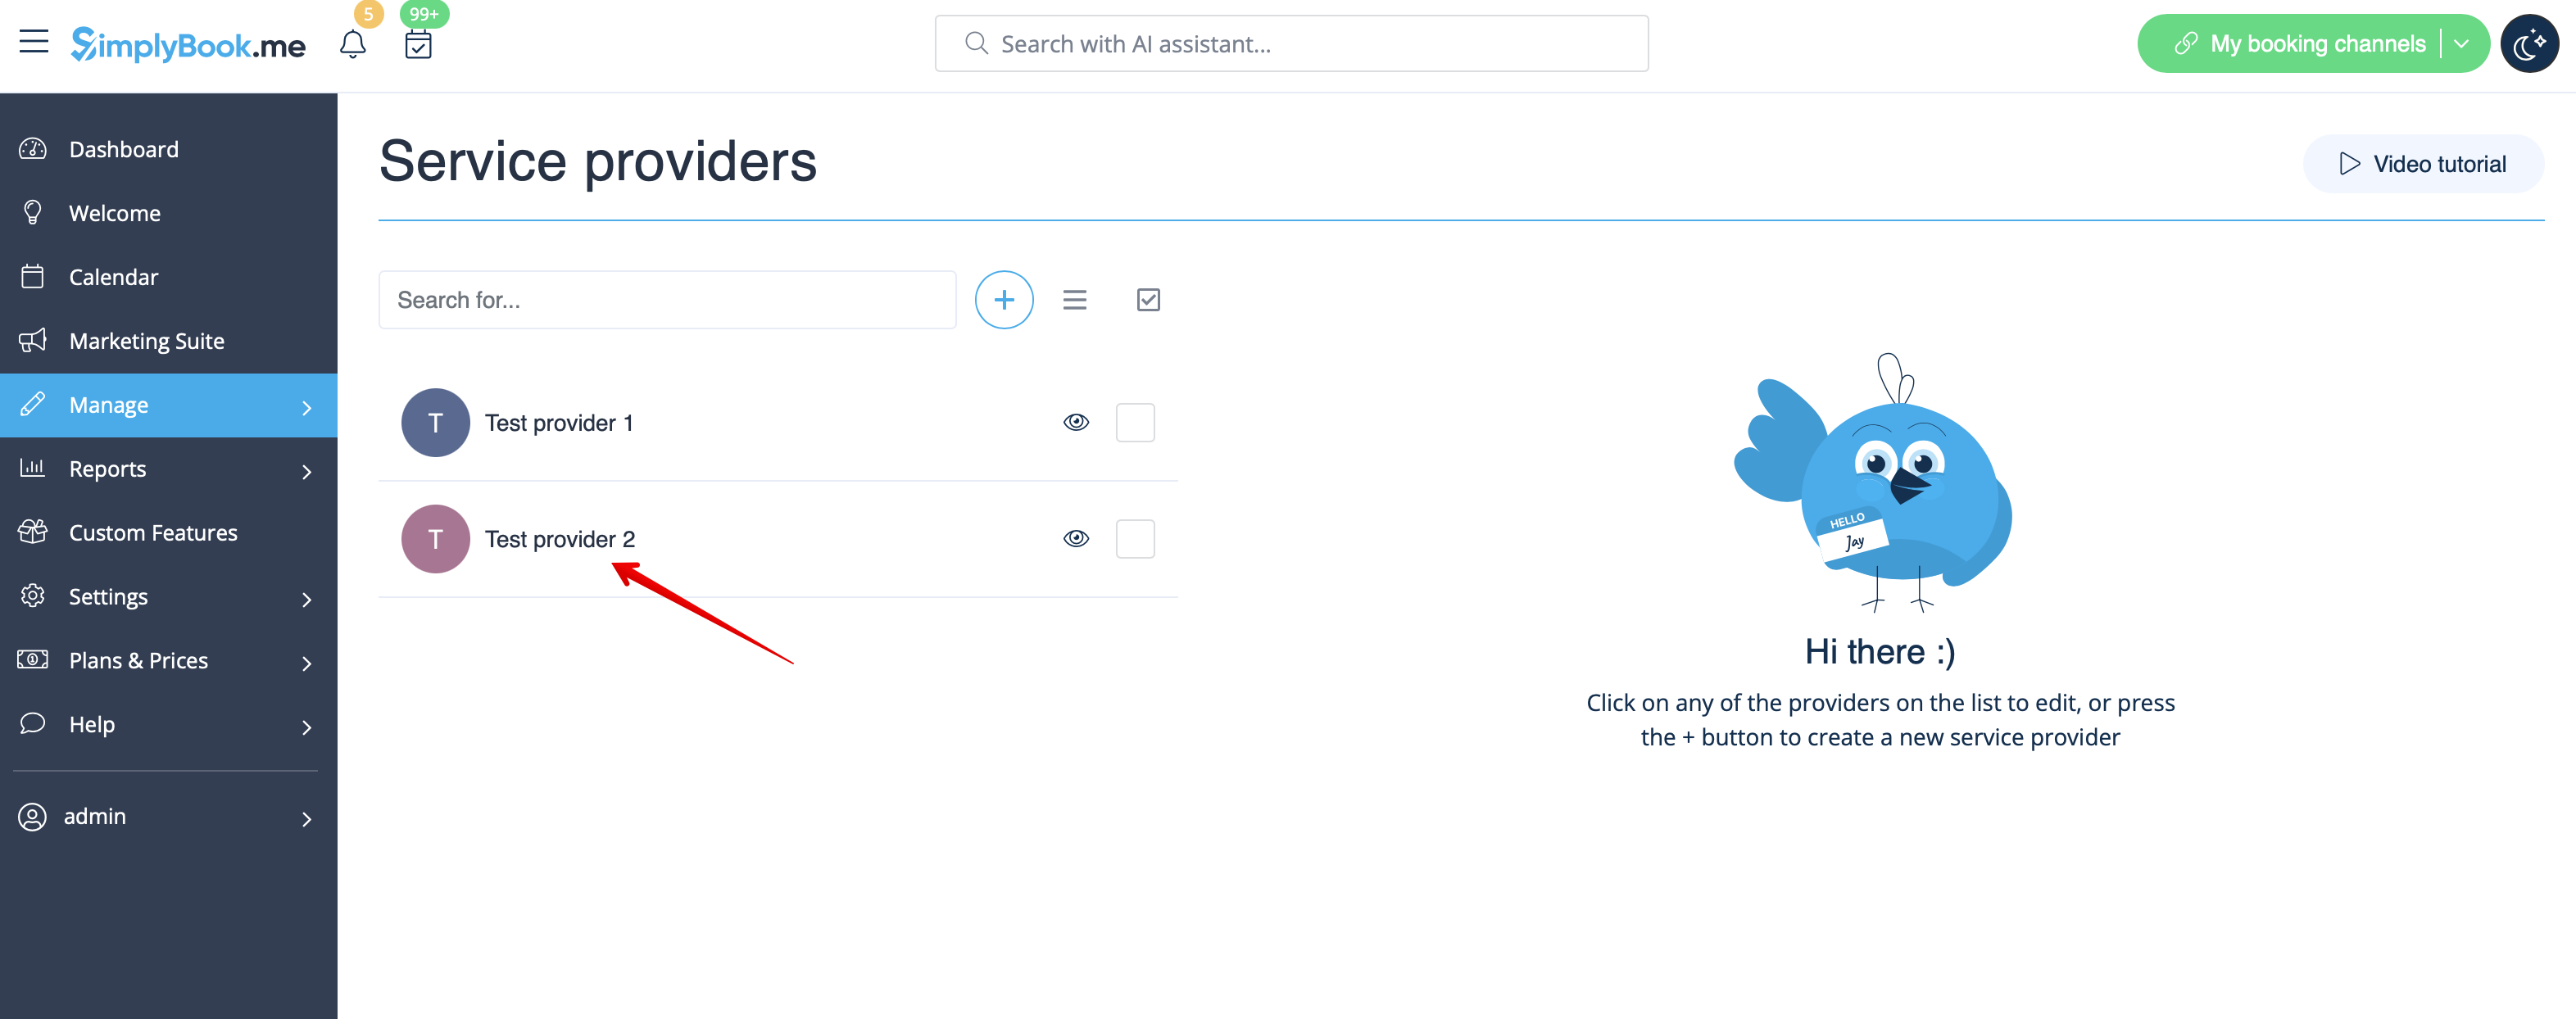
Adding Providers
- Video tutorial
How to add a provider
In Manage -> Service Providers press + button.
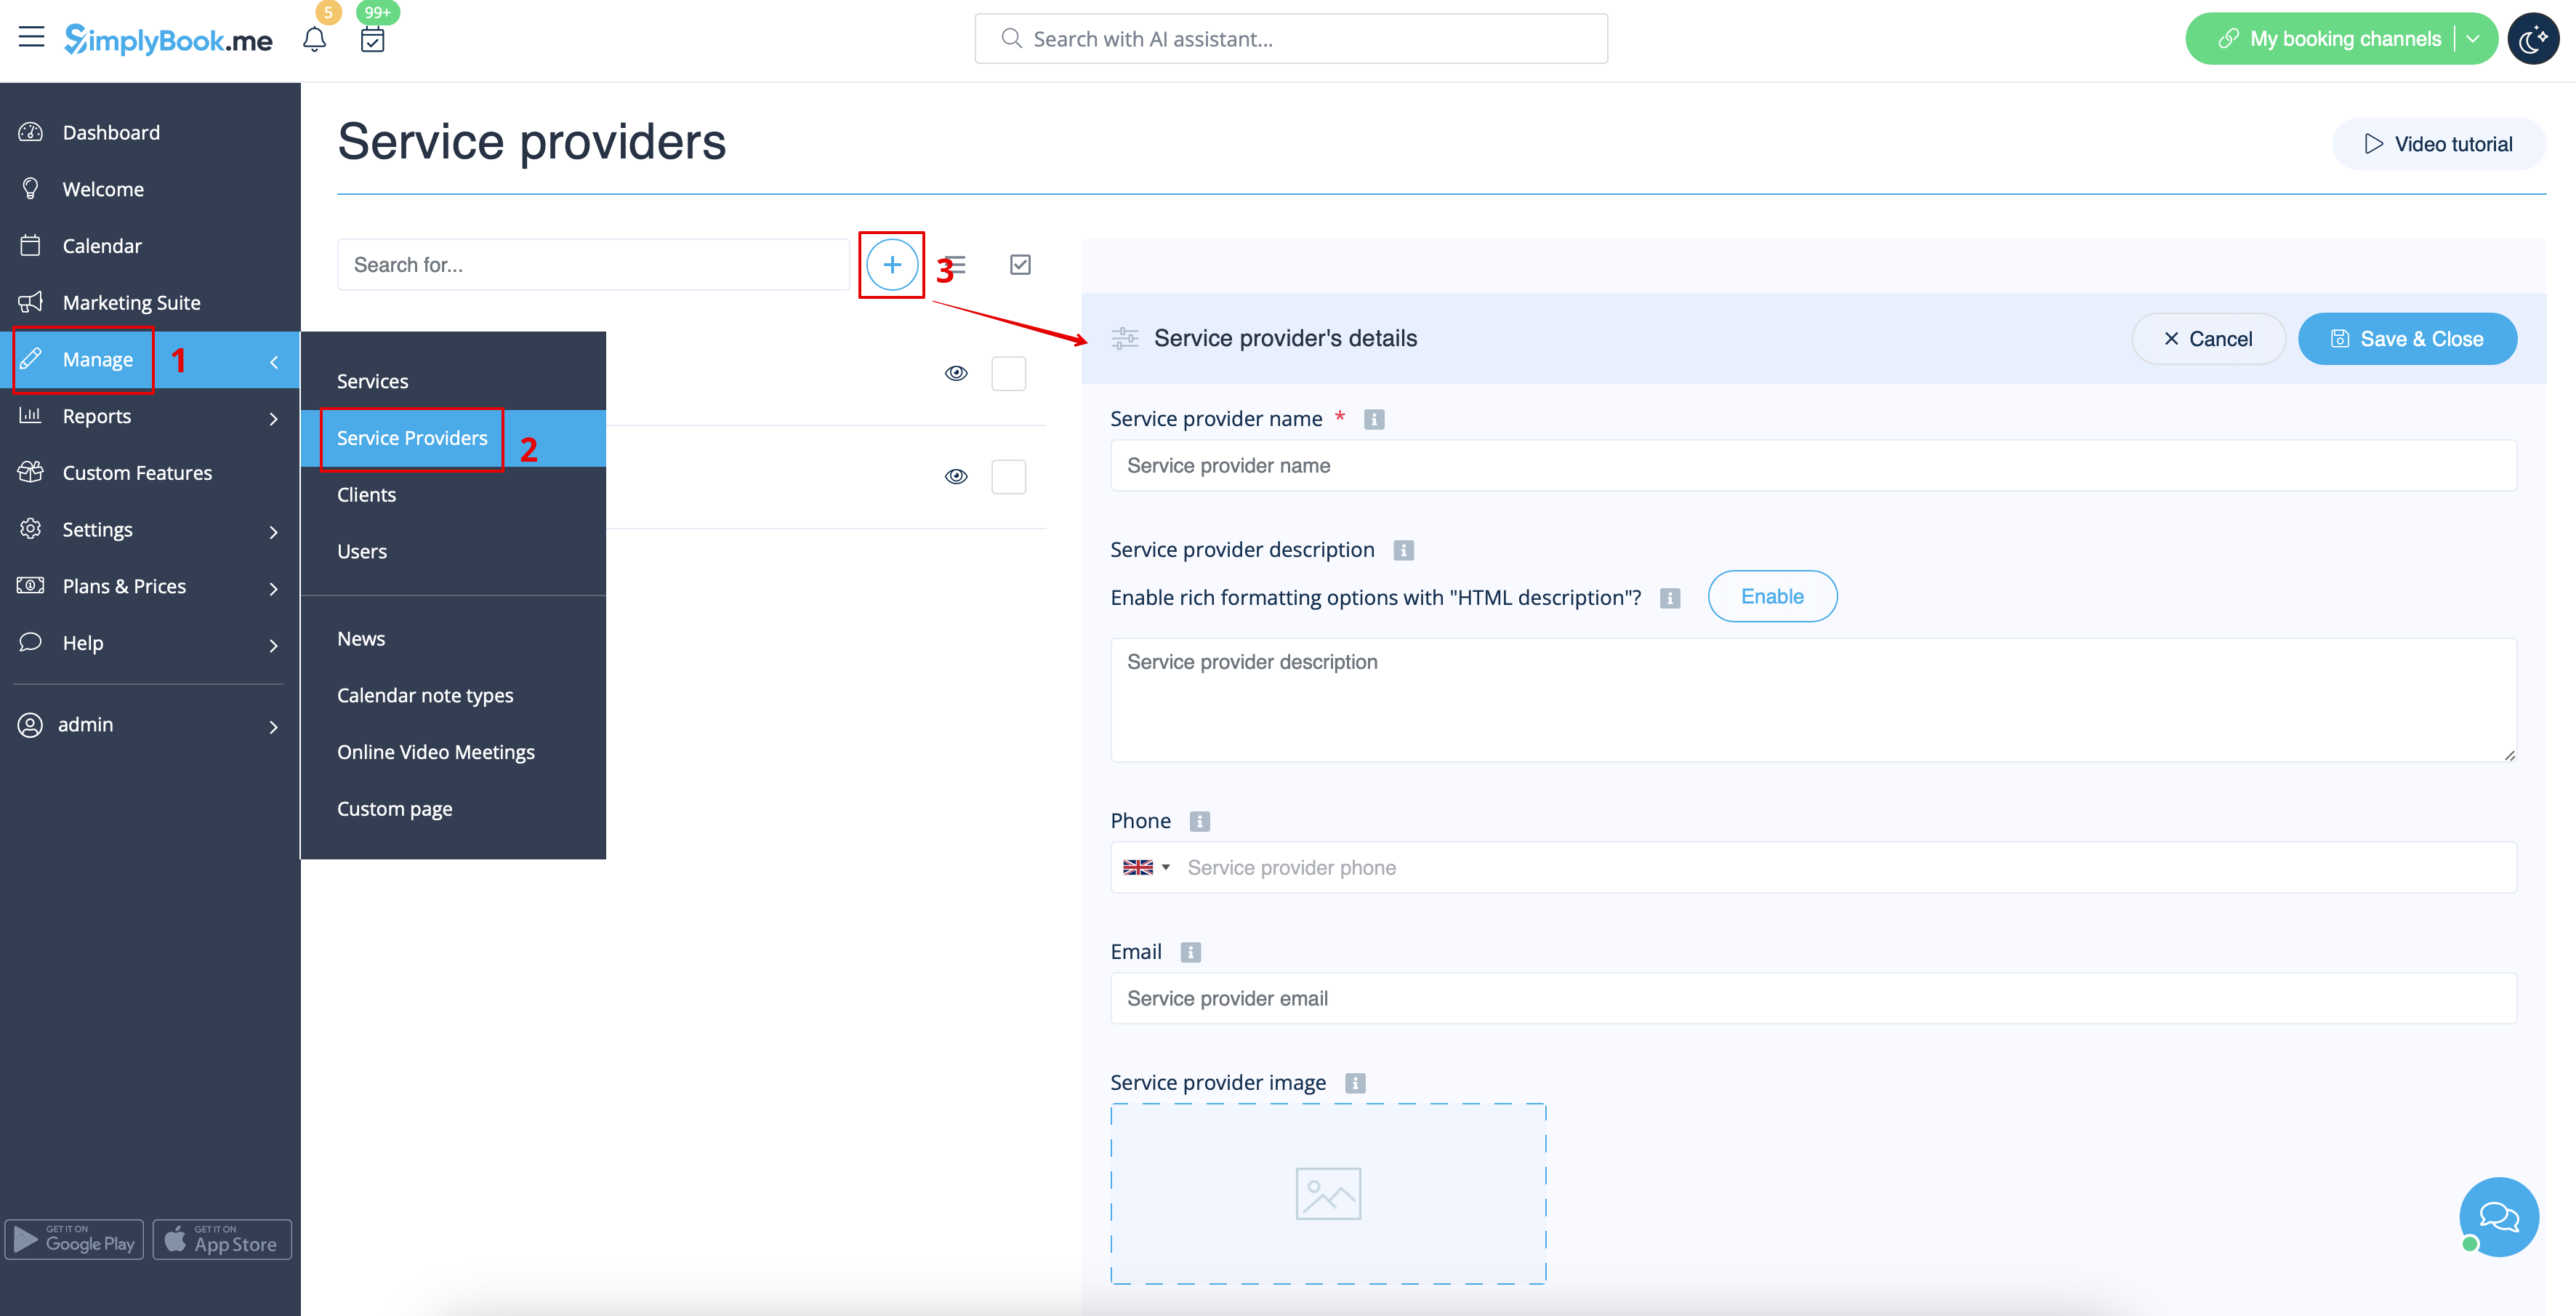
On the right side of the page insert the name of your service provider, set number of clients he/she can serve at a time and write service provider description.
You can also upload picture and set his/her phone number and email address if necessary.
Save settings.
Please note! Phone number should be added in international format for SMS notifications to be sent correctly.
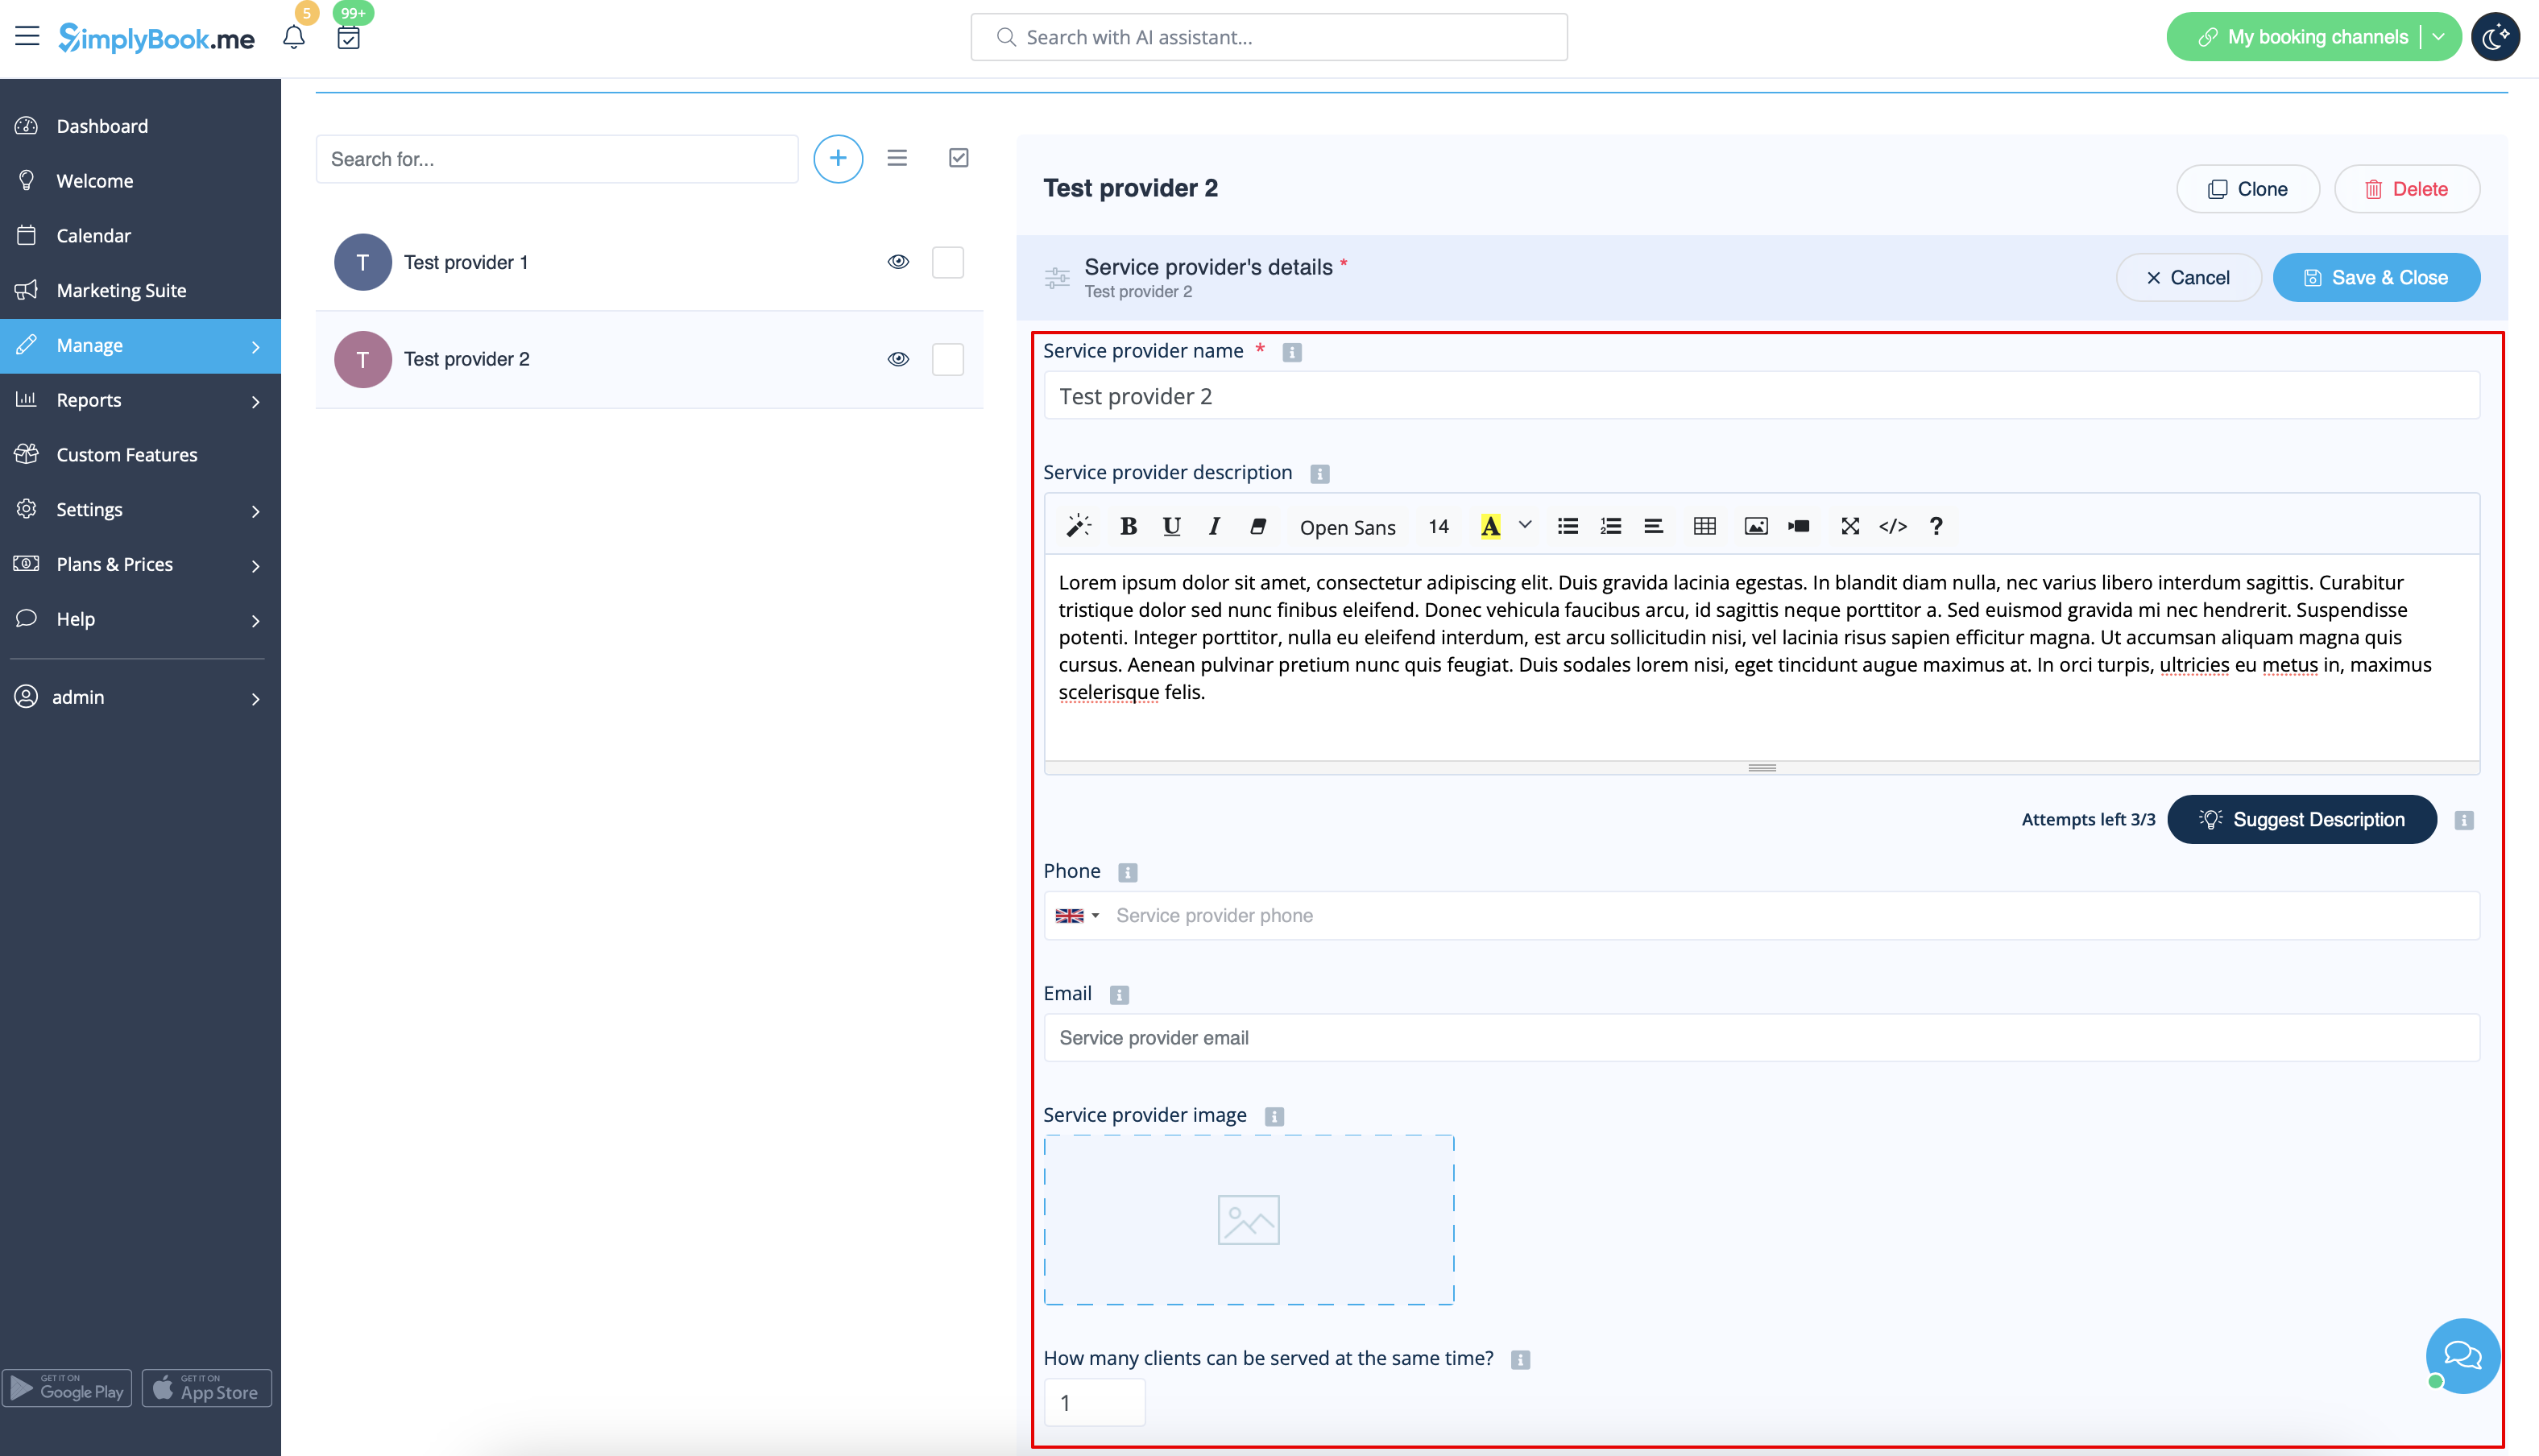
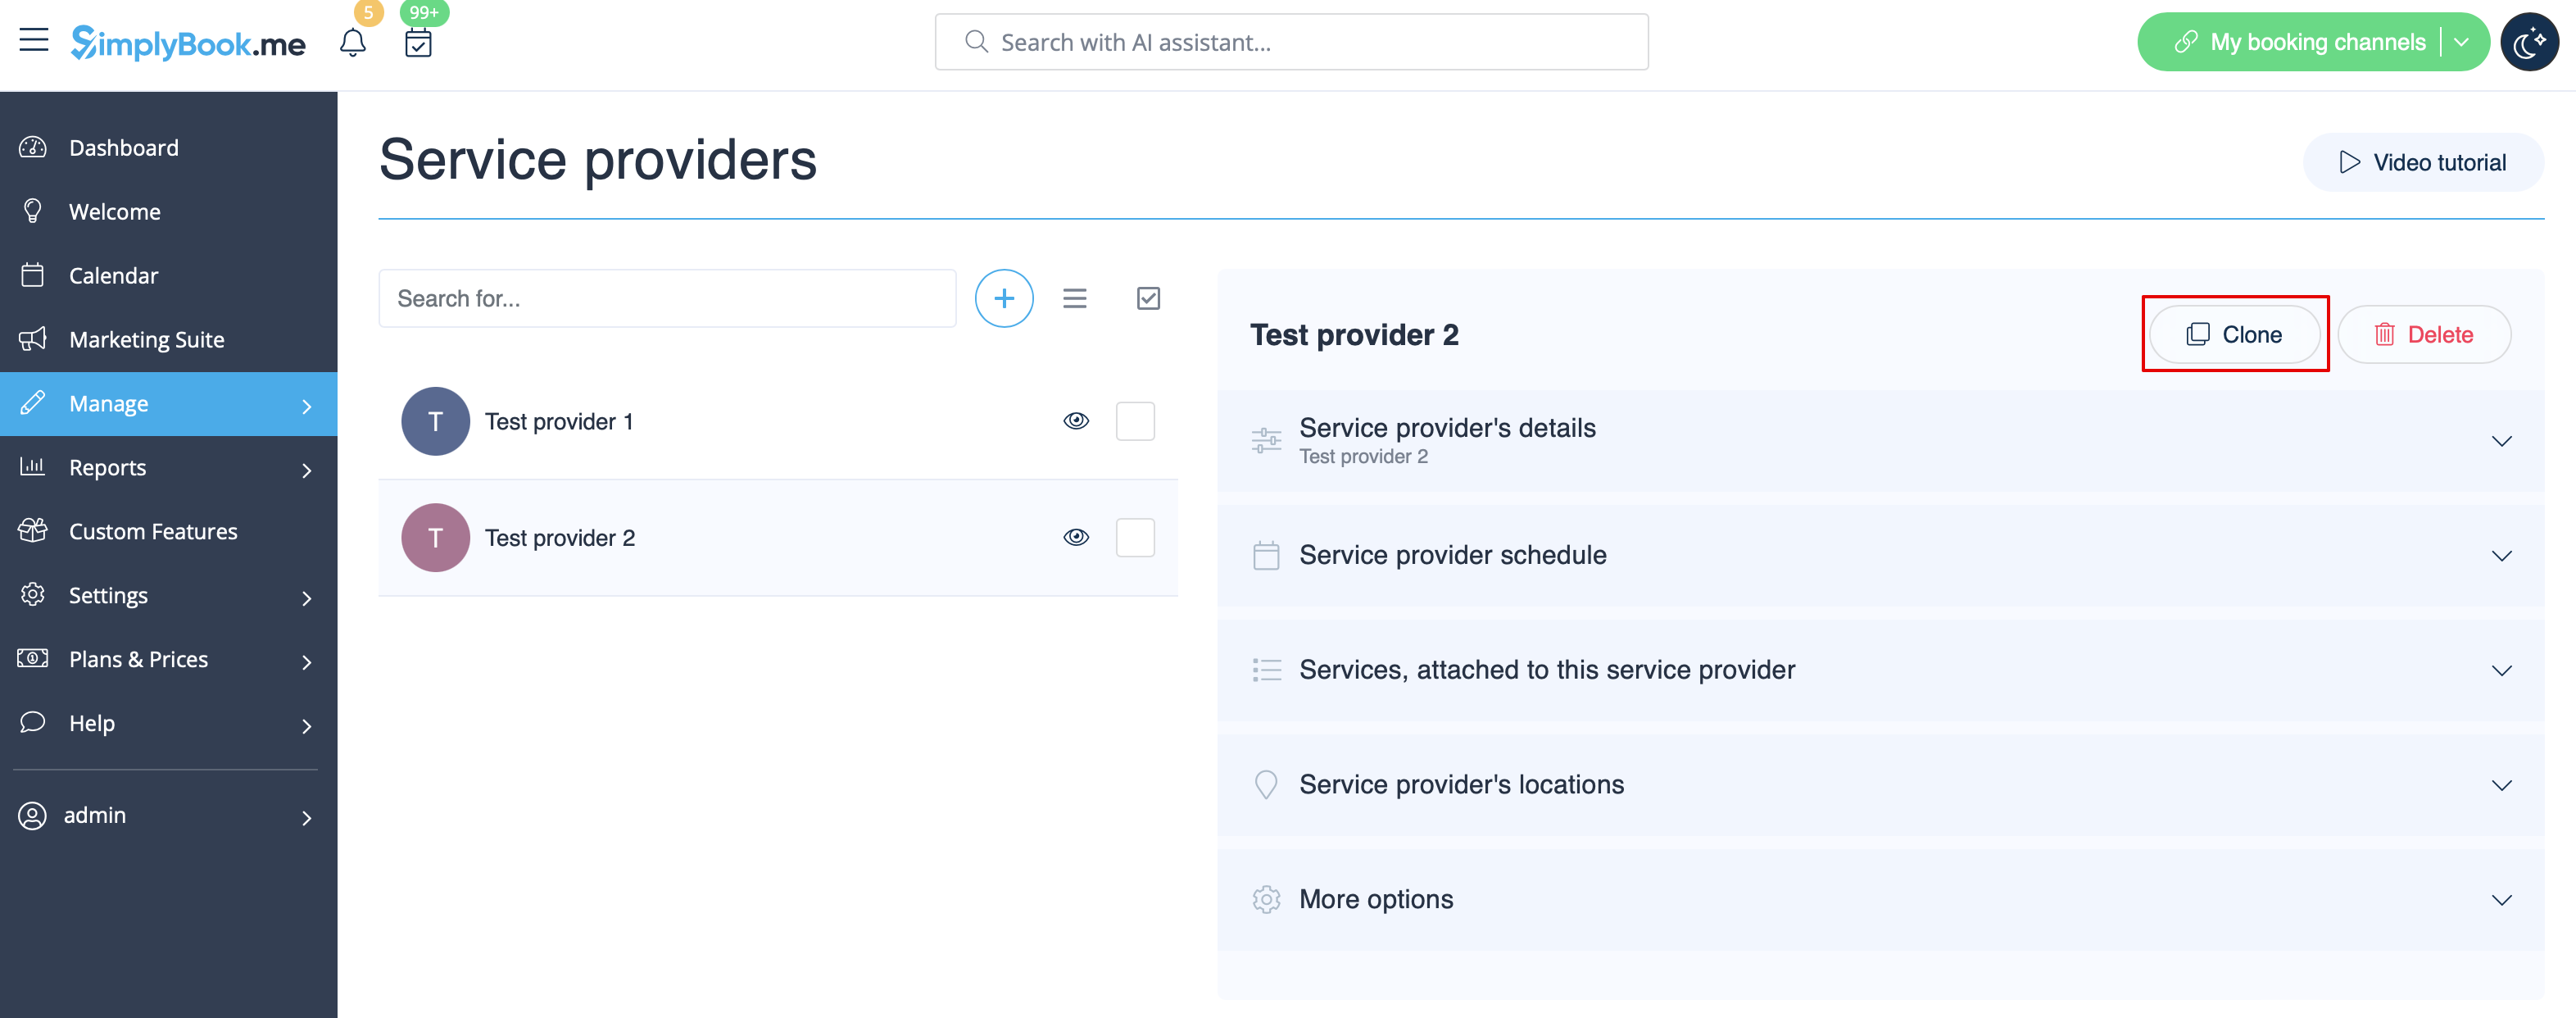
How to clone a provider
It may happen that you need to create several similar providers with the same settings.
Cloning option will definitely help you.
Please select the provider you would like to make the copy of.
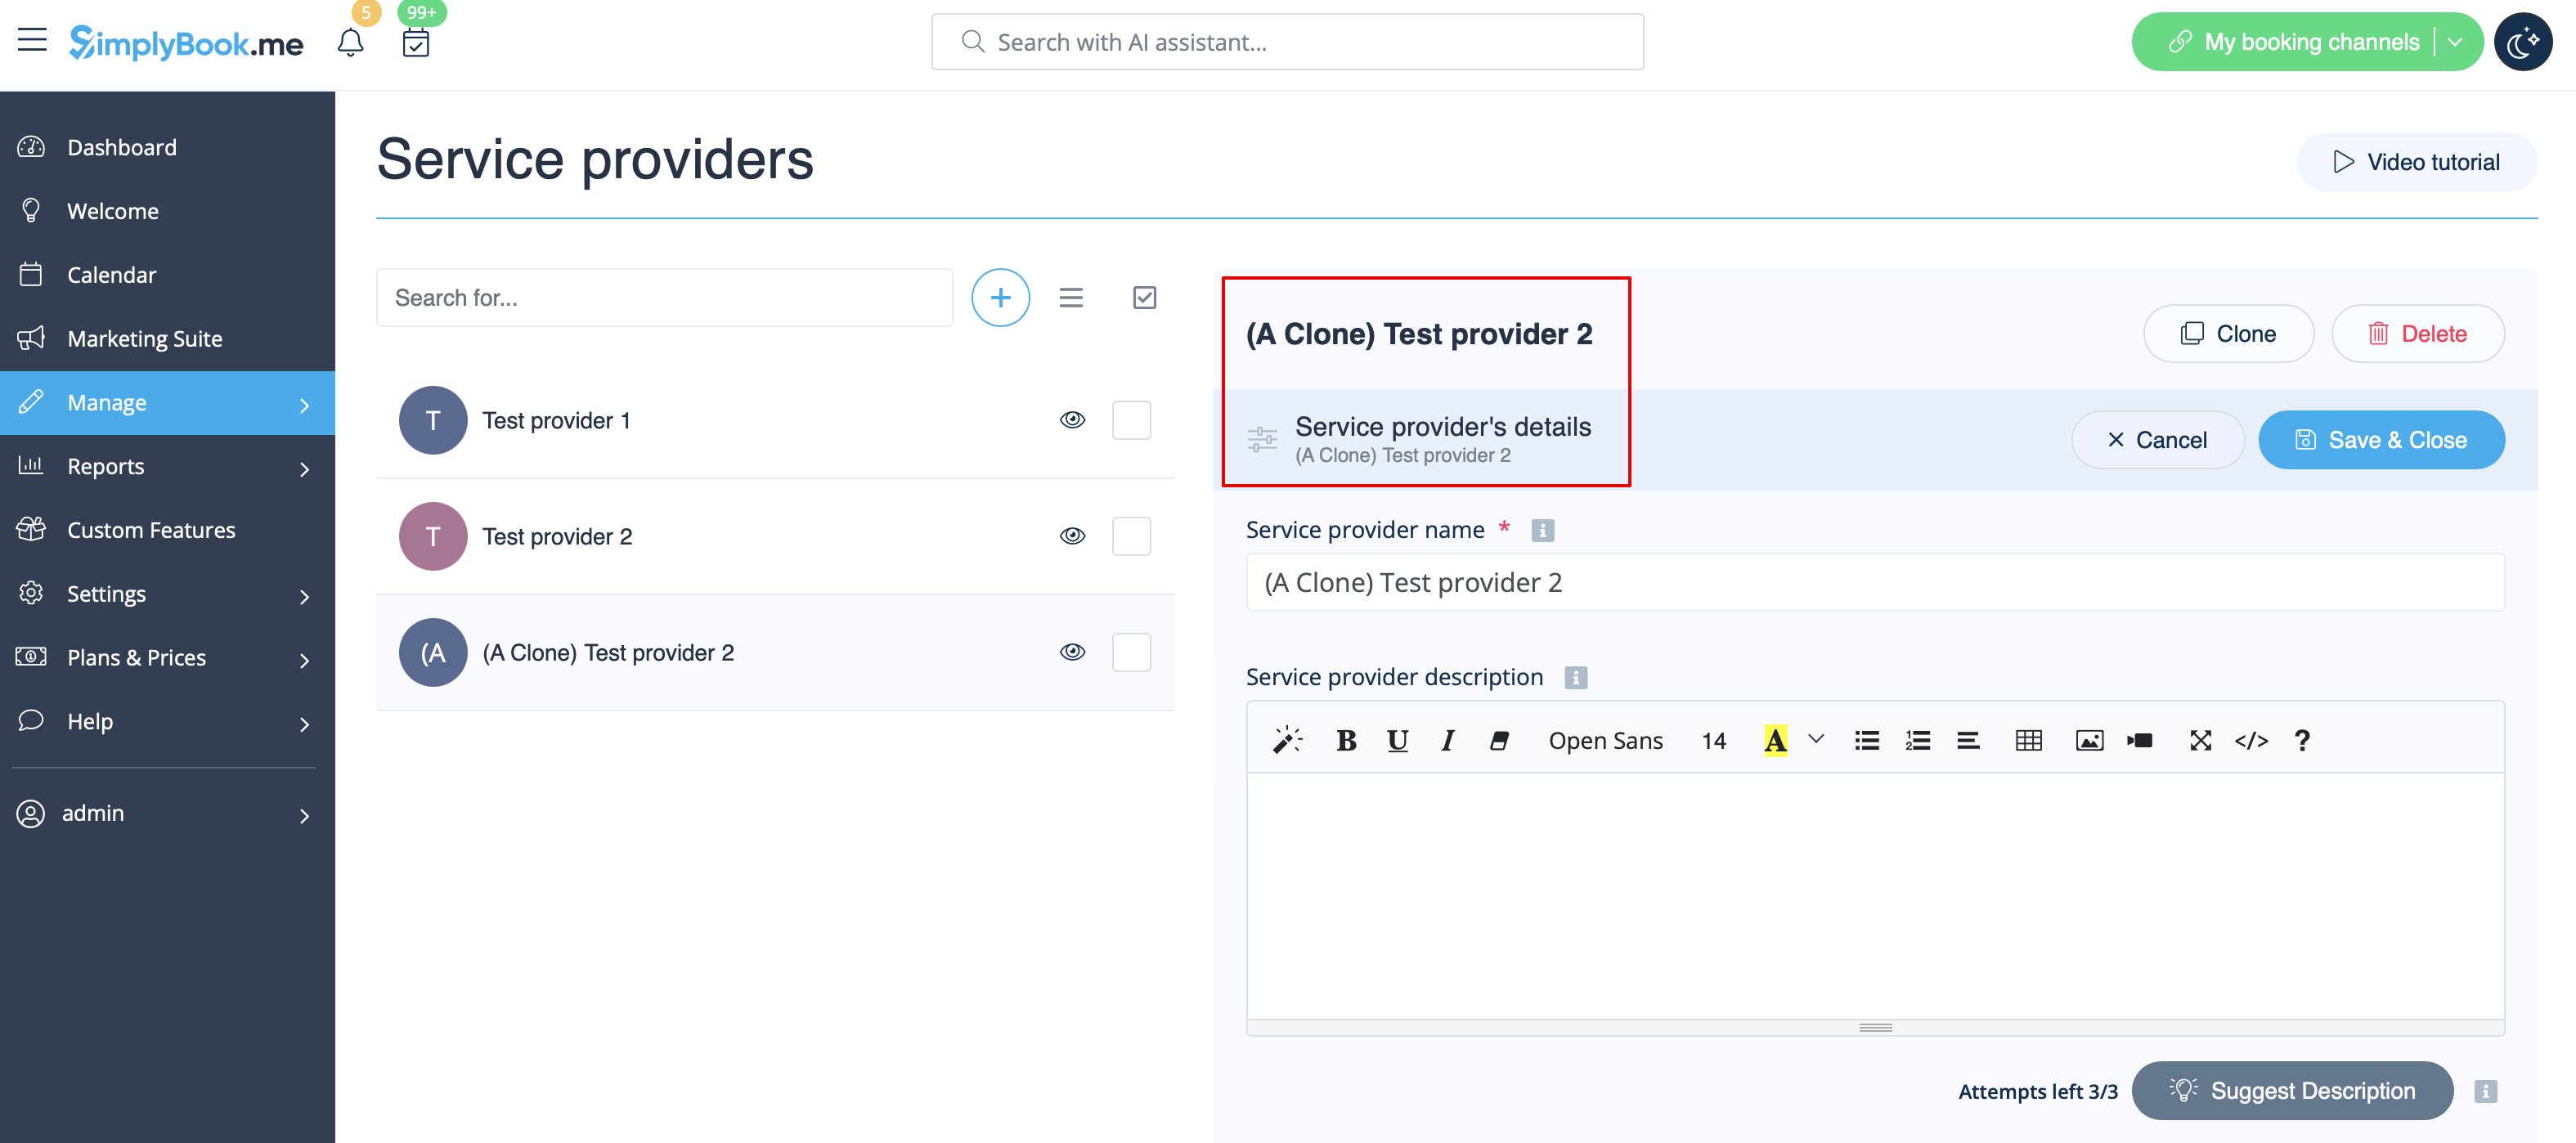
Click on Clone button in the top right corner, confirm the copying of the settings.
The following provider settings will be copied:
- provider name
- provider description
- provider phone and email address
- provider image
- number of clients provider can serve at a time
- provider schedule
- Calendar Sync feature settings if enabled and set
- Flexible Notifications feature settings if enabled and set
- Book Soon Notification System feature settings if enabled and set
As the result, one more provider will be added with Clone added to its name so that you will be able to easily see which providers are the copies.
(You can edit these providers names to adjust them to your needs in Service provider details tab for the corresponding provider)
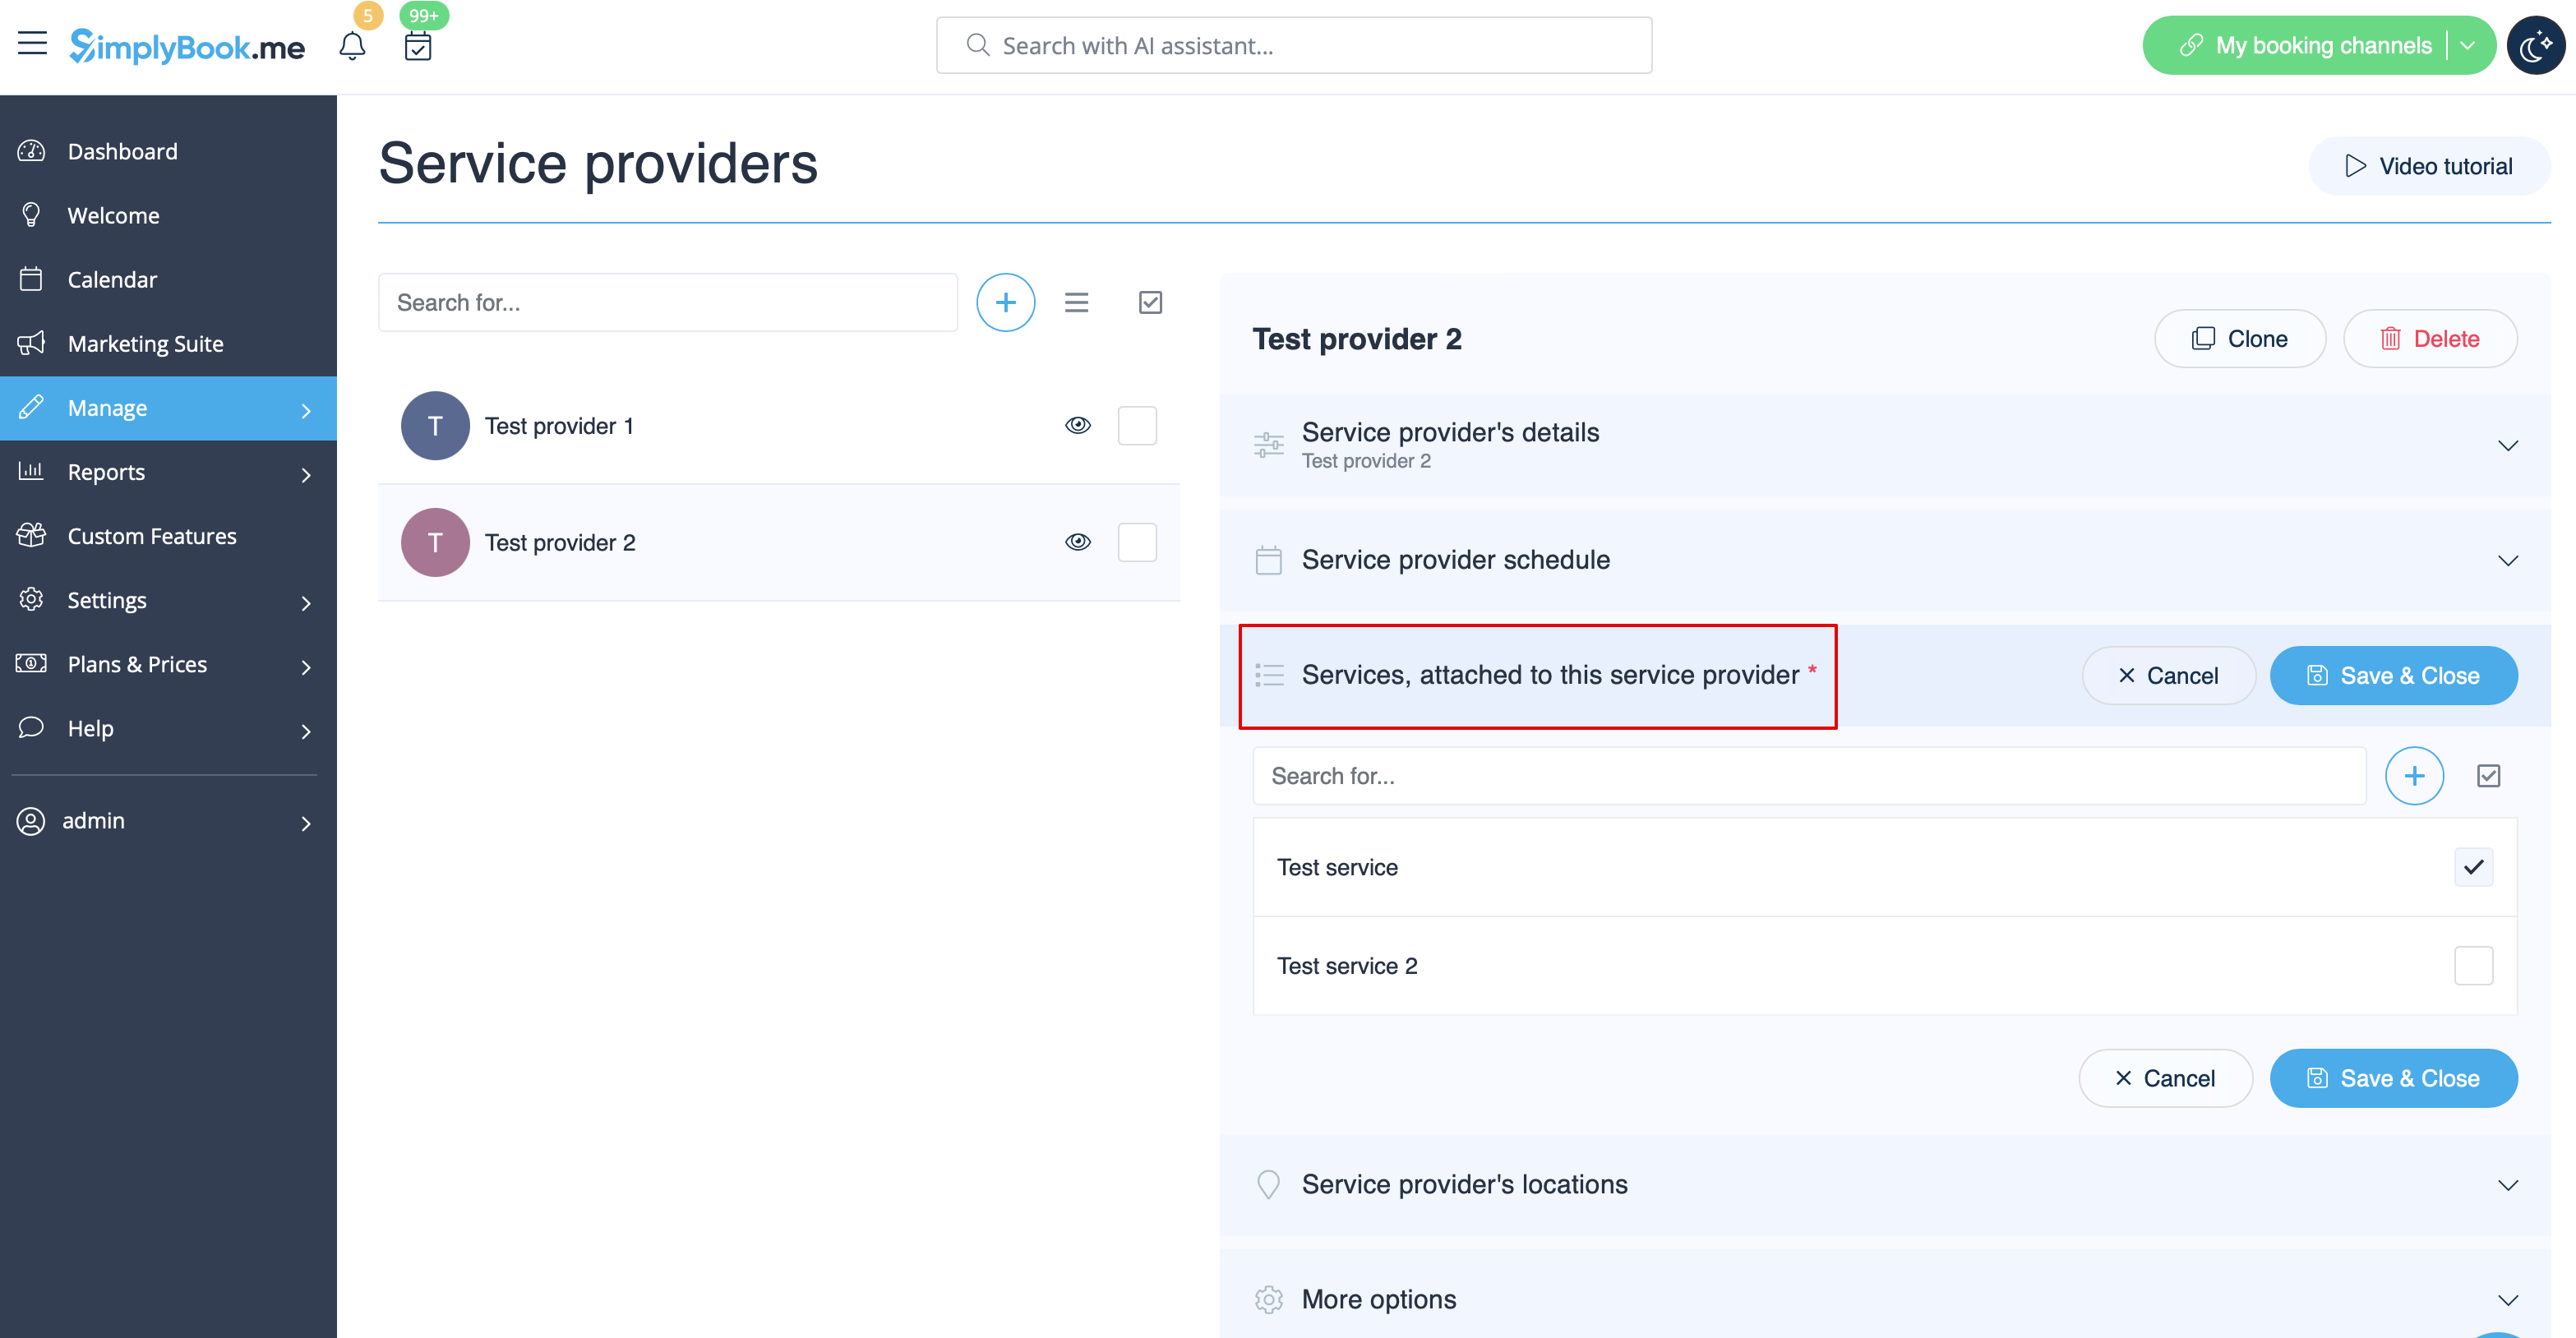
How to attach services to provider
In Manage -> Service Providers -> select the provider -> switch to Services, attached to this service provider tab and check the boxes with services this provider will perform.
Save settings.
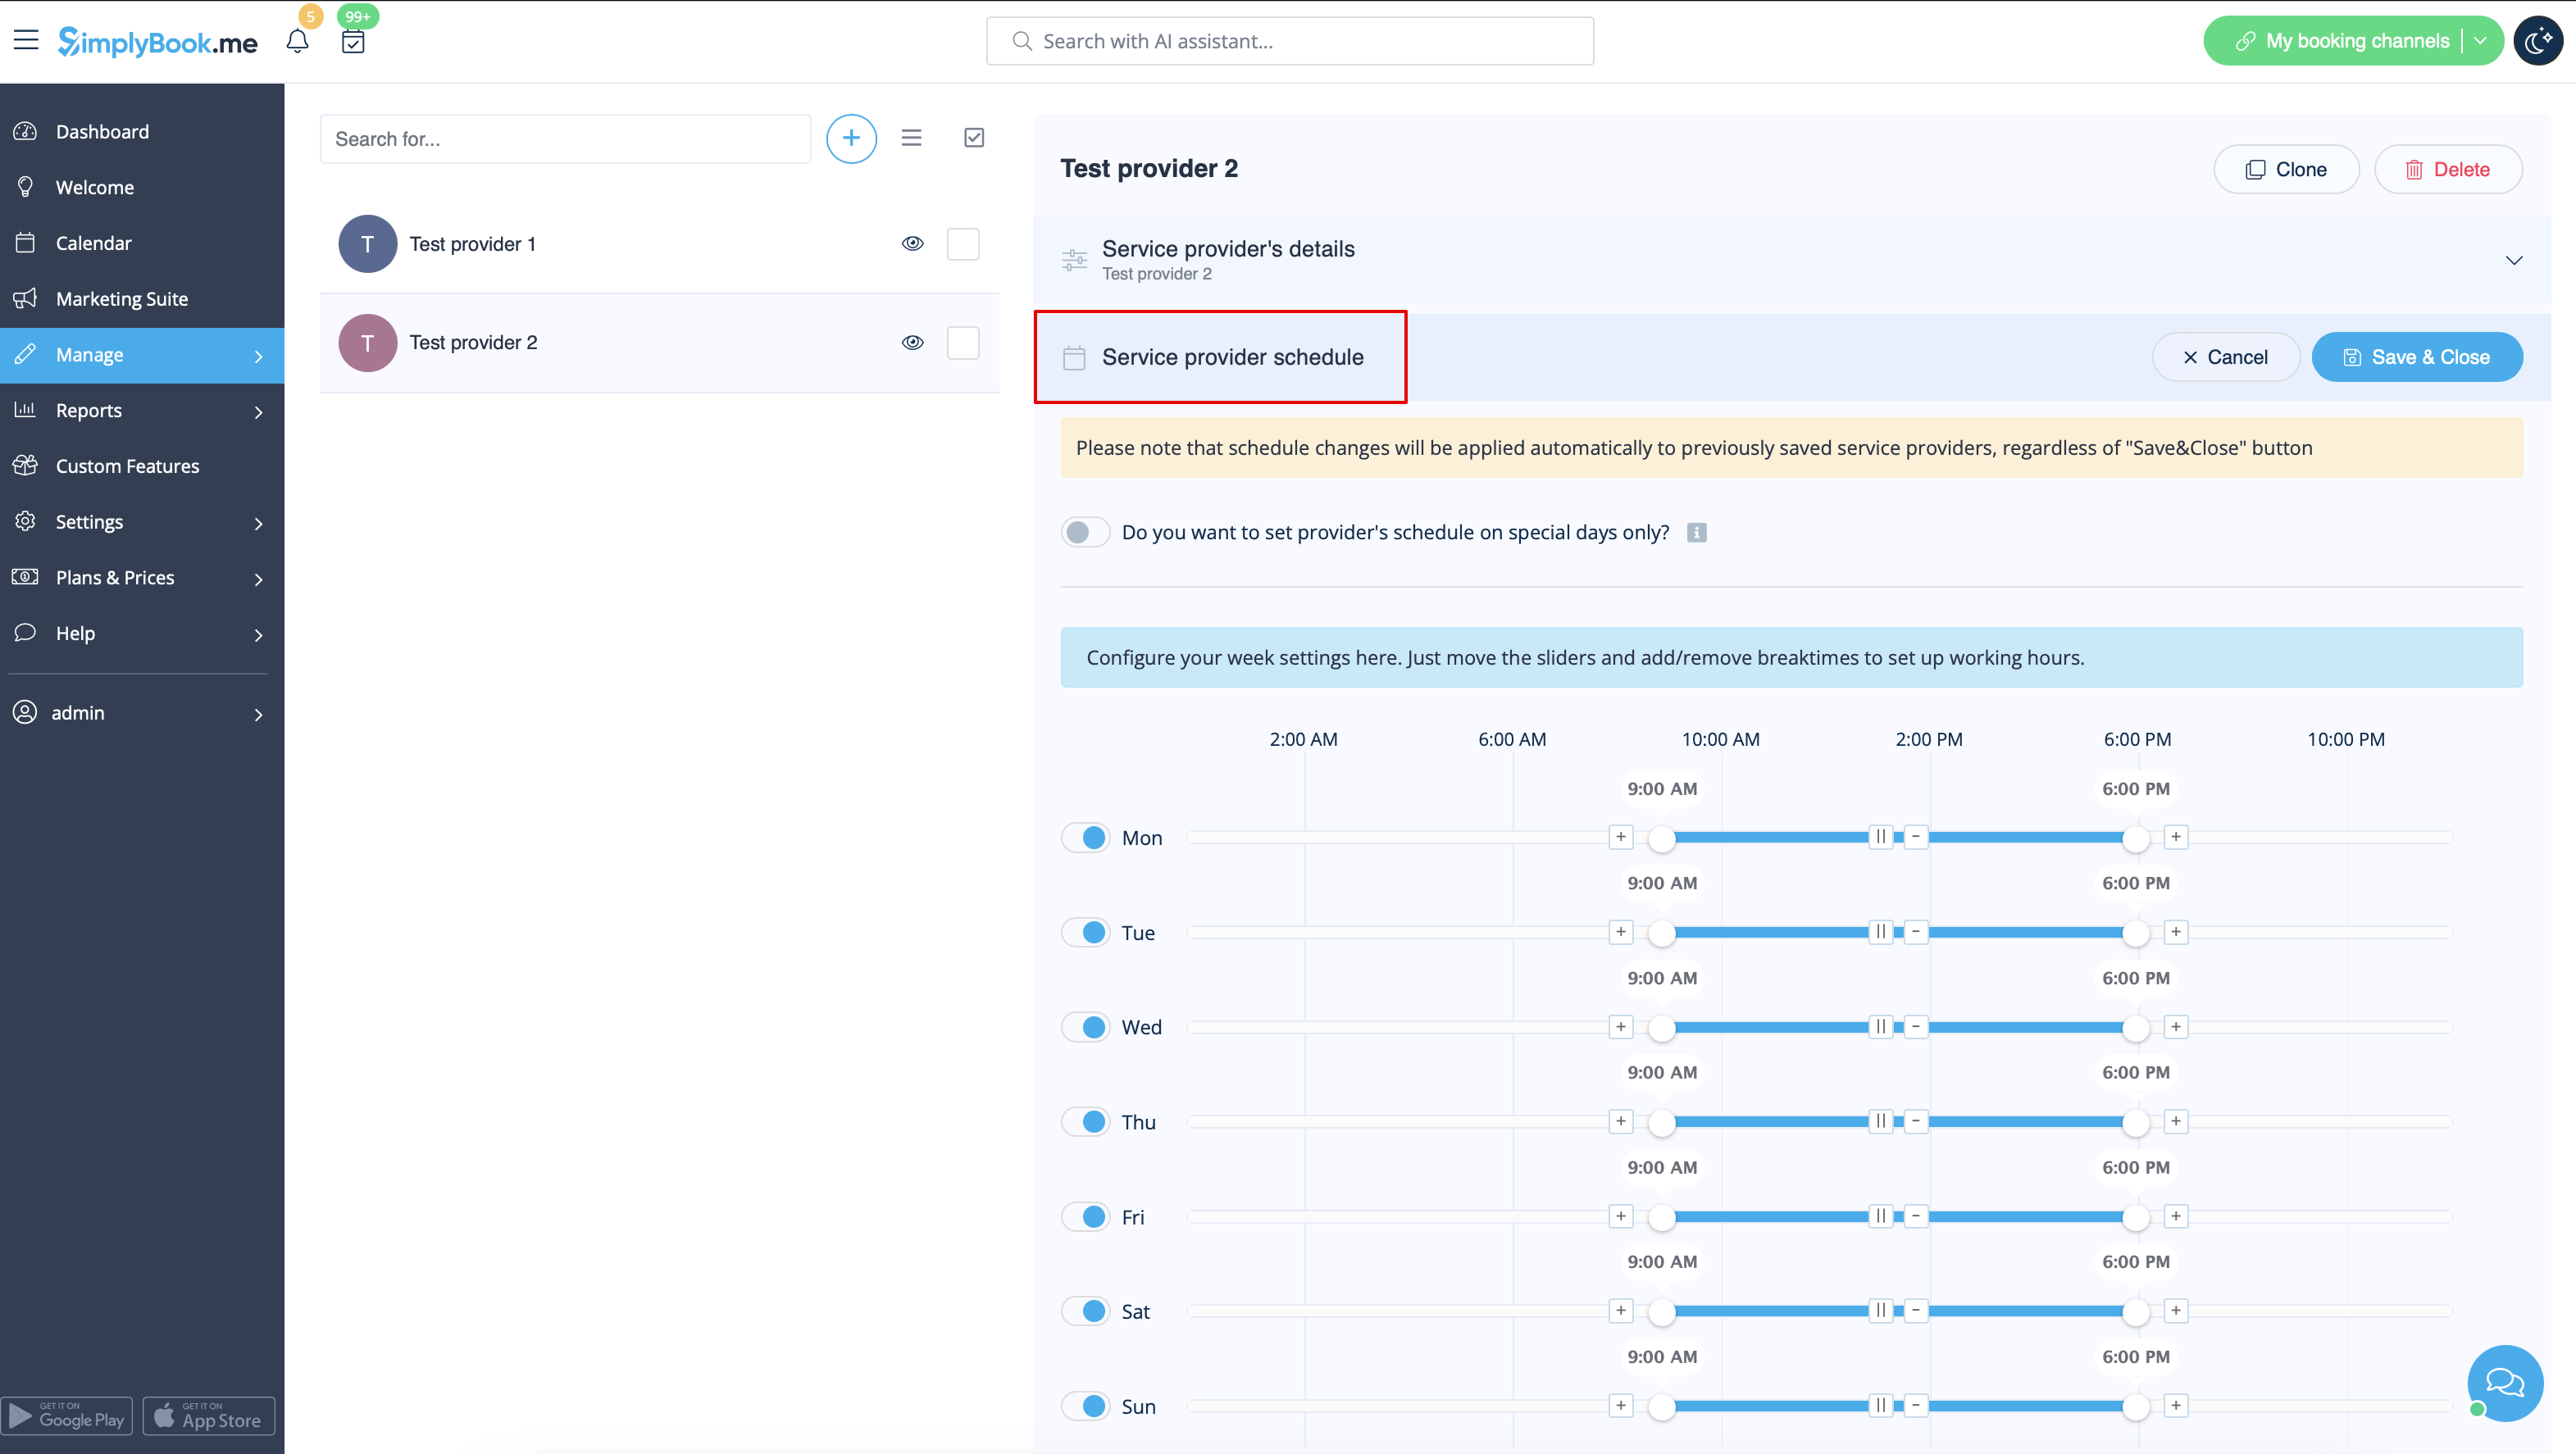
How to set schedule for provider
You can set regular schedule for providers in Manage -> Service Providers, choose necessary provider on the left and switch to Service provider schedule tab.
For example, if you work Monday-Friday 9a.m - 5p.m you simply set schedule for those dates by moving the sliders to desired positions(bright blue line will mean available time).
To make day of the week working/off use the switchers near days' names.

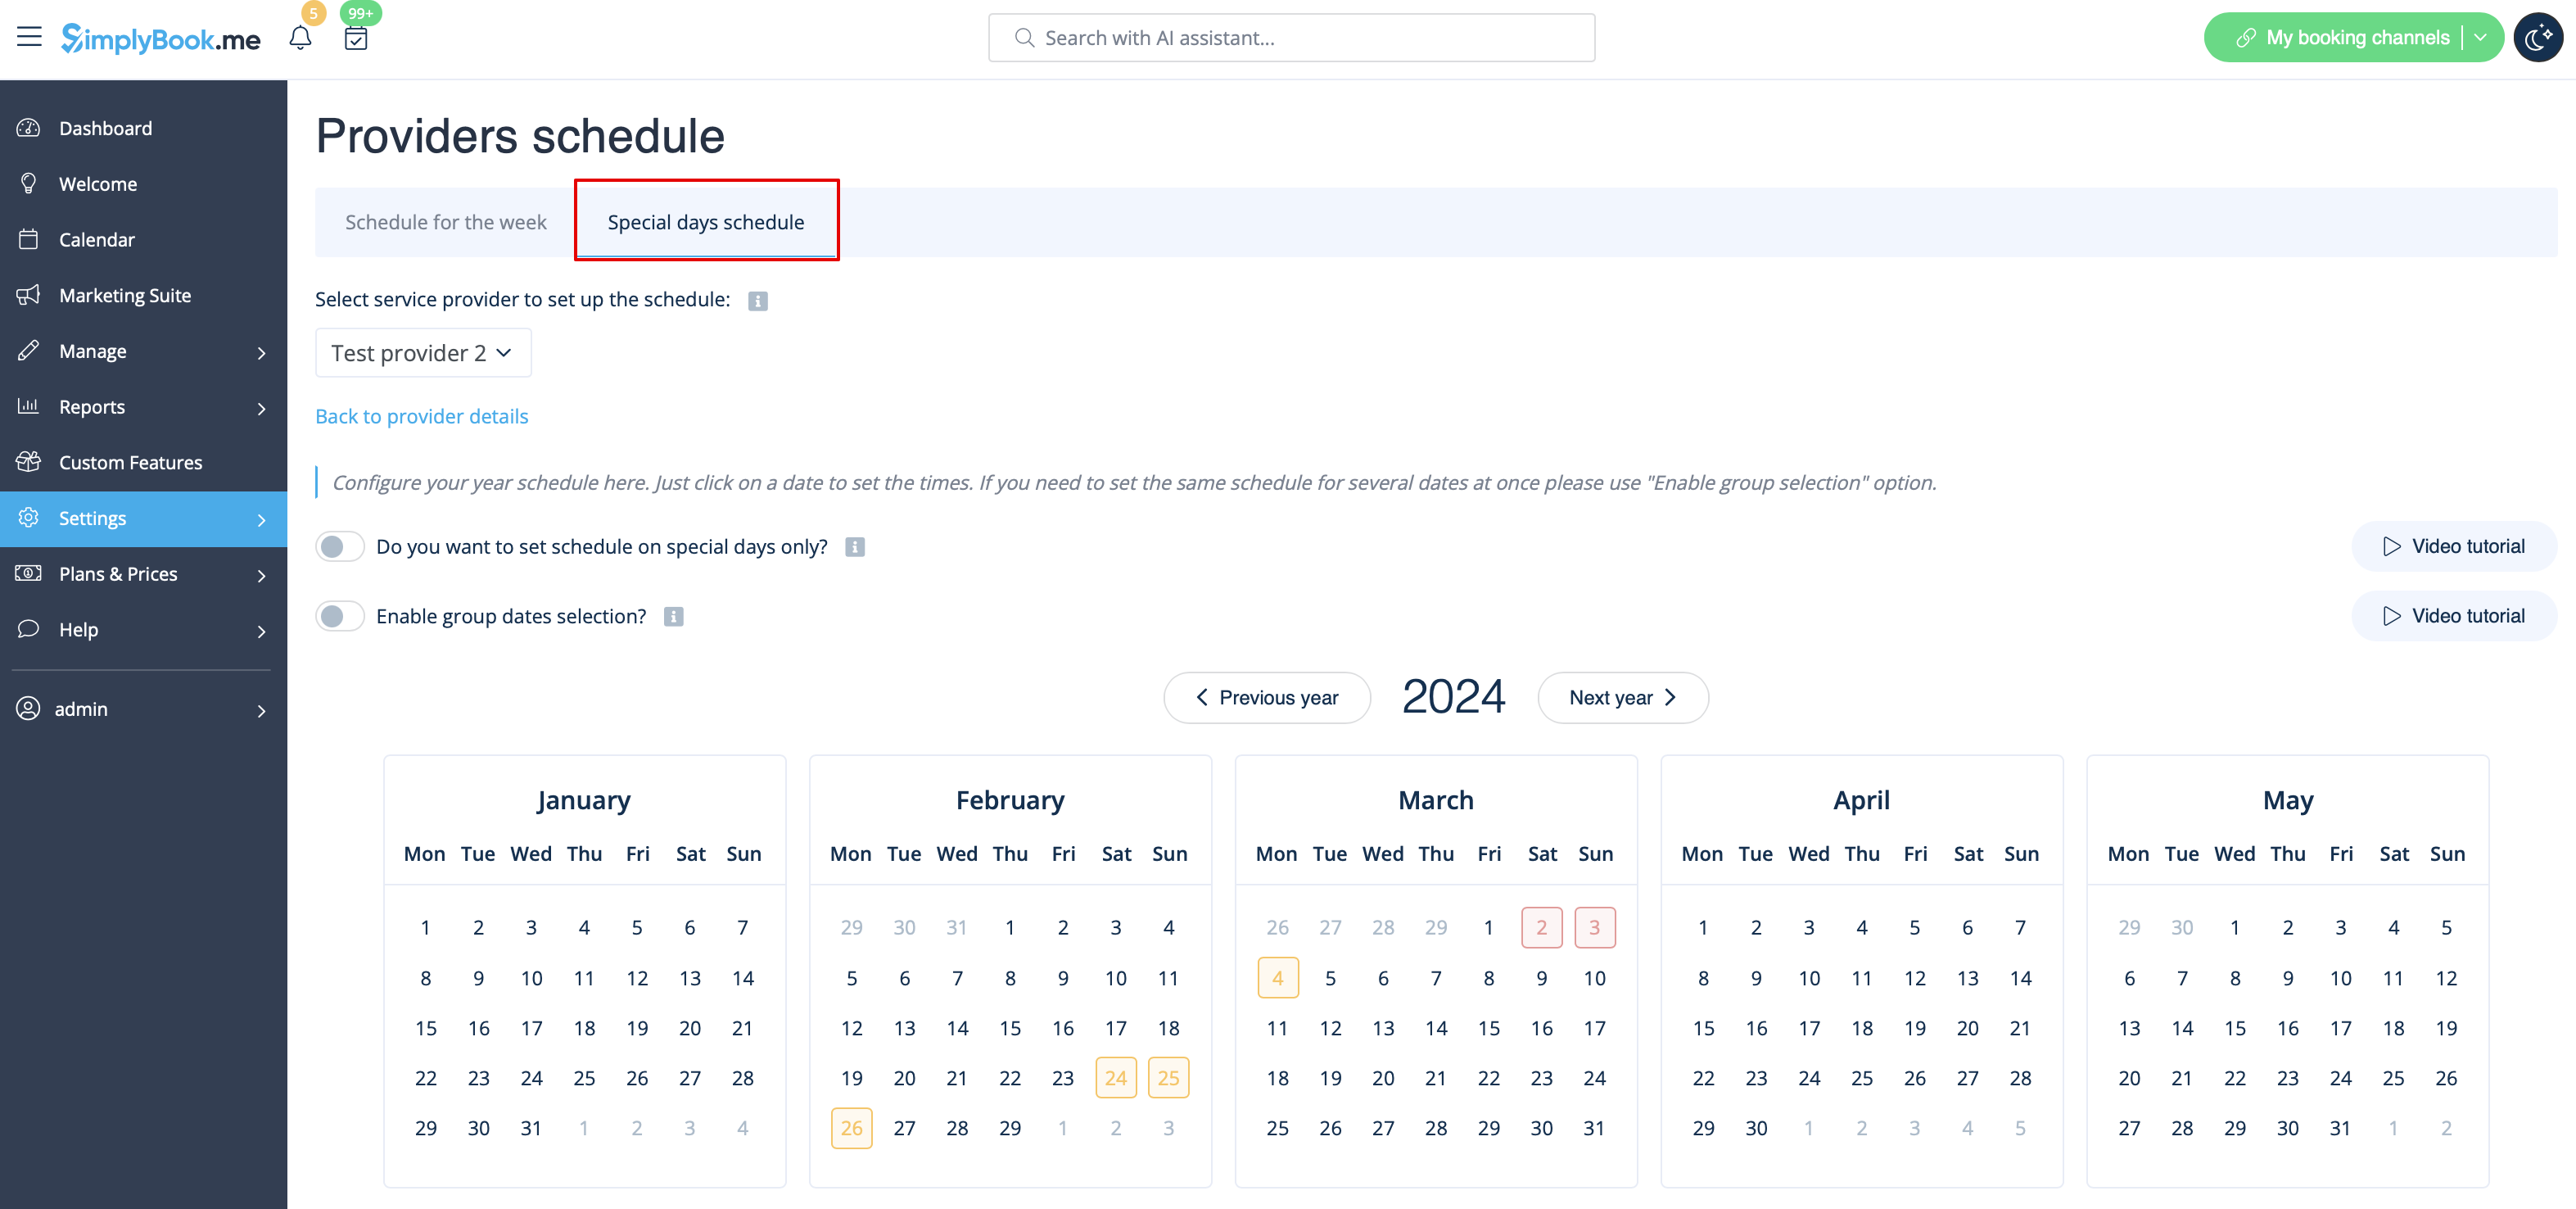
How to set schedule for holidays and other specific dates
You can set schedule for some specific date for provider in Manage -> Service Providers, choose necessary provider on the left and switch to Service provider schedule tab, choose Show advanced settings option and then Special days tab.
For example, if you work differently on certain date or have day off, you can click on the date and set schedule by clicking on the corresponding slots to make them available (bright blue)/not available (light blue).
To make some date working/off-day, click on the date and use Is working day? switcher near the schedule that appears in pop-up.
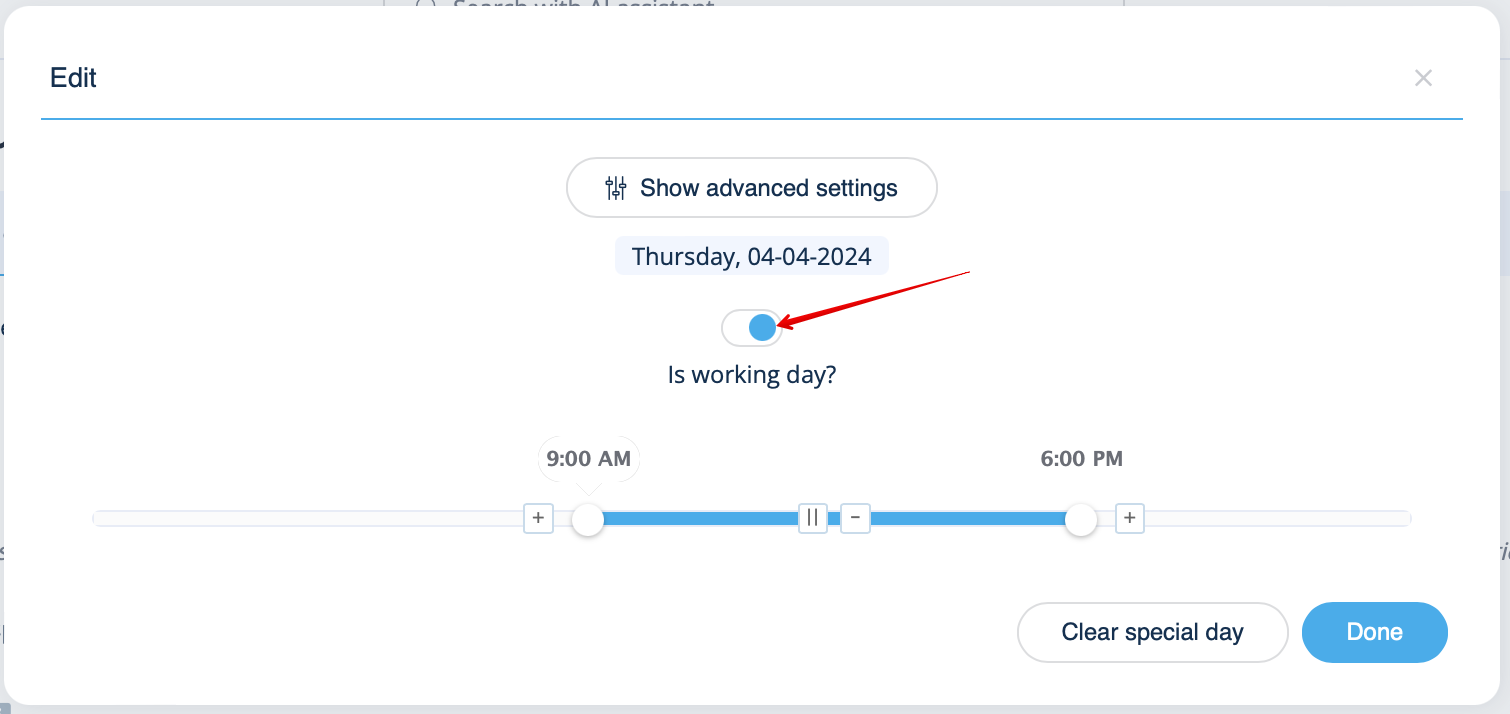
If you need to remove special day settings for some date, click on the date and press the clear special day button.