Bookings on Facebook
From SimplyBook.me
Call-to-action button for facebook fan page
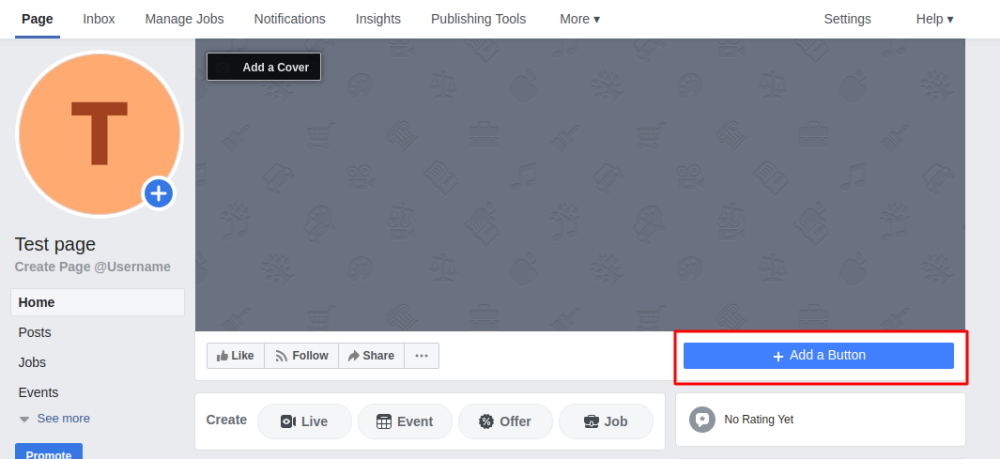
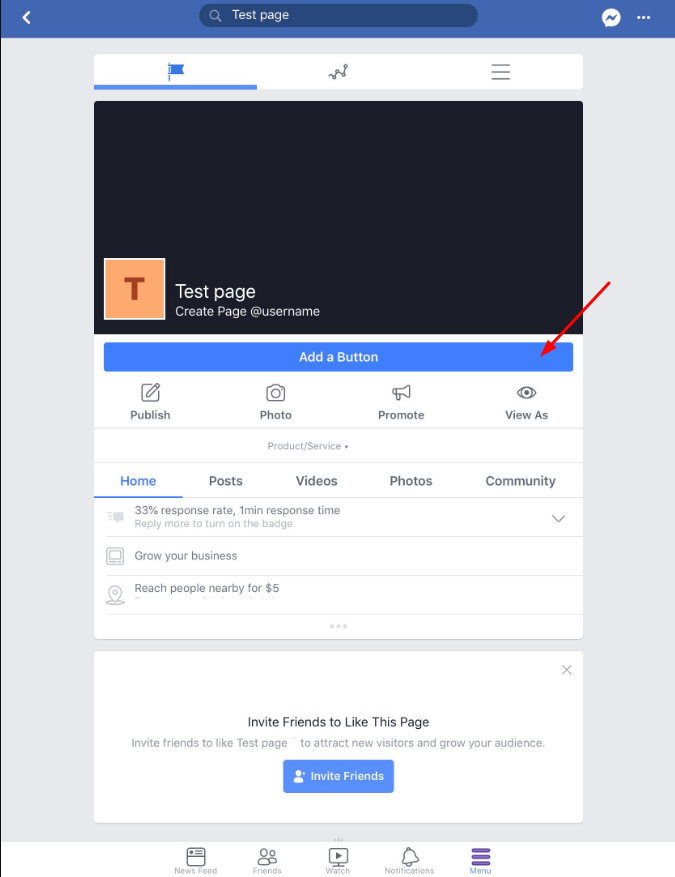
- 1. Go to your Page’s cover photo and click + Add a Button
- 2. Choose your call-to-action, then select Link to website option and enter the URL for your booking site.
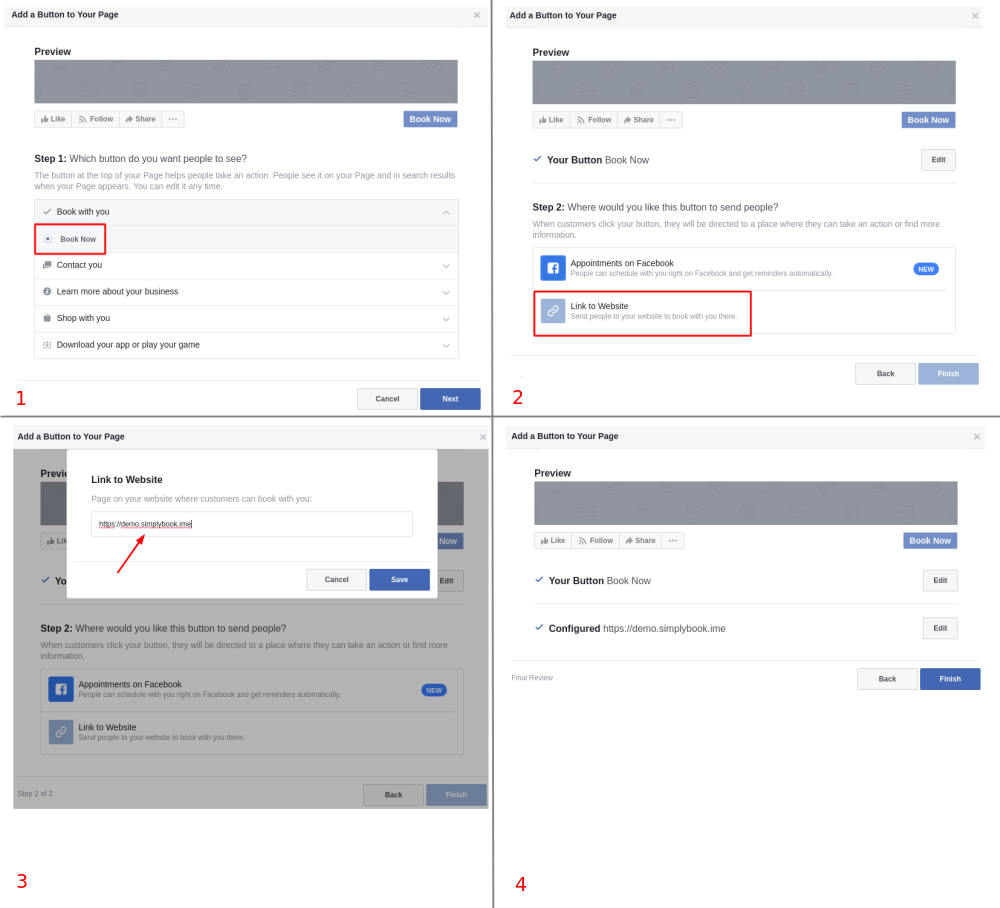
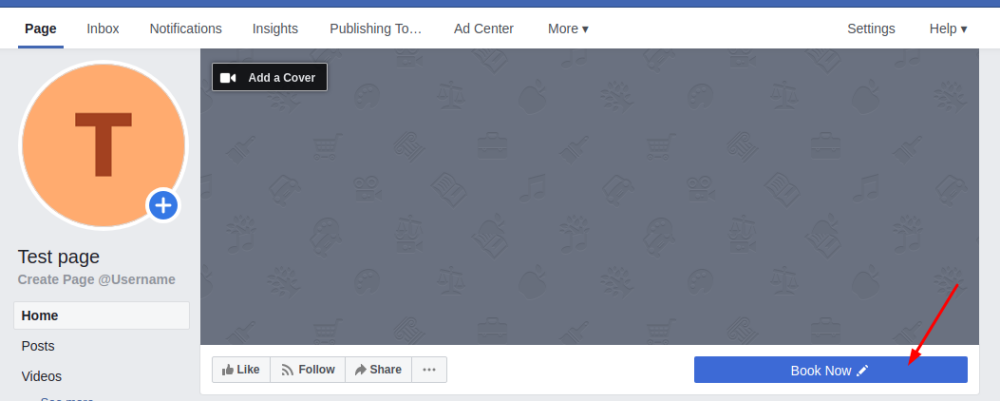
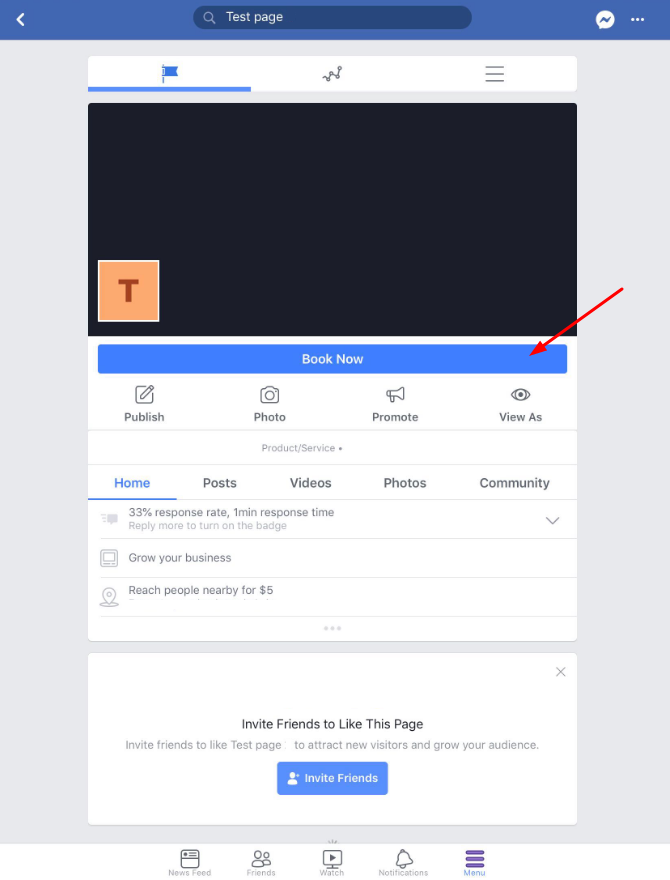
- 3. Click on Finish and you will get the button Book Now as a result, so that your clients will be able to click on it, go to your booking site and book your services.
Facebook chat bot
Please note! Facebook bot works in English only and provides only basic functionality, so for example payments, client login, memberships, approve bookings, etc. are not working there.
Contact support for more details.
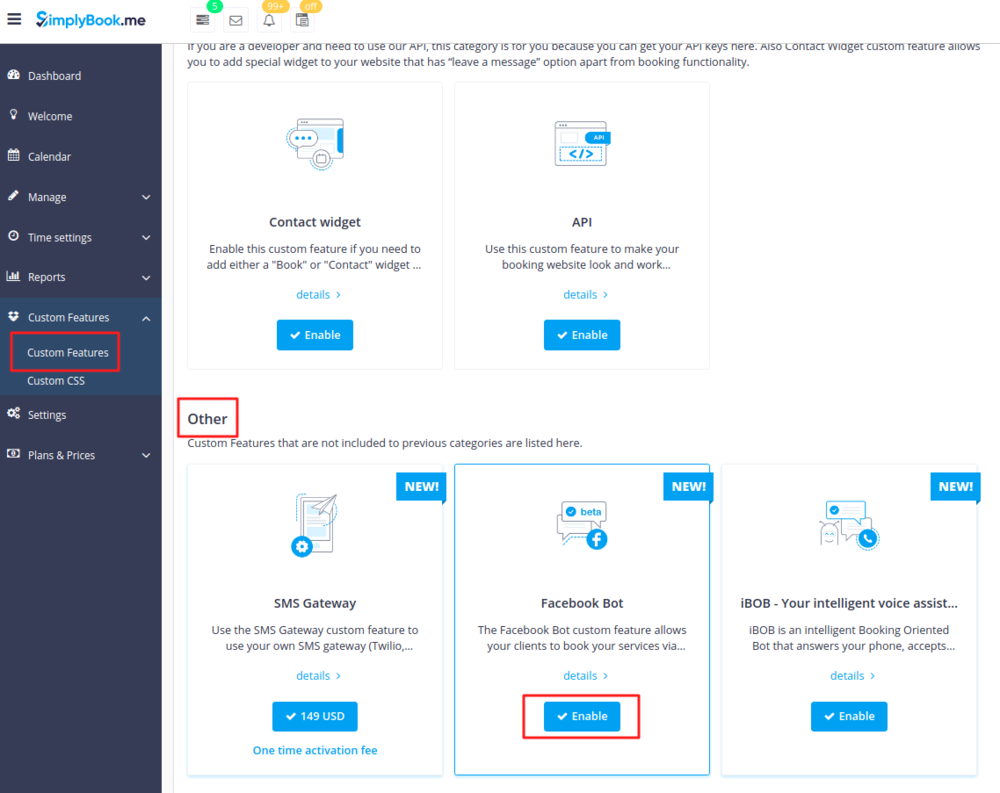
- 1. Enable Facebook Bot custom feature on your Custom Features page.
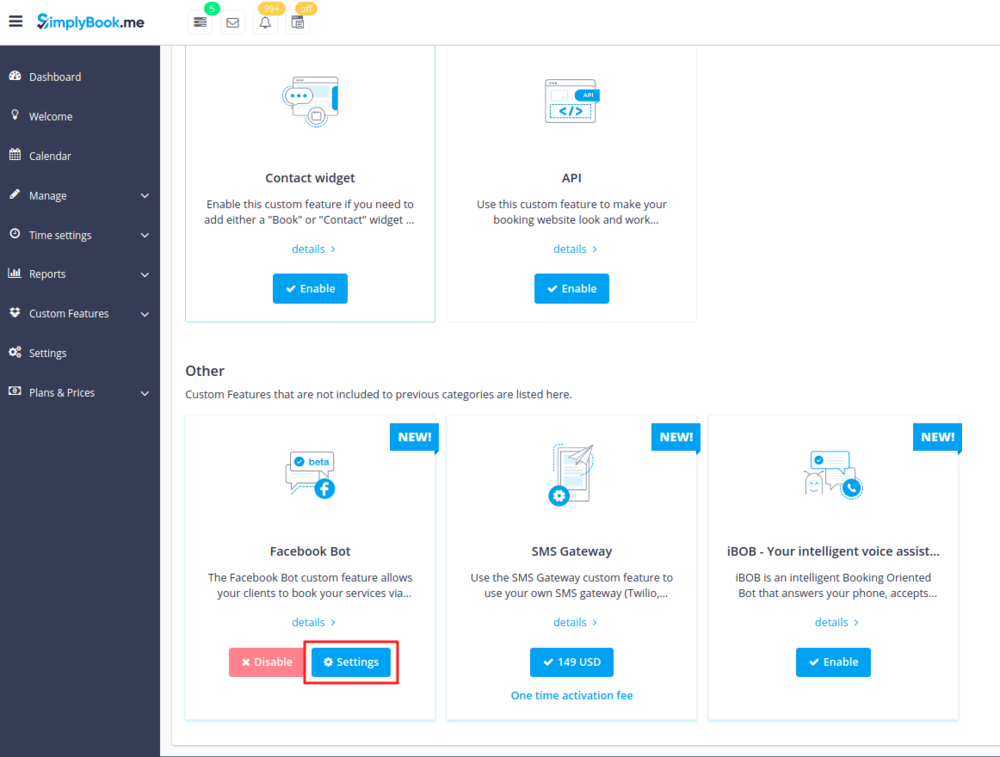
- 2. Choose Settings near it to see basic instructions.
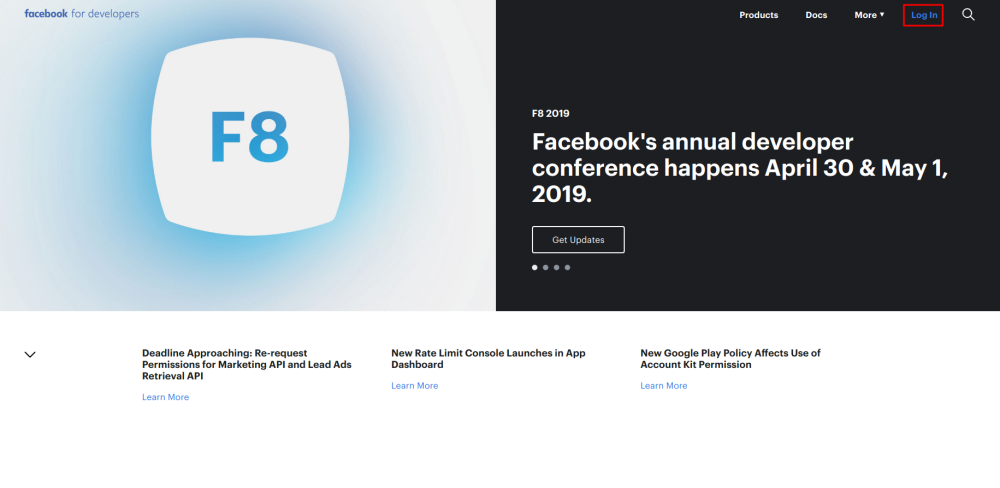
- 3. Log into the Facebook Developer Console.
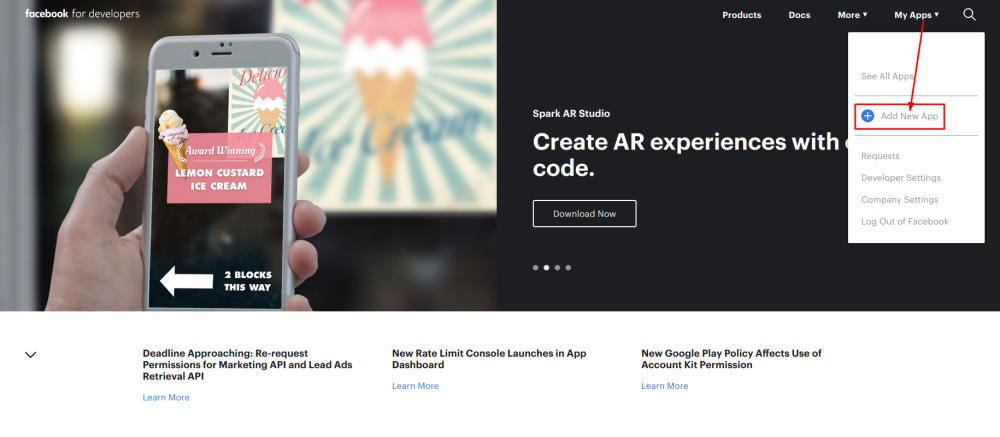
- 4. Click on My Apps in the upper right-hand corner and choose to Add a New App"
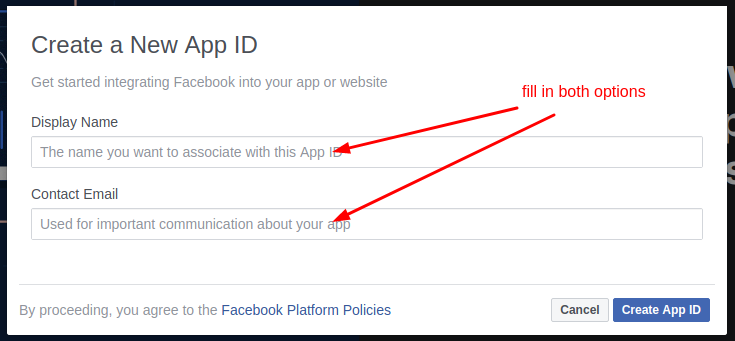
- 5. Enter a name and contact email address and click on Create App ID.
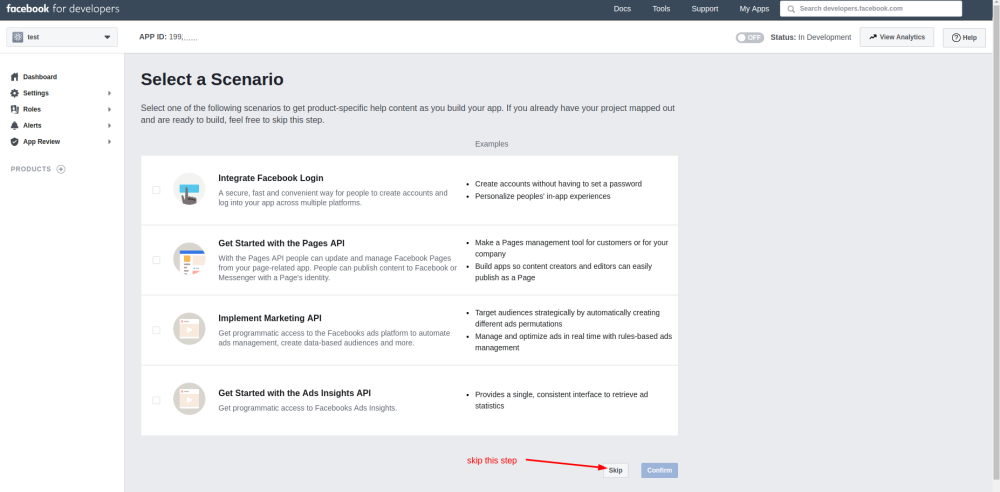
- 6. On the next page you will see scenarios. Please skip this step.
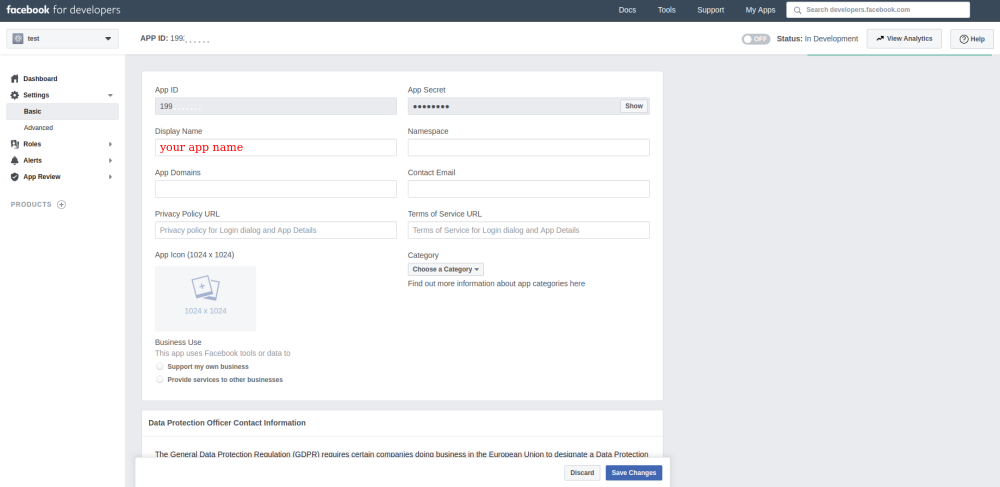
- 7. Add all basic information about your company and bot, required links, an icon as well as GDPR related information if necessary.
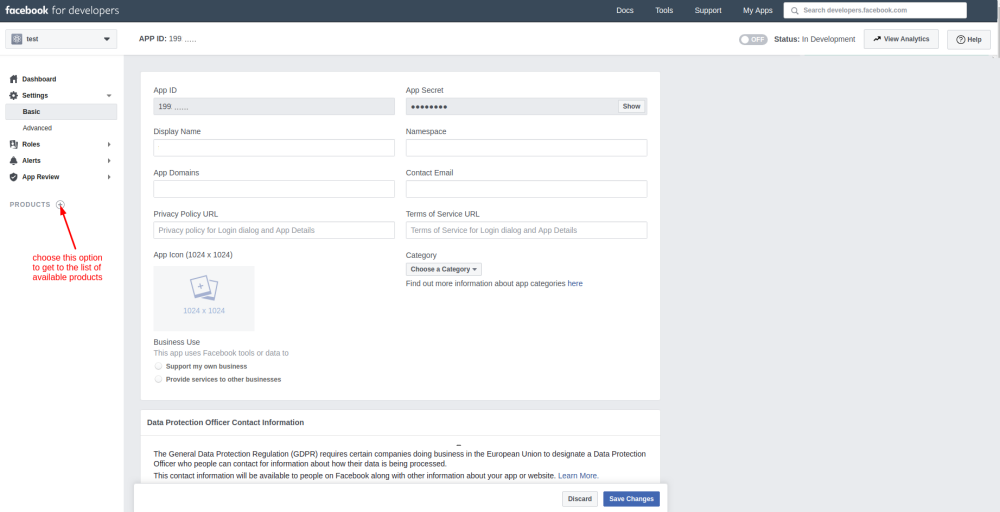
- 8. Then please click on + near Products on the left-side.
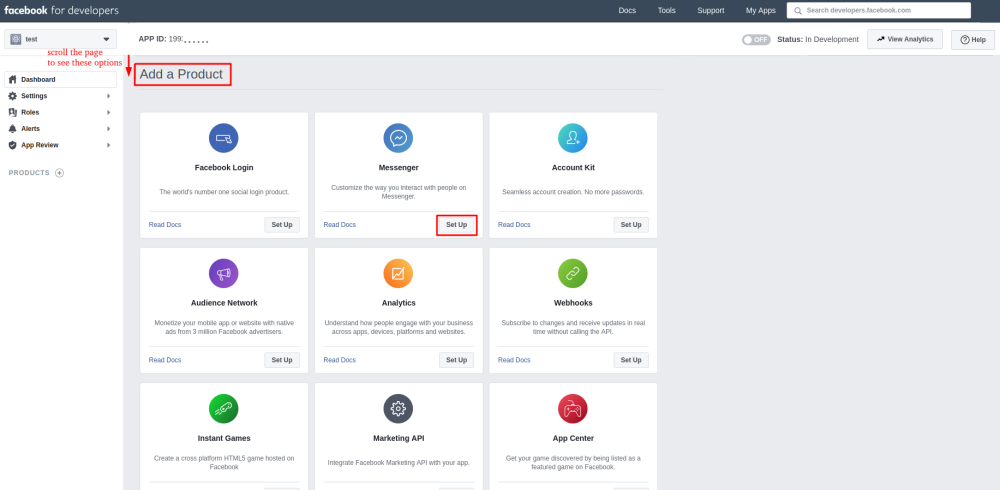
- 9. Scroll the page you see a little bit and click the Set Up button for the Messenger option.
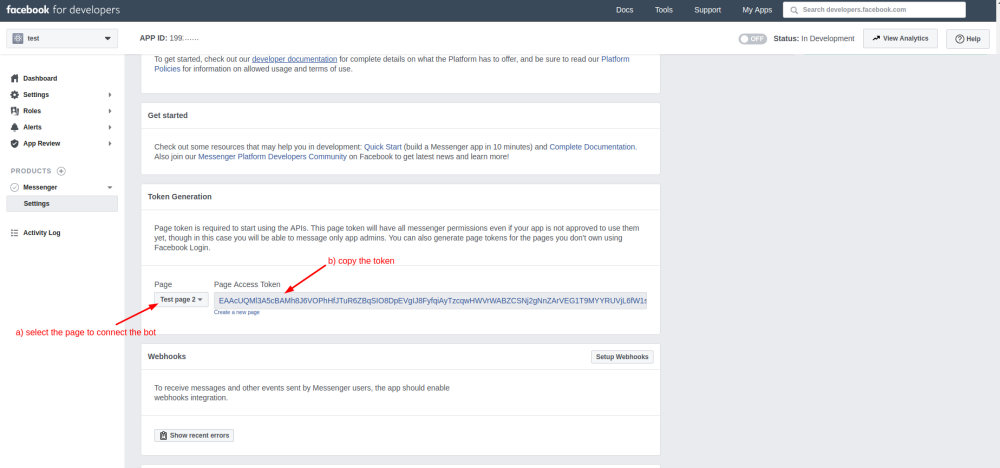
- 10. Under the Token Generation section, choose one of your Facebook pages, copy the token you get.
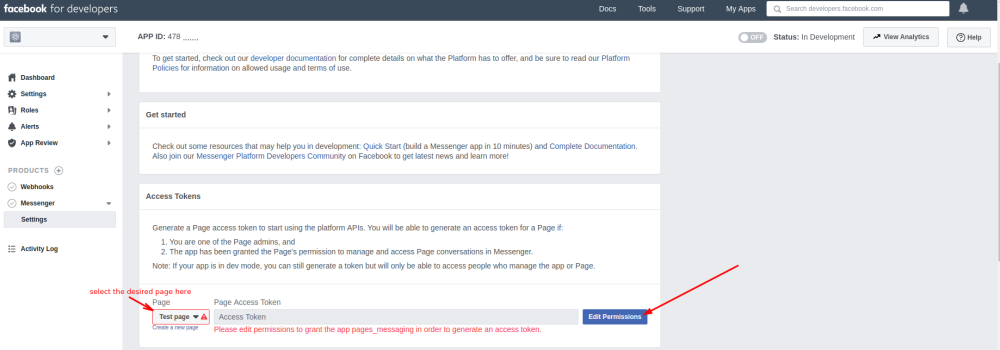
- If you see the following error while selecting the page you may need to edit the permissions.
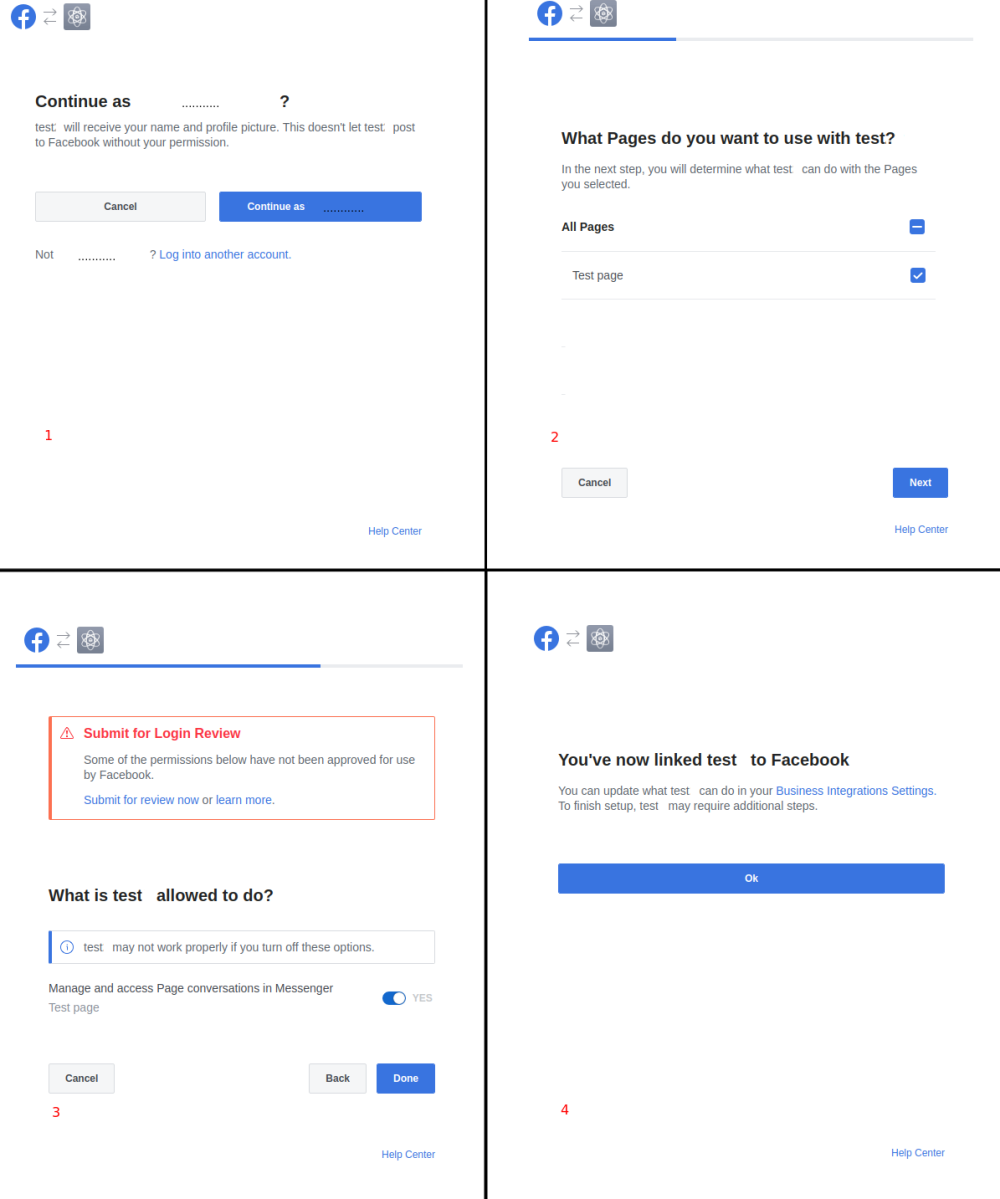
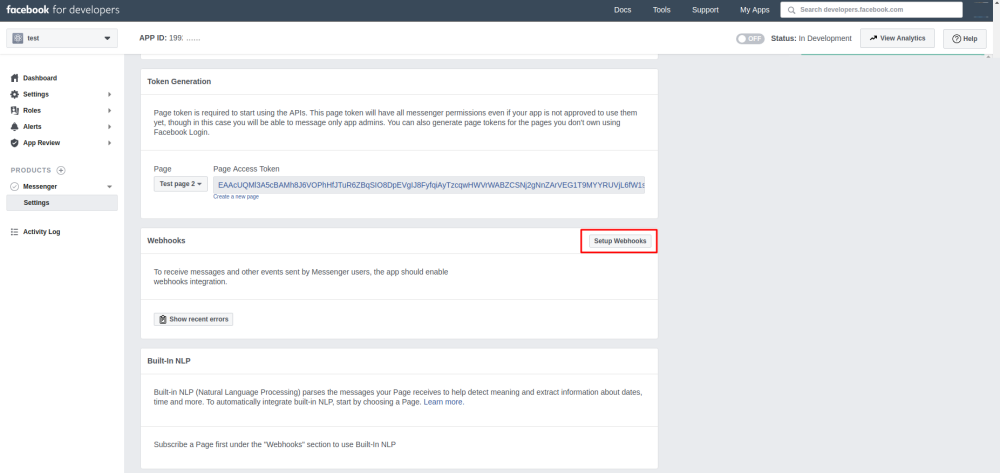
- 11. Then Page Access Token will be generated. Enter it in Simplybook.me Facebook bot settings.

- 12. Click the Setup Webhooks button under the Webhooks section and enter Callback URL and Verify token copied from SimplyBook.me Facebook Bot feature settings.
- 13. Check the messages and messaging_postbacks options under Subscription Fields.
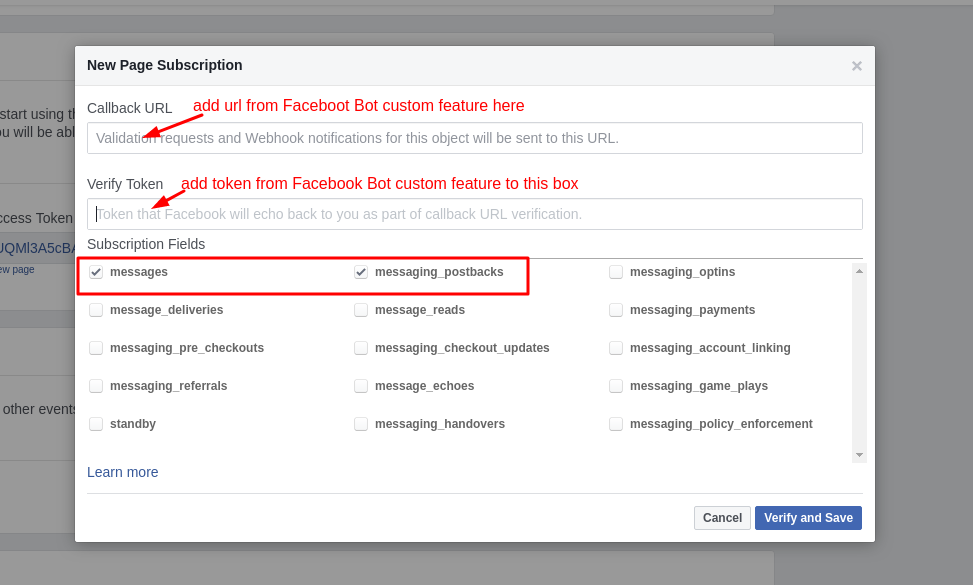
- 14. Click Verify and Save button.
- 15. Scroll to App Review for Messenger block, select the first option pages_messaging and add the details requested there.
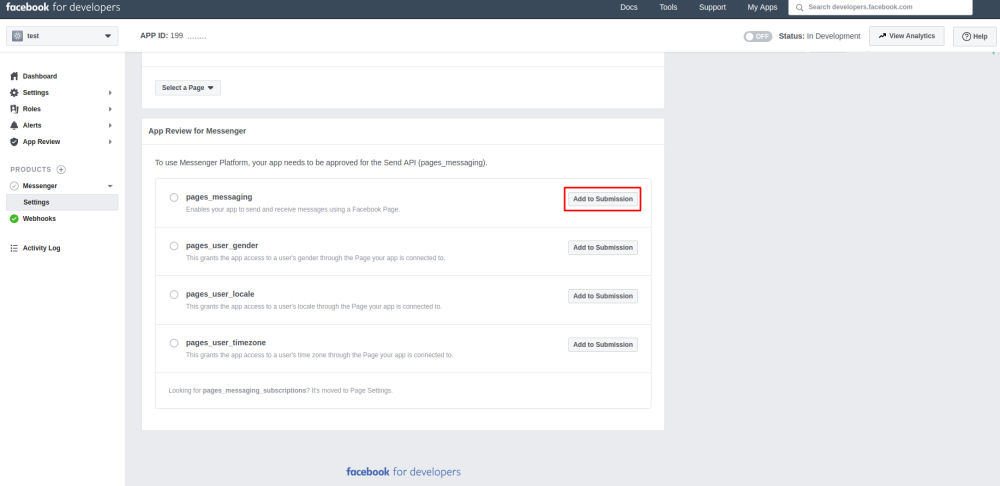
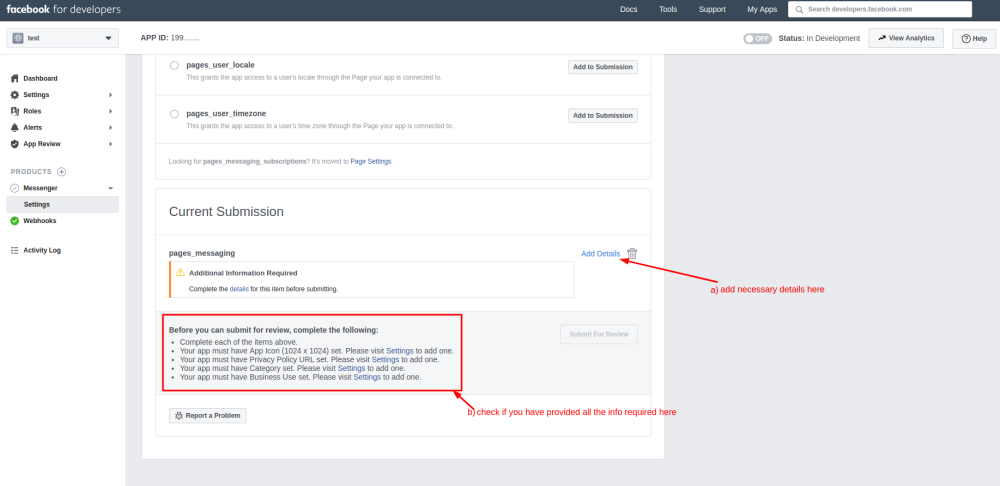
- 16. Complete the steps you see in the pop-up.(the steps may be changed by Facebook with time)
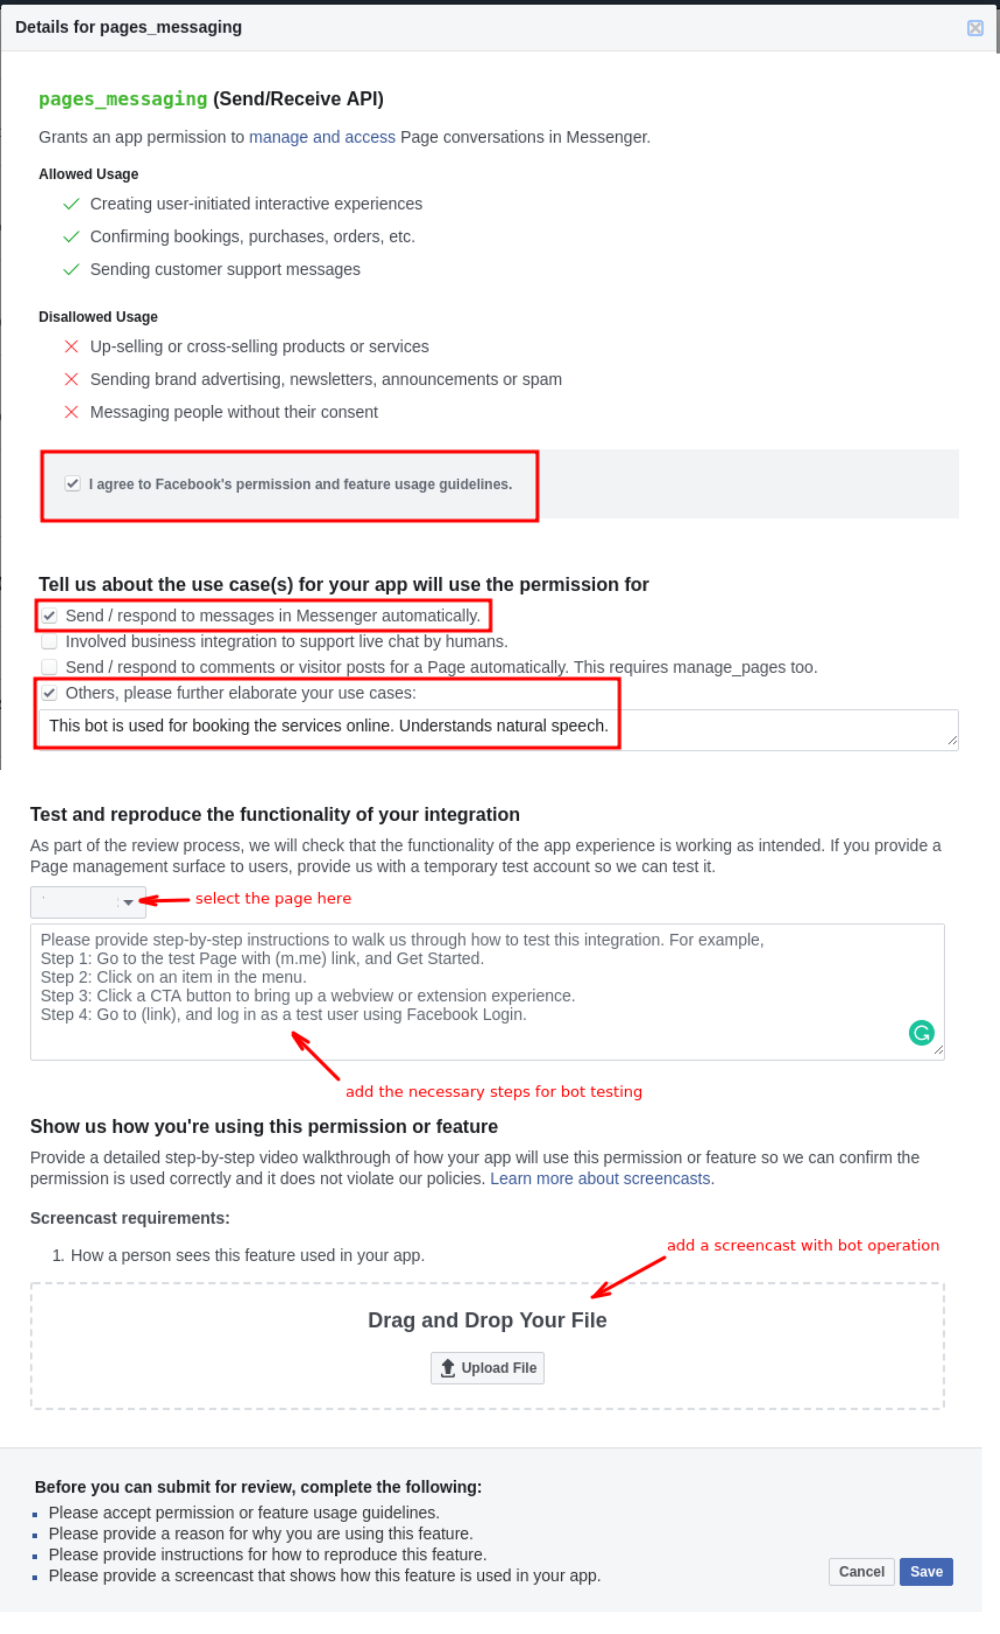
- 17. Submit your app for review.
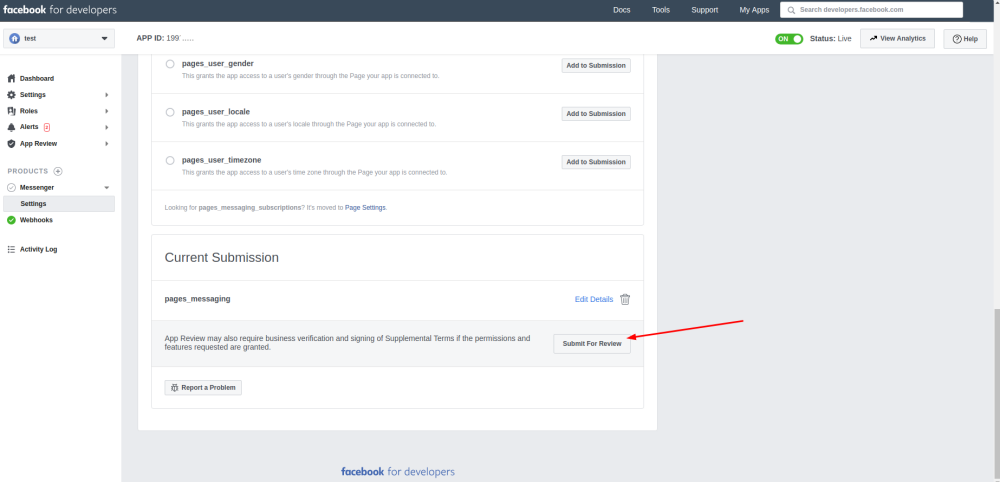
- 18. You can also make your app live for approved users to test.
- It will become available to all your page visitors after Facebook approval.

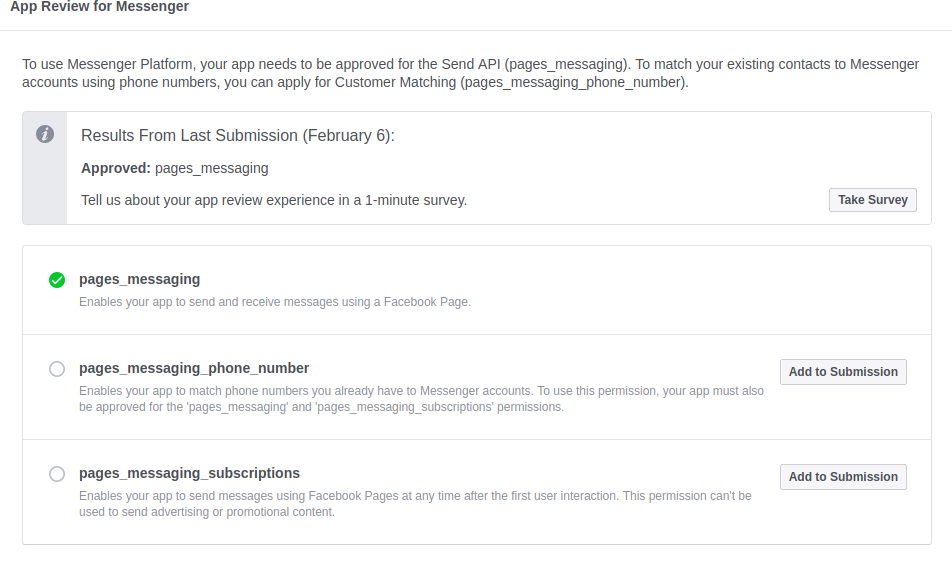
- 19. It may take some time for Facebook to approve your application and your clients will be able to book using the chat bot.
- Here you can see how approved request will look like
Facebook widget
How to add SimplyBook.me widget to your Facebook fan page
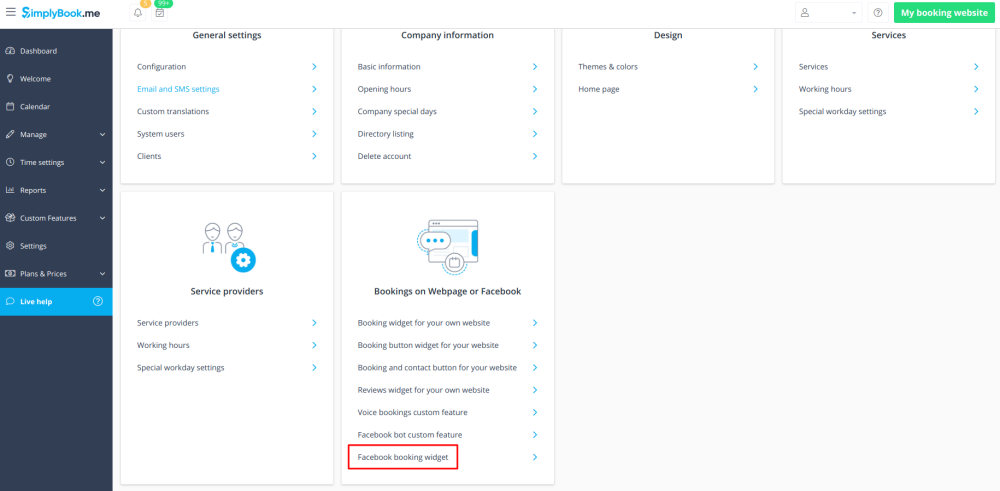
- 1.You can add SimplyBook.me functionality to Facebook fan page (only to fan page, it can't be connected to your personal page) in Settings -> Bookings on Webpage or Facebook -> Facebook booking widget -> Apply & add to facebook -> choose the page to attach Simplybook to.
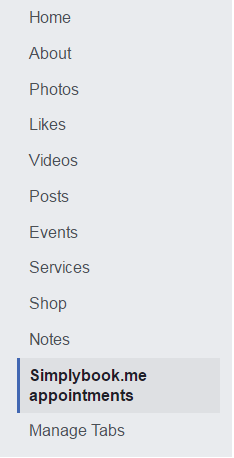
- 2. After you connected SimplyBook.me to Facebook fan page, it is listed in the left-side menu of the page under the photo of your company.
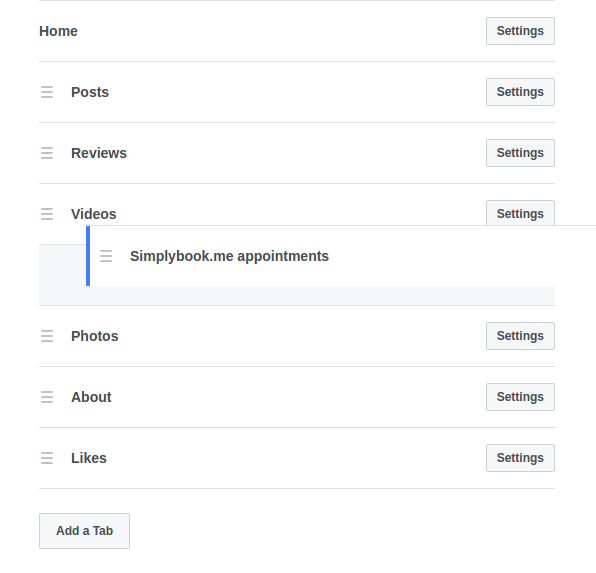
You can press Settings -> Templates and tabs and make SimplyBook.me more visible for clients by dragging and dropping it higher in the list.
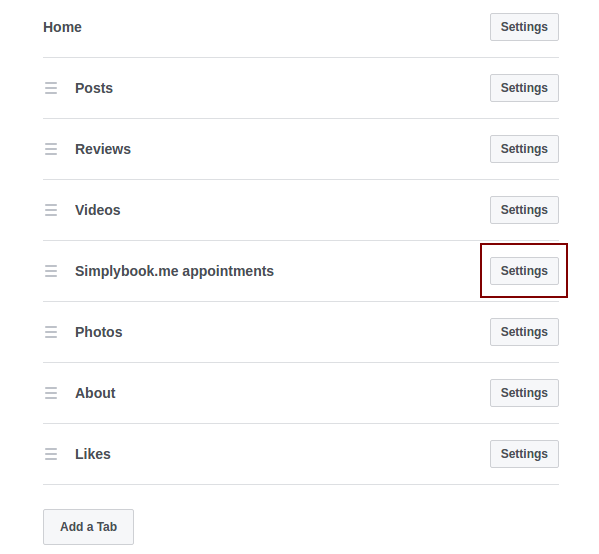
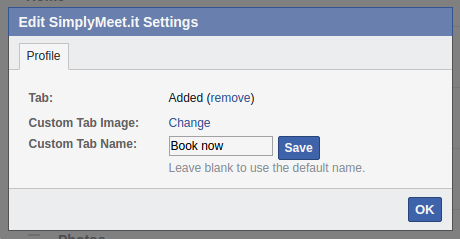
- 3. You may need to change the title Simplybook.me appointments to something else. For this, on your Facebook fan page go to Settings(upper bar) -> Templates and tabs -> SimplyBook.me appointments -> Settings -> Edit settings -> Custom tab name.
How to remove Facebook widget from my Facebook page?
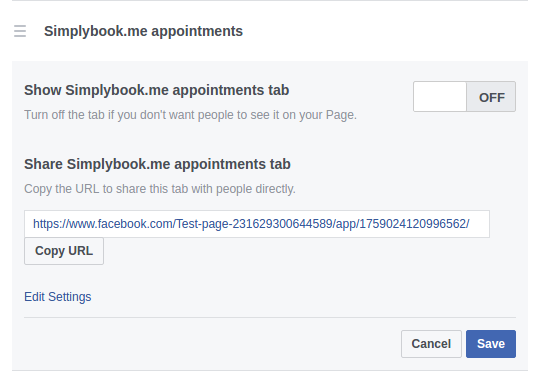
On your Facebook fan page go to Settings(upper bar) -> Templates and tabs -> SimplyBook.me appointments -> Settings -> press Off near Simplybook app to remove this tab and save settings.
Facebook widget is not visible from mobiles
- Unfortunately, Facebook does not show third-party apps from mobiles. Your clients need to access desktop version to book from Facebook.
I cannot change the email when book from Facebook
- When you use Facebook widget, the system perceives a customer as Facebook user and uses his/her data to fill in the details. Thus, by default it uses email under which Facebook is registered. Unfortunately, it is not in our competency to change this, you can try contacting Facebook support to clarify this issue.
