Difference between revisions of "WordPress integration"
| (2 intermediate revisions by the same user not shown) | |||
| Line 5: | Line 5: | ||
}} | }} | ||
| + | __FORCETOC__ | ||
| − | + | ==With the help of WordPress plugin== | |
| + | :1. In your WordPress admin interface navigate to <span style="background-color:#d4f8e5; padding:5px; border-radius:5px;">Plugins</span> -> <span style="background-color:#d4f8e5; padding:5px; border-radius:5px;">Add new Plugin</span> and search for '''Simplybook'''.<br> | ||
| + | :Install it and Activate. | ||
| + | [[File:Add sb plugin to wp new.png|1200px|center|link=https://help.simplybook.me/images/c/c5/Add_sb_plugin_to_wp_new.png]] | ||
| + | <br><br> | ||
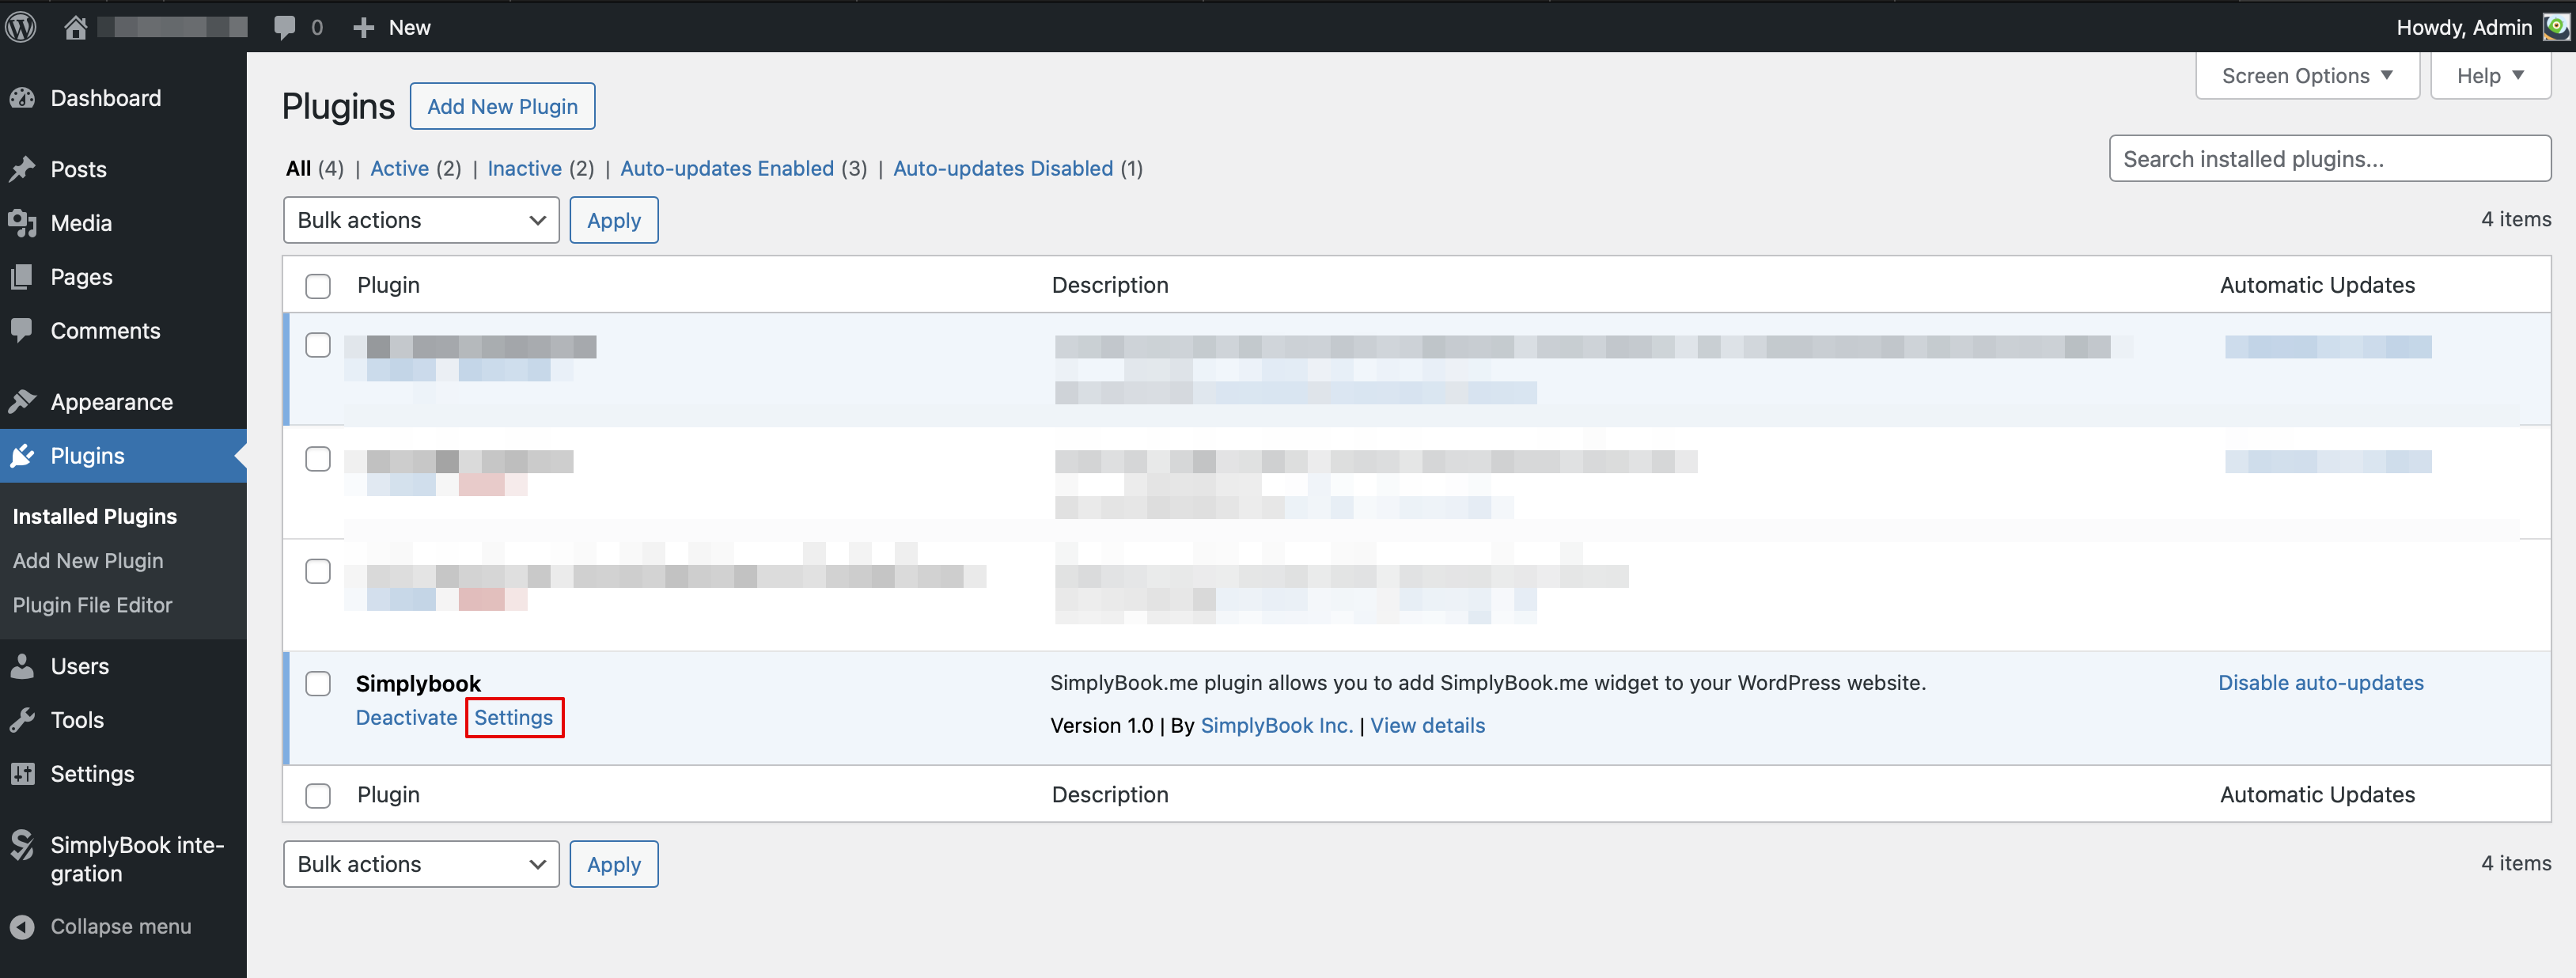
| + | :2. Navigate to plugin <span style="background-color:#d4f8e5; padding:5px; border-radius:5px;">Settings.</span> | ||
| + | [[File:Wp plugin settings new.png|1200px|center|link=https://help.simplybook.me/images/2/25/Wp_plugin_settings_new.png]] | ||
| + | <br><br> | ||
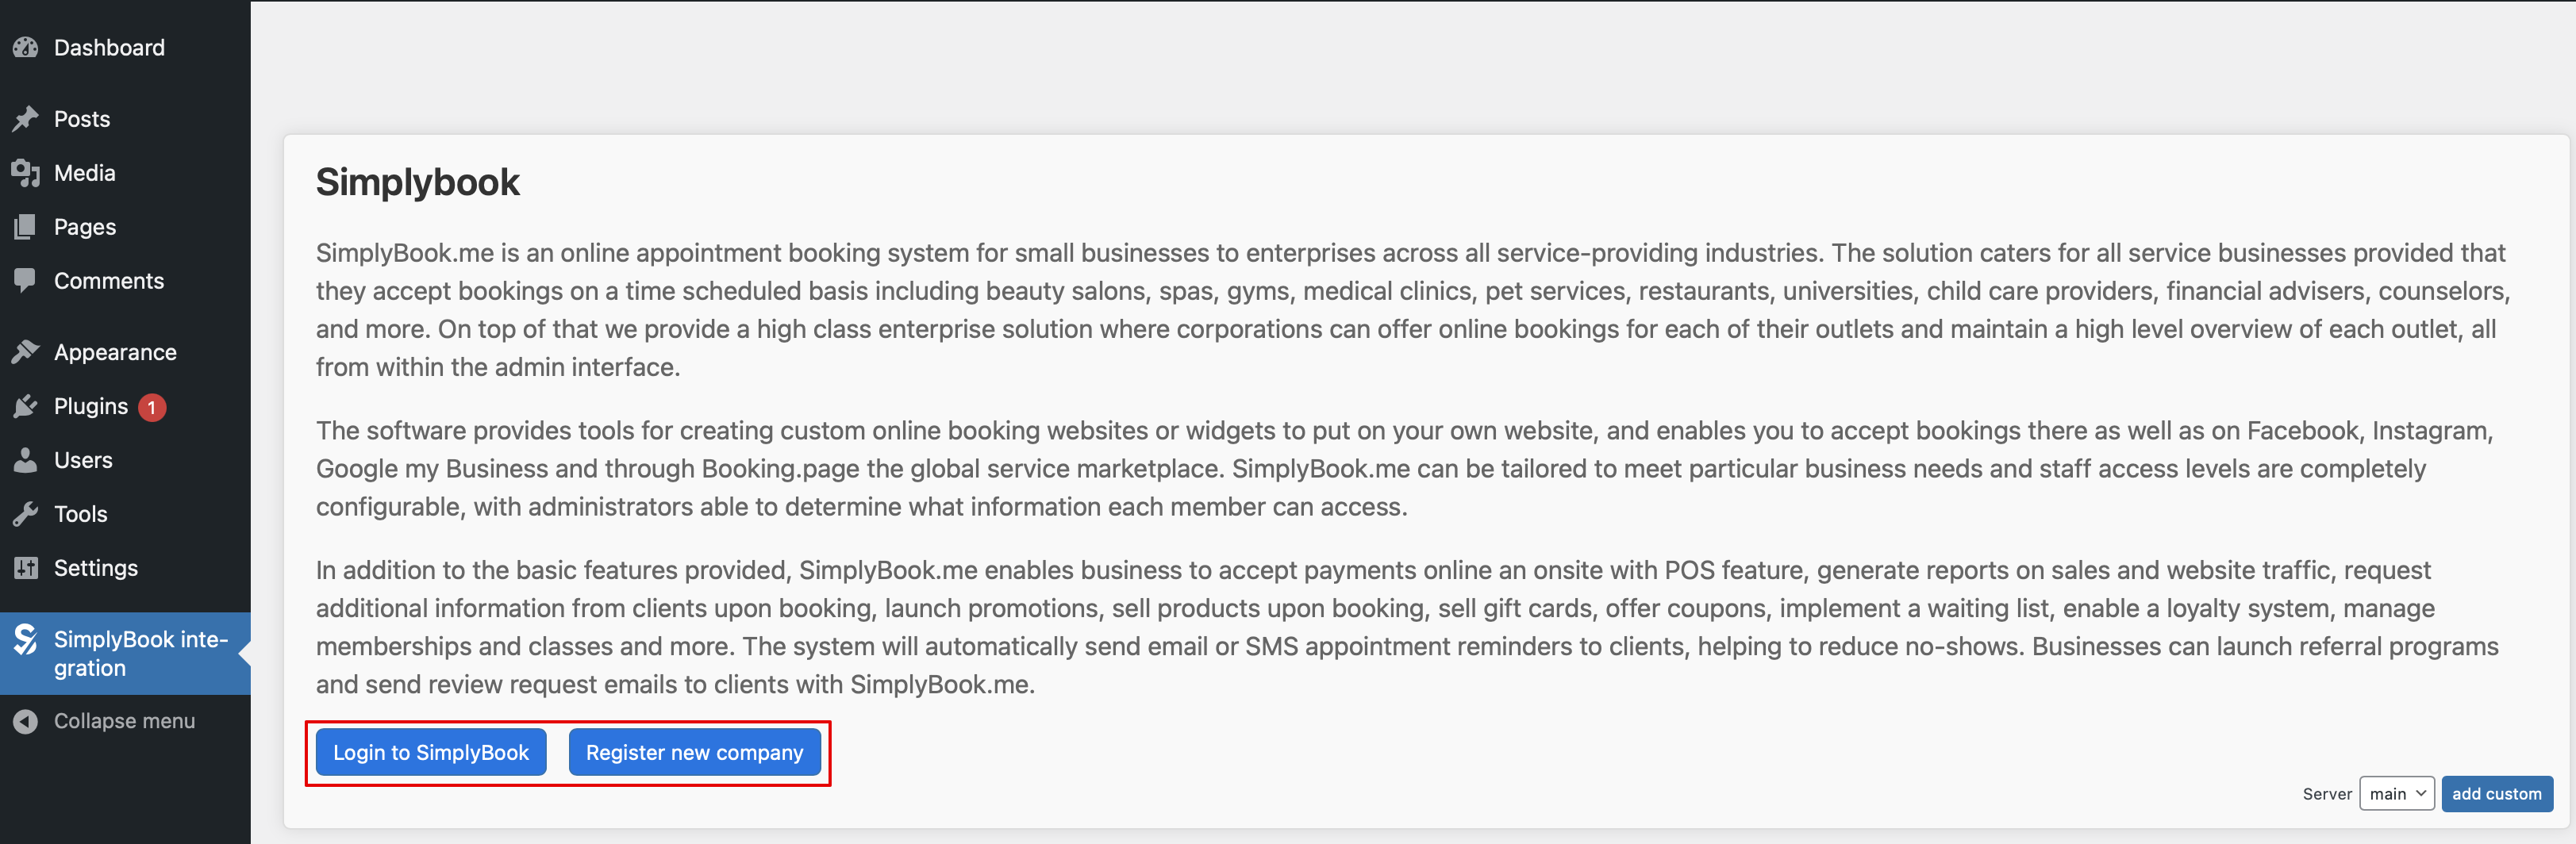
| + | :3. If you already have an account with SimplyBook.me please choose the <span style="background-color:#d4f8e5; padding:5px; border-radius:5px;">login</span> option there.<br> | ||
| + | :If you have not created it yet, simply click on <span style="background-color:#d4f8e5; padding:5px; border-radius:5px;">registration</span> option and sign up following the suggested steps. | ||
| + | [[File:Wp plugin login or register upd.png|1200px|center|link=https://help.simplybook.me/images/3/38/Wp_plugin_login_or_register_upd.png]] | ||
| + | <br><br> | ||
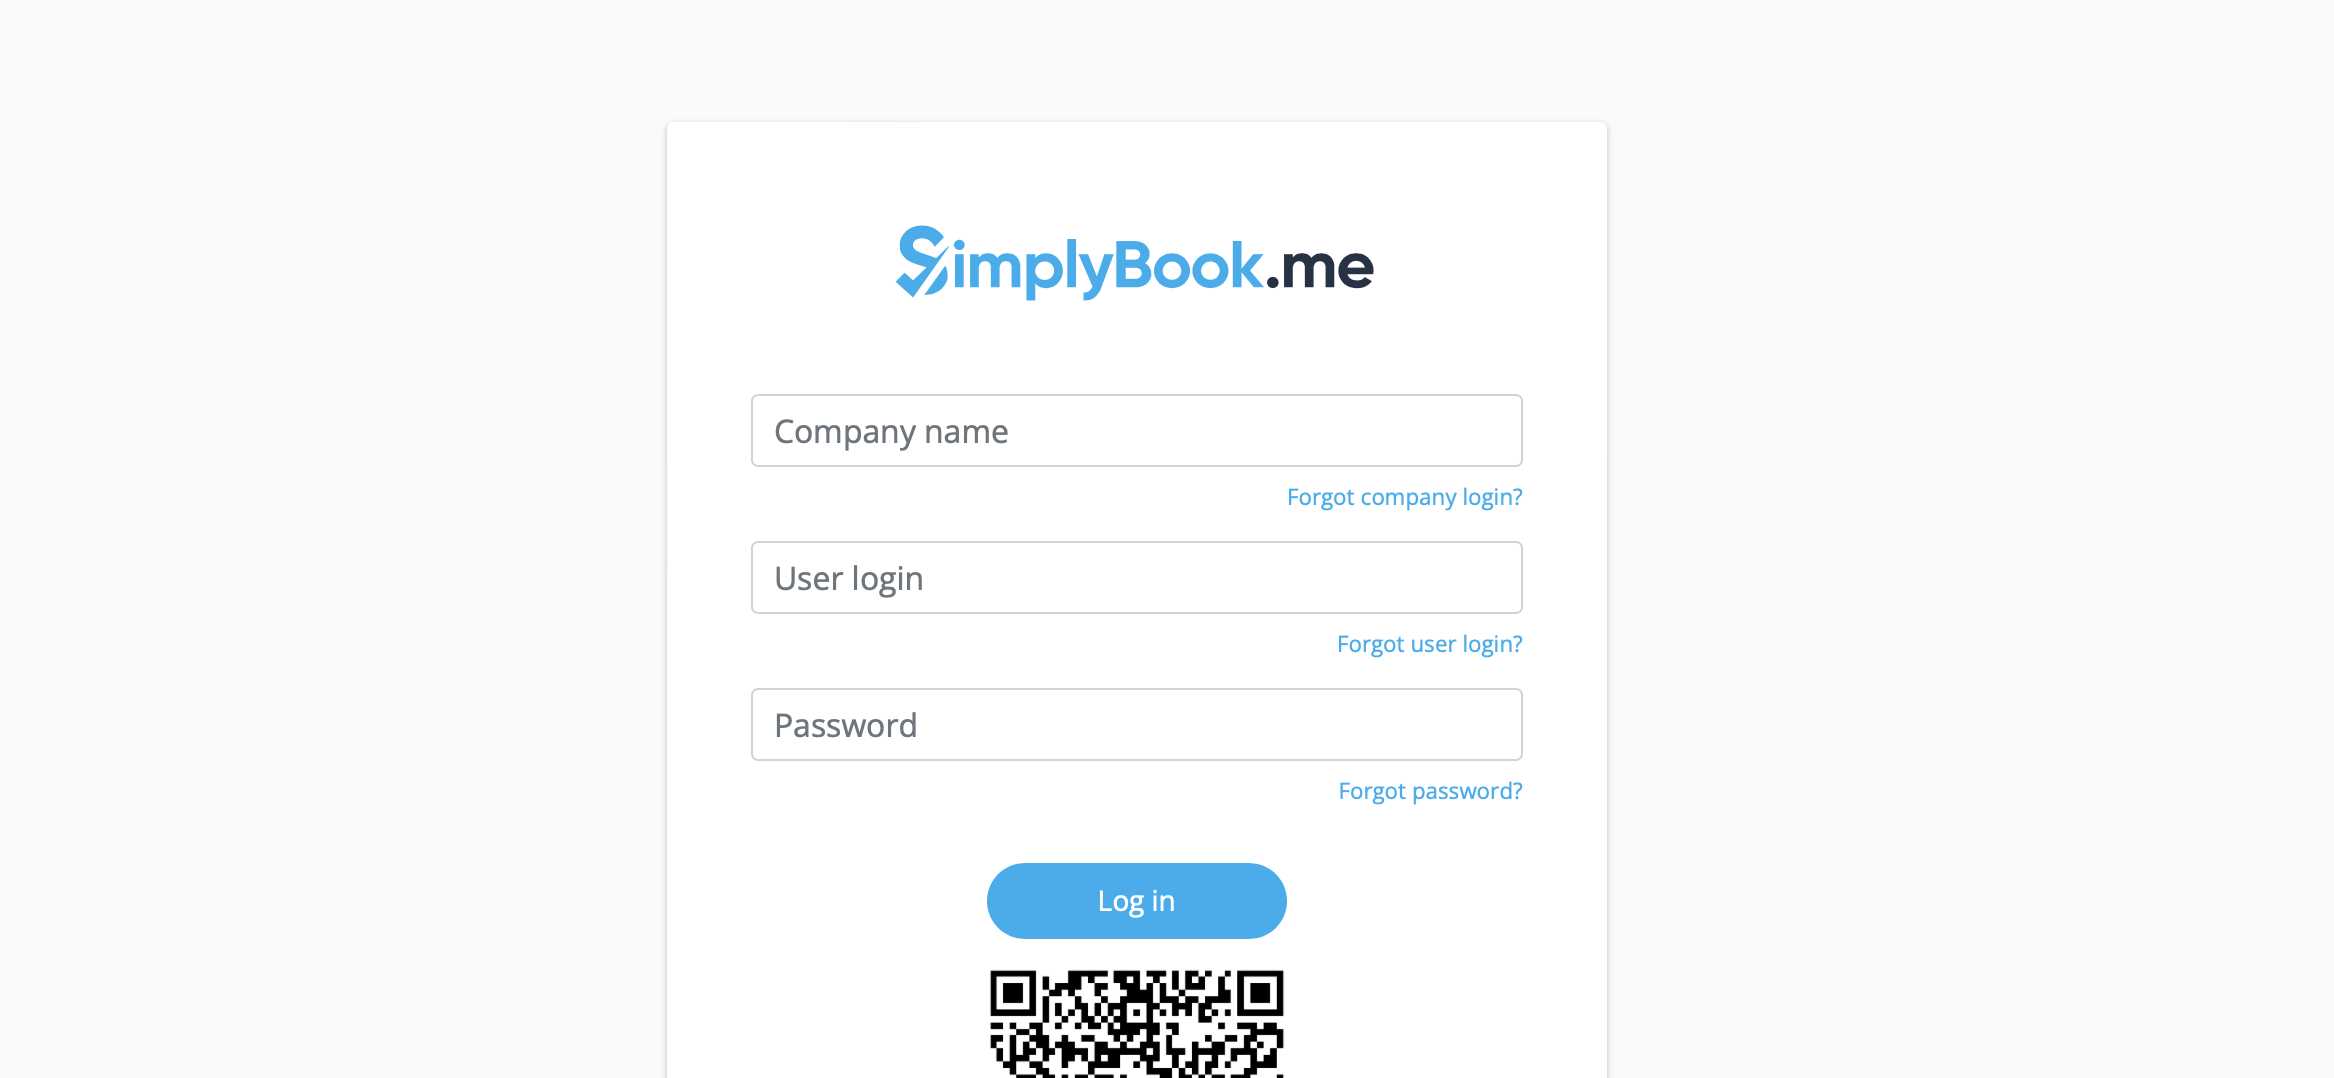
| + | :4. Log in providing <span style="background-color:#d4f8e5; padding:5px; border-radius:5px;">company login</span>, <span style="background-color:#d4f8e5; padding:5px; border-radius:5px;">user login</span> and <span style="background-color:#d4f8e5; padding:5px; border-radius:5px;">password.</span> | ||
| + | [[File:Sb login page.png|1200px|center|link=https://help.simplybook.me/images/f/f3/Sb_login_page.png]] | ||
| + | <br><br> | ||
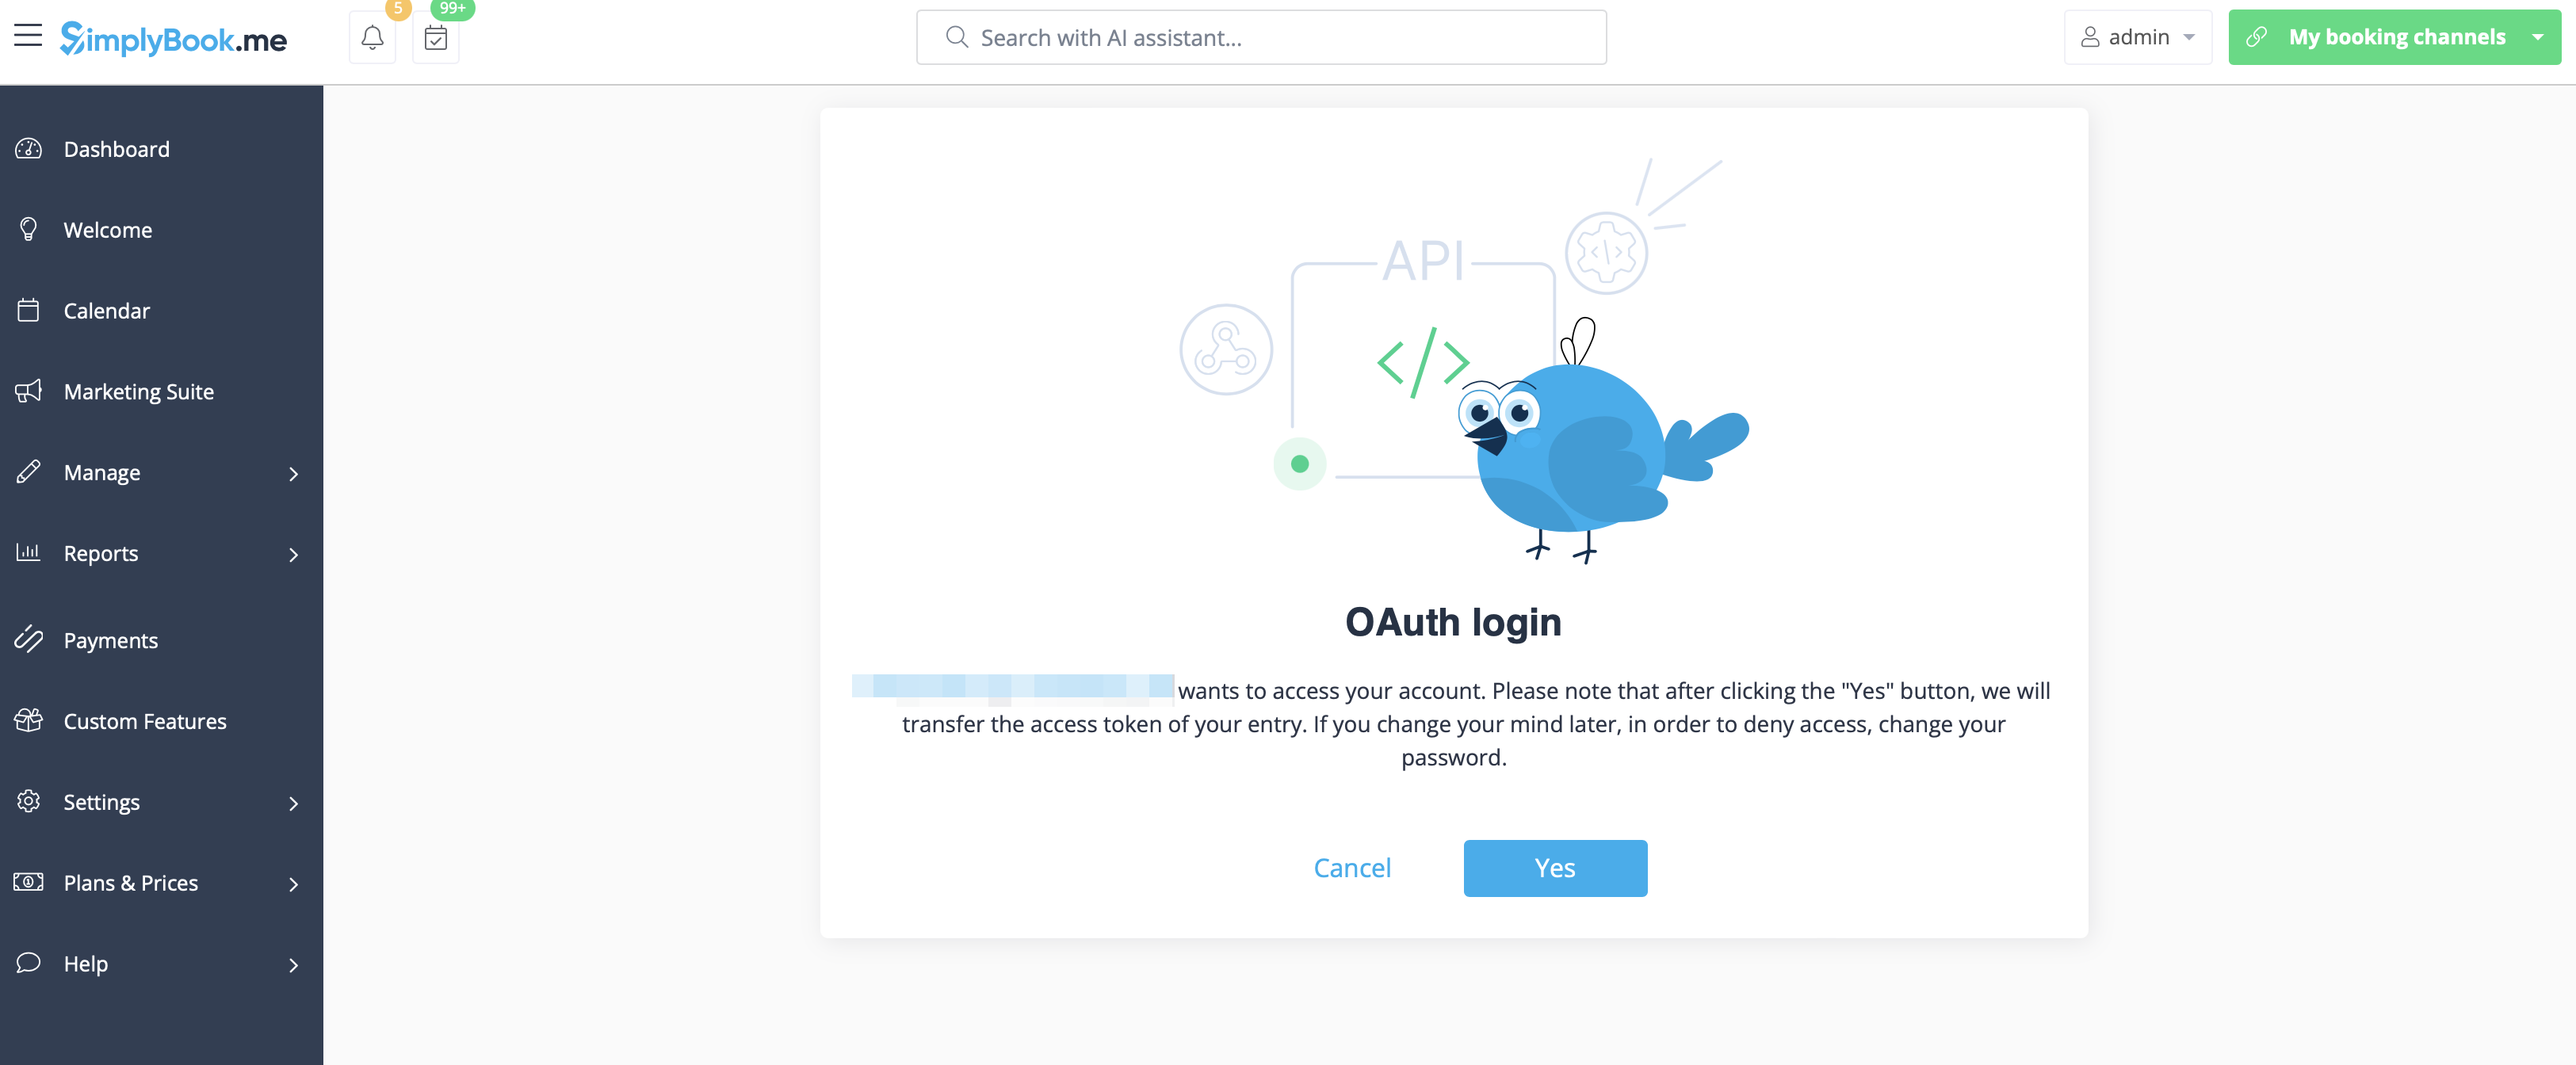
| + | :5. <span style="background-color:#d4f8e5; padding:5px; border-radius:5px;">Confirm the connection</span> between SimplyBook.me account and your WordPress system. | ||
| + | :You will get the one-time code to finalise the connection. | ||
| + | [[File:Sb confirm connection to wp new.png|1200px|center|link=https://help.simplybook.me/images/c/c1/Sb_confirm_connection_to_wp_new.png]] | ||
| + | <br><br> | ||
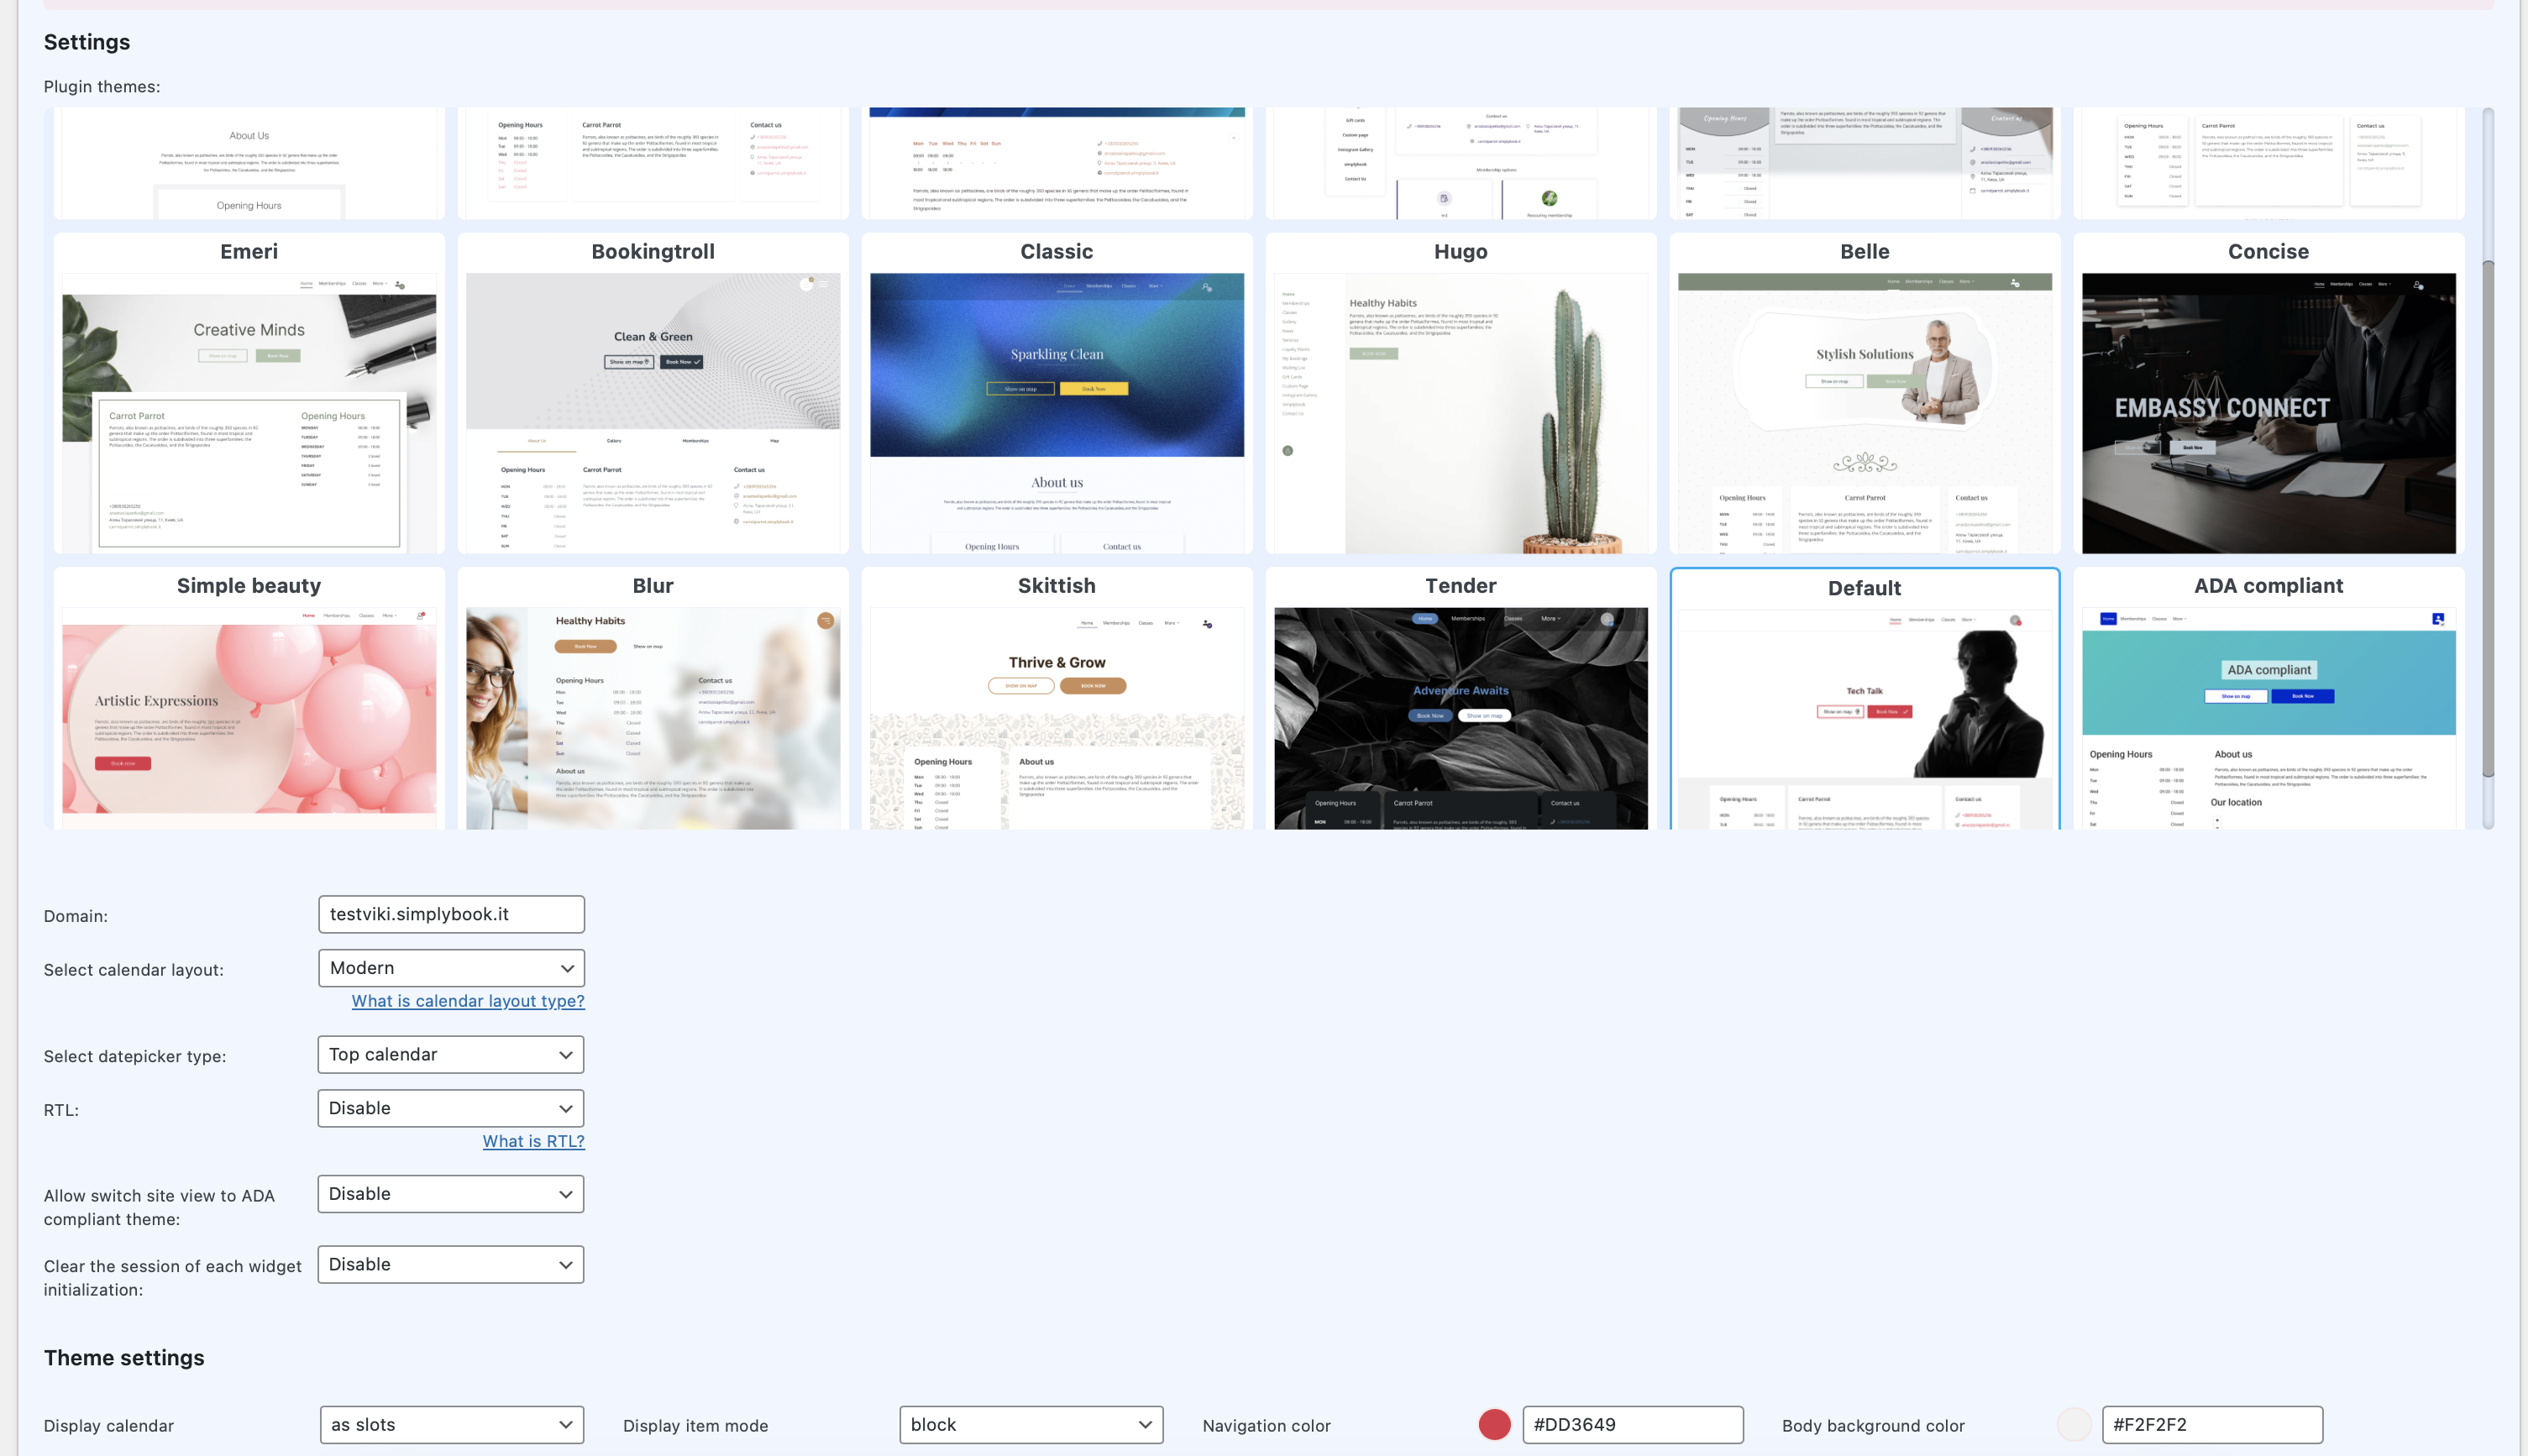
| + | :6. Adjust the <span style="background-color:#d4f8e5; padding:5px; border-radius:5px;">design</span> settings for your widget.<br> | ||
| + | :You can also select some predefined options for the plugin if necessary. | ||
| + | [[File:Wp adjust plugin design.png|1200px|center|link=https://help.simplybook.me/images/6/6e/Wp_adjust_plugin_design.png]] | ||
| + | <br><br> | ||
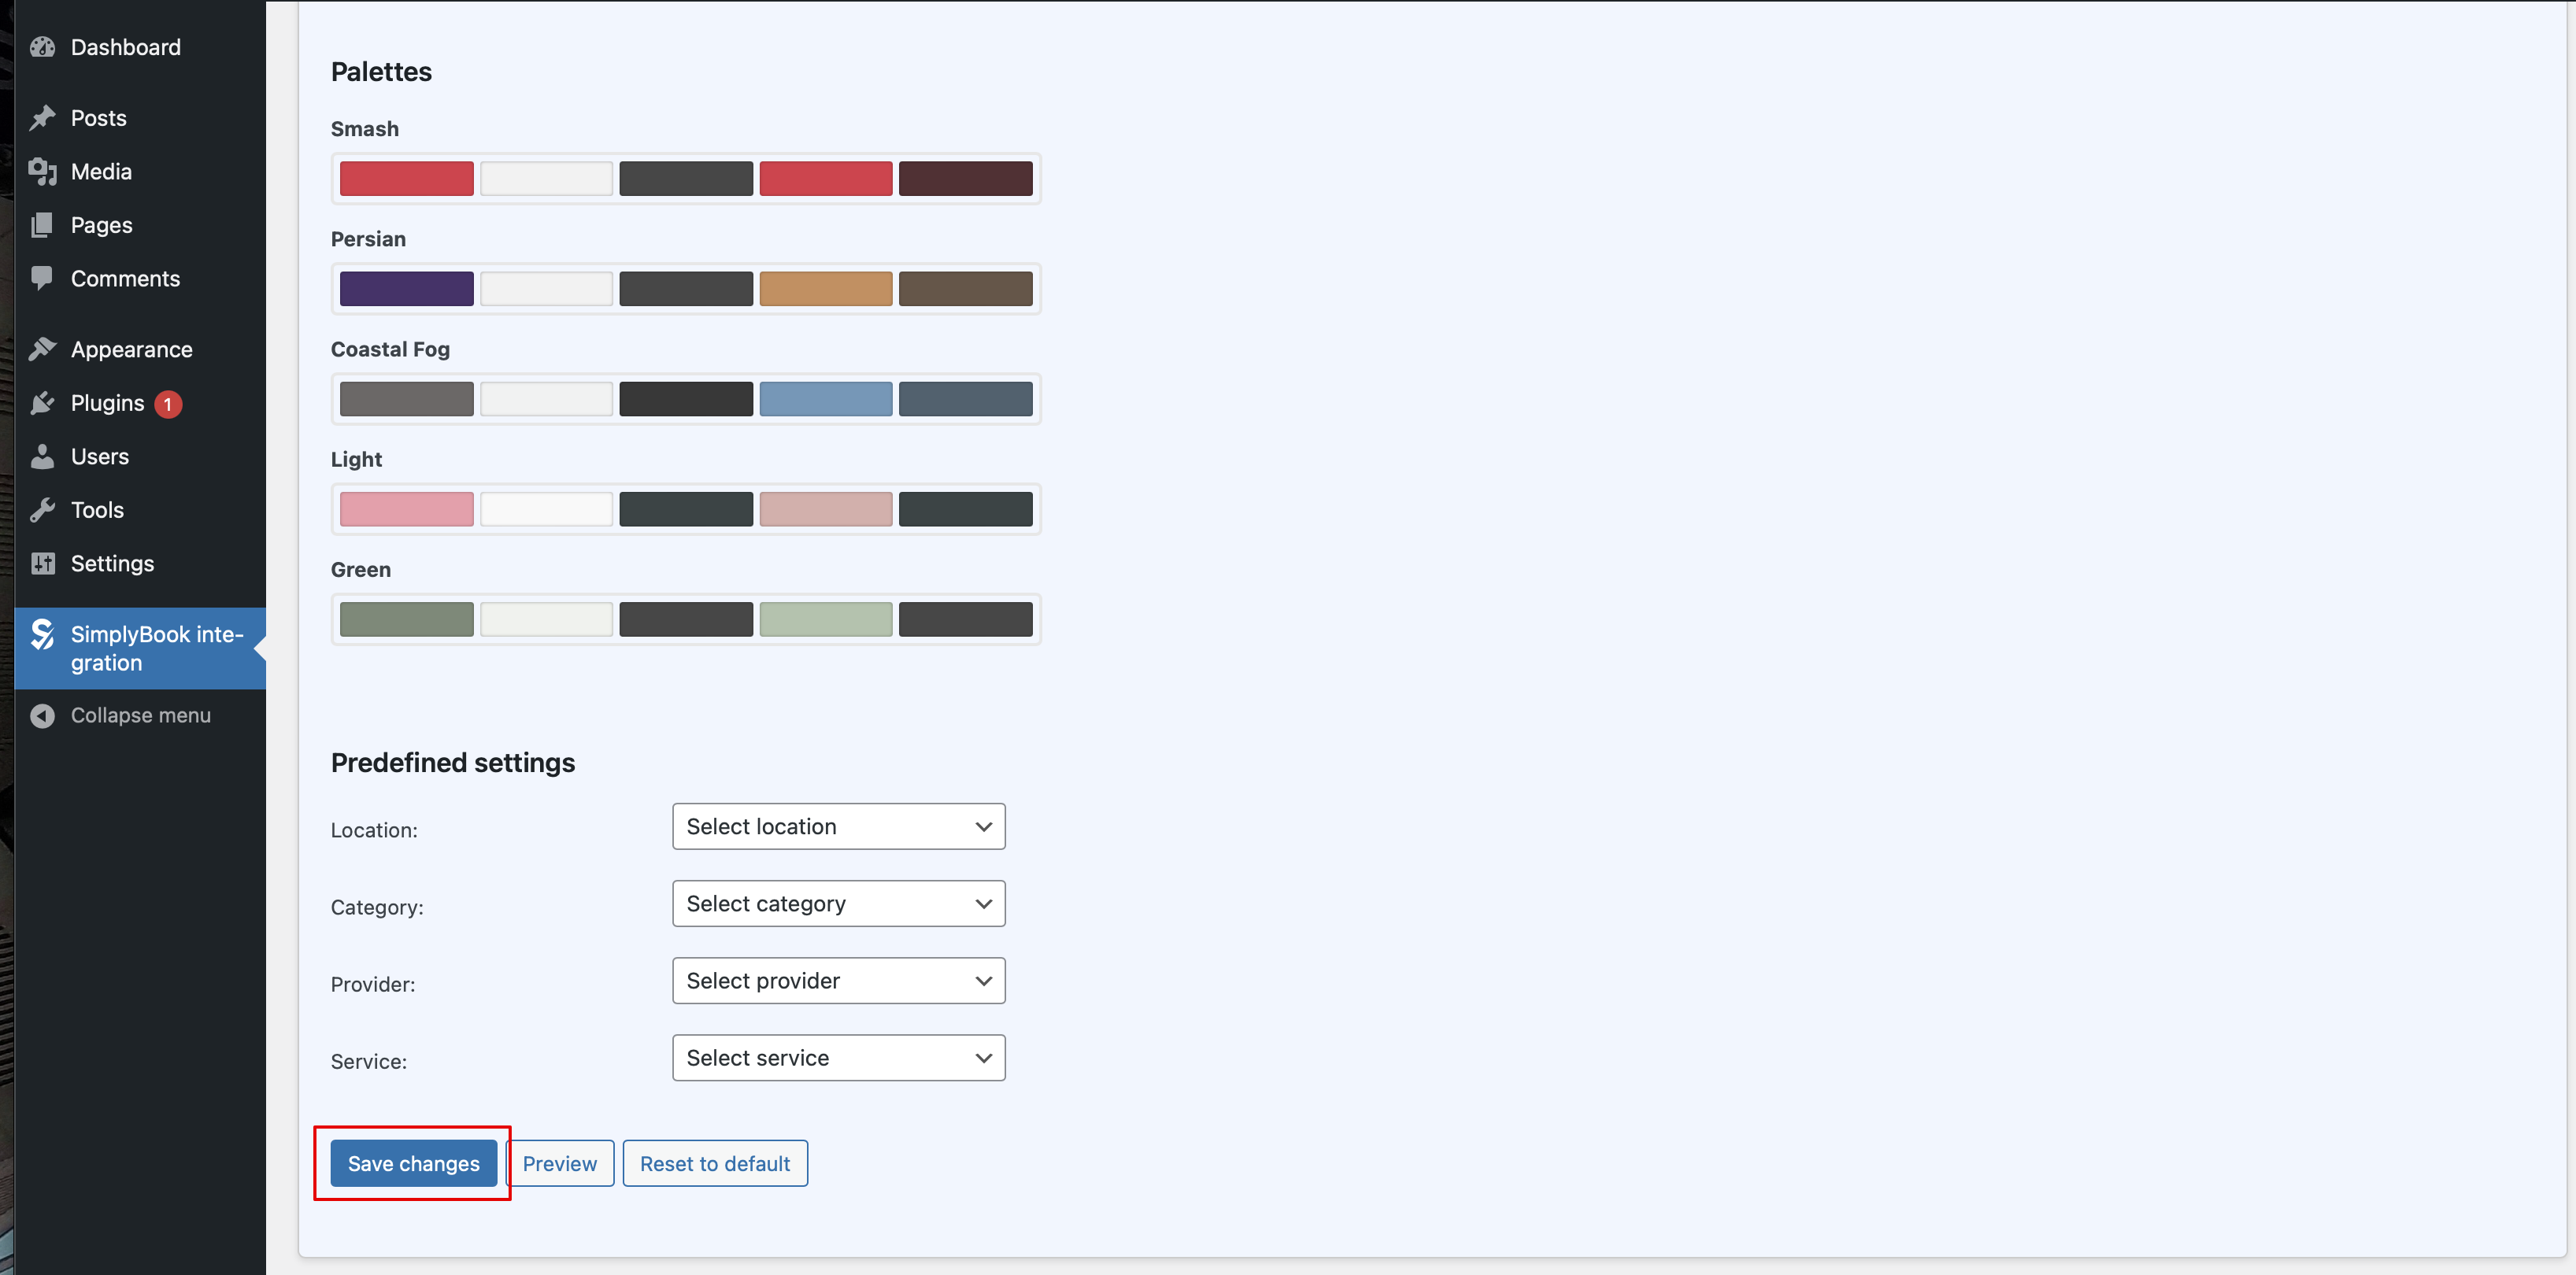
| + | :7. Scroll the page to the bottom, save settings and navigate to <span style="background-color:#d4f8e5; padding:5px; border-radius:5px;">Pages</span> section of your WordPress interface. | ||
| + | [[File:Save wp design.png|1200px|center|link=https://help.simplybook.me/images/0/06/Save_wp_design.png]] | ||
| + | <br><br> | ||
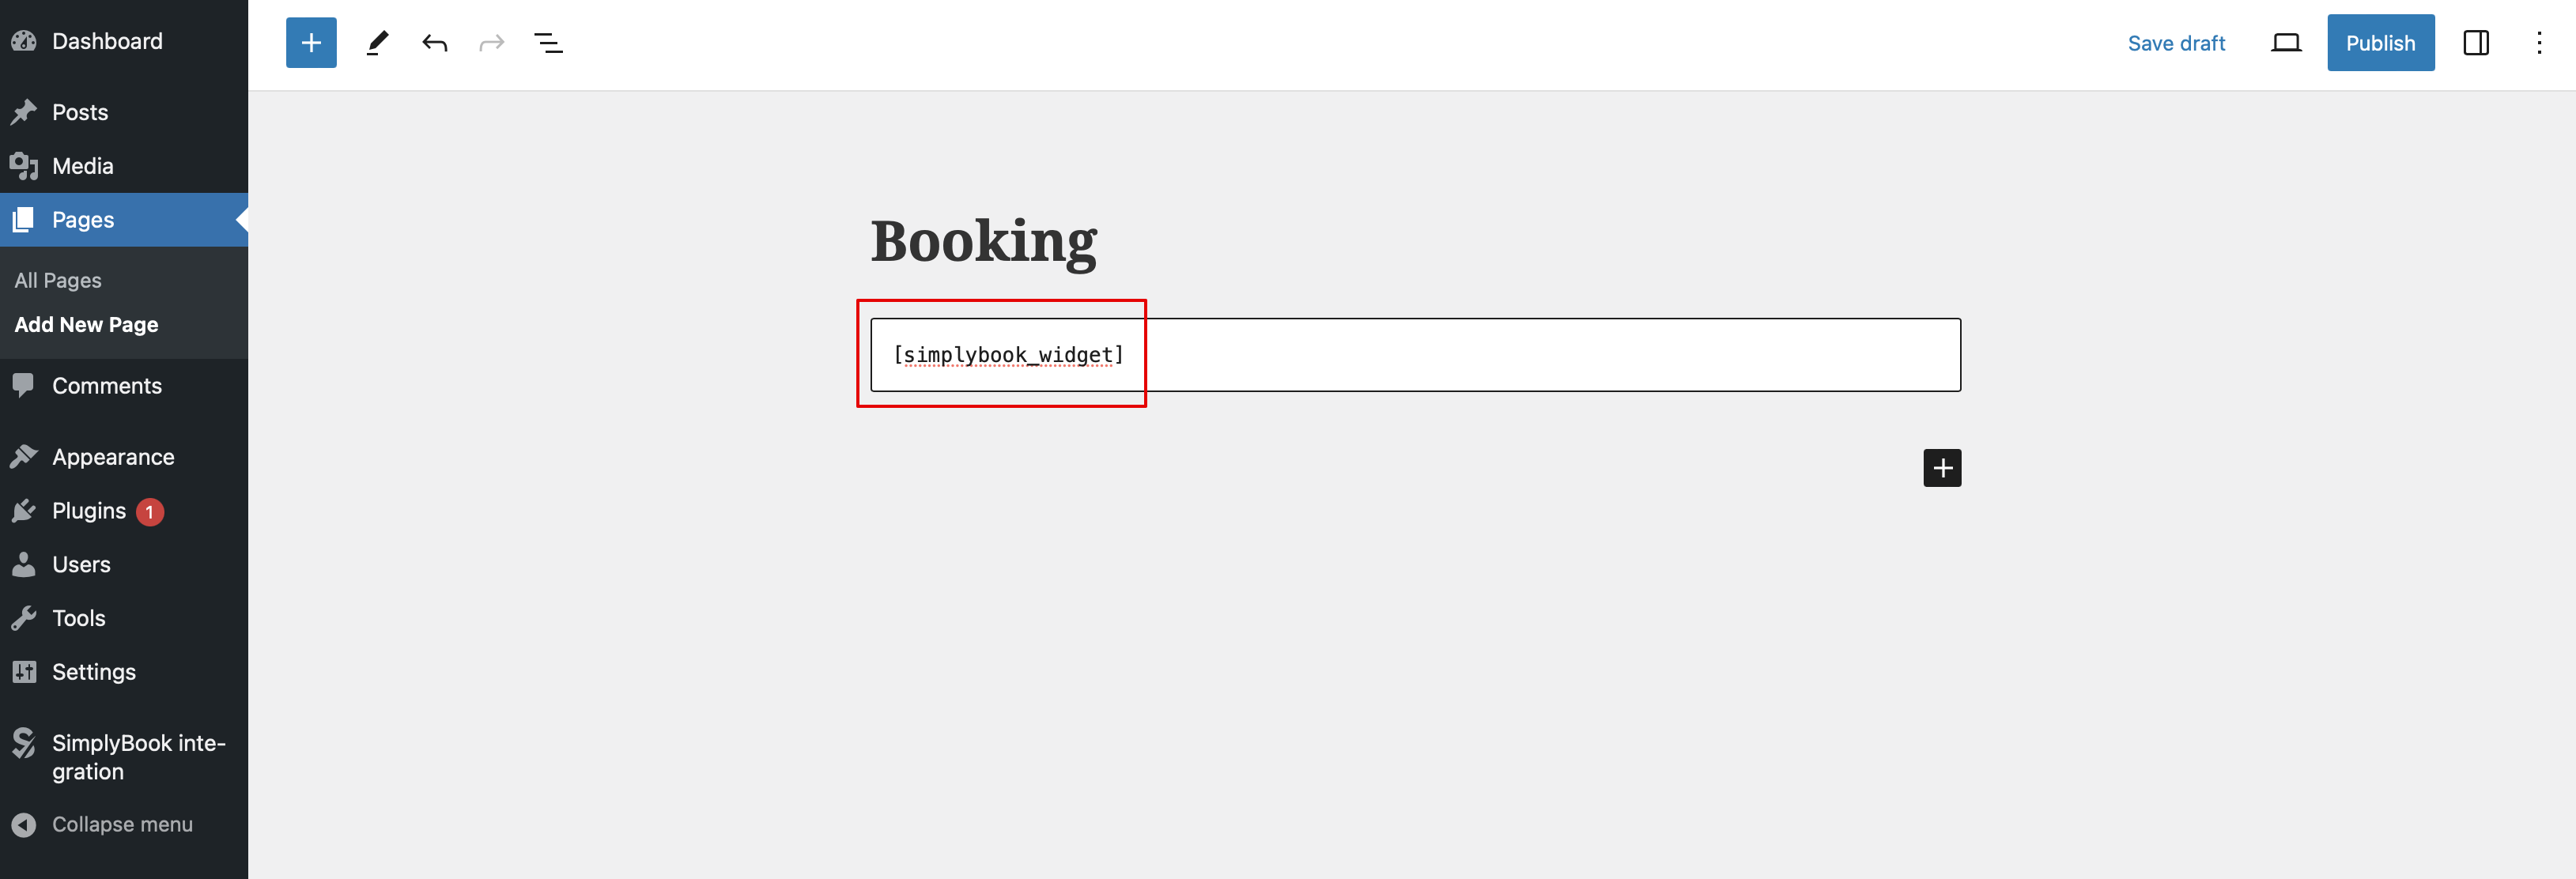
| + | :Create a new page and add a HTML block there. Paste <span style="background-color:#d4f8e5; padding:5px; border-radius:5px;">[simplybook_widget]</span> tag to its body and publish the page. | ||
| + | [[File:Paste tag to page.png|1200px|center|link=https://help.simplybook.me/images/7/7e/Paste_tag_to_page.png]] | ||
| + | <br><br><br><br> | ||
| + | ==As a Widget== | ||
:1. Please copy the code from <span style="background-color:#d4f8e5; padding:5px; border-radius:5px;">Settings</span> -> <span style="background-color:#d4f8e5; padding:5px; border-radius:5px;">Booking widgets settings</span> -> <span style="background-color:#d4f8e5; padding:5px; border-radius:5px;">iFrame widget</span> -> <span style="background-color:#d4f8e5; padding:5px; border-radius:5px;">Get widget code.</span> | :1. Please copy the code from <span style="background-color:#d4f8e5; padding:5px; border-radius:5px;">Settings</span> -> <span style="background-color:#d4f8e5; padding:5px; border-radius:5px;">Booking widgets settings</span> -> <span style="background-color:#d4f8e5; padding:5px; border-radius:5px;">iFrame widget</span> -> <span style="background-color:#d4f8e5; padding:5px; border-radius:5px;">Get widget code.</span> | ||
Latest revision as of 07:33, 9 April 2024
With the help of WordPress plugin
- 1. In your WordPress admin interface navigate to Plugins -> Add new Plugin and search for Simplybook.
- Install it and Activate.

- 2. Navigate to plugin Settings.
- 3. If you already have an account with SimplyBook.me please choose the login option there.
- If you have not created it yet, simply click on registration option and sign up following the suggested steps.
- 4. Log in providing company login, user login and password.
- 5. Confirm the connection between SimplyBook.me account and your WordPress system.
- You will get the one-time code to finalise the connection.
- 6. Adjust the design settings for your widget.
- You can also select some predefined options for the plugin if necessary.
- 7. Scroll the page to the bottom, save settings and navigate to Pages section of your WordPress interface.
- Create a new page and add a HTML block there. Paste [simplybook_widget] tag to its body and publish the page.
As a Widget
- 1. Please copy the code from Settings -> Booking widgets settings -> iFrame widget -> Get widget code.


- 2. Go to your WordPress admn side and create a new page or navigate to already created one, where you plan to add the widget. Click on + icon.

- 3. Search for HTML option.

- 4. Paste the previously copied code.

- 5. Publish your changes.
- Example (may look different depending on your WP theme and SimplyBook.me theme and settings).
